
 |
|
|
#651 |
|
Registered User
Join Date: Oct 2013
Location: spring
Posts: 287
|
Re: 1957 Chevy truck re-rebuild
hey Jim, you want to rent or sale that rivet tool? I am doing my vent windows now and these rivets are a pain in the you know what.
__________________
1959 Chevy Apache (sold) 1958 Fleetside Current My builds: http://67-72chevytrucks.com/vboard/s...d.php?t=606412 http://67-72chevytrucks.com/vboard/s...=1#post7560906 |
|
|

|
|
|
#652 | |
|
Registered User
Join Date: Aug 2012
Location: Salem Mo
Posts: 665
|
Re: 1957 Chevy truck re-rebuild
Quote:
Good call Dwight. 
__________________
My 57 Chevy truck build.http://67-72chevytrucks.com/vboard/s...d.php?t=541132 |
|
|
|

|
|
|
#653 | |
|
Registered User
Join Date: Aug 2012
Location: Salem Mo
Posts: 665
|
Re: 1957 Chevy truck re-rebuild
Quote:
The tool is easy to order from Classic parts and I think from LMC. I think it was about 5 or 6 dollars. http://www.classicparts.com/1951-87-.../#.VK6OOdLF_IQ Things to deal with.... The rivets are not hollow all the way down, meaning you can only tighten them to a certain point which is good, means you can only tighten so far and not over tighten on the rubber seal. Problem is, the tool with it's design does roll the edge of the rivet over ok but, it stopped short of getting the rivet all the way tight. The center of the tool made contact with the non-hollow part of the rivet and stopped the final setting of the rivet. Once I exhausted the use of the tool I used a regular punch of the proper diameter to finish getting the rivet tight. The concave tool in the picture is one of mine, it didn't come from the suppliers. I put it in a piece of heavy angle iron which I clamped to the vise and used it to support the head of the rivet as I rolled the other side with the tool. I wish I had taken more pictures of the process but I think I was too nervous about smacking something incorrectly with the hammer and forgot to. I hope this helps shed some light on the situation for you, once I got the first one figured out, the second one went much better. Side note.... if you can, install the rubber that goes all the way around the frame then install the flat one with the rivets. They both interlock where they meet and it makes the interlocking easier.
__________________
My 57 Chevy truck build.http://67-72chevytrucks.com/vboard/s...d.php?t=541132 |
|
|
|

|
|
|
#654 |
|
Registered User
Join Date: Oct 2013
Location: spring
Posts: 287
|
Re: 1957 Chevy truck re-rebuild
thanks. I found using a 3/8s bolt great for the curved end. most bolts have a curve at the end of the threads. at what point did you insert the vent window assy into main frame? did you install that first and rivet it to the long piece? I warped my frame that the vent window went in while trying to insert it into that frame and it pissed me off. I just left them and moved on to something else. haha
__________________
1959 Chevy Apache (sold) 1958 Fleetside Current My builds: http://67-72chevytrucks.com/vboard/s...d.php?t=606412 http://67-72chevytrucks.com/vboard/s...=1#post7560906 |
|
|

|
|
|
#655 |
|
Registered User
Join Date: Aug 2012
Location: Salem Mo
Posts: 665
|
Re: 1957 Chevy truck re-rebuild
Ahhh yes, I smile and chuckle, I too remember walking away a time or two.
I installed the flexible rubber piece that goes out and around the vent window, then put the straight riveted piece in place, then installed the rivets. Next I got the vent window frame, without the glass, in place. Next was setting the glass into the frame. I found that by getting the metal window frame with out the glass in it, installed first, was the best. Perhaps it had just a bit more give to it that way. It is a challenge forcing it all together. Use a little soapy water on the rubber to help slide the top frame pin into it's hole also. Now when you set the glass into the it's frame, you can close it to see just how deep you want to set it. Not far enough and you could touch the rivet heads when you close it. Too far and you might not touch the edge of the riveted straight rubber seal all the way. Wish I had more pics, I hear each one is like a 1000 words. lol. Jim
__________________
My 57 Chevy truck build.http://67-72chevytrucks.com/vboard/s...d.php?t=541132 |
|
|

|
|
|
#656 |
|
Registered User
Join Date: Oct 2013
Location: spring
Posts: 287
|
Re: 1957 Chevy truck re-rebuild
perfect. thanks.
__________________
1959 Chevy Apache (sold) 1958 Fleetside Current My builds: http://67-72chevytrucks.com/vboard/s...d.php?t=606412 http://67-72chevytrucks.com/vboard/s...=1#post7560906 |
|
|

|
|
|
#657 |
|
Registered User
Join Date: Aug 2012
Location: Salem Mo
Posts: 665
|
Re: 1957 Chevy truck re-rebuild
With all the ideas that I have gotten from this site I am happy to give back when I can. You're welcome.
I do have a couple of pictures of window installation, I may as well post them while we're on the subject for anybody else following along. One more piece of weather stripping in the door for the window is this channel piece. It has to be bent to follow the shape of the door and the window. It bends by hand but it likes to bend out of shape. I found that if I bend it with the window in the channel it'll help bend the channel with out it getting out of shape. It has to be cut to length, I used the 4 1/2" grinder with a cut off wheel, tin snips will work but kinda bends the edge of the cuts a little bit. 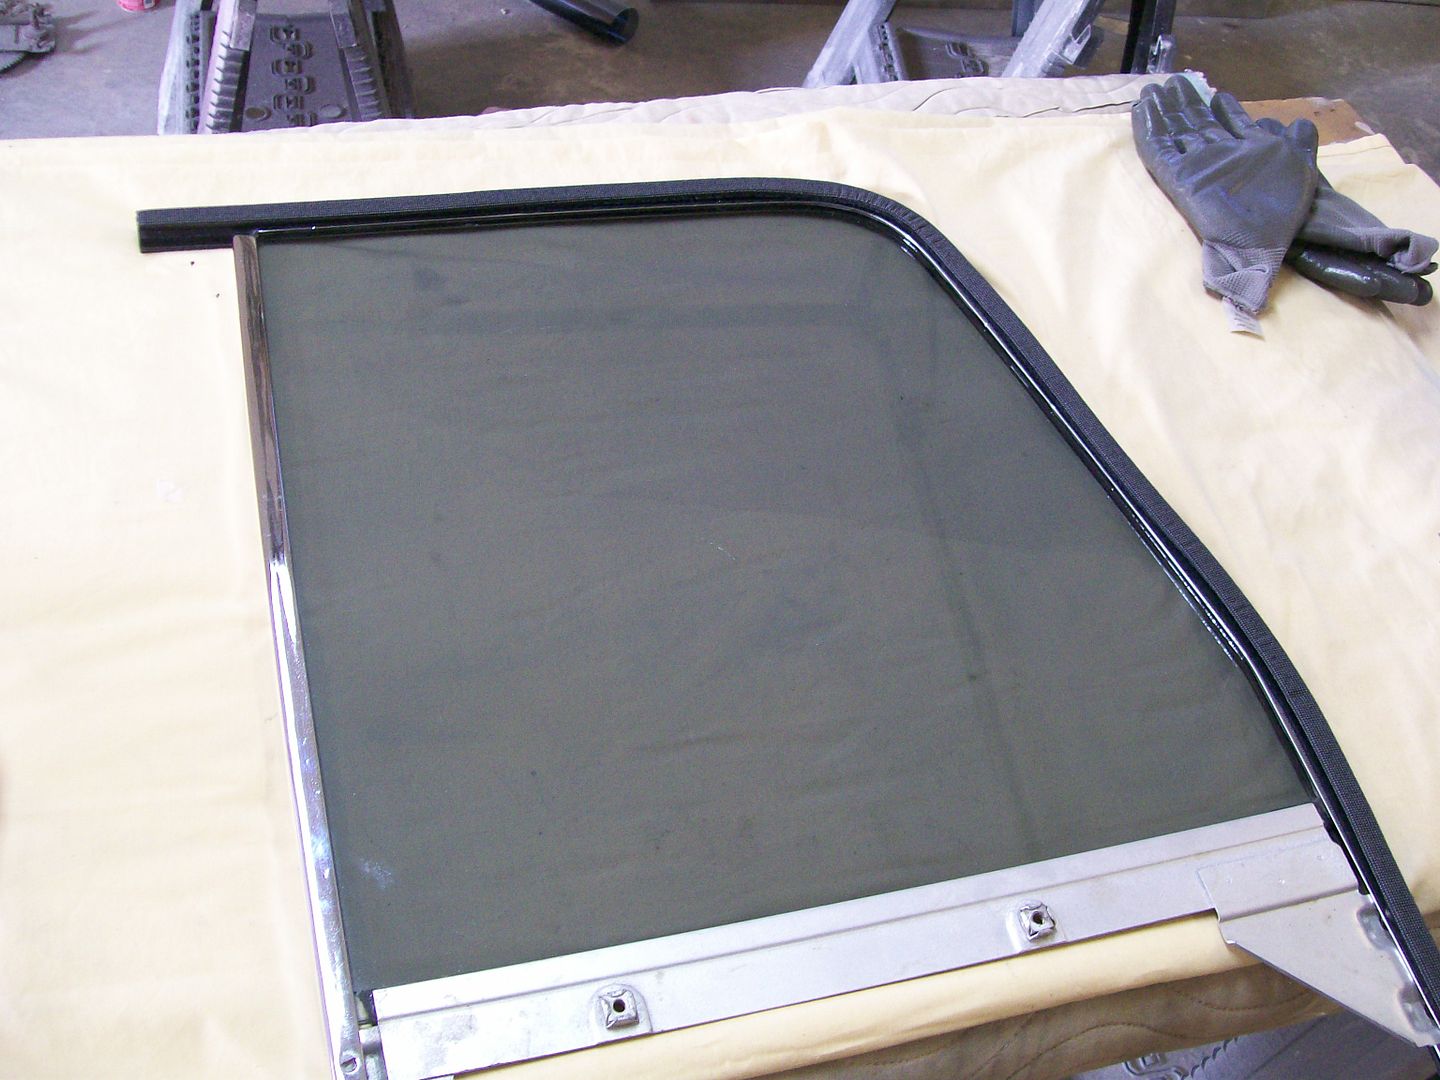 Next up these pain in the butt felt strips. I recommend before you put the window in to hold the felt strips in place. If the holes in the door don't line up near perfect with the mounting tabs on the felt strips, they will be more of a pain than they all ready are going to be to install. I used a 3" cut off wheel air grinder to remove some material to allow the felt strip to snap into the holes in the door. If one of these mounting tabs are off, the others will not line up and snap in. 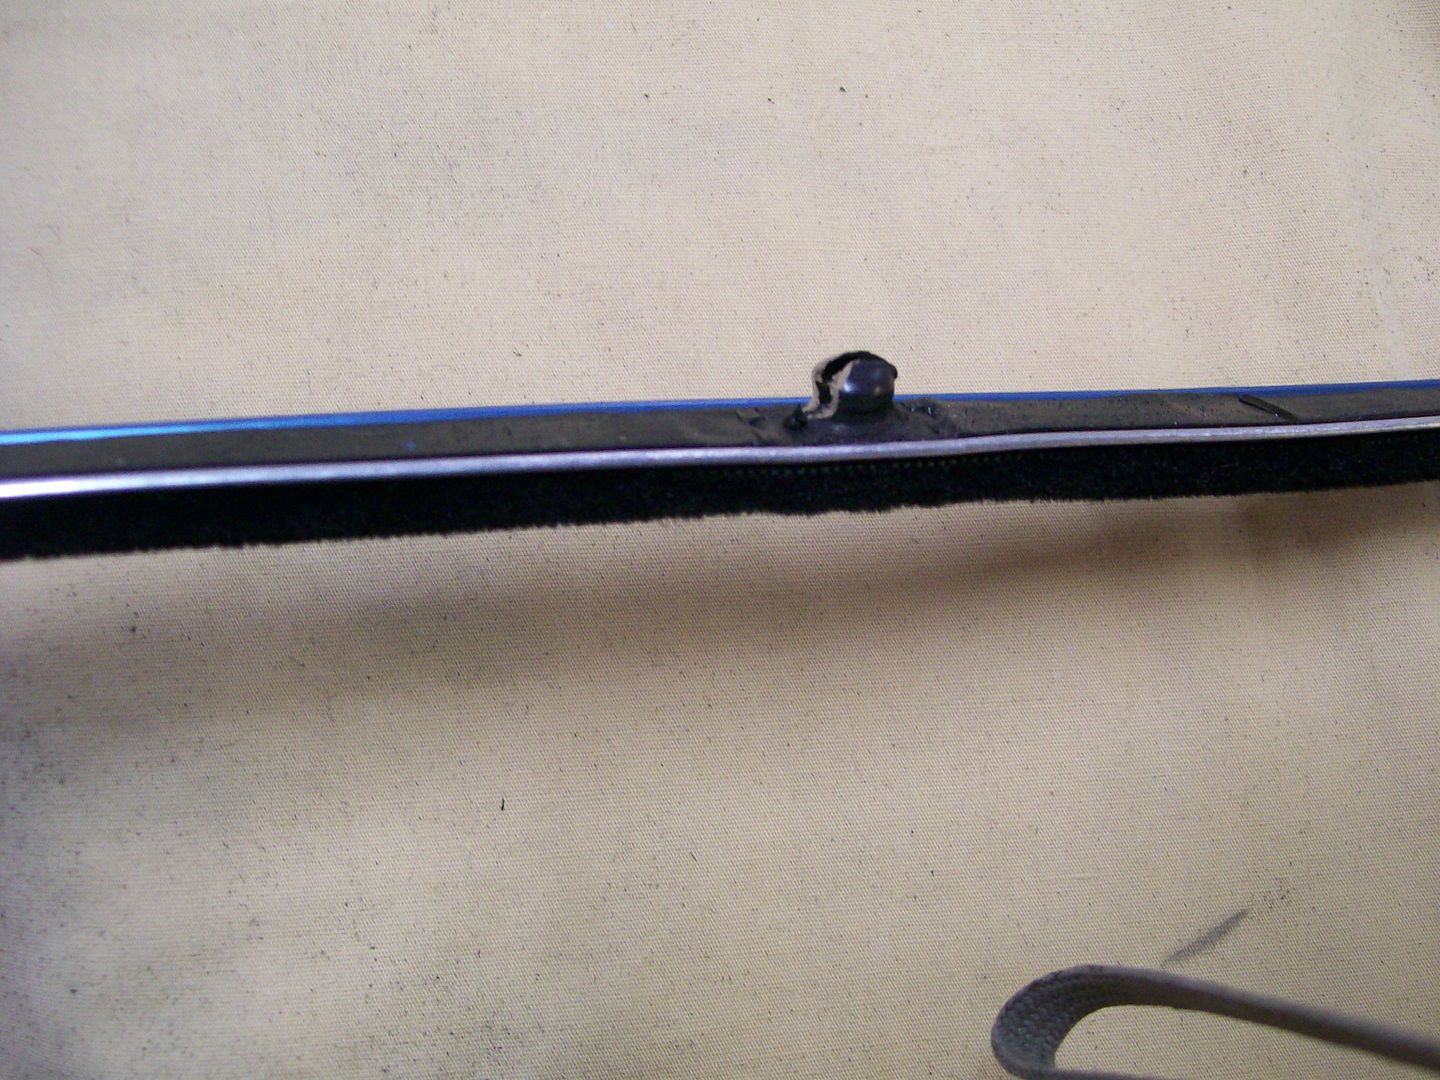 Side note.... remove all the blue adhesive protective shield before installing the felt strips, very difficult to remove it after they are installed. I saw a video where the guy installed the main window and the vent window frame at the same time, I nearly need 3 hands to do this. I found after the channel is in place, I glued some of the channel in place, but not the very top yet. With the channel in place in the door and I already installed the window regulator assembly, I put a towel down in the door so I can put the glass down in the door without it falling lower past it's main stopping point. Also, do not put the small square bump stop in place yet, you'll need the window to drop down that extra 1/2" to put the felt pieces in later. With the window set back in the channel I got the vent window assembly into the door, as I lowered it into place I made sure the window was settling into the vent window assembly track, then lined up the 4 screws to hold the vent window in place. Now the window can be raised, but how? The access hole is too small to grip the window, ahhh, duct tape to the rescue. 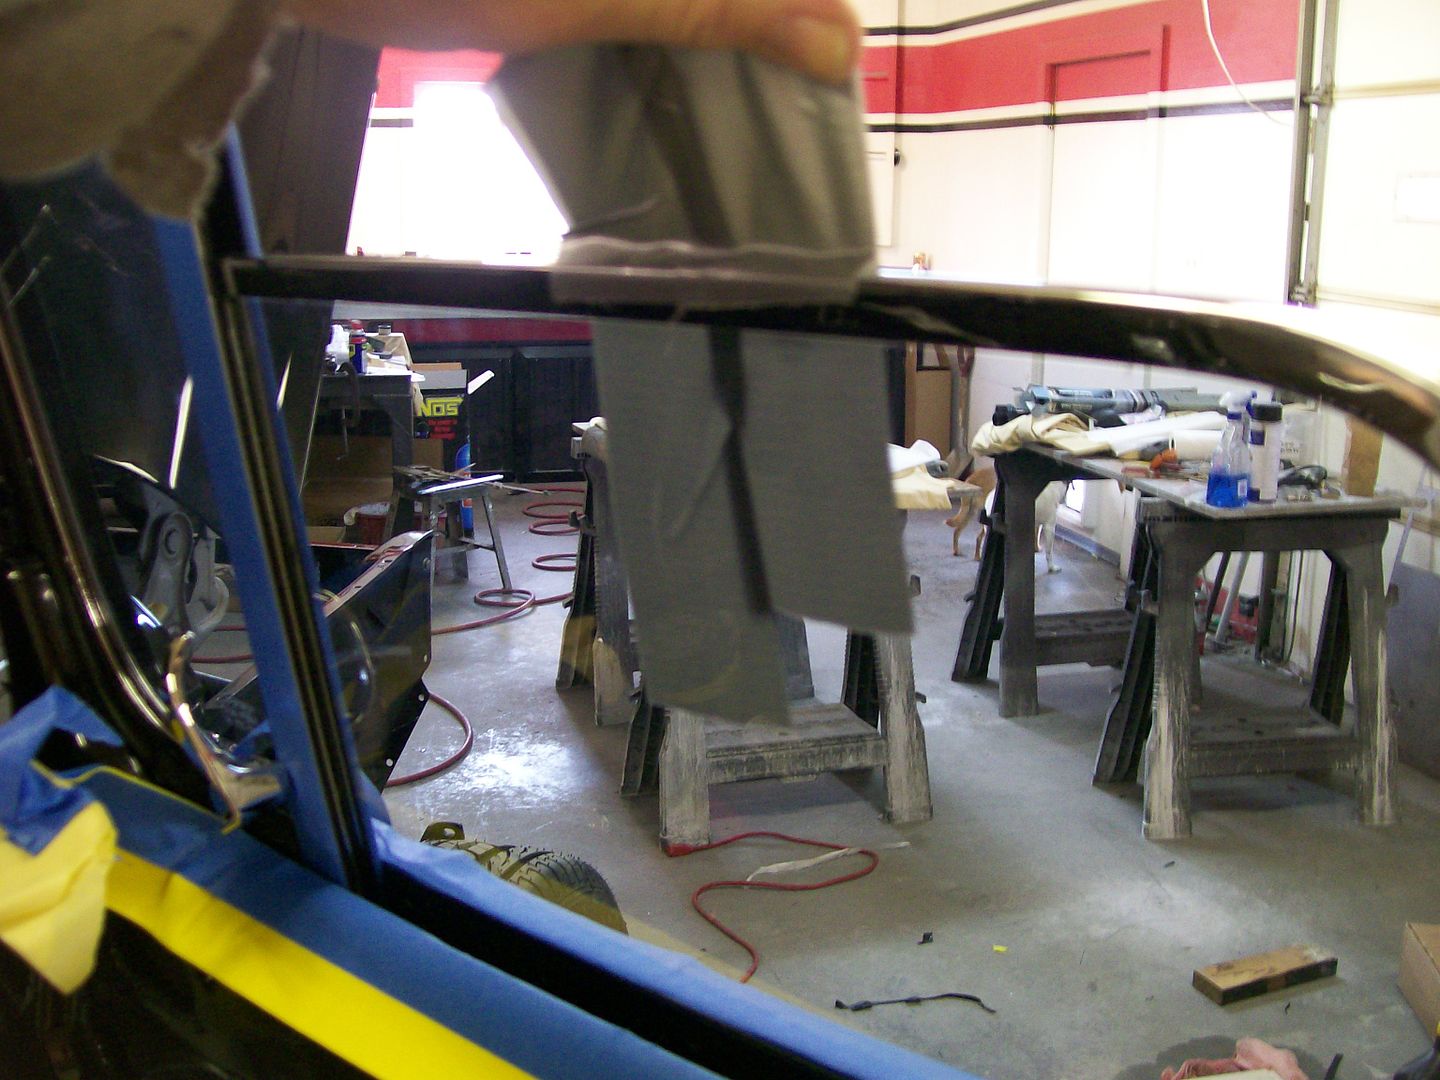 By time I was done I even put a small piece of wood in the duct tape for better grip. Now attach the roller rail with the window regulator rollers in place and tighten the two rail screws to the bottom of the window. Note, the back channel piece needs to be cut to length at the top and bottom, it needs to fit into a small clip at the bottom of the door and touch the top of the vent window frame at the top end. Now fight the gosh darn felt strips, take a deep breath, and good luck with those. I had to dab a little bit of black paint in this area when done, if there's a trick to them, I never figured it out. Once the felt strips are in, raise the window and remove the towel and install the push in bump stop in the door. I went ahead and dabbed a bit of glue at the top of the channel to ensure it stays in place at the top of the door, I haven't painted the piece of door frame that secures the top of the window channel yet. Another side note... the first one I installed the windows then installed the window regulator mechanism, e-gads, what a pain, it can be done but the vent window long leg that bolts to the door with the two screws is totally in the way of trying to get the regulator mechanism in place. Like every part of the build everything has their own characteristics, so often the best idea for me is to go in with a plan but have a very open mind to adapt as problems within the project arise.
__________________
My 57 Chevy truck build.http://67-72chevytrucks.com/vboard/s...d.php?t=541132 Last edited by Stepside Jim; 01-09-2015 at 12:35 AM. |
|
|

|
|
|
#658 |
|
Registered User
Join Date: Aug 2007
Location: Corona, California
Posts: 7,998
|
Re: 1957 Chevy truck re-rebuild
Great info.
Thanks for sharing. Kim |
|
|

|
|
|
#659 |
|
A320 Pilot/USAF Retired
Join Date: Mar 2009
Location: Charleston, SC
Posts: 2,629
|
Re: 1957 Chevy truck re-rebuild
Excellent write up!
__________________
JJ My 1957 build: http://67-72chevytrucks.com/vboard/s...d.php?t=334552 http://www.trifive.com/forums/showthread.php?t=22037 Instagram - Chuckdriver57 |
|
|

|
|
|
#660 |
|
Registered User
Join Date: Aug 2012
Location: Salem Mo
Posts: 665
|
Re: 1957 Chevy truck re-rebuild
I'm glad to say the doors and windows are doing fine.
 I have one picture of a replacement part for the doors, the window regulators. I pretty well ignored them til now, really, there has to be some part that hasn't been messed with on this truck, ha, I was wrong. Sometime in the past somebody did the ole' vise grips on on the door handle post and messed up the splines and I didn't feel confident of the splines and feared they would make a mess of the new door handles. Checking the catalog I ordered new ones from Classic parts. I hoped the ones I got would be as nice looking as the ones in the catalog. They were nice looking, fit perfect and work perfect, very nice pieces. Picture of an old one and a new one. 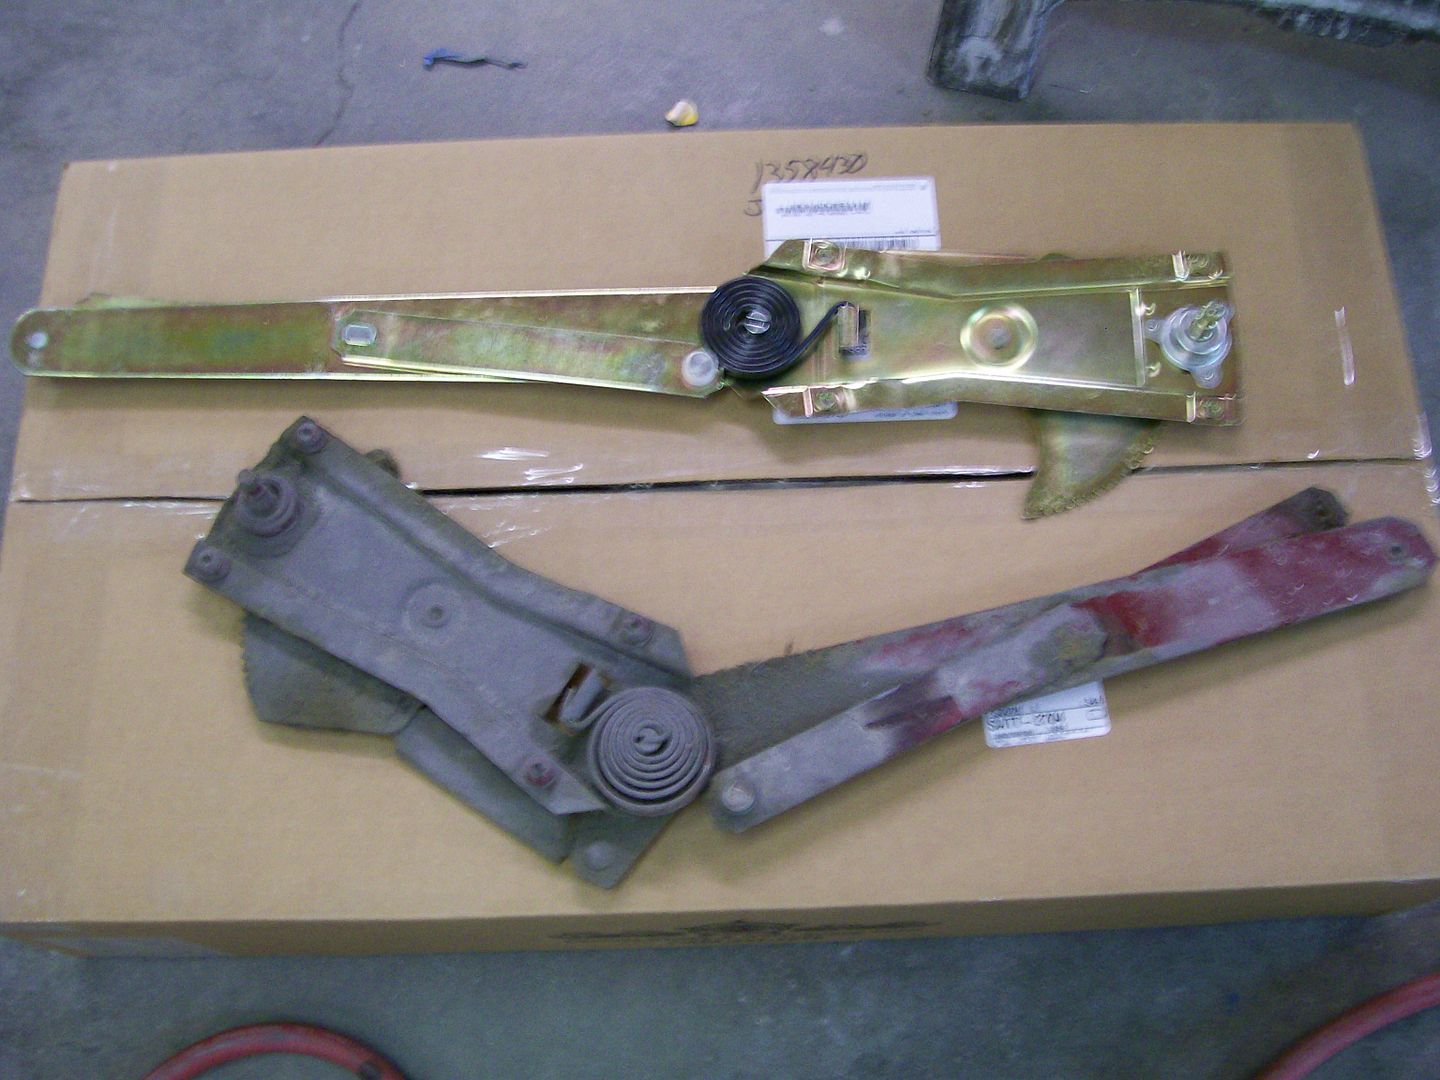 Next up is the rubber seal that fills the gap between the inner fender panel and the firewall. I got the ones listed but I remembered the ones that my Dad installed back in the 80's had more material to fill the gap. I know we are to slide it out towards the firewall for installation and gluing, I felt there wasn't much overlap on the inner fender to hold the seal in place. I went on line and found Sofseal had a universal seal and I ordered it. The next picture shows a short piece of each. There's just not enough material to fill the gap as the universal piece fills the gap nicely. 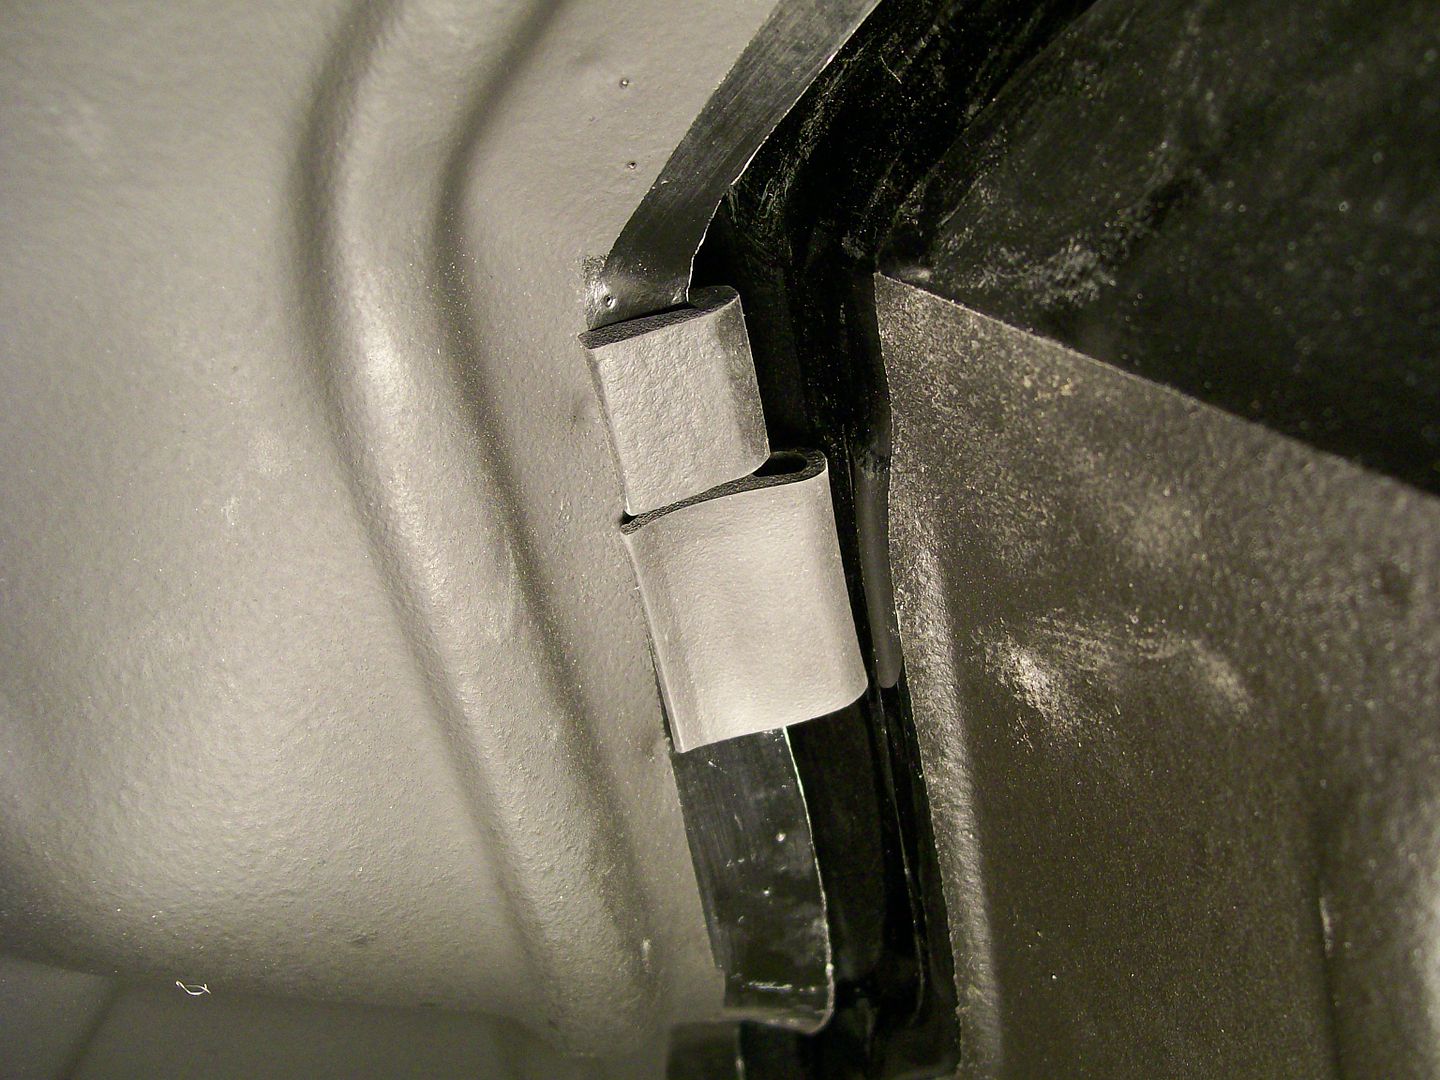 A picture of the ends of each. If I need to move the fender closer to the firewall yet, the universal one will simply collapse and conform. 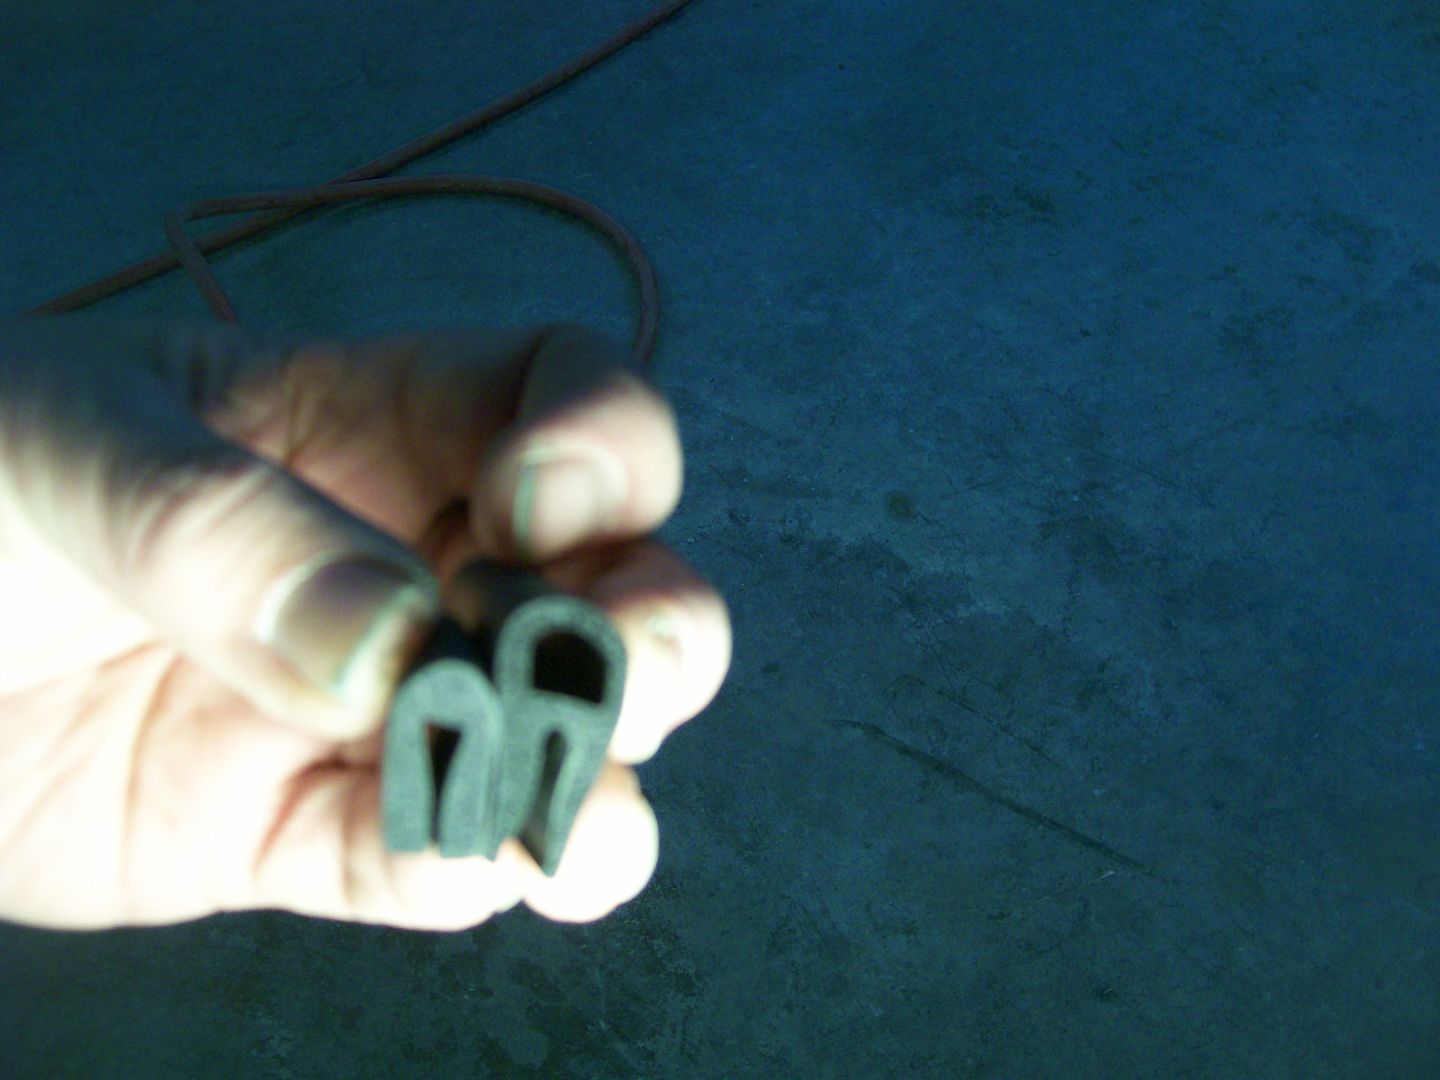 Finally I'm ready to commit my time to the wiring, but, before I did I decided I wanted to cover the shiny reflective look of the heat/sound barrier. I wanted it all black on the inside firewall. Nothing fancy, I cut vinyl material to do the job, the black carpet goes high enough to overlap the black vinyl. I also began laying out and labeling all the wires in the kit. The fuse block holder I made worked great, by time I was done I was able to tuck much of the cluster behind the fuse block, then the separate bundles fanned out from there. 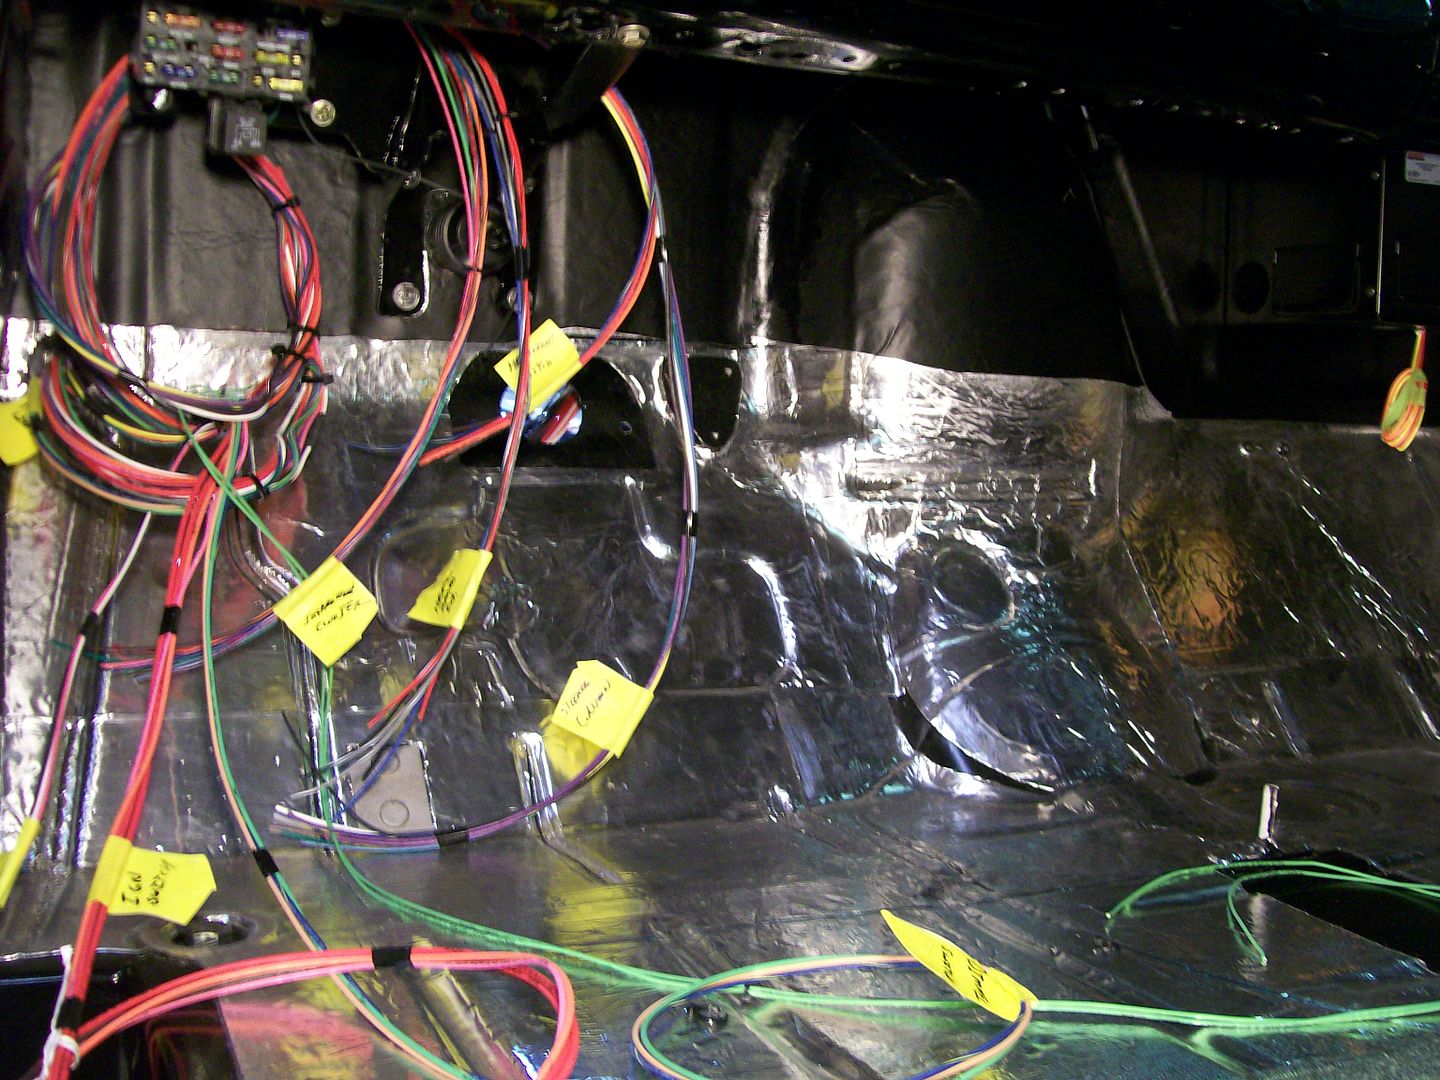 Half way through January already, I'm glad I haven't stopped for a break, this winter is going by fast. I'm starting to make a to-do list, I'm getting to the point were I can begin to see the light at the end of the tunnel.
__________________
My 57 Chevy truck build.http://67-72chevytrucks.com/vboard/s...d.php?t=541132 |
|
|

|
|
|
#661 |
|
Registered User
Join Date: Aug 2007
Location: Corona, California
Posts: 7,998
|
Re: 1957 Chevy truck re-rebuild
Nice progress.
Kim |
|
|

|
|
|
#662 |
|
Senior Member
 Join Date: Mar 2011
Location: West Plains, Missouri
Posts: 7,559
|
Re: 1957 Chevy truck re-rebuild
Little by little...Jim
__________________
my build thread: http://67-72chevytrucks.com/vboard/s...d.php?t=459839 Jimbo's long bed step build:http://67-72chevytrucks.com/vboard/s...t=464626<br /> |
|
|

|
|
|
#663 |
|
Registered User
Join Date: Aug 2012
Location: Salem Mo
Posts: 665
|
Re: 1957 Chevy truck re-rebuild
Time for an update.... I've majorly slowed down on progress, not for lack of time though, for me this is the time to slow down and pay attention to every detail. When I assemble I try to pay strict attention to possible long term issues.
First was making a nice little bracket to hold the Nitrous solenoids. 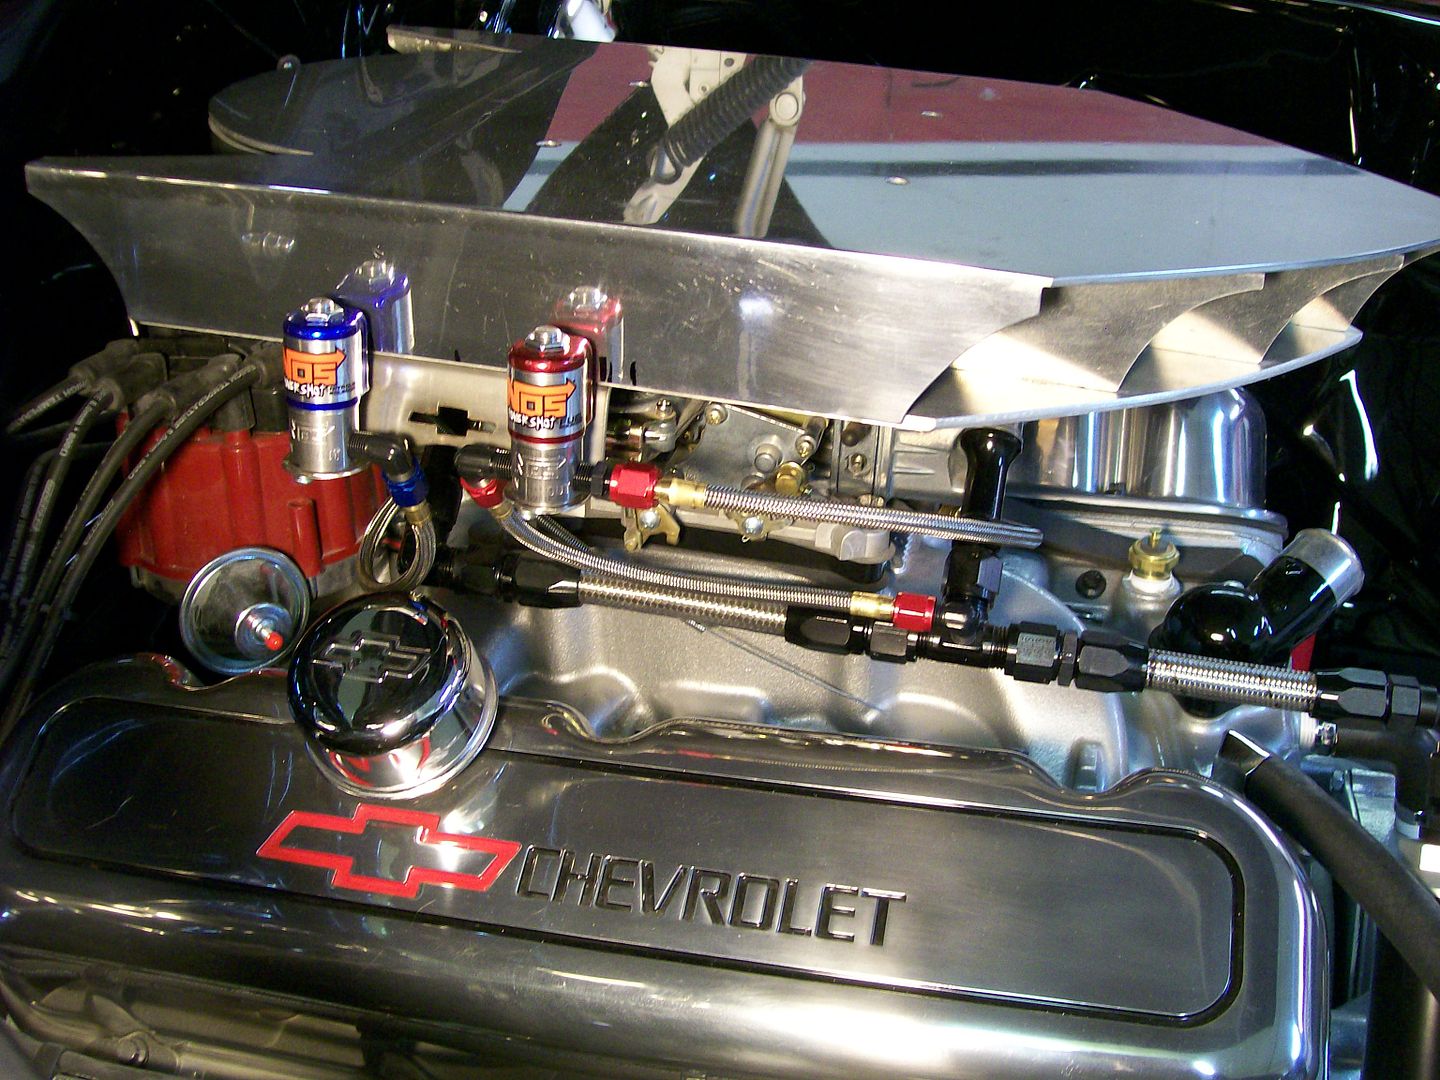 Working alone makes it hard to hold the bolts and tighten the nuts for the steering column, so I made a "U" shape plate to hold the bolts in place. 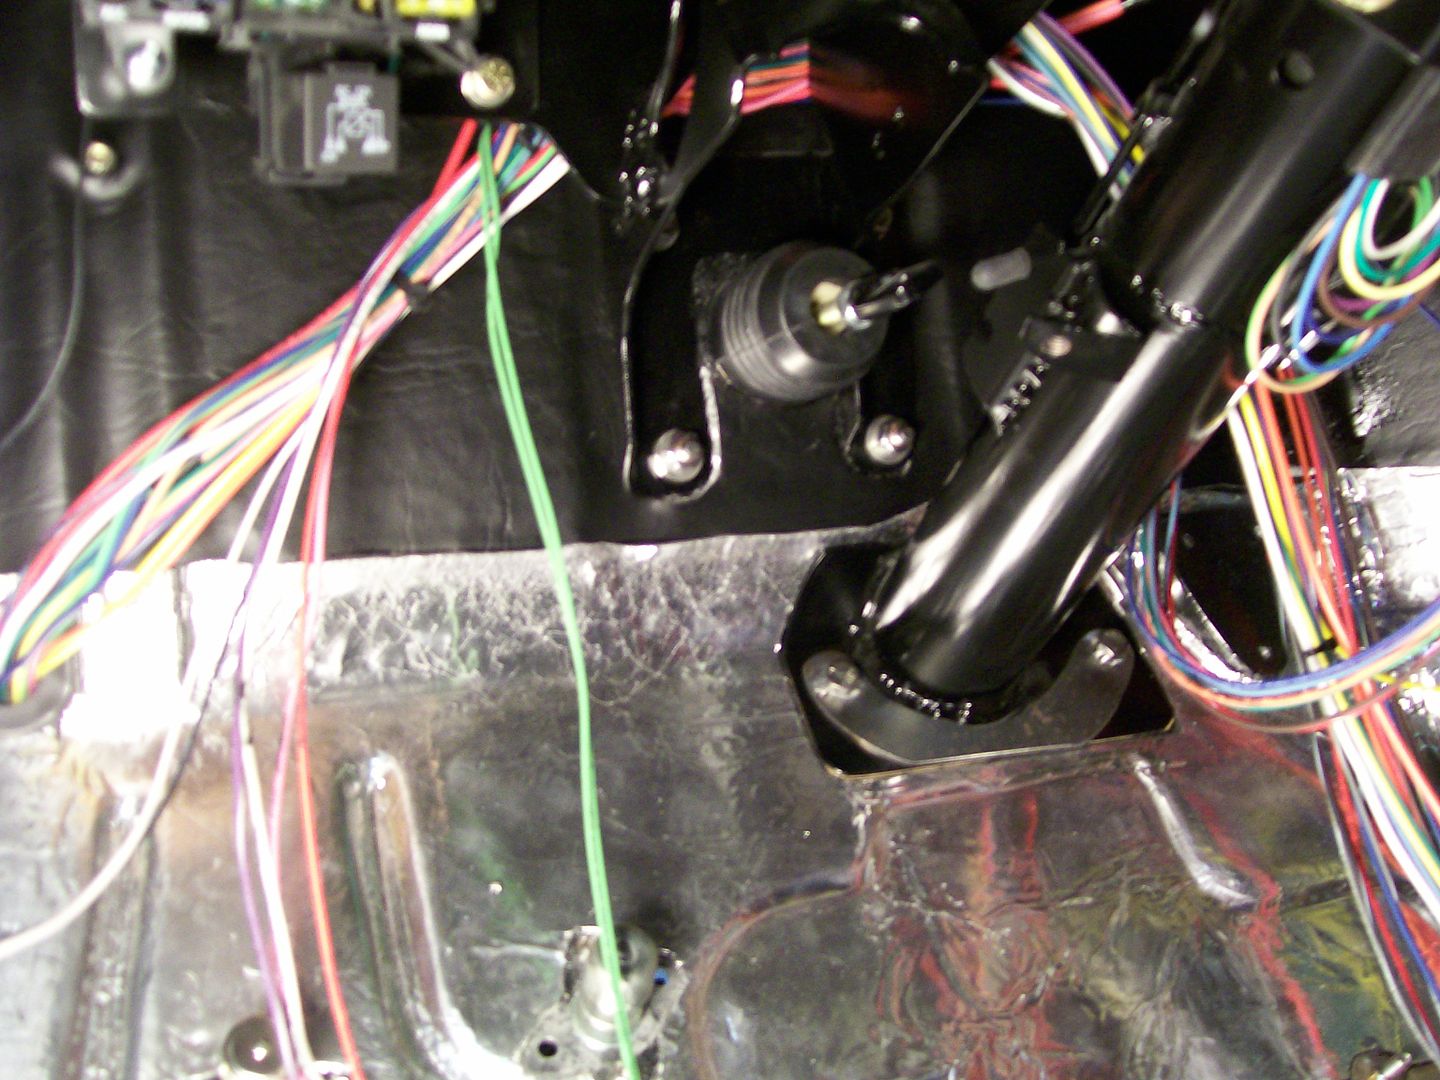 I have the two front brake lines running together without support, I figured if I tied them together I'd be happy. I cut some 1/8" stainless and made a bracket to support each other. 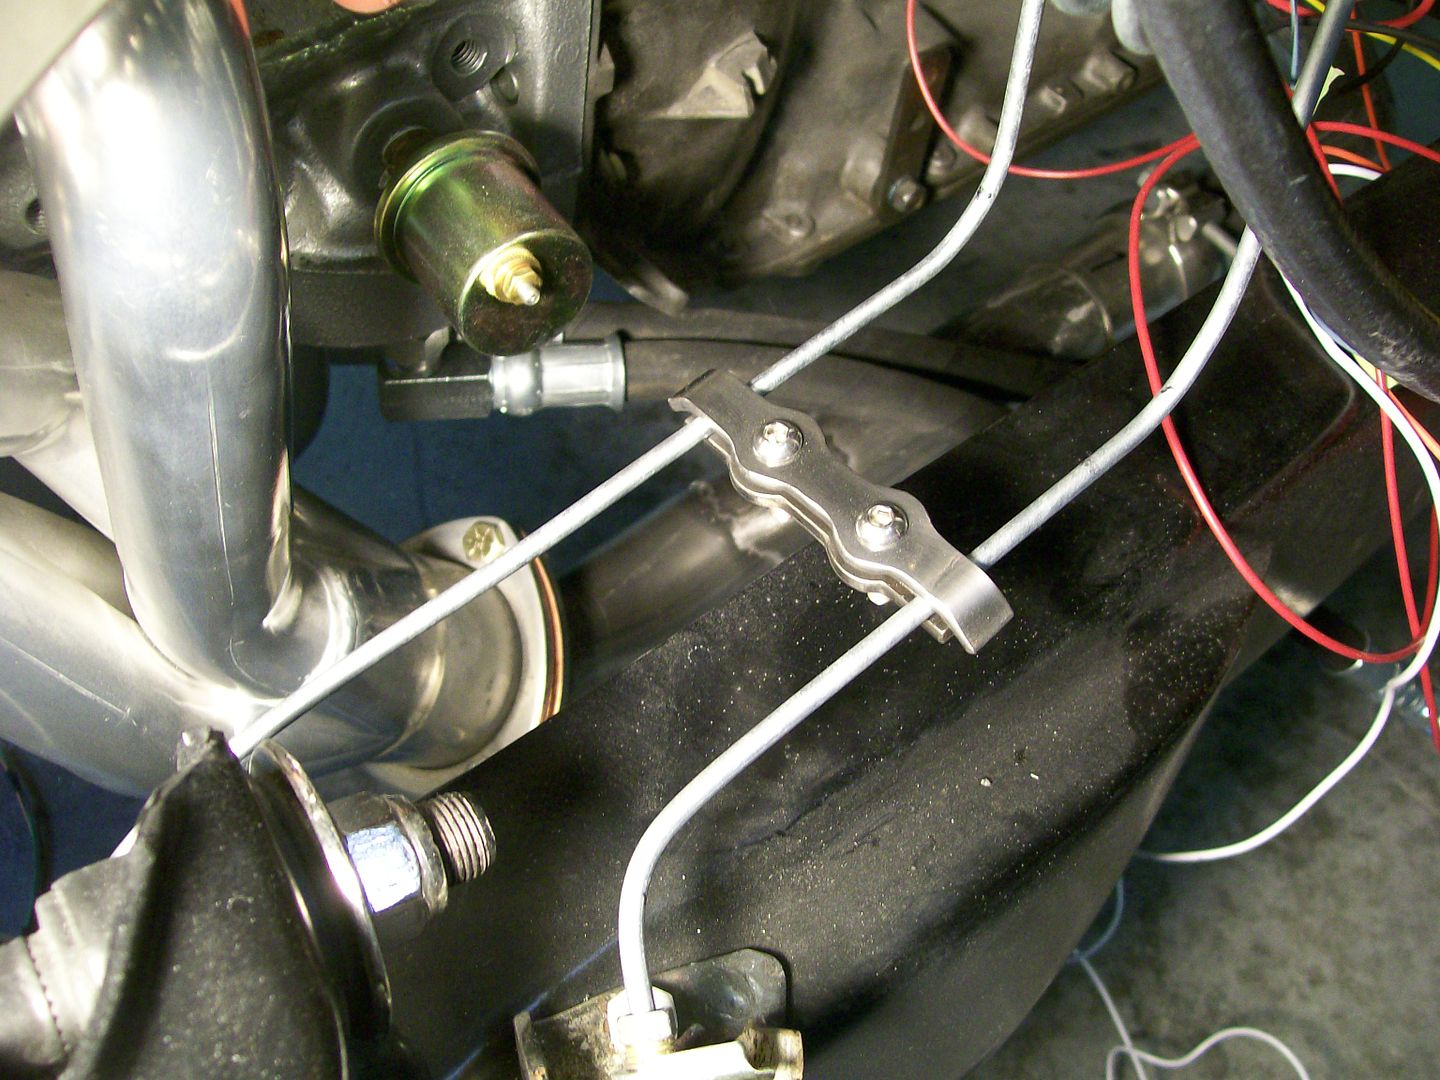 My goal is to hide most of the wiring. I'm using the under cab for much of it. Other wise some of the wiring is running under the fenders. 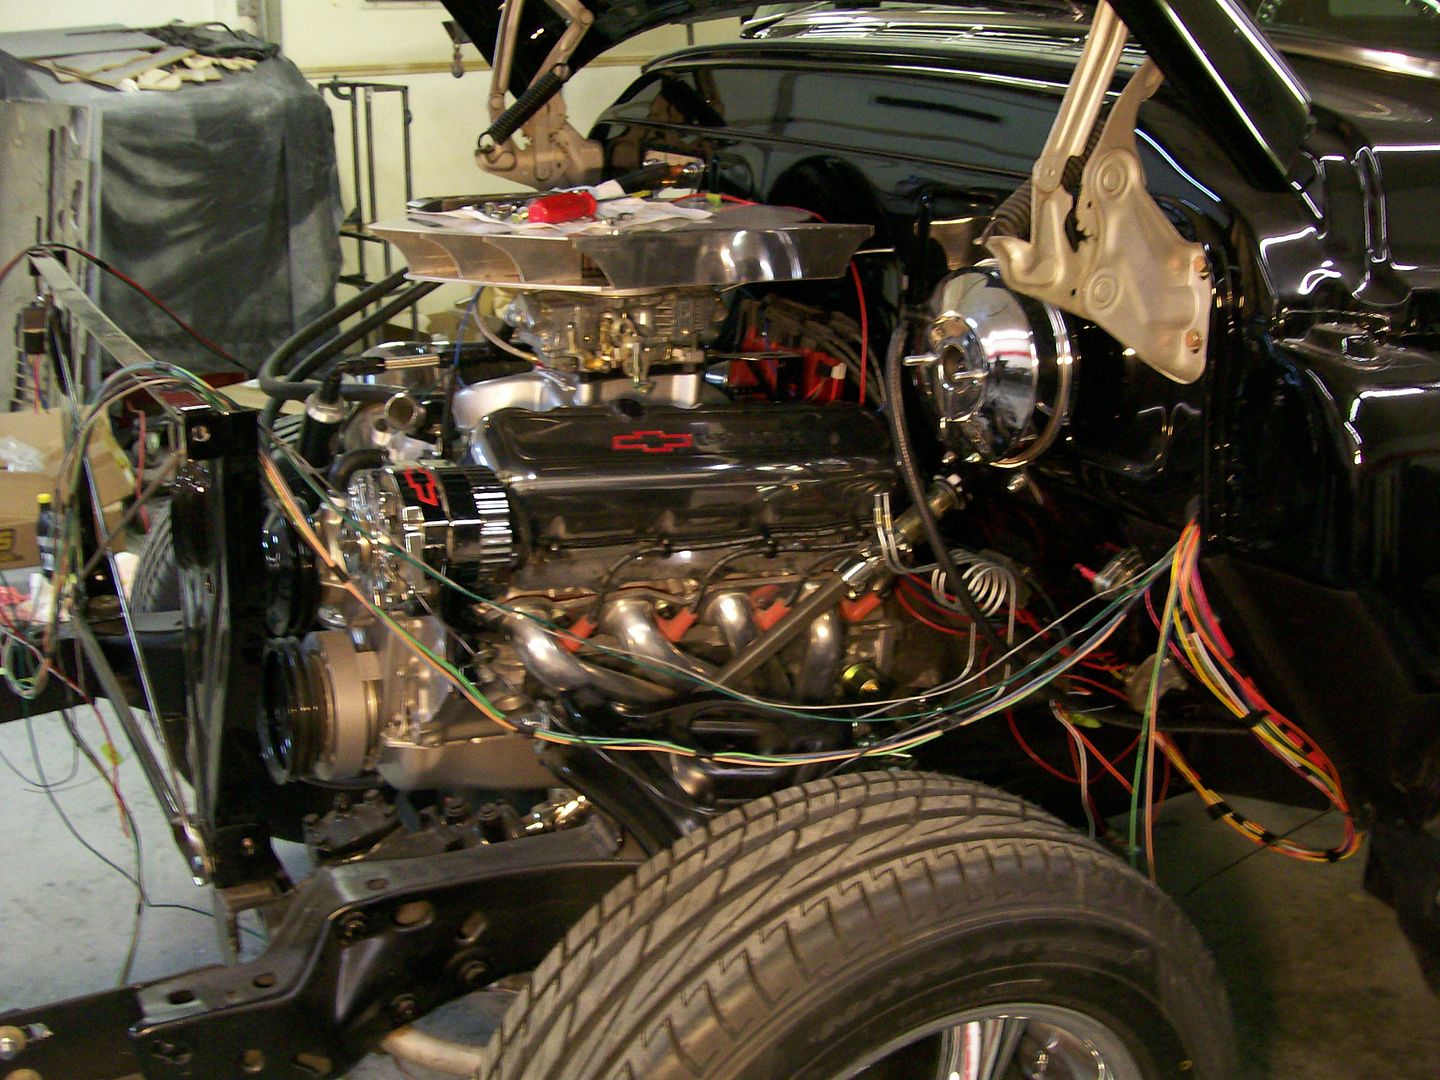 Getting to the alternator I figured I'd use the brackets I made for supporting the plug wires to hold the alternator power wire. 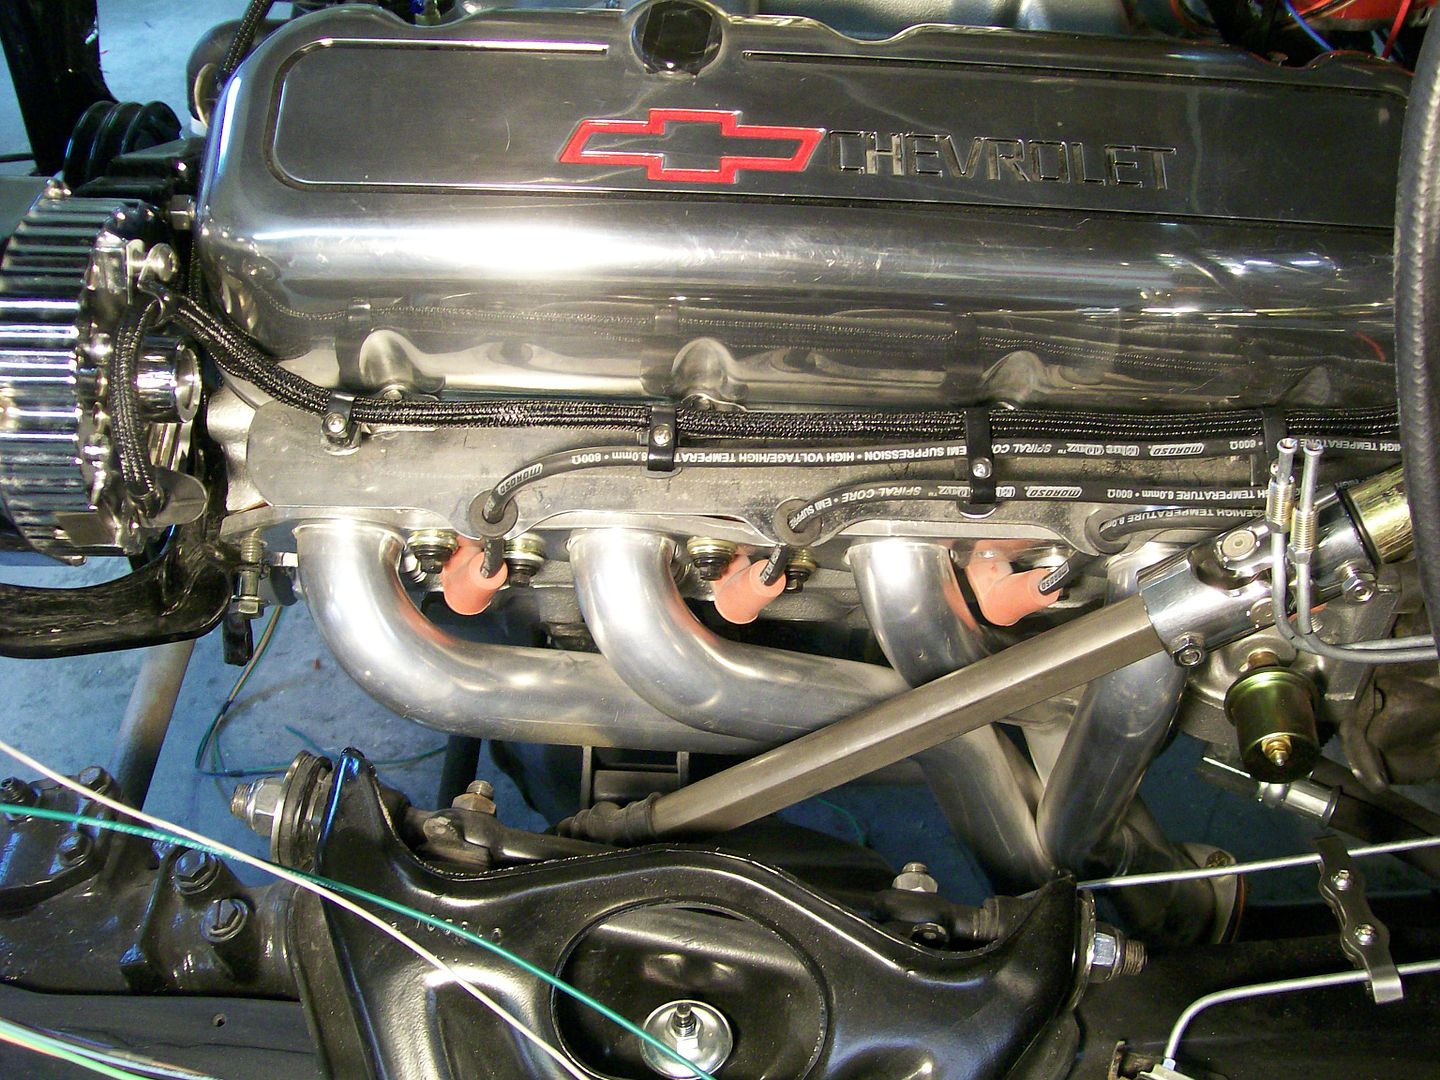 I checked the fit of one of the door panels. 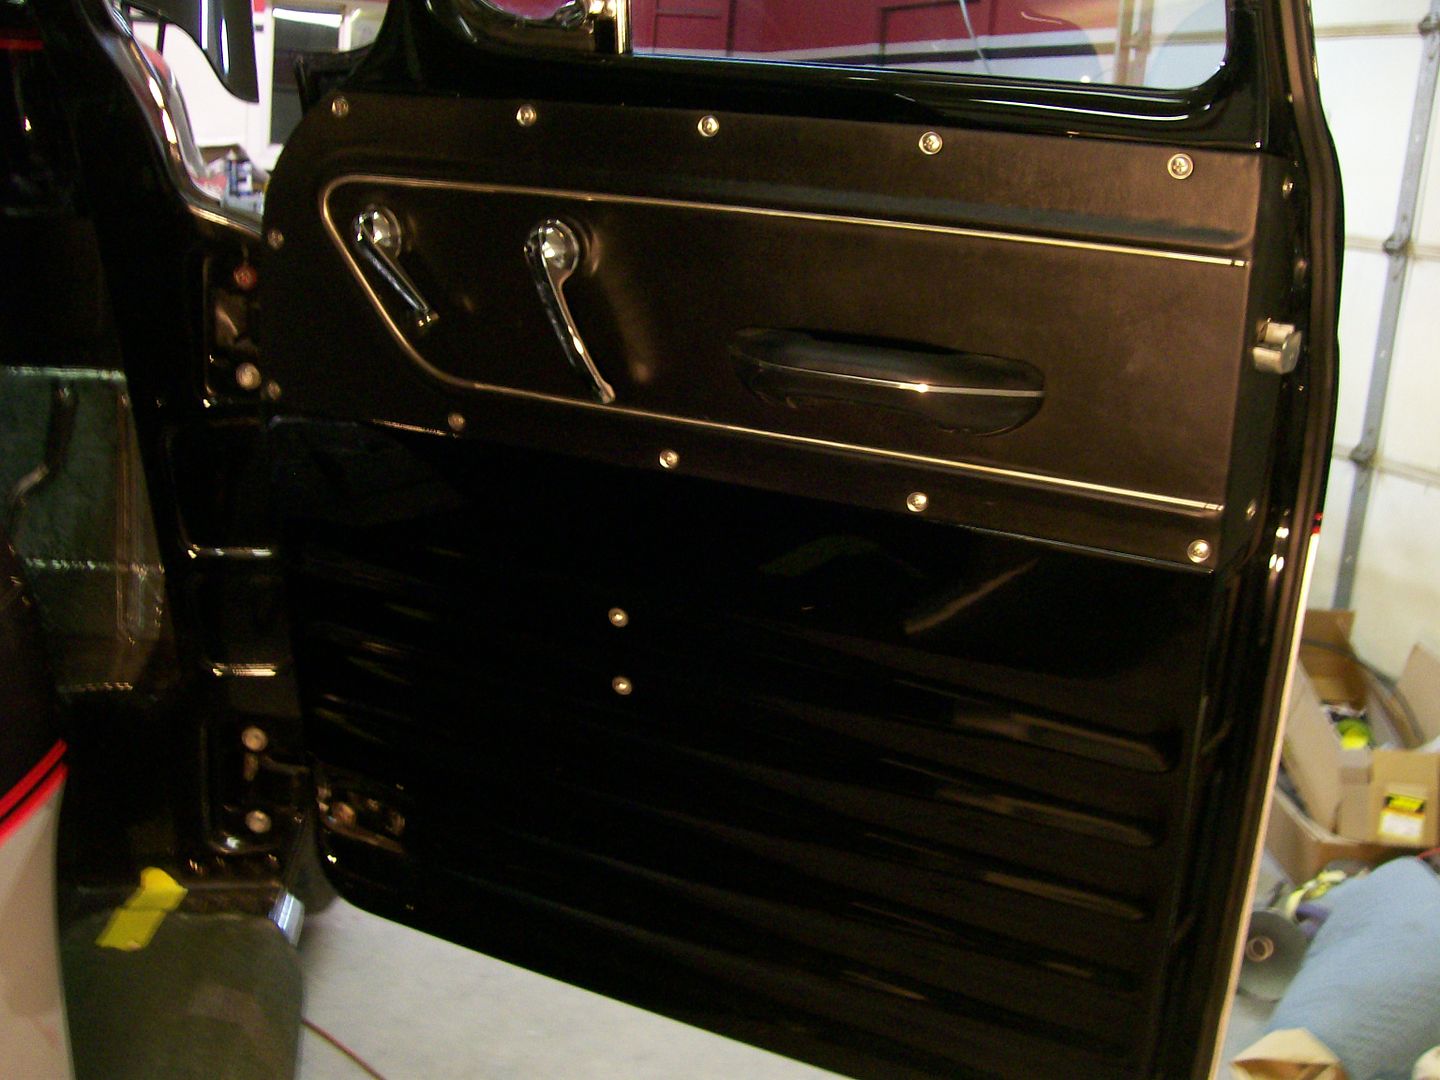 I hacked into the exhaust again. The more I thought about it, bolting directly to the headers without any kind of pivot doesn't give me options to adjust engine/driveshaft angle, these ball sockets took care of that issue. 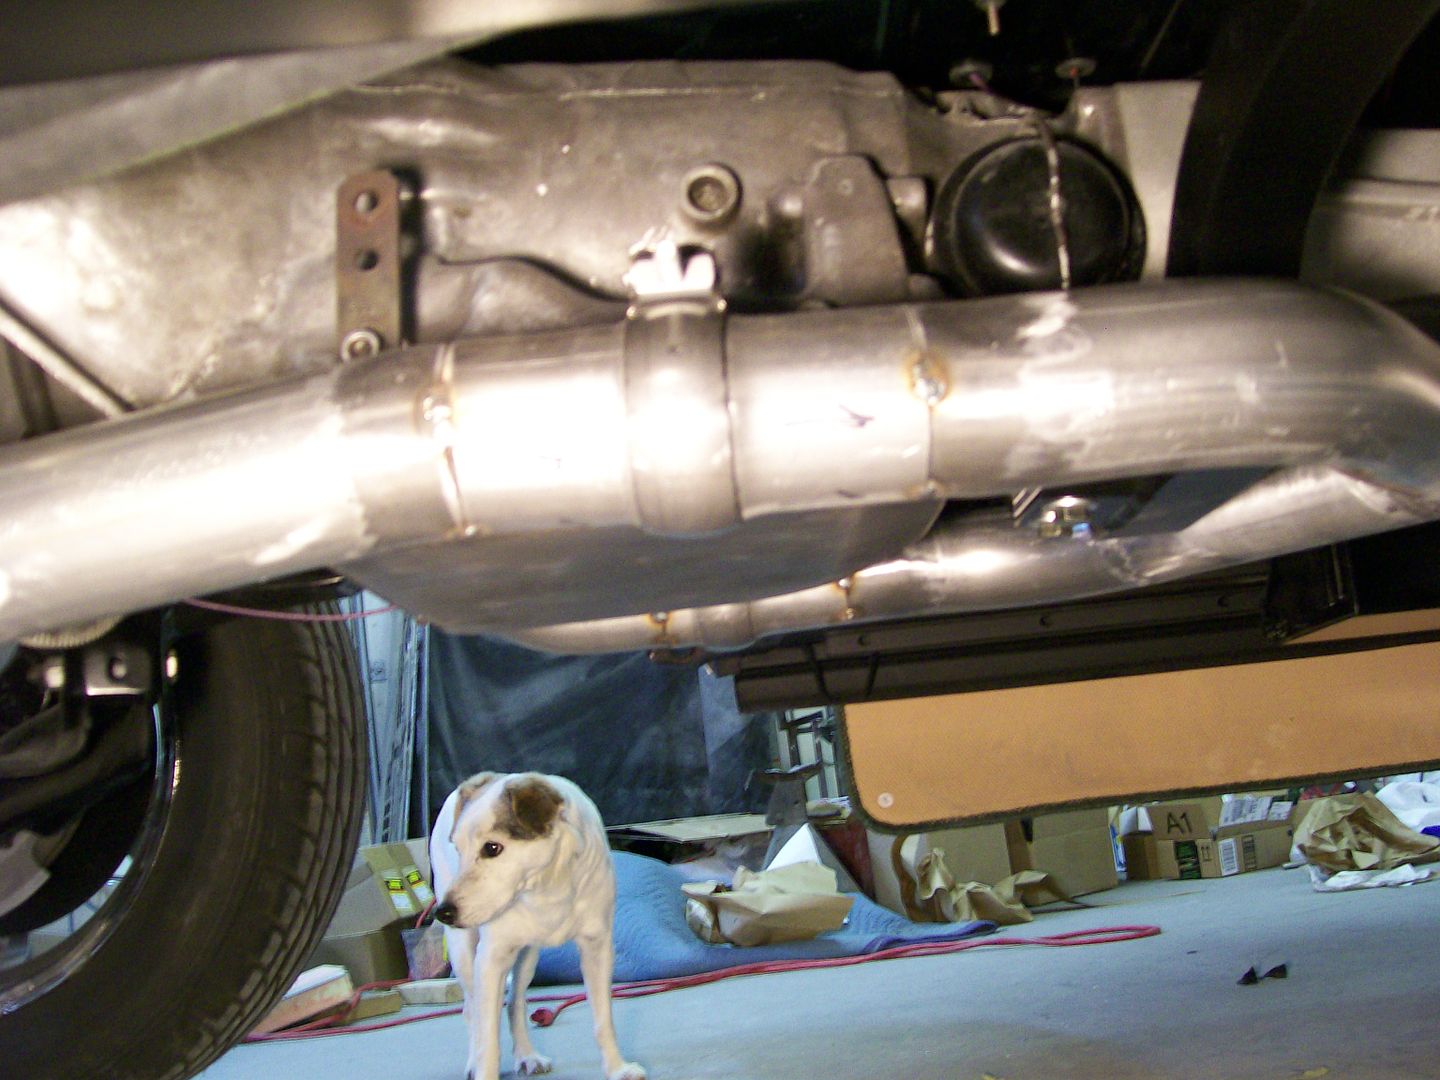 I like to run a master disconnect. The battery is one of the drop down boxes, I didn't want to run the cables over the frame so I drilled and grommeted the opening. I allowed extra cable length so I can pretty well drop the battery without issues. The only thing holding the switch in place to the floor is tightening the mounting nut. My concern is having it work loose and when I try to turn the switch on or off, the switch will spin in place. The oval plate between the floor and the switch has a female hex to match the switch face, it will not spin now. 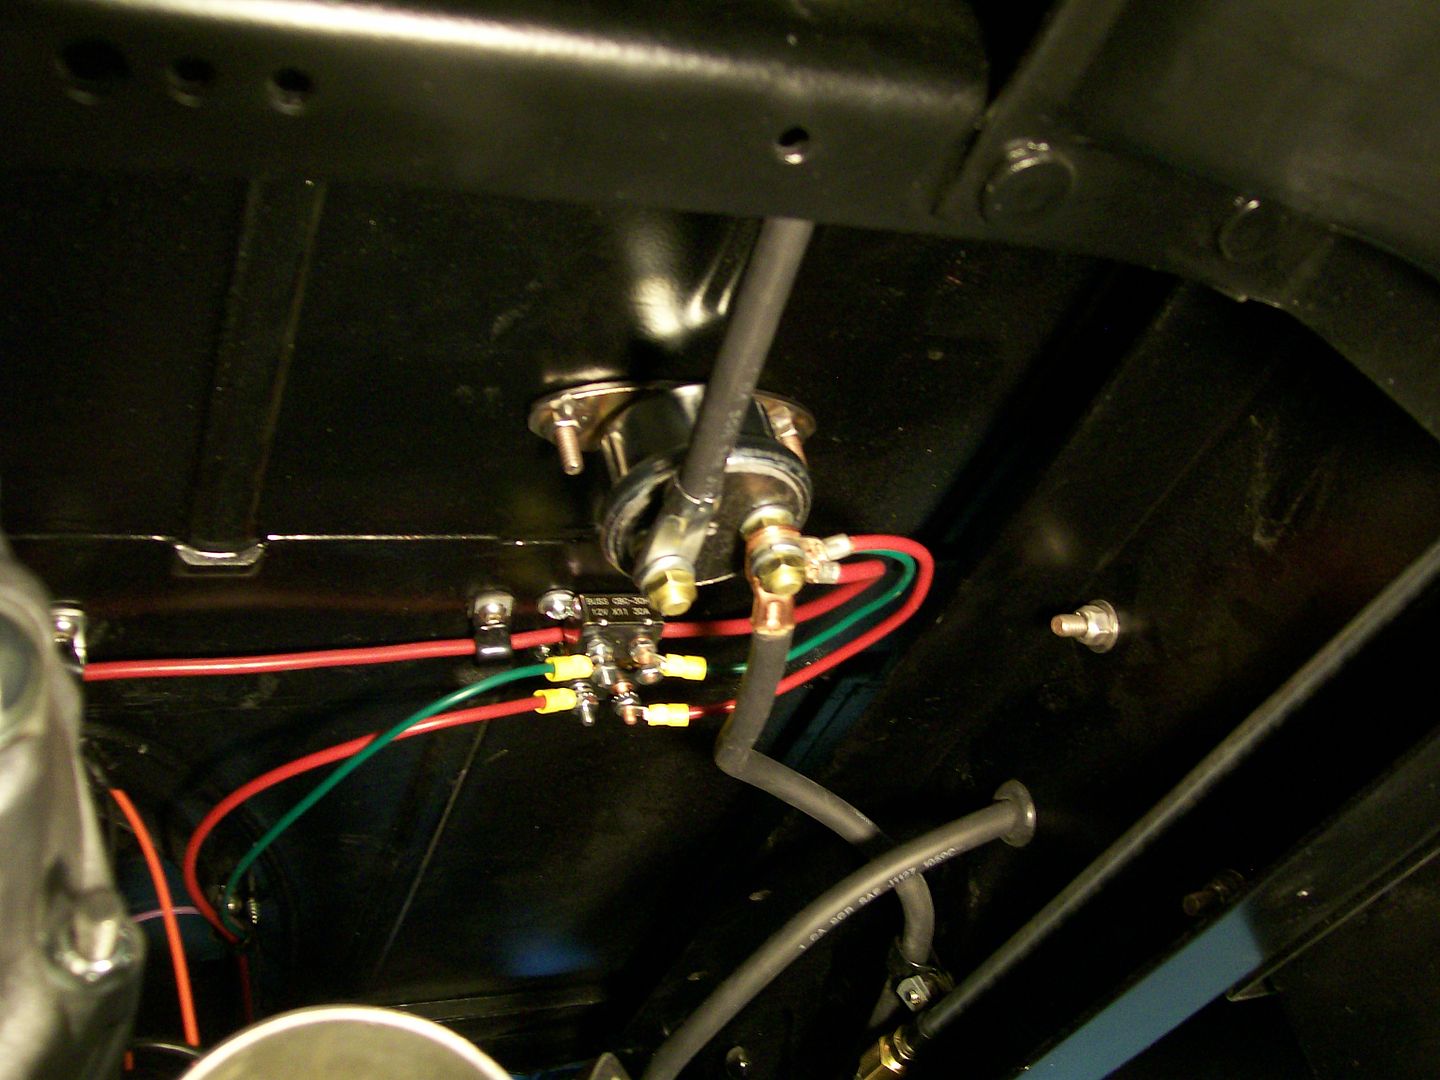 The only front wires will follow the fenders then stay within the hood latch panel, then to the headlights. 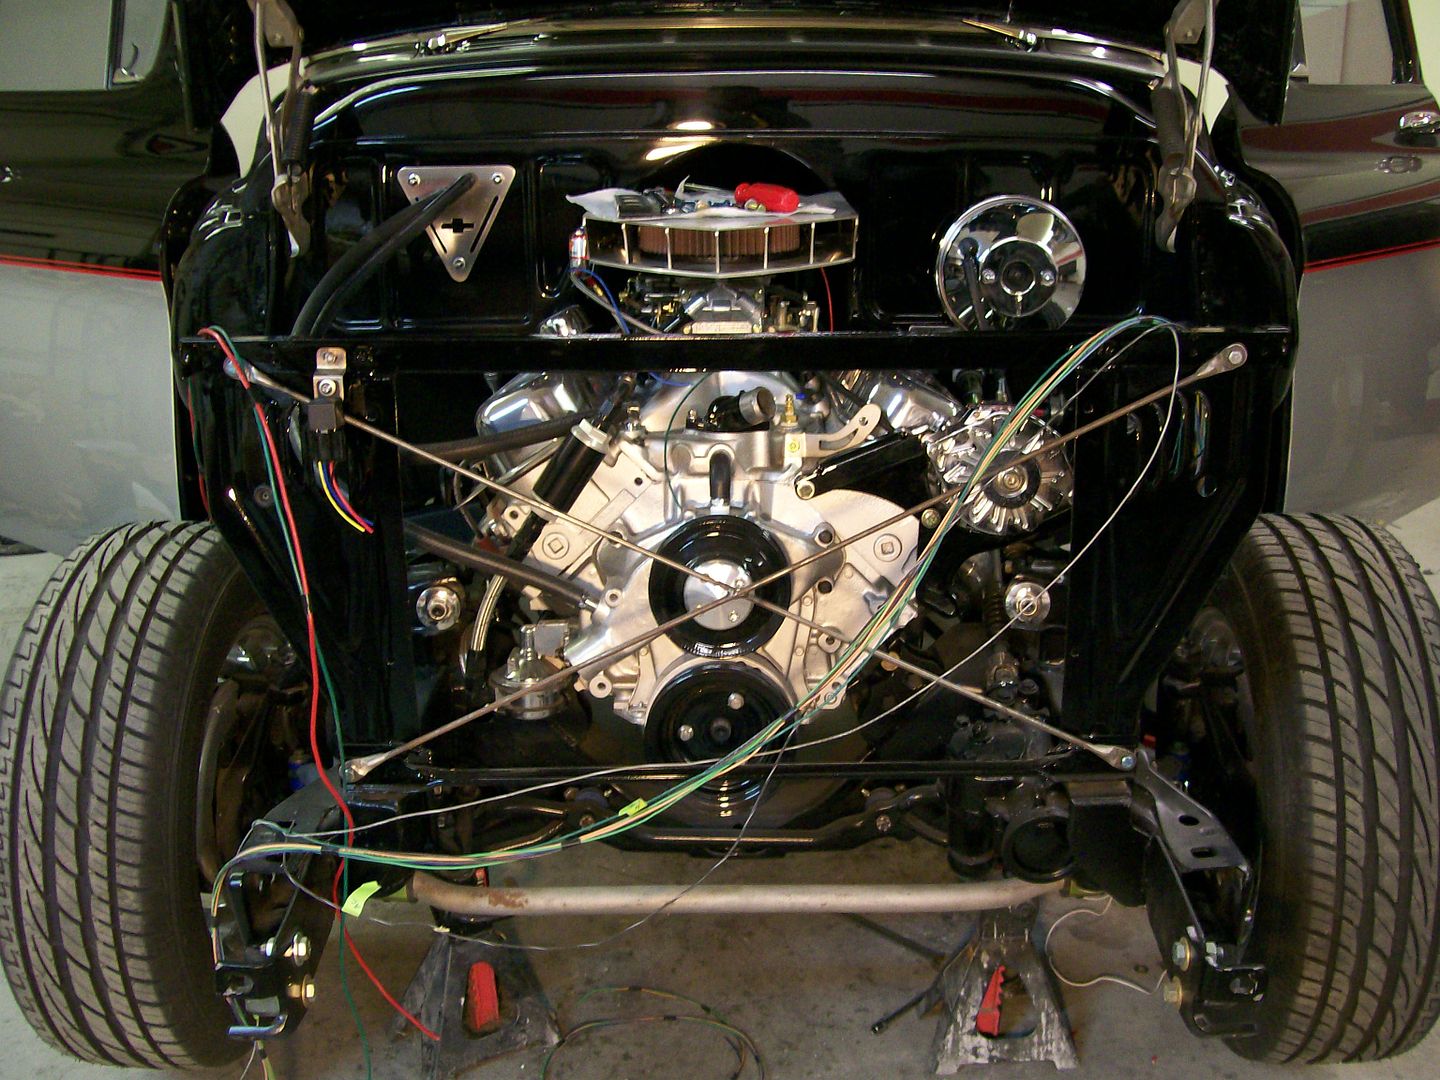 Tomorrow I hope get the front fenders back on and for good. Having them off has helped tremendously but now I need them on to finalize the front wiring. Tonight I glued the gaskets that go between front fenders and inner panels. 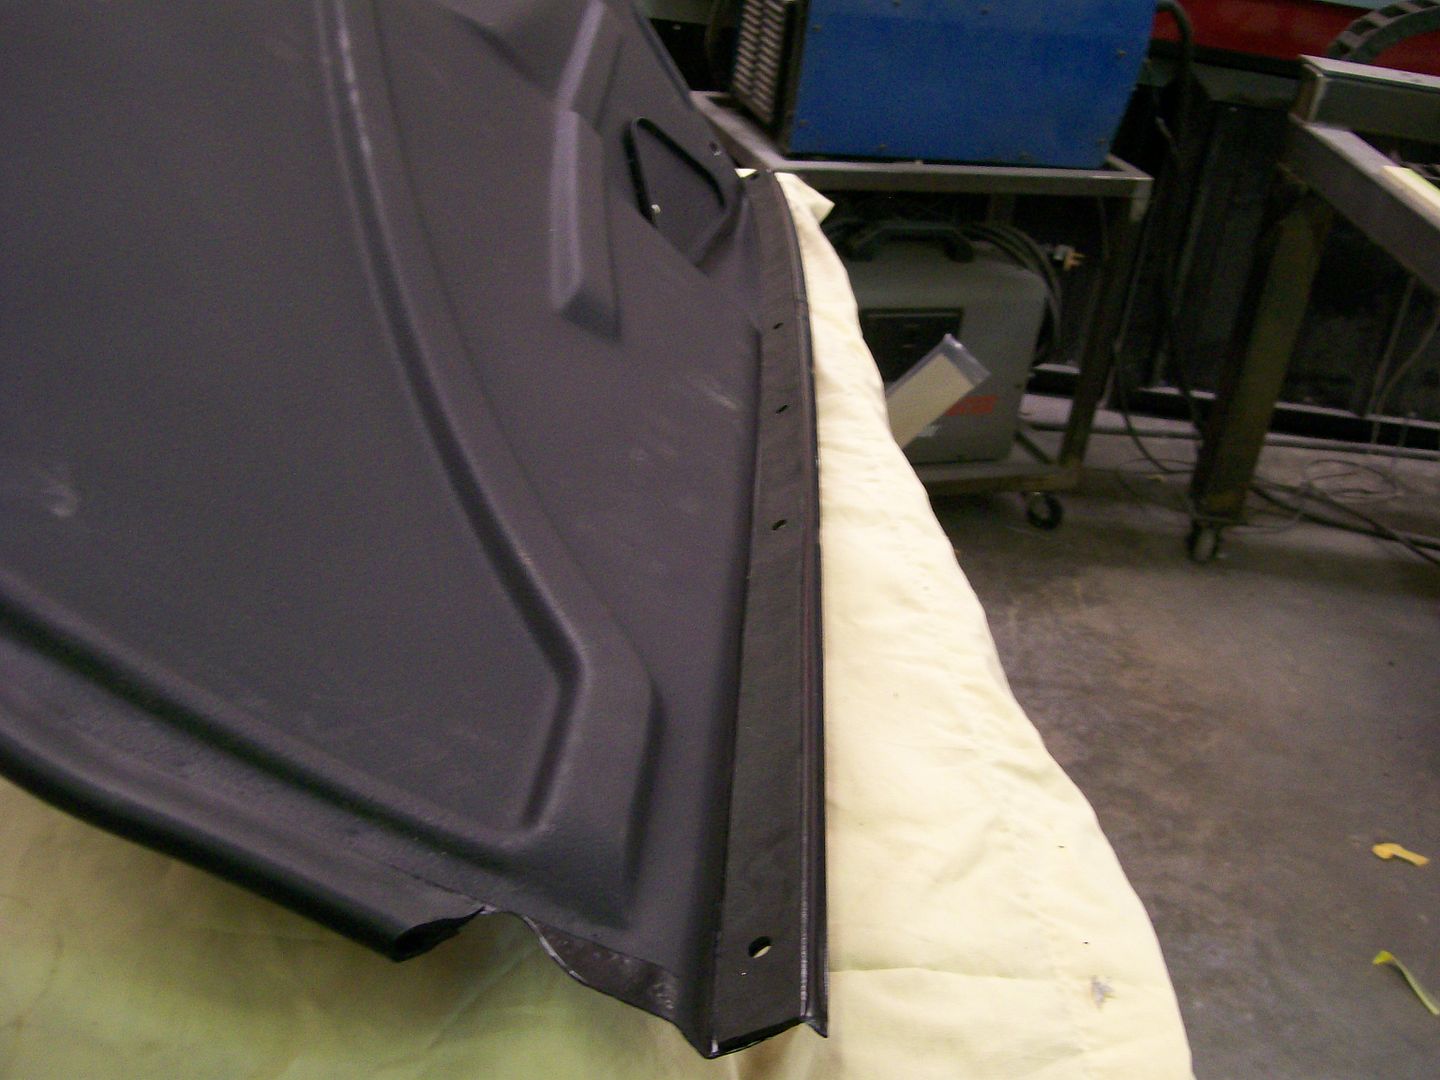 I had to run a separate circuit for dual fans and following Russell's advise so I also did the high beams through a relay. With all the little gadgets I've put into the truck I think I have it all covered, I just don't want to wrap all the wires then find I overlooked something.
__________________
My 57 Chevy truck build.http://67-72chevytrucks.com/vboard/s...d.php?t=541132 |
|
|

|
|
|
#664 |
|
Senior Member
 Join Date: Mar 2011
Location: West Plains, Missouri
Posts: 7,559
|
Re: 1957 Chevy truck re-rebuild
Jim, nice update and looking great...Jim
__________________
my build thread: http://67-72chevytrucks.com/vboard/s...d.php?t=459839 Jimbo's long bed step build:http://67-72chevytrucks.com/vboard/s...t=464626<br /> |
|
|

|
|
|
#665 |
|
Registered User
Join Date: Aug 2007
Location: Corona, California
Posts: 7,998
|
Re: 1957 Chevy truck re-rebuild
Really nice looking details.
Kim |
|
|

|
|
|
#666 |
|
Registered User
Join Date: Feb 2013
Location: Grants Pass Oregon
Posts: 474
|
Re: 1957 Chevy truck re-rebuild
Stepside Jim, I see that your Quality Control Inspector is checking out your work under the truck. Yup, looks good from here.
Earl
__________________
You have to have patiences or you'll be one. |
|
|

|
|
|
#667 |
|
Registered User
Join Date: Dec 2013
Location: Purmerend, Netherlands
Posts: 1,657
|
Re: 1957 Chevy truck re-rebuild
This is a masterpiece!
Really great work!
__________________
Cheers!! Kees. 1959 Chevy Fleetside Longbed My build: http://67-72chevytrucks.com/vboard/s...d.php?t=643426 Kool Guyz CC Instagram: _King_Kustom_ |
|
|

|
|
|
#668 |
|
Registered User
Join Date: Apr 2011
Location: Virginia Beach, VA
Posts: 516
|
Re: 1957 Chevy truck re-rebuild
Jim, I was driving down the road over the weekend and saw this, and thought - "There is something familiar about that paint job!"

|
|
|

|
|
|
#669 |
|
Registered User
Join Date: Oct 2013
Location: Oklahoma City Okla
Posts: 196
|
Re: 1957 Chevy truck re-rebuild
Great to see you making progress.
Dwight |
|
|

|
|
|
#670 |
|
Registered User
Join Date: Aug 2012
Location: Salem Mo
Posts: 665
|
Re: 1957 Chevy truck re-rebuild
Thanks everybody. Today the front fenders are back on and the truck looks so much more complete with them in place. Just putting those gaskets in place caused me to struggle getting the front back together. When I took the truck apart many of these odds and ends were missing, but I feel the extra effort to seal up all I can will make a more solid feeling truck when done.
Checking off my list of things to do, one thing I nearly forgot about is mounting a transmission cooler, should have that done by the weekend. bowt1ed, I notice every vehicle with that paint scheme not more than I ever did before. There is a car reality show, Fat and Furious, on one of the last episodes they redid a Hurst Olds, they did the black and silver too. Clarance J, too funny, it does look like she is the inspector. In my Photobucket I notice she shows up quite a bit. She has no special talents, but she sure is one loyal dog. Thanks to all for checking in, Jim
__________________
My 57 Chevy truck build.http://67-72chevytrucks.com/vboard/s...d.php?t=541132 |
|
|

|
|
|
#671 |
|
Registered User
Join Date: Feb 2015
Location: Crystal City MO
Posts: 3
|
Re: 1957 Chevy truck re-rebuild
Hey Jim, I love your truck!
 I was up to about 5 a.m. last night reading through the entire build. I am in love with your taillights and the roll pan between the bumper and bed. Its like Chevy built an awesome truck, and at the last min they were like, shoot, the buyers are on the way, and we forgot about the gas tank, tail lights and rear bumper and were like, quick, throw some lights and a back bumper on, and stick the tank behind the seat. He wont notice it back there anyways. I am curios on just a few things. Wondering why you chose not to move the tank out of the cab, and was wondering why you didn't weld in the trans cover? |
|
|

|
|
|
#672 | |
|
Registered User
Join Date: Aug 2012
Location: Salem Mo
Posts: 665
|
Re: 1957 Chevy truck re-rebuild
Quote:
On the transmission cover I had a concern about whether on not I would have to modify it in any way. As I setup the engine and transmission in the truck it all fit fine and I was moving forward on the project. Then as I disassembled the truck for paint, I went to remove the engine and transmission together, what I found was, as I lifted the engine and transmission, before the motor mounts cleared the frame mounts, the top of the transmission made contact with the transmission cover. Being one who never likes to weld myself into a corner, I simply removed the cover screws and I was able to remove the cover quickly, cut out a small section, weld in a new piece and check the fit. 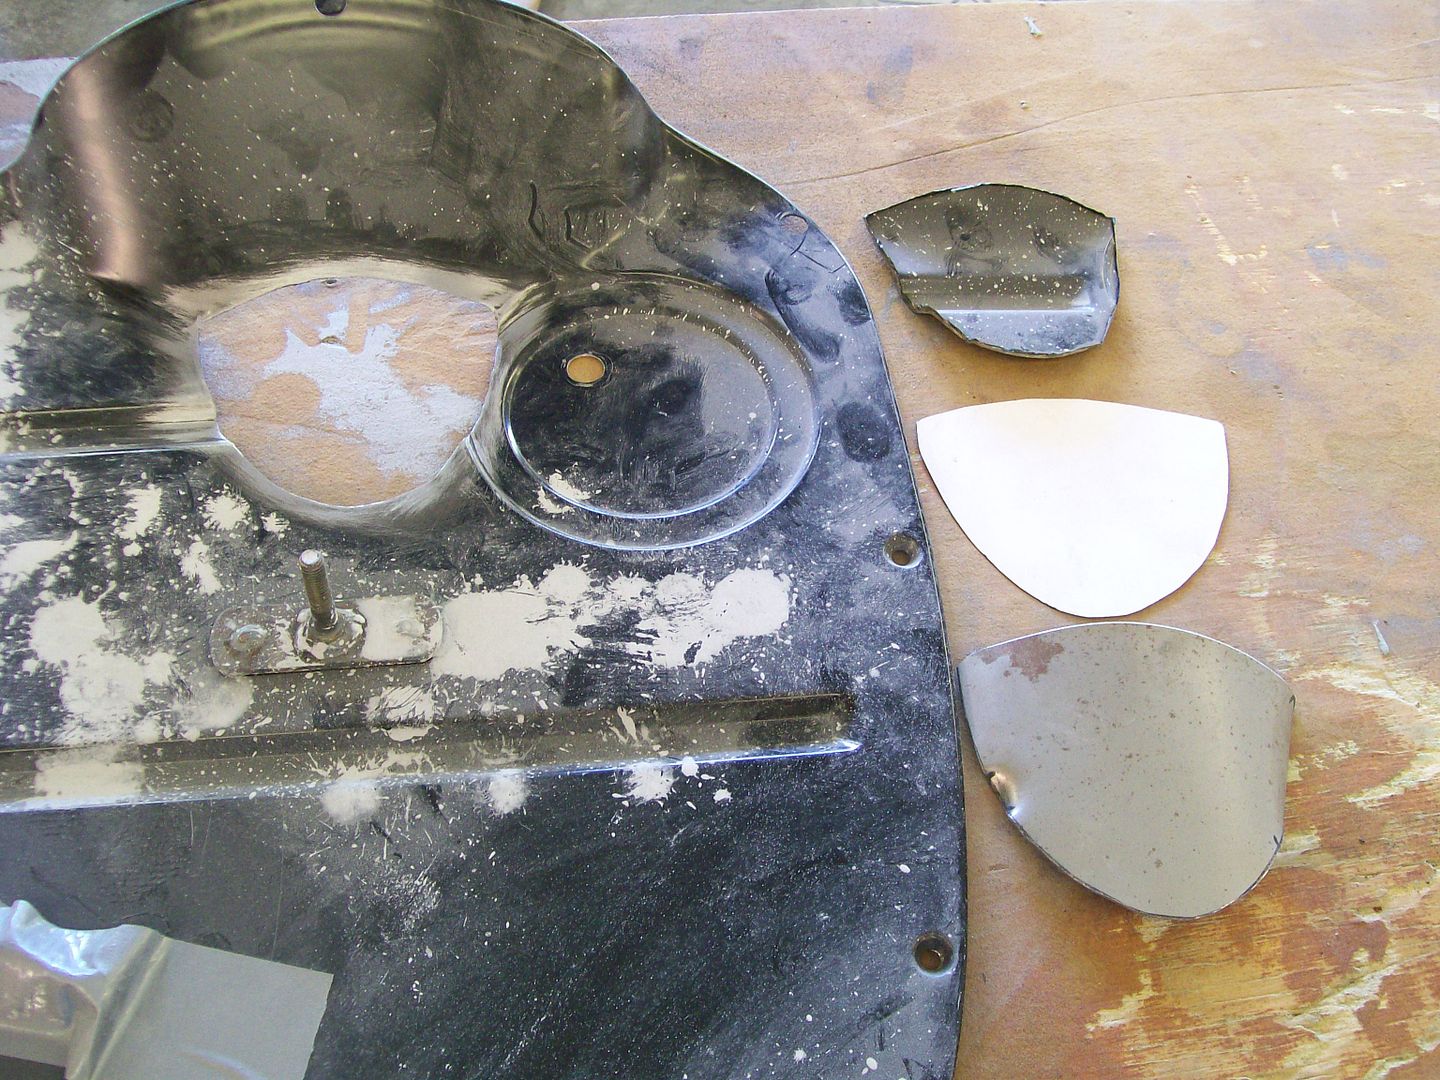 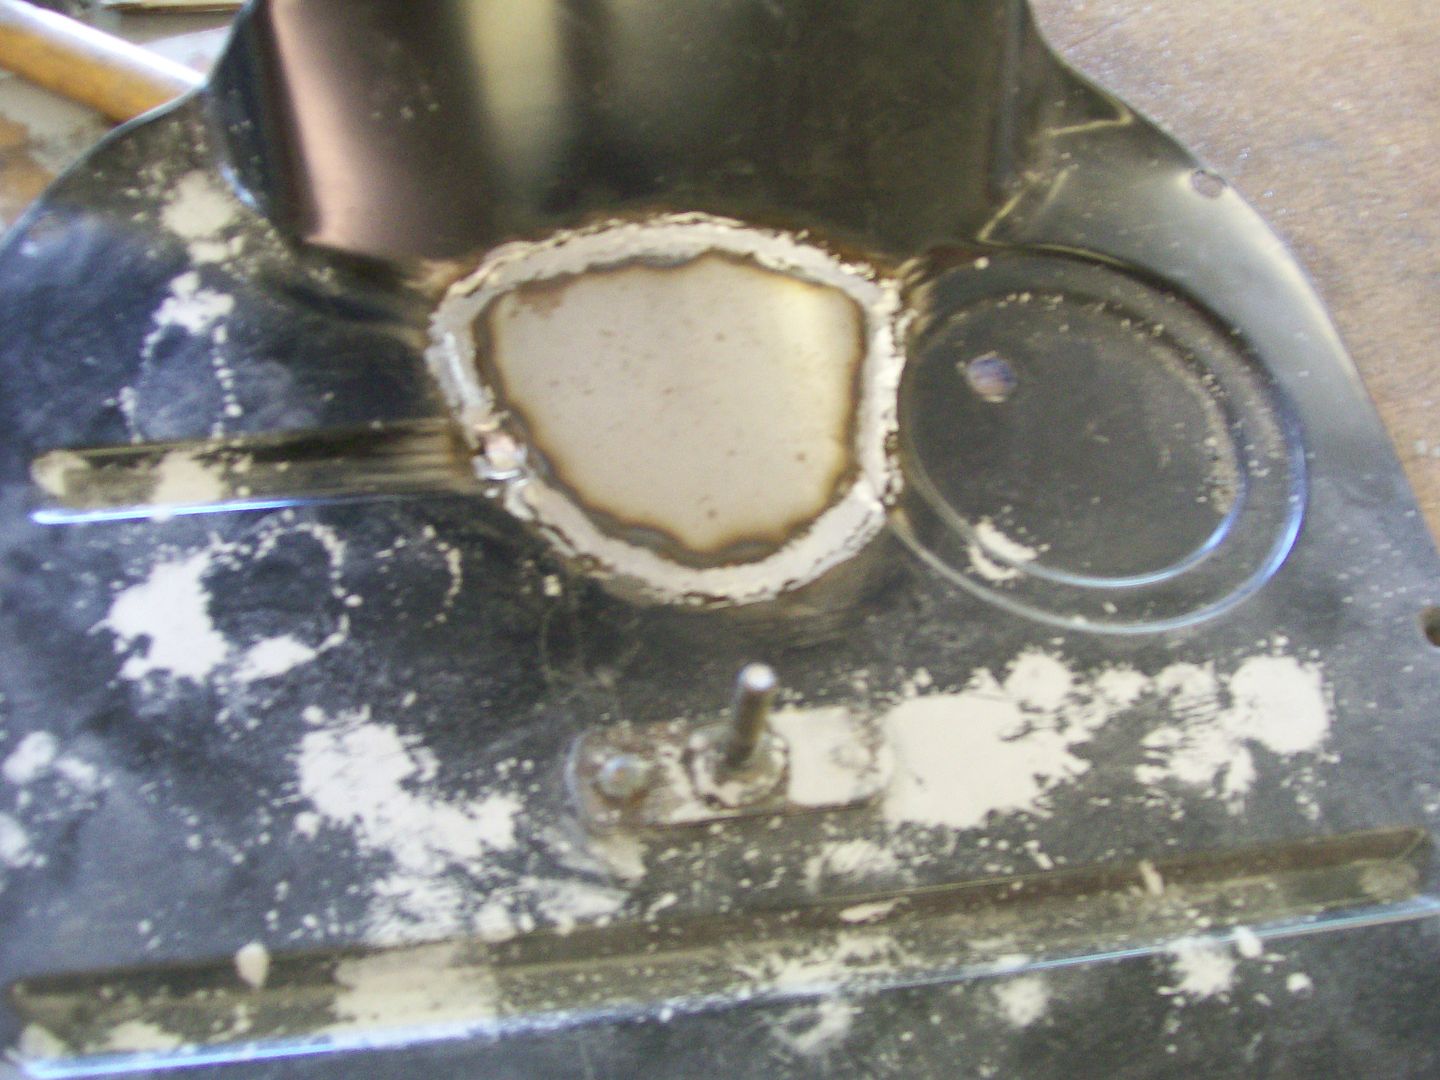 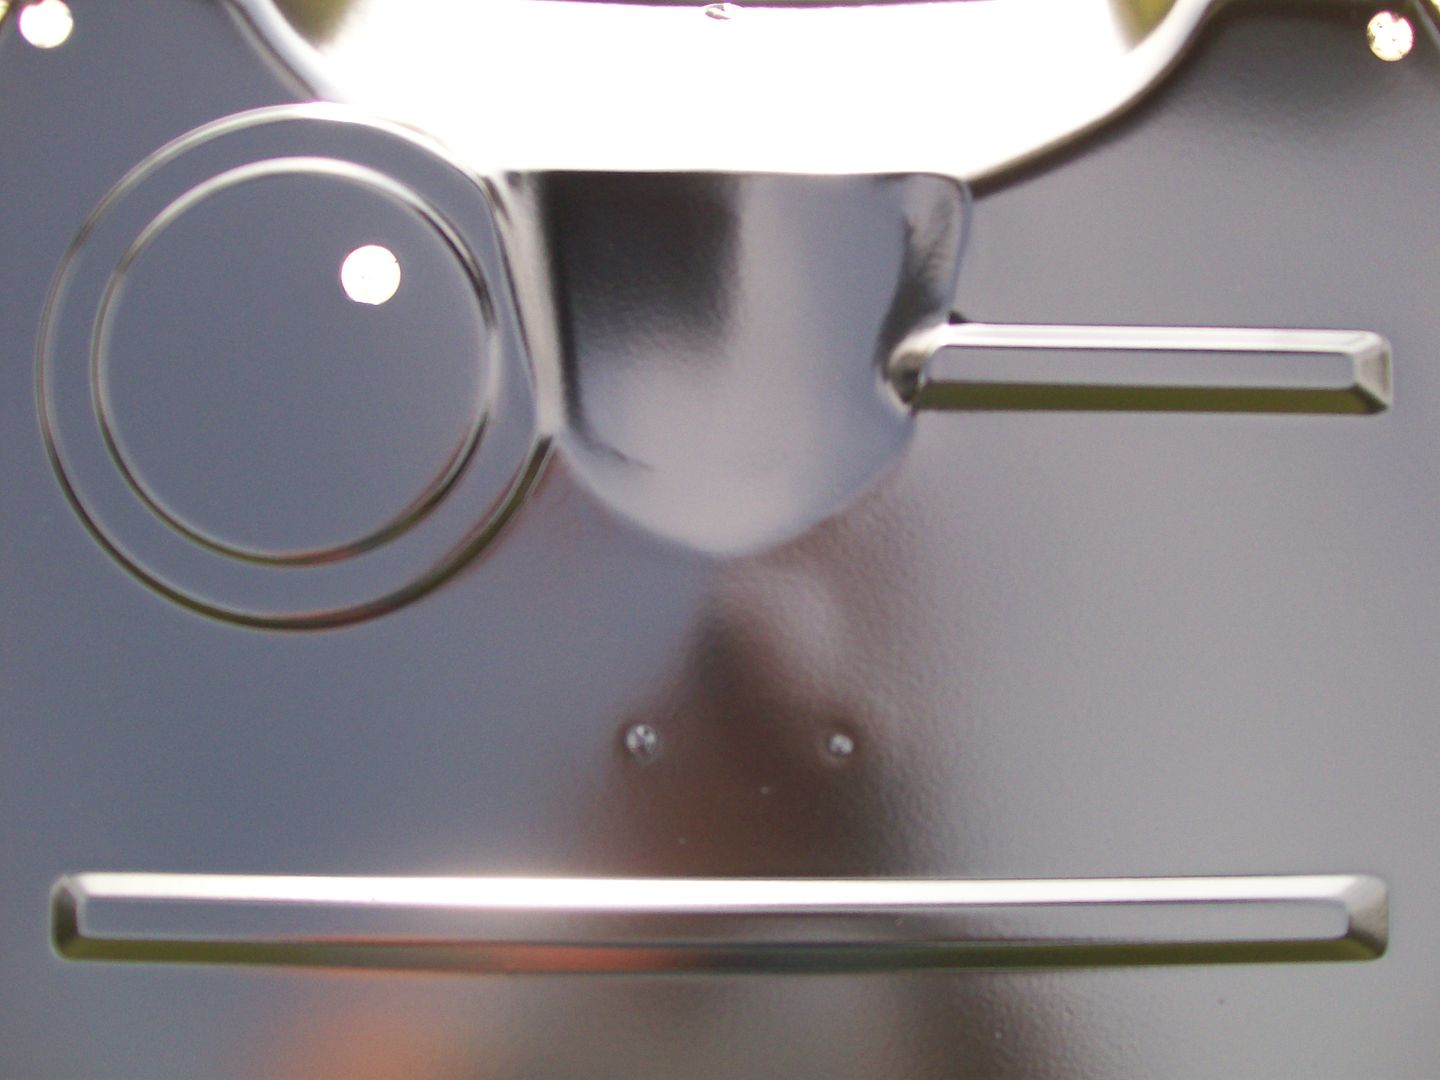 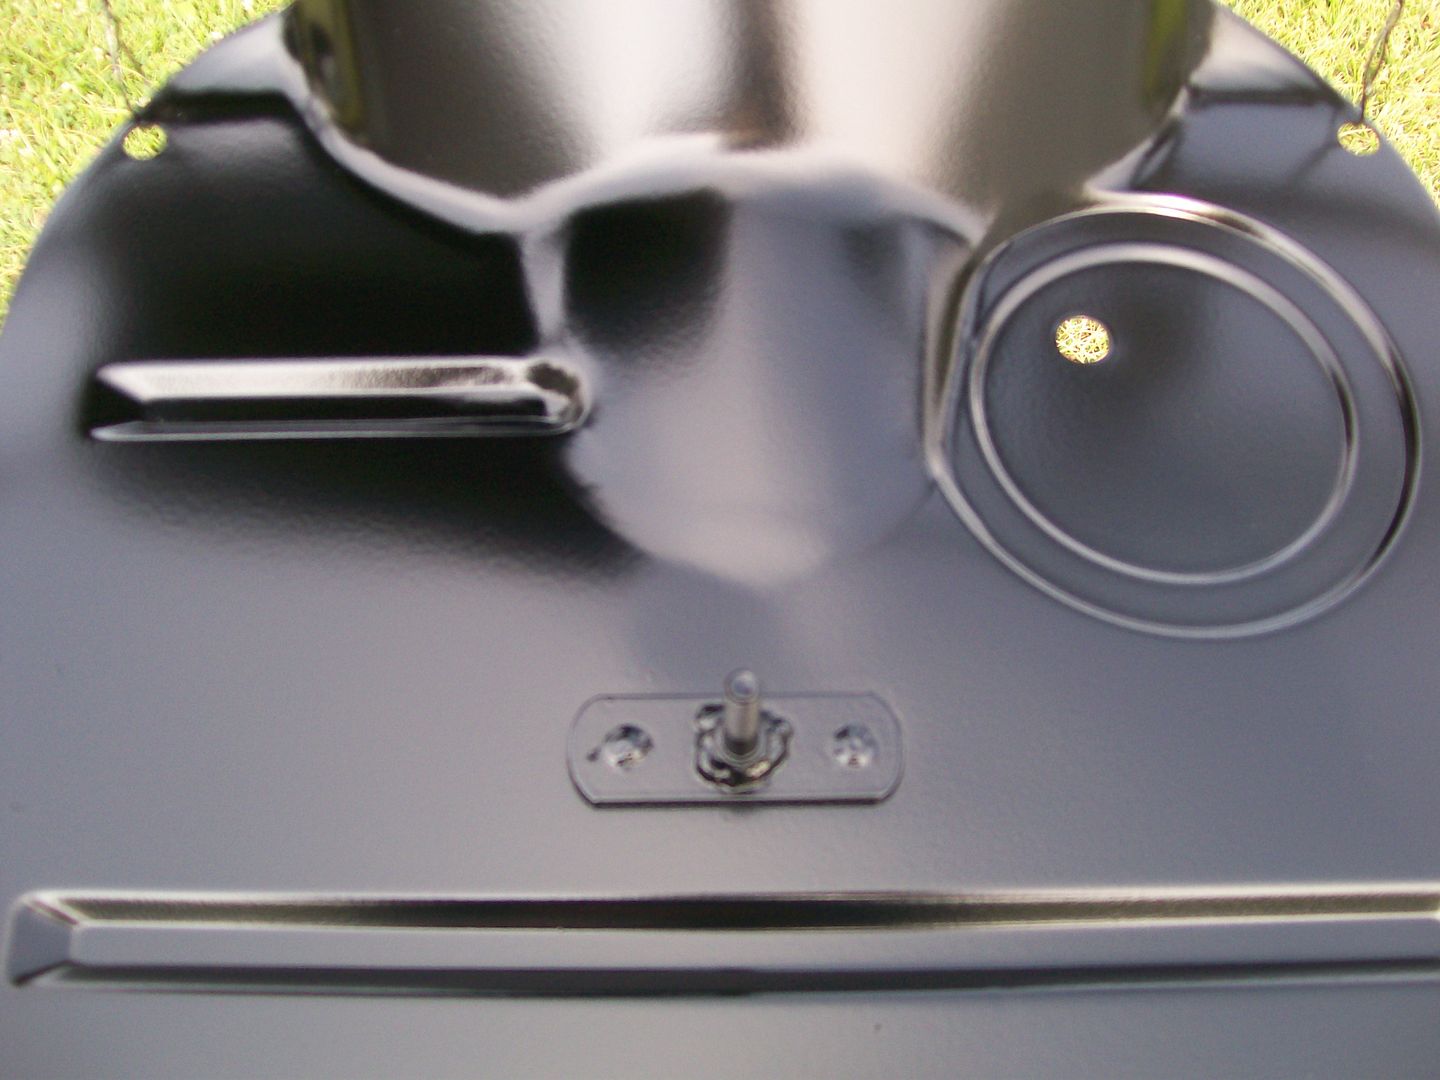 The fix was simple since I could do it on the work table. Gas Tank, many of the after market ones have so much tank hanging down beneath the frame and square in design, the look just didn't fit the design of the finished truck I was looking for. So I left the whole gas tank option open for now. If I did move the tank from the cab, I would have left the gas cap and the rubber grommet where it is for the old time look. With that in mind, I figure someday if I do decide to move the tank I can simply remove the one in the cab, then take out the bed floor and install a tank that fits my liking. I see some guys opting for the mustang gas tank, I like this idea, as some finish their installation I might go with the mustang tank in the future. Thanks for checking in Overmyhead55, it's always fun discussing the build.
__________________
My 57 Chevy truck build.http://67-72chevytrucks.com/vboard/s...d.php?t=541132 |
|
|
|

|
|
|
#673 |
|
56 - autocross
Join Date: Apr 2010
Location: Camarillo, Ca
Posts: 1,121
|
Re: 1957 Chevy truck re-rebuild
Hey Stepside
What master disconnect are you using? Do you have any pics of the top side? What is the block next to it? Relay? |
|
|

|
|
|
#674 | |
|
Registered User
Join Date: Aug 2012
Location: Salem Mo
Posts: 665
|
Re: 1957 Chevy truck re-rebuild
Quote:
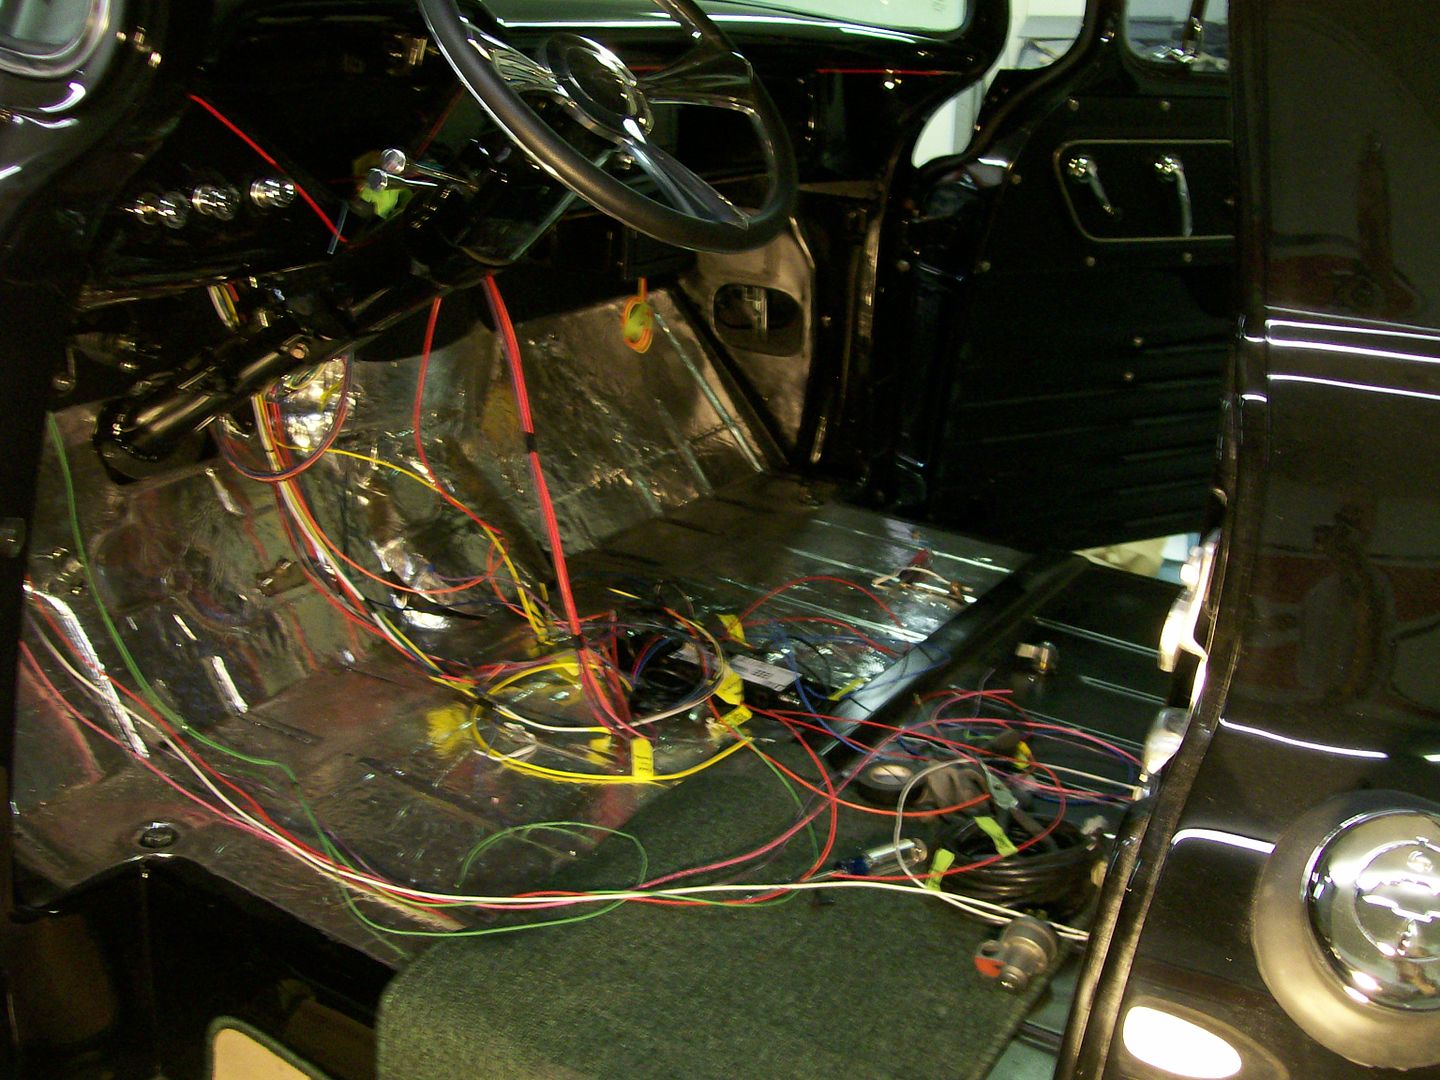 In the picture you were curious of, the item(s) next to the switch are 2 circuit breakers. One breaker is for a power wire for the headlight relay that will be hid within the radiator support. The second circuit breaker is the power wire heading to the dual electric fan control mounted on the inside of the inner fender panel. Under the cab I found there is a cavity that runs from side to side under the front seat bolt holes. I was able to drill into the cavity and put nut inserts in place to hold wire supports, circuit breakers and a few other odds and ends. Such as a speedometer cable support that has a speed sensor for the over drive unit. 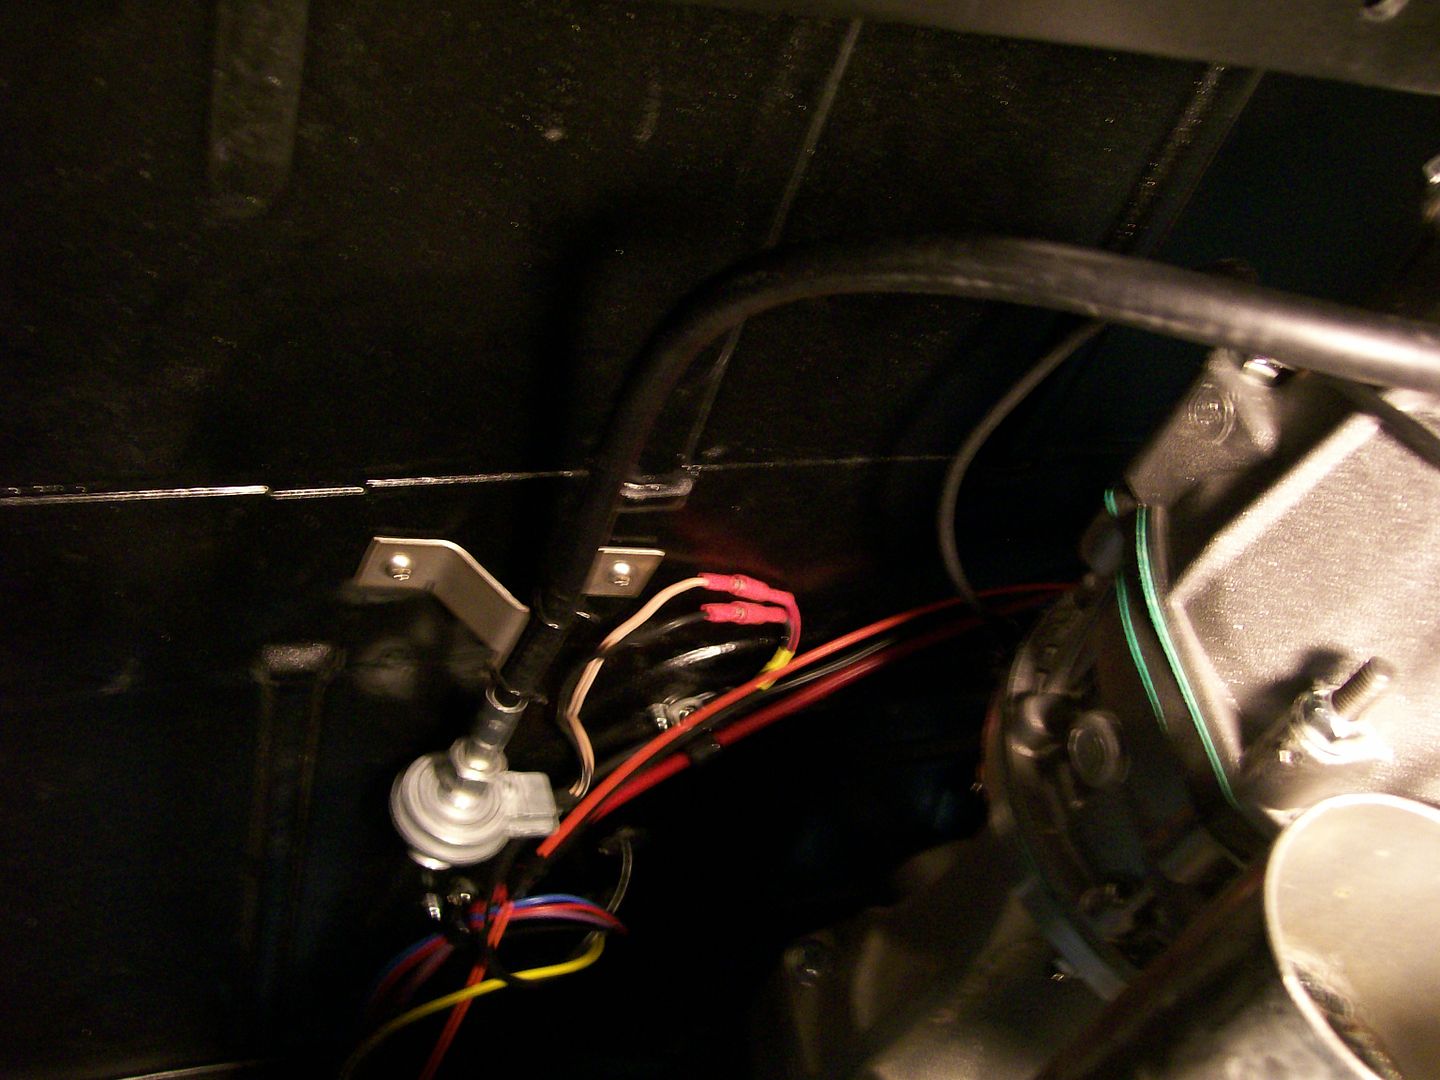 On the front of the truck picture there is the headlight relay, I've since moved it to the other side and made a different mount for it.
__________________
My 57 Chevy truck build.http://67-72chevytrucks.com/vboard/s...d.php?t=541132 |
|
|
|

|
|
|
#675 |
|
Registered User
Join Date: Aug 2007
Location: Corona, California
Posts: 7,998
|
Re: 1957 Chevy truck re-rebuild
Looking good.
The trans cover looks like it came from the factory that way. Kim |
|
|

|
 |
| Bookmarks |
| Thread Tools | |
| Display Modes | |
|
|