
 |
|
|
#51 |
|
Restoring a 68 SWB
Join Date: Jan 2008
Location: Nashville, TN
Posts: 1,068
|
Re: Lucy - My 1968 SWB
Yeah, I am gonna keep the intake. I am not gonna change much on the engine now. Just clean it up and put a new water pump, fuel pump, and maybe change the timing chain if needed.
I am gonna put a hidden hitch on it. I'll probably drive it like this for a few years at least. I wanted to go ahead and do the frame right this time around so I wouldn't have to bother with all of that when I do get ready to paint the body.
__________________
My Build Thread: Lucy - My 1968 SWB - Shop Truck Style North Nashville Concrete Contractor |
|
|

|
|
|
#52 |
|
Restoring a 68 SWB
Join Date: Jan 2008
Location: Nashville, TN
Posts: 1,068
|
Re: Lucy - My 1968 SWB
I've already pressure washed it once or twice when it was on the truck with the motor still in, but I guess I am gonna do it again with some oven cleaner and then some naval jelly.
__________________
My Build Thread: Lucy - My 1968 SWB - Shop Truck Style North Nashville Concrete Contractor |
|
|

|
|
|
#53 |
|
Restoration Virgin!
Join Date: Jan 2008
Location: Huntersville, NC
Posts: 8,299
|
Re: Lucy - My 1968 SWB
ahhhh....progress....looks good Trai!
__________________
Geoff with a G 1968 Chevy C10 SWB The Mistress 1972 Custom Deluxe C20 Suburban A Suburban Named Isabella 1966 Ford Mustang Mama's High School Graduation Present |
|
|

|
|
|
#54 |
|
Registered User
Join Date: Dec 2003
Location: Thomasville, NC
Posts: 1,877
|
Re: Lucy - My 1968 SWB
looking good, keep pictures coming

|
|
|

|
|
|
#55 |
|
Registered User
Join Date: Feb 2008
Location: Arizona
Posts: 638
|
Re: Lucy - My 1968 SWB
Just found the build thread and can't wait to see more. What drop are you going with? I have a 68(clone 50th) that I am getting ready to convert (5-lug) and drop 4/6 so I'd like to see what you do. It looks great!
__________________
72 Cheyenne shorty "CheyLow" 72 3/4 long 4X4 69 SWB "Prospector" 68 C/10 shorty - "Picacho" http://67-72chevytrucks.com/vboard/s...d.php?t=428379 sold to "93redsled"  Have you heard about C10 Talk? C10 Talk is a podcast all about C10 Trucks, the builders, the vendors, and most importantly the C10 Community. Check us out online at www.c10talk.com Have you heard about C10 Talk? C10 Talk is a podcast all about C10 Trucks, the builders, the vendors, and most importantly the C10 Community. Check us out online at www.c10talk.com
|
|
|

|
|
|
#56 |
|
VA72C10
 Join Date: Mar 2008
Location: Midlothian, VA
Posts: 25,267
|
Re: Lucy - My 1968 SWB
Looks like a really nice start to the project
__________________
Looking for a 67-72 swb or blazer project in or around VA. 
|
|
|

|
|
|
#57 |
|
Restoring a 68 SWB
Join Date: Jan 2008
Location: Nashville, TN
Posts: 1,068
|
Re: Lucy - My 1968 SWB
Thanks guys. Funds have been tight recently, so no major updates. Still cleaning on the frame and motor. Need to finish getting the control arms blasted too.
As for the drop, I am going with 18" wheels and 50 or 55 series tire, so whatever drop it takes to just get those wheels to tuck the fender is what I will do. I am gonna run bags all the way around, so I 'll just adjust til I get it where I need it. That's a cool 68!
__________________
My Build Thread: Lucy - My 1968 SWB - Shop Truck Style North Nashville Concrete Contractor |
|
|

|
|
|
#58 |
|
1967 C10 SWB
Join Date: Mar 2007
Location: Atlanta
Posts: 136
|
Re: Lucy - My 1968 SWB
I will be following your build. I like what I see so far. I am doing something similar
http://67-72chevytrucks.com/vboard/s...d.php?t=320847 No air bags but probably a 4/6 drop and some 20's Vex 
|
|
|

|
|
|
#59 |
|
Restoring a 68 SWB
Join Date: Jan 2008
Location: Nashville, TN
Posts: 1,068
|
Re: Lucy - My 1968 SWB
I got a flux core wire welder for Xmas and I got to try it out today. This is the first time I have ever welded anything. I practiced a few times on a thick piece of metal and laid down a nice little bead after a few tries, so I decided to cut up a bad fender and try my hand at some sheet metal.
I cut off the front cup off the fender and then welded it back on. I burnt through the metal a few times and had to fill it back in. All in all I was pretty pleased with the results. The cell phone pics aren't that great so it's hard to see the details. 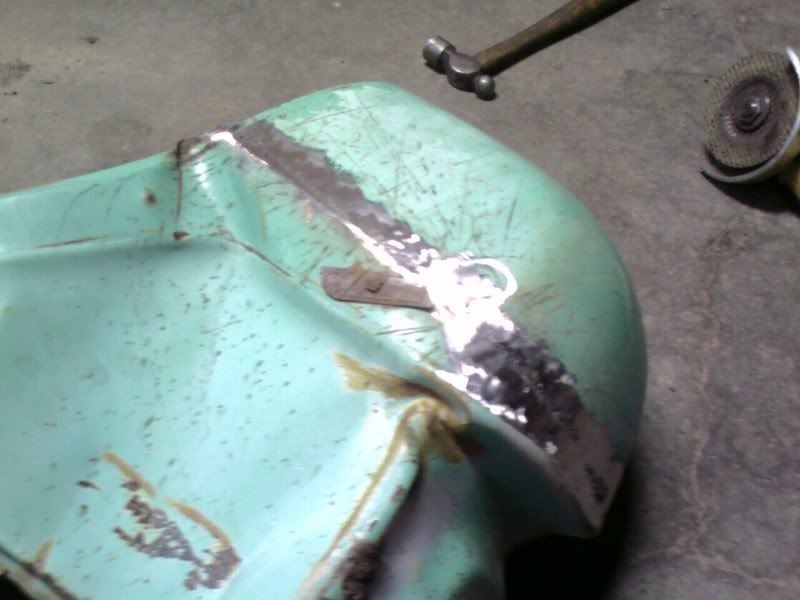 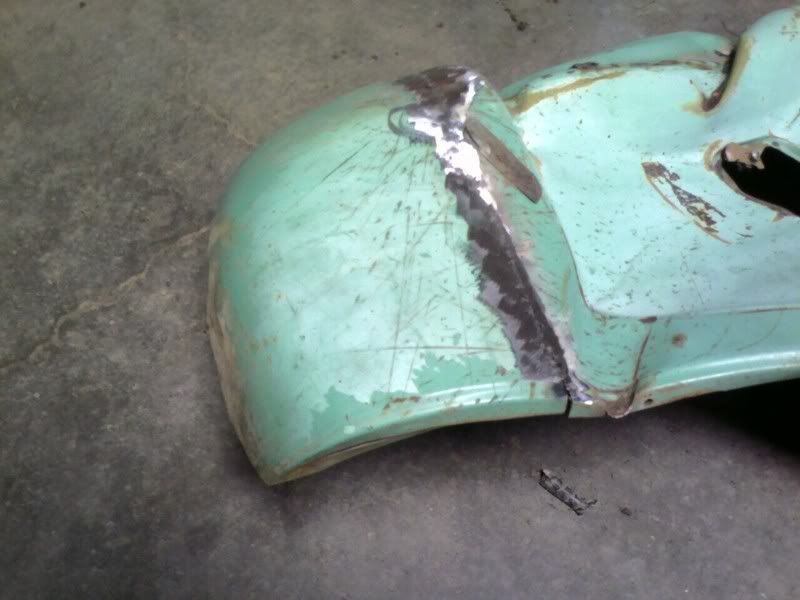
__________________
My Build Thread: Lucy - My 1968 SWB - Shop Truck Style North Nashville Concrete Contractor |
|
|

|
|
|
#60 |
|
Senior Member
 Join Date: Jul 2007
Location: Clarksville TN 37043
Posts: 8,702
|
Re: Lucy - My 1968 SWB
That looks good Trai
__________________
Chuck 68  swb Fleetside build ''Choncho'' swb Fleetside build ''Choncho'' http://67-72chevytrucks.com/vboard/s...d.php?t=374892 My trailer redo http://67-72chevytrucks.com/vboard/s...69#post5893869 Chuy my 59 bug http://67-72chevytrucks.com/vboard/s...d.php?t=653798 Putnam 87 GMC Shop truck http://67-72chevytrucks.com/vboard/s...d.php?t=707687 |
|
|

|
|
|
#61 |
|
Restoring a 68 SWB
Join Date: Jan 2008
Location: Nashville, TN
Posts: 1,068
|
Re: Lucy - My 1968 SWB
Thanks. Got any tips about how to keep from burning through the sheet metal? Do you use gas with your welder?
__________________
My Build Thread: Lucy - My 1968 SWB - Shop Truck Style North Nashville Concrete Contractor |
|
|

|
|
|
#62 |
|
Registered User
Join Date: Apr 2008
Location: Imperial Beach, CA
Posts: 1,040
|
Re: Lucy - My 1968 SWB
To keep from burning thru thin metal try a smaller wire gauge. .20(if your not that small yet) or so and lower the volts/temp a little at a time. I would use that scrap panel and stick a bead. If it burns thru lower the volts a little till it looks good. On sheet metal do not run a bead/line. Just spot weld it spreading it out as you go so you do not build up heat and warp the metal. Stick a spot every 5-6inches till it is filled in. I use c25 gas on sheet metal. That just keeps the weld cleaner. Flux coated is fine just make sure to wire brush it a lot.
__________________
69 c-10 BBC  462ci, forged crank, H-beam rods, 10.5-1 KB forged pistons, Dart Iron Eagle 308cc, Straub Cam, Comp Cams chrome moly full rollers, Weiand Team G, Prosystems 950, TH400/3500 Dalenzie stall, Currie 9+ Detroit Locker w/31spline axles.  3.5/6in drop. My Build. 3.5/6in drop. My Build.
Last edited by ripdog28; 01-04-2009 at 02:24 AM. |
|
|

|
|
|
#63 |
|
Registered User
Join Date: Jul 2007
Location: Manchester, TN
Posts: 136
|
Re: Lucy - My 1968 SWB
Looking good.
|
|
|

|
|
|
#64 | |
|
Restoring a 68 SWB
Join Date: Jan 2008
Location: Nashville, TN
Posts: 1,068
|
Re: Lucy - My 1968 SWB
Quote:
__________________
My Build Thread: Lucy - My 1968 SWB - Shop Truck Style North Nashville Concrete Contractor |
|
|
|

|
|
|
#65 | |
|
Registered User
 Join Date: Oct 2008
Location: Everett, WA
Posts: 326
|
Re: Lucy - My 1968 SWB
Quote:
Just read thru your build thread, Nice build you have going there
__________________
My Build Thread: http://67-72chevytrucks.com/vboard/s...d.php?t=318544 |
|
|
|

|
|
|
#66 |
|
Restoring a 68 SWB
Join Date: Jan 2008
Location: Nashville, TN
Posts: 1,068
|
Re: Lucy - My 1968 SWB
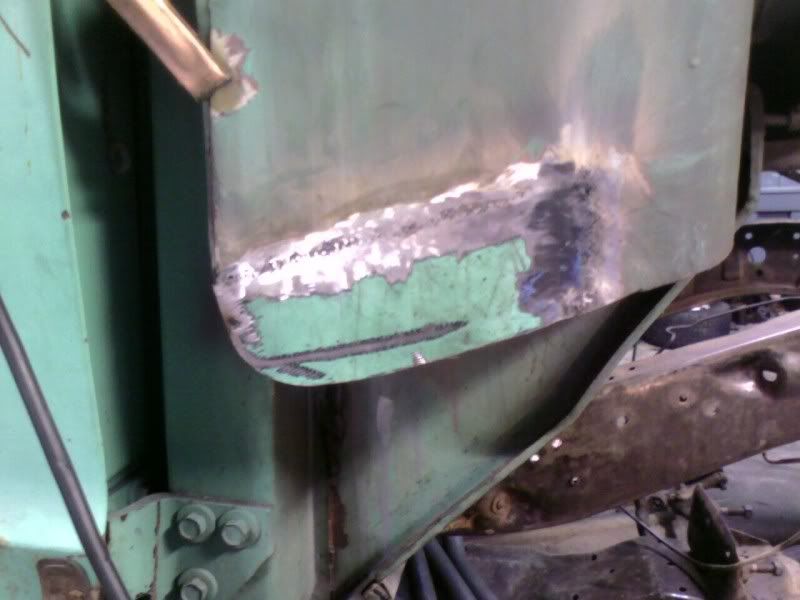
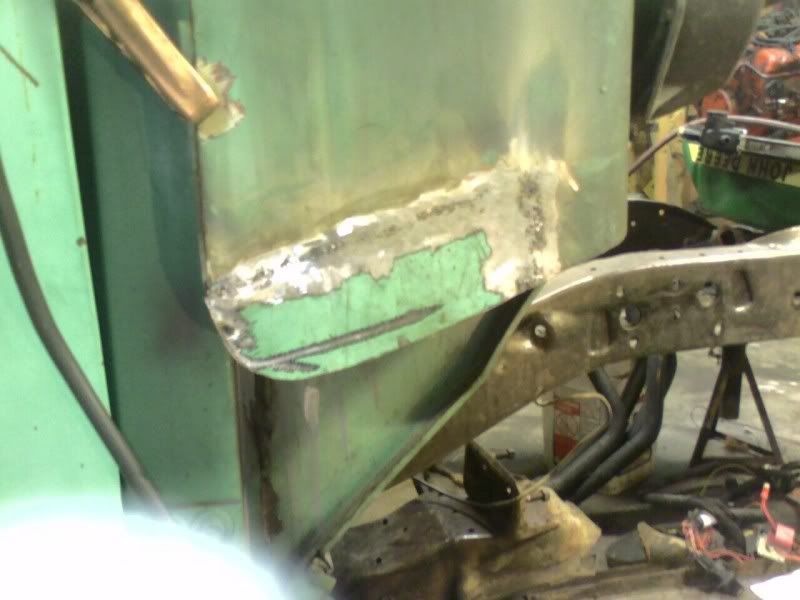
Tonight I started on a little rust repair. This little box behind the vent was rusted out pretty bad so I cut out all the rust. I cut it out all the way back to the cab. I brushed on some rust inhibitor/converter and let it dry while I was cutting up the metal to weld back in.
I made a template and cut some sheet metal out of an old fender. I put it in a vice and put a 90 degree bend on it to match what a I cut out. Took me a little bit of grinding to get it to match up, but I finally got it right. I even bent up a little curve at the end so it would match up. I clamped it and tack welded a few places and then lined the other side up and tacked it in place. Alot of tacks later it was really strong. I had some holes that I couldn't fill, but I think I am just gonna just gonna fill them with seam sealer and call it done. I should have taken some before, during and after pictures. Oh well. I got to come back tomorrow and fill the seams with seam sealer then I can cut out the piece for the the front and weld it back on. Here's what it looked like before I started. You can't see it but it was rotted this bad underneath too. 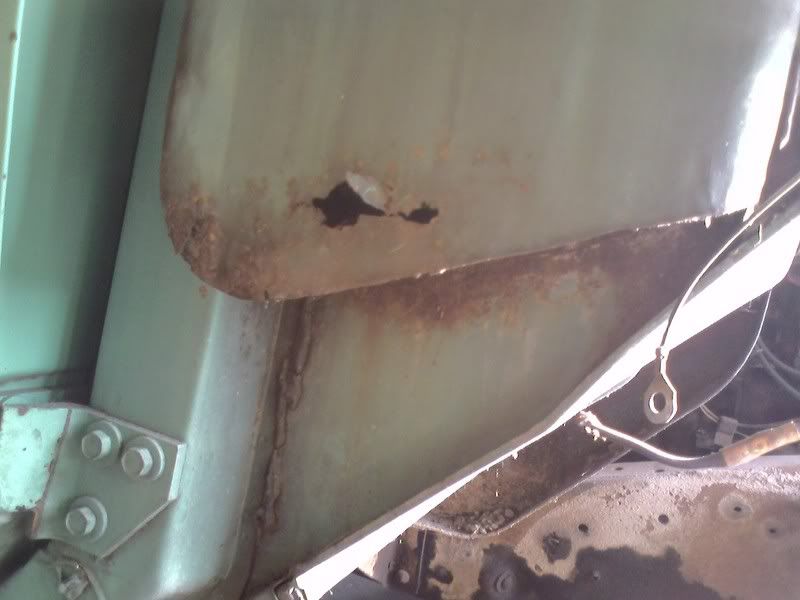 This is all the crap that came out of that little box. 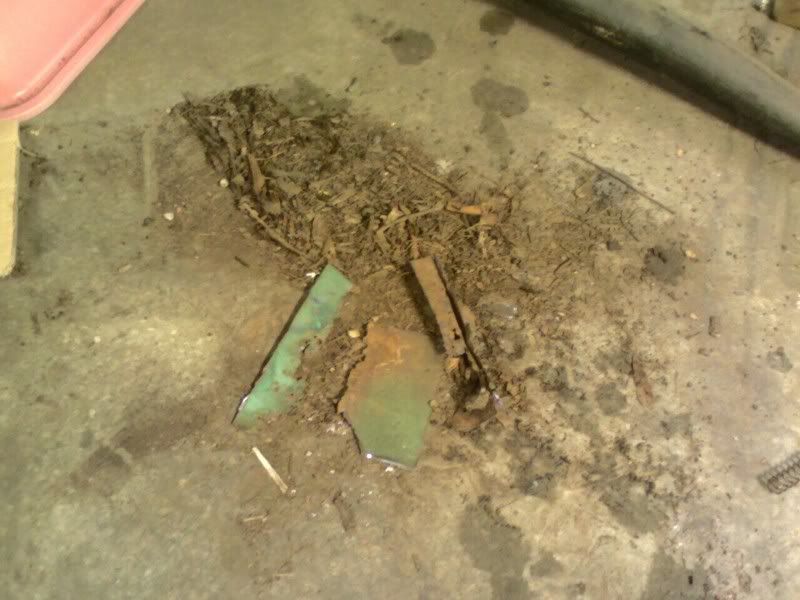 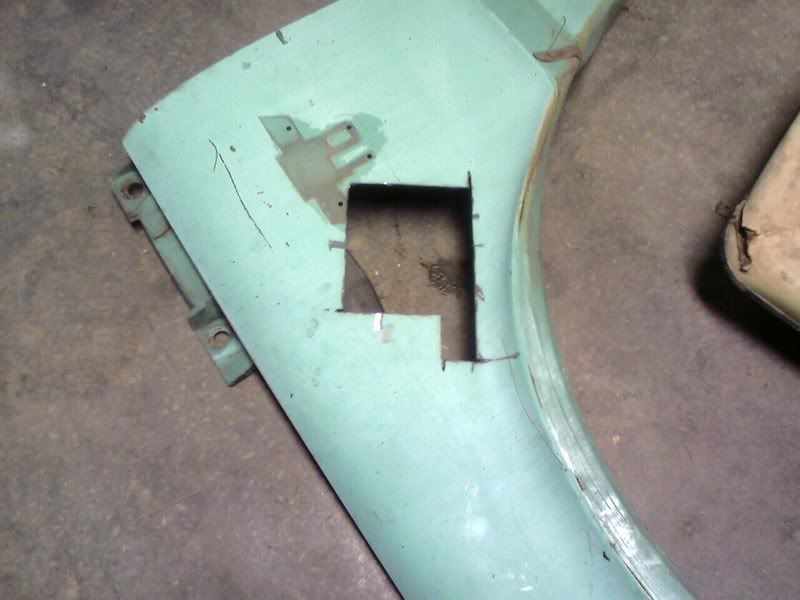 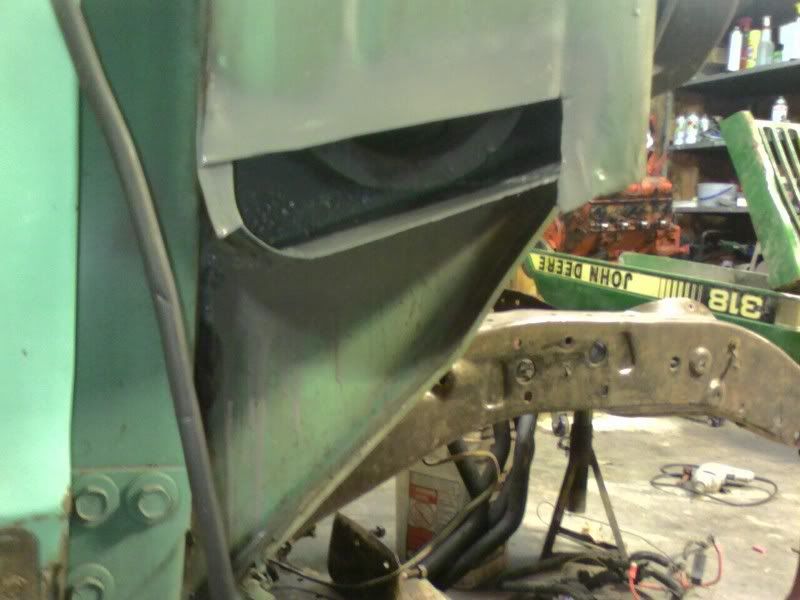 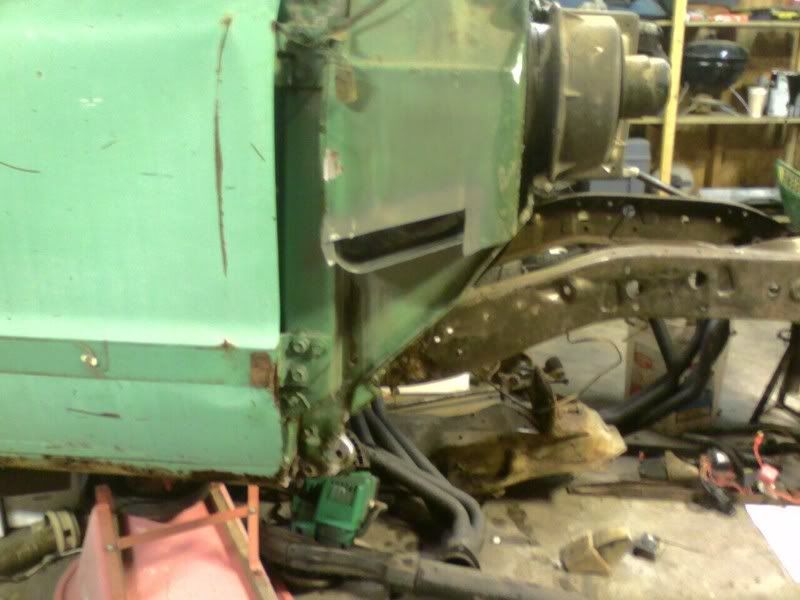
__________________
My Build Thread: Lucy - My 1968 SWB - Shop Truck Style North Nashville Concrete Contractor Last edited by tdave00; 01-05-2009 at 12:33 AM. |
|
|

|
|
|
#67 |
|
Restoring a 68 SWB
Join Date: Jan 2008
Location: Nashville, TN
Posts: 1,068
|
Re: Lucy - My 1968 SWB
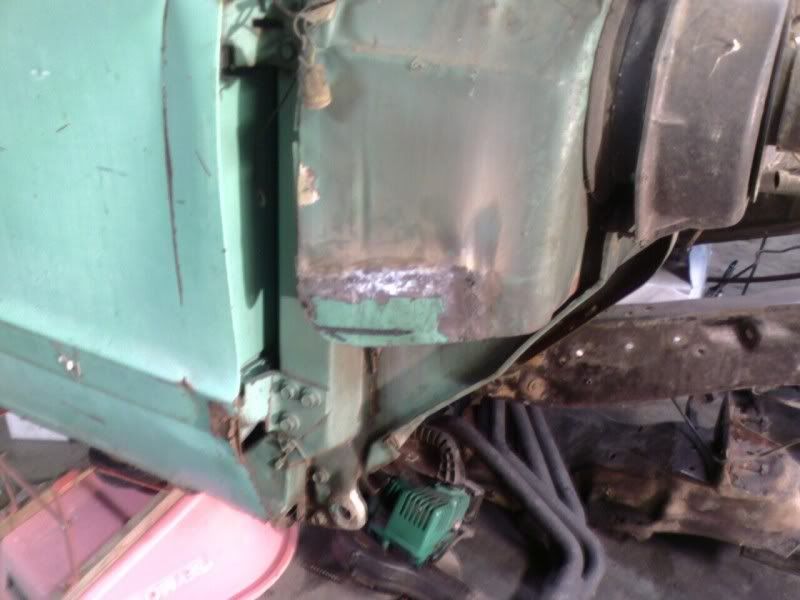
Got a little done tonight. Still have a few holes to fill, but it turned out pretty good.
__________________
My Build Thread: Lucy - My 1968 SWB - Shop Truck Style North Nashville Concrete Contractor |
|
|

|
|
|
#68 |
|
Registered User
 Join Date: Oct 2008
Location: Everett, WA
Posts: 326
|
Re: Lucy - My 1968 SWB
Looks like youíre getting a handle on your welding it just takes time and practice working with what ever tools that you have, keep up the good work
__________________
My Build Thread: http://67-72chevytrucks.com/vboard/s...d.php?t=318544 |
|
|

|
|
|
#69 |
|
THE DAMN YANKEE
Join Date: Sep 2006
Location: Southern MD
Posts: 551
|
Re: Lucy - My 1968 SWB
looks great trai, i'll be following this build my friend. phipp13
|
|
|

|
|
|
#70 |
|
Restoring a 68 SWB
Join Date: Jan 2008
Location: Nashville, TN
Posts: 1,068
|
Re: Lucy - My 1968 SWB
I went over tonight after the Titans game and worked on my Truck a little. I finally pulled the doors off the cab so I could take a look at the rockers. Man this is gonna be some work
 . Slow and steady. . Slow and steady.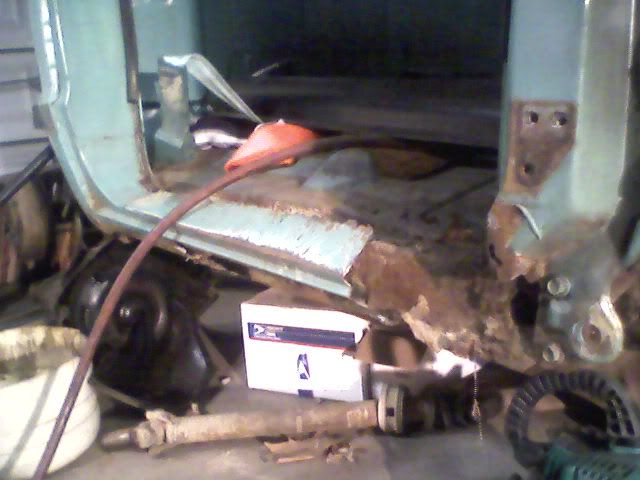 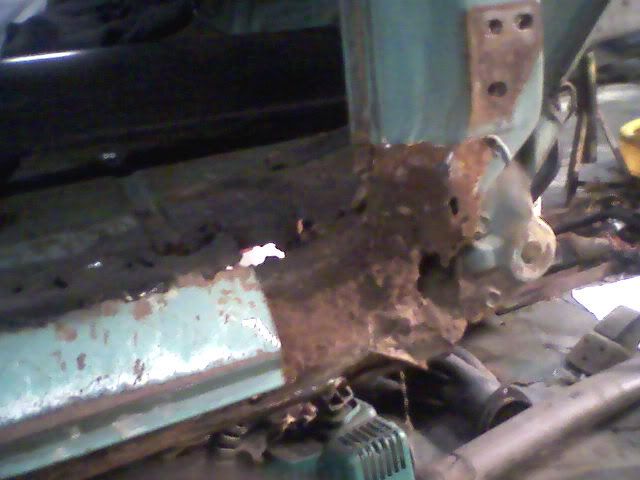 Sorry about the crappy pics. Didn't have my cell or my camera. Had to borrow someone's cell to take the pic.
__________________
My Build Thread: Lucy - My 1968 SWB - Shop Truck Style North Nashville Concrete Contractor Last edited by tdave00; 01-11-2009 at 08:05 AM. |
|
|

|
|
|
#71 |
|
Registered User
Join Date: Jul 2006
Location: Central PA
Posts: 12,201
|
Re: Lucy - My 1968 SWB
getting there, your vent boxes are better than mine... I had to replace the metal behind that area too!
__________________
The Garage: 1968 K-10 SWB - "Project Money Pit" 1996 Z-71 - "huntin rig" 1969 C-10 LWB (SOLD) "Project flip that truck or else" 1993 Passport, F@rd 1-ton (SOLD)"Project Cousin Eddie" My Garage Build "The 1,000 footer" |
|
|

|
|
|
#72 |
|
Insert Title Here
Join Date: Feb 2006
Location: Dyer, Indiana
Posts: 5,679
|
Re: Lucy - My 1968 SWB
coming along great so far...... Nice dedication with the name too...
__________________
BOBBY _69 SWB_ 1000 pics of 67-72's>> http://s193.photobucket.com/albums/z...-72/?start=all << |
|
|

|
|
|
#73 |
|
I'm here 2 learn!
Join Date: Oct 2008
Location: montgomery, al
Posts: 54
|
Re: Lucy - My 1968 SWB
I think I'm gonna take a short welding class....I'd like to buy a welder, but I'd hate to post of puff of smoke on the site where I blew something up...!

__________________
This is a great place! |
|
|

|
|
|
#74 | |
|
Restoring a 68 SWB
Join Date: Jan 2008
Location: Nashville, TN
Posts: 1,068
|
Re: Lucy - My 1968 SWB
Quote:
 . I think it will be easier, and safer, than you think. That being said, I should probably take a welding class myself . I think it will be easier, and safer, than you think. That being said, I should probably take a welding class myself  . .
__________________
My Build Thread: Lucy - My 1968 SWB - Shop Truck Style North Nashville Concrete Contractor Last edited by tdave00; 01-19-2009 at 06:41 AM. |
|
|
|

|
|
|
#75 |
|
Registered User
Join Date: Jan 2009
Location: Brazil, Indiana
Posts: 22
|
Re: Lucy - My 1968 SWB
Piece of cake, take your time and practice welding with different heat's and wire speed's.Before you know it you'll be laying down some nice bead's.Proper amount of penatration is key to a good weld.Good luck were ALL watching the build.
|
|
|

|
 |
| Bookmarks |
| Thread Tools | |
| Display Modes | |
|
|