
 |
|
|
|
|
#1 |
|
Registered Chevy Owner
Join Date: Aug 2008
Location: Snohomish, wa
Posts: 1,557
|
Re: My project 55 begins
cool thanks Joel!
__________________
Love is fleeting, but Chevy trucks are forever!!!!  1970 Chevy CST C10 long box 350/400  2008 Chevy Silverado short box 4x4 Had; 1951 Chevy short box 307/T5 1988 Chevy shot box 4x4 350/350 1971 Chevy C10 long box 4x4 350/350 1971 Chevy C20 long box 350/350 1971 Chevy C10 long box 350/350 |
|
|

|
|
|
#2 |
|
Registered User
Join Date: Mar 2008
Location: Monroe, WA
Posts: 181
|
Re: My project 55 begins
Dropped off my driveline! Shop is putting in the new center support bearing, shortening the front shaft, replacing the u-joints, putting on the slip yoke for the TH350 and balancing the whole thing. My chassis is about to be considered DONE!! Soon I will be able to work on the body work and paint prep. I wish I was made out of money this would go so much faster.
-Joel |
|
|

|
|
|
#3 |
|
Registered User
Join Date: Mar 2008
Location: Monroe, WA
Posts: 181
|
Re: My project 55 begins
Well my driveline is back and in the truck! Now I am kinda excited because soon this is going to start looking like a truck again instead of a pile of parts. I took some time last weekend and started cutting some chunks out of my old cab to fill the new cab and I am taking an inventory of what I am going to have to buy as far as patch panels. so far its not looking too bad.
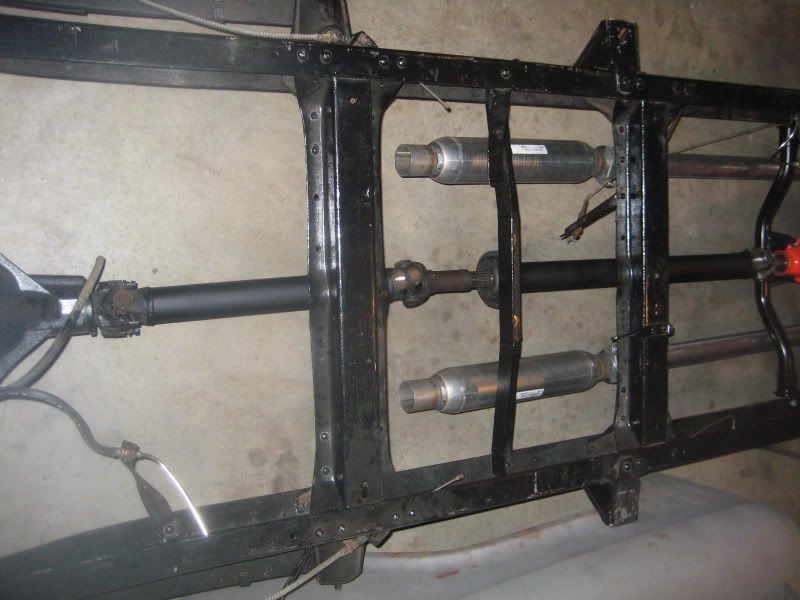 -Joel |
|
|

|
|
|
#4 |
|
Registered User
Join Date: Mar 2008
Location: Monroe, WA
Posts: 181
|
Re: My project 55 begins
Finally some sort of progress! We have been in the middle of trying to sell our house so everything has been focused on that (which sucks, I am exhausted with trying to keep the home spotless with two kids under 5!) So today I decided I am just going to put in some patch panels in. The truck isn't gonna build itself after all!
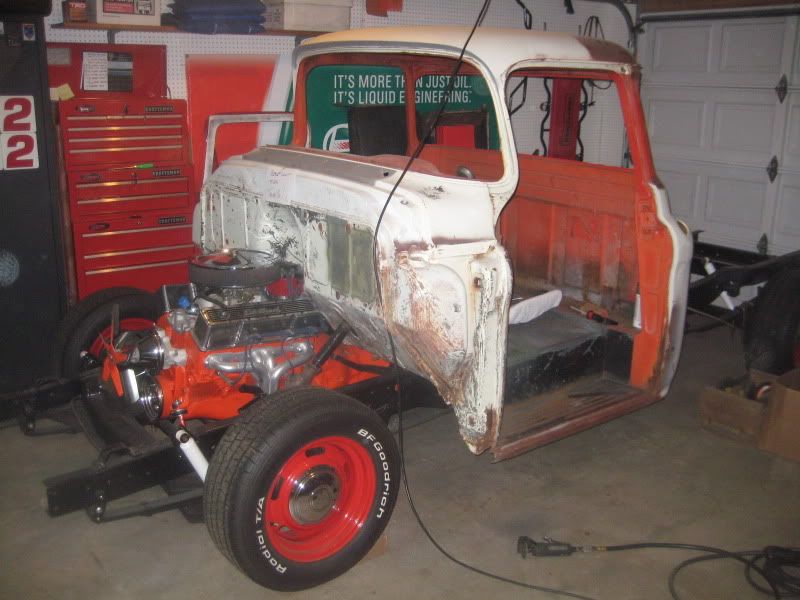 First patch was on the floor drivers side right where the heel hits when you are driving. Lucky for me the original cab which looked like swiss cheese after the sand blasting still had really solid floors. Me and my pal "sawzall" relieved the old cab of its good sheet metal. Saved me some money and its nice to fix my new cab with some original steel. 1st patch went in fairly nicely and I learned quickly about the correct settings for my welder. Funny thing is my buddy said you can train a monkey to mig weld, just grab some scrap and play around with it until you feel comfortable enough to attack the cab. I'm not going to lie I burned through a couple spots but after settling in on a good setting I was making good welds and the patch was in. Grabbed the grinder and everything is looking sweet (quite proud of myself at this point) then ooops little too aggressive and I ground through a ridge. (much cussing ensued.) I cant weld it because its right on an edge and too thin anyway. Time for lunch before I act dumb. Back from lunch and my mind is clear, cut out the thin spot and cut another chunk out of the old floor panel. It went in pretty quick and turned out just fine. At least now I have that much more experience! Now my drivers side step has a couple holes in it but is otherwise solid, I just couldn't see replacing the whole step so I salvaged a chunk out of the old cab and decided to try and repair the original step worse case I replace the whole step if I screw it up. 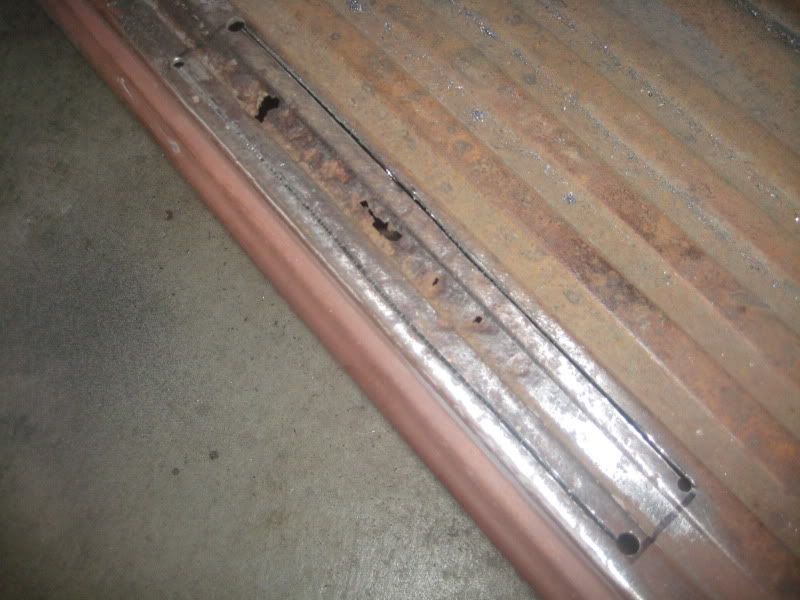 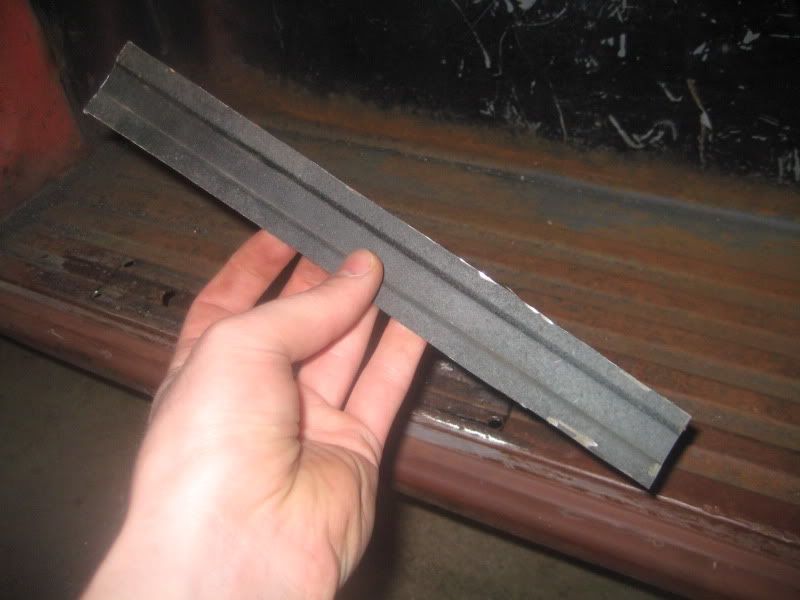 Now this turned out not half bad! I just shot it with some primer since its just going to the sand blasters after all the patches are in anyway. 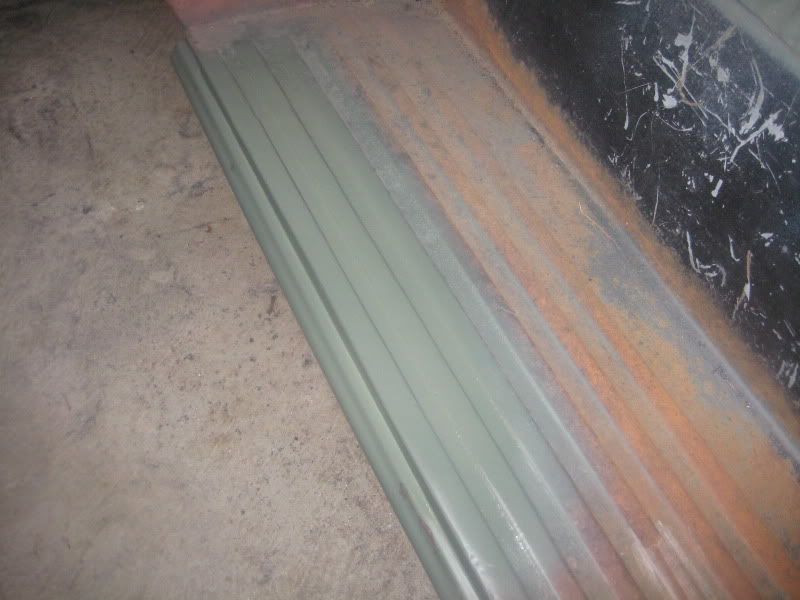 Now that the ball is rolling I am going to try and keep fixing a little bit every weekend. -Joel |
|
|

|
|
|
#5 |
|
A320 Pilot/USAF Retired
Join Date: Mar 2009
Location: Charleston, SC
Posts: 2,629
|
Re: My project 55 begins
Welcome back and nice work! I really like your rim choice!!
__________________
JJ My 1957 build: http://67-72chevytrucks.com/vboard/s...d.php?t=334552 http://www.trifive.com/forums/showthread.php?t=22037 Instagram - Chuckdriver57 |
|
|

|
|
|
#6 |
|
Registered User
Join Date: Aug 2007
Location: Corona, California
Posts: 7,998
|
Re: My project 55 begins
Looking good. That's the nice thing about steel, if you screw it up you can just cut it out and start over.
Kim |
|
|

|
|
|
#7 |
|
Registered User
Join Date: Aug 2007
Location: Corona, California
Posts: 7,998
|
Re: My project 55 begins
Looks good Joel.
Kim |
|
|

|
|
|
#8 |
|
Senior Member
  Join Date: Nov 2008
Location: Glendora, CA
Posts: 6,346
|
Re: My project 55 begins
You're doing great work...but I agree with lyrikz that you seem to be making it harder than it has to be and creating a greater possibility of warpage. Just cut out a simple square or rectangle and weld in s l o w l y.
|
|
|

|
|
|
#9 |
|
Registered User
Join Date: Jun 2006
Location: Idaho
Posts: 8,800
|
Re: My project 55 begins
I think the minimal approach is OK. Thats the way I went. It takes patience but preserving as much of the original metal as possible helps keeps the original alignment. Taking out gross area increases the chance for things to start moving.
__________________
1959 Chevy Short Fleetside w/ 74 4WD drive train (current project) OrrieG Build Thread 1964 Chevelle Malibu w/ 355-350TH (daily driver) Helpful AD and TF Manual Site Old Car Manual Project |
|
|

|
|
|
#10 |
|
Registered User
Join Date: Mar 2008
Location: Monroe, WA
Posts: 181
|
Re: My project 55 begins
|
|
|

|
|
|
#11 |
|
Registered User
Join Date: Mar 2008
Location: Monroe, WA
Posts: 181
|
Re: My project 55 begins
I have been making some progress, I started off with the floor since I needed the flange that the inner cab corner welds to and I have always thought it makes the most sense to put things back together in the exact opposite as I take them apart. I saved some good floor chunks from my old cab and since the corner of the floor has a groove in it I needed to make the first patch with a piece of that and some flat sheet I had laying around.
 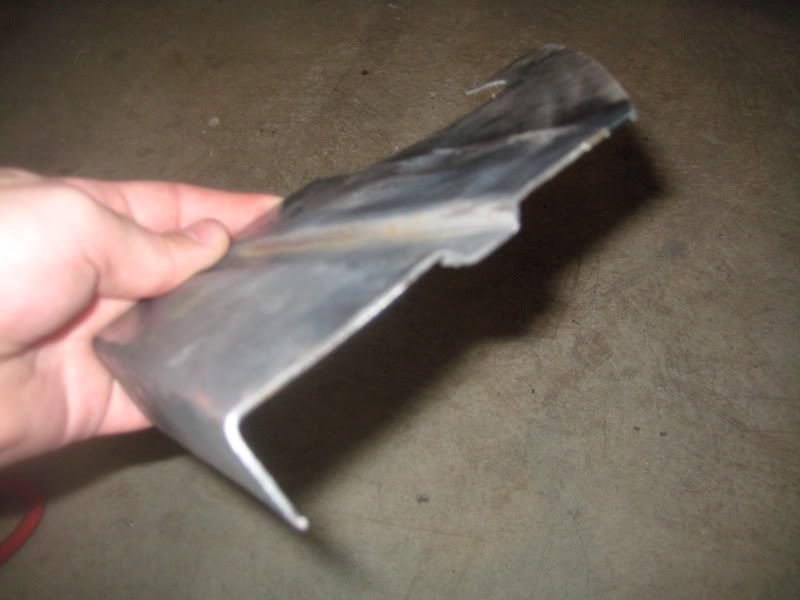 I also made a small patch out of the same chunk of old cab to fill the bottom of the firewall and continue the stock body groove. I used a piece of flat sheet hand bent to fit in the inner portion of the cab below the air vent. 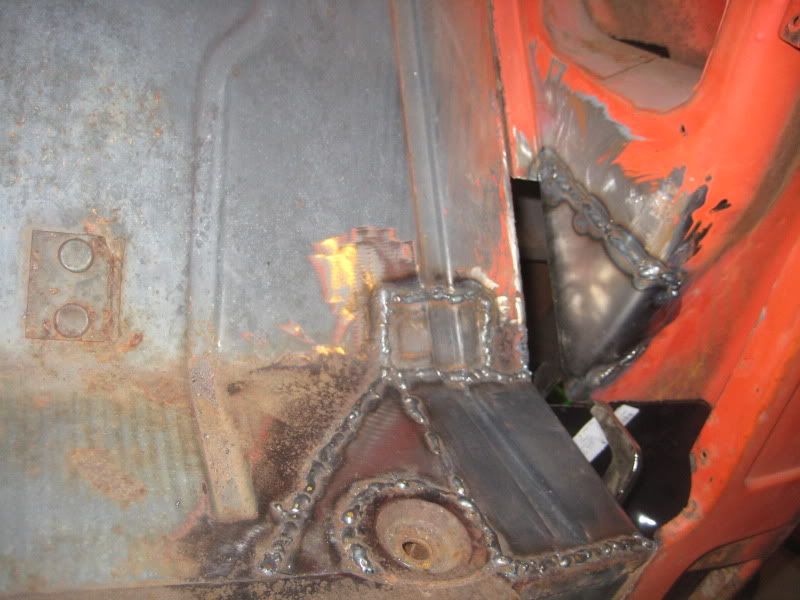 These patches went in without much hassle. -Joel |
|
|

|
|
|
#12 |
|
Registered User
Join Date: Mar 2008
Location: Monroe, WA
Posts: 181
|
Re: My project 55 begins
Next up was the flange where the firewall mates up to the cab corner. I measured the total of all three dimensions of the flange and bent up some scrap to fit.
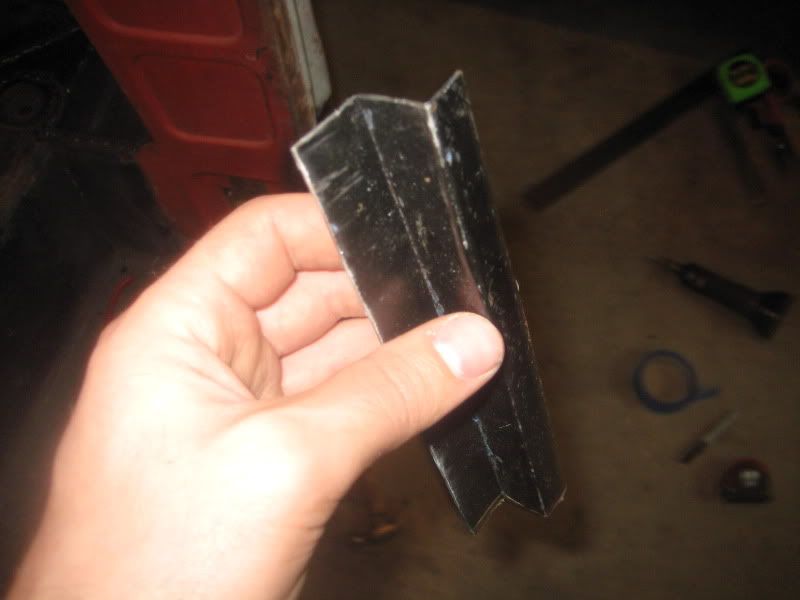 once I test fit it to make sure it would work I marked off the angles and trimed it to fit. I also drilled some holes in it to mimic the stock spot welds.   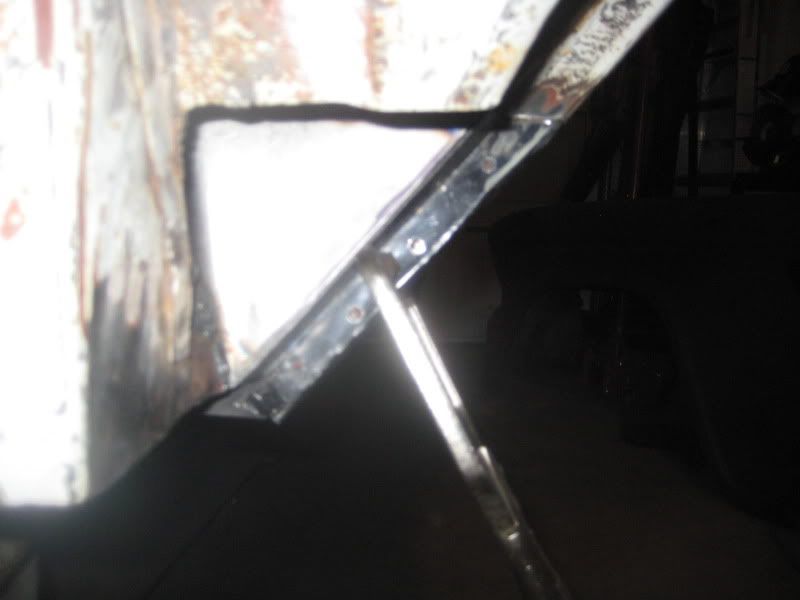 perfect fit, well perfect enough for me anyway. -Joel |
|
|

|
|
|
#13 |
|
Registered User
Join Date: Mar 2008
Location: Monroe, WA
Posts: 181
|
Re: My project 55 begins
I am thinking the picture maybe makes it look a little more complicated then it actually is.
|
|
|

|
|
|
#14 |
|
Registered User
Join Date: Aug 2007
Location: Corona, California
Posts: 7,998
|
Re: My project 55 begins
Looking real good Joel.
Kim |
|
|

|
|
|
#15 |
|
Registered User
Join Date: Mar 2008
Location: Monroe, WA
Posts: 181
|
Re: My project 55 begins
I am taking a very different direction with my truck at this point.... pictures to follow.

|
|
|

|
|
|
#16 |
|
Registered User
Join Date: Nov 2010
Location: SoCal
Posts: 914
|
Re: My project 55 begins
How's the truck going? Hope to see some photos soon. Very nice work btw.
__________________
I'm not tail-gating, I'm drafting.  http://67-72chevytrucks.com/vboard/s...d.php?t=432758 |
|
|

|
|
|
#17 |
|
Registered User
Join Date: Mar 2008
Location: Monroe, WA
Posts: 181
|
Re: My project 55 begins
|
|
|

|
 |
| Bookmarks |
| Thread Tools | |
| Display Modes | |
|
|