 |
Register or Log In To remove these advertisements. |
|
|
|
|||||||
 |
|
|
Thread Tools | Display Modes |
|
|
#101 |
|
Registered User
Join Date: Oct 2009
Location: SLC, Utah
Posts: 164
|
Re: New Member - 72 Jimmy: Project Knuckledragger mountain commuter
It took a while to get the new dizzy and get it in but it's in now and the old beast is running again.
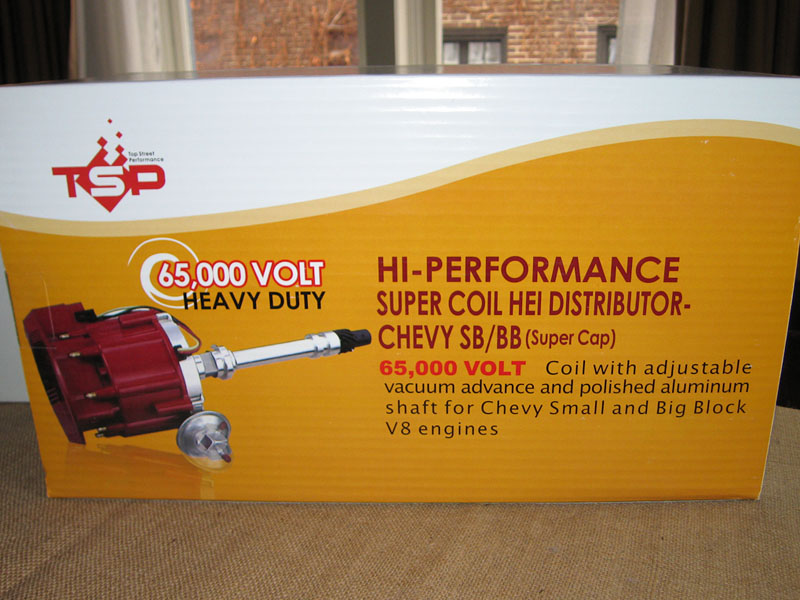
  The problem turned out to be a broken wire inside the HEI distributor. My research indicates that this is a common failure point on these distributors. The replacement "Skip White" distributor is a nice unit with a slightly different top cap design and supposedly more power than the stock GM units. The new dizzy went in fairly easily but when I went to put the top cap on I realized that there was no way it was going to fit. It's just too tall and bangs into the firewall. This is a HUGE problem because the top cap is secured by 4 screws that also secure the coil and the coil ground. On the stock cap the coil is held down by 4 separate screws and then the top cap has it's own 2 screws so it can run without the top cap. Not so with the Skip White. I trimmed an inch or so off one side of the cap and got it to fit but it was still very hard to tighten the screws because of the curve of the firewall. In the end I just reused the stock coil mounting screws and top cap with the new distributor. All the screw holes and mounts in the aftermarket cap were the same as the GM unit. The old cap and rotor looked pretty rough and they had 20K+ on them so it was time for a change. The truck revs a lot smoother now but I'm getting a little bit of detonation at full throttle so I'll need to back the timing off a bit and then maybe this summer I'll play with some springs and plug gap. The point of failure:  Skip White rebuild kit:  Skip White top cap:  GM top cap:  Skip White complete distributor: 
Last edited by snowblind; 01-19-2010 at 07:27 PM. |
|
|

|
|
|
#102 |
|
Registered User
Join Date: Oct 2009
Location: SLC, Utah
Posts: 164
|
Re: New Member - 72 Jimmy: Project Knuckledragger mountain commuter
Been rolling along trying to not spend money for a bit. Trucks running well with the new distributor.
Here's a video that begins with shots from the driver's seat of my Jimmy! Last edited by snowblind; 02-12-2010 at 02:53 PM. |
|
|

|
|
|
#103 |
|
Its lookin' like a Blazer!
Join Date: Aug 2003
Location: Gods Country, KY
Posts: 1,772
|
Re: New Member - 72 Jimmy: Project Knuckledragger mountain commuter
Awesome video, while I dig the people action footage, some of your ride throwin' snow would've been cool too
 Looks like you had no problem navigating around in it. Last edited by Big J; 02-12-2010 at 05:17 PM. |
|
|

|
|
|
#104 | |
|
Registered User
Join Date: Oct 2009
Location: SLC, Utah
Posts: 164
|
Re: New Member - 72 Jimmy: Project Knuckledragger mountain commuter
Quote:

|
|
|
|

|
|
|
#105 |
|
Registered User
Join Date: Oct 2009
Location: SLC, Utah
Posts: 164
|
Re: New Member - 72 Jimmy: Project Knuckledragger mountain commuter
Aaaaaaaaaaaallright!
   The Jimmy served faithfully for the remainder of the winter and we had a pretty cold/wet spring here this year. But the warm weather has finally returned and I've been busy. Some of you might remember these 2002 Tahoe seats...  Last fall I pulled the bottoms of them and had mounting tabs welded to the seat rails. They sat in my garage for the winter but now they are in the truck! To bolt them in I used two of the stock front holes and then drilled new holes for everything else. I'm using steel plate to reinforce the holes floor right now but I think it needs more than that. I will be doing floor/rocker/torsion box repairs soon and I plan on making more secure mounts then.    Next up was a fan upgrade. I put a single 12" on last fall but with summer coming I needed to get the rest of the cooling package done. I ordered a dual 12" aluminum fan shroud from www.classicheartbeat.com. Wes had it made and shipped to me in four days so I could install it over the weekend. Thanks Wes!   I found some nice aluminum T-bolts and rubber washers at Ace.  The fans and shroud are in and working but I don't have any photos yet. Stay tuned for those photos and more. I'll be doing a bunch of stuff in the next few weeks including a new steering box, new leaf springs & shackles and new door panels! |
|
|

|
|
|
#106 |
|
2wd FTW!!!!
Join Date: Jan 2007
Location: SLC UTAH
Posts: 673
|
Re: New Member - 72 Jimmy: Project Knuckledragger mountain commuter
Seats look good did you get the power hooked up to them?
|
|
|

|
|
|
#107 |
|
Registered User
Join Date: Apr 2009
Location: edmonton alberta canada
Posts: 496
|
Re: New Member - 72 Jimmy: Project Knuckledragger mountain commuter
i just used some flat iron drilled the holes so i could use the factory mounts.. then welded the seats to the flat iron and painted the metal black....done!! works great i can still pull them if i needed to. o they are 2006 chevy leathers.
. Because every adjustment on these seats is power I can't even check seating position until I get them wired up. I'll put power to them tonight and try and move them into a position that will make the mounting easier. I'm not sure how I'll mount the passenger seat. It doesn't look like it has any way to tilt forward so I may adapt it to work with some of the original forward tilt hardware. After I get the driver's mounted hopefully I'll have a clearer picture. Matt[/quote] Last edited by blazin; 06-29-2010 at 05:14 PM. |
|
|

|
|
|
#108 |
|
Registered User
Join Date: Oct 2009
Location: SLC, Utah
Posts: 164
|
Re: New Member - 72 Jimmy: Project Knuckledragger mountain commuter
Hey man. Those bumper lights are going strong! Thanks again for those.
You gotta have the power to move anything on these bad boys. Installation is a pain because you're always powering up to move it a little to access a bolt. For now it's just wire nuts and a fused wire from the battery that I switch back and forth when I need to move a seat.  This weekend I plan to add a relay and make them ignition hot. I'm saving the heat/memory wiring for later when I have a center console. This weekend I plan to add a relay and make them ignition hot. I'm saving the heat/memory wiring for later when I have a center console.
Last edited by snowblind; 06-29-2010 at 05:44 PM. |
|
|

|
|
|
#109 | |
|
Registered User
Join Date: Oct 2009
Location: SLC, Utah
Posts: 164
|
Re: New Member - 72 Jimmy: Project Knuckledragger mountain commuter
Quote:
My passenger seat doesn't tilt but I welded the mounts as far backward as I could so it will move as far forward as possible. With the seat all the way forward there is enough room for kids and small people to squeeze though. |
|
|
|

|
|
|
#110 | |
|
Registered User
Join Date: Apr 2009
Location: edmonton alberta canada
Posts: 496
|
Re: New Member - 72 Jimmy: Project Knuckledragger mountain commuter
i can see cutting them to make the seats lower.. but im sure the factory mounts are safe or why would gm make them like that?
Quote:
|
|
|
|

|
|
|
#111 | |
|
2wd FTW!!!!
Join Date: Jan 2007
Location: SLC UTAH
Posts: 673
|
Re: New Member - 72 Jimmy: Project Knuckledragger mountain commuter
Quote:
|
|
|
|

|
|
|
#112 | |
|
Registered User
Join Date: Oct 2009
Location: SLC, Utah
Posts: 164
|
Re: New Member - 72 Jimmy: Project Knuckledragger mountain commuter
Quote:
Your new seats have integrated seat belts but you no longer have the bolts connecting them to the rear bulkhead. In doing this you have bypassed at least half of the original mounting strength. Just to be clear - When I say "factory mounts" I'm talking about the holes in the floor that you screw the seat mounting bolts into for 1972 blazer/jimmy seats. Last edited by snowblind; 06-29-2010 at 06:42 PM. |
|
|
|

|
|
|
#113 | |
|
Registered User
Join Date: Oct 2009
Location: SLC, Utah
Posts: 164
|
Re: New Member - 72 Jimmy: Project Knuckledragger mountain commuter
Quote:
 I'm missing the torsion boxes on my truck and there is a bunch of rust in the rockers from the aux fuel tanks. I don't want to pull the top until after I replace all that stuff so it probably won't happen this summer. |
|
|
|

|
|
|
#114 | |
|
Registered User
Join Date: Apr 2009
Location: edmonton alberta canada
Posts: 496
|
Re: New Member - 72 Jimmy: Project Knuckledragger mountain commuter
sorry.. i was talking about the NEW seats mounts that you cut off. didnt realize you were talking about the floor mount. so how did you get the strenght back? did you some how bolt them to the bulkhead?
Quote:
|
|
|
|

|
|
|
#115 | |
|
Registered User
Join Date: Oct 2009
Location: SLC, Utah
Posts: 164
|
Re: New Member - 72 Jimmy: Project Knuckledragger mountain commuter
Quote:
I'm not trying to bust your balls here. On my truck the torsion boxes are gone so I have a really good view of the underside of the floor. That sheet metal is thiiiiiiiiin. The stock seats have angle iron welded in to span the space between the mounts but even then my passenger busted a hole in the floor just from being set down over the years. My biggest worry is that in a wreck the rear seat mounts would just rip the floor up like a beer can. I put some 1/4" steel plate on the underside of the floor under the rear mounts to spread the force out but it still worries me. For true piece of mind I want to reinforce my mounts with angle iron that spans from the trans tunnel to rocker and then ties back to the rear bulkhead. I don't think it needs to be super heavy duty if it spreads the load over a large enough area. I hope to replace my rockers and torsion boxes this summer. I'll be doing my reinforcements then. Last edited by snowblind; 07-01-2010 at 01:44 PM. |
|
|
|

|
|
|
#116 |
|
Registered User
Join Date: Oct 2009
Location: SLC, Utah
Posts: 164
|
Re: New Member - 72 Jimmy: Project Knuckledragger mountain commuter
Here's a few exterior photos.
   And the new shroud with dual 12" electric fans from www.classicheartbeat.com.  
Last edited by snowblind; 07-01-2010 at 01:55 PM. |
|
|

|
|
|
#117 |
|
Registered User
Join Date: Apr 2009
Location: edmonton alberta canada
Posts: 496
|
Re: New Member - 72 Jimmy: Project Knuckledragger mountain commuter
here is what i did (see pic) and i reinforced the underside. used the same bolt holes that the blazer floor has.
|
|
|

|
|
|
#118 |
|
Registered User
Join Date: Oct 2003
Location: Lake Stevens, WA
Posts: 75
|
Re: New Member - 72 Jimmy: Project Knuckledragger mountain commuter
Nice build! I'm on the hunt for some seats for my blazer. I'm hoping to go the same route and reinforce things from underneath.
Truck looks like a lot of fun man!  Any pics of the reinforced underside.
__________________
71 K5 In progress! |
|
|

|
|
|
#119 |
|
Registered User
Join Date: Apr 2009
Location: edmonton alberta canada
Posts: 496
|
Re: New Member - 72 Jimmy: Project Knuckledragger mountain commuter
|
|
|

|
|
|
#120 | |
|
Registered User
Join Date: Oct 2009
Location: SLC, Utah
Posts: 164
|
Re: New Member - 72 Jimmy: Project Knuckledragger mountain commuter
Quote:
My temporary set up is similar but I want the rear mounts to have a more secure mount than just the floor. It's the same deal as mounting a roll bar. Some people are OK just bolting it to the floor. |
|
|
|

|
|
|
#121 |
|
Registered User
Join Date: Oct 2009
Location: SLC, Utah
Posts: 164
|
Re: New Member - 72 Jimmy: Project Knuckledragger mountain commuter
I found these the other day. The edges are beveled to disperse the pulling force so that the plate doesn't cut/tear through the floor. I'm going to take some measurements tomorrow and see if I can fit them in.
 http://www.mooneyesusa.com/safety-be...es-p-2224.html Last edited by snowblind; 07-06-2010 at 11:50 AM. |
|
|

|
|
|
#122 |
|
Registered User
Join Date: Oct 2009
Location: SLC, Utah
Posts: 164
|
Re: New Member - 72 Jimmy: Project Knuckledragger mountain commuter
I did a bit of engine compartment and wiring cleanup this weekend.
My PO equipped the truck with a remote starter solenoid. Thank you sir! However, I wasn't really happy with it's location and mounting (lot's of exposed wires and zip ties) and I was adding to the mess with my own wiring "upgrades". I decided it was time to get everything cleaned up and protected before it got any worse. Anyways... On to the photos. Here you can see the starter solenoid mounted back on the firewall. The starter wire, one-wire alternator connection and "turn-on" wire are coming in from the right. The battery positive and a couple of accessory power wires are on the left. The black box in the left foreground contains six 20amp breakers and draws it's power directly from the + side of the remote solenoid.   And here are similar shots but with the cover on the breaker box. I also painted the inner fenders with some "semi-flat" Krylon, installed a washer bottle/pump from a 90's 2500HD and cleaned up the wiring on most of the driver's side and firewall. I'll get some photos of all that stuff later.  The breaker box is pretty slick. Bottom left of this photo you can see that it has a rubber grommet at the top entrance and a sealed rubber blank on the bottom. These grommets/blanks are easily switched around depending on where the wiring comes from. I bought the box at NAPA. They had it in stock in the back. 
Last edited by snowblind; 07-06-2010 at 12:35 PM. |
|
|

|
|
|
#123 |
|
Registered User
Join Date: Oct 2009
Location: SLC, Utah
Posts: 164
|
Re: New Member - 72 Jimmy: Project Knuckledragger mountain commuter
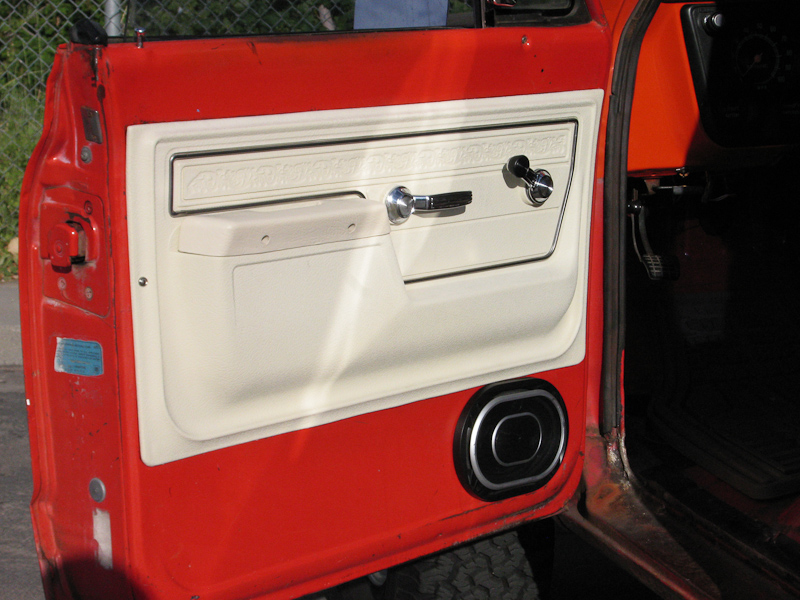
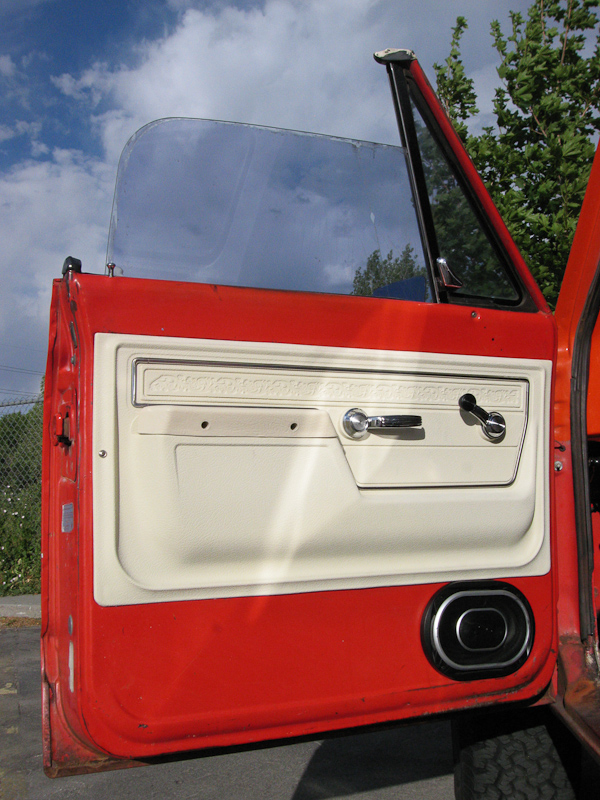
I found a 72 C10 at a local junkyard complete with door panels.
 They were dirty and the arm rests were toast but 20 minutes of scrubbing and new arm rests cleaned them up. They were dirty and the arm rests were toast but 20 minutes of scrubbing and new arm rests cleaned them up. The photos make the leather look a lot darker but it's closer in real life.     I wish my PO hadn't cut the doors for speakers... 
|
|
|

|
|
|
#124 |
|
Senior Member
 Join Date: May 2005
Location: New Brunswick, Canada
Posts: 591
|
Re: New Member - 72 Jimmy: Project Knuckledragger mountain commuter
Panels turned out great! Cleans up the doors nicely

|
|
|

|
|
|
#125 |
|
2wd FTW!!!!
Join Date: Jan 2007
Location: SLC UTAH
Posts: 673
|
Re: New Member - 72 Jimmy: Project Knuckledragger mountain commuter
A little elbow grease does wonders. They look great.
|
|
|

|
 |
| Bookmarks |
| Thread Tools | |
| Display Modes | |
|
|