
 |
Register or Log In To remove these advertisements. |
|
|
|
|||||||
 |
|
|
Thread Tools | Display Modes |
|
|
#101 |
|
Registered User
Join Date: Feb 2011
Location: SHAWNEE, KS
Posts: 191
|
Re: Another OLD BLUE Build Thread - 71 Chevy
Well, I am out of motivation for today.
Tore out all of the brake lines. I have an aftermarket proportioning valve that has been sitting on the shelf for over a year that I want to use. I also threw the headers up on the block so I could measure for motor mounts. I forgot how much of a PITA these long tubes are... I am going to have to cut the 3 bolt flange off of the passenger side and change the angle for it to clear the front d-shaft. Got all the motor mounts off and spent ~2 hrs "massaging" the firewall for the d-side valve cover so I could raise the engine up. 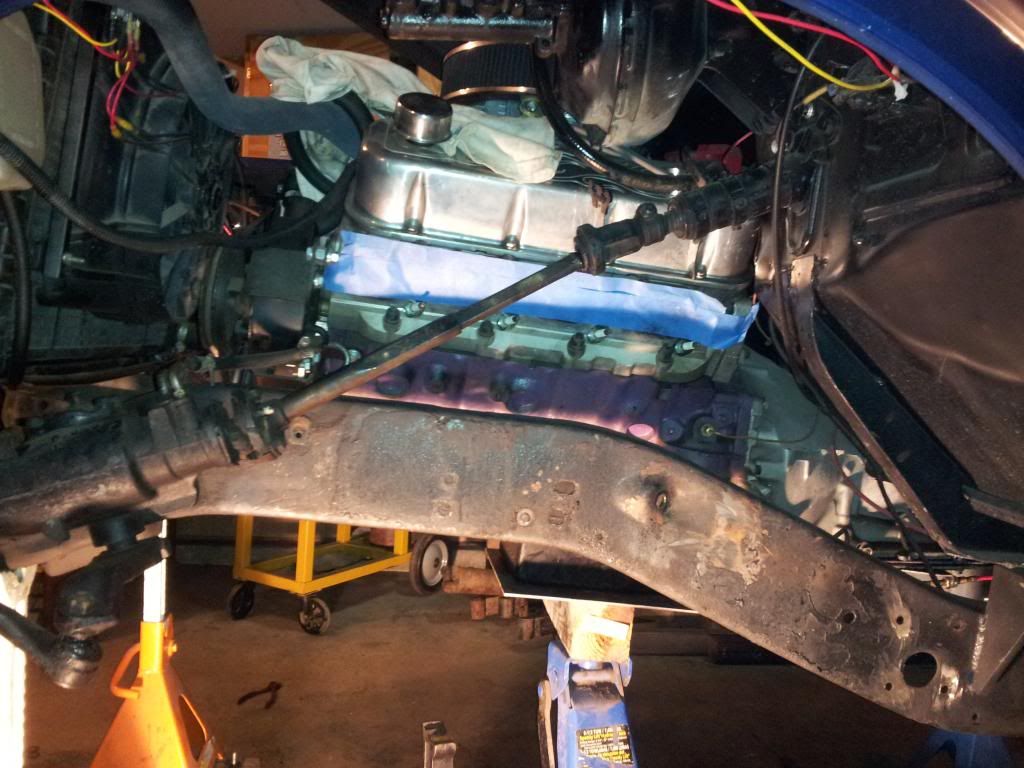 My scrap pile is growing. I wish I would have weighed it before I started. It HAS to be lighter. 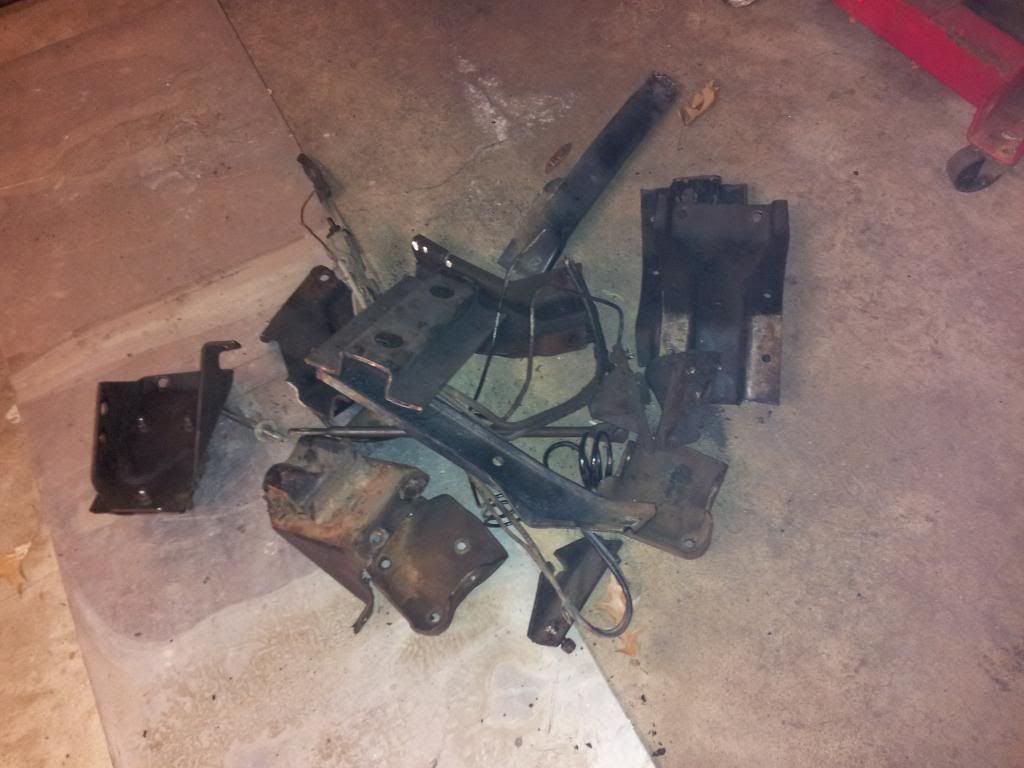 This is as far as I got on the motor mounts before throwing in the towel. There is a lot of staring/thinking behind those seemingly random pieces of metal... 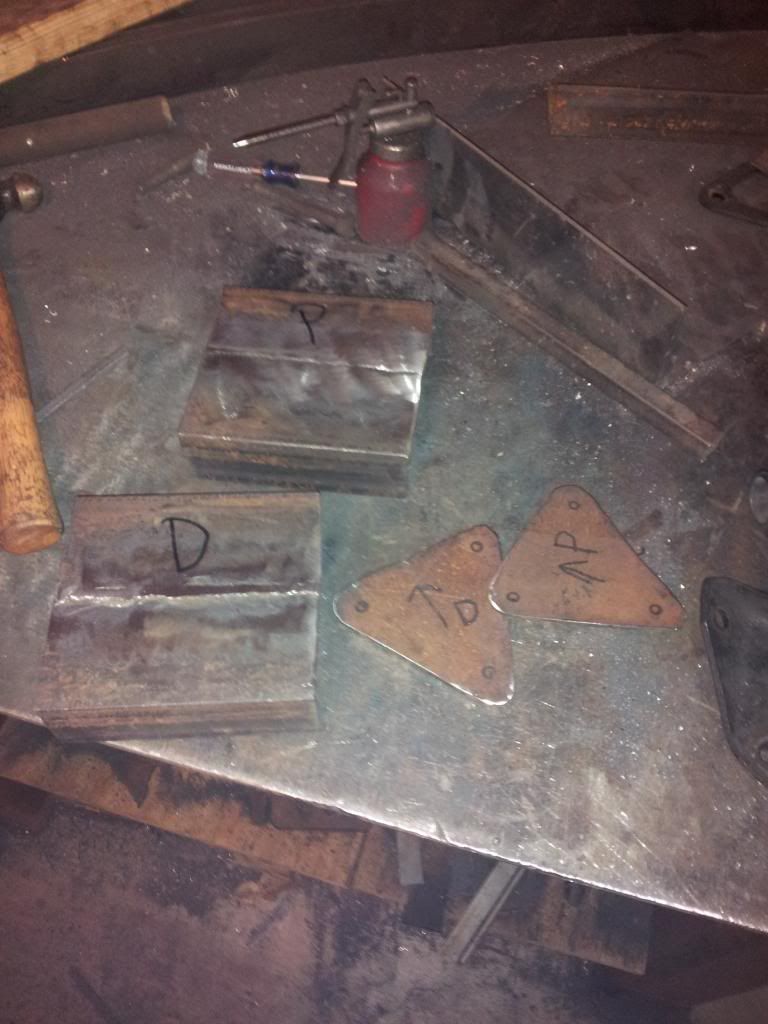 This is my homemade "filterfan". It is just a furnace filter bungee corded to a box fan. That filter was new when I started in the garage today. Maybe someday I will build a more advanced version with a furnace blower and mount it to the ceiling. 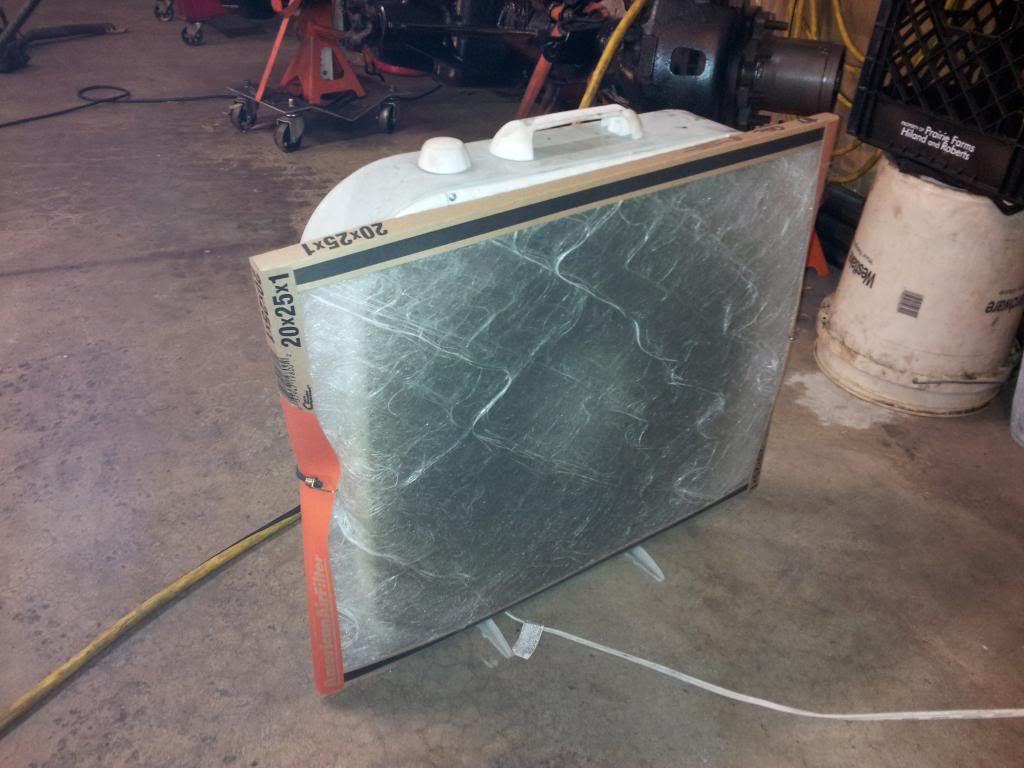
|
|
|

|
|
|
#102 |
|
Registered User
 Join Date: Aug 2012
Location: Homosassa, Fl.
Posts: 2,965
|
Re: Another OLD BLUE Build Thread - 71 Chevy
scrap goes for 9.00 a 100 lbs now.
|
|
|

|
|
|
#103 |
|
Registered User
Join Date: Feb 2011
Location: SHAWNEE, KS
Posts: 191
|
Re: Another OLD BLUE Build Thread - 71 Chevy
Picked up some goodies this week.
I have been thinking about this entirely too much, but I think I have a plan. To keep the front suspension as low as possible and eliminate the interference between the headers and upper shackle bolt, I am going to build "leaf spring slider boxes". Tim at LII has the best design HERE, but that is too easy and more $$$. My goal by the end of this build is to have the tools/ability to be able to build just about anything in house. So, I picked up a sheet of UHMW earlier this week. ~$60 for the whole sheet from a local supplier, it was an odd ball already cut sheet so he gave me a pretty good deal. I'll get specs on size/thickness next time I am out in the garage. Only a small strip of it will be used for the leaf spring sliders, the rest will be used for skid plates. 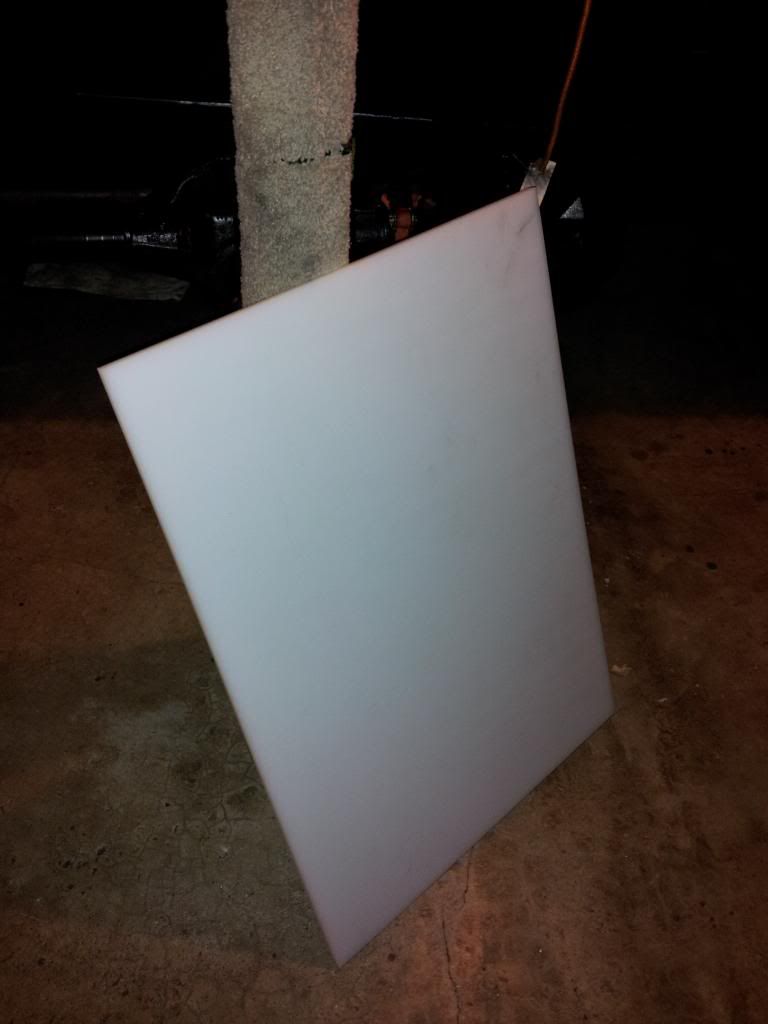
|
|
|

|
|
|
#104 |
|
Registered User
 Join Date: Aug 2012
Location: Homosassa, Fl.
Posts: 2,965
|
Re: Another OLD BLUE Build Thread - 71 Chevy
good idea there.
|
|
|

|
|
|
#105 |
|
Registered User
Join Date: Feb 2011
Location: SHAWNEE, KS
Posts: 191
|
Re: Another OLD BLUE Build Thread - 71 Chevy
Thanks man. I still gotta get my crayons out and make some "engineerd drawrings". I have a scanner at home now, so if I am not too embarrassed of them, I might post them.
Got some progress done on the motor mounts. Still have quite a bit to finish on these. I tried to figure out a way to incorporate a x-member as one piece, but I just couldn't make it all work. At this point I think I am going to use the two bottom bolts from the motor mount plate on the frame side and build an x-member that incorporates them. Another challenge to this is that my front suspension is not built yet and I am not sure where the bump stops and axle housing will end up. Most likely the x-member will have the bump stops attached to it to keep the stress on the frame as low as possible. 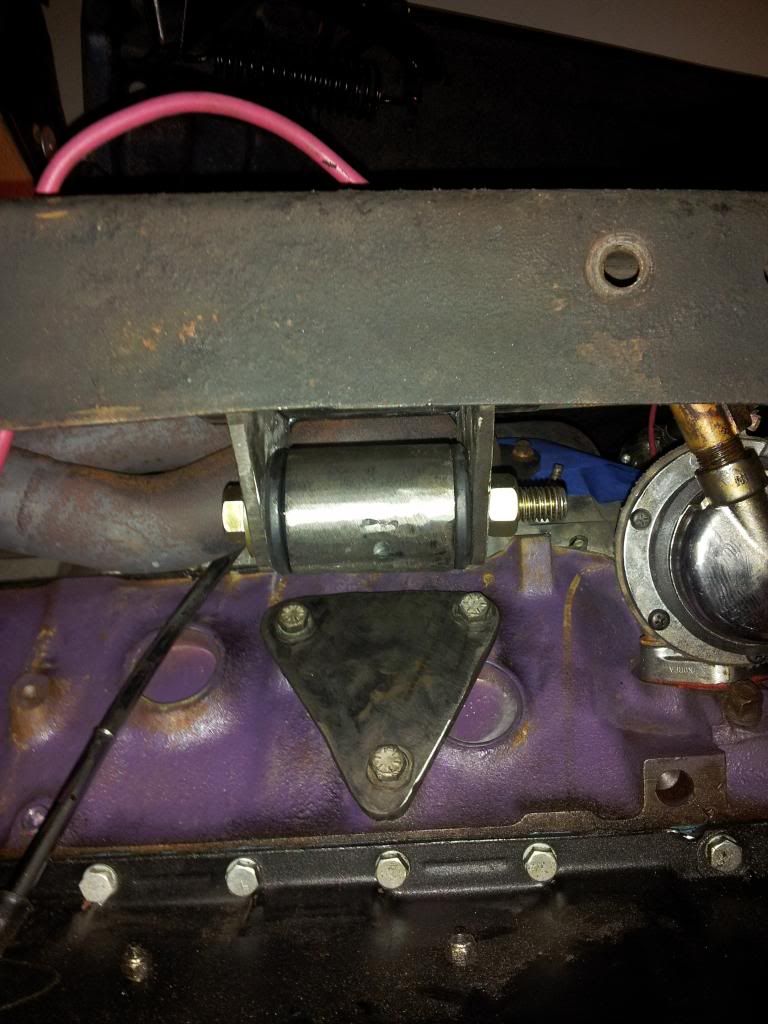 I should have a chance to work on it this weekend. I hope to get the motor mounts done and the front suspension at least mocked up. |
|
|

|
|
|
#106 |
|
Registered User
Join Date: Feb 2011
Location: SHAWNEE, KS
Posts: 191
|
Re: Another OLD BLUE Build Thread - 71 Chevy
Finally finished my motor mounts today.
Managed to work on them in-between Gertrudes mandatory "chuck-it" breaks :homer: 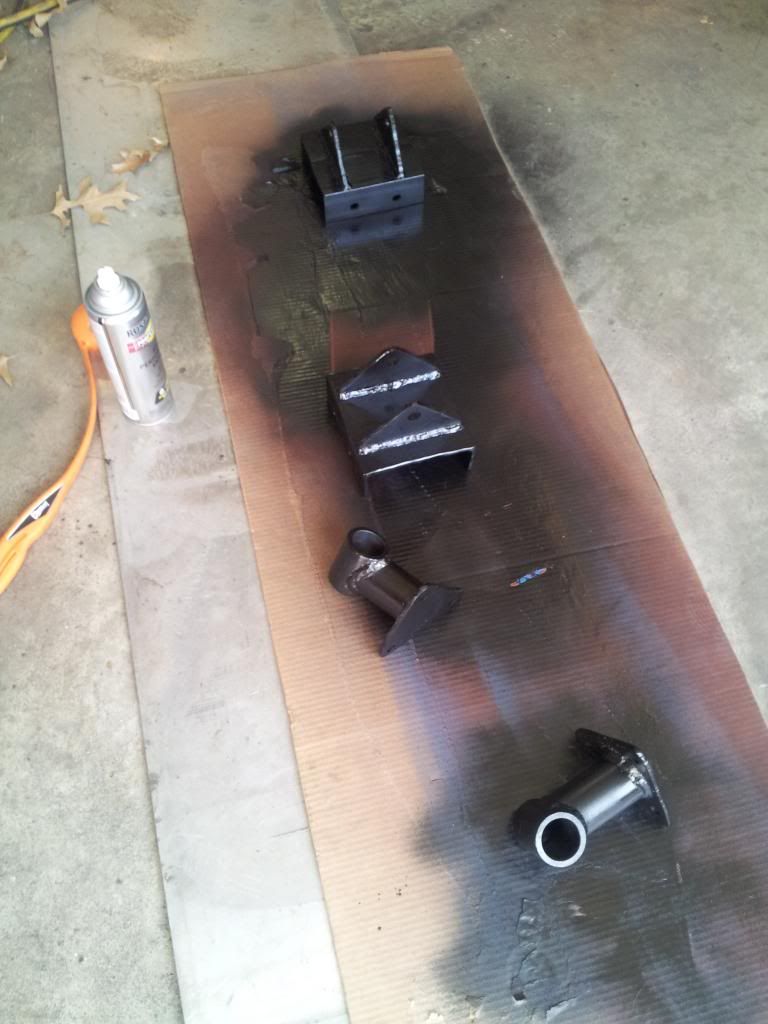 I have a bad habit of not waiting until the paint dries before installing new parts...adds character I guess... 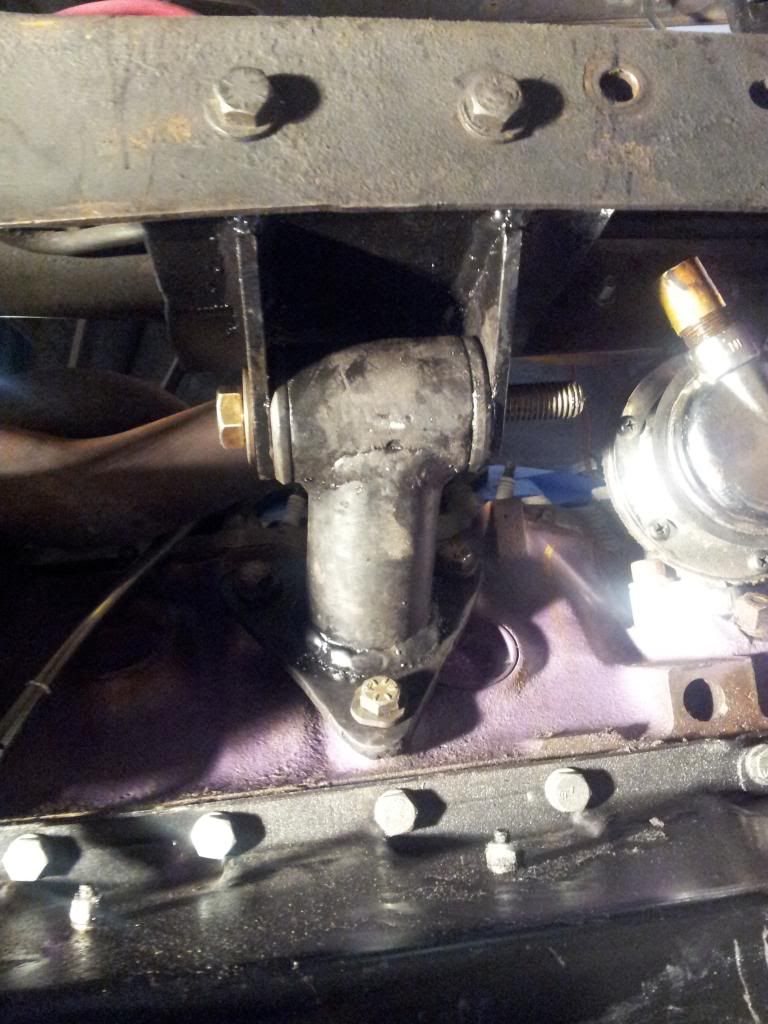 As discussed earlier, I will be adding a crossmember once I get the front suspension set up to reduce some of the stress on the motor mounts/block. 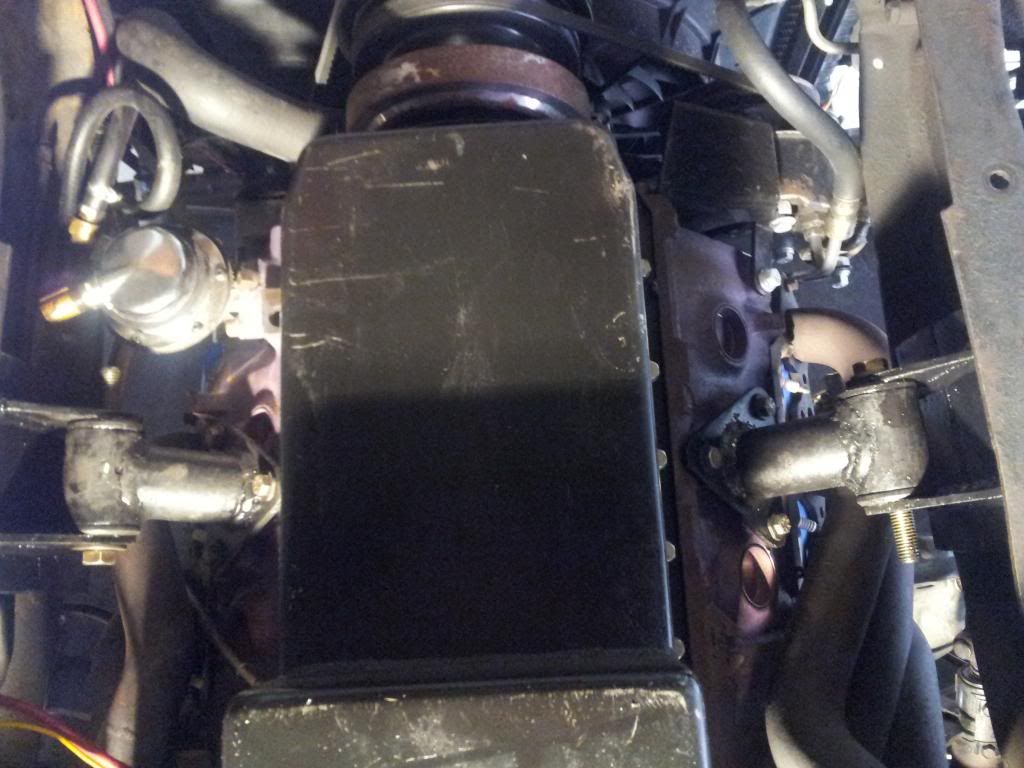 Buddy came by in the afternoon and we celebrated progress by cracking our first home-brewed bottles of Black IPA. Came out really good considering it was our second batch ever. We also brewed a new batch of Espresso Stout tonight. Which is now aptly named "Galaxy Stout" because I was trying to take a picture of the mash process and managed to drop my phone in the pot.... My phone is now getting the bag of rice treatment, I think I picked it out quick enough though. 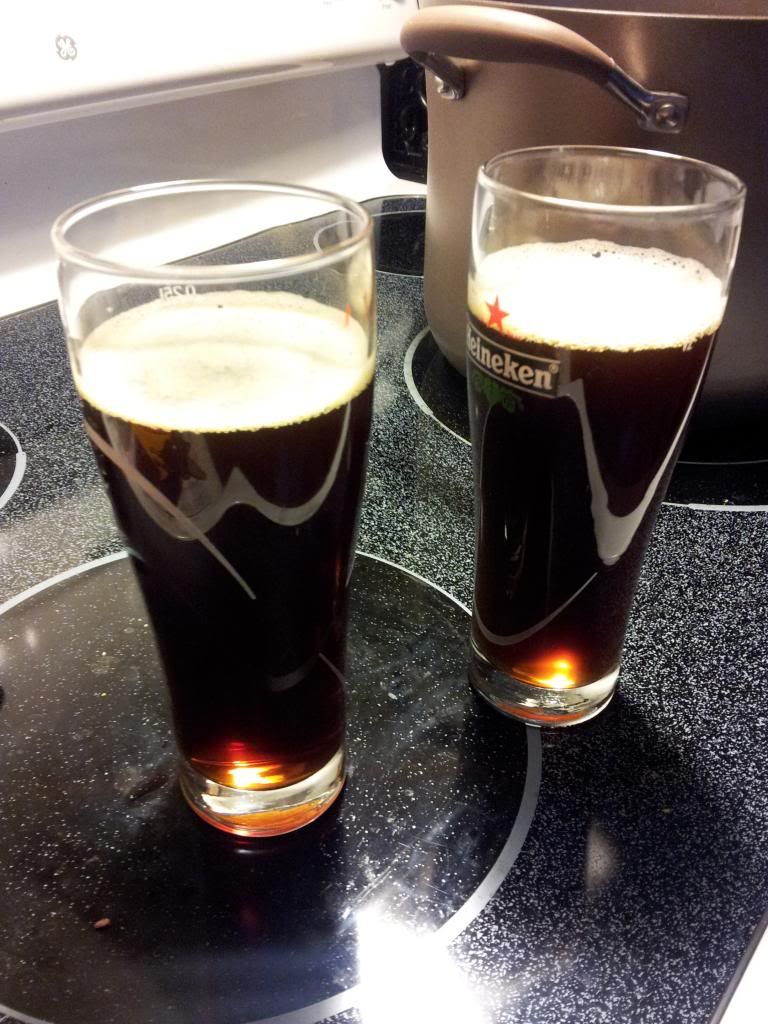 Hope to start on the suspension tomorrow. |
|
|

|
|
|
#107 |
|
Registered User
Join Date: Feb 2011
Location: SHAWNEE, KS
Posts: 191
|
Re: Another OLD BLUE Build Thread - 71 Chevy
So much for getting anything done on my suspension today...
The DD Ram wouldn't start today. So it took priority. Replaced coil/plugs/wires/cap/rotor, now she starts right up and runs way better than before. The plugs I took out had ~.055-.060 gap and the spec was .040, way overdue. Bad part is, I am now totally out of motivation to work on the Chevy. Went up to World of Wheels today. Dad had his Deuce up at the show and opened up for all of the kids to climb on/around. There was a line of people all day to get up in the cab. 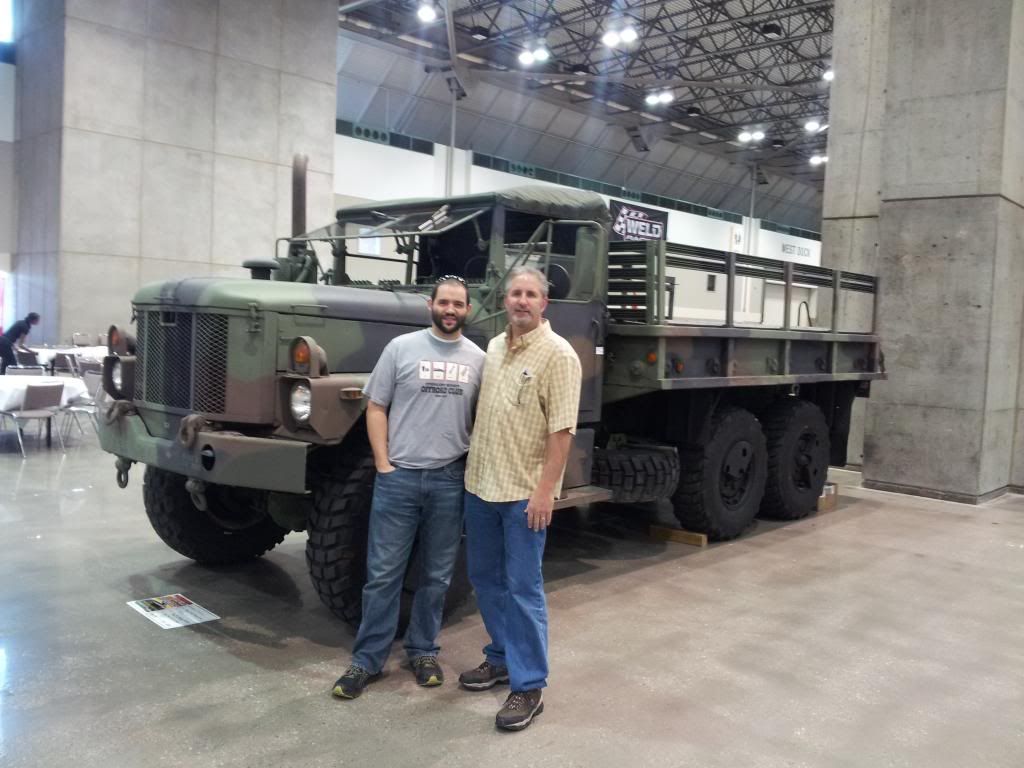 Got to look at a bunch of ~71 era Chevy trucks that were waaaaay nicer than mine. |
|
|

|
|
|
#108 |
|
Registered User
Join Date: Feb 2011
Location: SHAWNEE, KS
Posts: 191
|
Re: Another OLD BLUE Build Thread - 71 Chevy
Engineeerd Drawrings
These describe my plans, I will probably change a couple of things as I go. 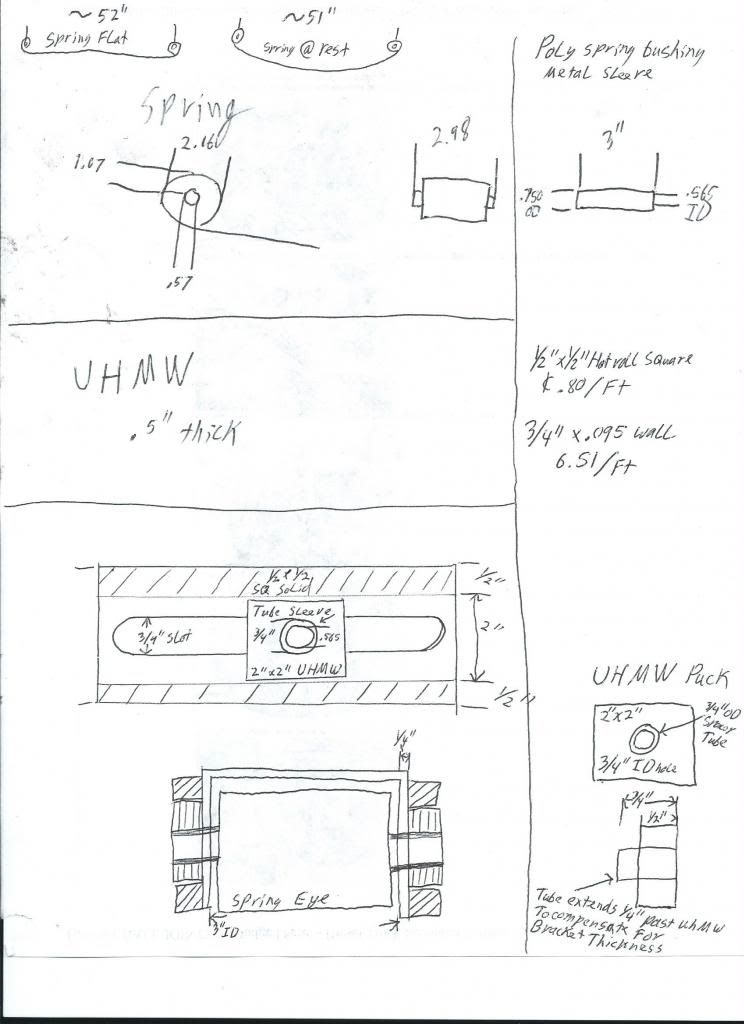 The thought is with the tube sleeve, I will be able to crank down on the leaf spring bolt without affecting the preload on the UHMW bushings or limiting suspension travel. Picked up the 1/2x1/2 square and tubing today. The only tubing that they had in the size I needed was chromoly. I think they overcharged me for it, but it was such a small amount that I spent <$20 for 8 ft of 1/2x1/2 and 2ft of the chromo. Total so far, is up to ~$80 and should have leftover materials. |
|
|

|
|
|
#109 | |
|
Registered User
Join Date: Feb 2011
Location: SHAWNEE, KS
Posts: 191
|
Re: Another OLD BLUE Build Thread - 71 Chevy
I have had this idea in my mind and have been doing passive research on it for a long time. I just realized that it was all in my head, and I hadn't posted any of it to share.
There is a lot of discussion on the topic, but relatively few people that have actually done the sliders and even fewer who have posted results. UHMW is a plastic, but as far as plastics go, it is probably one of the most high tech plastics available. Quote:
Essentially UHMW is made for bearing/sliding applications. They use if for everything from launching boats to fake knees and hips. UHMW pros: Self lubricating - greasing it would actually reduce the life because it would attract dust/grit which would wear it faster. High impact resistance Can be machined Is not brittle, does not crack like plexiglass (excluding lexan) It has a temperature range from -240*F to +266*F UHMW Cons: It is still a wearable item. Hopefully it doesn't wear out fast, but if it does, there is no risk of catastrophic failure due to the slot design. Below are some links to threads that I have found useful about the shackle slider boxes: http://www.pirate4x4.com/forum/gener...-shackles.html http://www.pirate4x4.com/forum/gener...kle-boxes.html http://forum.ih8mud.com/hardcore-cor...f-sliders.html Clearly the easiest way for me to do this would be to go buy the ones from Tim at Liquid Iron Industries. But, if I buy the part, I get one part. If I buy the tools to make the part, I can make as many as I want, and I get a free lesson in the study of plastics. |
|
|
|

|
|
|
#110 |
|
Registered User
Join Date: Feb 2011
Location: SHAWNEE, KS
Posts: 191
|
Re: Another OLD BLUE Build Thread - 71 Chevy
Finally made a little progress today.
Spent ~2hrs cleaning the garage, 2 hours messing it up again, and another hour cleaning. New to do list board: 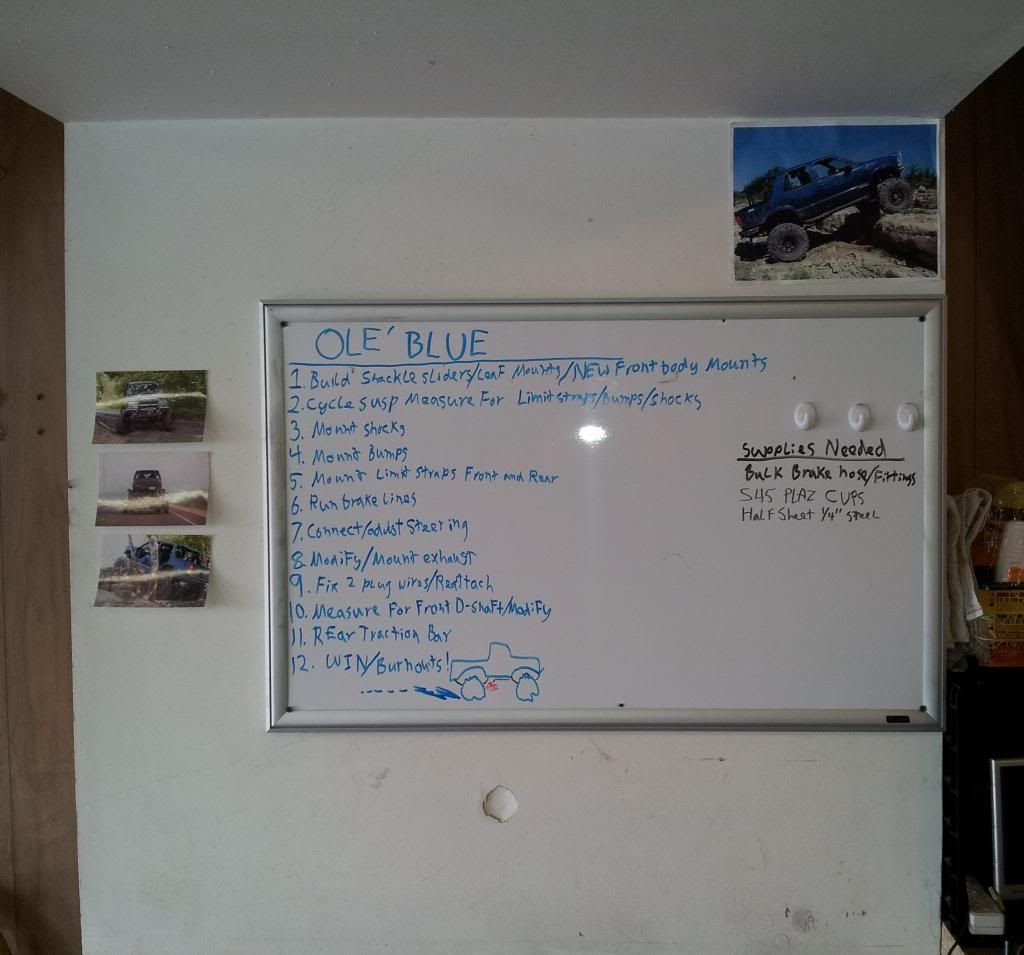 More crap cut off, down to clean frame rails in the front. Removing the factory brackets/rivets with the 1/2" steel that the PO welded over them was a PITA! 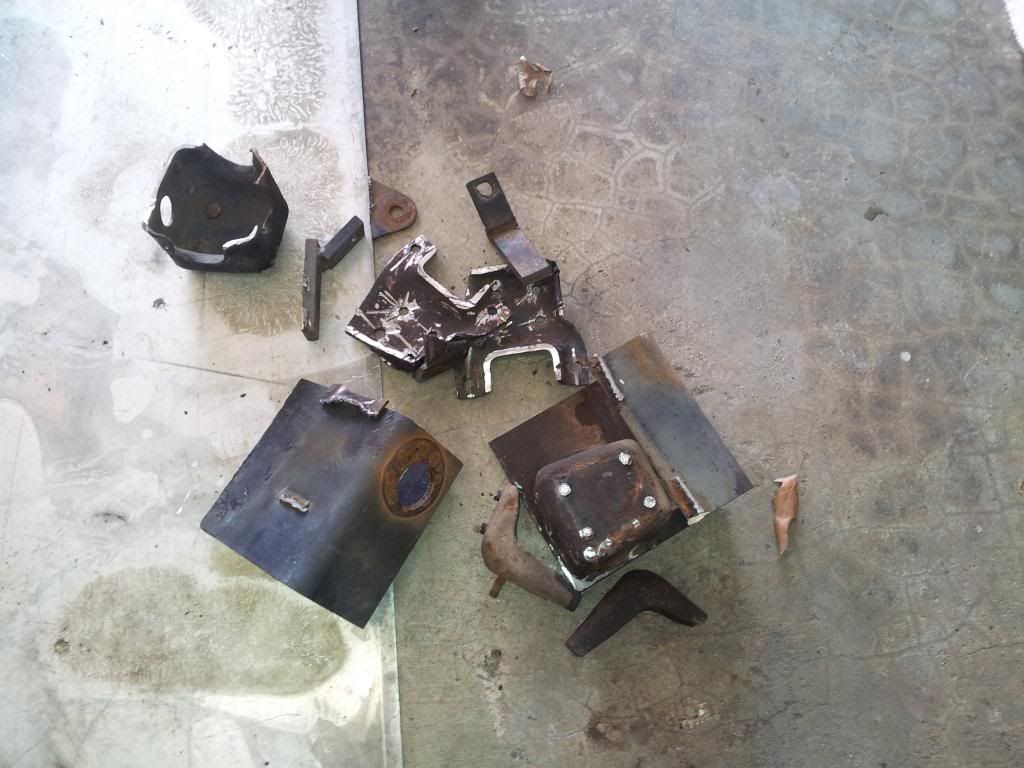 Made a huge mess, then got to clean it up again. 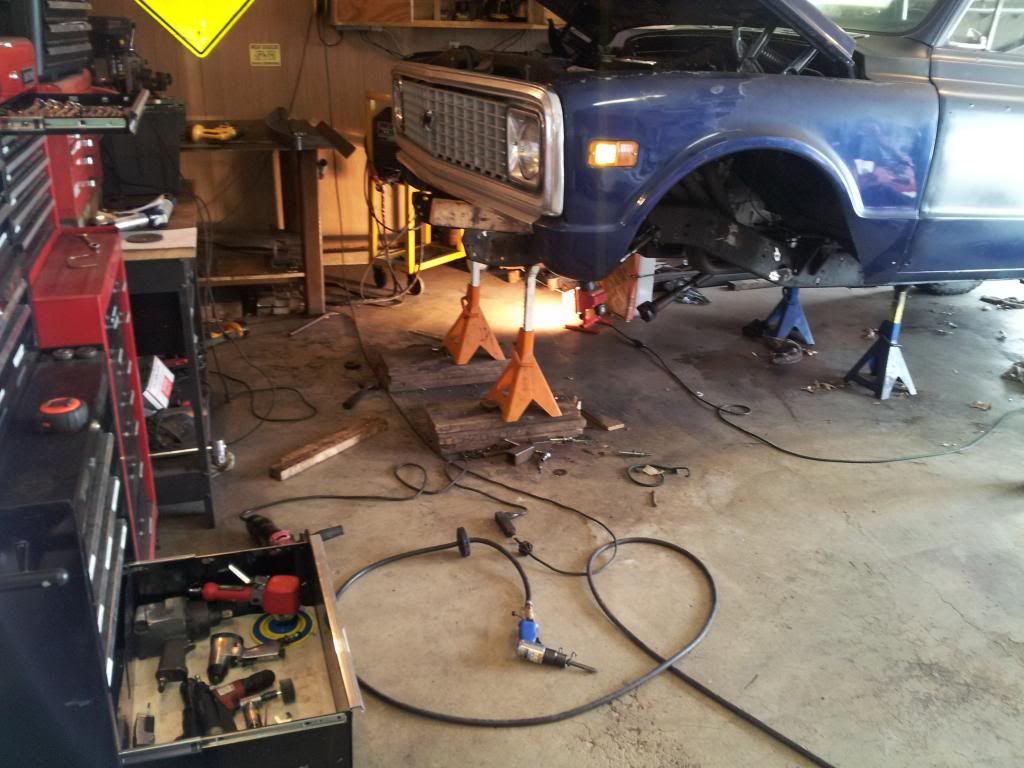 Getting closer. Yes I am planning on using the push/pull steering for a while. We'll see how it works out. 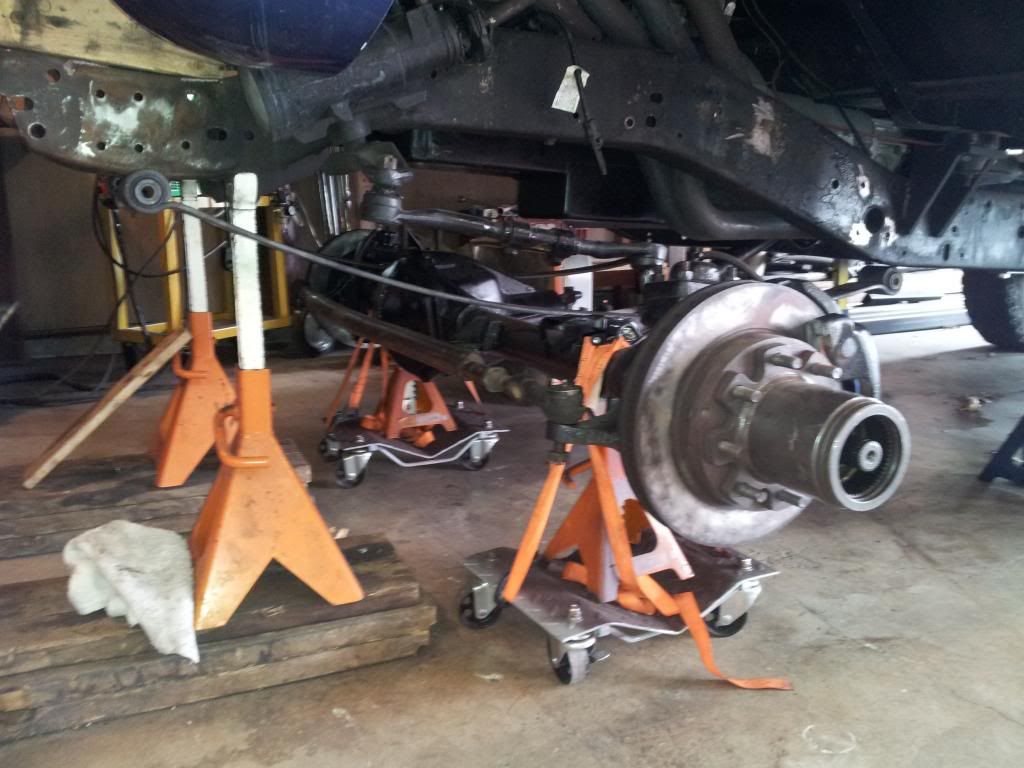 I am pretty much out of 1/4" steel and motivation for today. I will have to pick up some more supplies this week. |
|
|

|
|
|
#111 |
|
Registered User
 Join Date: Dec 2012
Location: Moses Lake Washington
Posts: 162
|
Re: Another OLD BLUE Build Thread - 71 Chevy
Glad to see you back at it, nice "to do list" especially #12 be sure to take pics or a video when completing that one i can't wait

__________________
My build: Project "Lazarus" 8.1 Vortec and Allison in a 72 swb k10  http://67-72chevytrucks.com/vboard/s...d.php?t=555878 |
|
|

|
|
|
#112 | |
|
Registered User
Join Date: Feb 2011
Location: SHAWNEE, KS
Posts: 191
|
Re: Another OLD BLUE Build Thread - 71 Chevy
Quote:
 Not to spam up my thread, but I am looking to raise some $$$ to put into some parts on the truck. Decided I am not going to use the wiring harness that I bought. If anybody is interested, PM me. Lets make a deal. 1967-72 Painless Wiring Harness + A/C harness 10206 Wiring Harness from Jegs A/C harness from Jegs So I bought this harness thinking I was going to semi-restore my truck. Well it turns out that probably half of everything I am going to do to it will require custom wiring.  A/C harness not in pic. I literally opened the box stared at it, and then put it in the corner in my "to do" pile. Brand new, both in box. Jegs wiring harness $455.99 and A/C harness $111.99 would come out to 567.98 + Shipping and handling. Package deal, both for $500 shipped!!!!! Will separate, PM me and we can discuss. |
|
|
|

|
|
|
#113 |
|
Registered User
Join Date: Feb 2011
Location: SHAWNEE, KS
Posts: 191
|
Re: Another OLD BLUE Build Thread - 71 Chevy
Progress!!!!
The start of my home-made B52 kit. I was going to weld them together but wifey was using the dryer, and I wasn't about to stop her progress :p Broke the swirl ring on my plasma torch so I got to cut these all out by hand with a grinder/chop saw... For those that say they don't have the right tools. This goes to show you a drawring, some angle grinders and a small drill press go a long way. 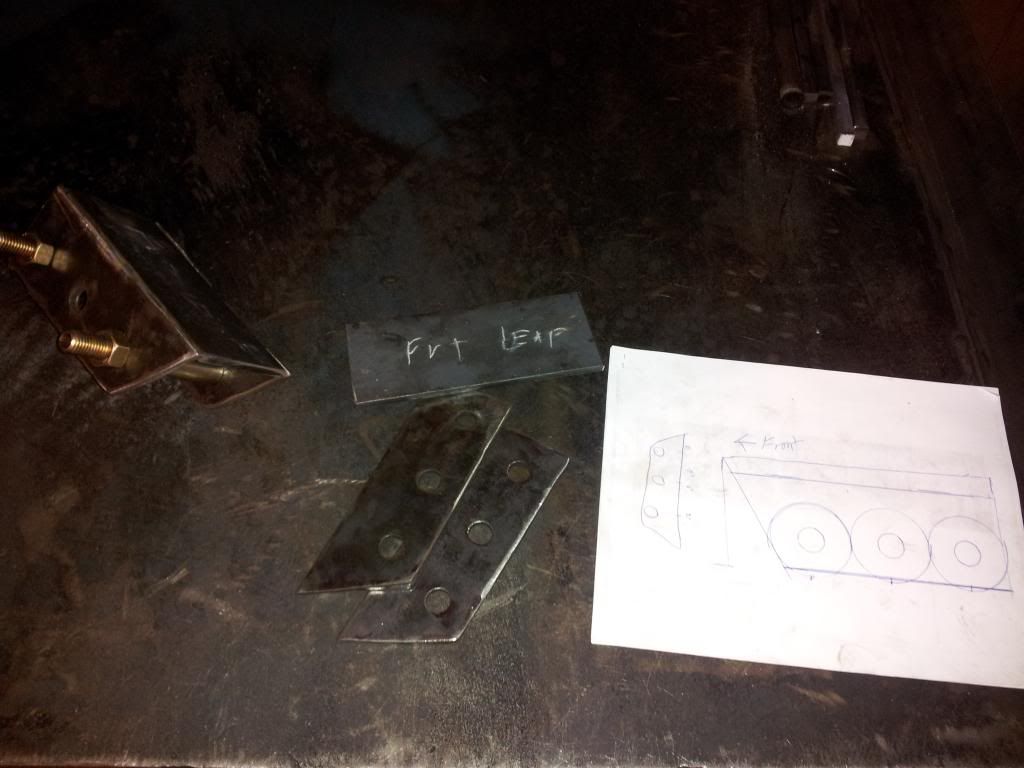 Now I just need to integrate some body mounts then start building the slider boxes. |
|
|

|
|
|
#114 |
|
Registered User
Join Date: Feb 2011
Location: SHAWNEE, KS
Posts: 191
|
Re: Another OLD BLUE Build Thread - 71 Chevy
Shackle Sliders:
Start with Homebrew expresso stout and some planning 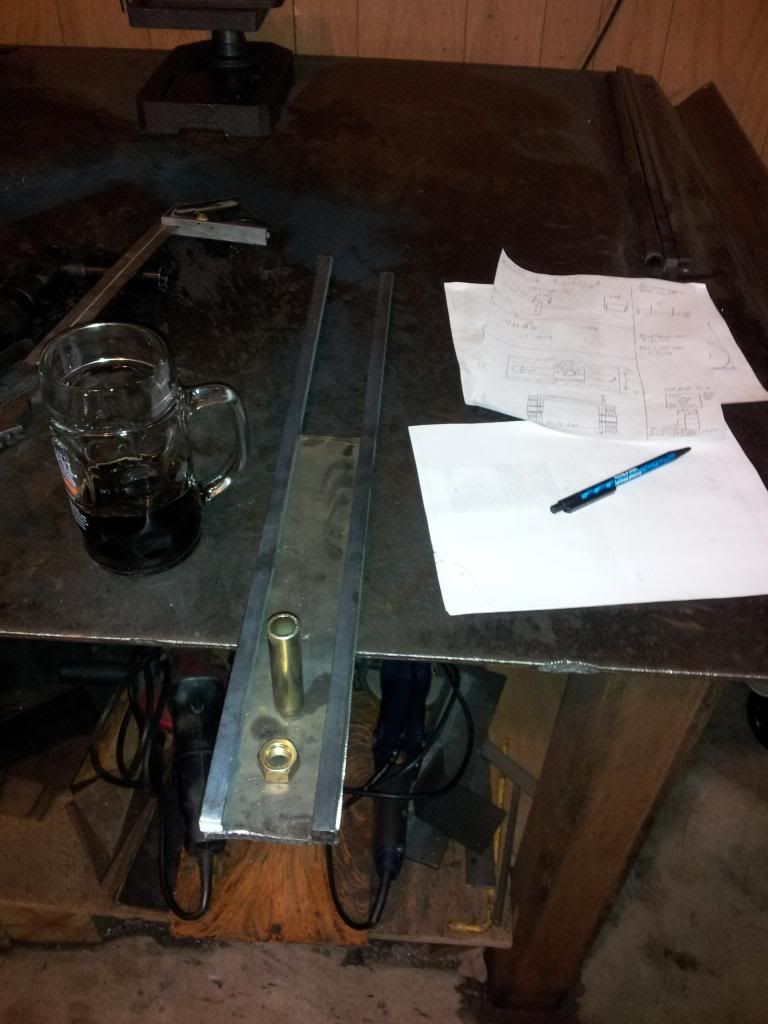 Cut materials (I made the OD of the shackle boxes 9" and the slot 7") 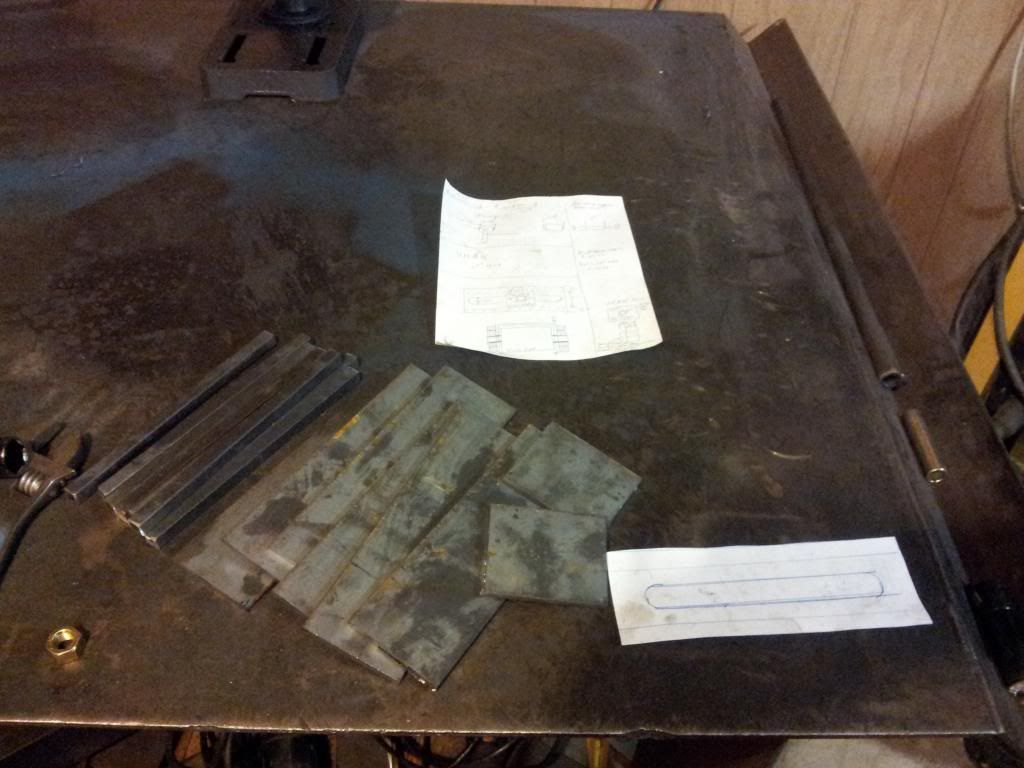 Drill 3/4" holes to show the beginning and end of the slot When I am trying to make multiple identical plates, I tack weld them together so the holes all line up. 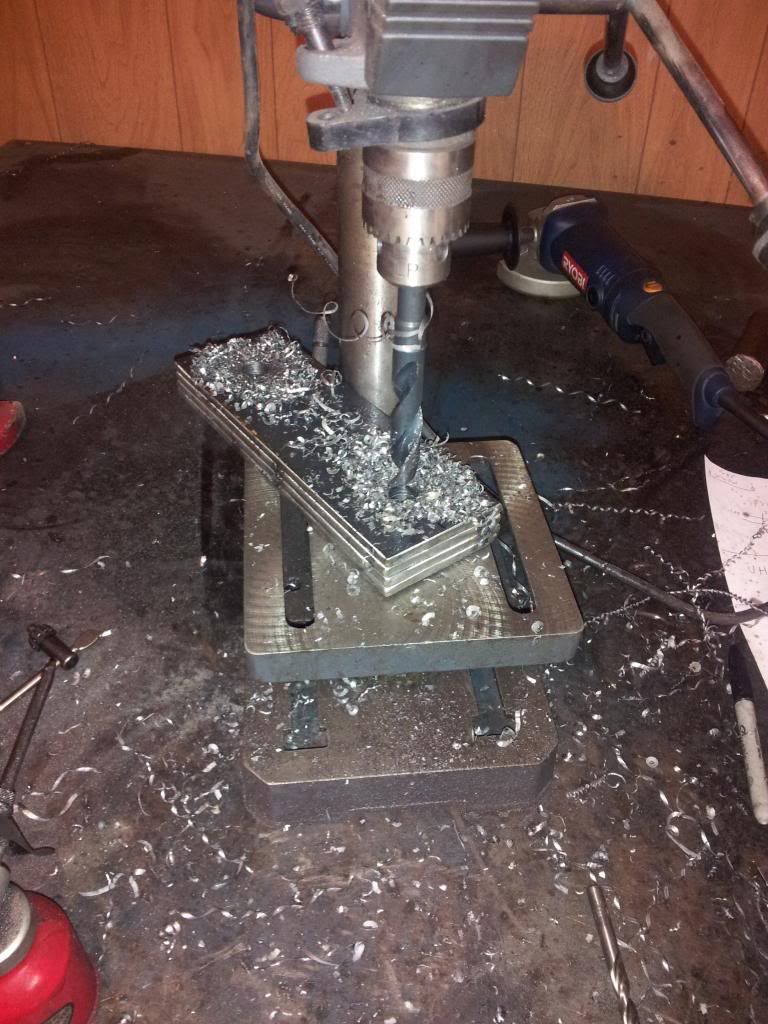 Get friendly with my 7" metabo making the slots 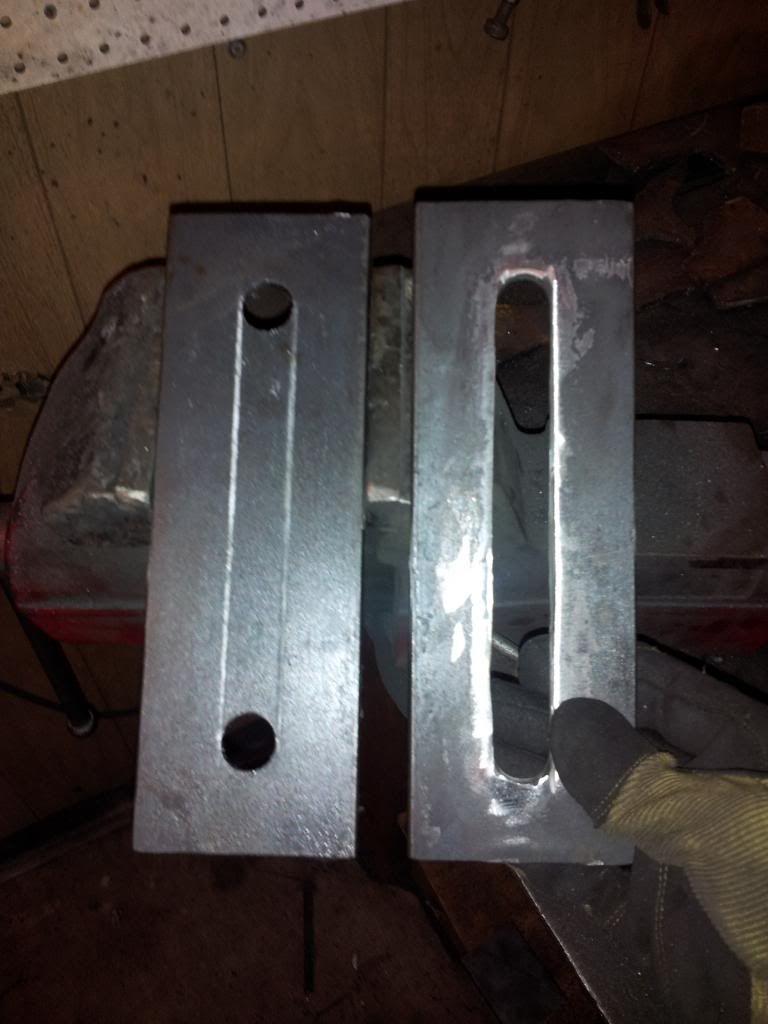 Assemble with some 3" spacers to establish width 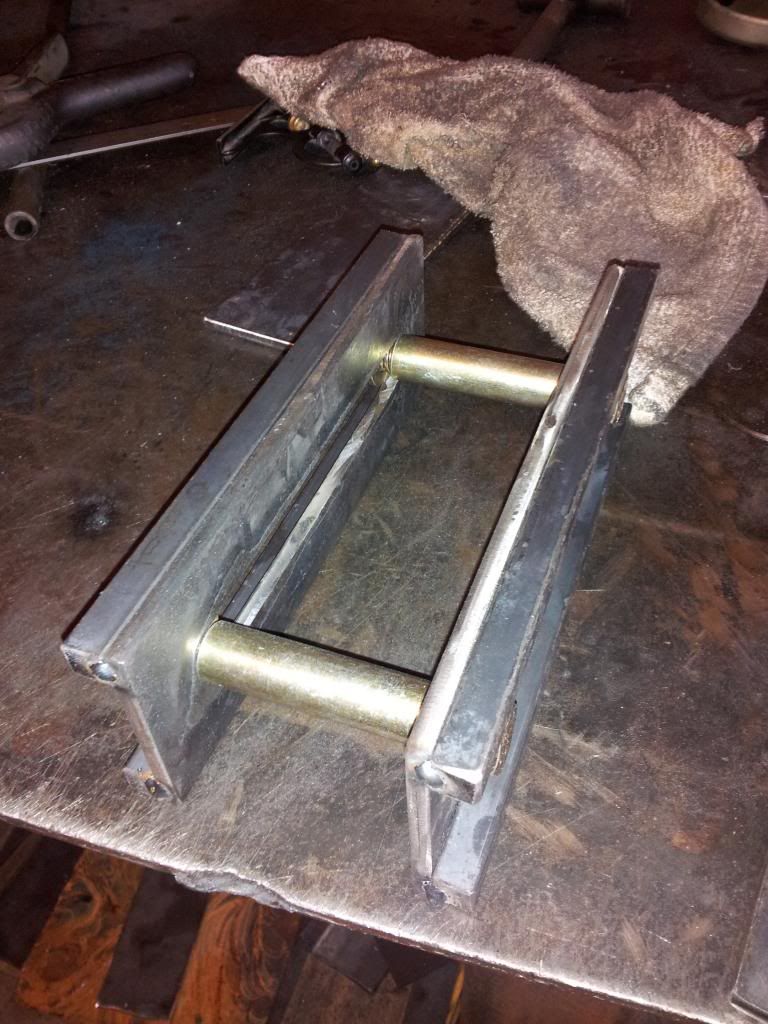 Bam, I present you home-made shackle sliders 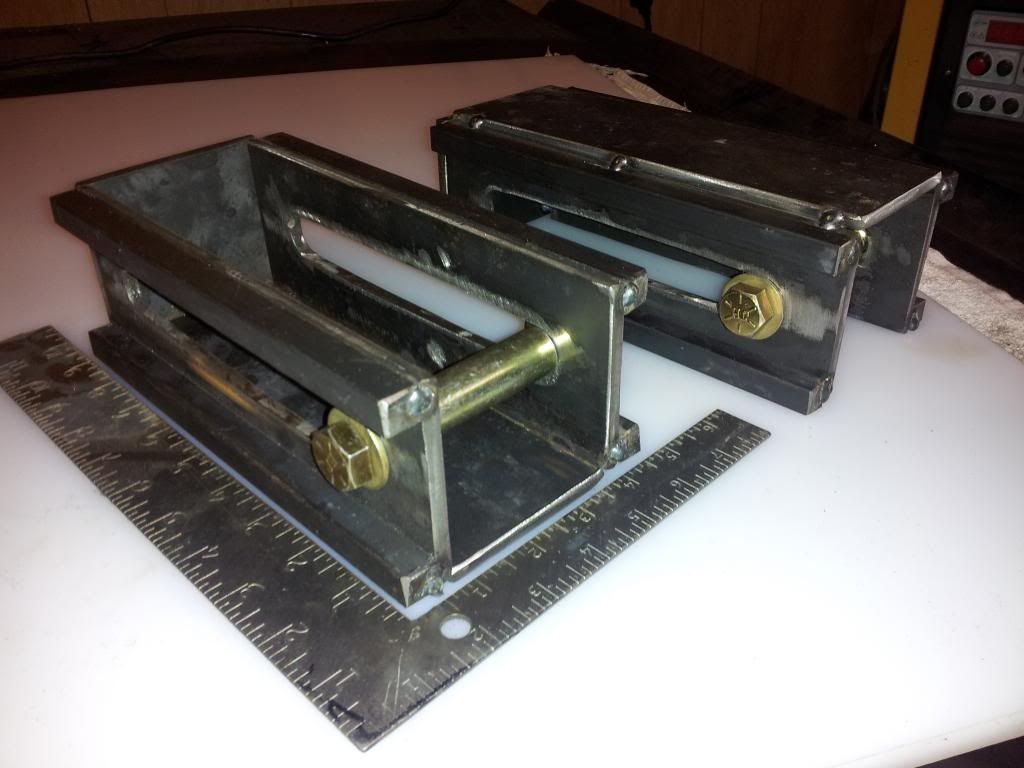 Still need to cut the UHMW and bolt spacers. Ran out of motivation, off to make/drink some beer. |
|
|

|
|
|
#115 |
|
Registered User
Join Date: Feb 2011
Location: SHAWNEE, KS
Posts: 191
|
Re: Another OLD BLUE Build Thread - 71 Chevy
Cut the UHMW bushings today with the FIL's table saw. Came out pretty good.
Just gotta drill them out now. Made ~10 so I have some spares just in case. 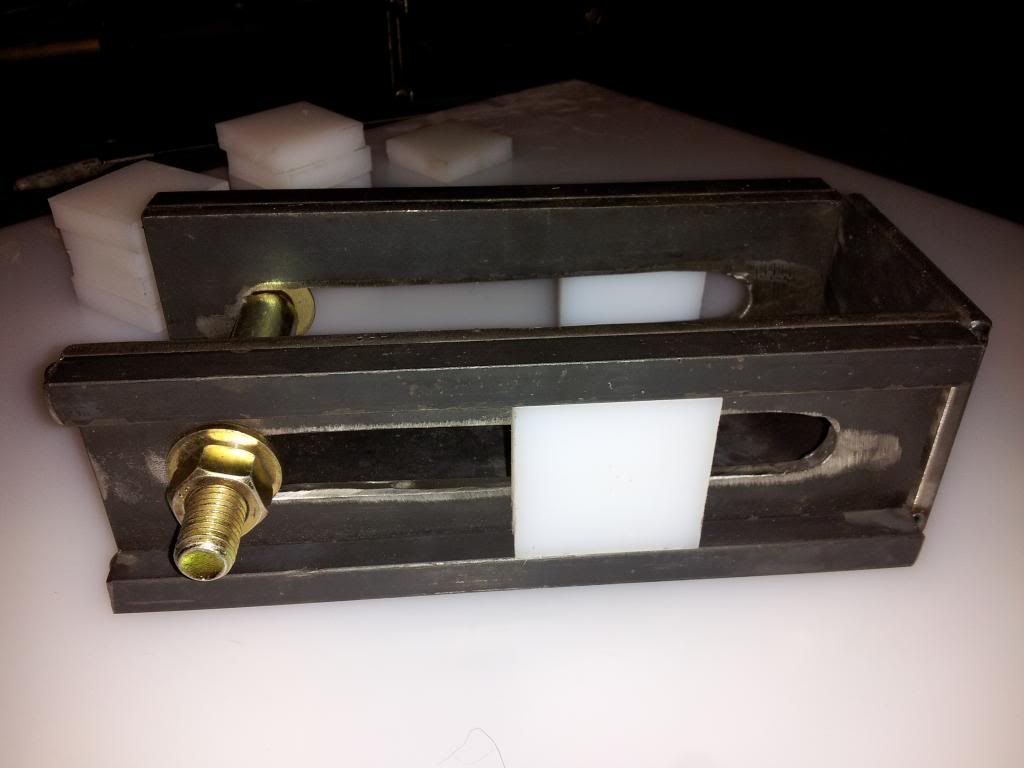
|
|
|

|
|
|
#116 |
|
Registered User
Join Date: Feb 2011
Location: SHAWNEE, KS
Posts: 191
|
Re: Another OLD BLUE Build Thread - 71 Chevy
Progress!!
Drilled out the UHMW pucks 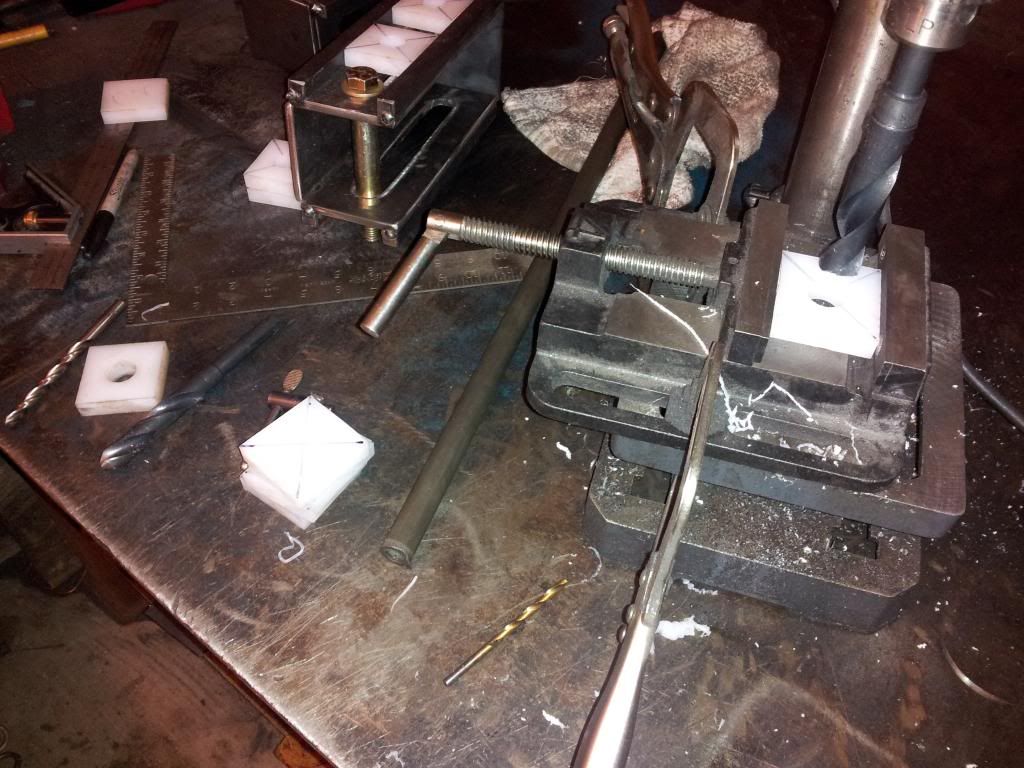 It was snowing outside and I had nothing better to do, so I got a wild hair and switched the machine over to TIG. Probably haven't tried/done TIG for ~2 years or so. For whatever reason I couldn't figure out/get the footpedal to work so this is just with the trigger on pulse. 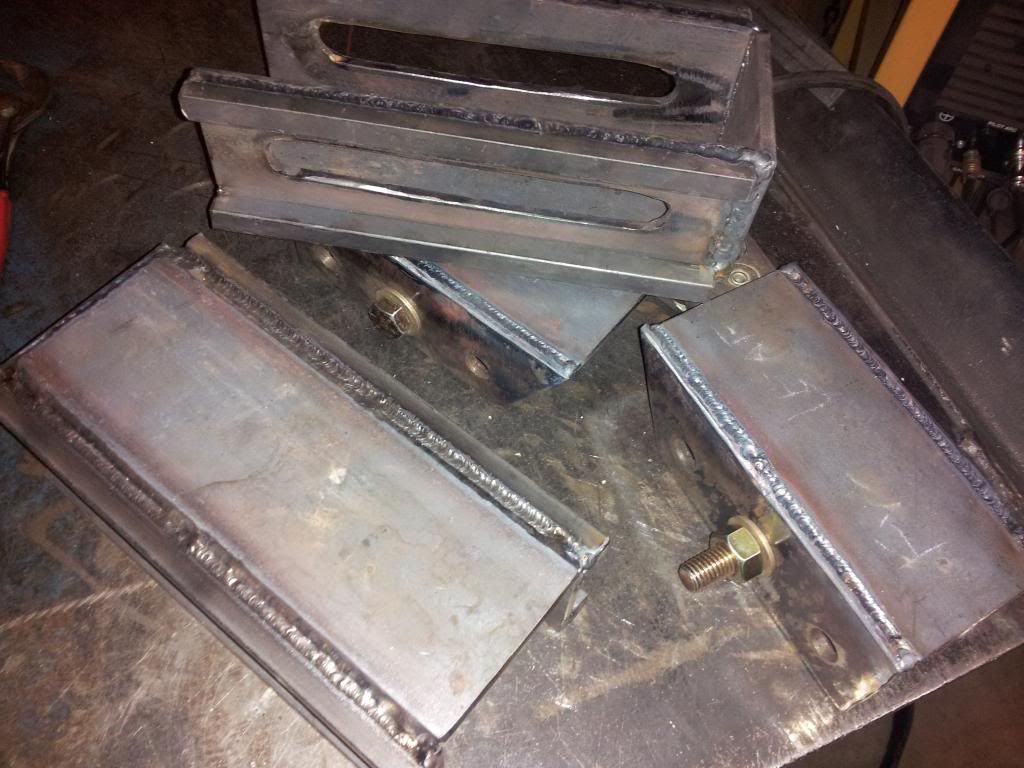 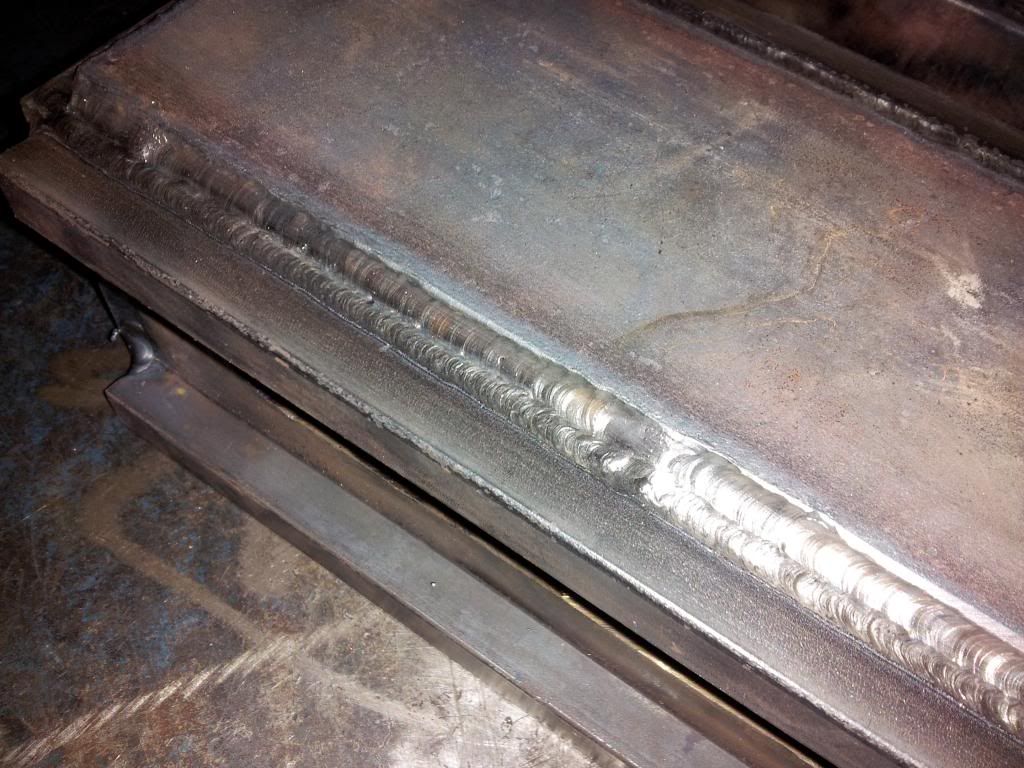 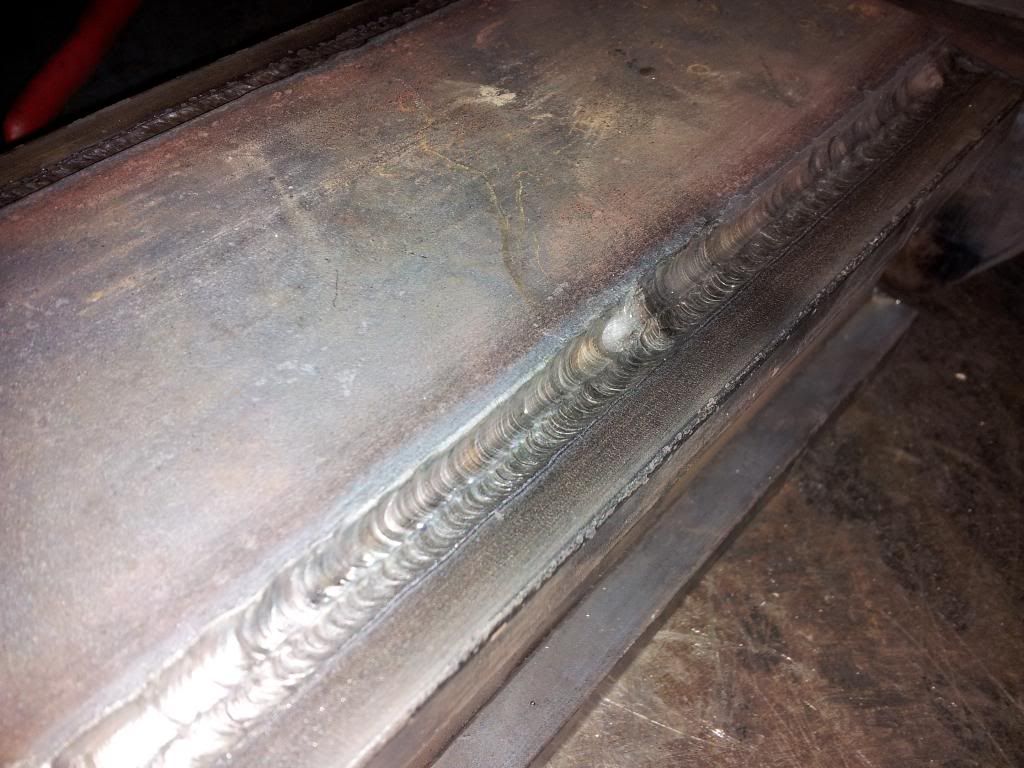 Tried to TIG on a couple of spots on the inside of the brackets, but it was a PITA, so I will MIG weld the inside next time I am out working. |
|
|

|
|
|
#117 |
|
Registered User
Join Date: Feb 2011
Location: SHAWNEE, KS
Posts: 191
|
Re: Another OLD BLUE Build Thread - 71 Chevy
So, it seems I have come to the end of my ~2 month hiatus. During the break I managed to go to Ireland with the wifey for 10 days (absolutely gorgeous place) and get a new job (waaay less stress, better pay, better hours, and I enjoy it :smokin: ).
Spent 1/2 the day Saturday cleaning the garage. It seriously helps soo much the next day when you get to lay on a semi-clean floor and know exactly where all of your tools are. Here is a pic of the Leaf spring sliders assembled, but with the spacer on the outside of the bracket so you can see what it looks like when it is inside the slot. 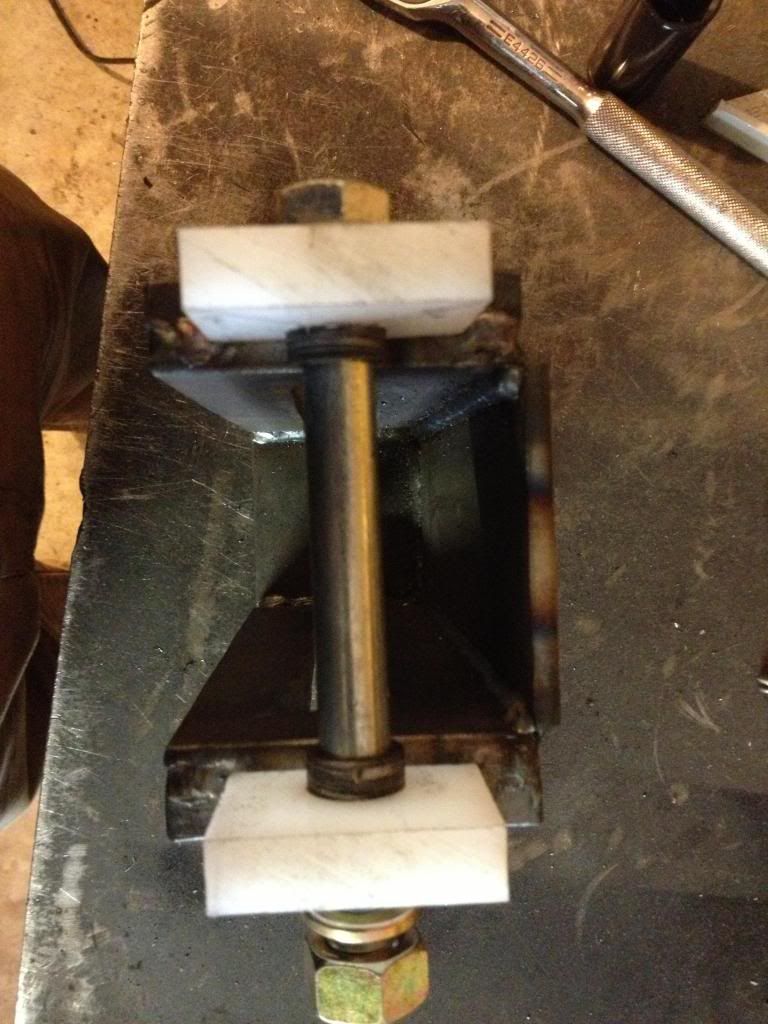 Got the front and rear leaf spring hangers mostly installed. But I am now having some serious doubts that it will be low enough... (yes, you guys were probably right about the D60 being quite a bit taller) Right now I just have the main leaf and a body mount puck in there to take up the gap for the missing leaves. The only way to really know is to put the full leaf pack in tomorrow and get the whole truck's weight on it. Suspension Compressed: 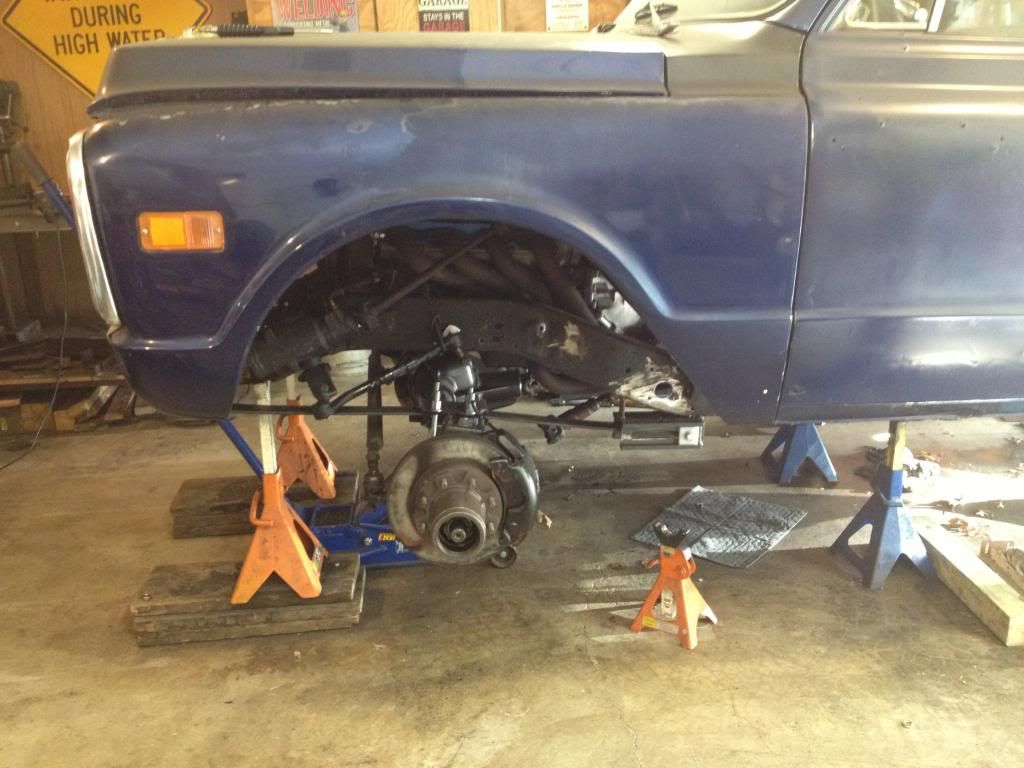 Drooped (It droops further if you put weight on it): 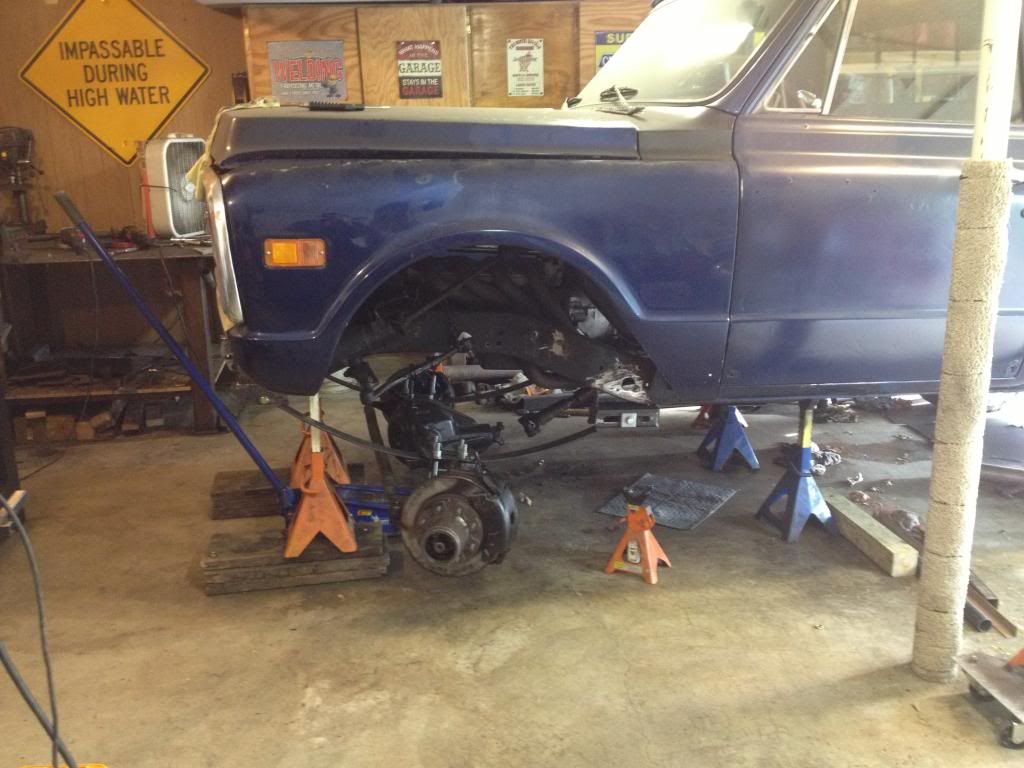 And just because I thought it was a cool pic. D-side up, pax side no tire and drooped. No rubbing. 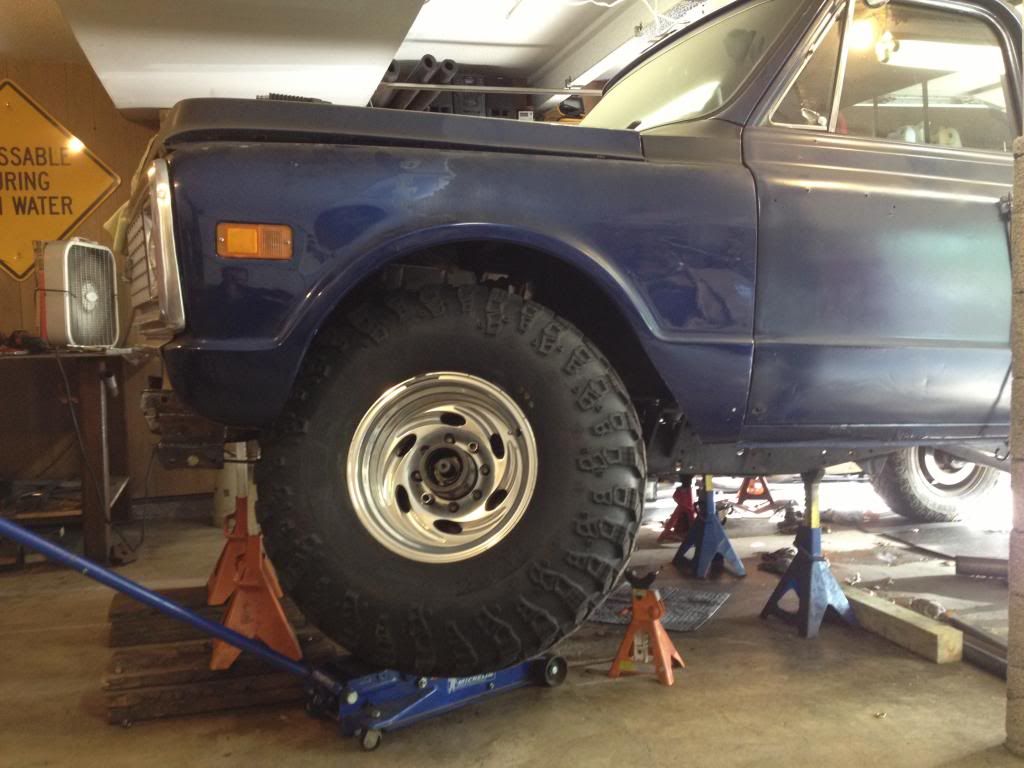 If I am OK with the ride height, tomorrow I plan to final weld and assemble the suspension then build bumpstops/engine xmember, shocks, brakes, etc, etc. |
|
|

|
|
|
#118 |
|
Registered User
 Join Date: Dec 2012
Location: Moses Lake Washington
Posts: 162
|
Re: Another OLD BLUE Build Thread - 71 Chevy
Nice work, glad to see you back at it, good to see old blue gettin some love again.

__________________
My build: Project "Lazarus" 8.1 Vortec and Allison in a 72 swb k10  http://67-72chevytrucks.com/vboard/s...d.php?t=555878 |
|
|

|
|
|
#119 | |
|
Registered User
Join Date: Feb 2011
Location: SHAWNEE, KS
Posts: 191
|
Re: Another OLD BLUE Build Thread - 71 Chevy
Quote:
I sold my '02 dodge ram gasser (11mpg on a good day) and bought the wife a newer '10 Maxima ~22mpg (silly fast car...). So now I drive her '00 honda accord (v6 26.7mpg last tank). Therefore it promptly got a home-built 2" receiver hitch and home built receiver mounted bike rack, and yes I do plan on pulling a lawn trailer with it occasionally. Another long day down. Made lots of progress! More flex testing before putting the rest of the leaves in. 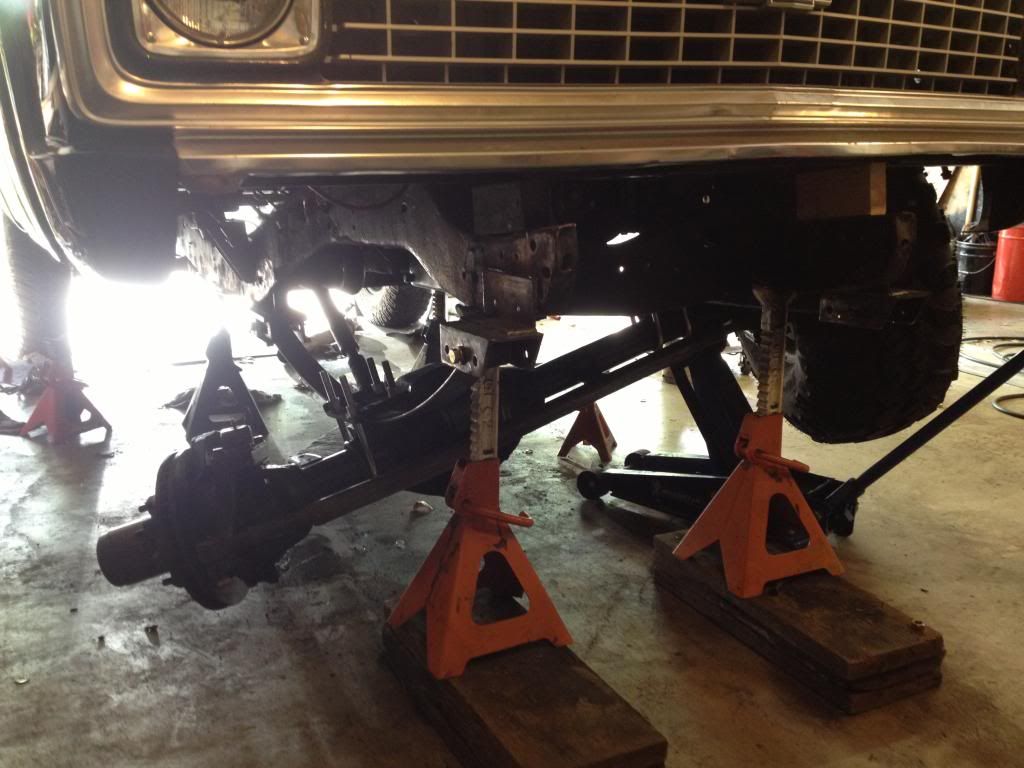 Custom super deep socket for the u-bolts 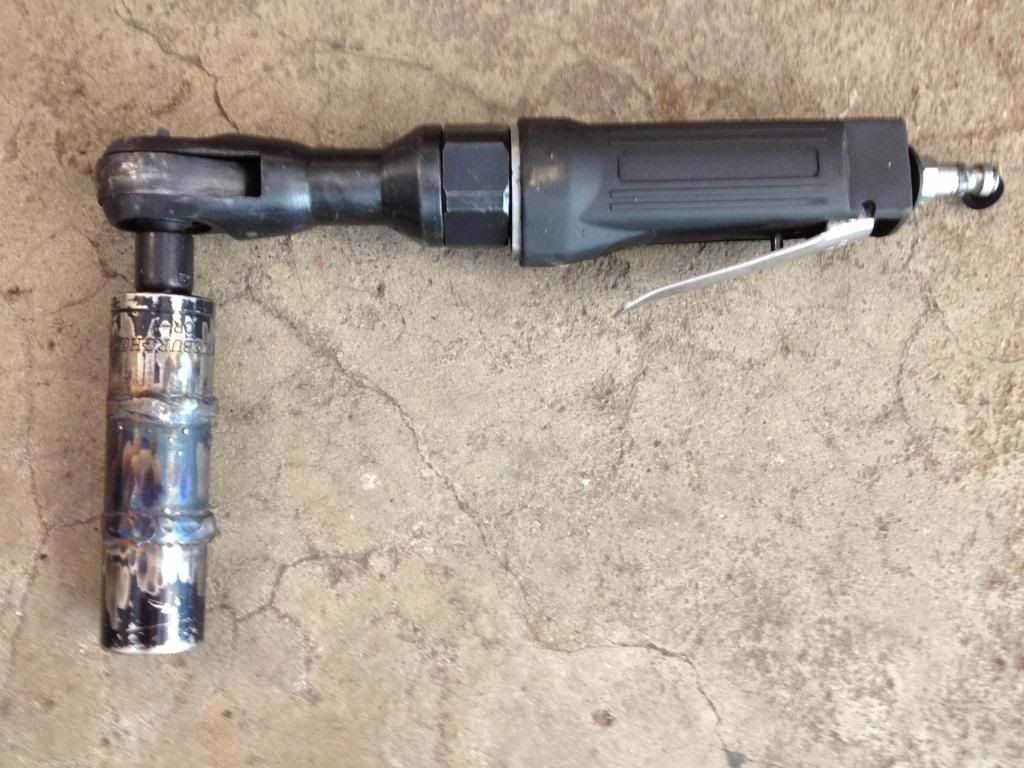 Sitting on all 4's (~1" shorter than my garage door opening :grinpimp: I do think I'm going to have to modify the J arm on the opener again though) 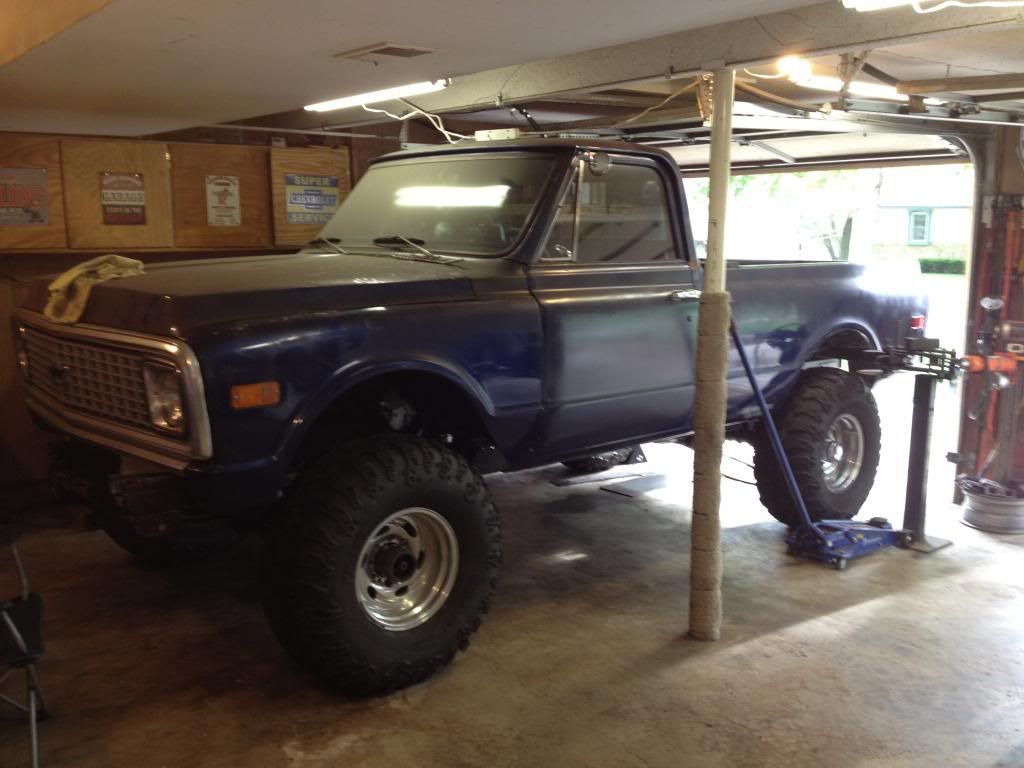 Got all of the shock bushings fixed/reassembled and they are ready to mock up. I am going to use the factory bottom shock mounts since it works well with the factory push/pull steering 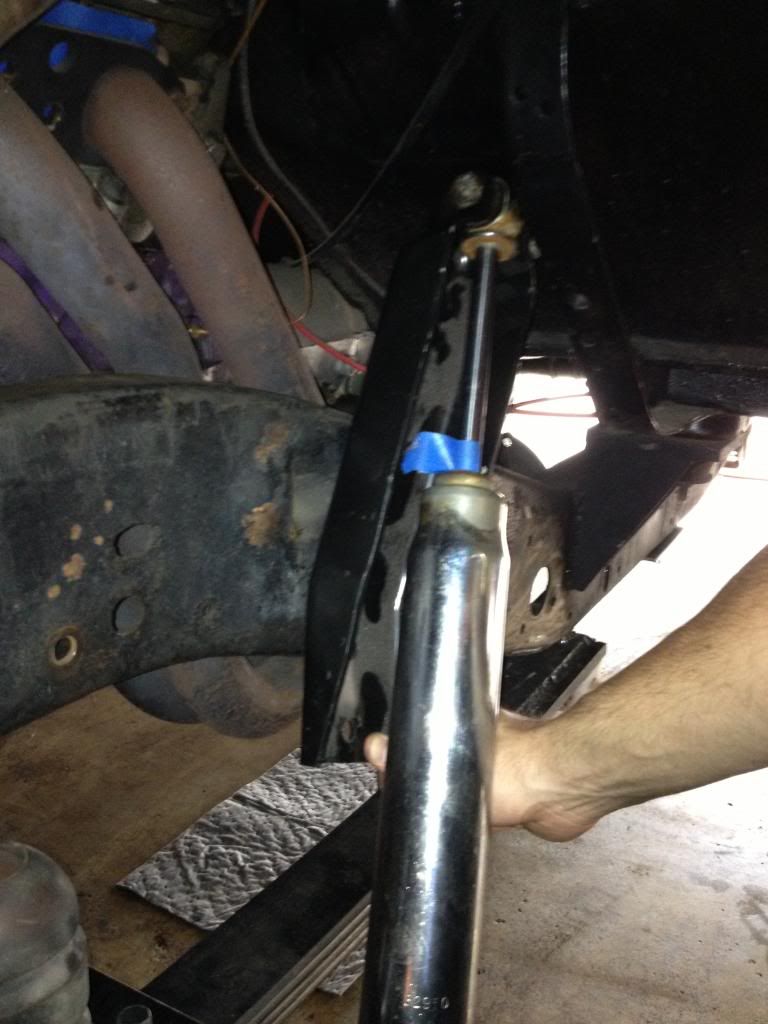 I am officially out of juice from this weekend. Got a lot done with my lone helper Gertrude. Up next: Finish shock mounts core support body mounts/spring hanger bracing mount bump stops/engine x-member run brake lines Re-do exhaust (not excited about this one...) Limit straps Front driveshaft will need some love (not sure how much I can grind the cv to get more angle, I'll have to do some research) Lots of other stuff... WIN/BURNOUTS!!!!! |
|
|
|

|
|
|
#120 |
|
Registered User
Join Date: Feb 2011
Location: SHAWNEE, KS
Posts: 191
|
Re: Another OLD BLUE Build Thread - 71 Chevy
Progress!
Got the front body mounts made and welded on. NOT made out of 1/2" steel, I bet these are a quarter of the weight of what I took off. 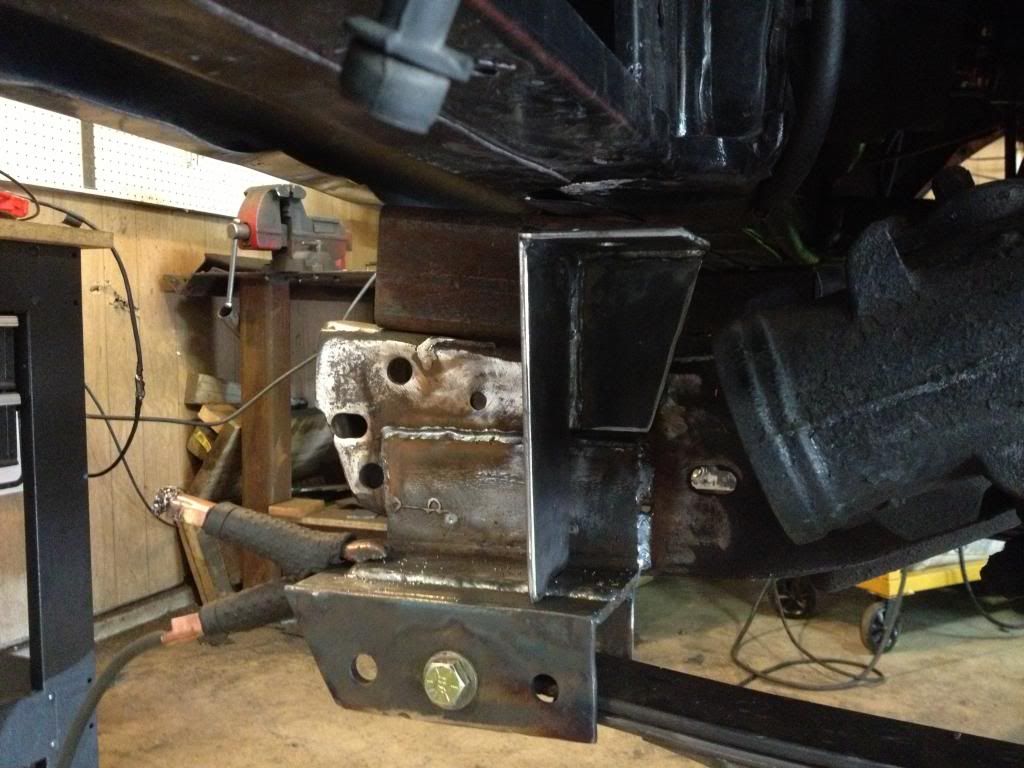 Got plates cut out for the bump stop brackets. Getting close to mounting the bump stops and shocks. 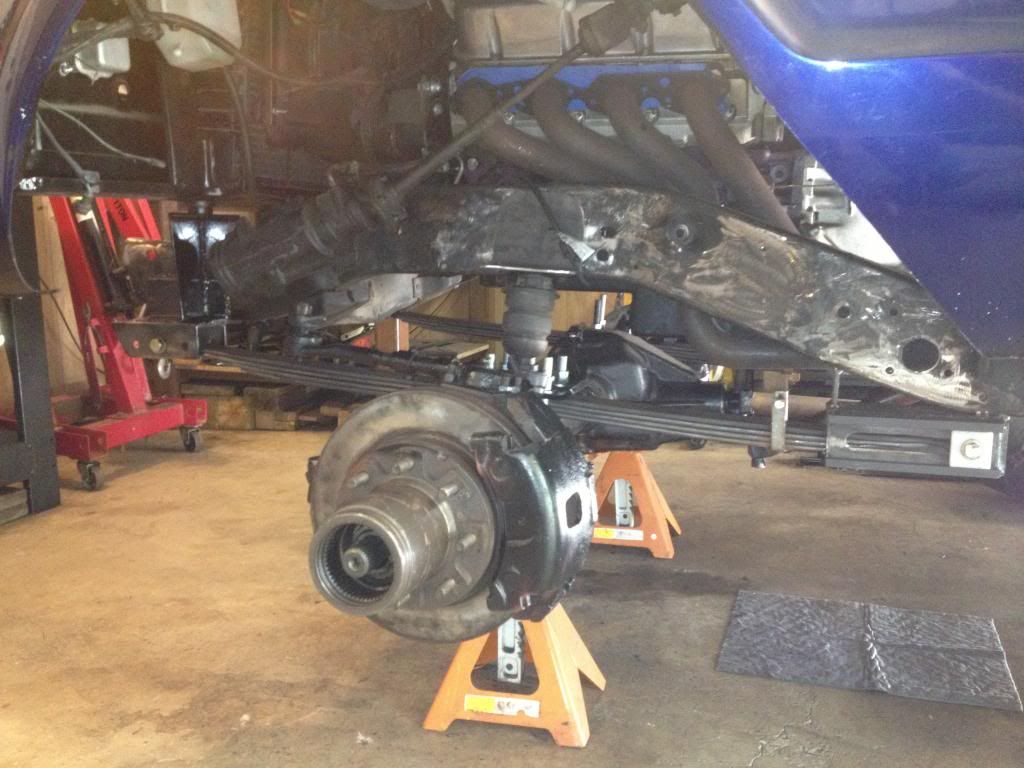 I'm also planning on plating the frame above the shackle sliders all the way up to the shock mounts after I figure out where those will be. Also, I held the remaining pieces of exhaust that I took off up under the truck and it looks like I will be able to reuse most of it with just a couple of angle changes. |
|
|

|
|
|
#121 |
|
Registered User
Join Date: Feb 2011
Location: SHAWNEE, KS
Posts: 191
|
Re: Another OLD BLUE Build Thread - 71 Chevy
Gettin close!
Made some poor-man limit straps $9.99 each @ Northern Tool and I had a $5 off coupon. Wrap the nylon in multiple layers of aluminum foil and weld in small amounts, allowing to cool in between. 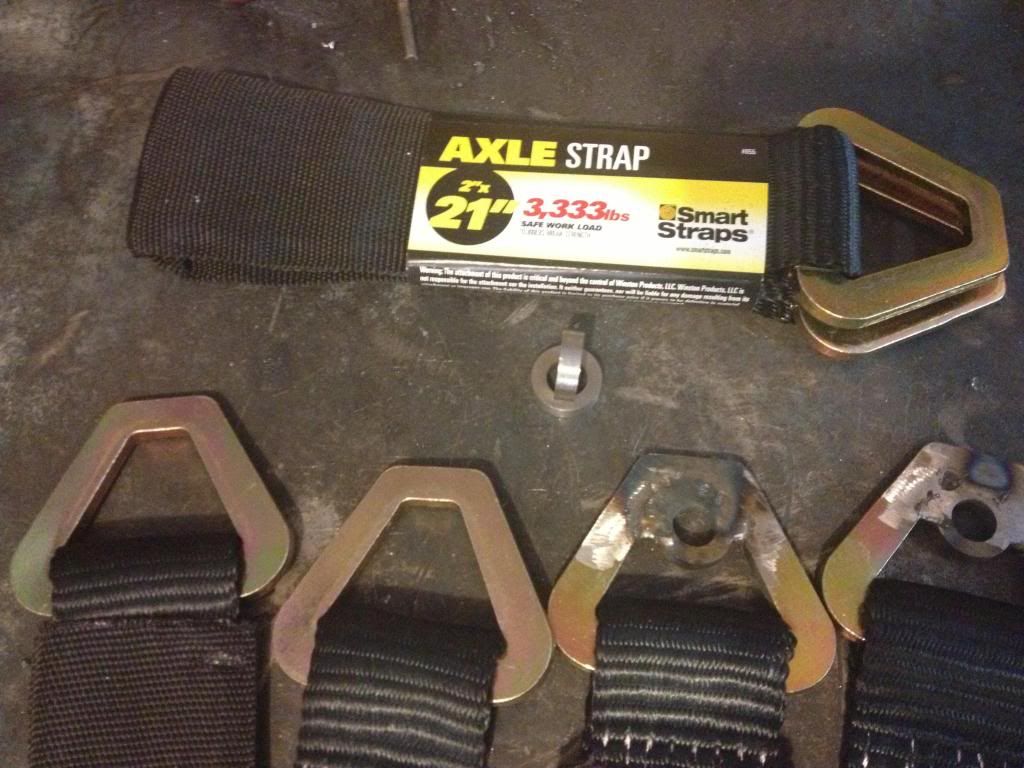 Finished product 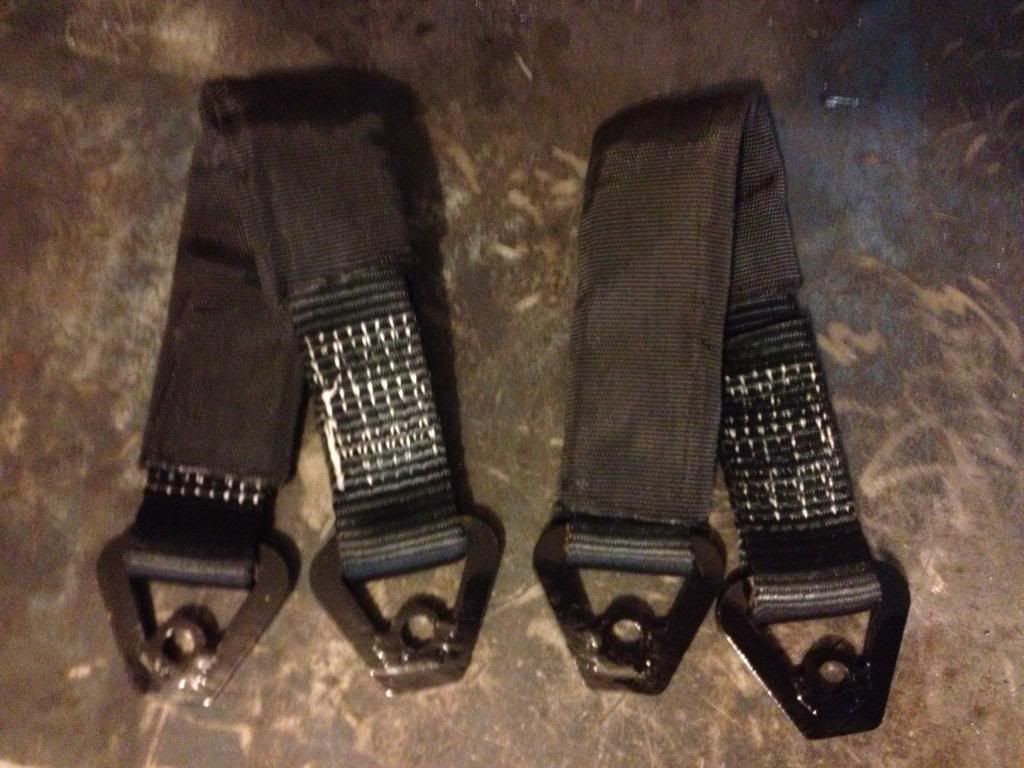 Got Shocks fully mounted and bump-stops mounted and gusseted. The limit straps I am planning on having bolt to the lower shock mount and make a 3 hole bracket on the frame so it has some adjust-ability. 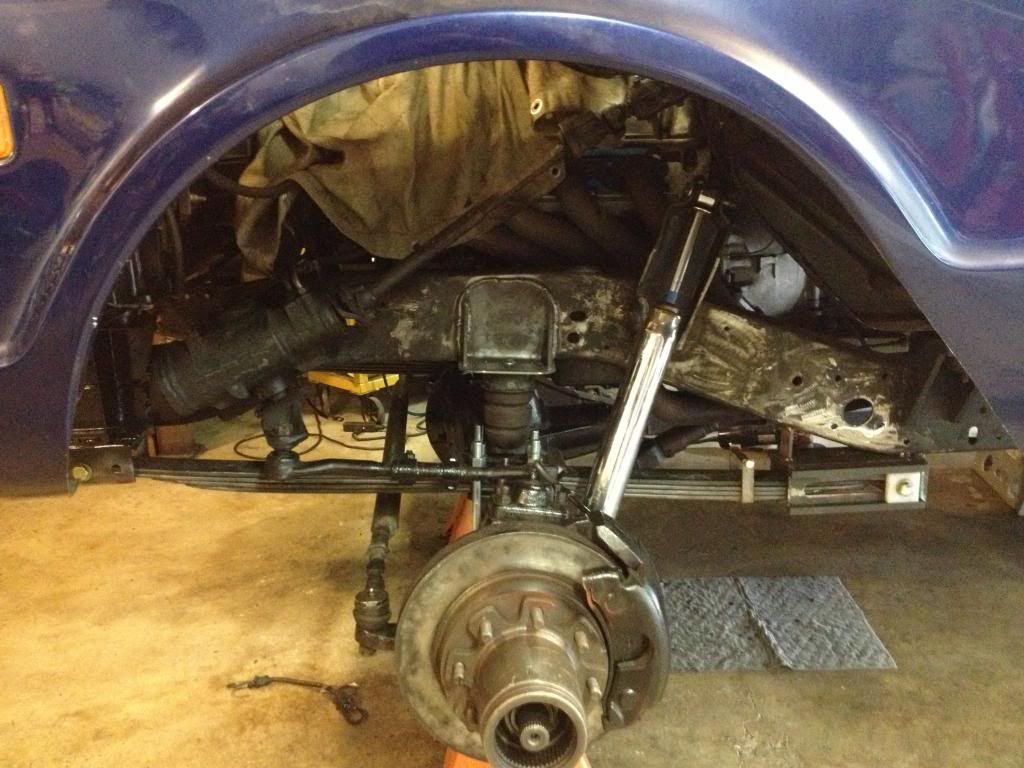 I actually got to cross some things off my list yesterday, it was very satisfying. |
|
|

|
|
|
#122 |
|
Registered User
Join Date: Feb 2011
Location: SHAWNEE, KS
Posts: 191
|
Re: Another OLD BLUE Build Thread - 71 Chevy
|
|
|

|
|
|
#123 |
|
Registered User
Join Date: Feb 2011
Location: SHAWNEE, KS
Posts: 191
|
Re: Another OLD BLUE Build Thread - 71 Chevy
Got some more stuff done over the last couple of weeks.
Driveshaft is ready to go back in. It will be very close to the right length, but I might have to shorten it by 1" or so. Massaged the CV in multiple places, good for an extra 5* or so. 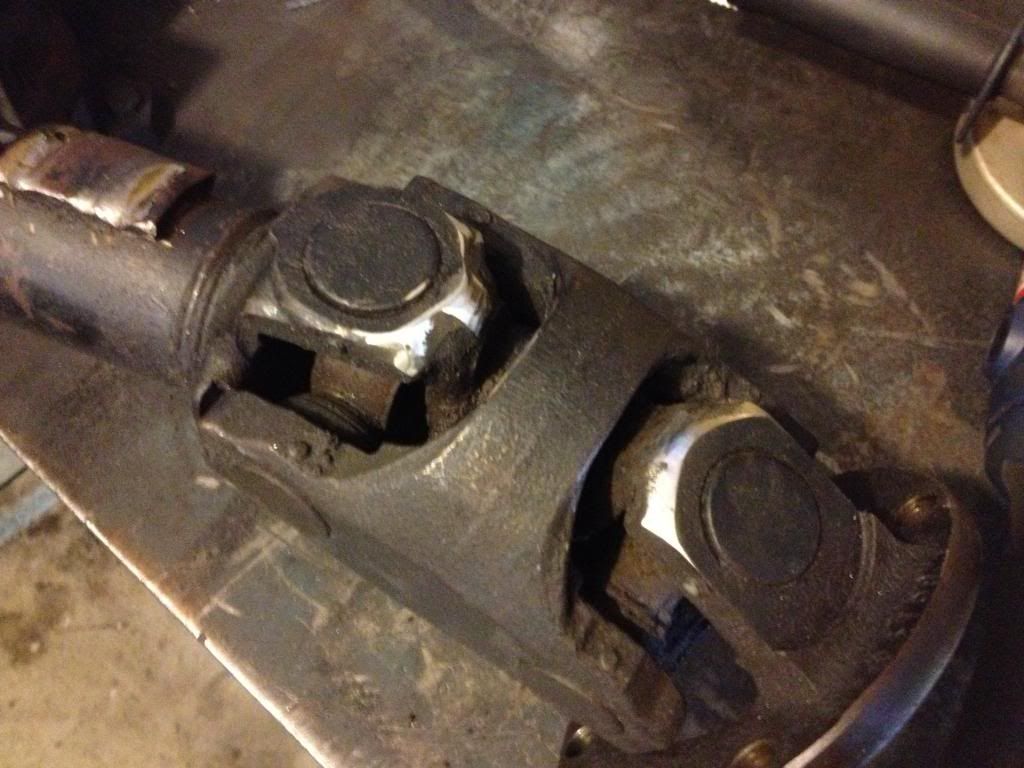 Gotta build a new engine crossmember. I thought about it for a while and was going to make some kind of square tube thing, but decided that I needed to make myself try some new things. I think it will turn out good. 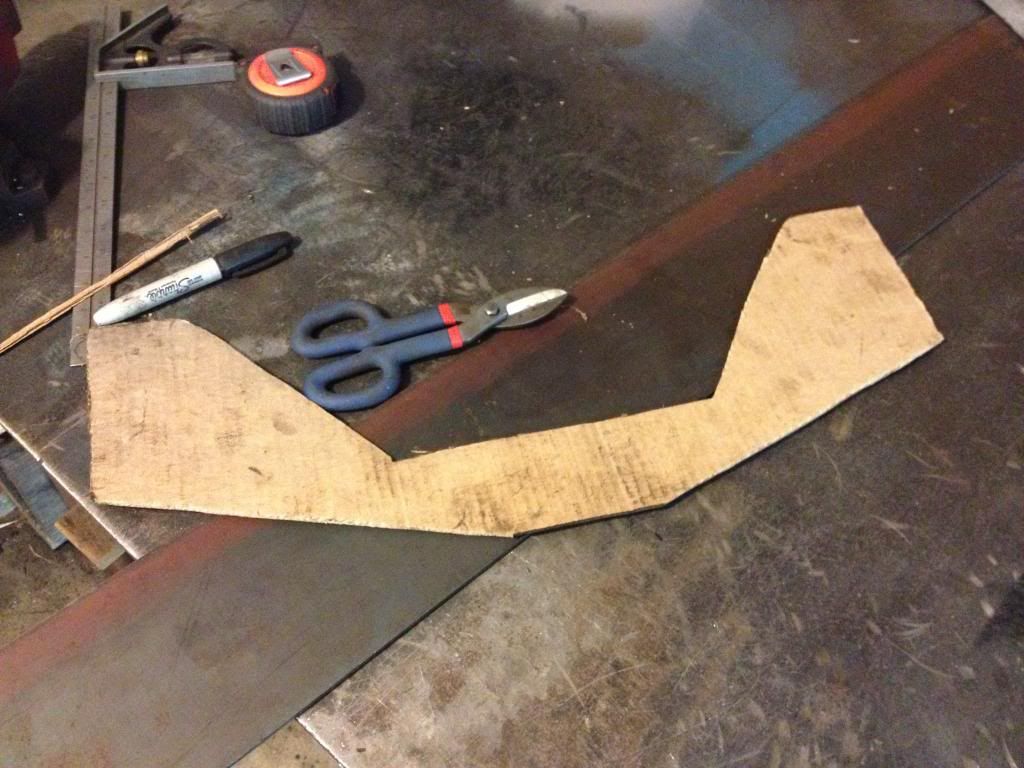 As far as I got before I ran out of motivation. I will have to notch the front plate on the passenger side a little for the pumpkin. The two crossmembers will be connected together with a plate and lots of speed holes. The taller front plate will tie into the two main motor mount bolts. 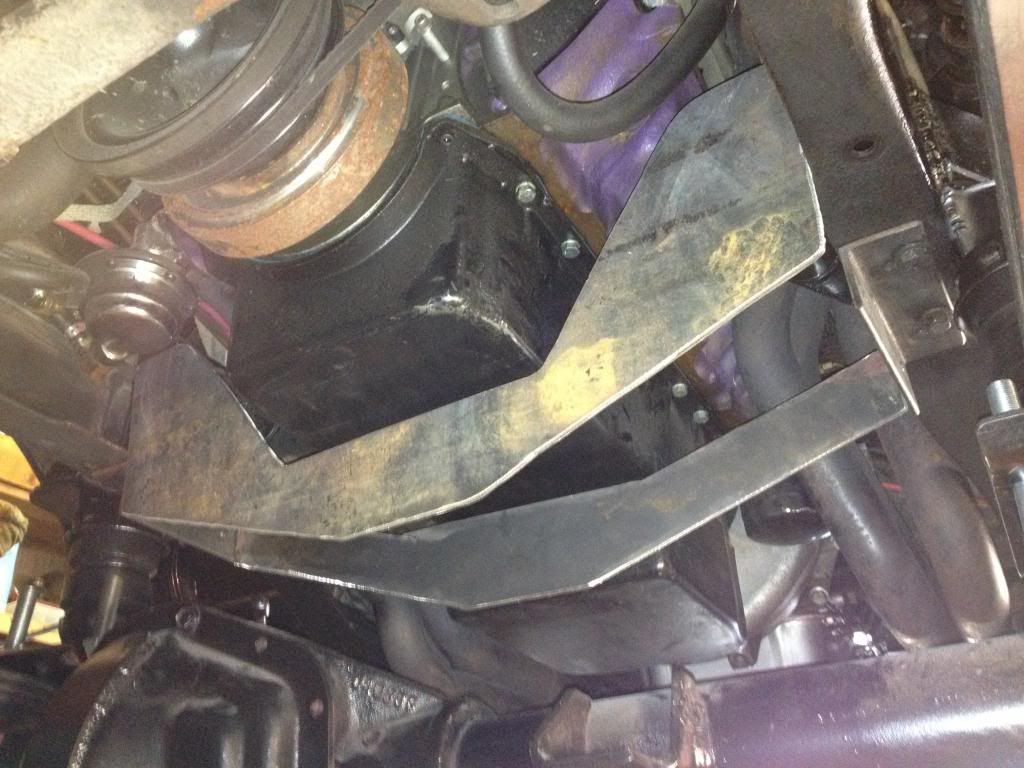 Gertrude and I sat in the truck for a while and made engine noises while pretending we were on a cruise. She was very disappointed when we had to get out and hadn't gone anywhere yet... 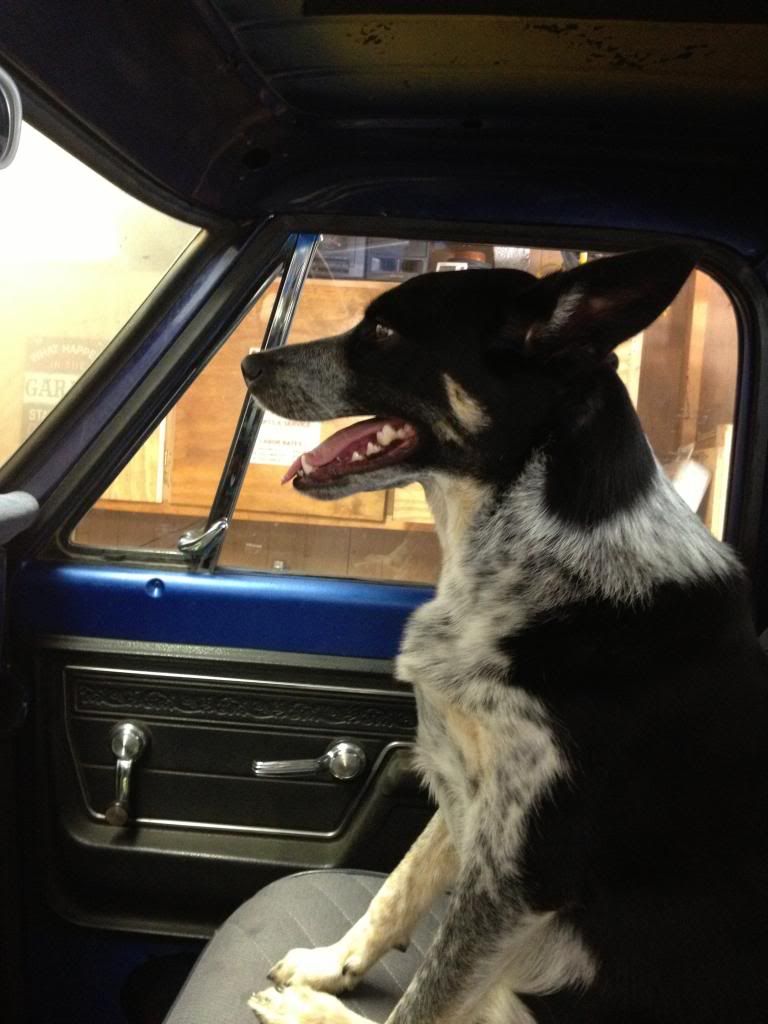
|
|
|

|
|
|
#124 |
|
Registered User
Join Date: Feb 2011
Location: SHAWNEE, KS
Posts: 191
|
Re: Another OLD BLUE Build Thread - 71 Chevy
I'm hoping to get it out of the garage by Sunday afternoon. My list is dwindling, I will get a picture of it later.
Lunchtime update from today My secret to making mostly accurate drill holes is to put a dab of white lithium grease (the kind in the tub) on the ends of the bolts then line up the plate and press it against the bolts. This leaves a nice grease mark to center punch, then drill it out. 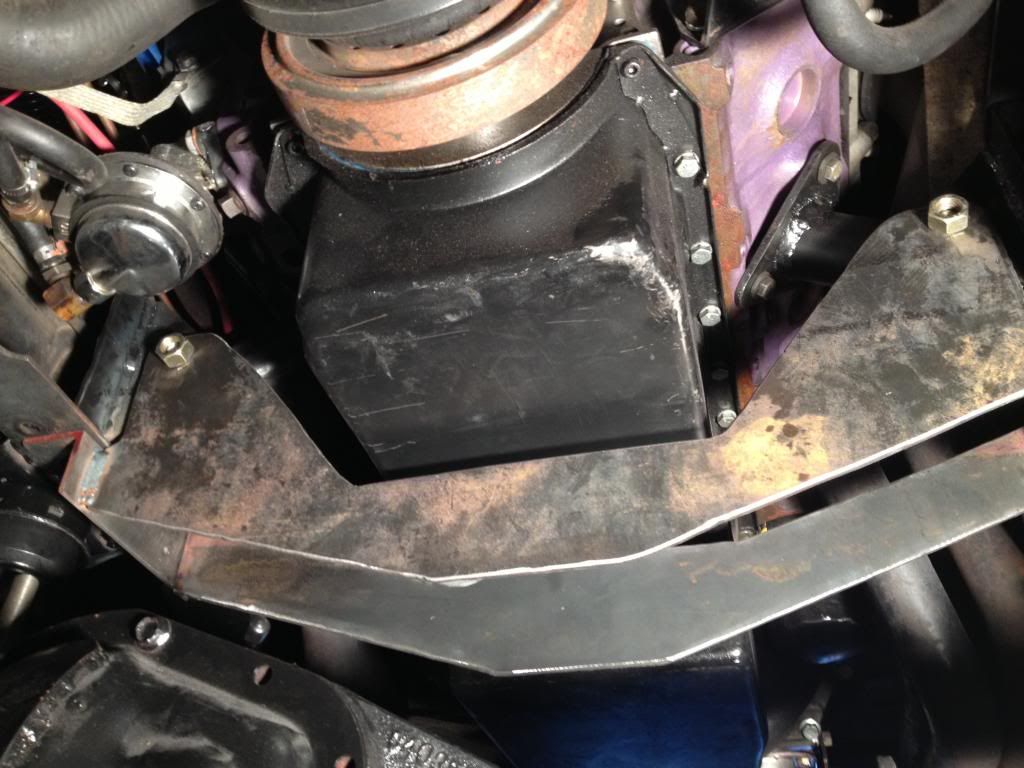 Told you there would be speed holes 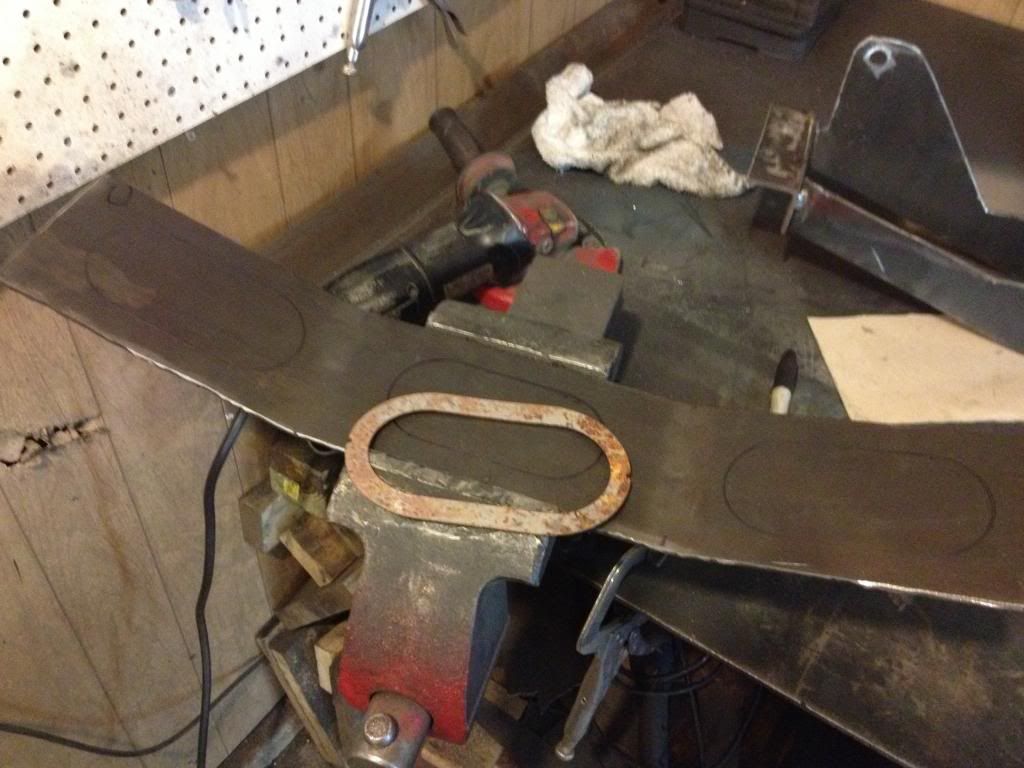 Free online cookie for whoever can guess what manufacturer that oval template came from. Not too bad for freehand with the plasma cutter. 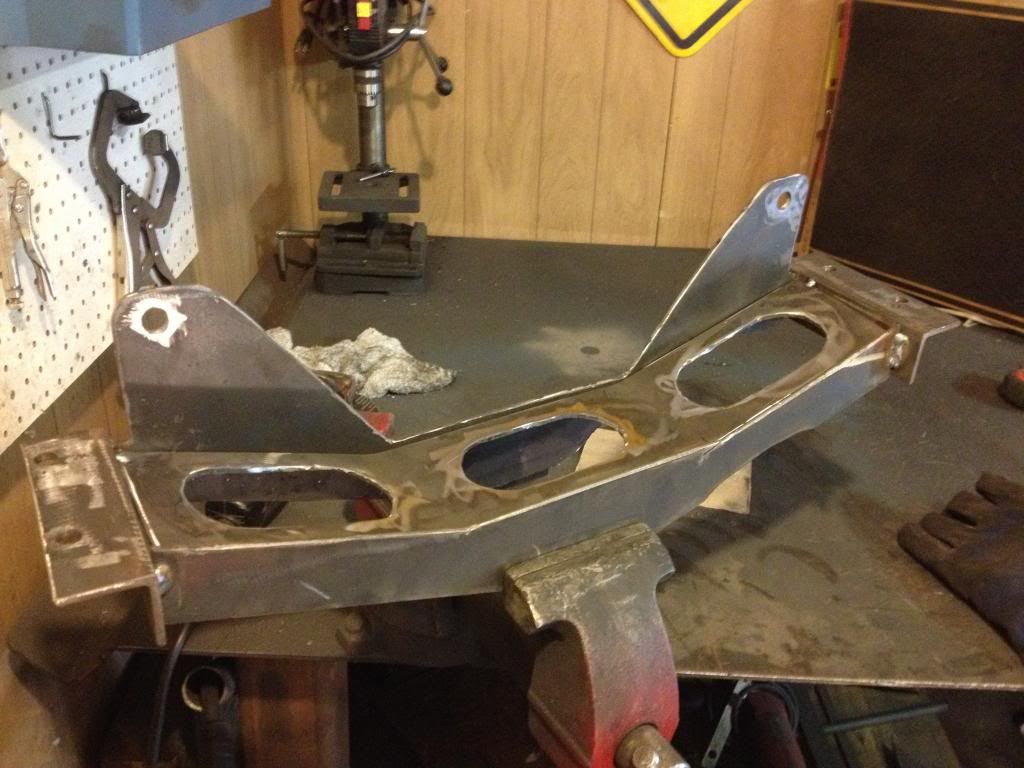 Waiting for the paint to dry, gotta go get a tire patched on the wife's car in the meantime. 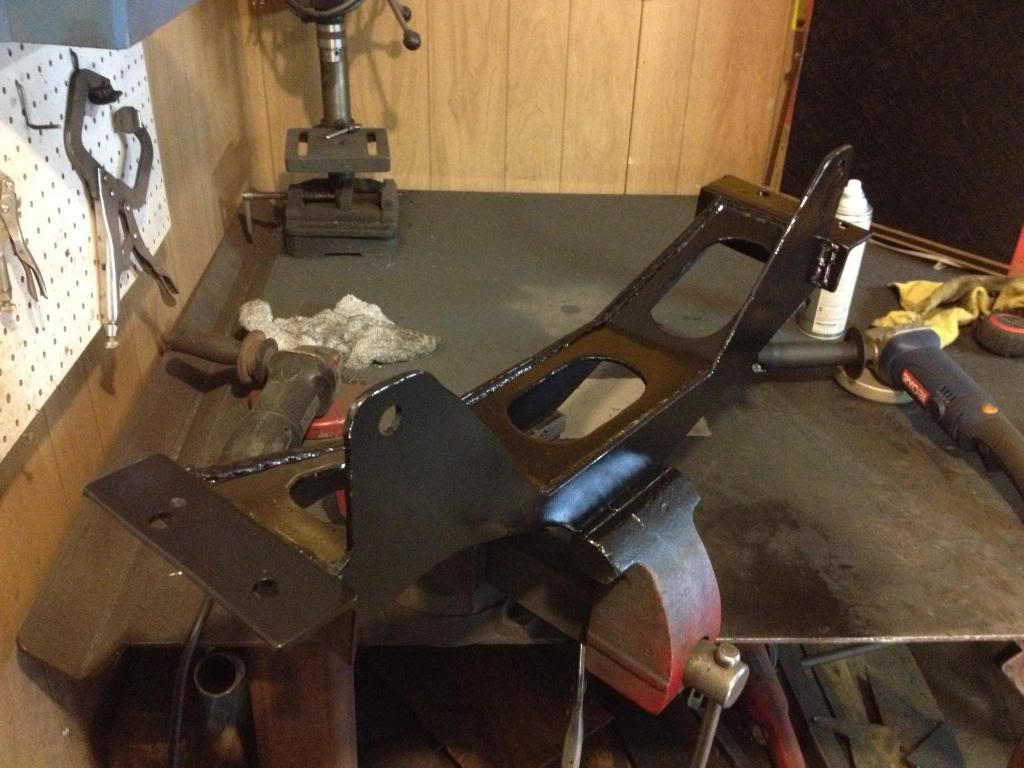 More updates tonight. |
|
|

|
|
|
#125 |
|
Registered User
Join Date: Feb 2011
Location: SHAWNEE, KS
Posts: 191
|
Re: Another OLD BLUE Build Thread - 71 Chevy
|
|
|

|
 |
| Bookmarks |
| Thread Tools | |
| Display Modes | |
|
|