
 |
|
|
#126 |
|
Has more rust than truck...
Join Date: Apr 2005
Location: Ivanhoe, MN
Posts: 2,421
|
Re: Silver Dollar
Awesome build, subscribed.
|
|
|

|
|
|
#127 |
|
Account Suspended
Join Date: Aug 2007
Location: USA
Posts: 1,223
|
Re: Silver Dollar
Power steering hose are for a 73-up c10. I change the fitting in the rear of the pump. took it from a old truck in the junk yard when no one was looking, (they charged me a $3 cover charge so I guess were even.) The old fitting threads right in and excepts the older hoses. That made installation easy and cheap two of my favorite things.
Last edited by mrhino; 11-21-2010 at 09:12 PM. |
|
|

|
|
|
#128 | |
|
Amateur Rust Fighter
Join Date: Sep 2007
Location: Mankato, MN
Posts: 1,087
|
Re: Silver Dollar
Quote:
__________________
Brent '72 Chevy SWB stepside - [ Build Thread ] '79 ChevMC SWB fleetside - [ Build Thread ] '64 Chevy SWB fleetside & '66 Chevy SWB stepside (waiting in the wings...) Last edited by brossow; 11-21-2010 at 09:24 PM. |
|
|
|

|
|
|
#129 | |||
|
Account Suspended
Join Date: Aug 2007
Location: USA
Posts: 1,223
|
Re: Silver Dollar
Quote:
I checked out your link. It Looks sweet. The plastic on the portable booth looked fairly thin or is that just a illusion Quote:
Quote:
|
|||
|
|

|
|
|
#130 |
|
Account Suspended
Join Date: Aug 2007
Location: USA
Posts: 1,223
|
Re: Silver Dollar
|
|
|

|
|
|
#131 | |
|
Still Learning
Join Date: Jul 2009
Location: Central Oklahoma
Posts: 10,108
|
Re: Silver Dollar
Quote:
Get this puppy assembled for that holiday drive~ 
|
|
|
|

|
|
|
#132 |
|
Registered User
Join Date: Mar 2009
Location: norman okahoma
Posts: 269
|
Re: Silver Dollar
I can't wait to see it finished. I like the color you chose
__________________
The TEAL GMC build thread is HERE 1972 GMC SWB 454 oval ports TH400 fastest 1/4 mile time so far 13.05 @ 104 If you think you have too much horsepower you obviously have a traction problem ! |
|
|

|
|
|
#133 |
|
Account Suspended
Join Date: Aug 2007
Location: USA
Posts: 1,223
|
Re: Silver Dollar
After the Cab and bed went back on. (sorry no Pictures of that.) it was time to start Hooking up the fuel fill.
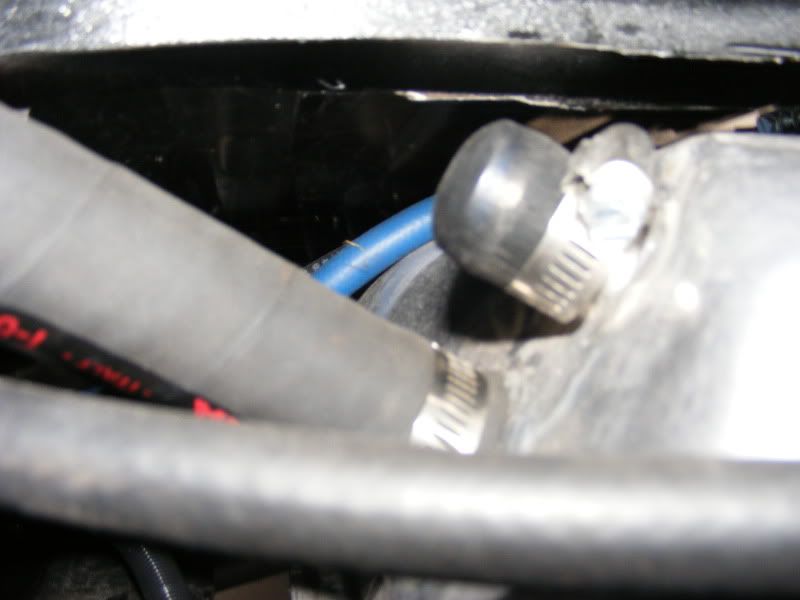 This is a shot of the fuel fill hose going over the frame 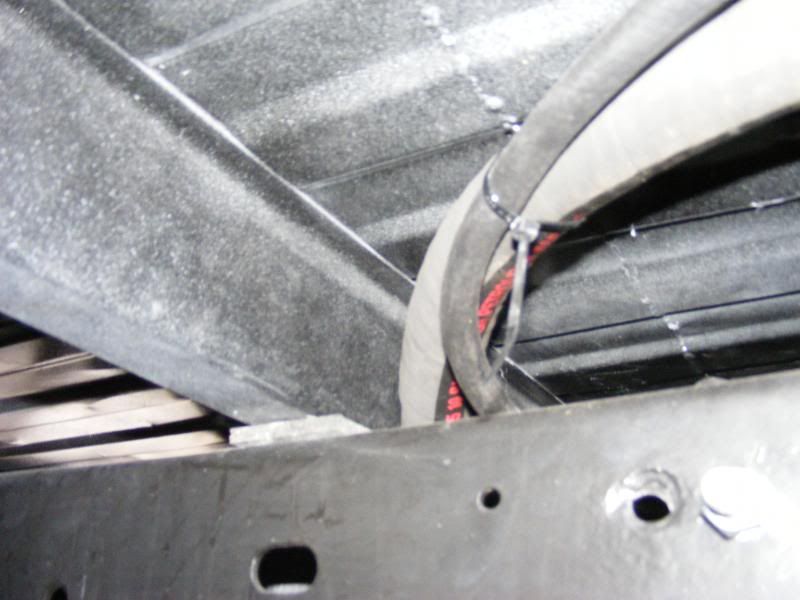 I cut a notch in the rear bed support channel so the fuel fill hose and vent hose could make there way to the stake pocket in the bed 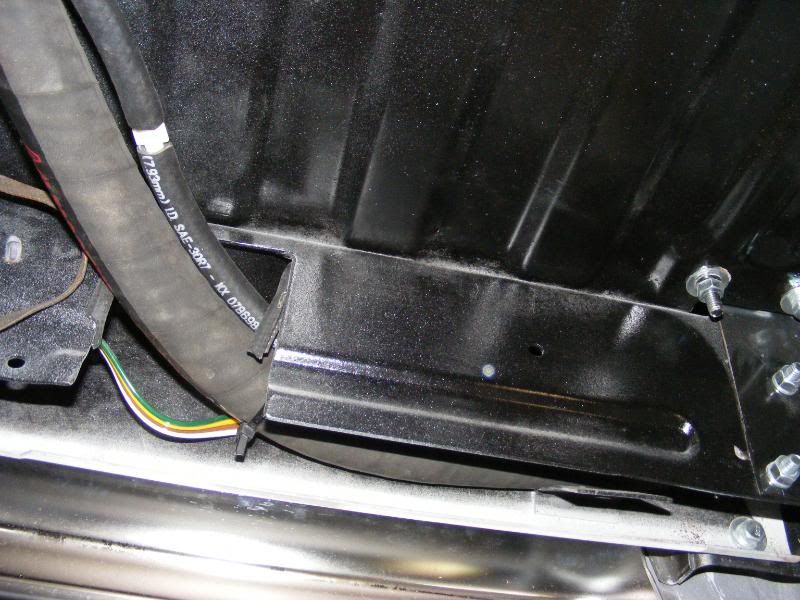 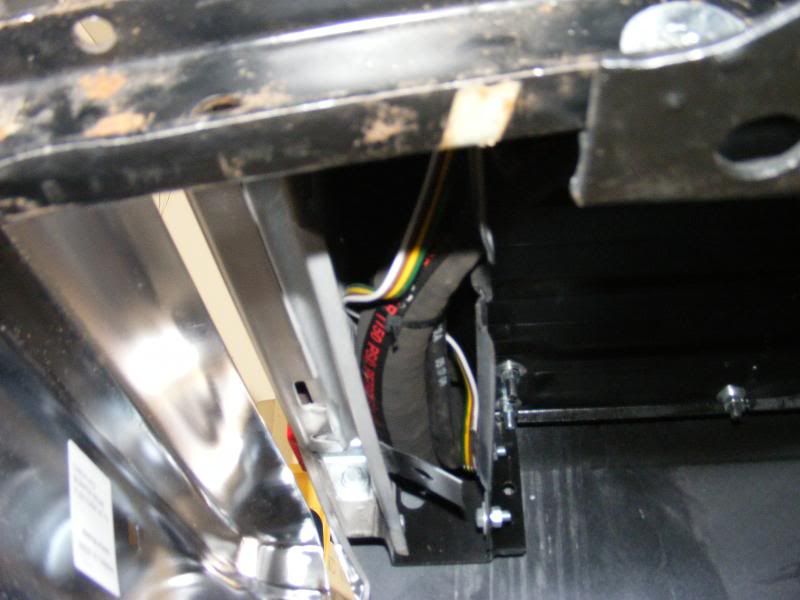 once in the channel, it is not visible from the underside. unless you look straight up into it. 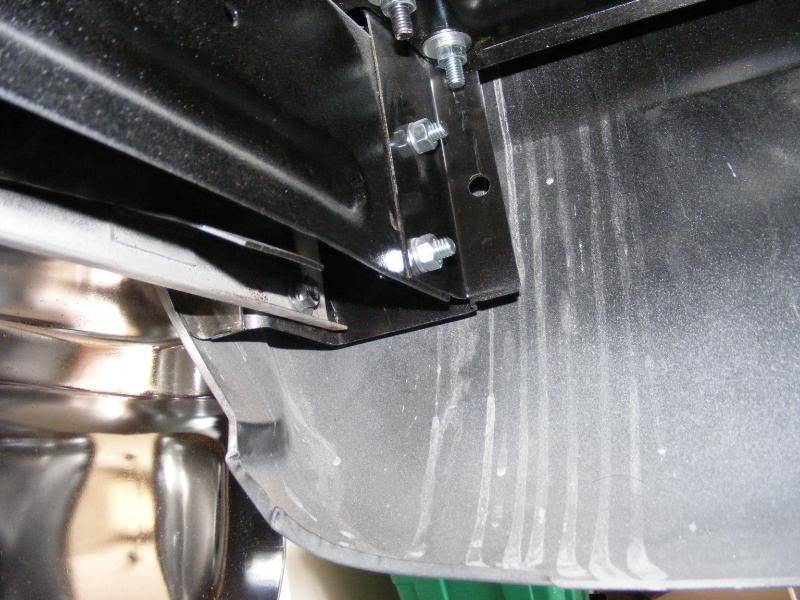 I had to make the hole in the inside of the stake pocket behind the back up light a little bigger. Then slipped the hose onto the Marine fuel fill, and tightened with a couple hose clamps. 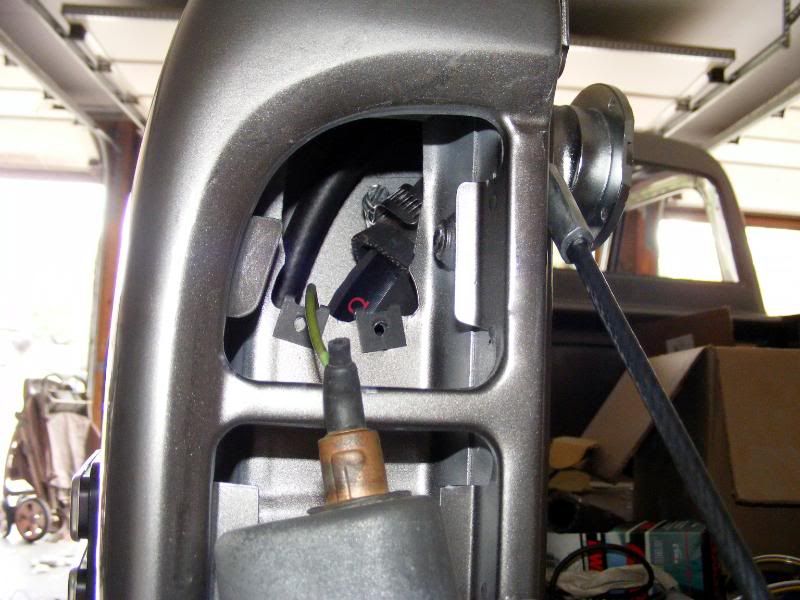 Pushed it into the the stake pocket. 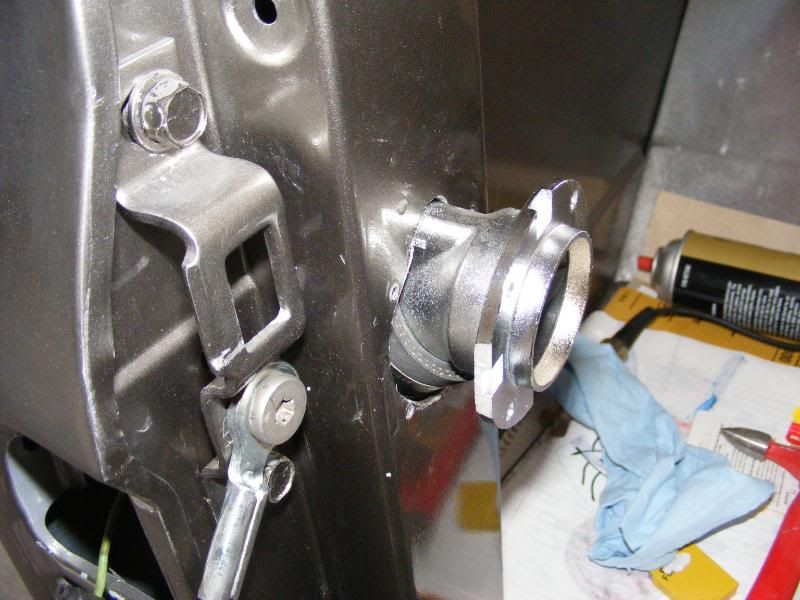 Tightened it with the 4 screws and closed the lid. 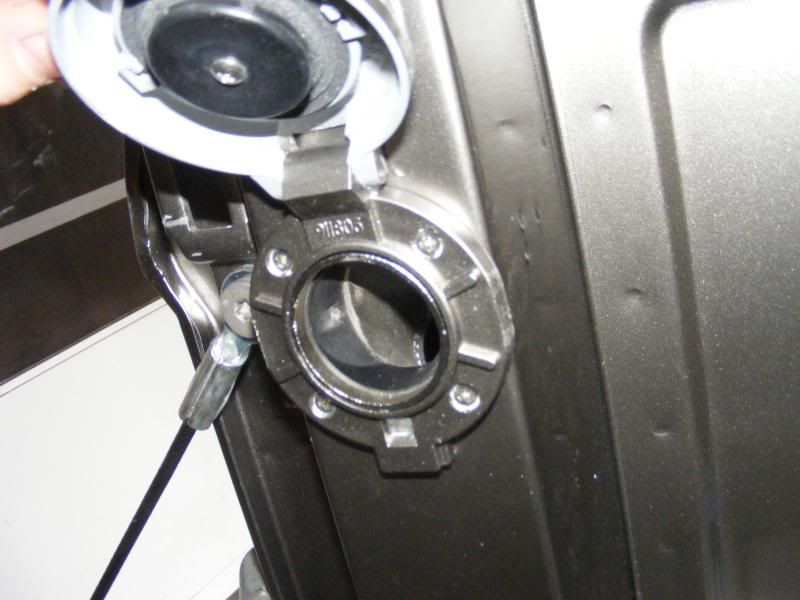 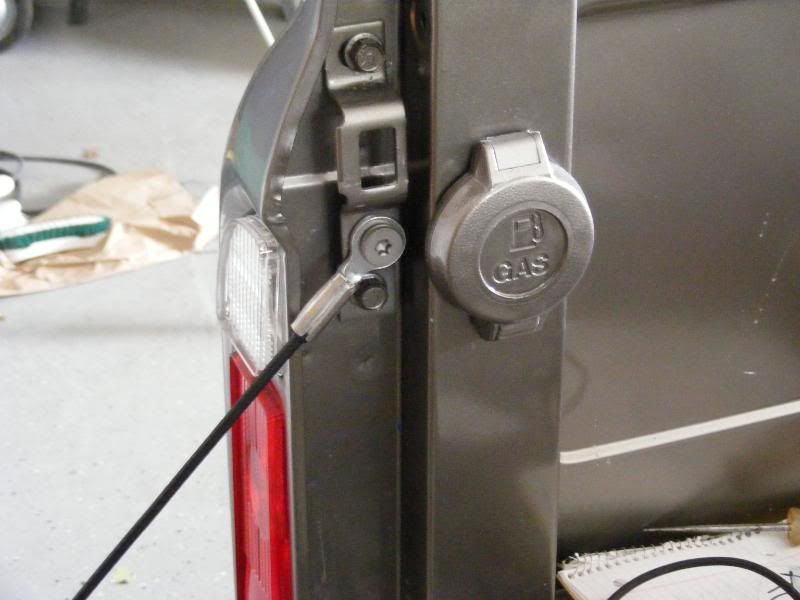
Last edited by mrhino; 11-23-2010 at 11:12 AM. |
|
|

|
|
|
#134 |
|
Master Procrastinator
Join Date: Sep 2009
Location: Grande Prairie AB Canada
Posts: 1,128
|
Re: Silver Dollar
that's a sweet mod, where'd you find that style cap, have you tried filling it yet?
__________________
 My Buildhttp://67-72chevytrucks.com/vboard/s...d.php?t=395506 My Buildhttp://67-72chevytrucks.com/vboard/s...d.php?t=39550620 Duramax tow pig 68 2wd short stepper project 77 2wd short fleet beater 52 short project |
|
|

|
|
|
#135 |
|
Account Suspended
Join Date: Aug 2007
Location: USA
Posts: 1,223
|
Re: Silver Dollar
Thanks, I got it on ebay, but they can be had at a marina. No I havent filled it at a pump Yet, but I have used a 5 gallon can and it worked pretty good. right after adding fuel. there was a strong smell of gas in the garage, but went away after while. the filler is vented that must be what I smelled. Hopefully.
|
|
|

|
|
|
#136 |
|
Registered User
Join Date: Feb 2009
Location: Tennessee
Posts: 147
|
Re: Silver Dollar
Keep up the great work!!!!!!! Really digging the whole build
|
|
|

|
|
|
#137 |
|
Registered User
Join Date: Jul 2009
Location: Russellville, Arkansas
Posts: 1,699
|
Re: Silver Dollar
Did you get your Thanksgiving ride? Trucks looking great. Lots of really cool ideas.
|
|
|

|
|
|
#138 |
|
Account Suspended
Join Date: Aug 2007
Location: USA
Posts: 1,223
|
Re: Silver Dollar
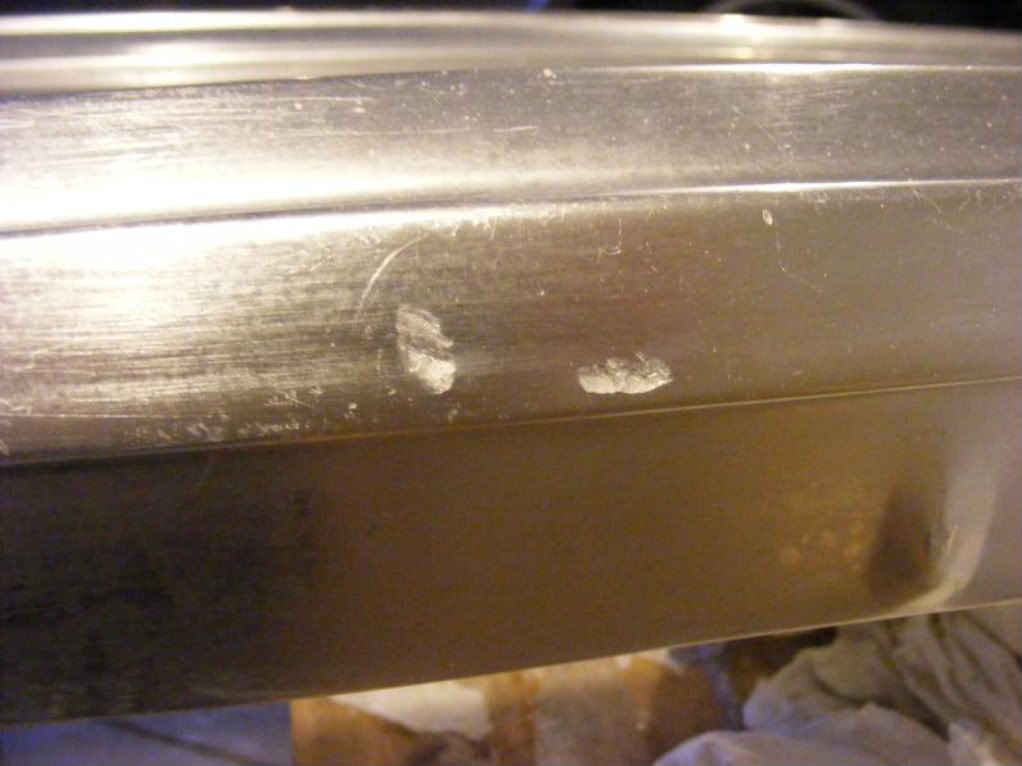
unfortunately no. its been cold and raining here for a few days, plus I dont have a windshield. I bought one a several weeks ago, put it in my basement for safe keeping. then decide it would be best if change all the glass. (the new windshield makes old glass look like really old glass). Put all new clear glass. went down to get the windshield. I didnt realized till right then the windshield I had gotten has a green tint to it. I been tiring to get a clear windshield, but because of the holiday It hasn't worked out. Im working on the grill right now. its got a few small gouges on top, and Im sure they will stick out like a sore thumb, once its polished. any suggestions here would be appreciated.
Last edited by mrhino; 11-27-2010 at 07:56 PM. |
|
|

|
|
|
#139 |
|
VA72C10
 Join Date: Mar 2008
Location: Midlothian, VA
Posts: 25,267
|
Re: Silver Dollar
Love the filler. I'm not sure on the grille. I've heard you can work with it once the anodizing is off and then re-anodize or clear it.
__________________
Looking for a 67-72 swb or blazer project in or around VA. 
|
|
|

|
|
|
#140 |
|
Registered User
 Join Date: Jul 2010
Location: memphis
Posts: 2,537
|
Re: Silver Dollar
Thumbs up on tha filler mod
|
|
|

|
|
|
#141 |
|
Account Suspended
Join Date: Aug 2007
Location: USA
Posts: 1,223
|
Re: Silver Dollar
well i figured it out, now i just have to spend the rest of the week polishing it.
before 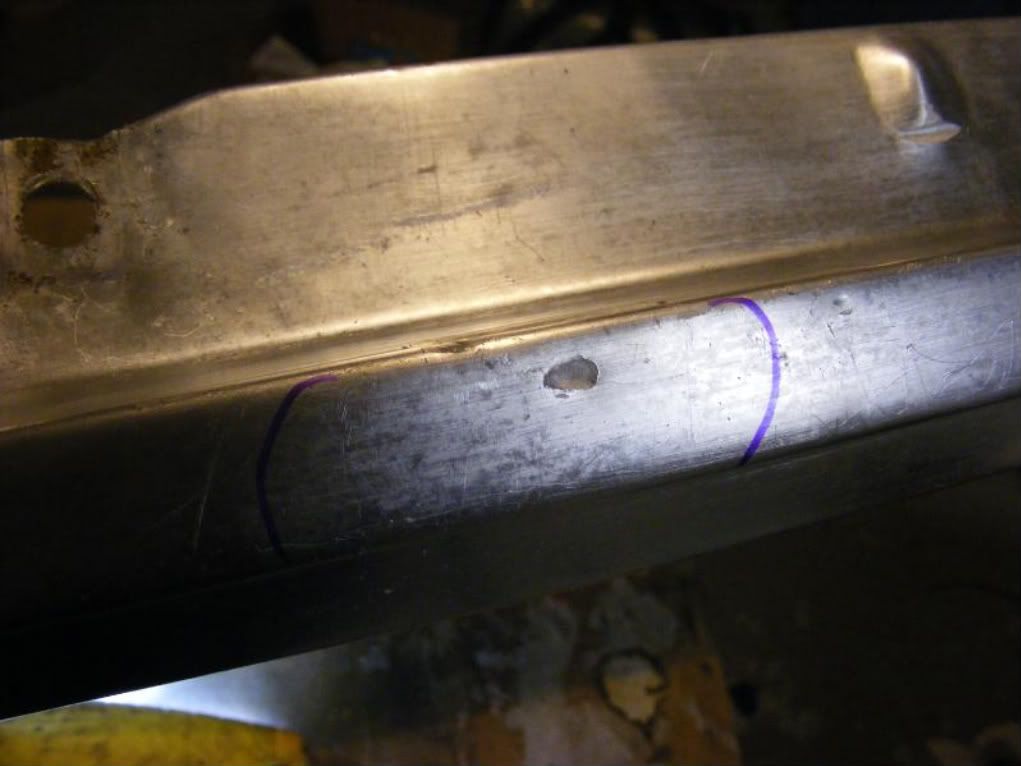 after 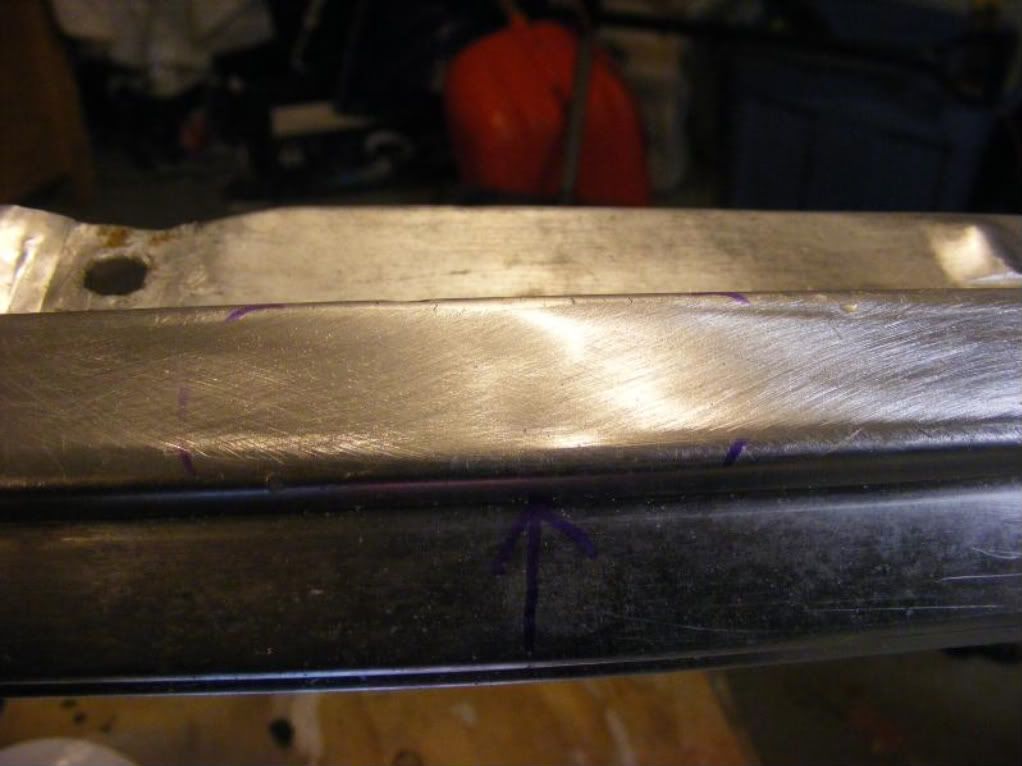 before 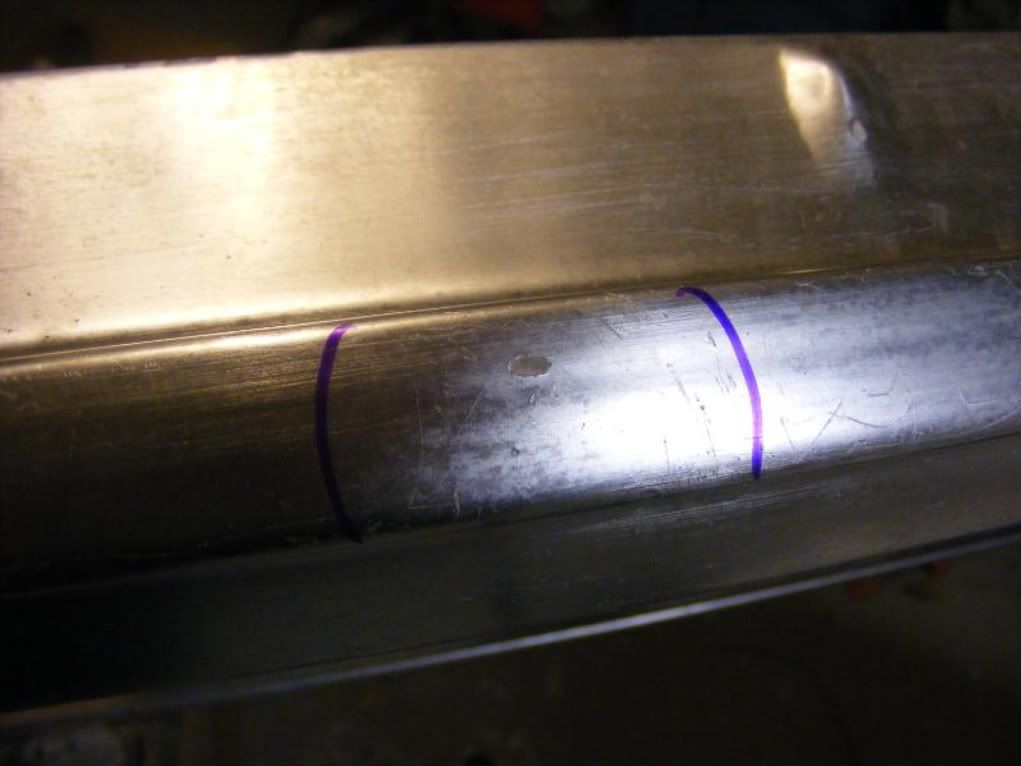 after 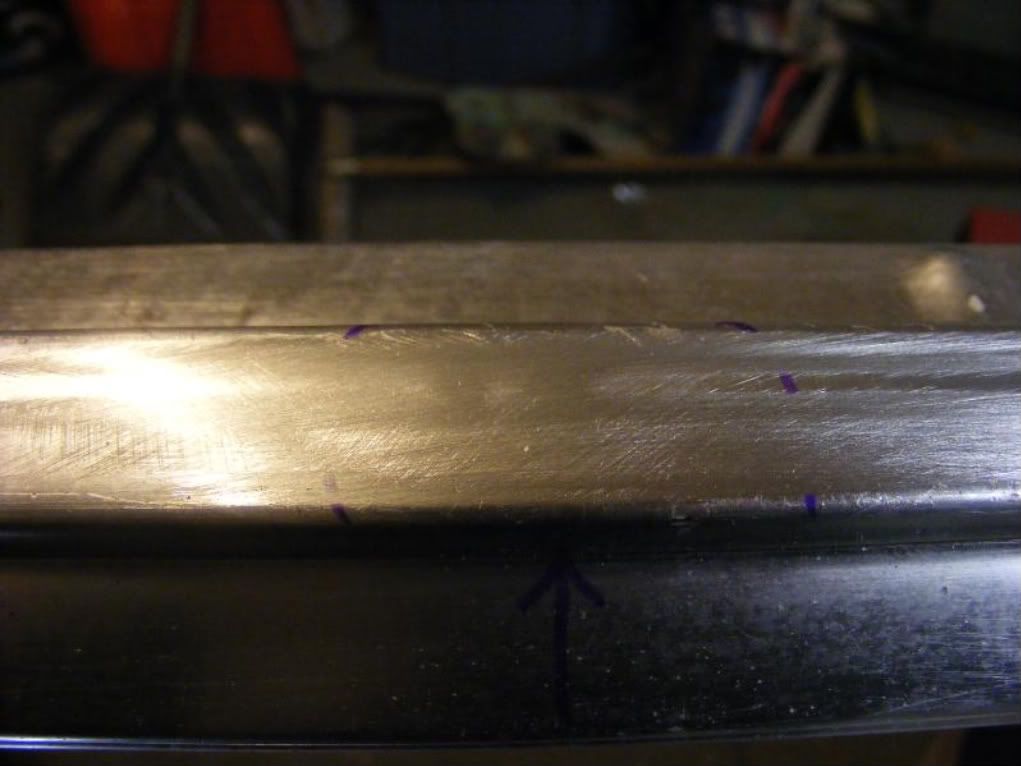
|
|
|

|
|
|
#142 | |
|
Amateur Rust Fighter
Join Date: Sep 2007
Location: Mankato, MN
Posts: 1,087
|
Re: Silver Dollar
Quote:

__________________
Brent '72 Chevy SWB stepside - [ Build Thread ] '79 ChevMC SWB fleetside - [ Build Thread ] '64 Chevy SWB fleetside & '66 Chevy SWB stepside (waiting in the wings...) |
|
|
|

|
|
|
#143 |
|
Here kitty kitty kitty
Join Date: Aug 2010
Location: Perrysville, IN
Posts: 548
|
Re: Silver Dollar
OK now, stop teasing and share the secret!!!!!! Inquiring minds want to know......
|
|
|

|
|
|
#144 |
|
Account Suspended
Join Date: Aug 2007
Location: USA
Posts: 1,223
|
Re: Silver Dollar
I got my old friend the sanding block out and sanded the trim to reveal the low spots, then took a small drift and tapped the back side lightly till the dent was up the sandded it again very lightly till all that was left was the Low spot again, then took a small punch and tap that low spot up till i could sand it flat and not have the pit. all taps and sanding was done very lightly, the aluminium is fairly thin. it dont take much to ting it back to shape. it took a couple of hours to do 5 spots. here's a pic of the center punch and the dimples on the back side.
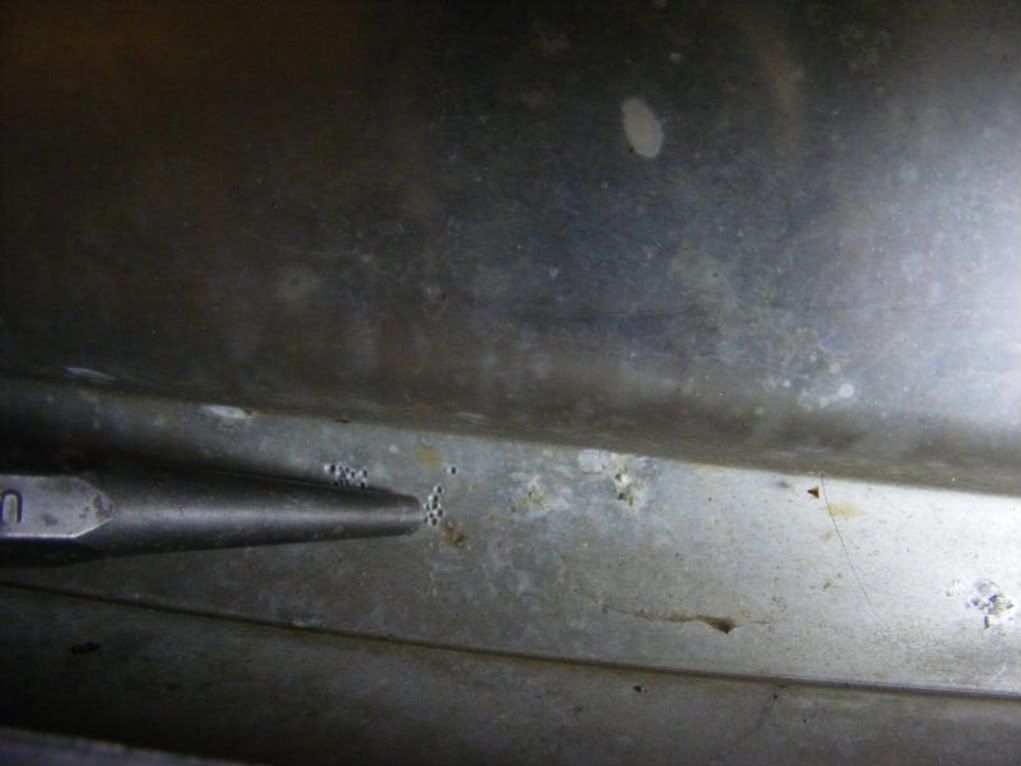
Last edited by mrhino; 11-28-2010 at 01:53 PM. |
|
|

|
|
|
#145 |
|
Registered User
Join Date: Jun 2010
Location: Leesburg GA
Posts: 547
|
Re: Silver Dollar
I use a rounded wooden dial rod on dent. But on small divots, That would work even better.
Spike 
__________________
68 stepside http://67-72chevytrucks.com/vboard/s...0&goto=newpost |
|
|

|
|
|
#146 |
|
Here kitty kitty kitty
Join Date: Aug 2010
Location: Perrysville, IN
Posts: 548
|
Re: Silver Dollar
Thanks for the info, this will be used on our trucks for sure!
|
|
|

|
|
|
#147 |
|
VA72C10
 Join Date: Mar 2008
Location: Midlothian, VA
Posts: 25,267
|
Re: Silver Dollar
nice work!
__________________
Looking for a 67-72 swb or blazer project in or around VA. 
|
|
|

|
|
|
#148 |
|
Registered User
Join Date: Jul 2009
Location: Russellville, Arkansas
Posts: 1,699
|
Re: Silver Dollar
Good thinking. You must have lots of free time on your hands though. Keep at it.
|
|
|

|
|
|
#149 |
|
Account Suspended
Join Date: Aug 2007
Location: USA
Posts: 1,223
|
Re: Silver Dollar
Thanks for the compliments on the filler neck. As you can see in those pictures, I also added Tailgate cables. Its a pretty easy add on.
First I ground down the pivot on the original tailgate catch/strap to remove the metal strap. On one of my trips to the salvage yard, I pick up some tailgate cable bolts from a Dakota. I cleaned them up in my bead blast cabinet, and cut them down a little so it wouldn't bottom out on the bedside. You can see that they are shouldered so the cable will turn freely no matter how tight you get the bolt 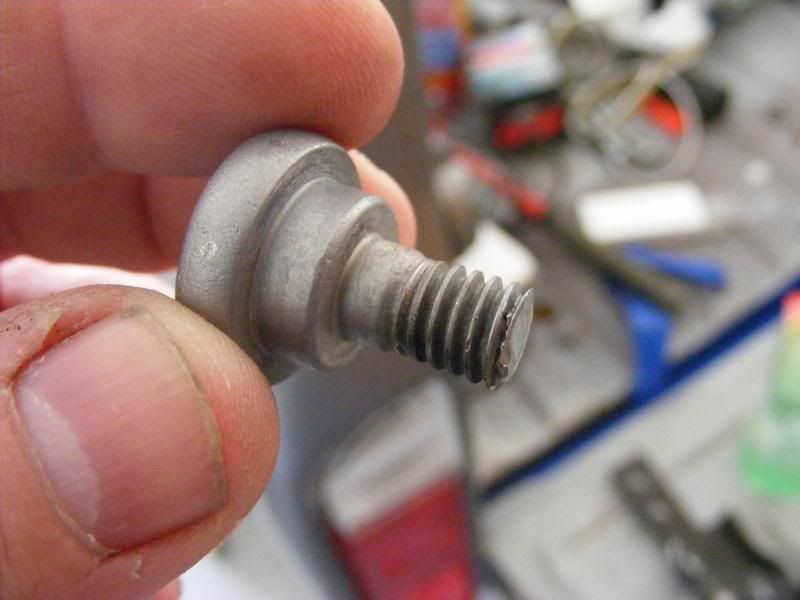 I then welded a nut to the back side of the catch for the dakota bolt to thread into. (You could always use a lock washer and tighten the nut if you dont have a welder.) 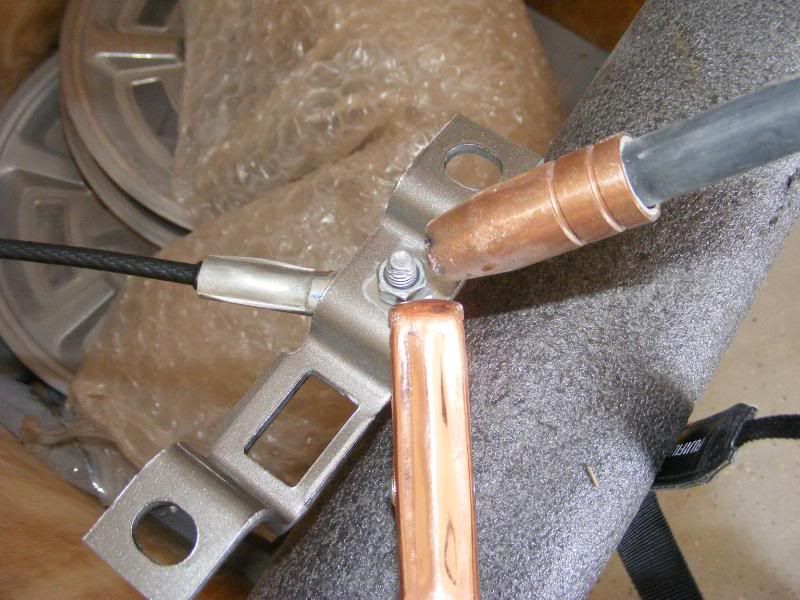 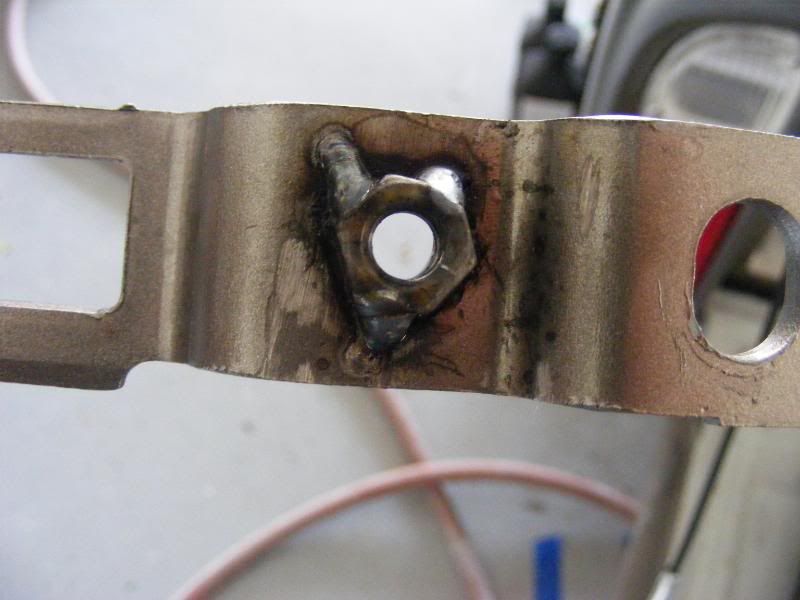 bolted the catch back on, along with a new cable I got from Advance parts the number is 38521 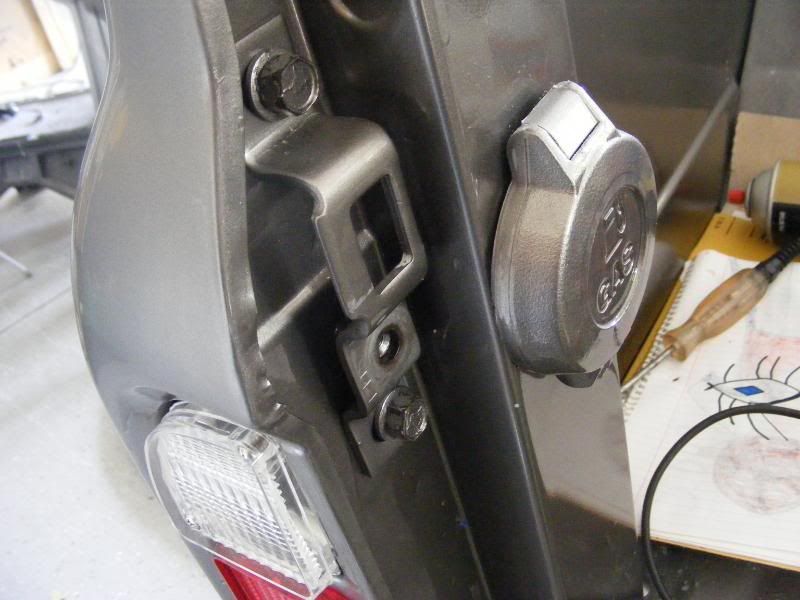 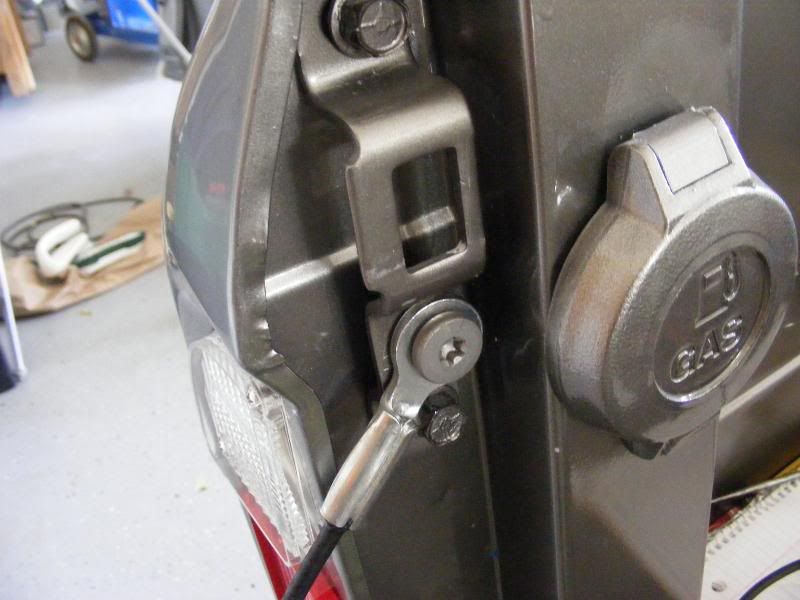 The other end of the cable slips on to the original tailgate pivot point. 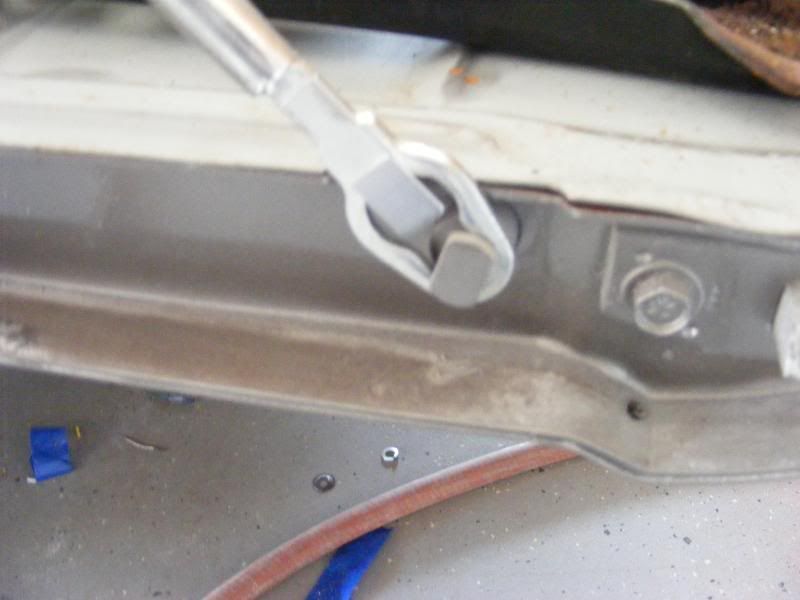 It looks cool, and it should be quieter than the metal strap clanking around back there. 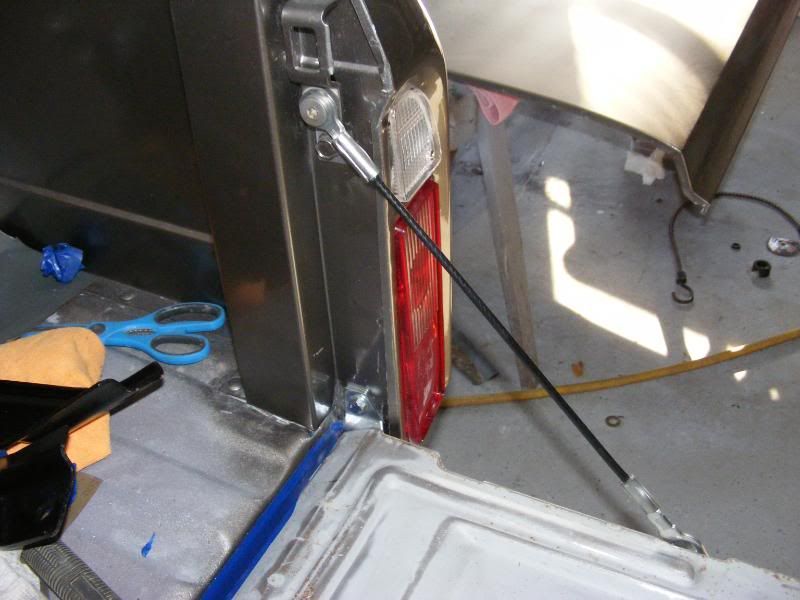 As you can see the tailgate lays nice and level. 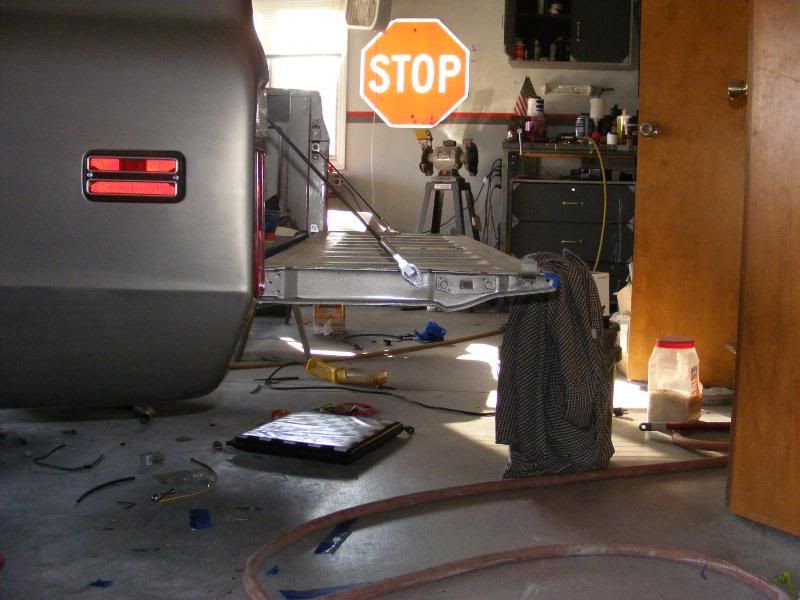
Last edited by mrhino; 11-29-2010 at 12:56 PM. |
|
|

|
|
|
#150 |
|
Amateur Rust Fighter
Join Date: Sep 2007
Location: Mankato, MN
Posts: 1,087
|
Re: Silver Dollar
That cable is SLICK!

__________________
Brent '72 Chevy SWB stepside - [ Build Thread ] '79 ChevMC SWB fleetside - [ Build Thread ] '64 Chevy SWB fleetside & '66 Chevy SWB stepside (waiting in the wings...) |
|
|

|
 |
| Bookmarks |
| Tags |
| 5.3, boss 338, house of kolor, lsx, tank |
| Thread Tools | |
| Display Modes | |
|
|