
|
|
|
 02-01-2013, 11:15 PM
|
#1 |
|
Registered User
 Join Date: Nov 2007
Location: NLR, AR
Posts: 1,387
|
Re: Junkyard Jimmy Super Low Buck Build Thread
ohh, thanks for the shot of the trailer hitch. I wonder if they still make that one?
|

|

|
|
02-02-2013, 01:32 AM
|
#2 |
|
Registered User
Join Date: Apr 2003
Location: Indep, MO
Posts: 5,893
|
Re: Junkyard Jimmy Super Low Buck Build Thread
He's right. All together is the best, especially with the metallics.
Posted via Mobile Device
__________________
Boppa's Old Yeller Truck Build, Old Yeller's New Heart! Project Buzz Bomb Flyin' Low! |
|
|
|
|
02-02-2013, 01:59 AM
|
#3 | ||
|
GEARHEAD
Join Date: Aug 2003
Location: MN
Posts: 6,121
|
Re: Junkyard Jimmy Super Low Buck Build Thread
Quote:
Quote:
I also needed some input on my taping job and see if I was doing it right in the panel gaps, and on the edges, etc. So far, so good.
__________________
If no one knows what you're doing, they can't tell you you're doing it wrong HG's Dream Car Build - Shelby Cobra Kit Build your own adjustable track bar 71  Long Fleet C/10 Long Fleet C/10 72  Jimmy 4x4 (Junkyard Jimmy) Jimmy 4x4 (Junkyard Jimmy)HG's Plow Truck '78  K35 Dually K35 DuallyBigass Farm Truck HG's thread of miscellaneous stuff |
||
|
|
|
|
02-02-2013, 09:29 AM
|
#4 |
|
Just a nother gear head
Join Date: Jul 2009
Location: Barrington NH
Posts: 501
|
Re: Junkyard Jimmy Super Low Buck Build Thread
thats a nice mustang. always liked those too, more than the camaro. your jimmy will look good with that style two tone. i say do it! and yes jam or edge your panels and roll tape them then paint it as a whole. only exception is, it would be easier to paint the hood off the truck but do it at the same time so it all matches perfectly. keep up the great work.

__________________
2013 HD FLHX 2000 chevy 2500 6.0l 4x4 3dr 2000 harley fxdx 71 Jimmy 4x4- future crawler/ woods rig 71 blazer (C4 2wd conv project) http://67-72chevytrucks.com/vboard/s...d.php?t=523589 
|
|
|
|
|
02-02-2013, 11:37 AM
|
#5 | |
|
Registered User
Join Date: Nov 2007
Location: NLR, AR
Posts: 1,387
|
Re: Junkyard Jimmy Super Low Buck Build Thread
Quote:
:edit: they still make them. Can you see if that happens to have a part number on it for me? Looks like 44108 to me... http://www.reeseprod.com/content/pro...040&part=44108 |
|
|
|
|
|
02-02-2013, 12:56 PM
|
#6 | |
|
GEARHEAD
Join Date: Aug 2003
Location: MN
Posts: 6,121
|
Re: Junkyard Jimmy Super Low Buck Build Thread
Quote:
And here... http://orangecounty.craigslist.org/pts/3526932843.html I've seen it come up listed for ford and dodge also and it seems to be a universal one. That second add had some dimensions listed for it. Like I said before, mine has the sides flipped and 1/2" spacers to make it work. When I bought it it was supposed to fit a 71 and newer (which the first ad above says), but they were mistaken. It works great as I have it set up. I pulled a 20' four winns runabout with inboard/outboard motor and a few trailers and it was rock solid.
__________________
If no one knows what you're doing, they can't tell you you're doing it wrong HG's Dream Car Build - Shelby Cobra Kit Build your own adjustable track bar 71 Long Fleet C/10 72 Jimmy 4x4 (Junkyard Jimmy)HG's Plow Truck '78 K35 DuallyBigass Farm Truck HG's thread of miscellaneous stuff |
|
|
|
|
|
02-02-2013, 05:13 PM
|
#7 |
|
GEARHEAD
Join Date: Aug 2003
Location: MN
Posts: 6,121
|
Re: Junkyard Jimmy Super Low Buck Build Thread
Short update, sprayed some of the new G2 featherfill primer. It didn't lay very smooth for me, not sure if it's supposed to be kind of orange peely or if I just need to adjust the gun some more. I increase air pressure, which helped and opened the flow up some, which also helped. In any case, I sprayed a full quart on the driver side. Oh, and it's black, which I didn't even think about when I ordered it.
Back in Black... 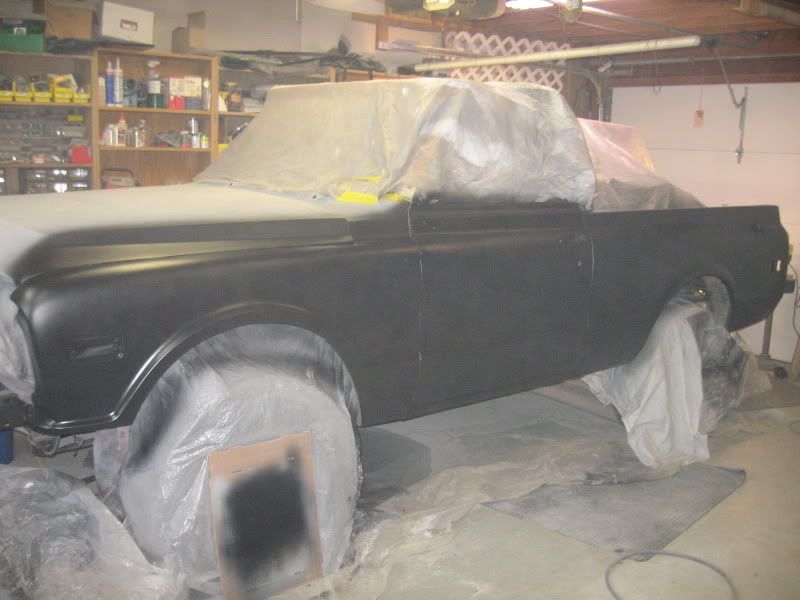 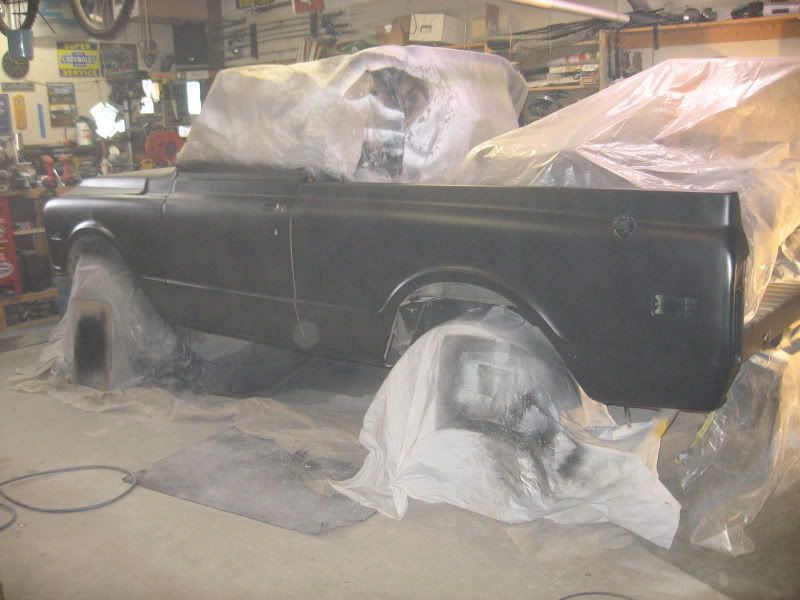
__________________
If no one knows what you're doing, they can't tell you you're doing it wrong HG's Dream Car Build - Shelby Cobra Kit Build your own adjustable track bar 71 Long Fleet C/10 72 Jimmy 4x4 (Junkyard Jimmy)HG's Plow Truck '78 K35 DuallyBigass Farm Truck HG's thread of miscellaneous stuff |
|
|
|
|
02-02-2013, 07:40 PM
|
#8 |
|
Registered User
Join Date: Apr 2003
Location: Indep, MO
Posts: 5,893
|
Re: Junkyard Jimmy Super Low Buck Build Thread
Ach! Hot tip: throw a splash of thinner in to get it to flow. Looks great!
Posted via Mobile Device
__________________
Boppa's Old Yeller Truck Build, Old Yeller's New Heart! Project Buzz Bomb Flyin' Low! |
|
|
|
|
02-02-2013, 08:04 PM
|
#9 | |
|
GEARHEAD
Join Date: Aug 2003
Location: MN
Posts: 6,121
|
Re: Junkyard Jimmy Super Low Buck Build Thread
Quote:
__________________
If no one knows what you're doing, they can't tell you you're doing it wrong HG's Dream Car Build - Shelby Cobra Kit Build your own adjustable track bar 71 Long Fleet C/10 72 Jimmy 4x4 (Junkyard Jimmy)HG's Plow Truck '78 K35 DuallyBigass Farm Truck HG's thread of miscellaneous stuff |
|
|
|
|
|
02-03-2013, 09:50 PM
|
#10 |
|
GEARHEAD
Join Date: Aug 2003
Location: MN
Posts: 6,121
|
Re: Junkyard Jimmy Super Low Buck Build Thread
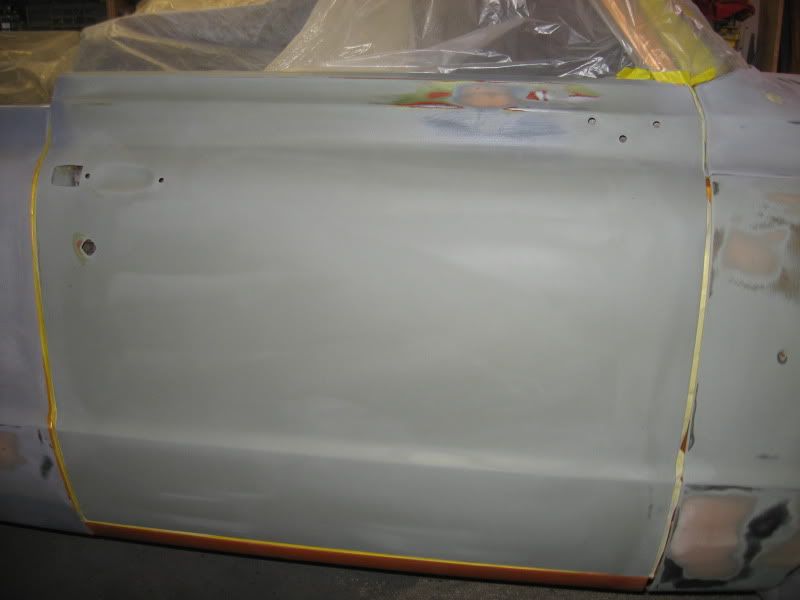
Been a busy day. Got it all painted up pretty...
  Looks great huh? Well, I did clean up the garage again and get the jimmy turned around so I can work on the passenger side. 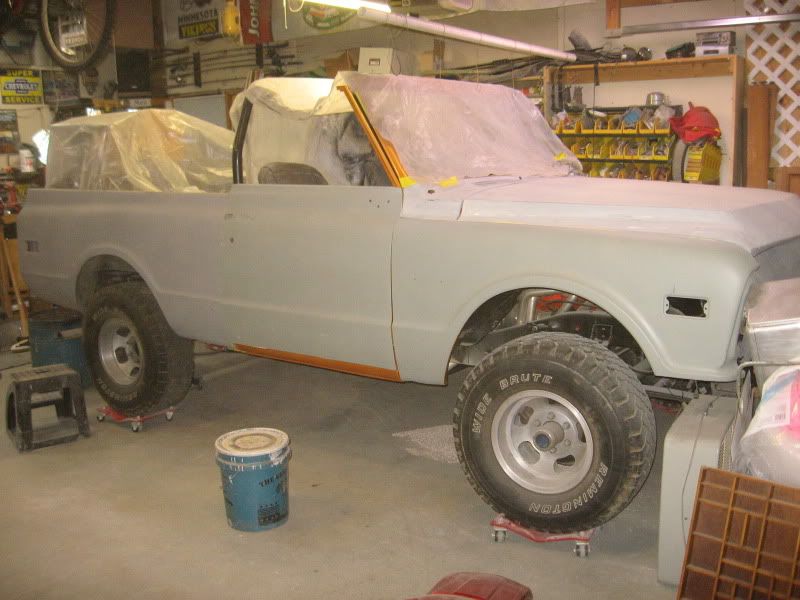
__________________
If no one knows what you're doing, they can't tell you you're doing it wrong HG's Dream Car Build - Shelby Cobra Kit Build your own adjustable track bar 71 Long Fleet C/10 72 Jimmy 4x4 (Junkyard Jimmy)HG's Plow Truck '78 K35 DuallyBigass Farm Truck HG's thread of miscellaneous stuff |
|
|
|
|
02-03-2013, 09:53 PM
|
#11 |
|
Registered User
Join Date: Apr 2003
Location: Indep, MO
Posts: 5,893
|
Re: Junkyard Jimmy Super Low Buck Build Thread
Lovin' the flake!
Posted via Mobile Device
__________________
Boppa's Old Yeller Truck Build, Old Yeller's New Heart! Project Buzz Bomb Flyin' Low! |
|
|
|
|
02-04-2013, 04:59 PM
|
#12 |
|
Registered User
Join Date: Apr 2011
Location: .
Posts: 3,104
|
Re: Junkyard Jimmy Super Low Buck Build Thread
Read the whole thread.
I noticed your build when I first signed on this thing to do my own build but being a newbie I lost your thread build and didn't know how to find it again. Later on I found it but as things go never had time to thoroughly read through and enjoy your whole build. Glad to report I read and totally enjoyed it. Thread, writting, figuring out how to do sheet metal, Christmas gifts and killing a lobster.  and much more. and much more.Its taken me 3.5 days to go through. Looking at pics, lookin back to see if I missed anything, distractions pulling me away, broken foot and all the stuff that goes with that, super bowl, yada yada yada. Return to keep reading on. Re-study the pics. Im not much of a book reader but this build has me hooked. At the beginning of my build someone had said to me,"Man, you don't know the meaning of the word fear". I have to say that was one of the first things I thought of when I started reading your build. You Sir are the man. Fear in not in your vocabulary. Definitely Subscribed!!!! |
|
|
|
|
02-05-2013, 08:11 AM
|
#13 | ||
|
GEARHEAD
Join Date: Aug 2003
Location: MN
Posts: 6,121
|
Re: Junkyard Jimmy Super Low Buck Build Thread
Quote:
Quote:
Courage is not the lack of fear but the ability to face it." ---- Lt. John B. Putnam Jr. (1921-1944) And I'd go one step further and say, "and move forward." Many times along this build I had to ask myself, "what's the worst that can happen?" My biggest one is still yet to be seen. Painting the outside of the body. The paint I chose is about the absolute worst possible choice a newby can make for a 1st time paint job. It could turn out splotchy, uneven, terrible orange peel, huge runs, I'll bump it with my shirt, air hose, hands, whatever. BUT, I think I can overcome those things, so I'll push on. As far as cutting up metal, or experimenting with things like the black chrome look, I always had options for other parts, or I could find/buy replacements, if what I tried didn't work out. And I remember my goals for this project, which is just to make it look decent and be fun to play with and drive. That allows me to look past my mistakes and accept things as-is when someone else that is building their "dream truck" would not be able to do that. I already built my dream truck. It was a modest dream, but it turned out better than I had hoped. I think this project is surpassing my wildest expectations also.
__________________
If no one knows what you're doing, they can't tell you you're doing it wrong HG's Dream Car Build - Shelby Cobra Kit Build your own adjustable track bar 71 Long Fleet C/10 72 Jimmy 4x4 (Junkyard Jimmy)HG's Plow Truck '78 K35 DuallyBigass Farm Truck HG's thread of miscellaneous stuff |
||
|
|
|
|
02-05-2013, 11:58 PM
|
#14 |
|
GEARHEAD
Join Date: Aug 2003
Location: MN
Posts: 6,121
|
Re: Junkyard Jimmy Super Low Buck Build Thread
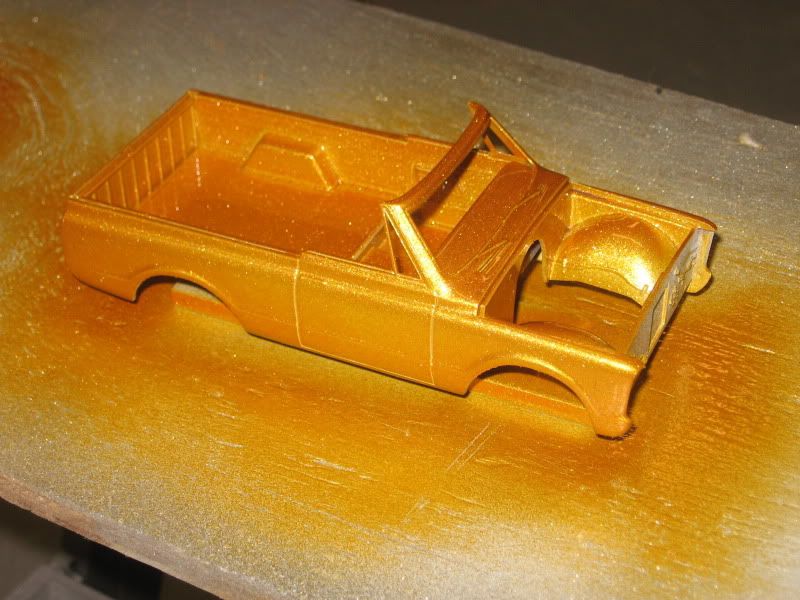
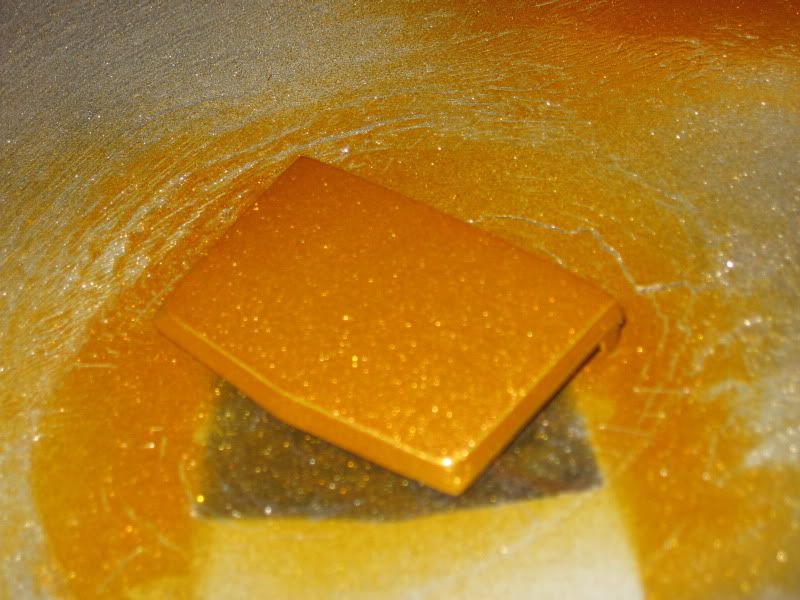
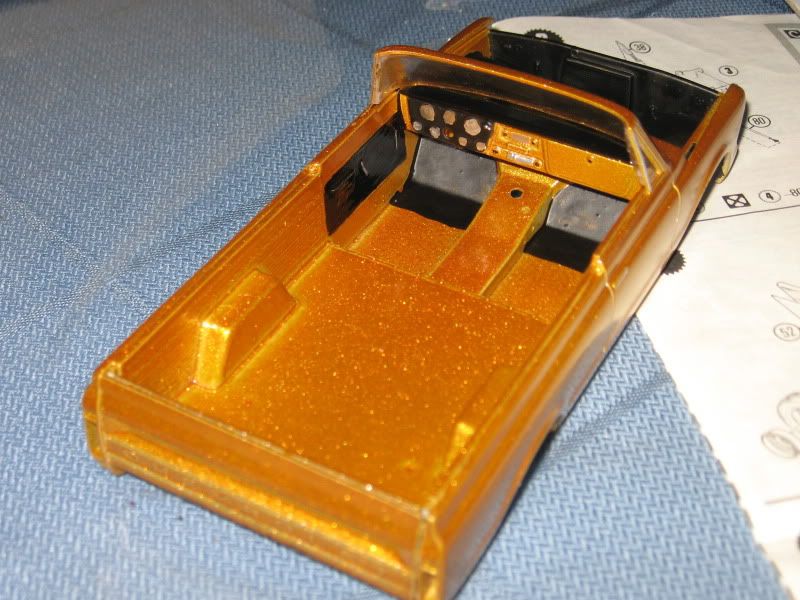
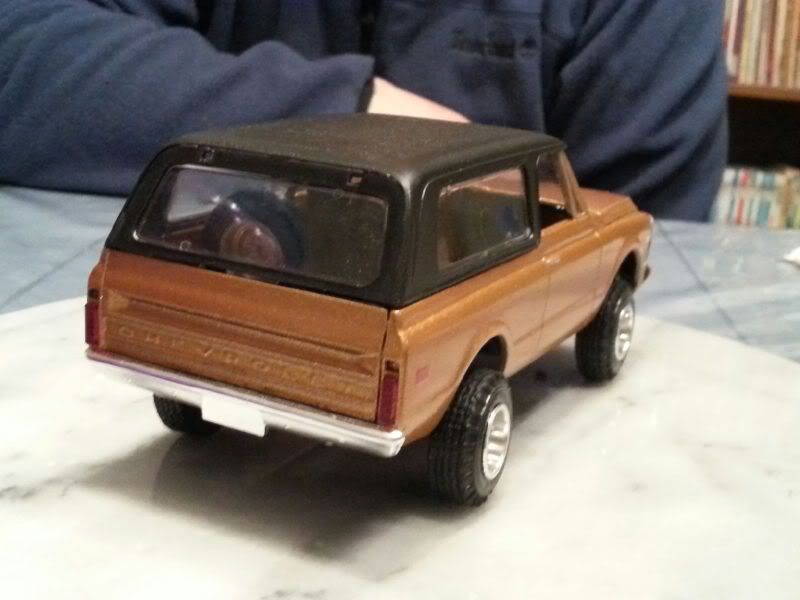
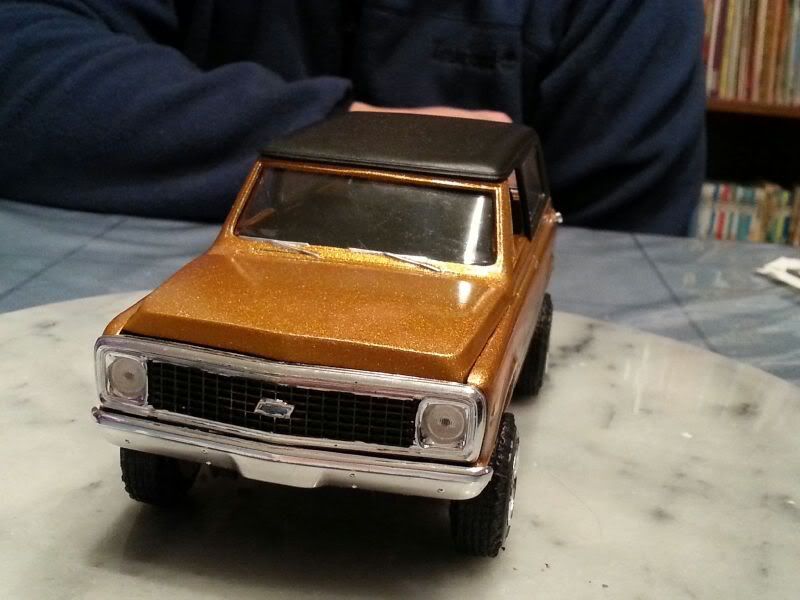
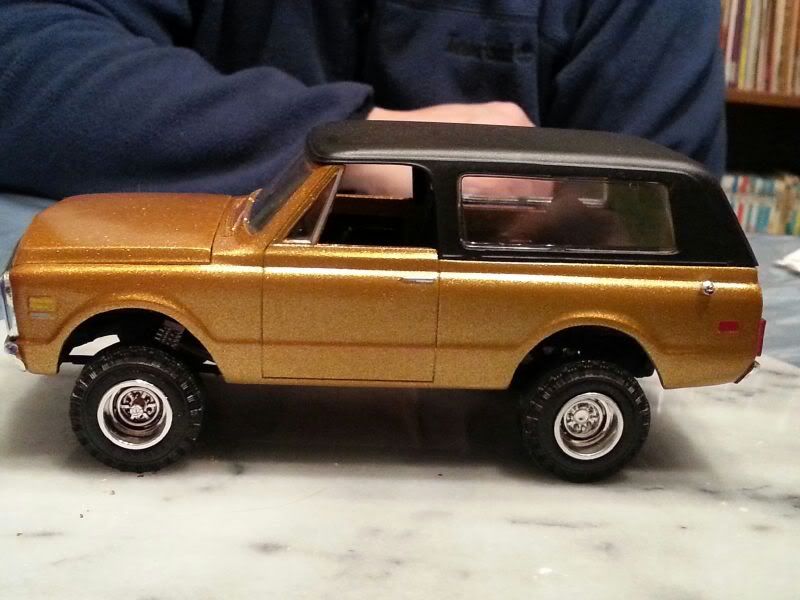
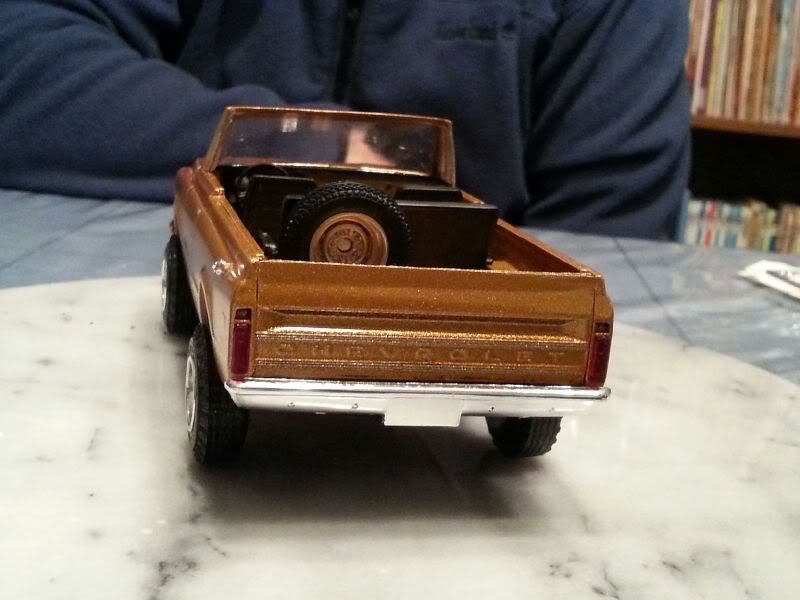
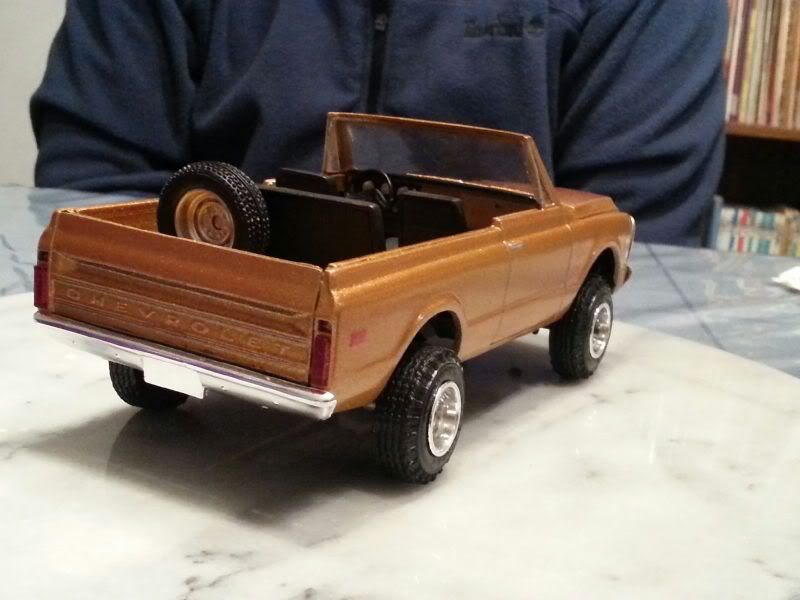
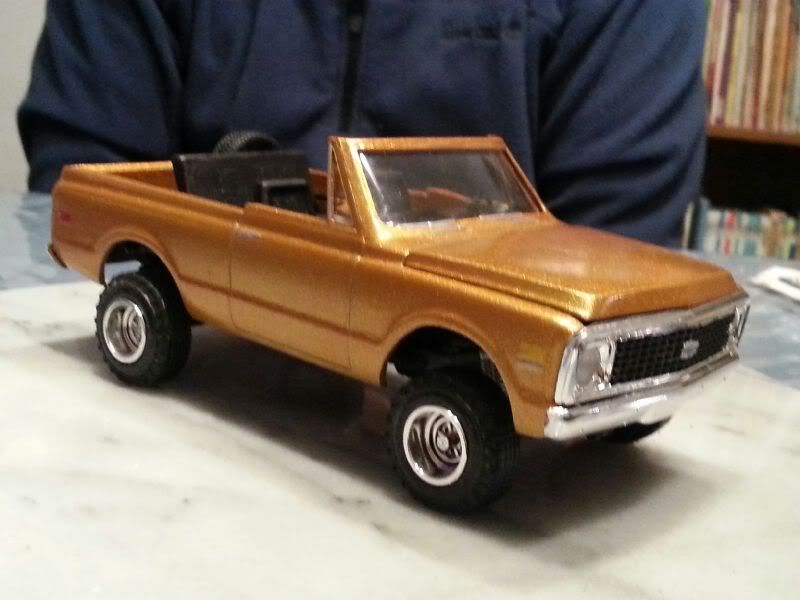
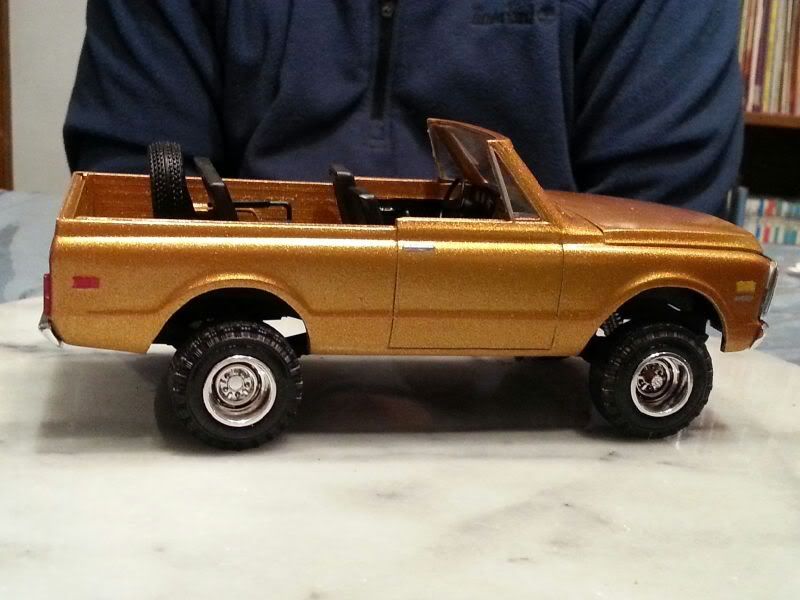
Finished up the small scale version tonight. One of my better efforts for a model. BTW, the spare tire wheel is not gold, its silver, just reflecting the gold off it.
__________________
If no one knows what you're doing, they can't tell you you're doing it wrong HG's Dream Car Build - Shelby Cobra Kit Build your own adjustable track bar 71 Long Fleet C/10 72 Jimmy 4x4 (Junkyard Jimmy)HG's Plow Truck '78 K35 DuallyBigass Farm Truck HG's thread of miscellaneous stuff |
|
|
|
|
02-06-2013, 12:08 AM
|
#15 |
|
Senior Member
Join Date: Nov 2003
Location: Brookings, SD
Posts: 10,497
|
Re: Junkyard Jimmy Super Low Buck Build Thread
Nice hood mod on the model.

__________________
Some people are like slinkies, they aren't good for anything, but you can't help but smile when you see one tumble down the stairs. |
|
|
|
|
02-06-2013, 11:36 PM
|
#16 | |
|
GEARHEAD
Join Date: Aug 2003
Location: MN
Posts: 6,121
|
Re: Junkyard Jimmy Super Low Buck Build Thread
Quote:
Went back to work on the full scale version. Didn't really accomplish a lot, but things that needed to be done got done. Stripped paint from the top of the bed rail, and at the bottom of the bedside forward of the wheel well. Just hadn't been done yet. Still need to get the inside edge of the bed rail yet. 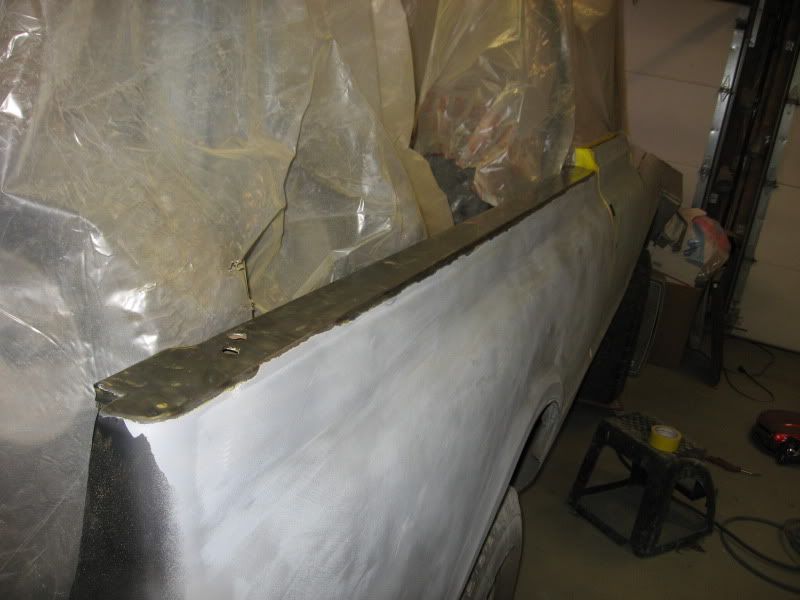 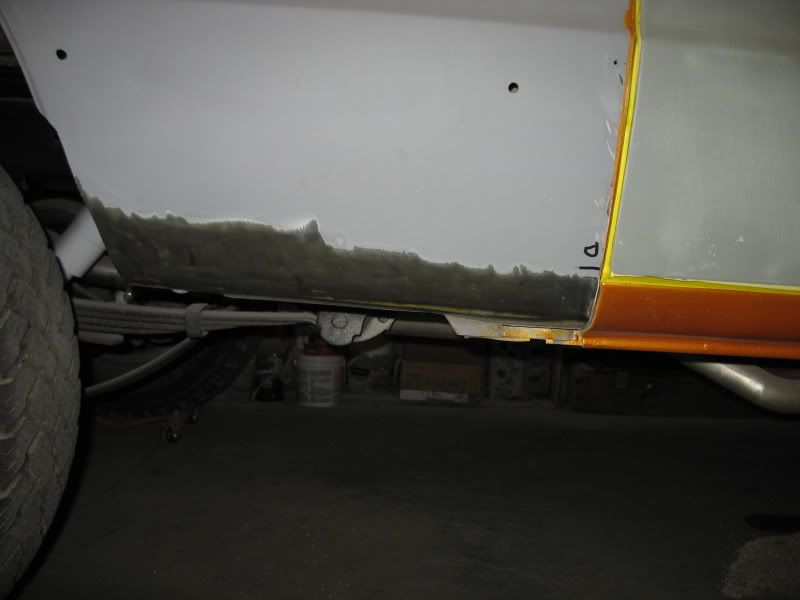 Then I went through about half a mile of tape on the door jamb area. Couldn't open the door for the pic because of the plastic. 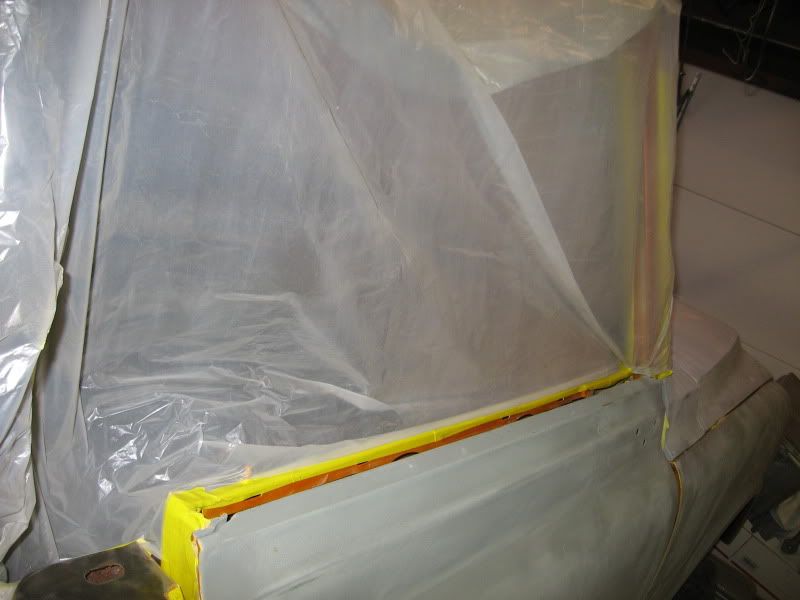 I did get a long board and scuffed over the whole side of the jimmy just to give me an idea of how much filler work there is to do and surprisingly, there isn't a lot. I'm not thrilled with how the edge around the wheel well looks, but I'll try and get it as smooth as possible. I think the bright color paint will hide a lot. One thing I need to make a decision on is fender emblems. Passenger side fender has holes, driver side doesn't. I think I'd like to use them. Clean 'em up and spray like I did the grill. And I have to remember to fill the holes that are on the bedsides for side moulding. I decided to leave the cut outs from the front edge of the wheel wells for tire clearance. I figure it may need that in the future. As for the future of this build, I don't think I've really talked about it here yet. This project is far from done. Even after paint and reassembly. All of the work so far is really just setting me up a base to build from. This truck is going to be my toy to try out anything new I want. I have plans to re-do the suspension to a link style set up with coils or coil-over shocks. Probably a 4 link in the back, and 3 link in front. A full cage will tie into the frame. Probably going to have to do some frame boxing/strengthening, stronger cross members, etc. Skid plates of course. I'm dreaming of a baja style truck. Not full competition, but a blast to drive, on or off road, with the looks of the 70's still in place. Wheels and tires will need to be changed, axles either swapped or rebuilt for more strength. Lots of future experimentation. Short term goal is to get her painted and back on the road as a driver. Have some fun, do some cruising, show off a bit. I have a bout 4 months before summer really shows up. Hopefully thats enough.
__________________
If no one knows what you're doing, they can't tell you you're doing it wrong HG's Dream Car Build - Shelby Cobra Kit Build your own adjustable track bar 71 Long Fleet C/10 72 Jimmy 4x4 (Junkyard Jimmy)HG's Plow Truck '78 K35 DuallyBigass Farm Truck HG's thread of miscellaneous stuff Last edited by hgs_notes; 02-06-2013 at 11:50 PM. |
|
|
|
|
|
02-08-2013, 12:55 AM
|
#17 |
|
Registered User
Join Date: Apr 2011
Location: .
Posts: 3,104
|
Re: Junkyard Jimmy Super Low Buck Build Thread
Good job on the small version.
I've been gathering rolls of tape for when "Bompenstein" gets to that stage. Looks great keep it up. |
|
|
|
|
02-09-2013, 01:55 PM
|
#18 | |
|
GEARHEAD
Join Date: Aug 2003
Location: MN
Posts: 6,121
|
Re: Junkyard Jimmy Super Low Buck Build Thread
Quote:
This morning I worked on getting the side molding holes filled. I wasn't gonna weld up 3/8" holes because I don't think I'm good enough to do it without too much heat and warpage. Plan B is my old friend panel adhesive. I did the same thing to holes in the floor of my truck cab. I cleaned up the back side with some 40 grit and wiped it down with wax/grease remover. I cut some 1" squares from some scrap and cleaned them up the same way. A rough grit helps scratch the surface for the adhesive to grip to. Then just apply the adhesive with a little brush and stick on my patches to the back side. All I have to do is clean up the outside a bit, a touch of filler and sand smooth. No weld hole patches. 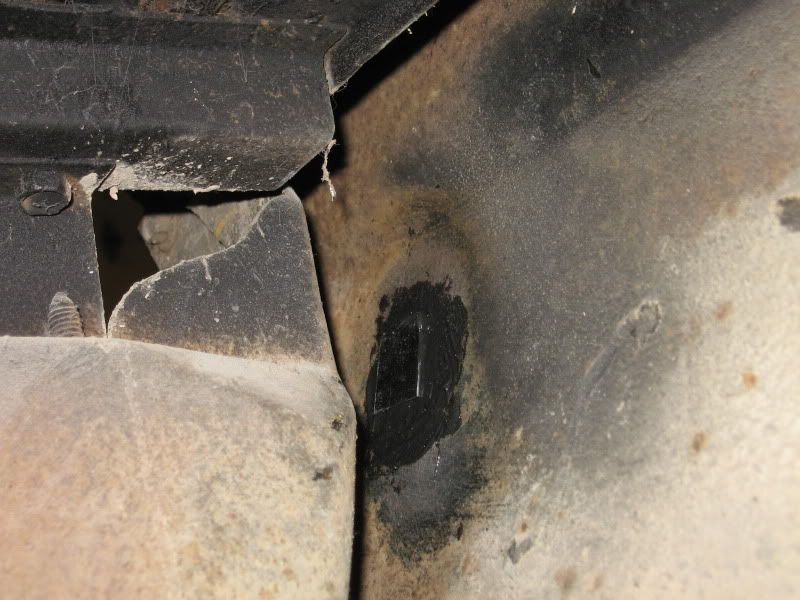 Then I finished stripping paint from the bed rail, cleaned that off and sprayed the remaining bare metal with epoxy primer. Not without complications though. Got everything ready, poured the primer into the gun and pulled the trigger. Nothing but air. Turns out I suck at cleaning my spray gun.  Pour the primer back out, disassemble, completely this time, and get some brushes through it. It was a pain, but I fixed it and learned another lesson. 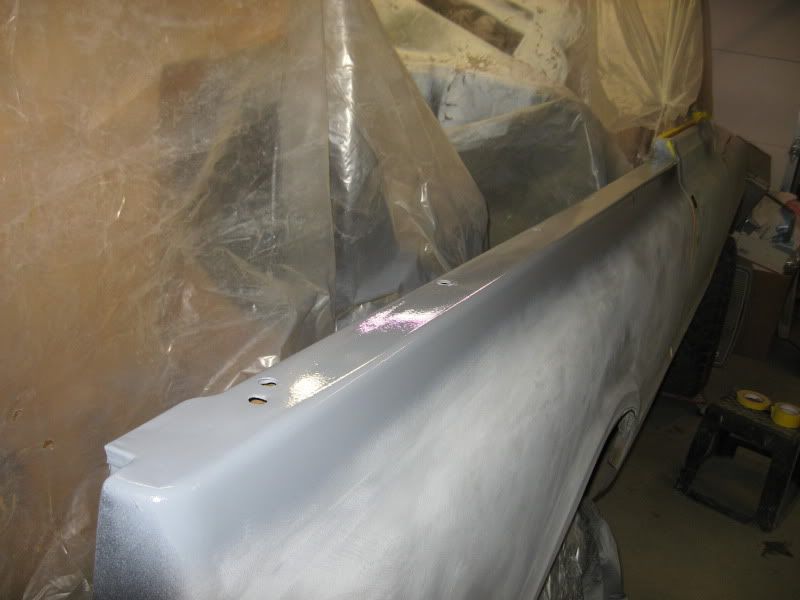 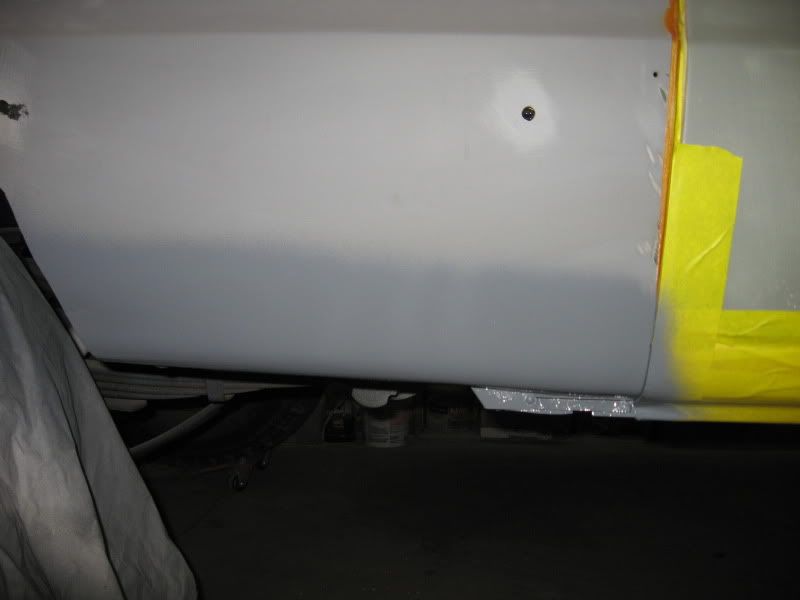 Maybe later today I'll go back out and do some filler work. I'd like to get that done and spray the G2 primer over this side before the weekend is done. Oh yeah, I also pulled the roll bar out. It was in the way, but I want to cut off the feet and redo those to fit the floor better. On another note... My wife has been working out a lot, trying to get back her girlish figure (it's working, daddy is happy). This morning she had a workout class that was based on MMA/kick boxing and came home smiling and happy, she loved it. Then said she was going to do another one at 5 am tuesday, to which I responded in a negative way. (guess who is a light sleeper) So tip of the day, to you fellas, young and old alike that haven't learned this lesson yet. If your first response is not encouraging and supportive, shut the hell up.  That is all. 
__________________
If no one knows what you're doing, they can't tell you you're doing it wrong HG's Dream Car Build - Shelby Cobra Kit Build your own adjustable track bar 71 Long Fleet C/10 72 Jimmy 4x4 (Junkyard Jimmy)HG's Plow Truck '78 K35 DuallyBigass Farm Truck HG's thread of miscellaneous stuff |
|
|
|
|
|
02-10-2013, 06:57 PM
|
#19 |
|
GEARHEAD
Join Date: Aug 2003
Location: MN
Posts: 6,121
|
Re: Junkyard Jimmy Super Low Buck Build Thread
Didn't get back out there yesterday afternoon enough to make significant progress. What I did get done was basically taping and masking and wiping it down and ready to spray. Then when I went out today and looked at it more critically I decided maybe I should get some of the filler work done first. So I slathered (good word ain't it, slathered) on some mud and sanded. saw a few more areas and slathered some more on and sanded some more.
  This is the area that still needed the most work. If you don't remember, go back a ways and see how screwed up this bed side was. I left it then with a wheel arch that just wasn't quite right. It still was in at the top of the arch about 1/8" or so. The little radius right in the inner part of the arch was not good. So I spent some extra time there today to try and improve it as much as my meager skills would allow. 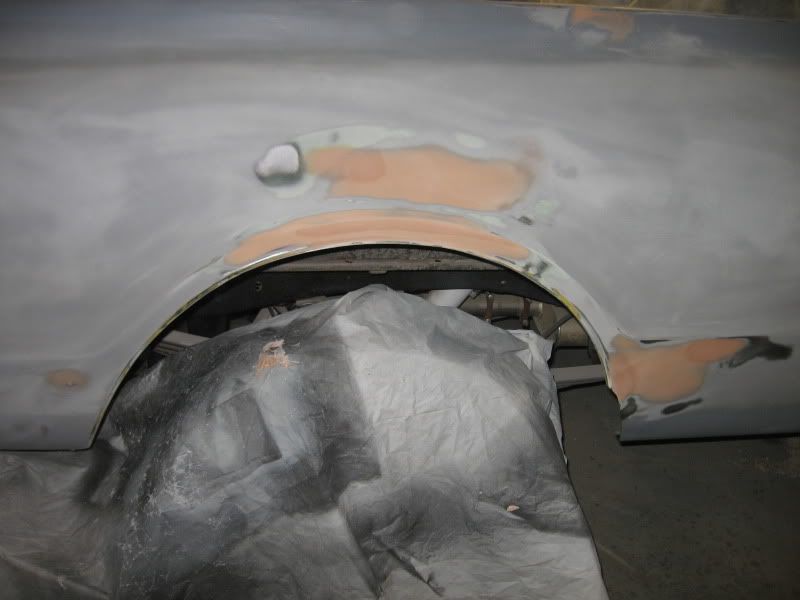 Then I sprayed the bare metal spots with some etch primer and mixed up about a qt of 2k high build primer and started spraying. For some reason, the last 2 times I used this primer, I've had serious fish eyes in the primer. I'm using a wax/grease remover and letting it flash off before I spray(maybe not long enough), but for some reason it's still acting like its contaminated with oil. Adding reducer to the primer helps it spray better and it only seems to do it on the first coat. I think it finishes flashing off during that first coat and is ok after, but it's still frustrating. Anyway, after about 3 good coats of 2k, its ready to sand again Yeah!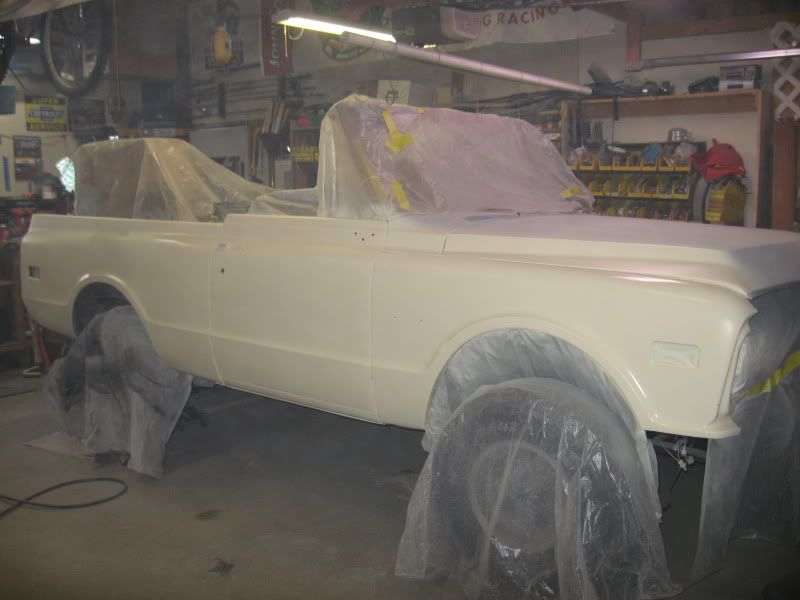 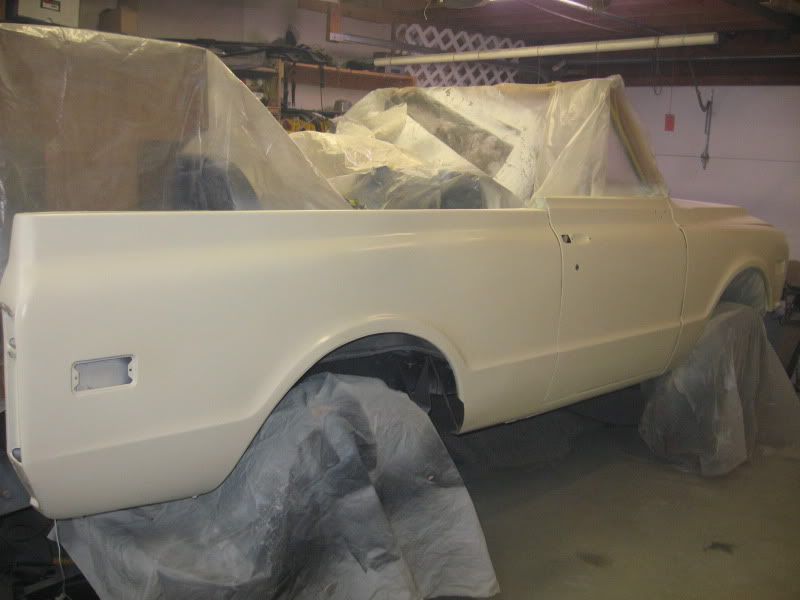 Hopefully this blocks out fairly well and the featherfill primer can finish it off. I plan on spraying the hood and cowl with that also on the next go around with the featherfill. Then one last sanding session and it'll be ready for paint. I really believe I'll have it painted before the end of this month.
__________________
If no one knows what you're doing, they can't tell you you're doing it wrong HG's Dream Car Build - Shelby Cobra Kit Build your own adjustable track bar 71 Long Fleet C/10 72 Jimmy 4x4 (Junkyard Jimmy)HG's Plow Truck '78 K35 DuallyBigass Farm Truck HG's thread of miscellaneous stuff |
|
|
|
|
02-11-2013, 11:12 AM
|
#20 |
|
Registered User
Join Date: Nov 2007
Location: NLR, AR
Posts: 1,387
|
Re: Junkyard Jimmy Super Low Buck Build Thread
I wished mine looked that good. Maybe some year.........
|
|
|
|
|
02-11-2013, 03:52 PM
|
#21 | |||
|
GEARHEAD
Join Date: Aug 2003
Location: MN
Posts: 6,121
|
Re: Junkyard Jimmy Super Low Buck Build Thread
Quote:
Quote:
Quote:
Taking a snow day today. 35 mph winds with gusts in the 40's and a layer of fresh snow yesterday. I live on the prairie, nothing stops the snow from messing up the roads and I drive a lot for a living. Anywho, back to the build. I started out with some guide coat. 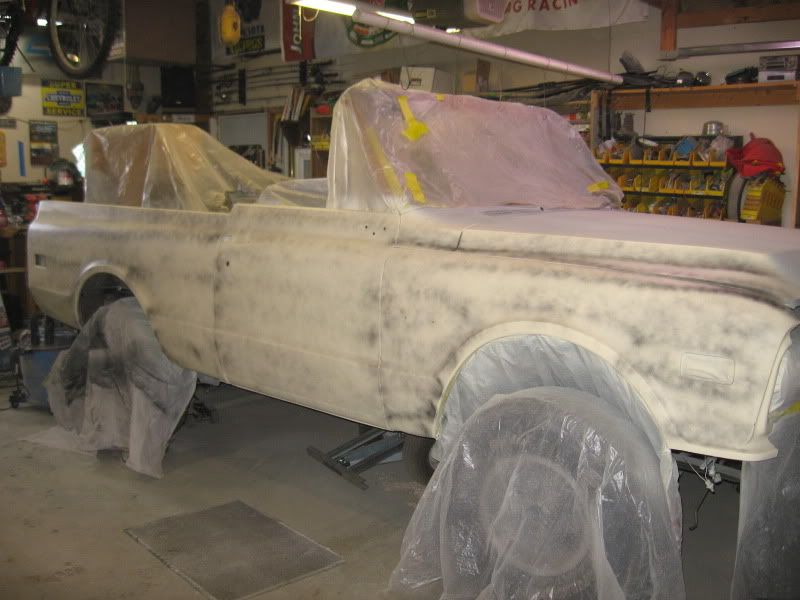 The rough texture of the primer was a real PITA to sand through. 4 hours later with 180 grit on a 12" block... 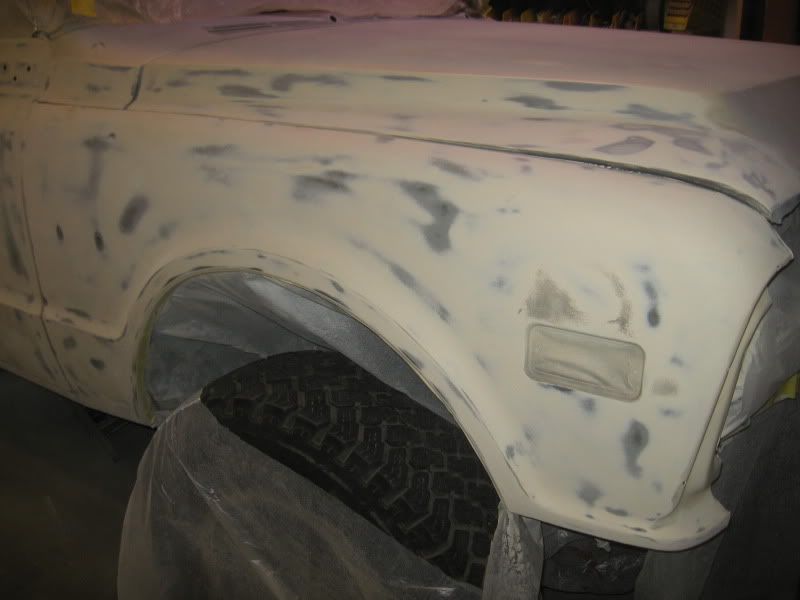 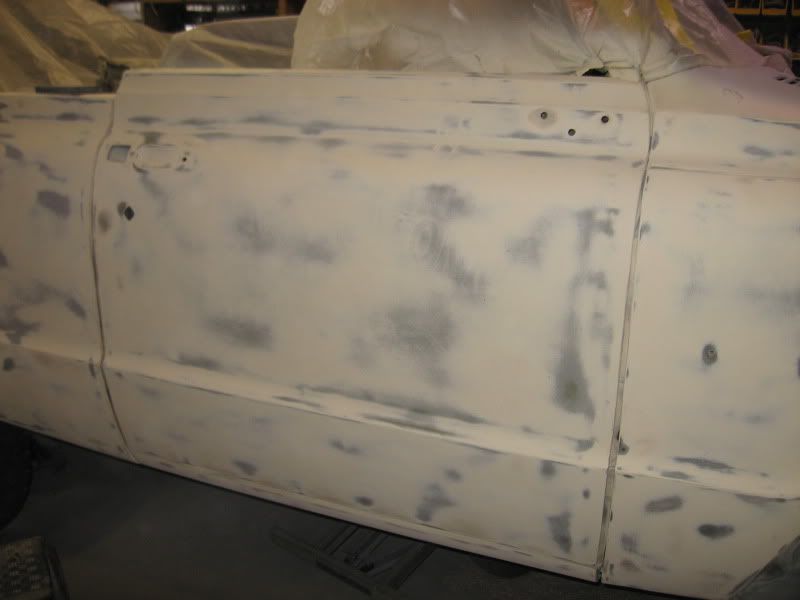 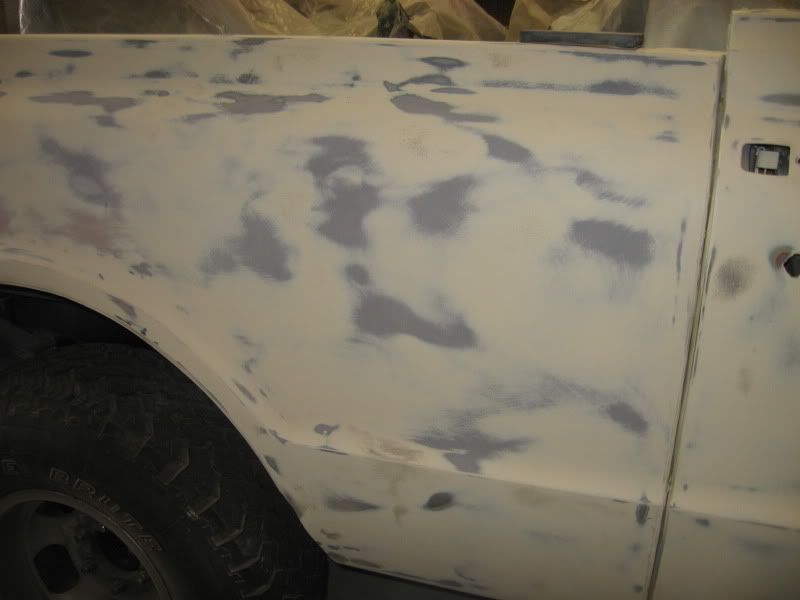 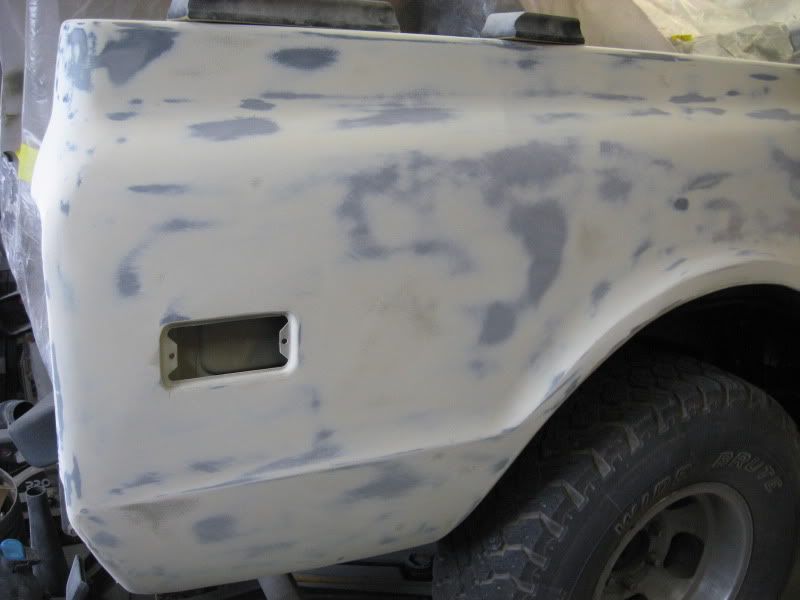 All the gray spots were high spots (not anymore). Not sure if it'll show in these pics, but the blacker spots are lows where the guide coat remains. Really not too bad. I think the featherfill should finish it off and I'll use a 220 and/or 320 grit on my 18" block to finish off the dry sanding. So, what looked pretty sweet in yesterdays pics is not so great once you hit it with a good block. Here's a pic of my rear wheel arch. Not great, but acceptable to me. 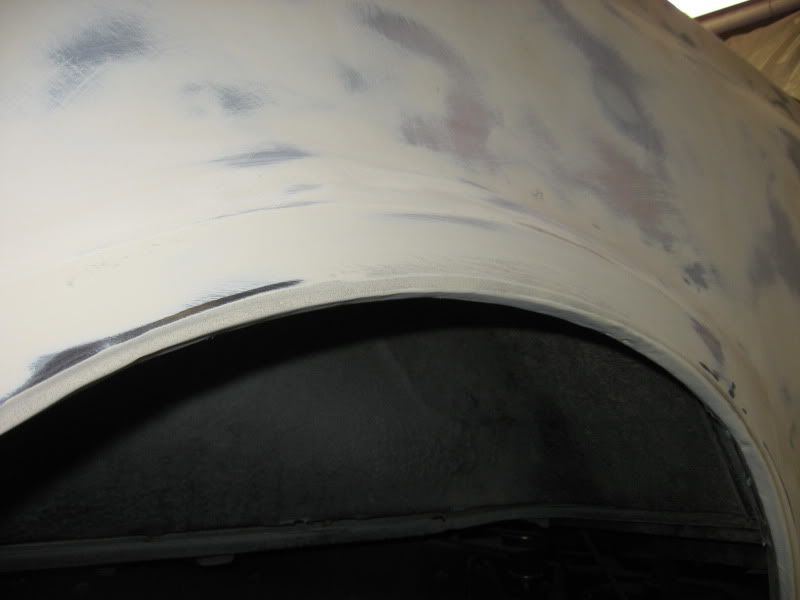 And what does a person look like after blowing dust around the garage for 4 hours? Ignore the stupid look on my stupid face. The wife snapped it while I was talking. I did have a dust mask on. Not sure it helped.  Next step is to wipe it all down again and spray with the featherfill. And I get to sand some more. Awesome. 
__________________
If no one knows what you're doing, they can't tell you you're doing it wrong HG's Dream Car Build - Shelby Cobra Kit Build your own adjustable track bar 71 Long Fleet C/10 72 Jimmy 4x4 (Junkyard Jimmy)HG's Plow Truck '78 K35 DuallyBigass Farm Truck HG's thread of miscellaneous stuff |
|||
|
|
|
|
02-11-2013, 05:28 PM
|
#22 |
|
Registered User
Join Date: Oct 2012
Location: LaGrangeville, NY
Posts: 51
|
Re: Junkyard Jimmy Super Low Buck Build Thread
awesome progress!....
Nice model too...great job on that.....I can definitely see an accent stripe either along the fender lips and lower door areas, or maybe something thinner where a pin stripe would go....I am a fan of those flame styled pinstripe blocks...the flames run on the underside or top side of the stripe...the stripe is maybe 3" wide max..... The Mustang color scheme would work well with the satin black...you could even get a vinyl guy to tastefully include simple lettering in the stripe on the rear quarter.....Ill try to post what Im talking about later..... great job! JP |
|
|
|
|
02-11-2013, 06:14 PM
|
#23 |
|
Registered User
Join Date: Oct 2012
Location: LaGrangeville, NY
Posts: 51
|
Re: Junkyard Jimmy Super Low Buck Build Thread
maybe something along the lines of this:
 See if any of these graphics inspire some more thought....I love the gold paint, but breaking it up a little might be a nice touch... JP |
|
|
|
|
02-11-2013, 06:24 PM
|
#24 |
|
GEARHEAD
Join Date: Aug 2003
Location: MN
Posts: 6,121
|
Re: Junkyard Jimmy Super Low Buck Build Thread
JP, that looks pretty cool, but in keeping with the 70's theme, I would probably go with just a double line stripe along the belt line rather than flame style. Don't suppose you could show me what the mustang style black hood would look like on one of the model pics?
__________________
If no one knows what you're doing, they can't tell you you're doing it wrong HG's Dream Car Build - Shelby Cobra Kit Build your own adjustable track bar 71 Long Fleet C/10 72 Jimmy 4x4 (Junkyard Jimmy)HG's Plow Truck '78 K35 DuallyBigass Farm Truck HG's thread of miscellaneous stuff |
|
|
|
|
02-12-2013, 12:15 AM
|
#25 |
|
Registered User
Join Date: Oct 2012
Location: LaGrangeville, NY
Posts: 51
|
Re: Junkyard Jimmy Super Low Buck Build Thread
Like this?
 JP |
|
|
|
 |
| Bookmarks |
|
|


 Hybrid Mode
