
|
 02-12-2009, 10:36 PM
|
#26 |
|
Registered User
Join Date: Apr 2008
Location: Gales Creek, Oregon
Posts: 619
|
Re: Dad's Budget Build 55
Nope, Stock innner panel. It has the battery box from an S-10 pick up bolted right to the inner fender. Then we made a brace from the free floating corner down lower to the inner fender to stiffen it up.
__________________
There are two kinds of people, those who finish what they start and so on. 70 GMC Longhorn (A.K.A Money Bucket) 57 Chev 3100 05 Chevy LLY Dmax. 67 Chevy Camaro Dad's Budget Build 55 My Longhorn Build |

|

|
|
02-12-2009, 10:56 PM
|
#27 |
|
Registered User
Join Date: Jun 2006
Location: Idaho
Posts: 8,800
|
Re: Dad's Budget Build 55
Simply, I like it. Looking at the photo again what looked like a recess is actually a bulge from looking at the other side photo. I'm interested because I will need to add a second battery in that location for my winch. Thanks for the info.
__________________
1959 Chevy Short Fleetside w/ 74 4WD drive train (current project) OrrieG Build Thread 1964 Chevelle Malibu w/ 355-350TH (daily driver) Helpful AD and TF Manual Site Old Car Manual Project |
|
|
|
|
02-13-2009, 12:59 AM
|
#28 |
|
Registered User
Join Date: Jun 2007
Location: Saskatoon, Saskatchewan,:
Posts: 2,901
|
Re: Dad's Budget Build 55
great project you and your dad have there, and you are one h#ll of a son to help him out, i hope to one day do the same for mt mom, she has her first truck she ever had , a 57 alos, i know how you feel.
__________________
James 1968 GMC "HAVOC" 1986 GMC "Frank" J.J.R.H. Design & Consulting My 68`Rebuild "HAVOC": http://67-72chevytrucks.com/vboard/s...d.php?t=316300 A 58' chev build thread: http://www.67-72chevytrucks.com/vboa...d.php?t=311238 1969 Camaro Pro Touring http://67-72chevytrucks.com/vboard/s...61#post3513361 Swiss Cheese: http://67-72chevytrucks.com/vboard/s...d.php?t=384390 Adjustable Trailing Arm How-To: http://67-72chevytrucks.com/vboard/s...d.php?t=321100 1968 Ford Farm Truck: http://67-72chevytrucks.com/vboard/s...=1#post6555587 |
|
|
|
|
02-13-2009, 09:15 AM
|
#29 |
|
Registered User
Join Date: Jan 2009
Location: Kansas city
Posts: 756
|
Re: Dad's Budget Build 55
Looks real good especially the dash shaving you did!
|
|
|
|
|
02-13-2009, 12:08 PM
|
#30 | |
|
Registered User
Join Date: Apr 2008
Location: Gales Creek, Oregon
Posts: 619
|
Re: Dad's Budget Build 55
Quote:
With the stock inner fenders and stock size radiator you could use one of these boxes on each side of the radiator. They are slightly smaller then the stock battery tray would allow but if you get the right batteries then they would have the same power in each. If you do move 2 batteries down to the front. Post it up here. I would be interested in seeing it too. Oh just so you know what I used exactly the batt tray came from aa 1986 S-10 with a 4cyl. Not sure if they are all the same but thats what the one I used came out of. (My cousin is building his into a drag racer) I have scavenged a ton of parts of it for my 57 as well as my Dad's 55. I have the rear end set aside for my 57 in the near future.
__________________
There are two kinds of people, those who finish what they start and so on. 70 GMC Longhorn (A.K.A Money Bucket) 57 Chev 3100 05 Chevy LLY Dmax. 67 Chevy Camaro Dad's Budget Build 55 My Longhorn Build |
|
|
|
|
|
02-13-2009, 12:10 PM
|
#31 | ||
|
Registered User
Join Date: Apr 2008
Location: Gales Creek, Oregon
Posts: 619
|
Re: Dad's Budget Build 55
Quote:
Quote:
Thanks so much. I was just wingin' it when it came to that. It turned out pretty good. Thanks again!
__________________
There are two kinds of people, those who finish what they start and so on. 70 GMC Longhorn (A.K.A Money Bucket) 57 Chev 3100 05 Chevy LLY Dmax. 67 Chevy Camaro Dad's Budget Build 55 My Longhorn Build |
||
|
|
|
|
03-25-2009, 02:12 PM
|
#32 |
|
Registered User
Join Date: Apr 2008
Location: Gales Creek, Oregon
Posts: 619
|
Re: Dad's Budget Build 55
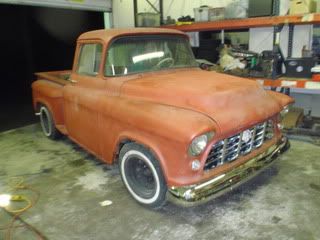
Update March 2009
Dad doesn't want to spend the money on a MustangII front end so: Decided to try to put power steering on the stock axle. Stock: 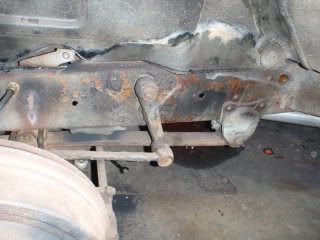 Built the spacer plate to mount the steering box to the frame.  Installed the Pump bought at a wrecking yard (40 bucks with all the brackets and another water pump & Aternator) other issues we were trying to take care of too. 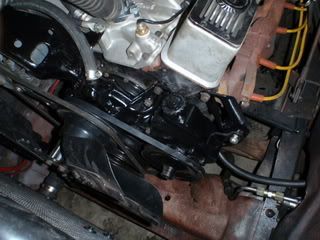 Found a Kit from CPP and installed the box. 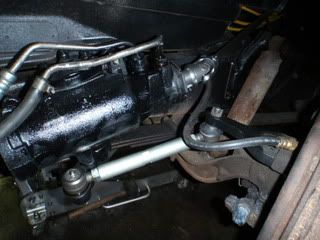 Had to relocate the shocks to the back of the axle. 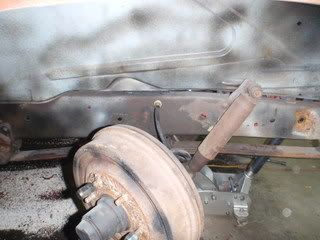 Had to remove the top two bolts from the top of the spindle to attach the new steering arm. 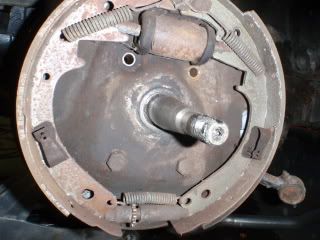 Found out I had a 4wd Box and the new Pitman arm would not fit(it doesn't say anything about having to have a 2wd box with the kit). So I bought another from a board member. Again.. another 4wd Box. so off to U-Pull-It. I found one on a 2wd Chevy that still had the hoses attached so no water inside. 30 bucks from the yard. Back to install it on the truck with the new pitman arm. All fits pretty good. I'm pretty happy with the kit overall. A new problem when I went to finish the install was the PS fluid was leaking like a siv when I fired the motor. After a closer look. I found out there is yet another difference. 1980 and older uses an inverted flare style hose connections and the 81-87 uses o-ring style. and wouldnt ya know it. I have a pre-80 pump and a Post-80 box. I fabbed together new pressure side hose and changed the return line to the correct one for the box attaching it to the existing return line hose...... Ok that problem seems to be fixed.. No leaks. Now for the Total 207.00 for the Kit from CPP including the new pitman arm for Lowered trucks. (72.00) 40.00 for Pump and Misc stuff from the first trip to the wrecking yard. 15.00 for a missing bracket from second trip to wrecking yard 50.00 for 2nd steering box (that didn't work) 30.00 for 3rd steering box. 17.00 for new PS pressure hose. 165.00 for Steering shaft Parts from Zigs Street Rods. 0.00 For Column Home Made (ill post that next) 0.00 Column Drop. Same thing. 50.00 for Misc Paint, Brake Clean, PS Belt. $574.00 Total to install Power steering.
__________________
There are two kinds of people, those who finish what they start and so on. 70 GMC Longhorn (A.K.A Money Bucket) 57 Chev 3100 05 Chevy LLY Dmax. 67 Chevy Camaro Dad's Budget Build 55 My Longhorn Build Last edited by Sinisterspeed; 03-25-2009 at 02:32 PM. |
|
|
|
|
03-25-2009, 02:46 PM
|
#33 |
|
Registered User
Join Date: Apr 2008
Location: Gales Creek, Oregon
Posts: 619
|
Re: Dad's Budget Build 55
Ok now for the Steering Column.
Obviously you cant use a stock column with this install (or at least I don't know how you would since its all once piece) I had a Stock Shifter Column from my 72 Chev Also a stock Shifter Column from a 68 Furd due to the fact i have to jump the frame to get to the new steering box on the outside of the frame I couldnt use the Chevy column (35") even when mounted a bit to high it would stop clear down in the rail. The Furd column is 32" but it has a rag joint connector on the end of it. So.. We took the two columns appart and cut the shaft inside both columns. We added the end of the chevy column to the top 18" of the ford column therfore everything in the column would work correctly but we ended the column with a solid shaft from the Chevy column. We had to use a couple bushings from the bottom of the chevy column too. Drilled the shaft and slid a large washer up to the bottom of the bearings pinning it in place. Once i was ready to connect it to the steering shaft from the box. I cut the shaft about 2" from the end of the column and ground both sides flat to make a 3/4 DD shaft that would mate up to a universal joint. Rather then spending 90 bucks on a column drop i made one out of some scrap in the shop. It's a bit crude but it works. All the while we were trying to pull off the Column shift as well. With a brake pedal going through the floor as well the linkage and brake pedal go though the same area. This wasn't so easy. After we though we had it we notice that if you mash the brake pedal it could contact the linkage if its in park and kick it into Reverse.. No big deal ill rework it tomorrow........... While trying to fix some other stuff I called my cousin that built the motor about why it was not idling right. He came right up. We walked in the shop as he says fire it up... Natural reaction when you get into an automatic. Jump in hold the brake and hit the key..... Guess what I forgot.... Yep... Right through my garage door. We spent the next hour kicking my garage door back into submission and rehanging the rollers so it would work.... This less then 2 hours after i grabbed the jumper cables and tossed them up on the shelf causing one of the clamps to swing over 2 ft away from where i tossed it and pow right through the window.... BAD DAY IN THE SHOP! 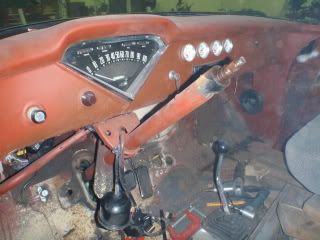 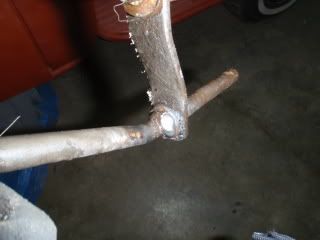 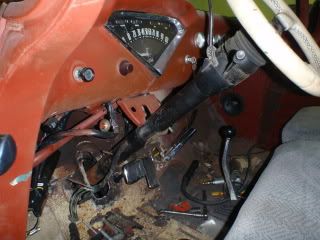 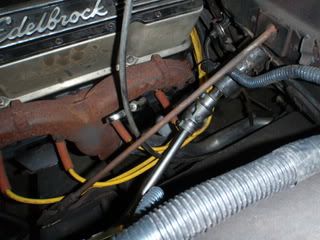
__________________
There are two kinds of people, those who finish what they start and so on. 70 GMC Longhorn (A.K.A Money Bucket) 57 Chev 3100 05 Chevy LLY Dmax. 67 Chevy Camaro Dad's Budget Build 55 My Longhorn Build Last edited by Sinisterspeed; 03-25-2009 at 02:48 PM. |
|
|
|
|
03-25-2009, 02:51 PM
|
#34 |
|
Registered User
Join Date: Apr 2008
Location: Gales Creek, Oregon
Posts: 619
|
Re: Dad's Budget Build 55
A few other things that got accomplished during Dad's 55's Stay at my house (this time)
Redneck lower job. 6 from leafs turned into 3 (lowered 3.5") Fixed the main cab support where we cut it out for Master Cyl Access. Made the access door. Removed that new B&M shifter I gave him. Changed the Alt. (its charging now) Cut and Welded tab on Brake Arm. Installed the brake pad purchased a few months ago. Welded up the giant hole in the floor where the stock column goes through. Got the Front bumper I got him for xmas mounted with some chrome Bumper bolts I had laying around. Hood repaired and Installed. (next post)
__________________
There are two kinds of people, those who finish what they start and so on. 70 GMC Longhorn (A.K.A Money Bucket) 57 Chev 3100 05 Chevy LLY Dmax. 67 Chevy Camaro Dad's Budget Build 55 My Longhorn Build Last edited by Sinisterspeed; 03-25-2009 at 03:00 PM. |
|
|
|
|
03-25-2009, 02:59 PM
|
#35 |
|
Registered User
Join Date: Apr 2008
Location: Gales Creek, Oregon
Posts: 619
|
Re: Dad's Budget Build 55
Ok for the Hood issues.
Much to my dismay. I was told when the truck arrived this time. That he tried to put the hood on but the weld nuts in the hood were damaged. Sure enough. 3 of the 4 holes either had no threads or no weld nut all together. Fortunatly I had some seat plates from work in the shop. (I brought these home to make my seat mounts) So here is a pic of the hood holes drilled to 5/8"  Set the plates in there  Tacked them all in and trimmed the exess 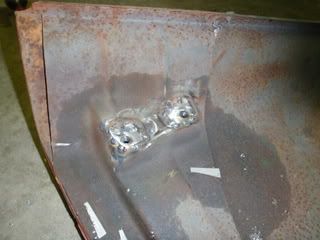 Little rustolem keep it from rusting.. 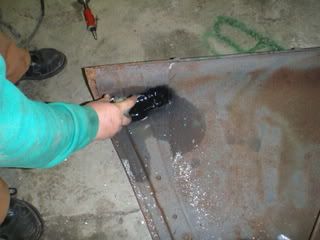 Whoala! 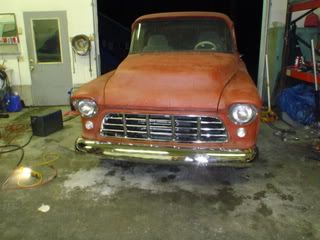 We just drilled all 4 out since these seat plates were fine thread. Might as well make them all the same.
__________________
There are two kinds of people, those who finish what they start and so on. 70 GMC Longhorn (A.K.A Money Bucket) 57 Chev 3100 05 Chevy LLY Dmax. 67 Chevy Camaro Dad's Budget Build 55 My Longhorn Build |
|
|
|
|
03-25-2009, 03:04 PM
|
#36 |
|
Registered User
Join Date: Apr 2008
Location: Gales Creek, Oregon
Posts: 619
|
Re: Dad's Budget Build 55
Misc. Pics.
__________________
There are two kinds of people, those who finish what they start and so on. 70 GMC Longhorn (A.K.A Money Bucket) 57 Chev 3100 05 Chevy LLY Dmax. 67 Chevy Camaro Dad's Budget Build 55 My Longhorn Build Last edited by Sinisterspeed; 03-25-2009 at 03:04 PM. |
|
|
|
|
03-27-2009, 12:53 PM
|
#37 |
|
Registered User
Join Date: Feb 2005
Location: Deep River, Ct
Posts: 135
|
Re: Dad's Budget Build 55
Nice project and a really fine thing to do for (with) your dad. I just got divorced after 28 years and having my sons to work with on my truck and theirs is the greatest thing. My dad is gone but his "touch" lingers on. Have fun.
|
|
|
|
|
01-16-2010, 09:12 PM
|
#38 |
|
Registered User
Join Date: Apr 2008
Location: Gales Creek, Oregon
Posts: 619
|
Re: Dad's Budget Build 55
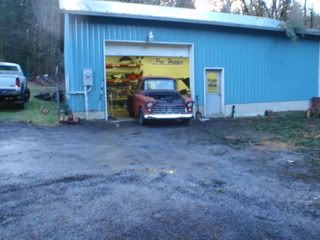
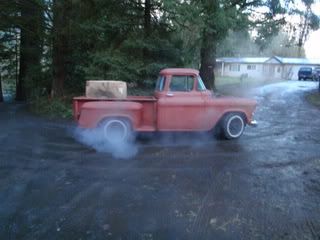
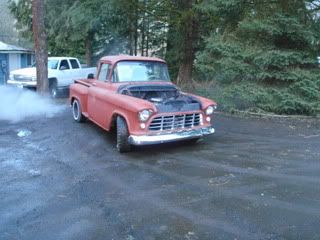
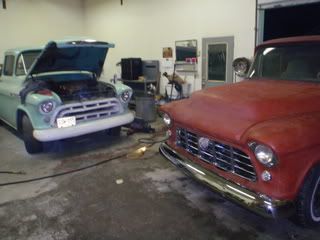
Well it was march of 09 when I last had this truck at my house. Dad has done a few little things with the truck.
Put in a seat our of something? IDK he brought the seat I just made the mounts so its in there now. Then he tried to drive the truck around. After changing his shorts a couple times He is ready to upgrade that front suspension! wheew finially... but. Now I have to: cut the new wiring job. (since we didnt make it plug into the cab) remove the front clip. remove the engine I just put in (again) take off all the power steering stuff I built (anyone wanna buy some power steering for the stock axle?) we ordered the Mustand II from speedway but its already been 2 weeks and it hasn't showed yet. everything is on back order I guess. so here is the progress back in my shop on day one. 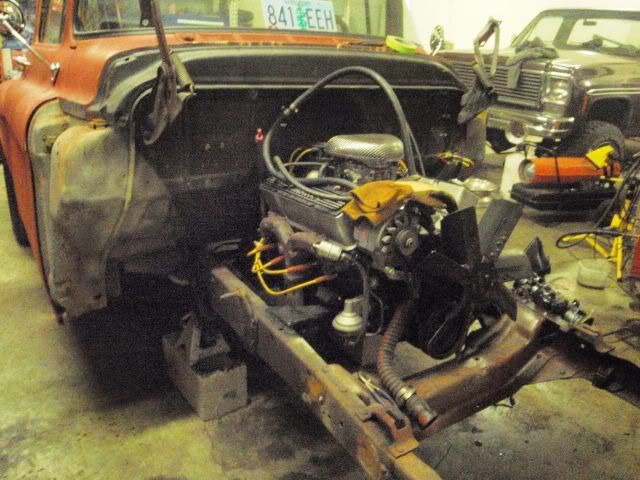 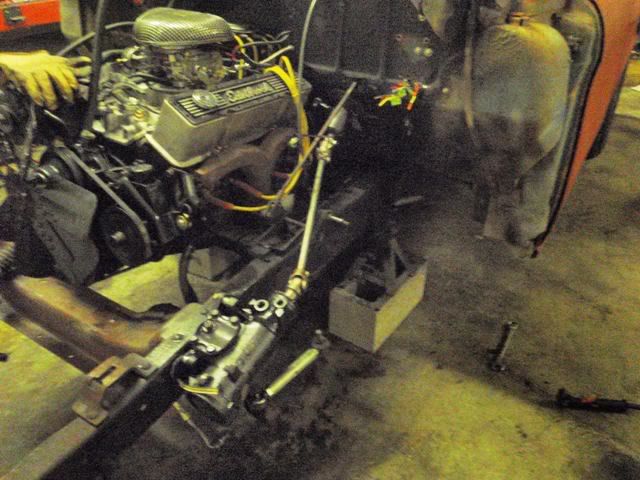 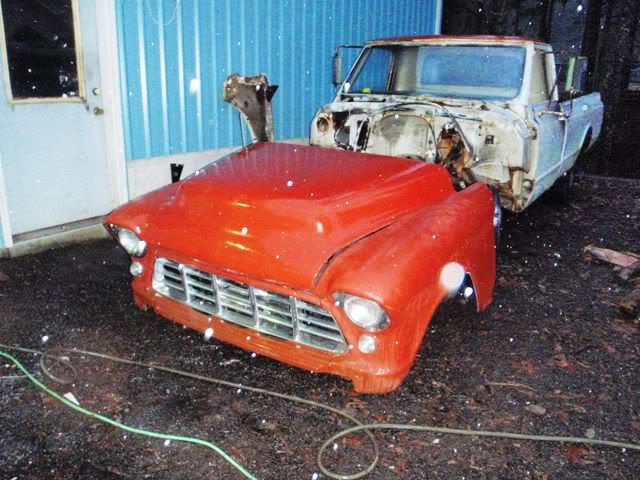 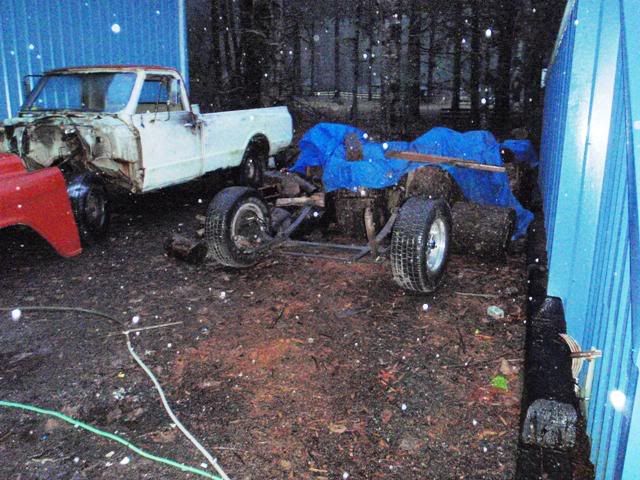 tomorrow I'll get the motor out and start prepping the frame by finishing cutting off all the leaf spring mounts and doing some grinding. This time when the motor is out of the way I am going to just weld up all those extra holes in the firewall (like we should have done in the first place)
__________________
There are two kinds of people, those who finish what they start and so on. 70 GMC Longhorn (A.K.A Money Bucket) 57 Chev 3100 05 Chevy LLY Dmax. 67 Chevy Camaro Dad's Budget Build 55 My Longhorn Build |
|
|
|
|
01-16-2010, 11:26 PM
|
#39 |
|
Registered User
Join Date: Apr 2007
Location: Callander Ont.
Posts: 387
|
Re: Dad's Budget Build 55
Wow !!! Mustang II front clip on it's way !!! Nice
Geeze Robert !! Maybe install some buttons, zippers, and snaps LOL It'll make taking it apart and putting it back together so much easier LOL I feel your pain buddy LOL
__________________
--Glenn-- http://67-72chevytrucks.com/vboard/s...d.php?t=345975 http://67-72chevytrucks.com/vboard/s...d.php?t=564403 |
|
|
|
|
01-17-2010, 02:33 PM
|
#40 |
|
Registered User
Join Date: Jul 2007
Location: Toppenish, WA
Posts: 15,426
|
Re: Dad's Budget Build 55
Nice thread, my dad never did get "the project" although he was there a lot to give moral support while I worked on mine. Some of our finest times together were out in the shop or driveway working on the 48 or quite often with me working on his daily driver and him handing tools.
Having battled with an I beam front end for 20 years on the 28 after having an independent under it before I can say that he will love the difference it makes in the truck. |
|
|
|
 |
| Bookmarks |
|
|


 Linear Mode

