
|
Register or Log In To remove these advertisements. |
|
|
|
|||||||
 |
|
|
Thread Tools | Display Modes |
 11-18-2015, 12:05 AM
|
#1 |
|
Registered User
Join Date: Apr 2015
Location: Columbus, Ohio
Posts: 46
|
49, bagged, 6.0, patina, the works
Been a long time lurker and figured I would go ahead and start a build thread. I picked this truck up in the car corral at Goodguys two years ago. It was stuffed in a barn in Washington for 30 years, has killer patina, and was all there. I fell in love.
The original frame was rotted so it's getting an S10 chassis. Other plans are air ride, 3 link rear, 6.0LSX/4L80E, nice interior, vintage air, etc. etc. These photos are a timeline from 2 years ago with the most recent being today. I work on the truck a lot more now and have been making progress daily, so stay tuned! Enjoy! 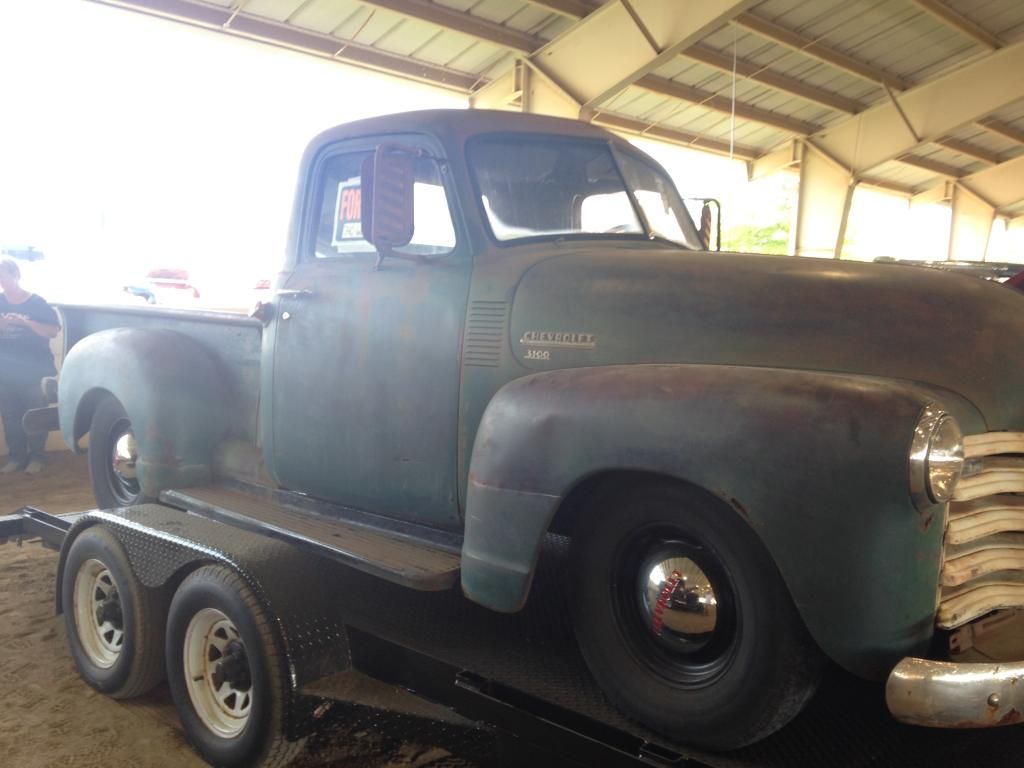 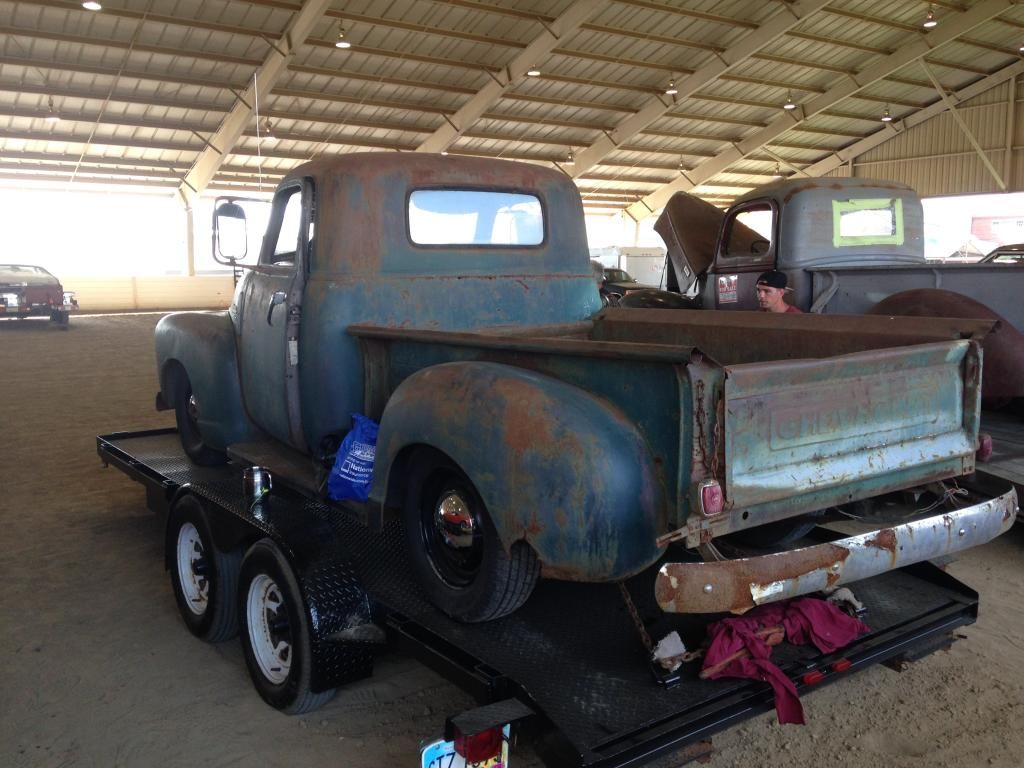 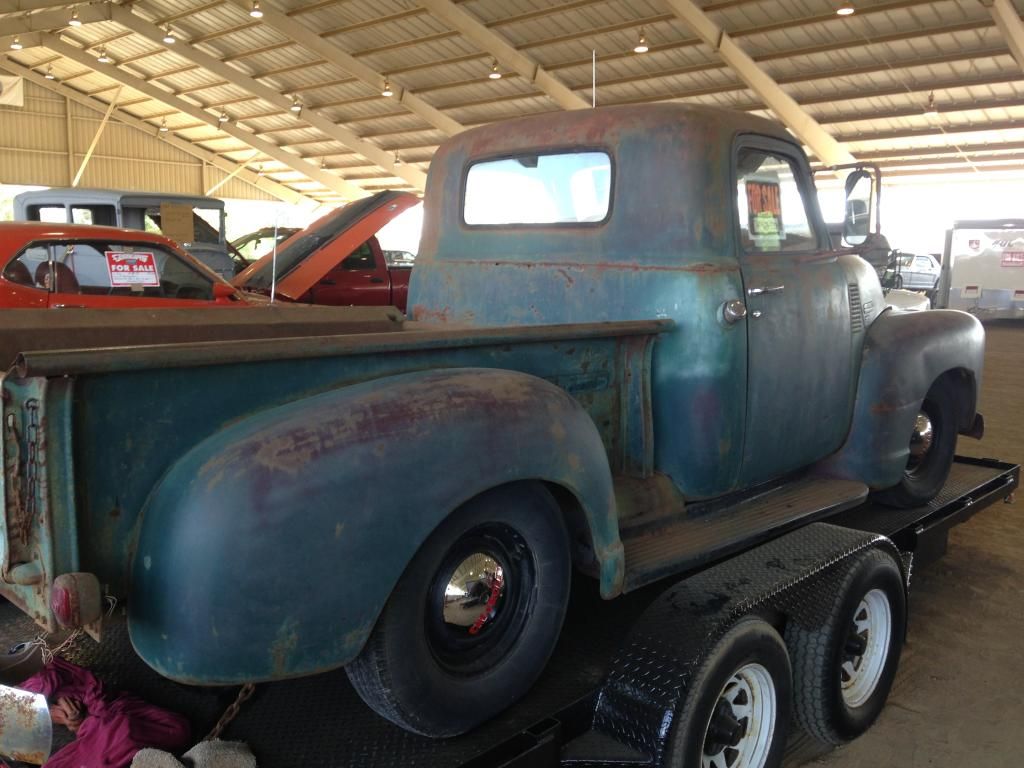 Started tearing it apart. 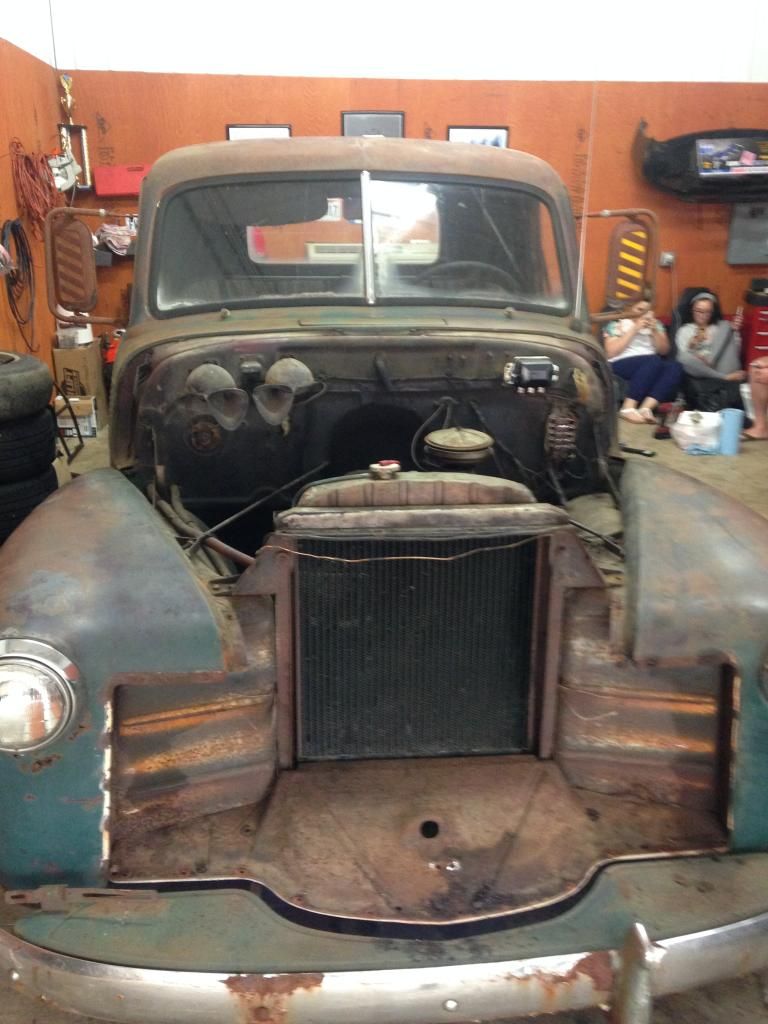 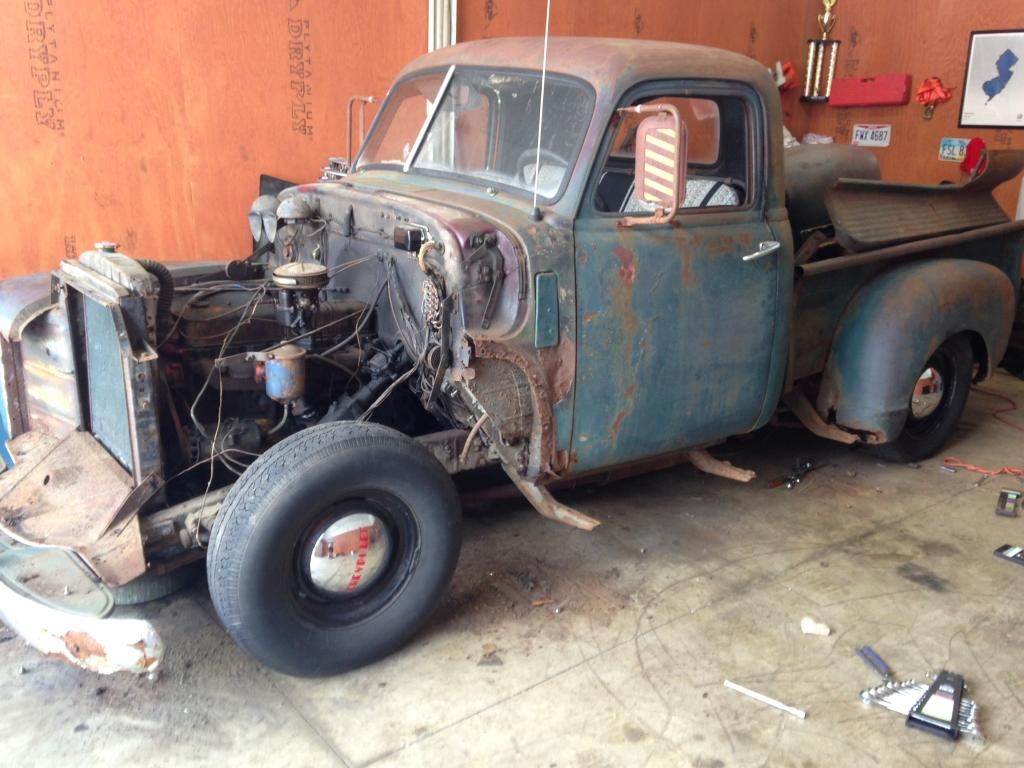 Couldn't help myself :stickoutt 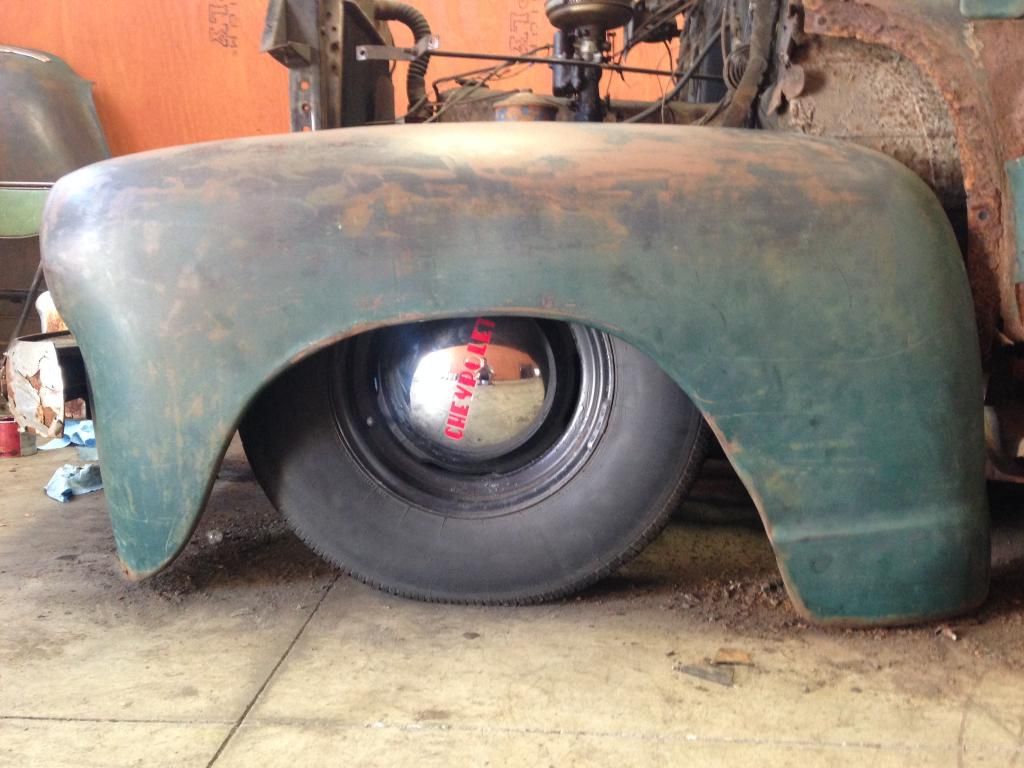   Bought an S10 longed for dirt cheap, yanked the cab and bed to send to scrap. [IMG]  [/IMG] [/IMG]My sick cab removal tool [IMG]  [/IMG] [/IMG]Frame with the motor/trans left. Sold the dropout a few weeks later. [IMG]  [/IMG] [/IMG]Yanked everything from the 49 frame [IMG]  [/IMG] [/IMG]What I ended up with at the end of that night [IMG]  [/IMG] [/IMG]Stripped the frame completely (super fun, not) and began to assemble the swap kit from code504 to land all the 49' components on the s10 frame. Picked up a 4x4 rear end from the yard. The s10 frame is the correct width to fit underneath the cab and bed, but with how large the track width is on the 49', the 4x4 rear end helps fill out the fenders. [IMG]  [/IMG] [/IMG]Rebuilt the front control arms, energy suspension bushings, proforged super travel balljoints, repainted. [IMG]  [/IMG] [/IMG]Fresh front rotors/wheel bearings/ races/seals. [IMG]  [/IMG] [/IMG]Assembled with 2" drop spindles, proforged upper and lower balljoints. [IMG]  [/IMG] [/IMG]And back on the ground again. Dad had some random old radials laying in the basement which were good to get the chassis back on the ground and size up how it will lay. [IMG]  [/IMG] [/IMG]Starting to look like a truck again. [IMG]  [/IMG] [/IMG]3 Link came in the mail [IMG]  [/IMG] [/IMG]Roller     Cab back on the chassis for a test fit  Support from the pup  Front bags in and finished up. Control arms dehumped, welded, plated, and repainted. Clip on for a test fit  Lays out pretty hard  Found a killer deal on the perfect donor vehicle for the drivetrain. 04 1ton express van with a healthy 6.0 LQ4 and 2WD 4l80e (freshly rebuilt). Had no brakes and the guy wanted out of it. Towed it on home. Pretty sketchy on an 18ft trailer.  Easiest way to pull the motor/trans haha  Frame out, motor out.  Motor back in the shop for tear down   Next up is making the harness stand alone on a 4 fuse 2 relay setup. Then regasket the whole motor, add the TSP 228r cam, valve train upgrades and into the truck it goes for a test fit. Separated the motor and trans today, removed some things from the motor and got it on the stand for tear down. [IMG]  [/IMG] [/IMG]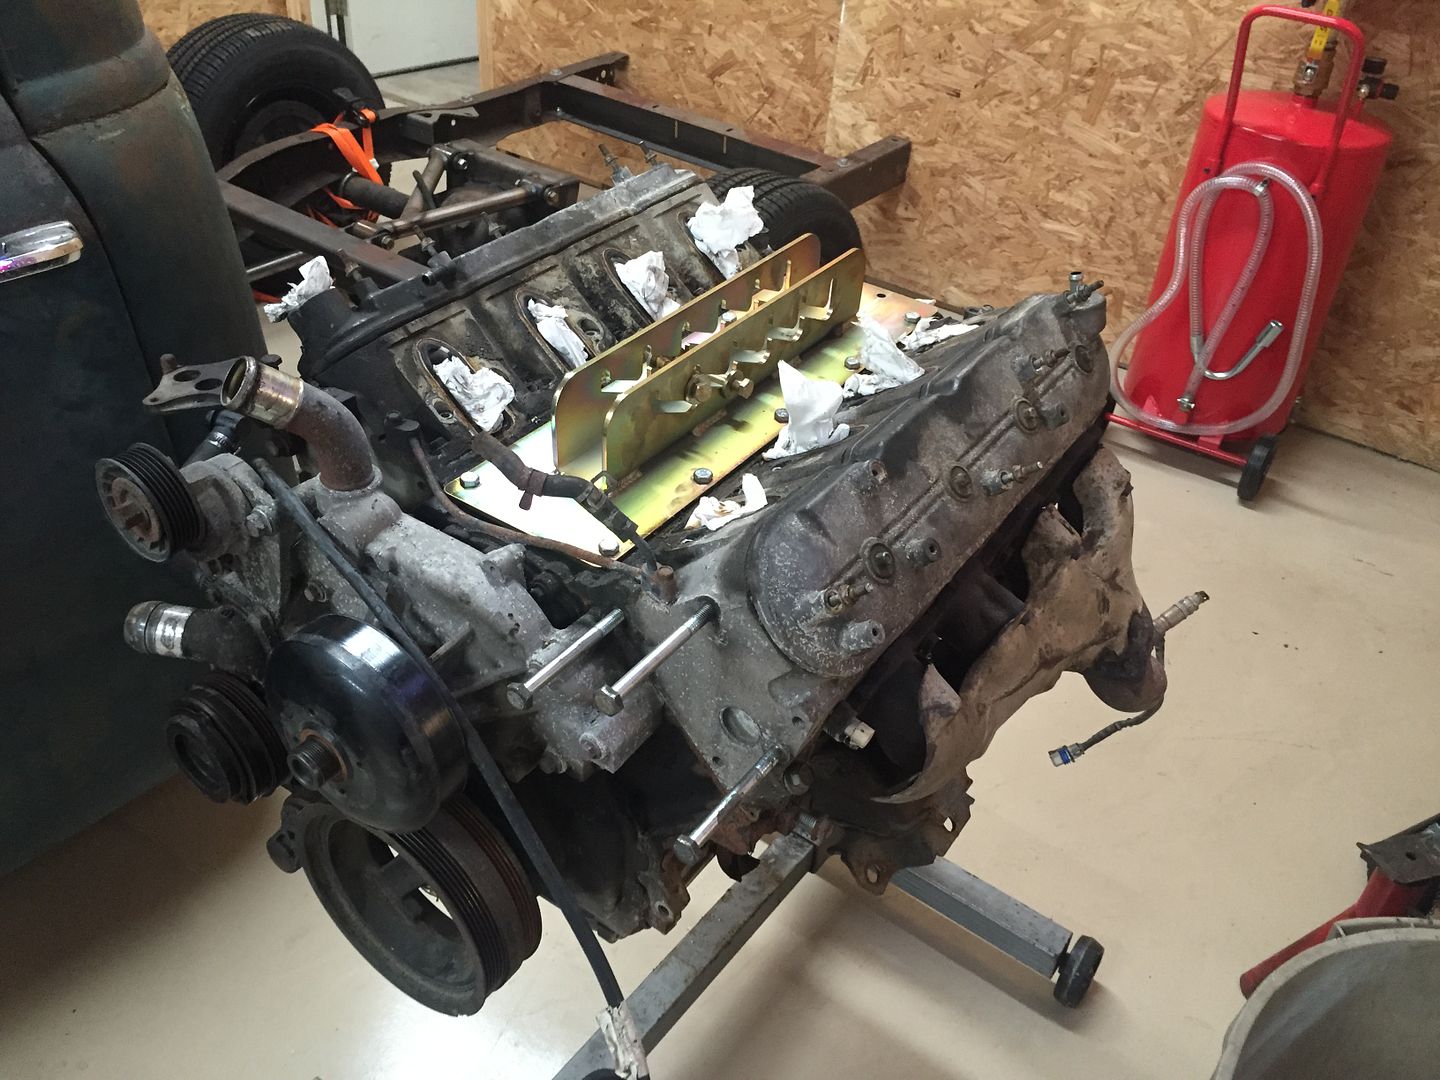 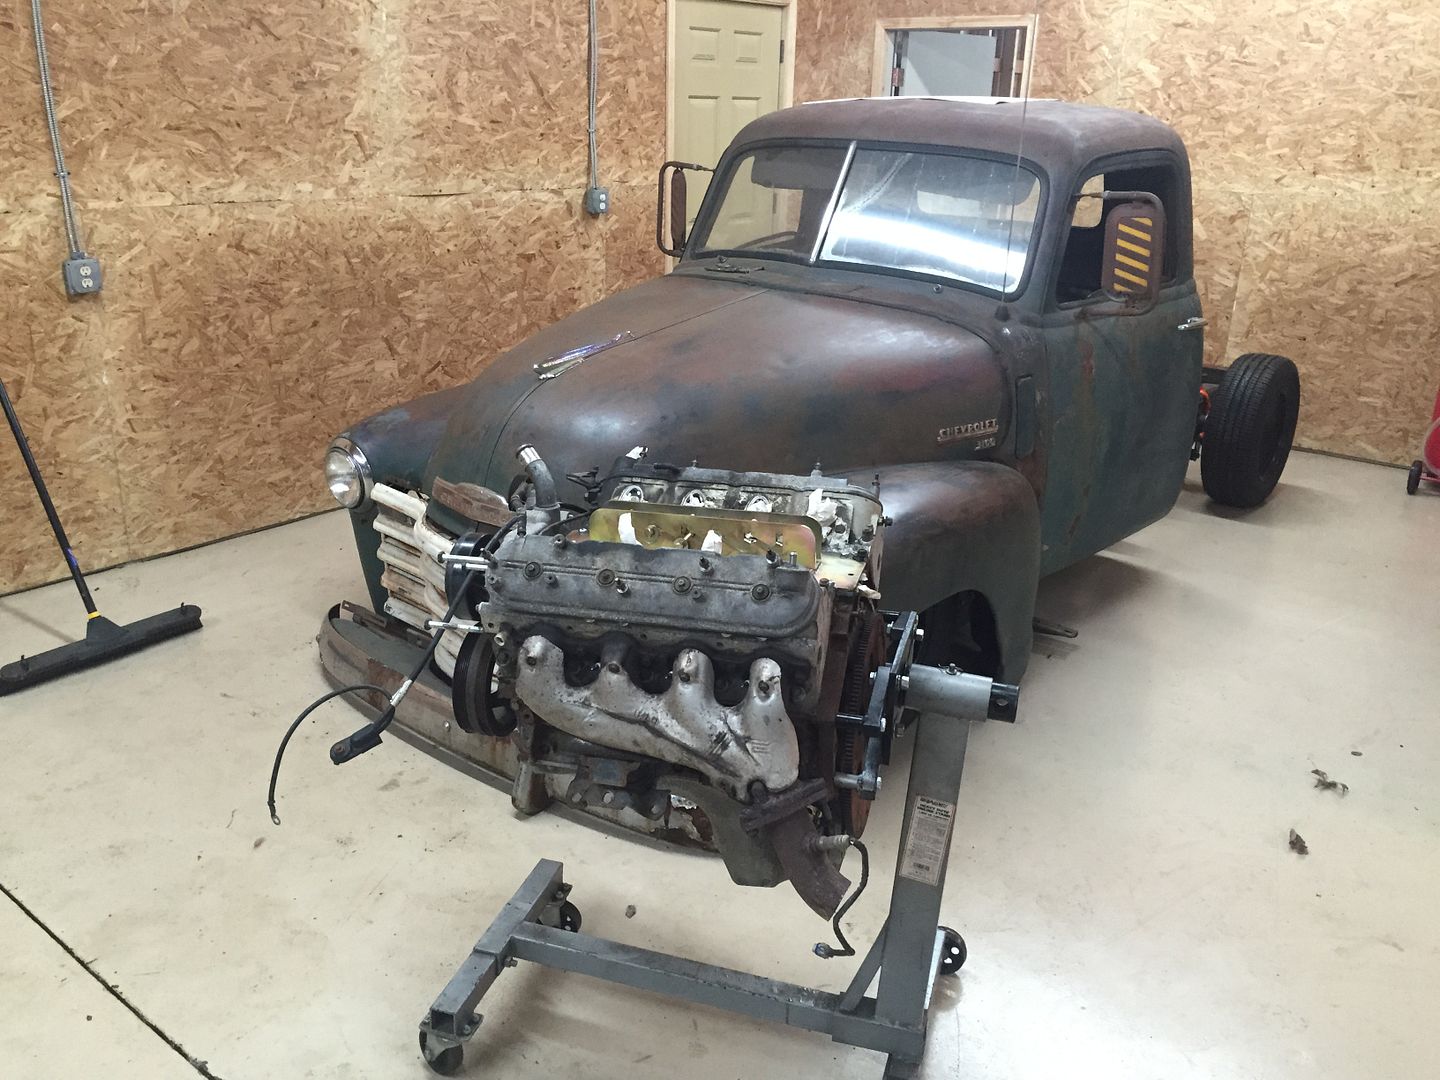  Had some ****ty luck with the trans so I'll have to go get this tigged by a friend. Mistakes happen I guess. 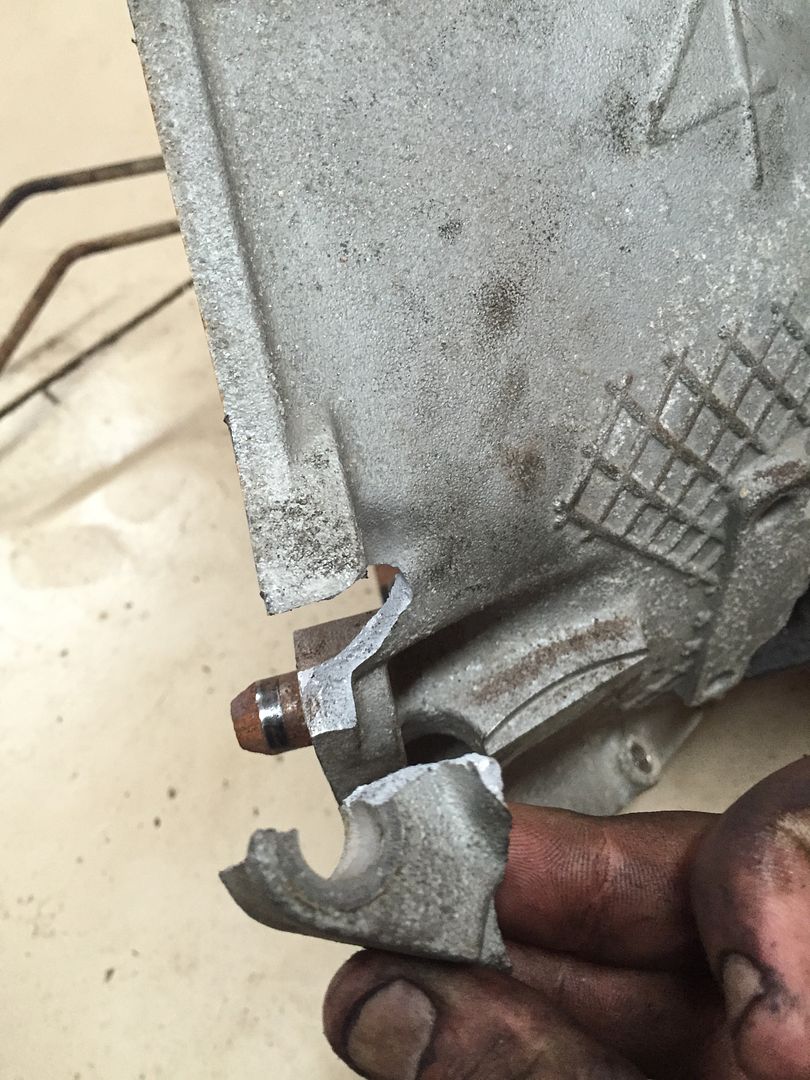 The motor has definitely fought me with its typical Chevy issues, dipstick rusted to the block and broke off, both front manifold bolts broke inside the heads. Next time i'm at the shop ill be tackling those issues and continue to break the motor down and begin cleaning. |

|

|
|
11-18-2015, 12:35 AM
|
#2 |
|
Senior Member
 Join Date: Mar 2011
Location: West Plains, Missouri
Posts: 7,560
|
Re: 49, bagged, 6.0, patina, the works
Welcome to the group, doing some nice work. I'll follow along for the build...Jim
__________________
my build thread: http://67-72chevytrucks.com/vboard/s...d.php?t=459839 Jimbo's long bed step build:http://67-72chevytrucks.com/vboard/s...t=464626<br /> |
|
|
|
|
11-18-2015, 02:41 AM
|
#3 |
|
Registered User
Join Date: Oct 2009
Location: Marysville KS
Posts: 105
|
Re: 49, bagged, 6.0, patina, the works
Looks good, following
|
|
|
|
|
11-18-2015, 04:28 AM
|
#4 |
|
Senior Member
Join Date: May 2007
Location: Doodah Kansas
Posts: 7,774
|
Re: 49, bagged, 6.0, patina, the works
nice condensed timeline! I would have jumped on that original truck too
__________________
the mass of men live lives of quiet desperation if there is a problem, I can have it. new project WAYNE http://67-72chevytrucks.com/vboard/s...d.php?t=844393 |
|
|
|
|
11-18-2015, 09:06 AM
|
#5 |
|
Registered User
 Join Date: Mar 2007
Location: Scotts, Michigan
Posts: 3,779
|
Re: 49, bagged, 6.0, patina, the works
Looks great. I was at Columbus 2 years ago and I remember seeing your truck in the car corral for sale. Nice progress.
Marc
__________________
...........__________ .................. ((__|__||___\____ ..;.;;.:;:;.,;..;((_(O))____ (_(O)) 1948 Chevy Truck - Finished SOLD!! 1953 Chevy Suburban "Family Truckster" Completed: Spring of 2021 http://67-72chevytrucks.com/vboard/s...d.php?t=605484 1994 4x4 Blazer - "Field Find" https://67-72chevytrucks.com/vboard/...ferrerid=30857 |
|
|
|
|
11-18-2015, 12:01 PM
|
#6 |
|
Registered User
Join Date: Nov 2014
Location: Langley B.C
Posts: 179
|
Re: 49, bagged, 6.0, patina, the works
Nice looking patina. I had the same manifold bolts go one mine as well.
|
|
|
|
|
11-18-2015, 12:09 PM
|
#7 |
|
Registered User
Join Date: Aug 2015
Location: Houston texas
Posts: 168
|
Re: 49, bagged, 6.0, patina, the works
I like the patina on it gonna be sick with that 6.0 in there. ive kicked the idea of putting one in my build just haven't come across a good deal yet. ill follow along man good luck
__________________
big_moss bagged 51 3100 build |
|
|
|
|
11-18-2015, 12:51 PM
|
#8 |
|
Registered User
Join Date: Nov 2012
Location: Post Falls, Idaho
Posts: 1,757
|
Re: 49, bagged, 6.0, patina, the works
Awesome.....subscribed
|
|
|
|
|
11-18-2015, 01:08 PM
|
#9 |
|
Registered User
Join Date: Mar 2015
Location: Morada, CA --- (Near Lodi)
Posts: 1,443
|
Re: 49, bagged, 6.0, patina, the works
Another nice build going on.....
__________________
My Build: 57 Chevy Pro-Street |
|
|
|
|
11-18-2015, 03:18 PM
|
#10 |
|
Registered User
Join Date: May 2013
Location: Kansas City
Posts: 572
|
Re: 49, bagged, 6.0, patina, the works
Sweet score on the van.
When you get to it can you show some more pics/info on the Thorbros three link. I was thinking about going that way too. |
|
|
|
|
11-18-2015, 10:13 PM
|
#11 |
|
Registered User
Join Date: Jan 2015
Location: Prior Lake MN
Posts: 87
|
Re: 49, bagged, 6.0, patina, the works
I would like to see pics of the Thorbros kit installed as well. Are you going to notch the frame? What's your plan for mounting the rear bags?
|
|
|
|
|
11-18-2015, 11:07 PM
|
#12 |
|
Senior Member
Join Date: Jul 2012
Location: Oblong, Illinois
Posts: 7,028
|
Re: 49, bagged, 6.0, patina, the works
Cool build and love your shop. I will be tagging along.
|
|
|
|
|
11-19-2015, 09:57 AM
|
#13 | |
|
Registered User
Join Date: Apr 2015
Location: Columbus, Ohio
Posts: 46
|
Re: 49, bagged, 6.0, patina, the works
Quote:
Thanks everyone else! |
|
|
|
|
|
11-19-2015, 09:41 PM
|
#14 |
|
Registered User
Join Date: Mar 2013
Location: Edmonton, AB
Posts: 298
|
Re: 49, bagged, 6.0, patina, the works
Wicked dude. Yours reminds me a lot of my 49'
|
|
|
|
|
11-27-2015, 05:55 PM
|
#15 |
|
Registered User
Join Date: Apr 2015
Location: Columbus, Ohio
Posts: 46
|
Re: 49, bagged, 6.0, patina, the works
Harness laid out
 Removing unnecessary wiring (Emissions, Rear O2 sensors, A/C, etc. etc.) Began labeling what I will need from the PCM to get +12v  Harness went on a diet  PCM connectors/all wires that will receive switched 12v. All thats left to do now is solder them to their correct fuse/relay locations. I have the relay sockets, just waiting on the fuse block to come in.  Anyone like spaghetti?  That's it for now. Next update will be the finished harness, wrapped and fused, ready for install. |
|
|
|
|
11-27-2015, 06:08 PM
|
#16 |
|
Registered User
Join Date: Apr 2015
Location: Columbus, Ohio
Posts: 46
|
Re: 49, bagged, 6.0, patina, the works
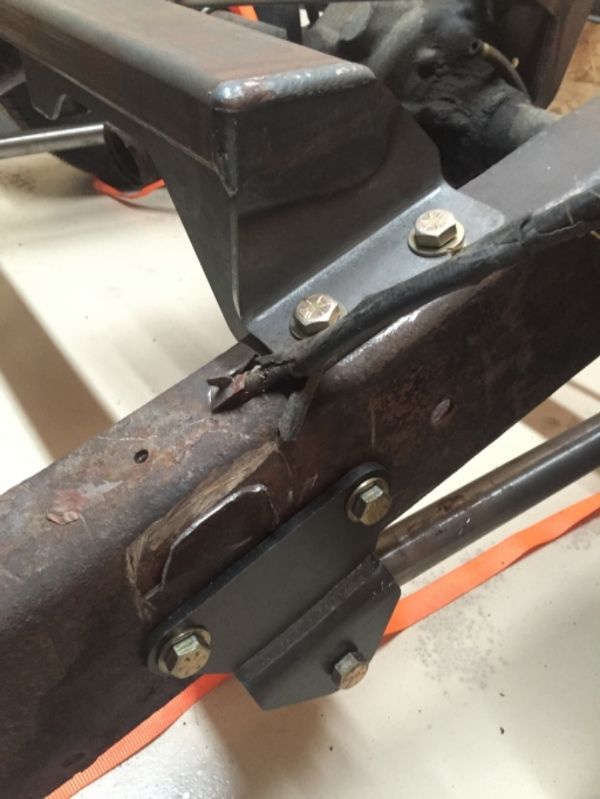
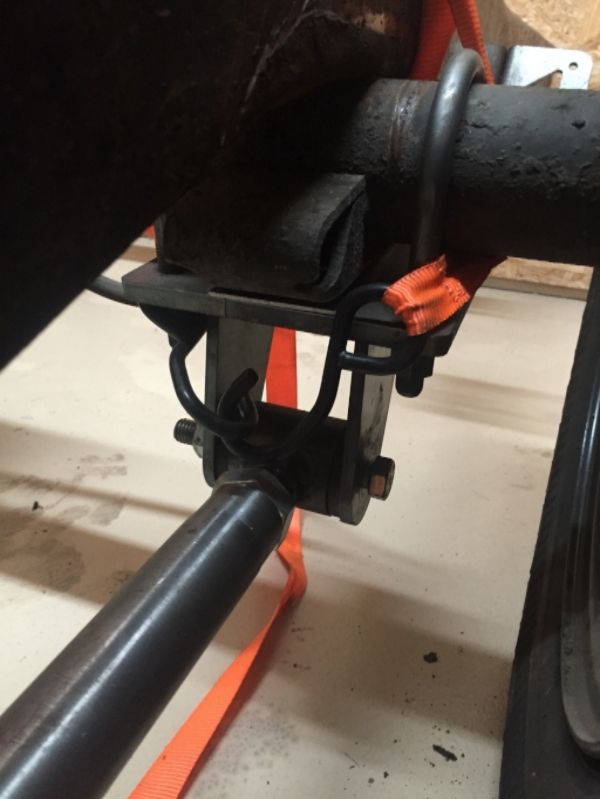
Also, for those wondering more about the 3link. Quality is top notch and heres a few pics of how the lower bars install, the cross member, and the diff bracket. The bolt on solution is nice for simplicity and ease of removal, etc. Ignore the lack of washers on some of the bolts, they're all there now.
Last edited by NickL; 11-27-2015 at 06:16 PM. |
|
|
|
|
11-28-2015, 10:18 PM
|
#17 |
|
SAVING ONE TRUCK AT A TIME
Join Date: Feb 2010
Location: sherwood oregon
Posts: 1,141
|
Re: 49, bagged, 6.0, patina, the works
Great work.
__________________
53-suburban (99% done) 40-pick up (99.9% done) 12-cc lb dually D-max (dd) 61-crew cab D-max "PAY LESS FOR WHAT YOU NEED PAY MORE FOR WHAT YOU WANT" 53 BURBAN BARN FIND:http://67-72chevytrucks.com/vboard/s...d.php?t=404091 1940 PROJECT MOON SHINE:http://67-72chevytrucks.com/vboard/s...d.php?t=551088 1961 CREW MAX: http://67-72chevytrucks.com/vboard/s....php?p=6957999 |
|
|
|
|
11-28-2015, 10:21 PM
|
#18 |
|
Registered User
Join Date: Aug 2015
Location: Houston texas
Posts: 168
|
Re: 49, bagged, 6.0, patina, the works
Looks good man
__________________
big_moss bagged 51 3100 build |
|
|
|
|
11-28-2015, 11:17 PM
|
#19 |
|
Registered User
Join Date: Sep 2014
Location: Auburn IN
Posts: 34
|
Re: 49, bagged, 6.0, patina, the works
I looked at that truck that weekend. Held out for a 5 window.
Nice project. |
|
|
|
|
11-30-2015, 04:07 PM
|
#20 |
|
Registered User
Join Date: Mar 2010
Location: Piper, KS
Posts: 683
|
Re: 49, bagged, 6.0, patina, the works
Nice job so far. Like where this is going.... Sub'd
|
|
|
|
|
12-01-2015, 09:53 PM
|
#21 |
|
Hey Y'all!!
Join Date: Dec 2007
Location: Bay Minette, Alabama
Posts: 1,755
|
Re: 49, bagged, 6.0, patina, the works
Really nice! Will be following your progress...
__________________
Just hopin' I live long enough to finish something!!! |
|
|
|
|
01-07-2016, 02:46 PM
|
#22 |
|
Registered User
Join Date: Mar 2013
Location: Edmonton, AB
Posts: 298
|
Re: 49, bagged, 6.0, patina, the works
Any updates on this?
Do you have any photos of the Code504 LS engine mounts? |
|
|
|
|
01-09-2016, 07:44 PM
|
#23 |
|
Registered User
Join Date: Jan 2010
Location: Titusville, PA
Posts: 3,585
|
Re: 49, bagged, 6.0, patina, the works
like what I'm seeing, I'll be in on it.
__________________
51' 99toLife finished 2011,355 sbc,5speed, patina, redoing whole truck, inter, bags, etc http://67-72chevytrucks.com/vboard/s...d.php?t=382481 49Hardtimes s/10 susp- bagged, vortec sbc, 5 speed, patina, sold http://67-72chevytrucks.com/vboard/s...d.php?t=594874 VIDEOS https://youtu.be/E8zHhjgS_lA https://youtu.be/E8zHhjgS_lA Geronimo 54' LS engine, static drop IFS, Client build, just about done http://67-72chevytrucks.com/vboard/s...62#post7399162 52' 3100 Slowly in progress, will be painted two toned, have 235 with a t-5, lowered OG frame Other projects, 49' farmuse 3100, killer Patina, will be slammed, LS engine, full done interior up next! www.coffeeandcustoms.com |
|
|
|
|
01-10-2016, 12:52 AM
|
#24 | |
|
Registered User
Join Date: Apr 2015
Location: Columbus, Ohio
Posts: 46
|
Re: 49, bagged, 6.0, patina, the works
Quote:
Just been so busy working, sorry for the lack of updates everyone! |
|
|
|
|
|
01-11-2016, 11:22 PM
|
#25 |
|
Registered User
Join Date: Apr 2015
Location: Columbus, Ohio
Posts: 46
|
Re: 49, bagged, 6.0, patina, the works
Bit of an update for you guys.
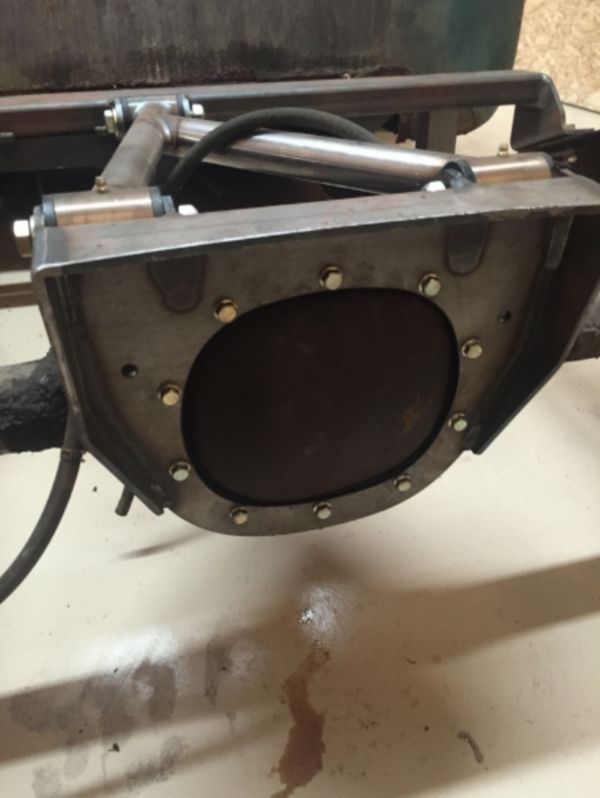
Code 504 LS series mounts. This is the passenger side mount and its components. 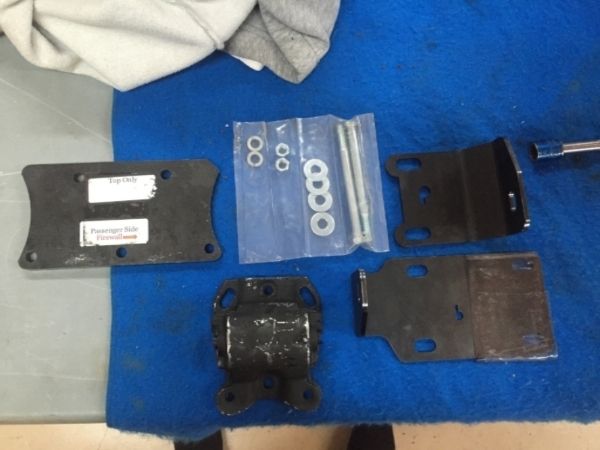 Mounted to the block 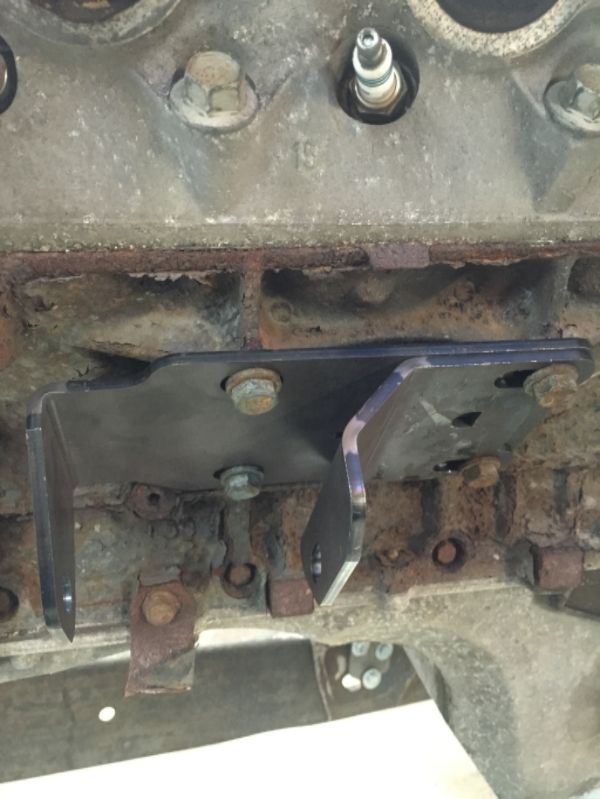 Getting the drivers side bolted up to the crossmember. (missing third and final bolt in this pic) 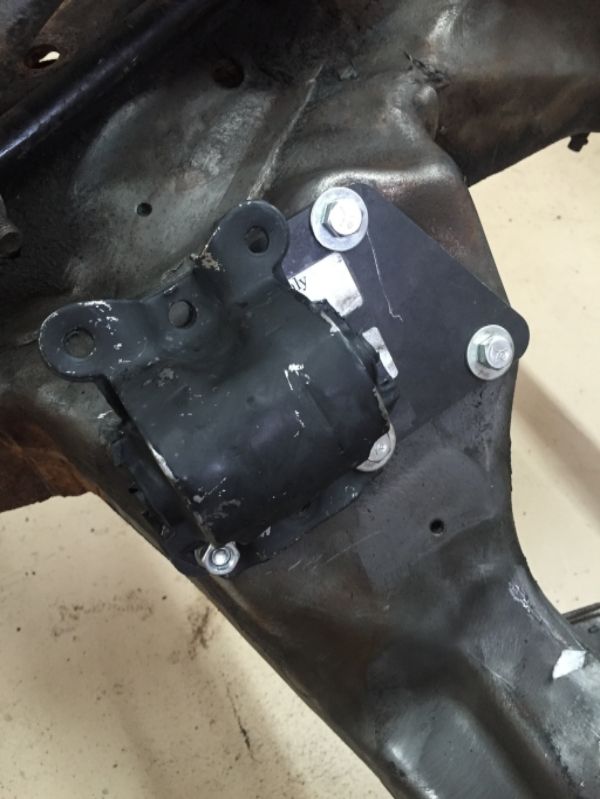 Motor/Trans in. 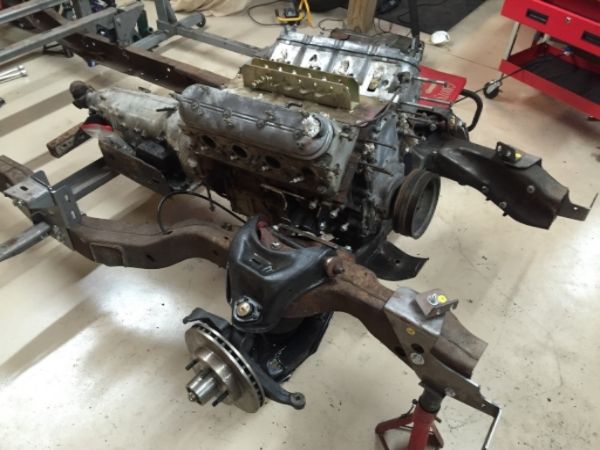 Few more shots. This shot shows how the A/C compressor will need relocated. Common with how far the engine must sit with the S10 swap. 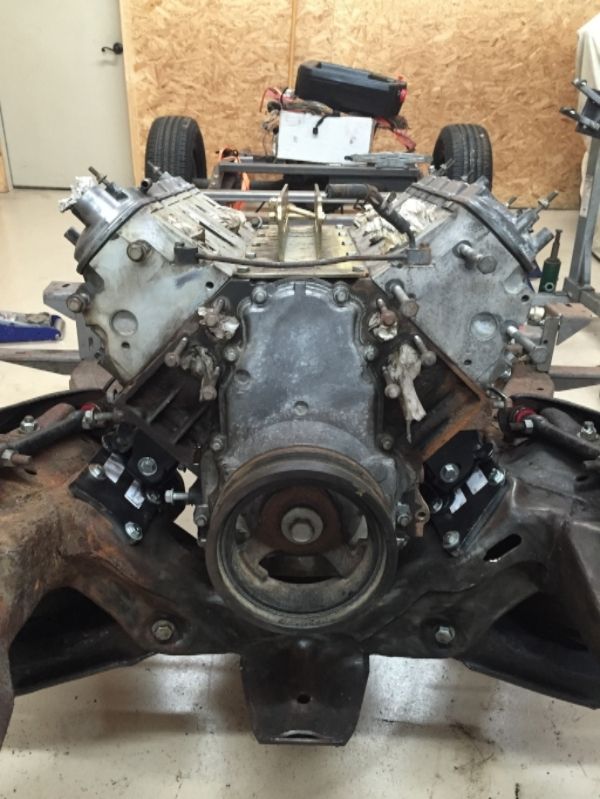 If you look closely in this photo, you'll see one of the issues that needs taken care of. With the trans mount in the only position it could possibly work, the pan of the trans hits the crossmember itself and prevents the mount from making contact with the crossmember. Im going to notch the crossmember/reinforce it and should be good to go. 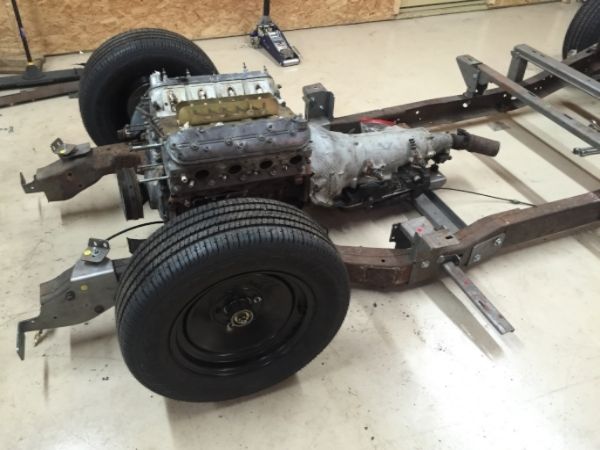 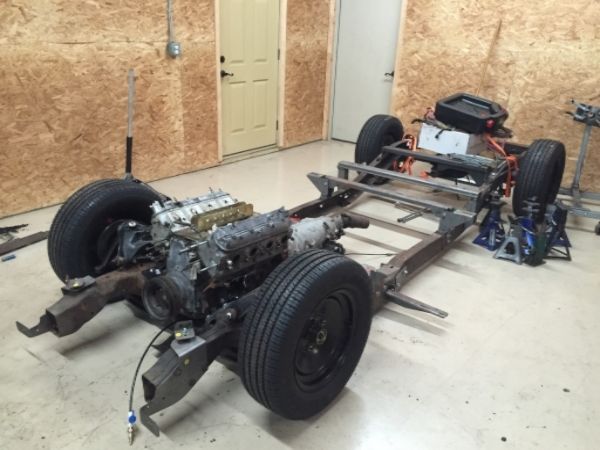 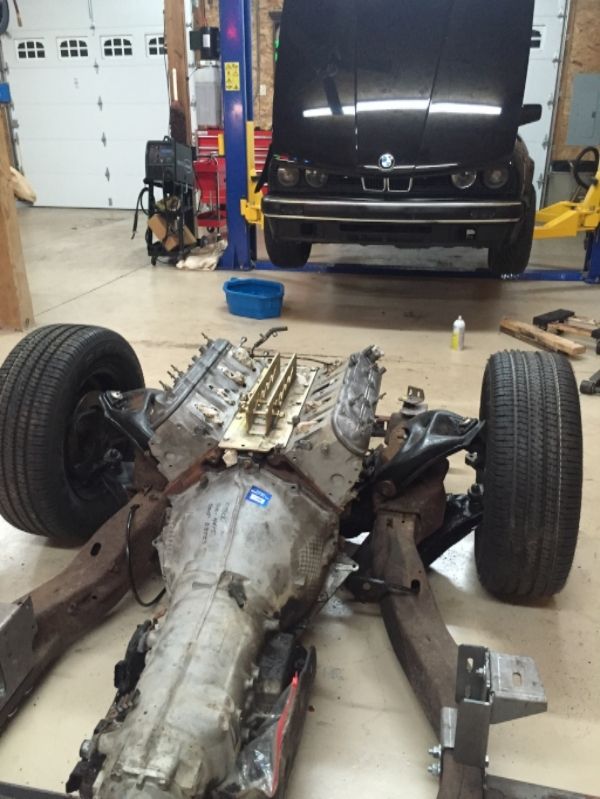 Overall: The mounts are nice. Simple but effective, nice quality. The only other issue other than the A/C and trans crossmember is the truck oil pan has way too much depth to it and is preventing the frame from airing out all the way. F-Body or Holley LSX conversion pan should fix this rather easily and gain some nice clearance for driving low. Unfortunately, I don't have the headers, steering shaft, and the cab isn't currently installed so no pictures of those things. Supposedly these mounts set the back of the heads 1" from the firewall. Should have that all taken care of sooner than later. |
|
|
|
|
| Bookmarks |
|
|


 Linear Mode

