
 |
Register or Log In To remove these advertisements. |
|
|
|
|||||||
 |
|
|
Thread Tools | Display Modes |
|
|
#1 |
|
Registered User
Join Date: Jan 2013
Location: Leonardtown, MD
Posts: 1,647
|
Repairing Sandblast Damage
In many cases warp damage from an overzealous operator will wreak havoc on sheet metal panels. Hopefully this will take away some of the mystery in repairs, if needed.
One of the members on another forum had the misfortune of trusting his 55 Chevy to a sandblasting expert ("been doing this stuff for thirty years!") and now is trying to regroup from the damage. His trunk lid was only sandblasted from the inside, and needless to say, too much pressure, too coarse media, one or both produced these results......  .......where the peening action caused the inside of the skin to stretch until it bulged inward. Discussion ensued as to the correct action to take to remedy the situation, with the primary differences of opinion being: 1) sandblast the outside to equalize the pressure caused by the peening (that caused a stretch on one side only) and then once equalized, shrink as needed to restore the panel to proper crown. 2) Shrink the panel as it sits, then take corrective action (stretch/shrink as needed) to restore the panel to proper crown. After various inputs, he was rather reluctant to try anything until a concensus is reached. So in the interest of learning something, I decided to help the guy out by conducting a test of both theories, and see what plays out. A local test subject was obtained, and also picked up a bag of medium grit Black Beauty from United Rentals. This was absolutely too coarse for use on sheet metal, but should help us to duplicate the results seen above. 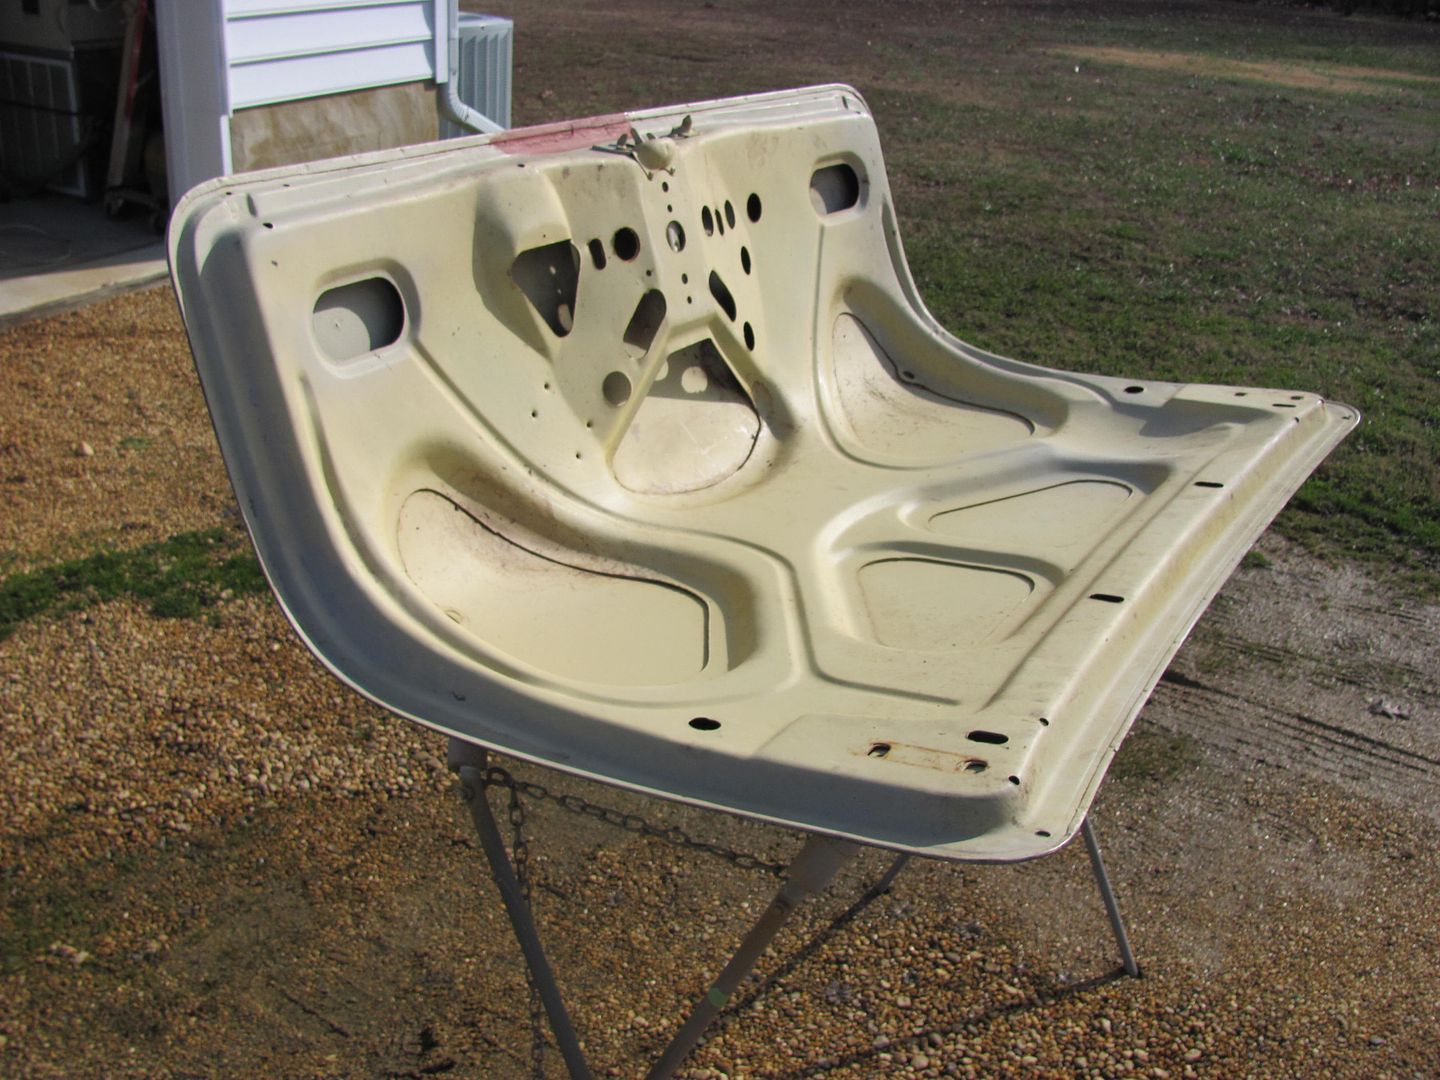 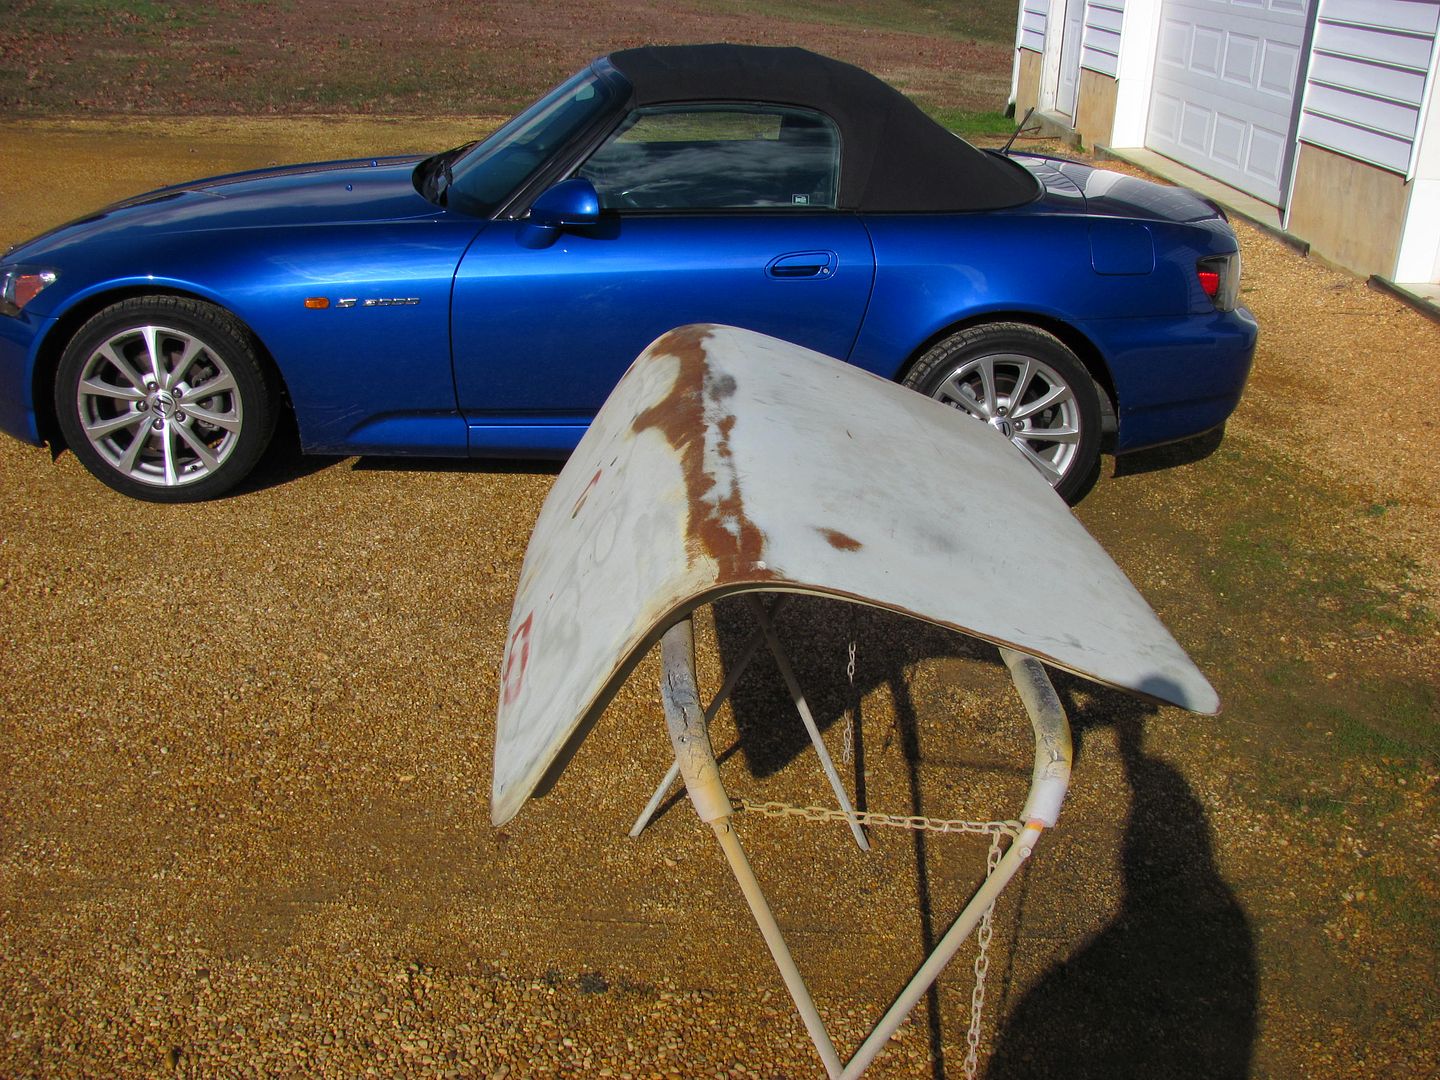 Here is the sample trunk lid after sanding all the bondo off the top. I took some measurements, made a template of the inner brace opening we will be using, and laid out the pattern on the outside so we can monitor the progress of the different methods. A datum was drawn about 2" in from the forward edge and the center edge of each hole. This was chosen as it is approximately the center of the radius on either end. 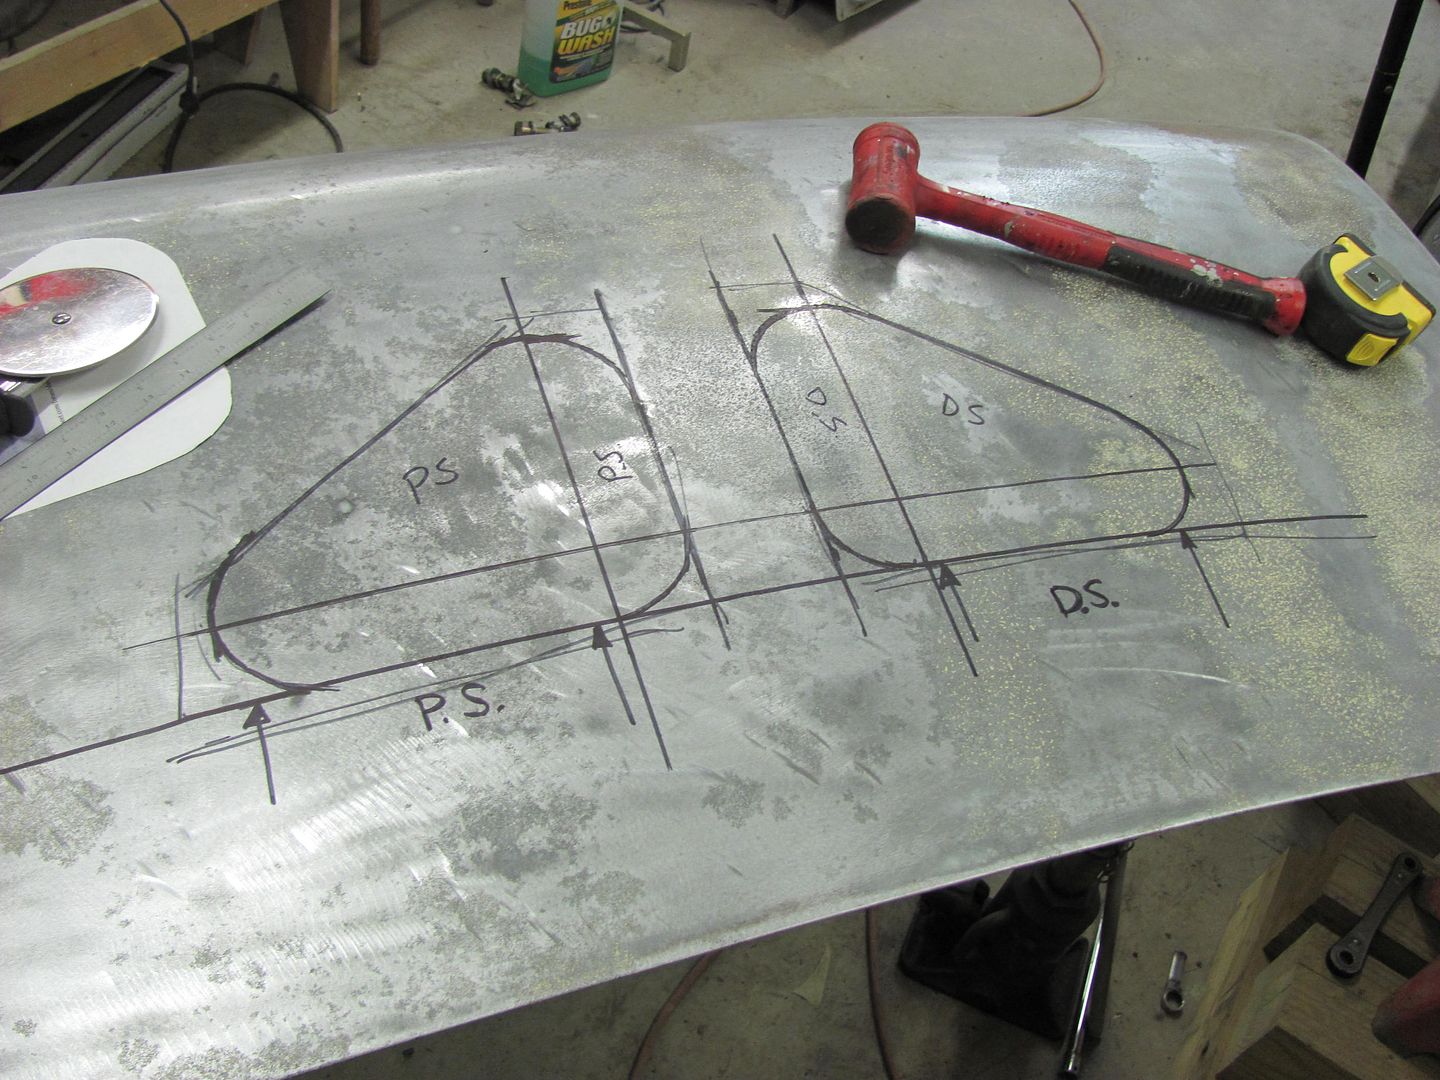 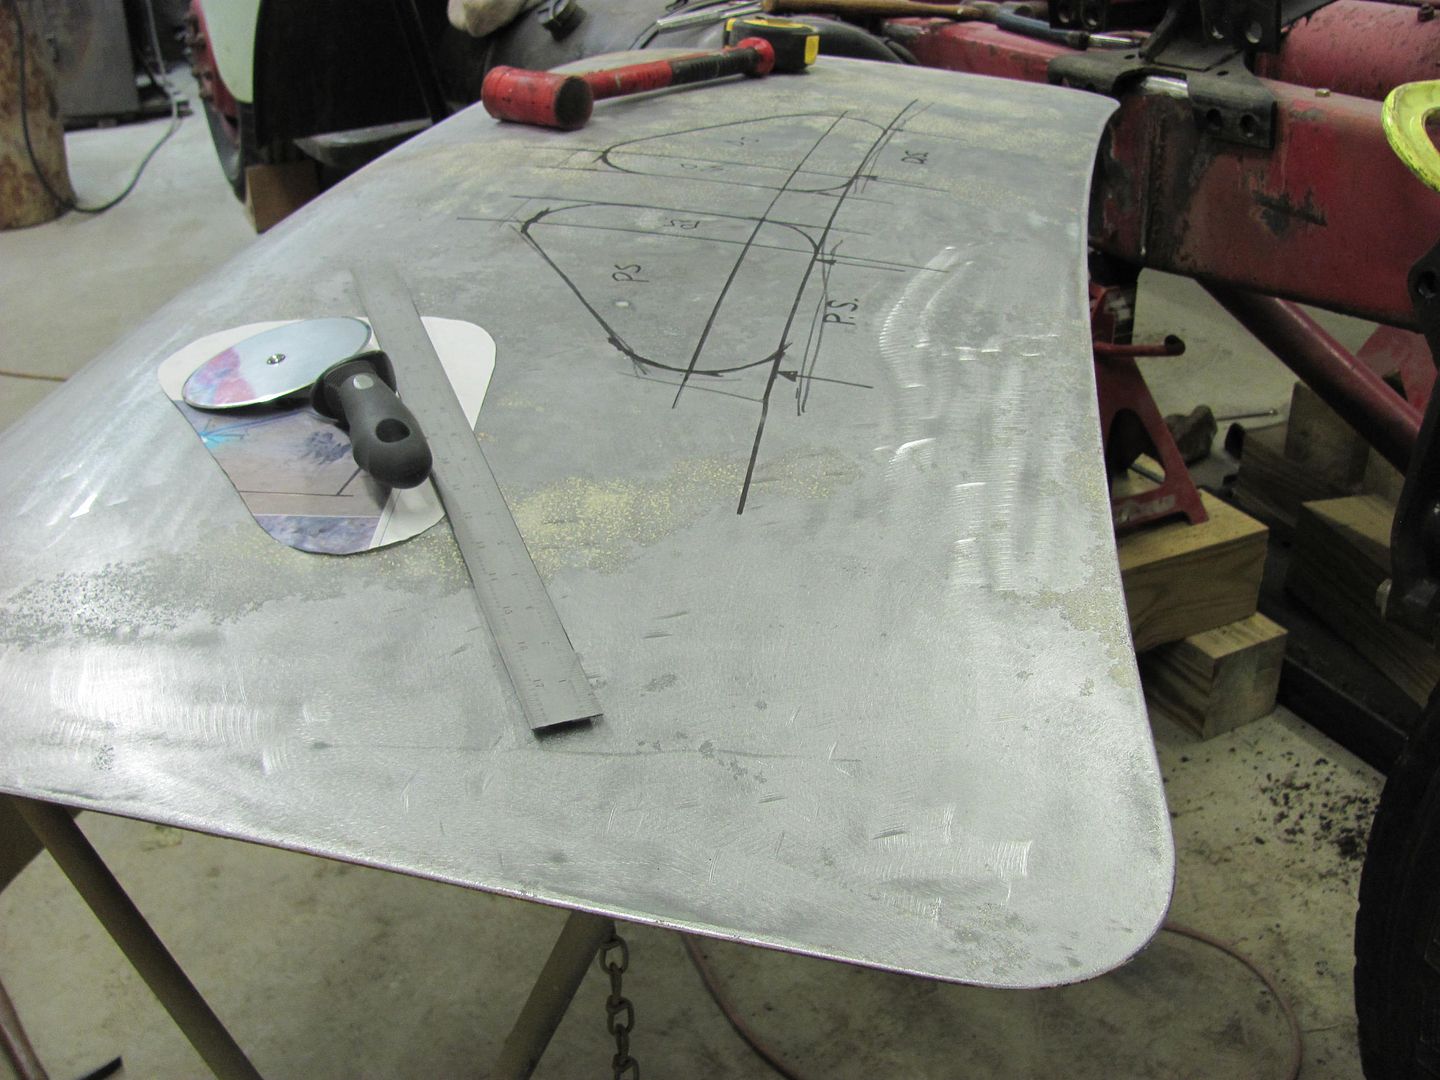 Next, the panel was checked along the datum lines in both directions to give us a baseline for panel straightness, and we'll check along these lines after sandblasting to see what damage occurs. Where there was a bit of waviness, it was a minimal amount that would have disappeared with some high build primer and block sanding. Given our 57 year old test subject, I guess we're lucky it's that close. 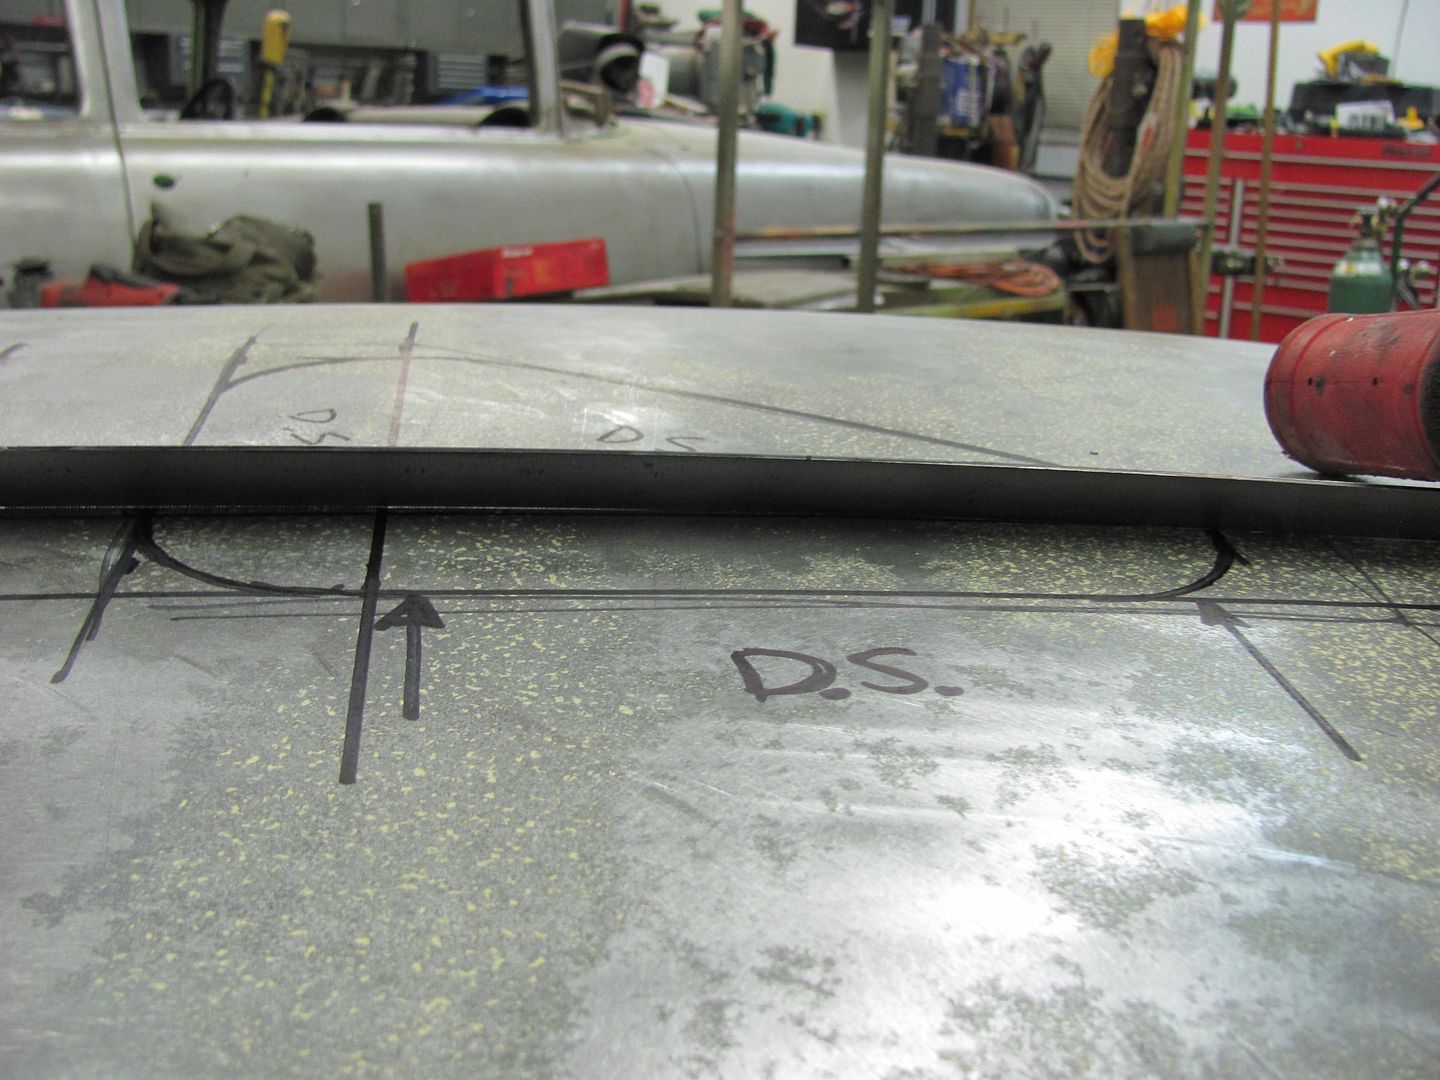 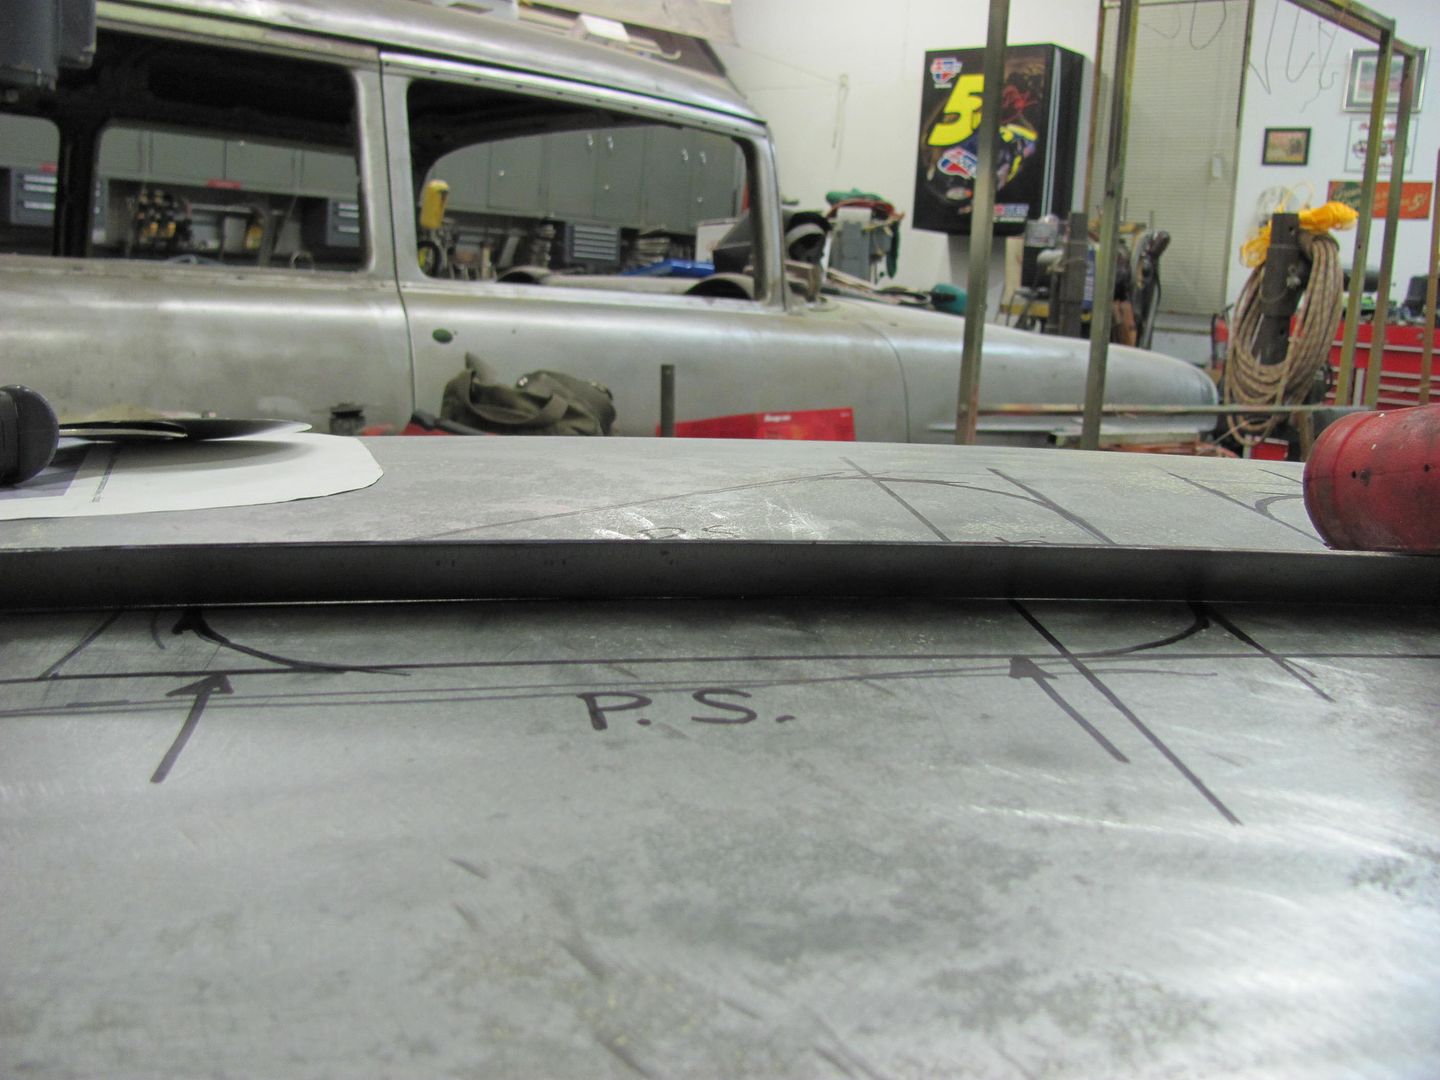 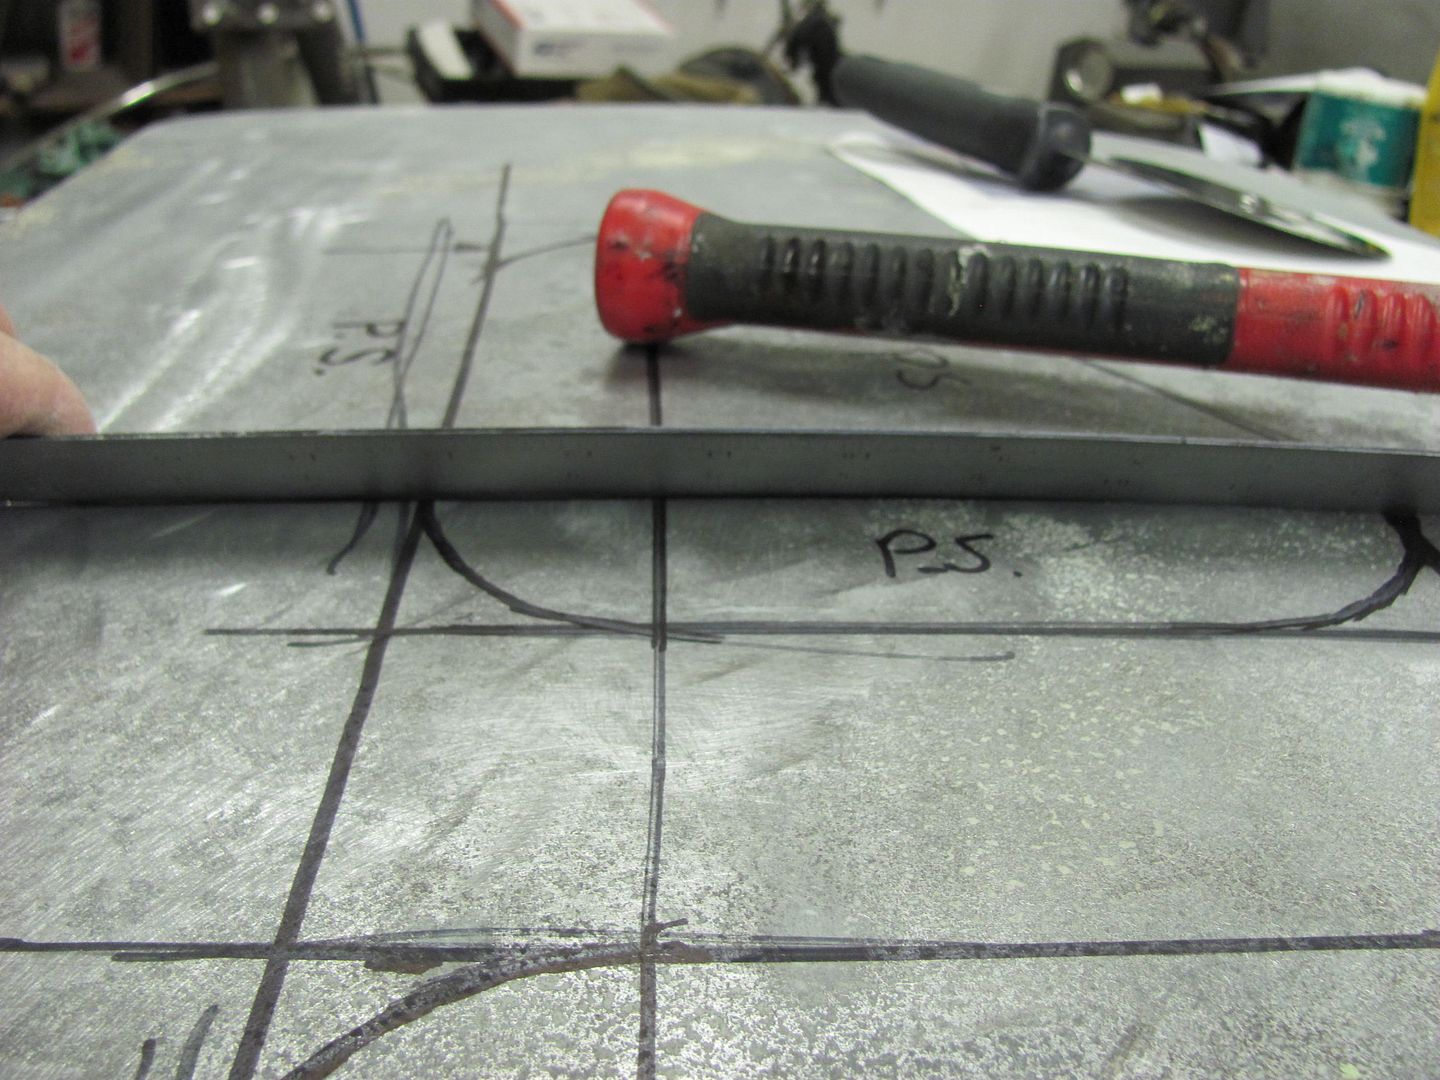 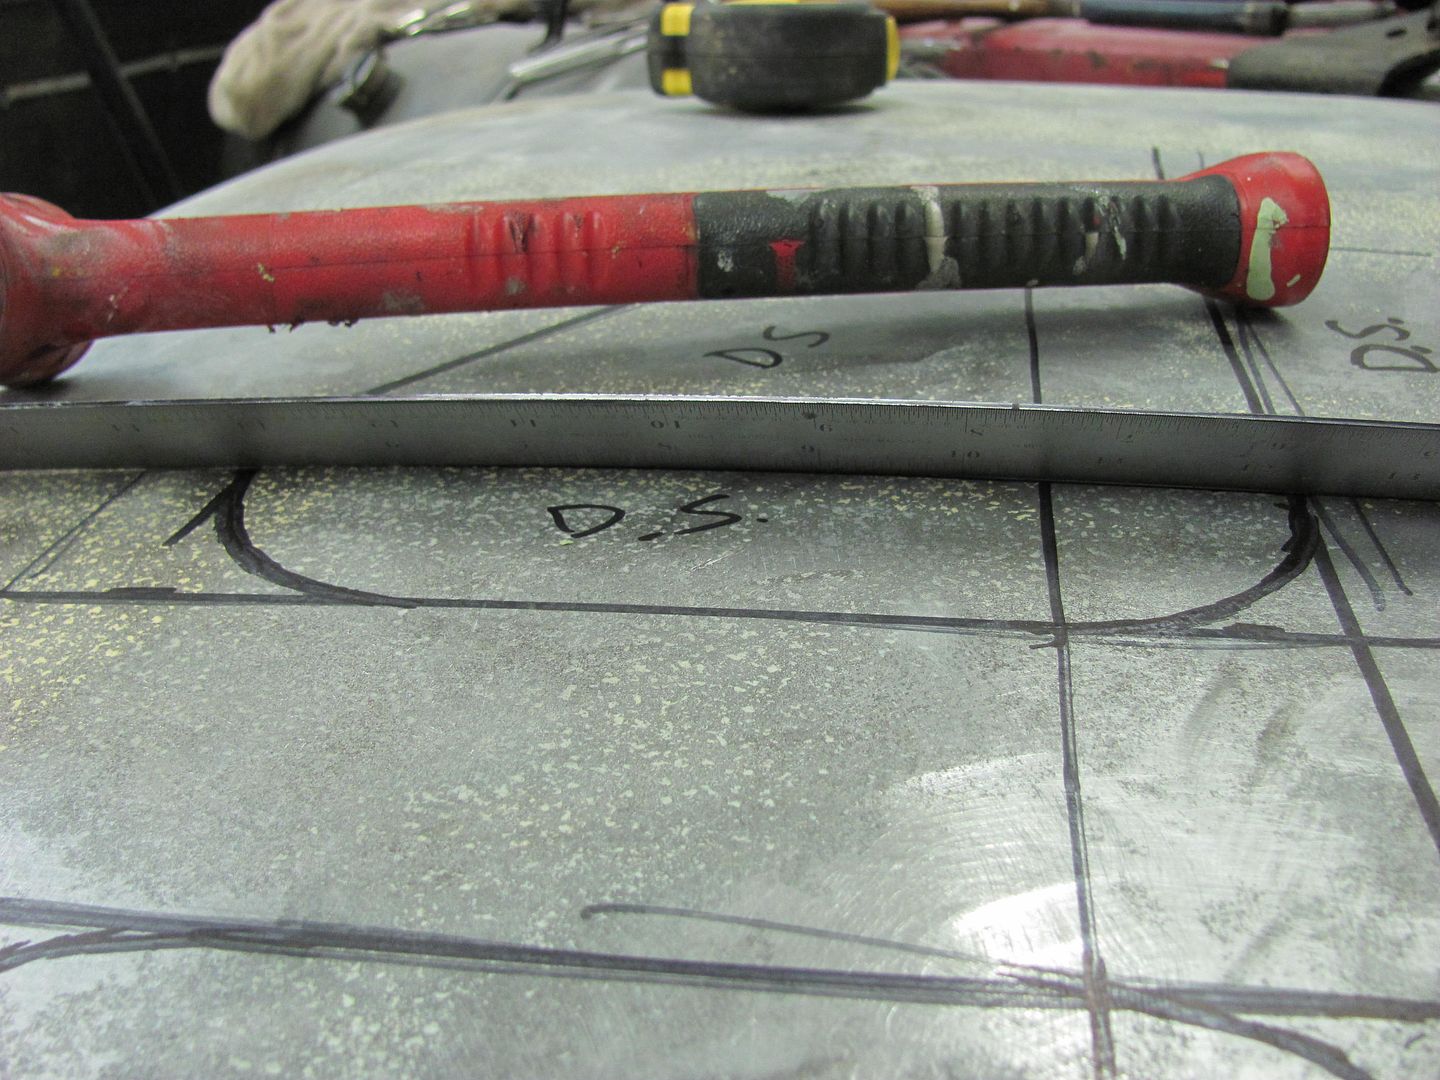 And here's our test subject, awaiting sandblasting. 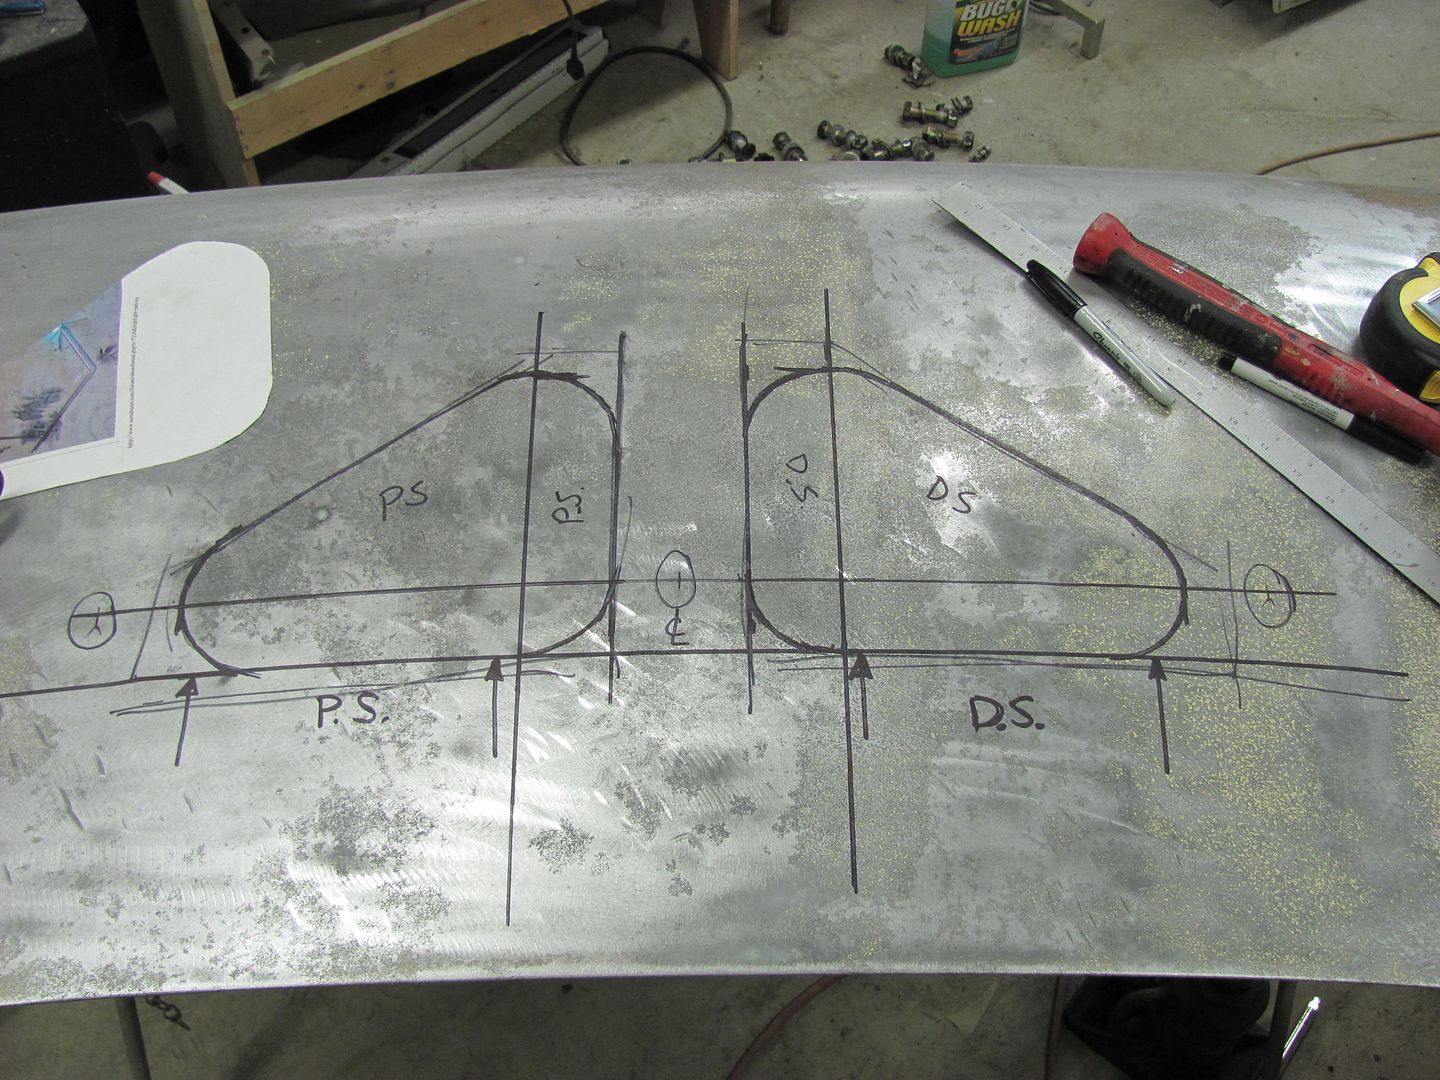 Well here's phase two of the test. The trunk lid was fitted into the blast cabinet. 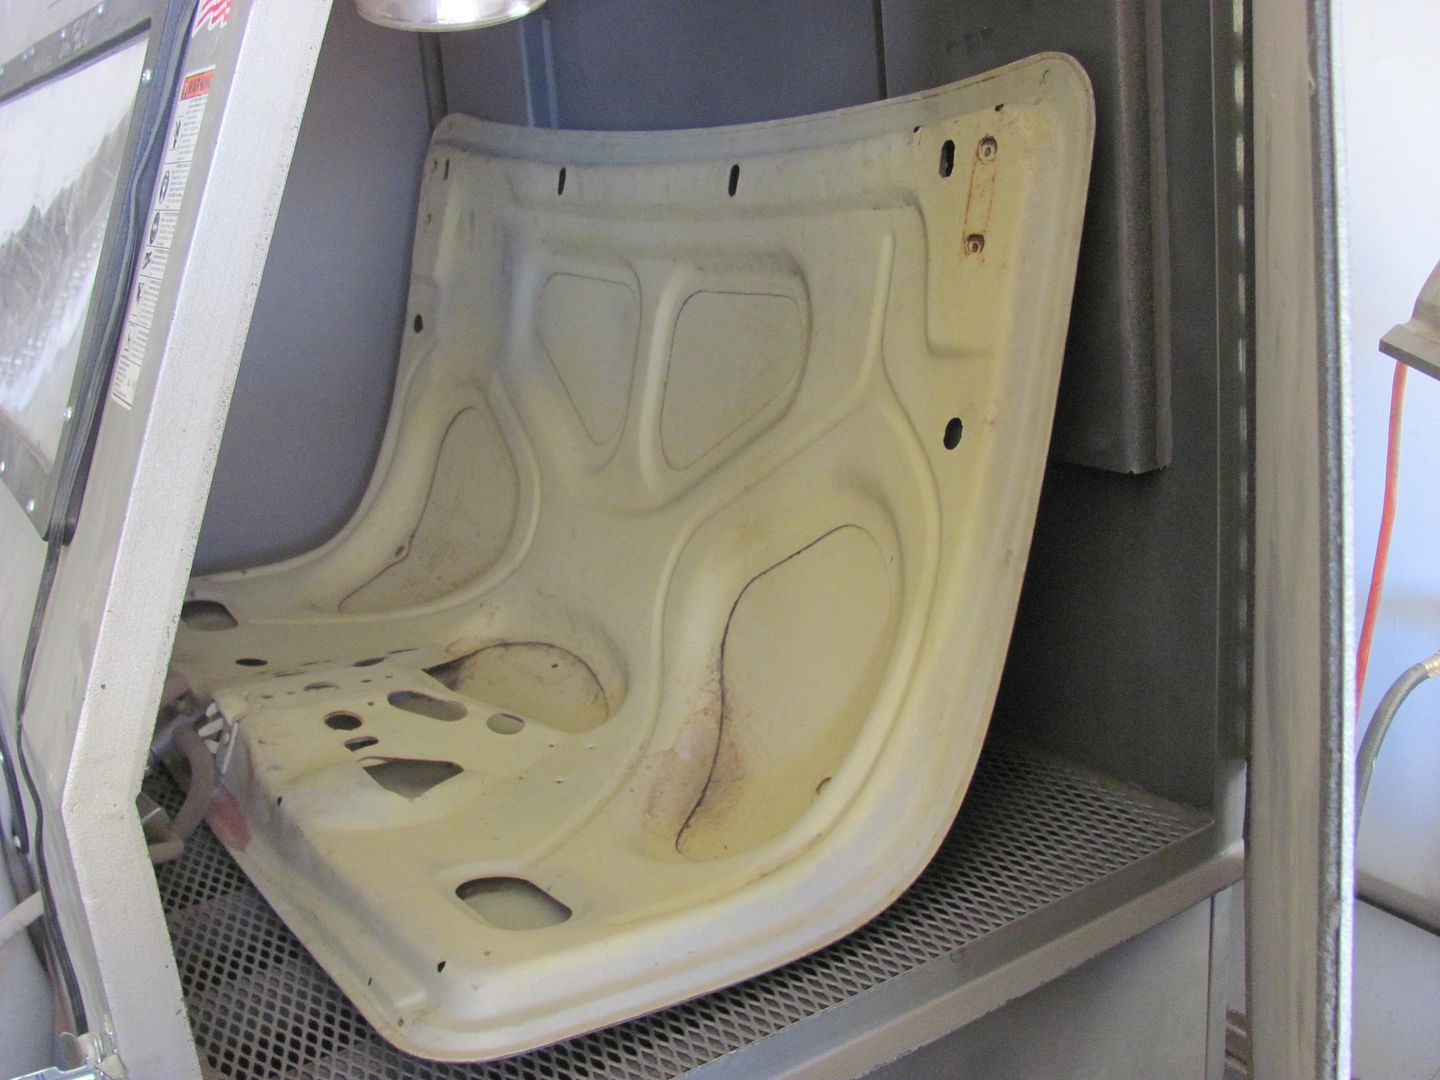 You always hear about how the heat from sandblasting is what causes the stretching and warping of the metal. I never gave that theory much thought before, but while we are testing, this would be a good opportunity to add that in the mix. In an attempt to minimize any outside influence while we measured temperature, the flood bulbs inside the cabinet were unscrewed enough to keep them turned off... 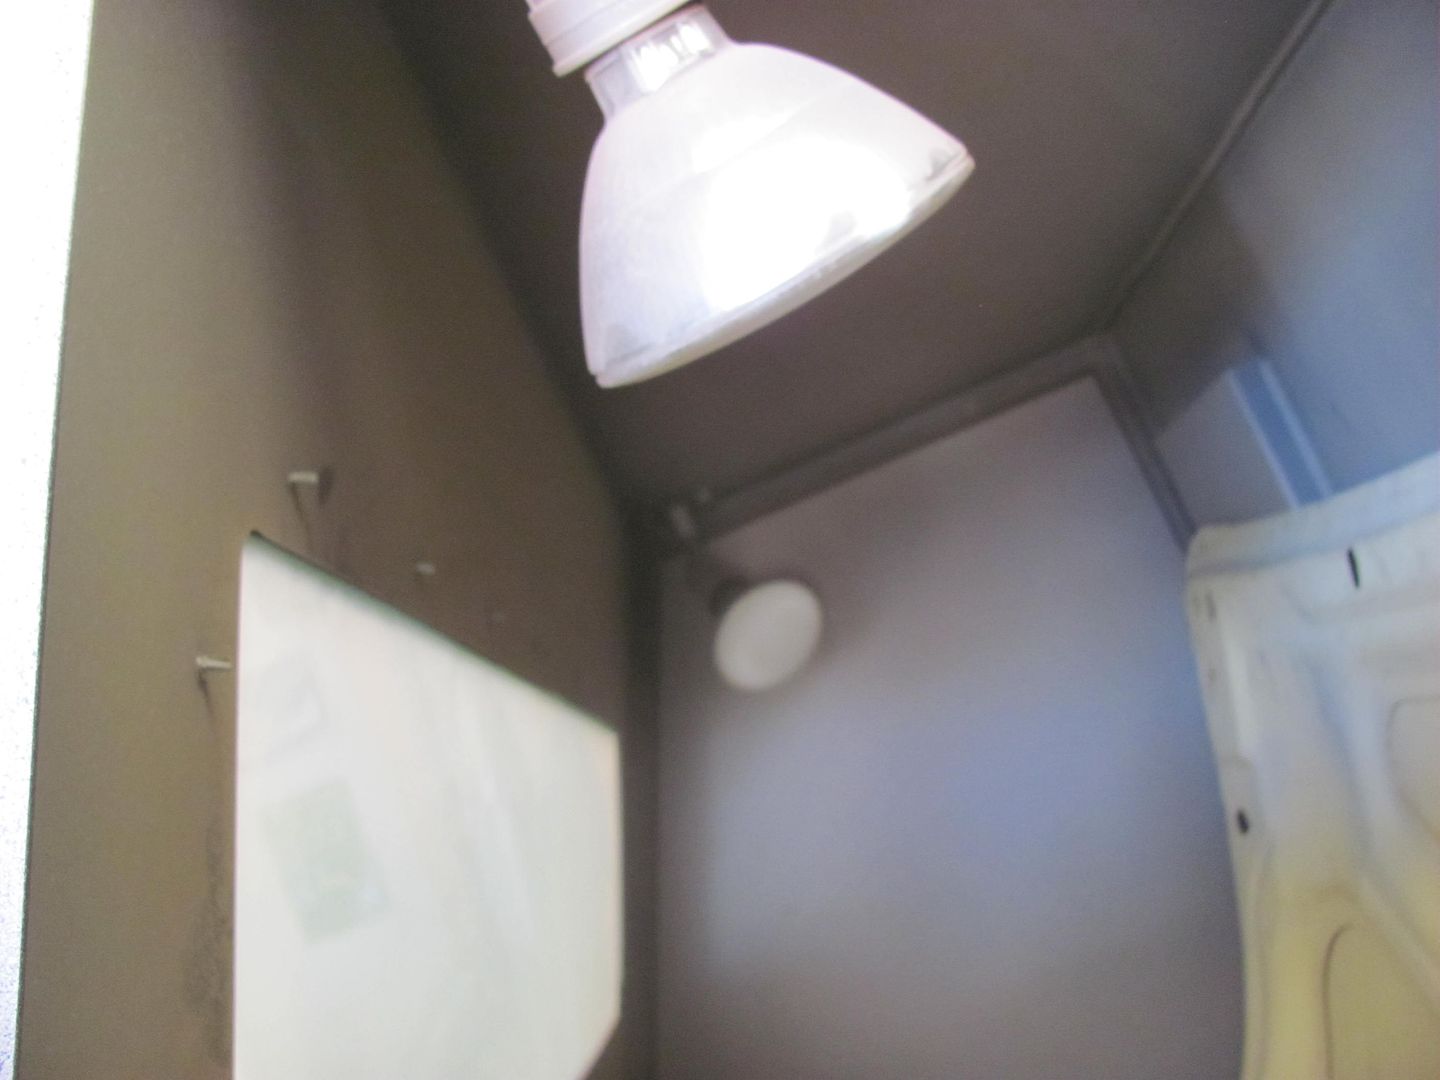 Here is the thermometer we'll be using today.... 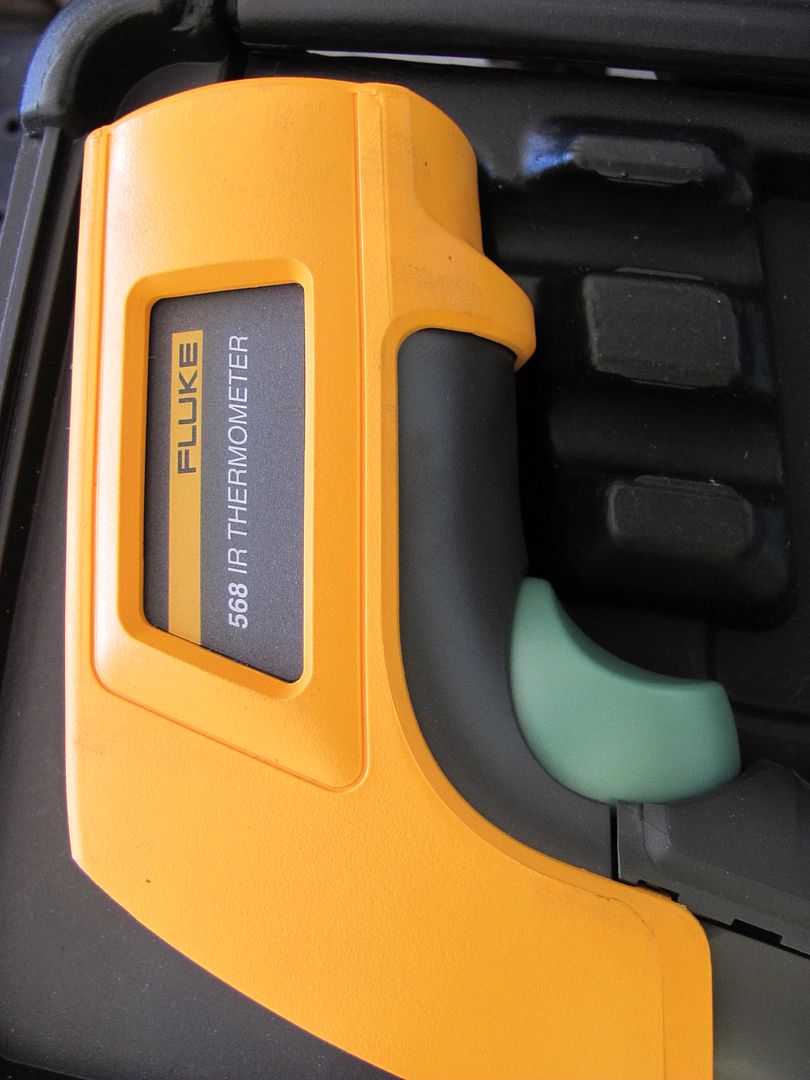 And here is the baseline temp..... 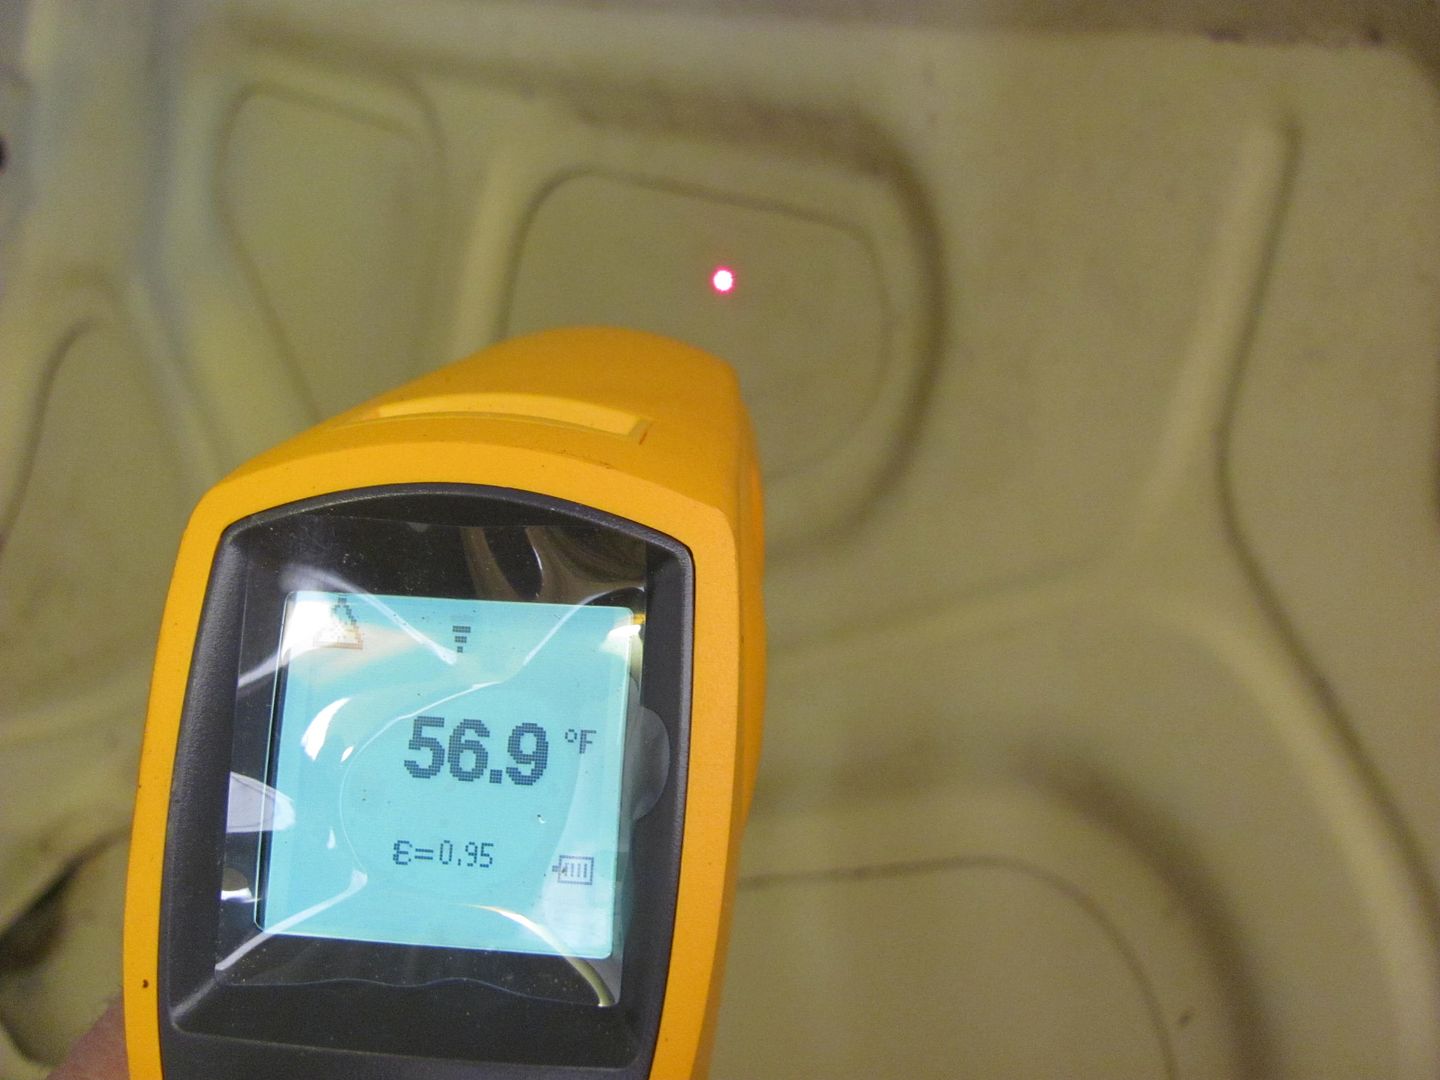 This is the media we'll be using today, Black Beauty medium grit. A bit coarse for sheet metal, but we're trying to duplicate the damage seen on Joe's trunk lid, so we'll give it a go..... 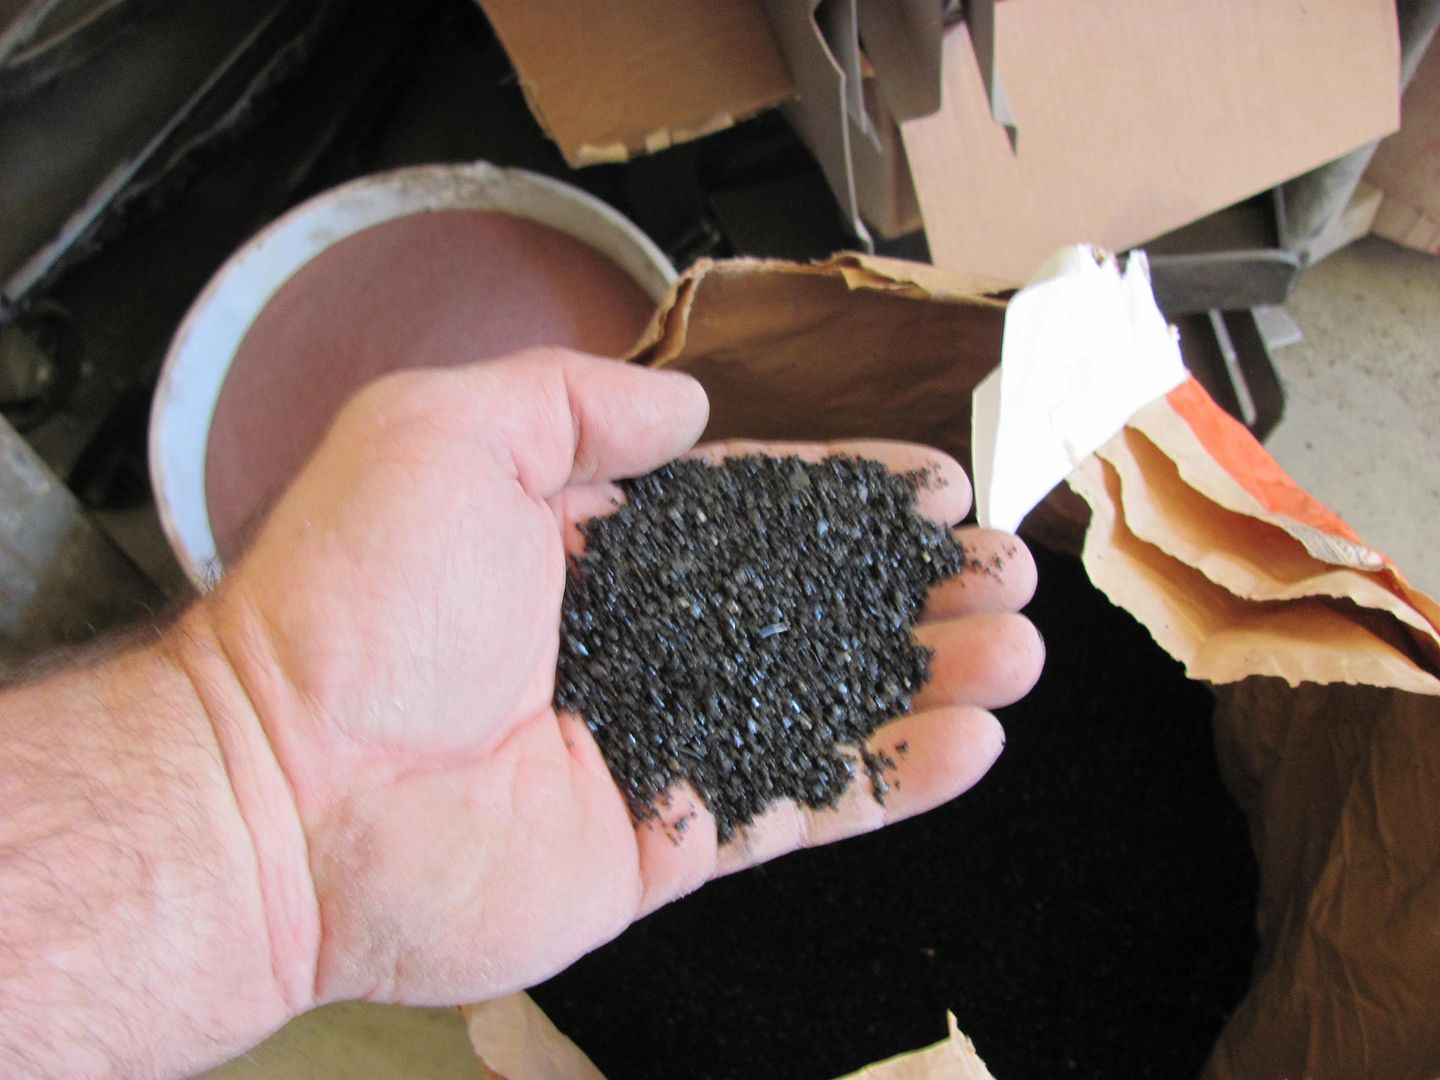 Then I changed out the media in the cabinet, and started blasting. As I had opened the garage door and it's rather warm out, and I was rather slow in getting the media changed out, I thought I should check the temp again. 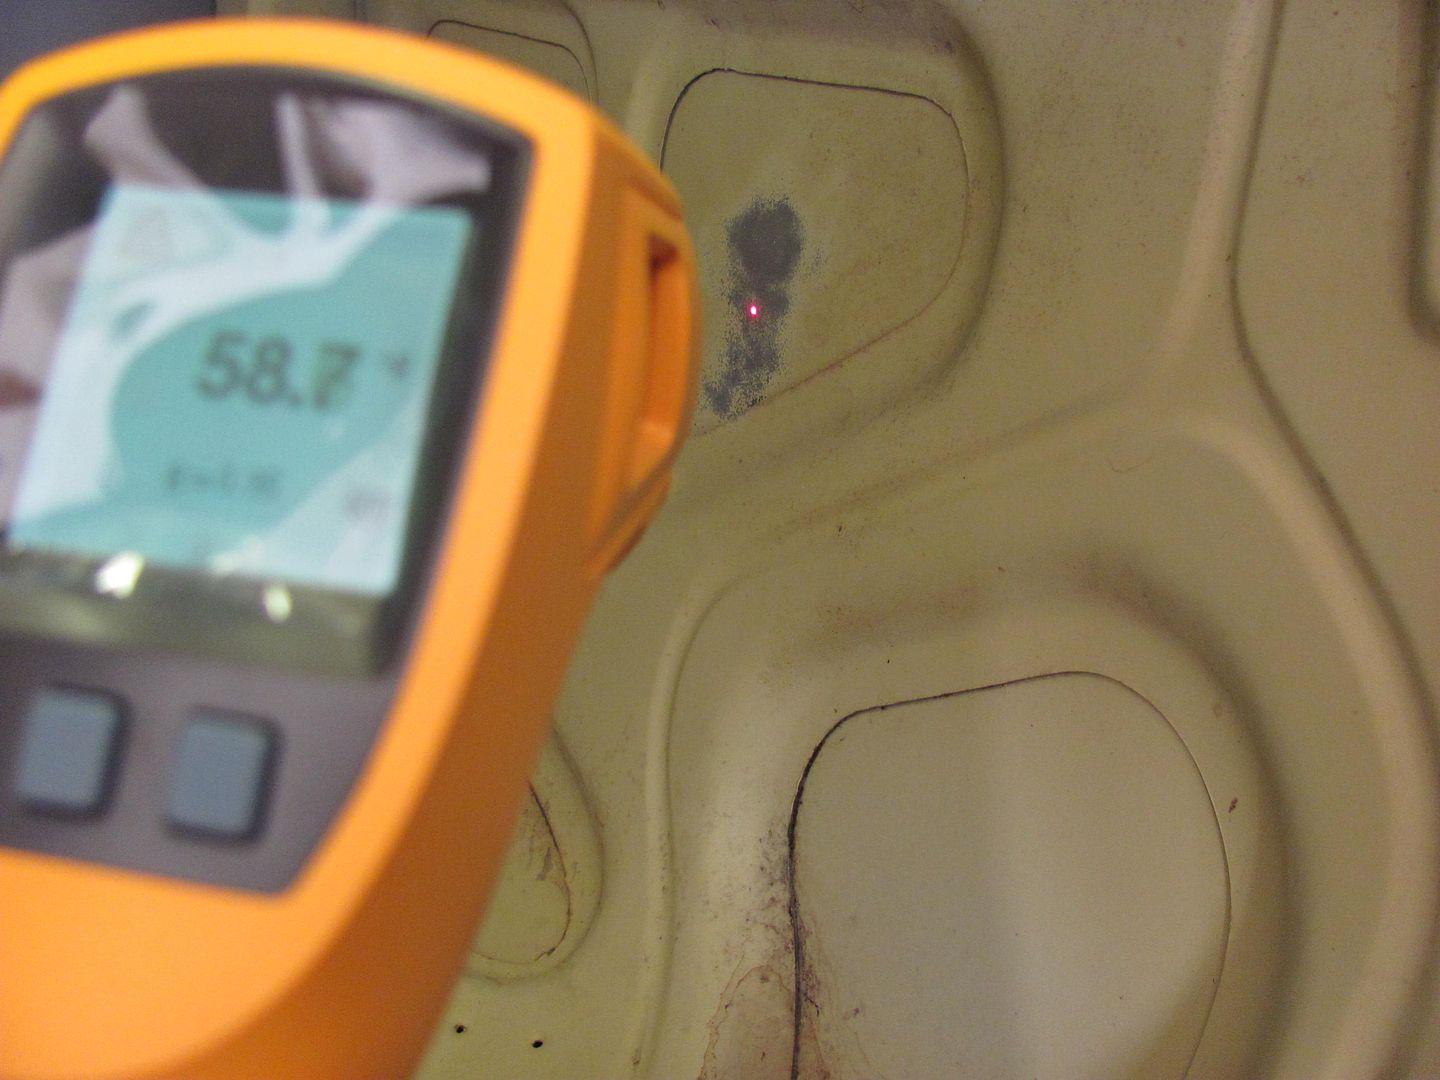 After clearing off the one hole, we had noticeable panel distortion from the outside. In checking the temp again, it had not moved since the last check. 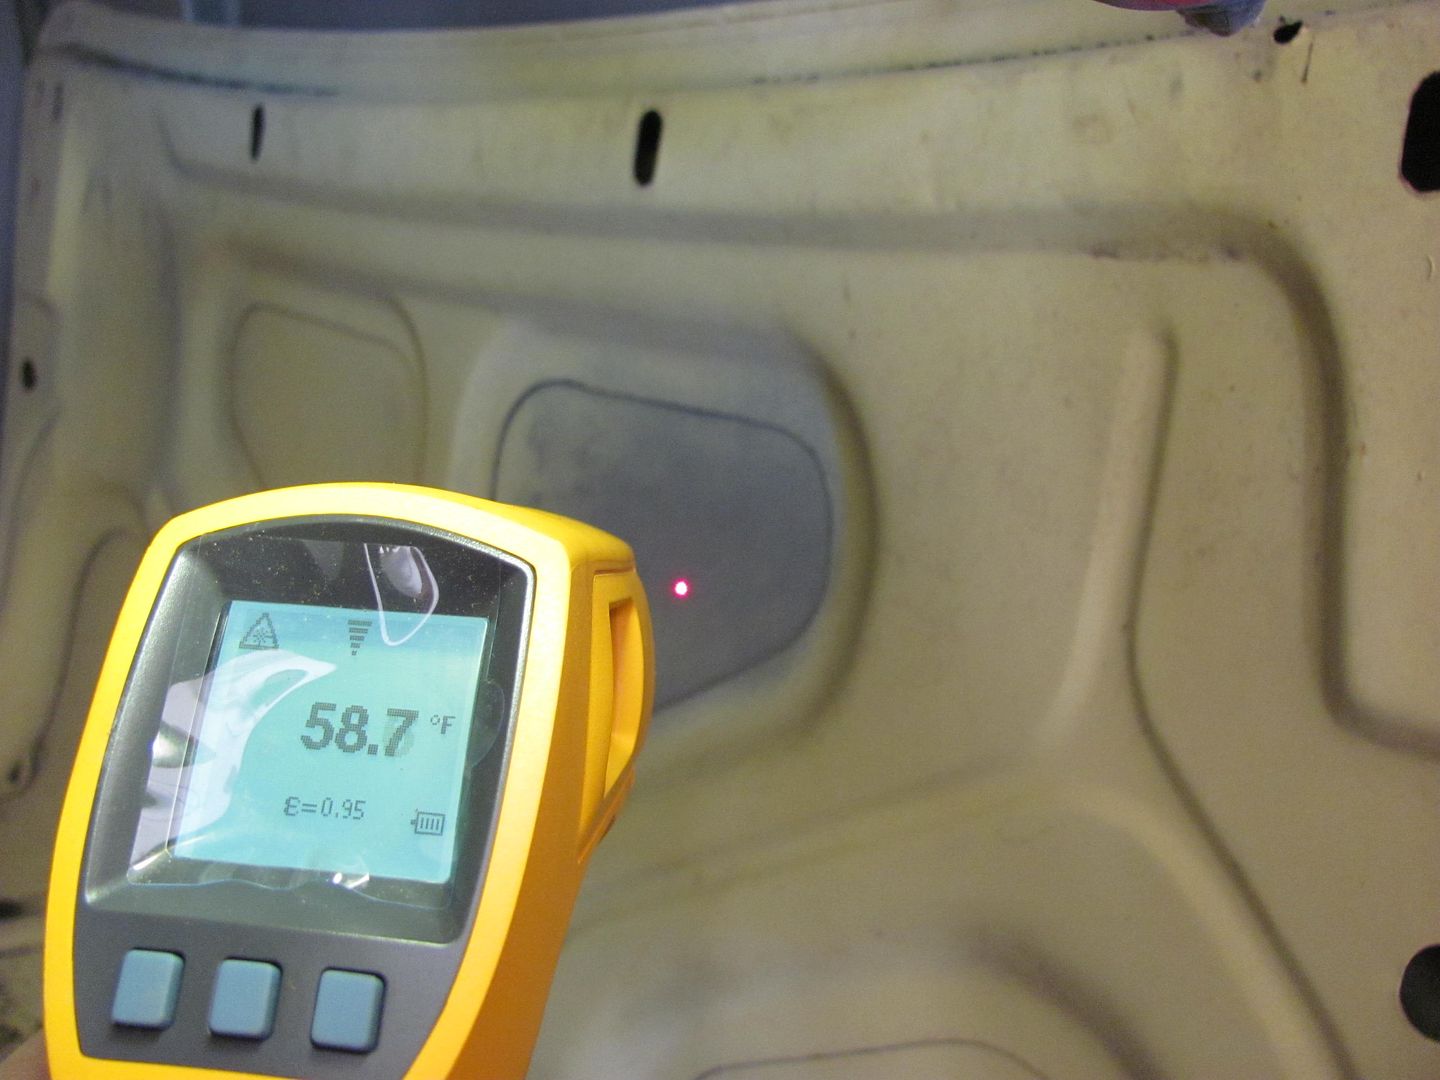 So in essence, the temp of the panel did not change from the time we started blasting the one hole until it was finished. If you want to scream conspiracy, well it has gone up a whopping 1.8 degrees since the trunk lid was placed in the cabinet. I doubt seriously this can be attributed to a heat issue. I do have a refrigerant dryer on my air system, so that helps to keep the compressed air from getting warm, and yet the panel stretched still, despite the absence of any significant heat increase. It should be safe to say the damage is caused due to the peening action of the media against the panel surface. Stretching has long since occurred by the time any heat has finally shown up. Lastly, here is the noticeable damage to the panel, measured along the datum lines as before.... 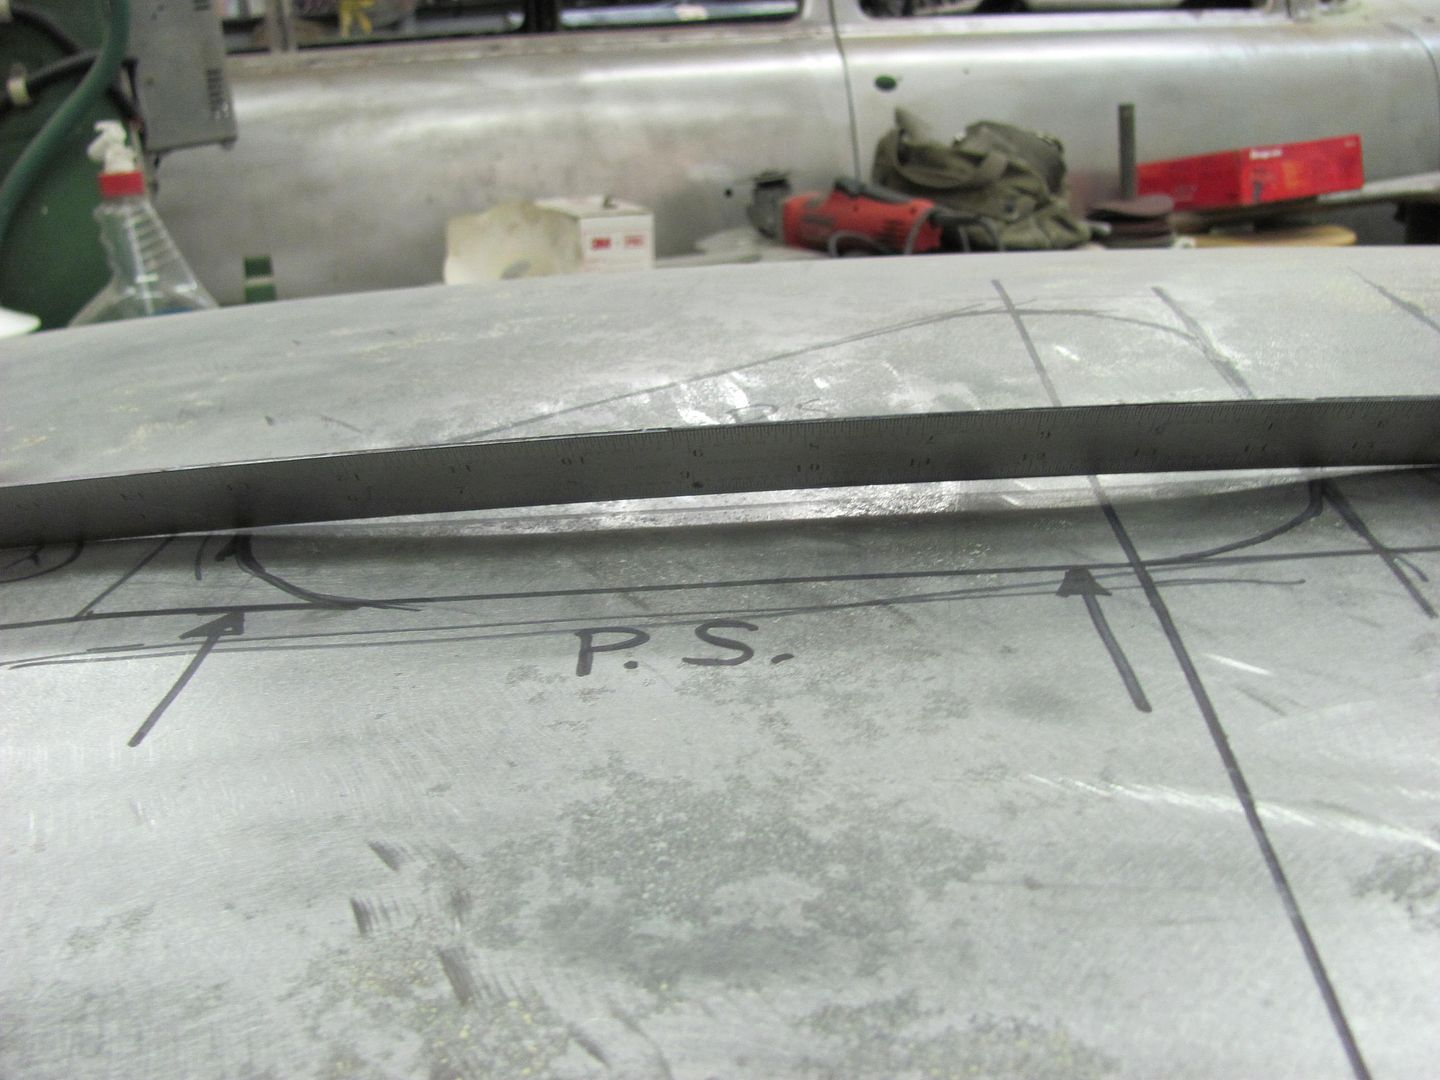 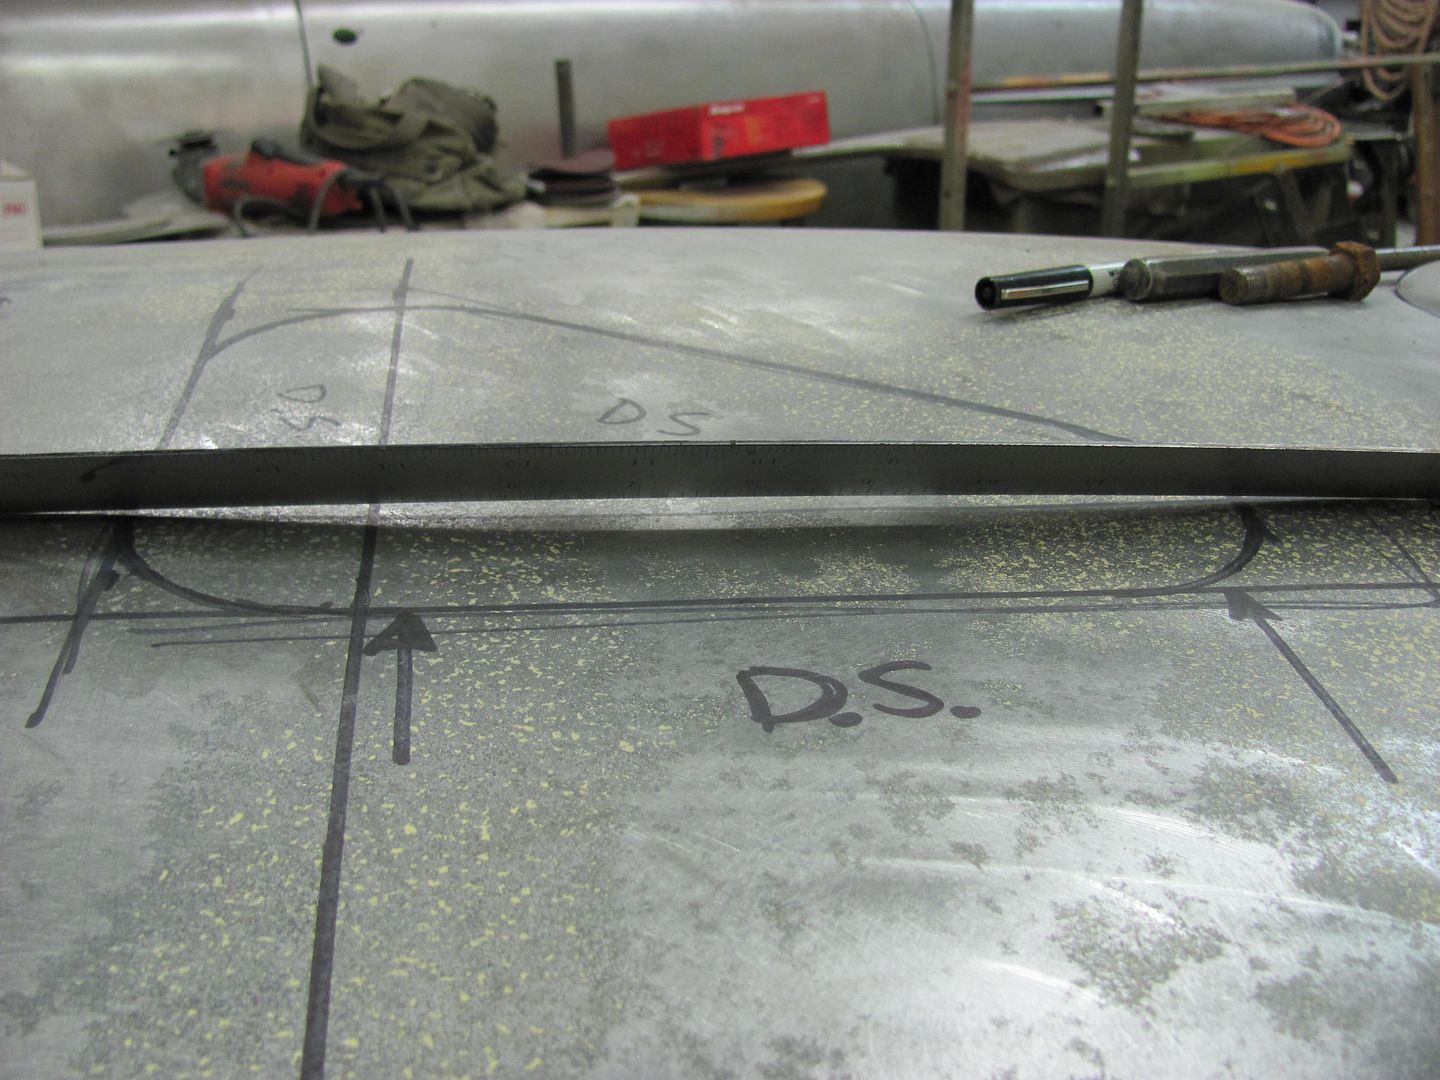 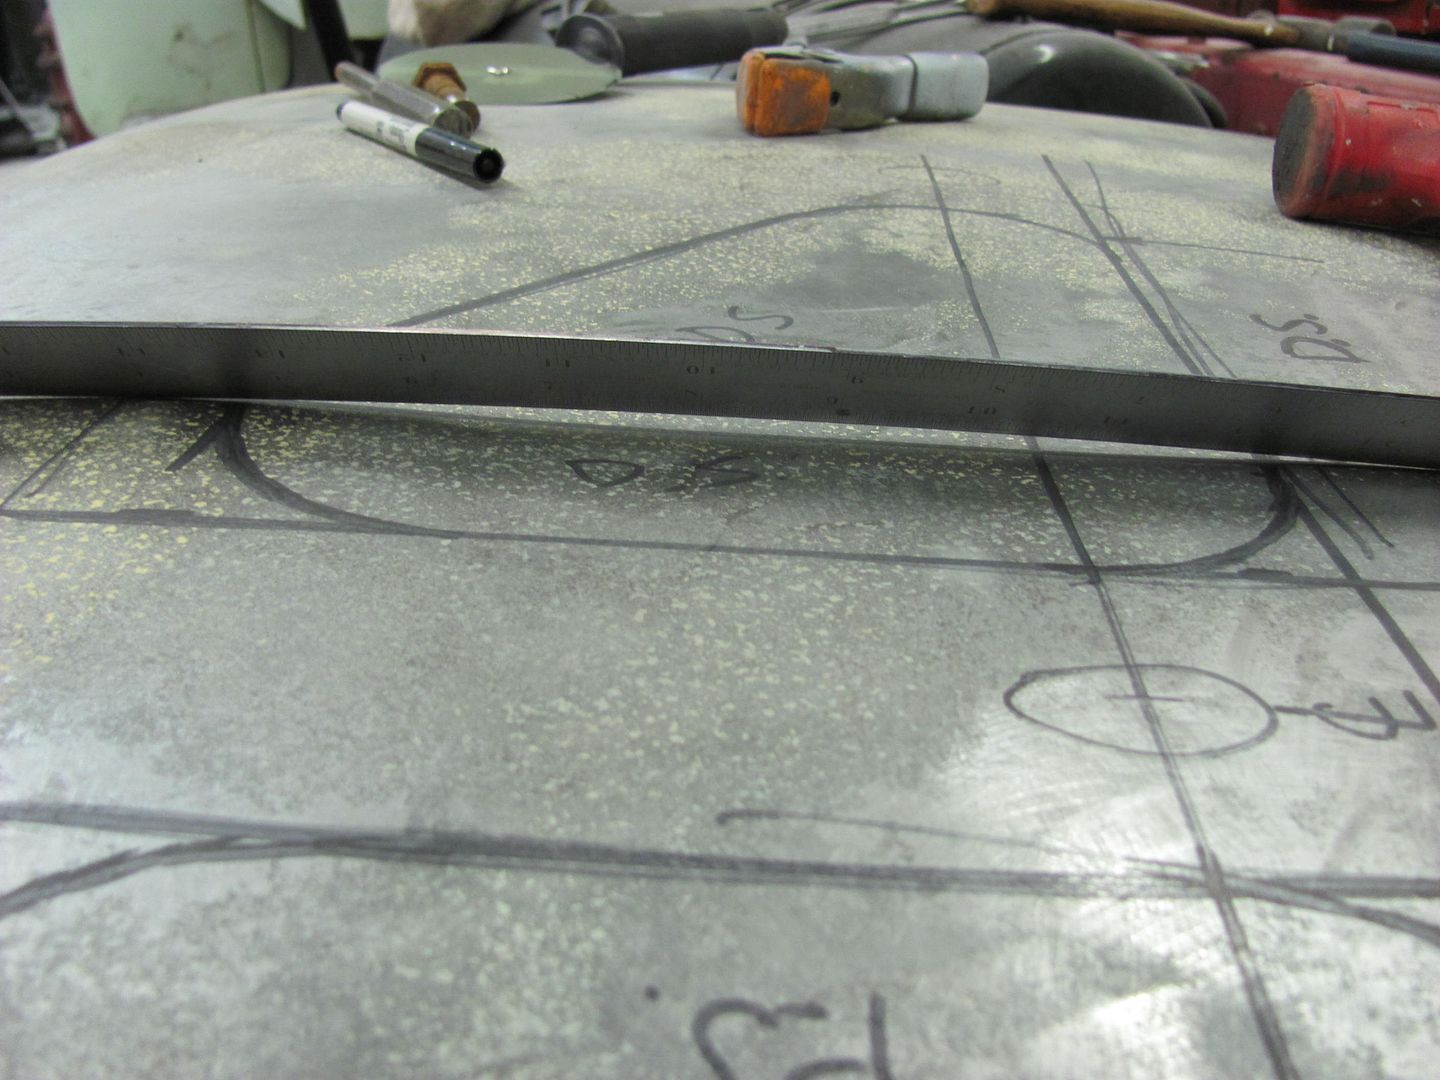 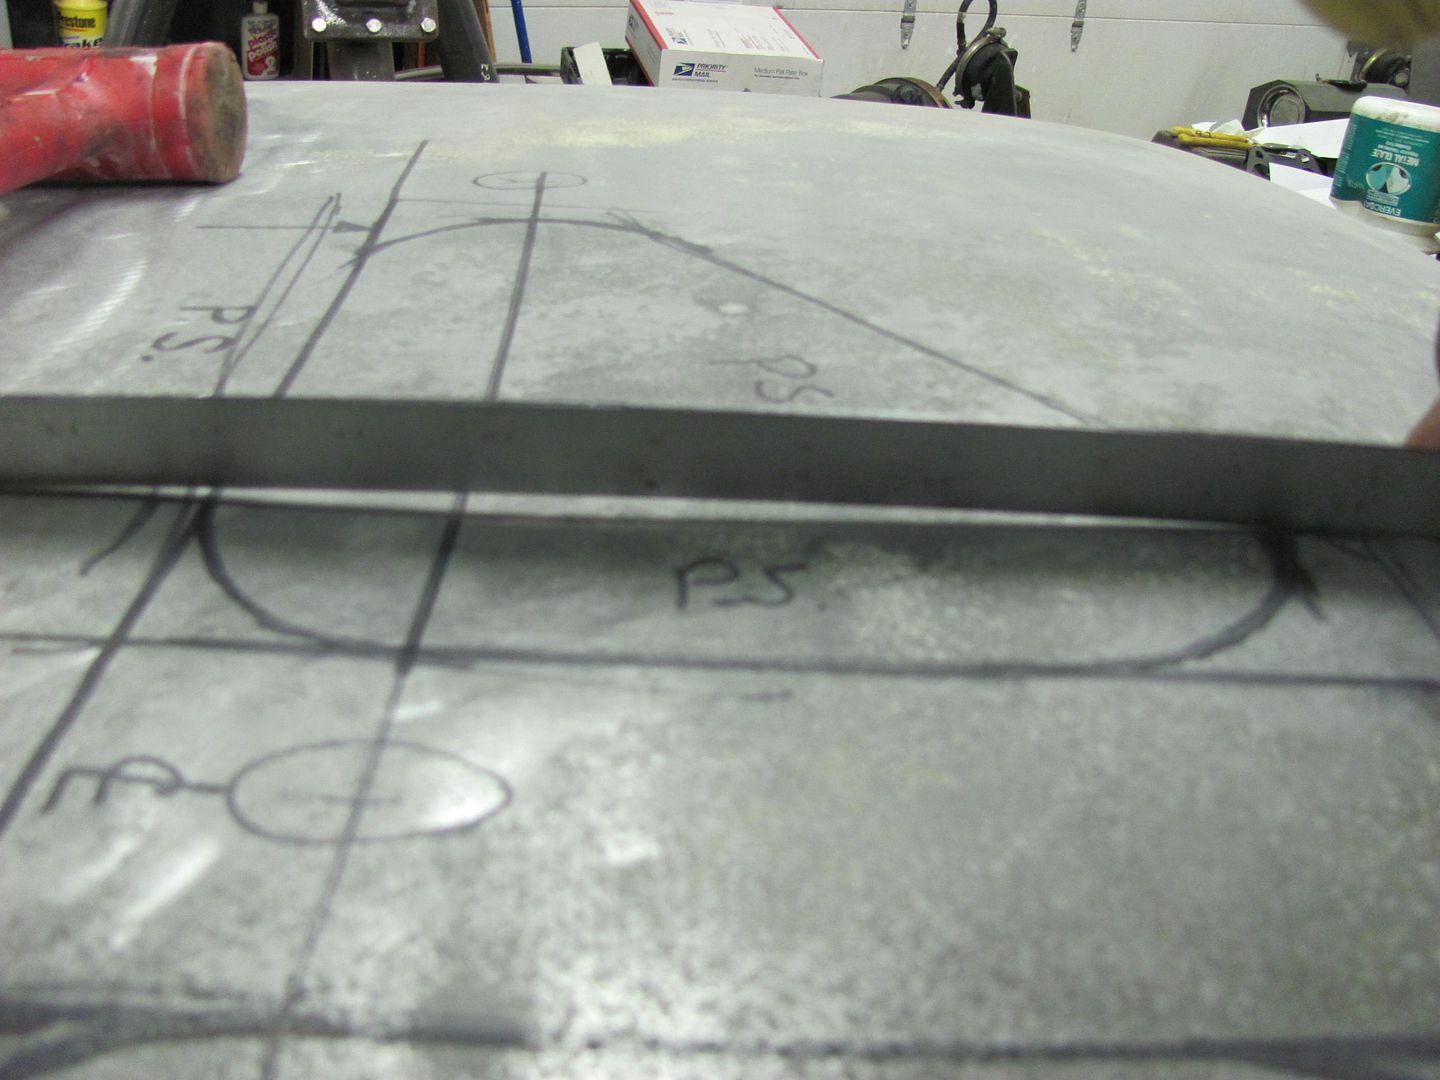 Just to show a comparison before and after........     Next phase of the test will be to sandblast one of the damaged areas from the outside to attempt to relieve the compression/stresses of that side of the panel and see how the panel reacts... I'll use our driver's side as that one showed a decrease in length, and well monitor what happens.....
__________________
Robert Last edited by MP&C; 10-22-2014 at 12:27 PM. |
|
|

|
|
|
#2 |
|
Registered User
Join Date: Jan 2013
Location: Leonardtown, MD
Posts: 1,647
|
Re: Repairing Sandblast Damage
On to some "repairs" ?
To preface, both test holes were bulged toward the inside. When I tried to push either out, they would oilcan out, but the stresses in the metal would bring them right back in once released. This is an indicator of what I call a tight oil can, or one that has resulted from a stretch. 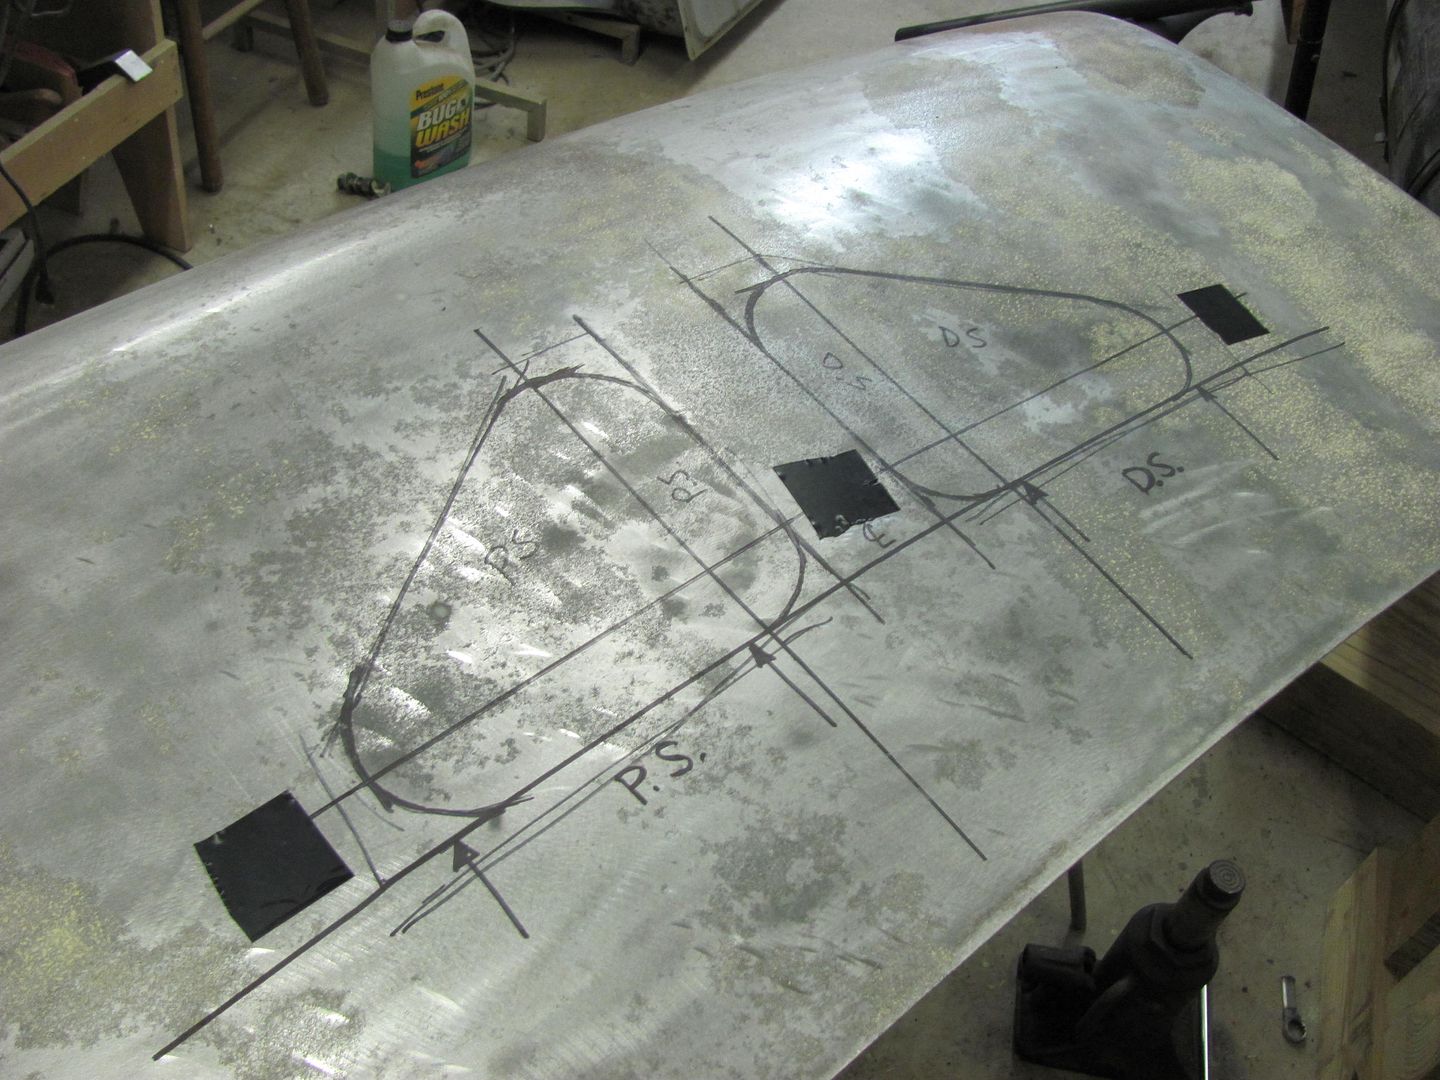 The driver's side test hole was sandblasted, and I stayed within the perimeter as marked so as not to stretch anything that was behind the inner panel and thus would be less accessible for any repairs. Once complete, you could tell the sandblasting had indeed relieved the stresses, as it would now oilcan in and out freely, and would stay where you put it. Pushed in, it does appear that the panel is about where it was before...... 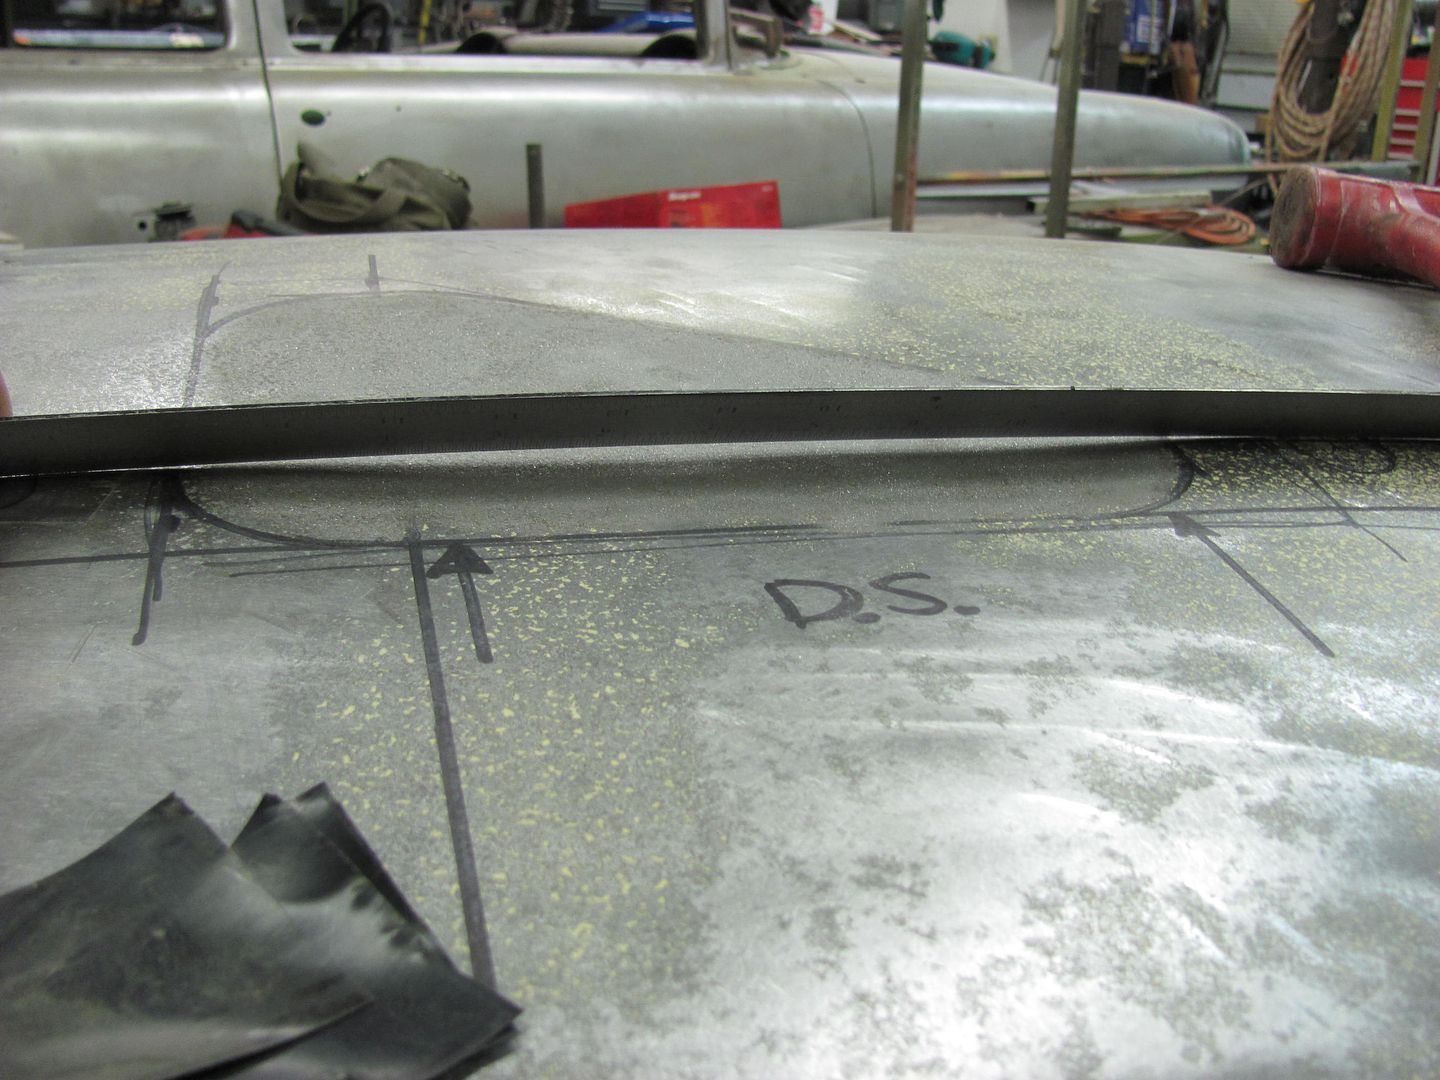 Pushed out, it shows some stretch as the panel assumes a sinusoid wave of sorts...... 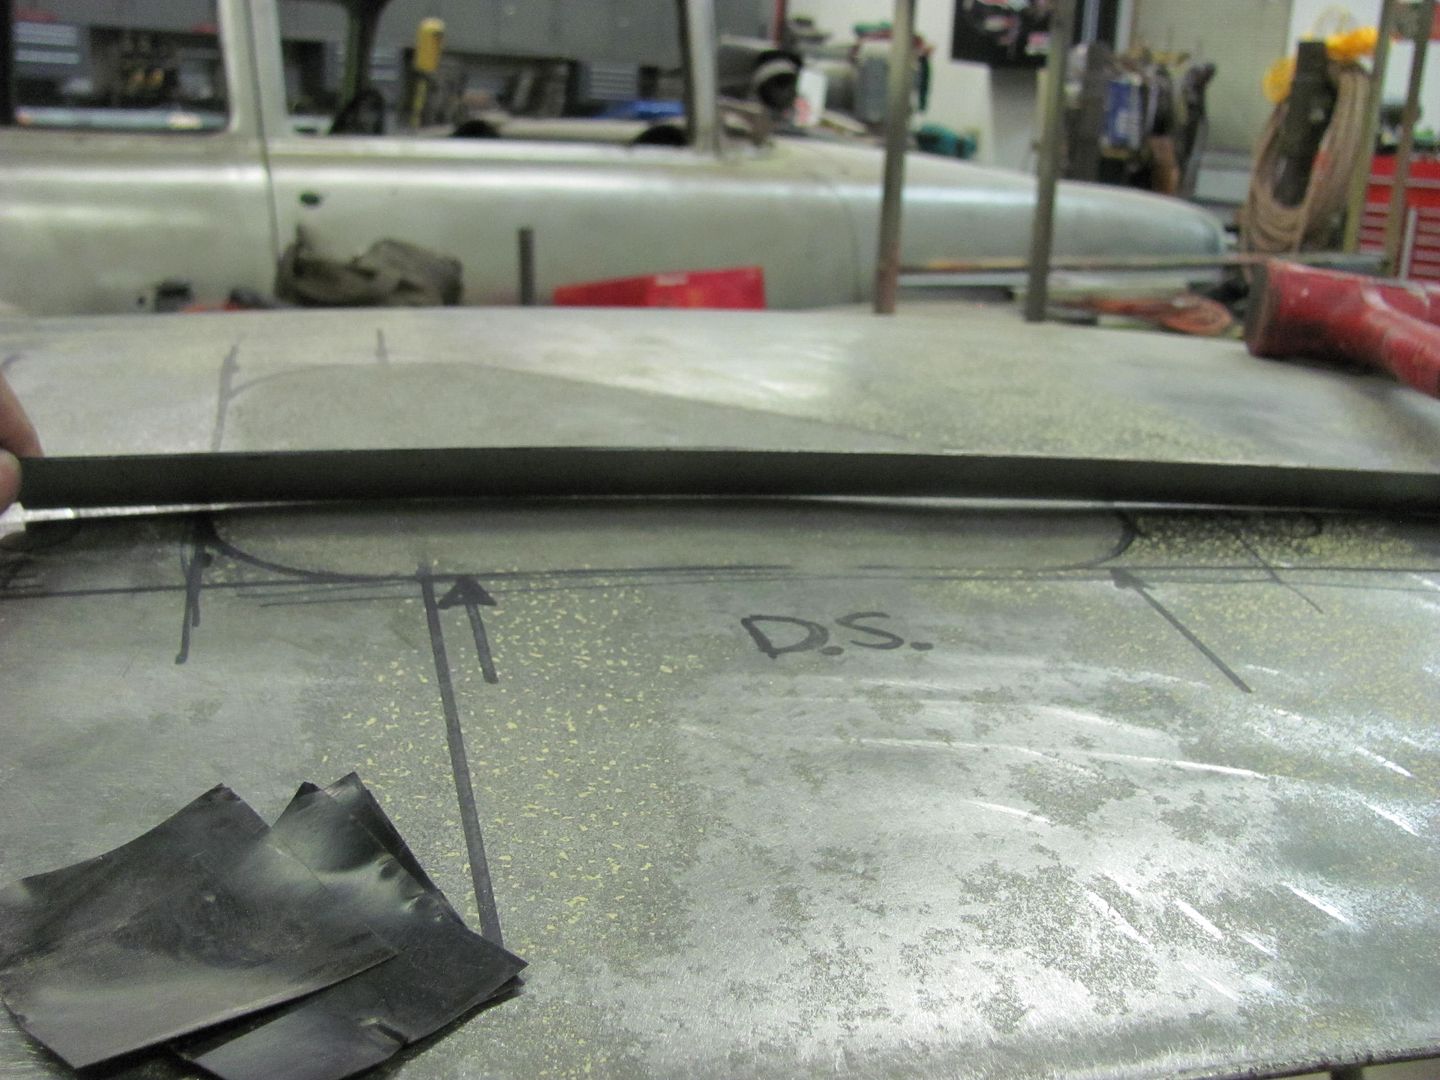 On to the passenger side test hole, this one is going to be addressed using the official Donut Dolly (produced by Daniel Gunderson). These have a concave feature on one end and convex on the other. 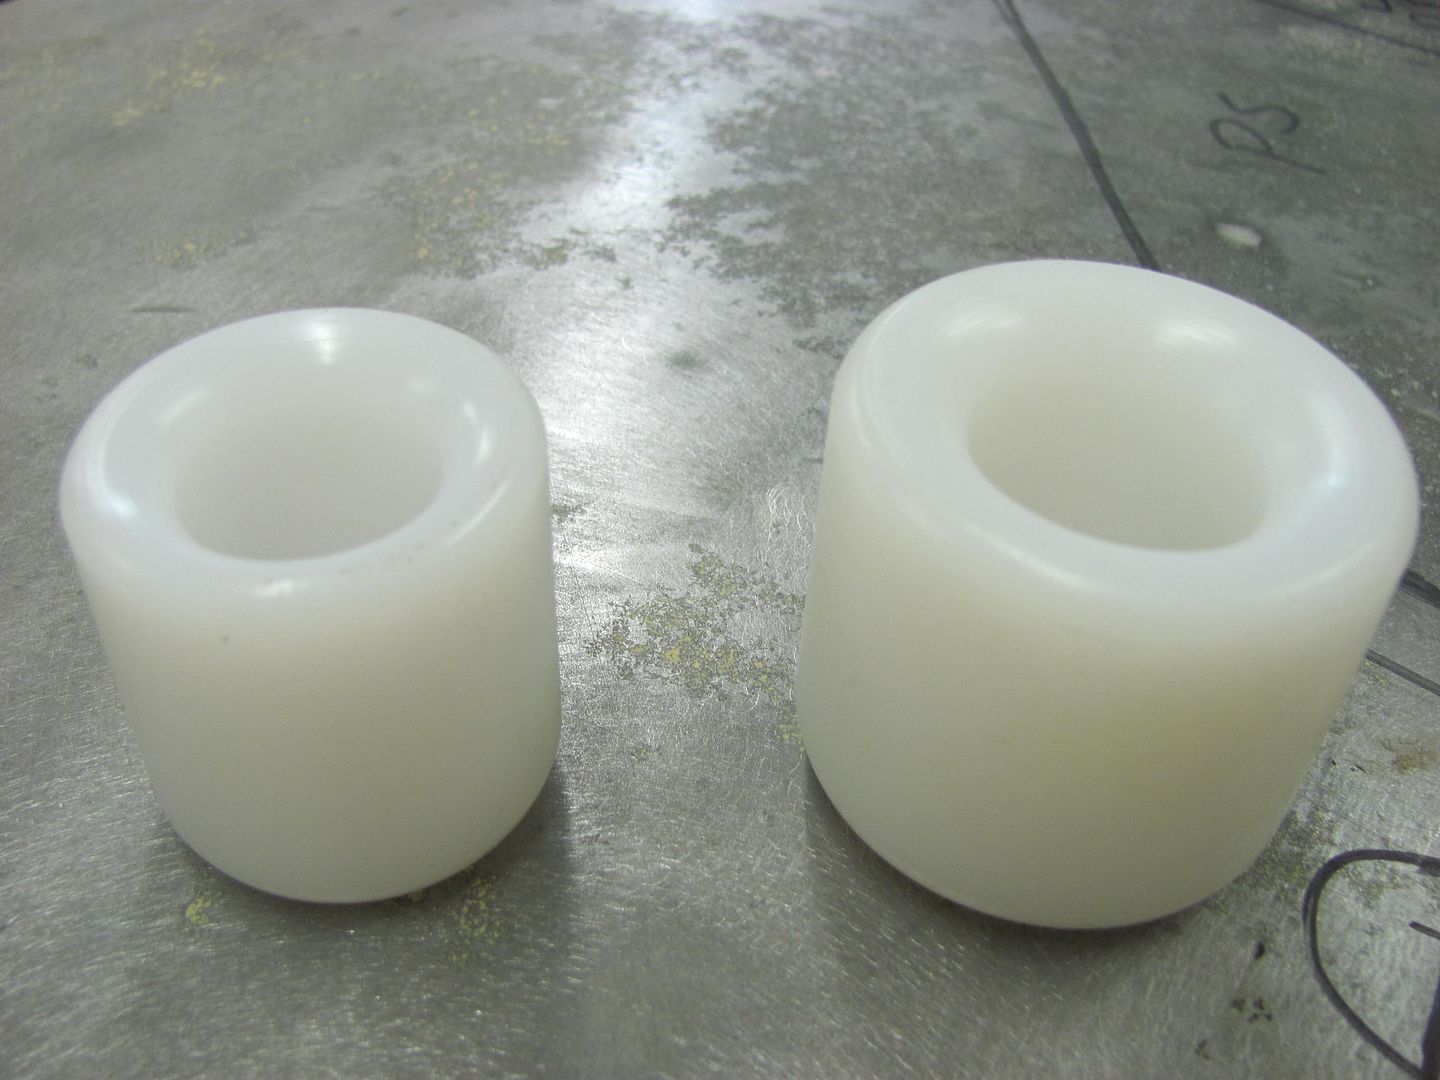 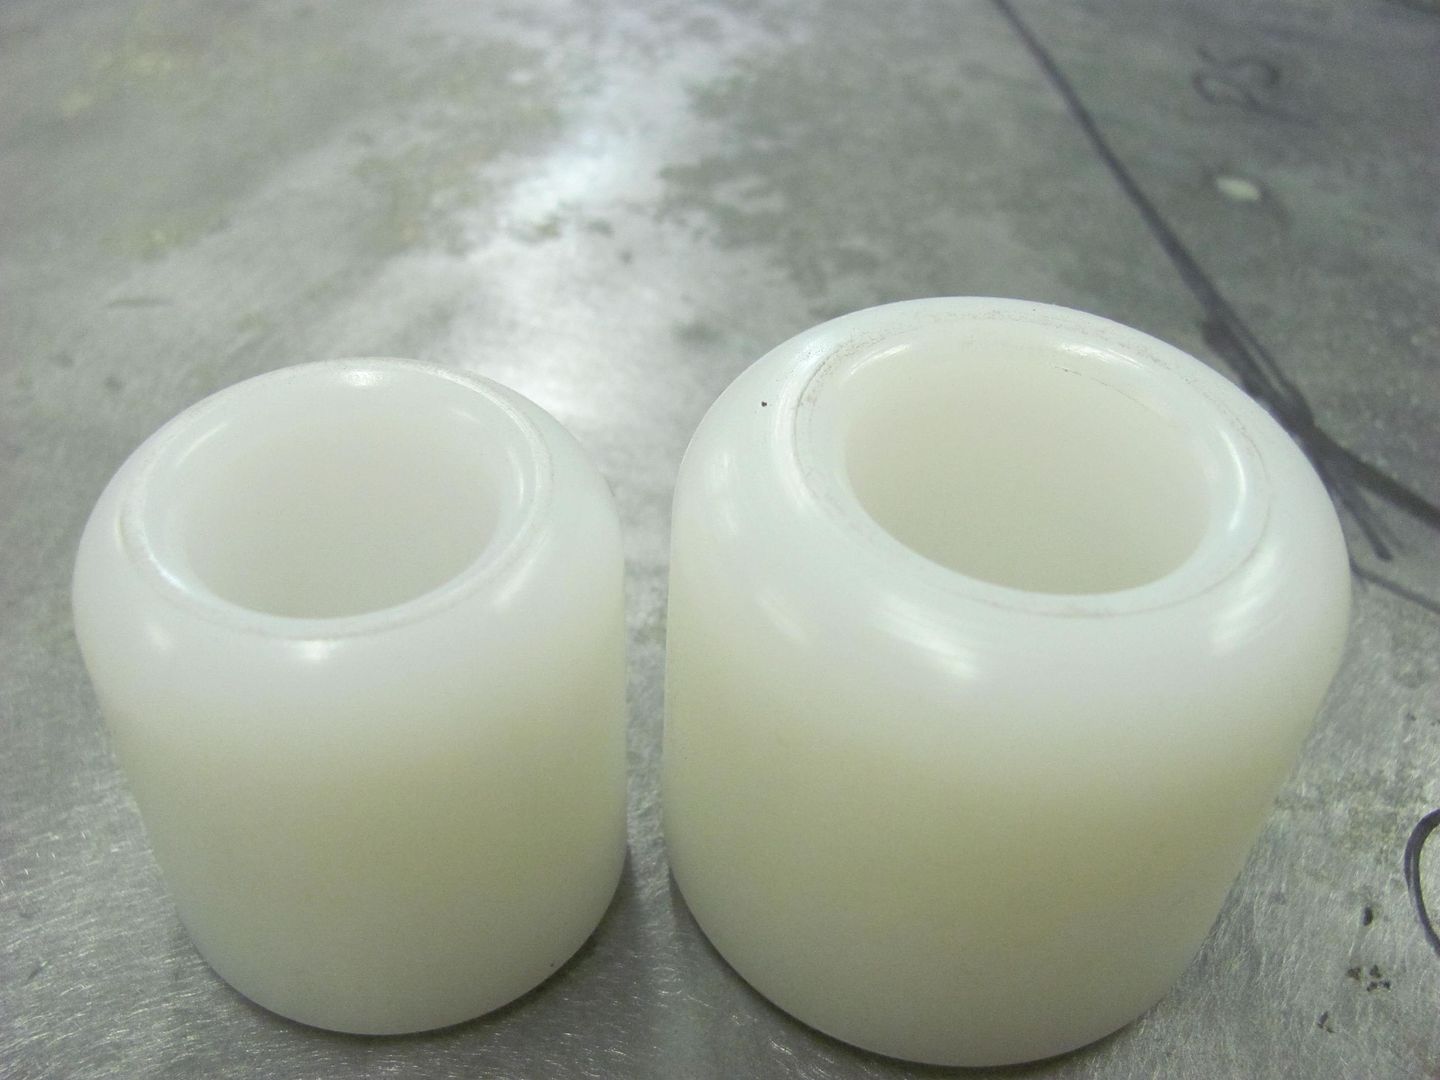 The basic principle is that the body hammer is used on the high or convex side, and the dolly is placed against the low or concave side. The dolly, as opposed to typical off dolly work, provides support completely around the hammer strike, instead of just to one side, for a more effective off dolly process. 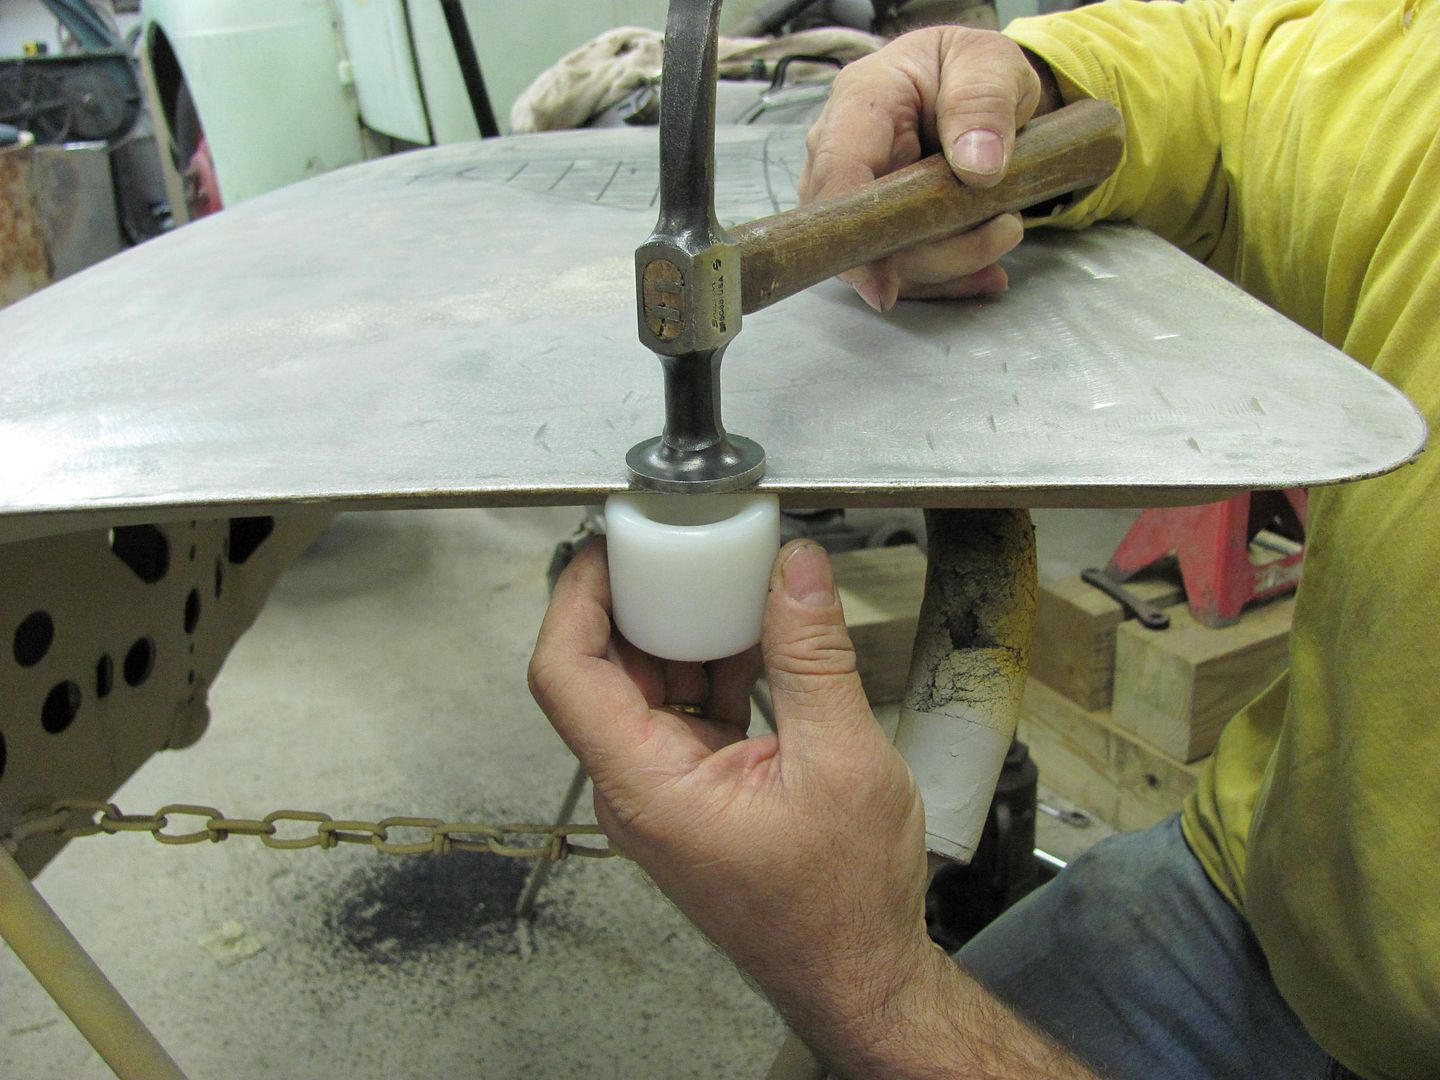 In order to keep track of things, I've found it best to lay out identical grids on either side of the panel. Align the dolly on two crossing lines on the bottom, align the hammer strike to the corresponding one above, and slowly move both across the panel as you use moderate hammer strikes, stopping every so often to verify alignment top and bottom...... 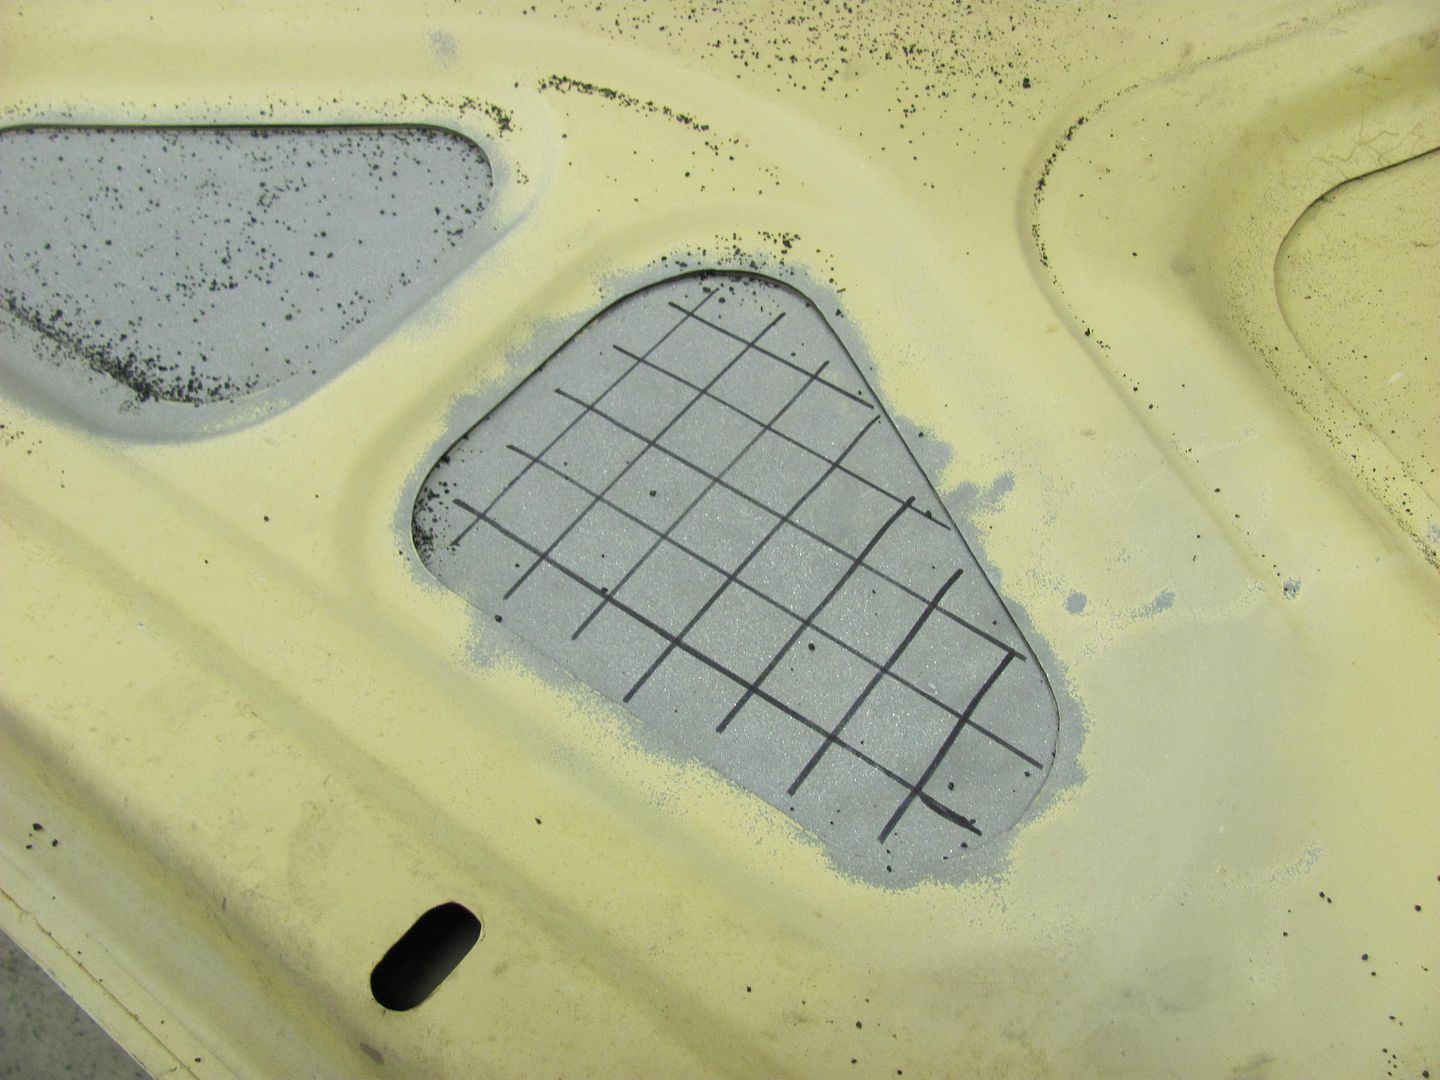 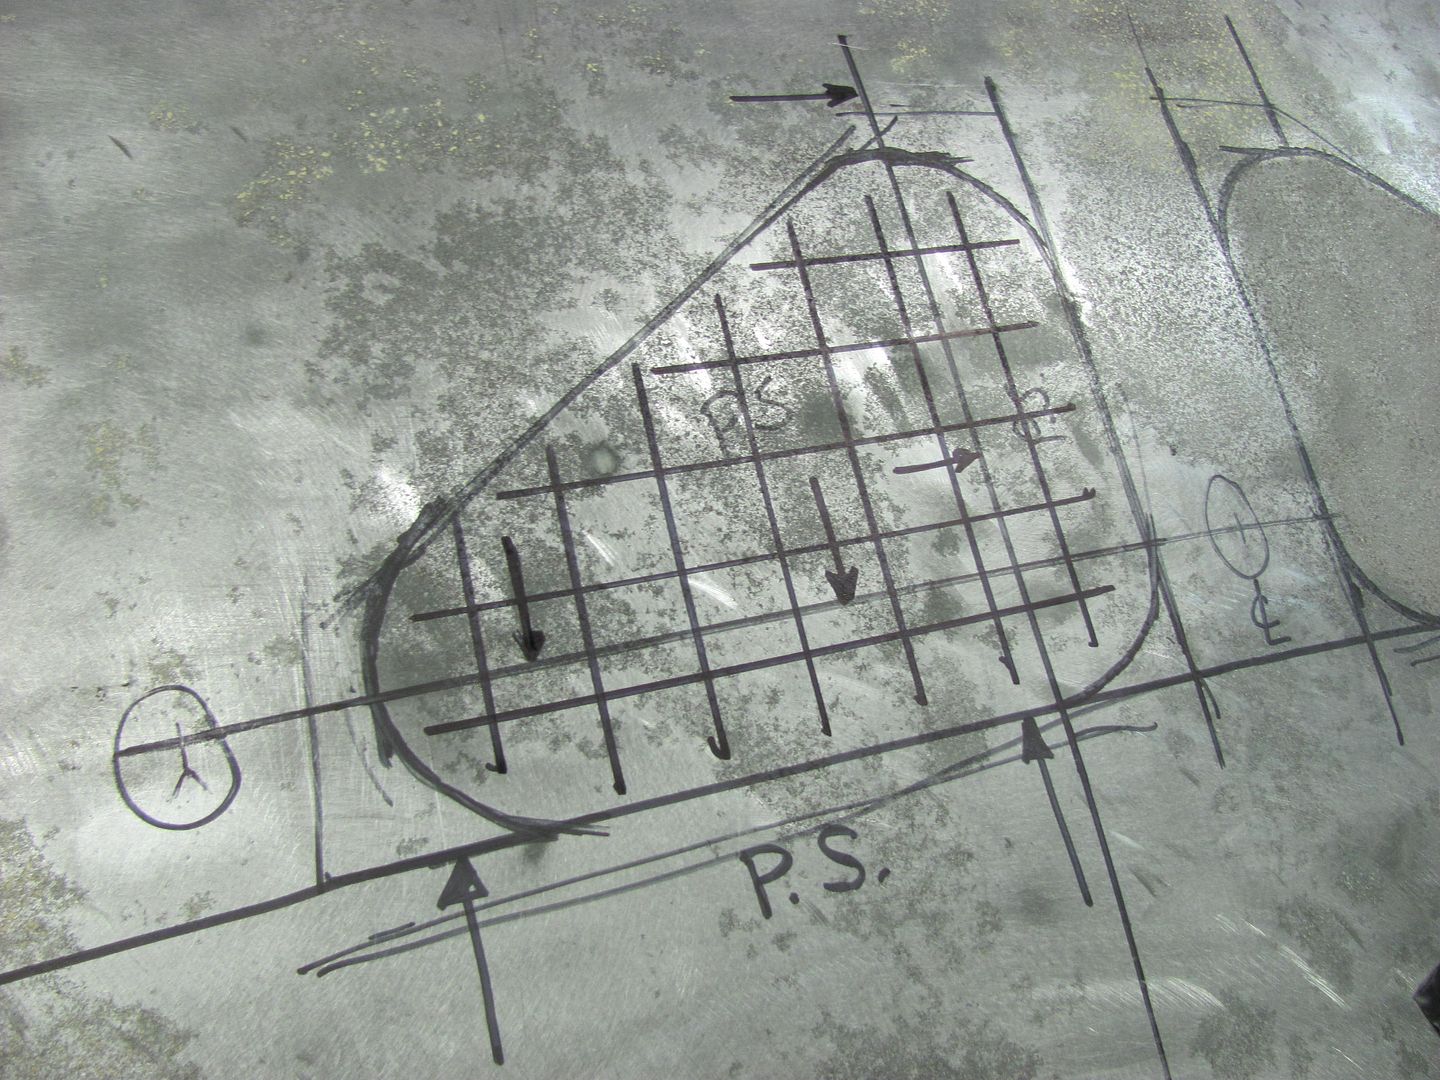 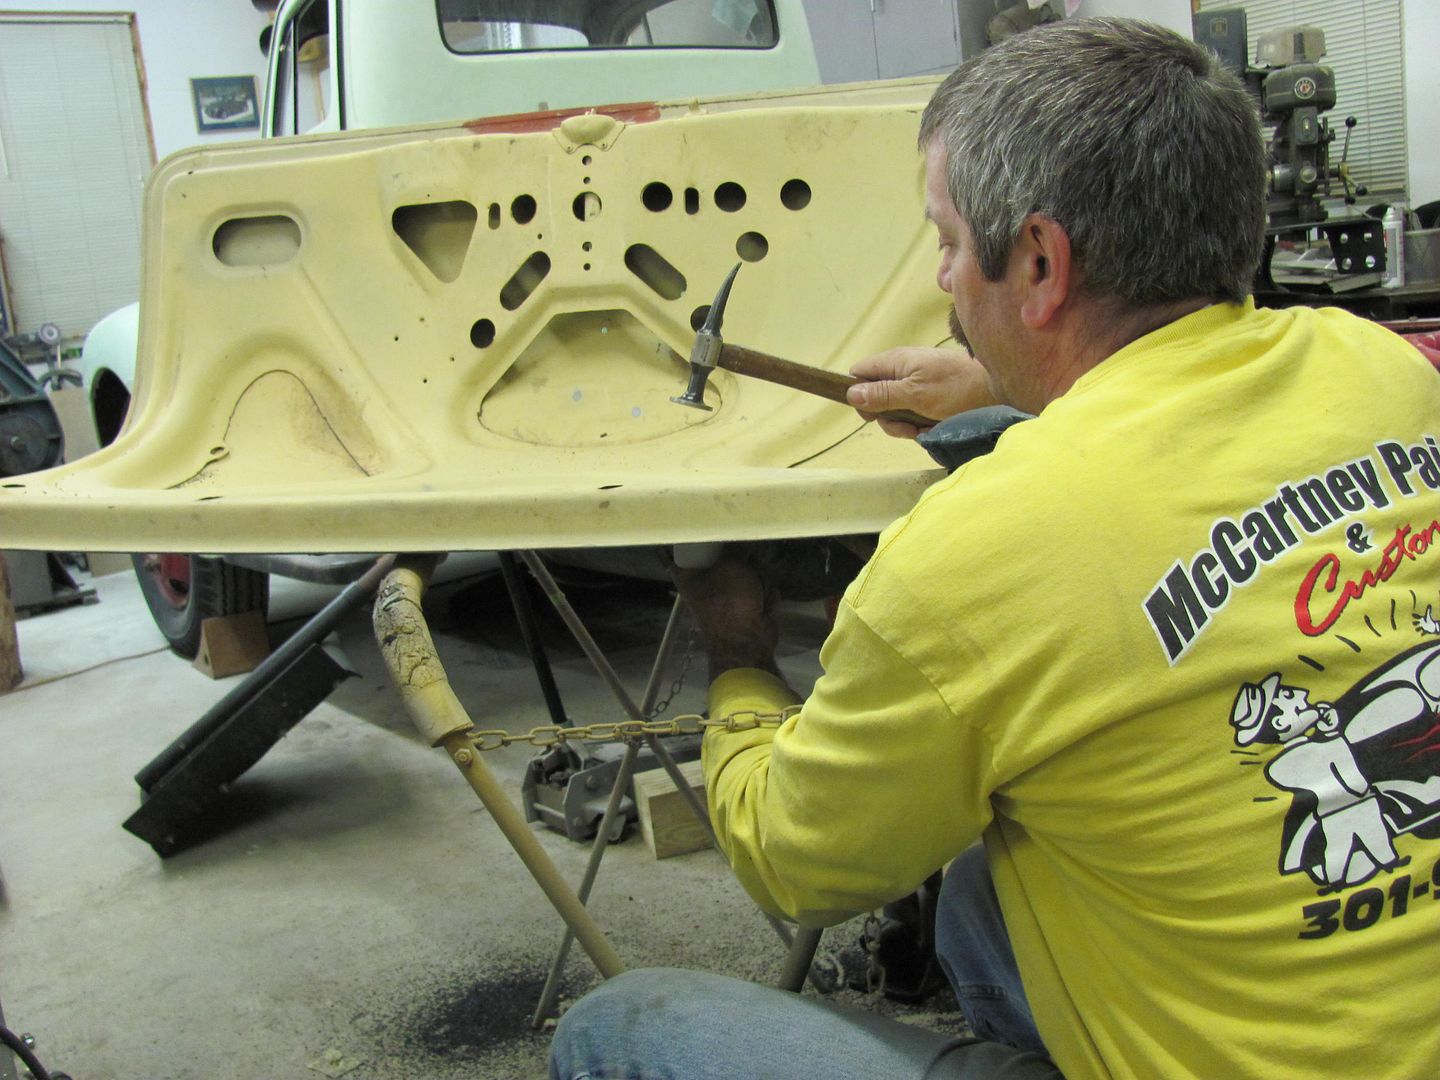 After about 5 minutes of shrinking, using a uniform pattern within the test hole, the panel now appeared to be relieved of its stresses as the panel would easily oil can back and forth. It appeared well shrunk, as it was a loose oilcan. At this point, I used my fancy hitch pin dolly and switched between the flat faced body hammer and a slapper to stretch things back and restore the crown... 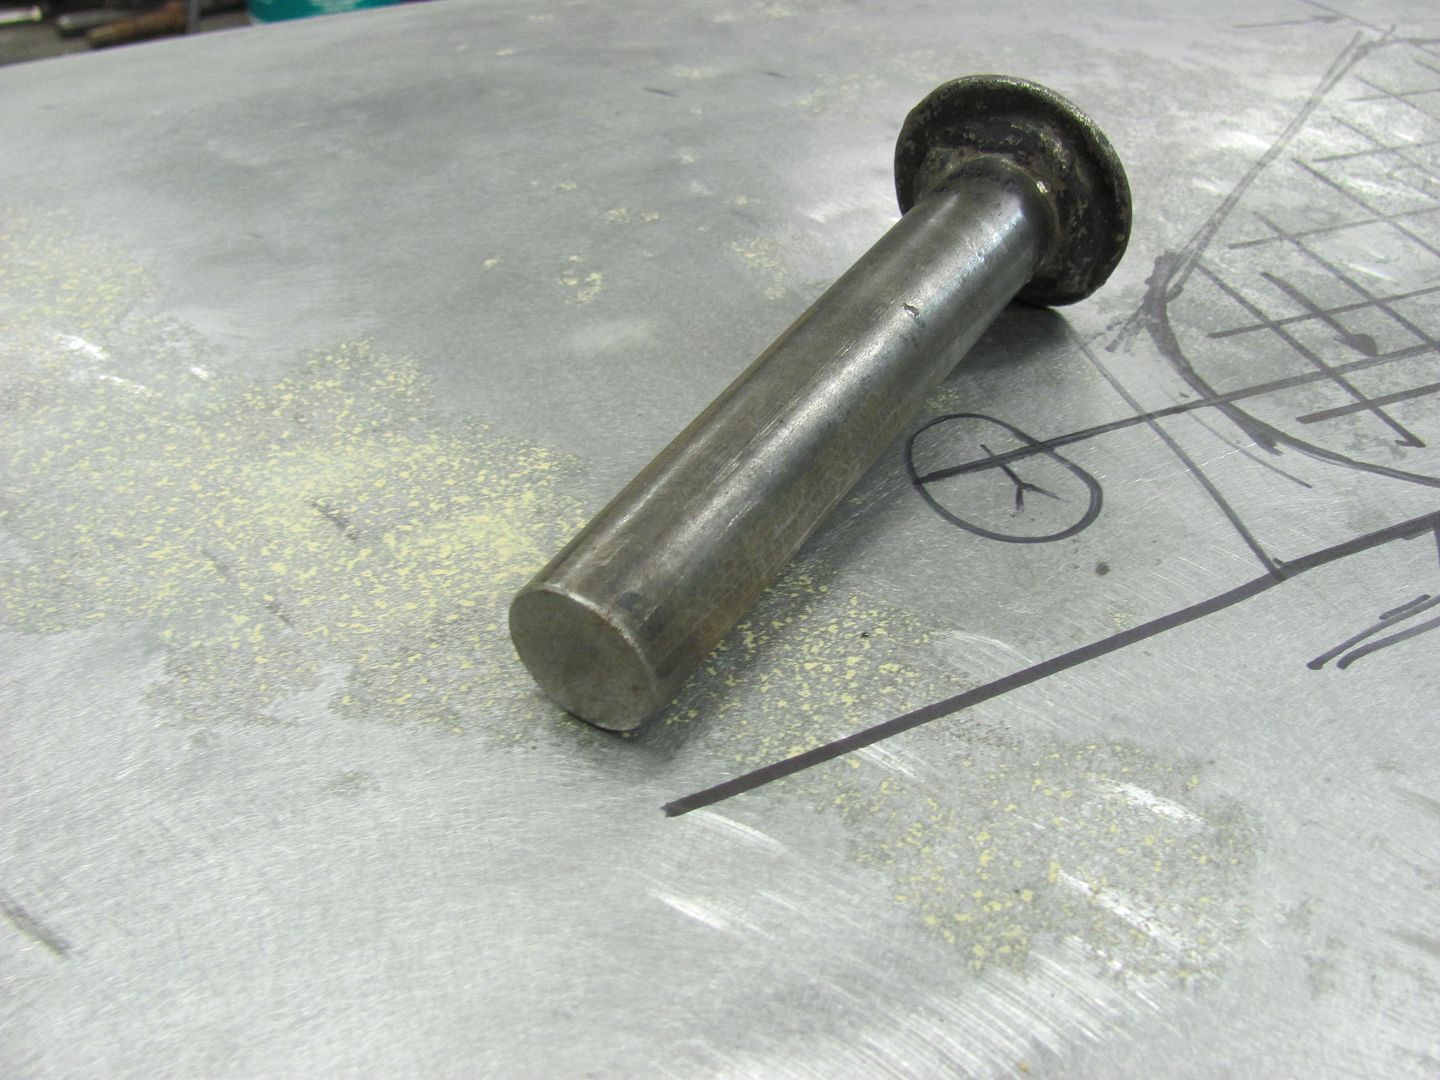 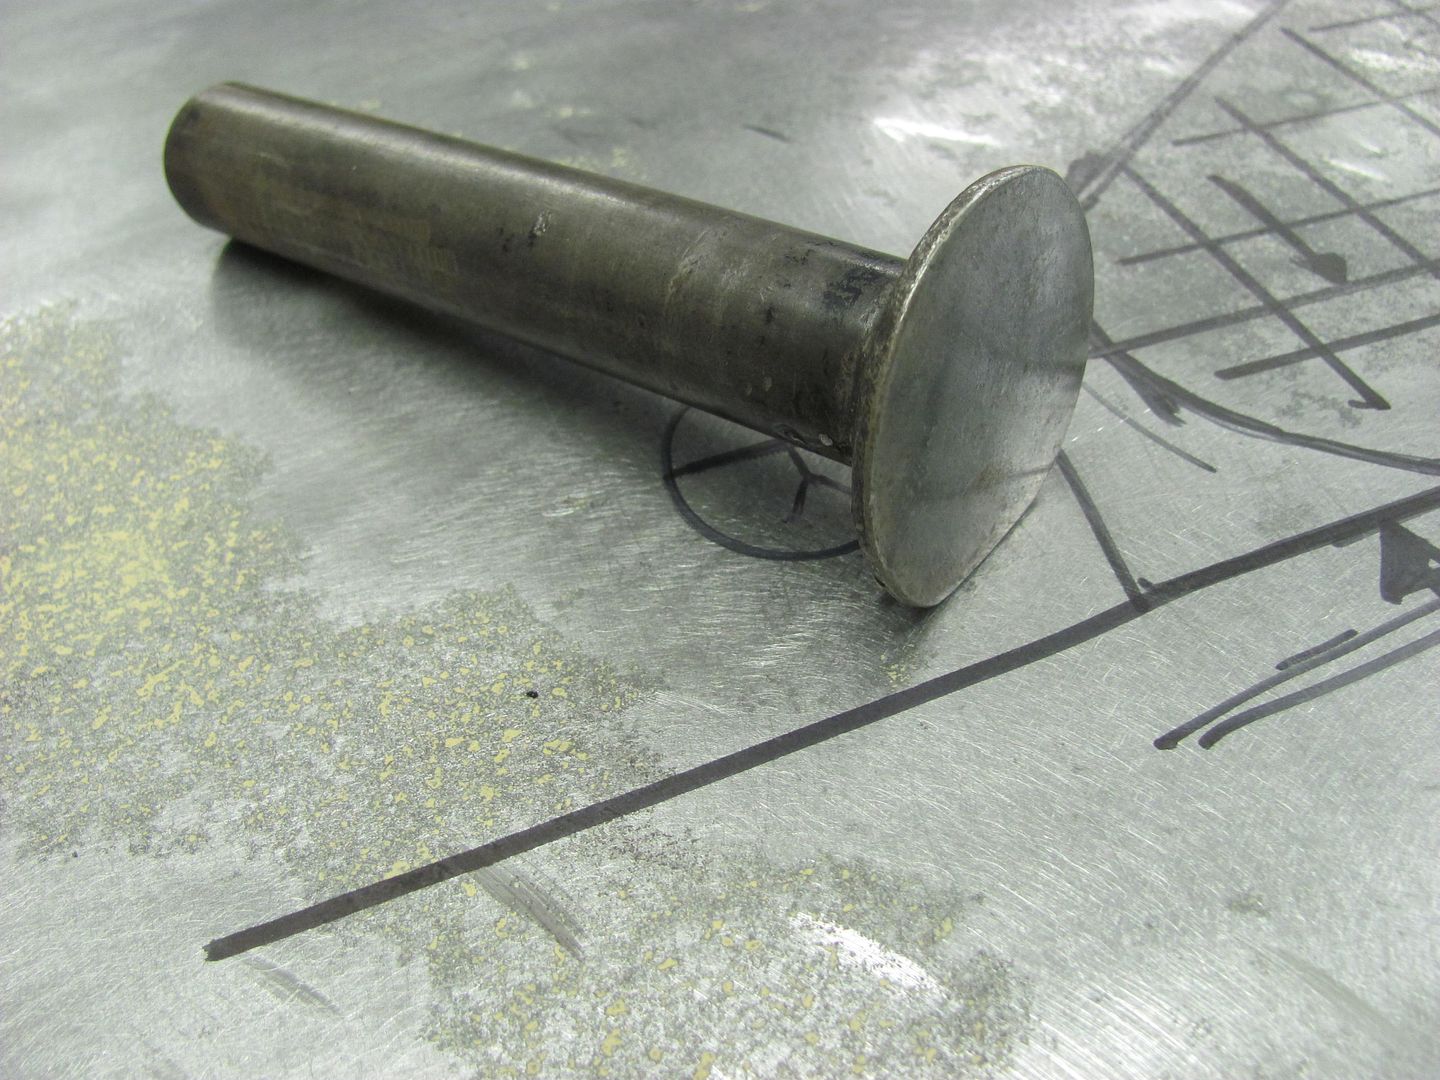 After about a half hour or so of bumping things around, the panel had been restored fairly well to the original crown. It would oil can inward if pressed, but once pressure was released it popped back up again. 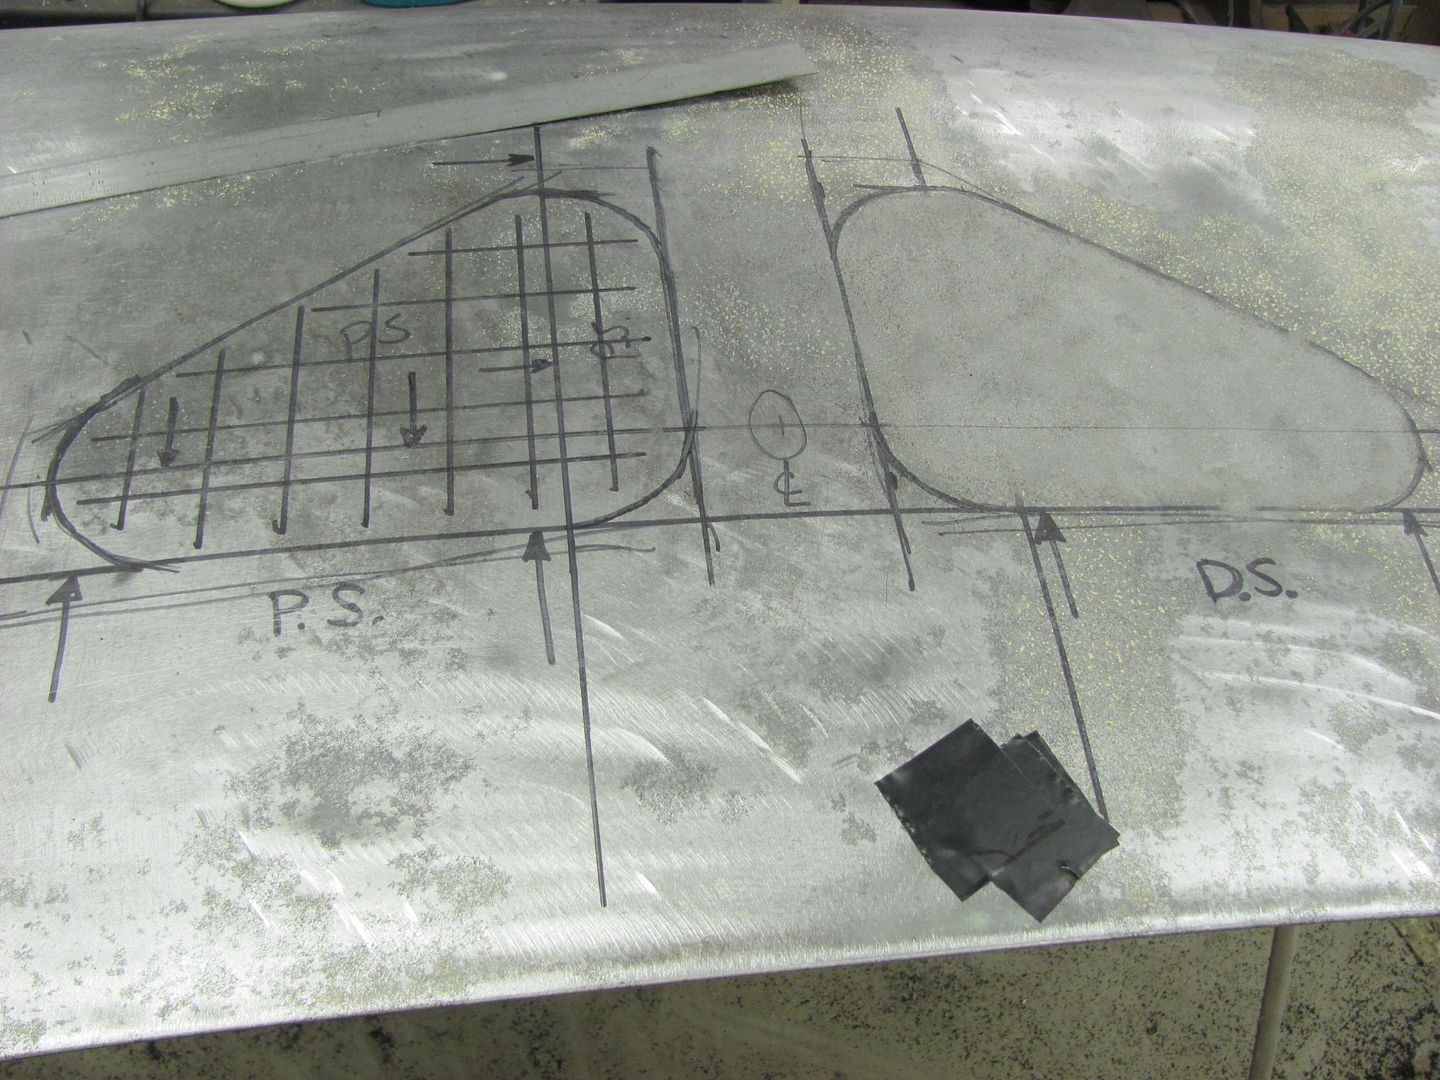 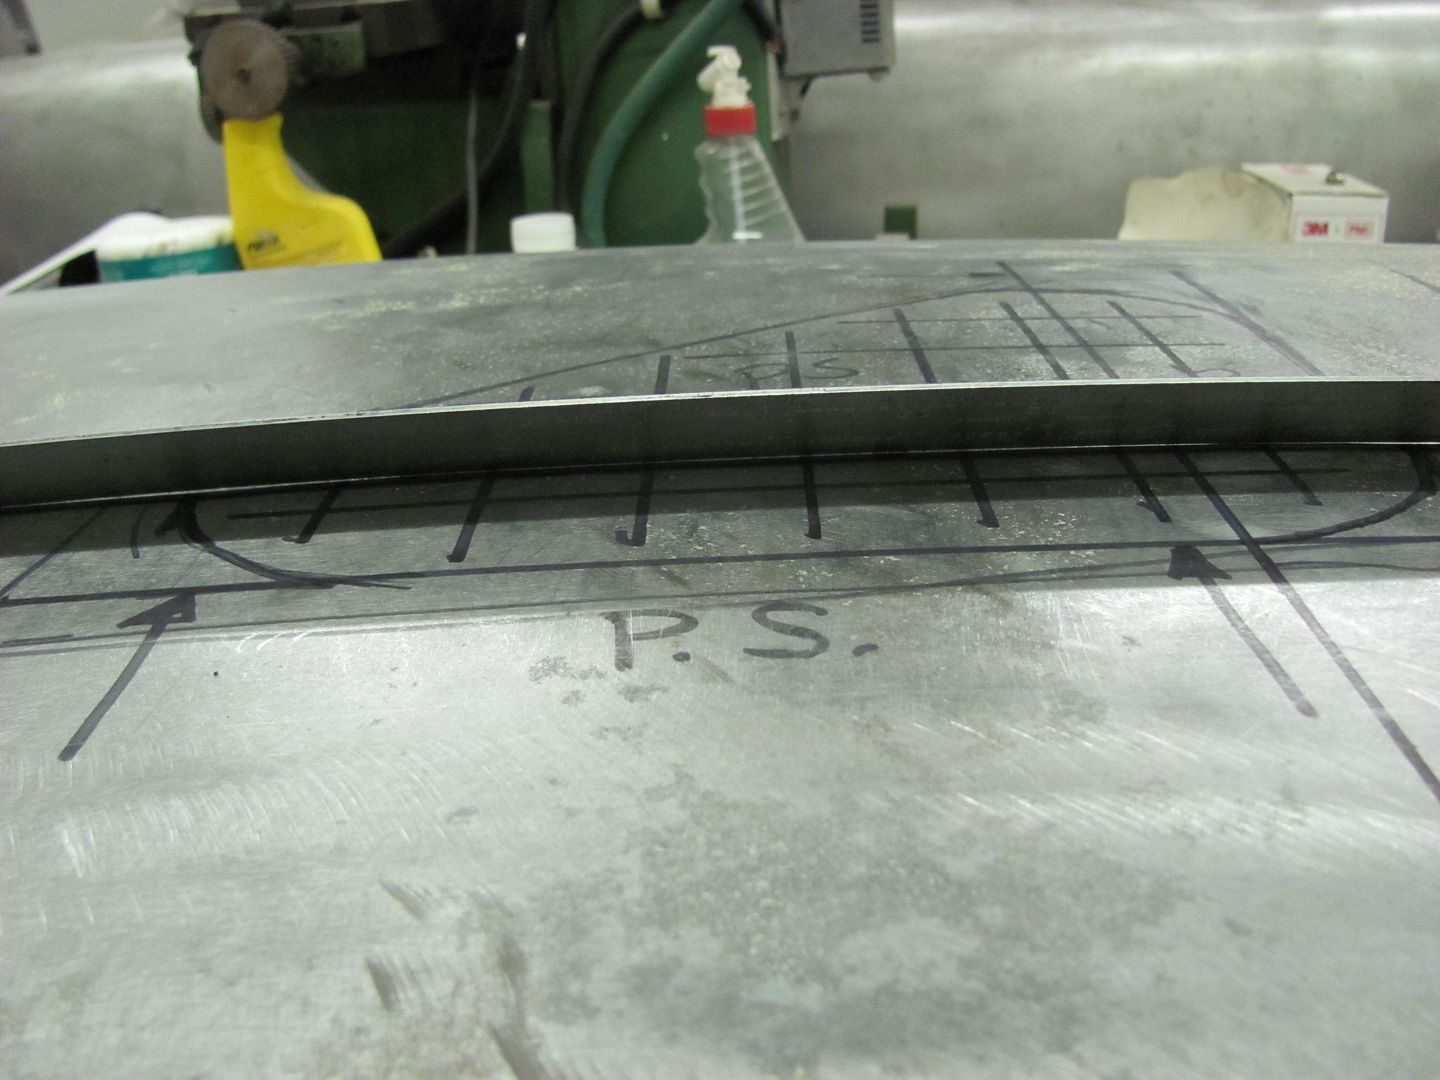 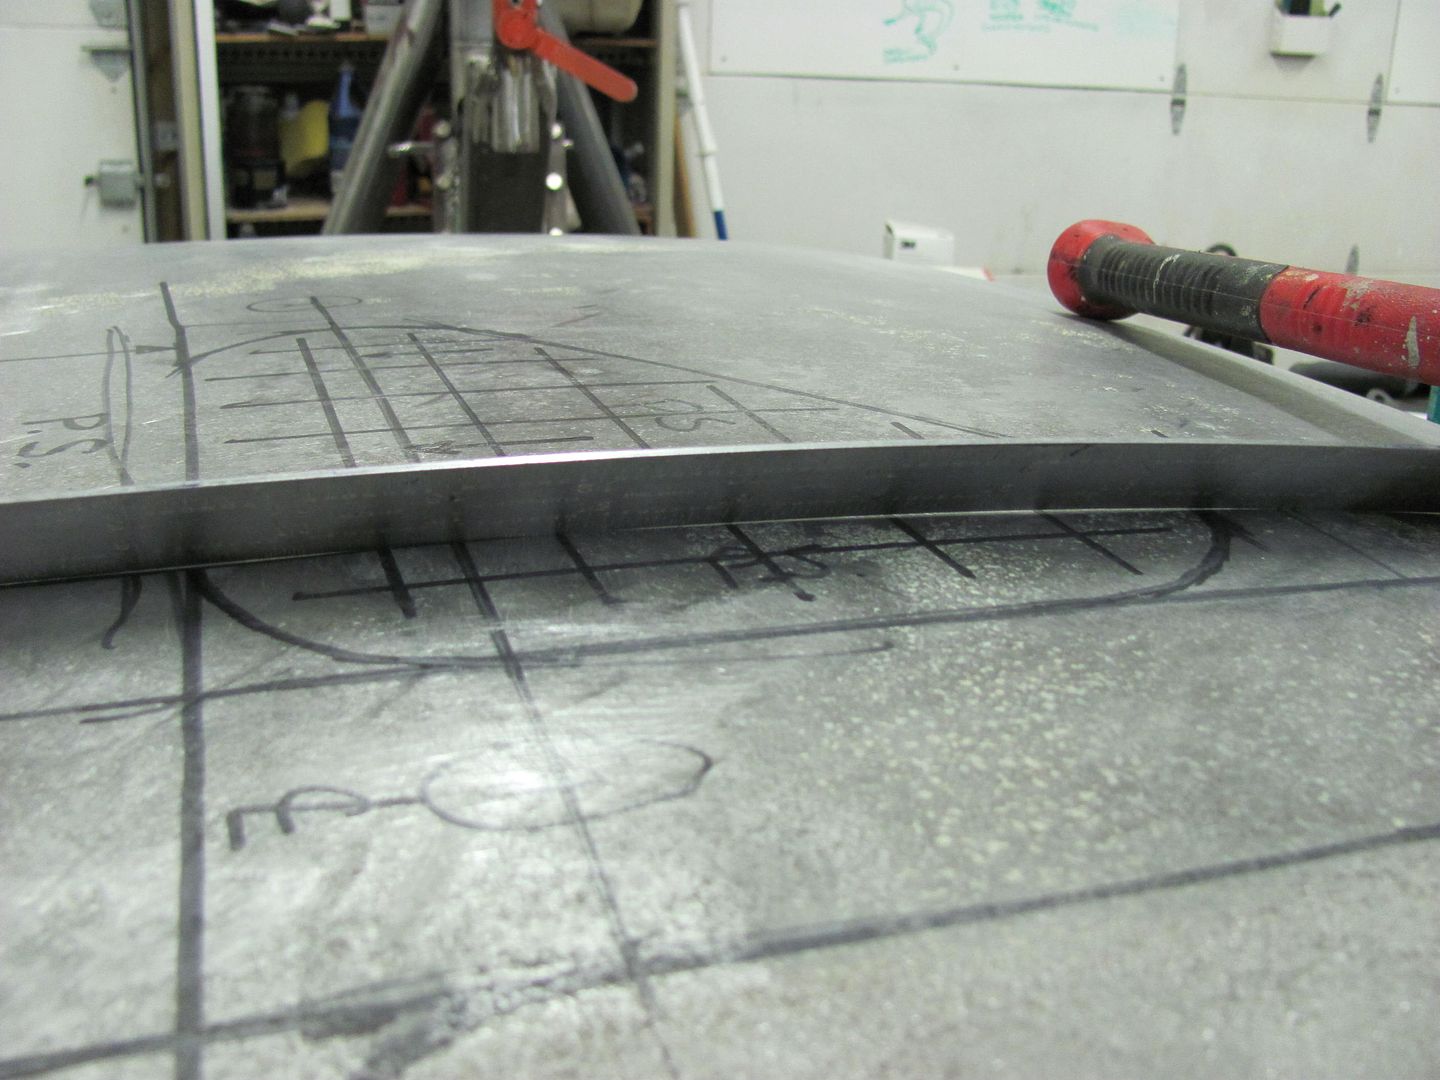 A bit more work would have gotten things closer, but how close do you need for a test, right? Here's the bottom side to show the hammer/dolly marks during stretching... 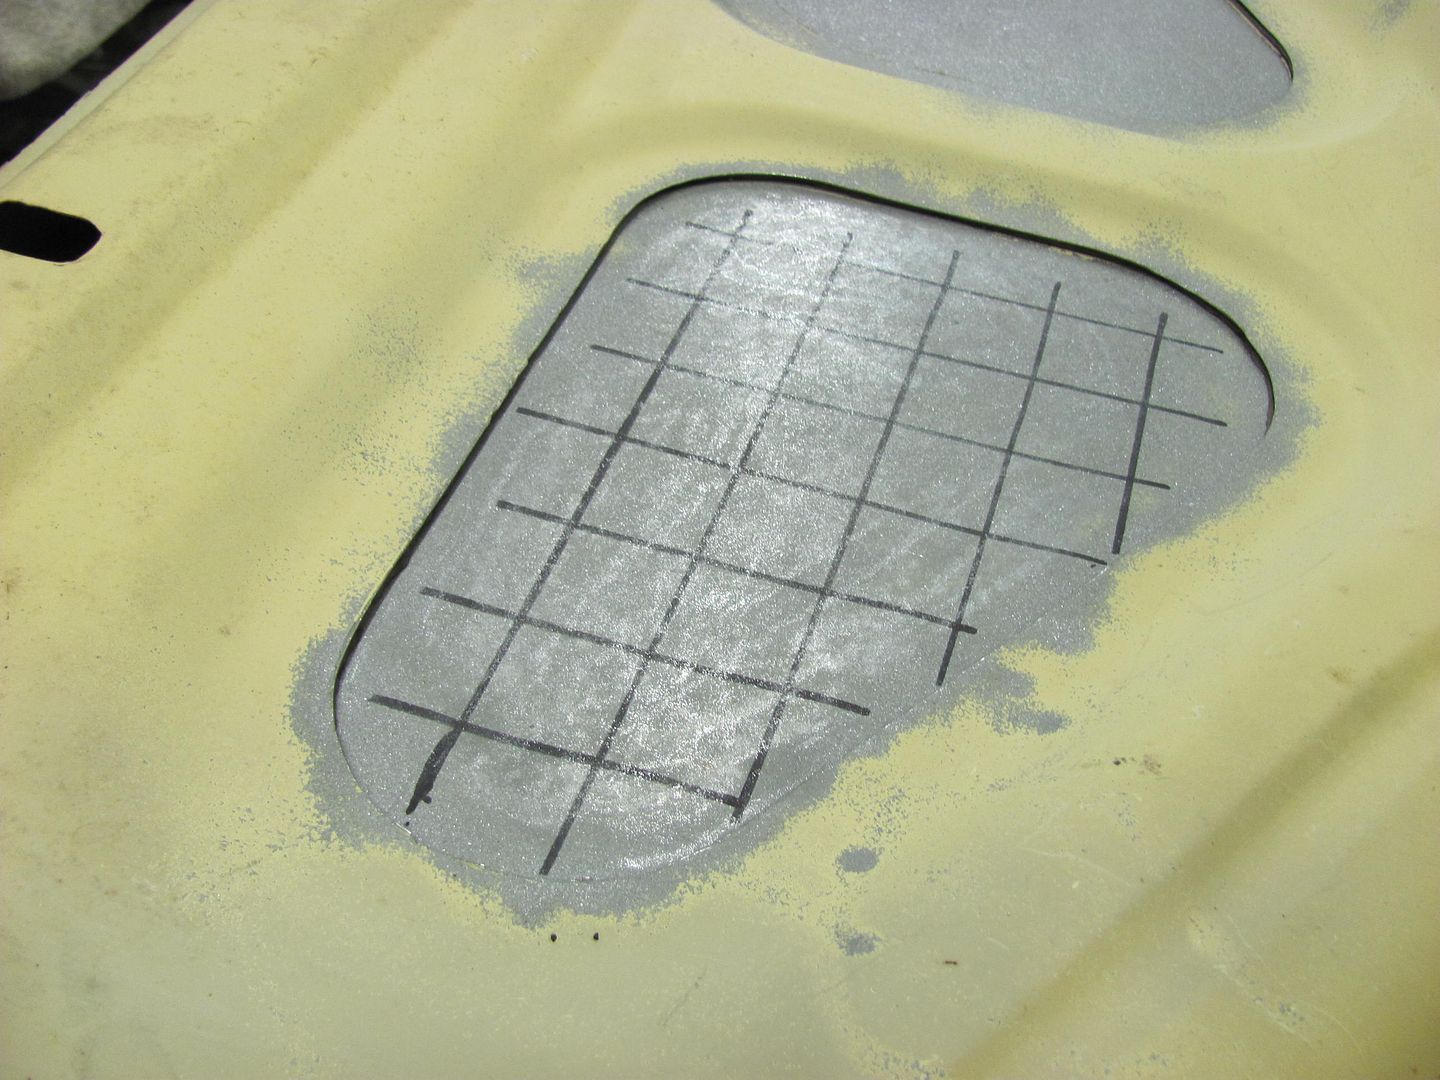 In using the donut dolly, given the nice loose oil can that resulted, it appears the process of forcing the expanded/sandblasted area into the hollow of the dolly compresses the panel back similar to where it was, relieving the stresses. While using the hammer and dolly to planish the passenger side test hole, I did notice an ever so slight bulge around the outer perimeter of the test hole on the outside in much the same way as the force from a dent causes a bit of springback and resulting bulge around that dent, toward the opposite side. So part of the repair process was to use the hitch pin dolly on the underside, just inside the edge of the hole opening, and to use the slapper on the topside in an off-dolly to help bump this back down. As with many dent repairs, there will be shrinking done from both sides of the panel. We'll have to see if we can use a different shrinking method for finishing the driver's side and see how that reacts.....
__________________
Robert Last edited by MP&C; 10-22-2014 at 12:32 PM. |
|
|

|
|
|
#3 | ||||||||
|
Registered User
Join Date: Jan 2013
Location: Leonardtown, MD
Posts: 1,647
|
Re: Repairing Sandblast Damage
I had received various comments and feedback from the original post, so here's a review to see what if anything we may have missed, or anything that may need further clarification. I did find a few things to bring up for discussion...
Quote:
I read that part and then, in reading the part highlighted in blue, I was wondering why the donut dolly seemed to work, both in shrinking the panel, and in relieving stresses, as seen by the loose panel oil can. I glanced back at my drawing I did of somewhat exaggerated damage resulting from the sandblasting, and thought of this: As a result of the damage to one side only, the inside has stretched, and the outside, unchanged, would be in compression by comparison. Moving on to shrinking, as the donut is placed against the concave part of the arc, it supports along the perimeter of the dolly and helps to "trap" the metal where is sits. As the hammer strikes from above, you are forcing the sheet into that hollow. Where the inside of the skin is stretched, and the outside is not, by forcing more length of the inside of the skin into the same distance of the outside (i.e.: into the hollow of the donut) are we not in essence equalizing the differing forces that exist on opposite sides of the panel? Quote:
The sandblasting of both sides has shown to relieve some of the stresses of the differing forces, as we did show the oilcan is now more equalized in force, it will stay where you push it to without popping back to the original position. Quote:
Where the driver's side test area does still show a stretch in the sinusoid wave, I don't think the stretch in this type of surface feature can be effectively removed using the shrinking disc, as the highs (in reference to the side the disc is working) that the disc is looking for alternate from one side to the other, where the inner structure may get in the way of effective work from that side. Perhaps that side could be pushed and held somehow toward the outside of the trunk lid to promote better access for the disc. As I've had limited exposure to this tool, I'll defer those thoughts to someone else with more experience to answer.... Quote:
Quote:
Quote:
Quote:
We've got a shrinking disc on the way, to use on a test of one of the remaining stretched areas. Once I re-damage the passenger side for the hammer and dolly "equalization", that would even give me one sample to use with the disc, one with a torch.
__________________
Robert Last edited by MP&C; 10-22-2014 at 12:37 PM. |
||||||||
|
|

|
|
|
#4 |
|
Registered User
Join Date: Jan 2013
Location: Leonardtown, MD
Posts: 1,647
|
Re: Repairing Sandblast Damage
Time for the next phase of the test. With the passenger side repaired with the use of the donut dolly, we sandblasted the inside once more to use for another test.
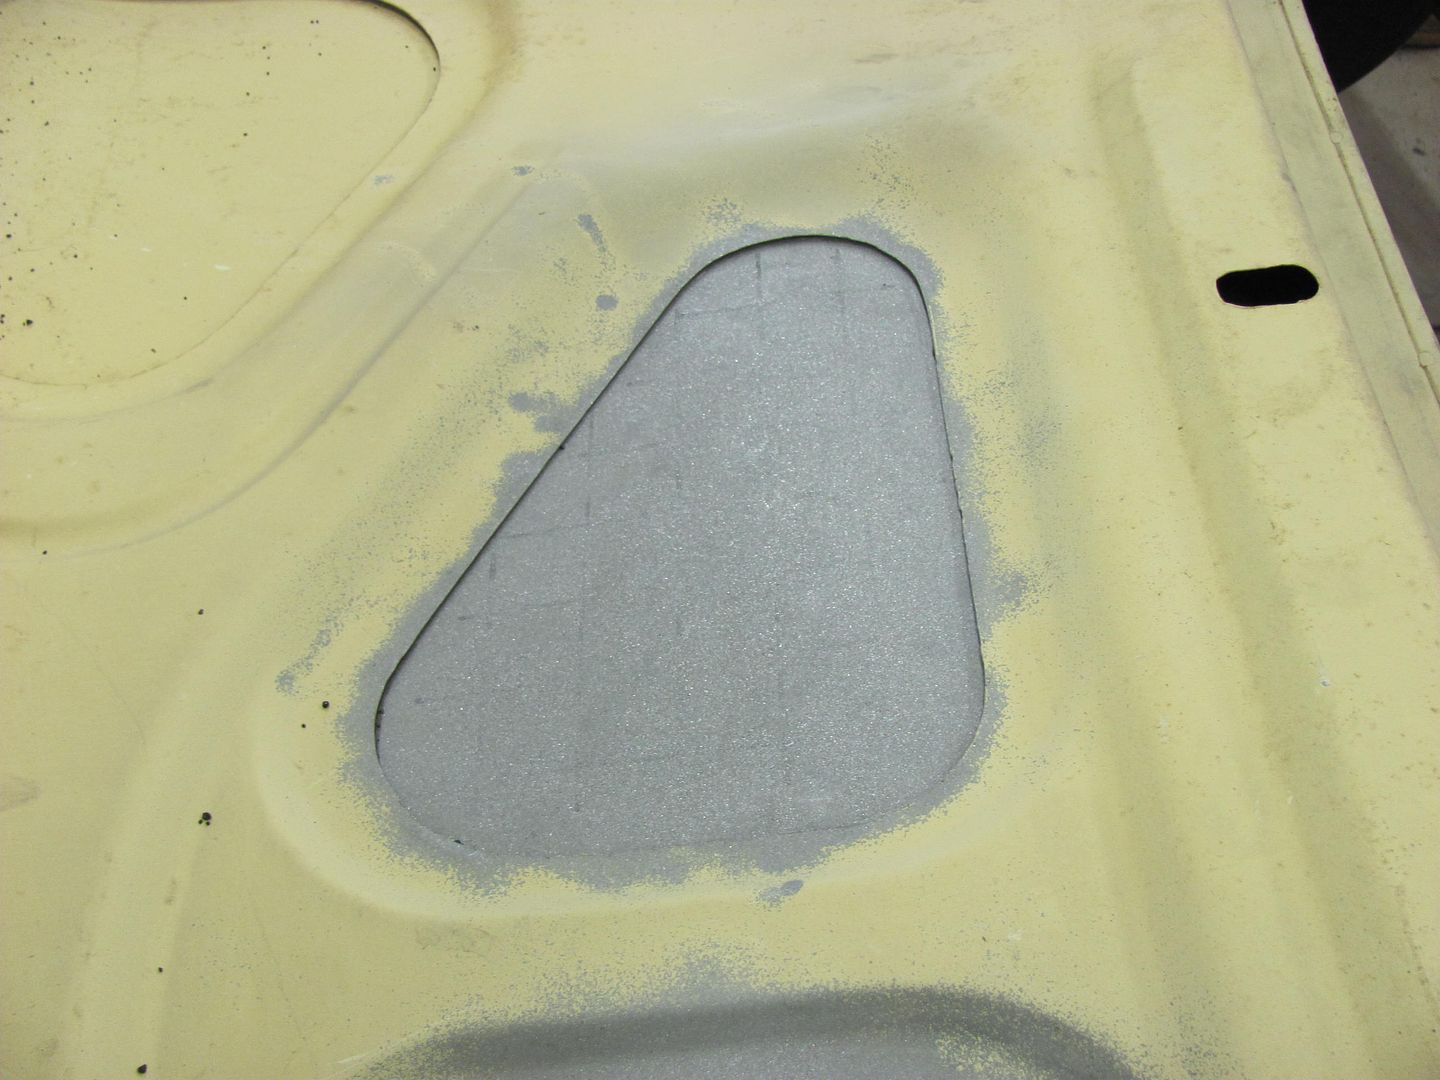 Sandblasted, the panel once again showed a bulge to the inside.... A test of the oil can effect showed it would pop toward the inside once released. 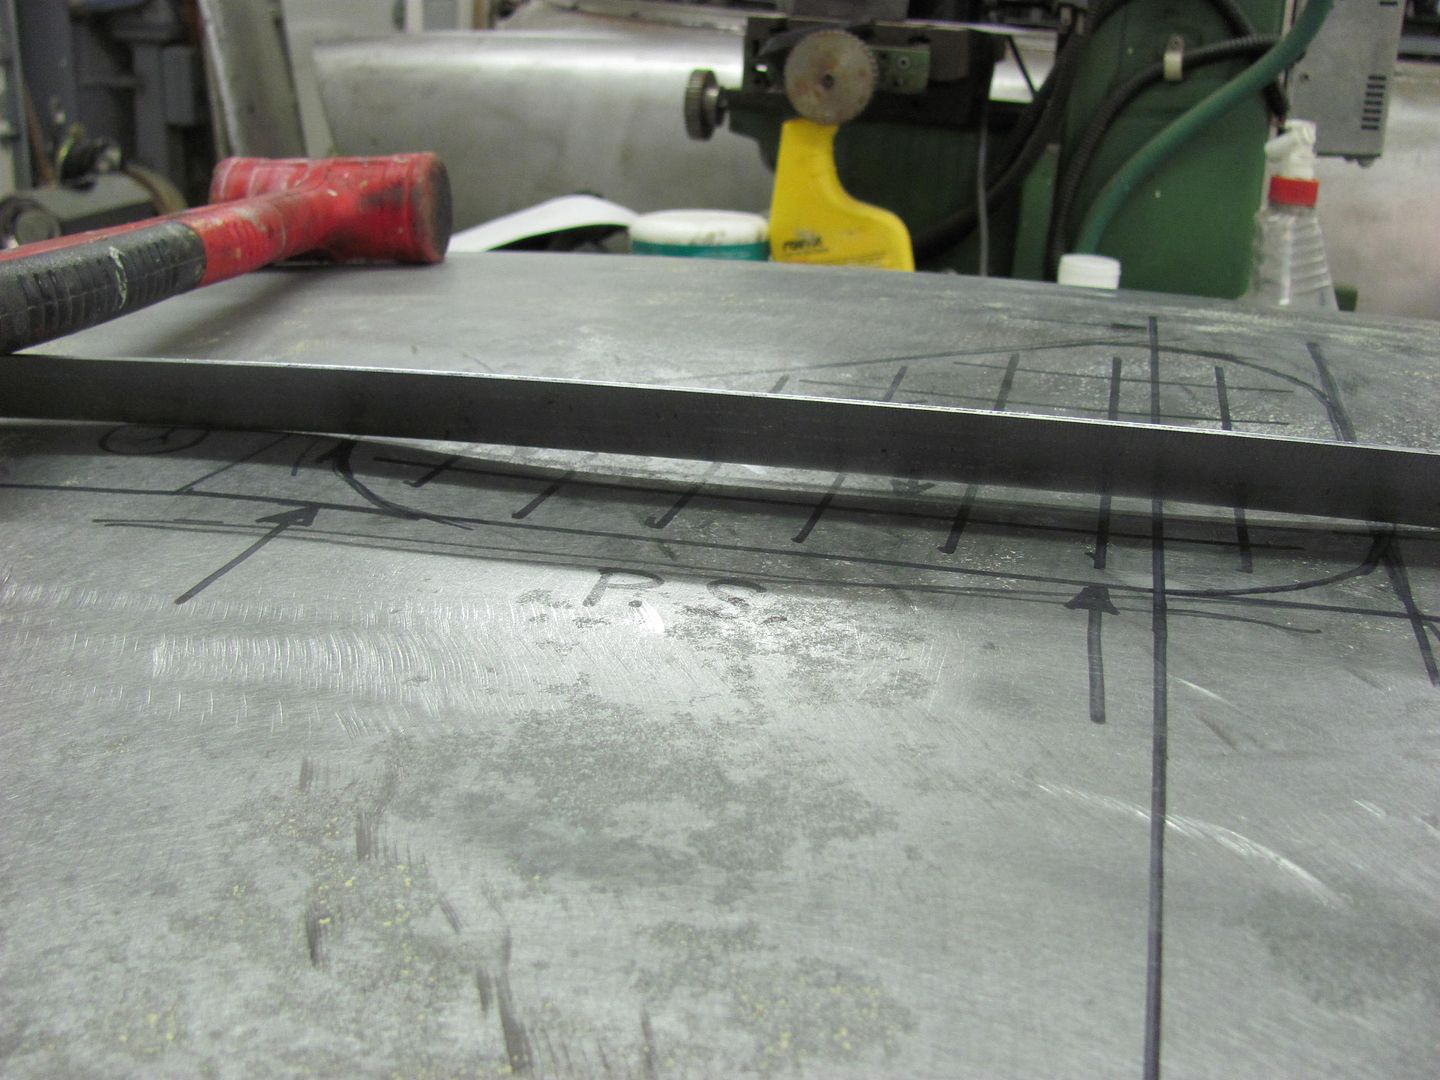 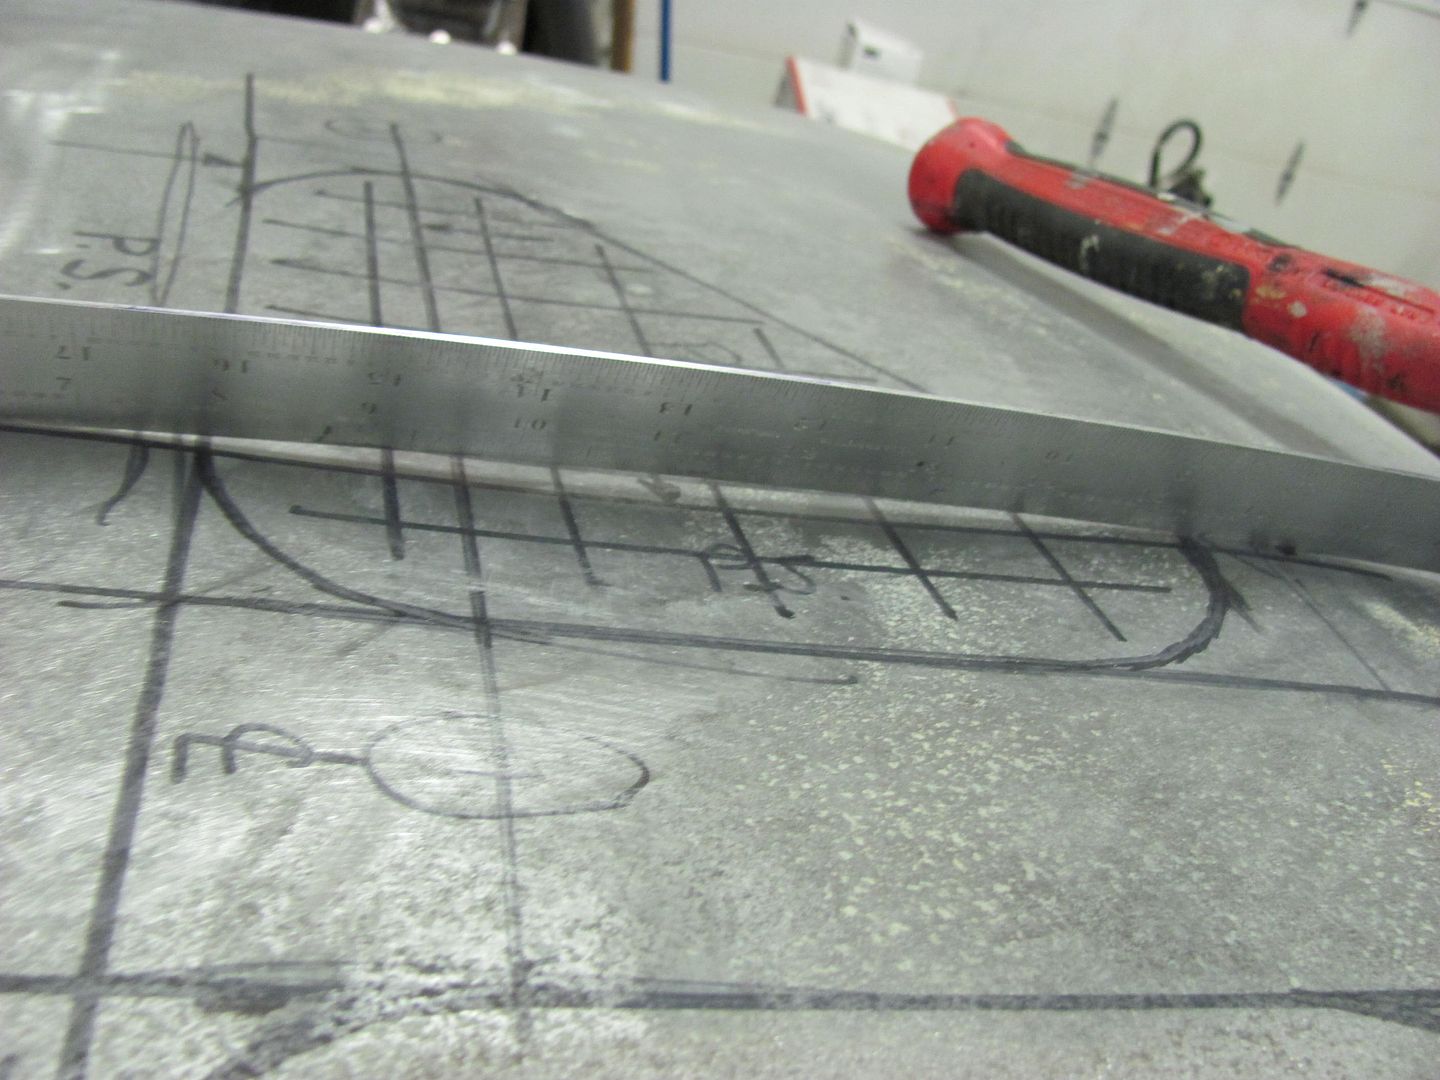 Now we'll use a hammer and hitch pin dolly to attempt to stretch the outside skin to equalize some of the stresses. The hitch pin was pressed against the inside to raise the panel as the hammer was used from the outside.. 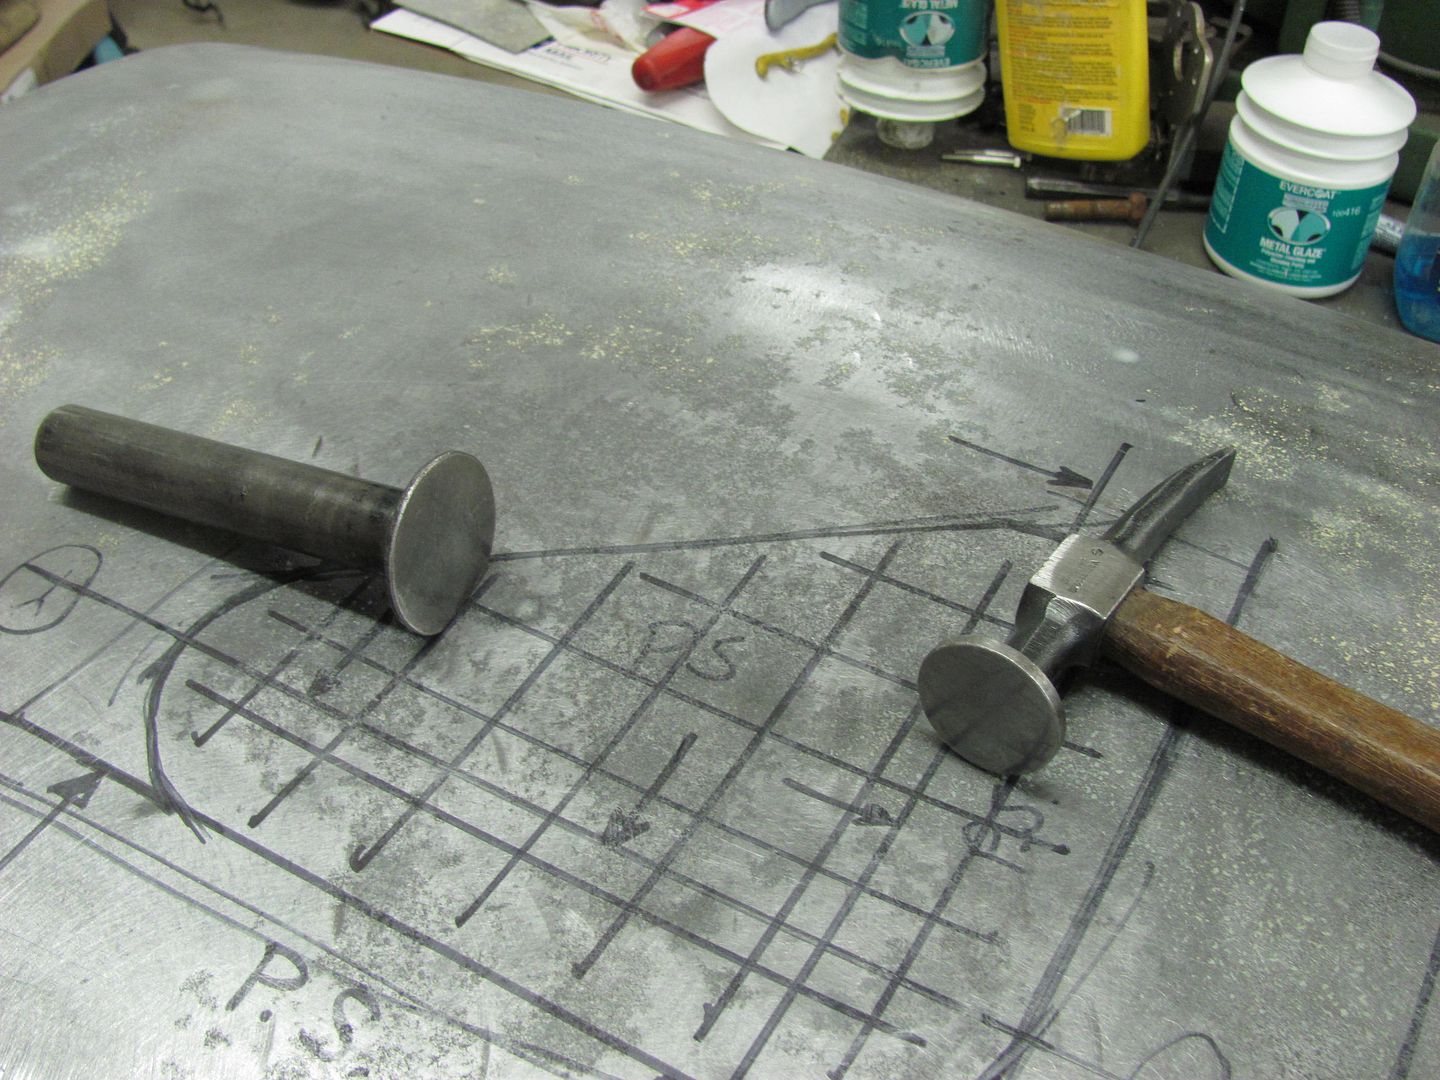 Once complete, the oil can effect seemed more equalized in that it would stay to which side you pushed it. The panel also shows the sinusoid wave... indicating a stretch within the opening on both sides... 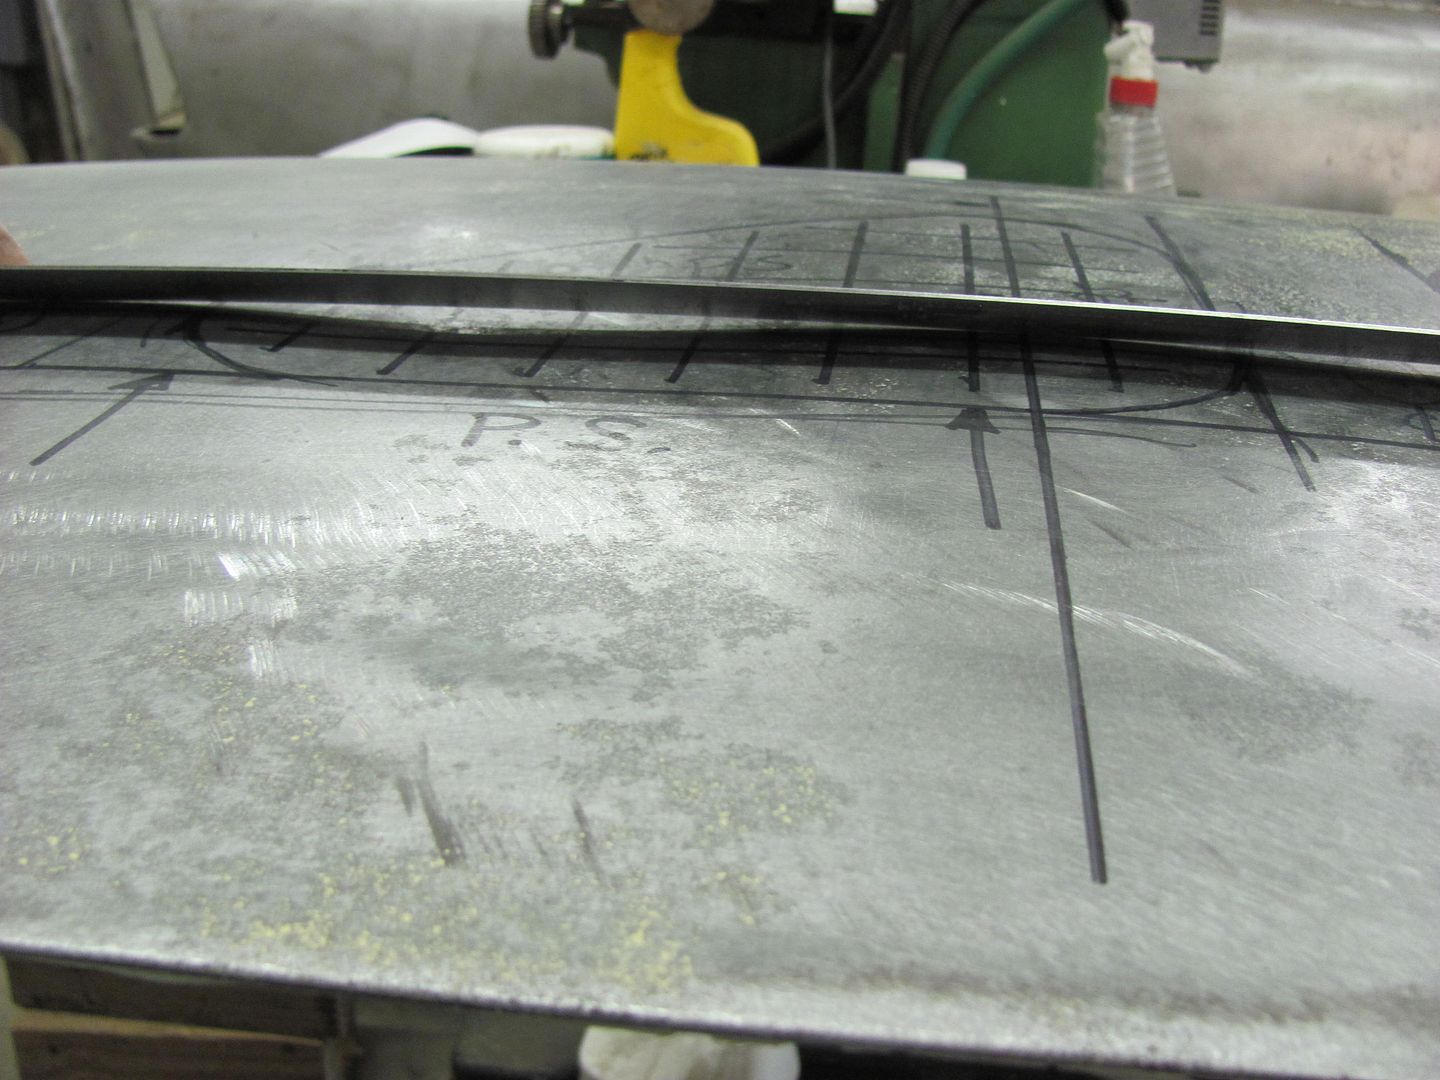 to attempt the repair to this side (again), we'll use heat in the form of the heating tip on the dent puller. 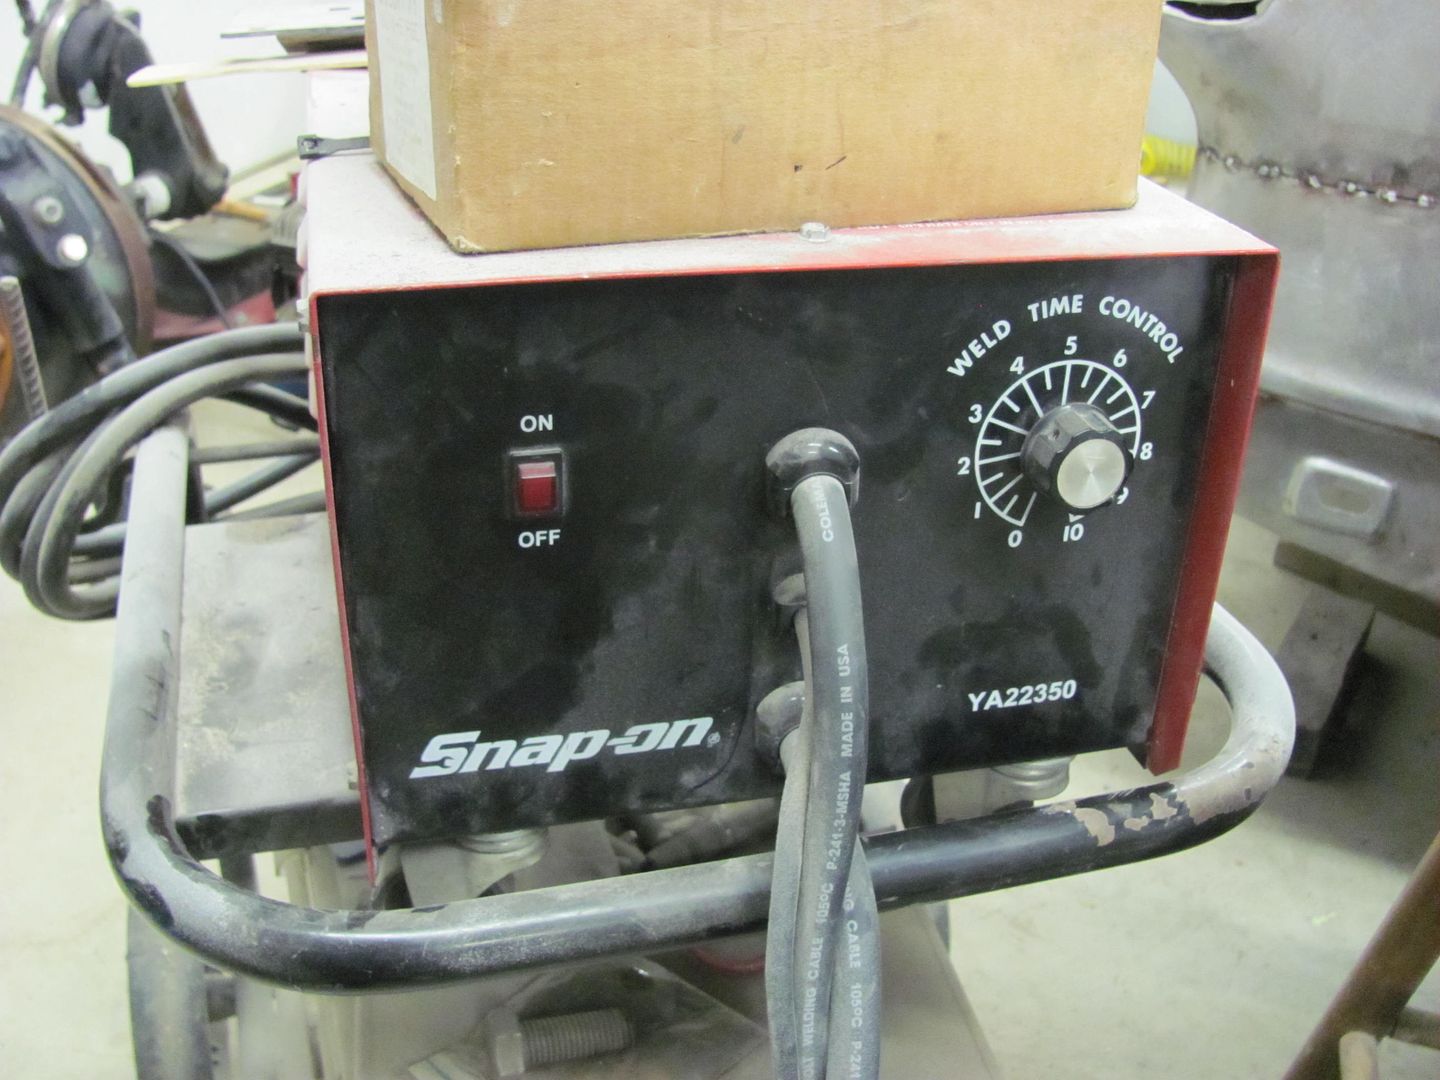 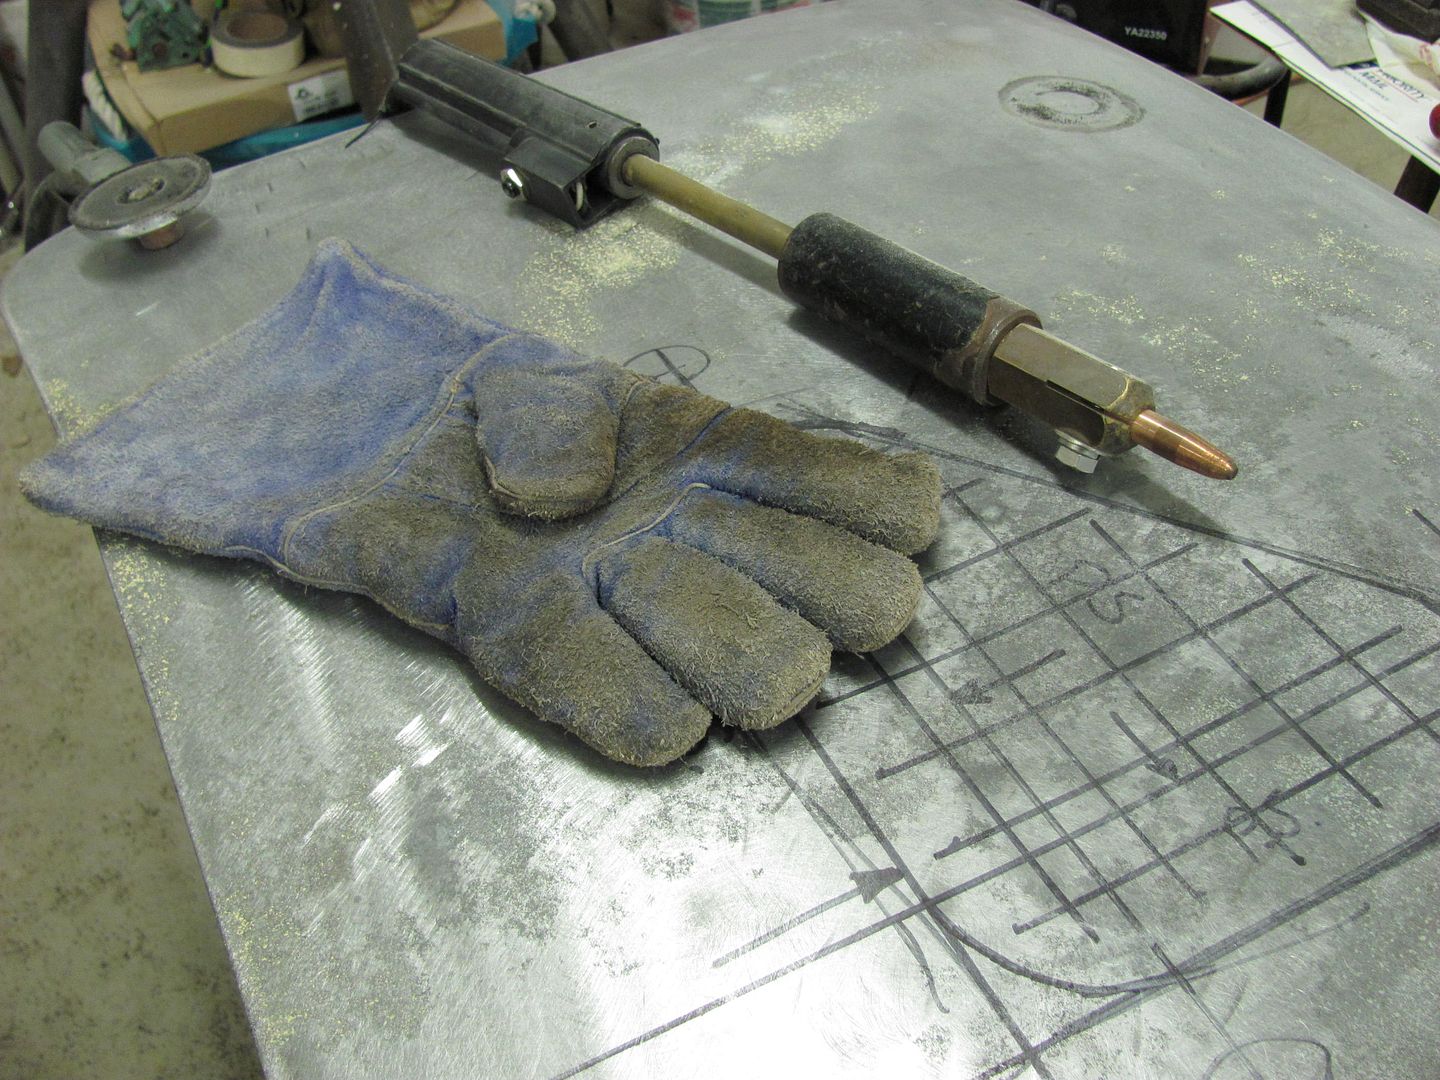 I used the glove to push the panel outward while shrinking with the heat tip from the outside, and the panel just didn't seem to be responding. Then it hit me, the damage was caused by stretching from the inside, so let's shrink from that side..... 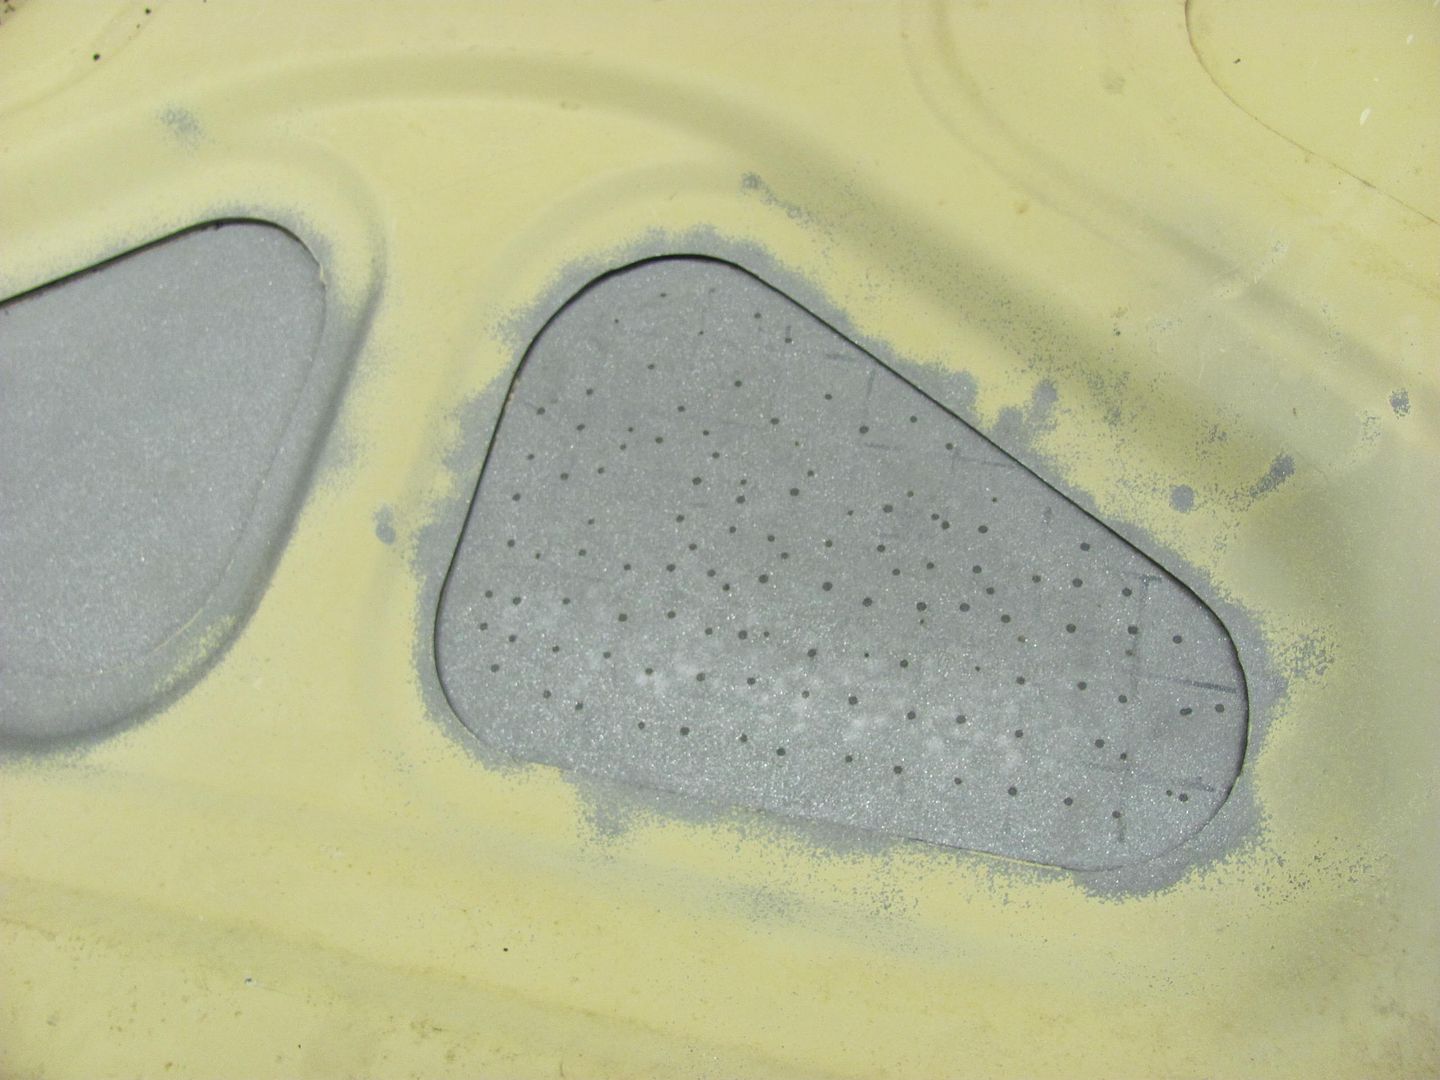 This appeared to do the trick, shrinking from the inside. Hindsight, the addition of the weight of the dent puller pushing the direction we want to go likely helped persuade the panel a bit more than had we continued from the outside. Actually, you could see the panel moving slightly around the perimeter of the heating tip as the panel was heated. 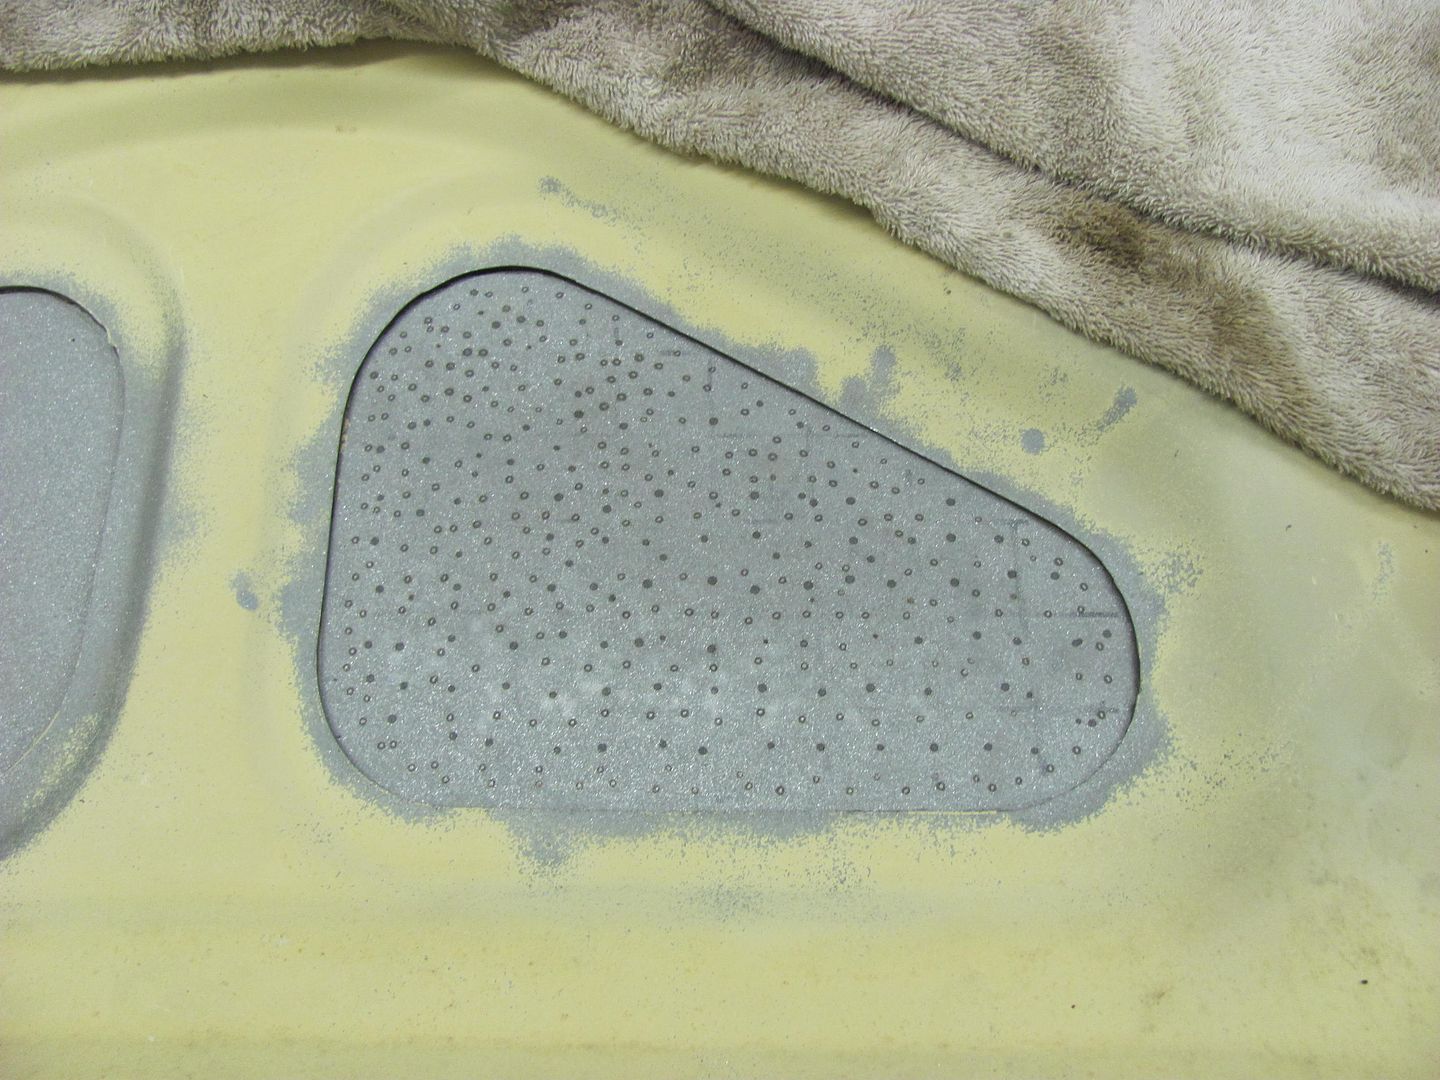 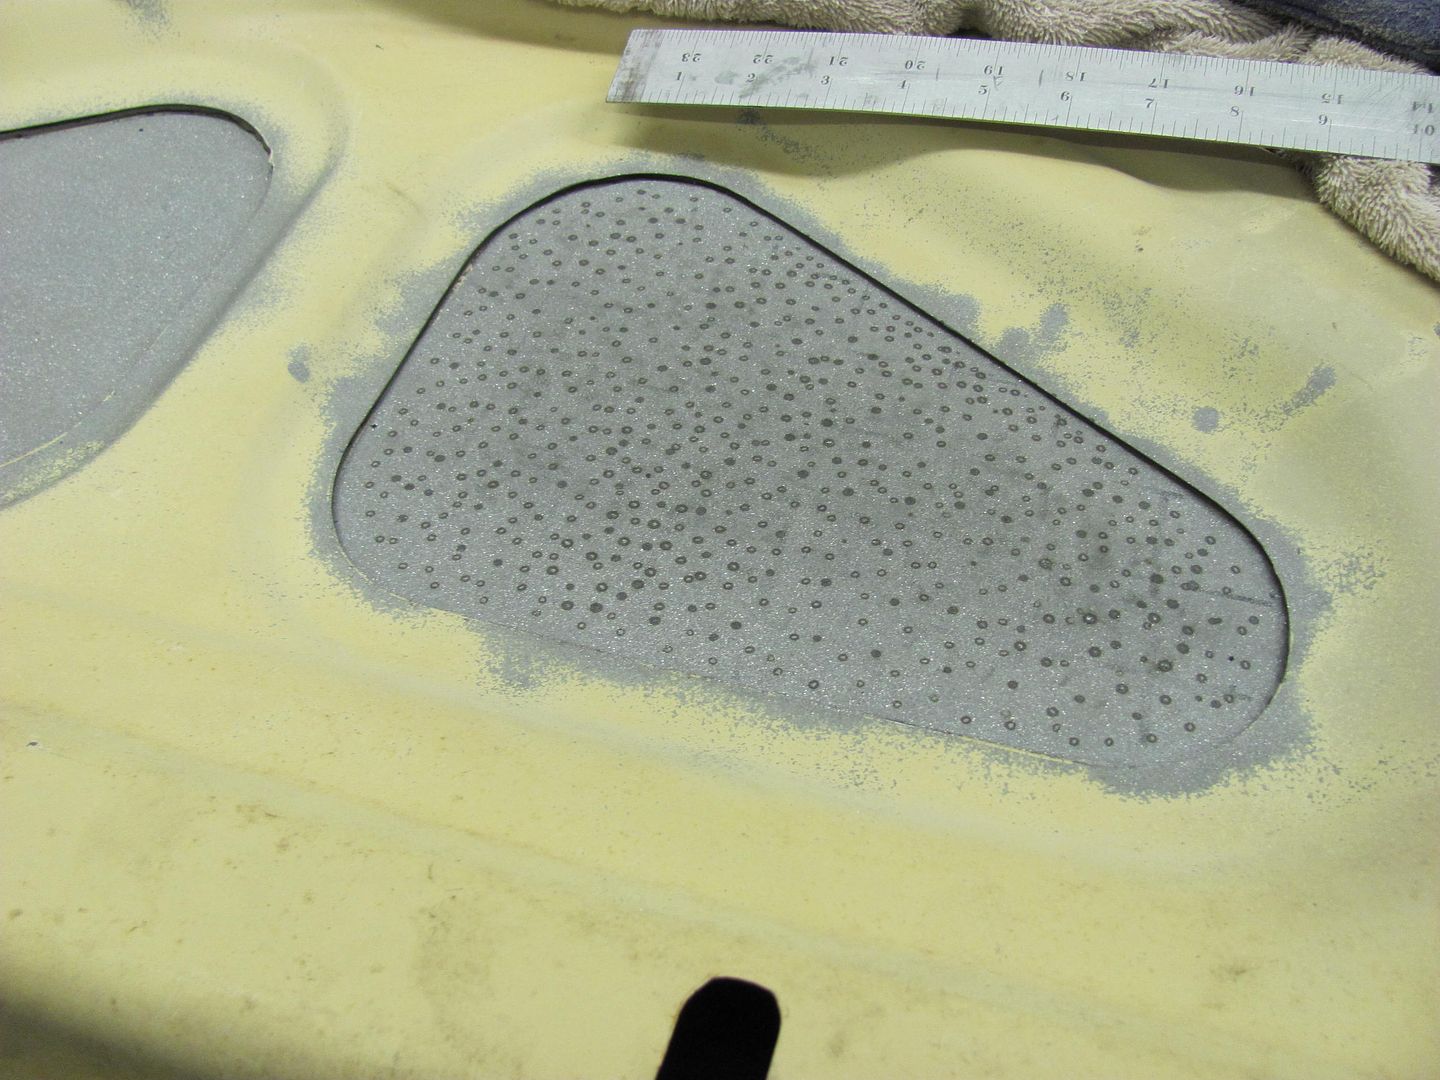 This process, with the majority of the heat now concentrated on the inside, was moving the panel outward as it was shrinking. Kept going until the panel seemed to stop responding to the heat shrinks, and then thought we'd planish to bring the crown up the little bit that was needed. Started again with the hammer and dolly, but it did not appear to work as well as it had after using the donut dolly. Keeping in line with the thoughts of the shrinking was more concentrated on the inside, what could we use to keep any stretch concentrated on the outside? Thought I'd give this small shot bag a try as the dolly.... 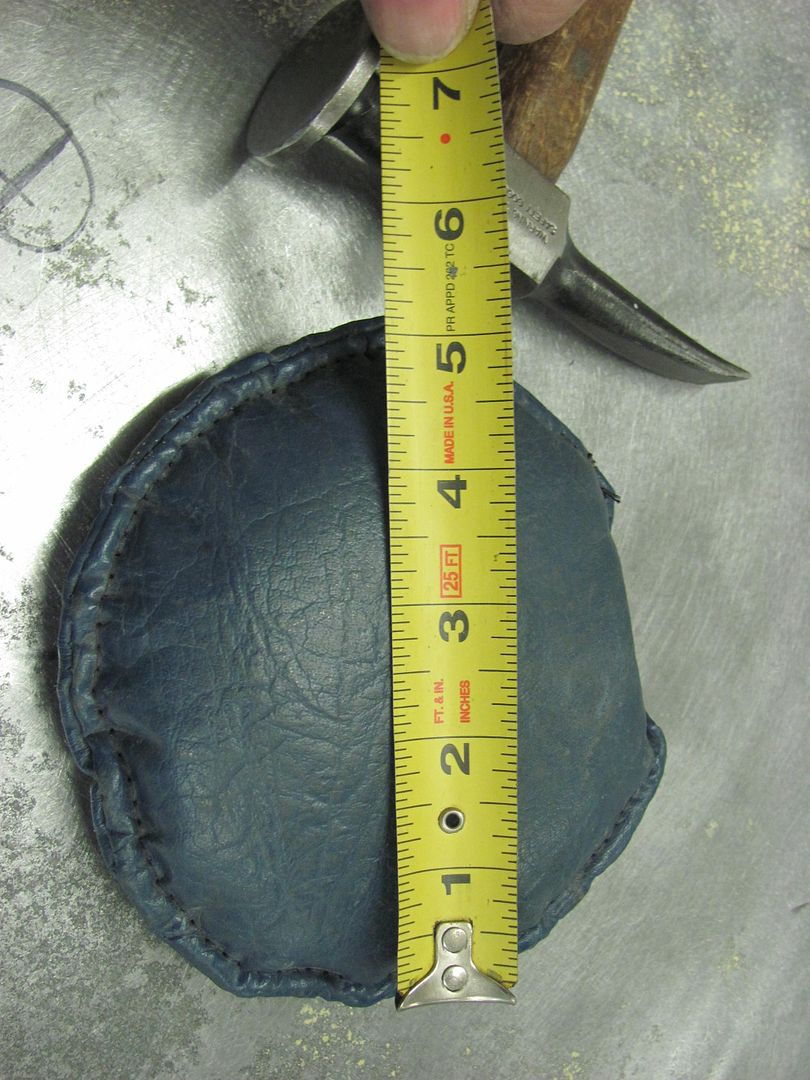 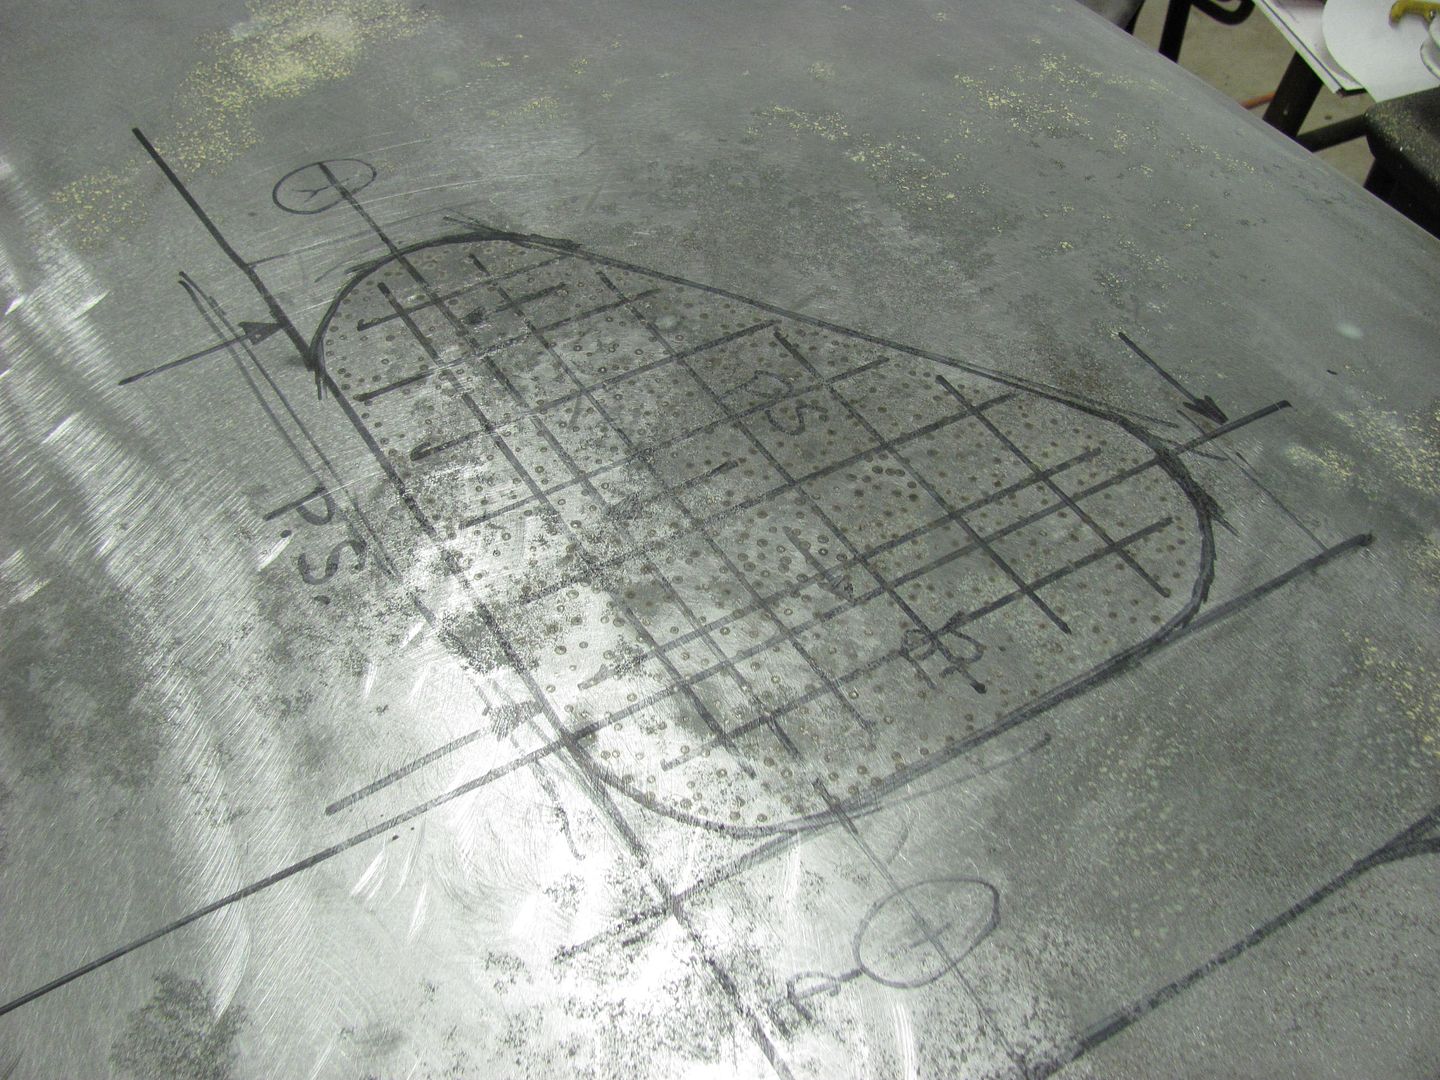 The panel once again seemed to respond well to the tool selection, again bumping the panel the direction we needed. 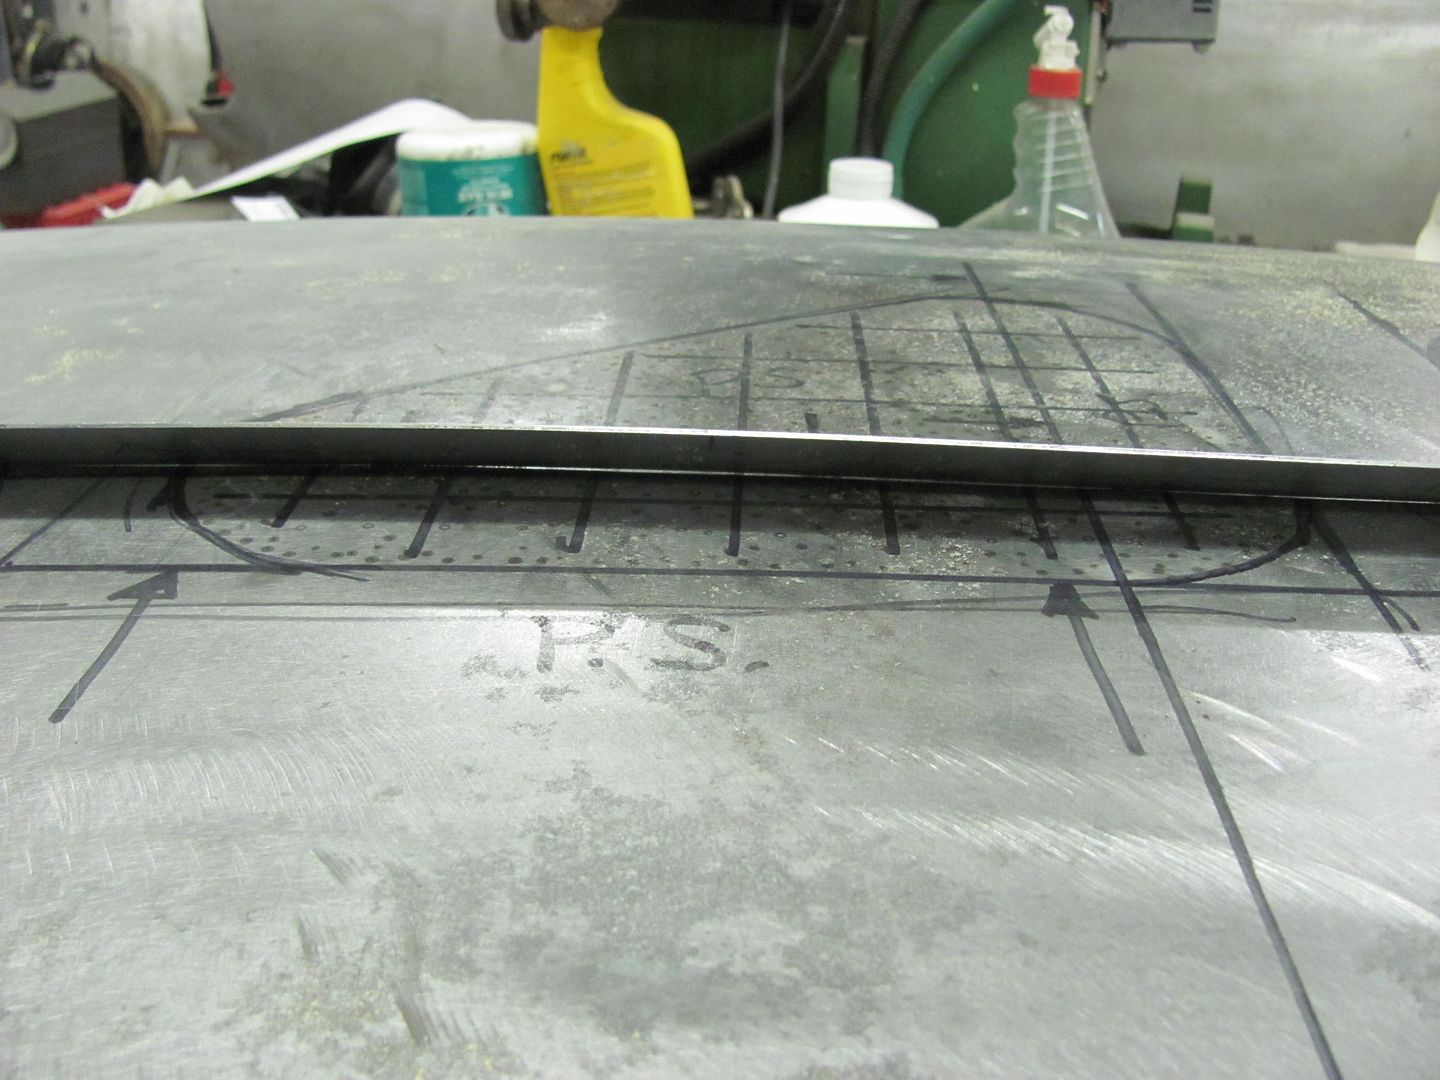 Not perfect, but looks like we're doing the right thing. A bit more work and it would be to a high build primer fix state. The care package also showed up, so next we will try the shrinking disc for its results on the drivers side test area... 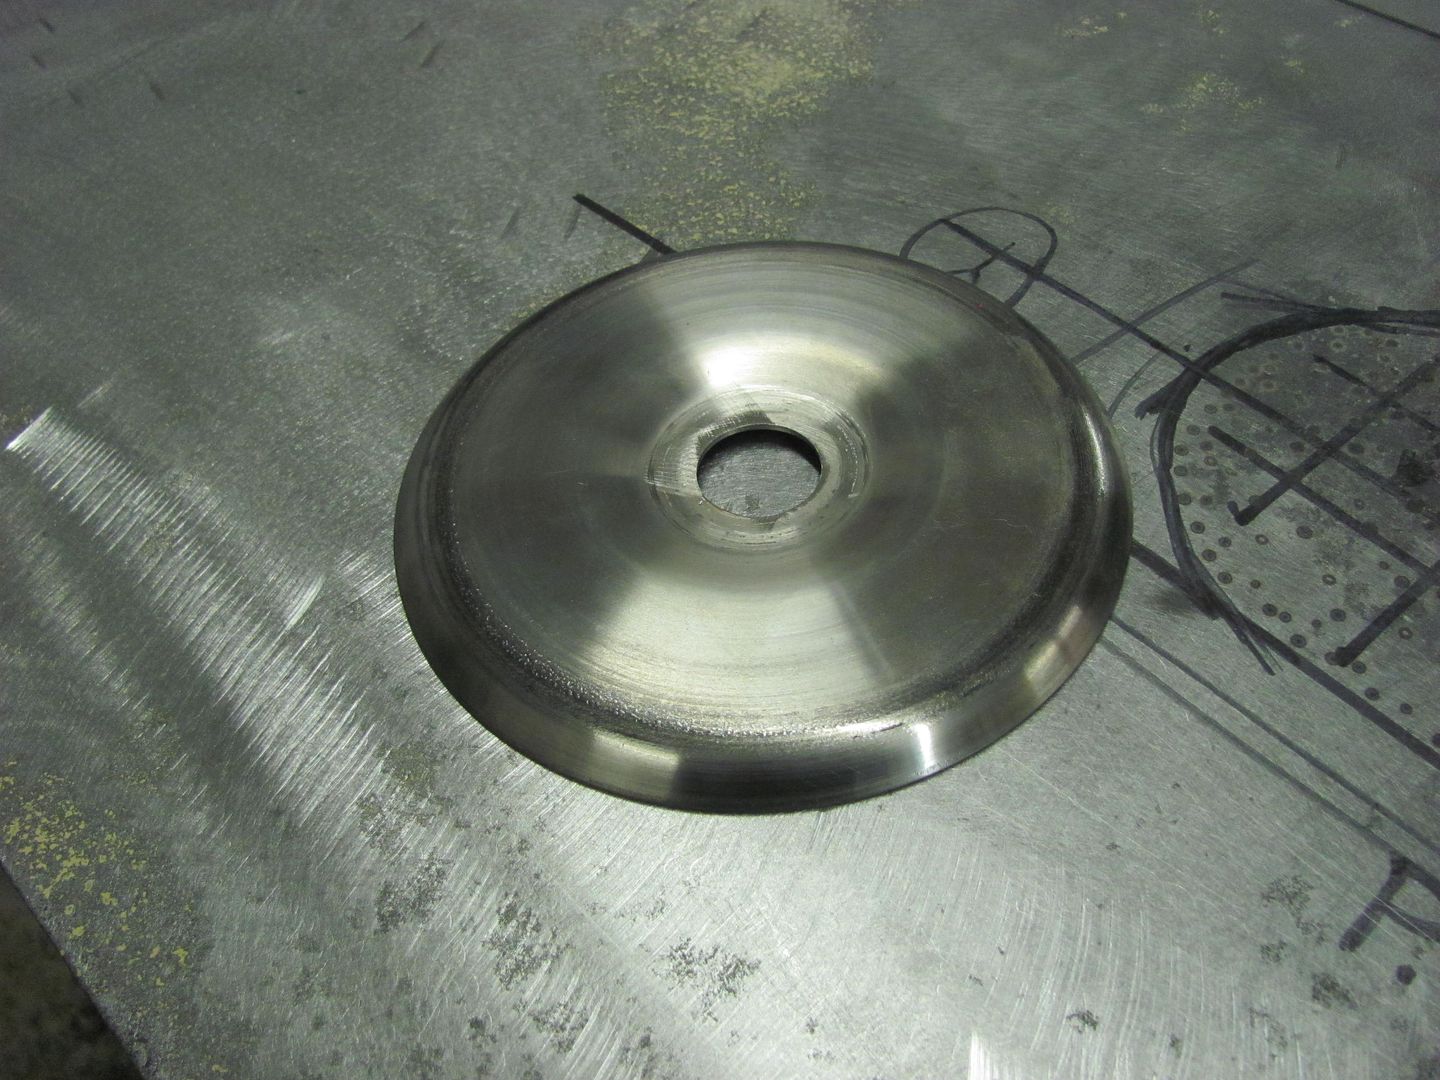
__________________
Robert |
|
|

|
|
|
#5 |
|
Registered User
Join Date: Jan 2013
Location: Leonardtown, MD
Posts: 1,647
|
Re: Repairing Sandblast Damage
Moving on to the next phase of the test, the shrinking disc. The disc is a 5" diameter, and kinda gets in the way of using the 4-1/2" guard. To promote the retention of digits, I did install the side handle...
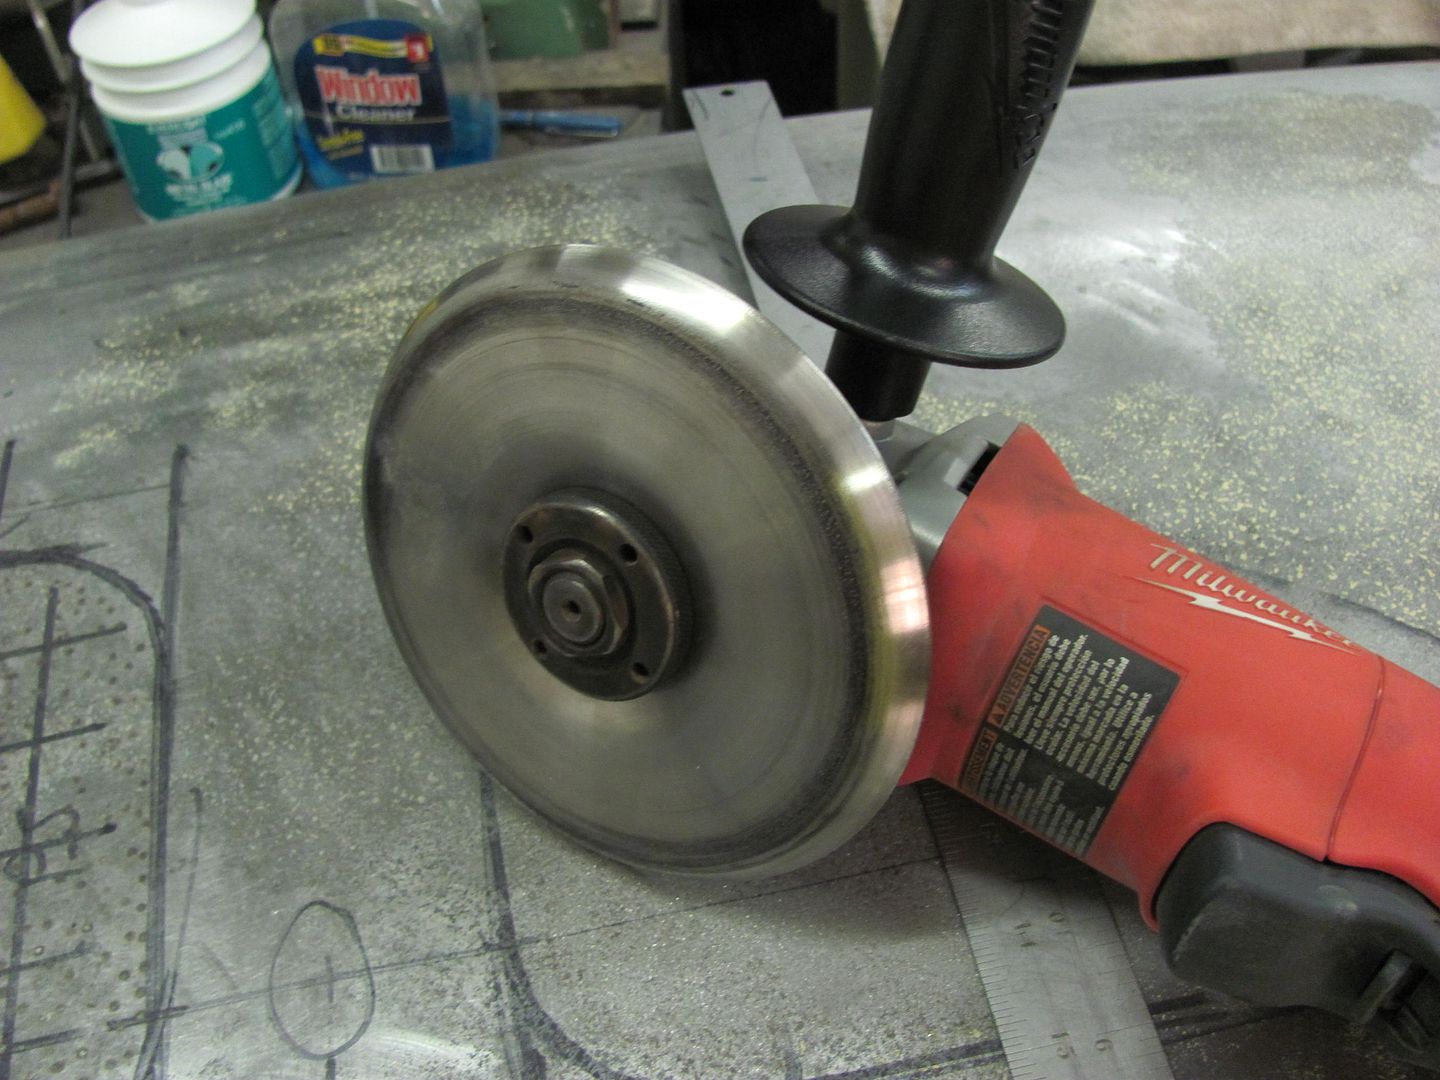 A quick check of our panel to find the high spot... 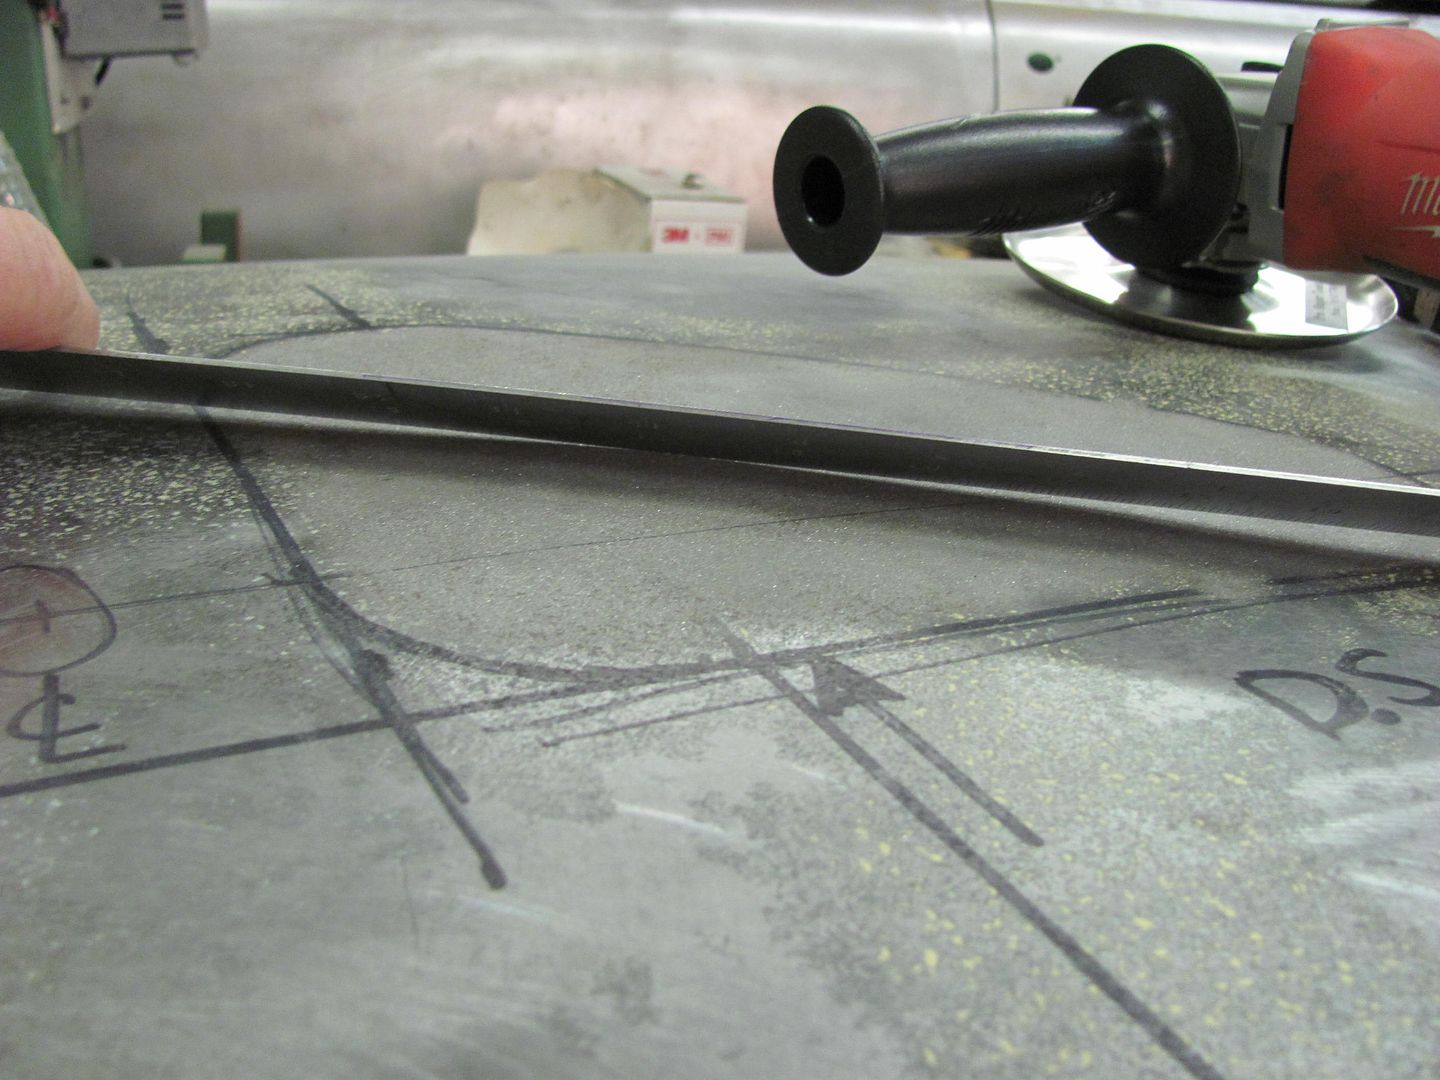 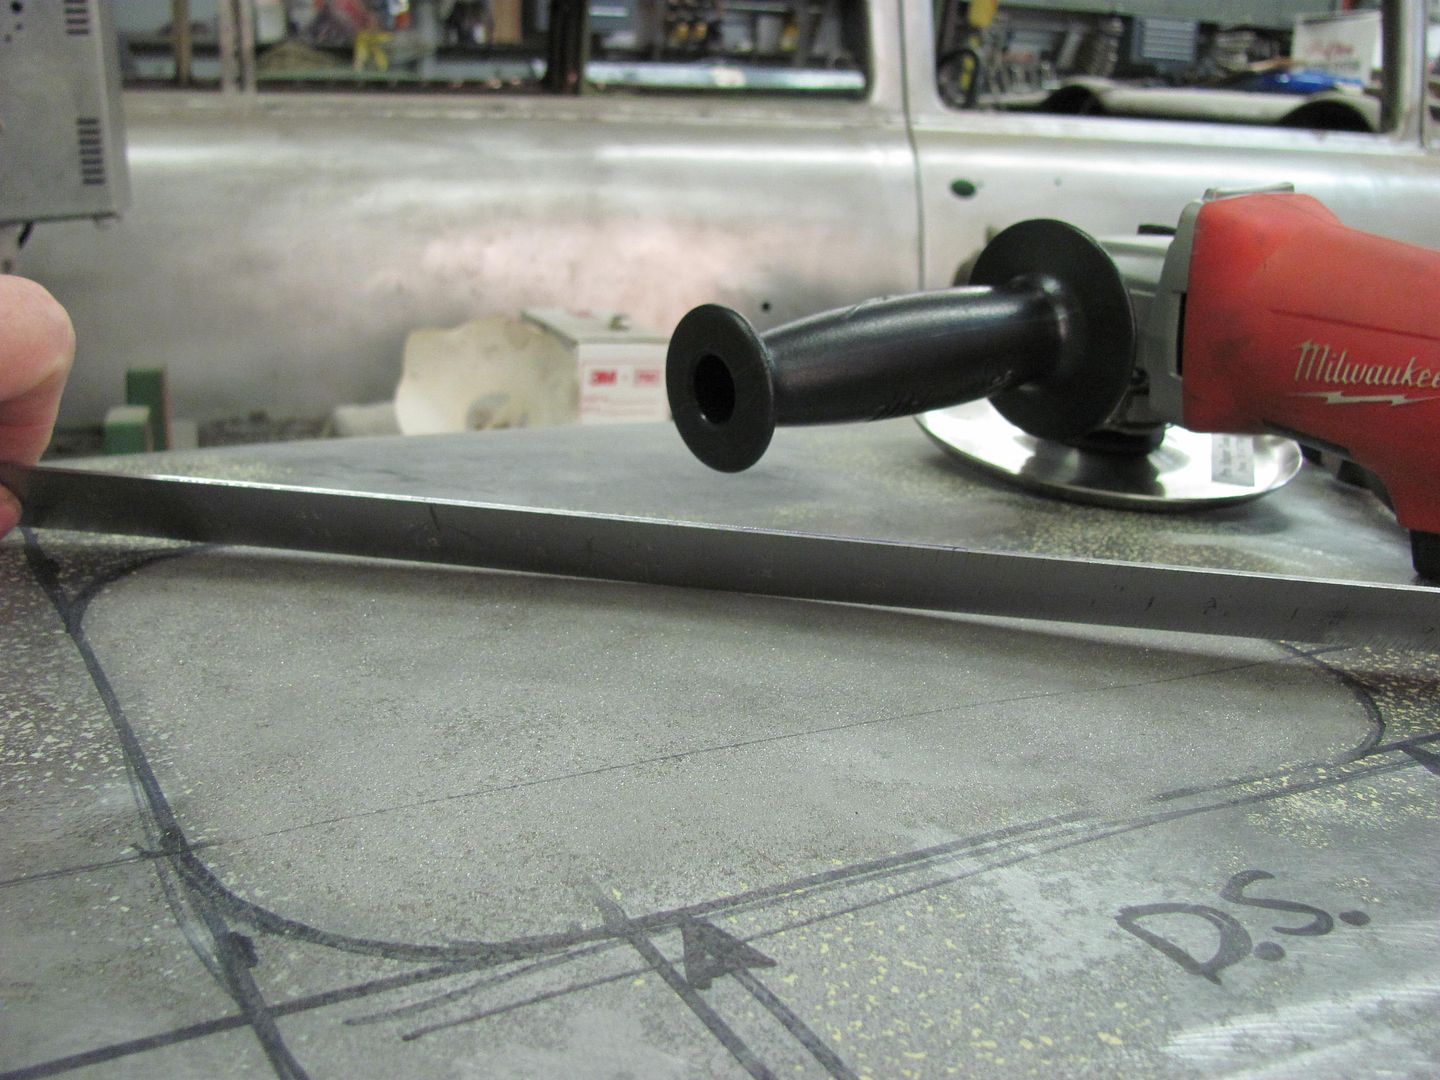 The panel was heated to a light brown color and cooled with a damp rag. 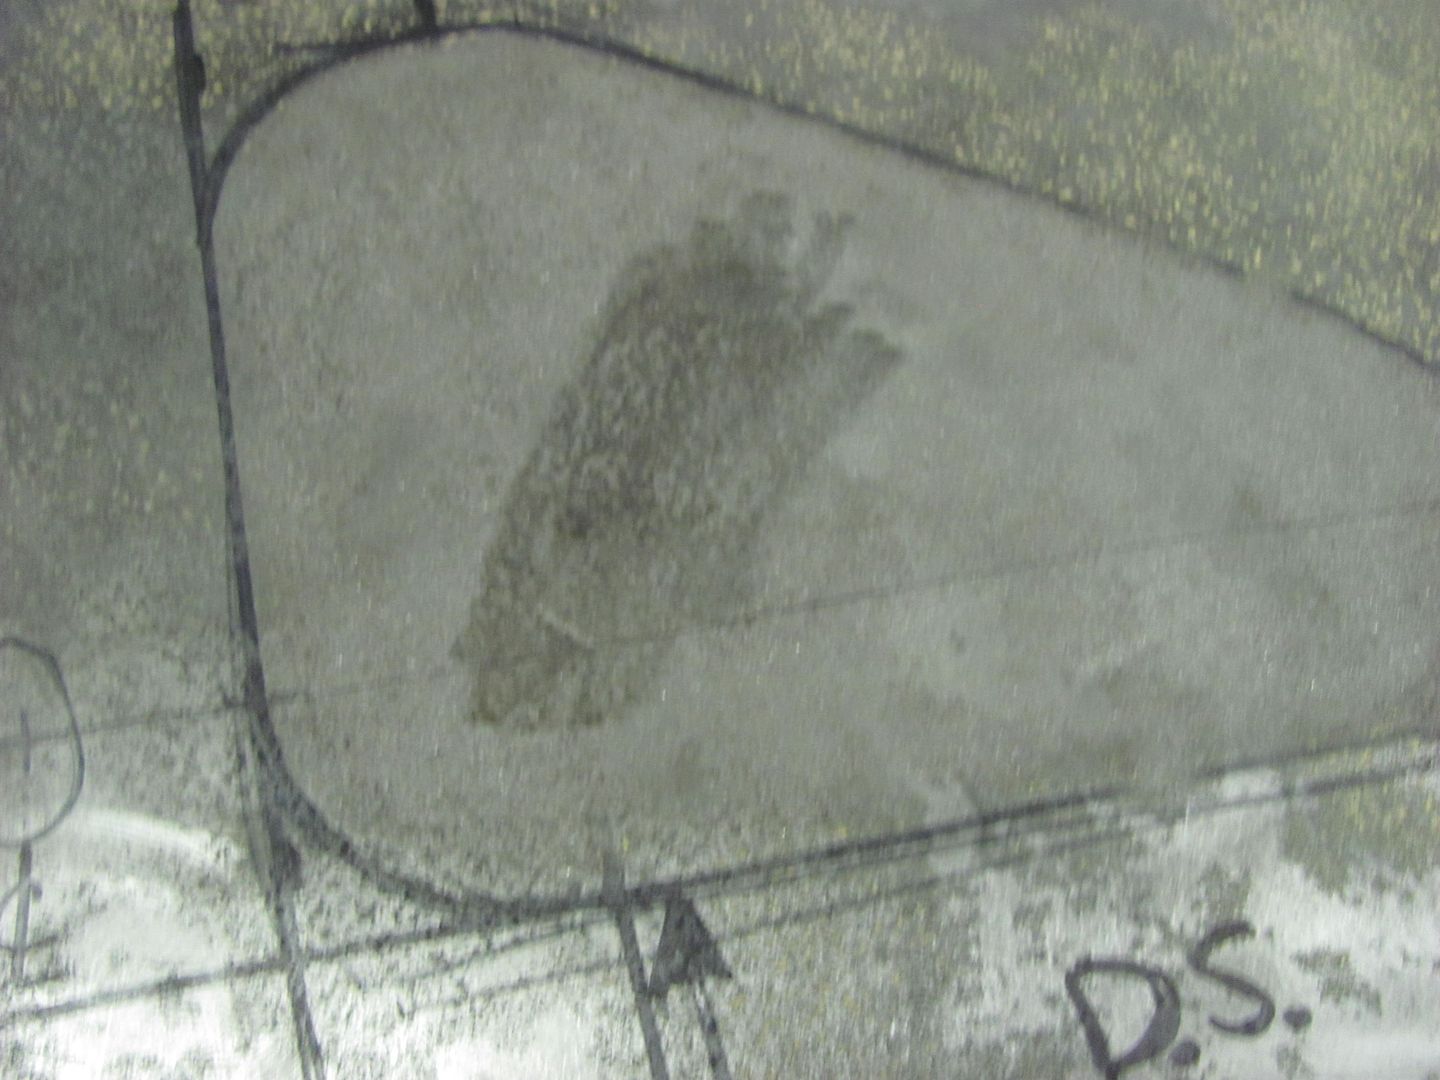 ....and quickly found that the stud/nut of the grinder hangs too far down to use the disc flat to the panel. 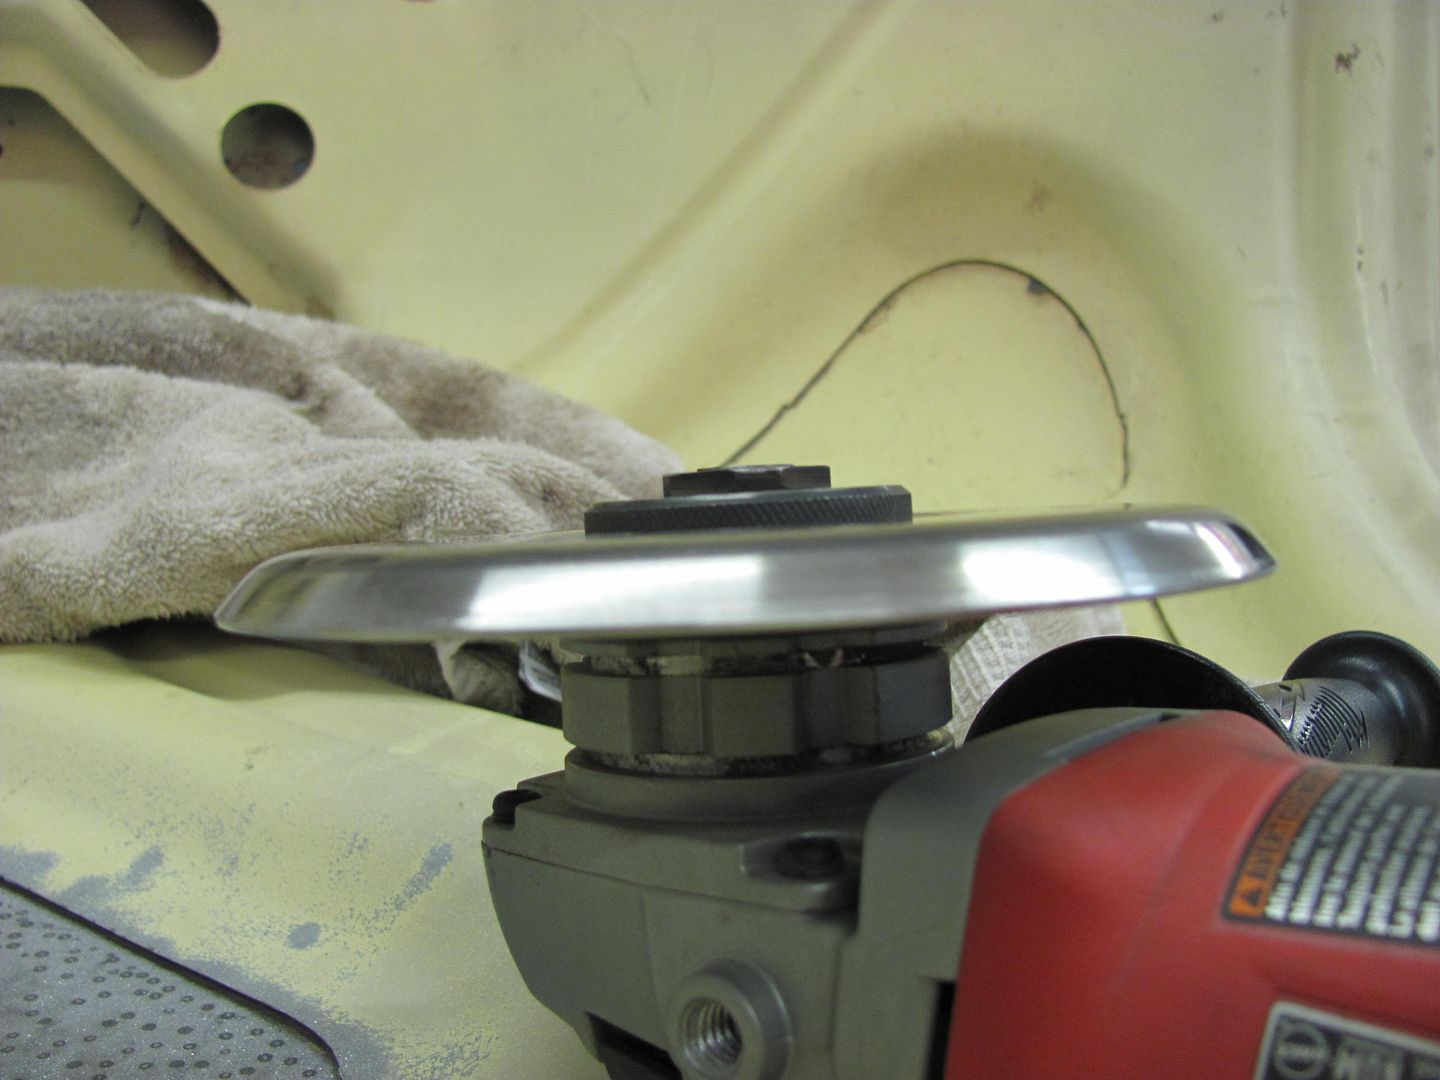 So because the grinder is held to an angle to the panel to clear the stud/nut, the panel has a tendency to assume the rounded shape of the leading edge of the disc... 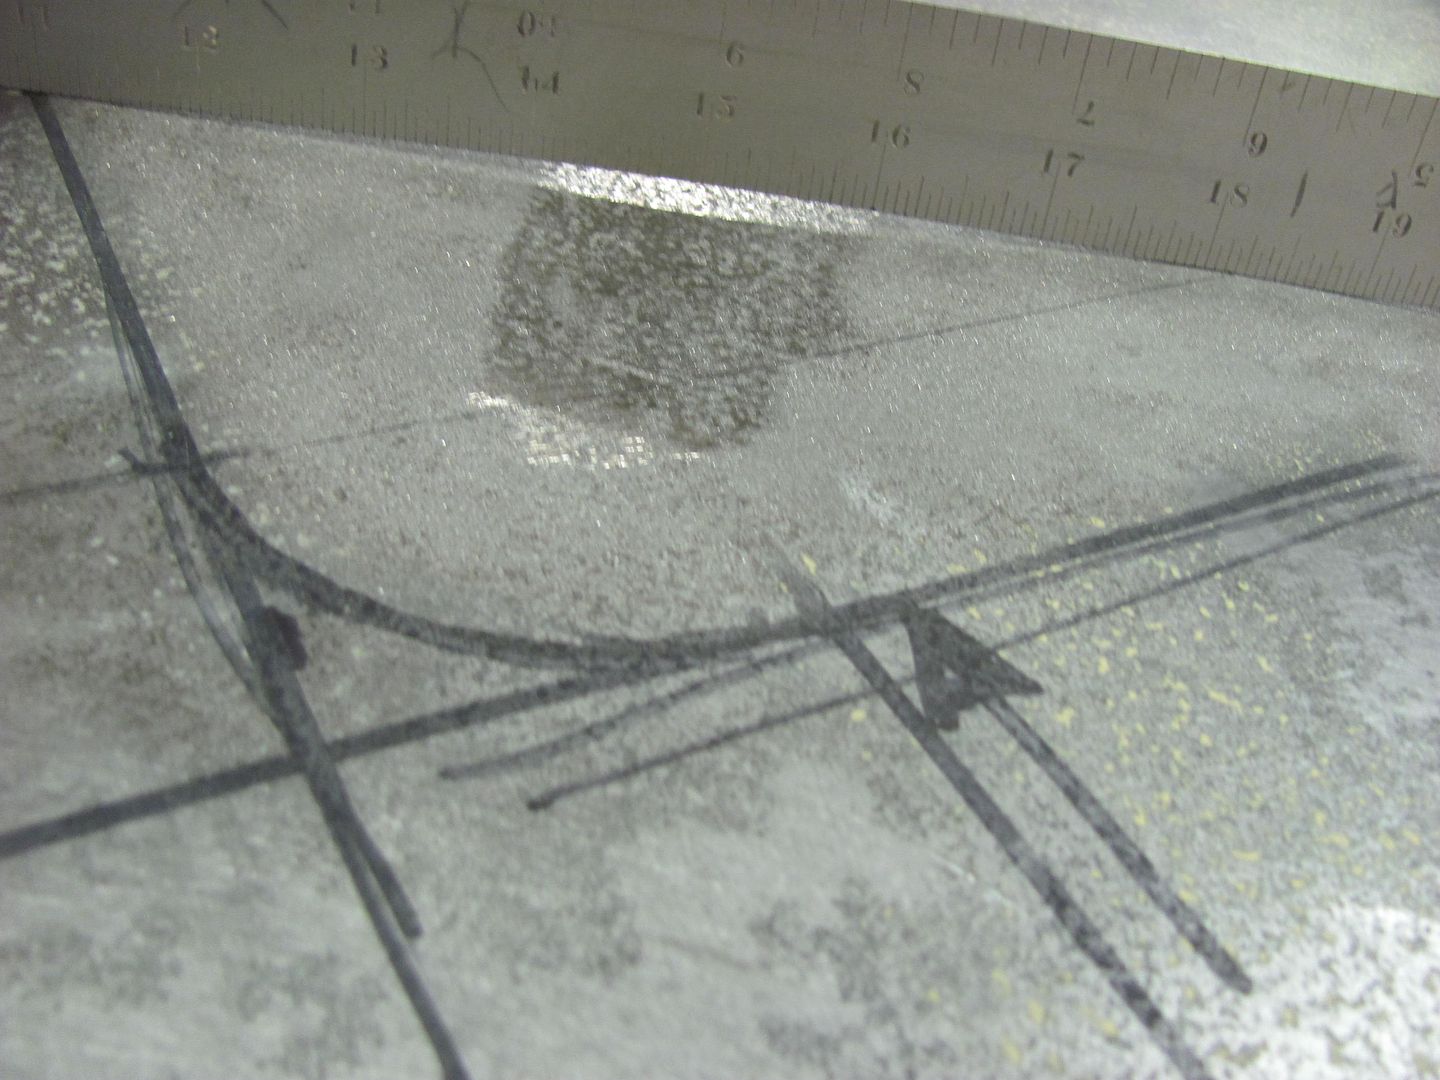 So right off the bat, my results will likely not be optimal, than if the spindle area of the disc were better offset to accommodate the spindle nut and permit the use of the flat area. Here is the next high area... 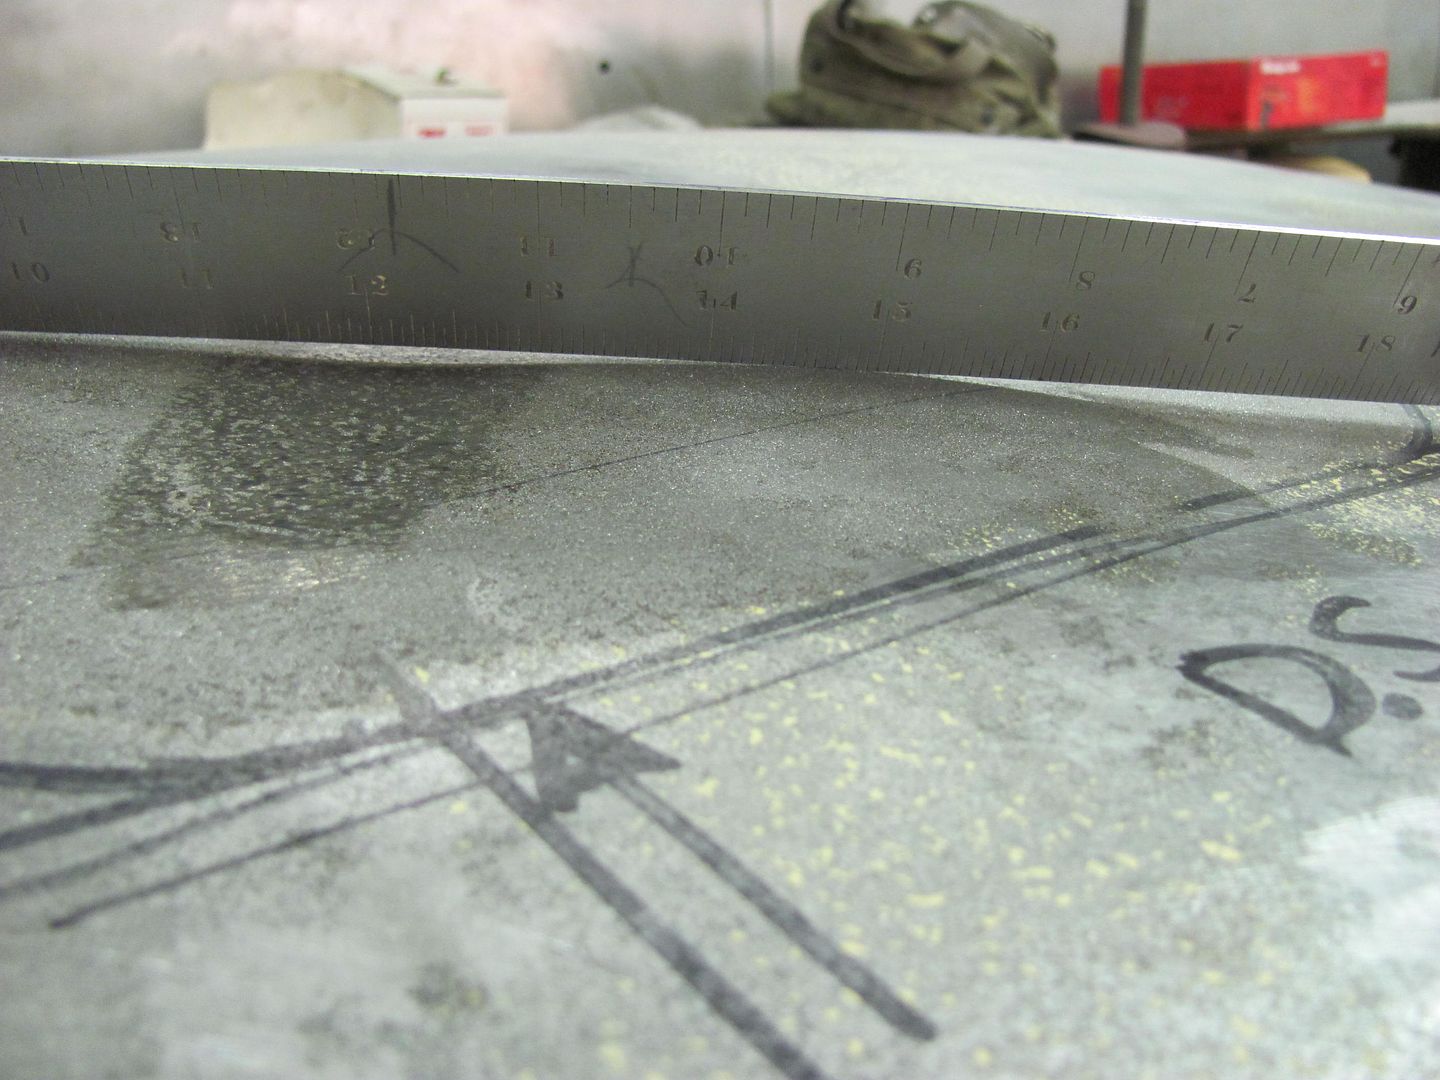 ...and our cooling device.. 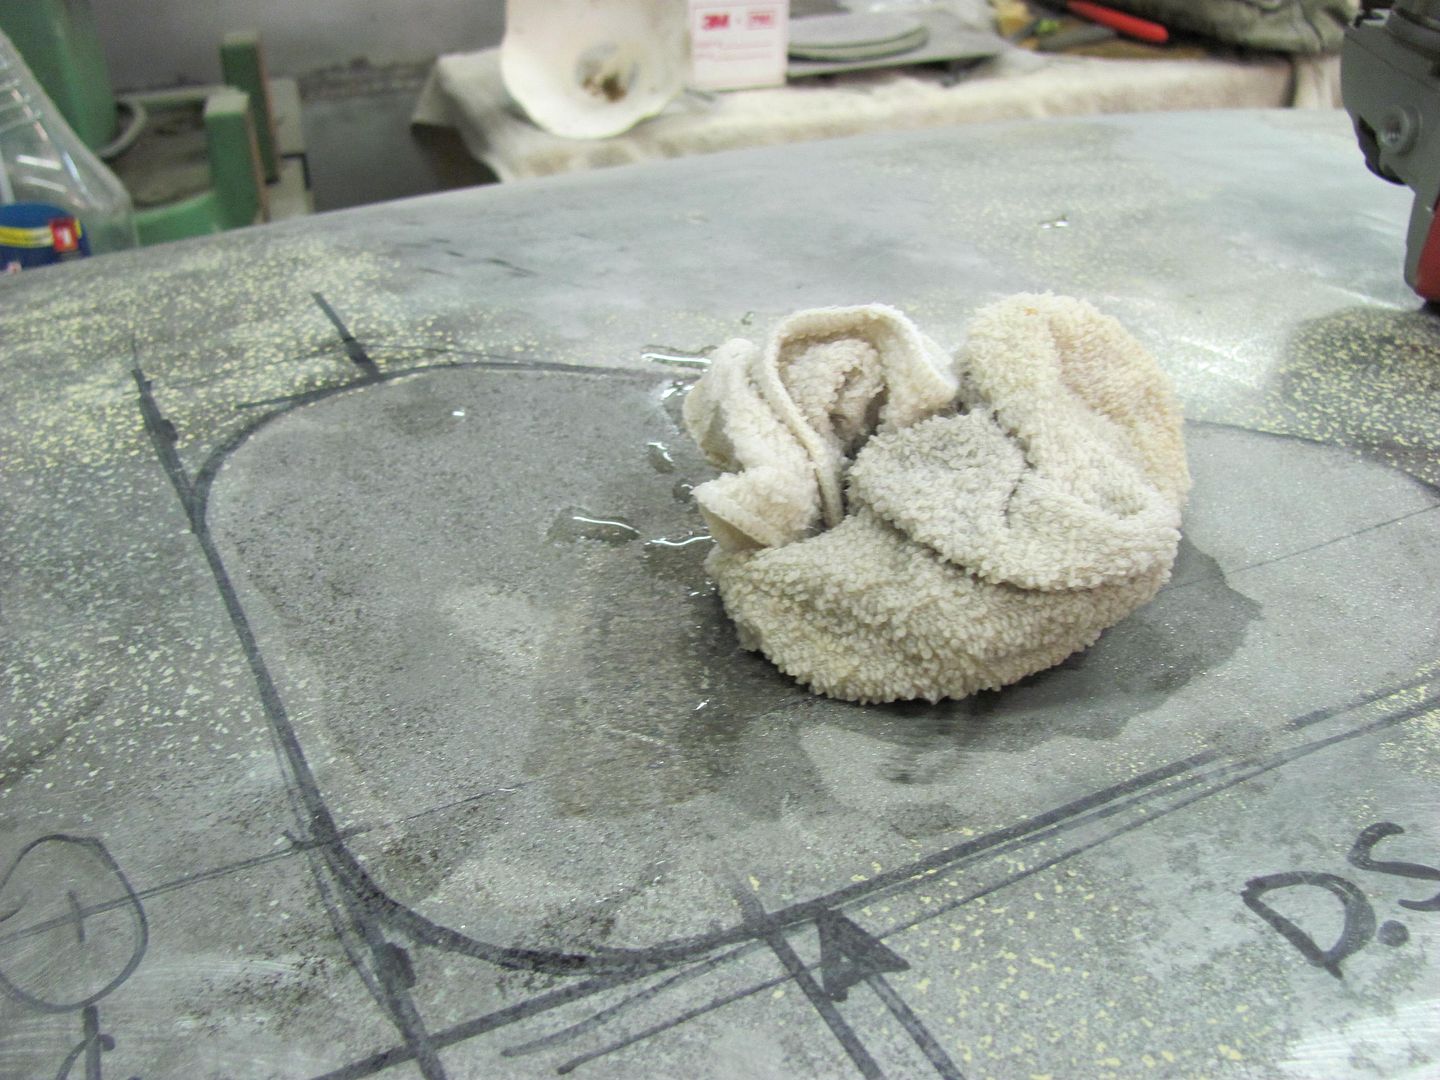 Looking at the results of the shrinking disc, the use of the disc at an angle appears to have gotten rid of the high spots, but created other issues.... 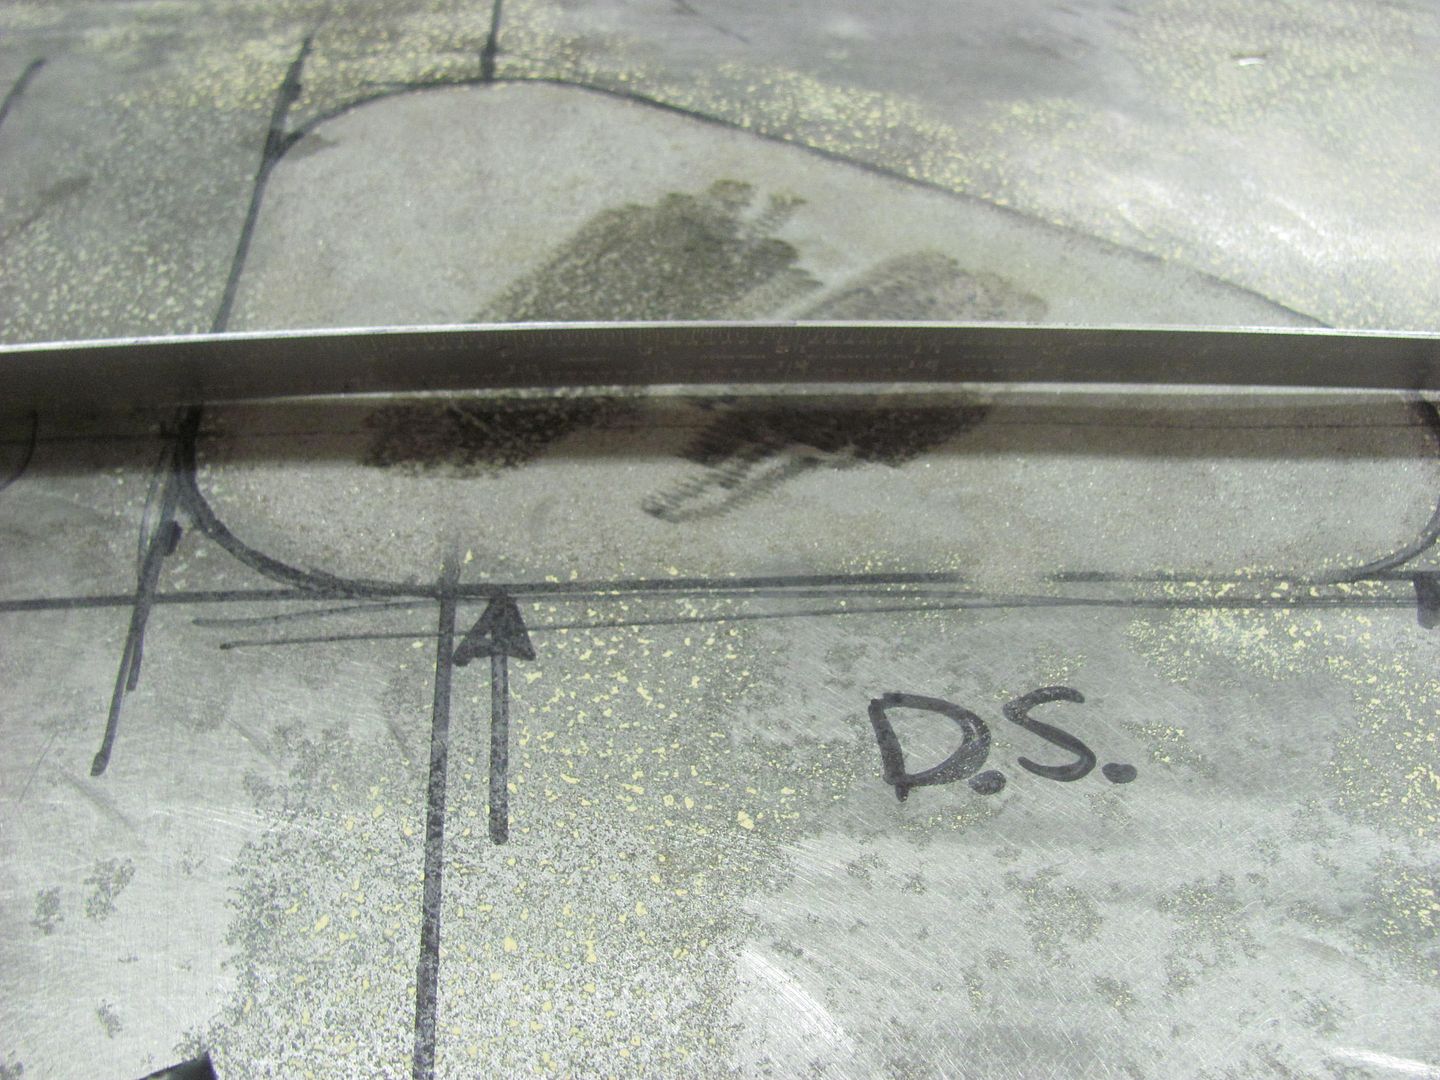 It's as if, in much the same fashion as the shrinks from the dent puller's heating tip, we would be better served by working this issue from the back side to better shrink the side that was damaged initially. Flipping the trunk lid over, here is what we see from the back side... 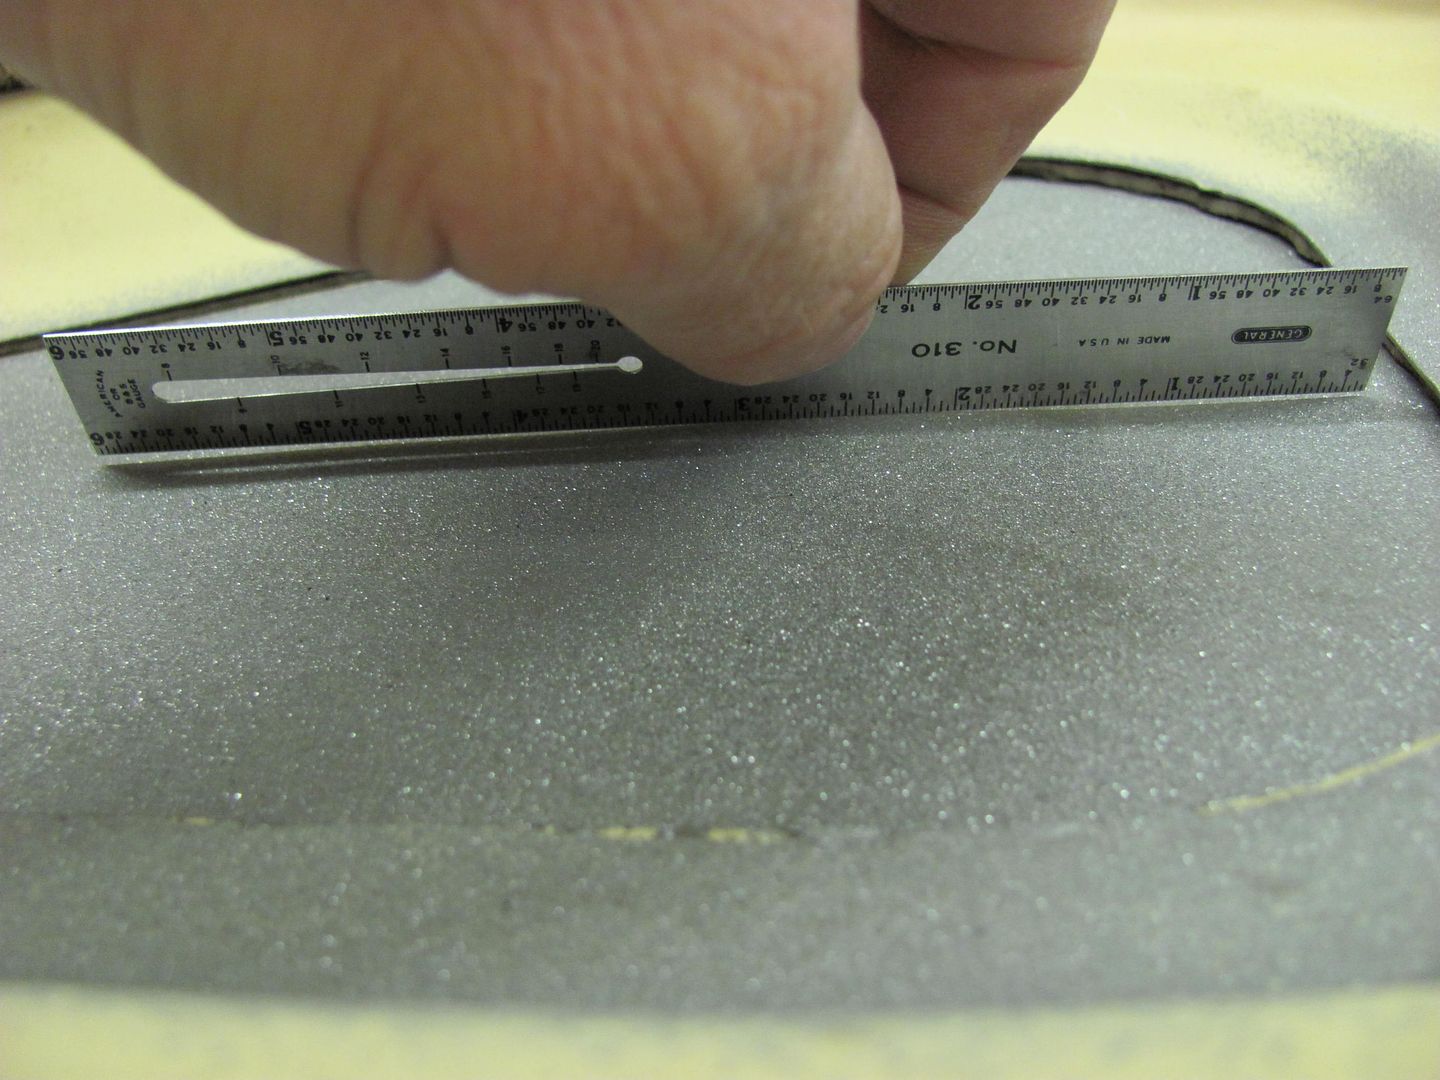 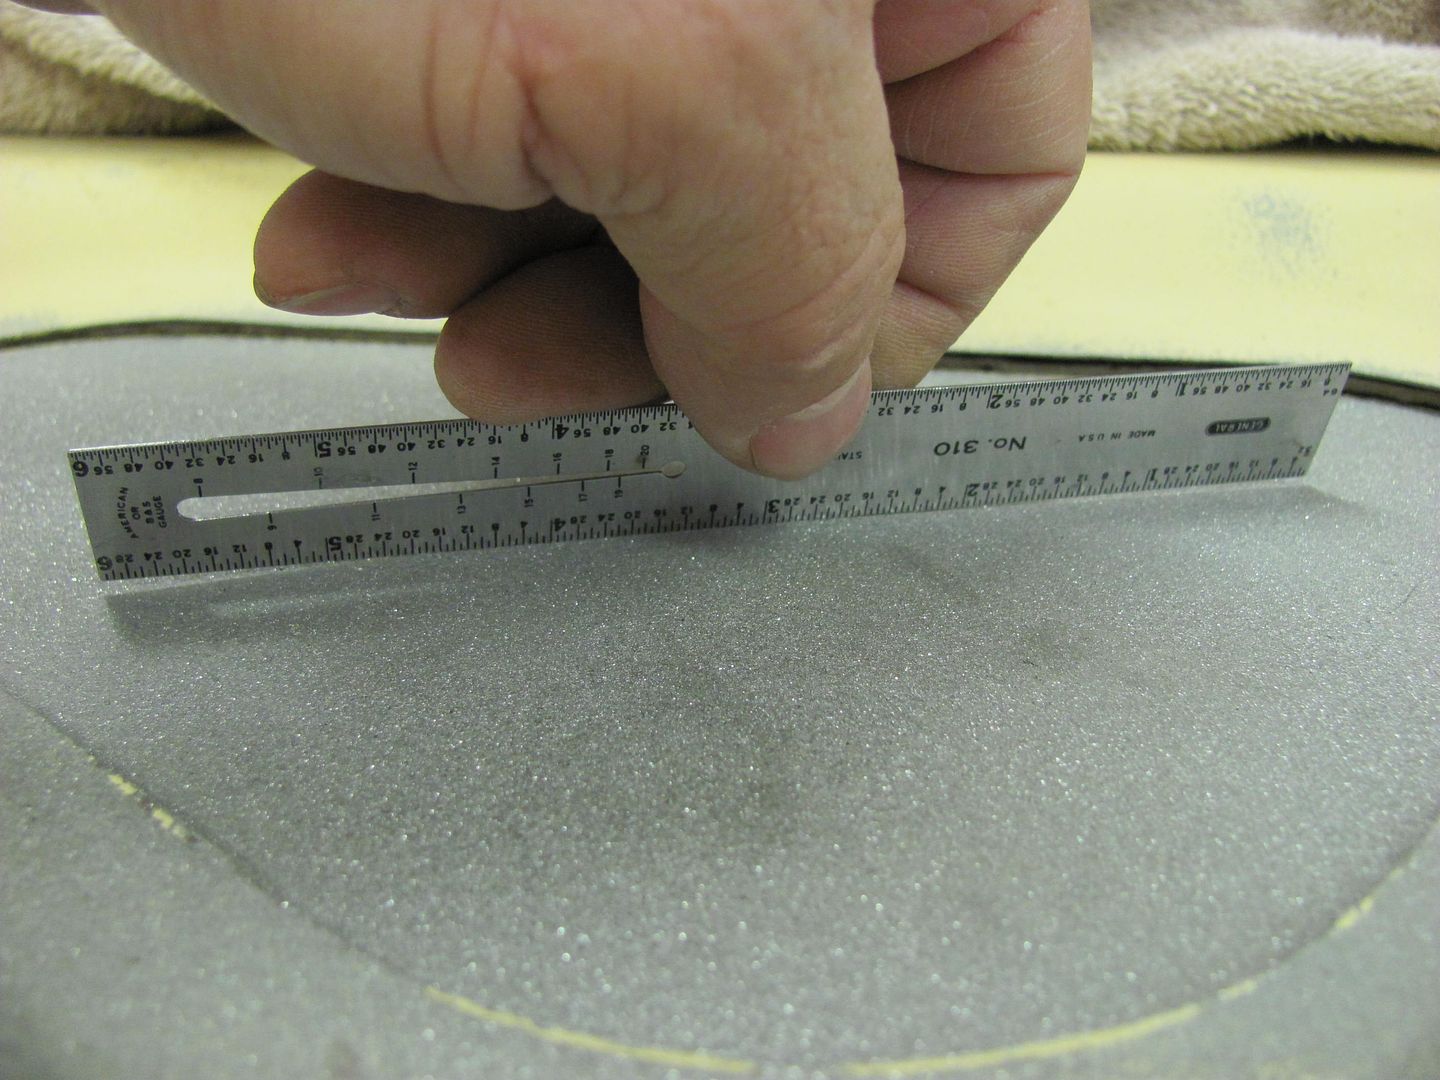 Since our tool has to be used at an angle due to the spindle, we should have clearance around the inner trunk lid structure. I'm not sure that a larger shrinking disc would permit this ability, but using the tool in the flat configuration would likely not cause the concave issue either. After using the disc from the inside of the trunk, here are the results.... 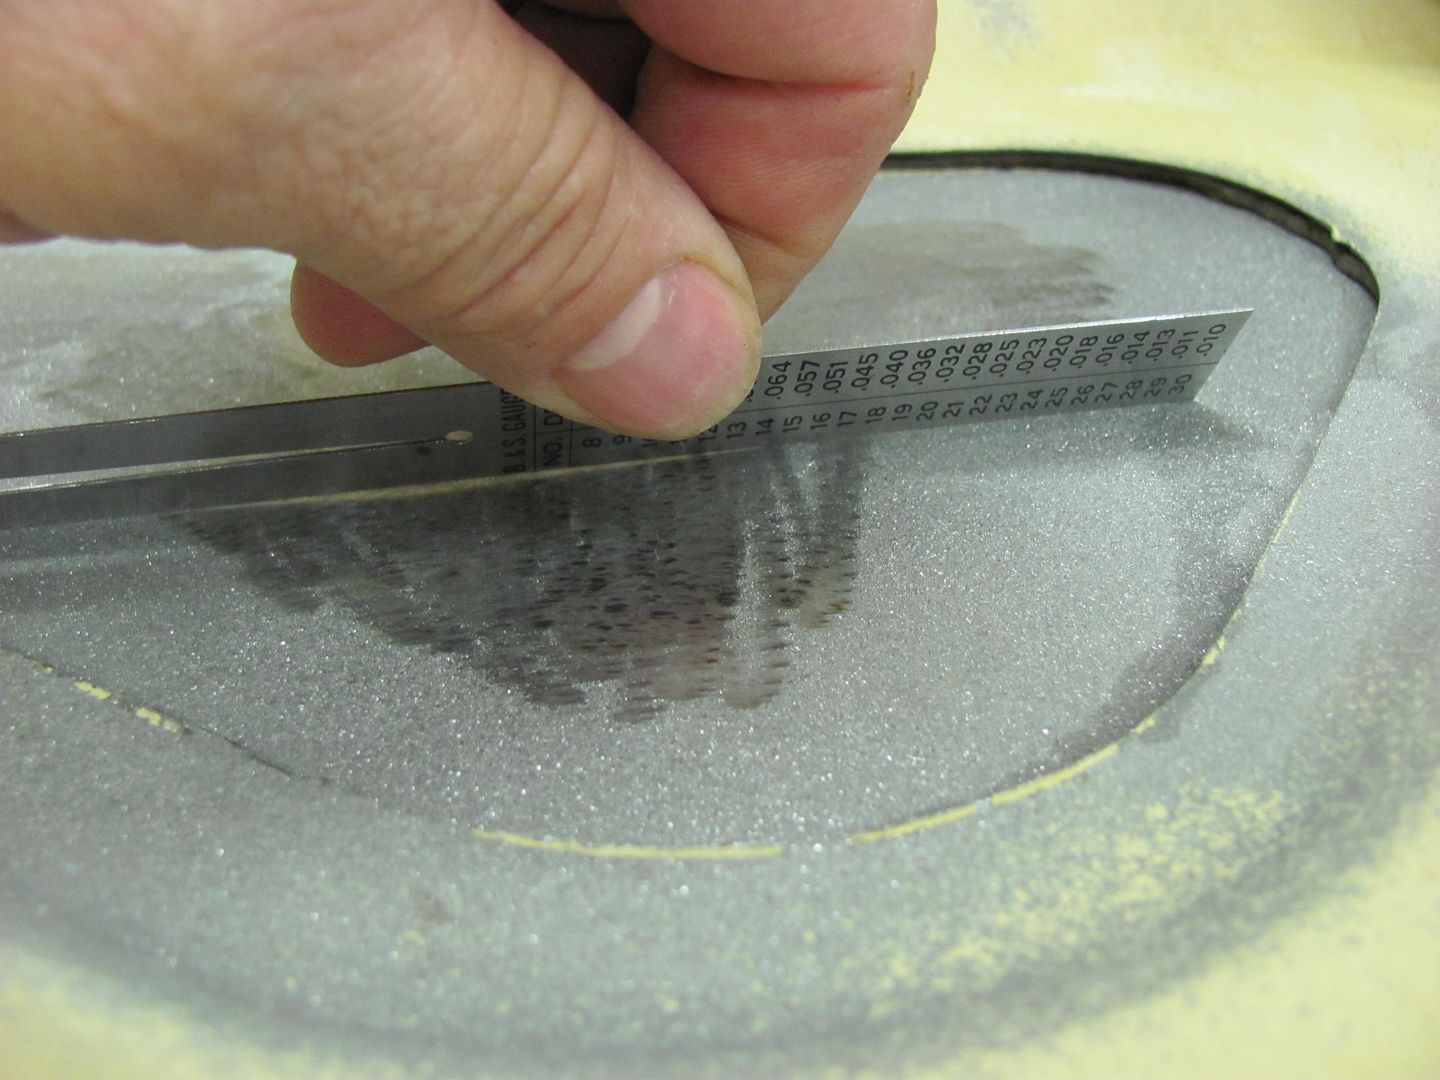 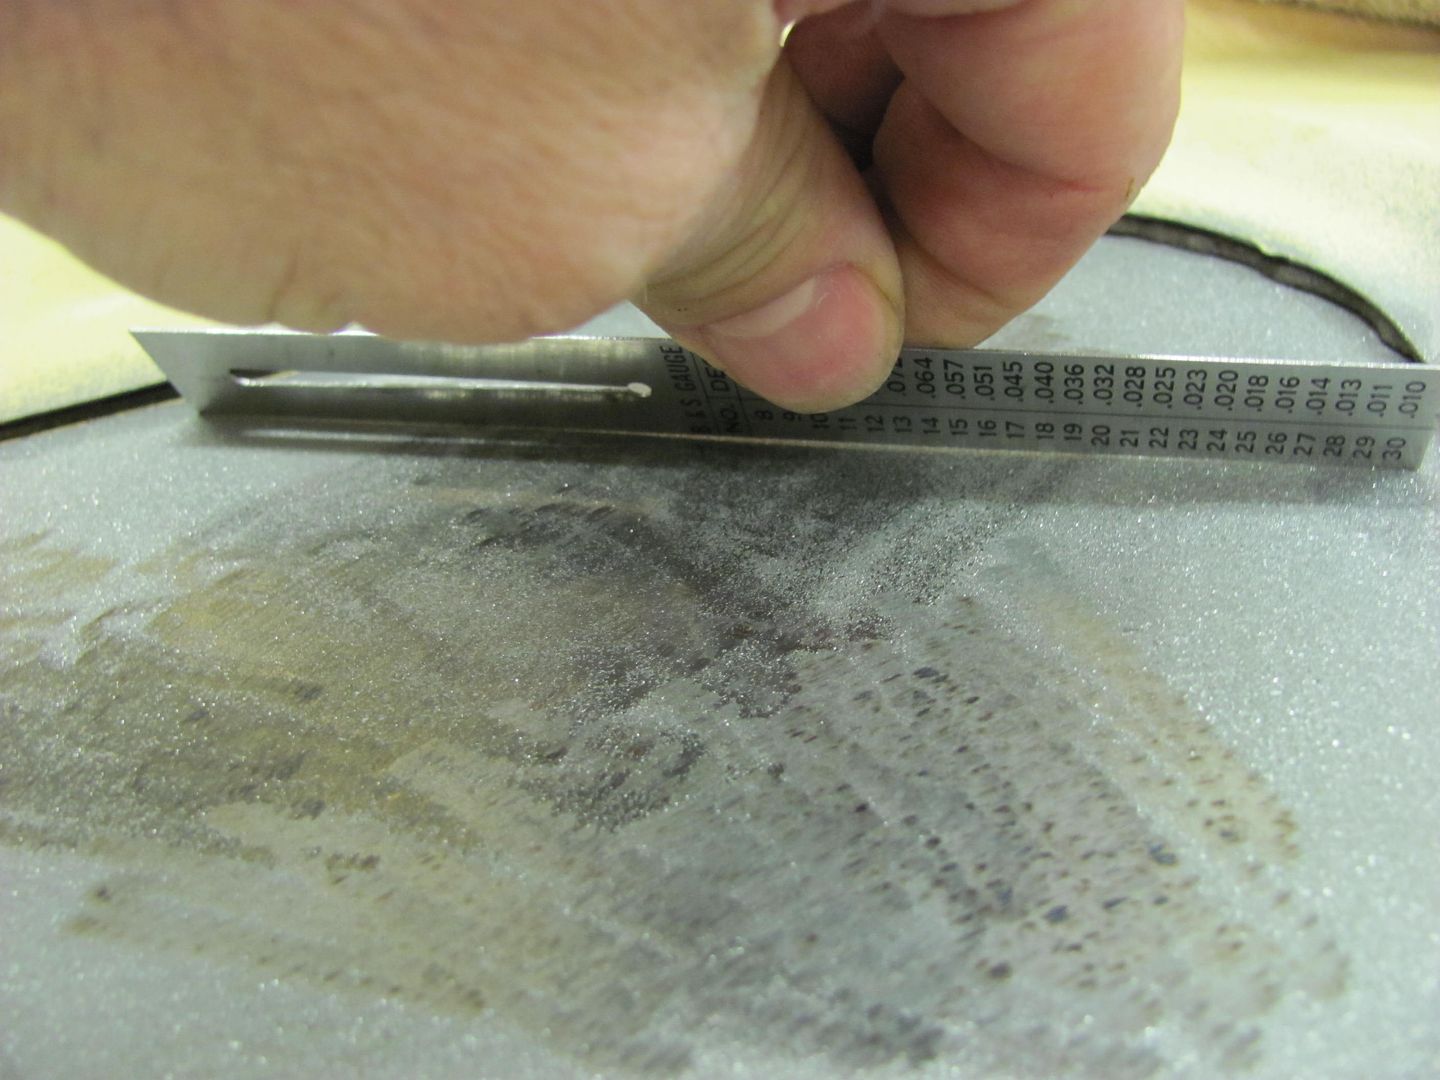 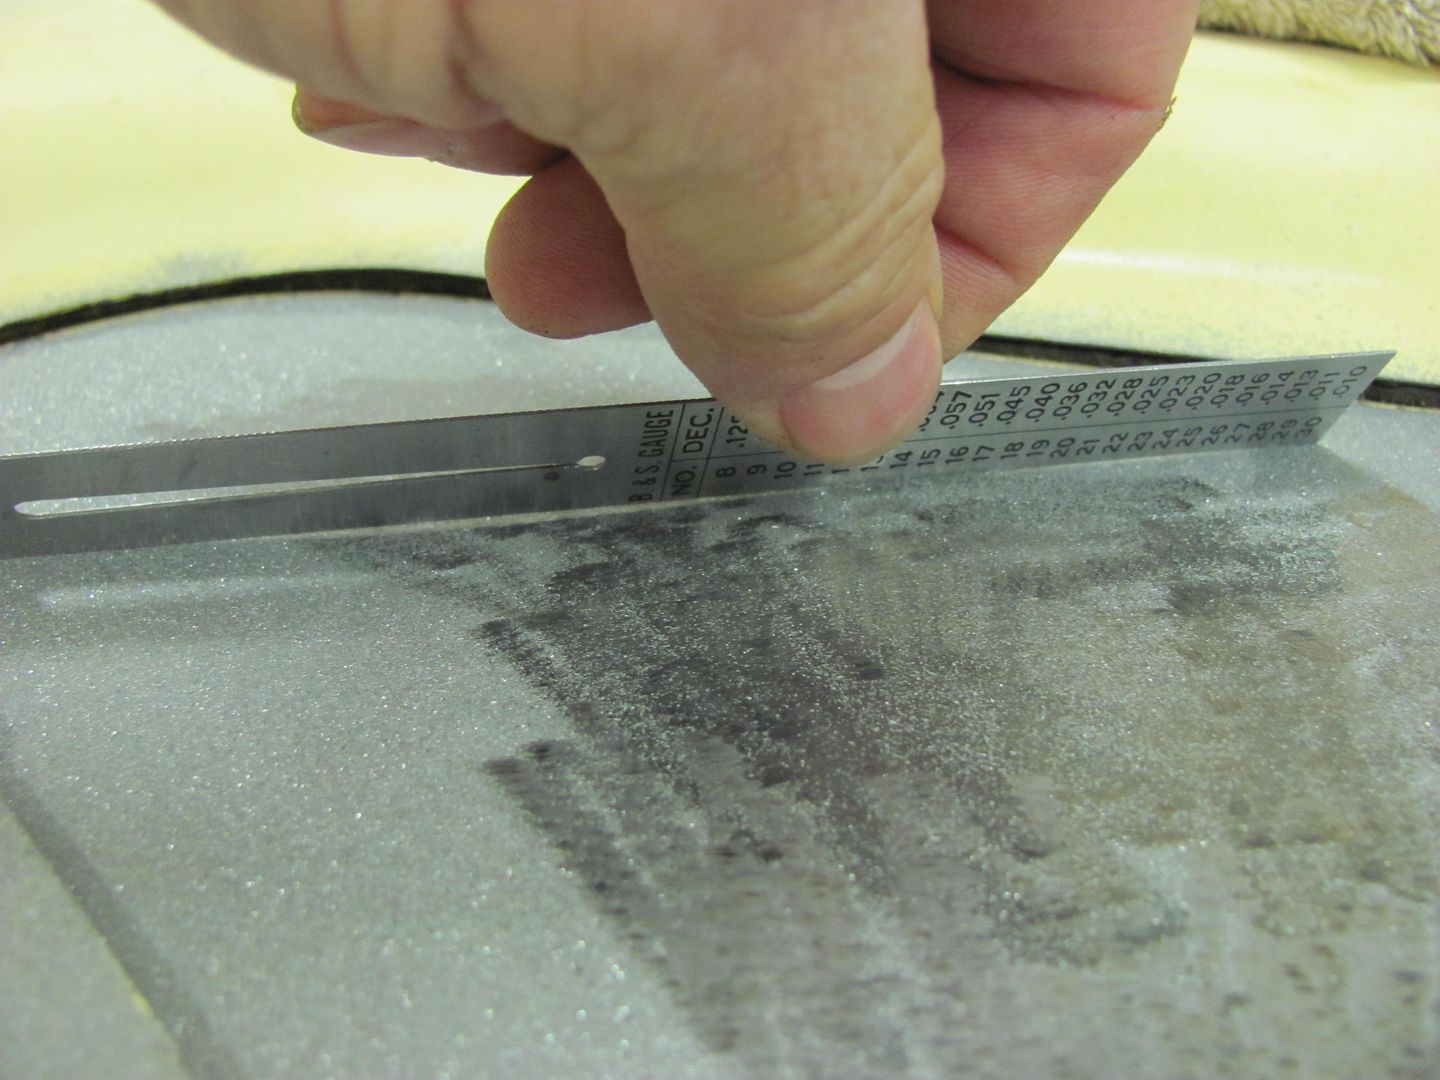 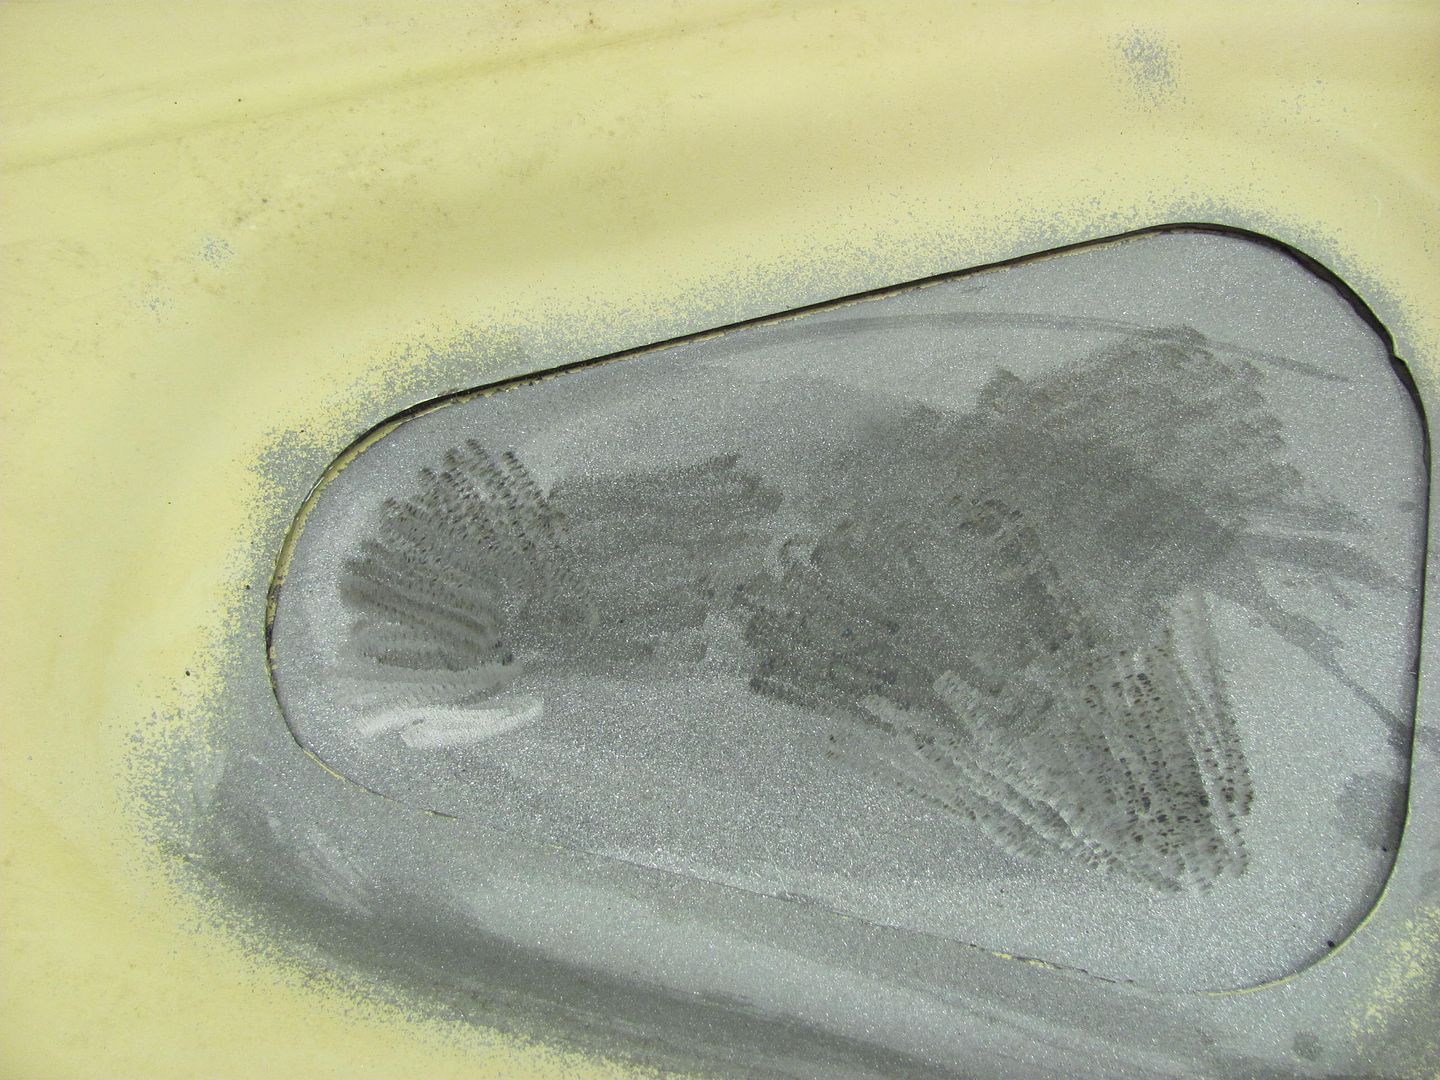 The initial check on the outside shows some minor concave issues where we used the disc from that side... 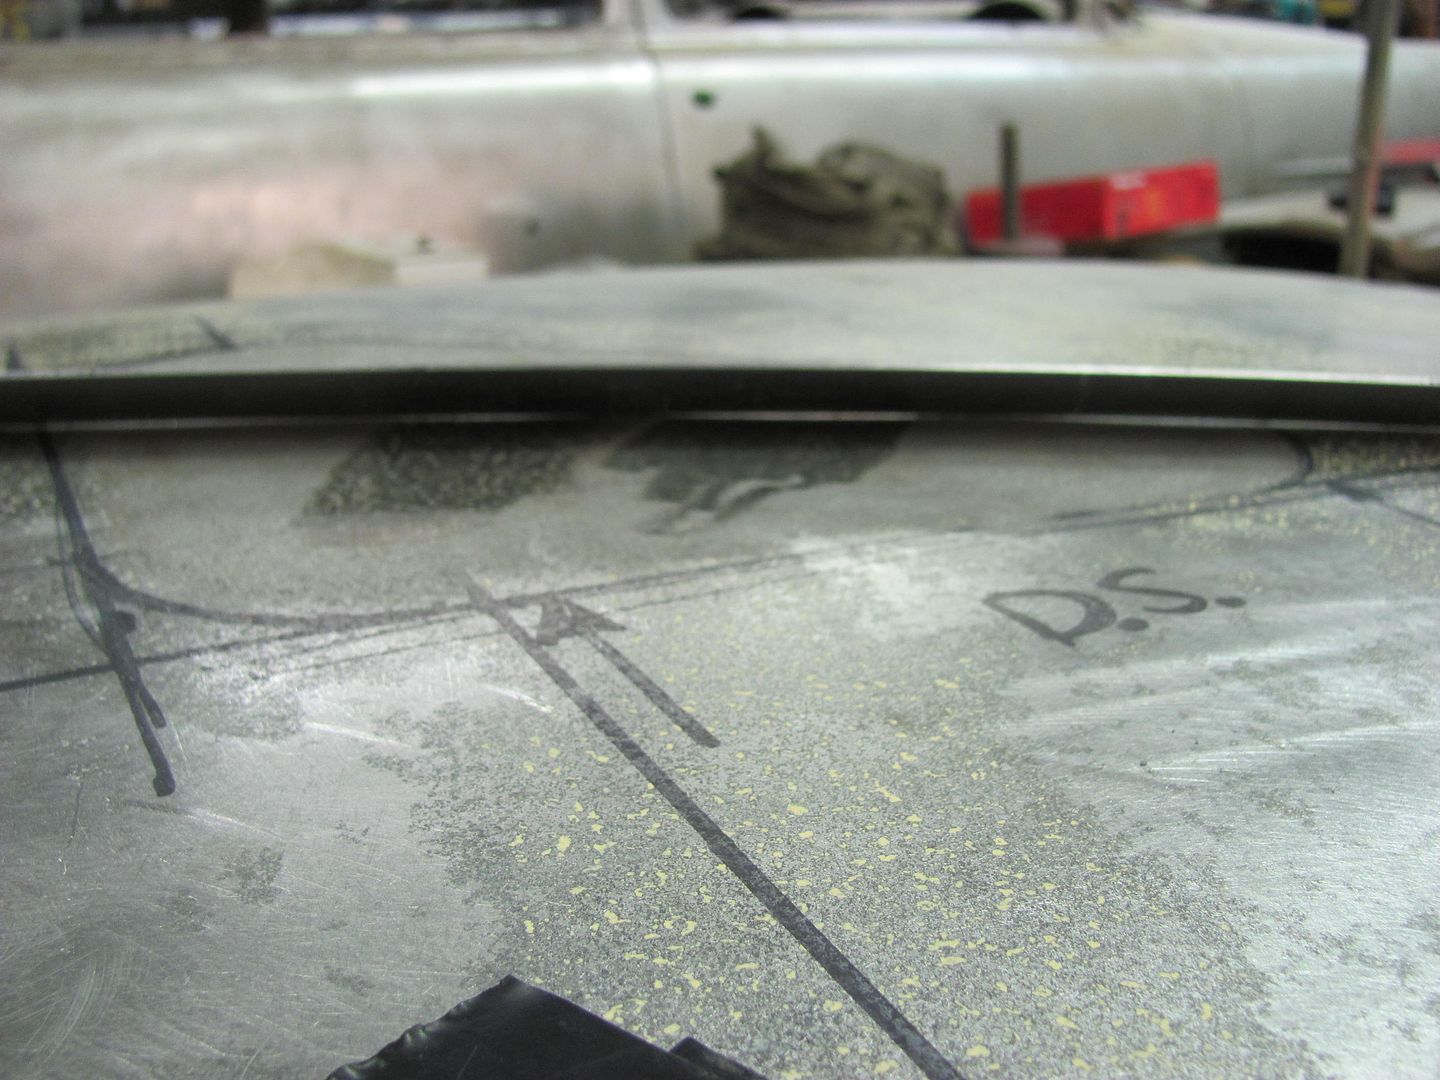 Following the success I had with the hammer and shot bag on the other test area, I thought I'd use it here as well 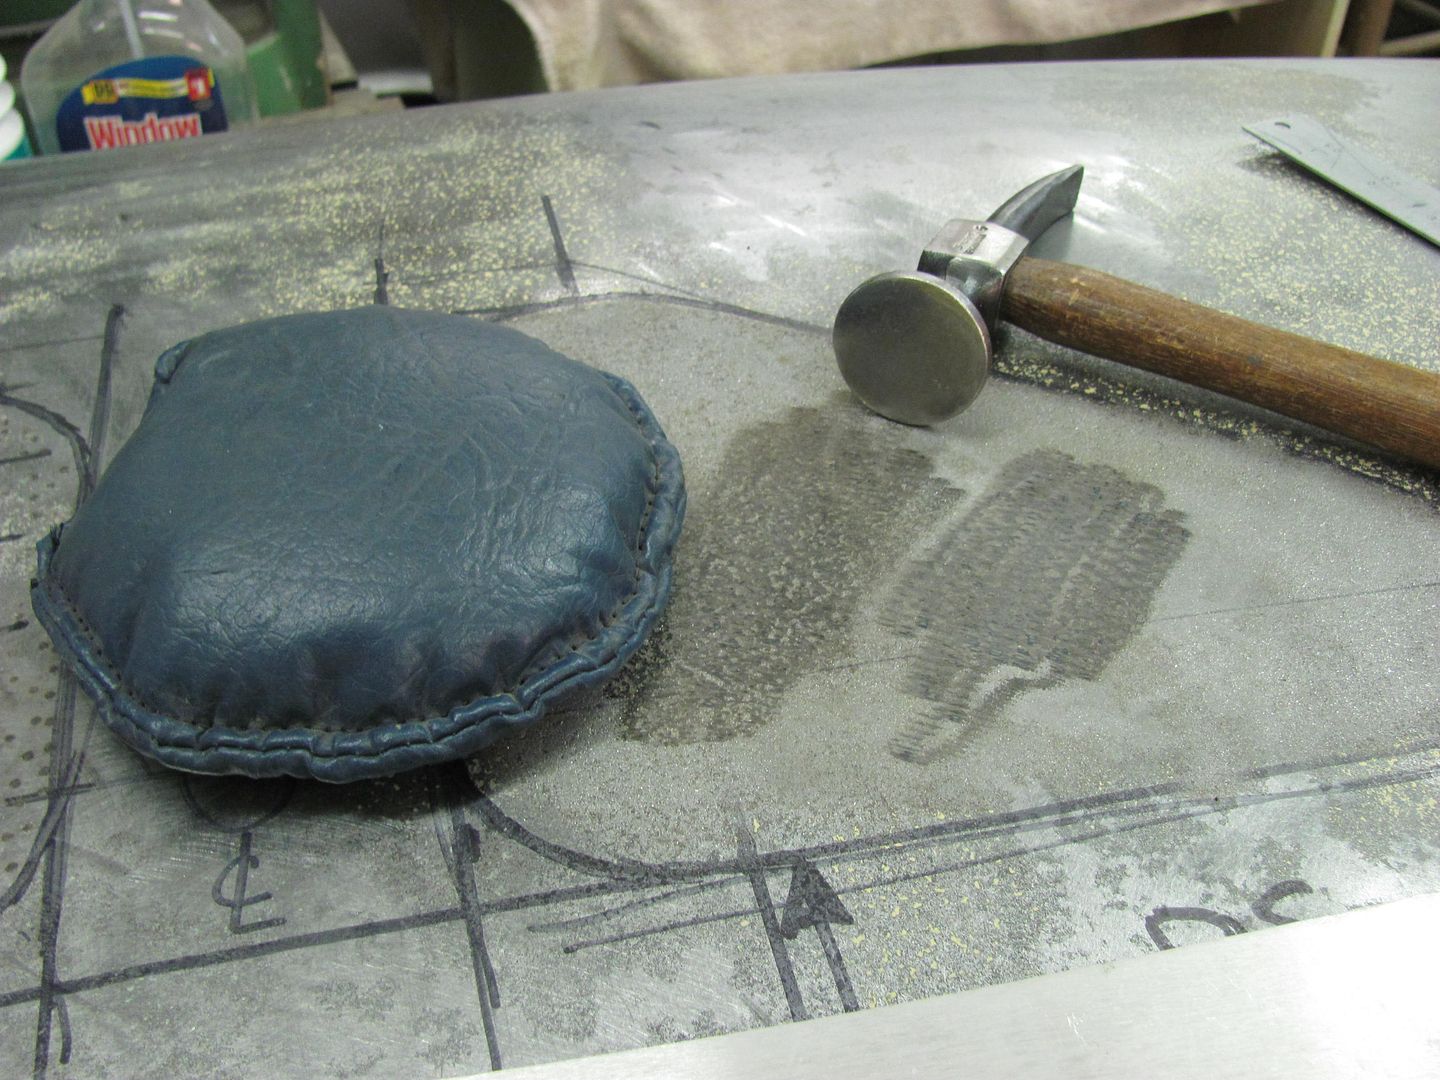 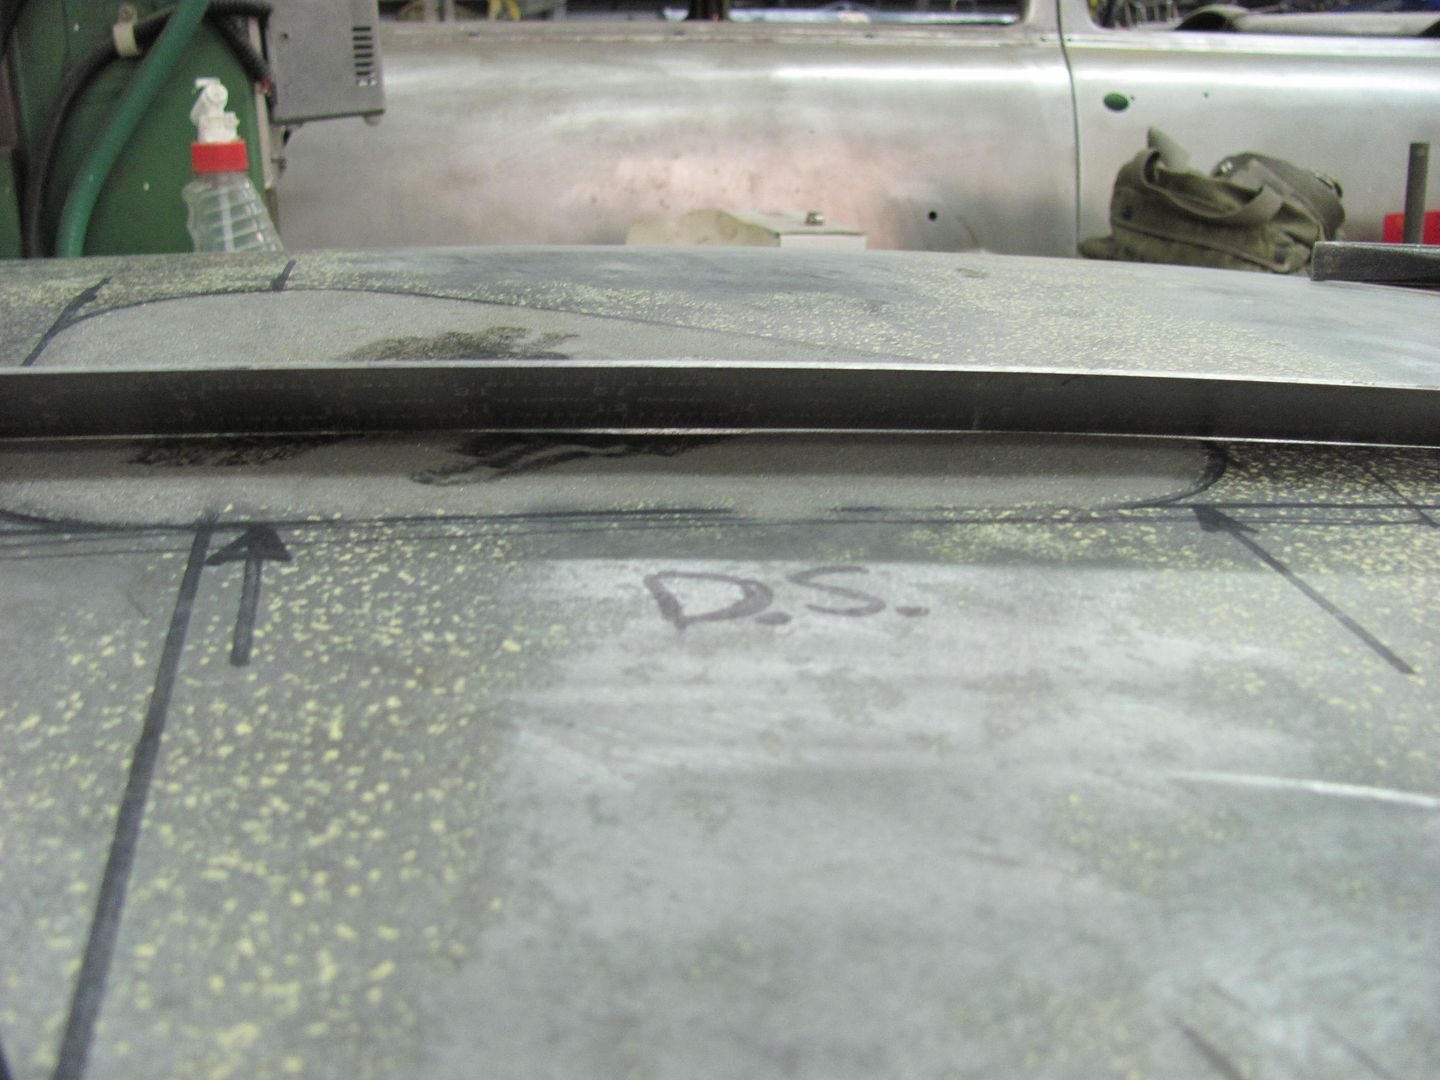 In checking the area towards the forward edge of the trunk lid, a number 11 sweep seemed to match it pretty well, so we'll use that to check across the entire area... 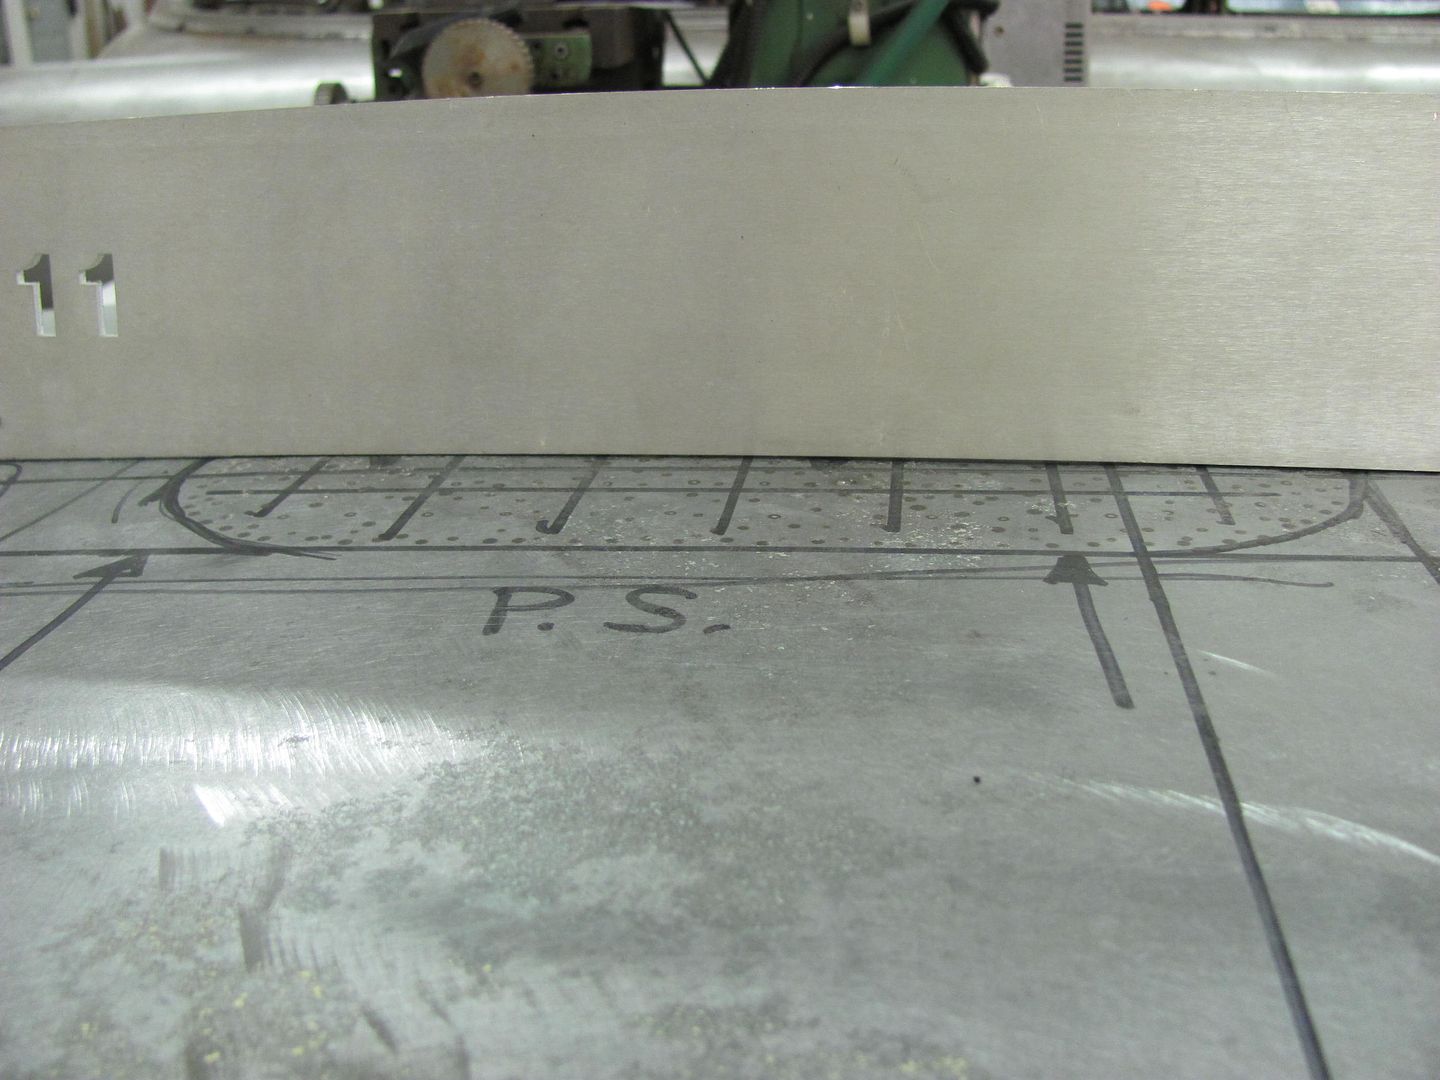 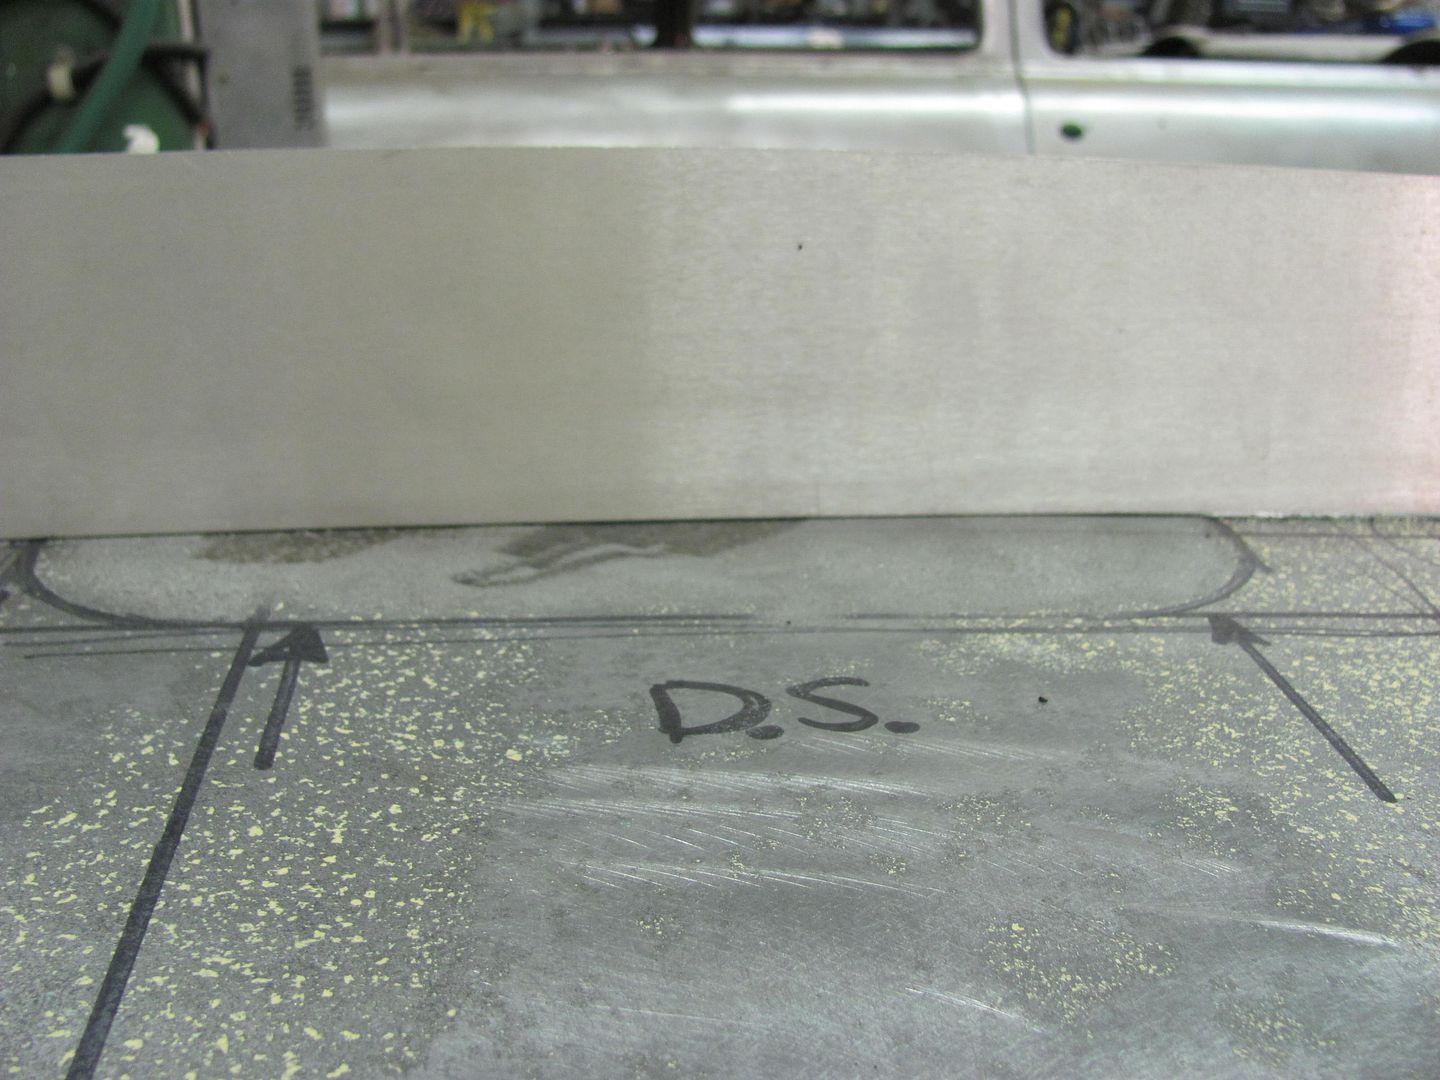 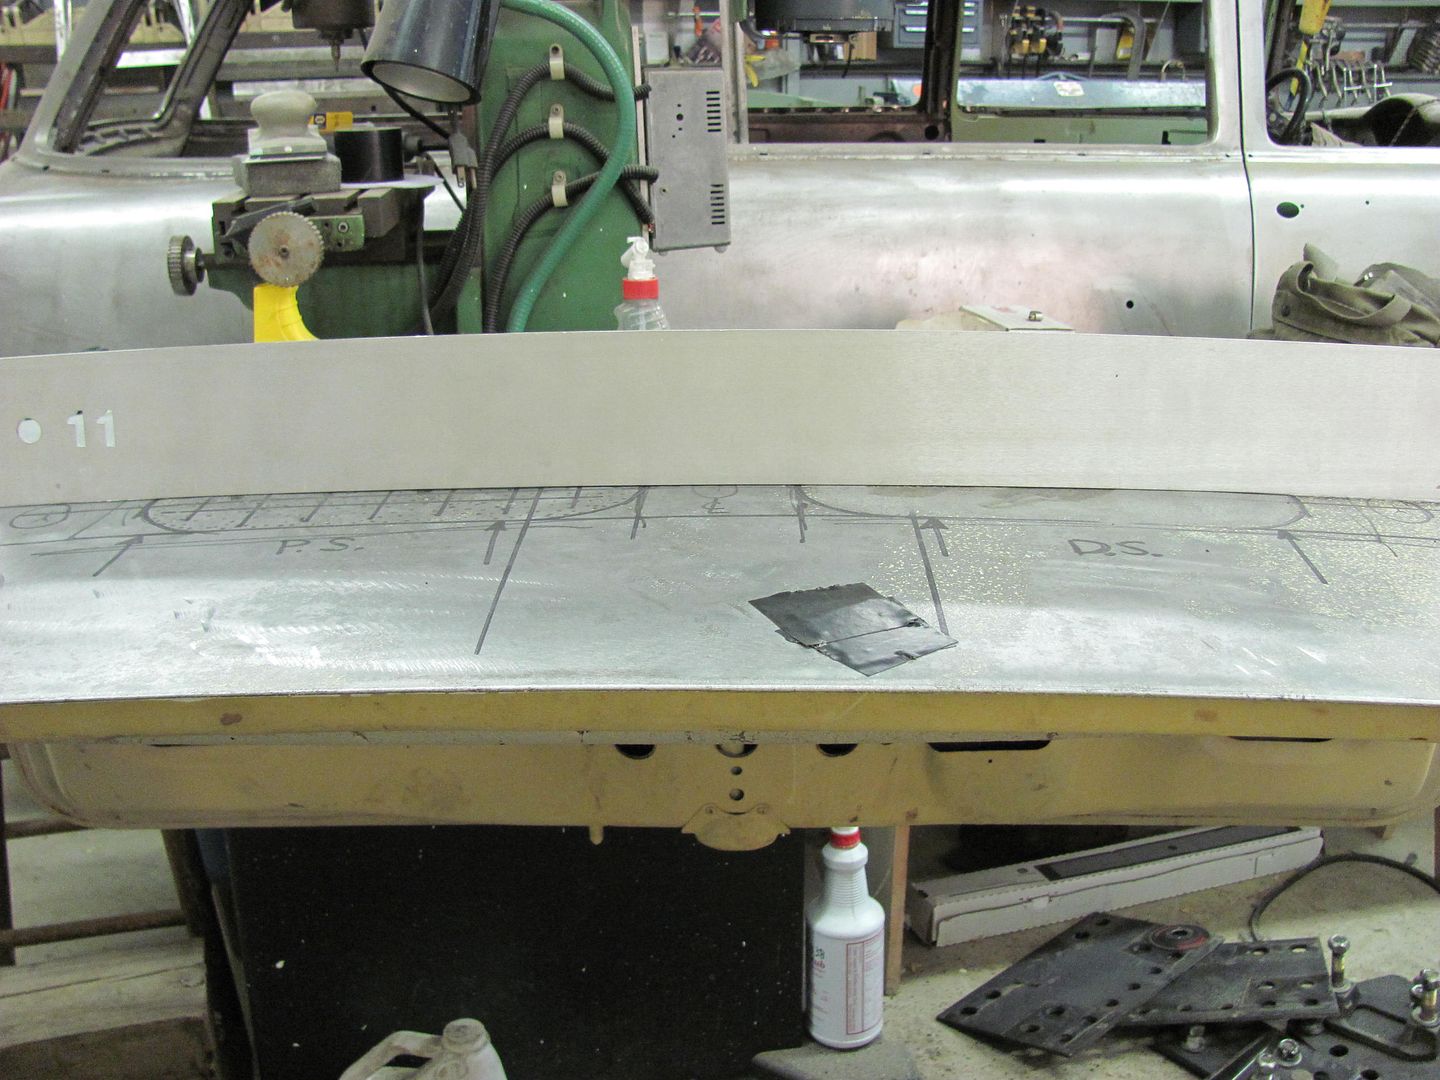 Where it's certainly not perfect, it wouldn't take much more to get it to that "high build fix" stage. Having used the three different methods, I think the shrinking disc was the quickest at showing results, but due to the fact we couldn't use it flat, it did cause other issues to address. But, this also allowed us to use it from the back side, where a flat only disc (or one of the larger ones) may have been a challenge. One of the larger discs used flat, may have been more suitable if you could hold the oil can in the outward position. Overall, IMO the disc works too quickly to be able to closely monitor the operation and keep results consistent throughout. Using the heating tip on the dent puller from the damaged side, IMO was very effective at returning the damage area to the original crown, with a small shot bag coming in handy for some of the "fine tuning". With as many shrinks as were needed, it is a slow, controlled process, and thus a bit easier than the shrinking disc in monitoring the progress. One would need a quality tool for as many shrinks as were used, or be sure to let it cool off once it gets good and warm. Where this process did show more promising results when used on the damaged side, you can also fix this type of damage with a torch. But if you have access enough to the backside with a sandblaster to damage something, then it should also leave plenty of room for the dent puller's heating tip for repair. The donut dolly works well in that the nature of the operation is moving the panel back in the direction the panel belongs. This also is a slow, controlled process as compared to the disc, so it makes it easy to monitor the progress. This does require access to both sides of the panel, and is most effective with accurate alignment of the hammer strikes centered on the dolly. So if you see yourself having difficulty in this alignment, perhaps one of the other "one sided" repair applications would work best for you. The only thing I think may have helped more in using this tool would have been to use the small shot bag instead of the hard dolly when I was attempting to planish remaining low spots. Heating with an acetylene torch and shrinking the hot spot would be another option, but I'm a firm believer in using slower, controlled methods where you can "sneak up" on your expected result, and not blow past it. For those who are adept in using the torch, I would suggest small circles heated up to a dime size or less, cooled, and then move to the next area. I would also suggest practicing any of these on a scrap piece that has purposely stretched in a similar fashion, to prevent causing further damage to something you are trying to save. Once you get comfortable with the methods you plan to use, then jump in on the damaged "good" panel..
__________________
Robert Last edited by MP&C; 10-22-2014 at 12:25 PM. |
|
|

|
|
|
#6 |
|
Registered User
Join Date: Jul 2009
Location: San Jose Ca
Posts: 2,871
|
Re: Repairing Sandblast Damage
Great read!! I vote sticky
__________________
David Used parts build: http://67-72chevytrucks.com/vboard/s...d.php?t=638991 My brother's Nova: http://www.67-72chevytrucks.com/vboa...d.php?t=727985 Rear suspension rework: http://www.67-72chevytrucks.com/vboa...d.php?t=750557 Instagram: myfabguy |
|
|

|
|
|
#7 |
|
Registered User
Join Date: Dec 2000
Location: Boise, Idaho
Posts: 6,003
|
Re: Repairing Sandblast Damage
Very interesting stuff Robert!
Brian
__________________
1948 Chevy pickup Chopped, Sectioned, 1953 Corvette 235 powered. Once was even 401 Buick mid engined with the carburetor right between the seats! Bought with paper route money in 1973 when I was 15. "Fan of most anything that moves human beings" |
|
|

|
|
|
#8 |
|
Senior Member
Join Date: Apr 2000
Location: Delta,Pa
Posts: 14,950
|
Re: Repairing Sandblast Damage
Thank you for taking the time and having such detailed pictures and explanations.
__________________
Owner of North Point Car Care in Dundalk Md. We specialize in custom exhaust on both modern and classic vehicles. We are a full service auto shop from classics to modern vehicles. Feel free to contact me with questions. I will give a 10% discount to any board member. |
|
|

|
|
|
#9 |
|
Registered User
Join Date: Oct 2007
Location: Spanaway
Posts: 8,451
|
Re: Repairing Sandblast Damage
^^ X2! ^^ I really like reading this stuff!
__________________
Mike. Swamp Rat build thread : http://67-72chevytrucks.com/vboard/s...d.php?t=595019 72 3/4T 4X4 4" BDS Lift 33" BFG's |
|
|

|
|
|
#10 |
|
Registered User
Join Date: Nov 2014
Location: Columbiana Ohio
Posts: 1,210
|
Re: Repairing Sandblast Damage
Great.... now Im terrified of ever blasting Anything....
Nice work you did... Thank you
__________________
"Hey... its only time and money right? Just do it." 67 Short Bed under major construction http://67-72chevytrucks.com/vboard/s...=651356&page=8 |
|
|

|
|
|
#11 |
|
Registered User
Join Date: Jan 2013
Location: Leonardtown, MD
Posts: 1,647
|
Re: Repairing Sandblast Damage
Thanks. To help prevent the damage shown above, use lower air pressure and finer grit media..
__________________
Robert |
|
|

|
|
|
#12 |
|
Registered User
Join Date: Mar 2013
Location: Marquette michigan
Posts: 828
|
Re: Repairing Sandblast Damage
Excellent article. If you want NO warpage use a pressure washer (minimum pressure of 2800 and 2.5 gpm) and an attachment from water cannon.com and use the abrasive of choice. The abrasive is drawn into a special end on the wand like a paint gun draws paint up from the cup (venturi principle) and cleans rust like you wouldn't believe. It can't warp because the water keeps it cool. Would you rather blast with air at 100-150 psi and warp it, or blast with 2800 psi with water and NOT warp it???? Been there done that, never going back to 100-150 psi system again. Look up on youtube under wet sandblasting.
|
|
|

|
|
|
#13 |
|
Registered User
Join Date: Mar 2013
Location: Marquette michigan
Posts: 828
|
Re: Repairing Sandblast Damage
I should add that even OSHA considers water sandblasting safe, no respirator needed because there is no dust. A good pair of goggles that cover all the way around is all you need. I blasted in the driveway, next day sand is dry, swept it up, sifted it clean and re-used it. You will get wet/sandy but brushes off easy!
|
|
|

|
|
|
#14 | |
|
Registered User
Join Date: Jul 2009
Location: San Jose Ca
Posts: 2,871
|
Re: Repairing Sandblast Damage
Quote:
__________________
David Used parts build: http://67-72chevytrucks.com/vboard/s...d.php?t=638991 My brother's Nova: http://www.67-72chevytrucks.com/vboa...d.php?t=727985 Rear suspension rework: http://www.67-72chevytrucks.com/vboa...d.php?t=750557 Instagram: myfabguy |
|
|
|

|
|
|
#15 |
|
Registered User
Join Date: Jan 2013
Location: Leonardtown, MD
Posts: 1,647
|
Re: Repairing Sandblast Damage
Don't buy in to the water Kool-Aid. Too much pressure and too coarse of media results in a peening action that stretches the metal. You can media blast under water if you think it will keep things cool enough for you, but in the end, given enough pressure and coarse enough of media, stretching will indeed occur despite external temps. I'm not saying the pressure washer system doesn't work, but they are playing on hype without understanding (or revealing) the true cause.
__________________
Robert |
|
|

|
|
|
#16 |
|
Registered User
Join Date: Mar 2013
Location: Marquette michigan
Posts: 828
|
Re: Repairing Sandblast Damage
I water sandblasted a 1968 oem tailgate last fall and did every square inch of it and took a straight edge to it and didn't see or feel any warpage. I used sand that the lumber store stocks. I have put my hand on the backside of a panel i did years ago dry sandblasting and i got burned instantly. Through the years i have done black paint jobs so my hands are my eyes when block sanding flat panels (black shows everything). I wet sandblasted my snowblower auger housing and there was paper thin areas at the edge and i used blackjack (very aggressive ) and no warpage, so in my world i'm convinced. Good luck.
|
|
|

|
|
|
#17 |
|
Registered User
Join Date: Jan 2013
Location: Leonardtown, MD
Posts: 1,647
|
Re: Repairing Sandblast Damage
Not disputing your results or the method. But comparatively, a water jet uses a concentrated stream of water mixed with an abrasive, and it cuts right through a panel. Did the water not cool it enough?
What I'm saying is that excessive applied pressure and excessive size of media combined are what cause the peening action, resulting in the stretch. Yes, given enough of this it will eventually cause the temperature of the panel to increase. But the temperature does not cause the stretch, it is a side effect of the peening action. Stretch has long occurred before the temperature rises. So any claim that it can't stretch because water keeps it cools is a bit misleading as to the actual cause of the stretch in typical media blasting....call it crafty wording or advertising hype, but sheet metal panels are media blasted every day without damage by observing air pressure and media size, without the use of water. Perhaps the water helps to "soften the blow" so to speak, by having the media in the mix. But as shown in the water jet example, which obviously uses a different delivery method than what you are using, water is not the secret Elixir of Unicorn blood.. Any process used incorrectly may cause damage. Accurately identifying the cause is the secret to corrective action in that method.
__________________
Robert Last edited by MP&C; 04-27-2015 at 09:18 AM. |
|
|

|
|
|
#18 |
|
Registered User
Join Date: Nov 2014
Location: Columbiana Ohio
Posts: 1,210
|
Re: Repairing Sandblast Damage
I am about to have a guy glass/water blast my under cab and bed sides... so what Im reading here... just because he using water to keep things cool does not mean I wont get damage? From what I understand its a fine glass he uses. I was originally going to have him dry ice blast it but he said it wont take the undercoating off Im trying to get off....
__________________
"Hey... its only time and money right? Just do it." 67 Short Bed under major construction http://67-72chevytrucks.com/vboard/s...=651356&page=8 |
|
|

|
|
|
#19 |
|
Registered User
Join Date: Mar 2013
Location: Marquette michigan
Posts: 828
|
Re: Repairing Sandblast Damage
I was initially lured in from a guy purchased a pallet of sand. I asked him what he used that much sand for? He said some of his buddies are contractors and pull enclosed trailers and the road salt destroys the paint job in no time. I remarked that if he sand blasts and hits the aluminum body near the frame it would be an ocean of waves from distortion!! His remark was "not at all". I asked what he was using? He said an attachment for a pressure washer! I went to youtube and searched it out, saw videos on it, google searched a vendor and matched my 3800 psi 3.5 gpm pressure washer. The special adaptor end has an included 0 degree nozzle sized for the output of the presssure washer. In use it spreads out quite a bit once it leaves the screw in cone end. The city water i hook up to is very cold coming from lake superior, say 45 degrees. I understand the peening effect is conducive to distortion, but after using it on three projects now using sand and blackjack and no distortion all i know is it works great and i have no complaints. To be honest i never saw the trailers that the guy waterblasted. 2 individuals with the same results, i can't say for sure. I clean my stainless steel expanded metal barbeque grill platform and takes the baked on food of in seconds and looks new, set the platform down into it's recess and it lays flat. A friend had his rearend out of his olds on jackstands and in 15 minutes and 4 bags of blackjack i had the whole thing down to bare, backing plates and all and removed rust scale 1/4" thick in spots. In use i stay back about a foot from the surface.
|
|
|

|
|
|
#20 | |
|
Registered User
Join Date: Mar 2017
Location: Etowah, TN
Posts: 210
|
Re: Repairing Sandblast Damage
Quote:
I have used Sand and Glass Bead - on lower - Air Settings - Damage may happen from "Over Working" an Area .. |
|
|
|

|
 |
| Bookmarks |
|
|