
 |
|
|
|
|
#1 |
|
Registered User
Join Date: Aug 2007
Location: Corona, California
Posts: 7,998
|
Re: 1957 Chevy truck re-rebuild
Nice job on the fuse block.
Kim |
|
|

|
|
|
#2 |
|
Registered User
Join Date: May 2000
Location: Flin Flon, Manitoba, Canada
Posts: 8,855
|
Re: 1957 Chevy truck re-rebuild
great idea on the fuse panel mount. I'm wishing i would have gone slower on my build so I could have borrowed a few of these great ideas.
__________________
My name's Tim and I'm a truckaholic My 56 Chevy shop truck build http://67-72chevytrucks.com/vboard/s...d.php?t=562795 |
|
|

|
|
|
#3 |
|
Registered User
Join Date: Aug 2012
Location: Salem Mo
Posts: 652
|
Re: 1957 Chevy truck re-rebuild
dubie, I hear ya, I've mentioned to denee 007 that I'm glad she's a little further ahead than I am, I know I'm more prepared than I would have been.
I'm still on the interior, so many choices to make and to chose from. I know I want to keep it clean and performance oriented. The truck is going to be two tone black and silver. With the steering wheel and the shifter having a black and polished aluminum or chrome, I don't want to bring the silver into the interior of the truck. I do however want to bring more of the polished look into the cab. Polished stainless steel is my choice for breaking up some of the black. I ordered 24 feet of 1/4" solid stainless rod. I'll call this the "trail of broken taps and drill bits"  I'm drilling with 5/64" and 7/74" drill bits and #6 taps, this is going to take a tremendous amount of patience. Plus stainless is a little harder than mild steel so it adds to the breakage. I'm drilling with 5/64" and 7/74" drill bits and #6 taps, this is going to take a tremendous amount of patience. Plus stainless is a little harder than mild steel so it adds to the breakage.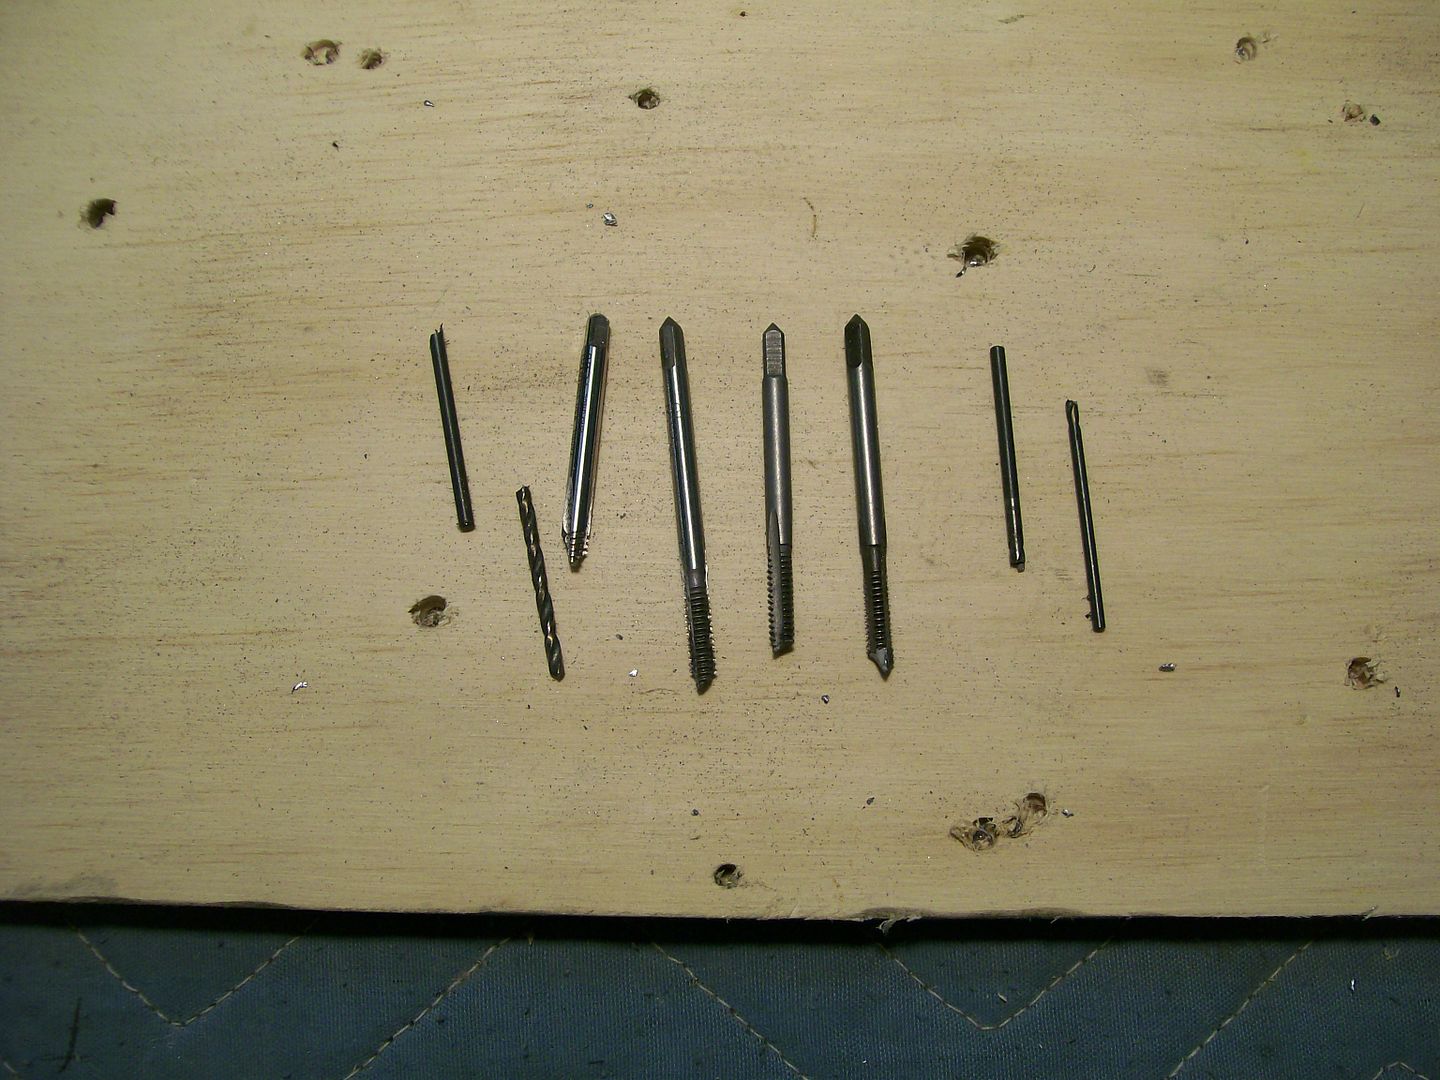 This is what I have to work with, I have no idea how a simple door panel can take such a beating and have extra holes drilled into it. I was about to order new ones til I came up with the stainless and black vinyl idea. 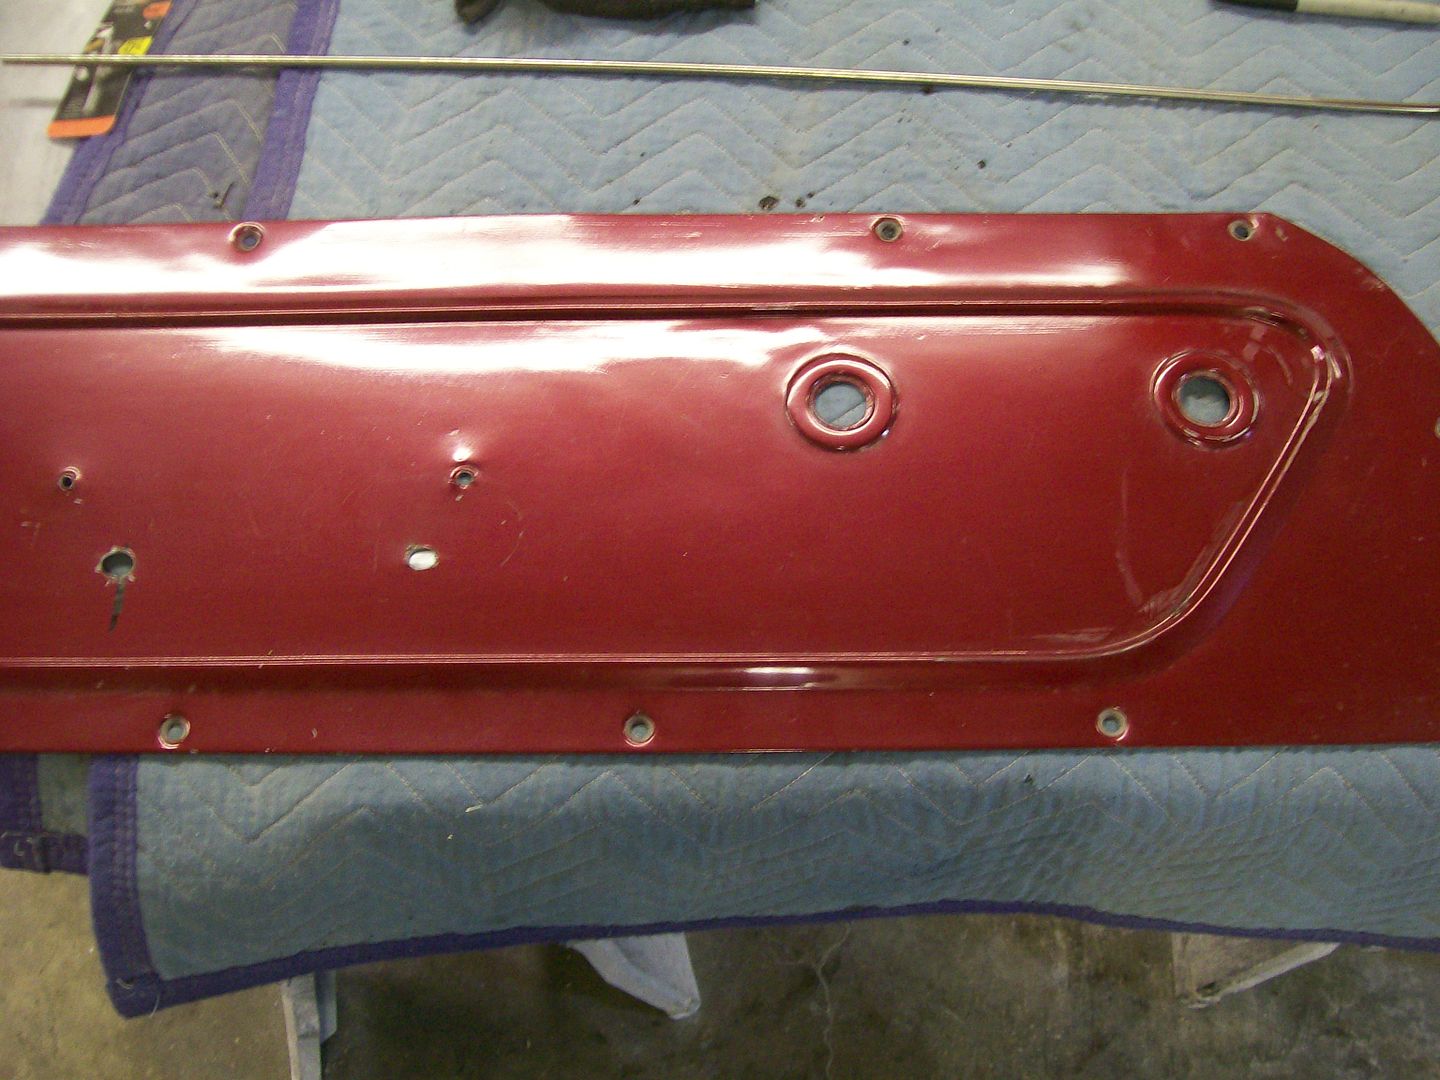 I'll jump to the close to finished product. Everything is temporarily in place. 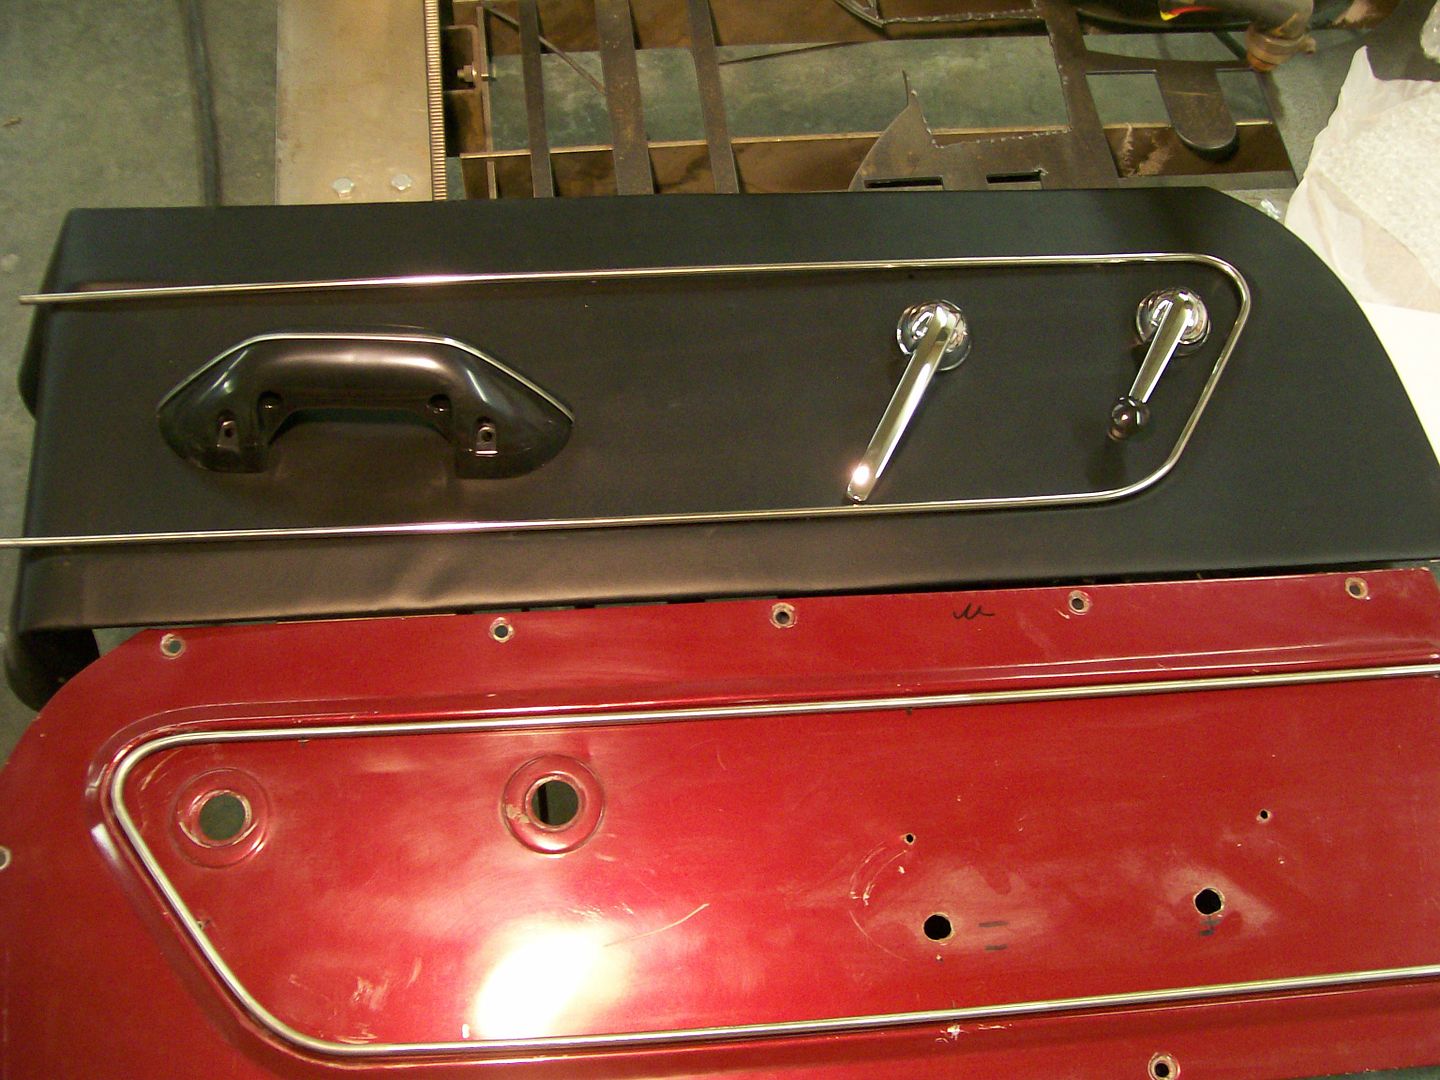 Hopefully the new black carpet will arrive this week, and with the doors painted black and black kick panels, this stainless should be minimal yet make a bold statement. 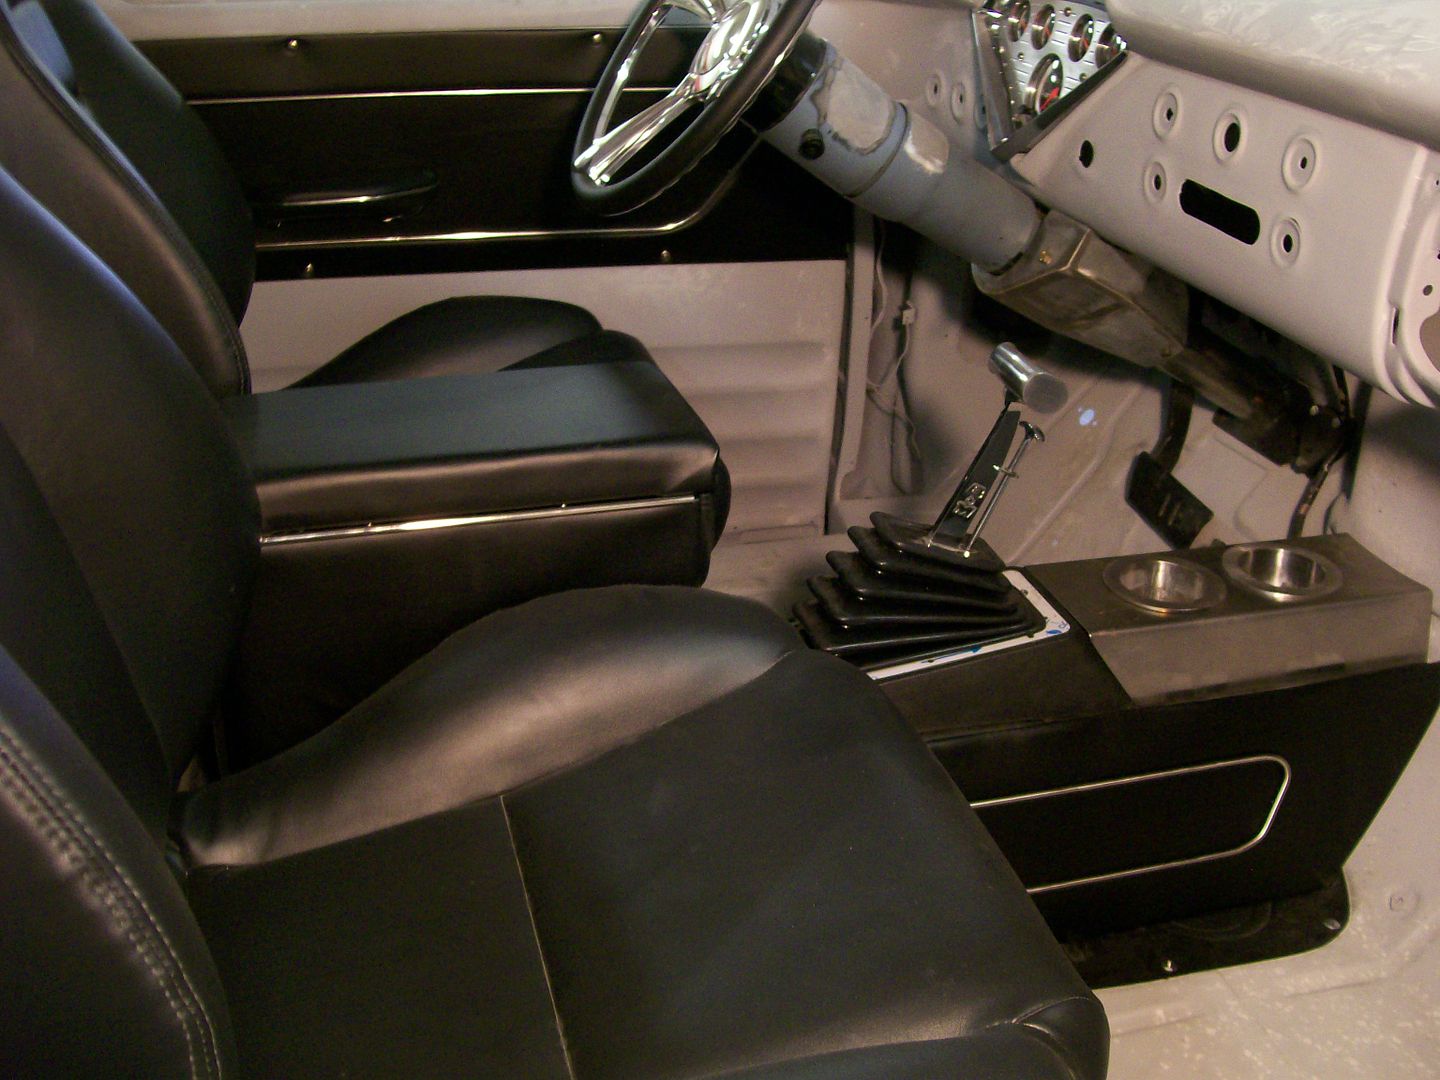 I have a boat load of pictures of how to, I'll get to those next. |
|
|

|
|
|
#4 |
|
Registered User
Join Date: Aug 2007
Location: Corona, California
Posts: 7,998
|
Re: 1957 Chevy truck re-rebuild
Door panels look nice.
Kim |
|
|

|
|
|
#5 |
|
A320 Pilot/USAF Retired
Join Date: Mar 2009
Location: Charleston, SC
Posts: 2,629
|
Re: 1957 Chevy truck re-rebuild
Very cool!
__________________
JJ My 1957 build: http://67-72chevytrucks.com/vboard/s...d.php?t=334552 http://www.trifive.com/forums/showthread.php?t=22037 Instagram - Chuckdriver57 |
|
|

|
|
|
#6 |
|
Registered User
 Join Date: May 2012
Location: Finley, TN.
Posts: 198
|
Re: 1957 Chevy truck re-rebuild
I hope you did not create a tuning fork effect with the fuse panel.
|
|
|

|
|
|
#7 |
|
Registered User
Join Date: Aug 2012
Location: Salem Mo
Posts: 652
|
Re: 1957 Chevy truck re-rebuild
On to the stainless trim work... I wasn't sure of how the stainless would clean up after the discoloration from heating it red hot, fortunately it polished up like it never happened.
I also made a bending platform. With the flat platform it helped keep the trim true to itself after bending. 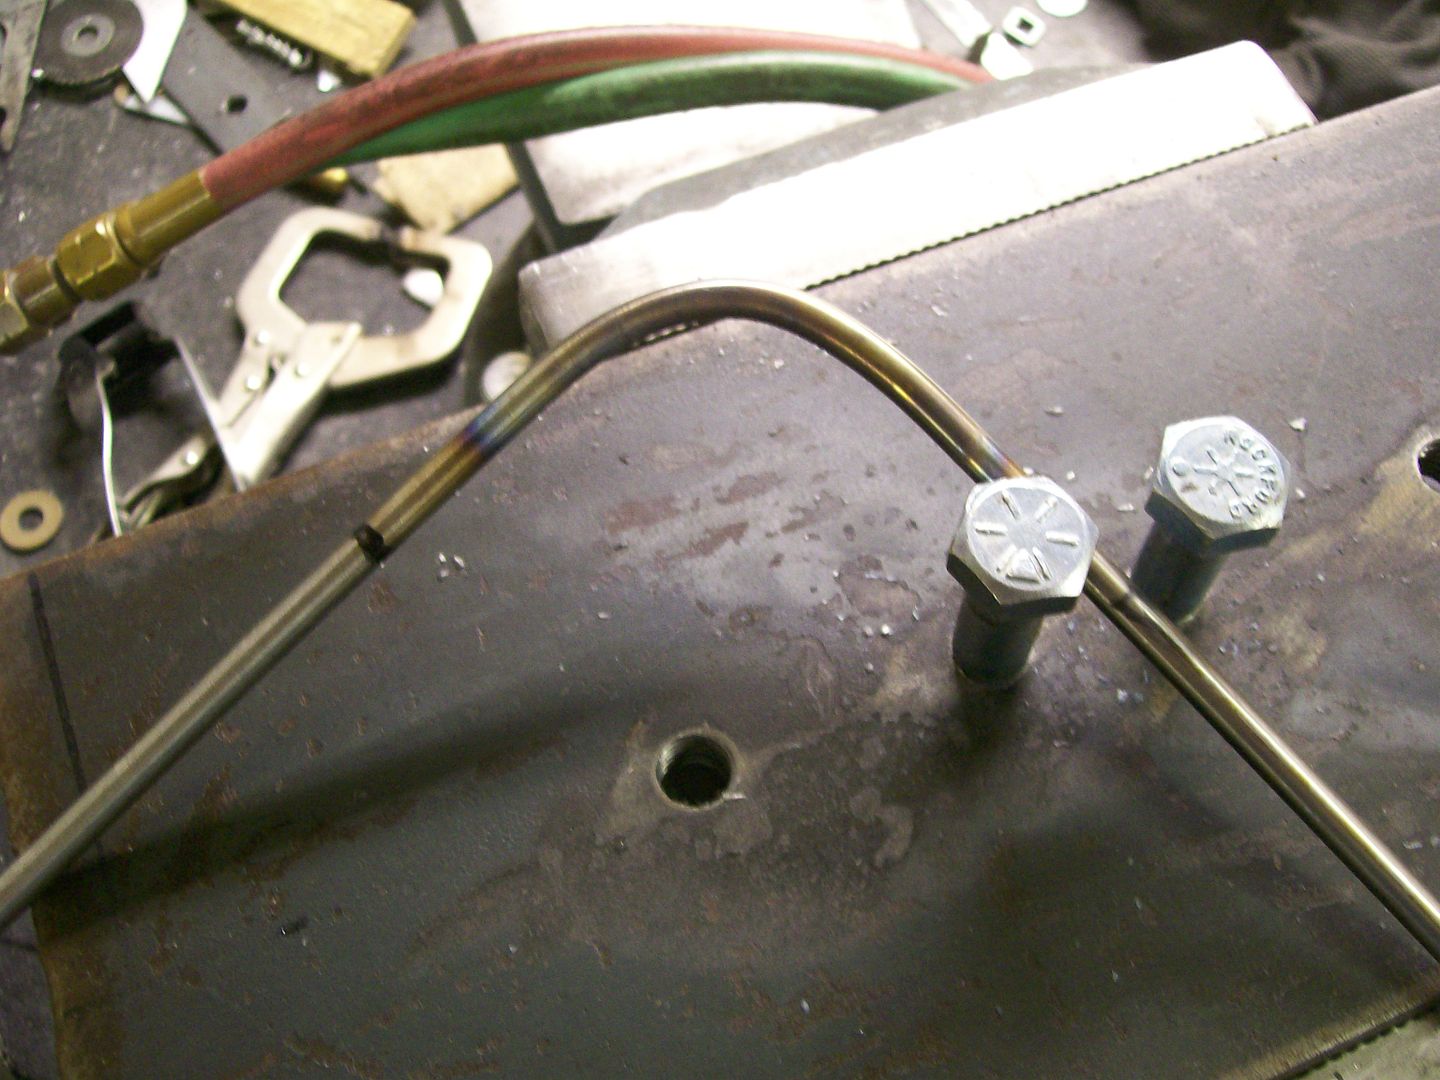 Slowly I bent the rod to match the door panel. 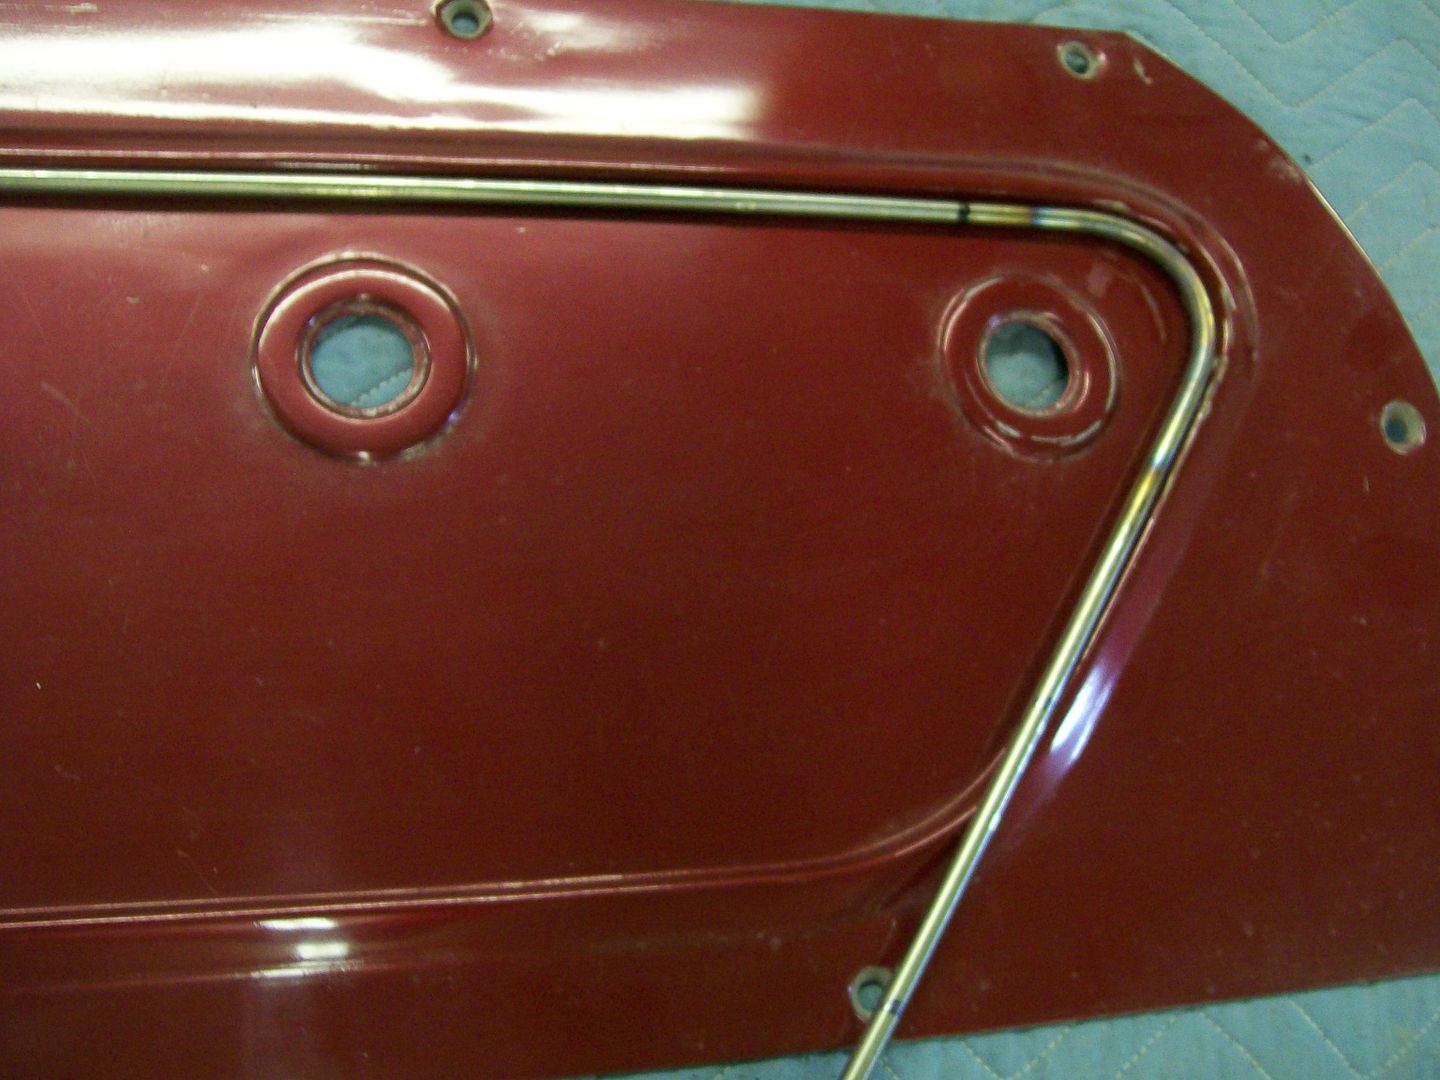 And here's one of the many of trouble makers. Trying to drill and tap to a #6 was no fun, but once done it all worked well. 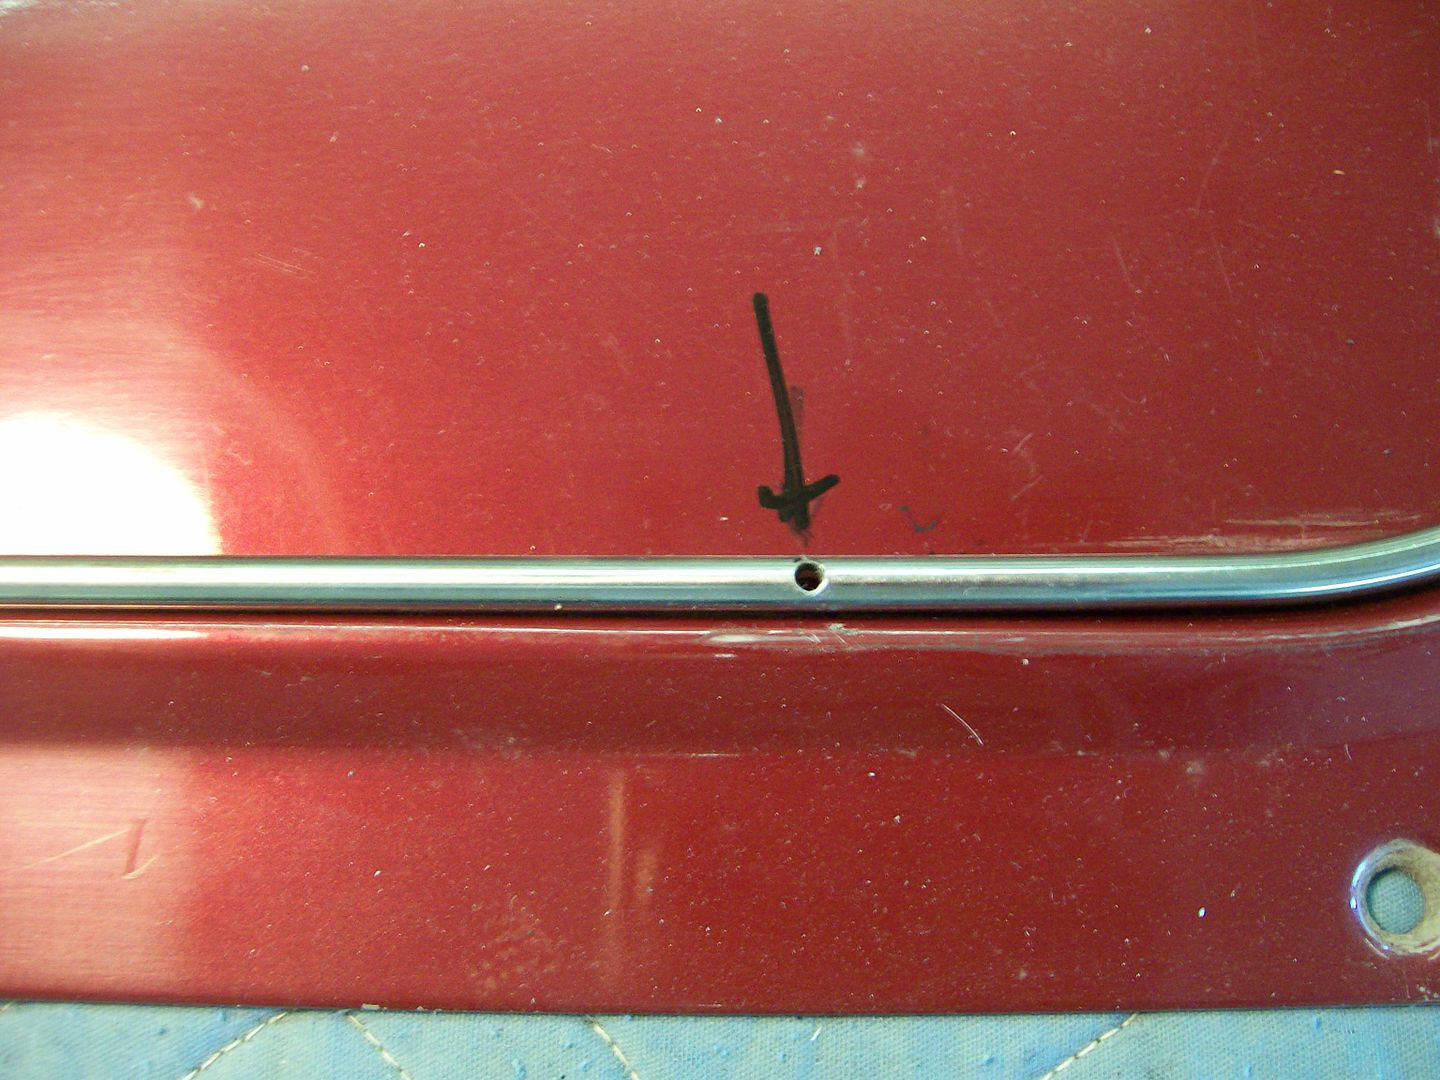 Here is the final result when finished. 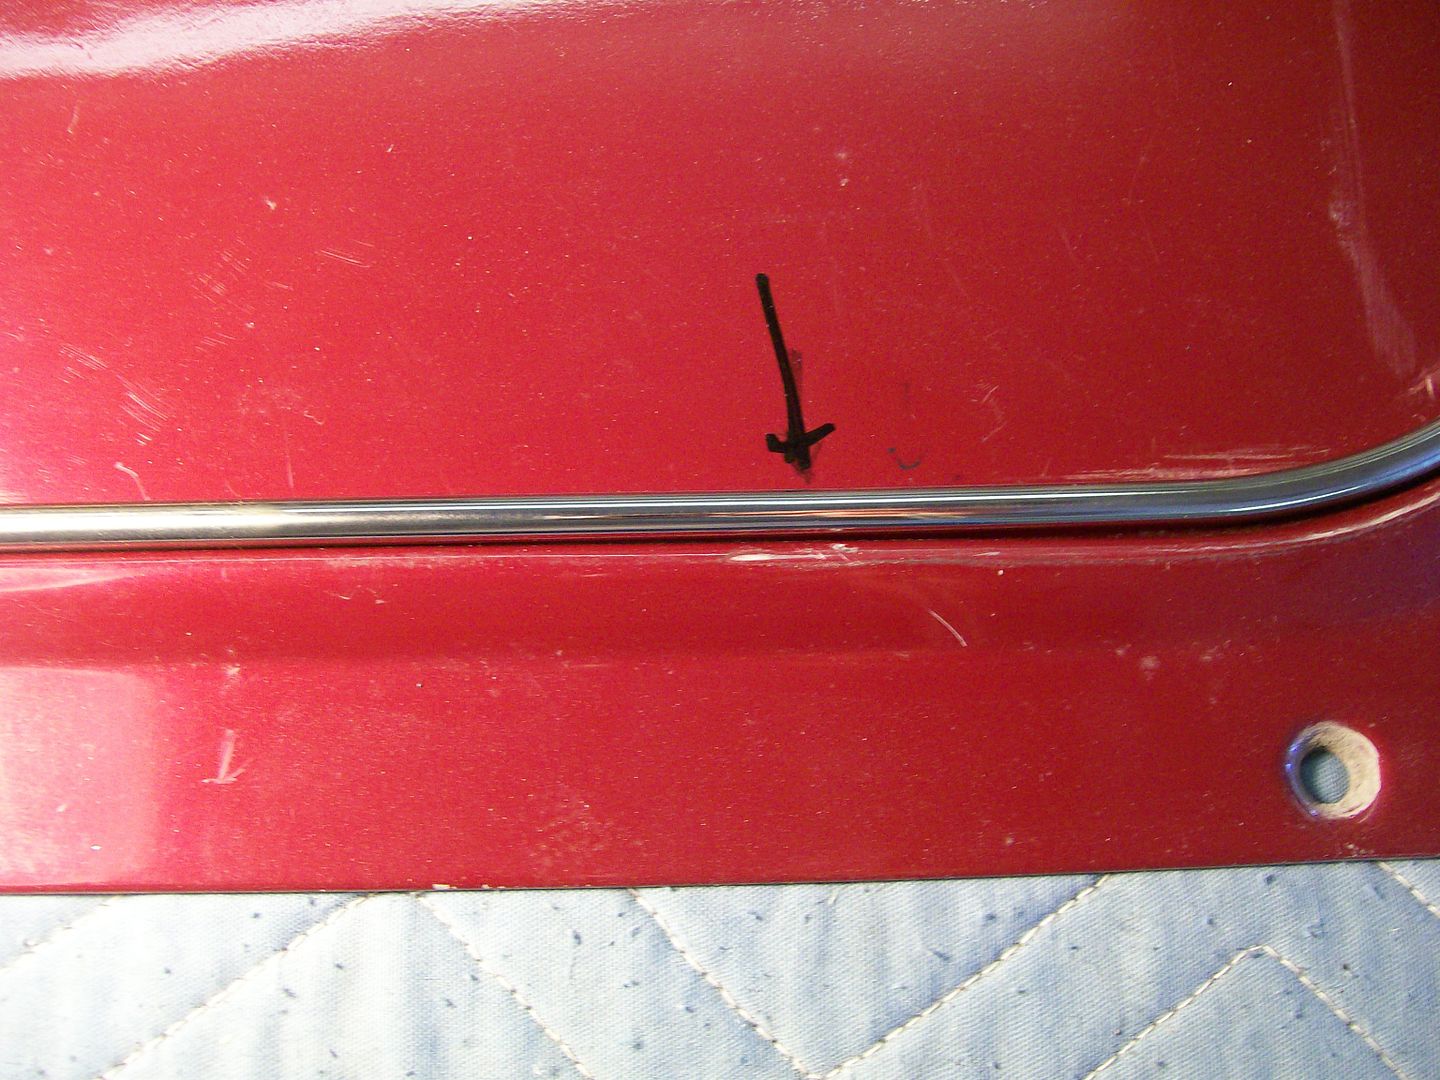 With these threaded holes I want to have a #6 screw thread into the backside. I need to weld shut the facing to get rid of the unsightly hole. 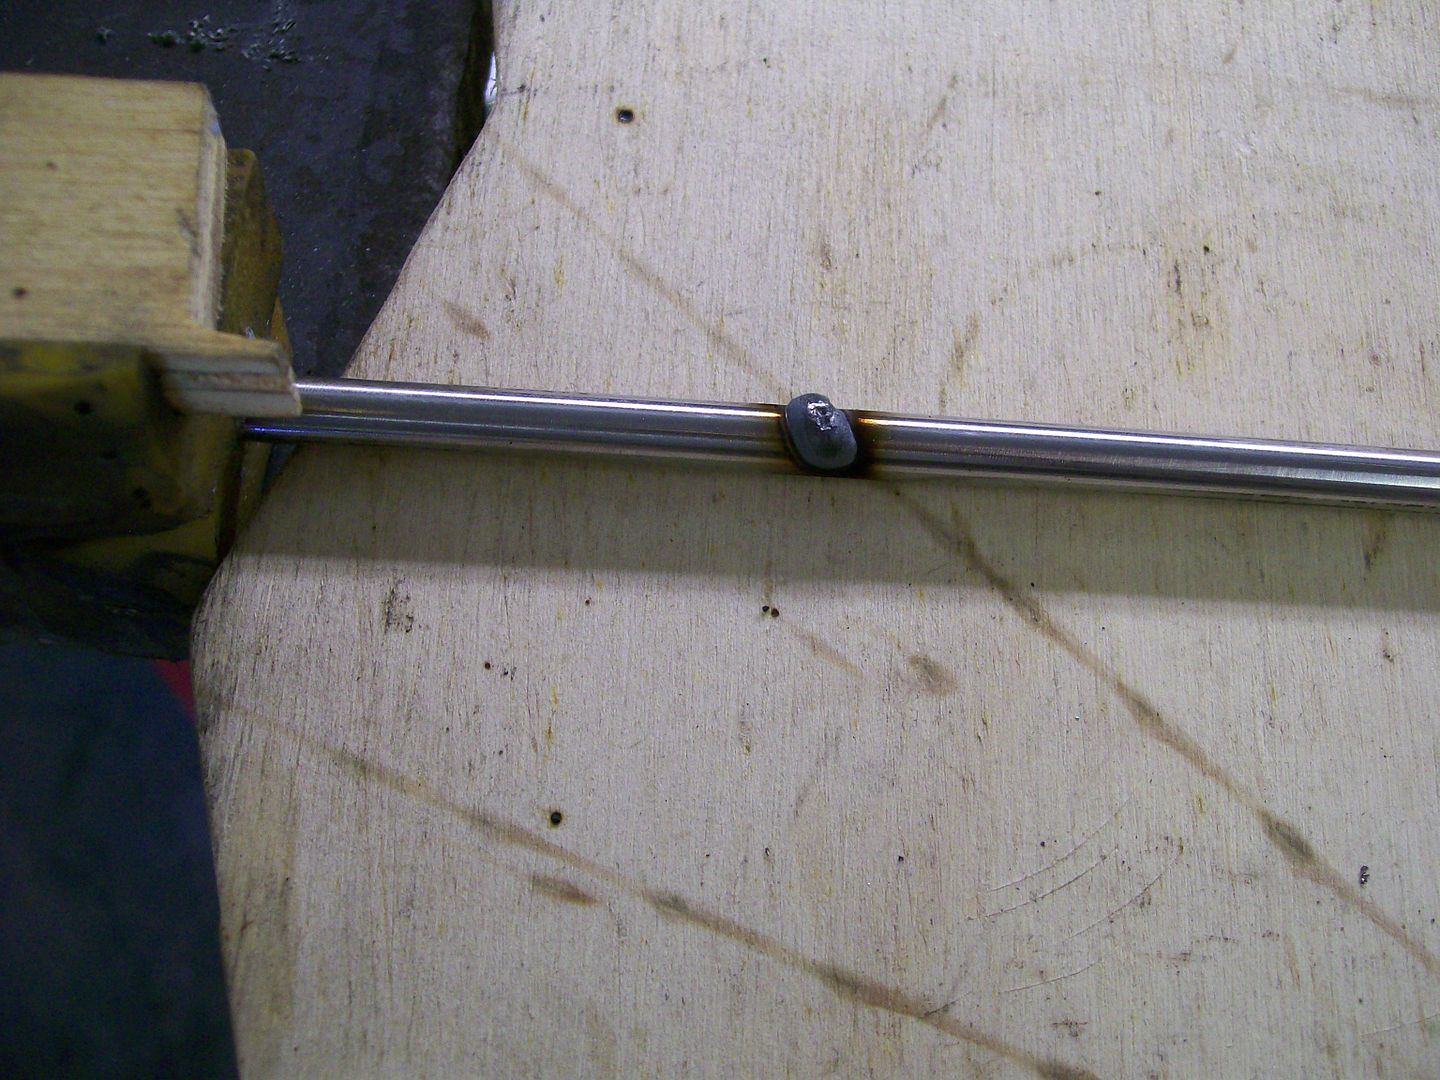 With just enough weld to cover the hole I used the 4 1/2" grinder to remove some of the excess. 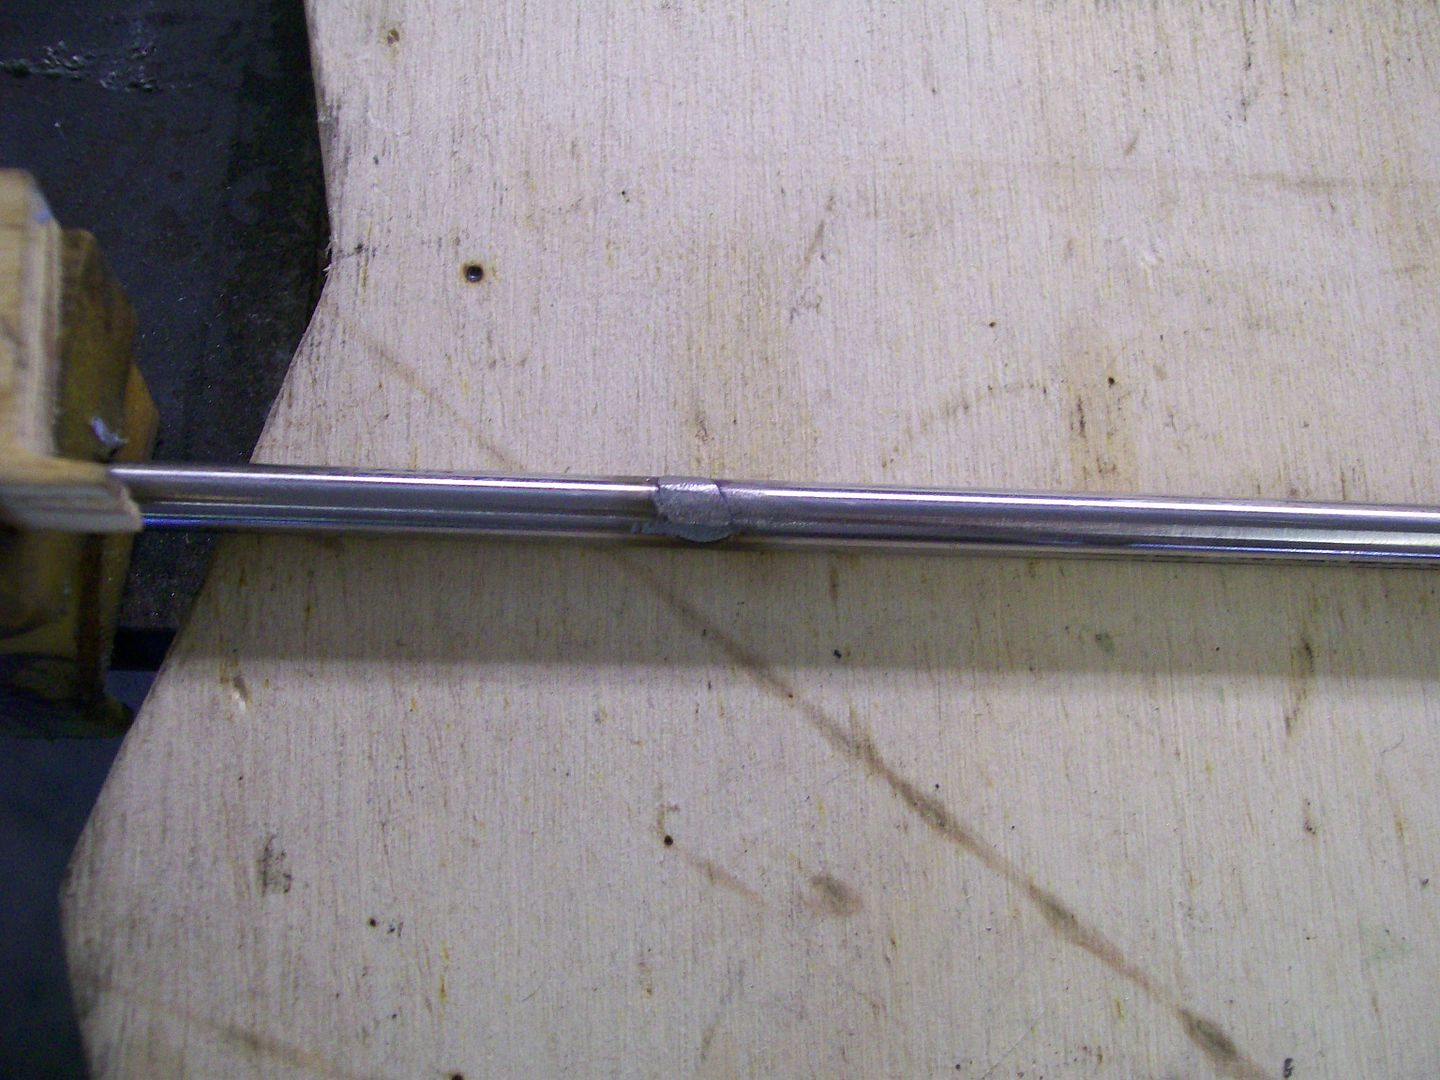 Now for some hand filing. 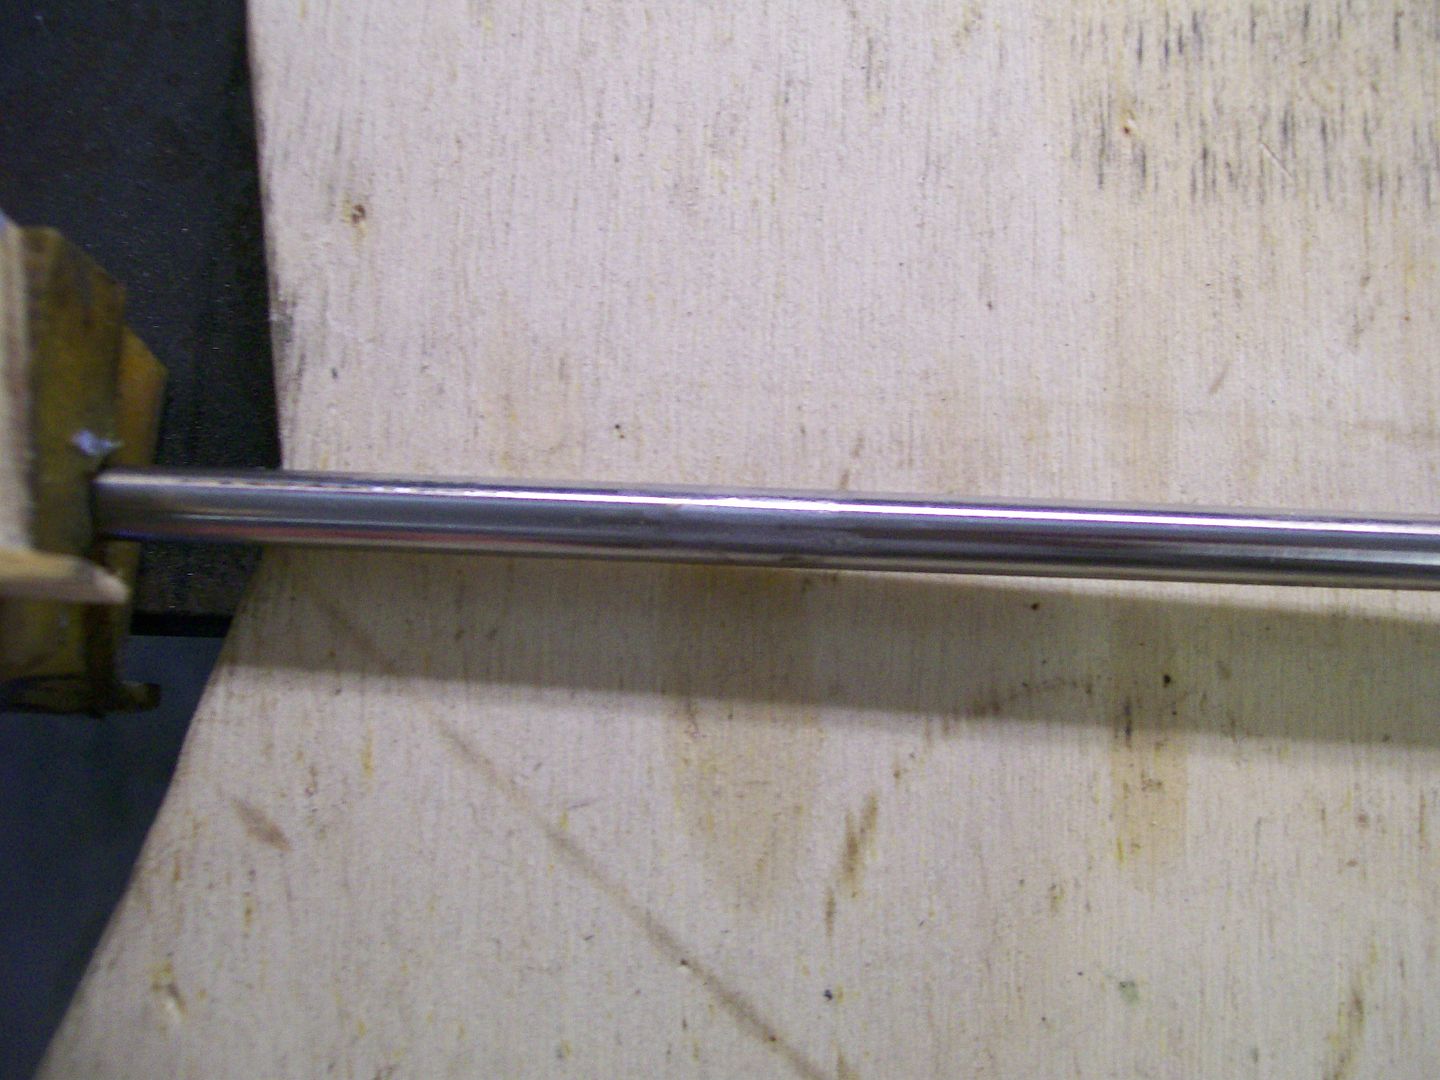 Now after emory cloth, ending with 400 grit. It still needs a final polish. 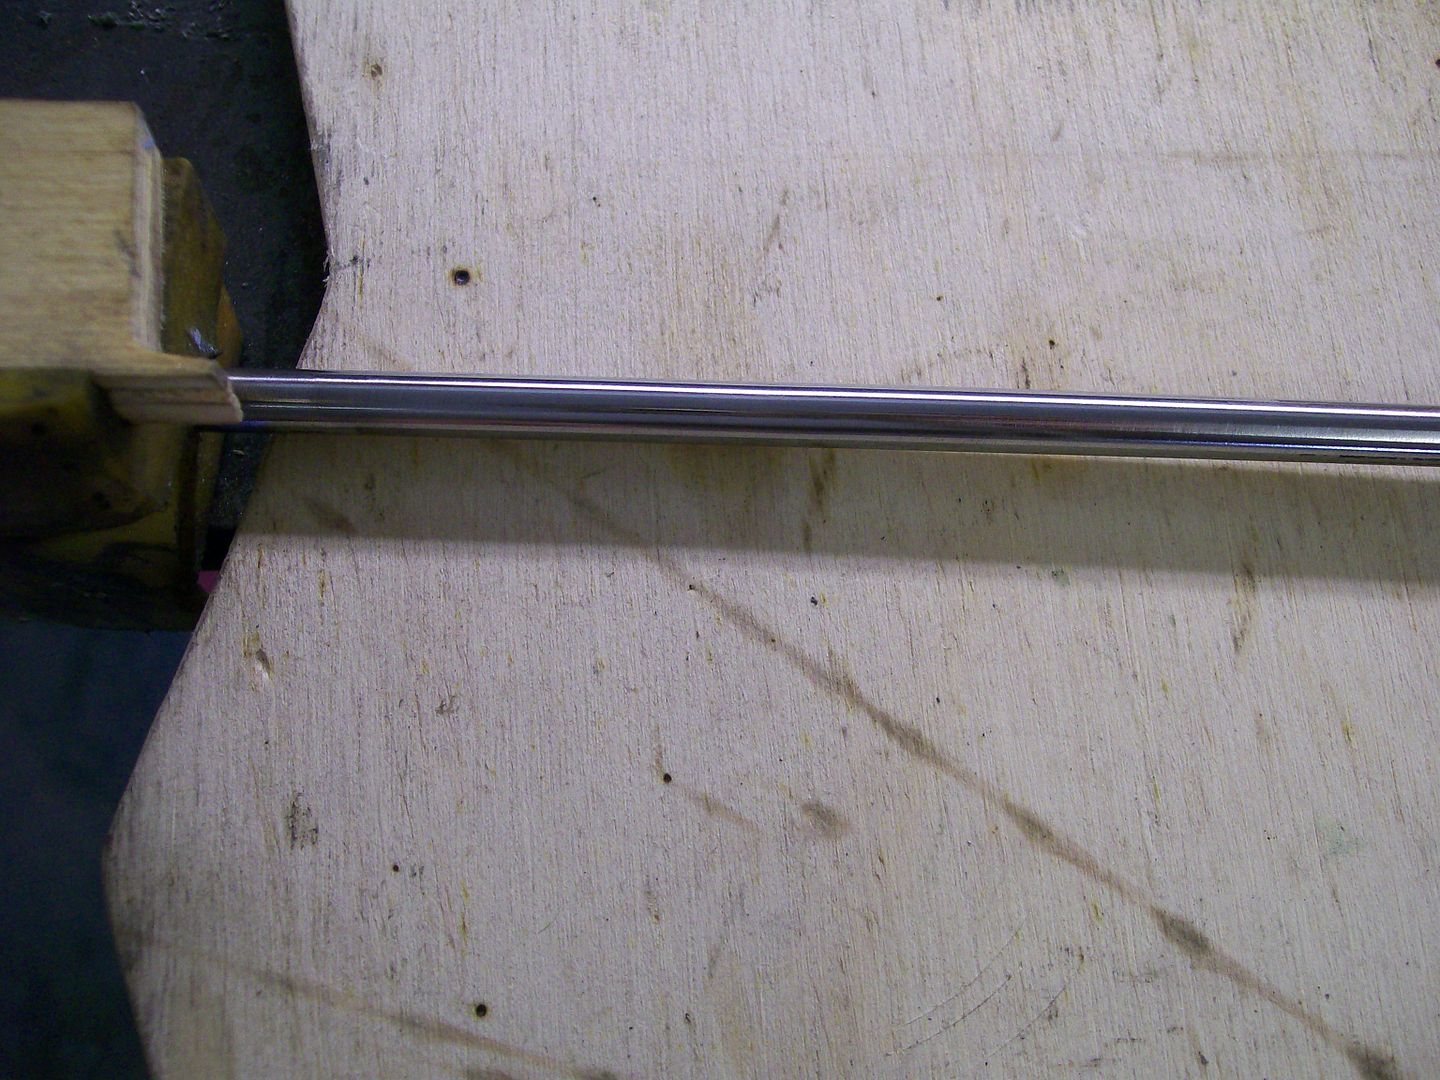 This worked for the door panels where the panel mounts against the door itself. It allows me to use a small wedge screws to hold the trim in place. On the floor counsel I wanted to have studs that I could use nuts to hold the trim in place, that'll be the next pictures. |
|
|

|
|
|
#8 |
|
Registered User
Join Date: Jan 2012
Location: Motown
Posts: 7,680
|
Re: 1957 Chevy truck re-rebuild
attention to detail is amazing
same ridge and ss trim in the console looks good stepside 
__________________
cool, an ogre smiley  Ogre's 58 Truk build Ogre's 58 Truk buildhow to put your truck year and build thread into your signature shop air compressor timer |
|
|

|
|
|
#9 |
|
Registered User
Join Date: Aug 2007
Location: Corona, California
Posts: 7,998
|
Re: 1957 Chevy truck re-rebuild
Very nice work.
Kim |
|
|

|
|
|
#10 |
|
Registered User
Join Date: Apr 2011
Location: .
Posts: 3,104
|
Re: 1957 Chevy truck re-rebuild
I Like
|
|
|

|
|
|
#11 |
|
Registered User
Join Date: Aug 2012
Location: Salem Mo
Posts: 652
|
Re: 1957 Chevy truck re-rebuild
Now to get the stainless steel to having studs for mounting vs. threaded holes.
Before the studs I had one picture of the backside of the door panel using screws to hold the stainless trim. Since this is all about a mock up and test fit I'm using duct tape to hold the vinyl in place. 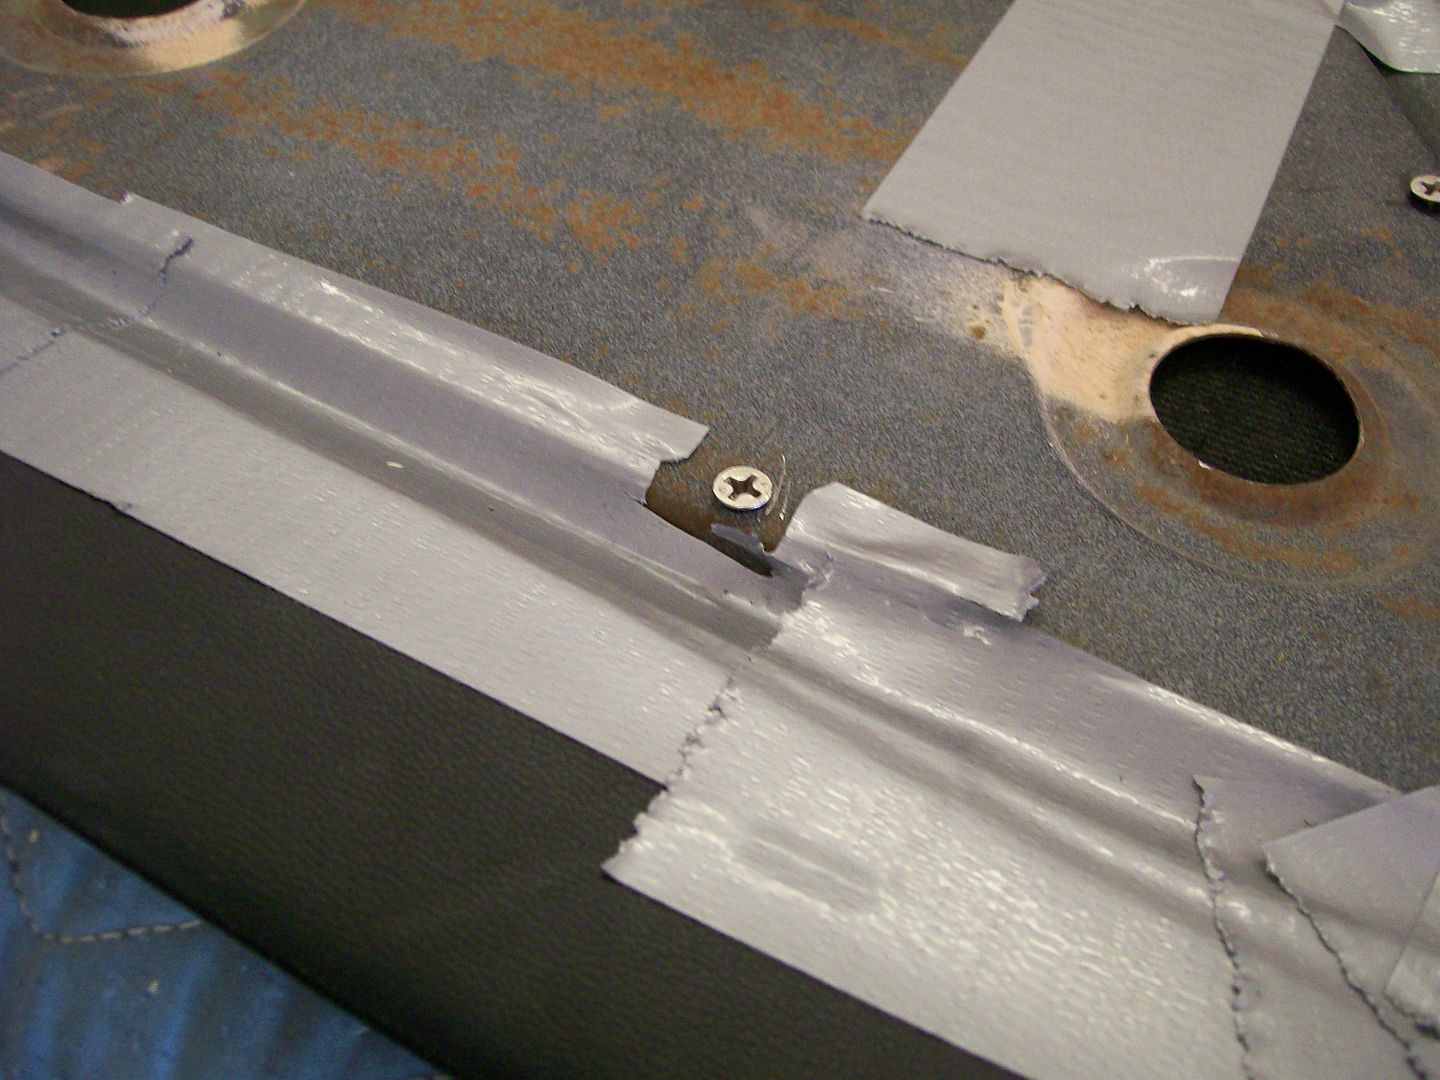 Using the same drilling a threading technique I have a threaded hole. 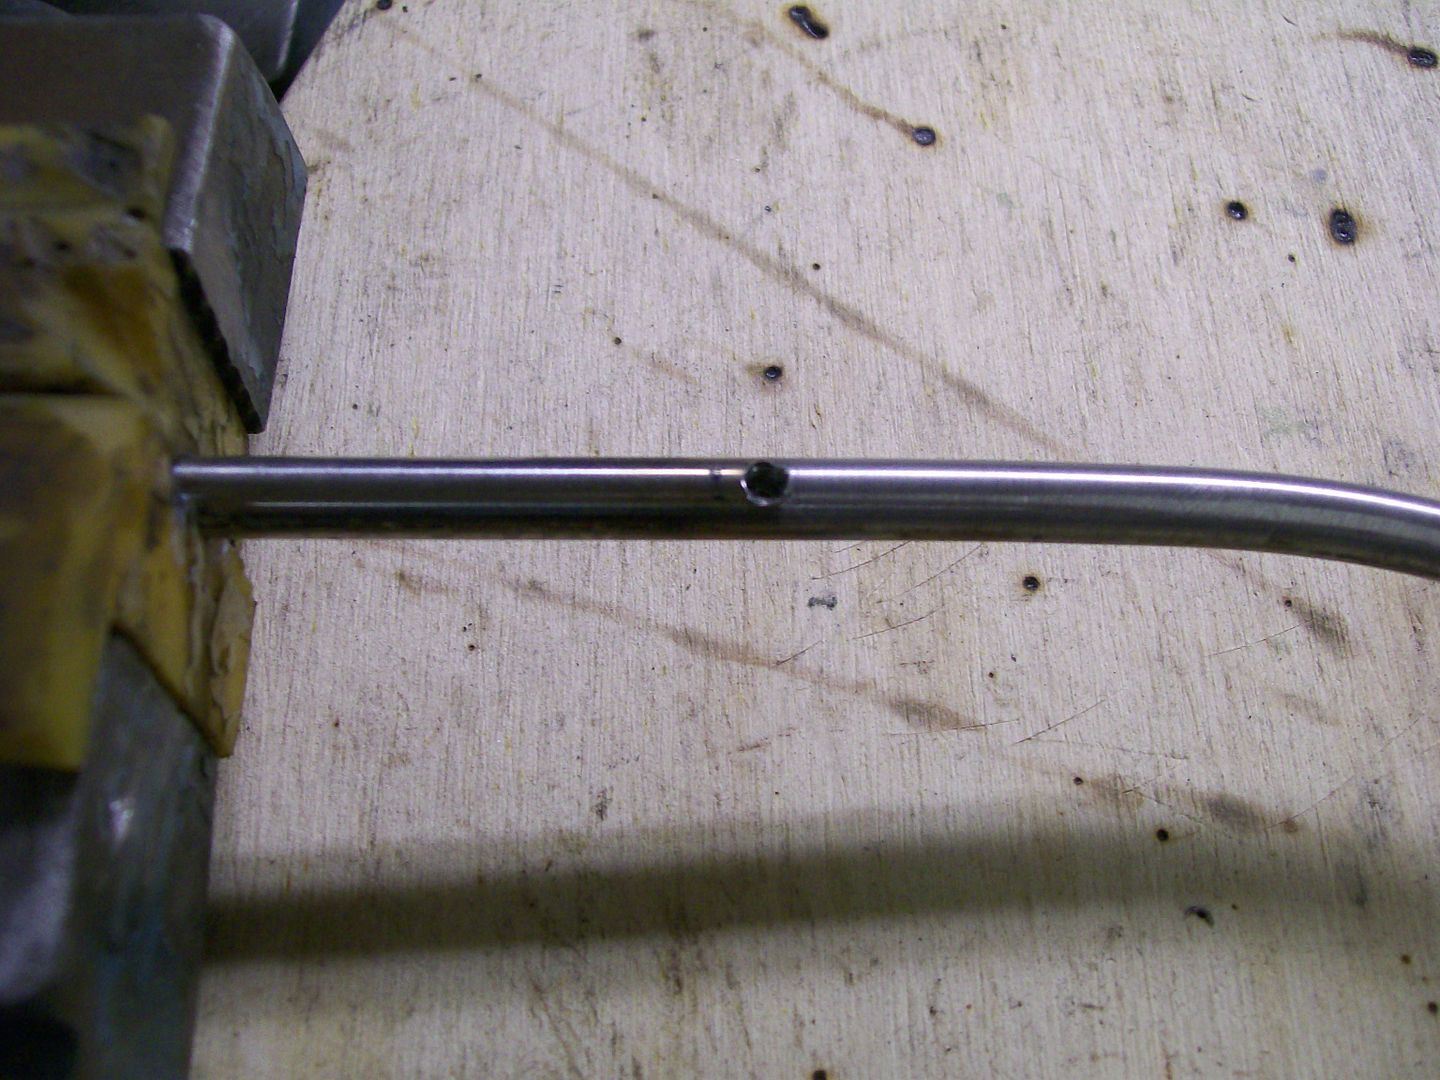 The screws I'm gonna use to create a stud has a tapered head.This works well, I take a pointed rotary brr to create a female taper. 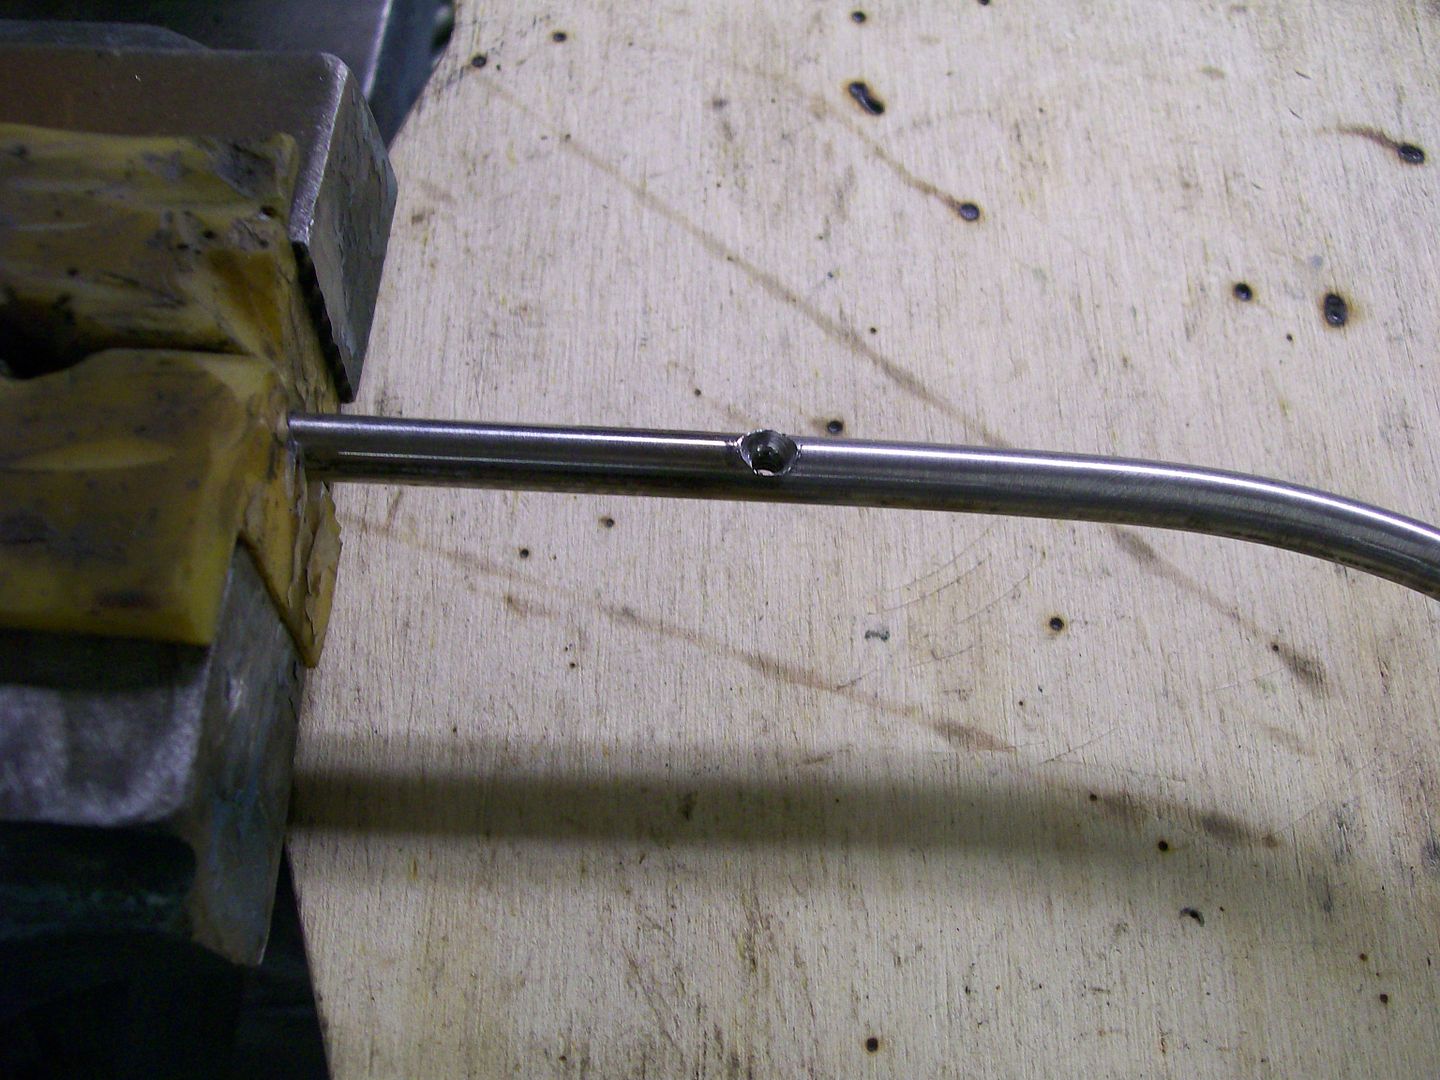 Then to thread the screw in place. At this point I tightened the screw very tight, I want it to seat itself and stay. 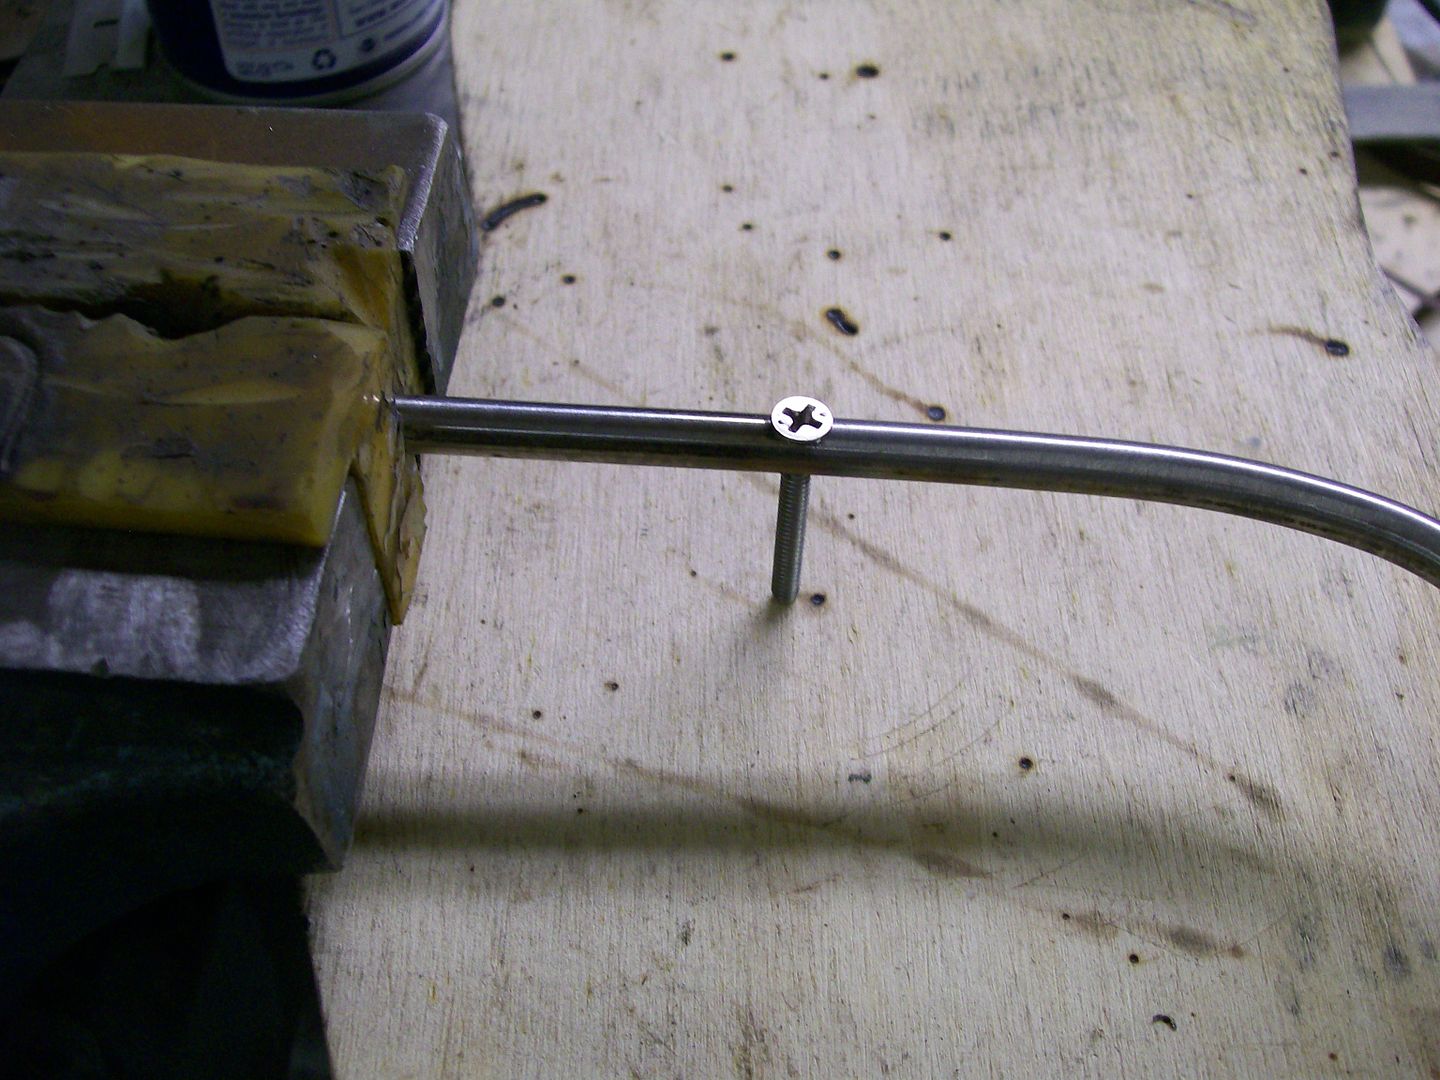 Now for some fine grinding and I ready to weld again. 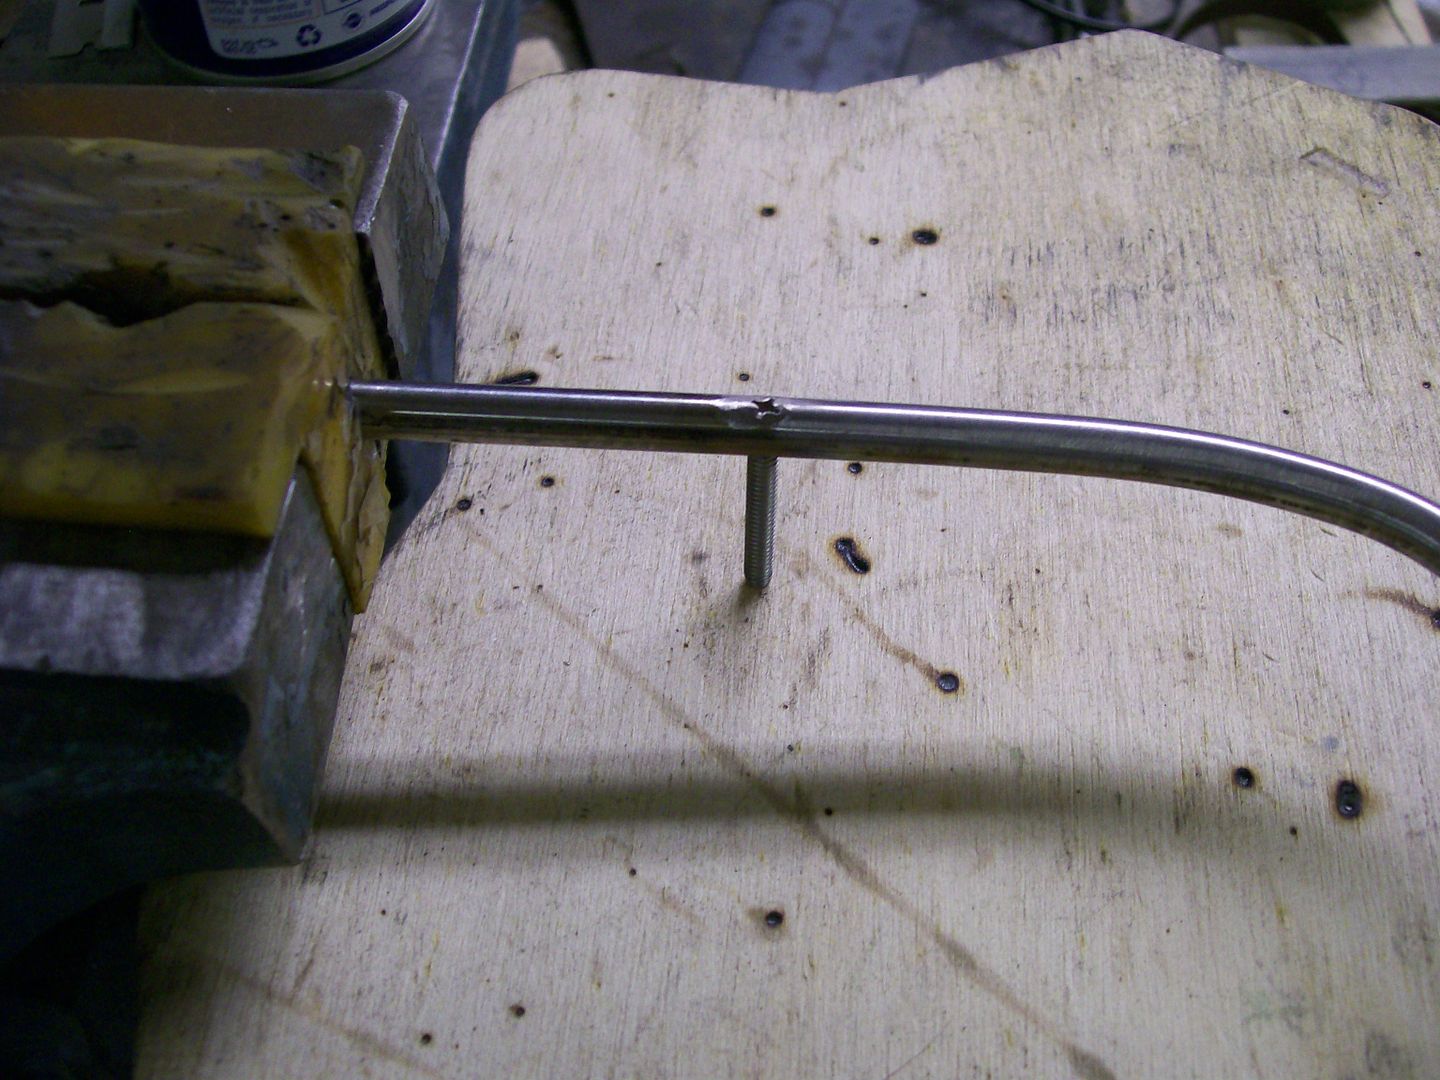 The welding and grinding and filing and polishing is the same procedure as closing the hole so I didn't show that again. Here is the final result. 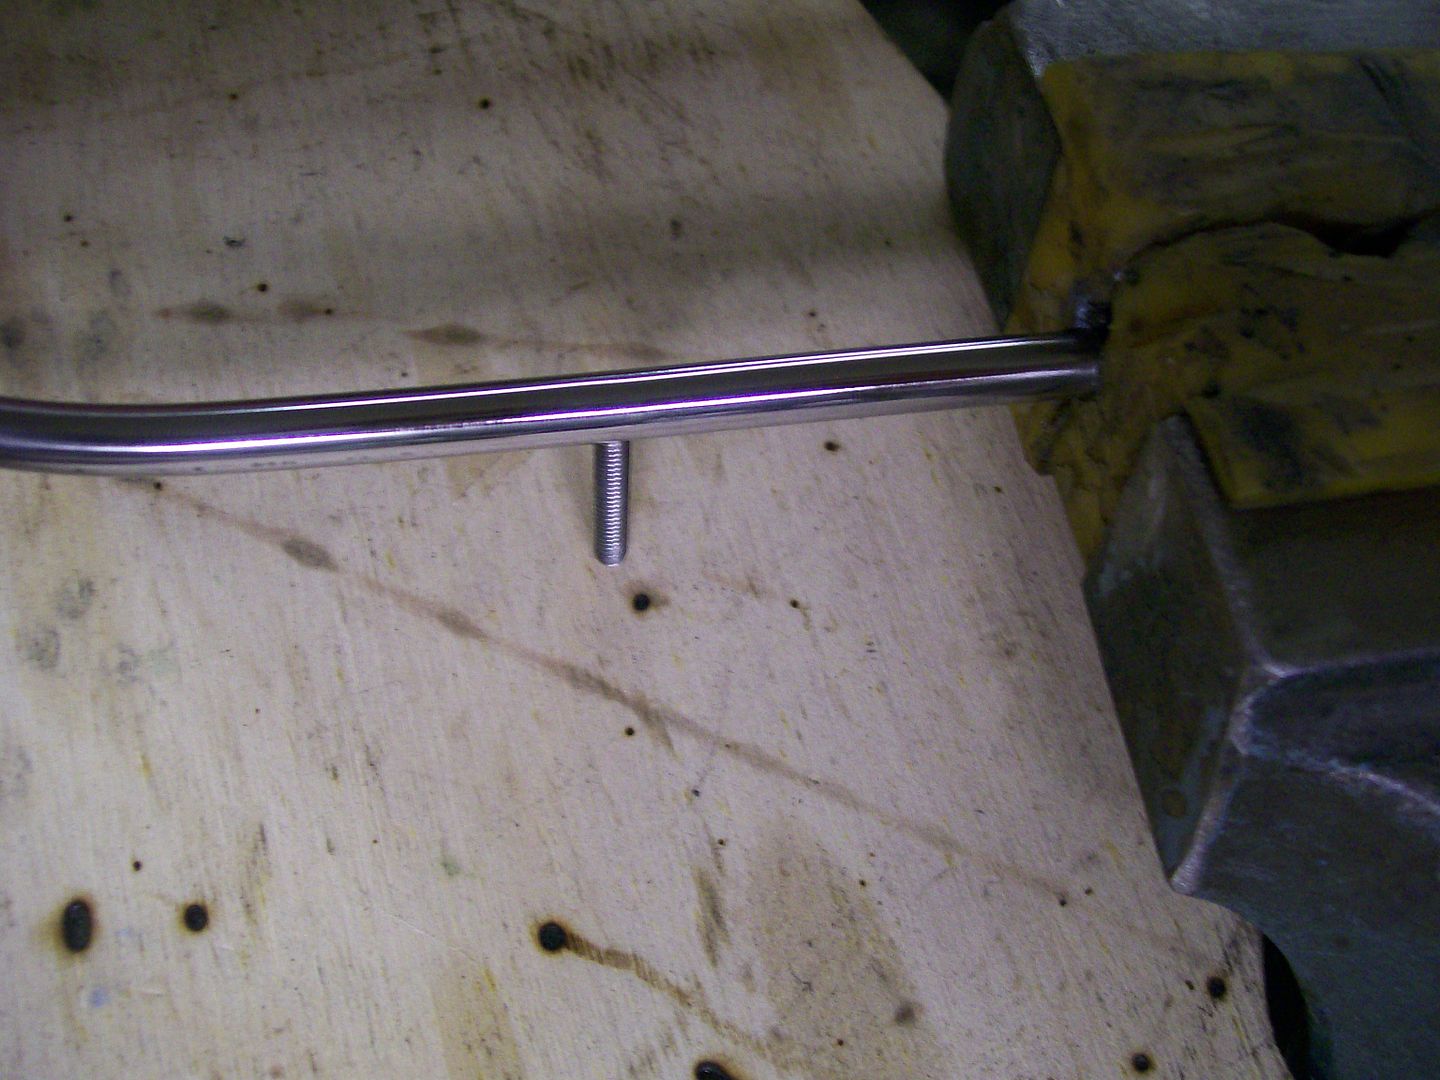 There is one step I could have saved. I could have just drilled the hole, then inserted the screw and tightened a nut to keep the screw in place then welded the head of the screw in place. By now I figured the technique for threading the holes and it seemed like a more secure way, so I took the long route. |
|
|

|
|
|
#12 |
|
Registered User
Join Date: Aug 2007
Location: Corona, California
Posts: 7,998
|
Re: 1957 Chevy truck re-rebuild
Nice work.
Kim |
|
|

|
|
|
#13 |
|
Registered User
Join Date: Apr 2011
Location: .
Posts: 3,104
|
Re: 1957 Chevy truck re-rebuild
Very Well Done Sir!
|
|
|

|
|
|
#14 |
|
Registered User
Join Date: Aug 2007
Location: Corona, California
Posts: 7,998
|
Re: 1957 Chevy truck re-rebuild
The finished one looks real nice.
Kim |
|
|

|
|
|
#15 |
|
Registered User
Join Date: Jan 2012
Location: Motown
Posts: 7,680
|
Re: 1957 Chevy truck re-rebuild
stuff like this shows your attention to detail
the factory would have started the bolts and sucked the bumper into shape if i paid myself $1 per hour, i'd have a million dollar truk  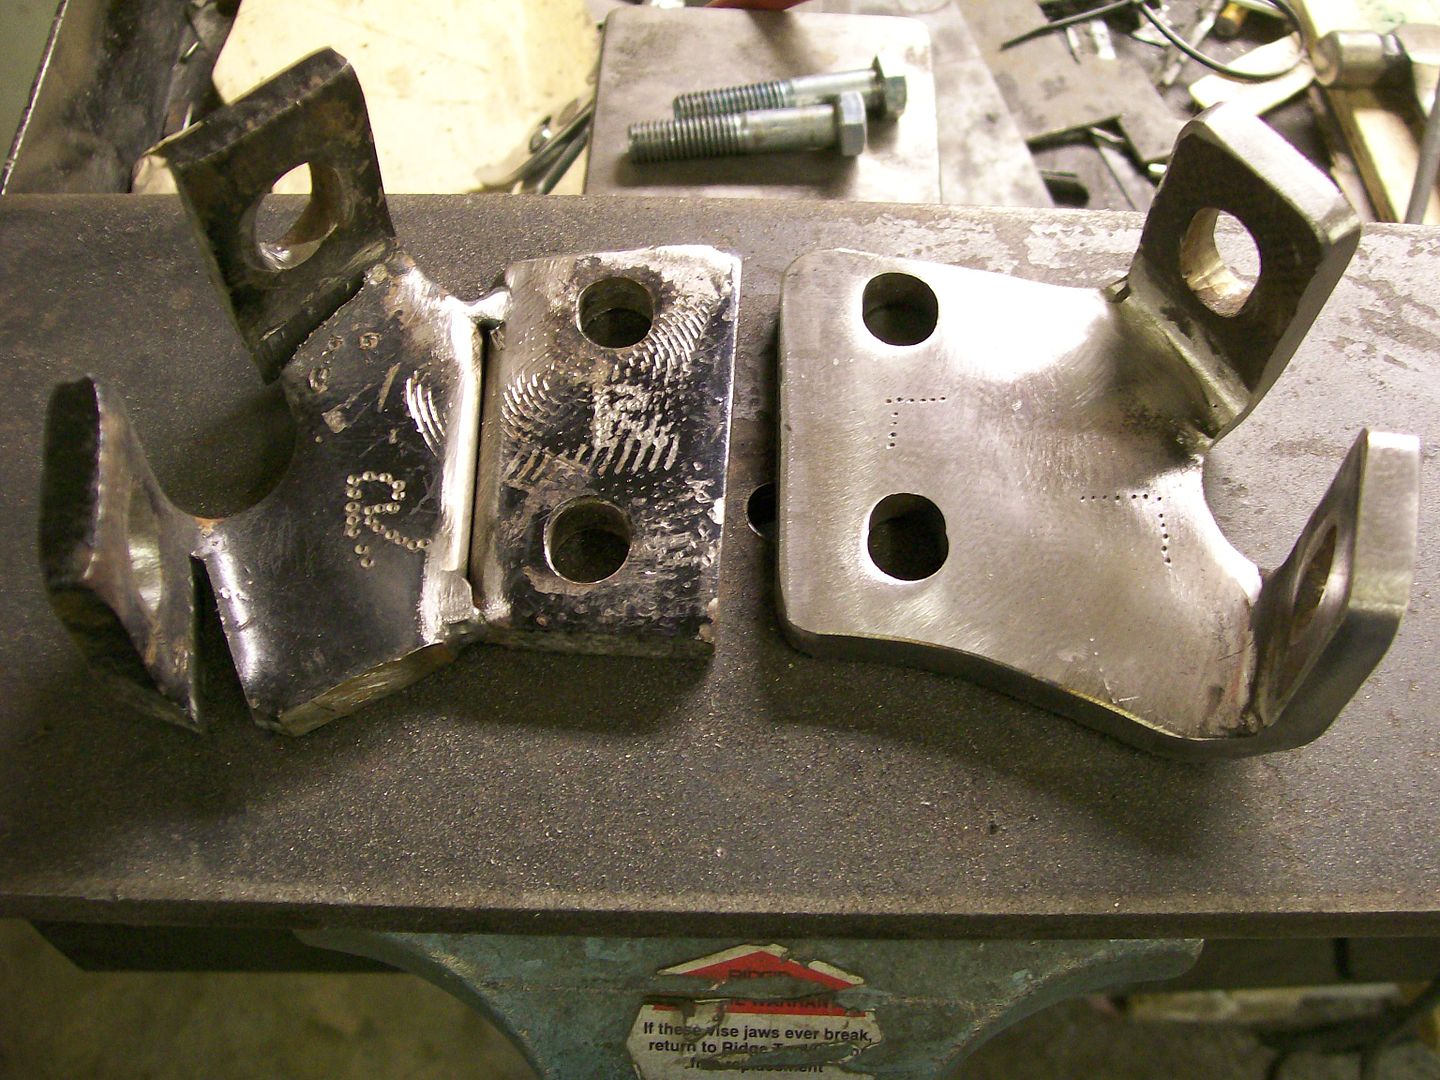
__________________
cool, an ogre smiley  Ogre's 58 Truk build Ogre's 58 Truk buildhow to put your truck year and build thread into your signature shop air compressor timer |
|
|

|
|
|
#16 |
|
Registered User
Join Date: Feb 2013
Location: Lakeside Ariz
Posts: 445
|
Re: 1957 Chevy truck re-rebuild
I have to do the same thing to mine. Nice work
Rich My build http://67-72chevytrucks.com/vboard/s...d.php?t=576185 |
|
|

|
|
|
#17 |
|
Registered User
Join Date: Aug 2012
Location: Salem Mo
Posts: 652
|
Re: 1957 Chevy truck re-rebuild
Finally things are starting to come together and progress is being made.
I'm pushing myself to make decisions about putting finishing touches on the interior trim. It happens that Sunday I got into another car I have with a floor counsel and bam, it hit me, I need a piece of trim that will surround the whole top of the shifter area and all the way up to the firewall. This will be tricky, it's gotta be stainless, it's gotta fit the curves of the shifter housing then follow along the cup holder area. Starting with a rough cut from a plate of 1/8" on the left, I need a couple pieces like the one on the right and one short piece to make the trim. 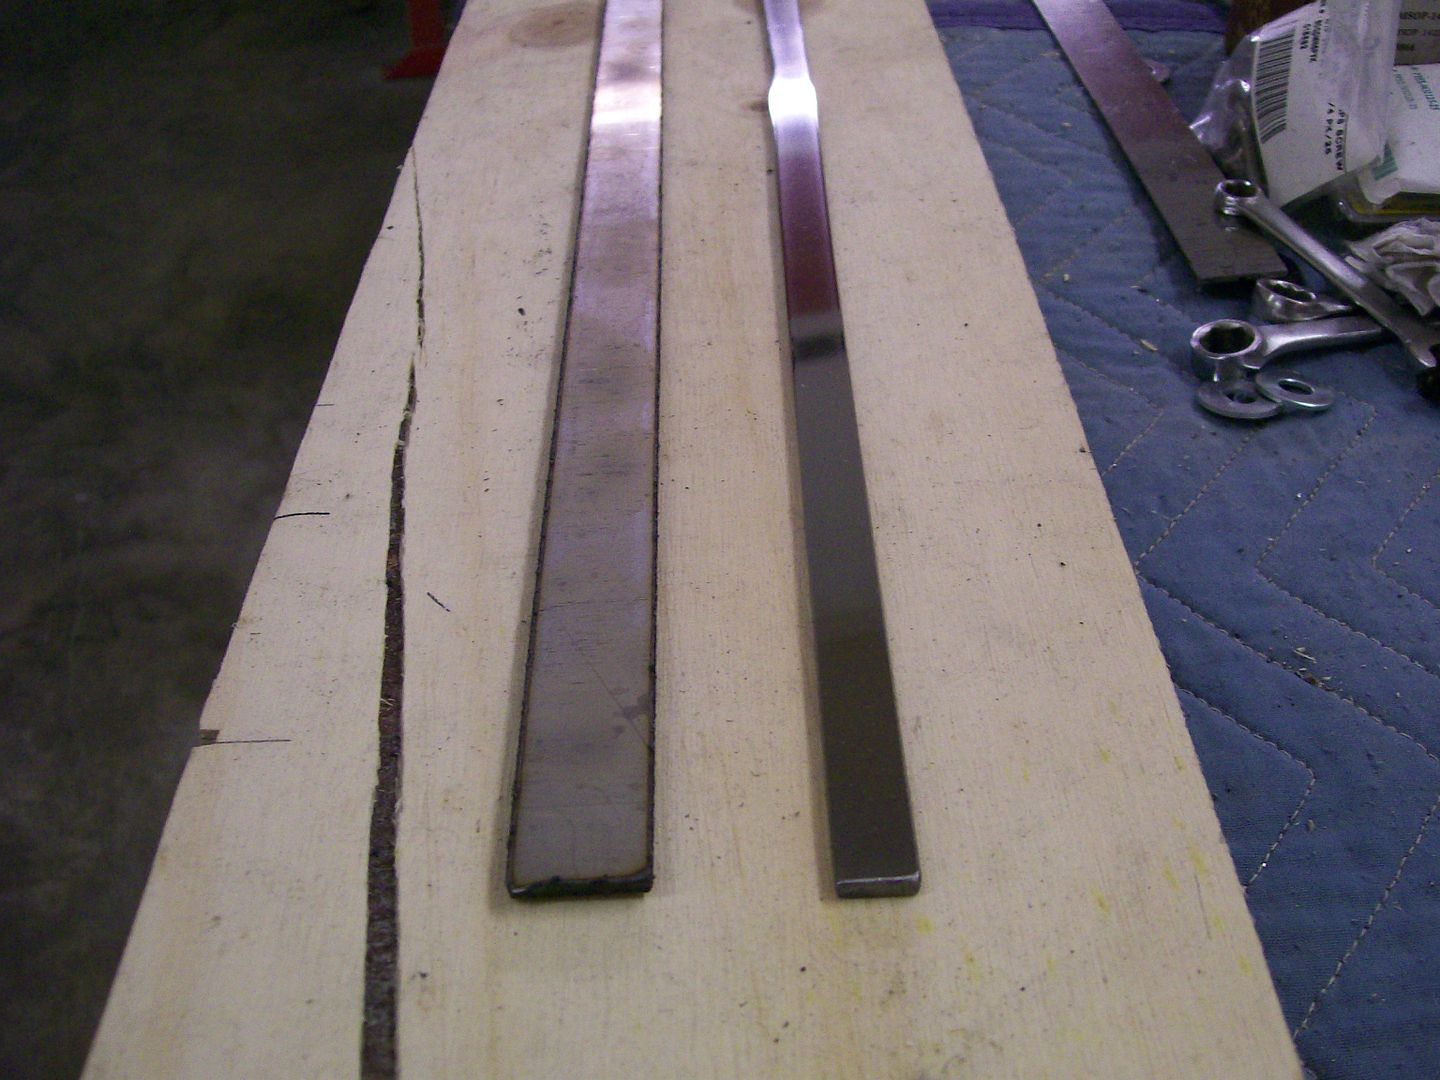 I'm displeased with the picture but I've got my three pieces clamped in place. 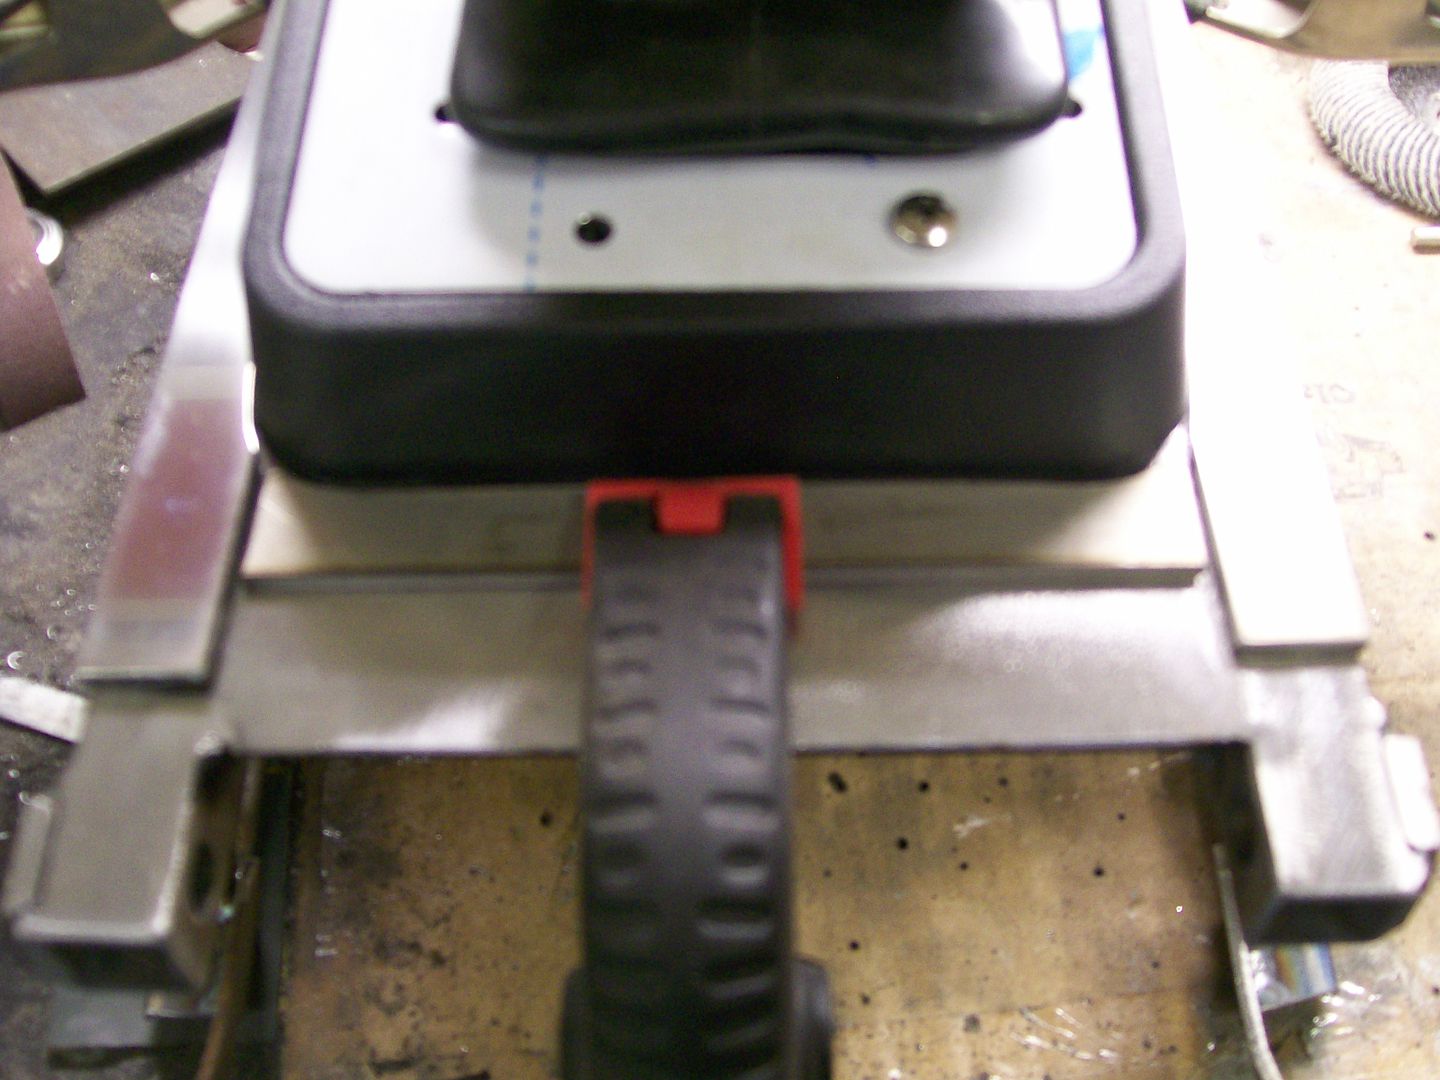 I'm also displeased with this picture too. The welds are not pretty but once again, the purpose is to attach and fill. 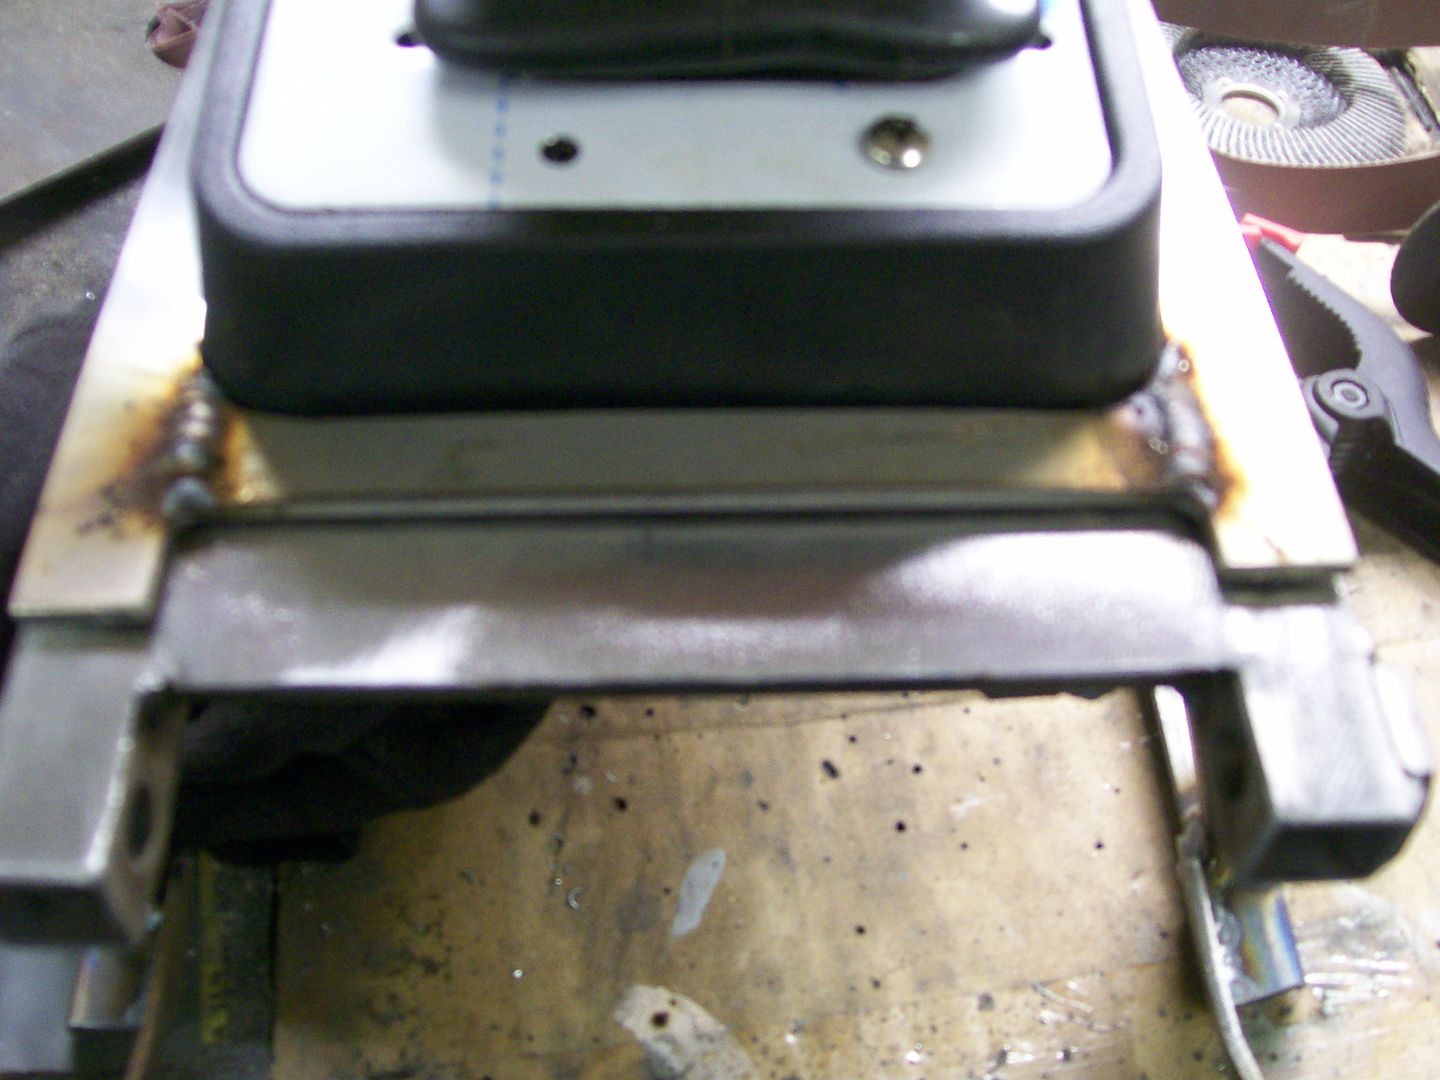 After some grinding and sanding it's coming along, yet with a few rough edges. 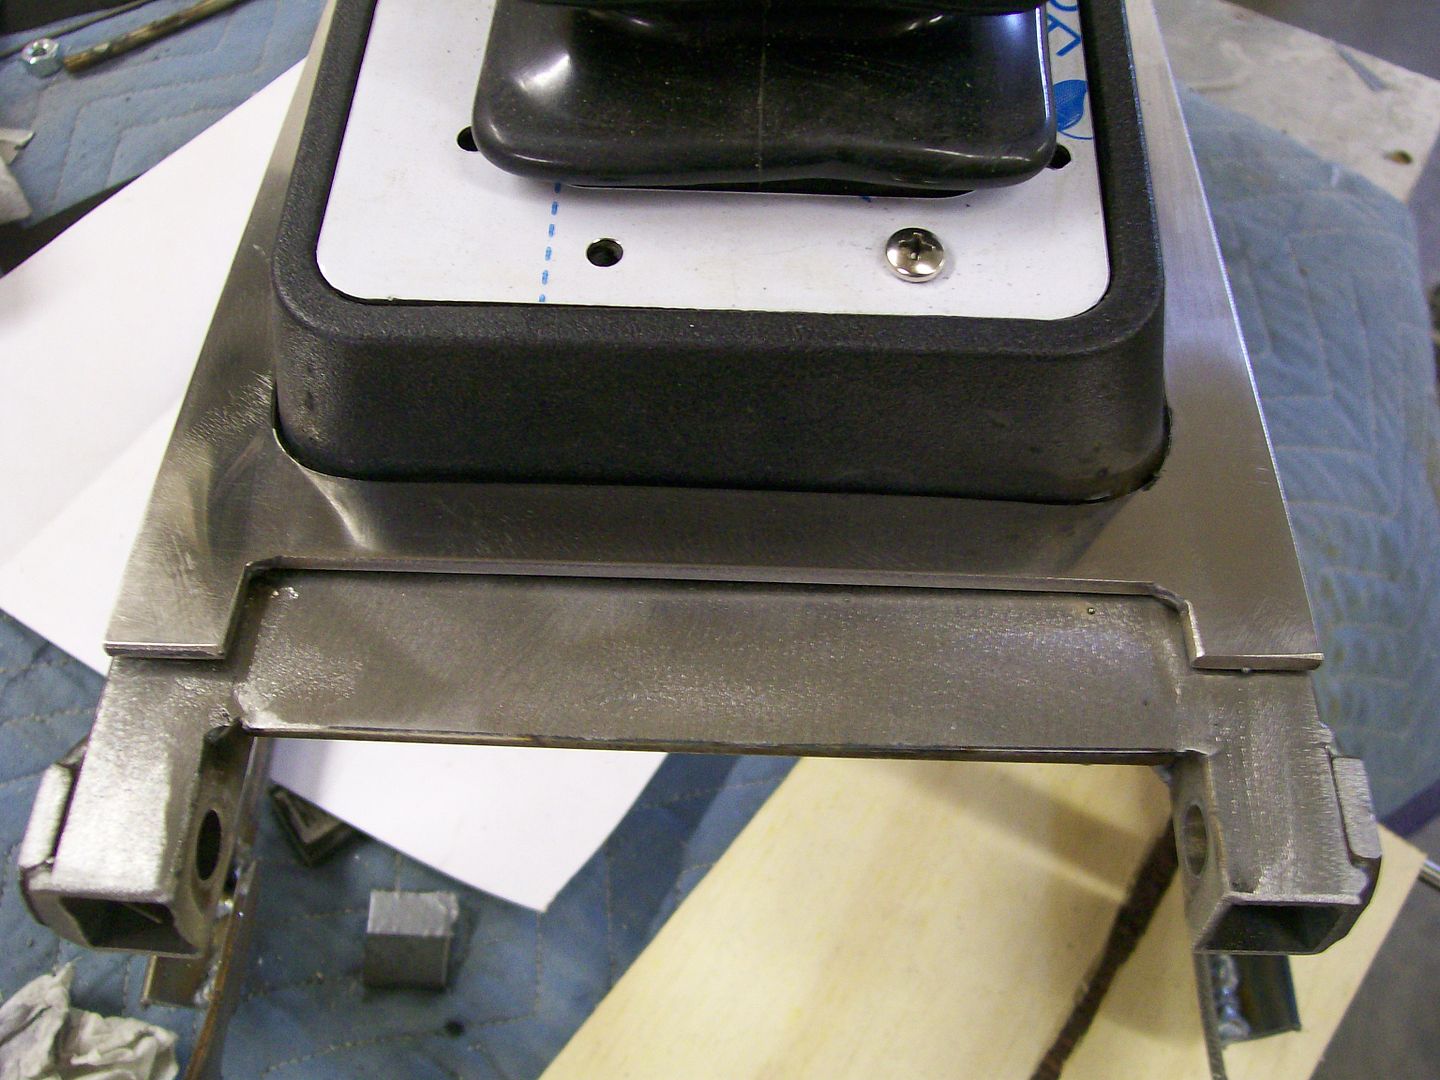 Now with the corners rounded and most of the roughness gone. I still need to final polish. 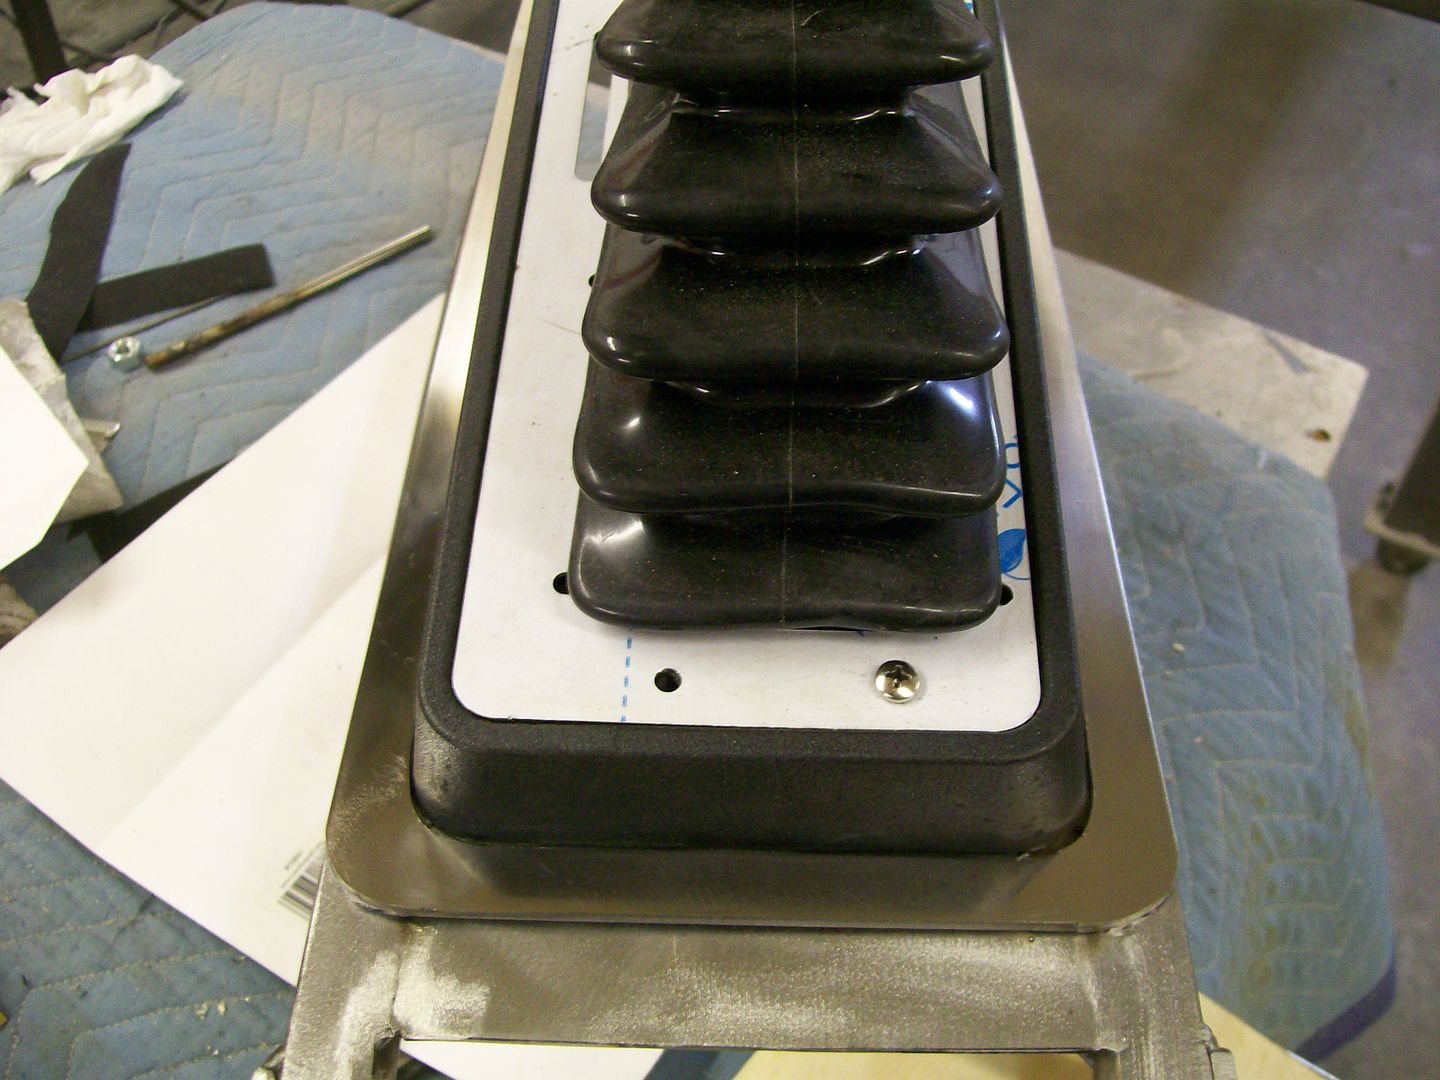 Much of this trim will be surrounded by black vinyl and should stand out nicely. It's not til times like this that I give credit to car manufacturers for making and designing cars/trucks and have to keep coming up with new updated designs that have to fulfill a need and still look good. |
|
|

|
|
|
#18 |
|
Registered User
Join Date: Feb 2013
Location: Lakeside Ariz
Posts: 445
|
Re: 1957 Chevy truck re-rebuild
Nice. What type of rod did you use to weld the stainless. ? Thanks
Rich |
|
|

|
|
|
#19 | |
|
Registered User
Join Date: Aug 2012
Location: Salem Mo
Posts: 652
|
Re: 1957 Chevy truck re-rebuild
Quote:
Flashing back to the vinyl door panel covering, the original design for mounting the panel is using a taper headed screw. The problem with using a taper head up against the vinyl is that the vinyl attaches to the screw and tries to turn with while tightening a removing. 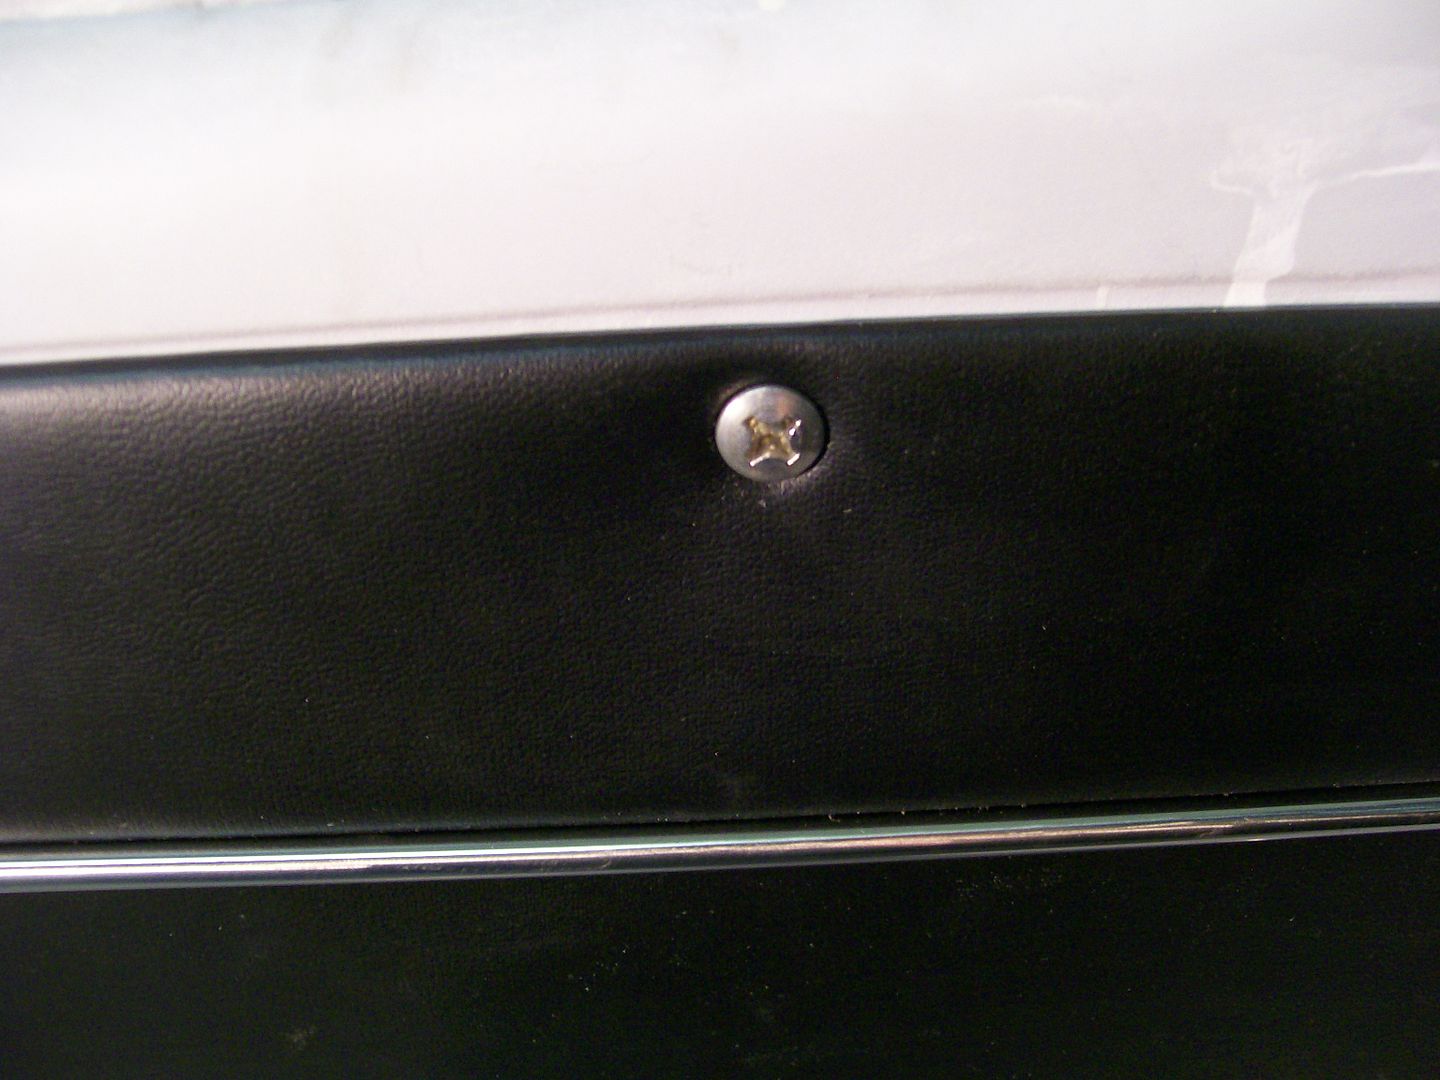 I still want the taper head look so I need a way around the problem. I also need a screw that is about a 1/4" longer than original. I found the longer screws, but no luck on cupped or coned washers. I did however find 1/4" stainless washers. On the left, longer screw, on the far right, original screw, washer to the right, bought stainless washer and the coned washer on the left. The coned washer is what I'm focused on here. I had to make a press adapter to make the coned washer......here goes. With the chop saw, I got a chunk of 1" round. Then drilled. 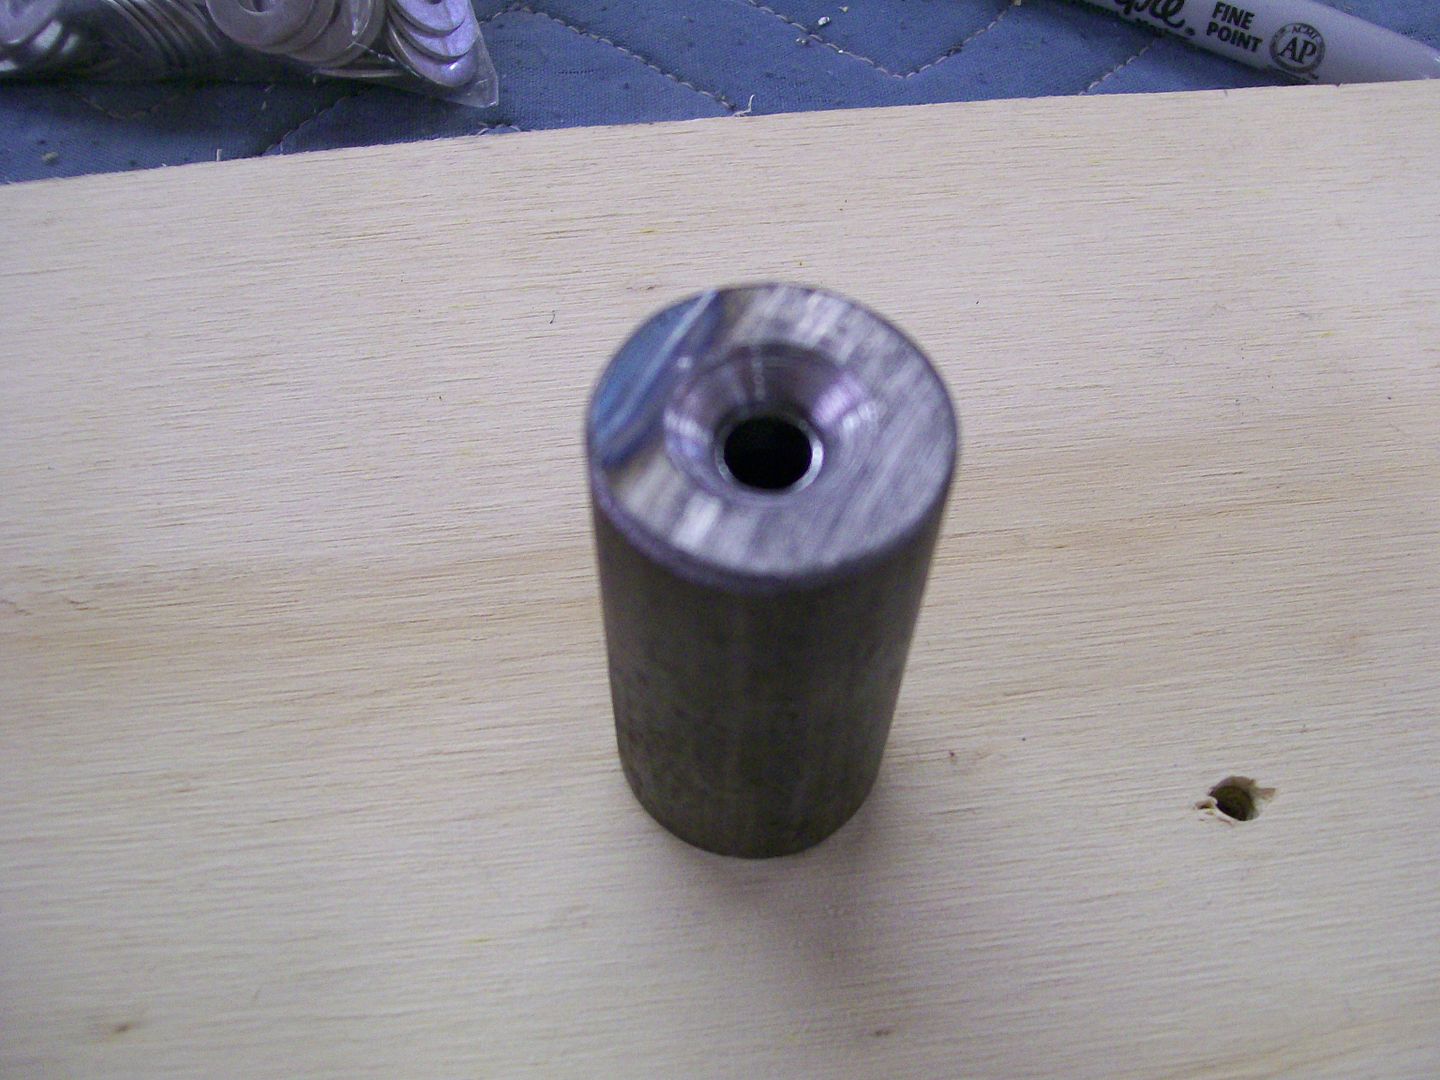 Then put a washer and a screw in place, then to the press. 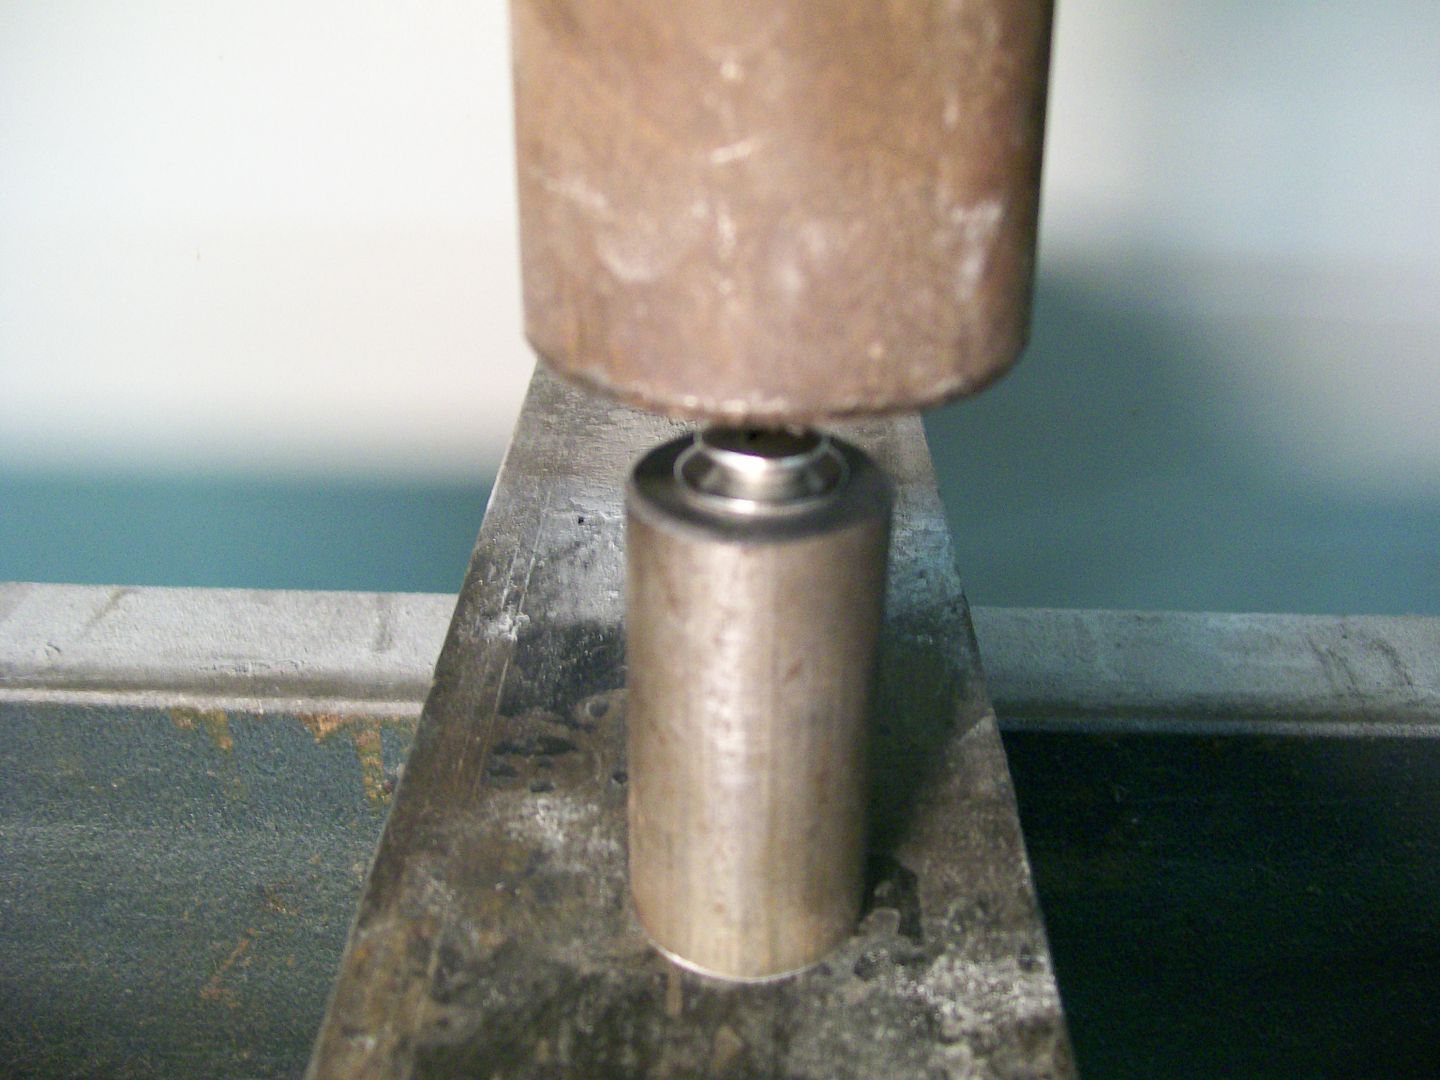 First one worked great so I pressed out about 30 of them. 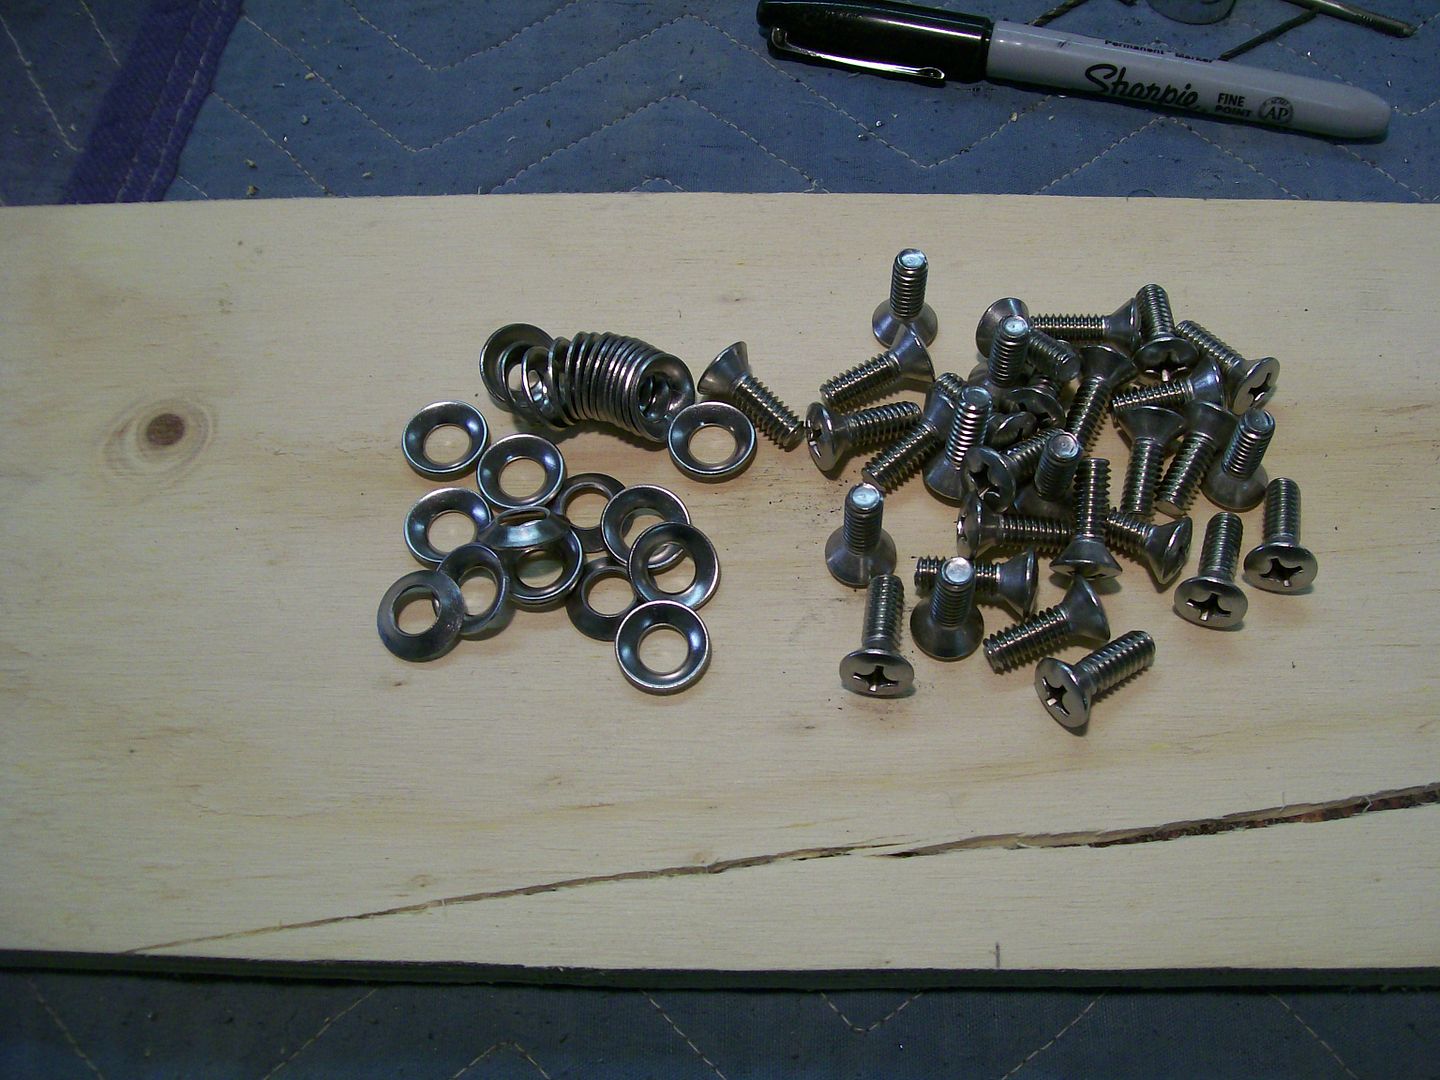 The final fit. I can tighten the screw without the vinyl trying to turn also, and doesn't change the original mounting system. 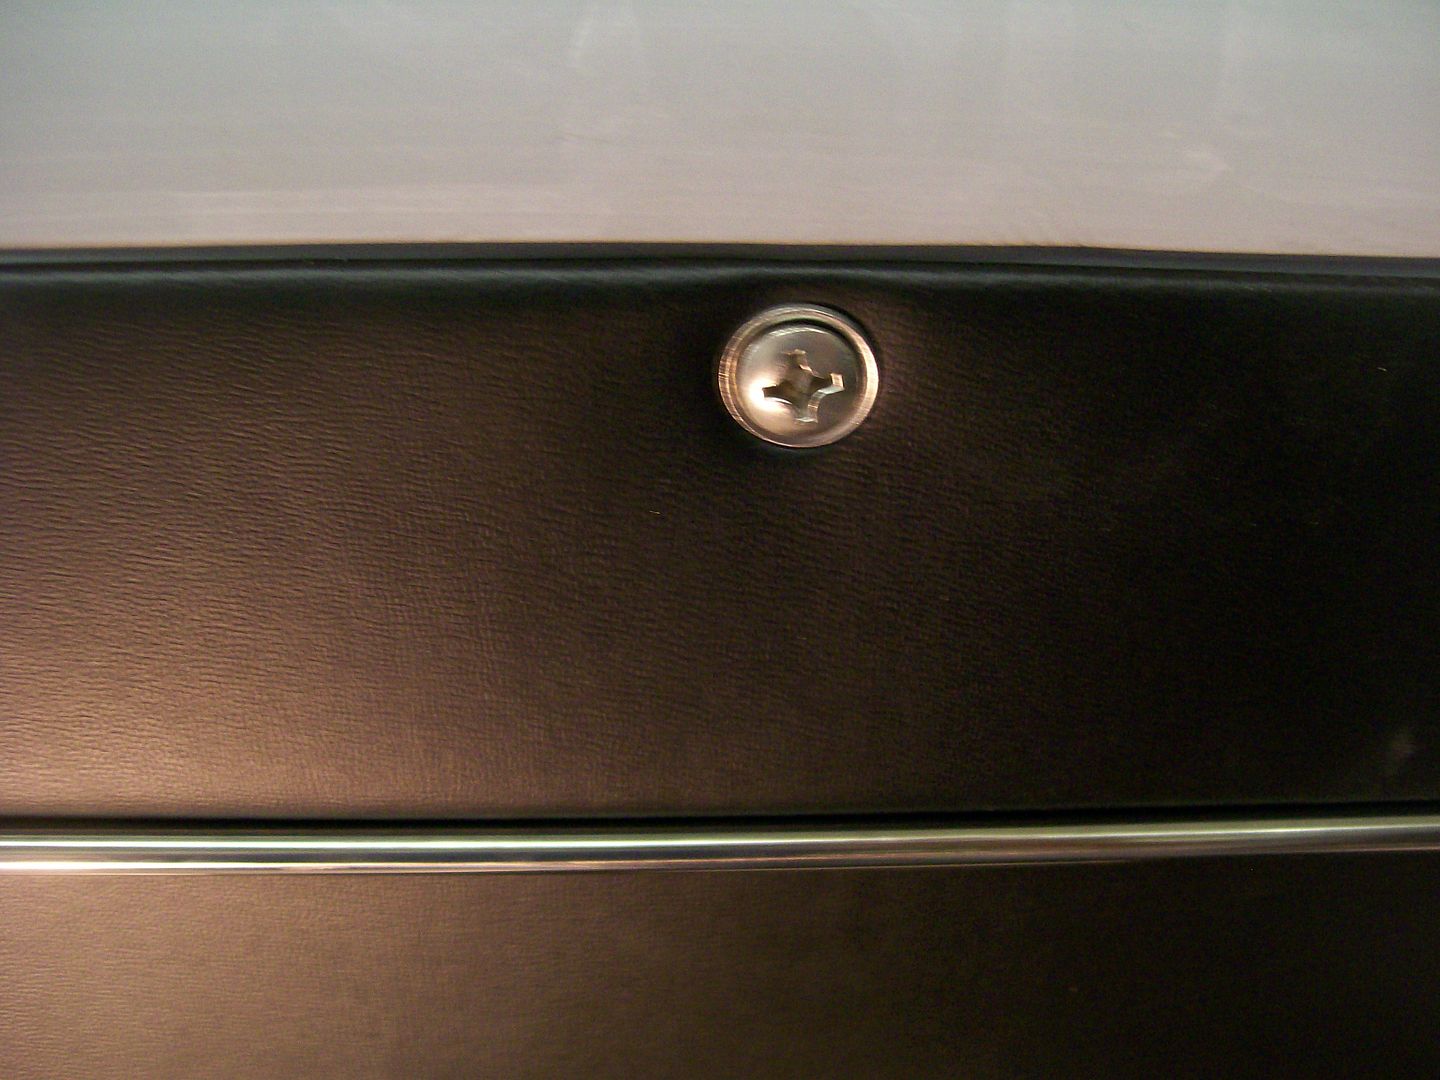 Hoooorah, check one more item off the to do list again. |
|
|
|

|
|
|
#20 |
|
Registered User
Join Date: Aug 2007
Location: Corona, California
Posts: 7,998
|
Re: 1957 Chevy truck re-rebuild
Very nice work.
Kim |
|
|

|
|
|
#21 |
|
Registered User
Join Date: Feb 2013
Location: Lakeside Ariz
Posts: 445
|
Re: 1957 Chevy truck re-rebuild
Looks good. a lot of work for a washer.
Rich |
|
|

|
|
|
#22 |
|
Registered User
Join Date: Aug 2007
Location: Corona, California
Posts: 7,998
|
Re: 1957 Chevy truck re-rebuild
Nice work on the washers.
Kim |
|
|

|
|
|
#23 |
|
A320 Pilot/USAF Retired
Join Date: Mar 2009
Location: Charleston, SC
Posts: 2,629
|
Re: 1957 Chevy truck re-rebuild
Well done!!
__________________
JJ My 1957 build: http://67-72chevytrucks.com/vboard/s...d.php?t=334552 http://www.trifive.com/forums/showthread.php?t=22037 Instagram - Chuckdriver57 |
|
|

|
|
|
#24 |
|
Registered User
Join Date: Aug 2012
Location: Salem Mo
Posts: 652
|
Re: 1957 Chevy truck re-rebuild
Thanks everyone, yes it was work getting the washers made but if there's one thing I've learned, don't look at the clock, just do what you gotta do.
 I did get the carpet, I got it from Classic industries. I had two concerns. 1) I didn't want it to have precut holes for the original steering column or pedals. 2) I was hoping it would go high up the firewall. For the first issue, they were kind enough to open the box and check the precut hole problem and call me back before shipping. For the second issue, I just had to hope. Glad to say.... it goes higher than I expected, which is a good thing. 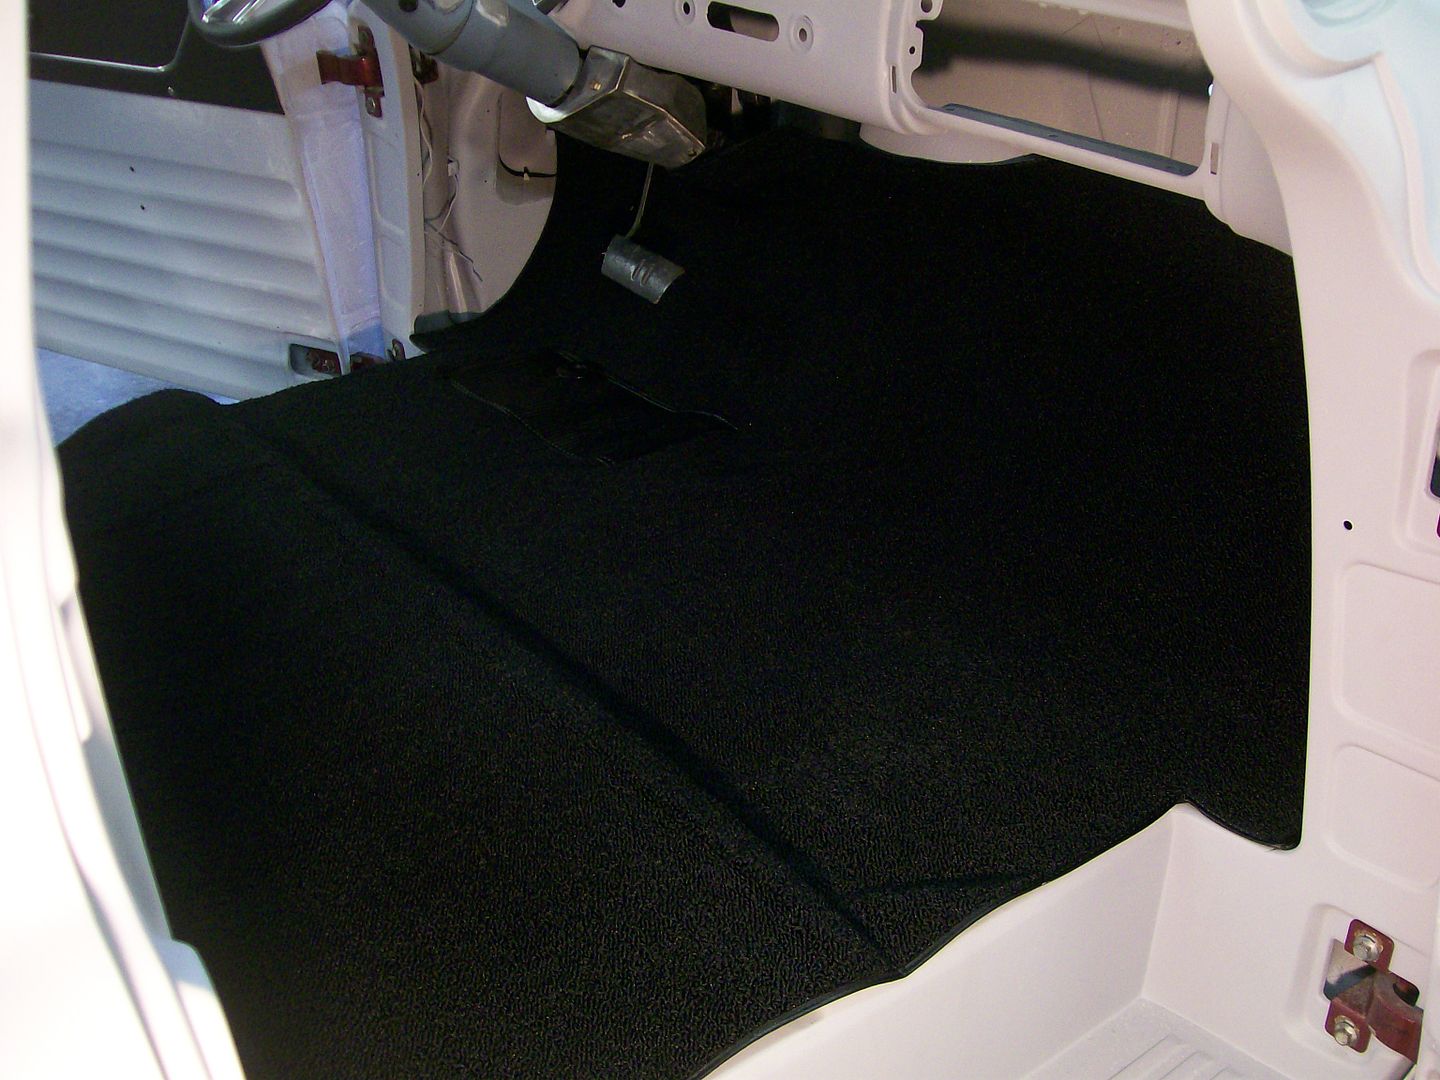 Now time to fit all the seat mounts and tunnel and dimmer switch and steering column, ect. 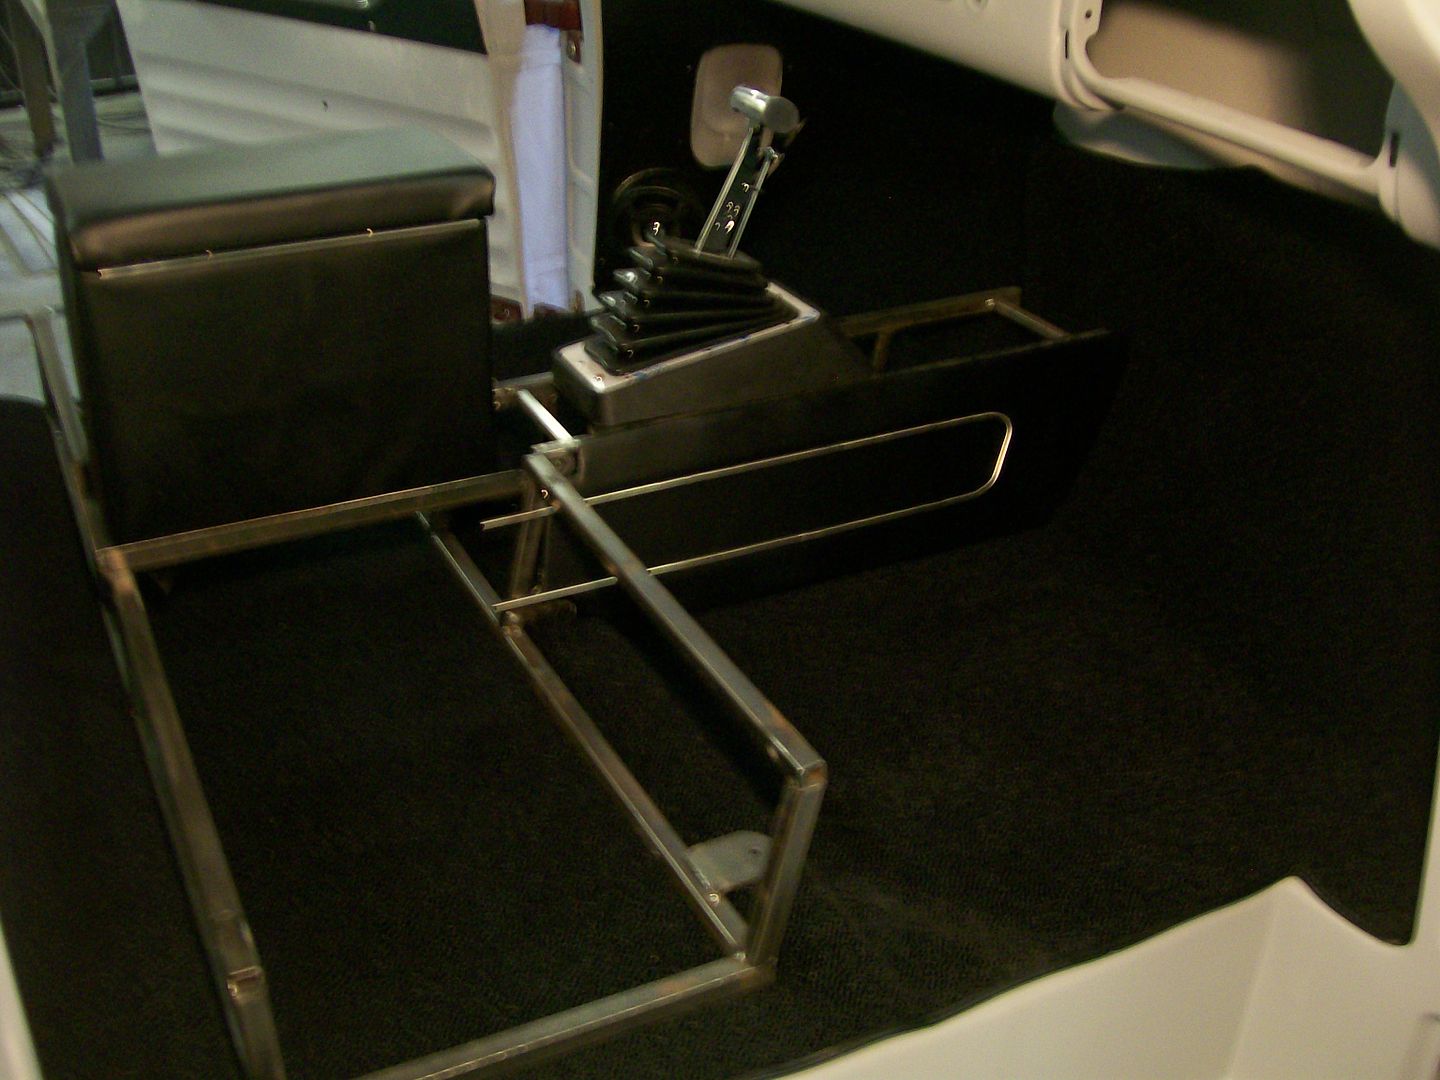
|
|
|

|
|
|
#25 |
|
Registered User
Join Date: Feb 2013
Location: Lakeside Ariz
Posts: 445
|
Re: 1957 Chevy truck re-rebuild
|
|
|

|
 |
| Bookmarks |
|
|