
 |
|
|
|
|
#1 |
|
Registered User
Join Date: Aug 2012
Location: San Luis Obispo
Posts: 62
|
Re: Shucks First Build
I'm not normally a fan of roll pans either, but I agree that it looks good on the step side.
That tailgate latch kit is really cool too! Looks like it was easy to install and looks like a nice part. Good job on the build so far!
__________________
BUILD IT! DRIVE IT! My Build Thread - http://67-72chevytrucks.com/vboard/s...d.php?t=734098 |
|
|

|
|
|
#2 |
|
Registered User
Join Date: Nov 2015
Location: Smethport, PA
Posts: 1,213
|
Re: Shucks First Build
If those lights are legal I think they are great. It will allow the rear end to stay nice and clean looking.
A thought on the bolt heads for the latch on the tail gate...weld studs to the tail gate. You just need short pieces of all thread. Weld them into the holes and grind it smooth.
__________________
85 K30 crew cab dually - Project http://67-72chevytrucks.com/vboard/s...d.php?t=694939 87 Wrangler Rock Crawler - Reason for the project http://www.wranglerforum.com/f330/da...ld-122601.html 04 1500 crew cab http://67-72chevytrucks.com/vboard/s...d.php?t=786514 |
|
|

|
|
|
#3 | |
|
Registered User
Join Date: Nov 2013
Location: Lawrence Kansas
Posts: 229
|
Re: Shucks First Build
Quote:
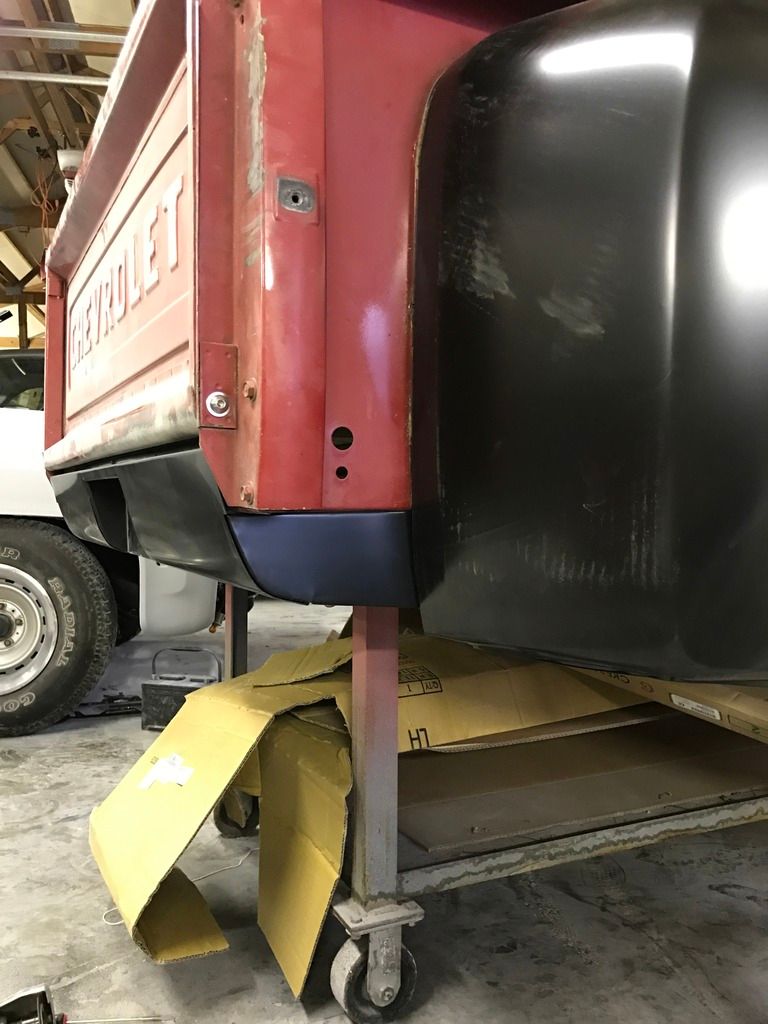 I've seen worse where I live. If those guys that smoke their tail lights with black paint don't get pulled over I sure shouldn't... As for the all thread, I'll probably end up doing one of those billet bolts n2trux referenced. I like your idea though, I still will keep that in mind.
__________________
|
|
|
|

|
|
|
#4 |
|
I'm just glad to be here!
Join Date: Jan 2008
Location: Longview, TX
Posts: 4,788
|
Re: Shucks First Build
We used the same light on Sunburn. Only thing I had different was that we had to have a rear facing red reflector on the back of the truck. I had a couple made that we could attach to the license plate for inspection and general daily driving. But when we went to a show, we could take them off to clean up the rear...
__________________
Karl  1965 Chevy Stepside(Grandpa's Old Blue) and (July 2015 Shop Build!)(2020, the Saga Continues) http://67-72chevytrucks.com/vboard/s...d.php?t=372424 The LST Challenge: http://67-72chevytrucks.com/vboard/s...=1#post7812257 Korbin's 1st Square: "Sunburn" http://67-72chevytrucks.com/vboard/s...d.php?t=418618 1985 GMC Sierra: "White Trash", Korbin's 2nd now... http://67-72chevytrucks.com/vboard/s...d.php?t=632305 Henry - 1984 Chevrolet, Owen's 1st Square |
|
|

|
|
|
#5 | |
|
Registered User
Join Date: Nov 2013
Location: Lawrence Kansas
Posts: 229
|
Re: Shucks First Build
Quote:
__________________
|
|
|
|

|
|
|
#6 |
|
Registered User
Join Date: Nov 2013
Location: Lawrence Kansas
Posts: 229
|
Re: Shucks First Build
Shot some more color today
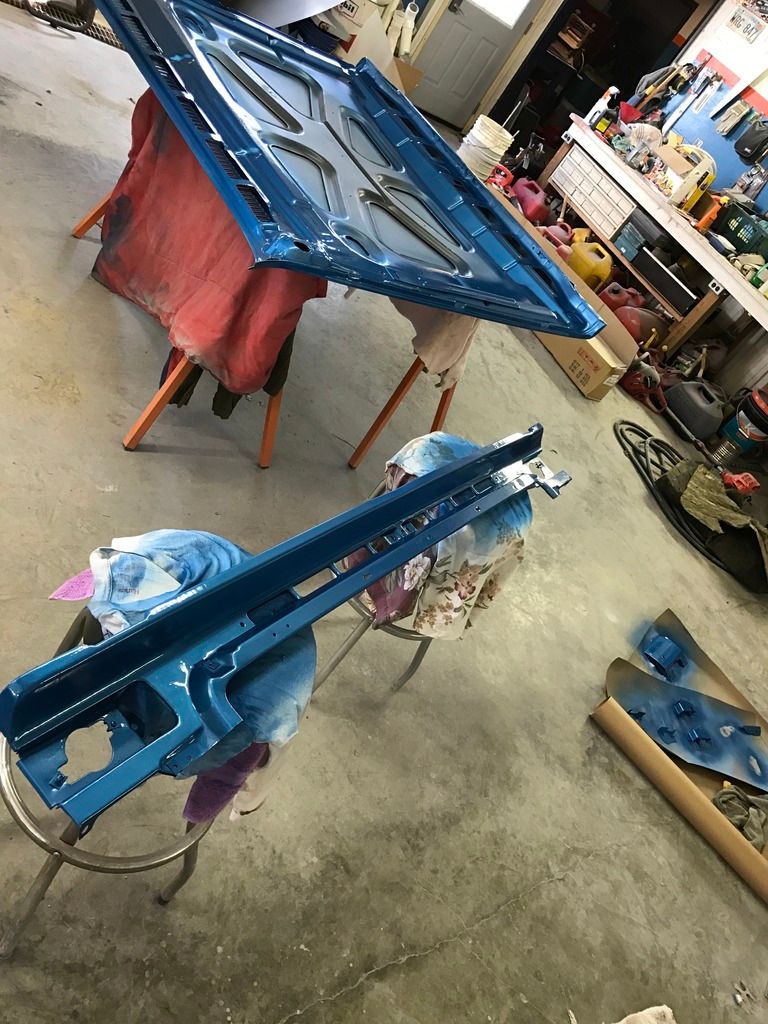 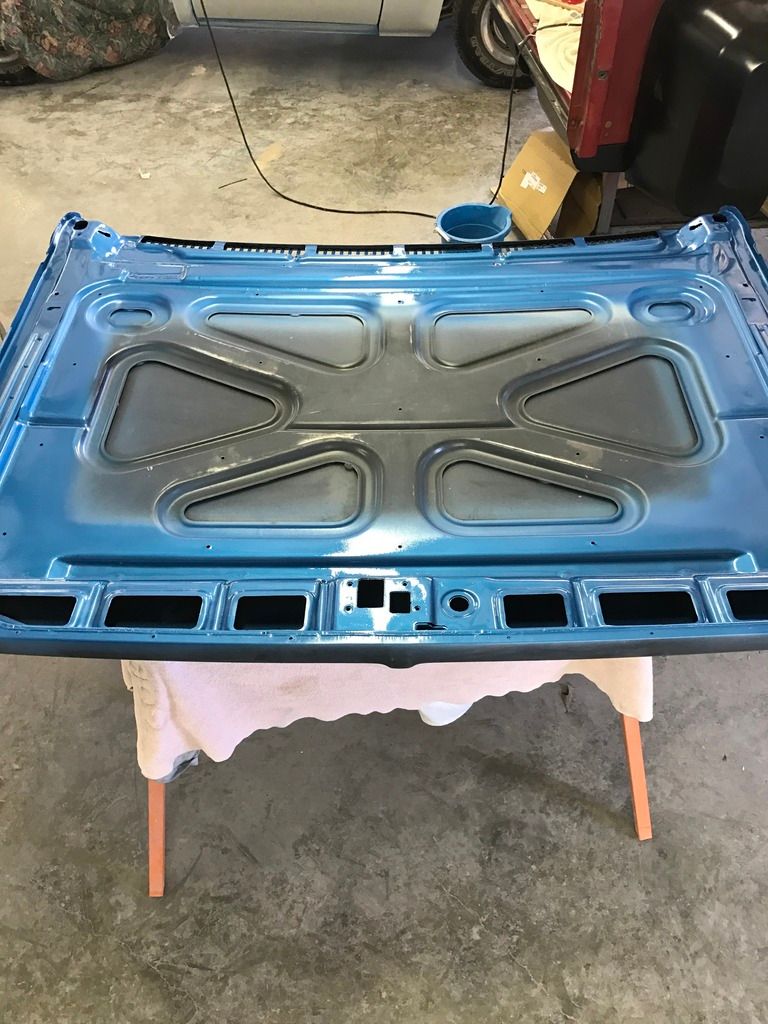 I really want a new one of these but I don't want the cheap plastic that it'll be so I polished mine out. Has it's fair share of dings but I think it'll work. 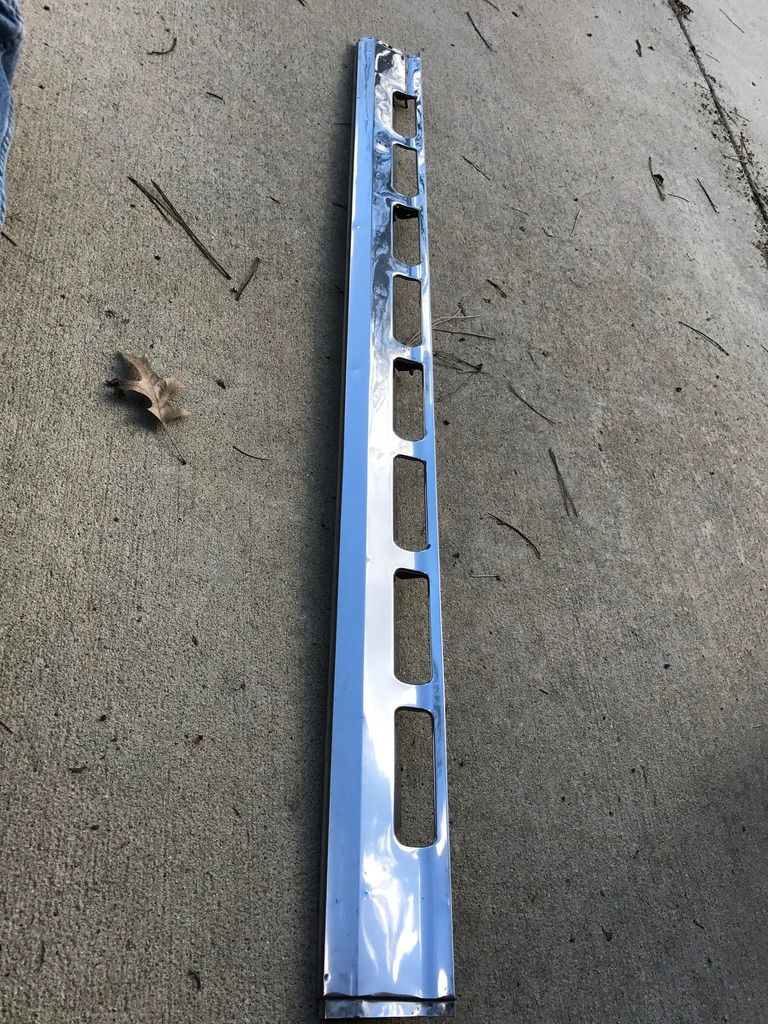
__________________
|
|
|

|
|
|
#7 |
|
Registered User
Join Date: May 2013
Location: Centerville,Ma.
Posts: 1,223
|
Re: Shucks First Build
Looks like you are still moving right along. As far as tailights if you are building a daily driver I would make sure to have 100% legal tail lights with reflectors. If someone hits you it is their fault, but if you don't have legal lighting they have an out. If you are parked with lights off and they hit you they have an excuse for not seeing you without the reflectors. As far as small round marker lamps Crysler products had some nice ones in the late 60's that would work.
http://www.ebay.com/itm/1968-68-dodg...-/371910359817 |
|
|

|
|
|
#8 | |
|
Registered User
Join Date: Nov 2013
Location: Lawrence Kansas
Posts: 229
|
Re: Shucks First Build
Quote:
__________________
|
|
|
|

|
|
|
#9 |
|
Registered User
Join Date: Nov 2013
Location: Lawrence Kansas
Posts: 229
|
Re: Shucks First Build
So I went a wheel store today and found out every wheel I had in mind was backordered for months! They reccomended these Ridlers to me and I do like them. Lots cheaper than any wheel I was wanting and they look pretty decent. Going back up today to finalize the purchase of 255/45/r20 and 295/40/r20 Nitto G2 tires with 20x8 and 20x9.5 wheels.
I went with the center wheels, grey centers with the brushed chrome lip. 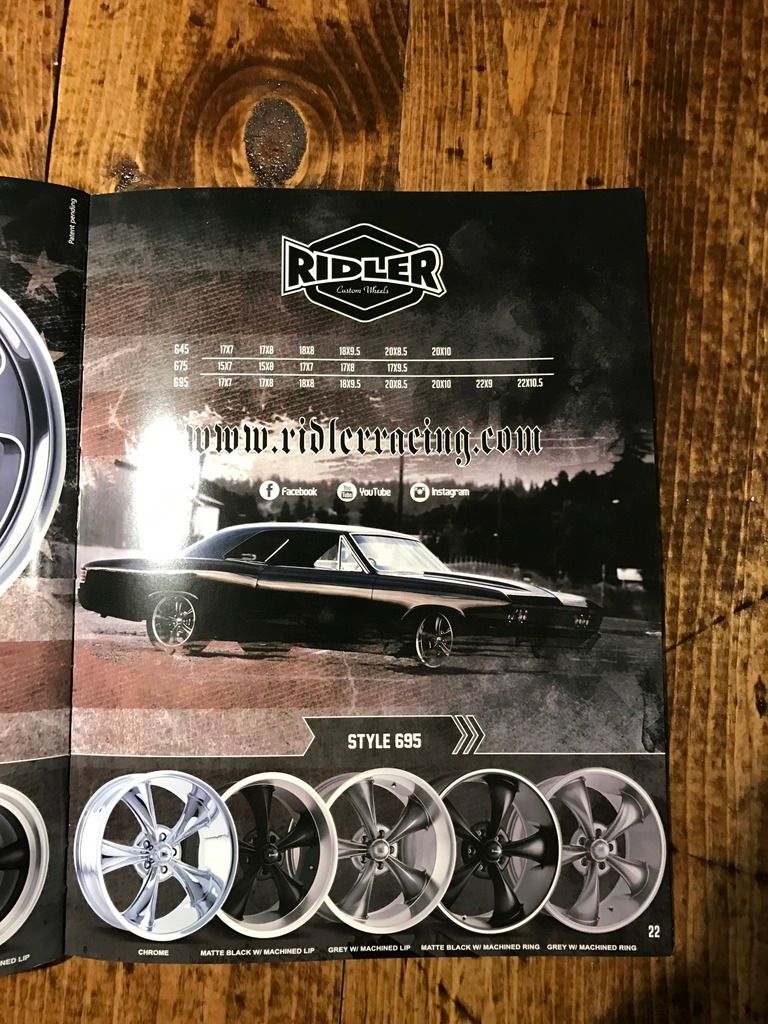
__________________
|
|
|

|
|
|
#10 |
|
Registered User
Join Date: Nov 2013
Location: Lawrence Kansas
Posts: 229
|
Re: Shucks First Build
__________________
|
|
|

|
|
|
#11 |
|
I'm just glad to be here!
Join Date: Jan 2008
Location: Longview, TX
Posts: 4,788
|
Re: Shucks First Build
Looks good. This was a good choice in wheels for that blue.
What backspace did you end up with front and rear?
__________________
Karl  1965 Chevy Stepside(Grandpa's Old Blue) and (July 2015 Shop Build!)(2020, the Saga Continues) http://67-72chevytrucks.com/vboard/s...d.php?t=372424 The LST Challenge: http://67-72chevytrucks.com/vboard/s...=1#post7812257 Korbin's 1st Square: "Sunburn" http://67-72chevytrucks.com/vboard/s...d.php?t=418618 1985 GMC Sierra: "White Trash", Korbin's 2nd now... http://67-72chevytrucks.com/vboard/s...d.php?t=632305 Henry - 1984 Chevrolet, Owen's 1st Square |
|
|

|
|
|
#12 | |
|
Registered User
Join Date: Nov 2013
Location: Lawrence Kansas
Posts: 229
|
Re: Shucks First Build
Quote:
20x8.5 with 4.75 20x10 with 5.5
__________________
|
|
|
|

|
|
|
#13 |
|
Registered User
Join Date: Nov 2013
Location: Lawrence Kansas
Posts: 229
|
Re: Shucks First Build
Still not done with rust repair, don't know how I missed this on the bed.
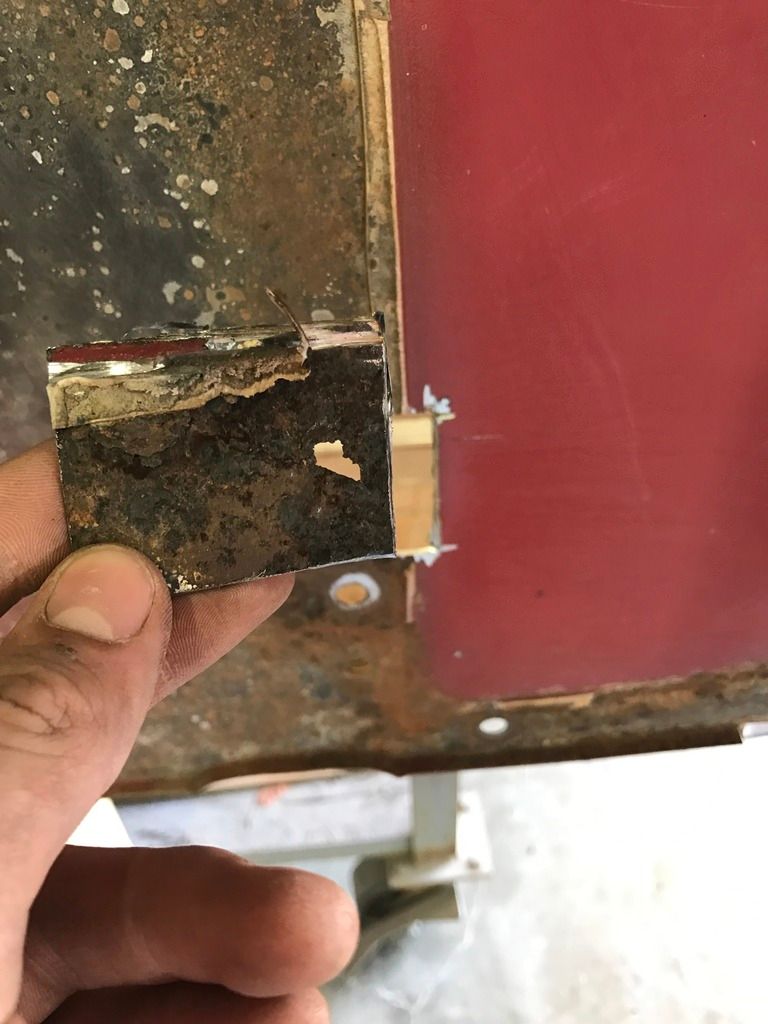 Riveted the roll pan on 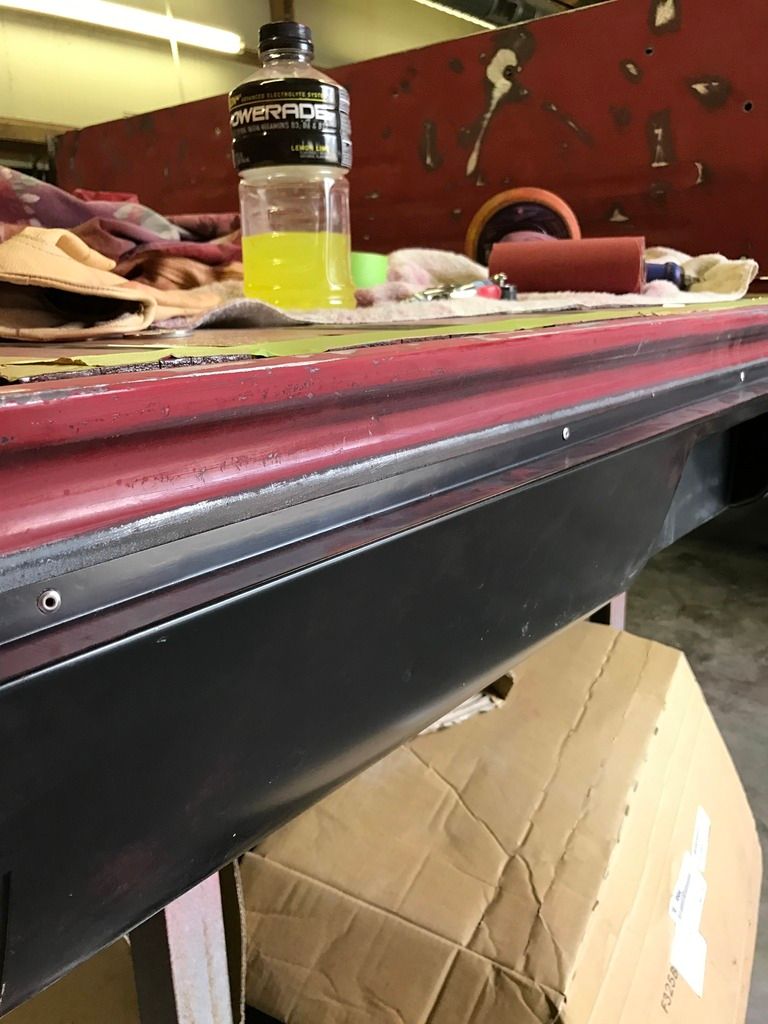 Bedsides sanded, scrapes and scars gone. Ready for primer after rust is fixed. Picking up a new front piece for the bed tomorrow. The PO actually used the bed for what it was intended for and it was pretty beat up. 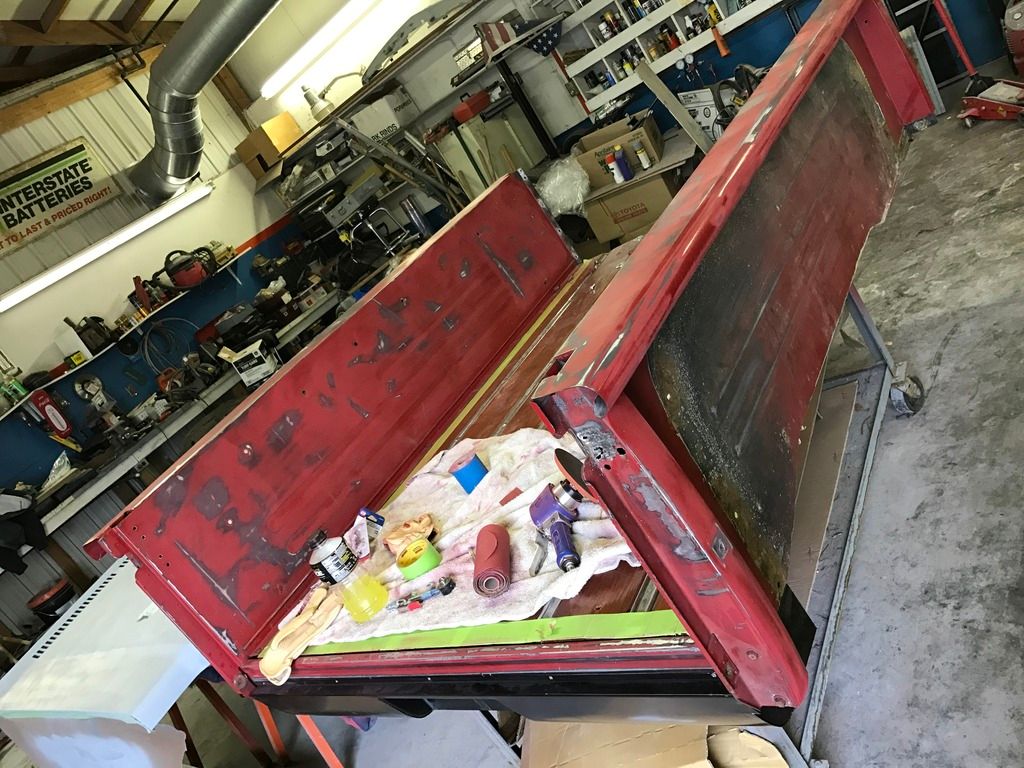 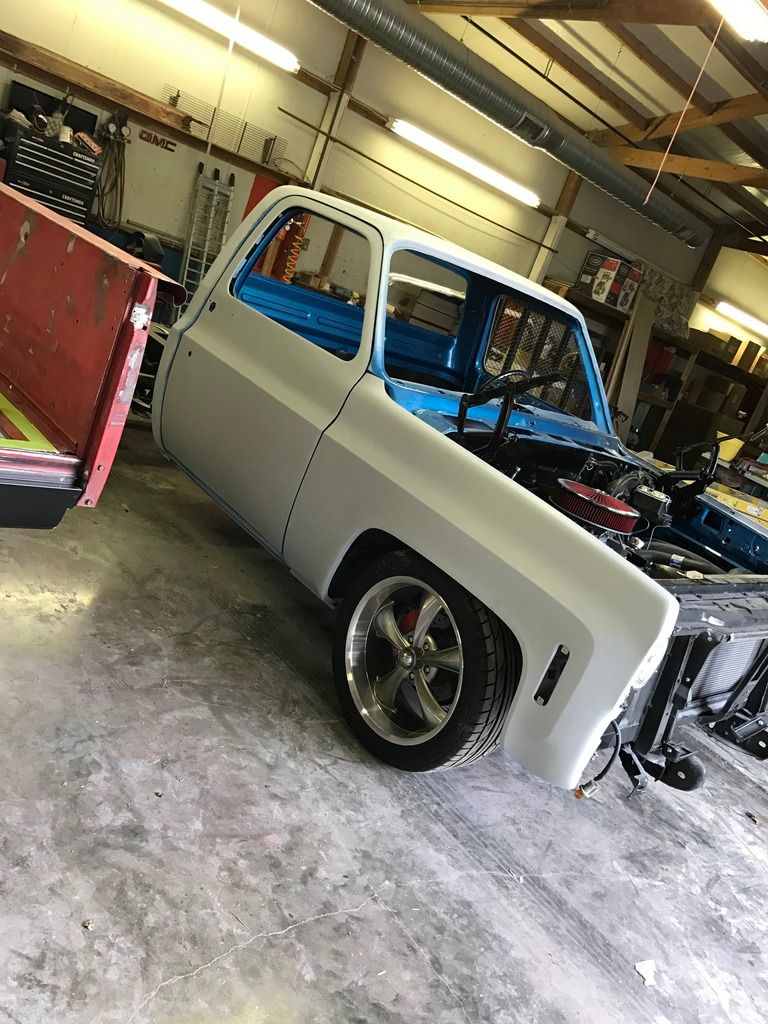 Getting so close!
__________________
|
|
|

|
|
|
#14 |
|
Registered User
Join Date: May 2013
Location: Centerville,Ma.
Posts: 1,223
|
Re: Shucks First Build
You are coming right along. If I can give a hint, take those nice new wheels and tires off until painted buffed and cleaned. Just wet sanding mud will be a pain to clean off of them. When you are ready to paint I would jack the truck up a foot and remove the front tires it will make painting the rockers and lower areas much easier. A 3 ft. ladder will let you reach the roof easy enough, or just stand on the frame behind the cab. I am assuming you are going to paint the cab and bed separately.
|
|
|

|
|
|
#15 | |
|
Registered User
Join Date: Nov 2013
Location: Lawrence Kansas
Posts: 229
|
Re: Shucks First Build
Quote:
__________________
Last edited by Shucks; 04-19-2017 at 09:48 PM. |
|
|
|

|
|
|
#16 |
|
I'm just glad to be here!
Join Date: Jan 2008
Location: Longview, TX
Posts: 4,788
|
Re: Shucks First Build
I would paint them separate. Or at least have a space wide enough to work between the cab and the bed front panel. That way you can spray the entire truck at once and not have to worry with rough overspray on the front of the bed or the back of the cab.
__________________
Karl  1965 Chevy Stepside(Grandpa's Old Blue) and (July 2015 Shop Build!)(2020, the Saga Continues) http://67-72chevytrucks.com/vboard/s...d.php?t=372424 The LST Challenge: http://67-72chevytrucks.com/vboard/s...=1#post7812257 Korbin's 1st Square: "Sunburn" http://67-72chevytrucks.com/vboard/s...d.php?t=418618 1985 GMC Sierra: "White Trash", Korbin's 2nd now... http://67-72chevytrucks.com/vboard/s...d.php?t=632305 Henry - 1984 Chevrolet, Owen's 1st Square |
|
|

|
|
|
#17 |
|
Registered User
Join Date: May 2013
Location: Centerville,Ma.
Posts: 1,223
|
Re: Shucks First Build
First complete paint would be easier by doing one half at a time. You will want to paint the rear fenders off the bed too as it is real tricky getting between fender top and bed rails.
|
|
|

|
|
|
#18 |
|
Registered User
Join Date: Nov 2013
Location: Lawrence Kansas
Posts: 229
|
Re: Shucks First Build
Correct, I would paint the fenders and the tailgate off the bed. But sounds like I'll paint it in halves now. Thanks for the advice guys. Paint is coming soon! Just a few things to wrap up on the bed.
__________________
|
|
|

|
|
|
#19 |
|
Registered User
Join Date: May 2013
Location: Centerville,Ma.
Posts: 1,223
|
Re: Shucks First Build
When painting a metallic color you can get away with painting parts that join at different angles without color match issues as long as it is coming from the same mix . It is when you paint two adjoining panels such as a door and fender that you can sometimes have a difference due to spraying conditions. It you look at any vehicle you will notice the top and side look lighter or darker from the way the light reflects.
|
|
|

|
|
|
#20 |
|
Registered User
Join Date: Nov 2013
Location: Lawrence Kansas
Posts: 229
|
Re: Shucks First Build
Well I made a minor mistake mistake today. I went To shave my stake pockets and got one done then realized I need them open to assemble my latches... So I had to tear it all apart. Luckily I only did one. But I'll just leave them open. Super embarrassing.
Got a lot done though. Got some rail plates welded in, a new headboard, and fixed the rust on the side of the bed. 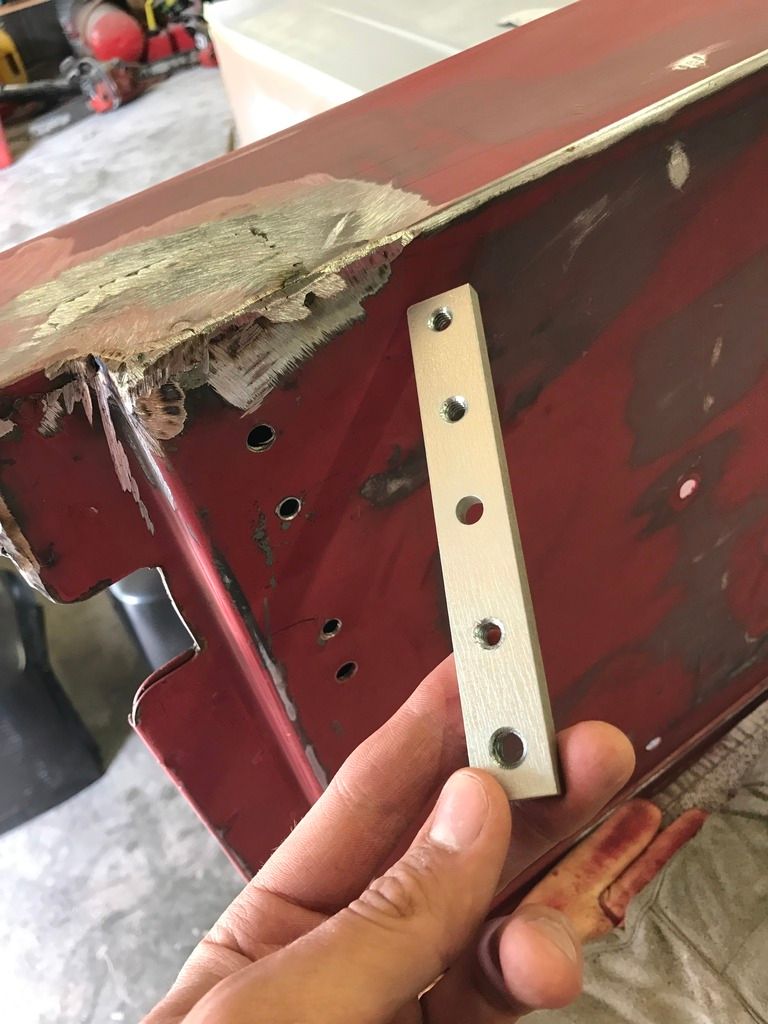 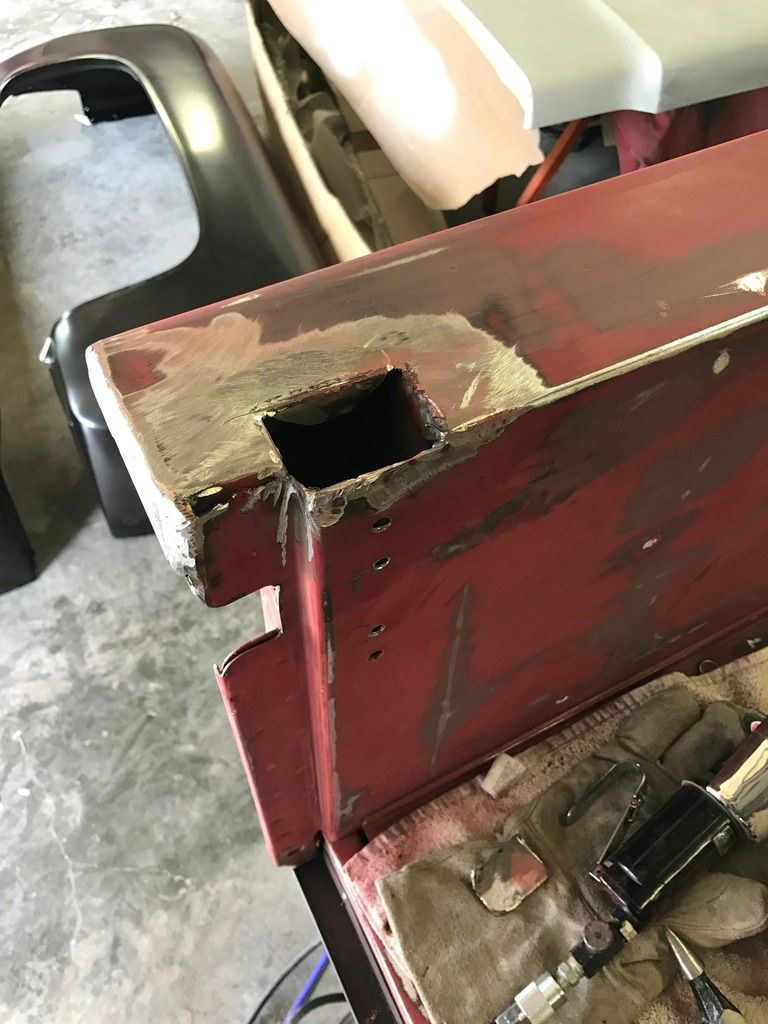 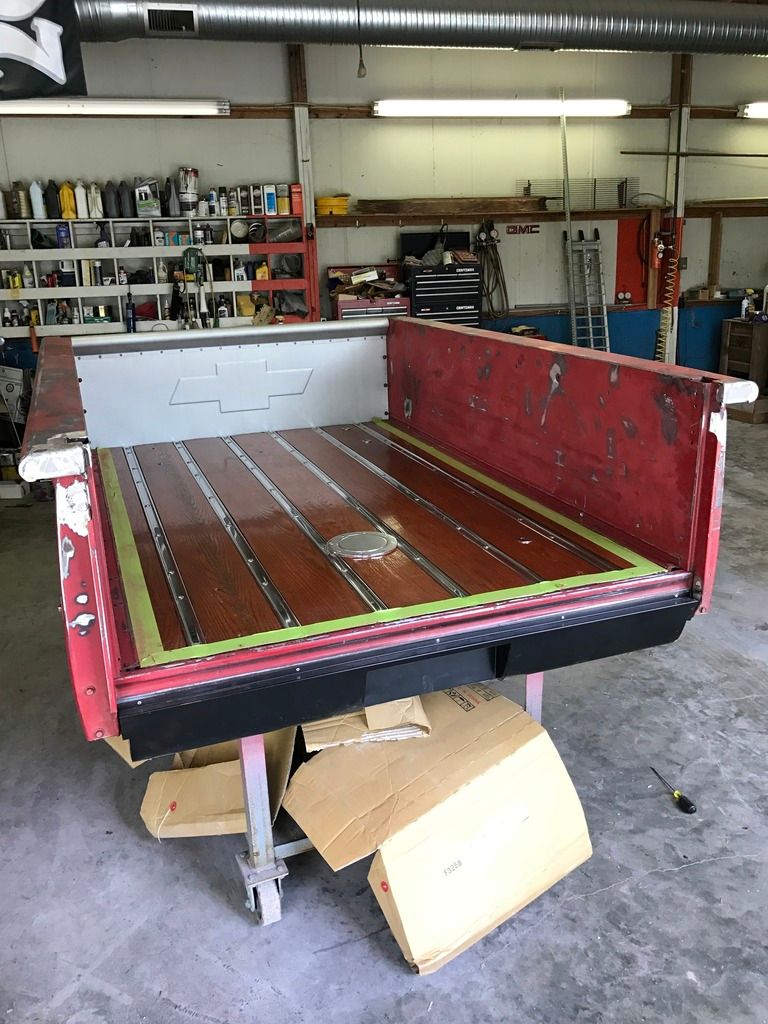 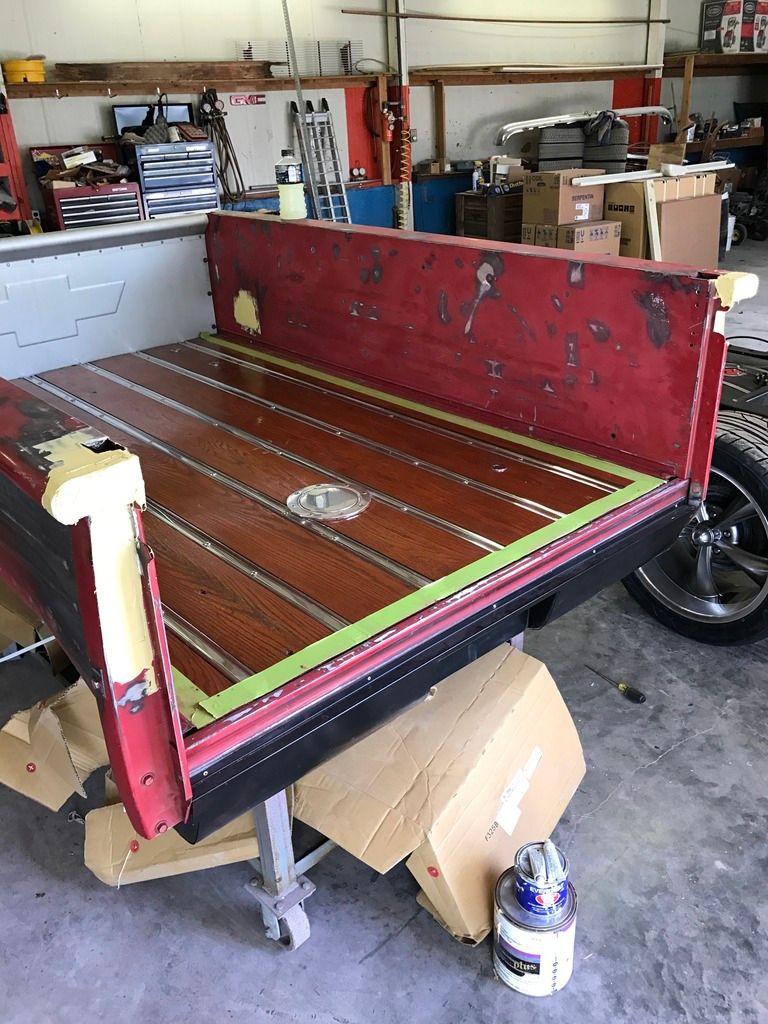
__________________
|
|
|

|
|
|
#21 |
|
Registered User
Join Date: Nov 2013
Location: Lawrence Kansas
Posts: 229
|
Re: Shucks First Build
__________________
|
|
|

|
|
|
#22 |
|
I'm just glad to be here!
Join Date: Jan 2008
Location: Longview, TX
Posts: 4,788
|
Re: Shucks First Build
Keep at it.
One word of advise I have for you from the last pictures. The masking on the bed floor is all loose and this can cause you problems when you spray paint and clear. Its not too bad when doing primer and all, but the loose folds can trap dust and dry paint. When you are shooting the color and clear, keep your masking tight and any seams or folds taped down. This keeps from having pockets that dry overspray can land and then get kicked back up when air passes over the area when spraying the next coat.
__________________
Karl  1965 Chevy Stepside(Grandpa's Old Blue) and (July 2015 Shop Build!)(2020, the Saga Continues) http://67-72chevytrucks.com/vboard/s...d.php?t=372424 The LST Challenge: http://67-72chevytrucks.com/vboard/s...=1#post7812257 Korbin's 1st Square: "Sunburn" http://67-72chevytrucks.com/vboard/s...d.php?t=418618 1985 GMC Sierra: "White Trash", Korbin's 2nd now... http://67-72chevytrucks.com/vboard/s...d.php?t=632305 Henry - 1984 Chevrolet, Owen's 1st Square |
|
|

|
|
|
#23 | |
|
Registered User
Join Date: Nov 2013
Location: Lawrence Kansas
Posts: 229
|
Re: Shucks First Build
Quote:
__________________
|
|
|
|

|
|
|
#24 |
|
Registered User
Join Date: Oct 2015
Location: PNW
Posts: 3,615
|
Re: Shucks First Build
This is the best thread I've seen about the painting process. A lot of practical advice coming from guys with experience and a guy willing to learn and not being offended by being given advice. I've learned a bunch. Thanks!
Truck is coming together nicely and will be very cool to drive. You have good endurance and it is going to pay off. |
|
|

|
|
|
#25 | |
|
Registered User
Join Date: Nov 2013
Location: Lawrence Kansas
Posts: 229
|
Re: Shucks First Build
Quote:
__________________
|
|
|
|

|
 |
| Bookmarks |
|
|