
 |
|
|
#276 |
|
Registered User
Join Date: May 2011
Location: Anderson SC
Posts: 3,898
|
Re: '55 International Metal/Body/Paint Work
Definitely, and I might contact Line-X directly to let them know that he's not giving the customer what they're paying for. If it was something our shop paid to have done then it would be stripped and redone, and any damage to the bed's body/paint work would be taken care of as well by the shop that sprayed it. The owner arranged to have the liner sprayed himself and paid them directly, so it's not our place to complain, the owner would have to do that. He hasn't seen it in person yet since we picked it up for him. If we were the paying customer then we probably wouldn't have loaded it up and brought it back to the shop, we'd be working out the details of having it stripped and resprayed properly.
__________________
Project Goldilocks '66 C10 Short Fleet BBW Build '65 C10 Highly Detailed Stock Restoration Thread '78 Camaro Targa Roof Build '55 International Metal/Body/Paint Work '66 F100 Full Rotisserie Restoration '40 Packard 120 Convertible Coupe Restoration How To Restore and Detail an Original Gauge Cluster How To Detail Sand Body Panels, Edges, Corners, Etc |
|
|

|
|
|
#277 | |
|
Registered User
Join Date: May 2011
Location: Anderson SC
Posts: 3,898
|
Re: '55 International Metal/Body/Paint Work
Quote:
I do want to say that I'm not against Line-X in any way; I'll just find another dealer to have future work done. They have the best looking liners IMO.
__________________
Project Goldilocks '66 C10 Short Fleet BBW Build '65 C10 Highly Detailed Stock Restoration Thread '78 Camaro Targa Roof Build '55 International Metal/Body/Paint Work '66 F100 Full Rotisserie Restoration '40 Packard 120 Convertible Coupe Restoration How To Restore and Detail an Original Gauge Cluster How To Detail Sand Body Panels, Edges, Corners, Etc |
|
|
|

|
|
|
#278 |
|
Registered User
Join Date: May 2011
Location: Anderson SC
Posts: 3,898
|
Re: '55 International Metal/Body/Paint Work
Bed and fenders are sanded/buffed and mounted.
Guide coated with sharpie marks. 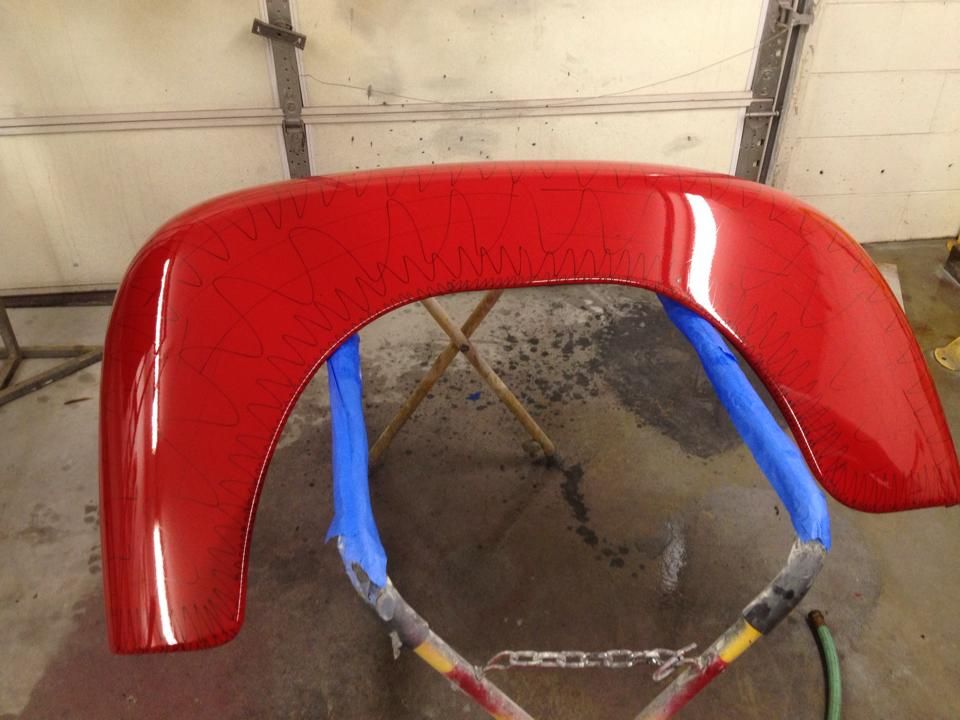 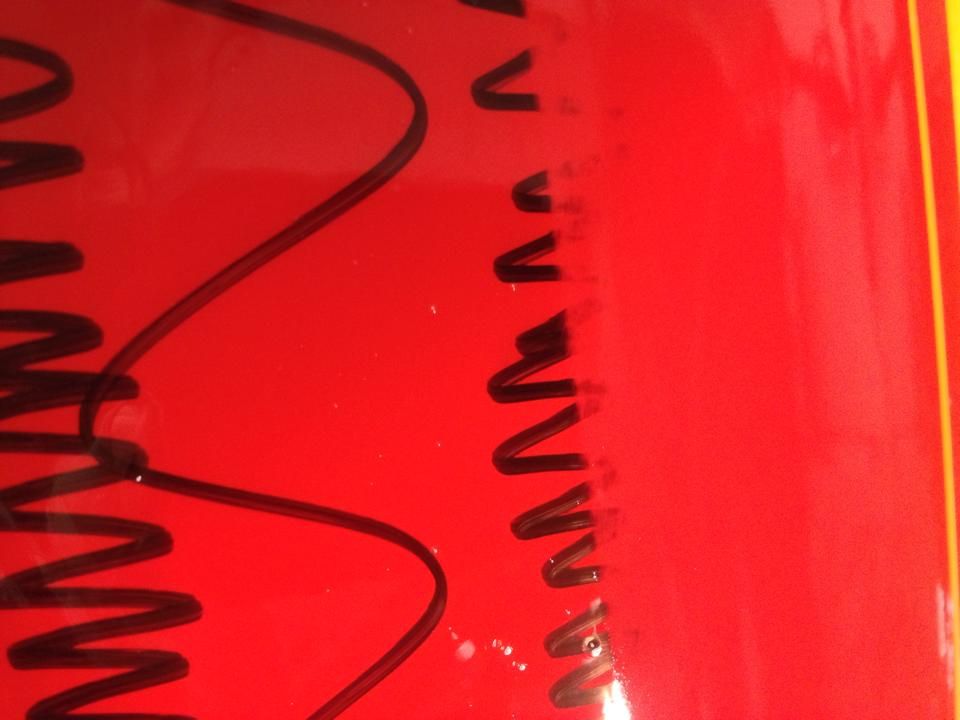 After blocking with 1000 grit, marked some areas to go over again. 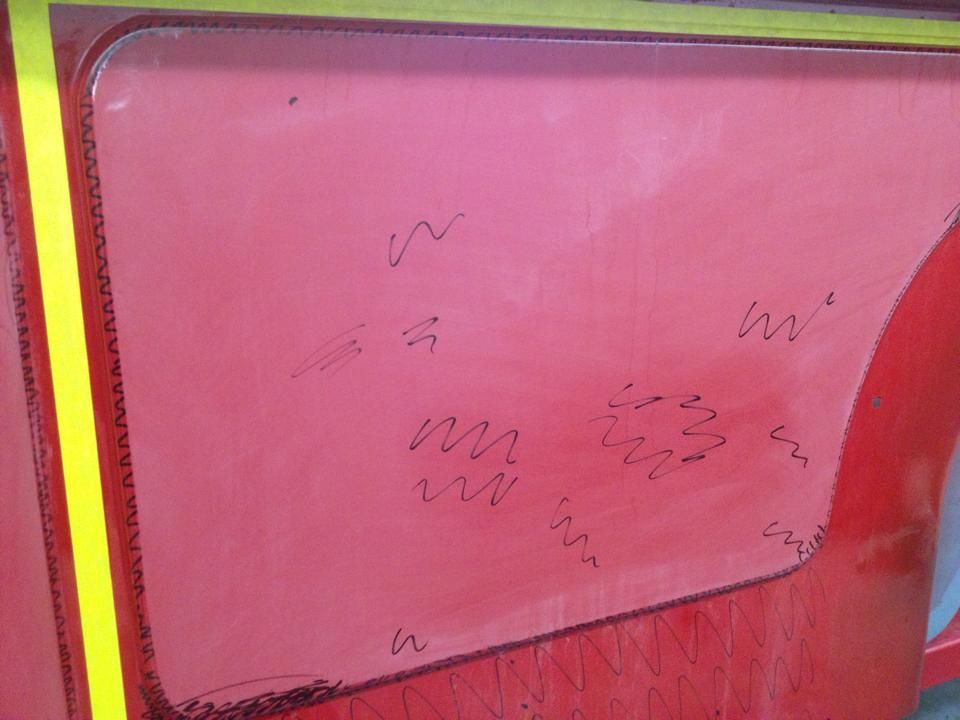 Guide coated with powdered charcoal before wetsanding with 2000. 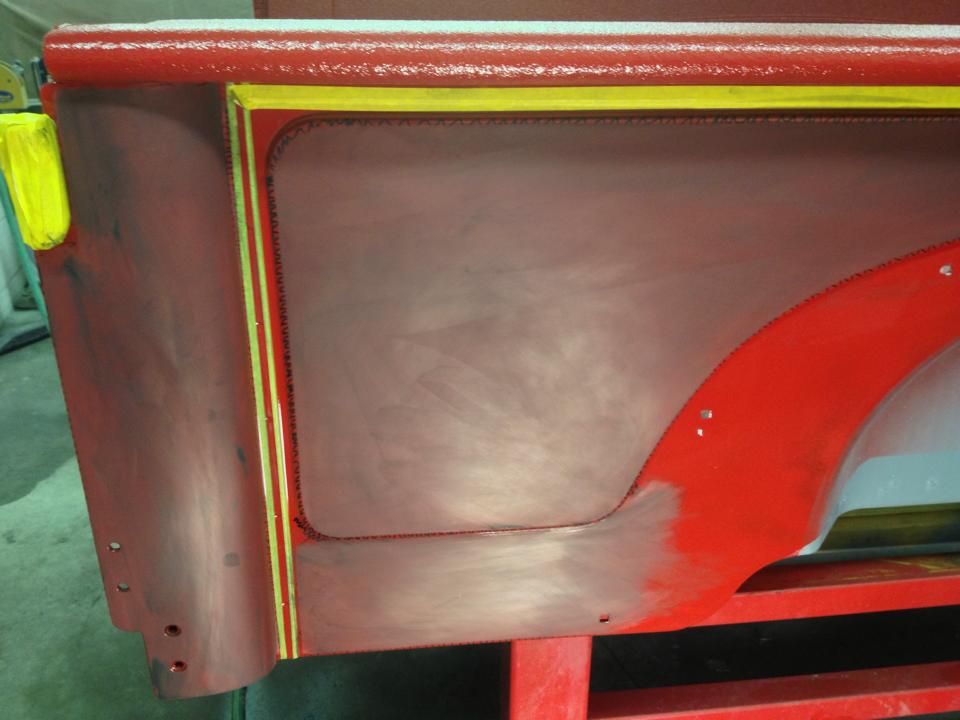 Fenderwells shot with bed liner after sanding with 2000, 2500, and buffing. 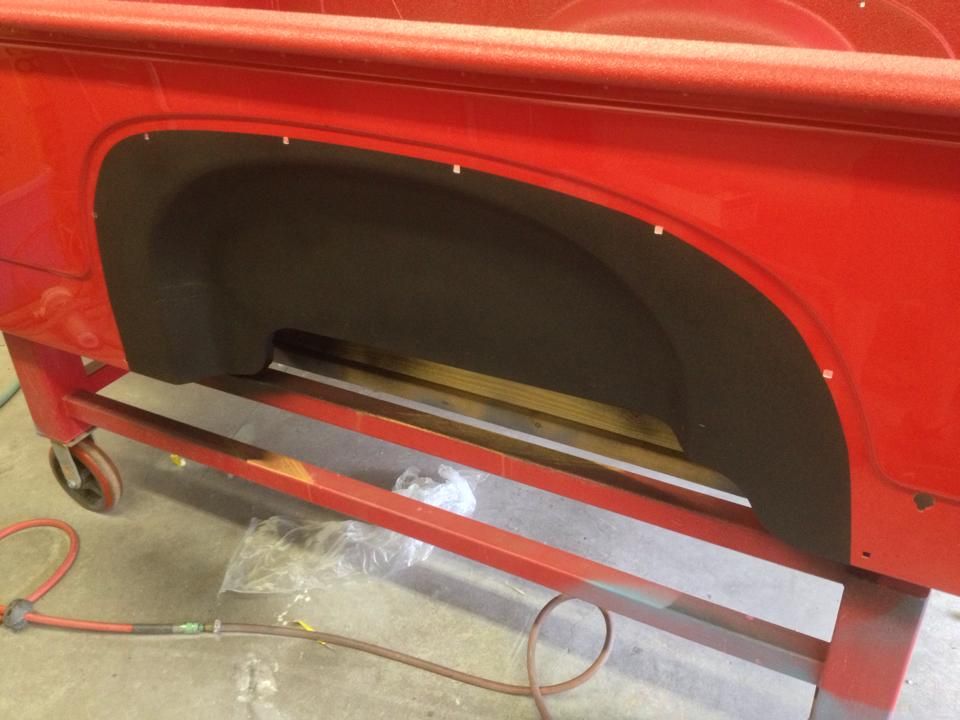 Fenders bolted on. 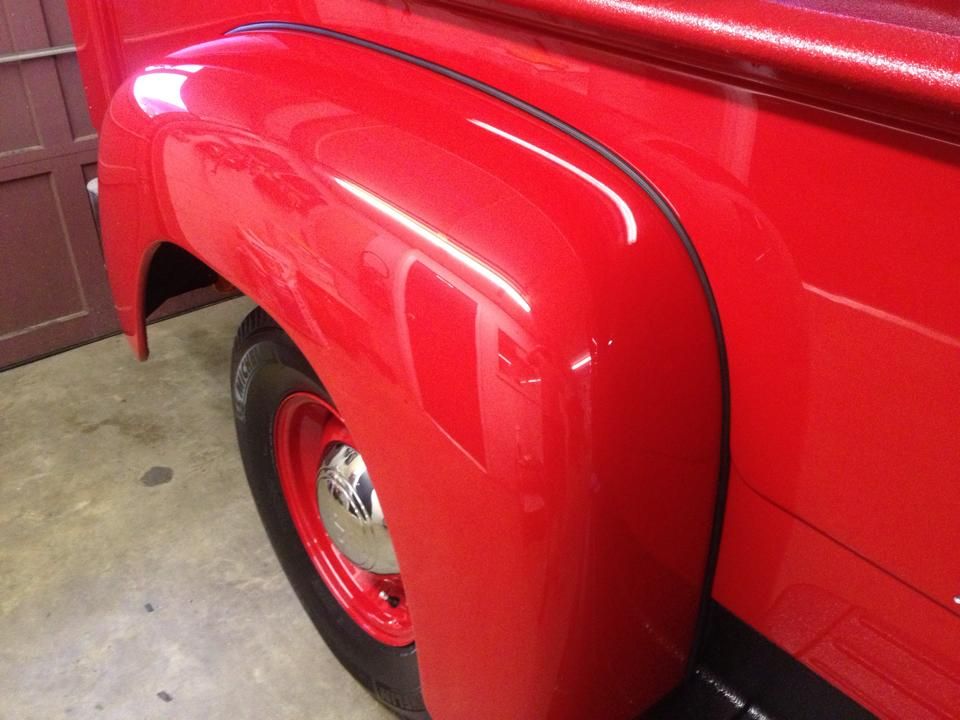 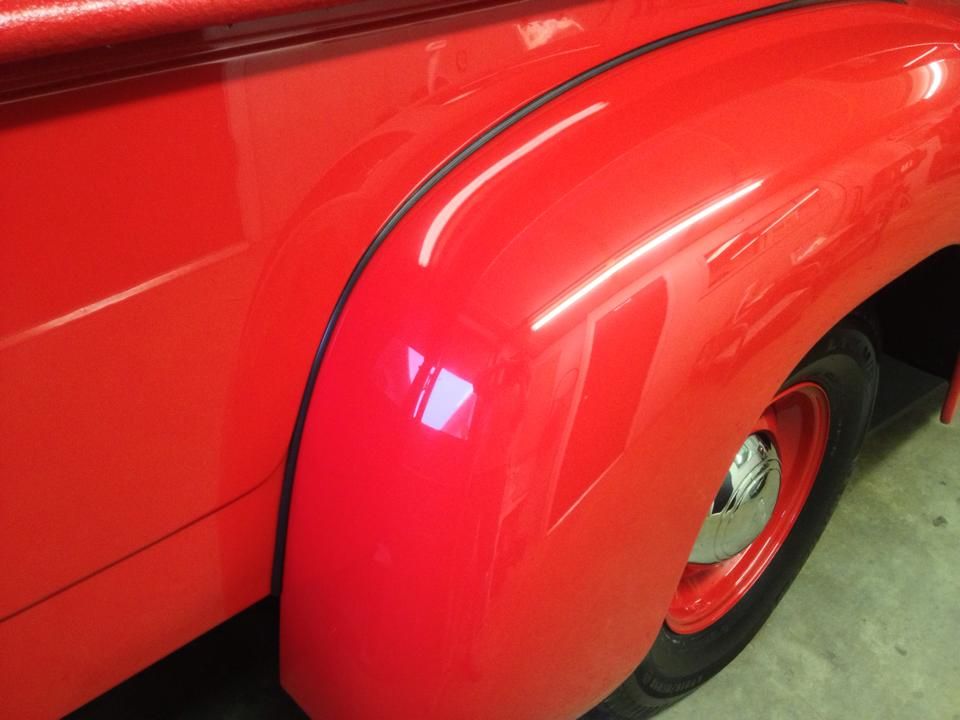 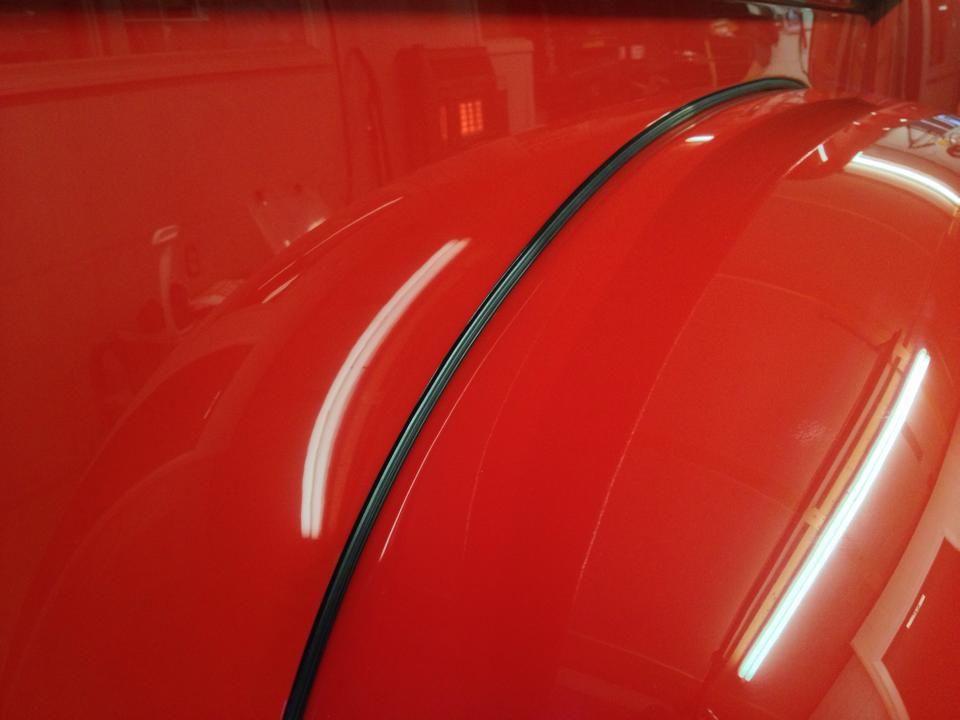 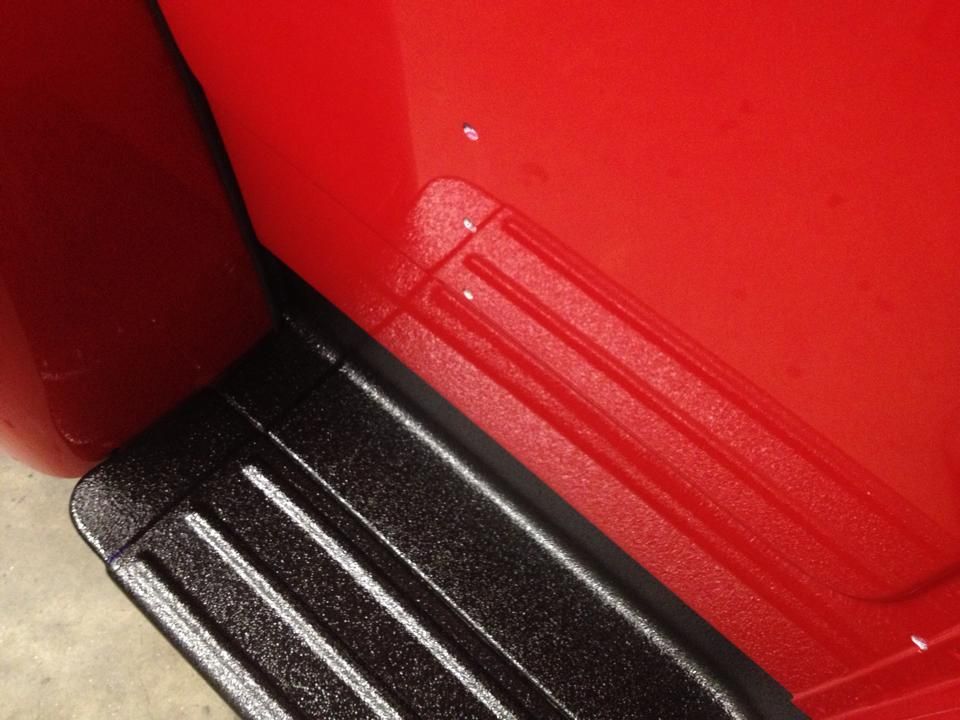 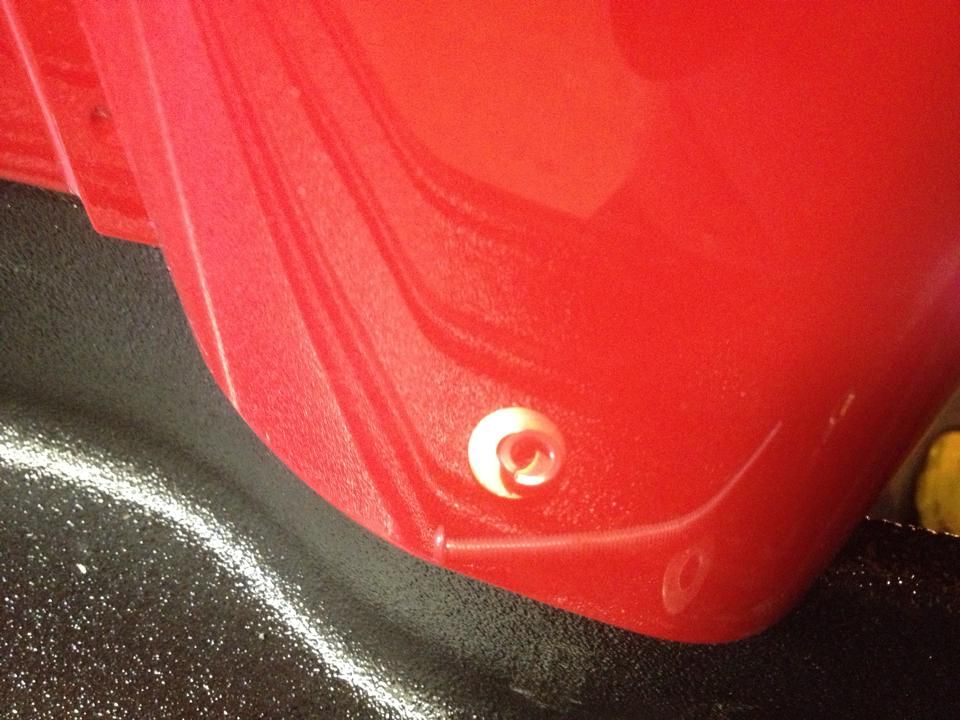
__________________
Project Goldilocks '66 C10 Short Fleet BBW Build '65 C10 Highly Detailed Stock Restoration Thread '78 Camaro Targa Roof Build '55 International Metal/Body/Paint Work '66 F100 Full Rotisserie Restoration '40 Packard 120 Convertible Coupe Restoration How To Restore and Detail an Original Gauge Cluster How To Detail Sand Body Panels, Edges, Corners, Etc |
|
|

|
|
|
#279 |
|
Registered User
Join Date: Apr 2011
Location: .
Posts: 3,104
|
Re: '55 International Metal/Body/Paint Work
Is there any way you might do a video on applying the powered charcoal and sanding process? Man if that question doesn't make me out to sound like a total newbie.....
Best paint and body work out there. Finish to perfection. |
|
|

|
|
|
#280 |
|
Registered User
Join Date: Jan 2013
Location: Leonardtown, MD
Posts: 1,647
|
Re: '55 International Metal/Body/Paint Work
   We're talking car show quality here comparable to something that only gets driven out of the trailer into the event... and he will be hauling with it  Can't blame him, I'd be showing it off too... As always, awesome work! 
__________________
Robert |
|
|

|
|
|
#281 | |
|
Registered User
Join Date: Apr 2003
Location: Indep, MO
Posts: 5,893
|
Re: '55 International Metal/Body/Paint Work
Quote:
I've been using it for everything. Even the SEM guide coat will clog a bit, especially in finer grits, this stuff doesn't. Plus which, the first thing I do is drop my new can of SEM guide coat and snap the ^%$@$%^ newfangled non-replaceable spray tips off, leaving me with a useless can of guide coat. I have three in stock now, I think. I can drop the 3m stuff, pick it up and keep right on truckin. It's good stuff. Beautiful work, BTW. Something for us all to aspire to.
__________________
Boppa's Old Yeller Truck Build, Old Yeller's New Heart! Project Buzz Bomb Flyin' Low! |
|
|
|

|
|
|
#282 | |||
|
Registered User
Join Date: May 2011
Location: Anderson SC
Posts: 3,898
|
Re: '55 International Metal/Body/Paint Work
Quote:
Here's a vid that shows dry guide coat in action. Quote:
Quote:
__________________
Project Goldilocks '66 C10 Short Fleet BBW Build '65 C10 Highly Detailed Stock Restoration Thread '78 Camaro Targa Roof Build '55 International Metal/Body/Paint Work '66 F100 Full Rotisserie Restoration '40 Packard 120 Convertible Coupe Restoration How To Restore and Detail an Original Gauge Cluster How To Detail Sand Body Panels, Edges, Corners, Etc |
|||
|
|

|
|
|
#283 |
|
Registered User
Join Date: May 2011
Location: Anderson SC
Posts: 3,898
|
Re: '55 International Metal/Body/Paint Work
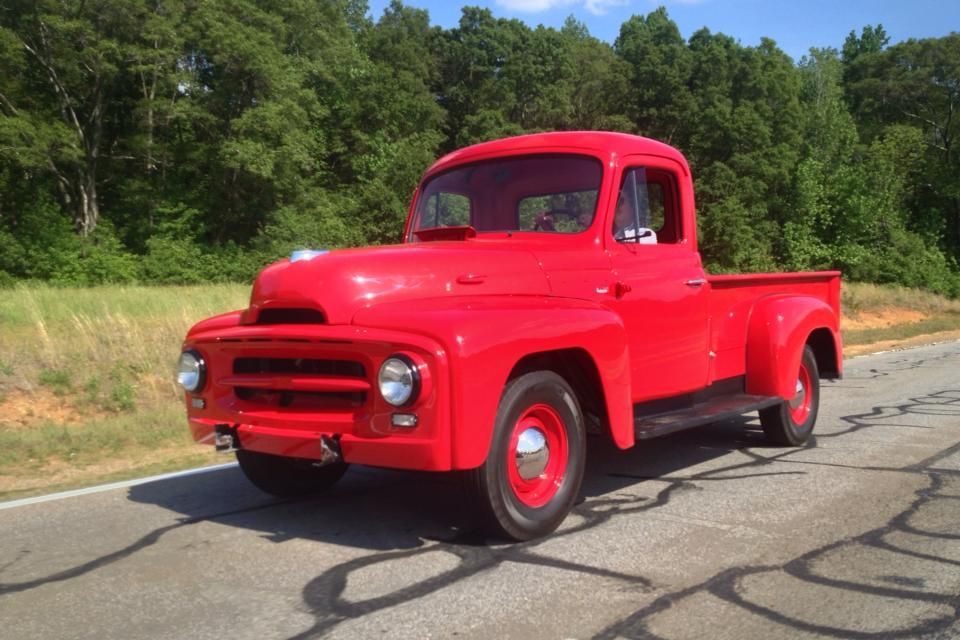
First drive out to the exhaust shop to have the tail pipe finished up now that the bed is on. The owner dropped off a tailgate and front bumper; those and tail lights are just about the last things it needs.
__________________
Project Goldilocks '66 C10 Short Fleet BBW Build '65 C10 Highly Detailed Stock Restoration Thread '78 Camaro Targa Roof Build '55 International Metal/Body/Paint Work '66 F100 Full Rotisserie Restoration '40 Packard 120 Convertible Coupe Restoration How To Restore and Detail an Original Gauge Cluster How To Detail Sand Body Panels, Edges, Corners, Etc |
|
|

|
|
|
#284 |
|
Registered User
Join Date: Oct 2009
Location: canton ga
Posts: 12,728
|
Re: '55 International Metal/Body/Paint Work
That is a very sharp truck .
|
|
|

|
|
|
#285 |
|
Proprietor of Dale's Corner
 Join Date: Nov 2012
Location: Vacaville , CA
Posts: 16,243
|
Re: '55 International Metal/Body/Paint Work
Nice....extremely nice
__________________
"Some Days Chickens And Some Days Feathers" Dale XNGH ECV Sam Brannan 1004 R.I.P. 67ChevyRedneck R.I.P. Grumpy Old Man R.I.P. FleetsidePaul |
|
|

|
|
|
#286 |
|
Registered User
Join Date: May 2011
Location: Anderson SC
Posts: 3,898
|
Re: '55 International Metal/Body/Paint Work
Thanks!!
__________________
Project Goldilocks '66 C10 Short Fleet BBW Build '65 C10 Highly Detailed Stock Restoration Thread '78 Camaro Targa Roof Build '55 International Metal/Body/Paint Work '66 F100 Full Rotisserie Restoration '40 Packard 120 Convertible Coupe Restoration How To Restore and Detail an Original Gauge Cluster How To Detail Sand Body Panels, Edges, Corners, Etc |
|
|

|
|
|
#287 |
|
Registered User
Join Date: May 2011
Location: Anderson SC
Posts: 3,898
|
Re: '55 International Metal/Body/Paint Work
I'm working on making a tailgate for it, nearly have it finished.
Center section made on our bead roller. 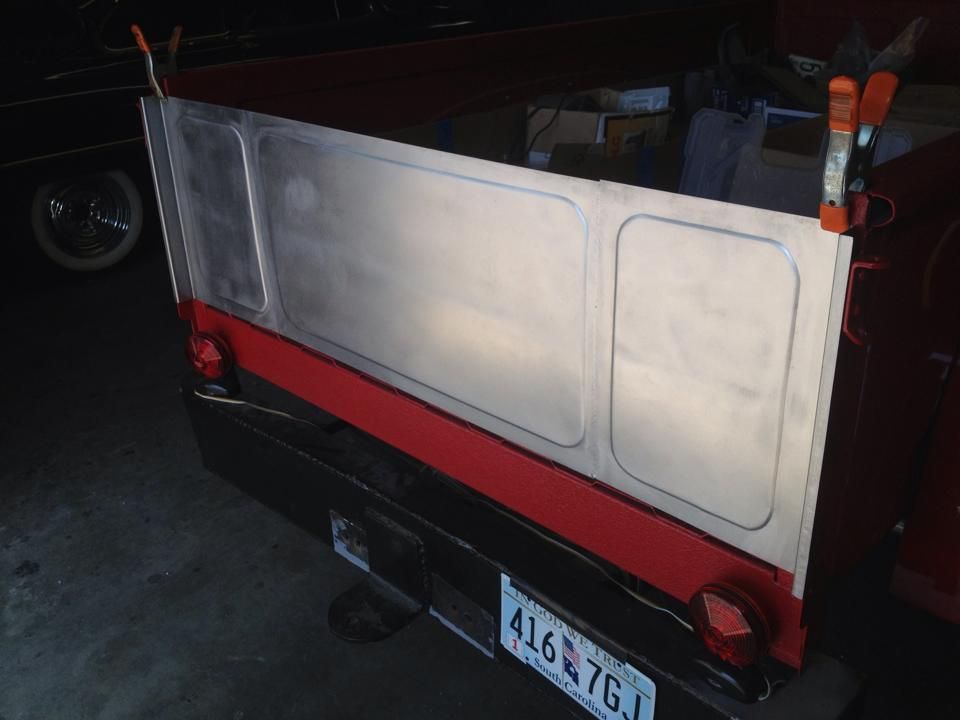 Section of the old upper tube. Has sheetmetal wrapped around it in a "p" shape. Couldn't get any of the local fab shops to make this for us so we did it ourselves. 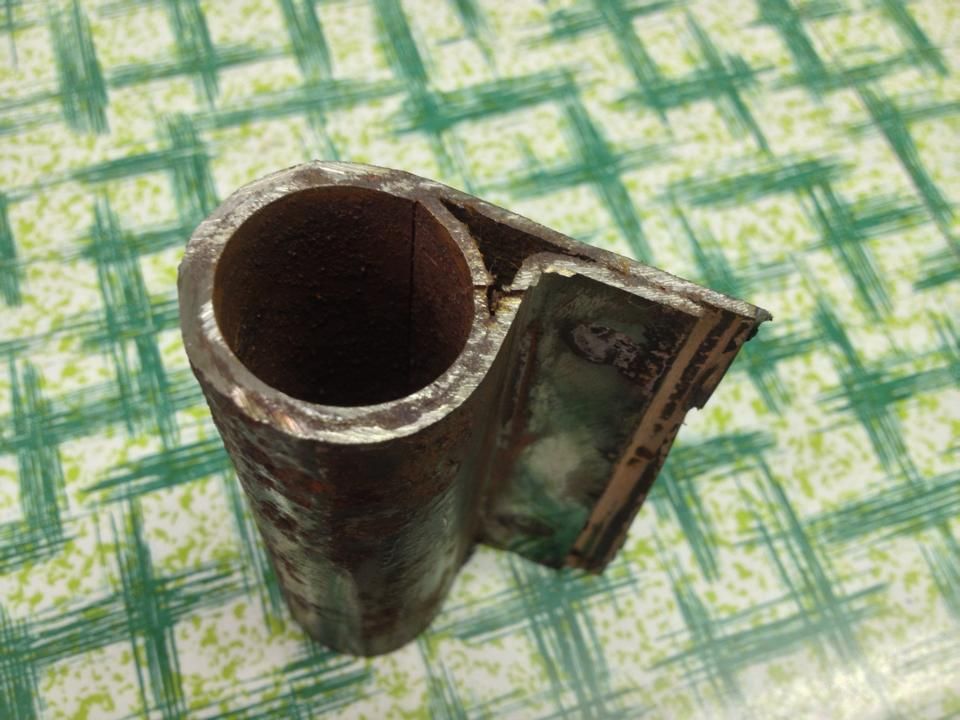 Making the wrap in three sections so it would bend easier. I broke the edge 90* then lined up the three panels with a piece of square tubing. 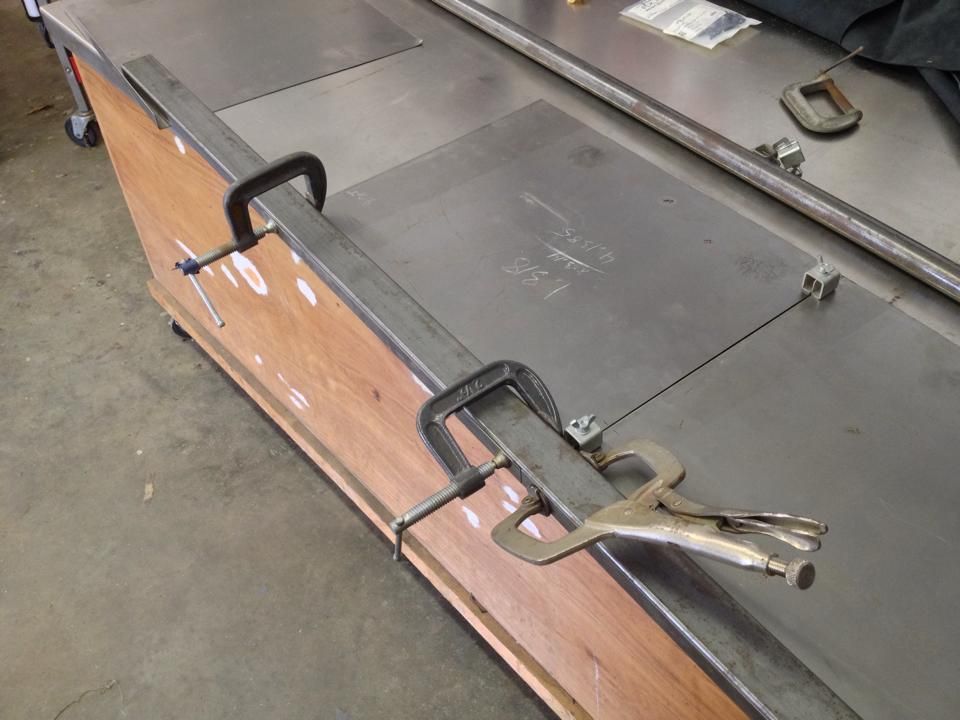 Tubing and sheetmetal cleaned and shot with weld-thru primer. 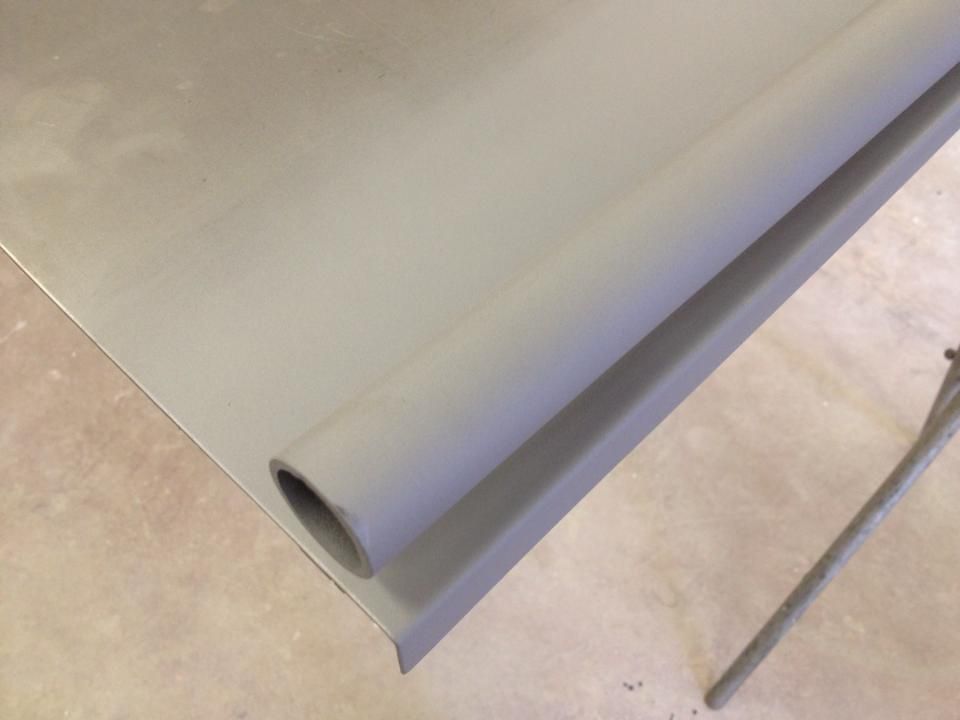 Tubing and panels aligned and tacked in place. 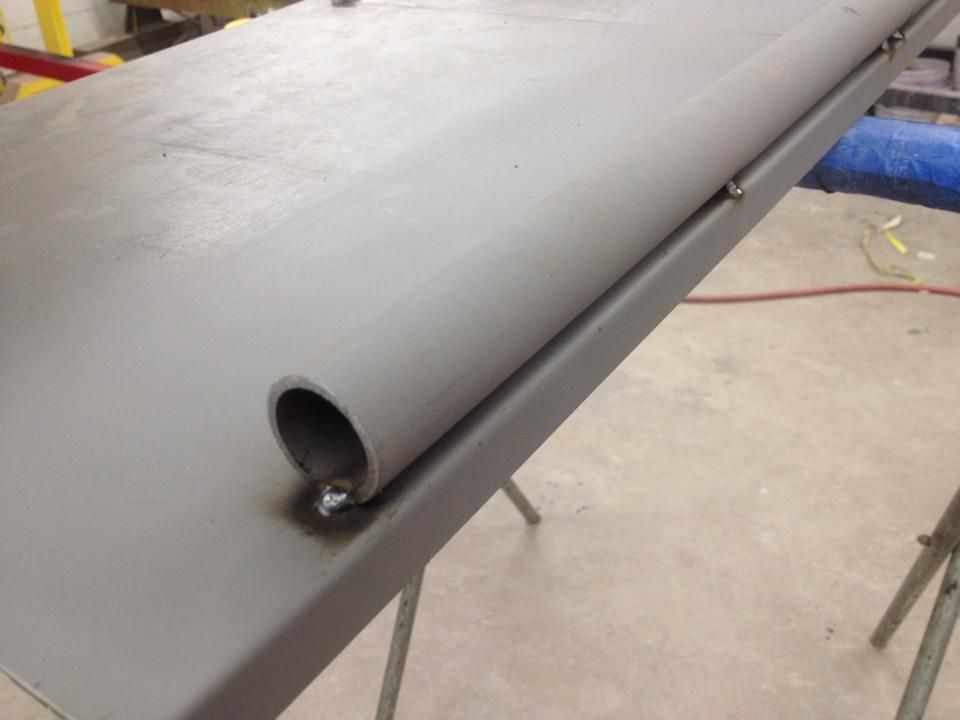 Used one of our carts to help hold the tube while we rolled the metal around it. Had to reposition the tube halfway through the roll. I made the sheetmetal sections about a foot longer to give us more leverage and have room to drill holes for the ratchet straps. 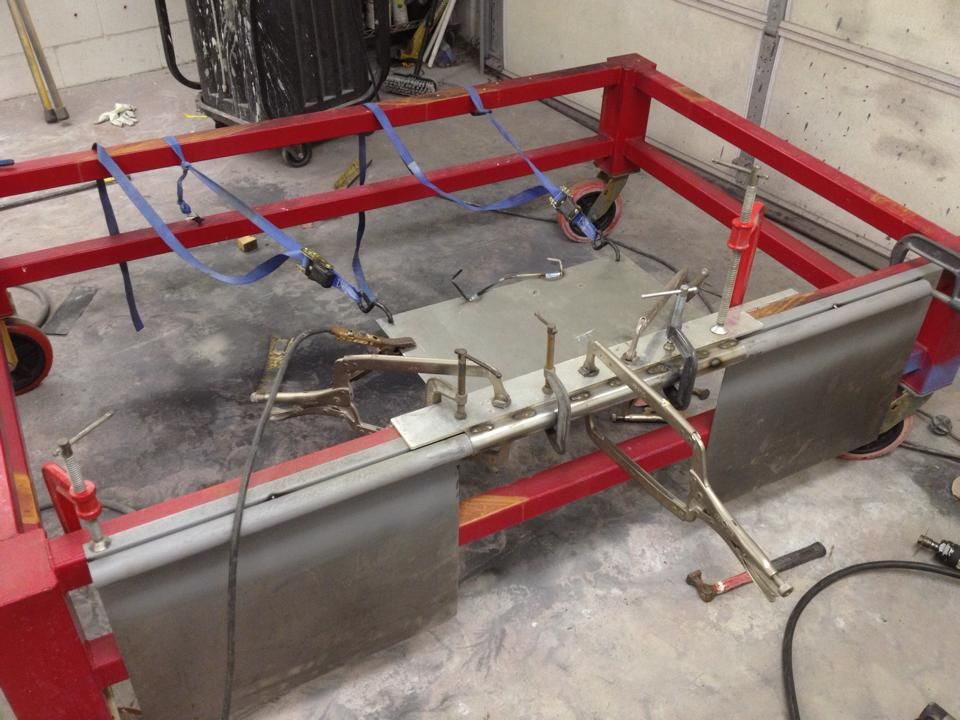 Once the first section was rolled tightly we clamped it and cut a few slots through the sheetmetal so we could plug weld the pieces together. That kept the sheetmetal tightly wrapped after we took the clamps off. 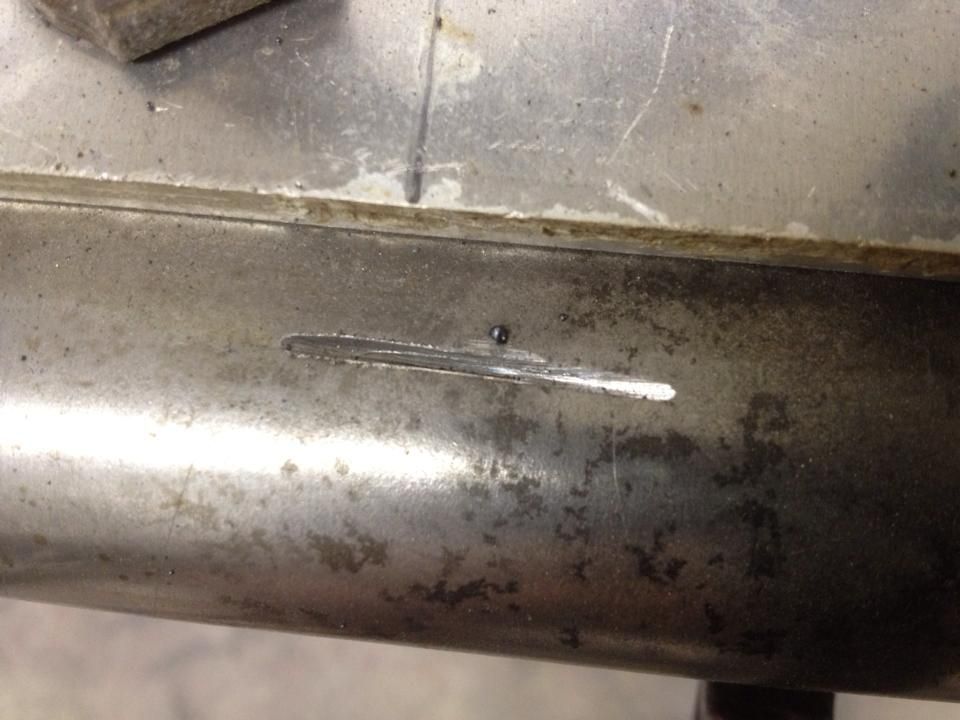 Front side after finishing the first section. 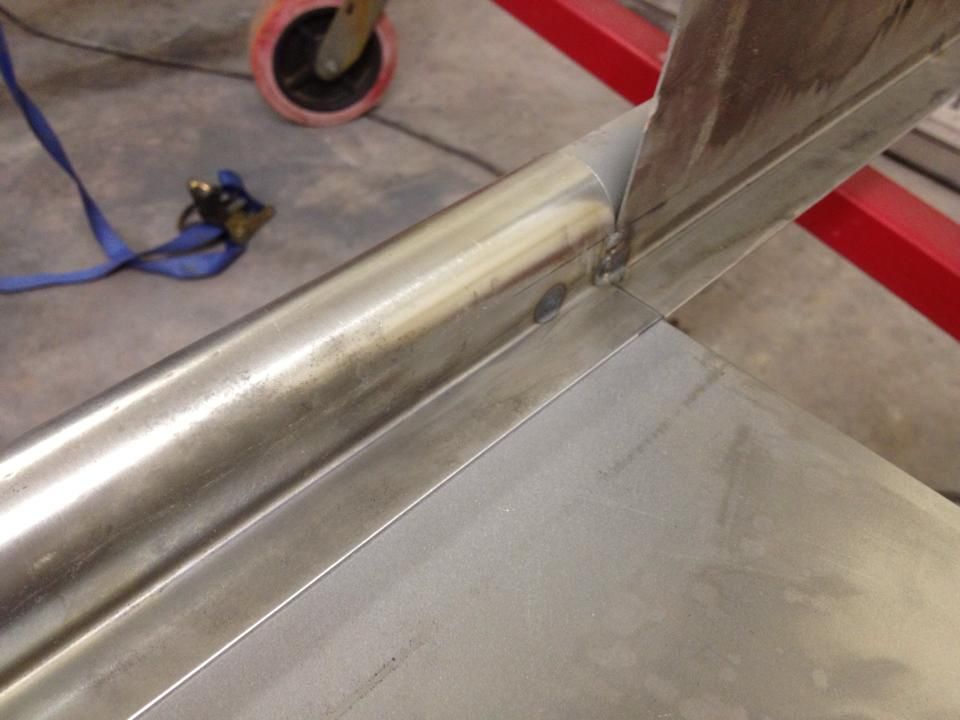 Second section wrapped. The panels are still aligned perfectly. 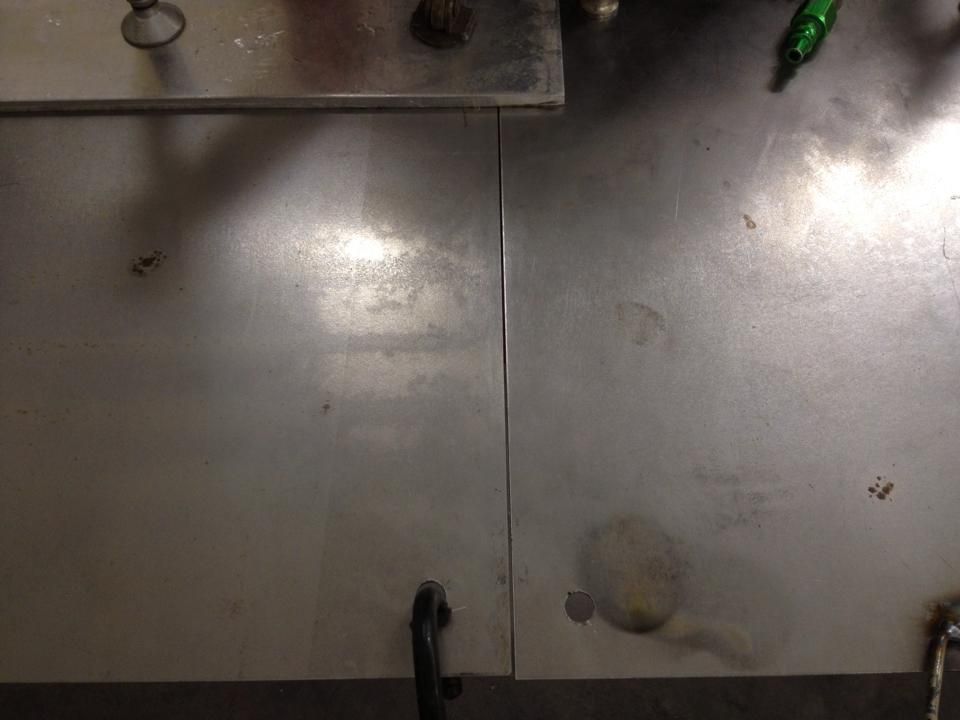 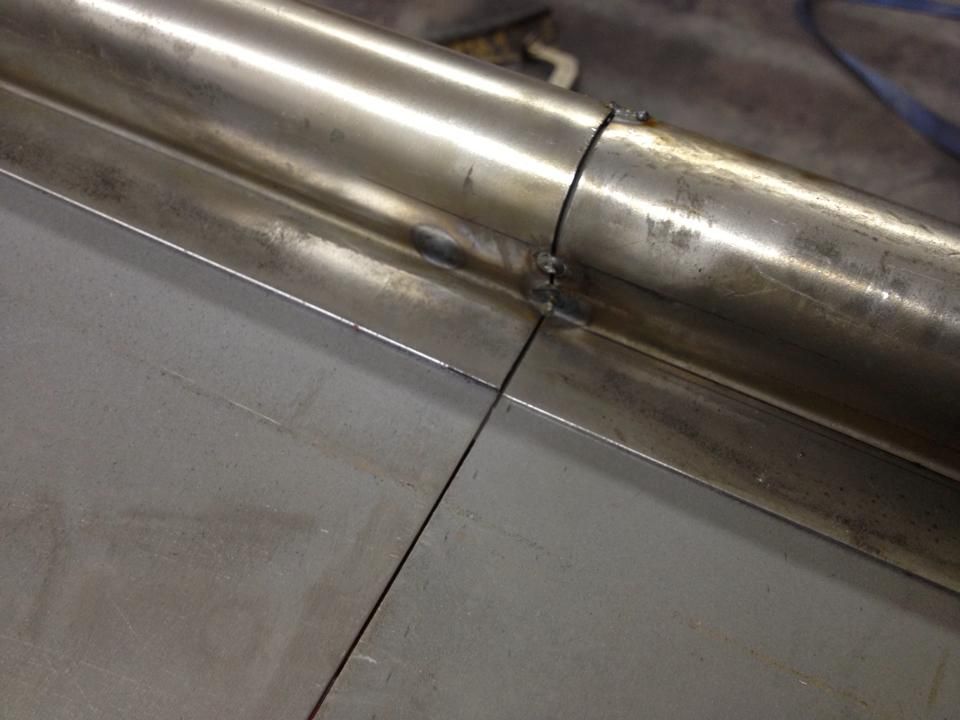 All three sections wrapped. Ready for trimming. 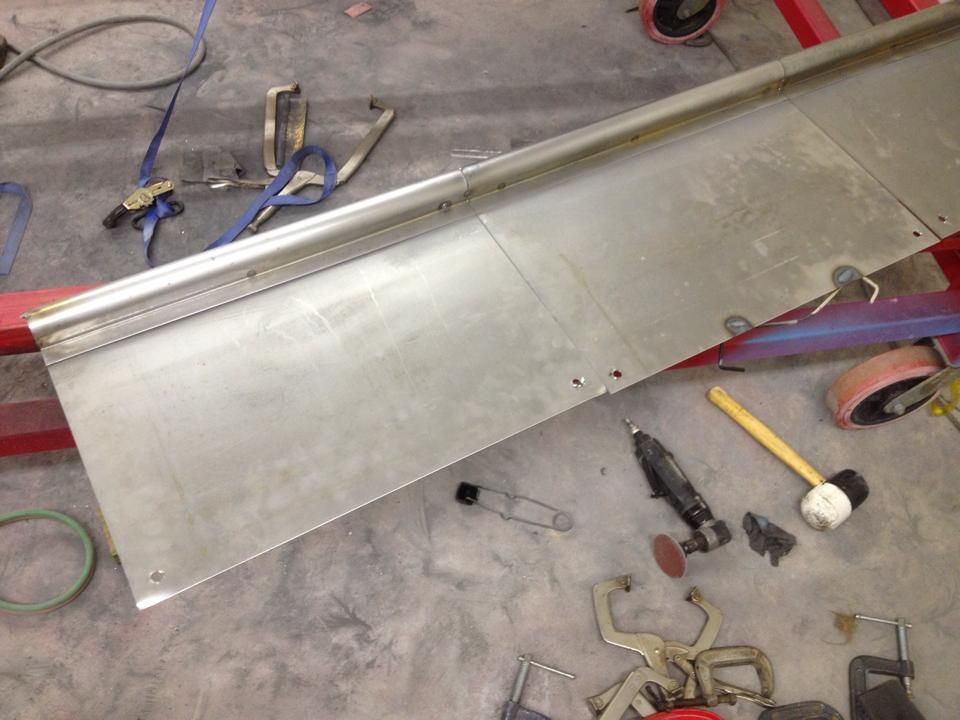 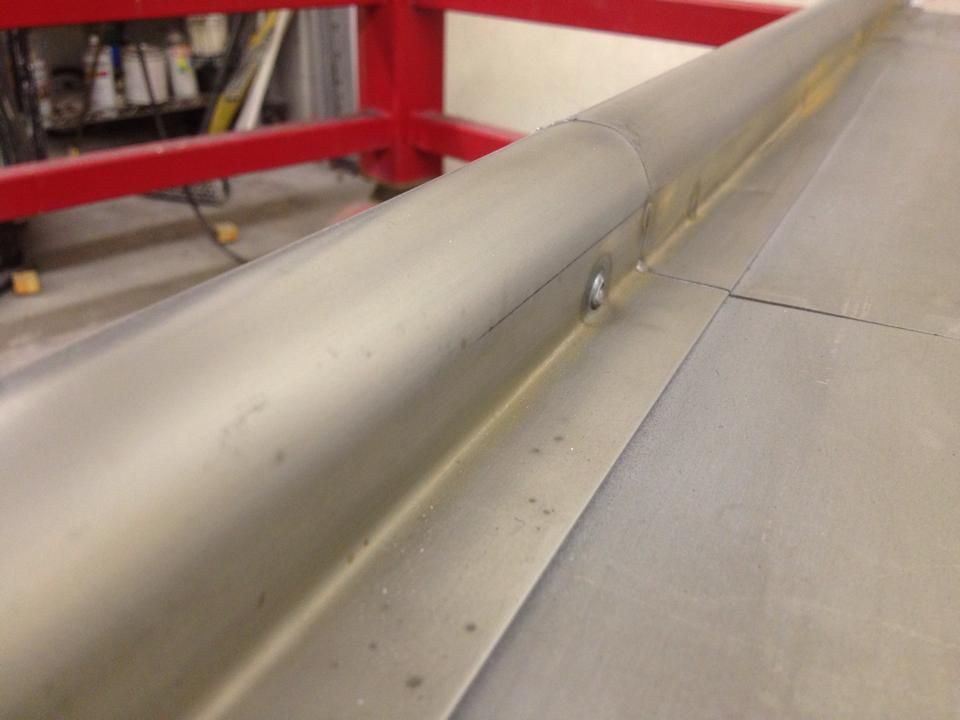 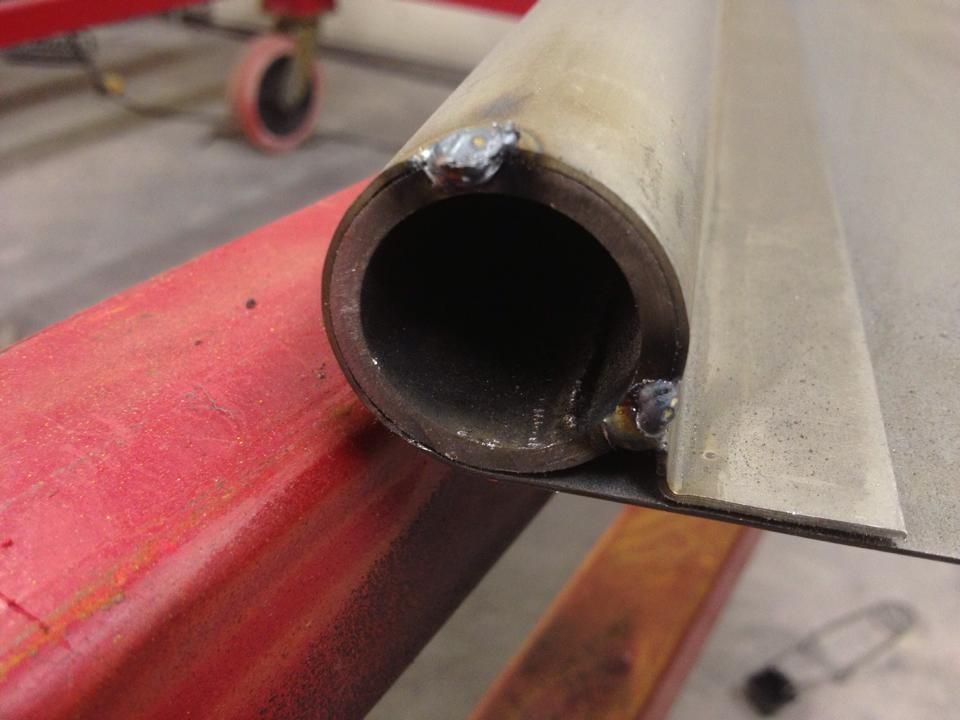
__________________
Project Goldilocks '66 C10 Short Fleet BBW Build '65 C10 Highly Detailed Stock Restoration Thread '78 Camaro Targa Roof Build '55 International Metal/Body/Paint Work '66 F100 Full Rotisserie Restoration '40 Packard 120 Convertible Coupe Restoration How To Restore and Detail an Original Gauge Cluster How To Detail Sand Body Panels, Edges, Corners, Etc Last edited by theastronaut; 09-22-2014 at 09:50 AM. |
|
|

|
|
|
#288 |
|
Registered User
Join Date: May 2011
Location: Anderson SC
Posts: 3,898
|
Re: '55 International Metal/Body/Paint Work
We took the old section with letters to a local fab shop and had them laser cut new letters. I beveled the edges so they look stamped and glued them on the tailgate with SEM Panel Bond.
Laid out the spacing. 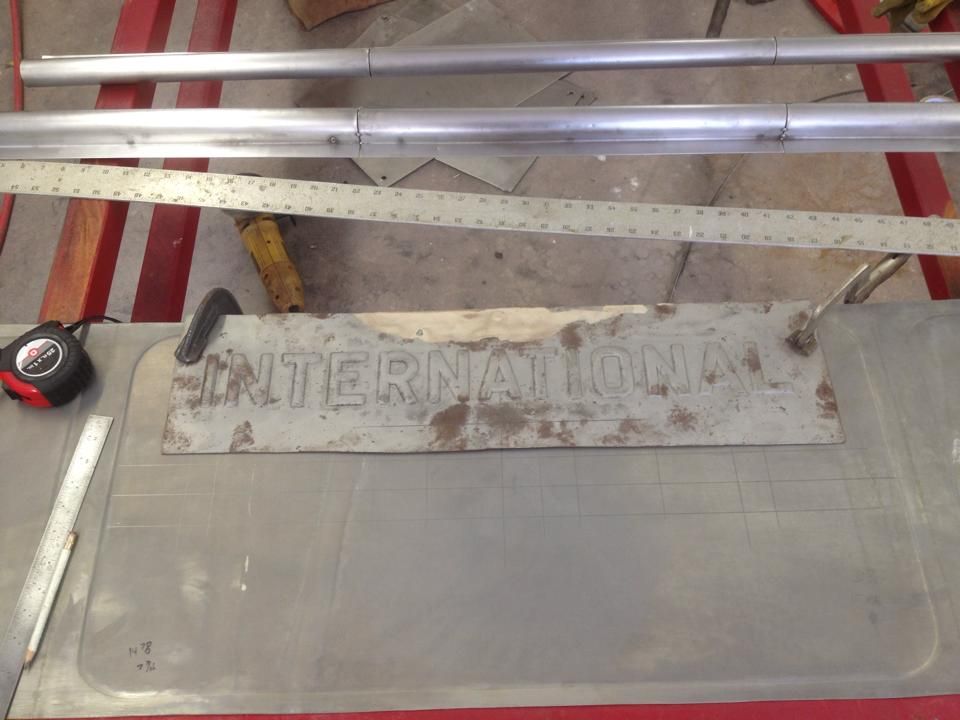 Tailgate and letters prepped by grinding with 36 grit. 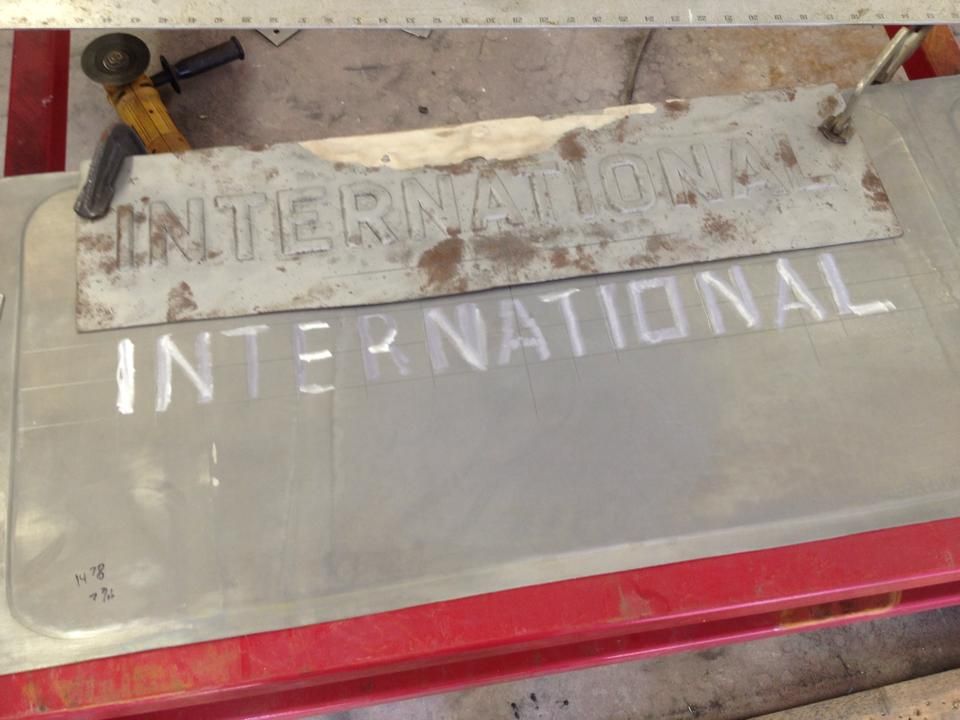 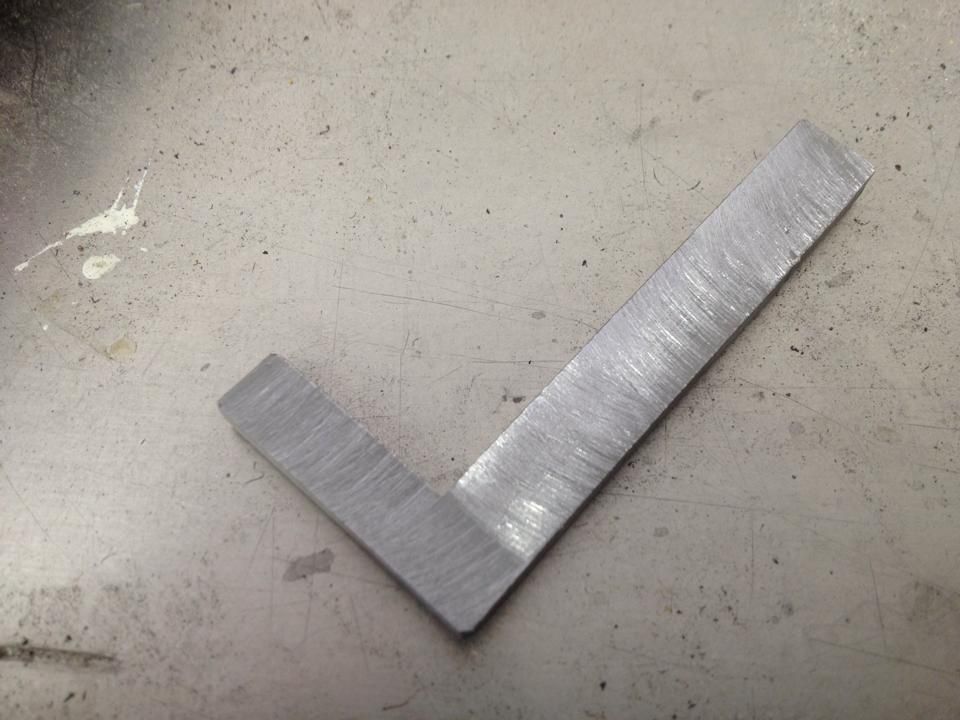 Thinly spread out the adhesive on my mixing board and stuck the letters into the adhesive. Left just enough to make it stick without squishing out of the edges and making a mess. 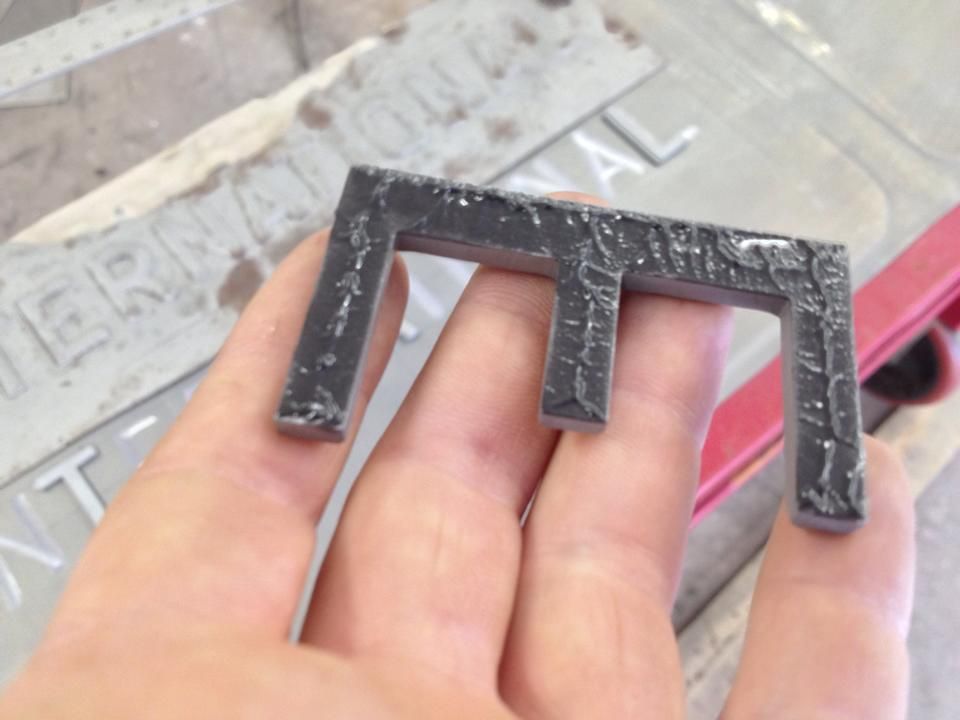 Letters in place, adhesive curing in the sun. Once we prime it with epoxy and high build it'll be hard to tell that it's not stamped. Of course the back side will be flat, no way around that using the glue-on letters. 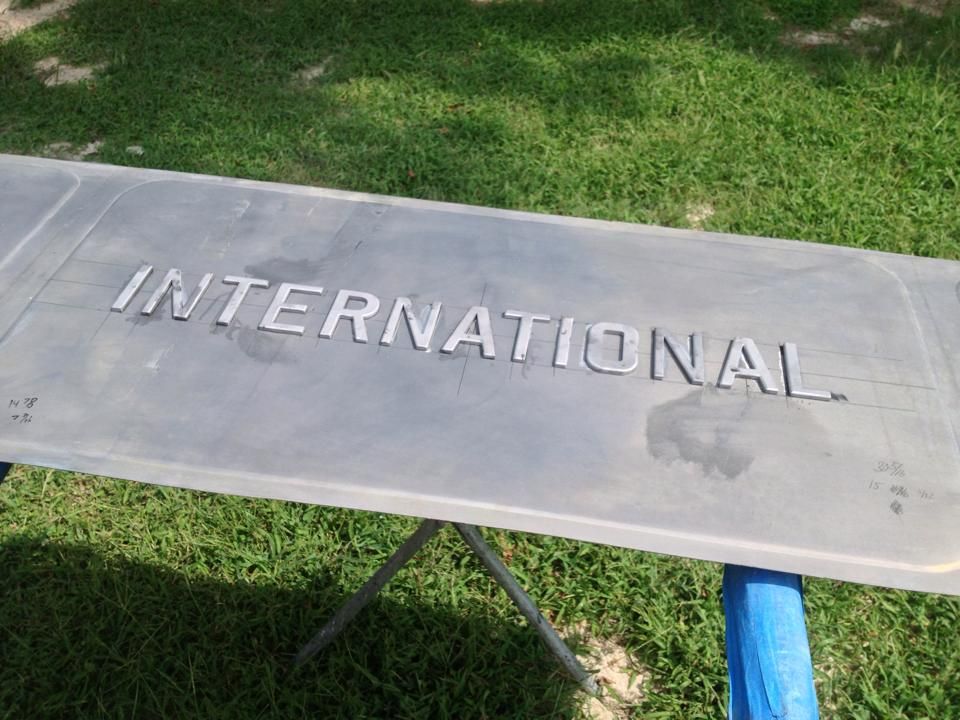
__________________
Project Goldilocks '66 C10 Short Fleet BBW Build '65 C10 Highly Detailed Stock Restoration Thread '78 Camaro Targa Roof Build '55 International Metal/Body/Paint Work '66 F100 Full Rotisserie Restoration '40 Packard 120 Convertible Coupe Restoration How To Restore and Detail an Original Gauge Cluster How To Detail Sand Body Panels, Edges, Corners, Etc |
|
|

|
|
|
#289 |
|
Registered User
Join Date: Apr 2011
Location: .
Posts: 3,104
|
Re: '55 International Metal/Body/Paint Work
What can I say???
There isn't anything you can't build/fabricate on that truck. Awesome! Inspired me once again to give an idea a try. |
|
|

|
|
|
#290 |
|
Registered User
Join Date: Oct 2013
Location: Oklahoma City Okla
Posts: 196
|
Re: '55 International Metal/Body/Paint Work
Great work, Thank you for posting. Be sure and do a thread on your next project there is much to learn from your process.
Thanks Dwight |
|
|

|
|
|
#291 |
|
Proprietor of Dale's Corner
 Join Date: Nov 2012
Location: Vacaville , CA
Posts: 16,243
|
Re: '55 International Metal/Body/Paint Work
Wow!! Is the first thing to say . Thanks again for sharing
__________________
"Some Days Chickens And Some Days Feathers" Dale XNGH ECV Sam Brannan 1004 R.I.P. 67ChevyRedneck R.I.P. Grumpy Old Man R.I.P. FleetsidePaul |
|
|

|
|
|
#292 | ||
|
Registered User
Join Date: May 2011
Location: Anderson SC
Posts: 3,898
|
Quote:
Quote:
Thanks!
__________________
Project Goldilocks '66 C10 Short Fleet BBW Build '65 C10 Highly Detailed Stock Restoration Thread '78 Camaro Targa Roof Build '55 International Metal/Body/Paint Work '66 F100 Full Rotisserie Restoration '40 Packard 120 Convertible Coupe Restoration How To Restore and Detail an Original Gauge Cluster How To Detail Sand Body Panels, Edges, Corners, Etc |
||
|
|

|
|
|
#293 |
|
Registered User
Join Date: May 2011
Location: Anderson SC
Posts: 3,898
|
Re: '55 International Metal/Body/Paint Work
The tailgate is now ready for epoxy and bodywork. Finished up the corner brackets and top hooks this morning.
Corner brackets. 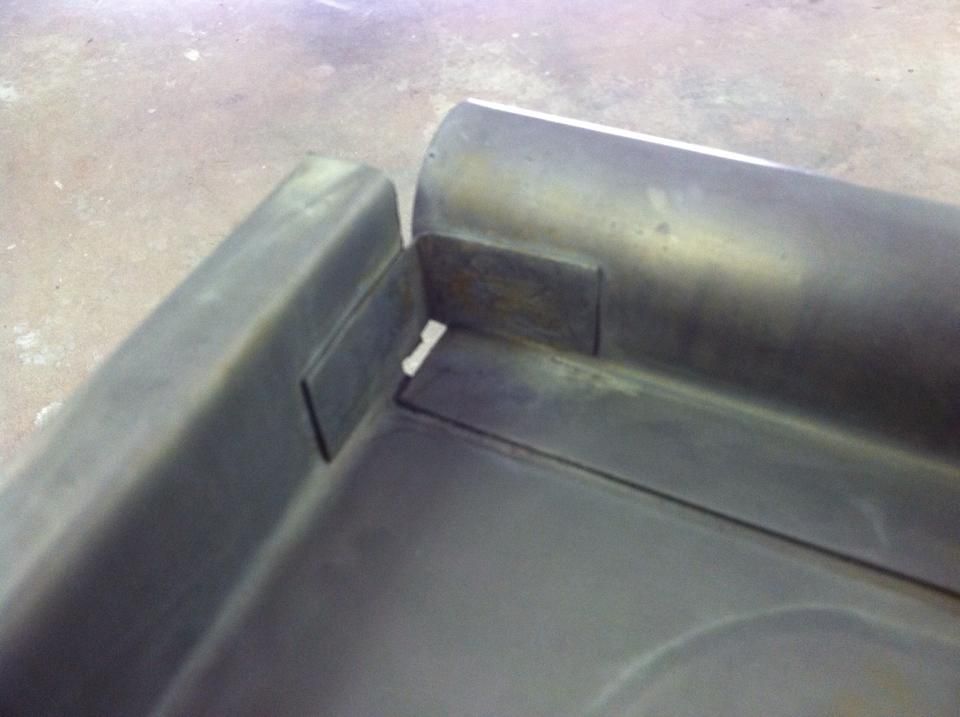 I drilled through the tailgate tube top and bottom to plug weld the hooks in places. Then drilled and tapped the hook for a stainless button head screw to replicate the original rivet. I'll weld the socket up and smooth the screw head so it looks 100% factory. 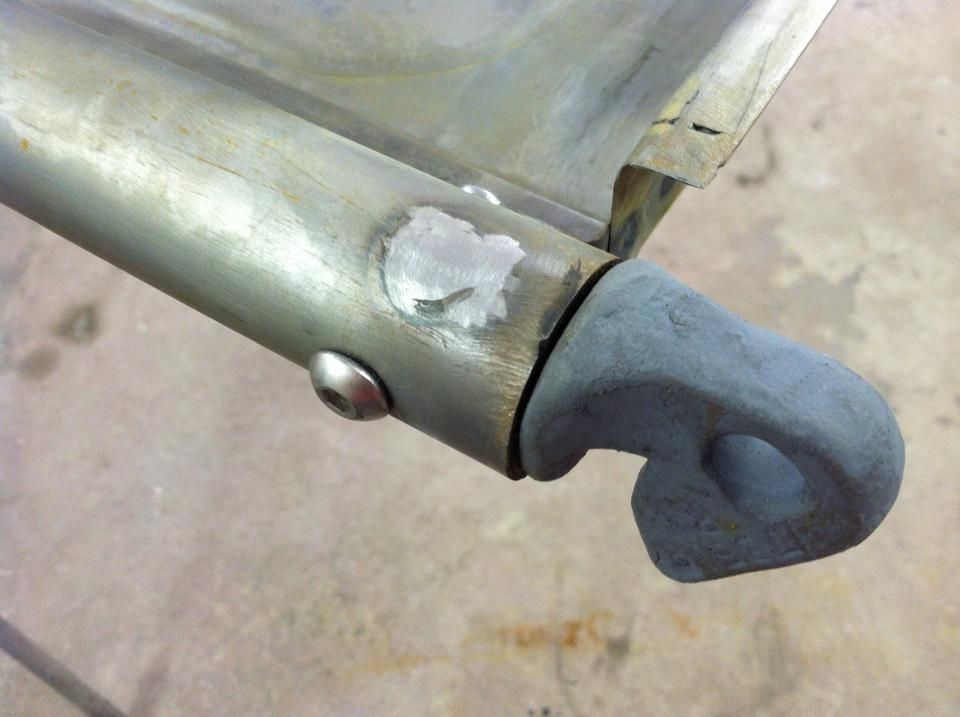 Short upper corner brace and clevis pin added on the bottom of the tube to replicate the rivet. These were glued in place with SEM panel bond. 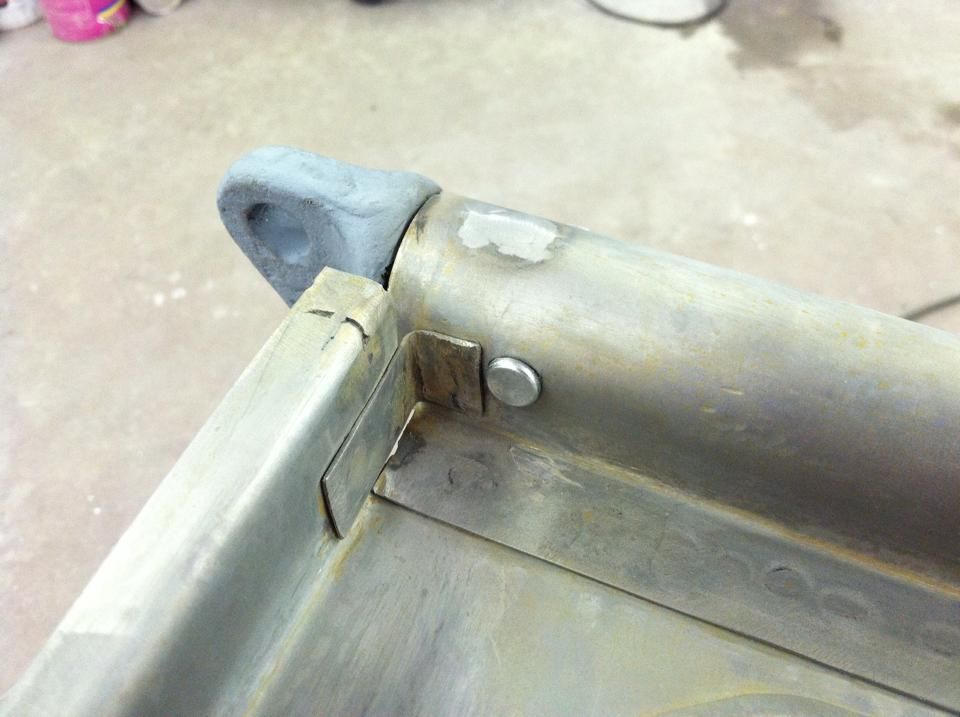
__________________
Project Goldilocks '66 C10 Short Fleet BBW Build '65 C10 Highly Detailed Stock Restoration Thread '78 Camaro Targa Roof Build '55 International Metal/Body/Paint Work '66 F100 Full Rotisserie Restoration '40 Packard 120 Convertible Coupe Restoration How To Restore and Detail an Original Gauge Cluster How To Detail Sand Body Panels, Edges, Corners, Etc Last edited by theastronaut; 09-22-2014 at 09:48 AM. |
|
|

|
|
|
#294 |
|
Junior Member
 Join Date: Oct 2003
Location: Milford, MI
Posts: 192
|
Re: '55 International Metal/Body/Paint Work
I tried the marker before wet sanding trick last night. Worked great. Thanks for the tips and showing us all the work that you accomplish.
|
|
|

|
|
|
#295 |
|
Registered User
Join Date: May 2011
Location: Anderson SC
Posts: 3,898
|
Re: '55 International Metal/Body/Paint Work
No problem, glad it helped!
__________________
Project Goldilocks '66 C10 Short Fleet BBW Build '65 C10 Highly Detailed Stock Restoration Thread '78 Camaro Targa Roof Build '55 International Metal/Body/Paint Work '66 F100 Full Rotisserie Restoration '40 Packard 120 Convertible Coupe Restoration How To Restore and Detail an Original Gauge Cluster How To Detail Sand Body Panels, Edges, Corners, Etc |
|
|

|
|
|
#296 |
|
Registered User
Join Date: May 2011
Location: Anderson SC
Posts: 3,898
|
Re: '55 International Metal/Body/Paint Work
Tailgate is in final primer and I've started wetsanding it. I took the letters back off so I could skim coat and block, then prime and block the center panel. That way the panel is straight behind the letters; one of my pet peeves is tailgates that are distorted around the letters. I sprayed epoxy over the slick sand so the SEM panel bond would stick (its not recommended over polyester primers) and re-glued the letters on. I also dimpled the flanges to replicate the original spot welds.
Sprayed with tinted K36. 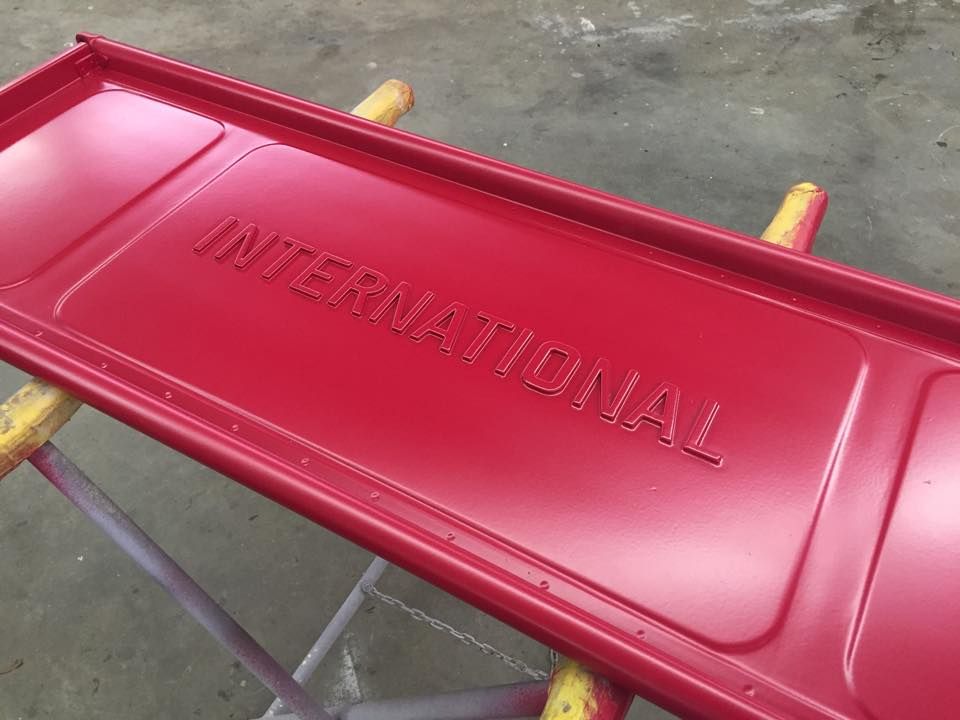 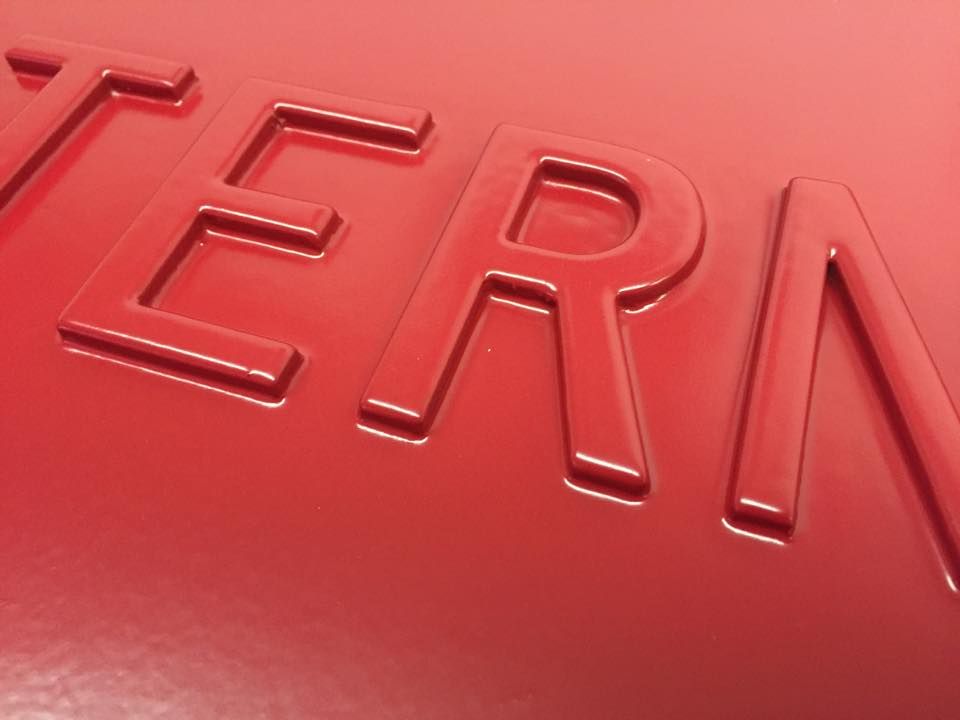 Made a set of blocks to detail sand around the letters. 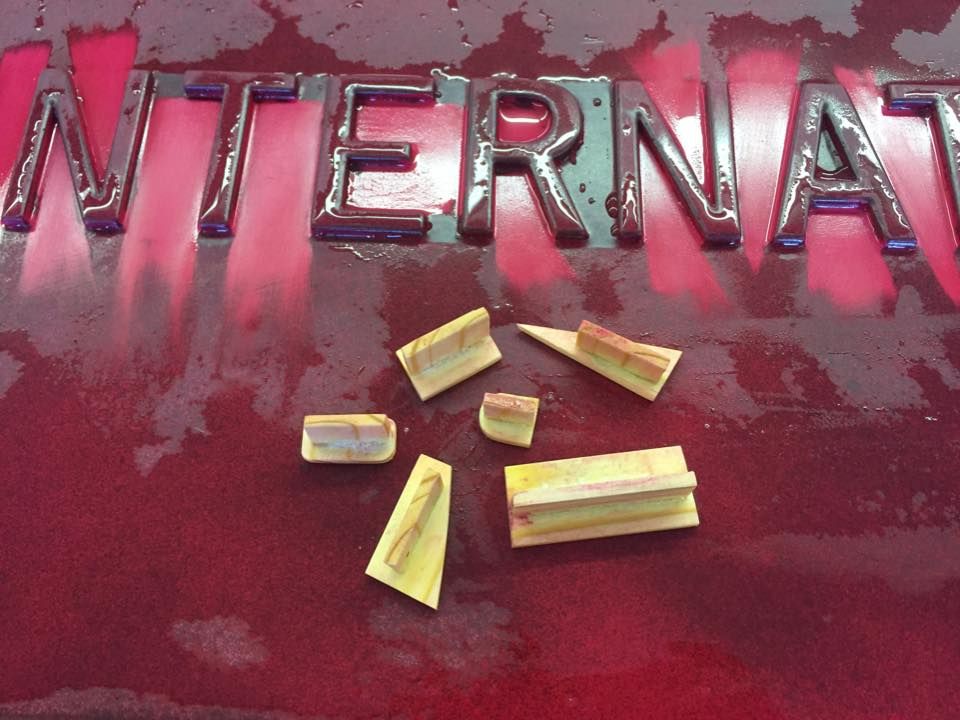
__________________
Project Goldilocks '66 C10 Short Fleet BBW Build '65 C10 Highly Detailed Stock Restoration Thread '78 Camaro Targa Roof Build '55 International Metal/Body/Paint Work '66 F100 Full Rotisserie Restoration '40 Packard 120 Convertible Coupe Restoration How To Restore and Detail an Original Gauge Cluster How To Detail Sand Body Panels, Edges, Corners, Etc |
|
|

|
|
|
#297 |
|
Registered User
Join Date: May 2011
Location: Anderson SC
Posts: 3,898
|
Re: '55 International Metal/Body/Paint Work
Tailgate and front bumper are painted. Need to buff the tailgate and have it shot with Line-X before I can install it. It almost doesn't need buffing, changed from DCX61 high solids hardener to DU5 normal solids hardener and a slower reducer to get the paint to lay out better. Need to get a set of tail lights and brackets, dad has to do the headliner and seat; not much more and it'll be ready to go home.
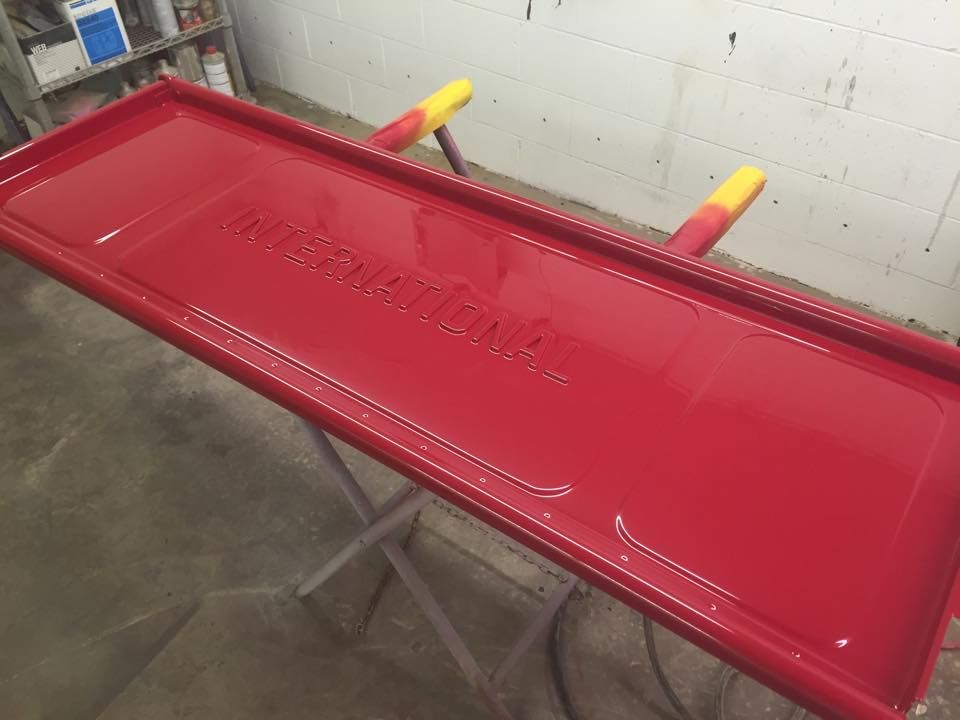 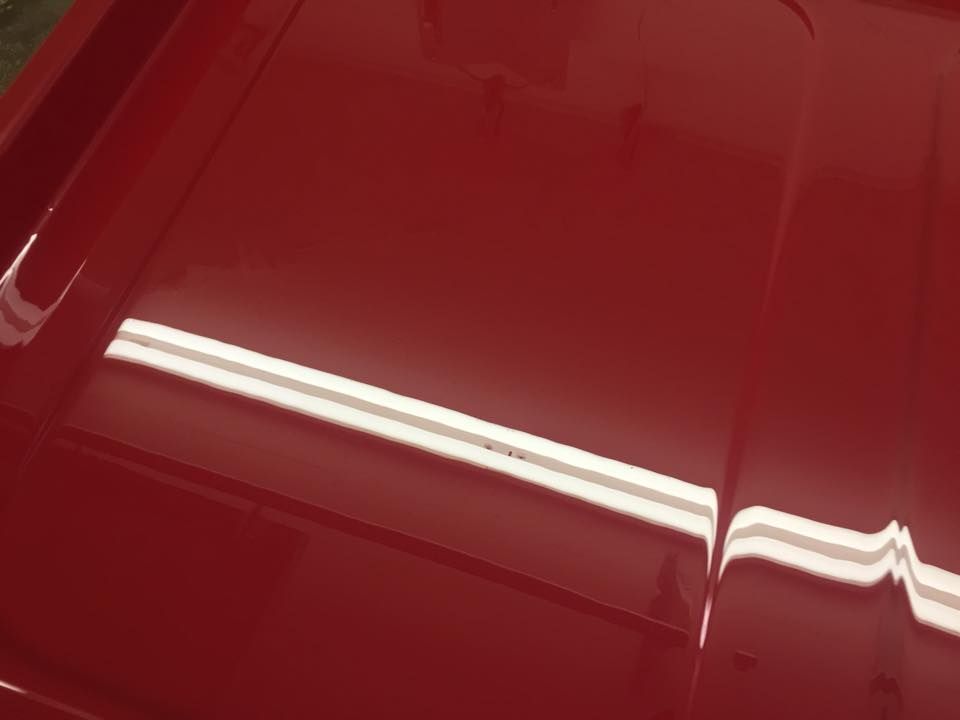 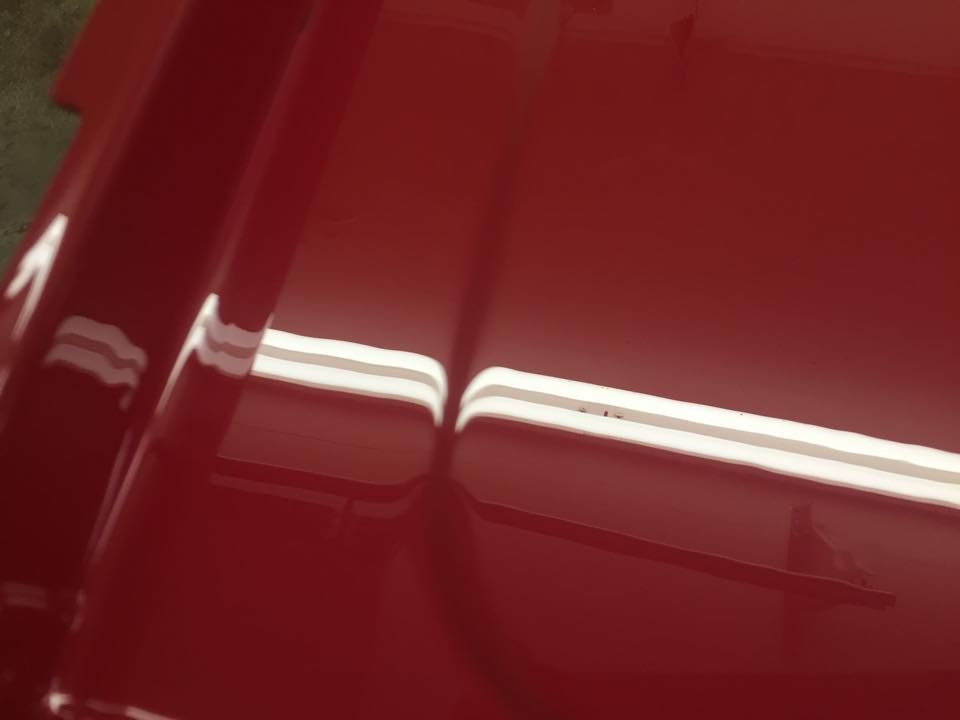 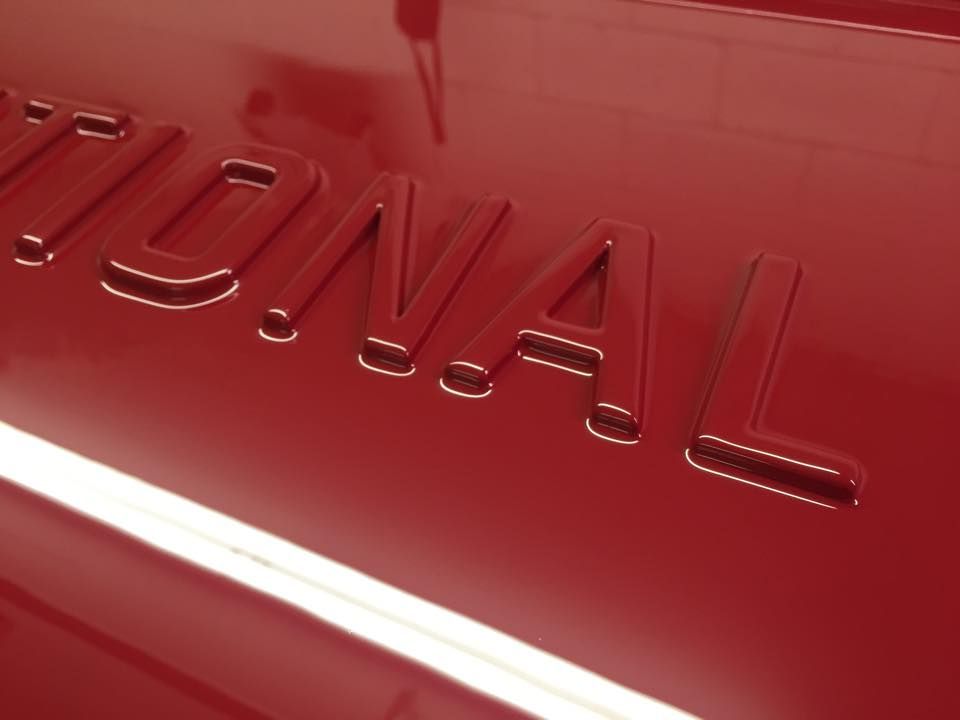 Front bumper finished and installed with smoothed and polished bolts. 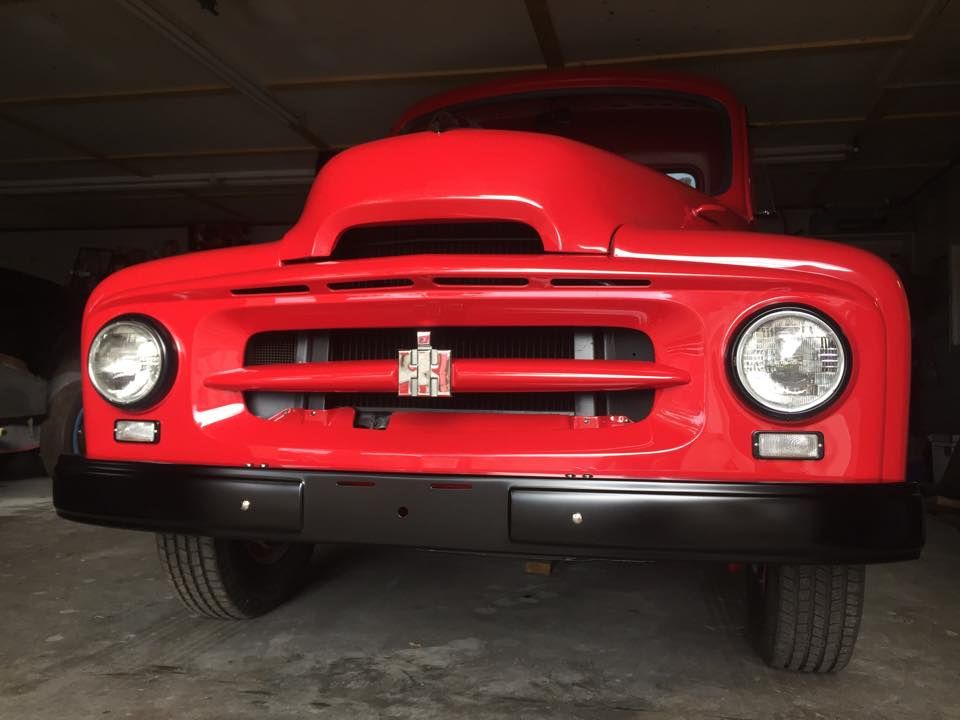 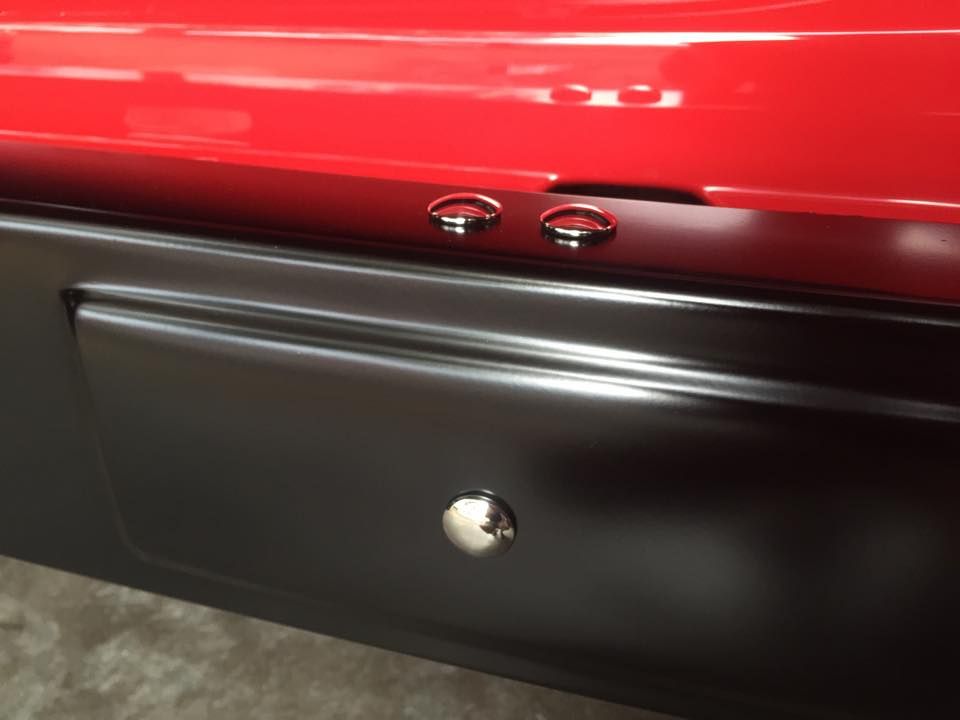
__________________
Project Goldilocks '66 C10 Short Fleet BBW Build '65 C10 Highly Detailed Stock Restoration Thread '78 Camaro Targa Roof Build '55 International Metal/Body/Paint Work '66 F100 Full Rotisserie Restoration '40 Packard 120 Convertible Coupe Restoration How To Restore and Detail an Original Gauge Cluster How To Detail Sand Body Panels, Edges, Corners, Etc |
|
|

|
|
|
#298 |
|
Registered User
Join Date: Oct 2009
Location: canton ga
Posts: 12,728
|
Re: '55 International Metal/Body/Paint Work
That is hands down the best looking International truck I have ever seen ,amazing workmanship you do.
|
|
|

|
|
|
#299 |
|
Registered User
Join Date: Apr 2012
Location: Beaver, Pa.
Posts: 197
|
Re: '55 International Metal/Body/Paint Work
Love this truck, sorry to see this thread come to an end but I know you'll provide more excellent work to follow. Thanks!
|
|
|

|
|
|
#300 |
|
Registered User
Join Date: Apr 2011
Location: .
Posts: 3,104
|
Re: '55 International Metal/Body/Paint Work
The top notch quality of work that you do. Its totally amazing how crisp everything looks.
Thanks for all the tips you give out during the build. |
|
|

|
 |
| Bookmarks |
|
|