
|
|
|
 09-15-2012, 02:18 PM
|
#1 |
|
Truck and auto performance nut
Join Date: Feb 2007
Location: McKinney,Texas
Posts: 3,848
|
Re: Br3w City's Project omgwtfbbq
....still look better with a 90* tho.
 
__________________
Kurt - '68 GMC short step - NIB '09 LY6 6.0L crate motor w/mods, NIB '12 crate 4L85e w/billet 3k stall Circle D, 3.73 posi 12 bolt, DynaTech f-swap headers, 3/4 drop, handling mods, etc. - my toy '72 Chevy LWB C-10 Highlander - 350/350 ps/pb/tilt/ac - not original but close '06 Chevy TrailBlazerSS - LS2/4L70e - little black hot rod SUV - my DD '18 Kia Sorento - wife's econo-driver '95 Chevy S10 - reg cab shortbed, LS, 4.3, auto... my '68's powertrain and chassis build -links broken A surprise phase - carb to efi -links broken |

|

|
|
09-16-2012, 02:08 AM
|
#2 |
|
meowMEOWmeowMEOW
Join Date: Sep 2009
Location: MKE WI
Posts: 7,128
|
Re: Br3w City's Project omgwtfbbq
Ya you better run
 Random Pro-Tip; If you ever get crap all of the splatter shield on your welding helmet, its kind of annoying. Between burn marks, gunk from cars falling on you, weld spatter etc, it can block a lot of vision. Although you CAN buy new shields, the shield itself wasn't really damaged, just gunked up. A little polishing compound does a pretty nice job extending its life. 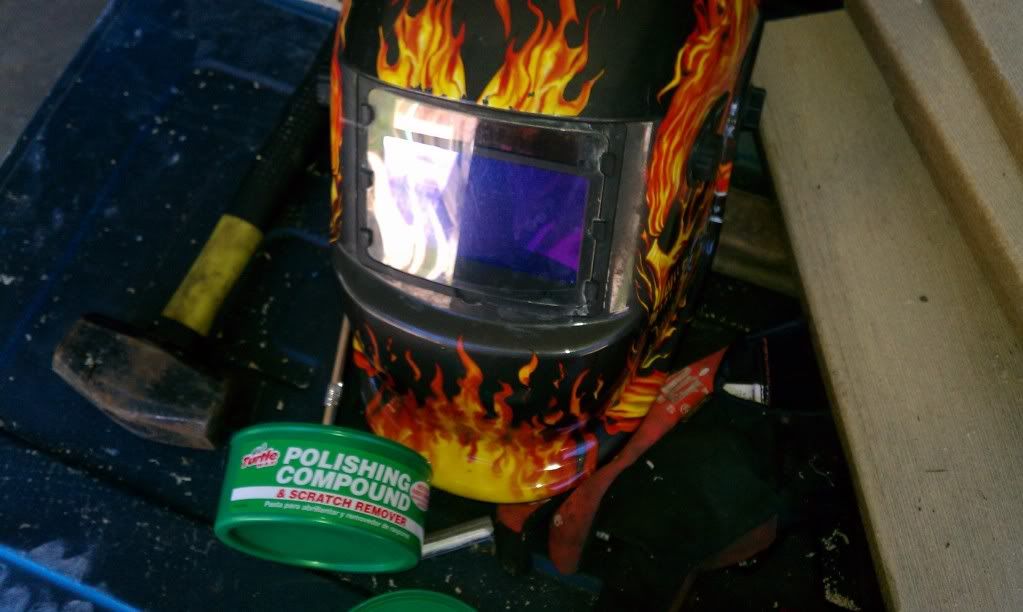 I cut up a bed support and used some square tube to build a support/drop subframe for the rear boards, allowing the location of the gas filler. 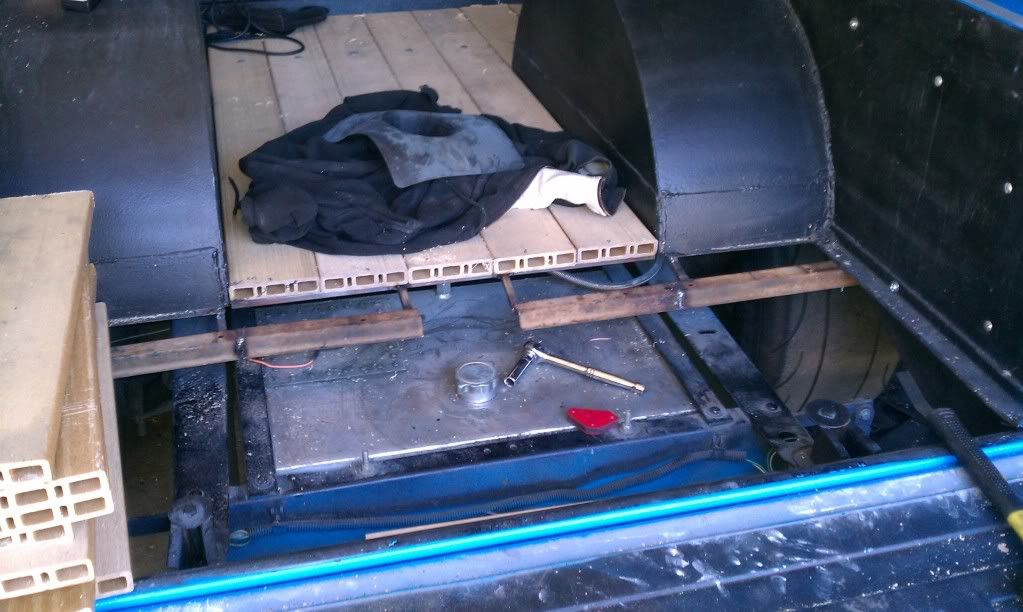  Then I mocked up the rear boards, only bolting a few in place for spacing, and made the hinged door for the gas filler. It has spring roller hinges, a magnetic clasp, and I have to add a handle to open it as well. 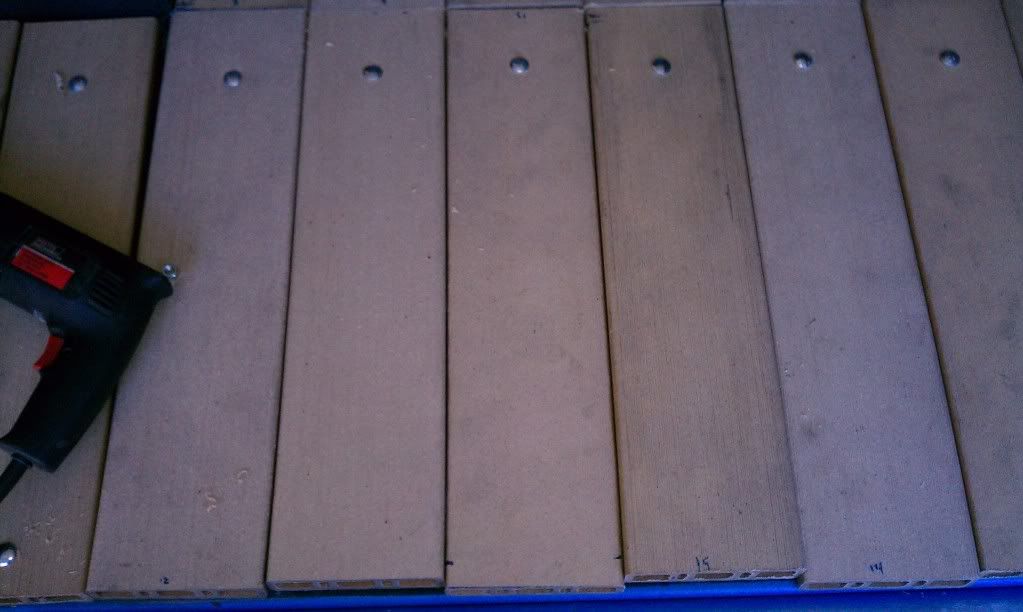 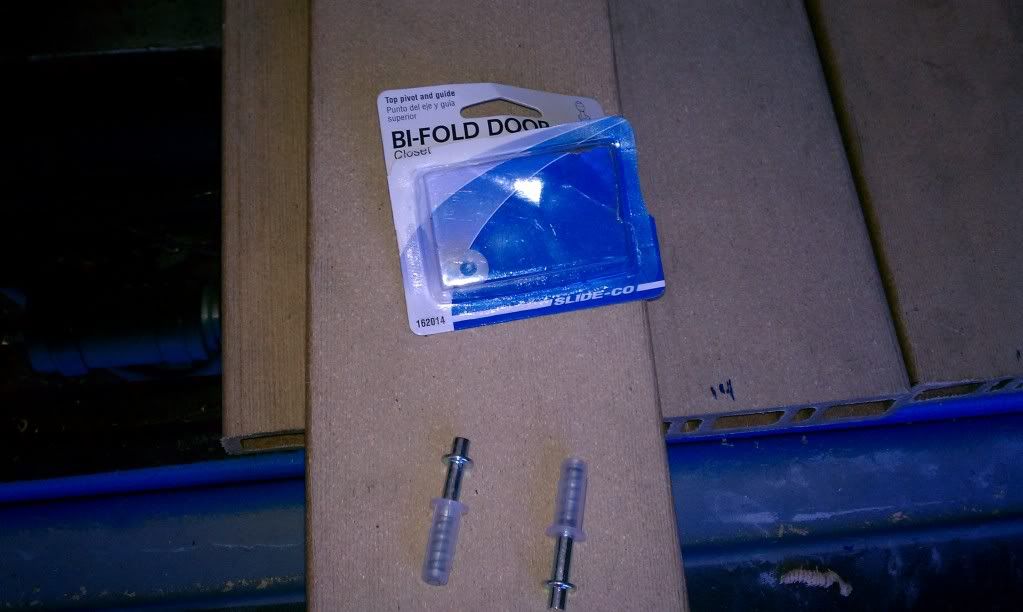 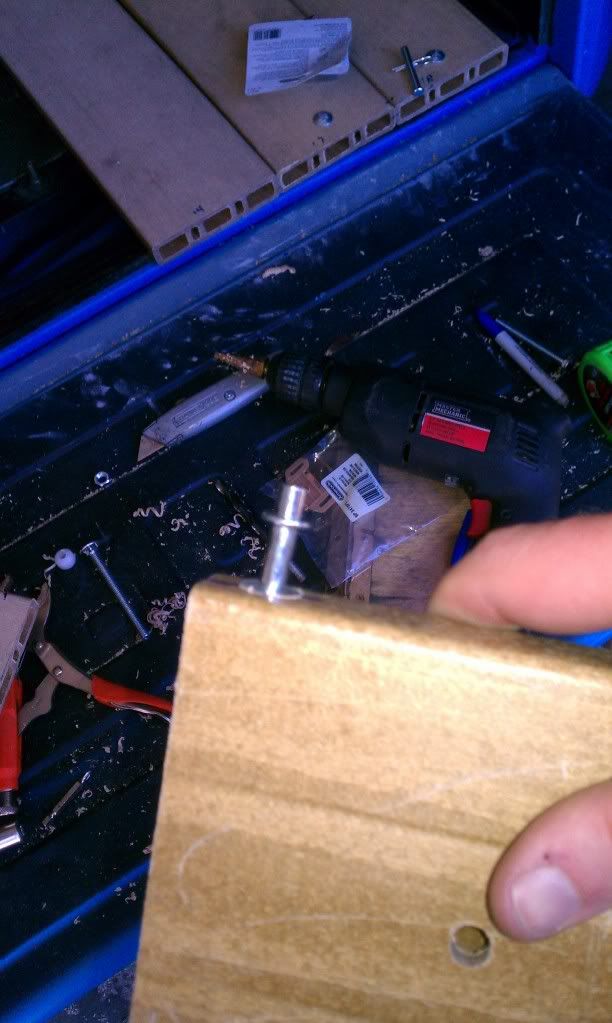 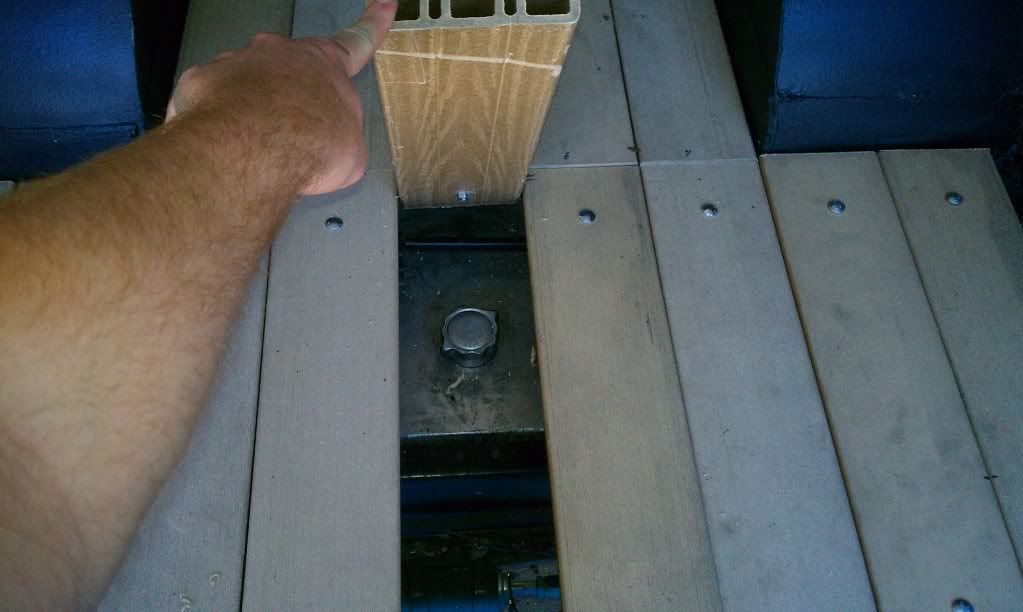 Tomorrow I'm finished the removeable door for the access to where I will be moving the battery, bolting down the rear of all the boards in the back, and getting trim strips for in between some of the boards.
__________________
'66 Short Step / SD Tuned / Big Cam LQ4 / Backhalfed /Built 4l80e / #REBUILDEVERYTHING  |
|
|
|
|
09-16-2012, 01:50 PM
|
#3 |
|
Registered User
Join Date: Jul 2011
Location: El Campo, Tx
Posts: 1,246
|
Re: Br3w City's Project omgwtfbbq
Great tip on the welding helmet! I hate that crap with the shields. I just bought one when I was 90 percent done with the boxing of the frame and it already looks terrible and your welds certainly do suffer when you can't see I found out. Interesting concept with the bed floor, I like it.
__________________
72 Chevy blue LWB, 99% original Oklahoma truck, 28,000 miles 72 Chevy SWB: http://67-72chevytrucks.com/vboard/s...d.php?t=486626 (Attempt/Mistake #2) 2003 Harley Davidson Dyna Superglide with 2007 Street Bob front end 2000 Ford F350 Powerstroke 4WD CCLB, 310,000 miles running great (STOLEN St. Patricks Day 2014 AND NEVER RECOVERED) 2002 Ford F250 Powerstroke 4WD CCLB (To replace stolen one) Hook em Horns!!! |
|
|
|
|
09-16-2012, 03:33 PM
|
#4 |
|
Registered User
Join Date: Sep 2011
Location: Tacoma, WA
Posts: 2,425
|
Re: Br3w City's Project omgwtfbbq
I like your innovative bed design !!
I have an idea for mine that will be 45 degrees from normal too 
__________________
Michael McMurphy My 66 Stepside My 64 Tow Truck My 66 Tempest Table Of Contents Added to Page1 |
|
|
|
|
09-16-2012, 06:31 PM
|
#5 |
|
PROJECT 7DEUCE
 Join Date: Dec 2002
Location: GRANTS PASS OR
Posts: 21,591
|
Re: Br3w City's Project omgwtfbbq
Ill have to see if polishin my lense helps.. I seem to always want my face as close to the fire as possible... Thanks for the tip..
__________________
GO BIG GREEN GO DUCKSMEMBER #6377 72 k-5 daily driver 6'' lift 35'' 350-350-205 slowly getting rust free. Project "7DEUCE" check out my build http://67-72chevytrucks.com/vboard/s...d.php?t=267665 Tim Powell..R.I.P EastSideLowlife..... R.I.P.. |
|
|
|
|
09-16-2012, 07:02 PM
|
#6 |
|
meowMEOWmeowMEOW
Join Date: Sep 2009
Location: MKE WI
Posts: 7,128
|
Re: Br3w City's Project omgwtfbbq
Added my splash guard/gas cap "bezel"
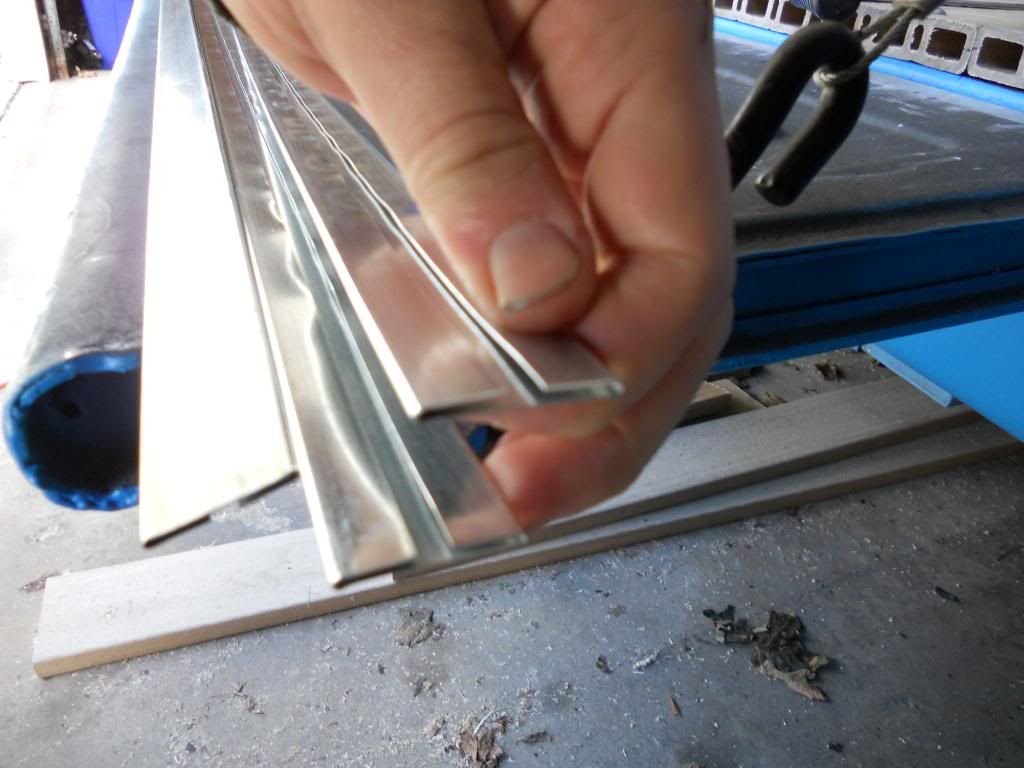
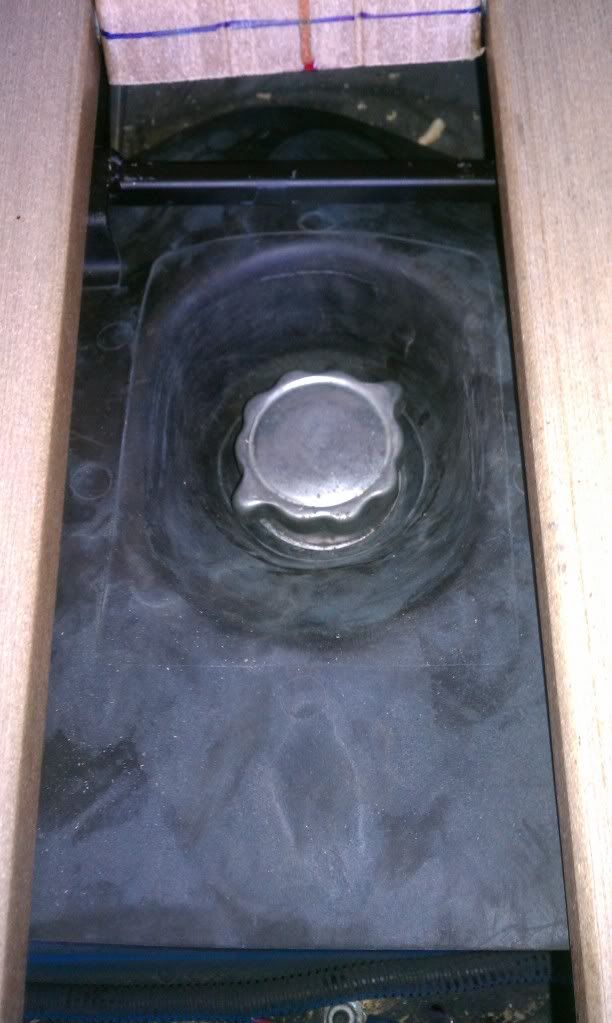 Cut out the old exhaust hanger to make space for the battery box when it goes in.  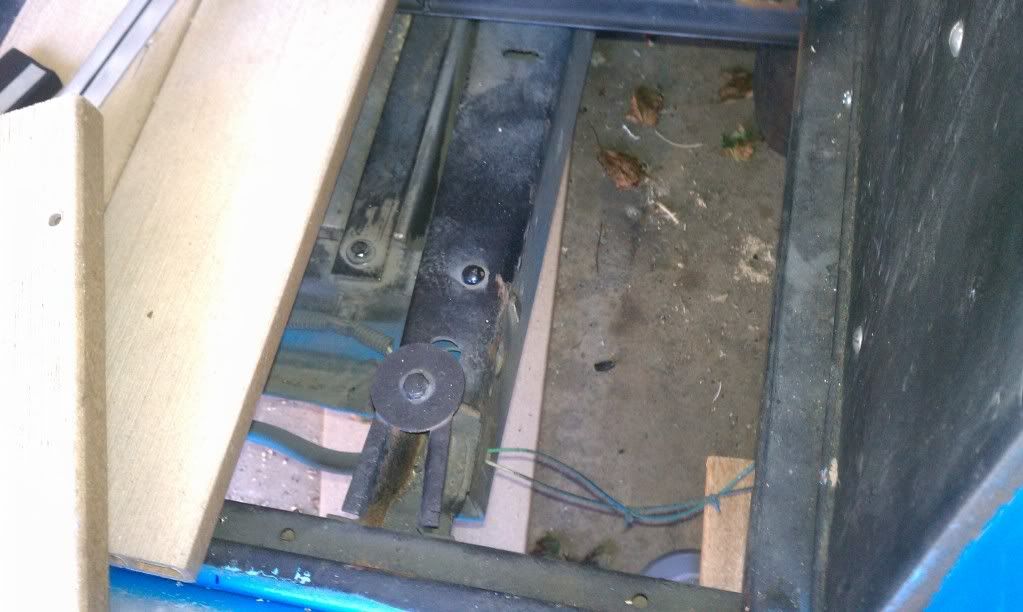 Mounted the locating studs/locking pins in the battery compartment cover 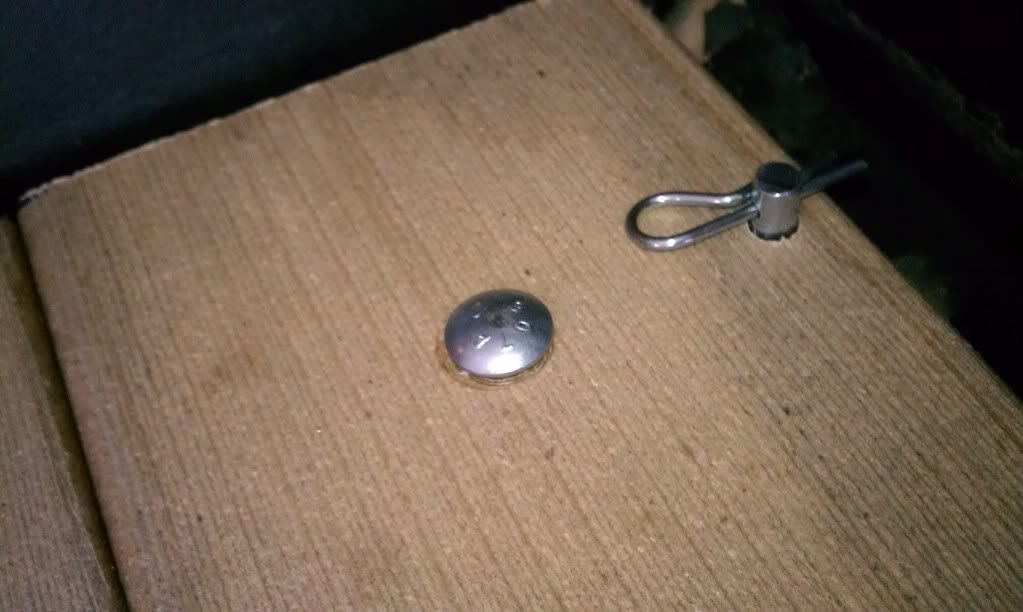 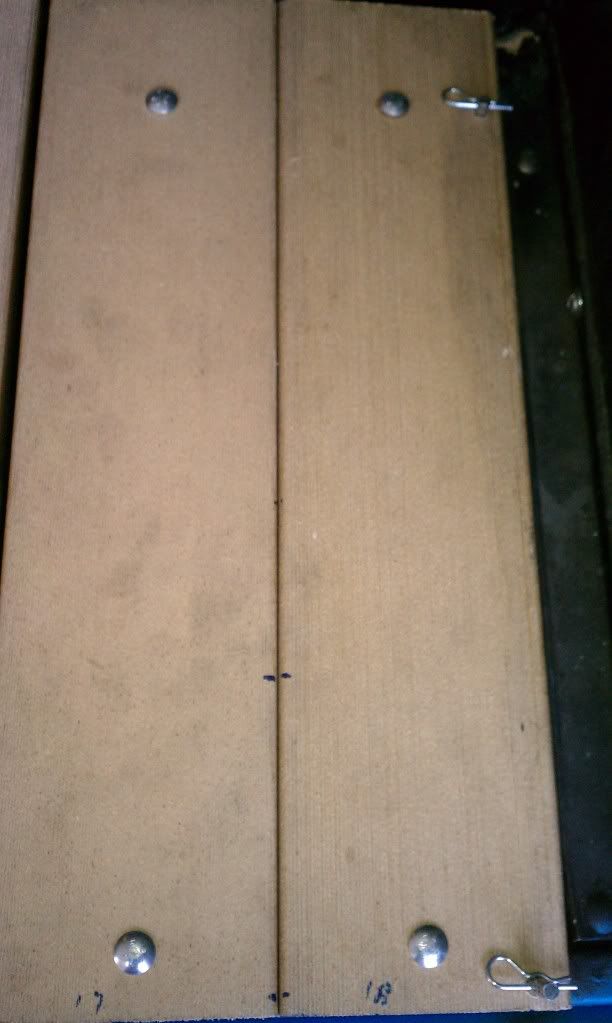 And finally I started making some of the cheapest bed rails on the planet. I used some sheetmetal connections, I *think* they are called cletes. Its just a 5 ft long flat folded peice of metal. It has 2 metal folds on the back creating a channel. When combined with some flat headed screws, it creates a "slip on" blind trim. No hardware visible. I have a few test fit here to show proof of concept. I will be doing the others, and they will all get ppainted black or body color, after the rest all gets rhino lined. Although they are fairly thin, at under $4 for a 5ft section, they are easily replaceable. 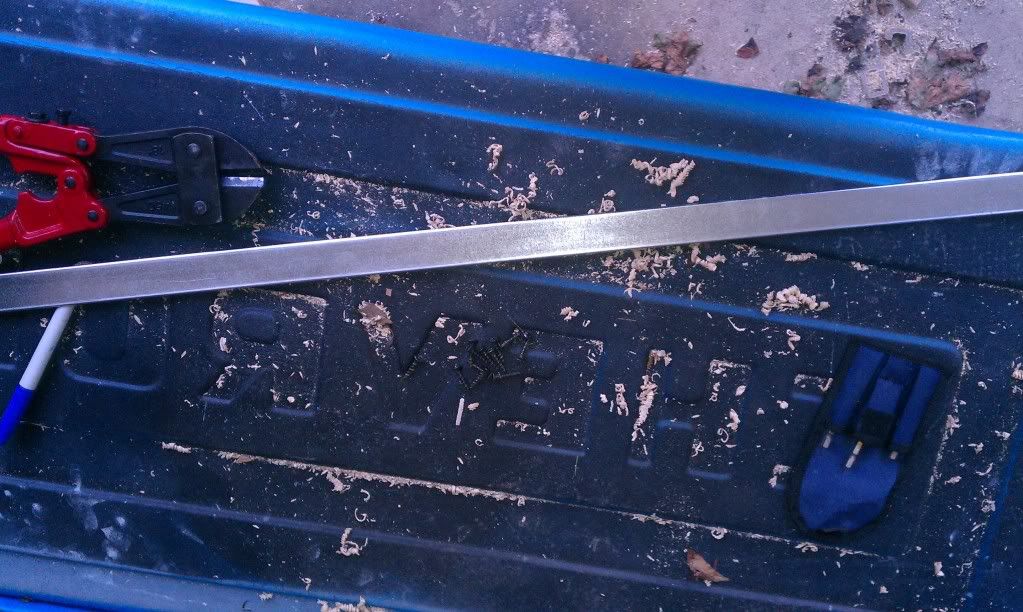   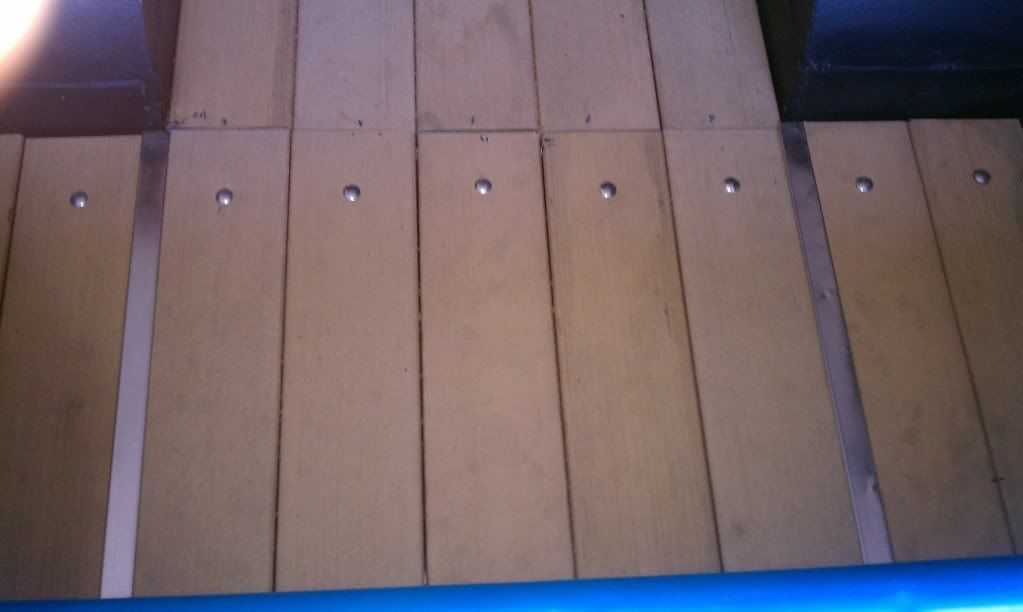
__________________
'66 Short Step / SD Tuned / Big Cam LQ4 / Backhalfed /Built 4l80e / #REBUILDEVERYTHING |
|
|
|
|
09-16-2012, 07:06 PM
|
#7 |
|
PROJECT 7DEUCE
Join Date: Dec 2002
Location: GRANTS PASS OR
Posts: 21,591
|
Re: Br3w City's Project omgwtfbbq
I like those cleets???????? Got any more info or bottom mounting pics of them?
__________________
GO BIG GREEN GO DUCKSMEMBER #6377 72 k-5 daily driver 6'' lift 35'' 350-350-205 slowly getting rust free. Project "7DEUCE" check out my build http://67-72chevytrucks.com/vboard/s...d.php?t=267665 Tim Powell..R.I.P EastSideLowlife..... R.I.P.. |
|
|
|
|
09-17-2012, 12:50 AM
|
#8 | |
|
meowMEOWmeowMEOW
Join Date: Sep 2009
Location: MKE WI
Posts: 7,128
|
Re: Br3w City's Project omgwtfbbq
Quote:
I'll take some pics of how its mounted as i lay out the other trim pieces this week.
__________________
'66 Short Step / SD Tuned / Big Cam LQ4 / Backhalfed /Built 4l80e / #REBUILDEVERYTHING |
|
|
|
|
|
09-16-2012, 08:10 PM
|
#9 |
|
Truck and auto performance nut
Join Date: Feb 2007
Location: McKinney,Texas
Posts: 3,848
|
Re: Br3w City's Project omgwtfbbq
you never cease to amaze me with the cool solutions you come up with.
__________________
Kurt - '68 GMC short step - NIB '09 LY6 6.0L crate motor w/mods, NIB '12 crate 4L85e w/billet 3k stall Circle D, 3.73 posi 12 bolt, DynaTech f-swap headers, 3/4 drop, handling mods, etc. - my toy '72 Chevy LWB C-10 Highlander - 350/350 ps/pb/tilt/ac - not original but close '06 Chevy TrailBlazerSS - LS2/4L70e - little black hot rod SUV - my DD '18 Kia Sorento - wife's econo-driver '95 Chevy S10 - reg cab shortbed, LS, 4.3, auto... my '68's powertrain and chassis build -links broken A surprise phase - carb to efi -links broken |
|
|
|
|
09-18-2012, 11:39 PM
|
#10 |
|
meowMEOWmeowMEOW
Join Date: Sep 2009
Location: MKE WI
Posts: 7,128
|
Re: Br3w City's Project omgwtfbbq
Here is some more close pics on the cletes im using for bed trim. The rear has the split, and there are a couple pics of the screws and how the seat.
 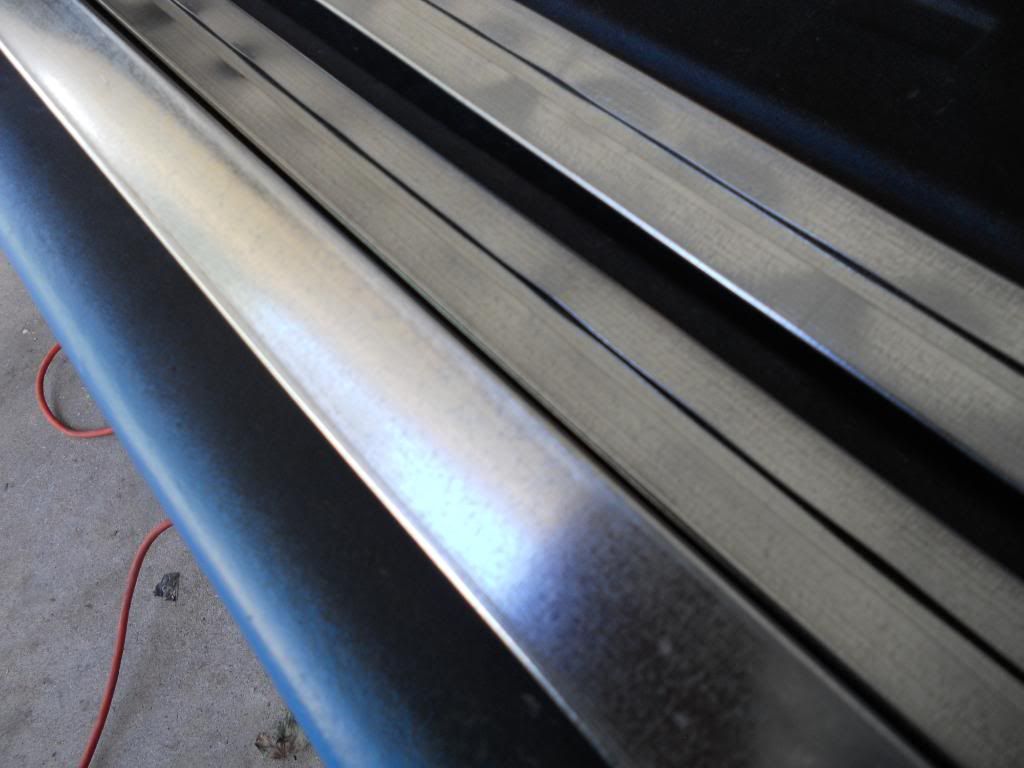   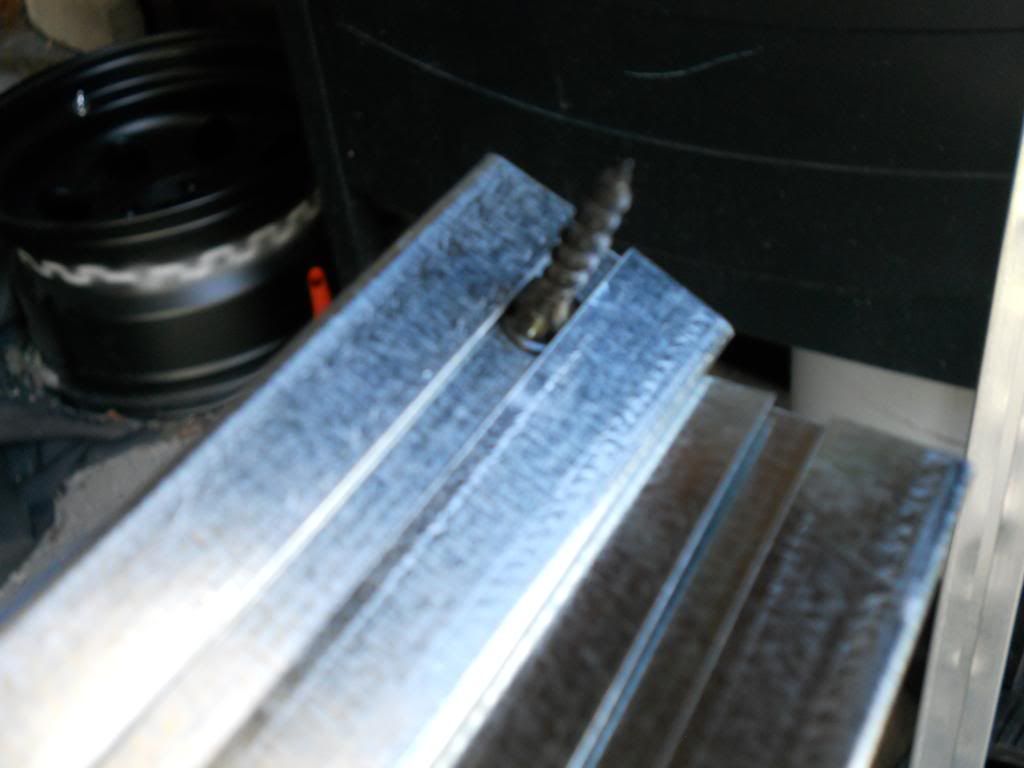 I started the long trim pieces. A little tougher to slip on because of having to align the piece over 6 or so screws, and it gets tough to slip the trim piece on as it gets further on. I've got a couple of pics of it going on. And a little progress pic of where I'm at. I should have the others installed in a day or so, then the whole deal gets rhinolined.  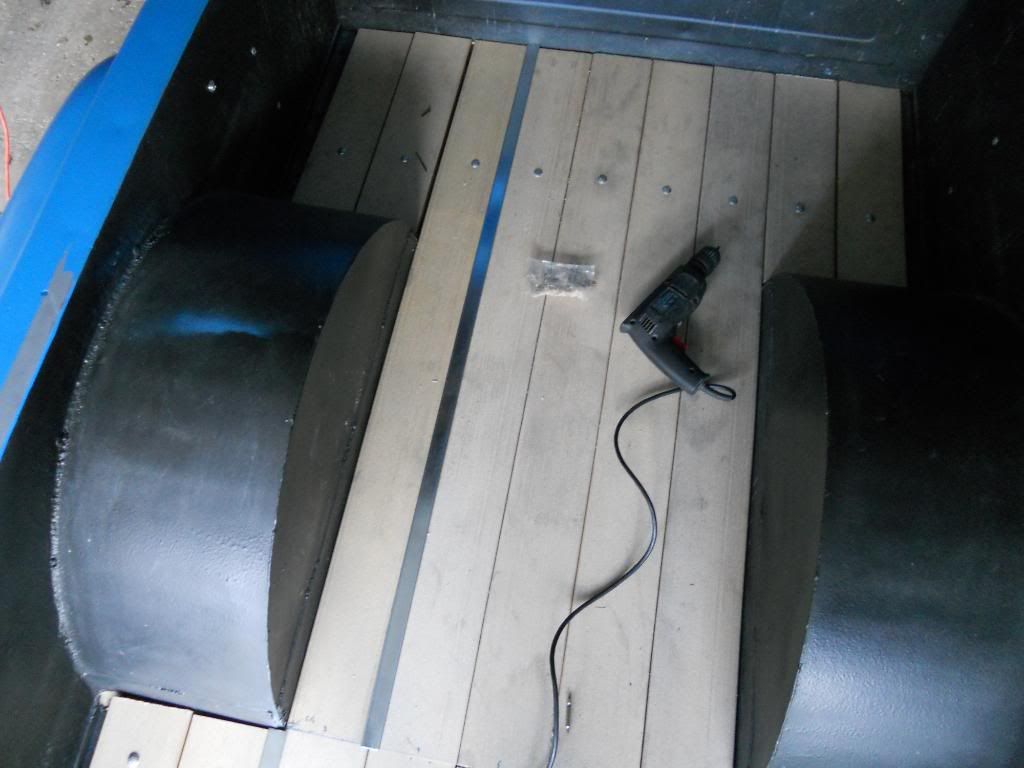 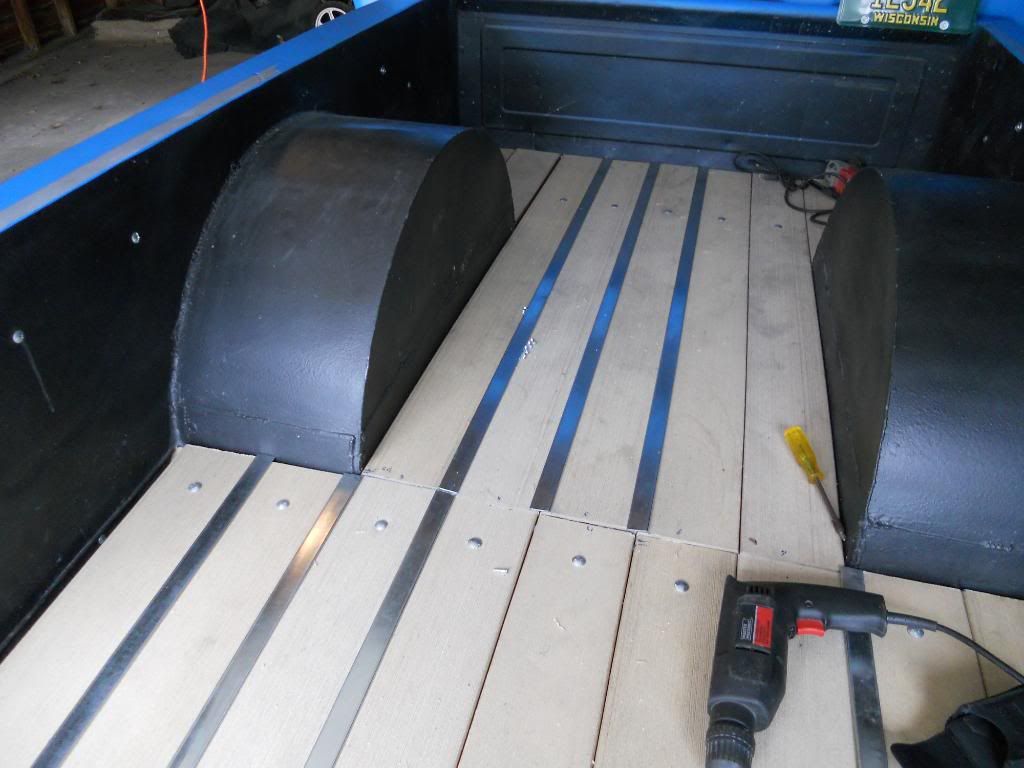
__________________
'66 Short Step / SD Tuned / Big Cam LQ4 / Backhalfed /Built 4l80e / #REBUILDEVERYTHING |
|
|
|
|
09-19-2012, 12:05 AM
|
#11 |
|
Registered User
Join Date: Sep 2011
Location: Tacoma, WA
Posts: 2,425
|
Re: Br3w City's Project omgwtfbbq
dude that is awesome LoL !!
Rock on
__________________
Michael McMurphy My 66 Stepside My 64 Tow Truck My 66 Tempest Table Of Contents Added to Page1 |
|
|
|
|
09-22-2012, 02:14 AM
|
#12 |
|
meowMEOWmeowMEOW
Join Date: Sep 2009
Location: MKE WI
Posts: 7,128
|
Re: Br3w City's Project omgwtfbbq
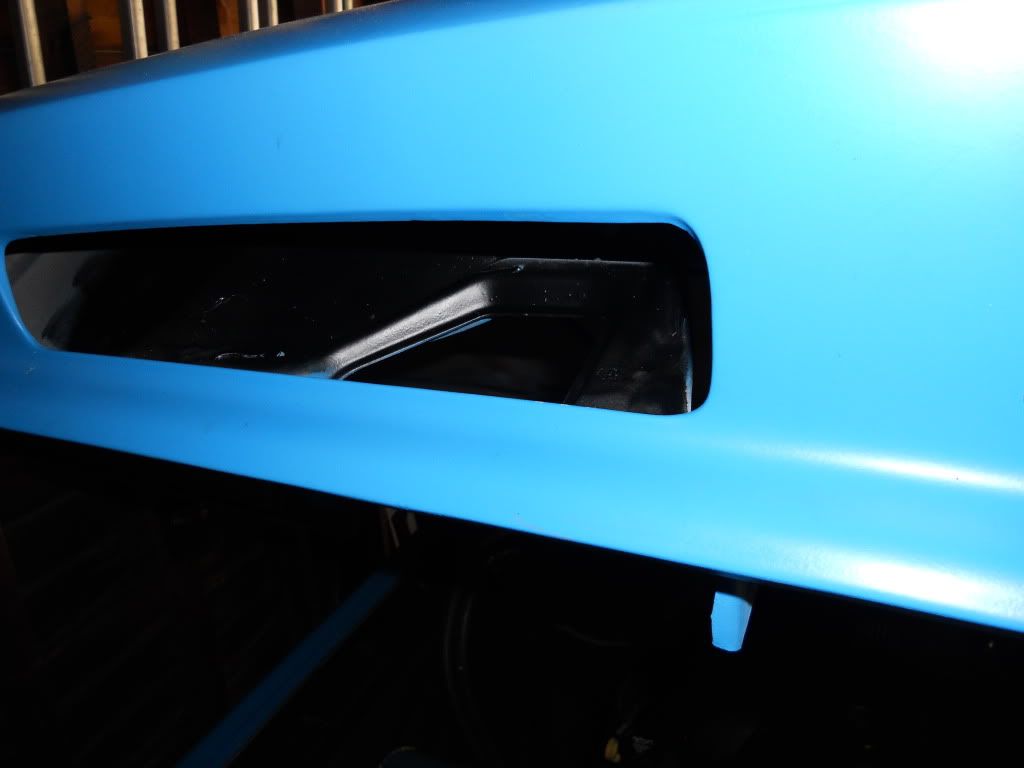
I decided to spend a few minutes and paint the backing area of the nostrils on the hood. It was blue from the paint job, but the light color made it easy to see in and notice the ugly latch and bolts etc...took 3 minutes but the contrast was nice.
  I finished laying out and bolting in the boards for the final time, as well as laying down and securing all the final trim pieces. This is the final layout, and although it looks decent there are a few obvious imperfections. These will soon disappear once the whole thing gets bedlined, bringing the bed together as one visual piece and securing the gaps between the paint work and the bed work. 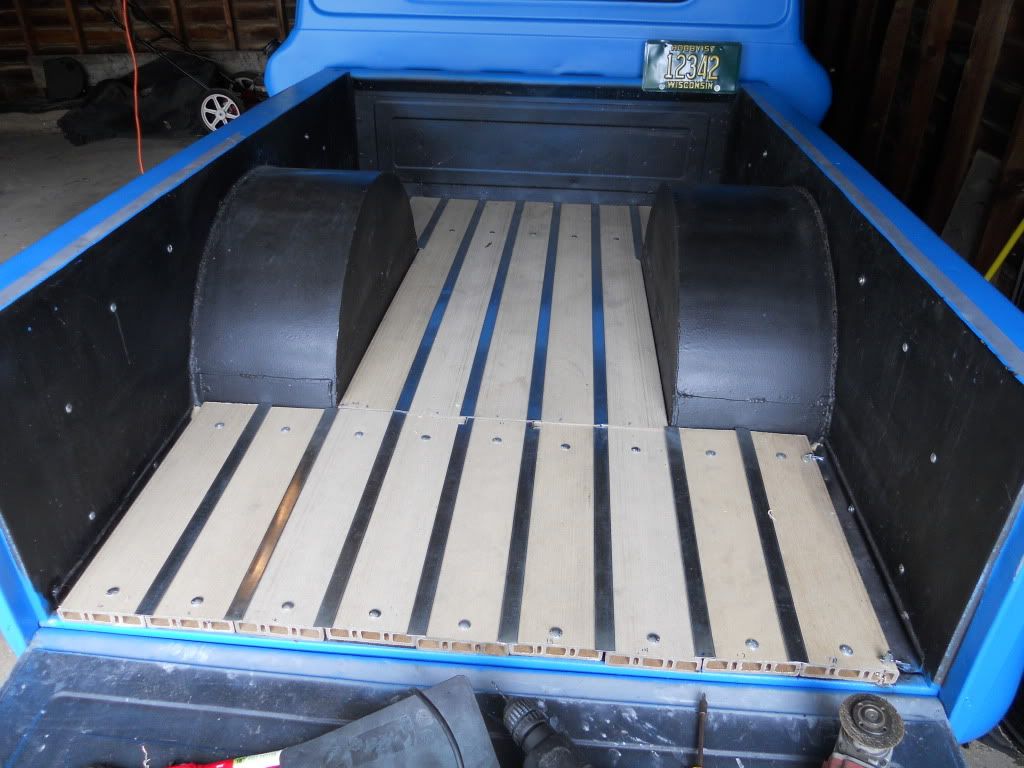  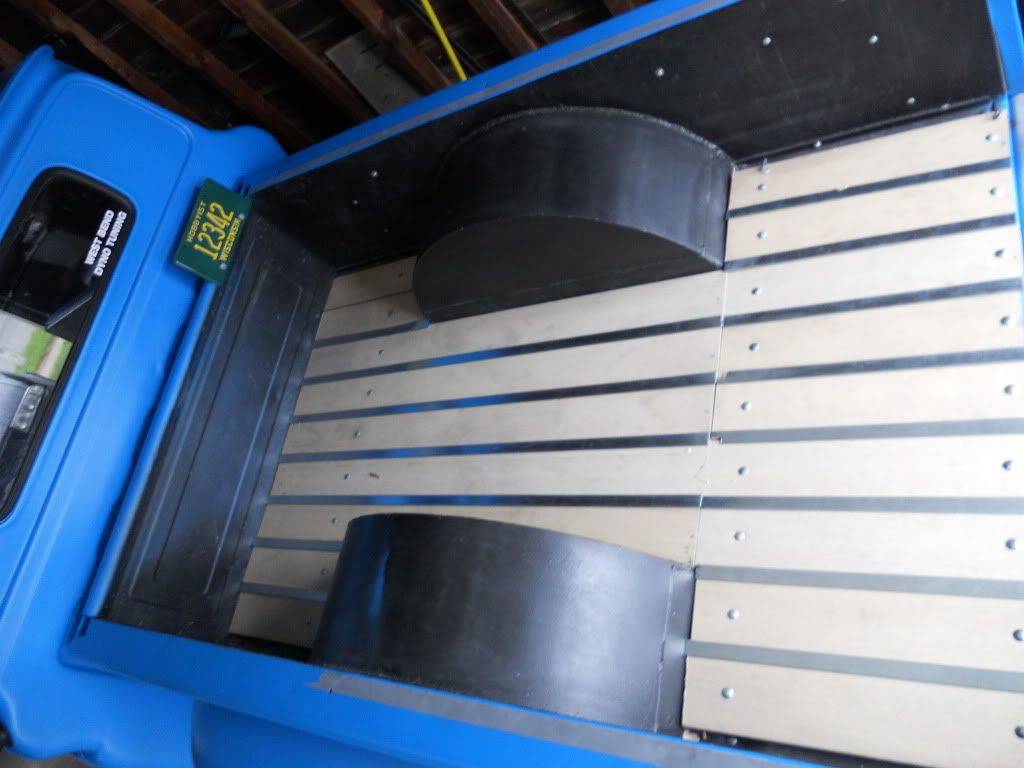
__________________
'66 Short Step / SD Tuned / Big Cam LQ4 / Backhalfed /Built 4l80e / #REBUILDEVERYTHING |
|
|
|
|
10-01-2012, 12:34 AM
|
#13 |
|
meowMEOWmeowMEOW
Join Date: Sep 2009
Location: MKE WI
Posts: 7,128
|
Re: Br3w City's Project omgwtfbbq
Not much progress. I've been waiting on some new tires before I can mount the black wheels up, and waiting on a quote from line-x or rhino on doing my bed and rails.
I did have a few extra summit bucks, and since I'm gearing up to do the rest of the hydroboost, I decided to pick up a line lock, since I'll have to mess with the brake lines anyway. 
__________________
'66 Short Step / SD Tuned / Big Cam LQ4 / Backhalfed /Built 4l80e / #REBUILDEVERYTHING |
|
|
|
|
10-09-2012, 01:14 AM
|
#14 |
|
meowMEOWmeowMEOW
Join Date: Sep 2009
Location: MKE WI
Posts: 7,128
|
Re: Br3w City's Project omgwtfbbq
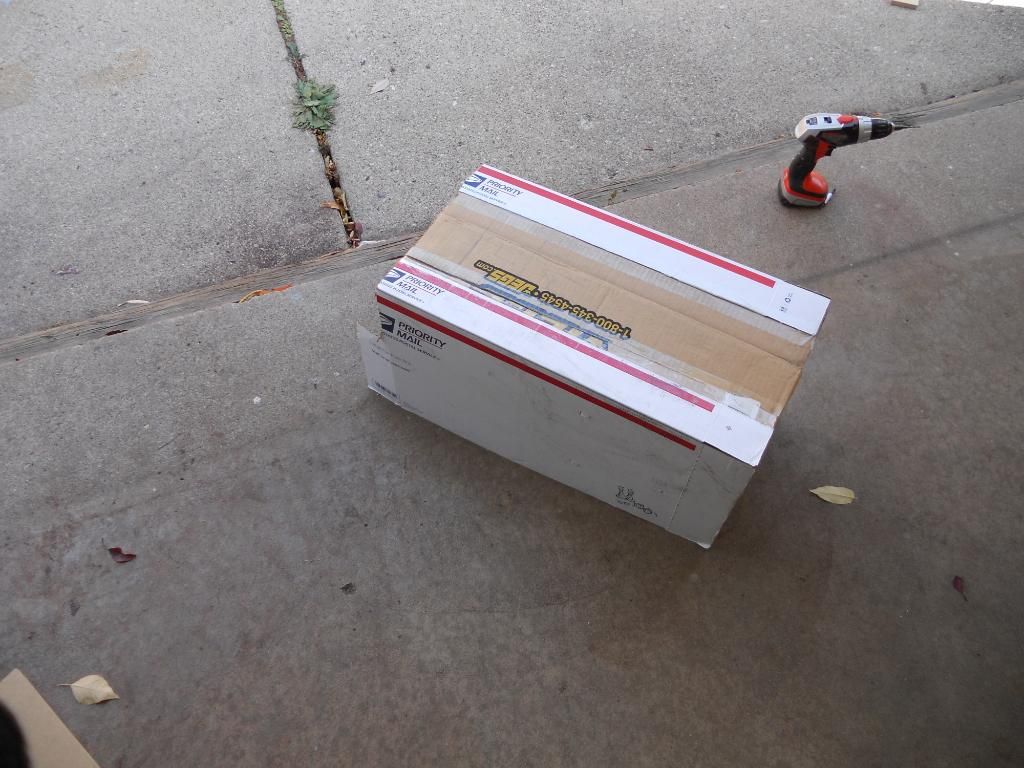
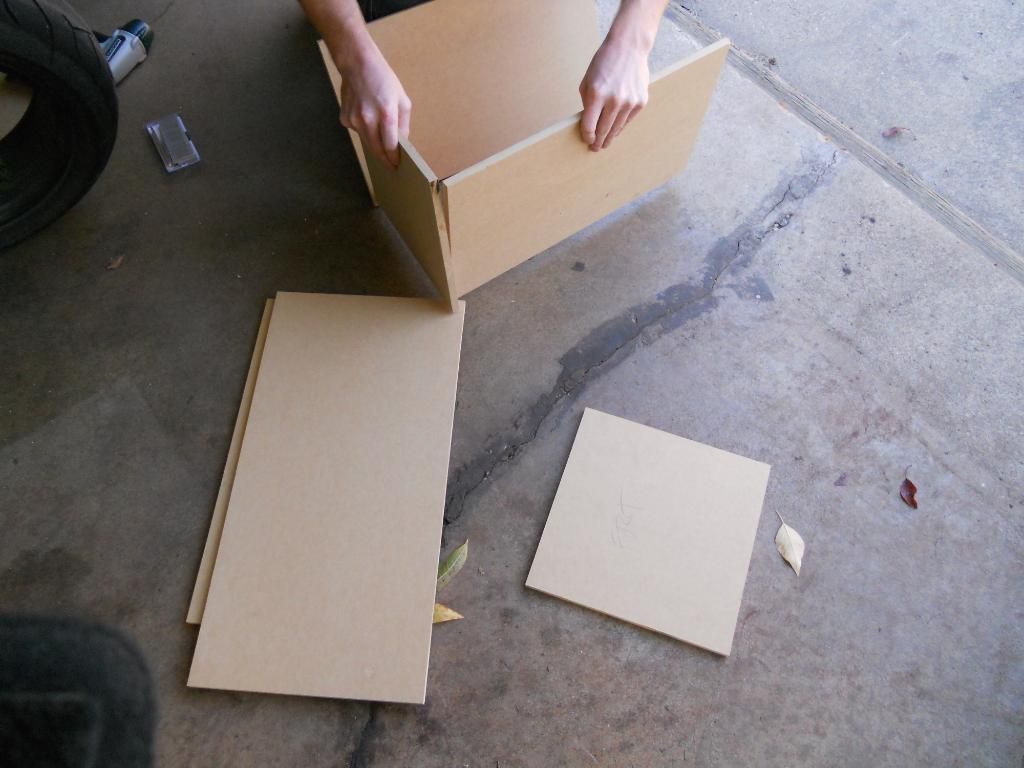
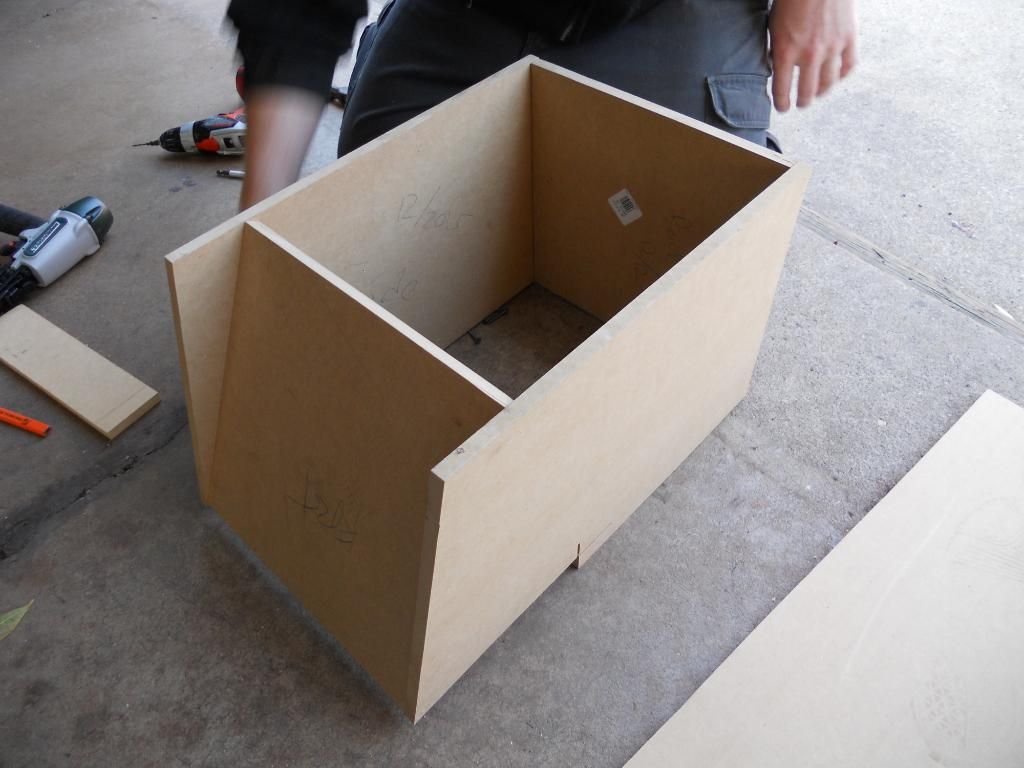
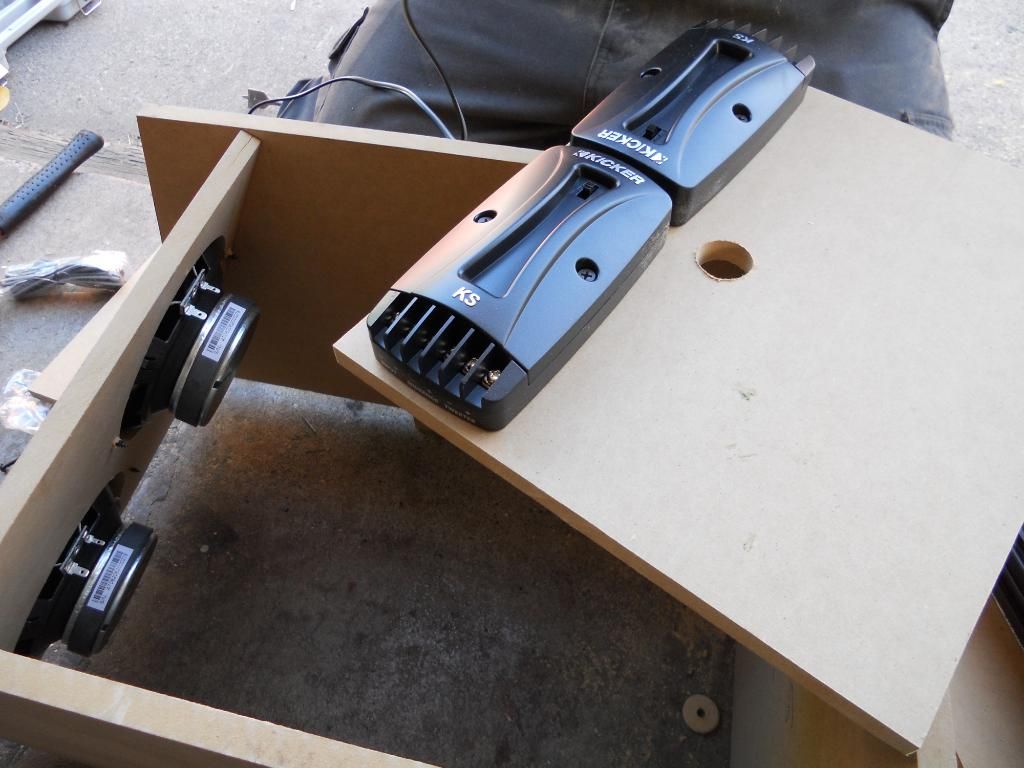
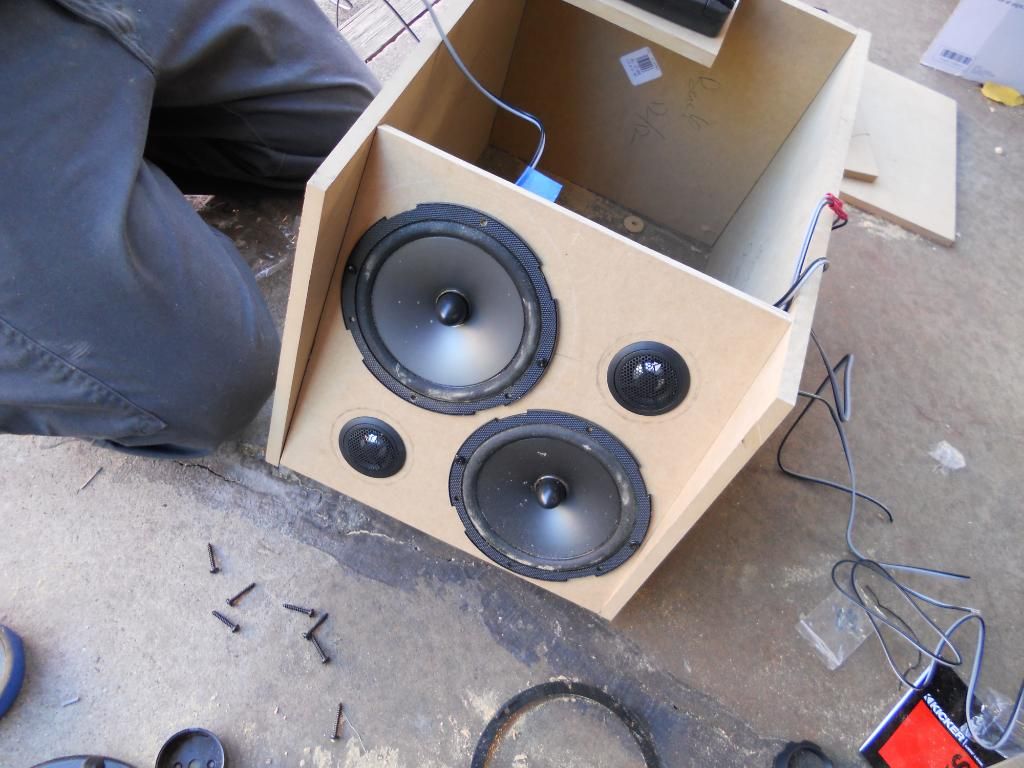
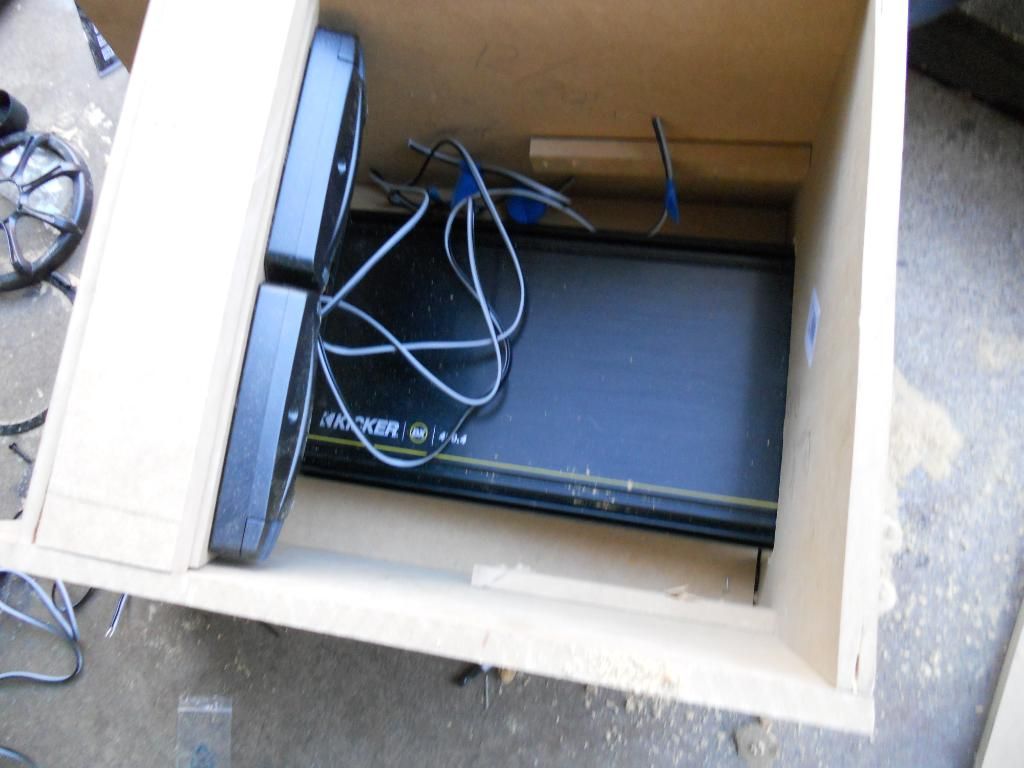
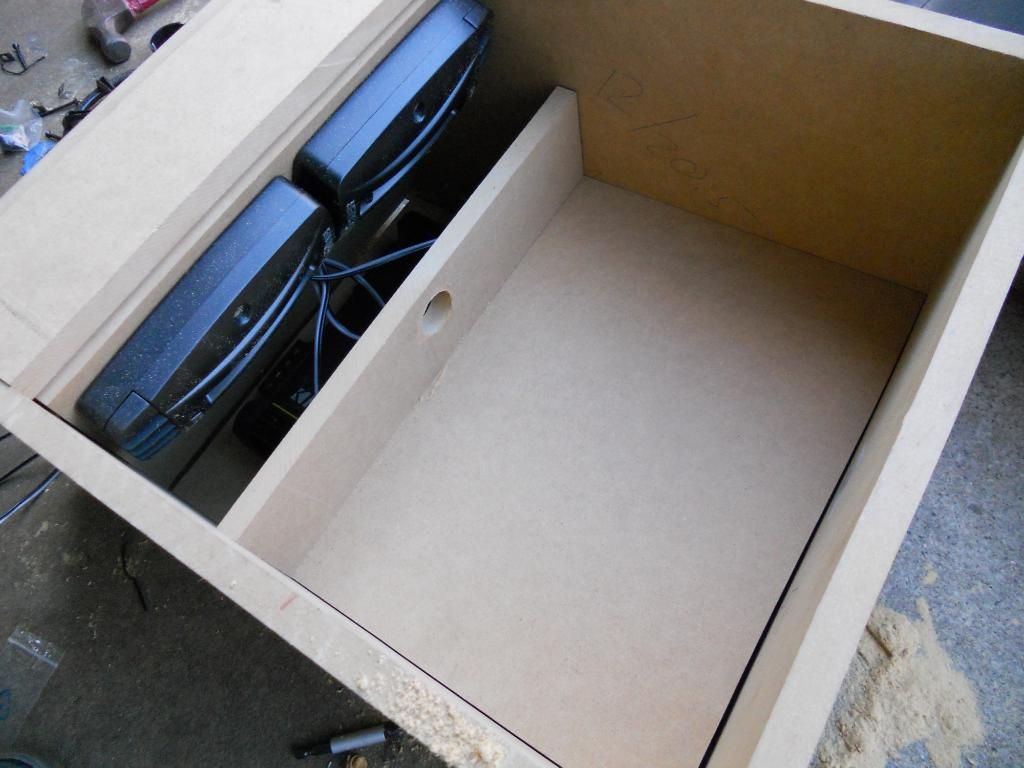
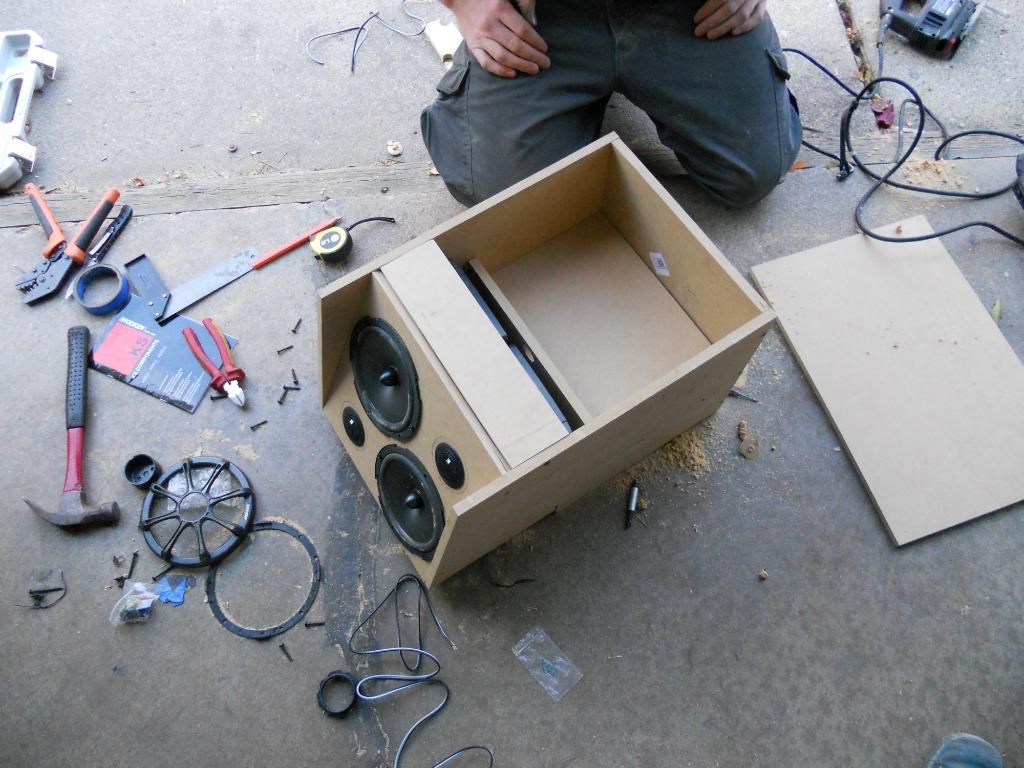
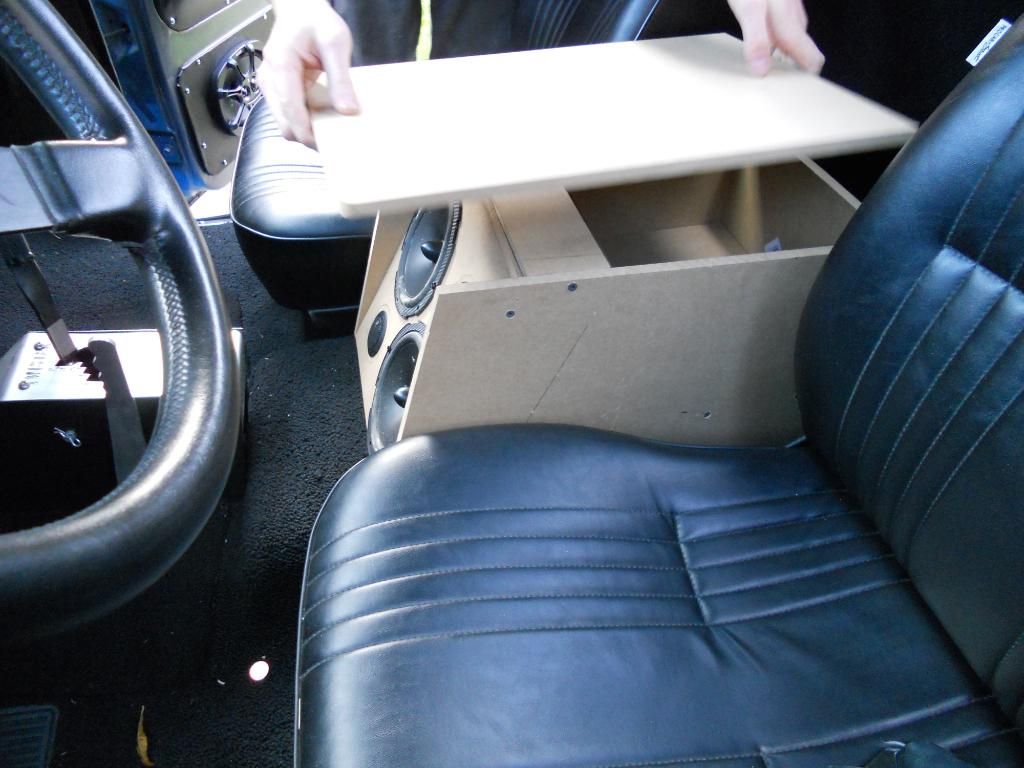
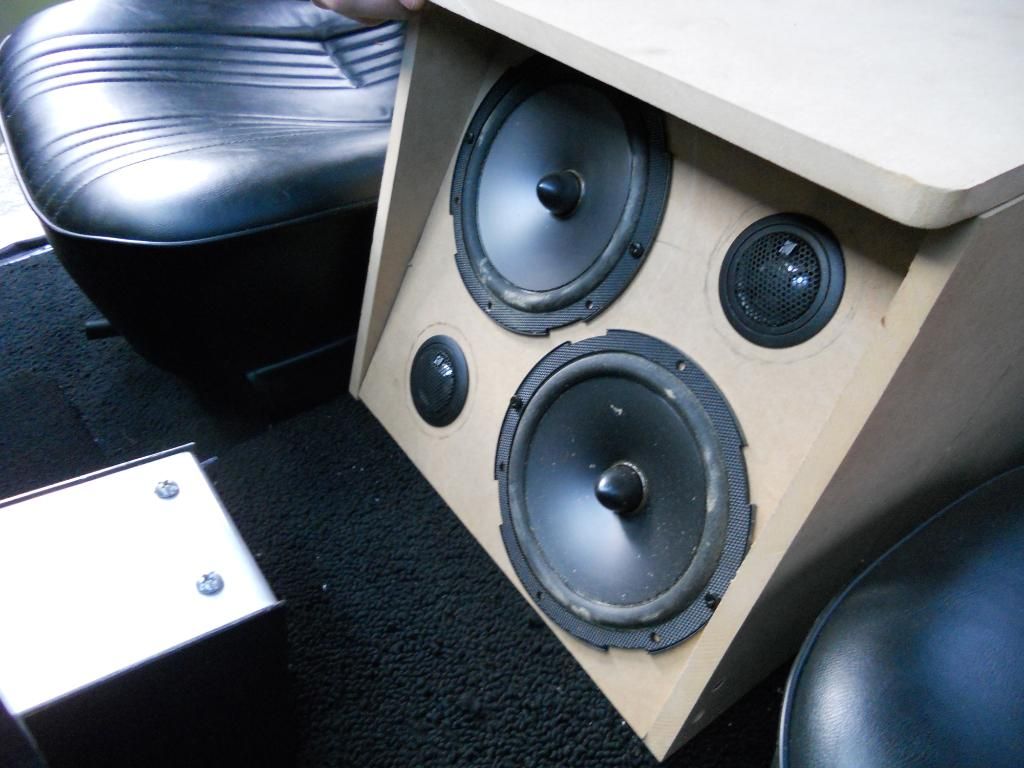
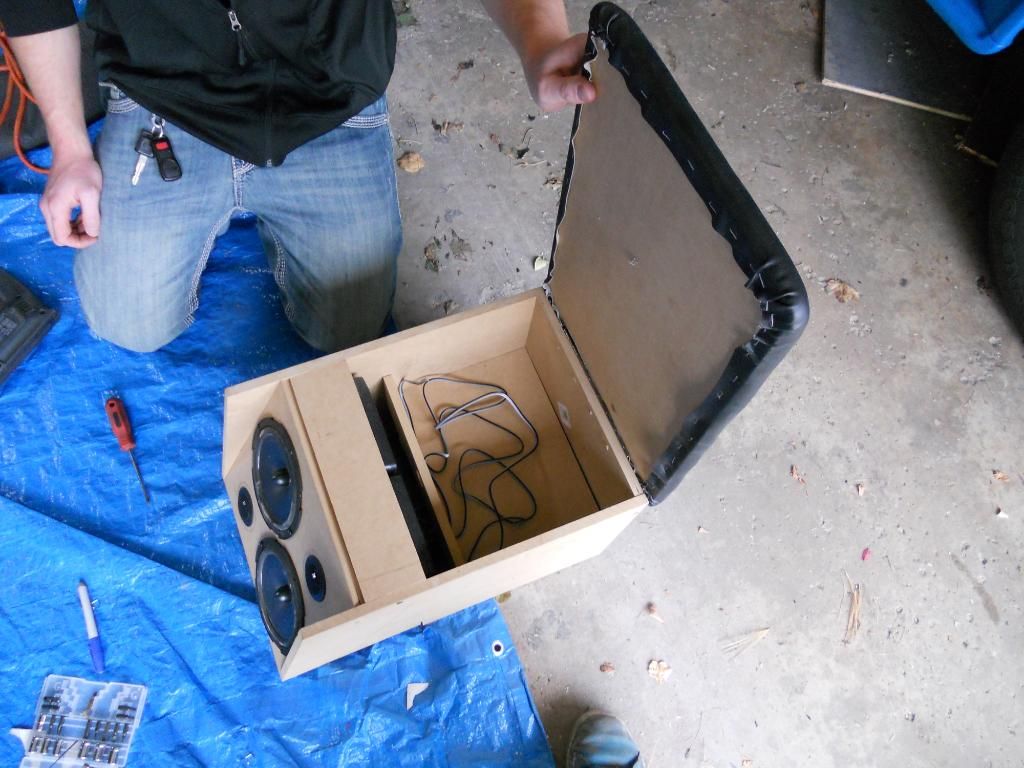
Actually got something accomplished today! Put in some hard work and finished the center console, aside from the hinges and upholstery/covering. Starting from a crappy cardobaord template, we used 1/2" mdf and table saw to do a good deal of work. We managed to squeeze a pair of 6.5" components with tweeters, their respective crossovers, a 4 channel amp, and a nice little tray so it still functions as a center console.
__________________
'66 Short Step / SD Tuned / Big Cam LQ4 / Backhalfed /Built 4l80e / #REBUILDEVERYTHING |
|
|
|
|
11-14-2012, 09:59 AM
|
#15 | |
|
Registered User
Join Date: Nov 2011
Location: Oklahoma City Oklahoma
Posts: 1,054
|
Re: Br3w City's Project omgwtfbbq
Whats the model # on those componets and how do they sound?
Quote:
|
|
|
|
|
|
10-10-2012, 01:38 AM
|
#16 |
|
meowMEOWmeowMEOW
Join Date: Sep 2009
Location: MKE WI
Posts: 7,128
|
Re: Br3w City's Project omgwtfbbq
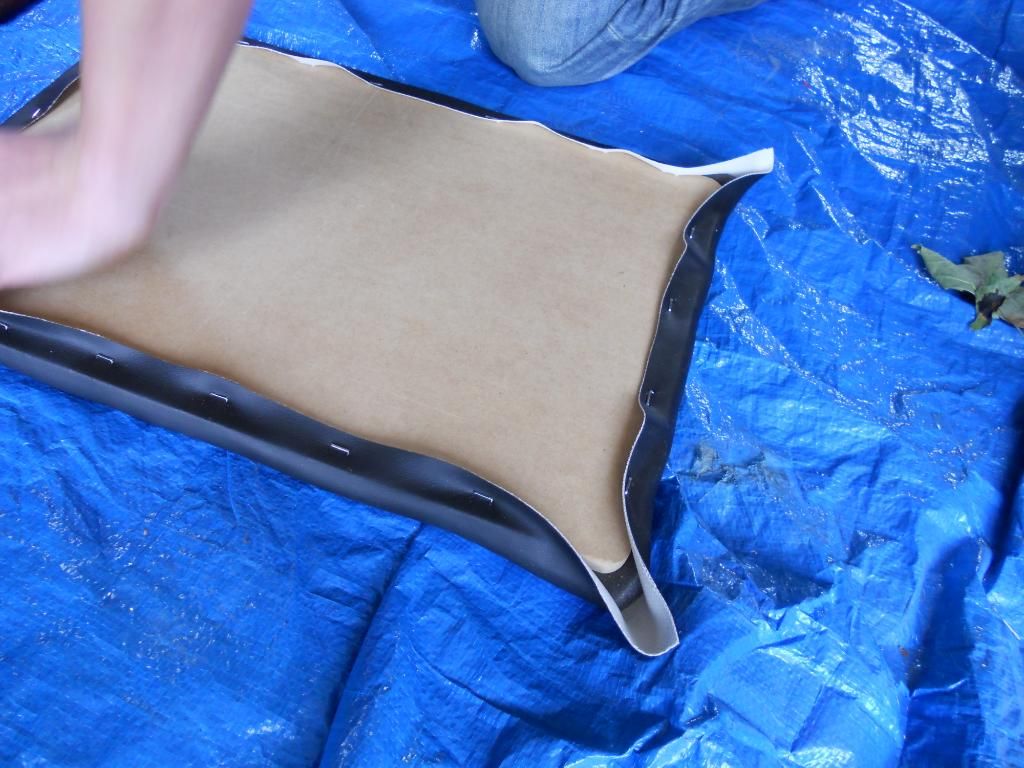
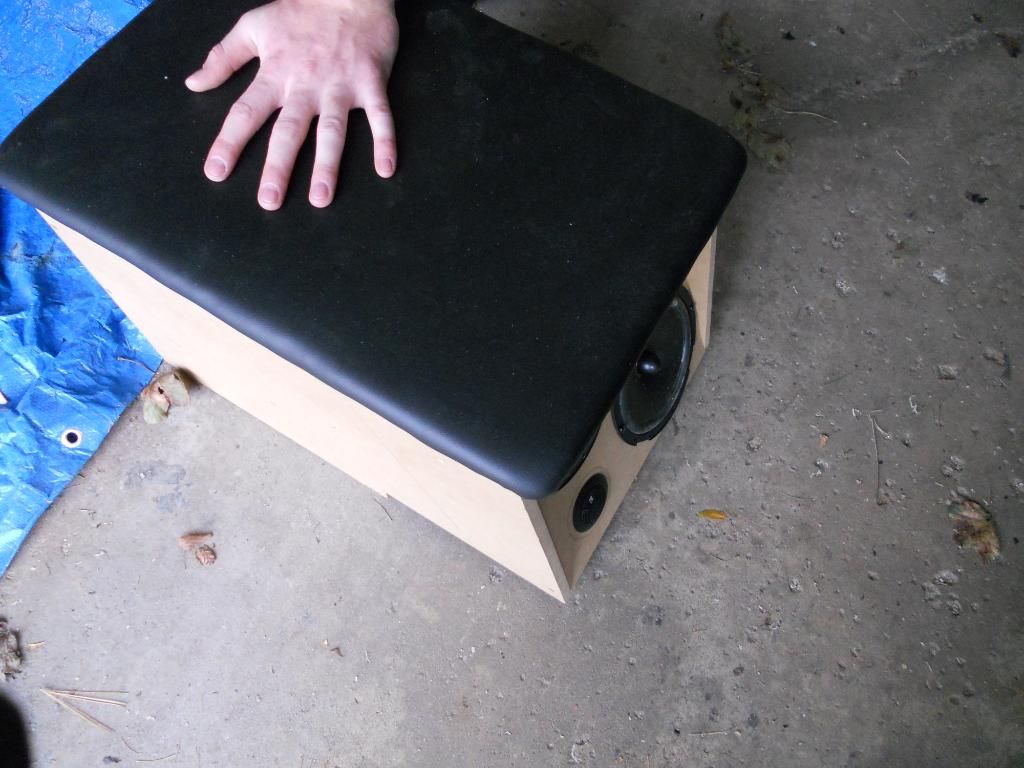
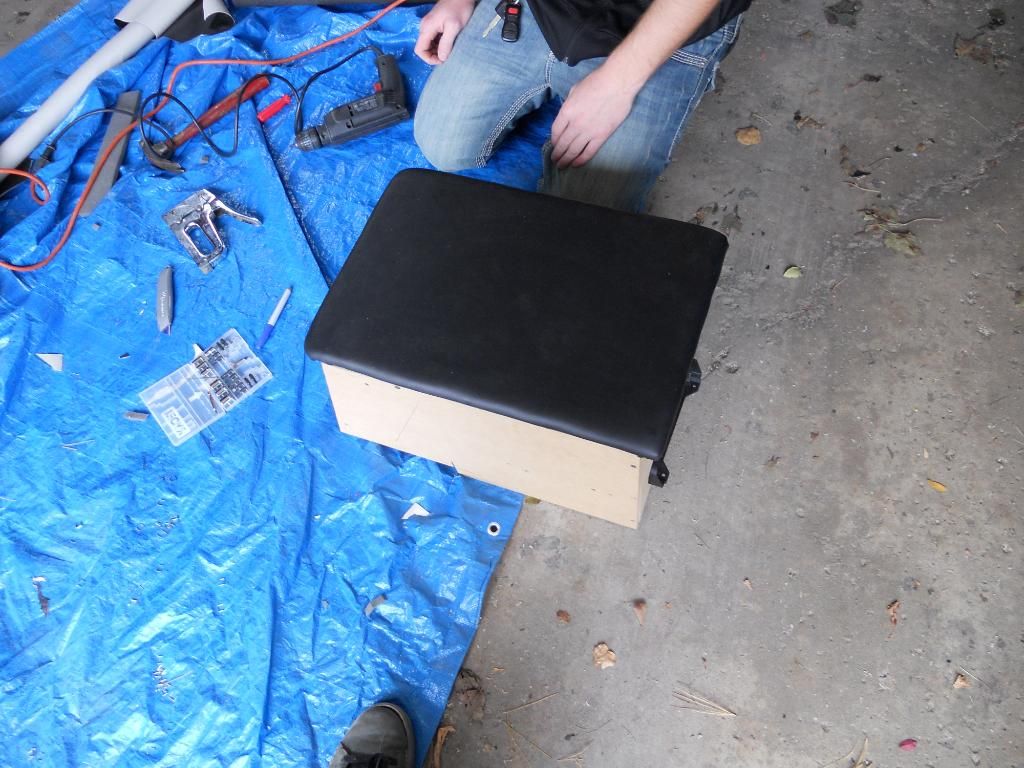
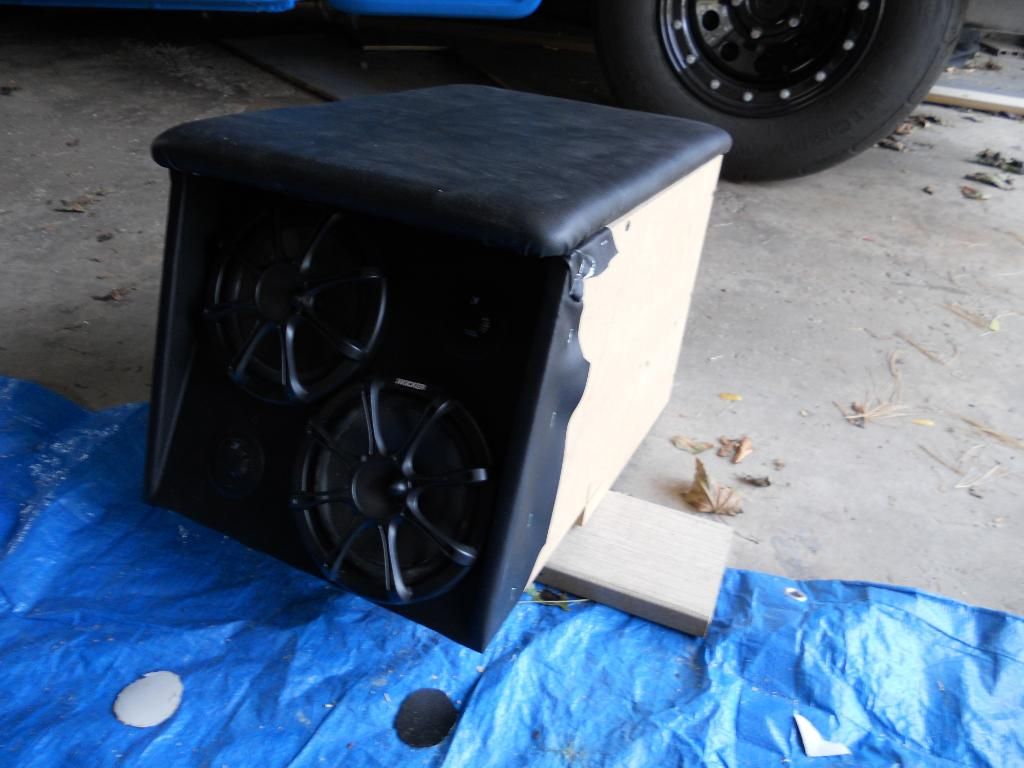
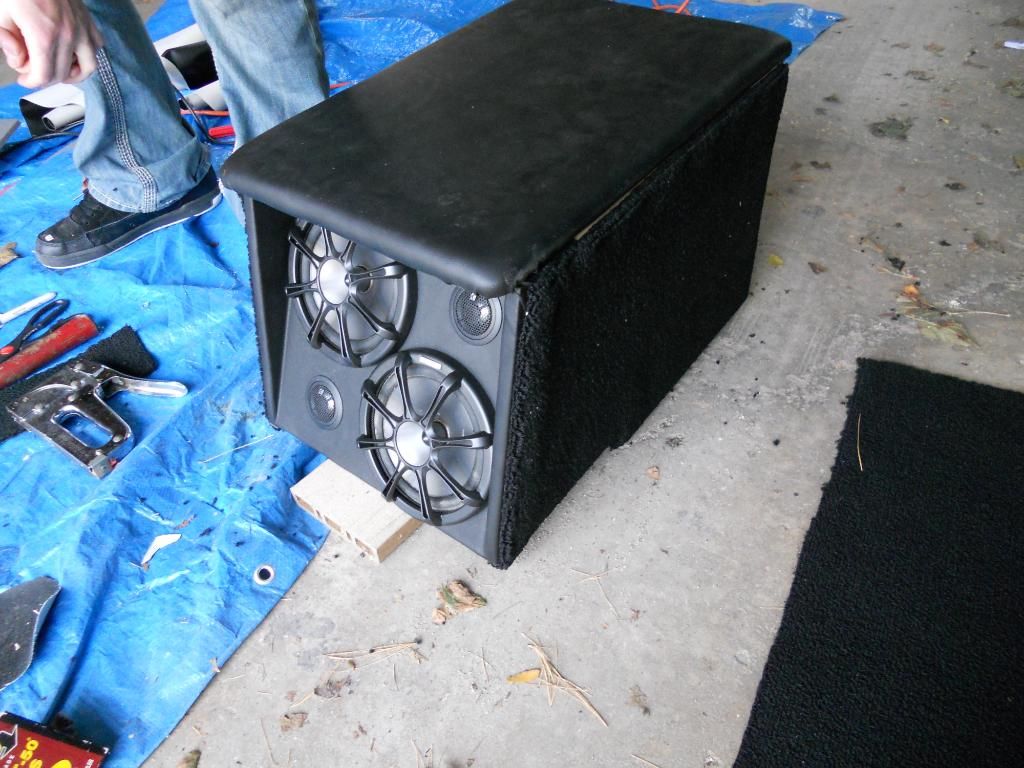
Did the finish work on the the center console. Used the same vinyl from everything else to cover the top (along with some 1/2 furniture foam) to create the padded top. Then covered the front and edges with said vinyl. followed by a padded carpet sides. It fits in great, allows access to everything, and still has room in front to slide a cupholder if desired for longer trips. With the new components and amp, the sound is a HUGE change from what it was a year ago.
__________________
'66 Short Step / SD Tuned / Big Cam LQ4 / Backhalfed /Built 4l80e / #REBUILDEVERYTHING |
|
|
|
|
10-15-2012, 02:14 AM
|
#17 |
|
meowMEOWmeowMEOW
Join Date: Sep 2009
Location: MKE WI
Posts: 7,128
|
Re: Br3w City's Project omgwtfbbq
First the SCARY news....on the way home from my 9 hr drive back from Kentucky, the return line on my fuel rail POPPED OFF and pumped fuel onto my warm headers. I was lucky that we had just started to pull off from a gas station, and the engine had been off for a fuel minutes and not at full temp. We shut it down and got the line held back in place, making the remainder of the drive just fine. They need to give me a set of the new design for free, as their product is defective.
Anyway, I did get my powdercoated wheels on in the front (dirty already in the pic). Took a number of pics when I stopped out at Glasgow Ky. I have a number of more HD pics coming from my brothers DSLR when he gets them uploaded. 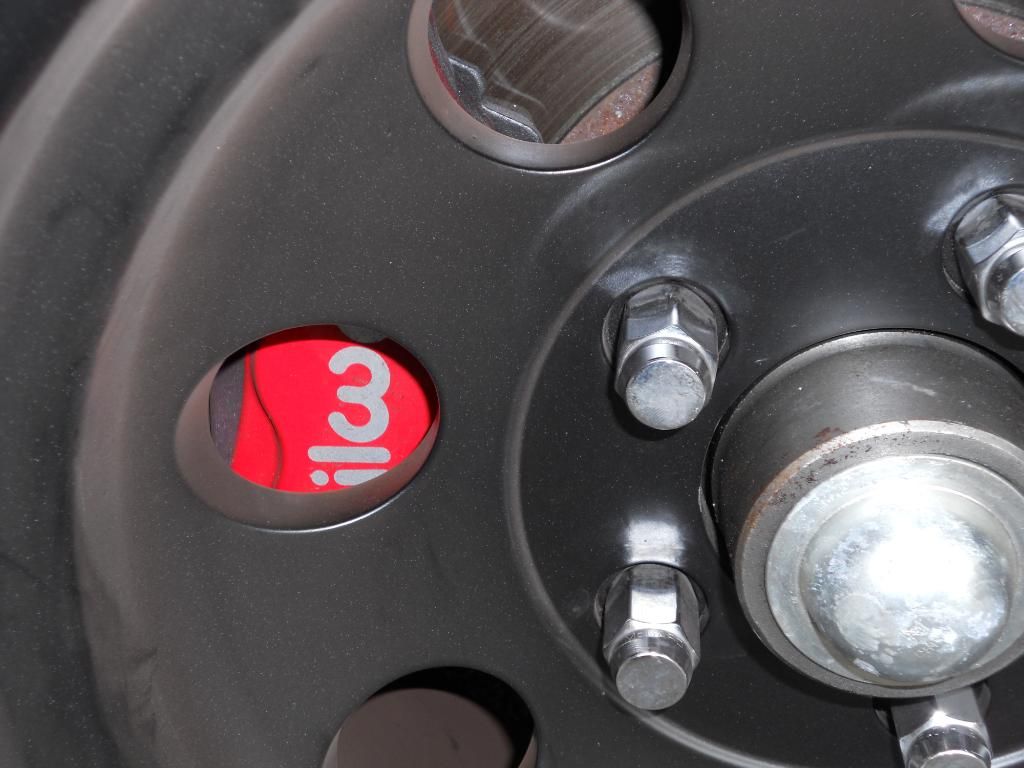 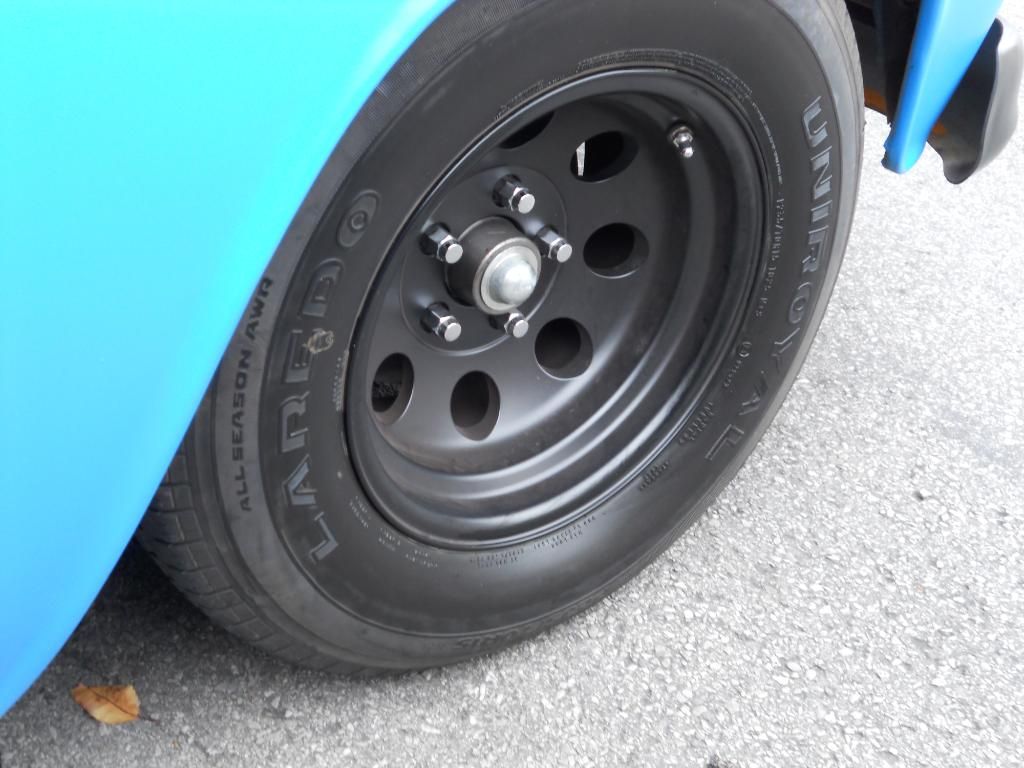   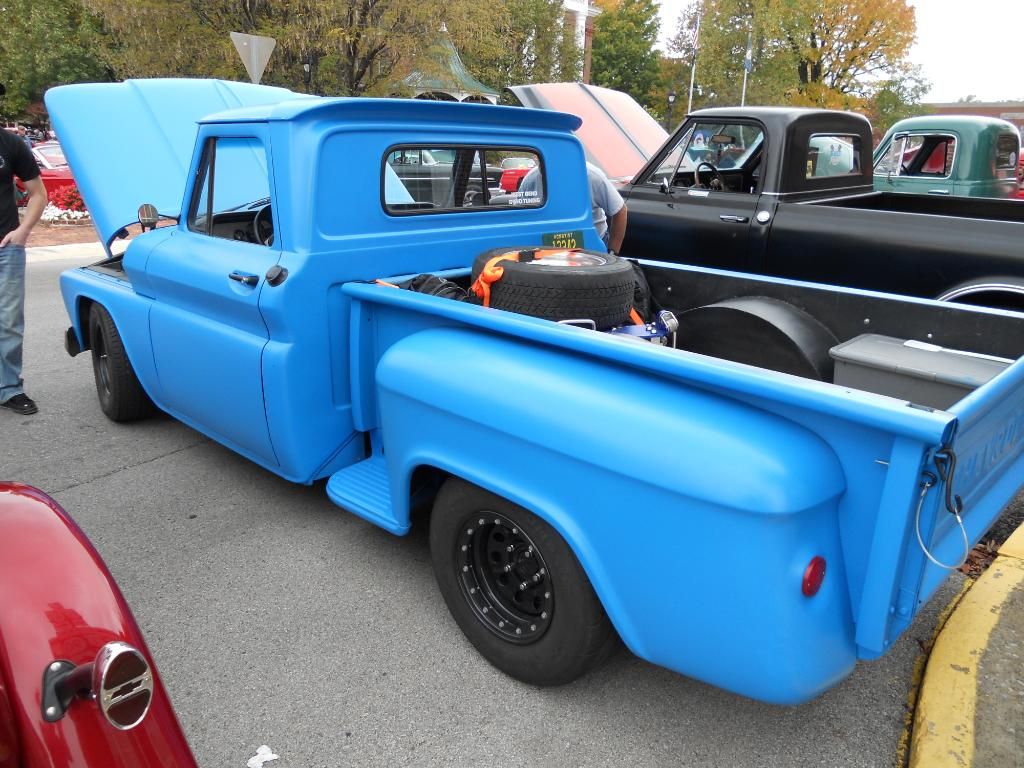 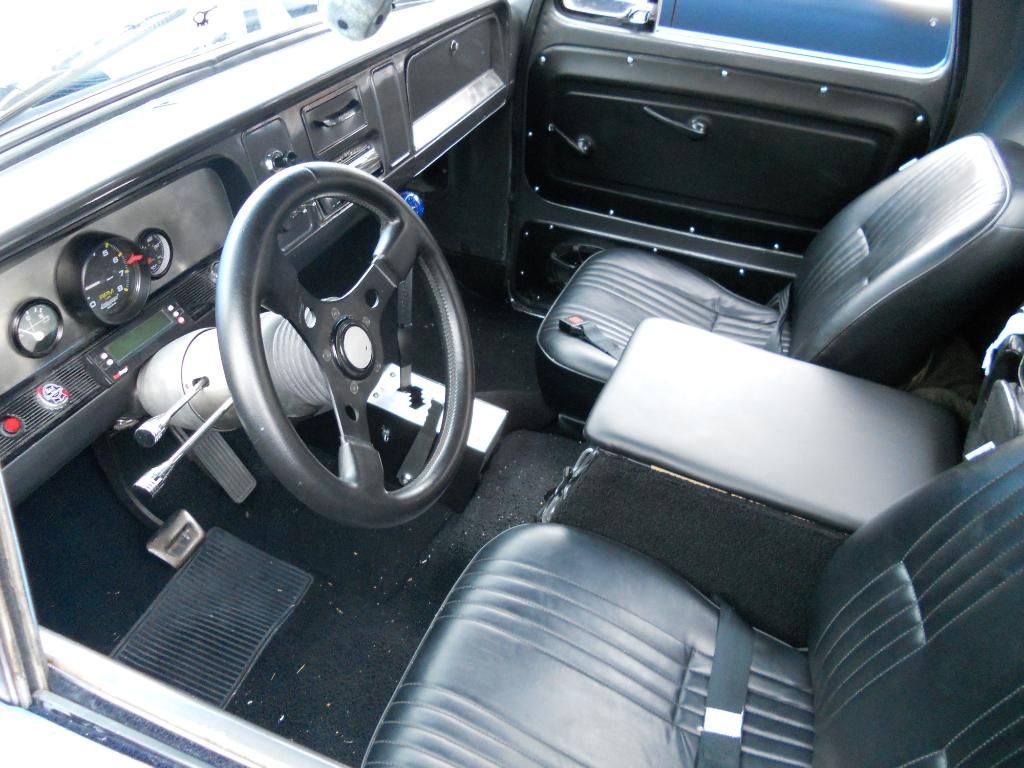  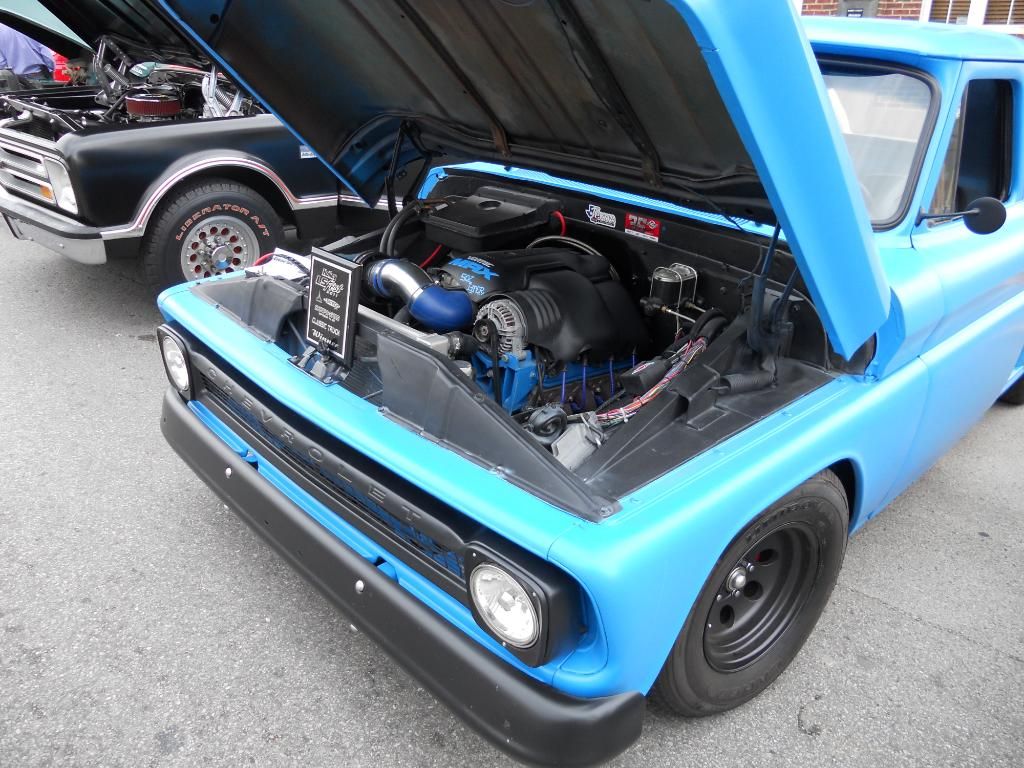 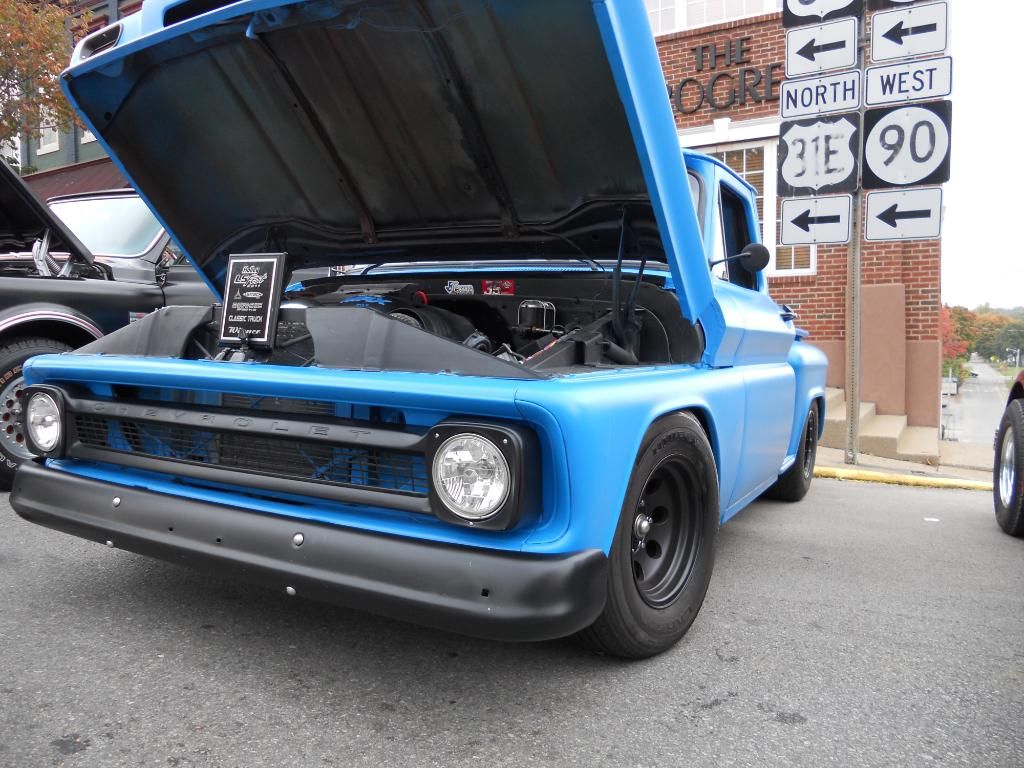
__________________
'66 Short Step / SD Tuned / Big Cam LQ4 / Backhalfed /Built 4l80e / #REBUILDEVERYTHING |
|
|
|
|
10-15-2012, 09:01 AM
|
#18 |
|
Registered User
Join Date: Apr 2012
Location: Vegas
Posts: 617
|
Re: Br3w City's Project omgwtfbbq
I dig the console idea, and glad that fuel leak wasn't more of an issue.
|
|
|
|
|
10-25-2012, 03:31 PM
|
#19 |
|
Registered User
Join Date: Aug 2012
Location: error 404 location not found
Posts: 816
|
Re: Br3w City's Project omgwtfbbq
Your truck is bada@#
__________________
1995 s10 blazer 4.3 1967 c10 350/350 fleet short 1993 s10 blazer 4.3l 4l60 RIP 6/20/14 2000 mercury sable Thats a how I roll |
|
|
|
|
10-25-2012, 05:17 PM
|
#20 |
|
Registered User
Join Date: Oct 2012
Location: Rockwall, Tx
Posts: 151
|
Re: Br3w City's Project omgwtfbbq
Brew,
What do your rear tires measure to (height and width)? I'm doing a pro-touring restomod and trying to run and 18x12 on the rear. Just trying to get an idea in my head of how large of a tub I need to put in. Tire I'm looking at is a 315/40-18... Darryl Last edited by 66C06; 10-25-2012 at 05:23 PM. |
|
|
|
|
10-25-2012, 05:45 PM
|
#21 |
|
meowMEOWmeowMEOW
Join Date: Sep 2009
Location: MKE WI
Posts: 7,128
|
Re: Br3w City's Project omgwtfbbq
Thanks guys.
Darryl, my tubs are a bit oversized, but I wanted to go bigger in case i decide to narrow the rear in the future. My rears are 325/50/15 Below is a comparison of our tires, mine is on the left, your 18 on the right. 
__________________
'66 Short Step / SD Tuned / Big Cam LQ4 / Backhalfed /Built 4l80e / #REBUILDEVERYTHING Last edited by BR3W CITY; 10-25-2012 at 05:53 PM. |
|
|
|
|
10-25-2012, 05:58 PM
|
#22 | |
|
Registered User
Join Date: Oct 2012
Location: Rockwall, Tx
Posts: 151
|
Re: Br3w City's Project omgwtfbbq
Quote:
How wide is your tub? How much clearance do you have between the outer sidewall and your inner fender AND how much clearance between the inner sidewall and tub? Lastly how much clearance from the tire to the top of the fender (closest point that would contact if bottomed out)? Thanks for your patience!!! D |
|
|
|
|
|
10-25-2012, 07:48 PM
|
#23 |
|
6>8 Plugless........
 Join Date: Sep 2007
Location: Prairie City, Ia
Posts: 17,140
|
Re: Br3w City's Project omgwtfbbq
Man, your truck is looking awesome! Great work on it!
__________________
Ryan 1972 Chevy Longhorn K30 Cheyenne Super, 359 Inline 6 cylinder, Auto Trans, Tilt, Diesel Tach/Vach, Buckets, Rare Rear 4-link and air ride option Build Thread 1972 GMC Sierra Grande Longhorn 4x4 1972 Chevy Cheyenne Super K20 Long Step side tilt, tach, tow hooks, AC, 350 4 speed 1972 C10 Suburban Custom Deluxe 1969 Chevy milk truck 1971 Camaro RS 5.3 BTR STG3 Cam Super T10 1940 Ford 354 Hemi 46RH Ford 9" on air ride huge project Tired of spark plugs? Check this out. |
|
|
|
|
10-27-2012, 01:07 PM
|
#24 |
|
meowMEOWmeowMEOW
Join Date: Sep 2009
Location: MKE WI
Posts: 7,128
|
Re: Br3w City's Project omgwtfbbq
Thanks diesel.
Darryl, from the outside of the tire to the inside of the fender, there is about 1.5 finger widths, so about 1". One side has a little more room becaue the PO trimmed the lip at one point. The inside of the tire has almost 6-8" to the tub if I guessed, tub itself is a foot wide. There is pretty much no chance of it bottoming out, the old bedside hangs about 1-1.5" into the tub where they overlapped and it was welded, even at that low point there is at least 5-7" room. For reference, my tub is so tall that it hits the TOP bolt where the fenders bolt onto the bedside. Fully loaded with my brother in the back, there is at least 5" before you'd even come close to touching anything.
__________________
'66 Short Step / SD Tuned / Big Cam LQ4 / Backhalfed /Built 4l80e / #REBUILDEVERYTHING |
|
|
|
|
10-27-2012, 02:01 PM
|
#25 | |
|
Registered User
Join Date: Oct 2012
Location: Rockwall, Tx
Posts: 151
|
Re: Br3w City's Project omgwtfbbq
Quote:
Thanks for the info!!!! |
|
|
|
|
 |
| Bookmarks |
|
|


 \\ MY YOUTUBE CHANNEL


 Hybrid Mode
