
|
|
|
 11-07-2014, 04:50 PM
|
#1 |
|
Registered User
Join Date: Jul 2011
Location: Des Moines, Iowa
Posts: 3,016
|
Re: Project "My Happy Mess"
__________________
project: "my happy mess" |

|

|
|
05-25-2015, 06:35 PM
|
#2 |
|
Registered User
Join Date: Jul 2011
Location: Des Moines, Iowa
Posts: 3,016
|
Re: Project "My Happy Mess"
Like magic, should be fixed now. Pictures showing.

__________________
project: "my happy mess" |
|
|
|
|
10-16-2011, 02:39 AM
|
#3 |
|
Registered User
Join Date: Jul 2011
Location: Des Moines, Iowa
Posts: 3,016
|
Re: Project "My Happy Mess"
  Installing the intake - 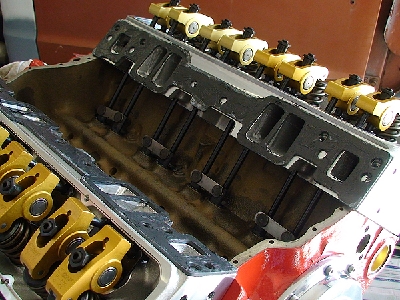 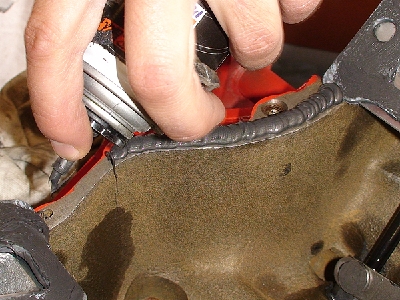 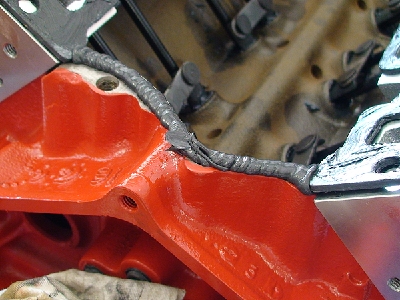 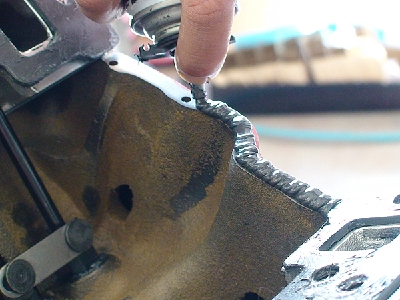 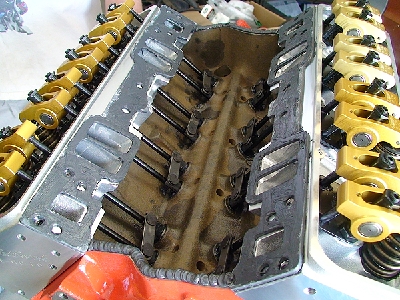 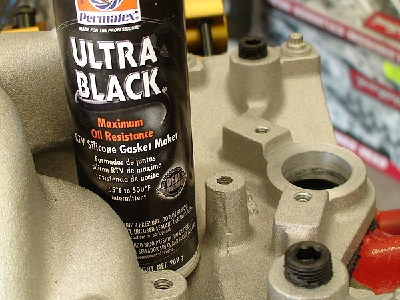 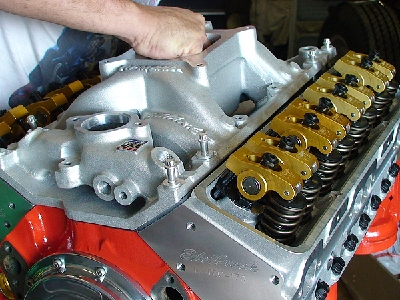 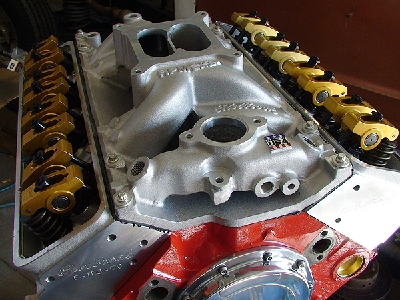 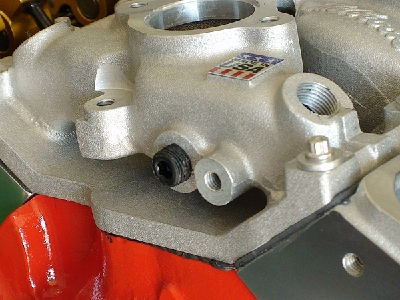 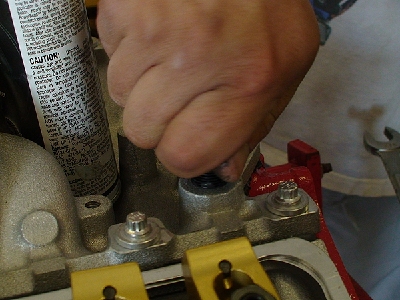 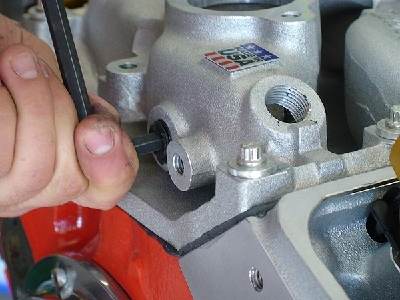 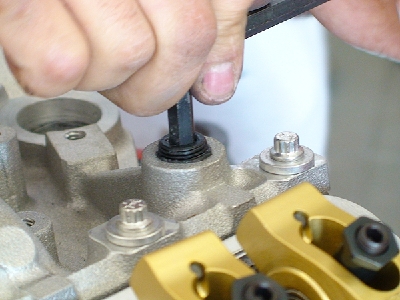 Tackeling the (front) frame before dropping the block/transmission (after lines). Proper breathing apparatus and ventilation used and recommended. Coat 1 complete, moving onto the 2nd coating - 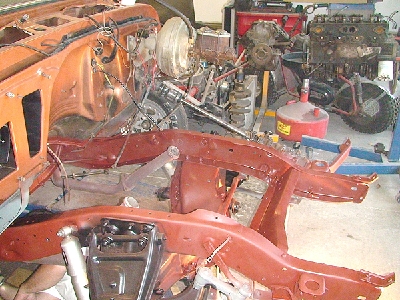 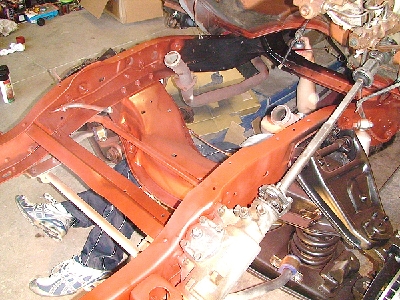 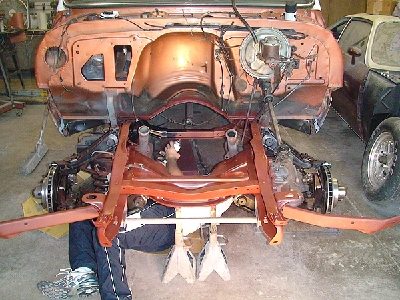 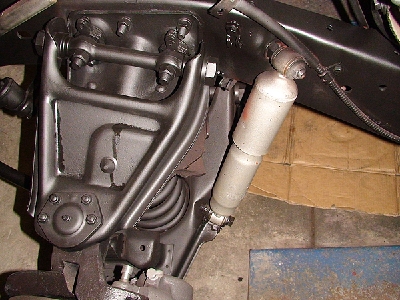 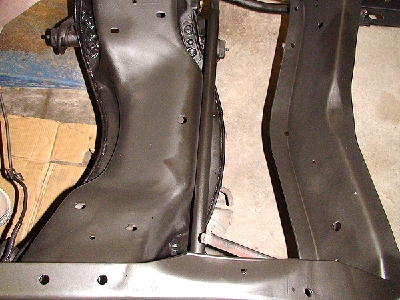 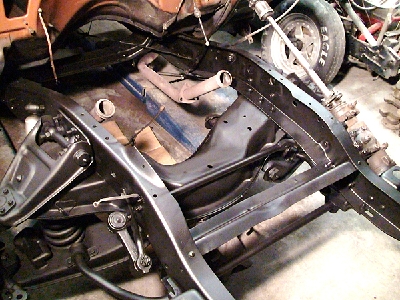 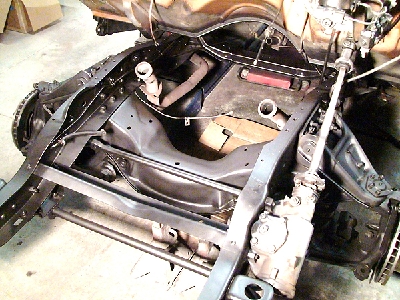 Finished. Will hit the underside with rubber in a can before engine/transmission. Real quick... Pan/transmission before - 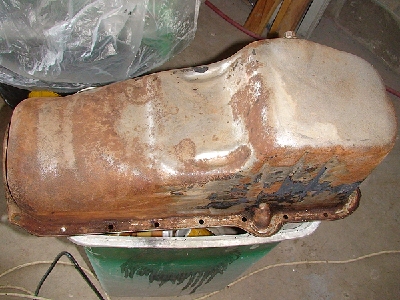  After - First coat Zero Rust Red for oil pan (second coat will be a black of a different product) - 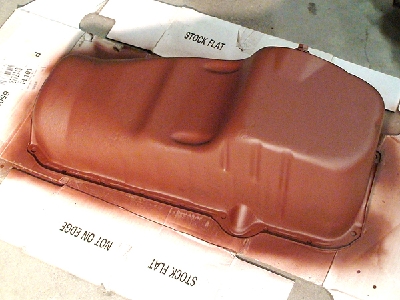 Cast 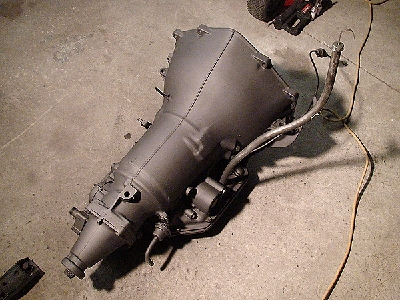   south side! 
__________________
project: "my happy mess" Last edited by litew8; 10-16-2011 at 02:47 AM. |
|
|
|
|
10-28-2012, 07:47 PM
|
#4 | |
|
Registered User
 Join Date: Aug 2012
Location: Homosassa, Fl.
Posts: 2,965
|
Re: Project "My Happy Mess"
Quote:
|
|
|
|
|
|
10-29-2012, 02:07 PM
|
#5 | ||
|
Registered User
Join Date: Jul 2011
Location: Des Moines, Iowa
Posts: 3,016
|
Re: Project "My Happy Mess"
Quote:
Quote:
In that picture, it is zero rust red that was a deep red like maroon. I painted it later with a black undercoating.
__________________
project: "my happy mess" |
||
|
|
|
|
10-16-2011, 07:45 AM
|
#6 |
|
Senior Member
Join Date: Mar 2011
Location: West Plains, Missouri
Posts: 7,555
|
Re: Project "My Happy Mess"
Looks like you've been busy, nice.....Jim
__________________
my build thread: http://67-72chevytrucks.com/vboard/s...d.php?t=459839 Jimbo's long bed step build:http://67-72chevytrucks.com/vboard/s...t=464626<br /> |
|
|
|
|
10-16-2011, 09:08 AM
|
#7 |
|
Registered User
Join Date: Mar 2011
Location: Oak Ridge NC
Posts: 957
|
Re: Project "My Happy Mess"
You're making good progress. I wish I was moving along like you are. The sandblasting was the way to go.
|
|
|
|
|
10-16-2011, 05:54 PM
|
#8 |
|
Registered User
Join Date: Jul 2011
Location: Des Moines, Iowa
Posts: 3,016
|
Re: Project "My Happy Mess"
Thank you.
The experience gained growing up wrenching on cars/engines helped put things into better perspective/execution for a first restore. Sand blasting def. cost me, but now as I undercoat I can see the payoff So far today, I've undercoated (zero rust) the rest of the underside. In an hour, I'll be spraying under body rubber/liner to top it off for good.
__________________
project: "my happy mess" |
|
|
|
|
10-17-2011, 03:42 PM
|
#9 |
|
Registered User
Join Date: Jul 2011
Location: Des Moines, Iowa
Posts: 3,016
|
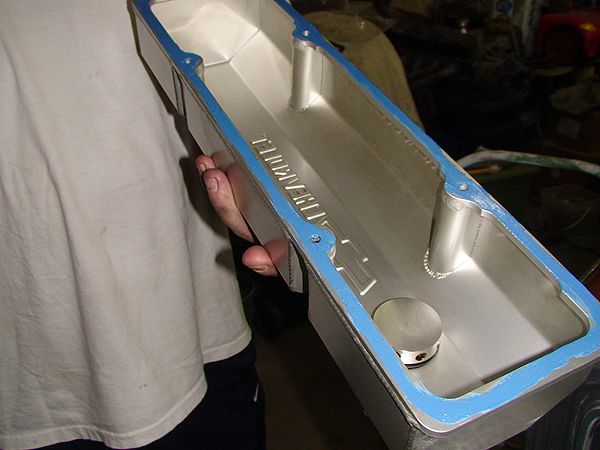
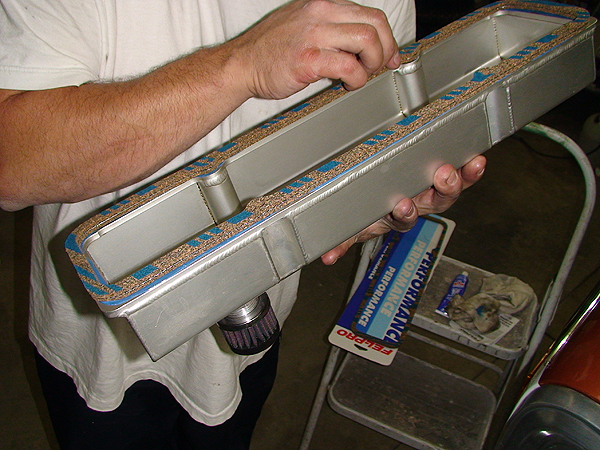
Undercoated
Weekend update -
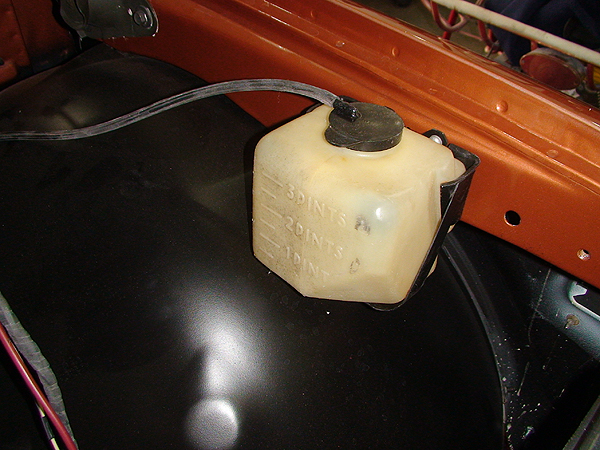
Got the oil pan and tranny pan painted. Used bed liner. It filled in the pits on the oil pan nicely, looks new now. 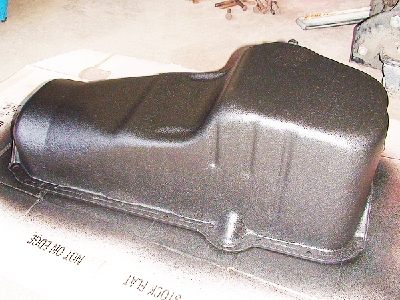 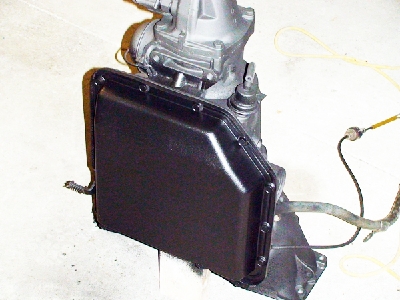 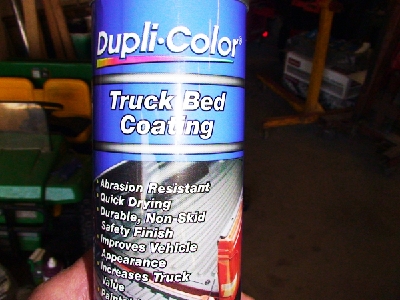 Here's the brand shock I'm using. Monroe Reflex.  Finished spraying the underside with rubber/liner. This is not the same liner I used for the oil/tranny pans, and looks A LOT better in person. Recap: underside has primer, 2 coats Zero Rust and a thick layer of bed liner! If this doesn't extend its life, I don't know what would. Sweet! 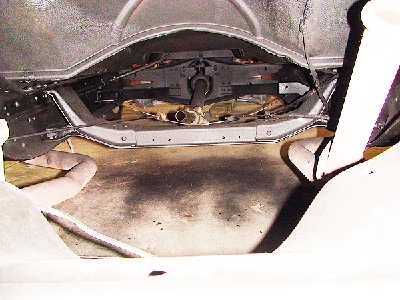 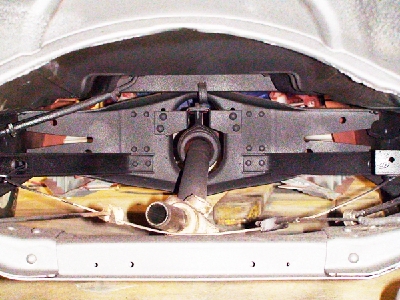 Have some touch-ups to do with the liner still. Otherwise, the brake/tranny lines should arrive tonight. Get those in, then we can place the engine/tranny. Once this hurdle has been jumped, on to the sheet metal... Thanks for looking all!
__________________
project: "my happy mess" Last edited by litew8; 10-17-2011 at 03:57 PM. |
|
|
|
|
10-17-2011, 04:17 PM
|
#10 |
|
VA72C10
 Join Date: Mar 2008
Location: Midlothian, VA
Posts: 25,269
|
Re: Project "My Happy Mess"
Looks good!
__________________
Looking for a 67-72 swb or blazer project in or around VA.
|
|
|
|
|
10-17-2011, 04:21 PM
|
#11 |
|
6>8 Plugless........
 Join Date: Sep 2007
Location: Prairie City, Ia
Posts: 17,140
|
Re: Project "My Happy Mess"
Nice progress and it's looking great!
__________________
Ryan 1972 Chevy Longhorn K30 Cheyenne Super, 359 Inline 6 cylinder, Auto Trans, Tilt, Diesel Tach/Vach, Buckets, Rare Rear 4-link and air ride option Build Thread 1972 GMC Sierra Grande Longhorn 4x4 1972 Chevy Cheyenne Super K20 Long Step side tilt, tach, tow hooks, AC, 350 4 speed 1972 C10 Suburban Custom Deluxe 1969 Chevy milk truck 1971 Camaro RS 5.3 BTR STG3 Cam Super T10 1940 Ford 354 Hemi 46RH Ford 9" on air ride huge project Tired of spark plugs? Check this out. |
|
|
|
|
10-17-2011, 04:45 PM
|
#12 |
|
Senior Member
Join Date: Mar 2011
Location: West Plains, Missouri
Posts: 7,555
|
Re: Project "My Happy Mess"
Looks good....Jim
__________________
my build thread: http://67-72chevytrucks.com/vboard/s...d.php?t=459839 Jimbo's long bed step build:http://67-72chevytrucks.com/vboard/s...t=464626<br /> |
|
|
|
|
10-17-2011, 07:18 PM
|
#13 |
|
Registered User
Join Date: Jul 2011
Location: Des Moines, Iowa
Posts: 3,016
|
Re: Project "My Happy Mess"
I've already been offered a 70 (?) Nova trade (while the truck is disassembled). lol
__________________
project: "my happy mess" |
|
|
|
|
10-18-2011, 09:35 PM
|
#14 |
|
Registered User
Join Date: Jul 2011
Location: Des Moines, Iowa
Posts: 3,016
|
Re: Project "My Happy Mess"
Got brake/transmission lines. Finished undercoating the cab. Picked up my cleaned (blasted) parts.
__________________
project: "my happy mess" |
|
|
|
|
10-21-2011, 04:23 PM
|
#15 |
|
Registered User
Join Date: Jul 2011
Location: Des Moines, Iowa
Posts: 3,016
|
Re: Project "My Happy Mess"
Been a great afternoon w/good weather here.
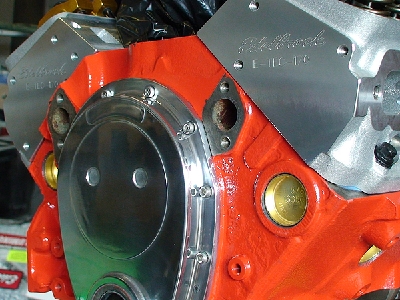
Got things painted and put together. Ran into an issue where my water pump doesn't mount due to it hitting the timing chain cover. :/ wth 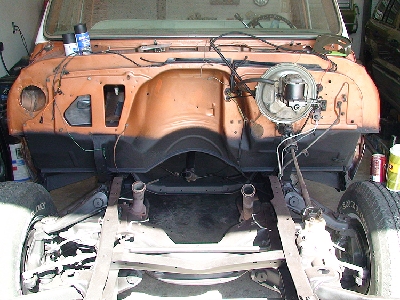   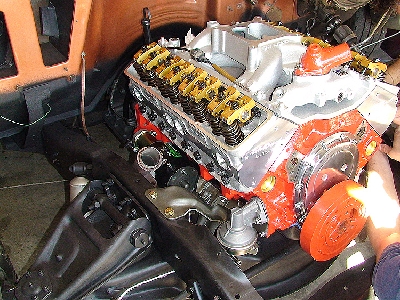
__________________
project: "my happy mess" |
|
|
|
|
10-22-2011, 04:28 AM
|
#16 |
|
Registered User
Join Date: Jul 2011
Location: Des Moines, Iowa
Posts: 3,016
|
Re: Project "My Happy Mess"
Sure enough...
__________________
project: "my happy mess" |
|
|
|
|
10-21-2011, 10:55 PM
|
#17 |
|
VA72C10
Join Date: Mar 2008
Location: Midlothian, VA
Posts: 25,269
|
Re: Project "My Happy Mess"
Looks great! I've heard issues with mounting a short water pump with a billet timing chain cover. I've seen guys grind down the nuts on the back of the water pump for it to fit. The only other options is going back to the steel cover or a chrome one.....or going with a long water pump but that means different pulleys/brackets...
__________________
Looking for a 67-72 swb or blazer project in or around VA.
|
|
|
|
|
10-22-2011, 03:14 AM
|
#18 |
|
Registered User
Join Date: Jul 2011
Location: Des Moines, Iowa
Posts: 3,016
|
Re: Project "My Happy Mess"
Thanks! Glad the info can be useful to others.
Thank you for looking, feedback welcome good or bad.@va Don't have the old to compare, given as core exchange. Before taking drastic measures, we decided to replaced bolts on the back plate with round head screws and it fit like a glove. Then  we find out that the original (1991 gm goodwrench crate engine), freshly painted, pulley bolt pattern is LARGER than that of the water-pump's mount. we find out that the original (1991 gm goodwrench crate engine), freshly painted, pulley bolt pattern is LARGER than that of the water-pump's mount. .... .... More pics later. Lesson learned and note to self - always compare (first) pulley with water pump pulley mount before purchase.
__________________
project: "my happy mess" Last edited by litew8; 10-22-2011 at 03:44 AM. |
|
|
|
|
10-22-2011, 04:05 AM
|
#19 |
|
Registered User
Join Date: Jul 2011
Location: Des Moines, Iowa
Posts: 3,016
|
Re: Project "My Happy Mess"
I think I need this type with a universal bolt pattern for the mount where there's a set of holes in a larger diameter. Maybe my 91' engine is a GenII?
 http://info.rockauto.com/getimage/ge...TFW43106-1.jpg
__________________
project: "my happy mess" |
|
|
|
|
10-22-2011, 11:21 AM
|
#20 |
|
6>8 Plugless........
Join Date: Sep 2007
Location: Prairie City, Ia
Posts: 17,140
|
Re: Project "My Happy Mess"
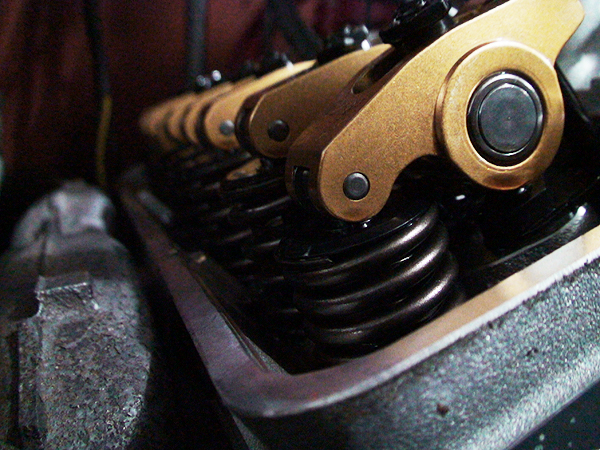
At least it's an easy fix. Swap your round head bolts in the new pump and install the new pump. I've had to take a grinder and grind down the back plate on the water pump before to get them to fit. Your truck is looking awesome! I love the look of your heads. Saweet!
__________________
Ryan 1972 Chevy Longhorn K30 Cheyenne Super, 359 Inline 6 cylinder, Auto Trans, Tilt, Diesel Tach/Vach, Buckets, Rare Rear 4-link and air ride option Build Thread 1972 GMC Sierra Grande Longhorn 4x4 1972 Chevy Cheyenne Super K20 Long Step side tilt, tach, tow hooks, AC, 350 4 speed 1972 C10 Suburban Custom Deluxe 1969 Chevy milk truck 1971 Camaro RS 5.3 BTR STG3 Cam Super T10 1940 Ford 354 Hemi 46RH Ford 9" on air ride huge project Tired of spark plugs? Check this out. |
|
|
|
|
10-22-2011, 04:18 PM
|
#21 |
|
Registered User
Join Date: Jul 2011
Location: Des Moines, Iowa
Posts: 3,016
|
Re: Project "My Happy Mess"
Thanks Ryan. I've already got it taken care of (as of 1/2 hour ago). Used the bolts that came with the ARP kit for the pump. Went and bought some others for the pulley. I should have referenced the 91' crate engine when purchasing the water pump. Got the right one this morning and installed. This one come closer to mounting without having to switch out the back plate bolts. It's a very tight/snug fit and the top back plate bots smash into the timing chain cover slightly, but are unnoticeable. Next thing to not fit right - the wire loom kit (arrives mid week). Watch and see, some dumb reason and they won't work with stock exhaust manifolds mounted, even though all the desc. mentions is 1955 to date.
Pics later.
__________________
project: "my happy mess" Last edited by litew8; 10-22-2011 at 04:40 PM. |
|
|
|
|
10-22-2011, 04:36 PM
|
#22 |
|
Senior Member
Join Date: Mar 2011
Location: West Plains, Missouri
Posts: 7,555
|
Re: Project "My Happy Mess"
Isn't it fun working on these old trucks, look at all the chances we get to change things
   ...Jim ...Jim
__________________
my build thread: http://67-72chevytrucks.com/vboard/s...d.php?t=459839 Jimbo's long bed step build:http://67-72chevytrucks.com/vboard/s...t=464626<br /> |
|
|
|
|
10-22-2011, 08:35 PM
|
#23 |
|
Registered User
Join Date: Jul 2011
Location: Des Moines, Iowa
Posts: 3,016
|
Re: Project "My Happy Mess"

__________________
project: "my happy mess" |
|
|
|
|
10-23-2011, 03:21 AM
|
#24 |
|
Registered User
Join Date: Jul 2011
Location: Des Moines, Iowa
Posts: 3,016
|
Re: Project "My Happy Mess"
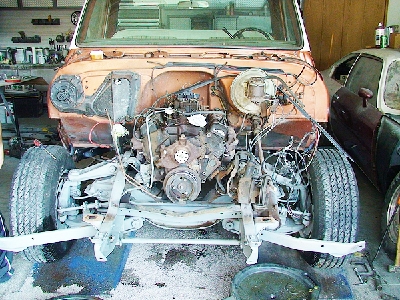
A quick fyi comment - I'm pretty certain my 91' crate engine was sold as a direct replacement for the original 71' engine (trucks). Which is why the majority of my accessory parts resemble the originals.
__________________
project: "my happy mess" Last edited by litew8; 10-23-2011 at 03:28 AM. |
|
|
|
|
10-23-2011, 11:21 AM
|
#25 |
|
So Many Ideas, So Little Money
Join Date: Sep 2001
Location: Marshalltown, IA
Posts: 1,610
|
Re: Project "My Happy Mess"
looking pretty good man
__________________
72 Blazer 3/4 ton running gear 4.10s NP205/TH350 350 4in lift half doors 71 C10 with 454 99 S-10 5.1L SBC 700R4 09 Malibu Marshalltown, Iowa |
|
|
|
 |
| Bookmarks |
|
|


 Hybrid Mode
