
|
|
|
 01-07-2015, 11:44 PM
|
#1 |
|
Registered User
Join Date: Oct 2007
Location: Spanaway
Posts: 8,451
|
Re: 55 Wagon Progress
Nice work!
__________________
Mike. Swamp Rat build thread : http://67-72chevytrucks.com/vboard/s...d.php?t=595019 72 3/4T 4X4 4" BDS Lift 33" BFG's |

|

|
|
01-08-2015, 12:05 AM
|
#2 |
|
Senior Member
 Join Date: Jul 2012
Location: Oblong, Illinois
Posts: 7,028
|
Re: 55 Wagon Progress
Yeah looks good. Gator Meet tool is handy. Made by Rick?
|
|
|
|
|
01-08-2015, 12:18 AM
|
#3 |
|
Registered User
Join Date: Jan 2013
Location: Leonardtown, MD
Posts: 1,647
|
Re: 55 Wagon Progress
On the Friday of the meet he took us on a tour of the machine shop his family runs, they cut some of those out on a laser. In addition to being a square, each corner is a different radius. Yes, it comes in handy!
__________________
Robert |
|
|
|
|
01-11-2015, 02:13 PM
|
#4 | |
|
Senior Member
Join Date: Jul 2012
Location: Oblong, Illinois
Posts: 7,028
|
Re: 55 Wagon Progress
Quote:
Looking forward to more 55 updates! You all do nice work. |
|
|
|
|
|
01-11-2015, 08:40 PM
|
#5 |
|
Registered User
Join Date: Jan 2013
Location: Leonardtown, MD
Posts: 1,647
|
Re: 55 Wagon Progress
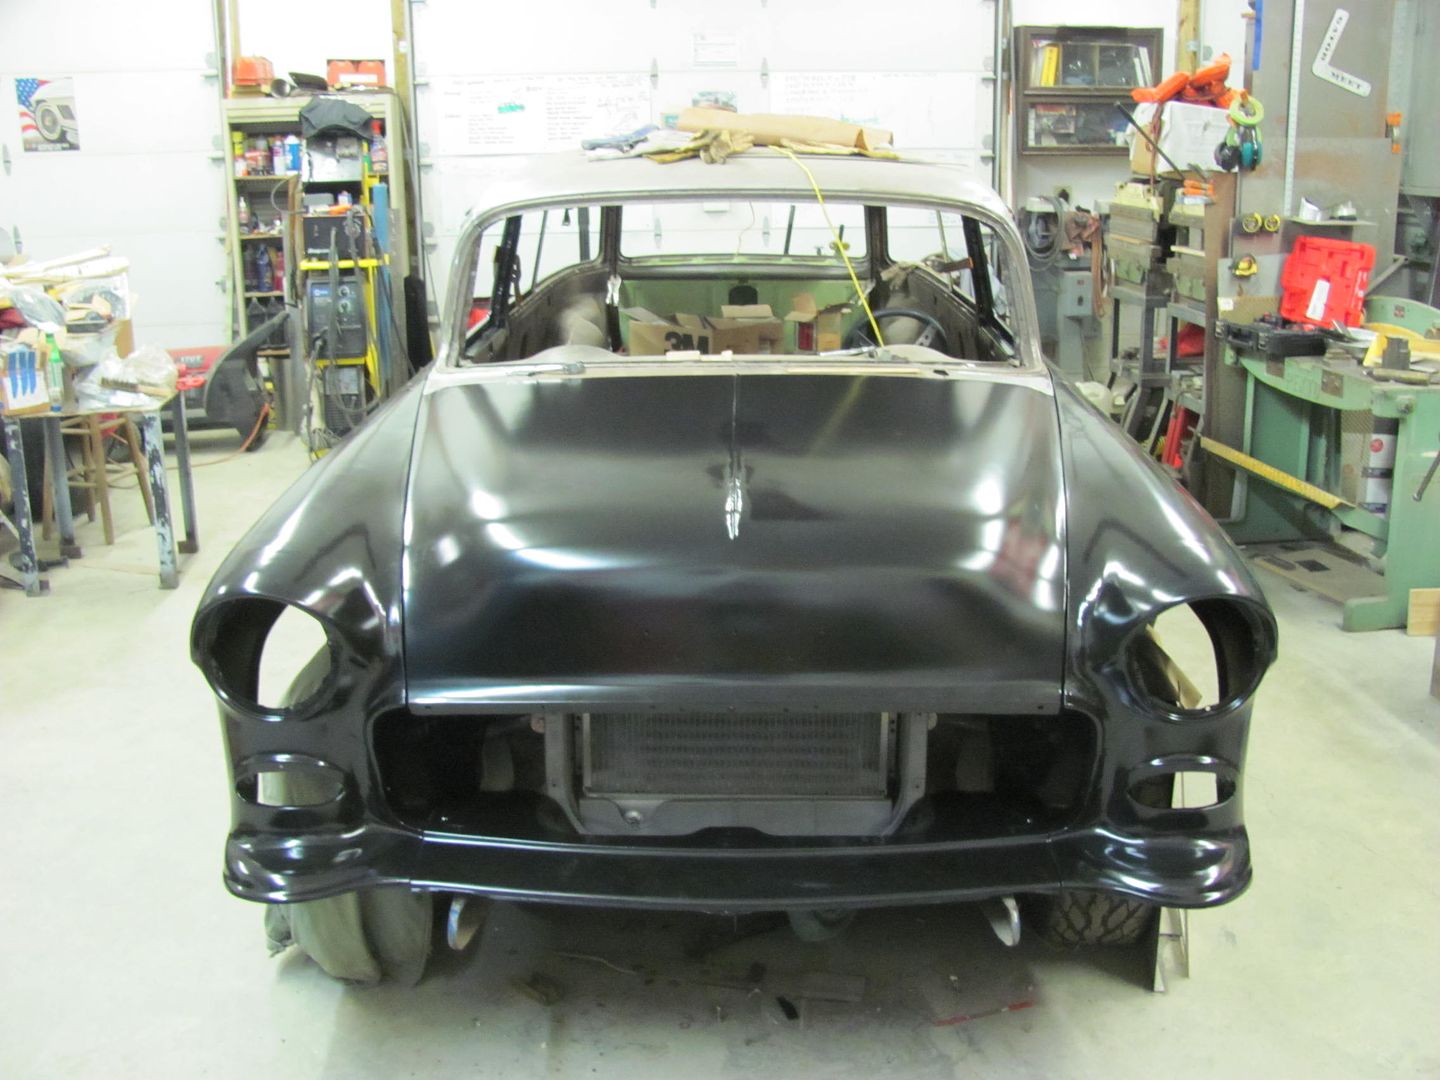
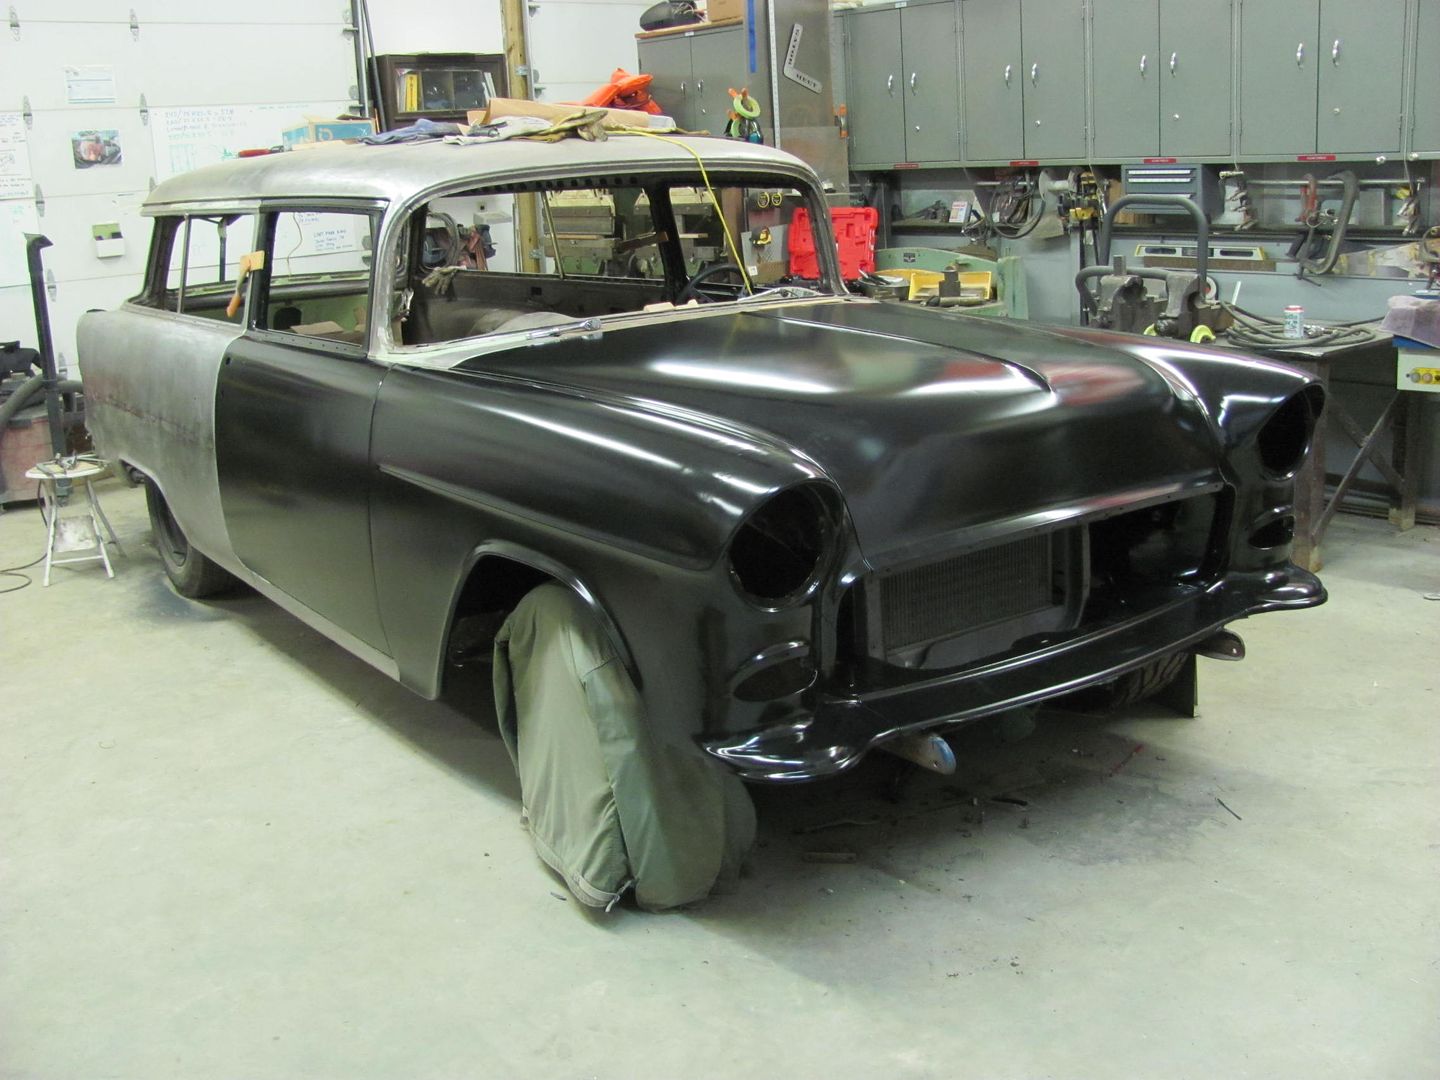
More progress on the wagon today. Kyle had finished the media blasting on the hood brace, so we had a few areas to address. As the hood ornament no longer exists, we didn't need the mounting holes going through the brace.
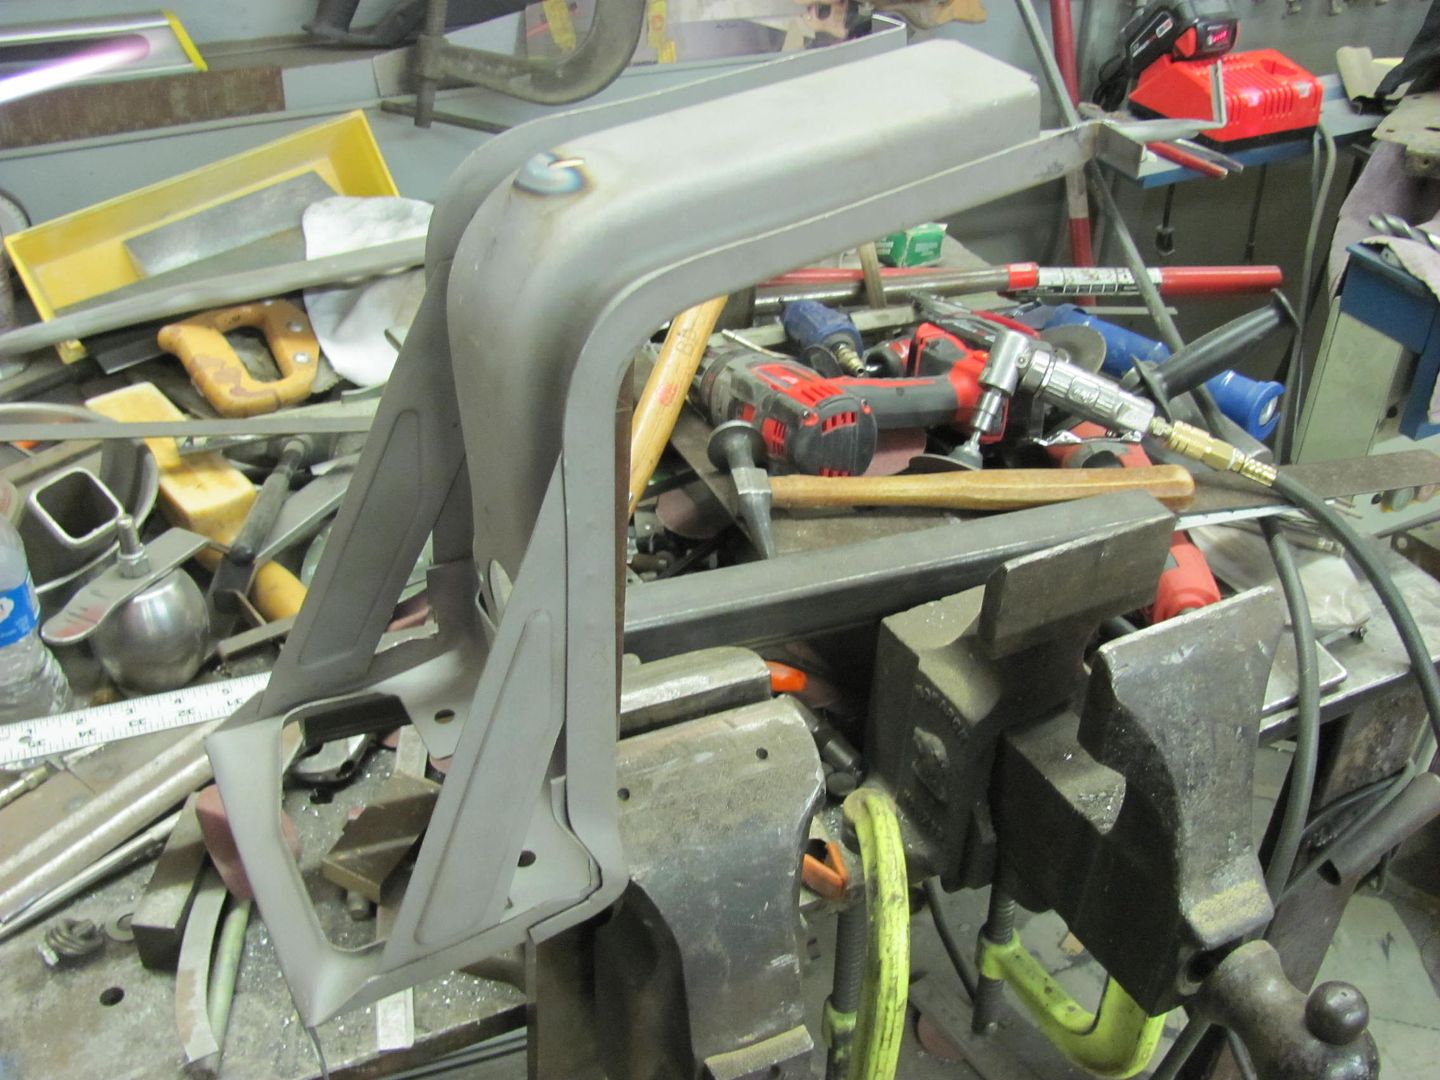 A piece of brass flat bar is radius-ed to make an anvil.. 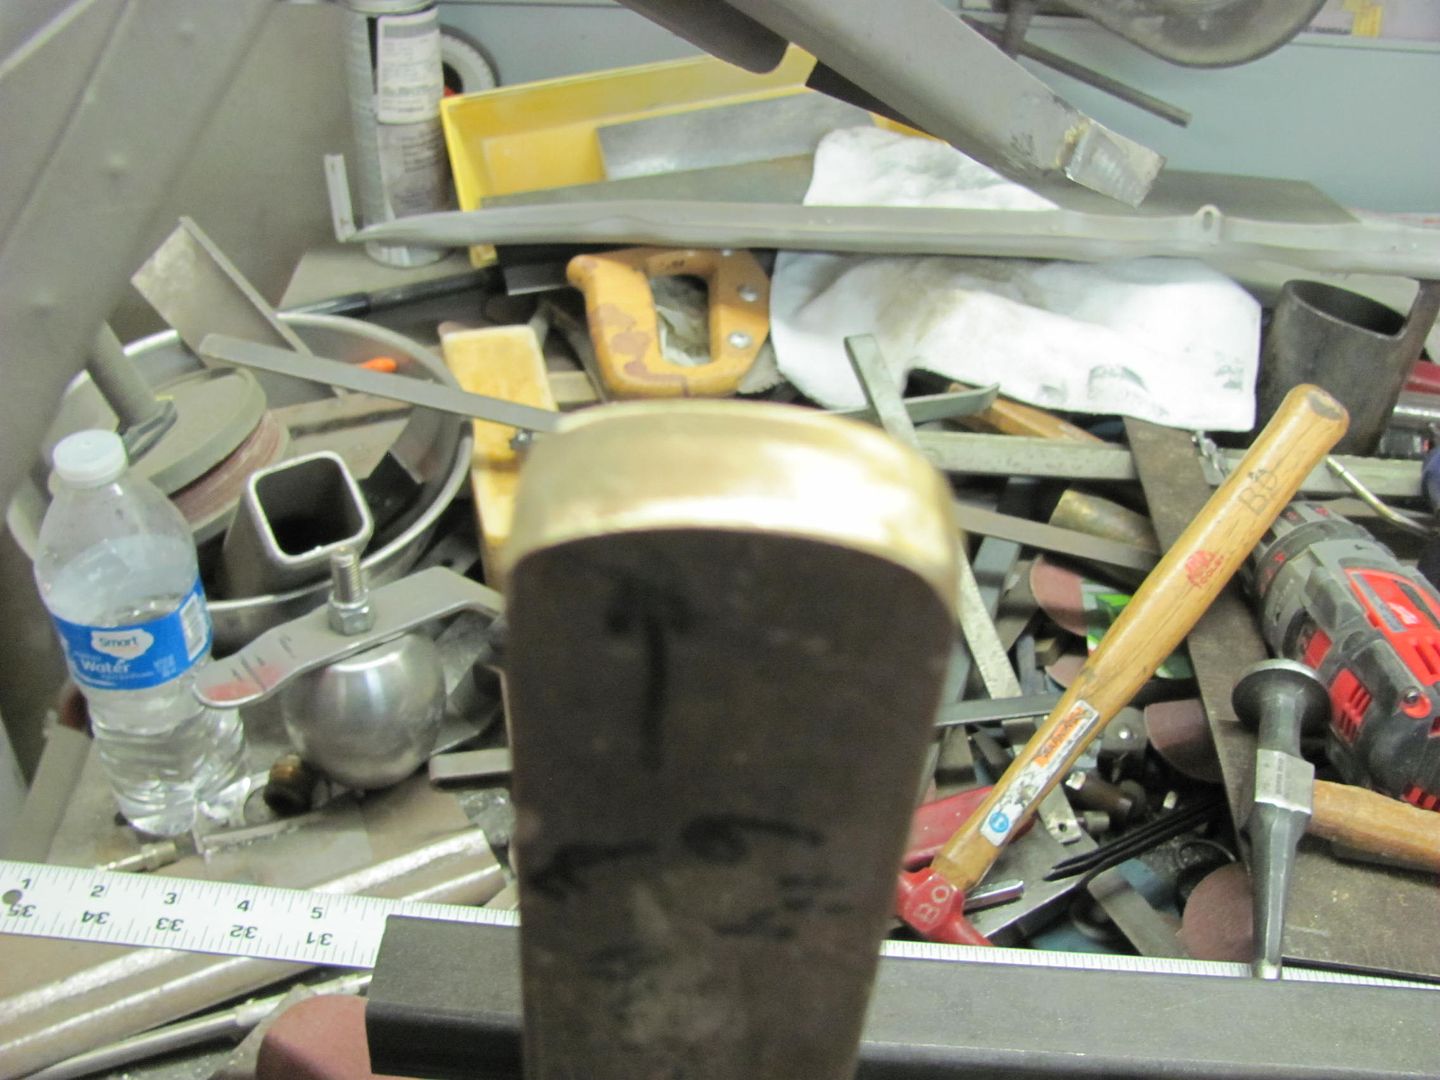 High spot is heated and tapped down with the hammer.. Then pick the next high spot and repeat.... 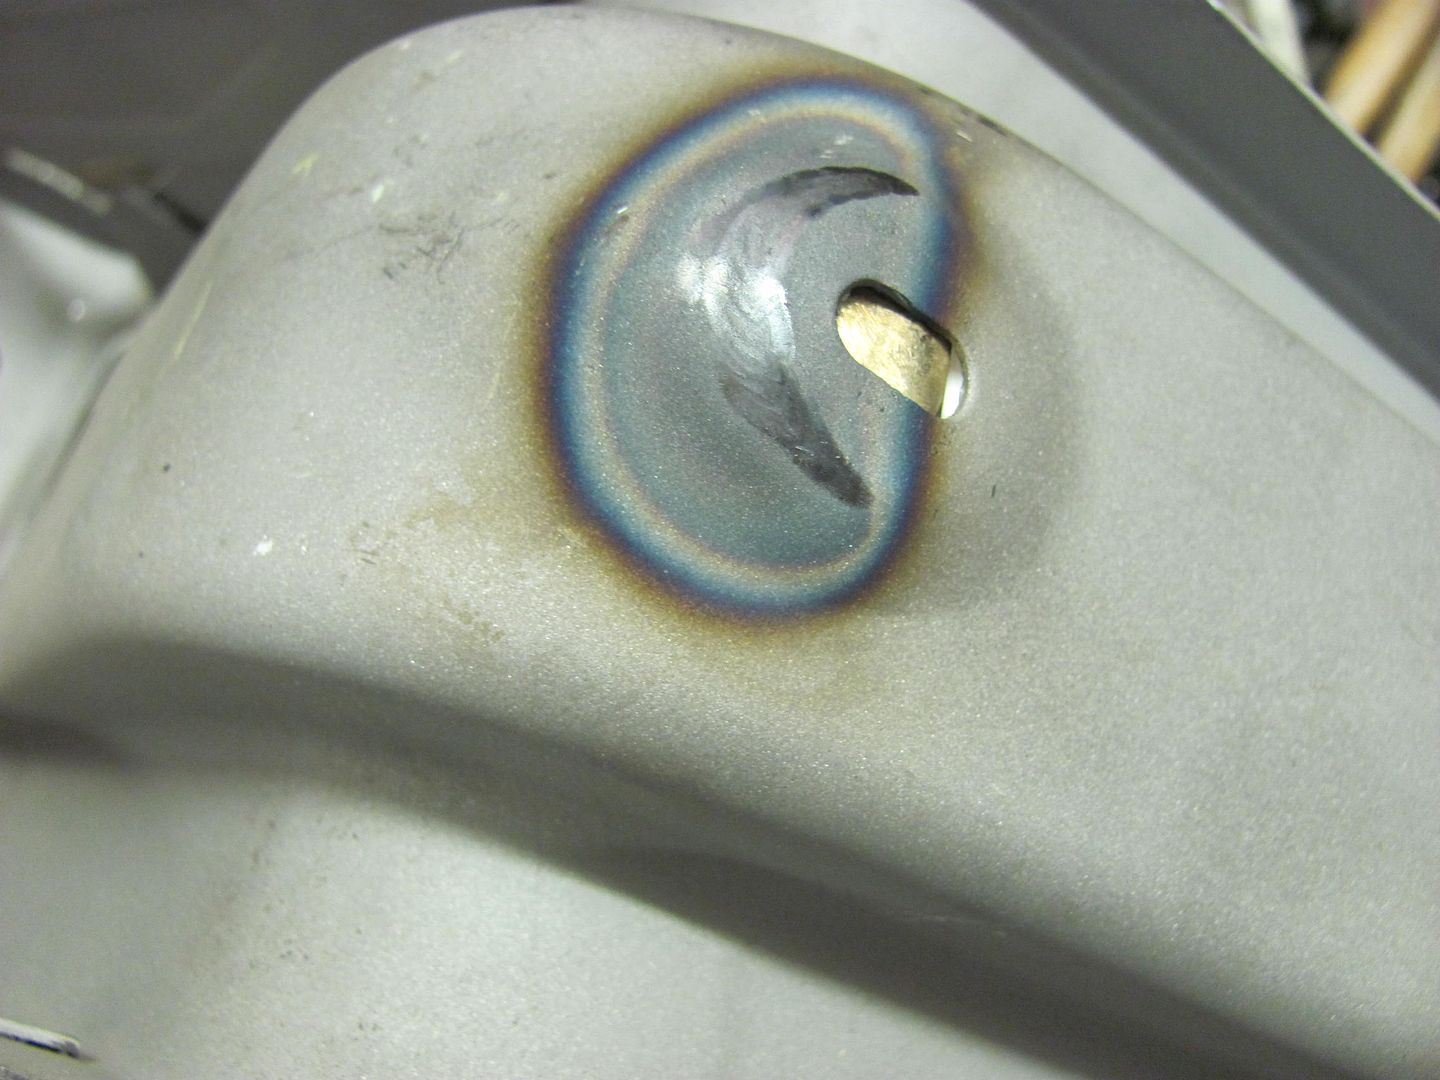 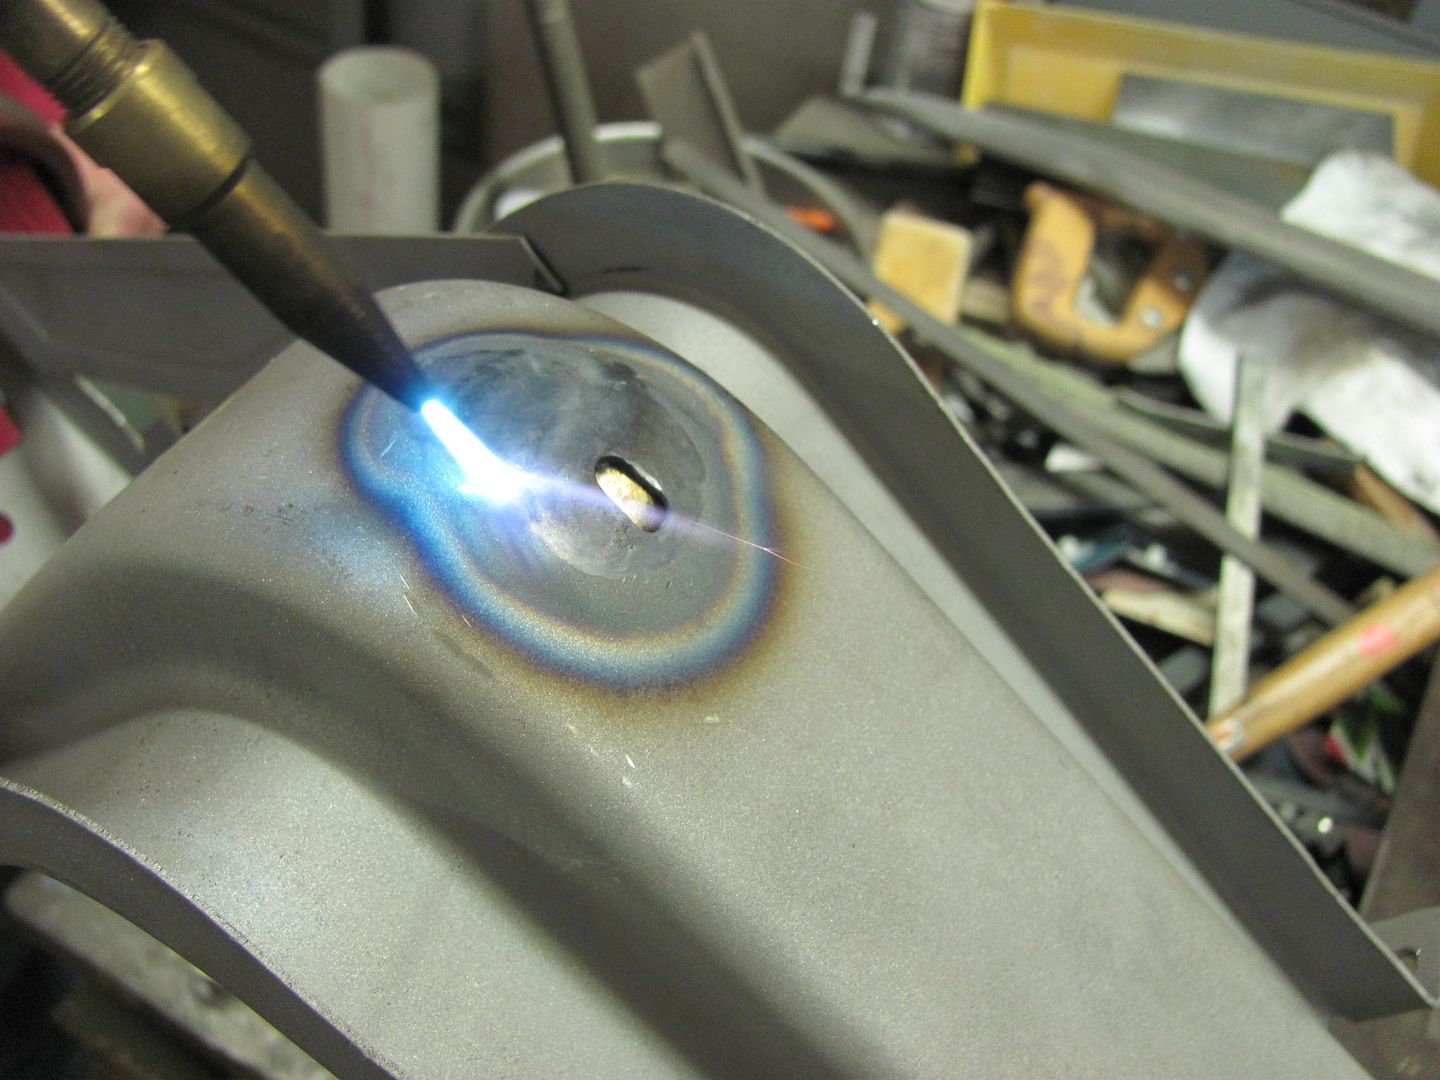 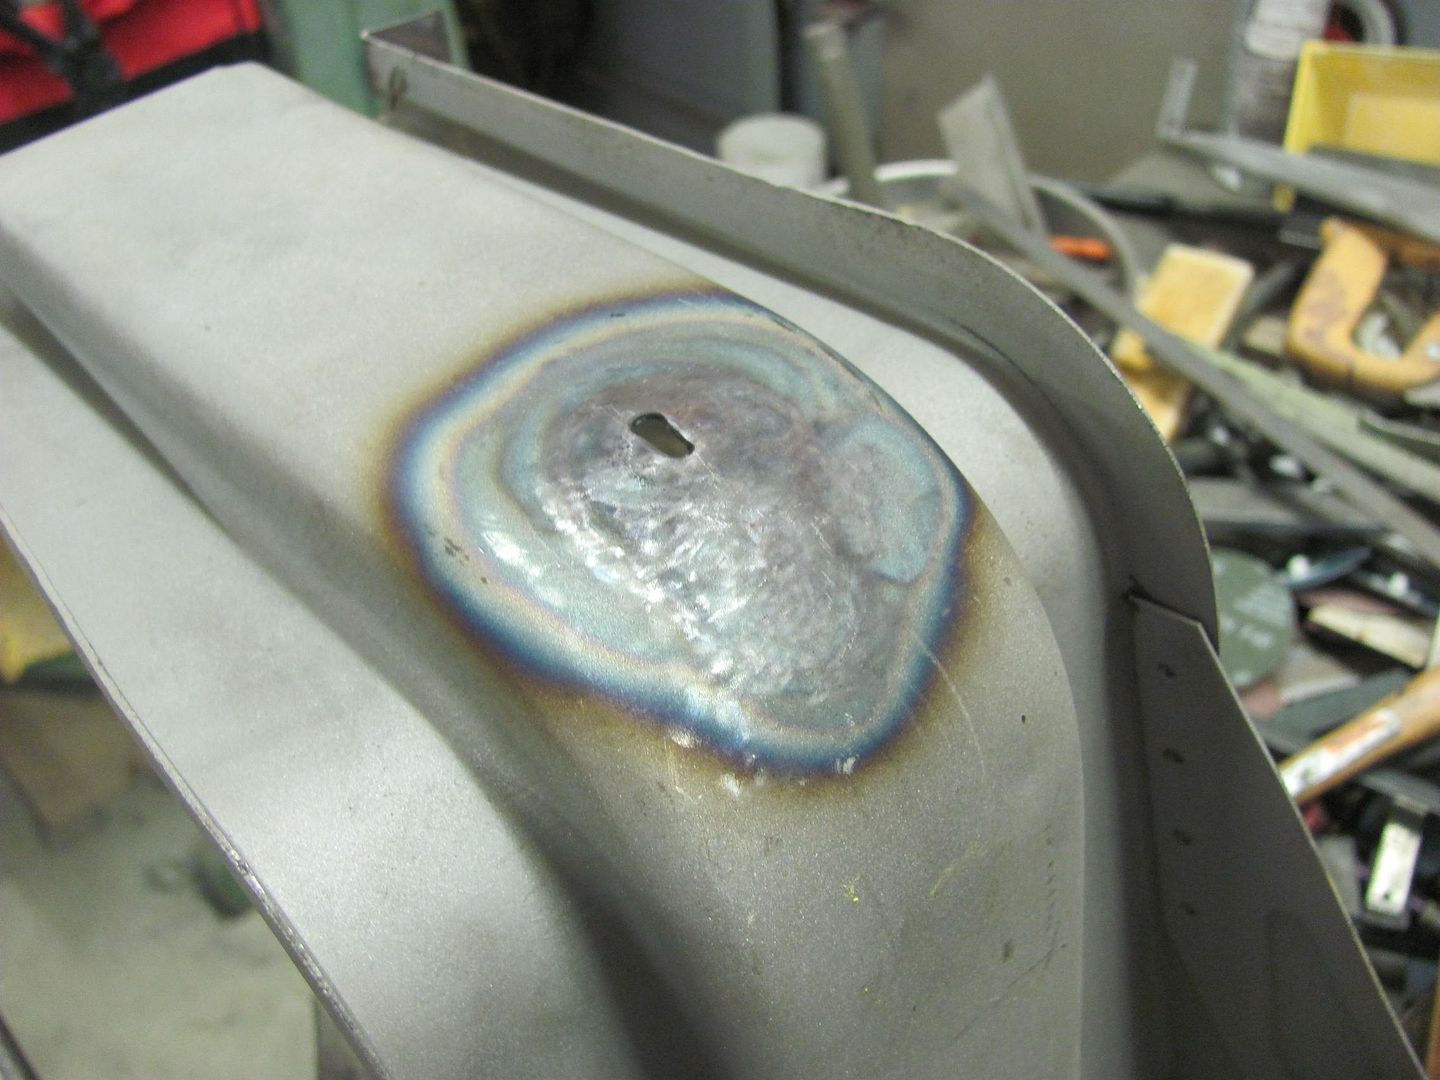 Slot is welded closed, welds dressed, area media blasted once again... 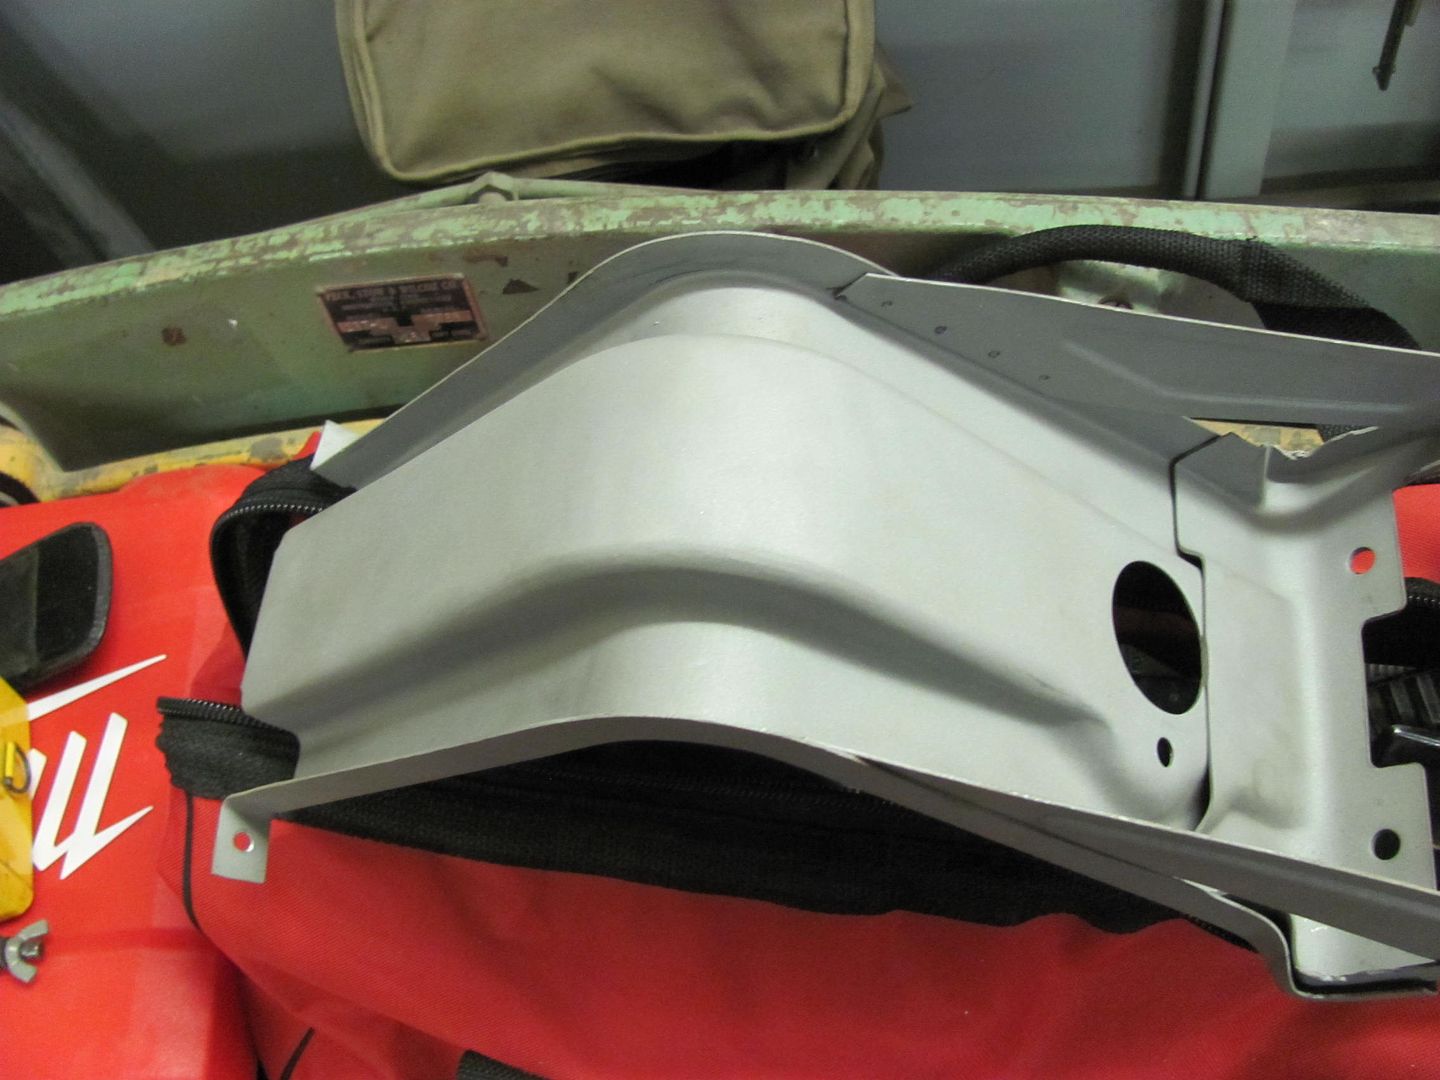 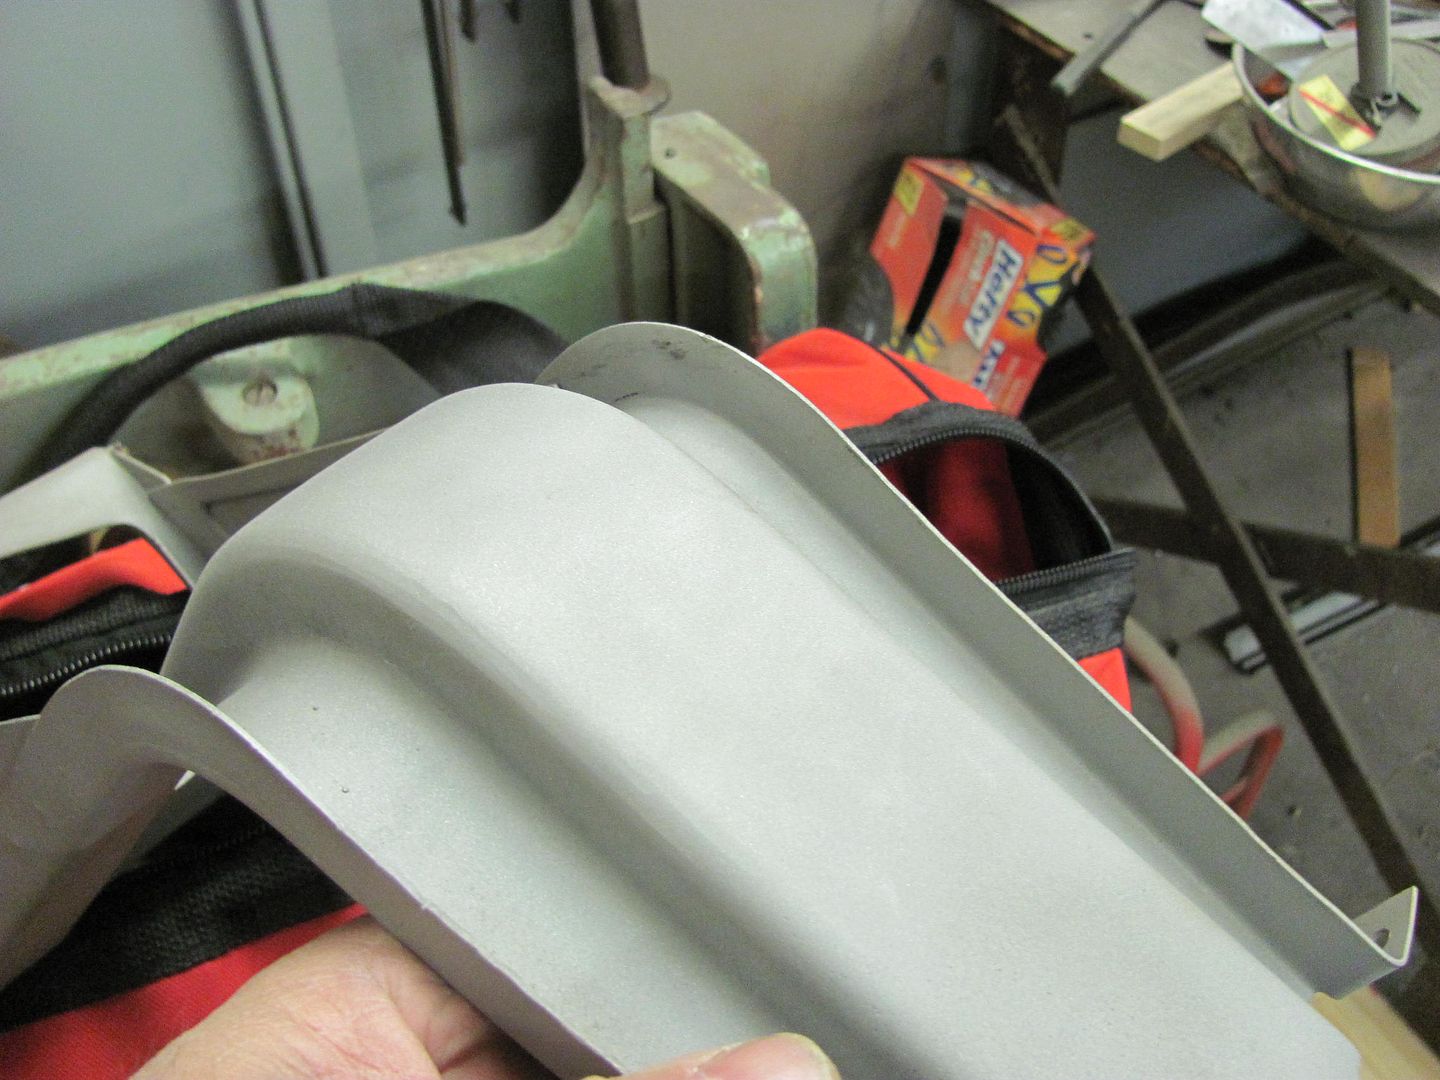 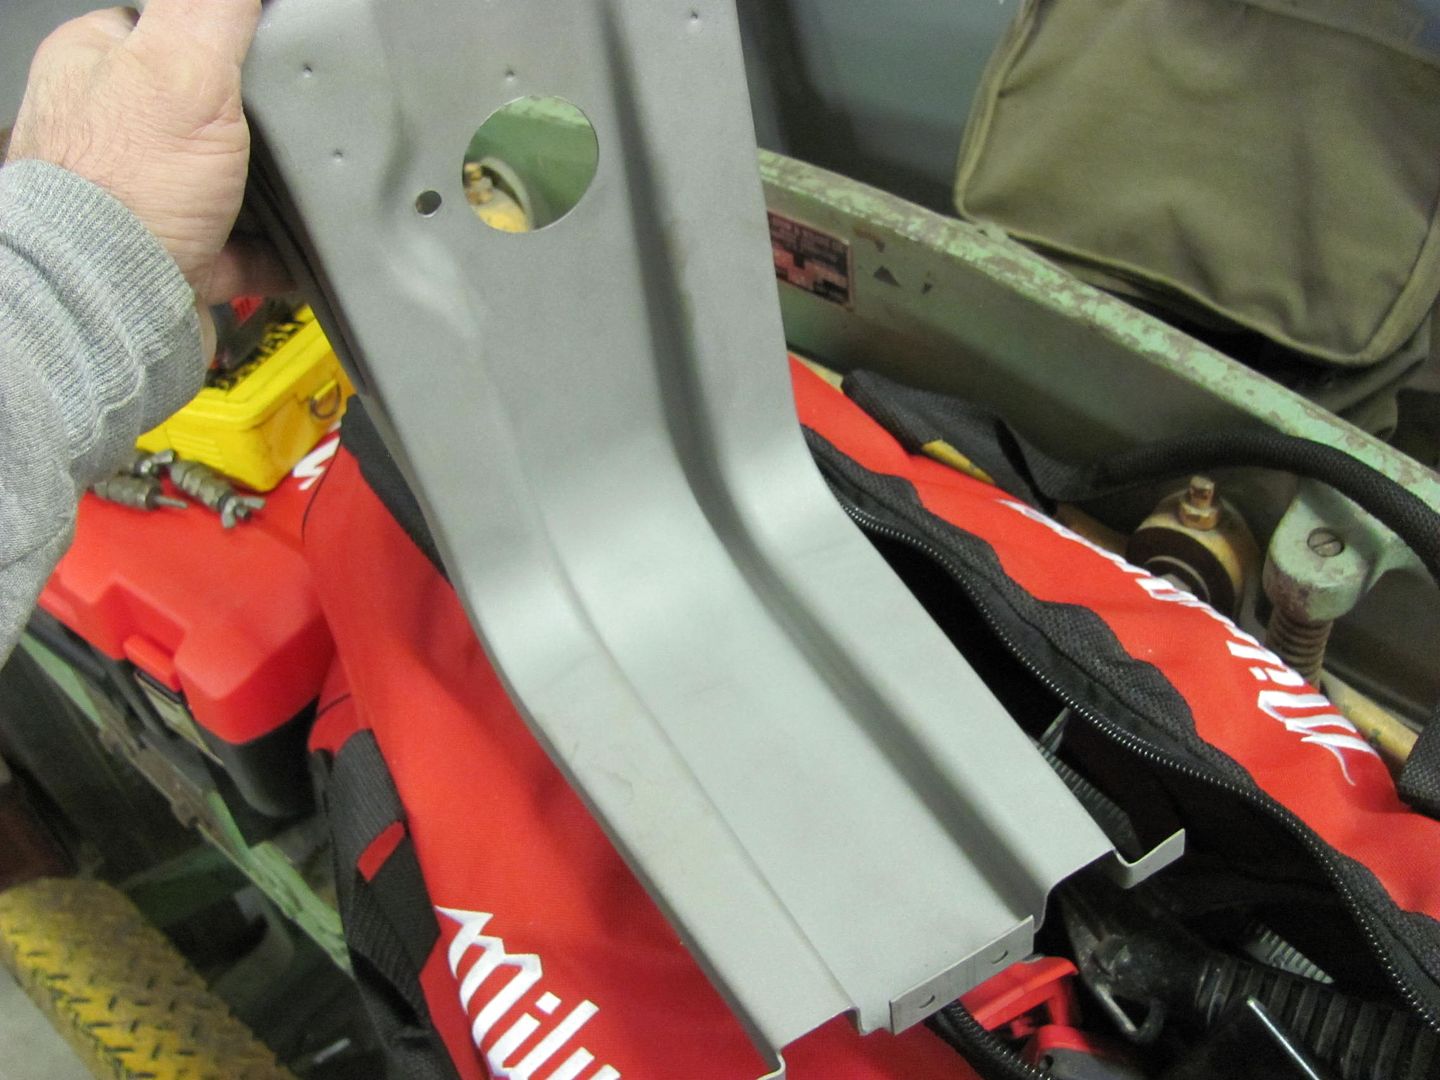 Kyle working on prepping the passenger door for primer... Sorry for the blurry picture, gonna have to fire the photographer! 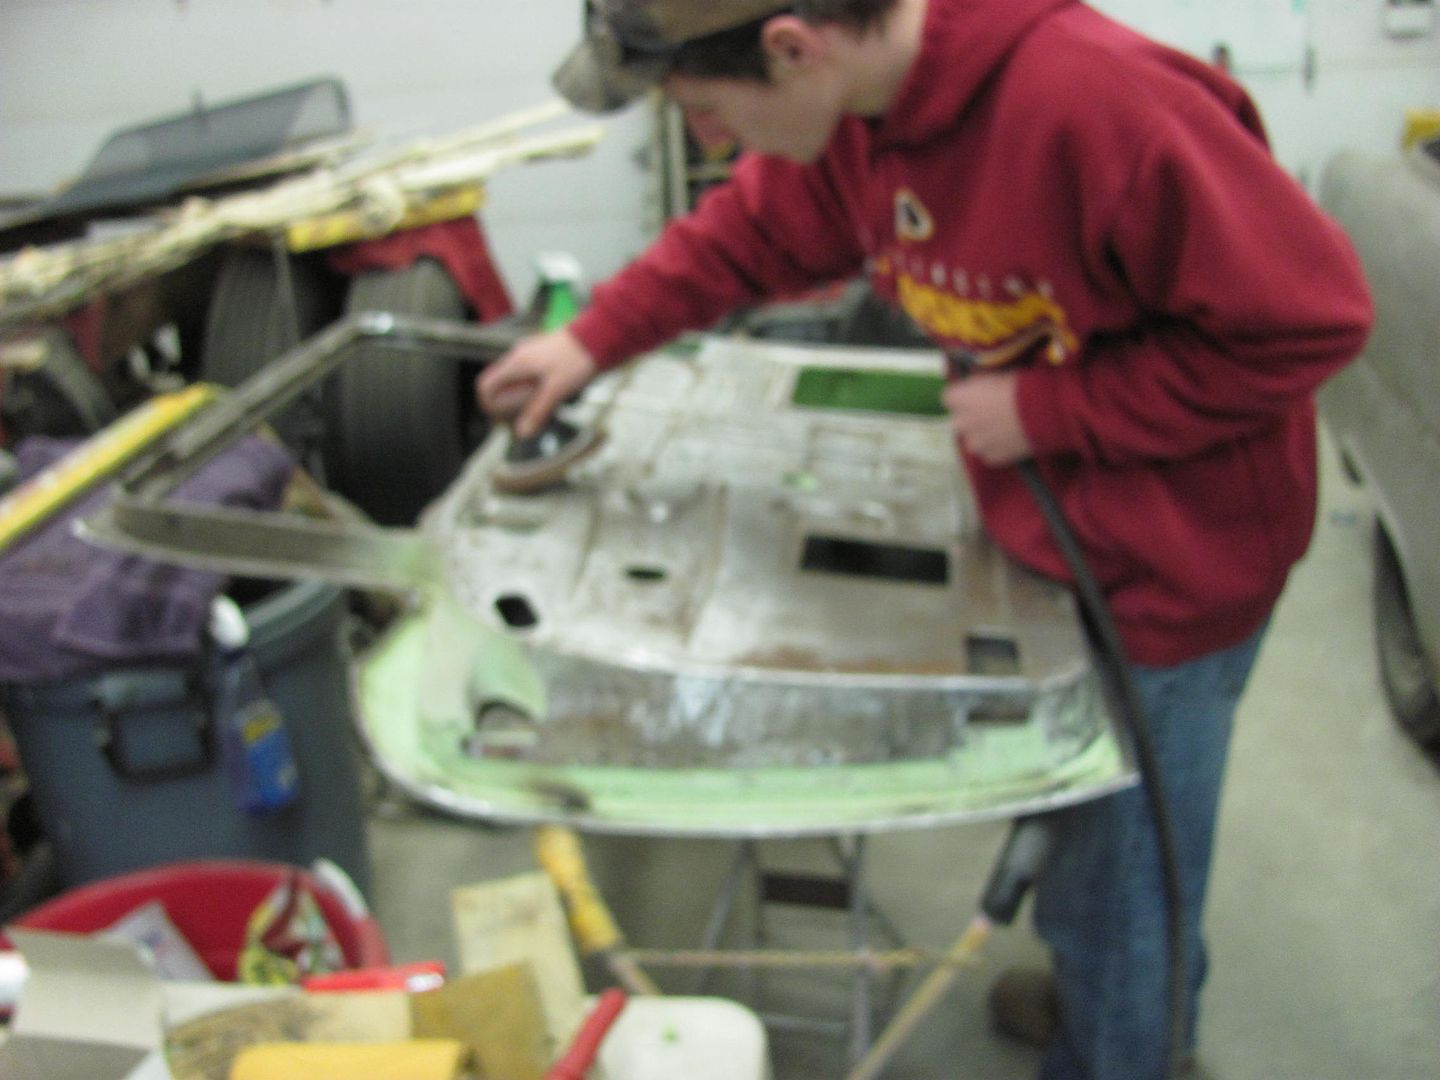 The hood ornament hole in the cross brace was also welded closed and dressed... 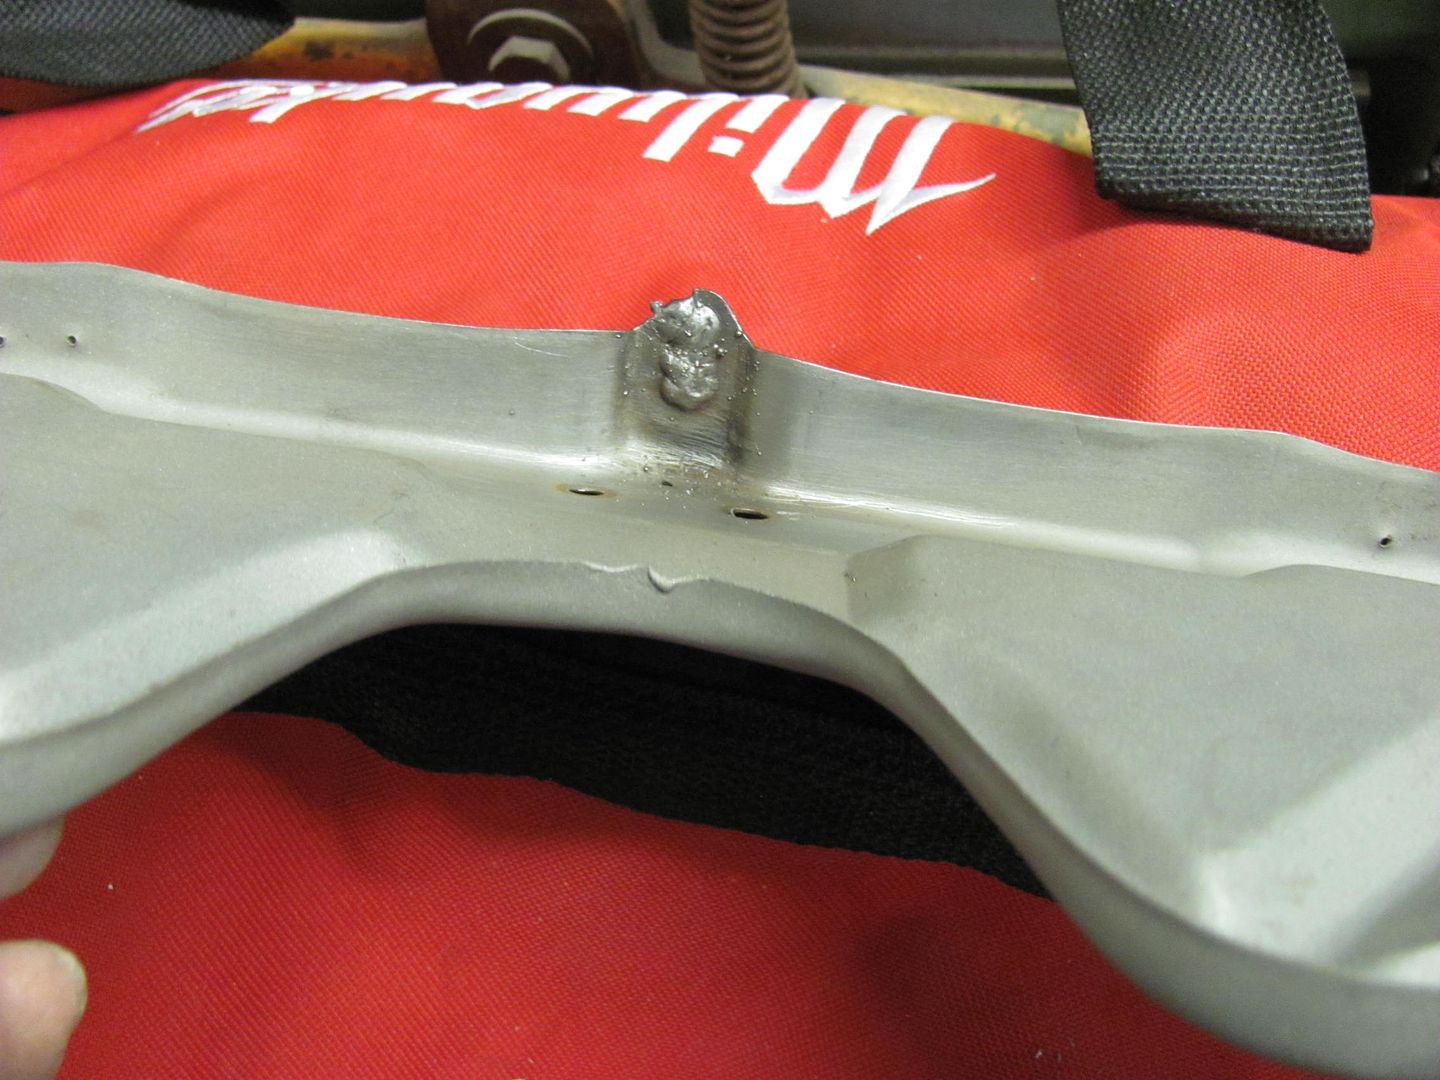 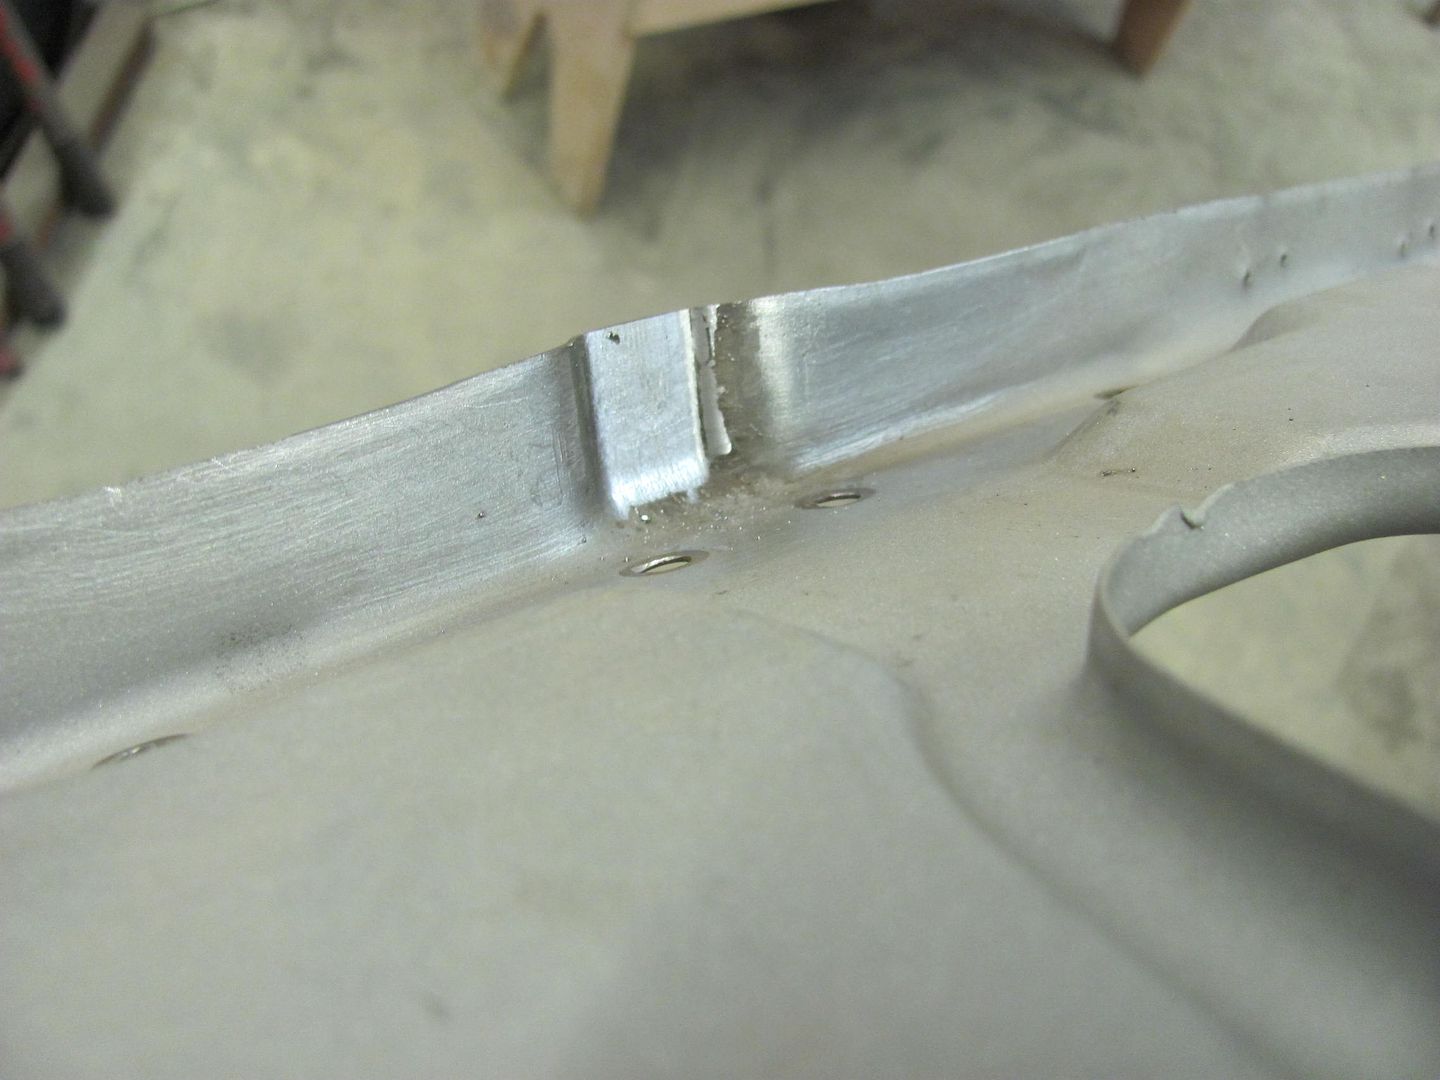 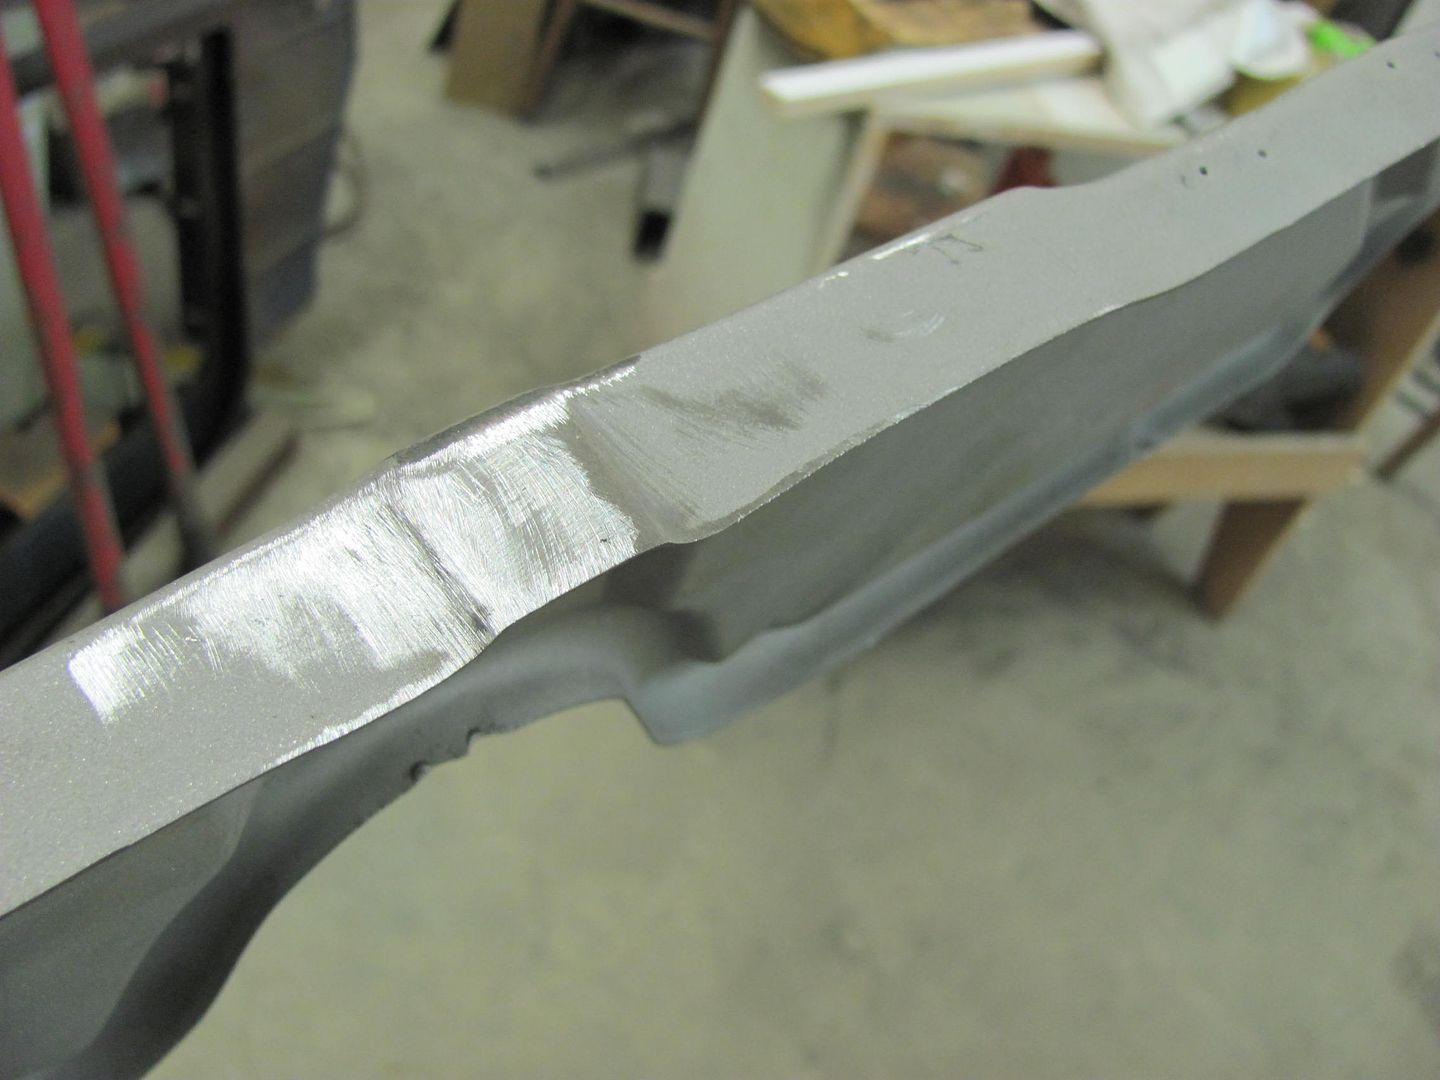 Next on the list were the stress cracks on the ends of the hood brace. 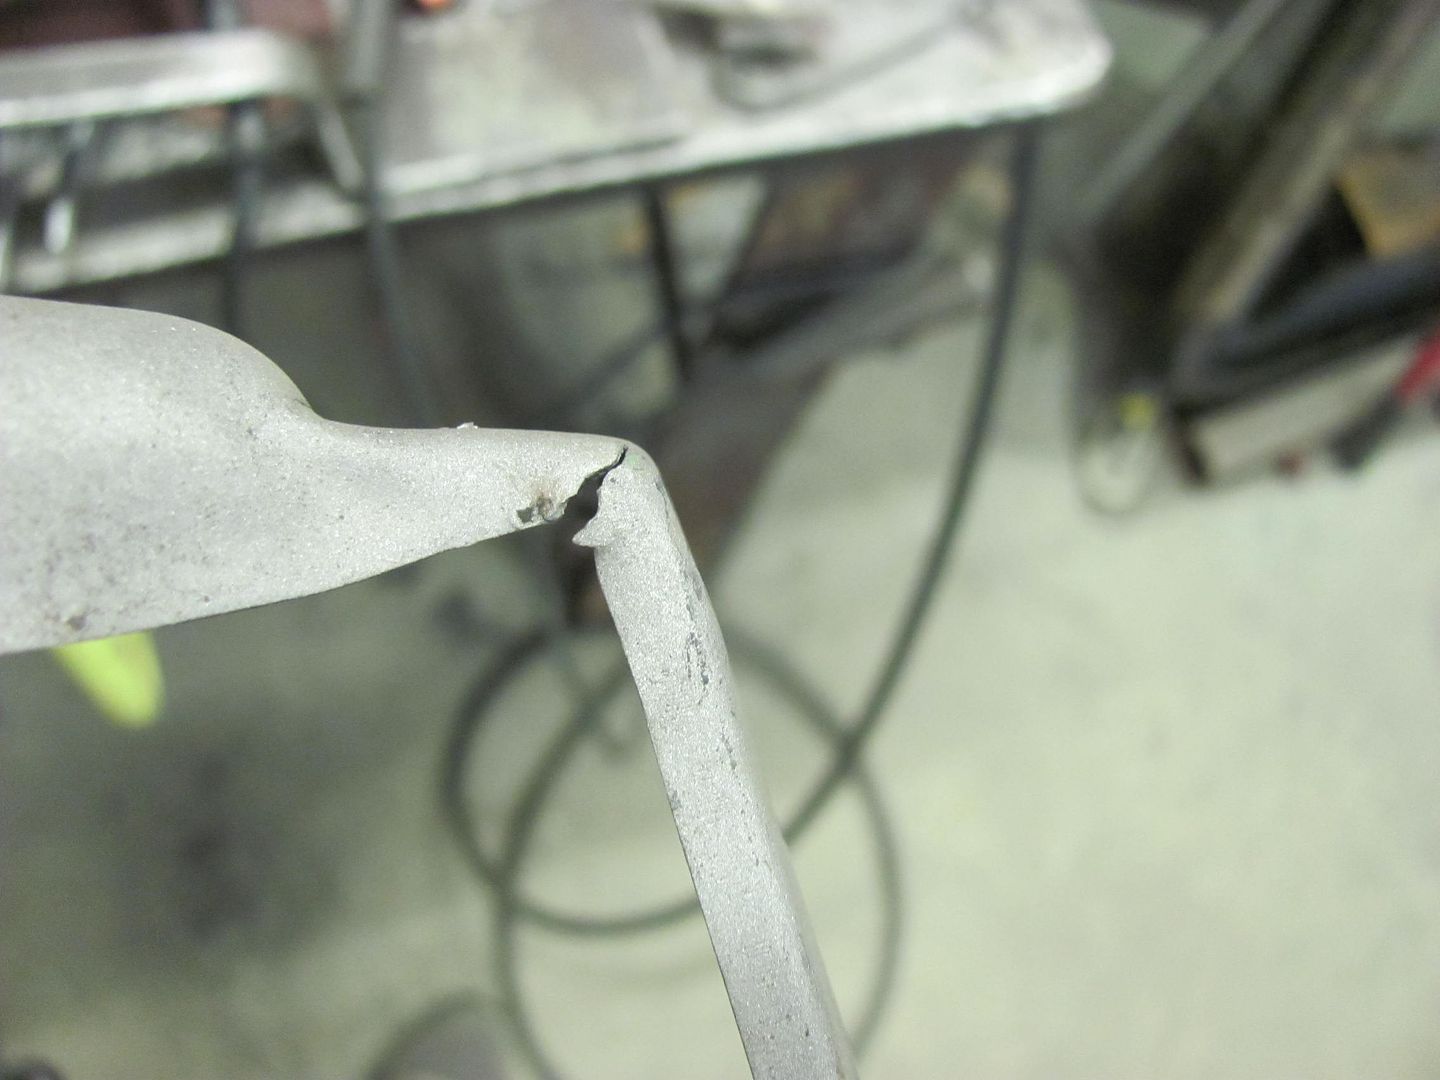 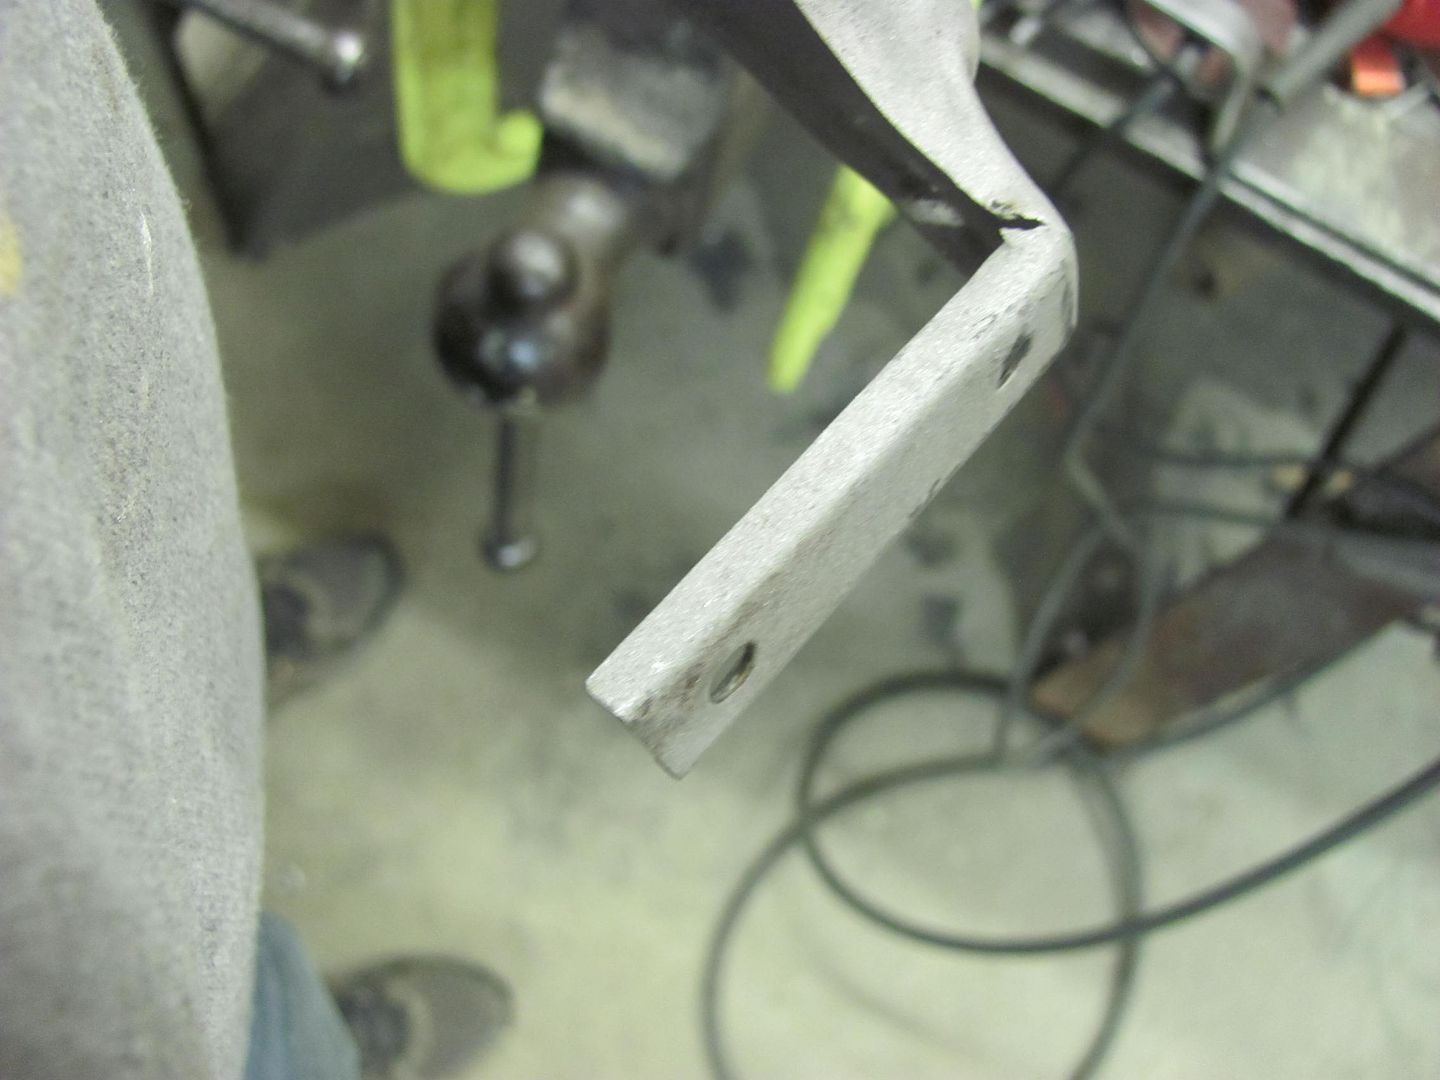 Some 16 gauge CRS was used to make some stiffeners inside the corners... 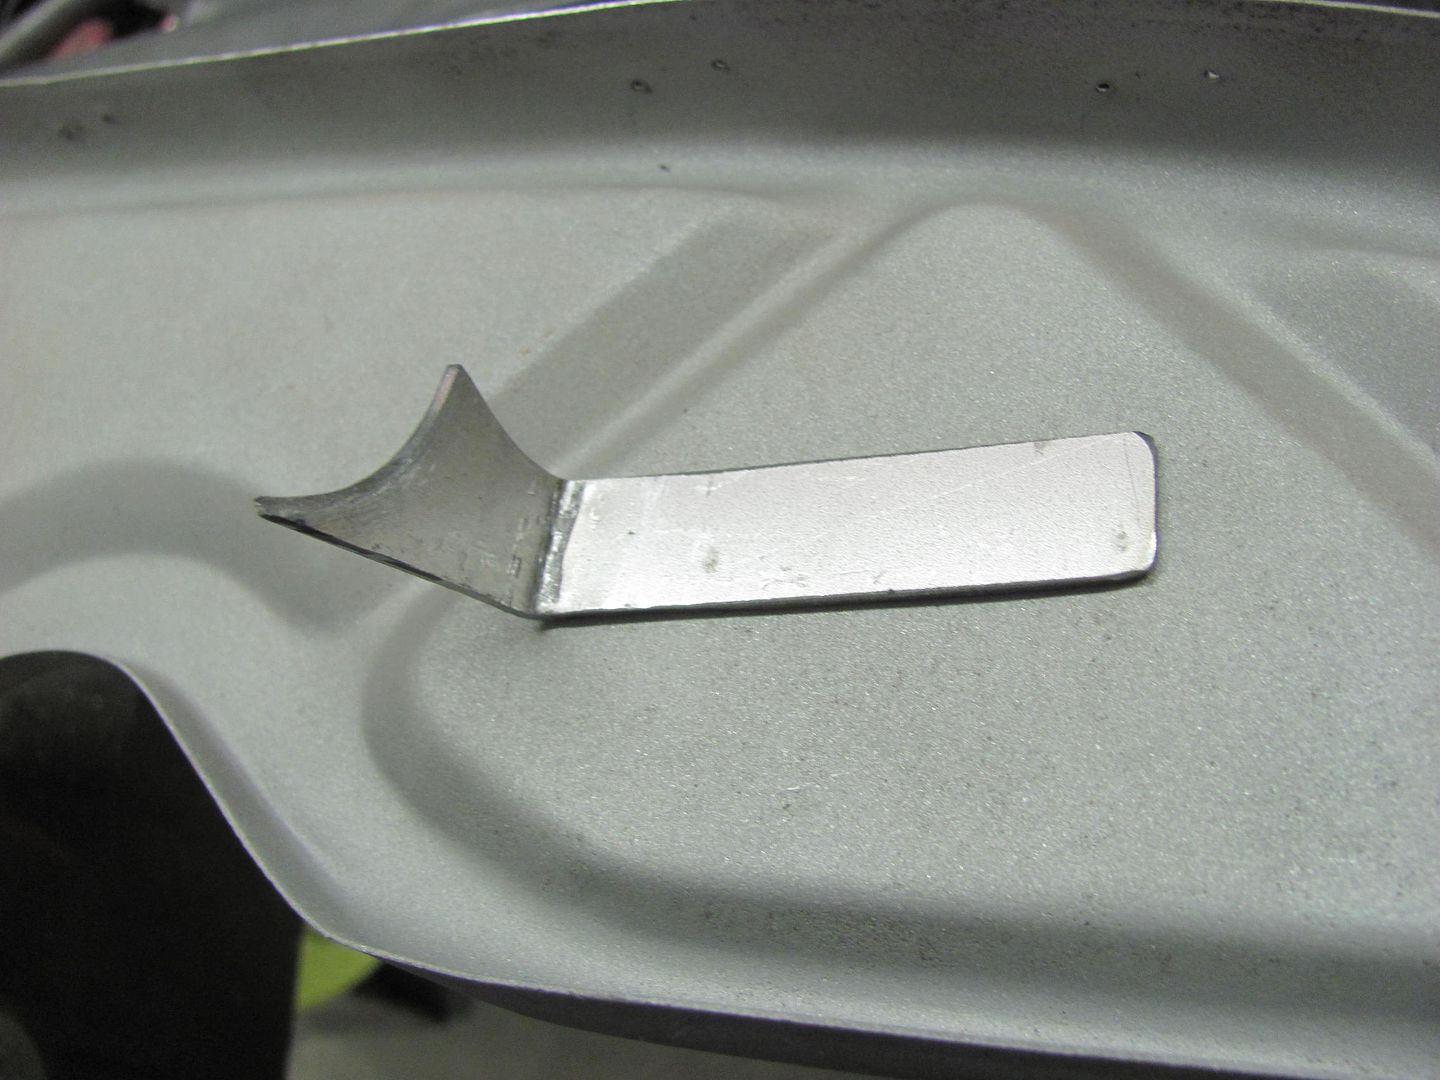 test fit.. 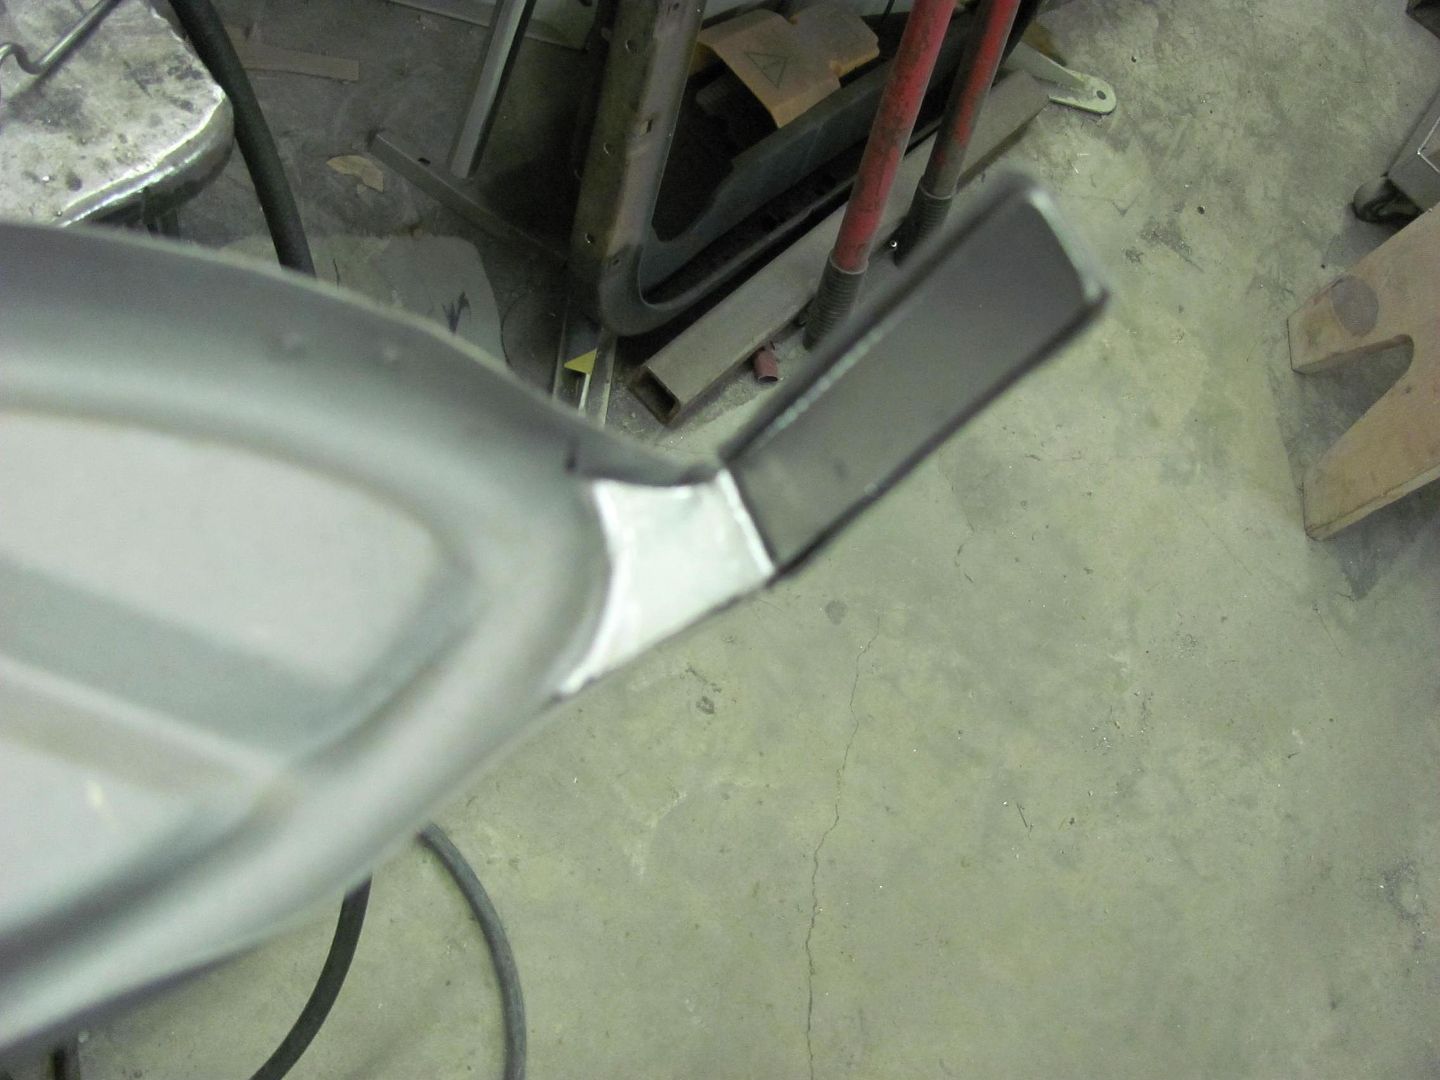 Plug welded in place and the flanges wrapped around... cracks repaired... 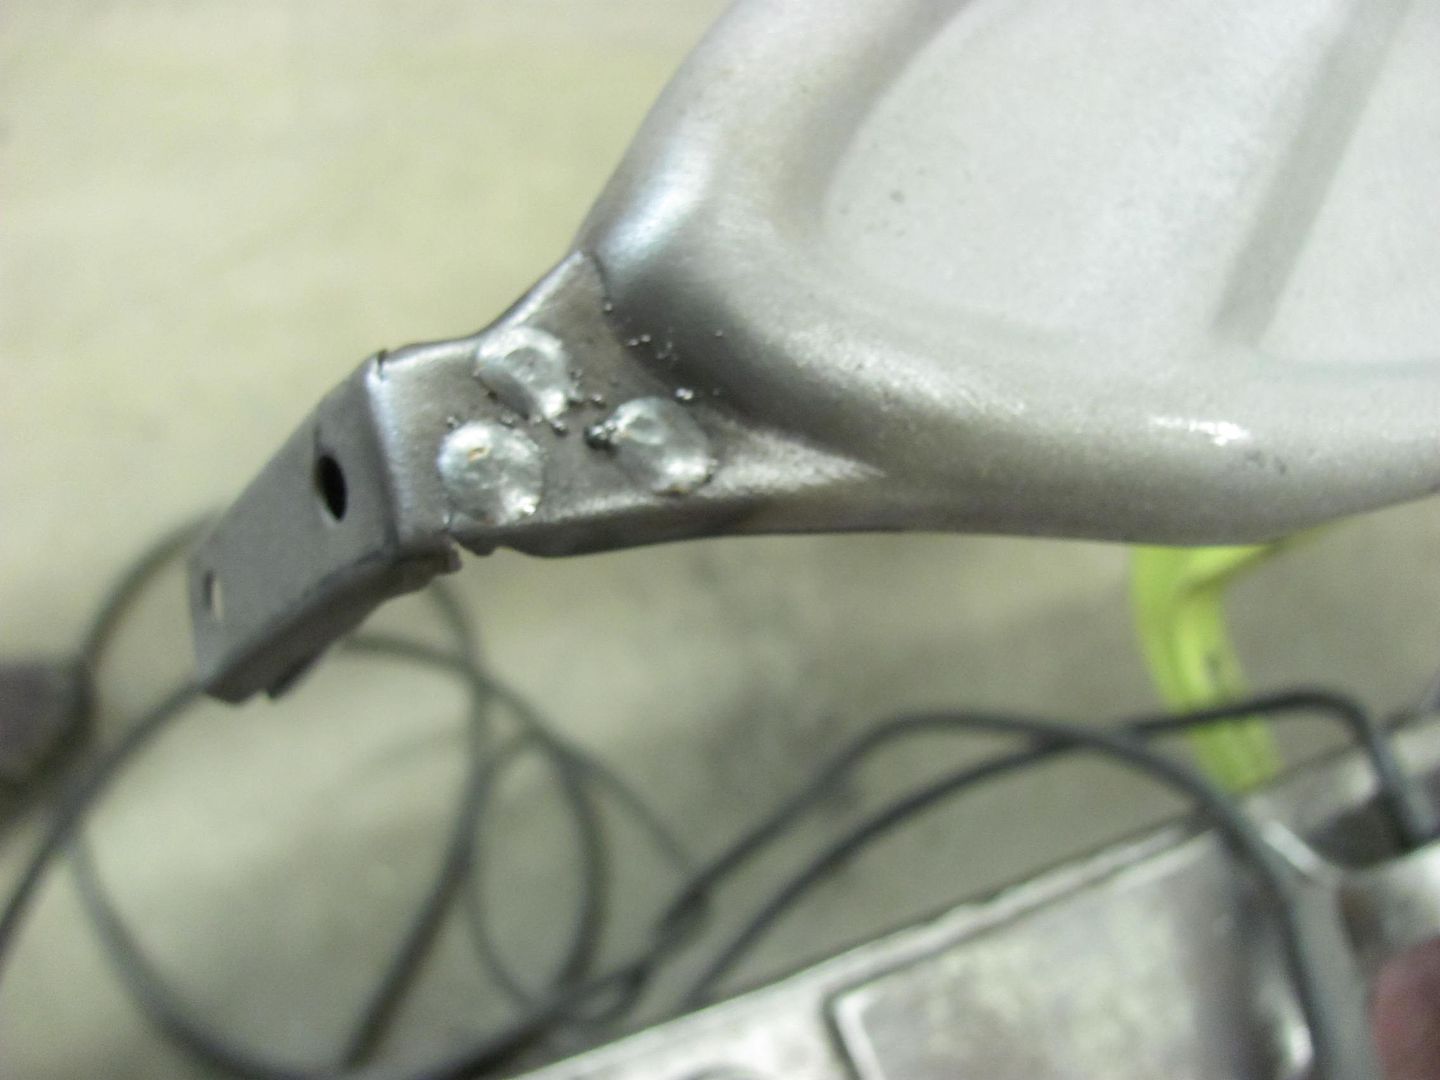 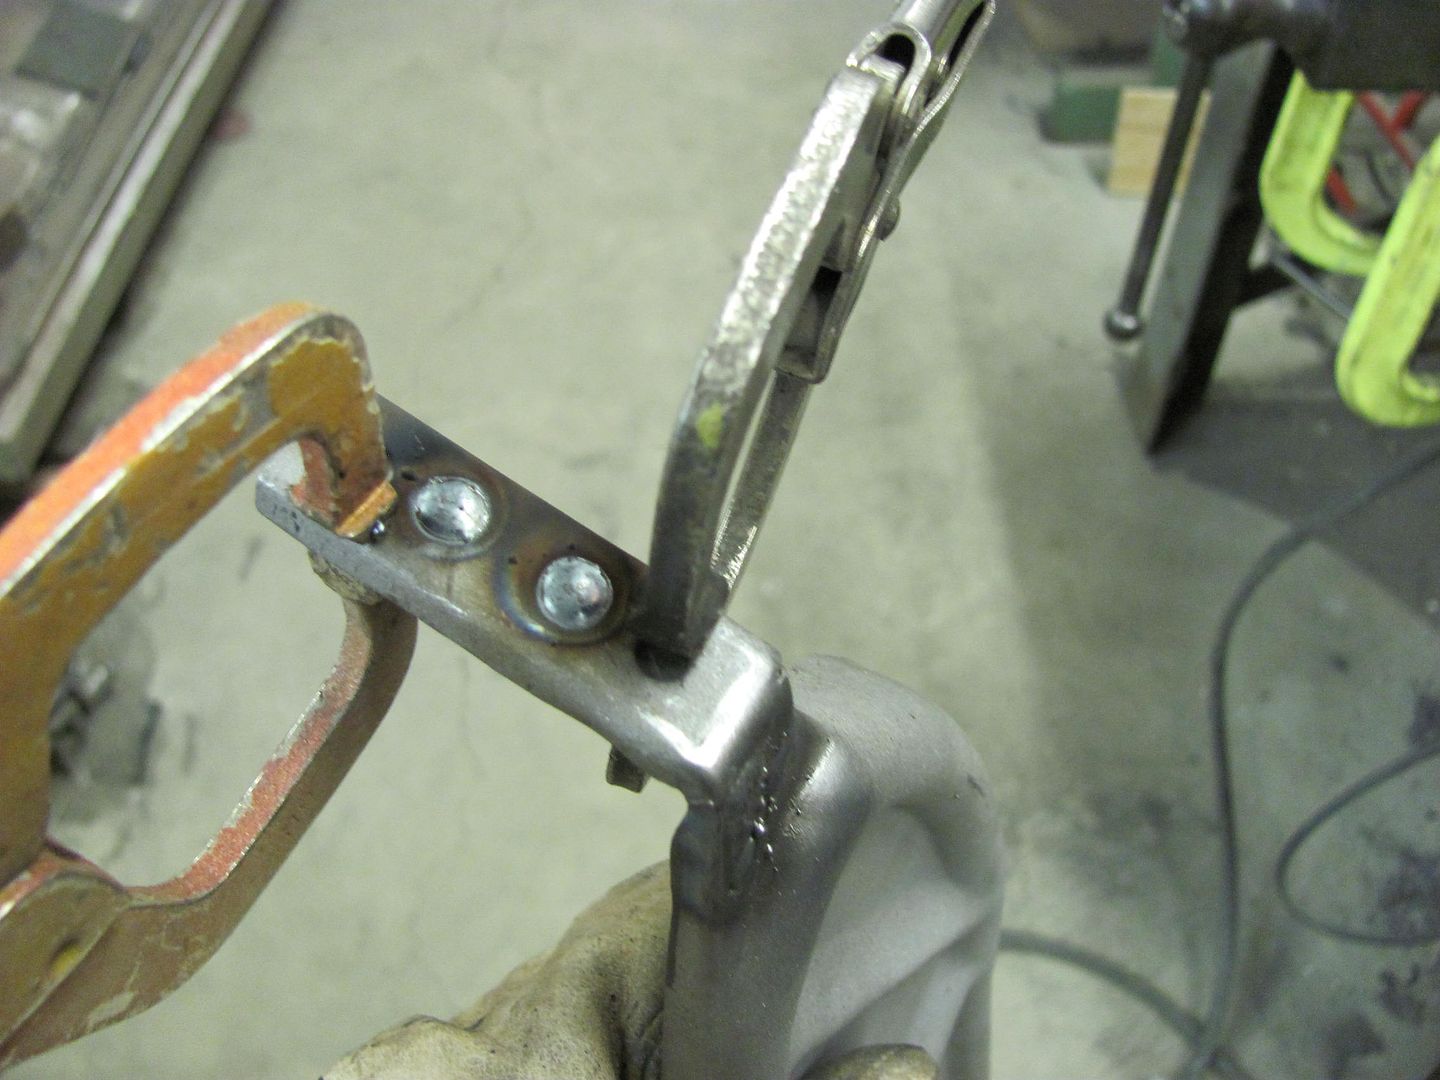  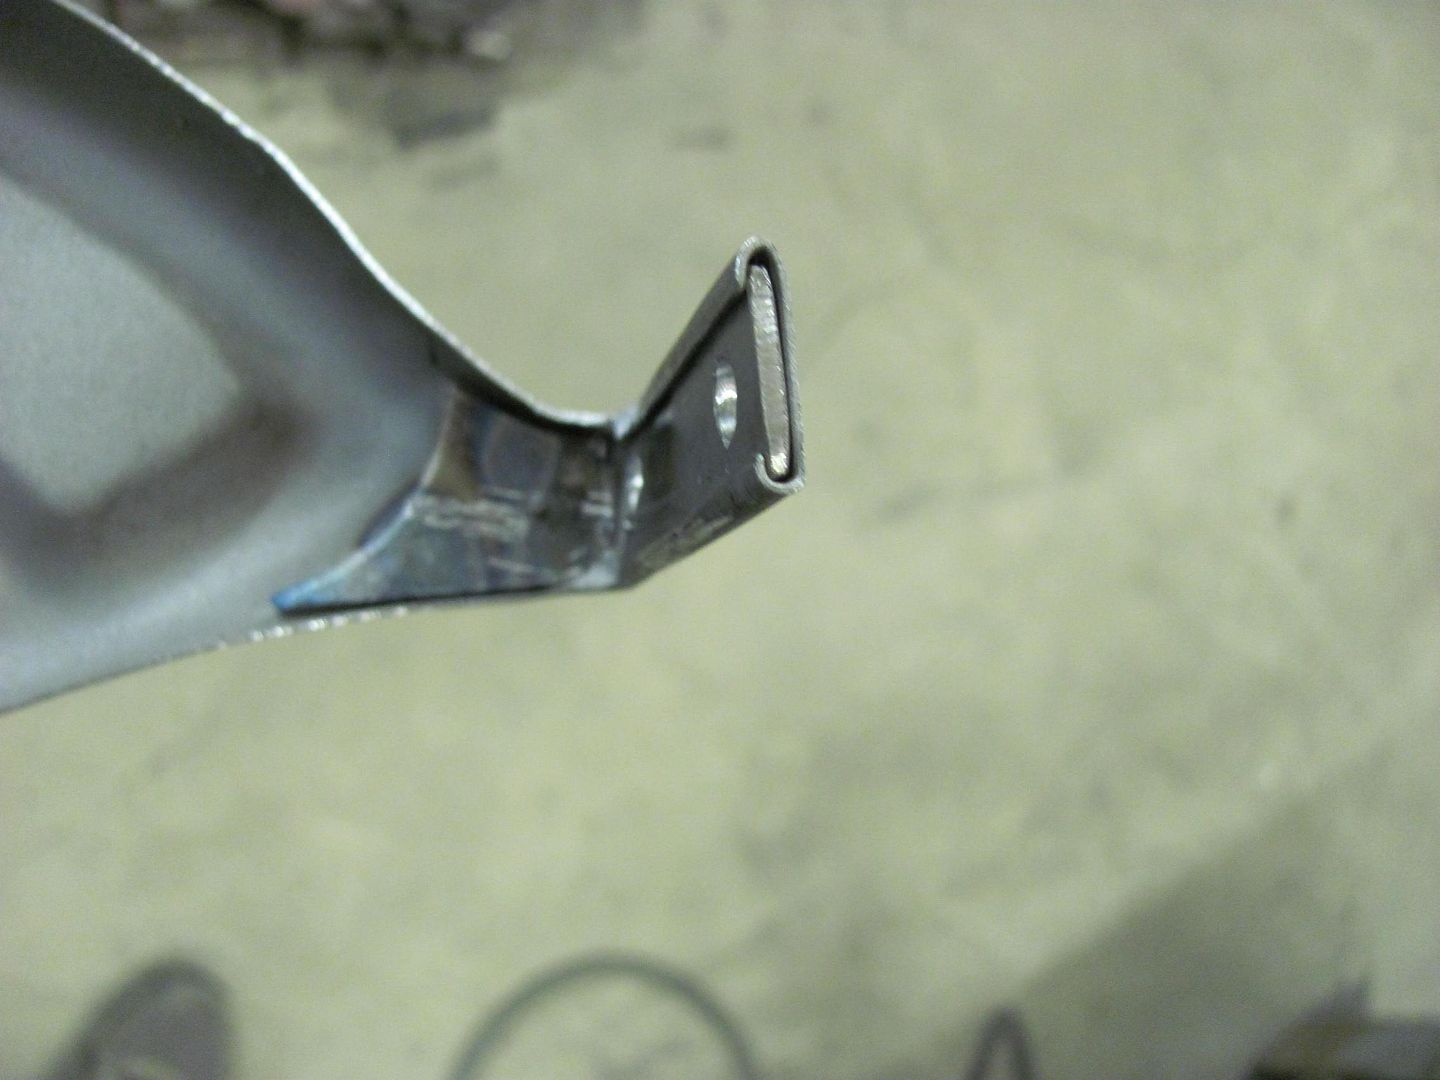 Test fit to the hood... 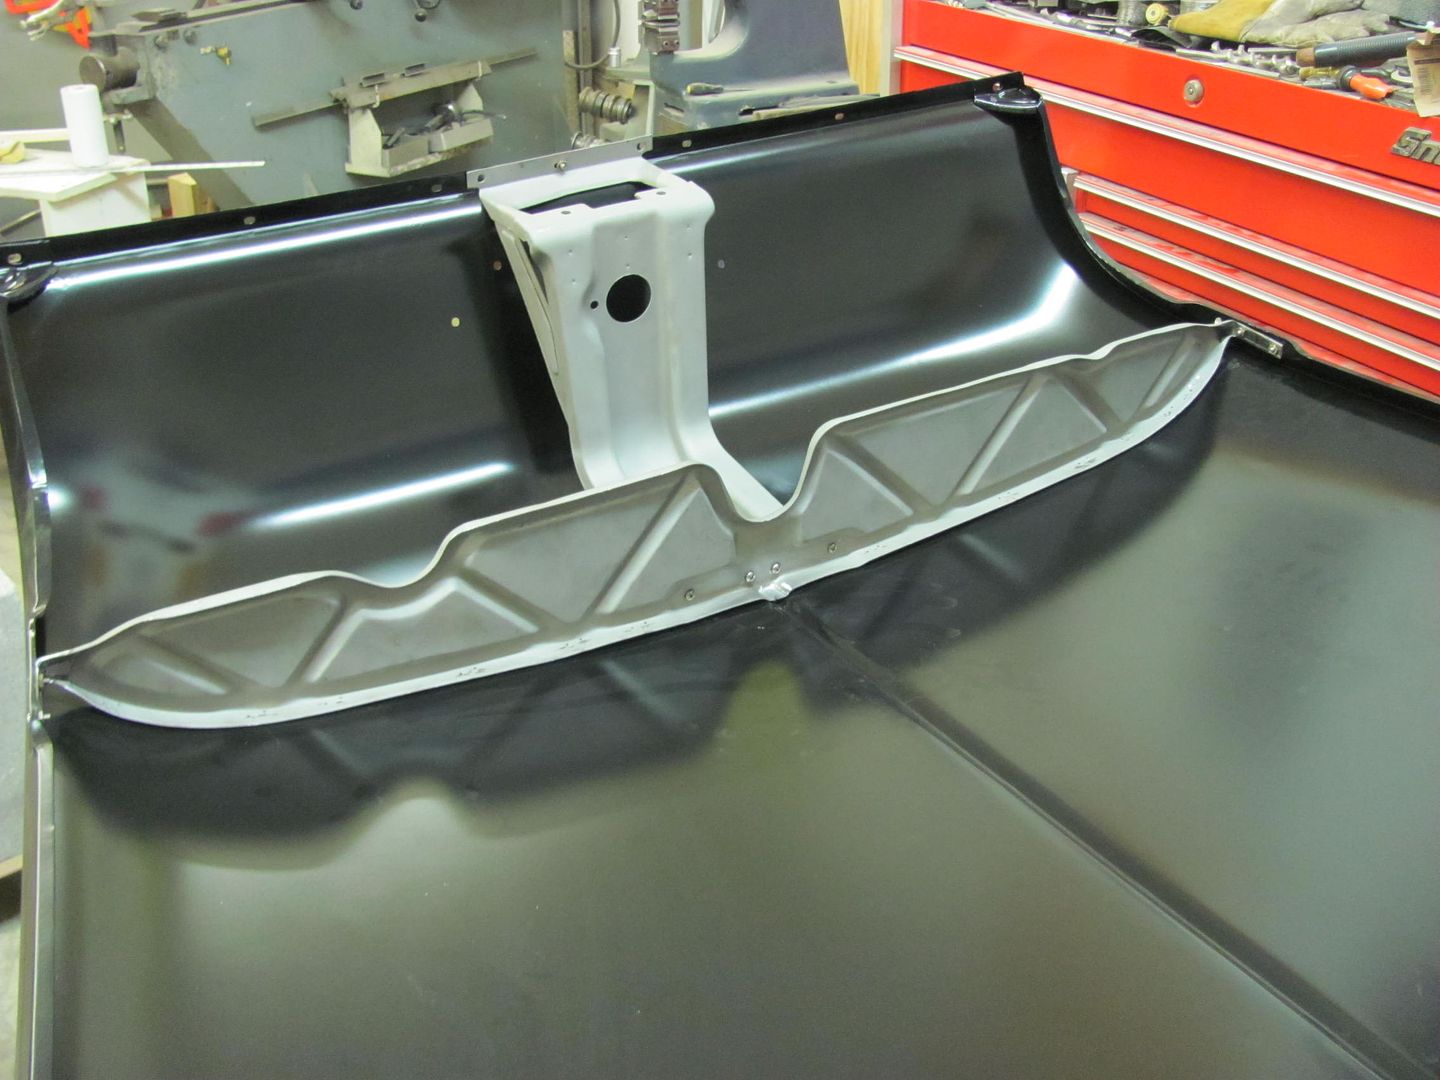
__________________
Robert |
|
|
|
|
01-14-2015, 11:58 PM
|
#6 |
|
Registered User
Join Date: Jan 2013
Location: Leonardtown, MD
Posts: 1,647
|
Re: 55 Wagon Progress
Tonight Kyle was putting the finishing touches on prepping the passenger door for paint. Lots of nooks and crannies. We ended up moving the drill press so we could open the media blast cabinet door wide enough to put the door inside. It was a snug fit, but made easier work of cleaning the door on the ends... The rest will be done by hand...
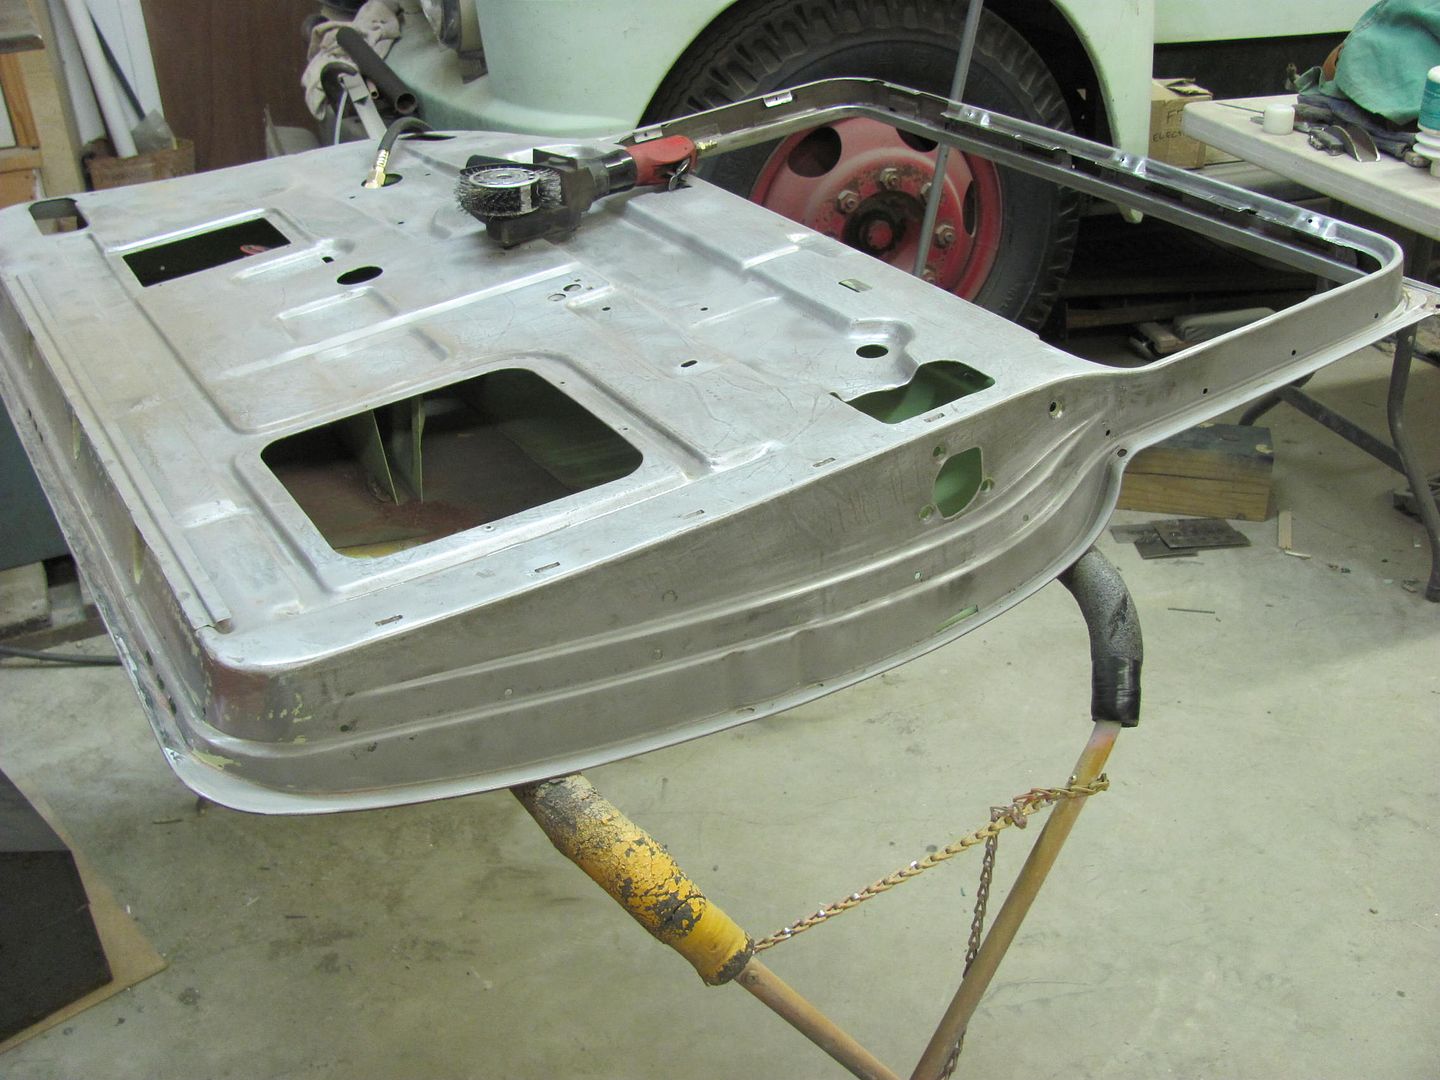 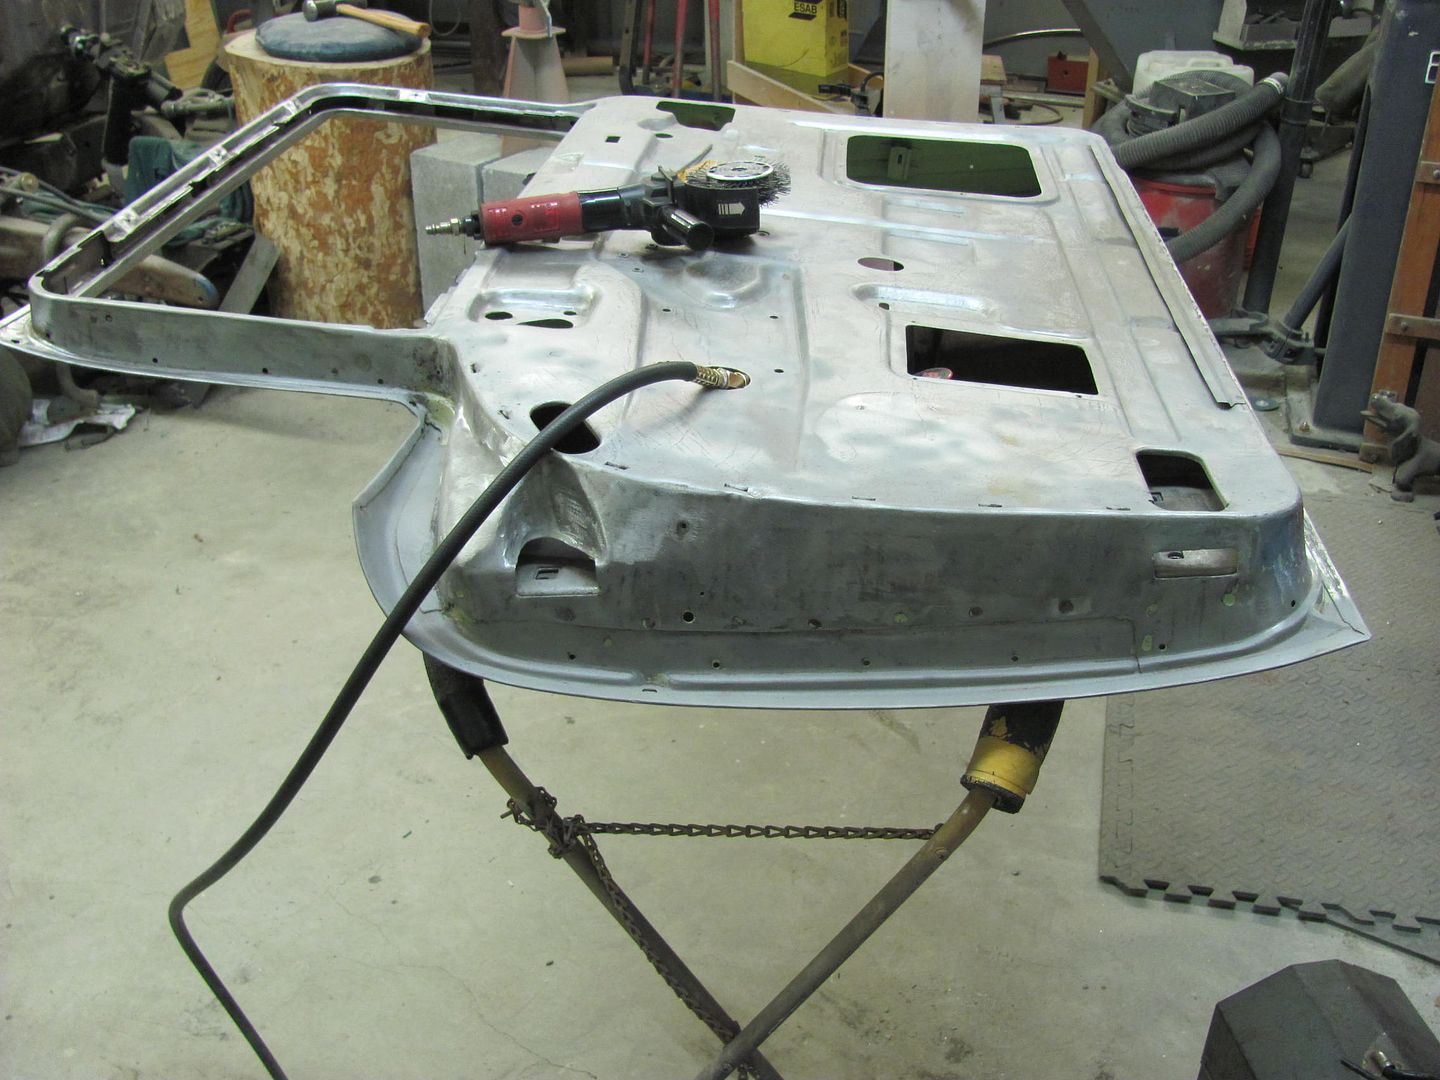 After adding the radius to the doors, it only made sense that the lift gate needed the same modification. Sorry to bore you with more of the same, just wait until we get to wet sanding  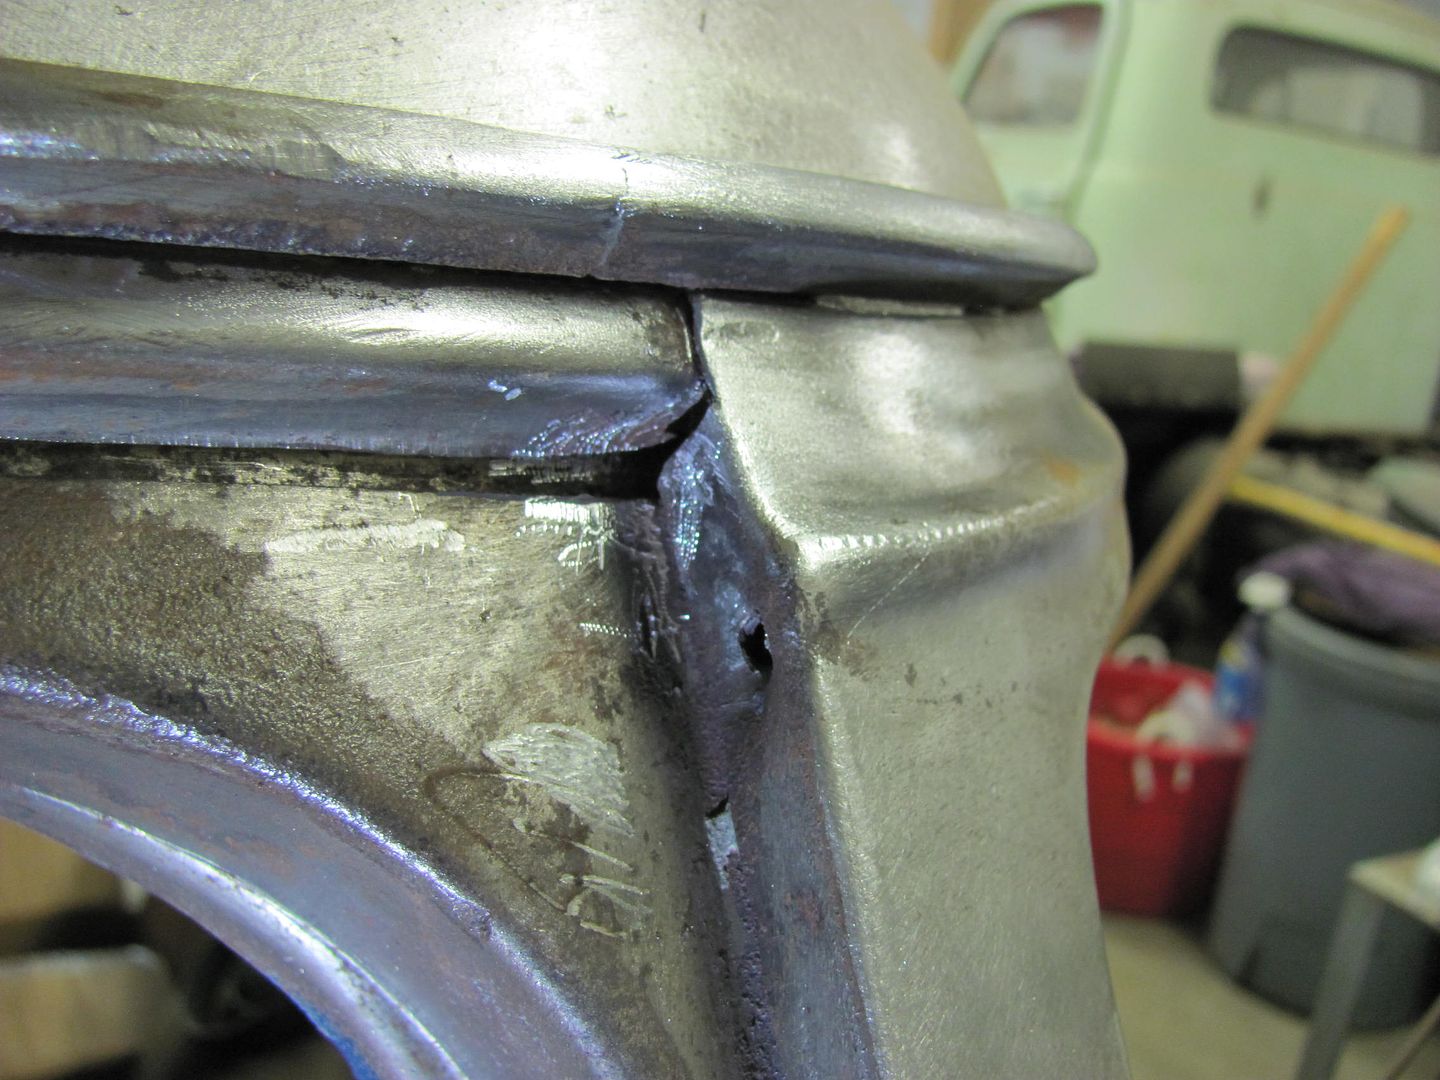 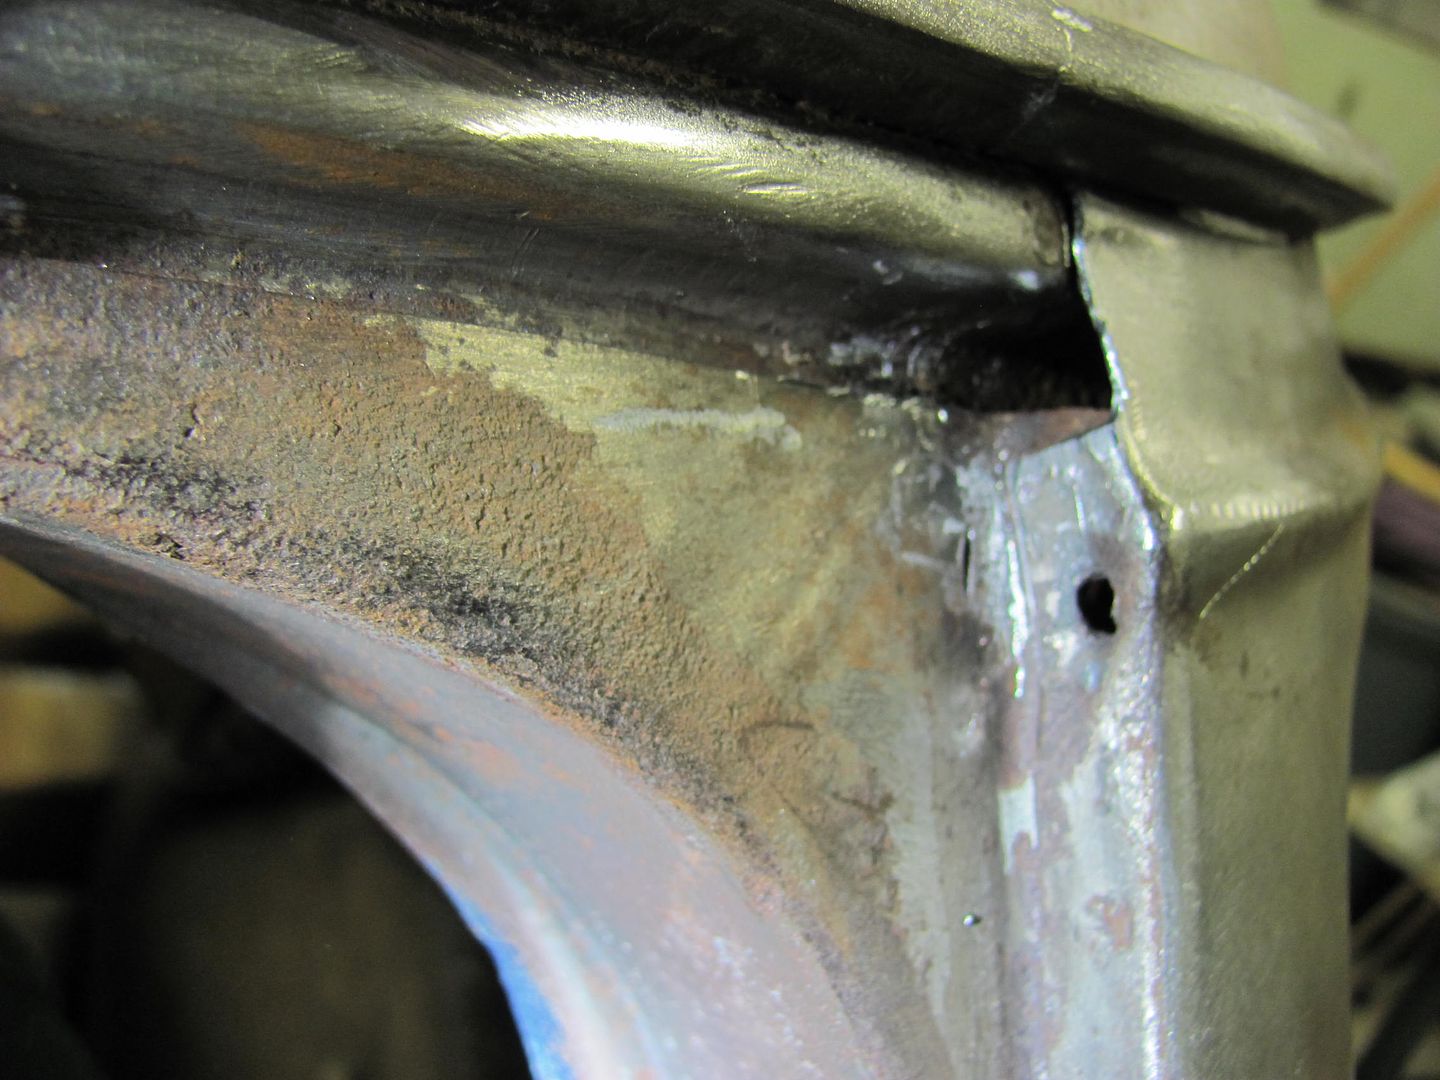 Test fit the radius... 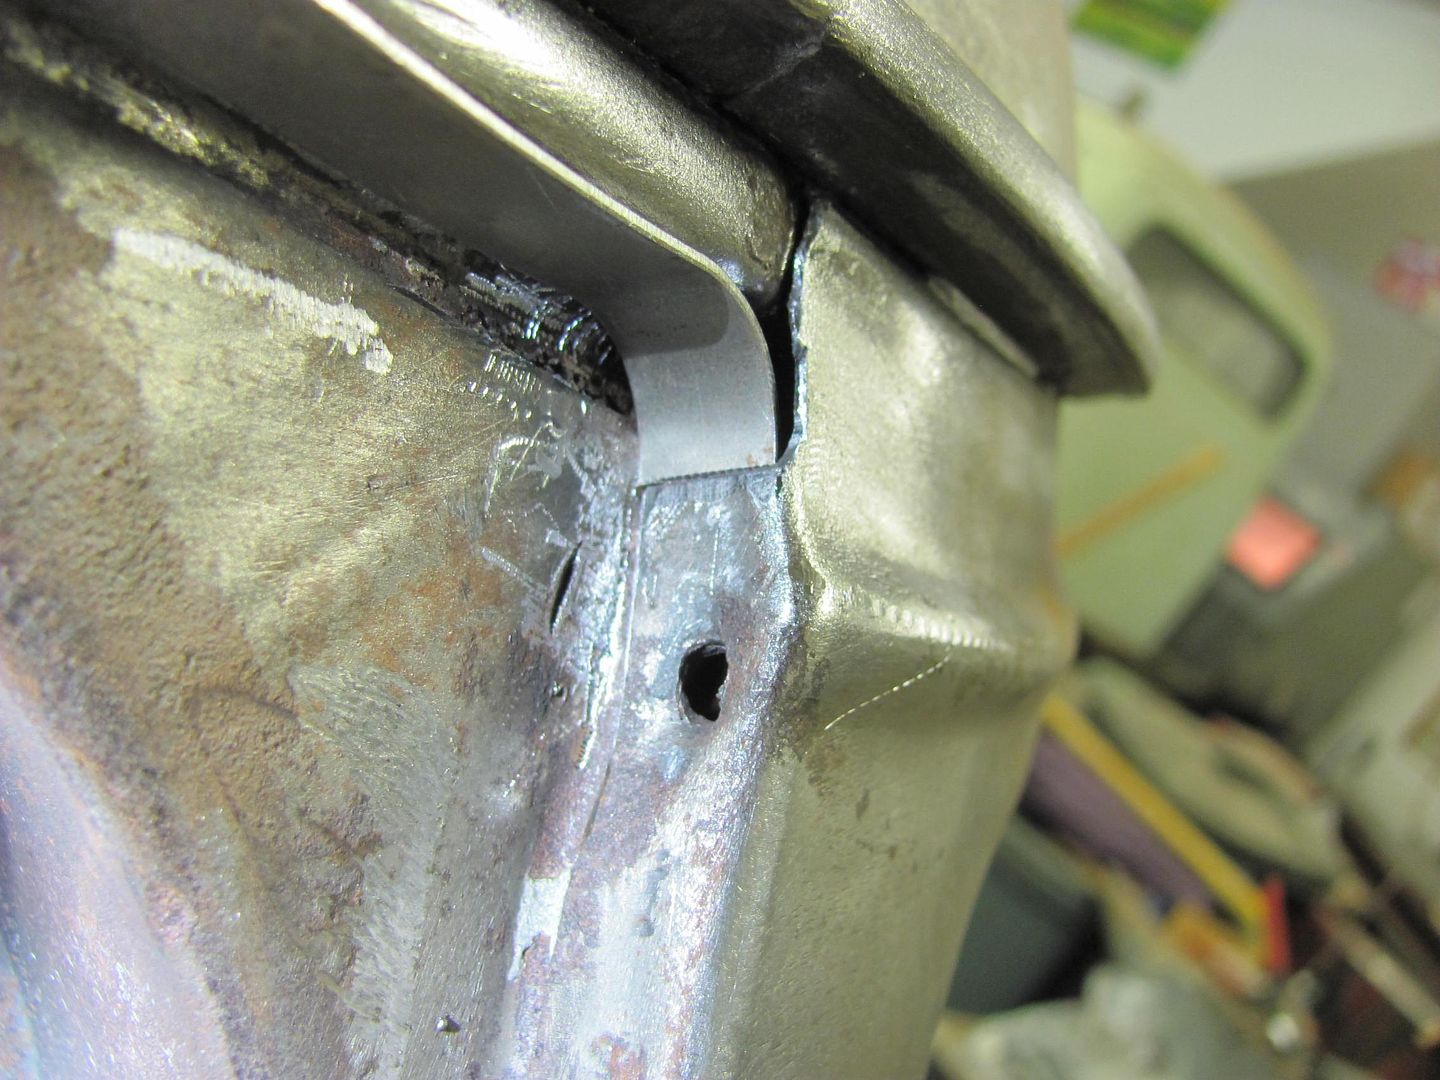 Scoring the second cut location, and tacking in place.. 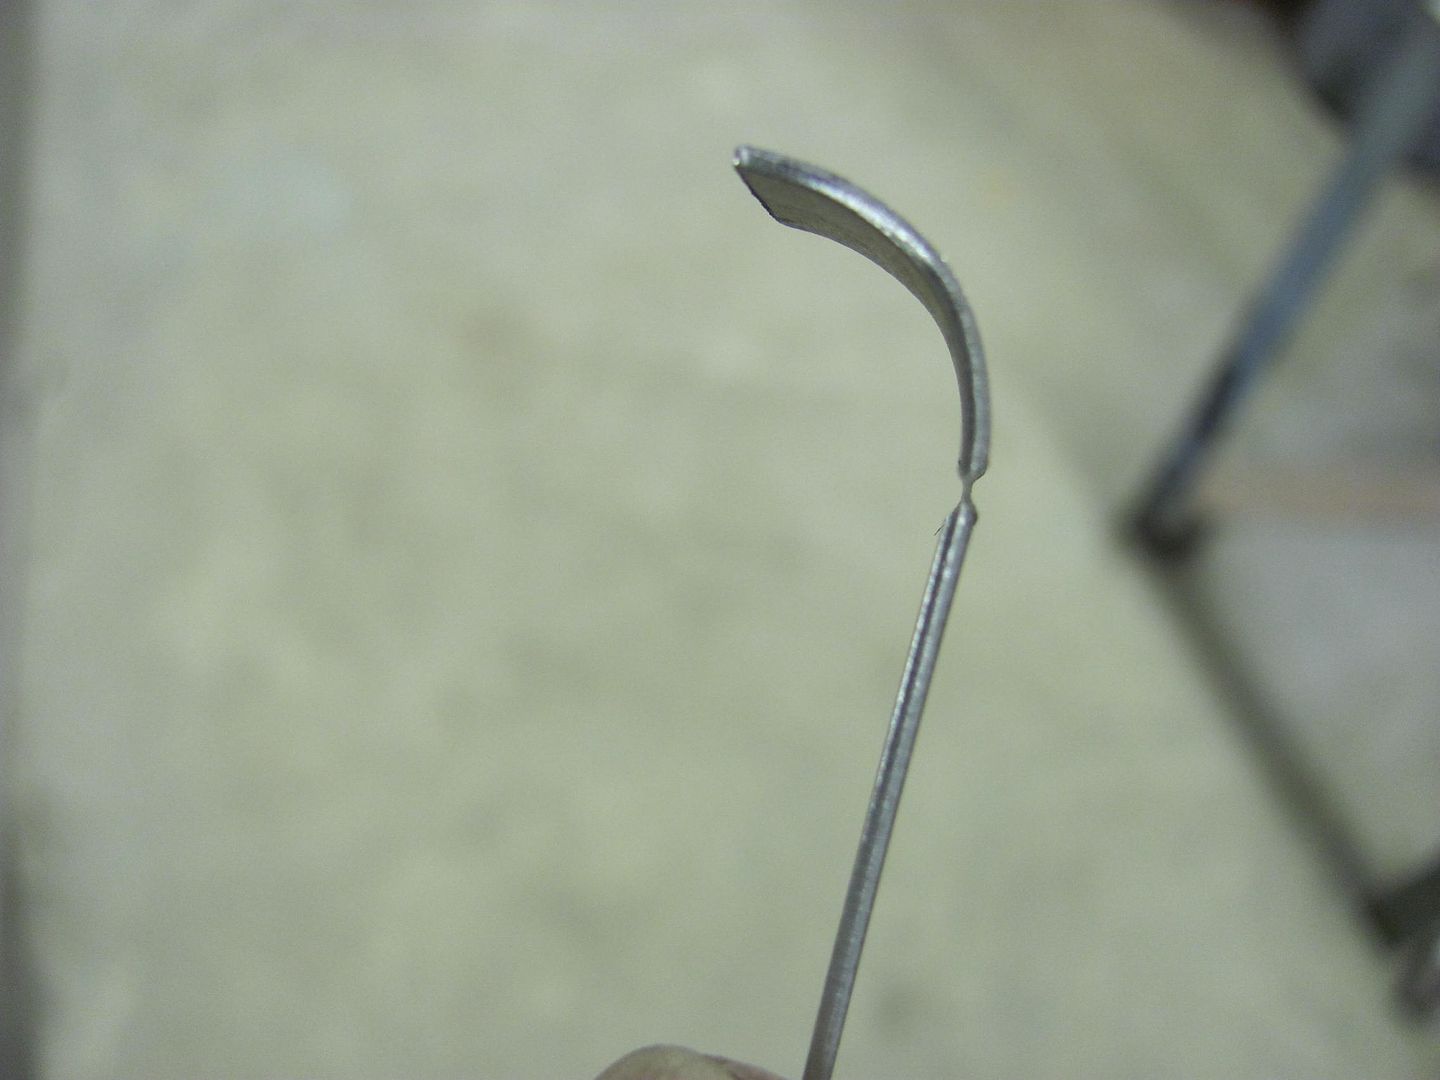 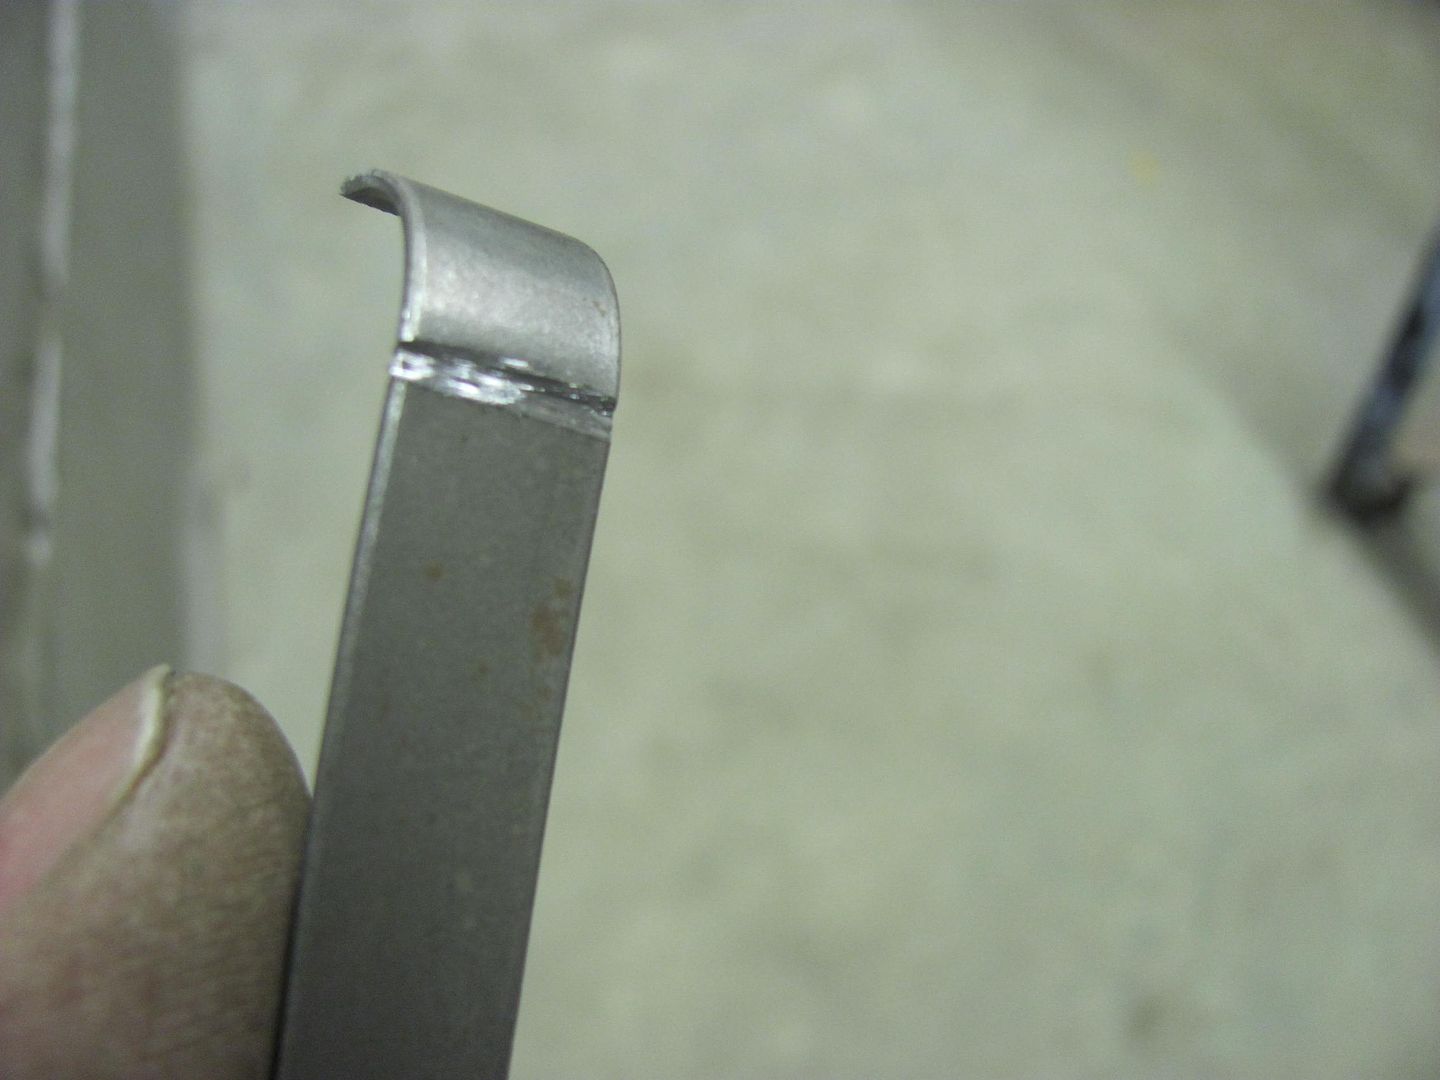 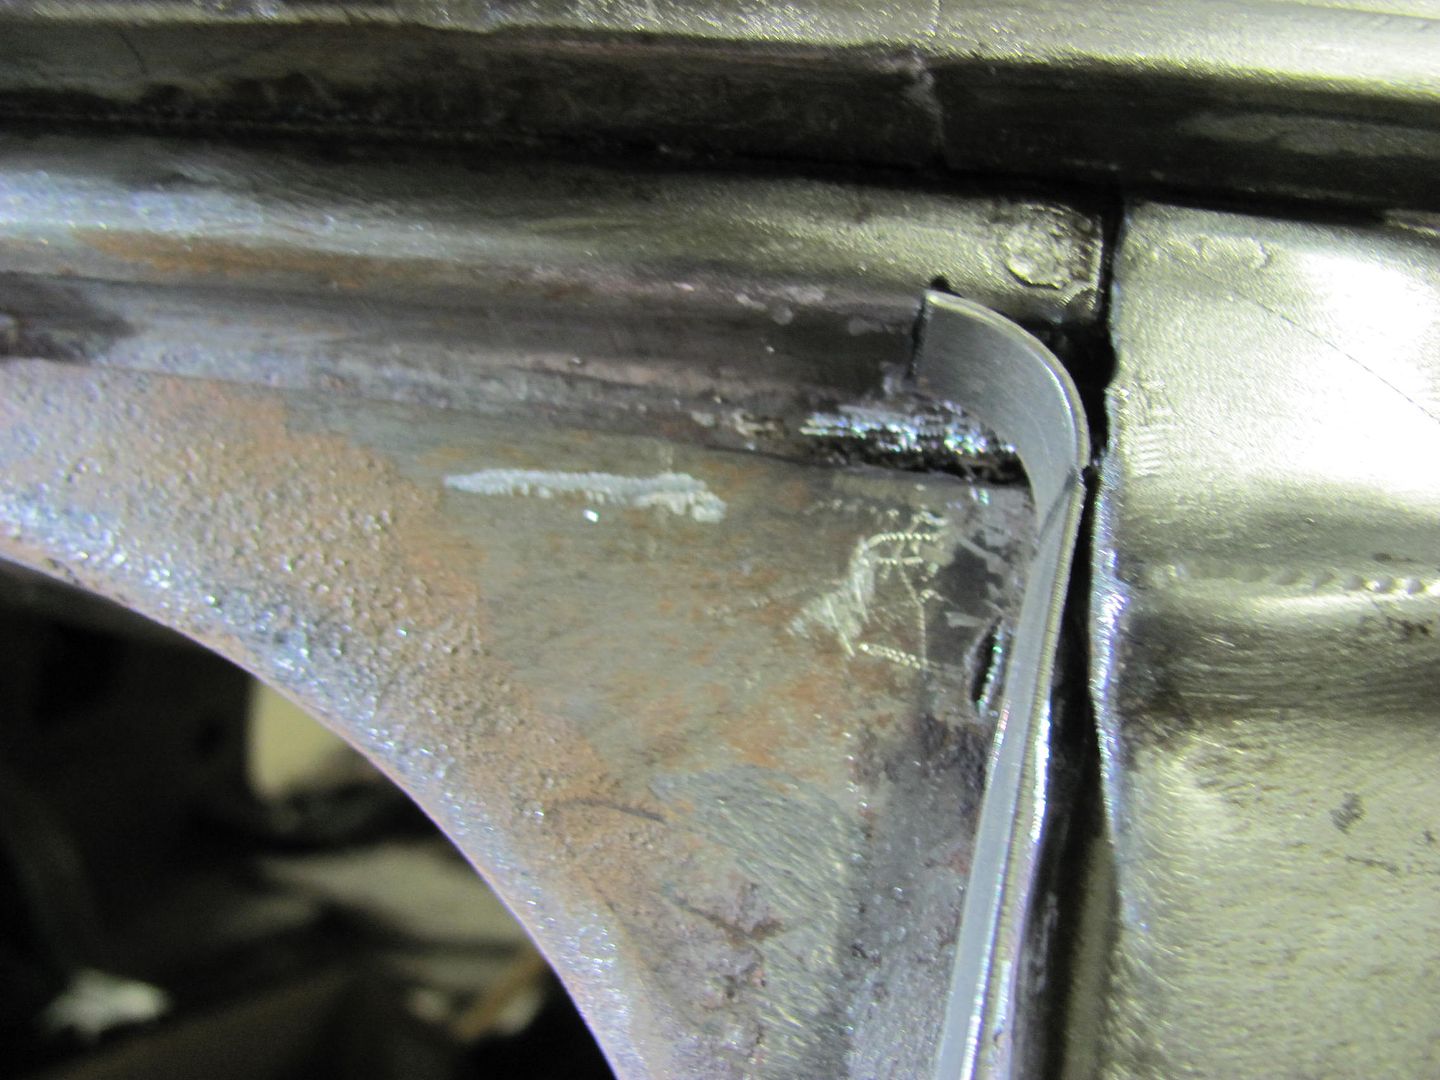 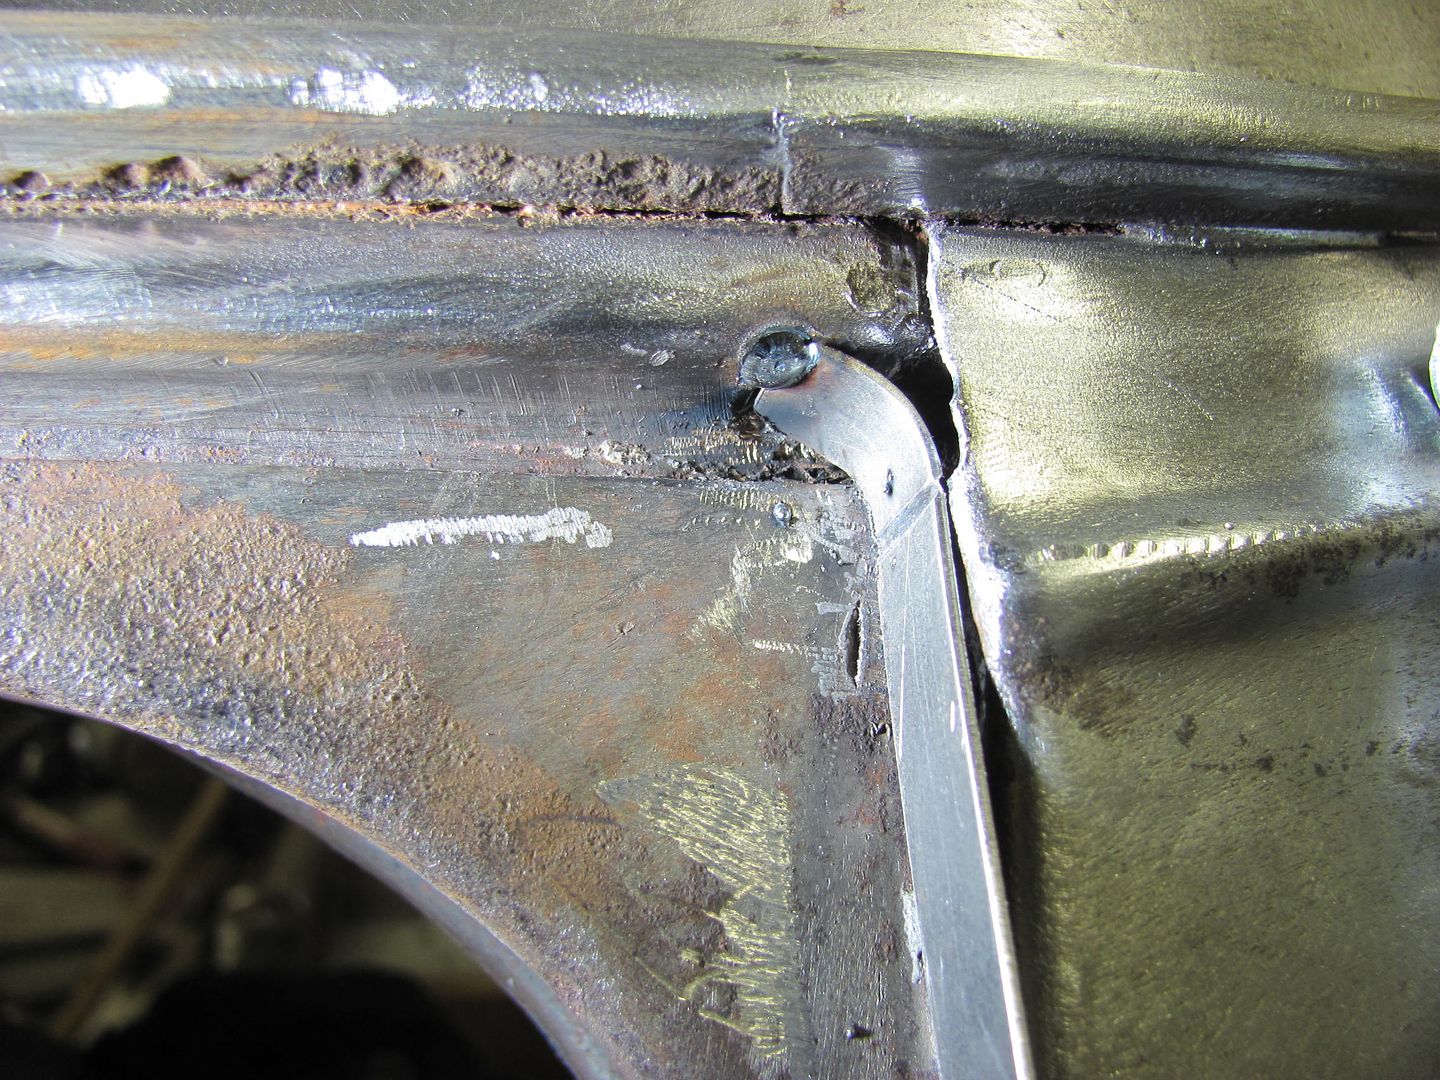 Snapped of the excess.... 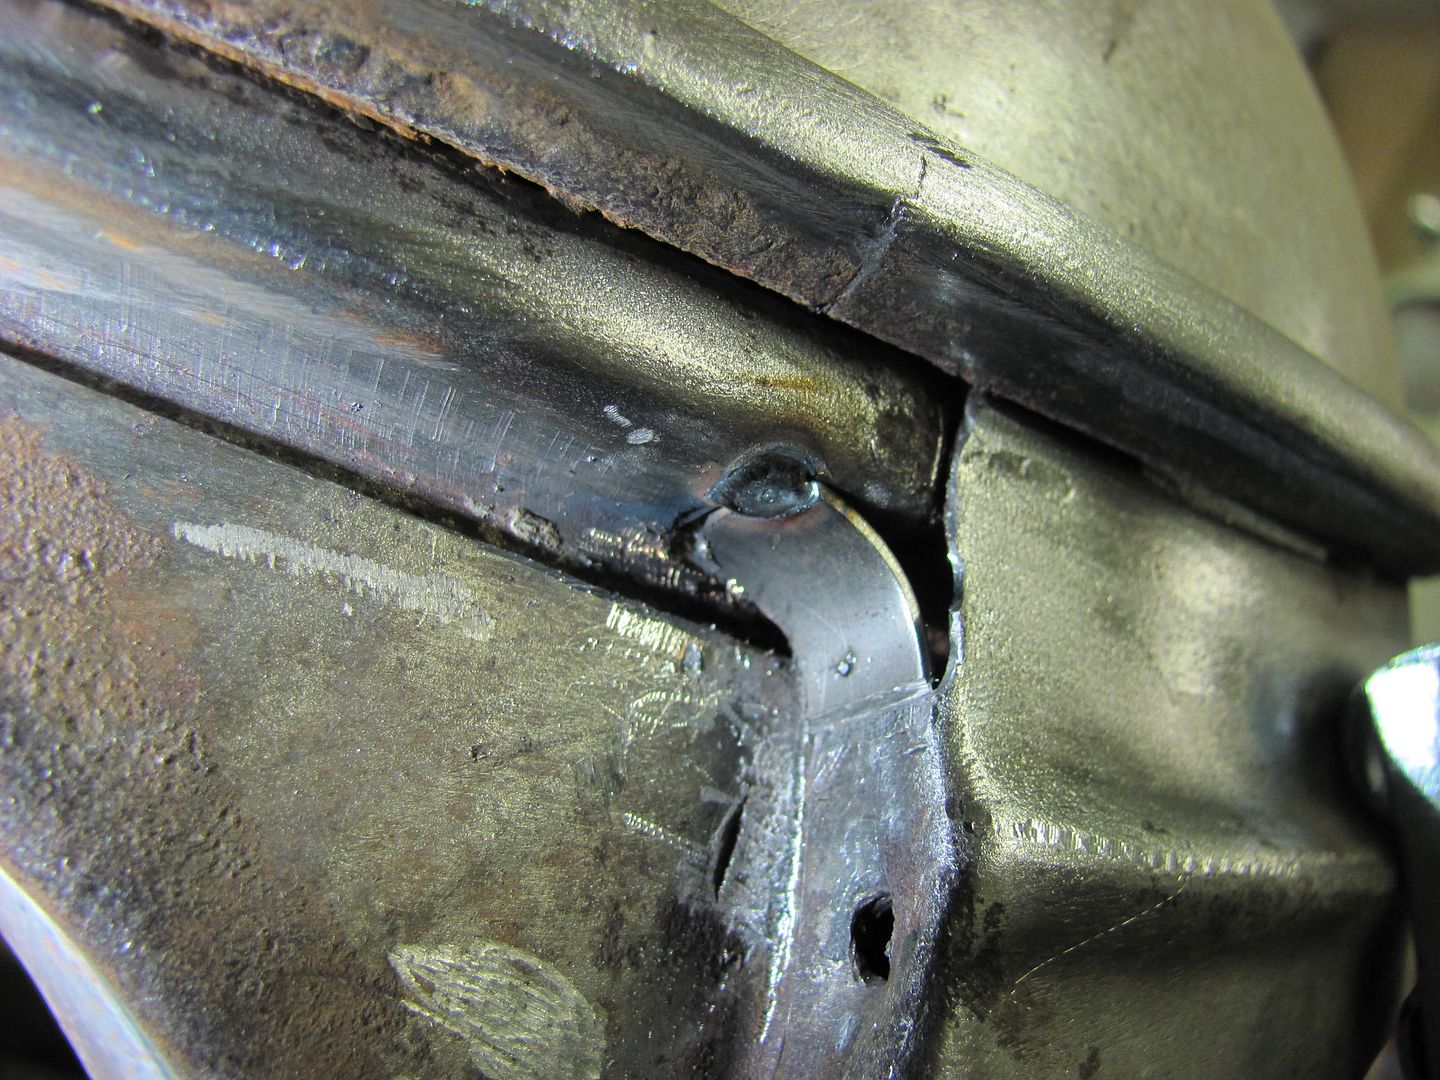 Checking the radius, and welded in and dressed... 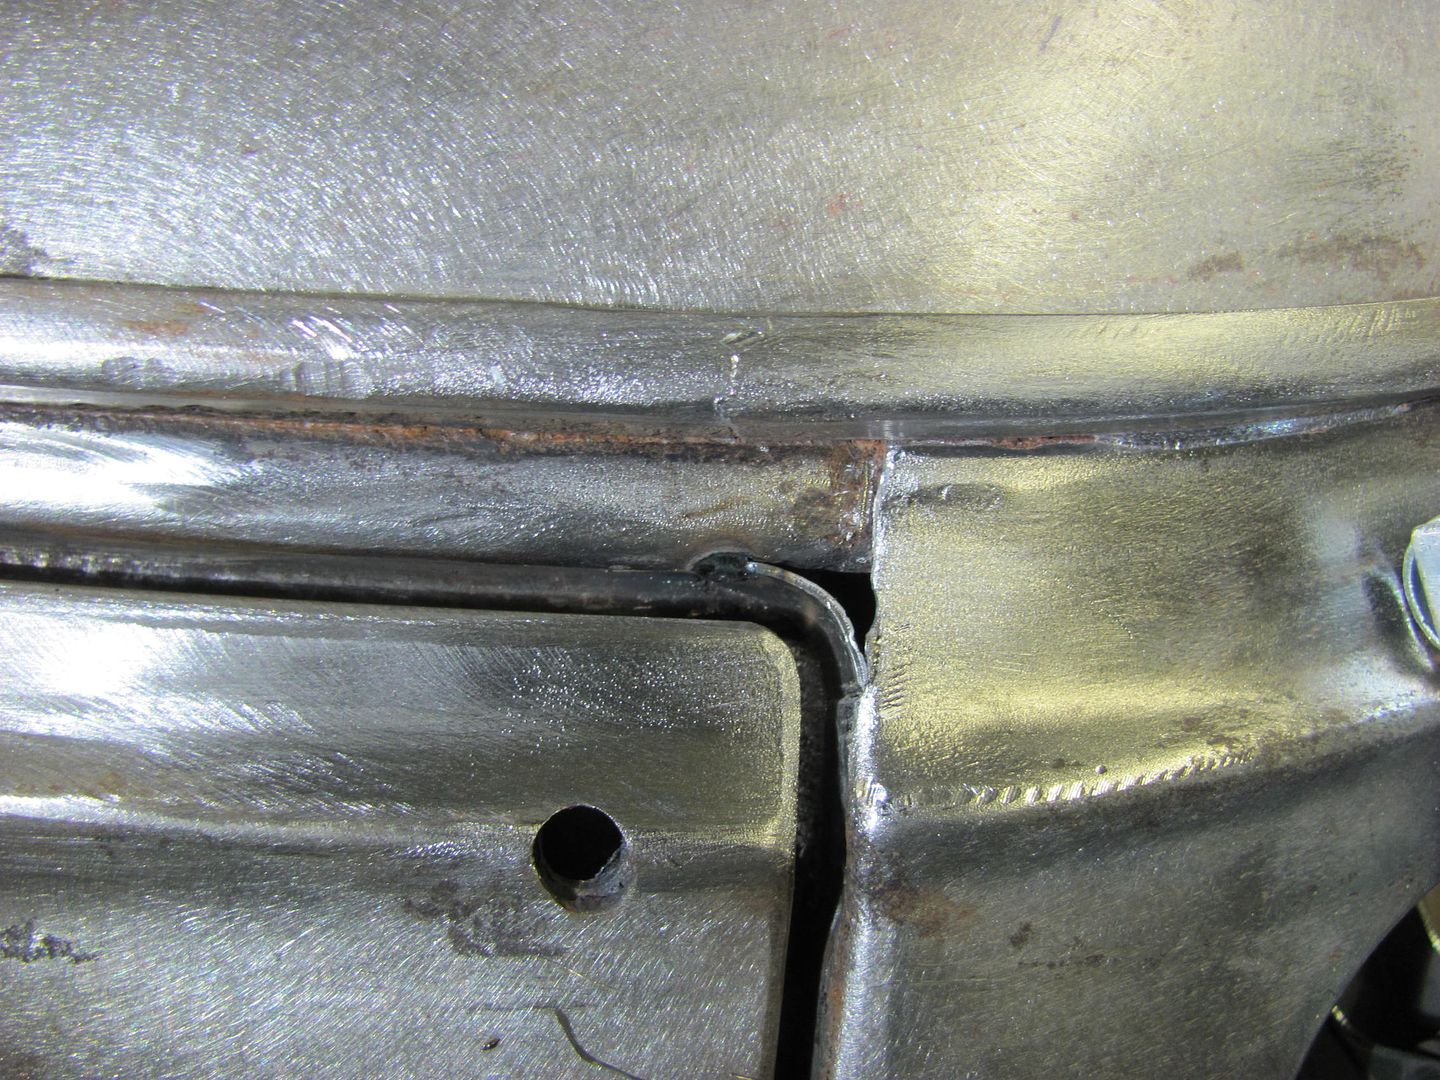 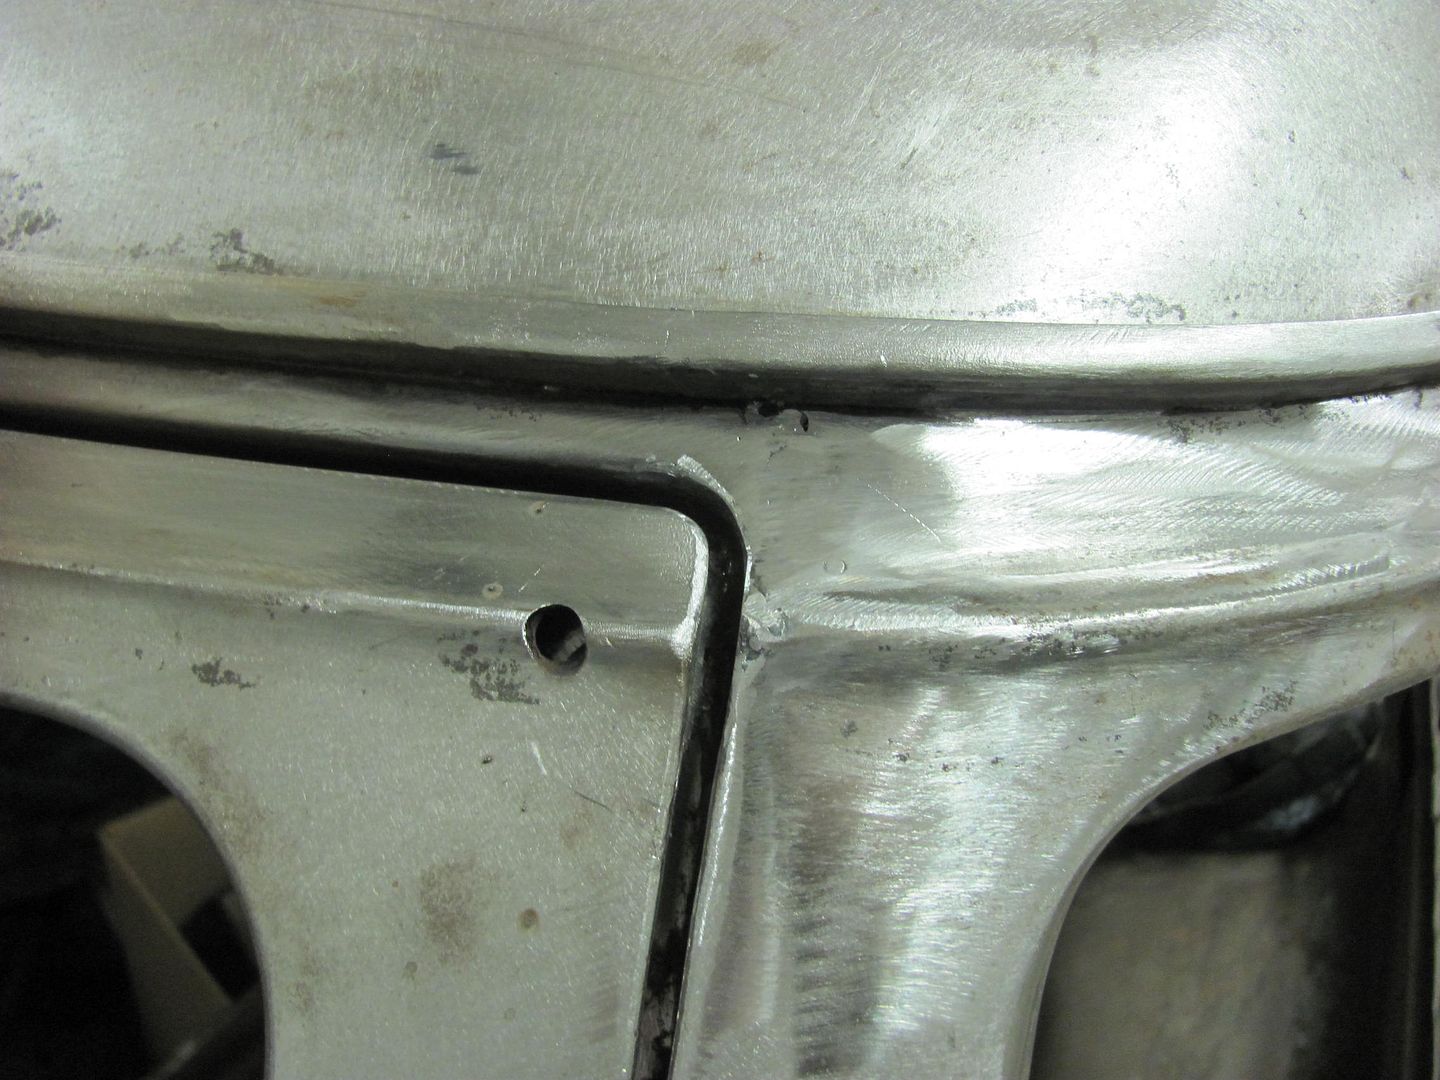 They're calling for a heat wave this weekend (in high 40's on Sunday), so we should get some more primer sprayed....
__________________
Robert |
|
|
|
|
01-15-2015, 02:27 PM
|
#7 |
|
Registered User
Join Date: May 2007
Location: Deale Md
Posts: 4,663
|
Re: 55 Wagon Progress
there's nothing boring in this thread, glad to see every little detail
__________________
James 63 GMC V6 4speed carryall 65 chevy swb bbw V8 auto 68 K20 327/4 speed, buddy buckets 2002 GMC CC Dually Duramax 64 GMC lwb 3/4 V6 4speed SOLD 66 GMC swb bbw buddy buckets SOLD IG duallyjams The only thing that stays the same is constant change! |
|
|
|
|
01-15-2015, 05:29 PM
|
#8 |
|
Senior Member
Join Date: Jul 2012
Location: Oblong, Illinois
Posts: 7,028
|
Re: 55 Wagon Progress
Me too, great work for many of us to try to aspire to.
Holy cow, how large a media blaster do you have to be able to put a 55 Chevy door in it? |
|
|
|
|
01-15-2015, 11:15 PM
|
#9 |
|
Registered User
 Join Date: Mar 2007
Location: Scotts, Michigan
Posts: 3,773
|
Re: 55 Wagon Progress
Great work. Can I ask how many years of experience you have under your belt. Your work says MANY.
Very nice...... Marc
__________________
...........__________ .................. ((__|__||___\____ ..;.;;.:;:;.,;..;((_(O))____ (_(O)) 1948 Chevy Truck - Finished SOLD!! 1953 Chevy Suburban "Family Truckster" Completed: Spring of 2021 http://67-72chevytrucks.com/vboard/s...d.php?t=605484 1994 4x4 Blazer - "Field Find" https://67-72chevytrucks.com/vboard/...ferrerid=30857 |
|
|
|
|
01-15-2015, 11:29 PM
|
#10 | ||
|
Registered User
Join Date: Jan 2013
Location: Leonardtown, MD
Posts: 1,647
|
Re: 55 Wagon Progress
Thanks for the comments and questions!
Quote:
Thanks, going on about 24 Quote:
58" wide. This one here, although I didn't pay anywhere near that for it. Bought it used.... http://www.tptools.com/1536-Champion....html?b=d*8016
__________________
Robert |
||
|
|
|
|
01-18-2015, 06:57 PM
|
#11 |
|
Registered User
Join Date: Jan 2013
Location: Leonardtown, MD
Posts: 1,647
|
Re: 55 Wagon Progress
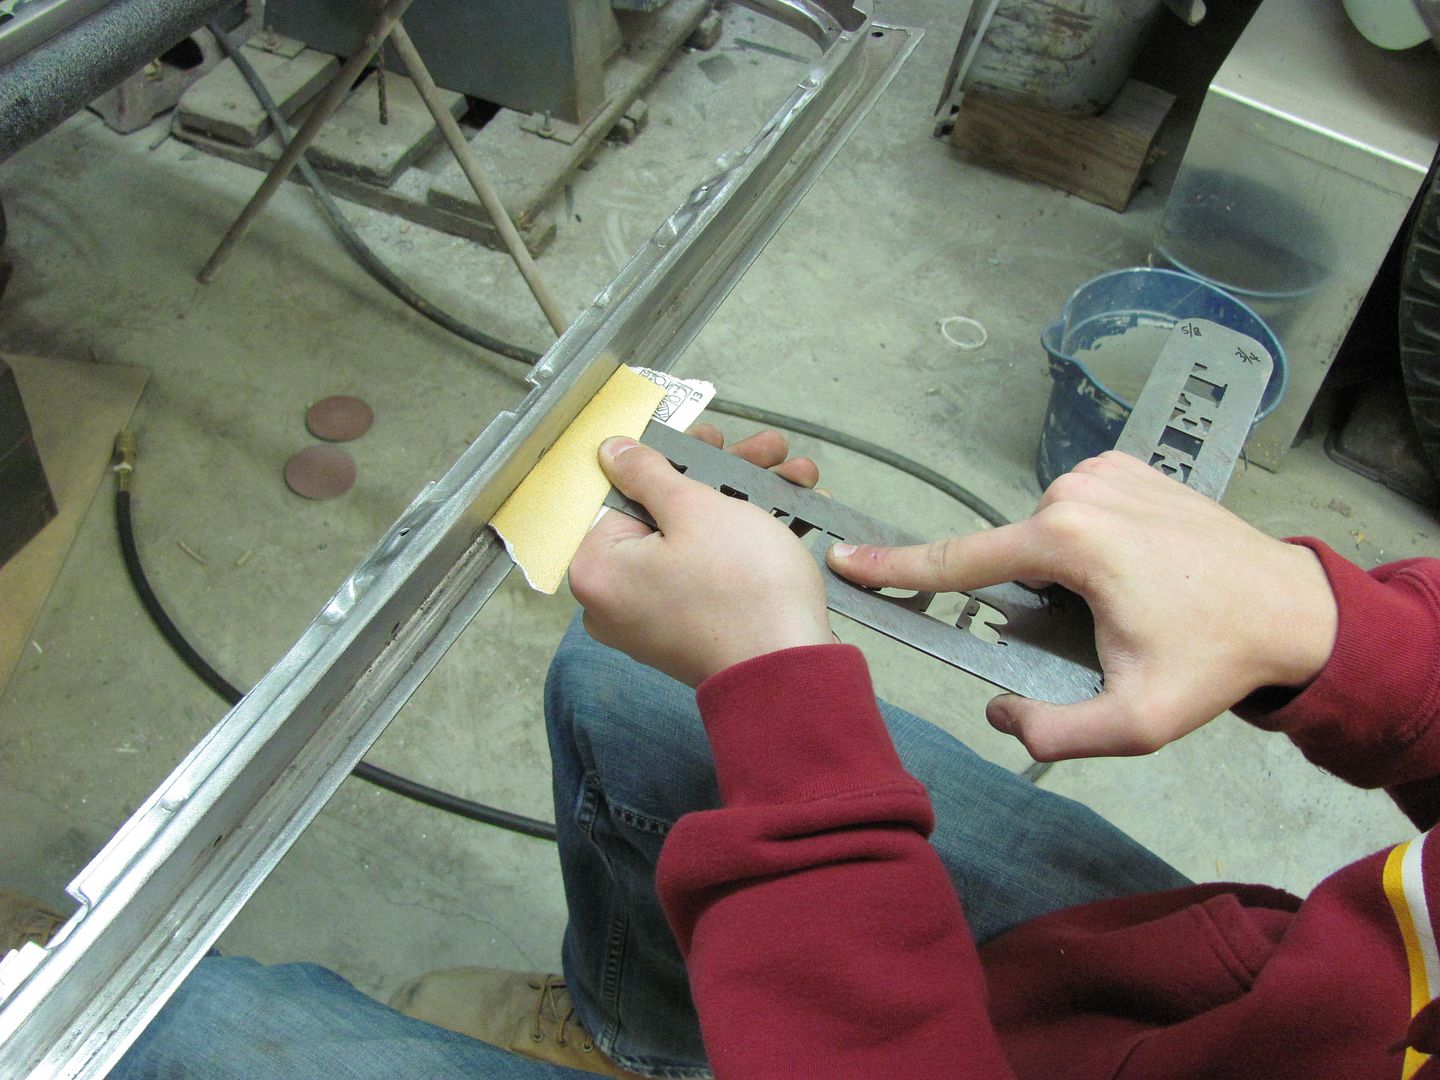
Kyle finishing up the prep on the door this morning, found another use for the GatorMeet radius square, here used as a sanding block to get into the tight crevices...
 Front fenders were both prepped with DA and 80 grit.. 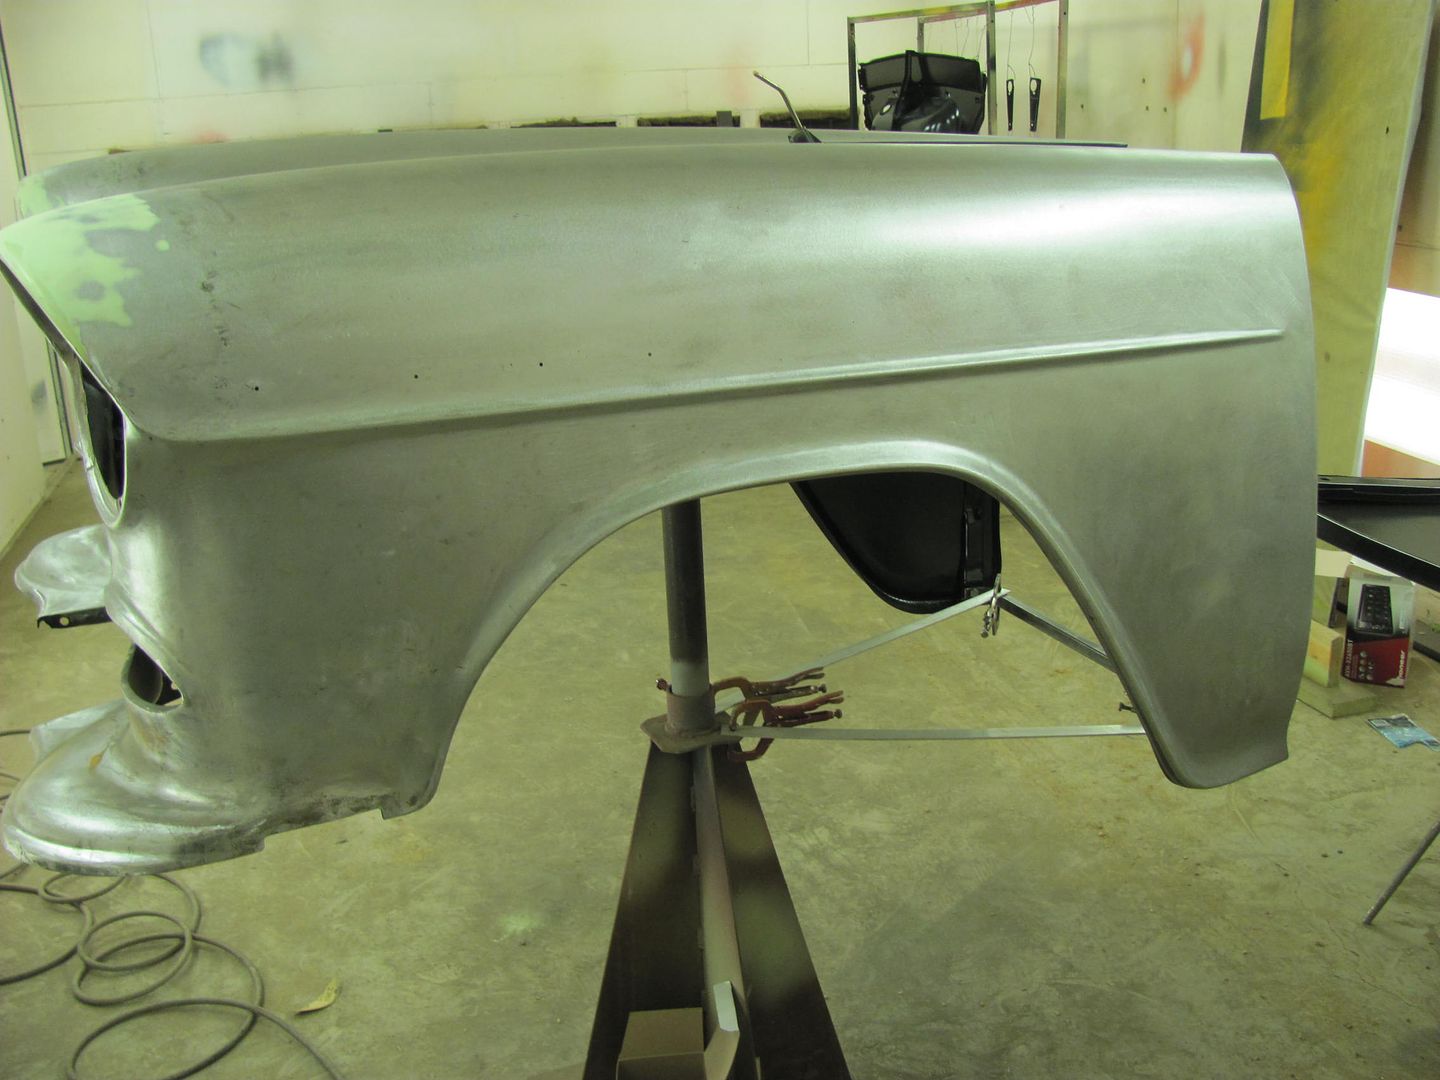  SPI Epoxy is mixed to allow for induction... 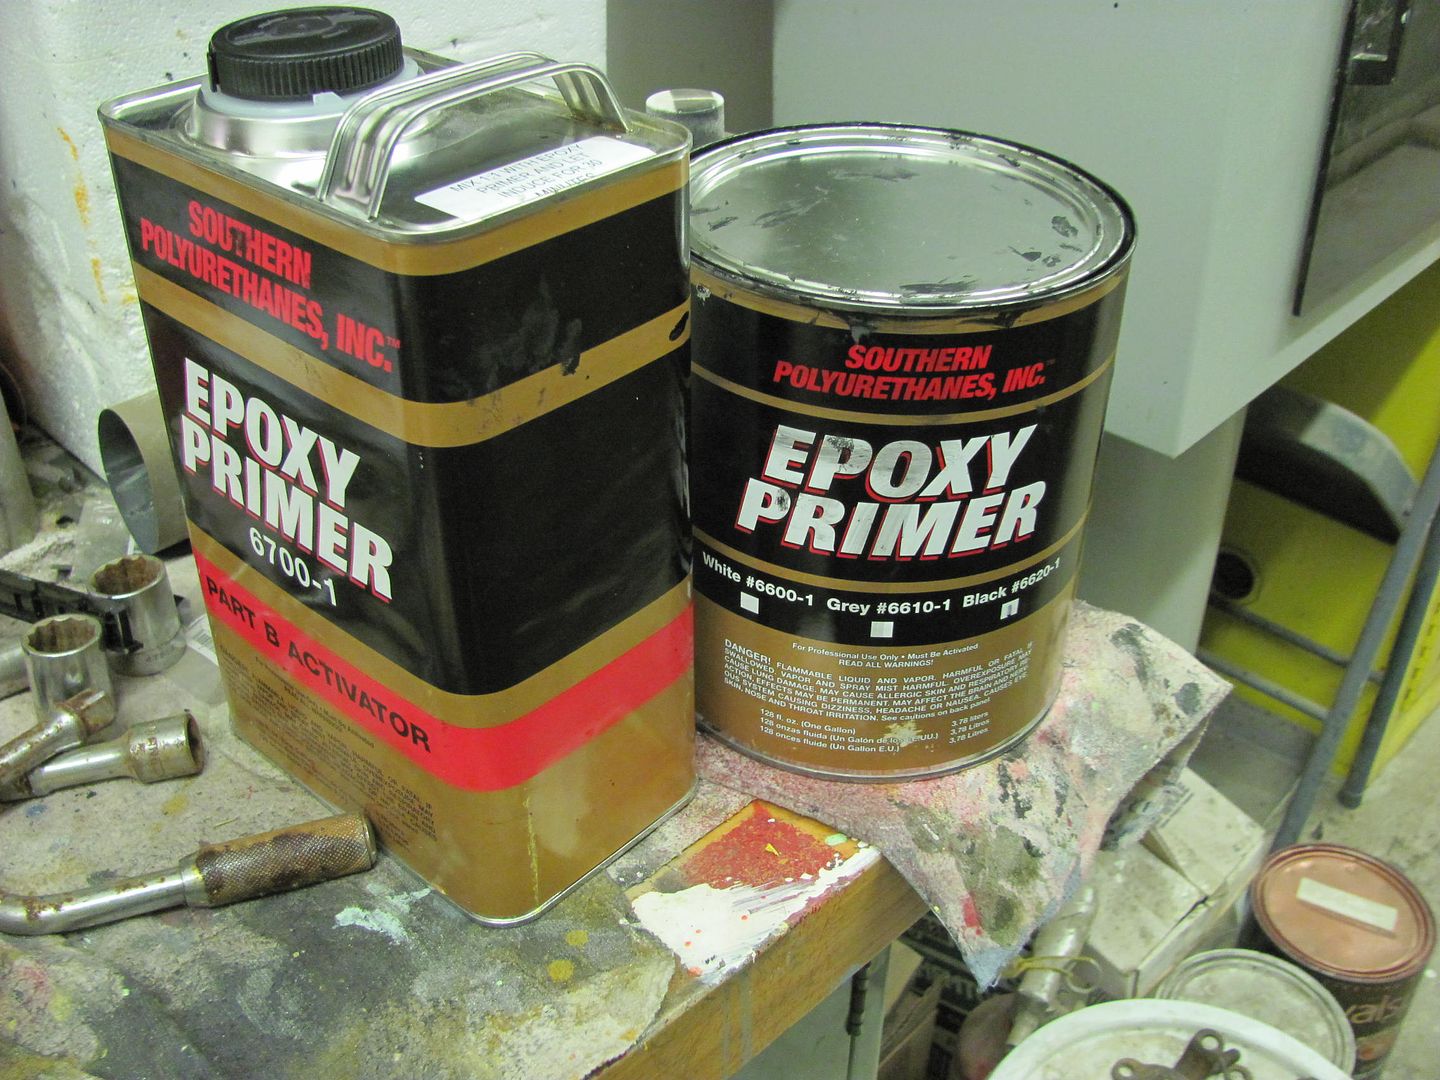 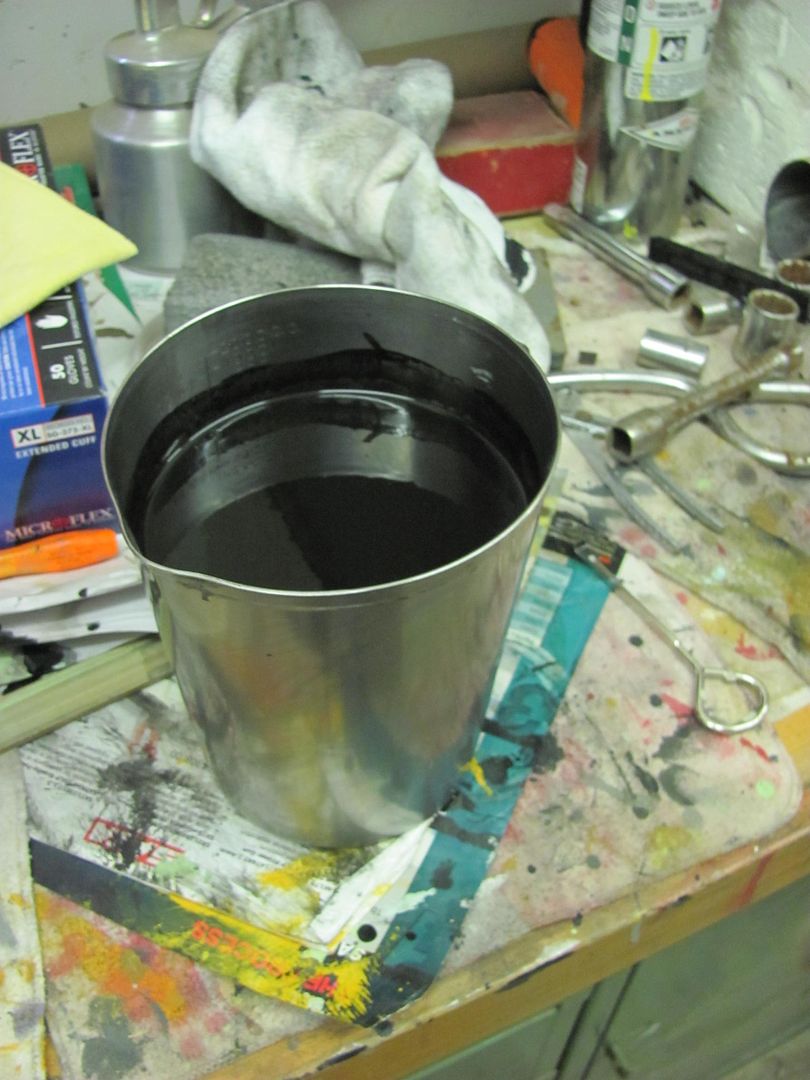 As the body parts had been soda blasted, it was cleaned with a hot soapy water (dish detergent) and a grey Scotchbrite, followed by a towel drying session.  Then this was followed up with preclean... 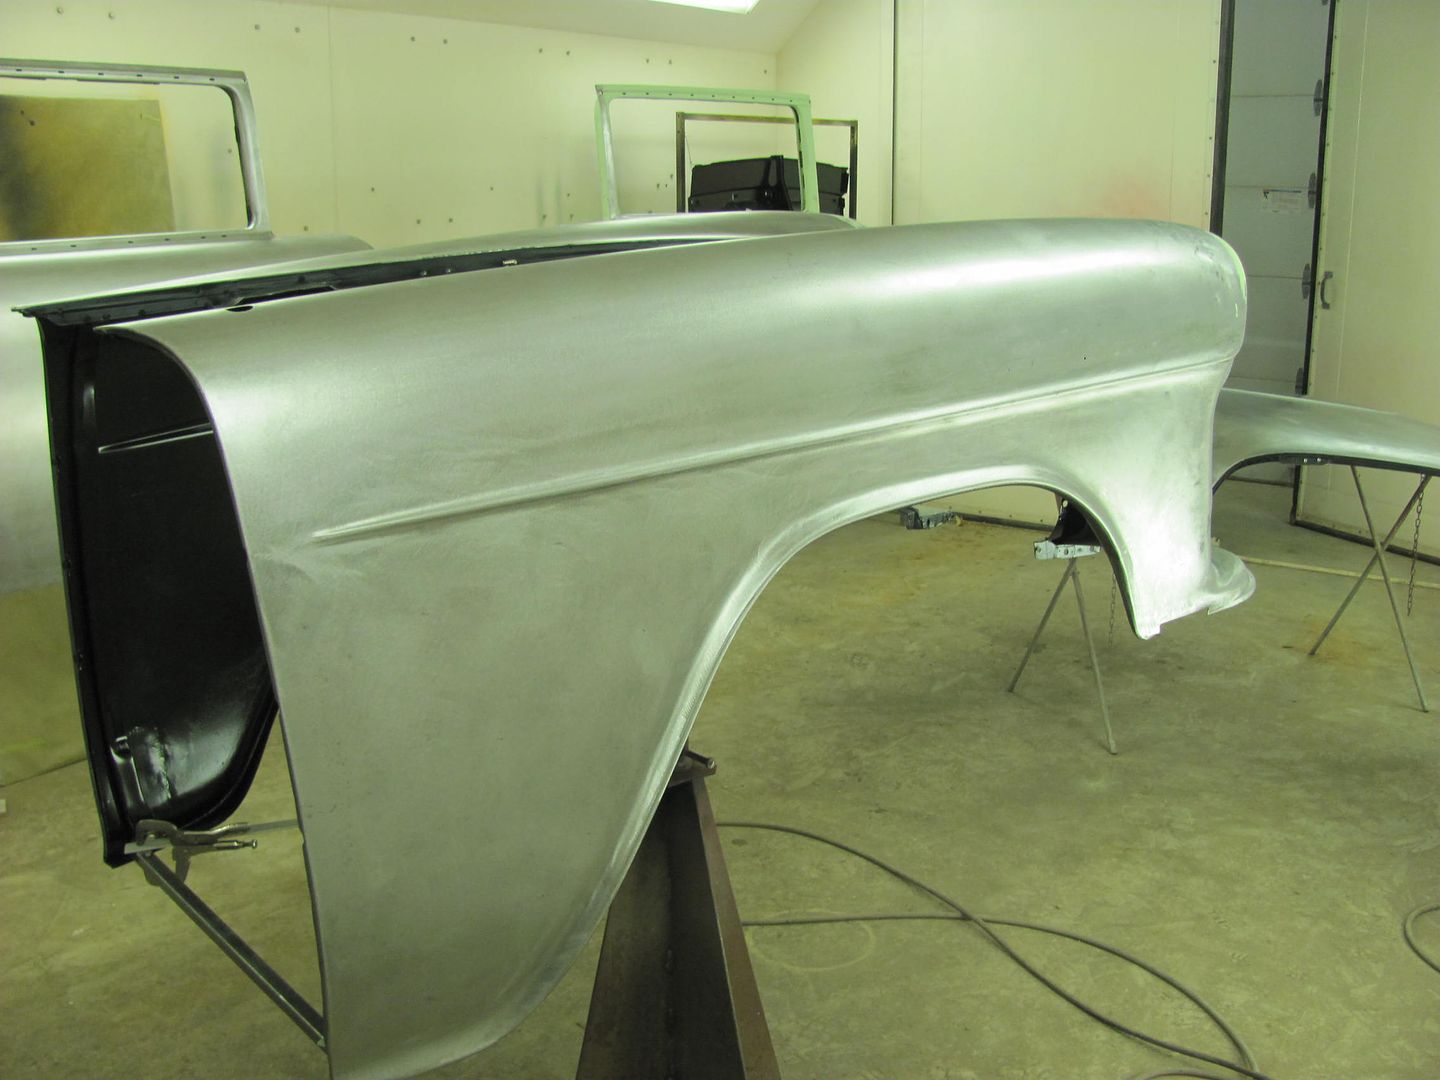 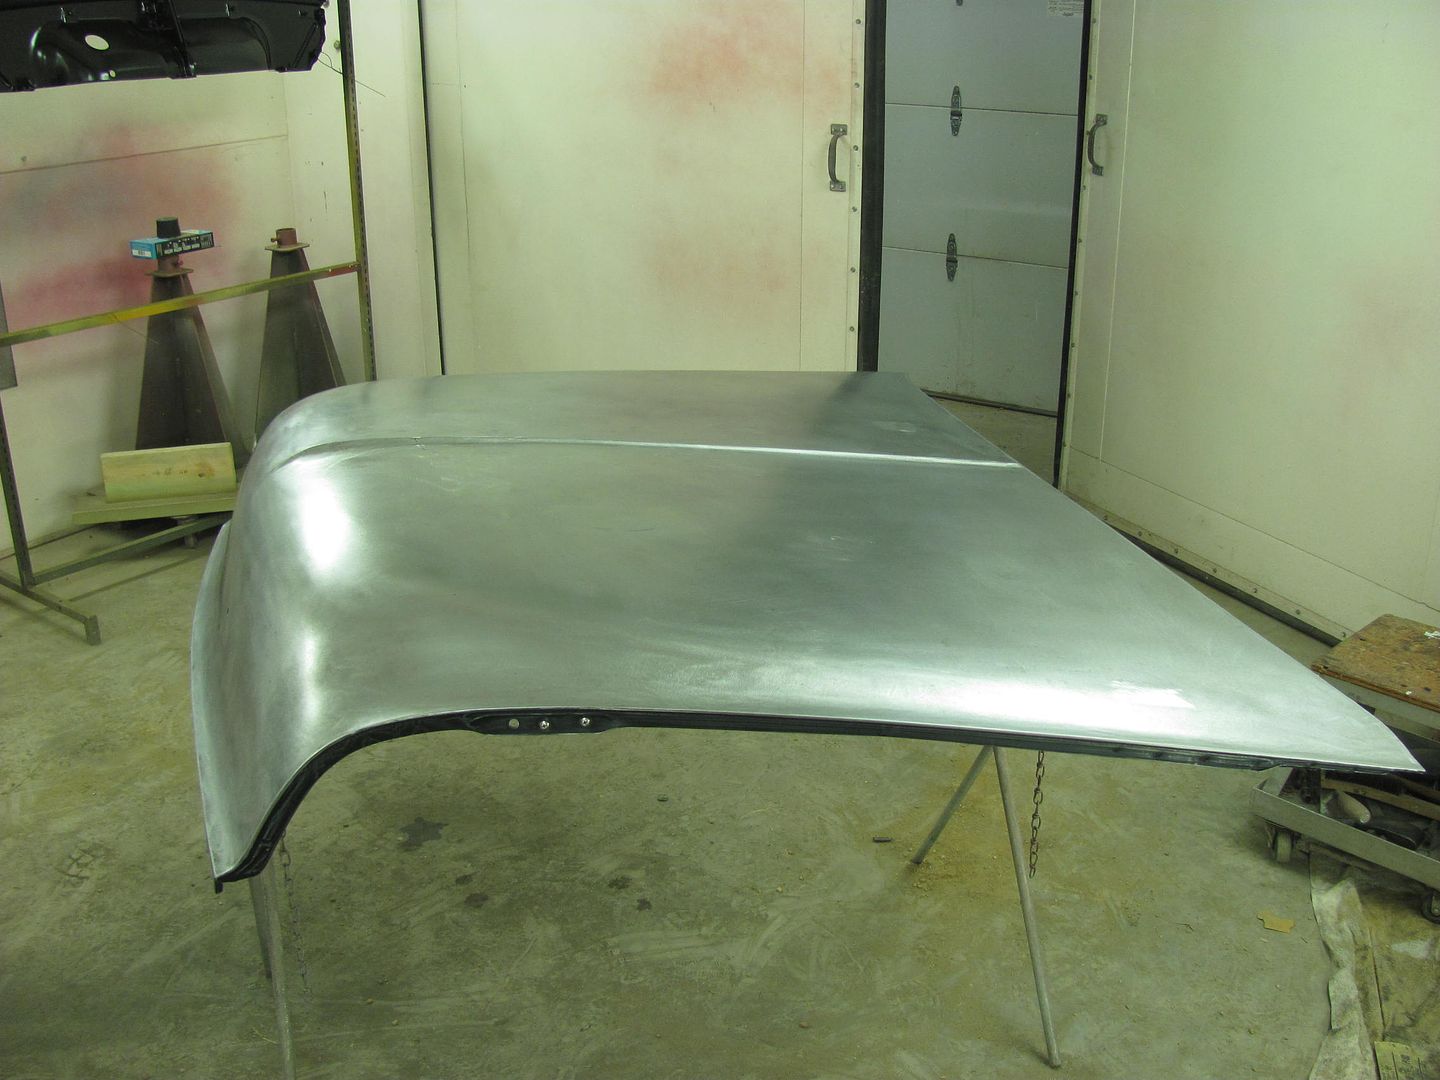 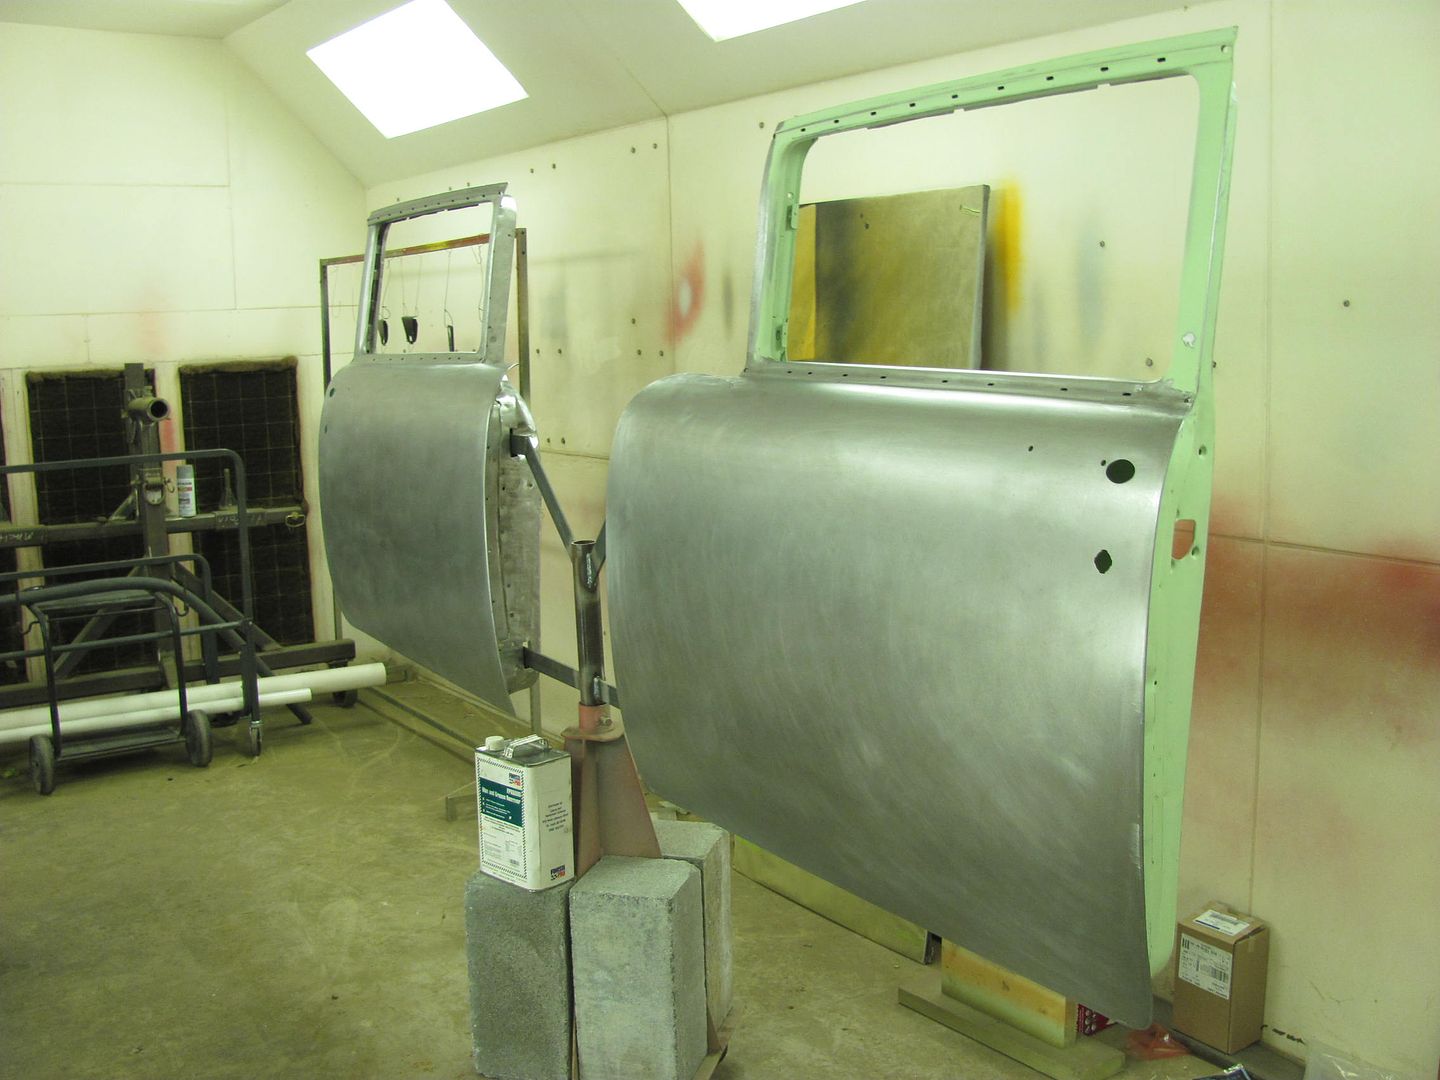 The door handle backing plates had not yet been installed on the back side of the door skins, so a coat of epoxy was sprayed on both, and then bolted together to allow to cure.. 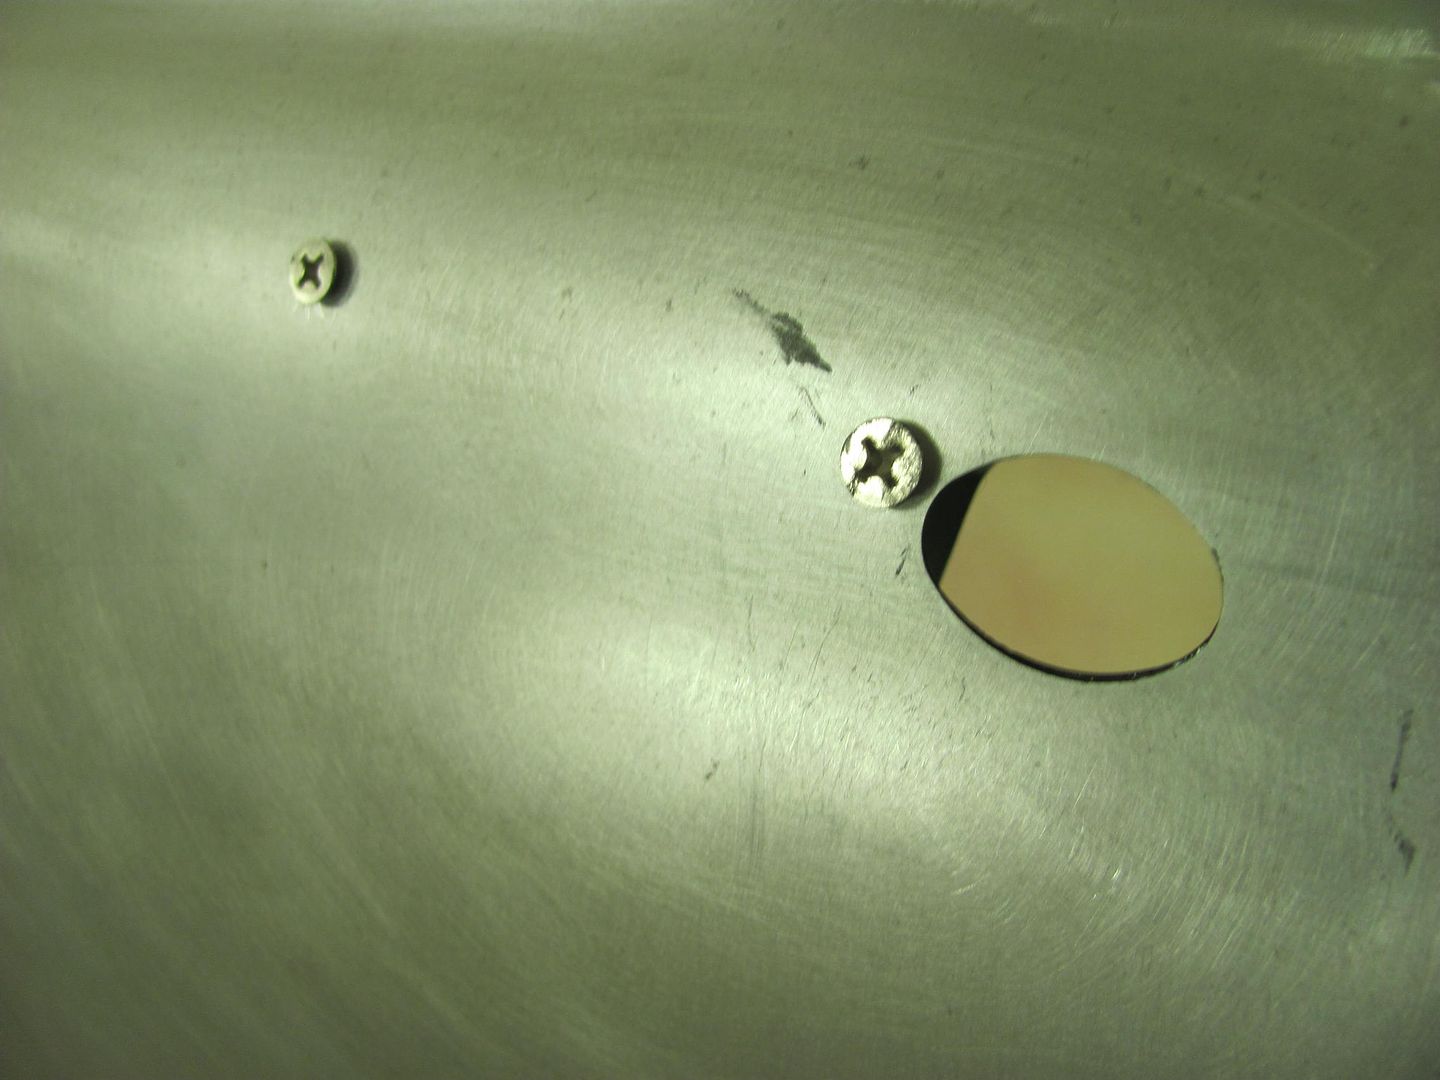 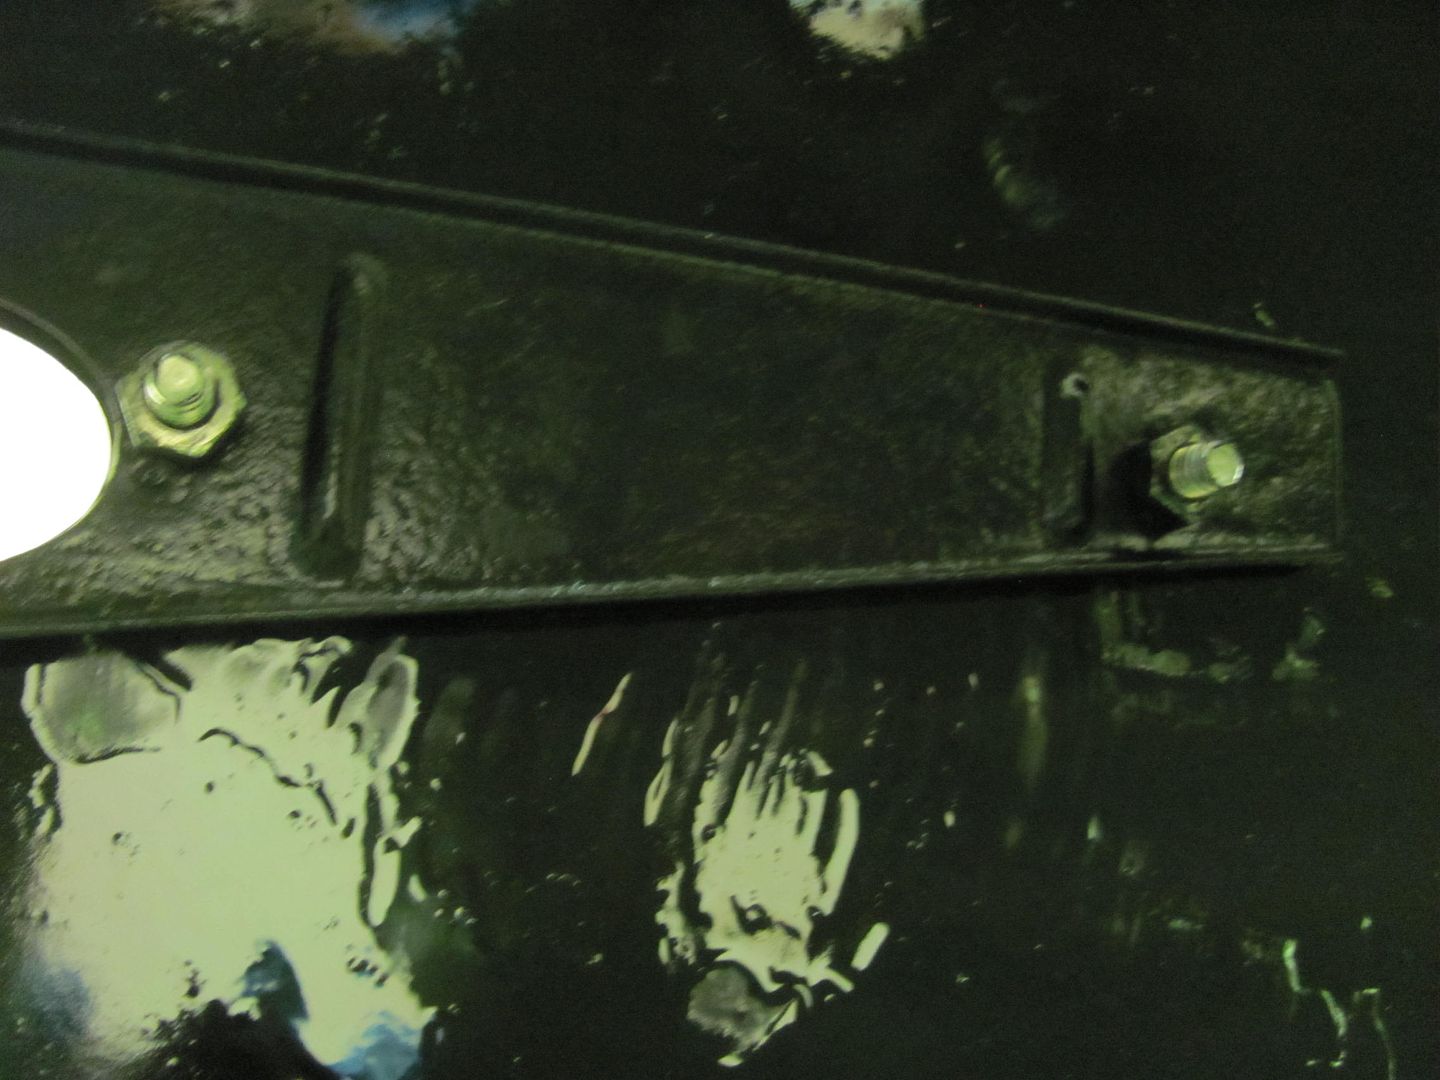 A good shot of the door paint fixture in action...  Two coats applied...  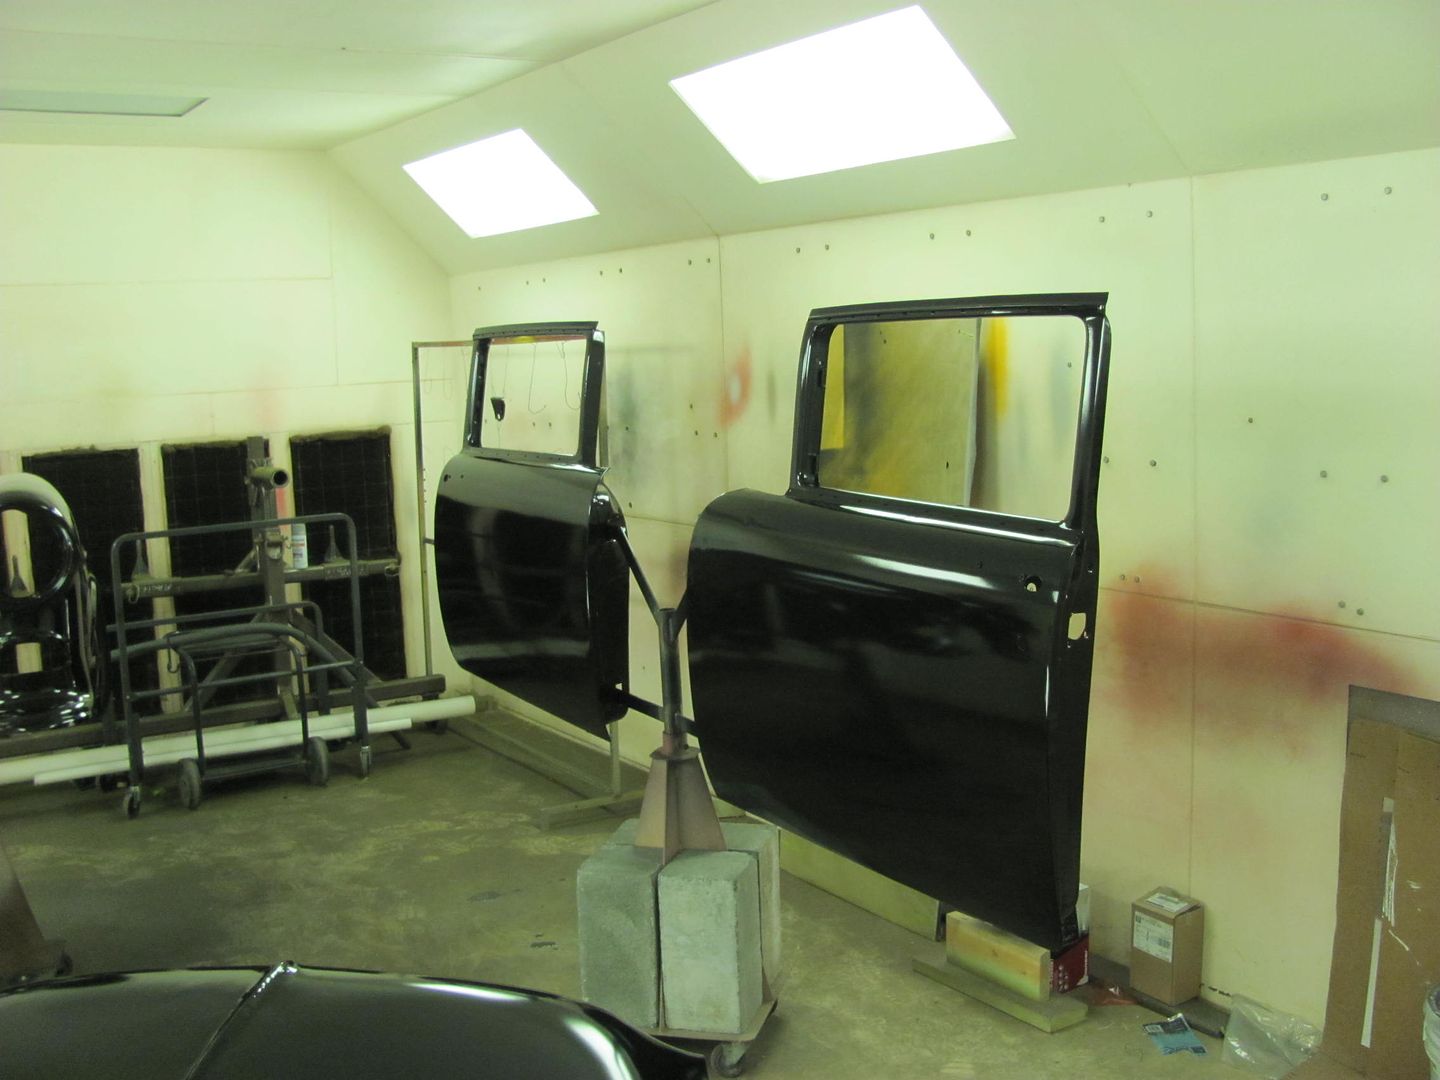 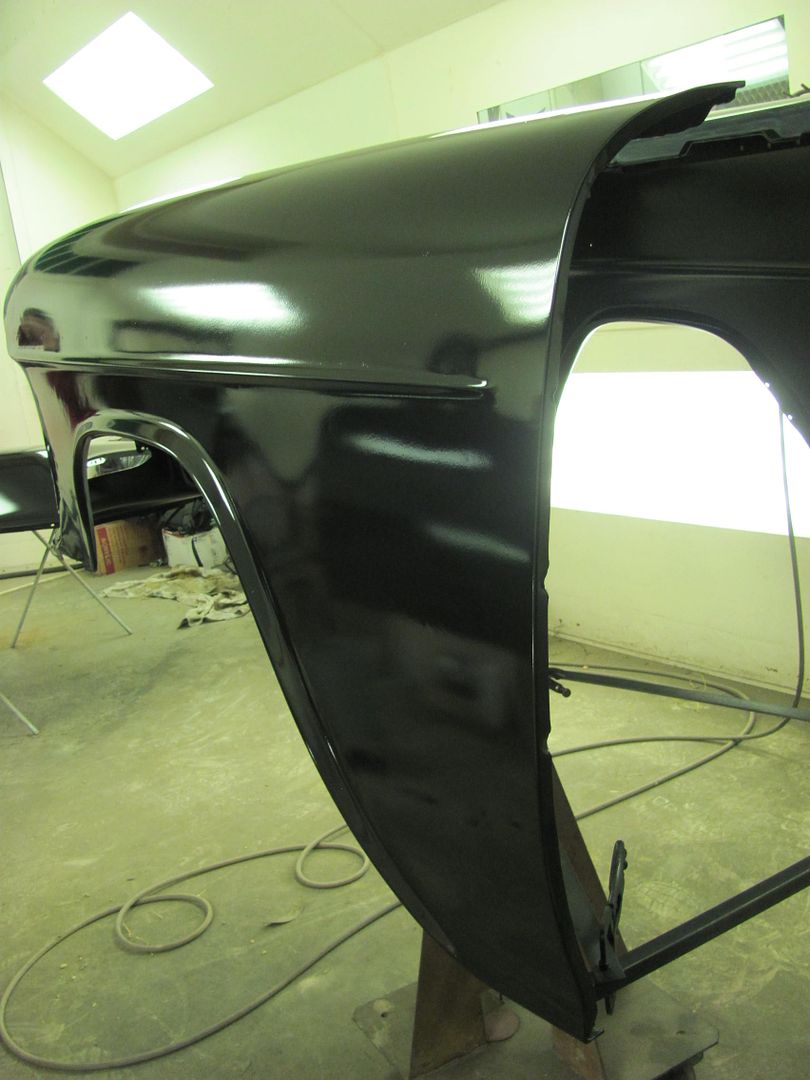 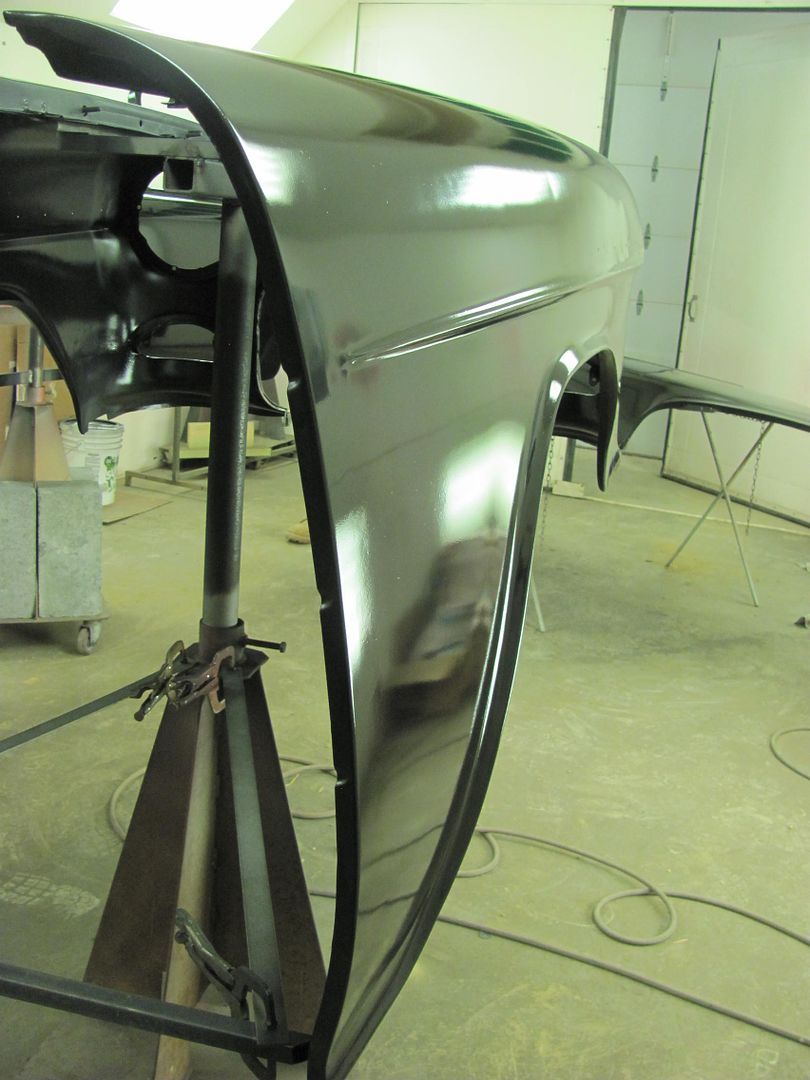
__________________
Robert |
|
|
|
|
01-20-2015, 09:30 AM
|
#12 |
|
Senior Member
Join Date: Jul 2012
Location: Oblong, Illinois
Posts: 7,028
|
Re: 55 Wagon Progress
Great paint work there! Barry makes a good product. We used SPI on my truck.
Shop looks good and I too found my welding table again Saturday. |
|
|
|
|
01-21-2015, 09:58 AM
|
#13 |
|
Registered User
Join Date: Dec 2012
Location: Pendleton, Indiana
Posts: 235
|
Re: 55 Wagon Progress
Just found this site, lots of nice work and info. Where did you get your Gatormeet radius gauge?
Thanks Rick |
|
|
|
|
01-21-2015, 12:02 PM
|
#14 |
|
Senior Member
Join Date: Mar 2011
Location: West Plains, Missouri
Posts: 7,559
|
Re: 55 Wagon Progress
Robert, just found out you were on this site. I had been following you on the HAMB site, when you were doing the tailgate repairs. That was in 2013, then nothing. Glad I found you on here. Now I have to go back and read 13 pages of work, and I look forward to some great work to catch up on...Jim
__________________
my build thread: http://67-72chevytrucks.com/vboard/s...d.php?t=459839 Jimbo's long bed step build:http://67-72chevytrucks.com/vboard/s...t=464626<br /> |
|
|
|
|
01-21-2015, 12:23 PM
|
#15 |
|
Registered User
Join Date: Jan 2013
Location: Leonardtown, MD
Posts: 1,647
|
Re: 55 Wagon Progress
Thanks for the comments and questions guys!
Jim, after I got done with the tailgate, I started putting all the progress updates in one thread, "55 210 Wagon Progress", same as you see here. Thanks for following along! Rick, I got that last year while attending GatorMeet in Adamstown MD, a three-day workshop on metalshaping here on the east coast.
__________________
Robert |
|
|
|
|
01-21-2015, 11:38 PM
|
#16 |
|
Registered User
Join Date: Jan 2013
Location: Leonardtown, MD
Posts: 1,647
|
Re: 55 Wagon Progress
Tonight we finished up radius-ing the liftgate opening...
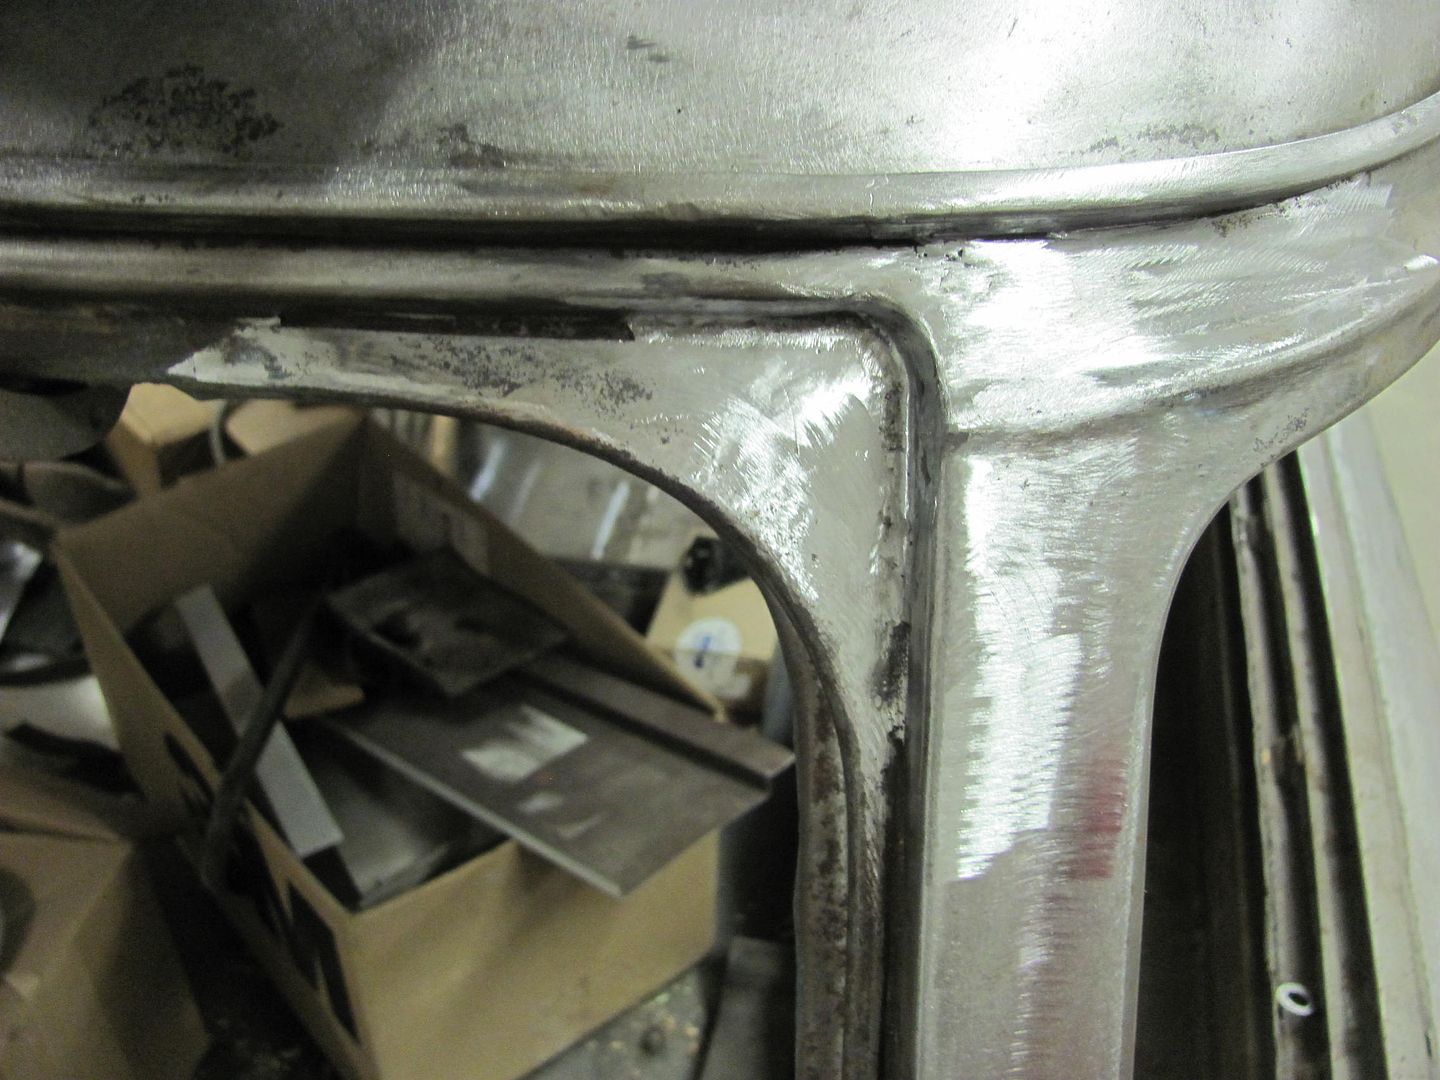 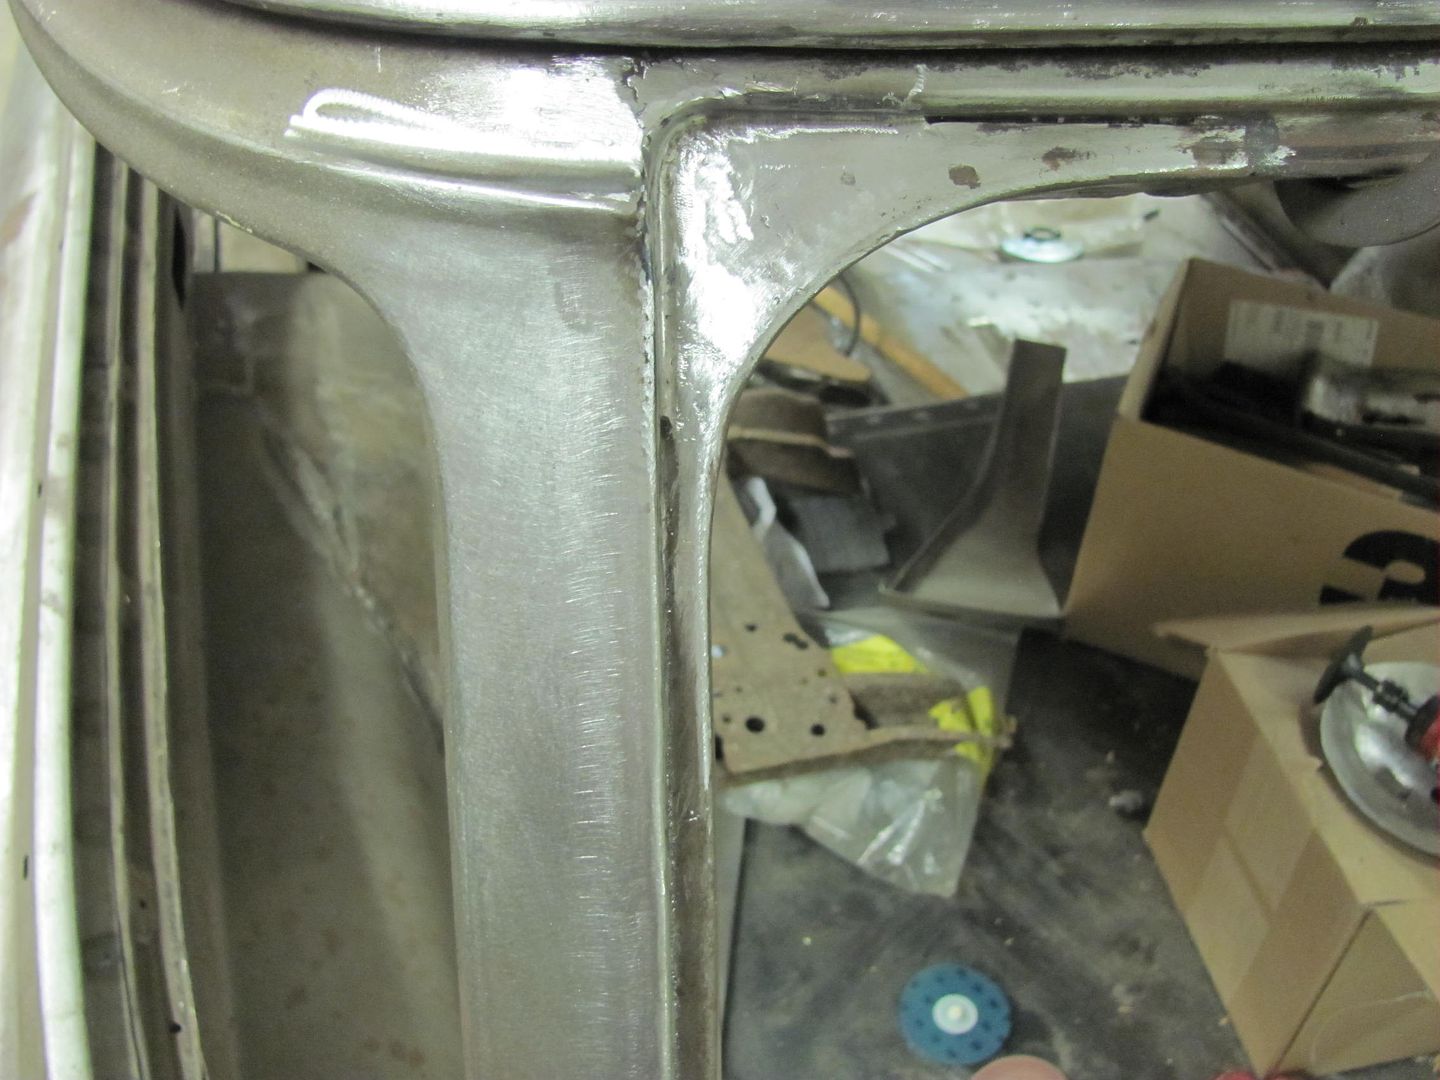 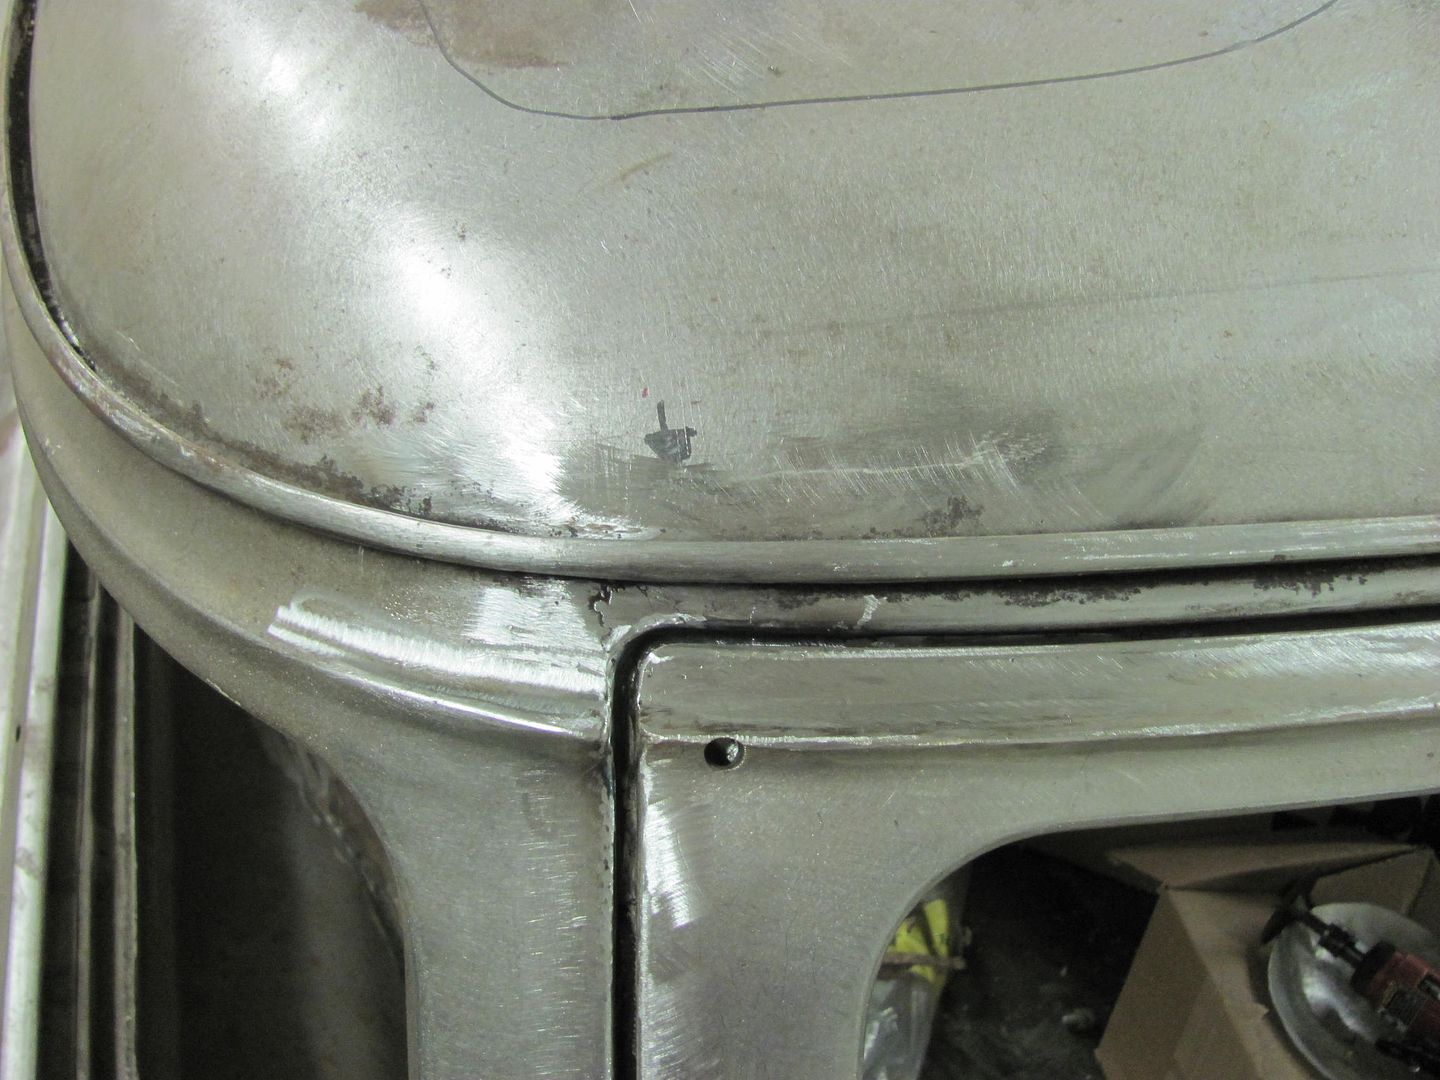 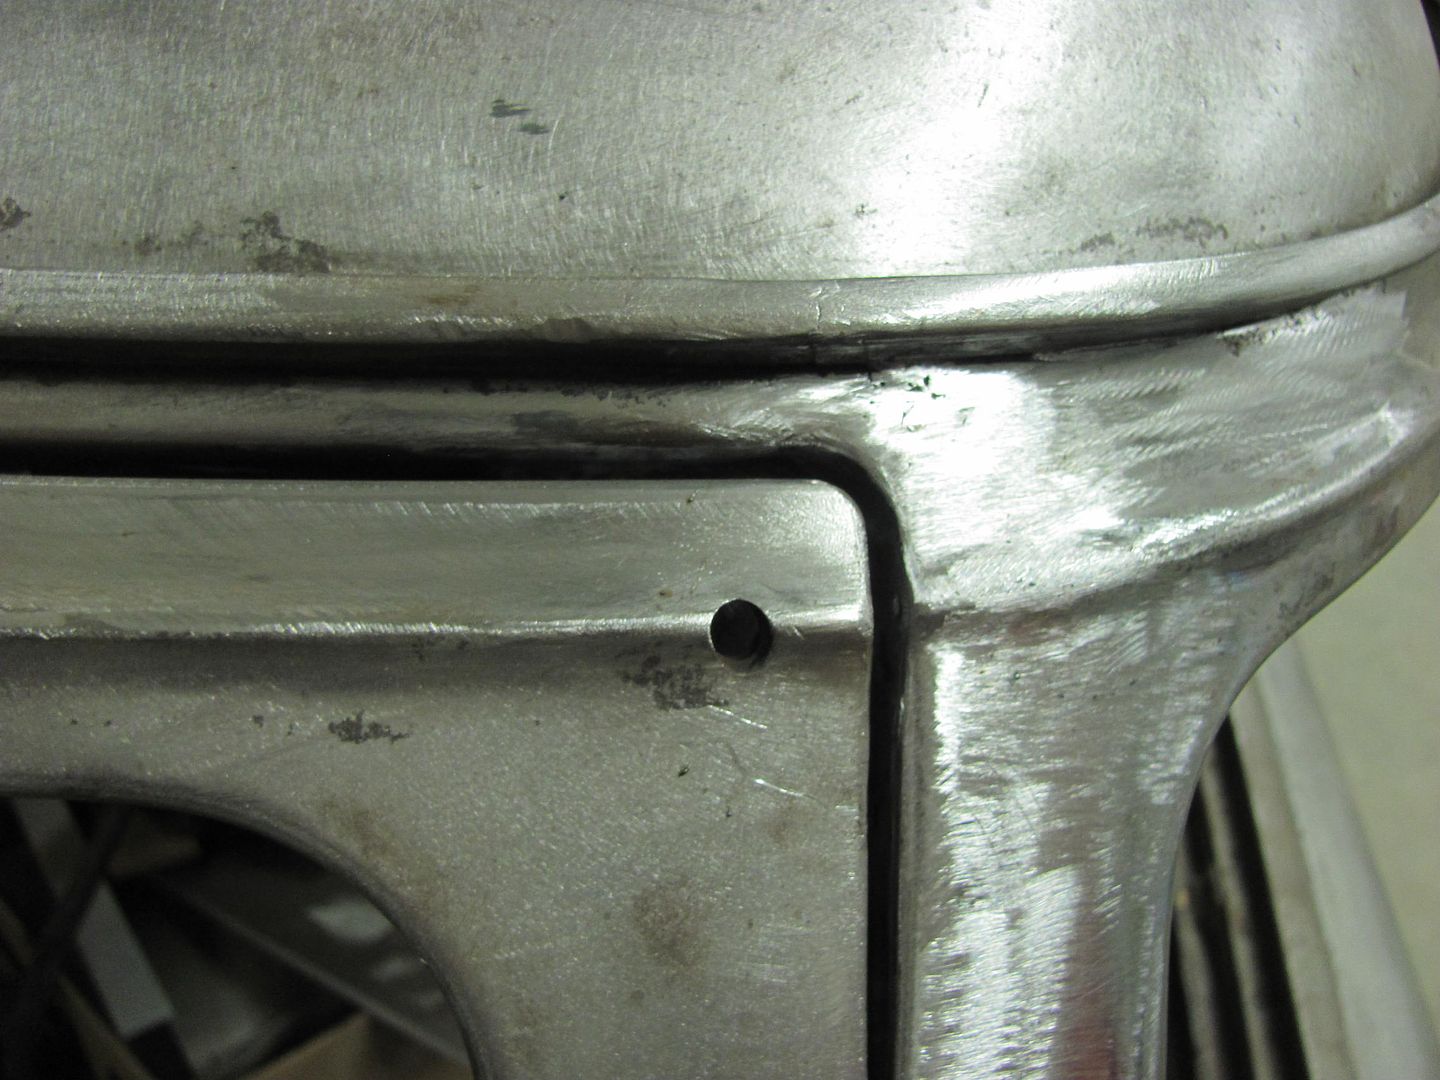 Next, we moved on to de-leading and shaving the last pinch weld seam at the back of the car. We've eliminated all of these to get rid of all the dirt/rust traps that we can... 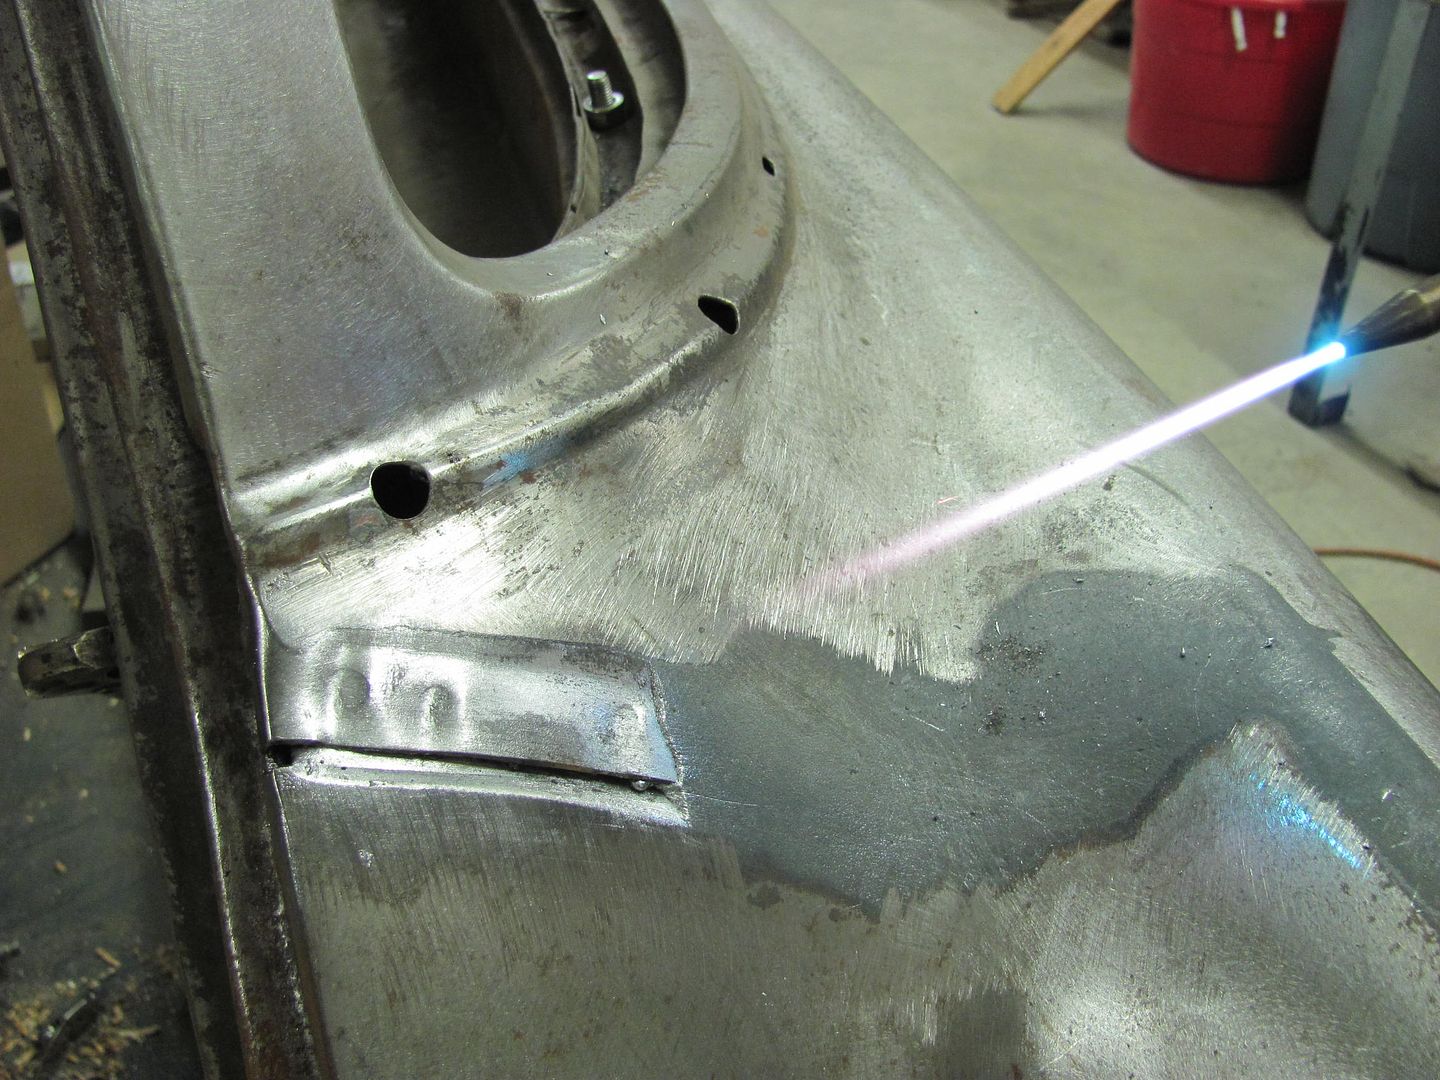 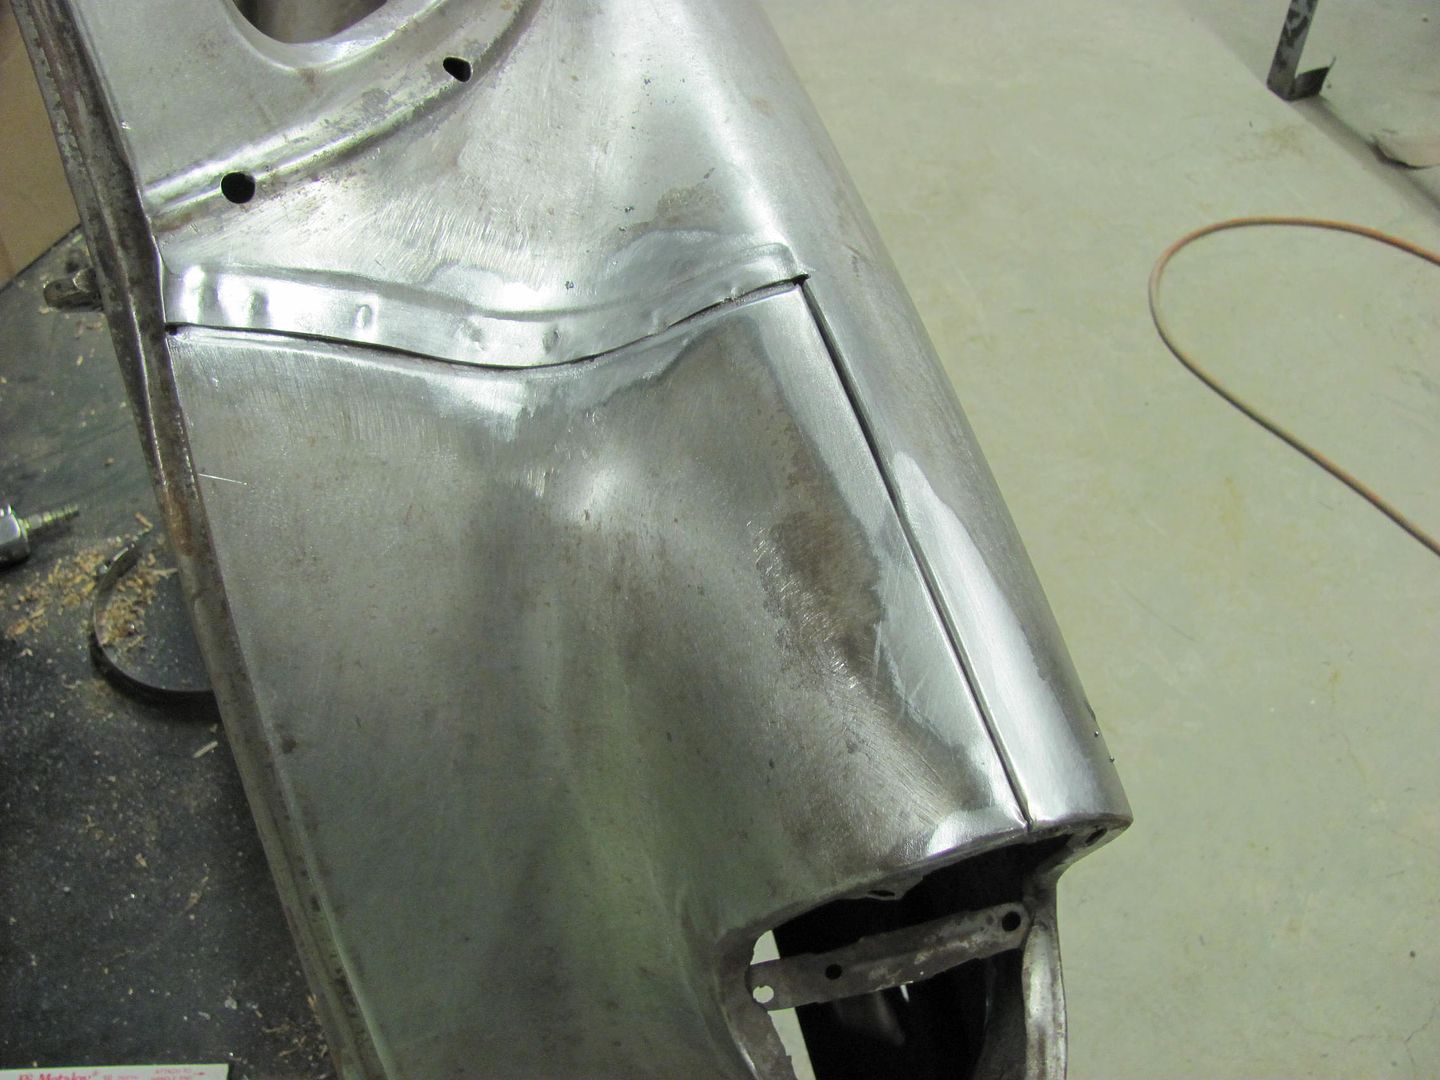 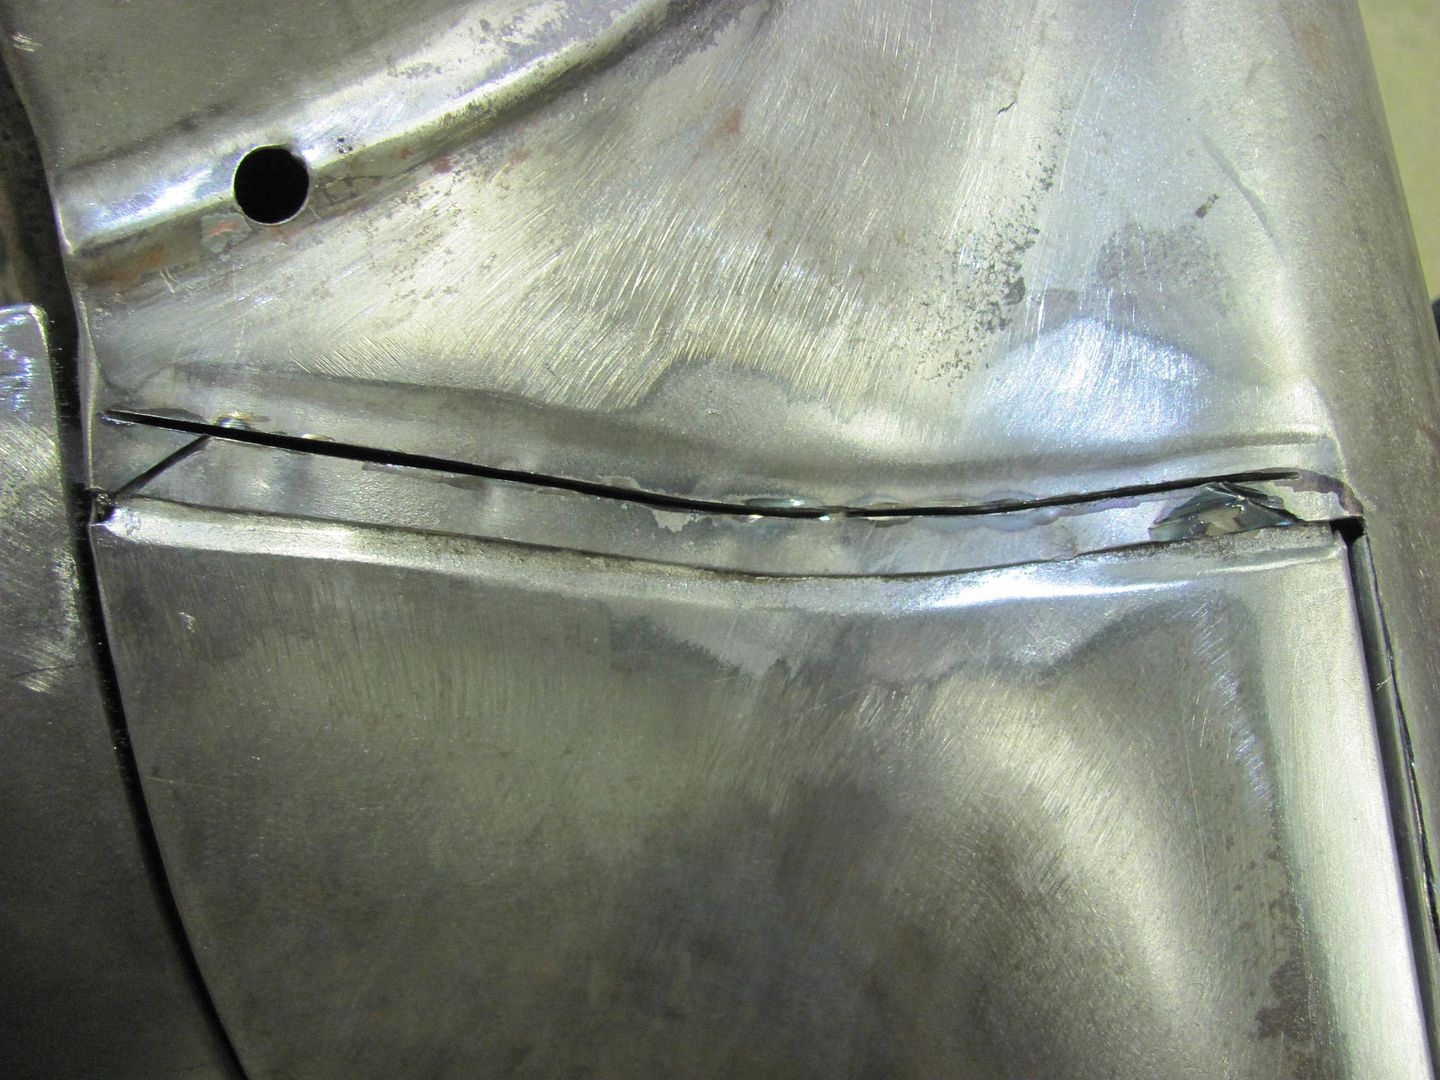 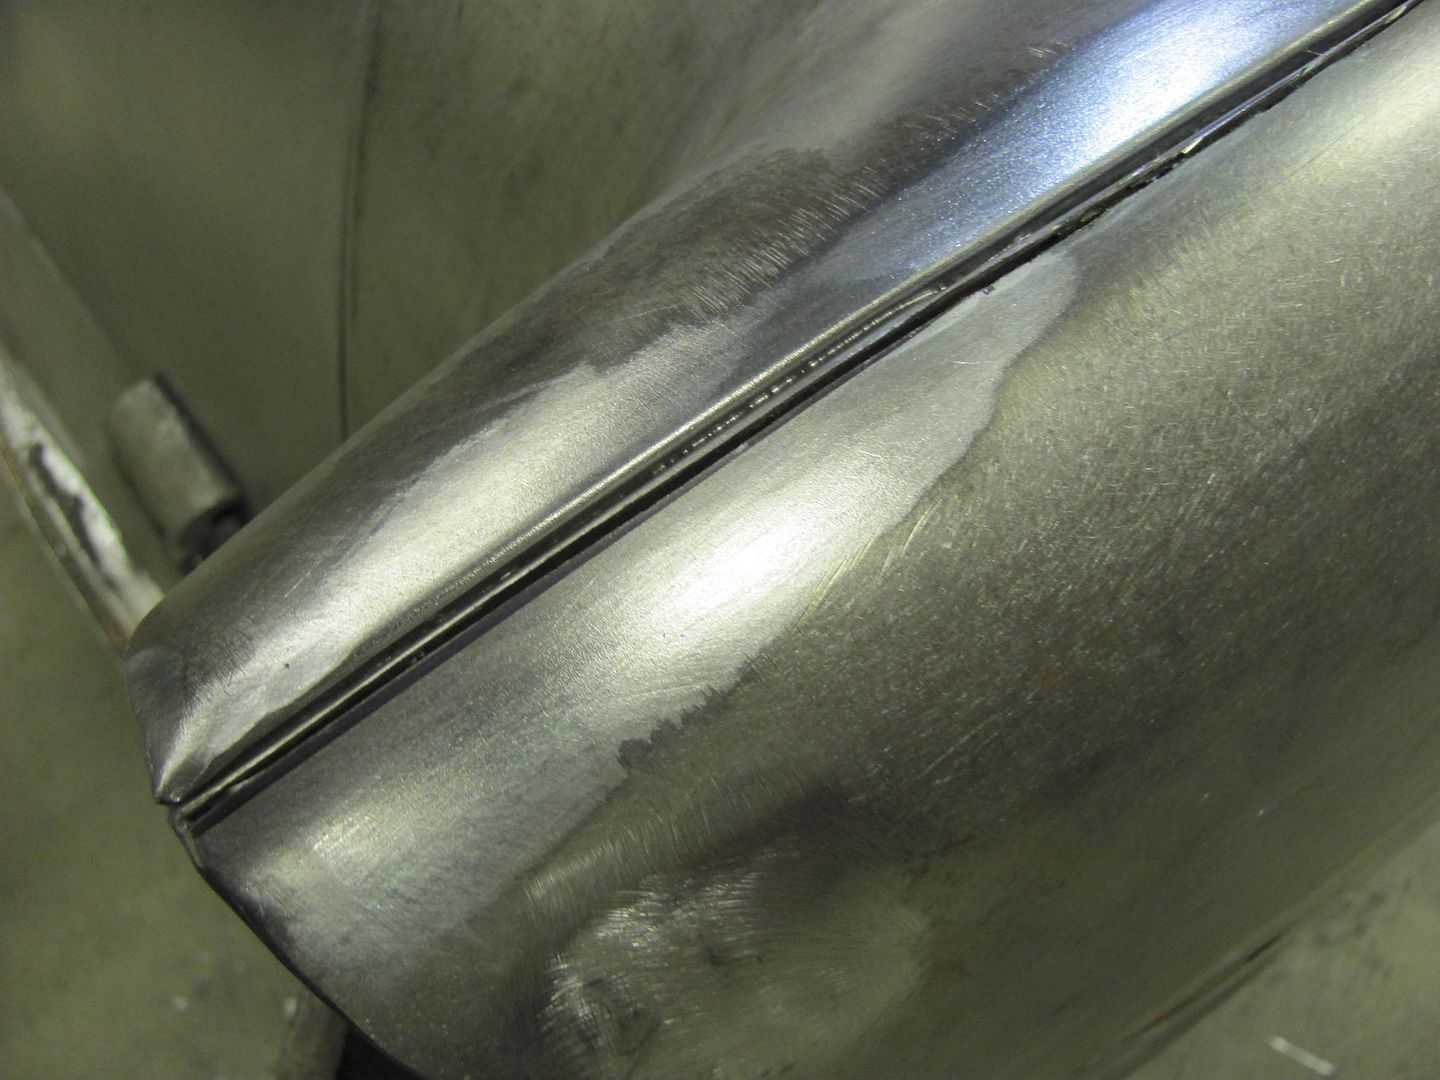 Removing the excess....  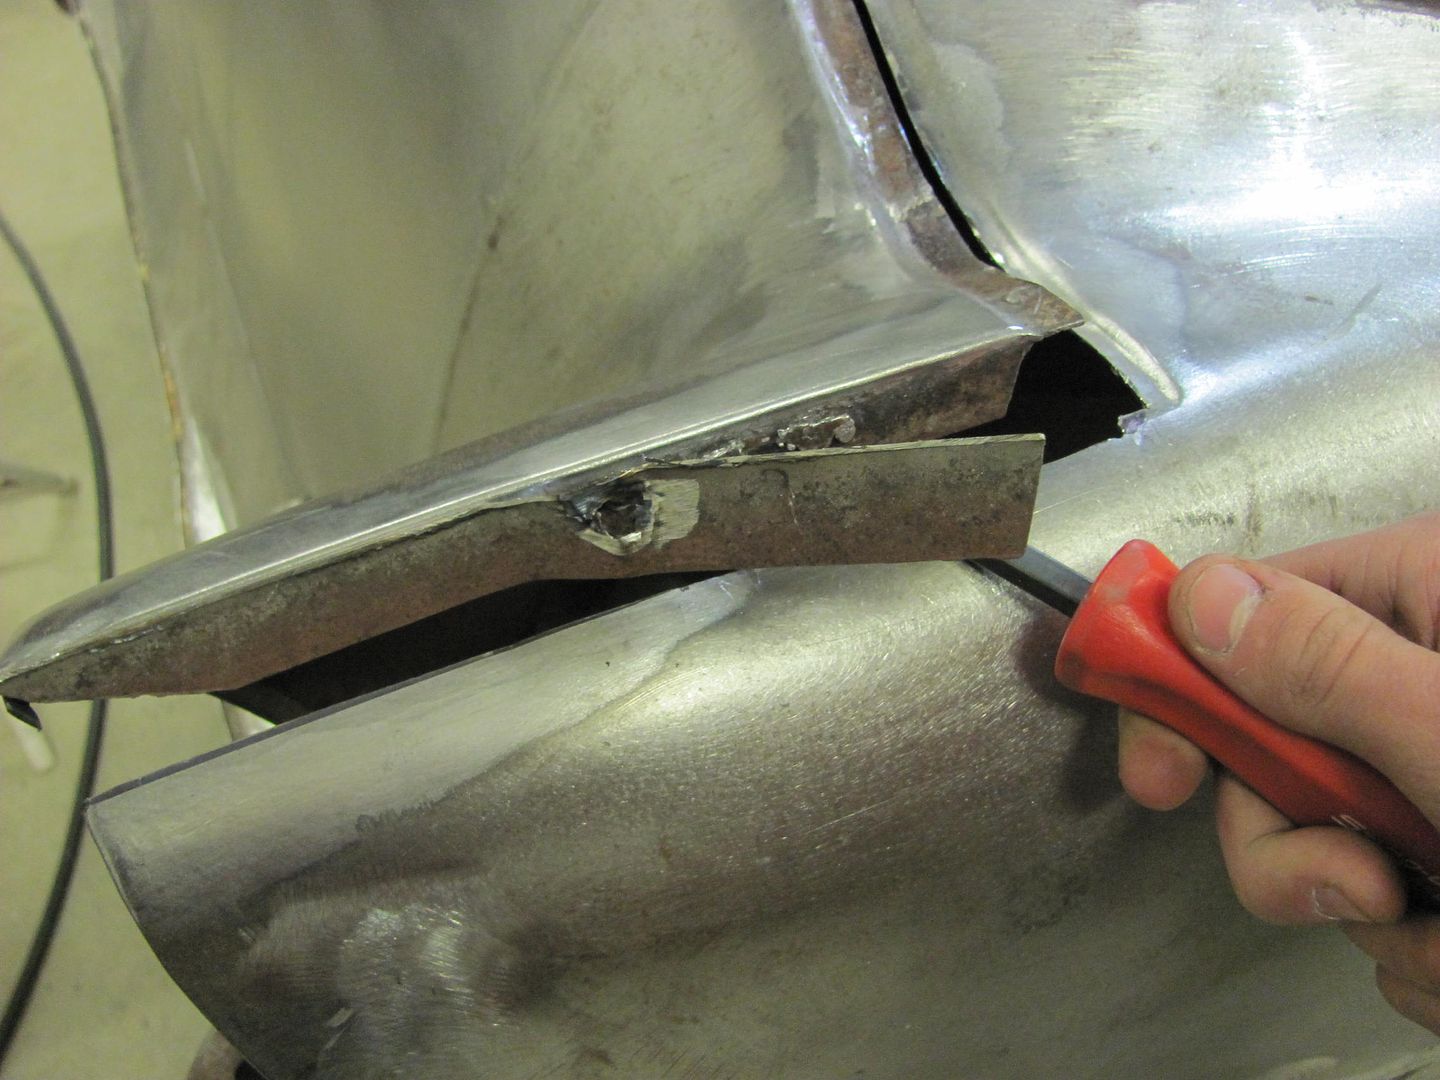 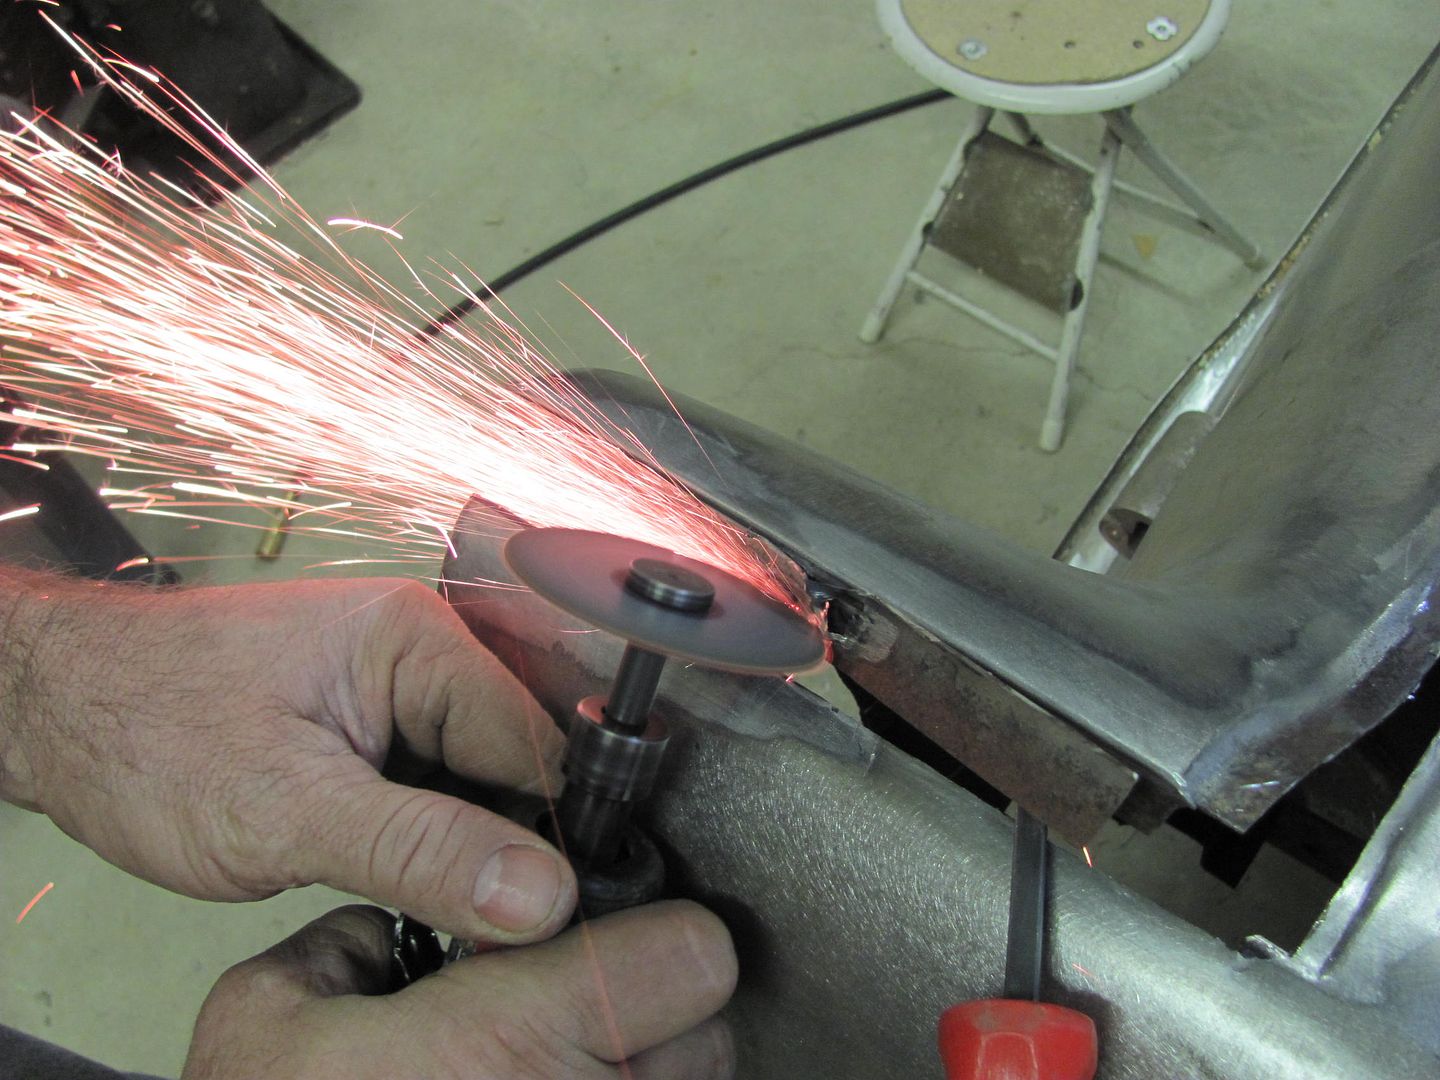 Getting some gap filler..... 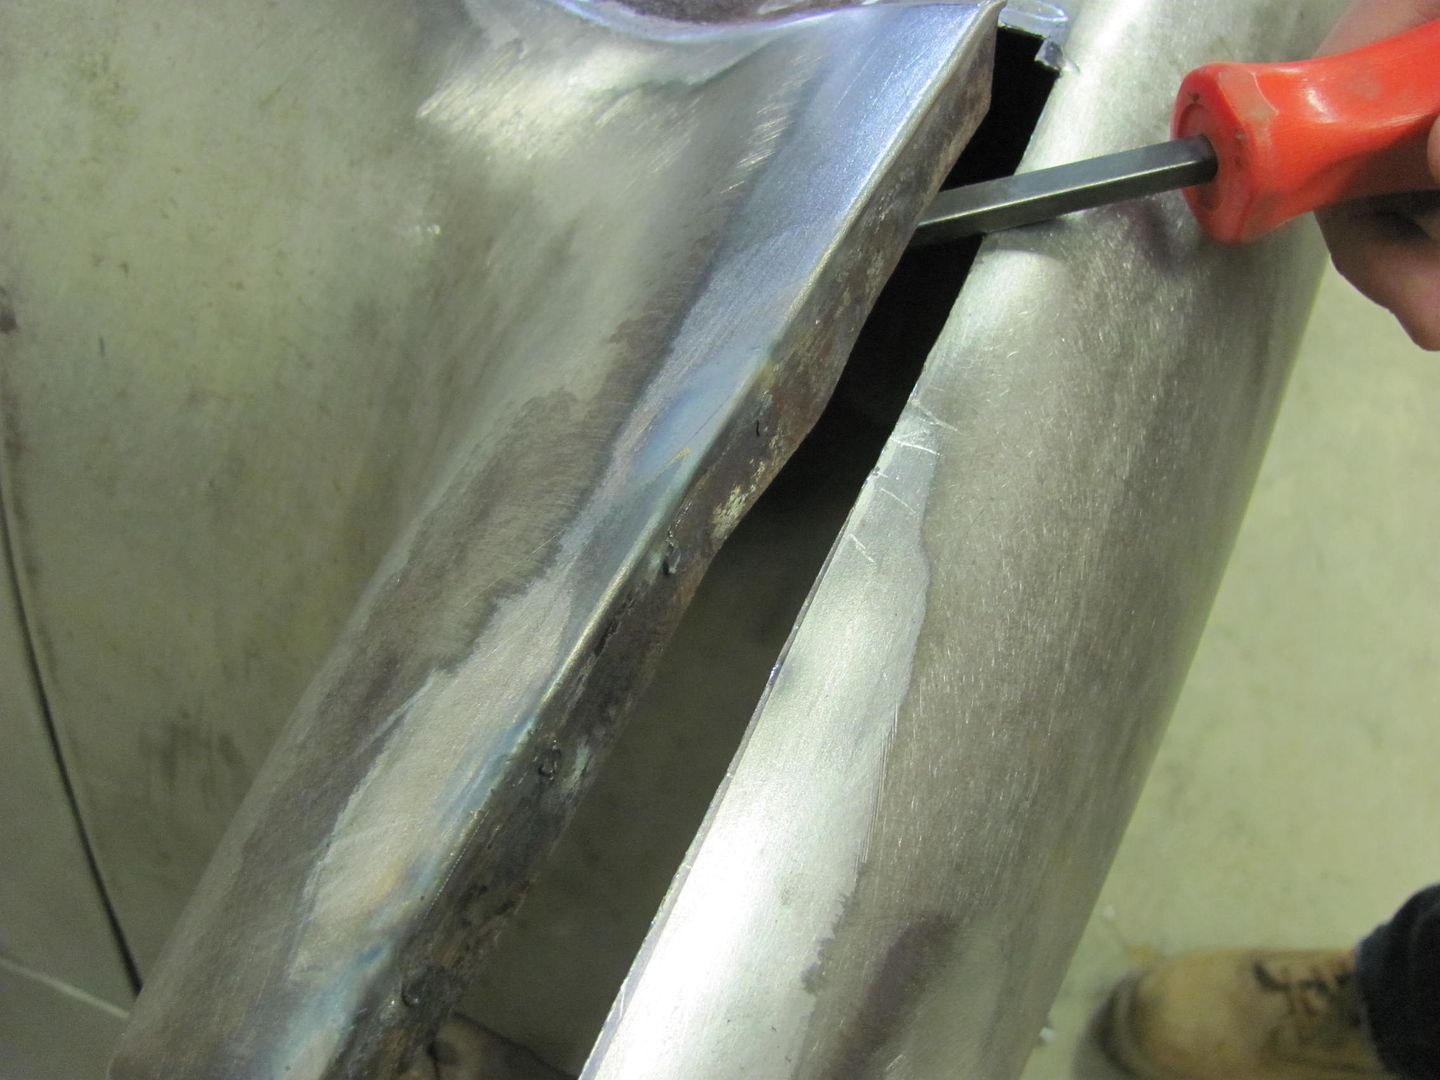 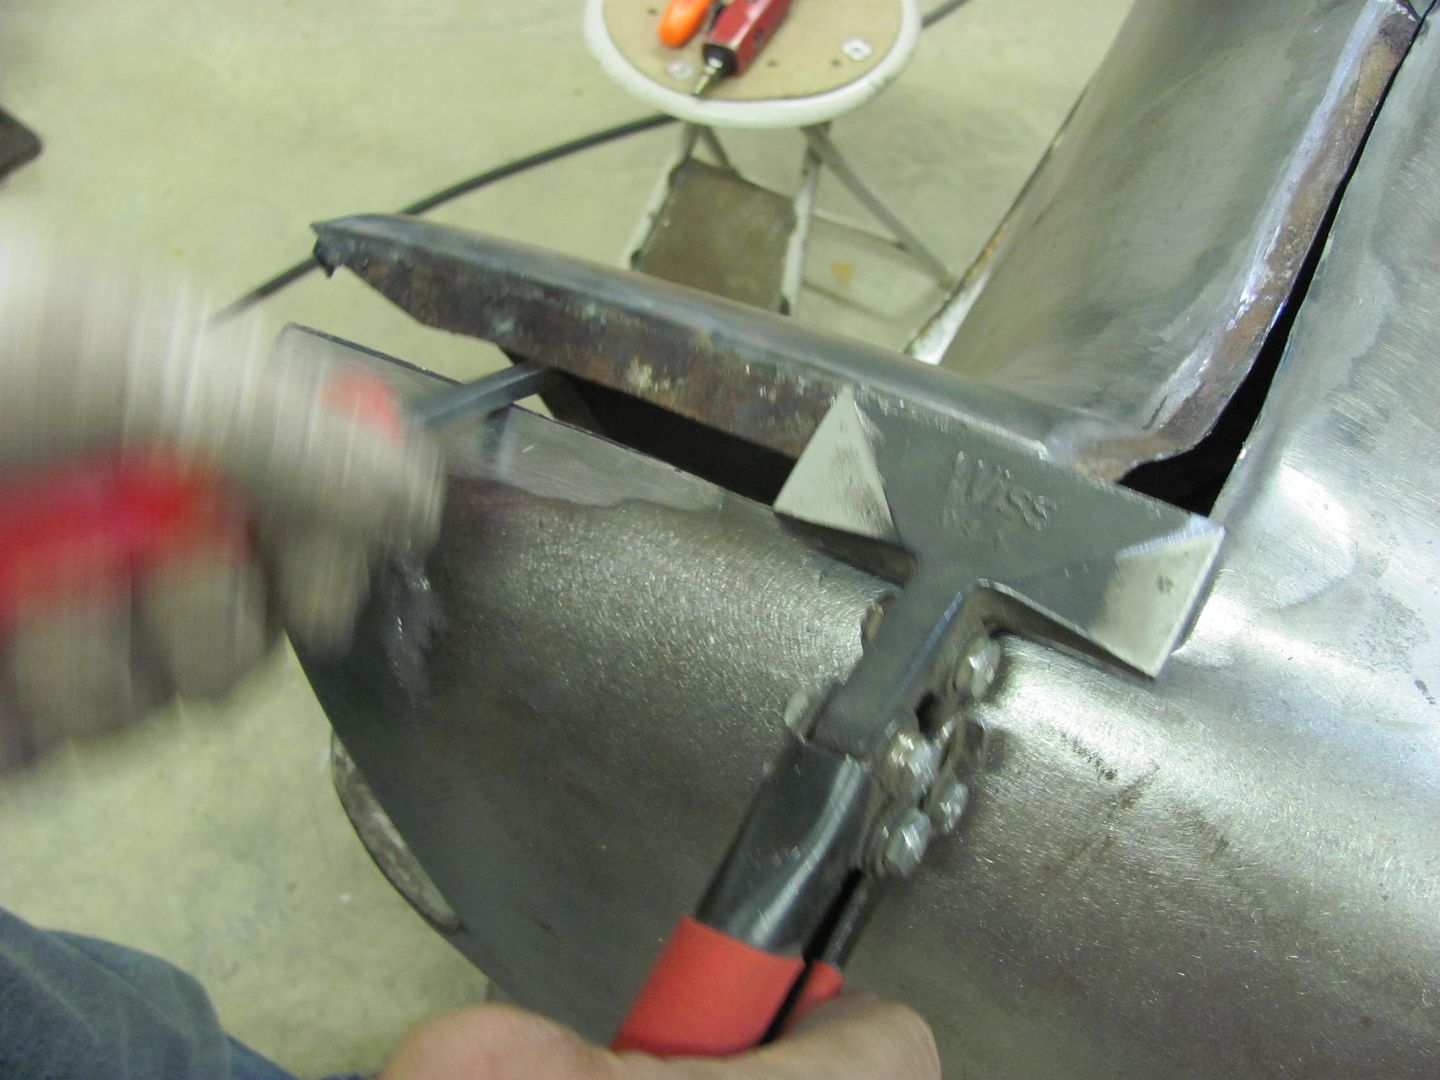 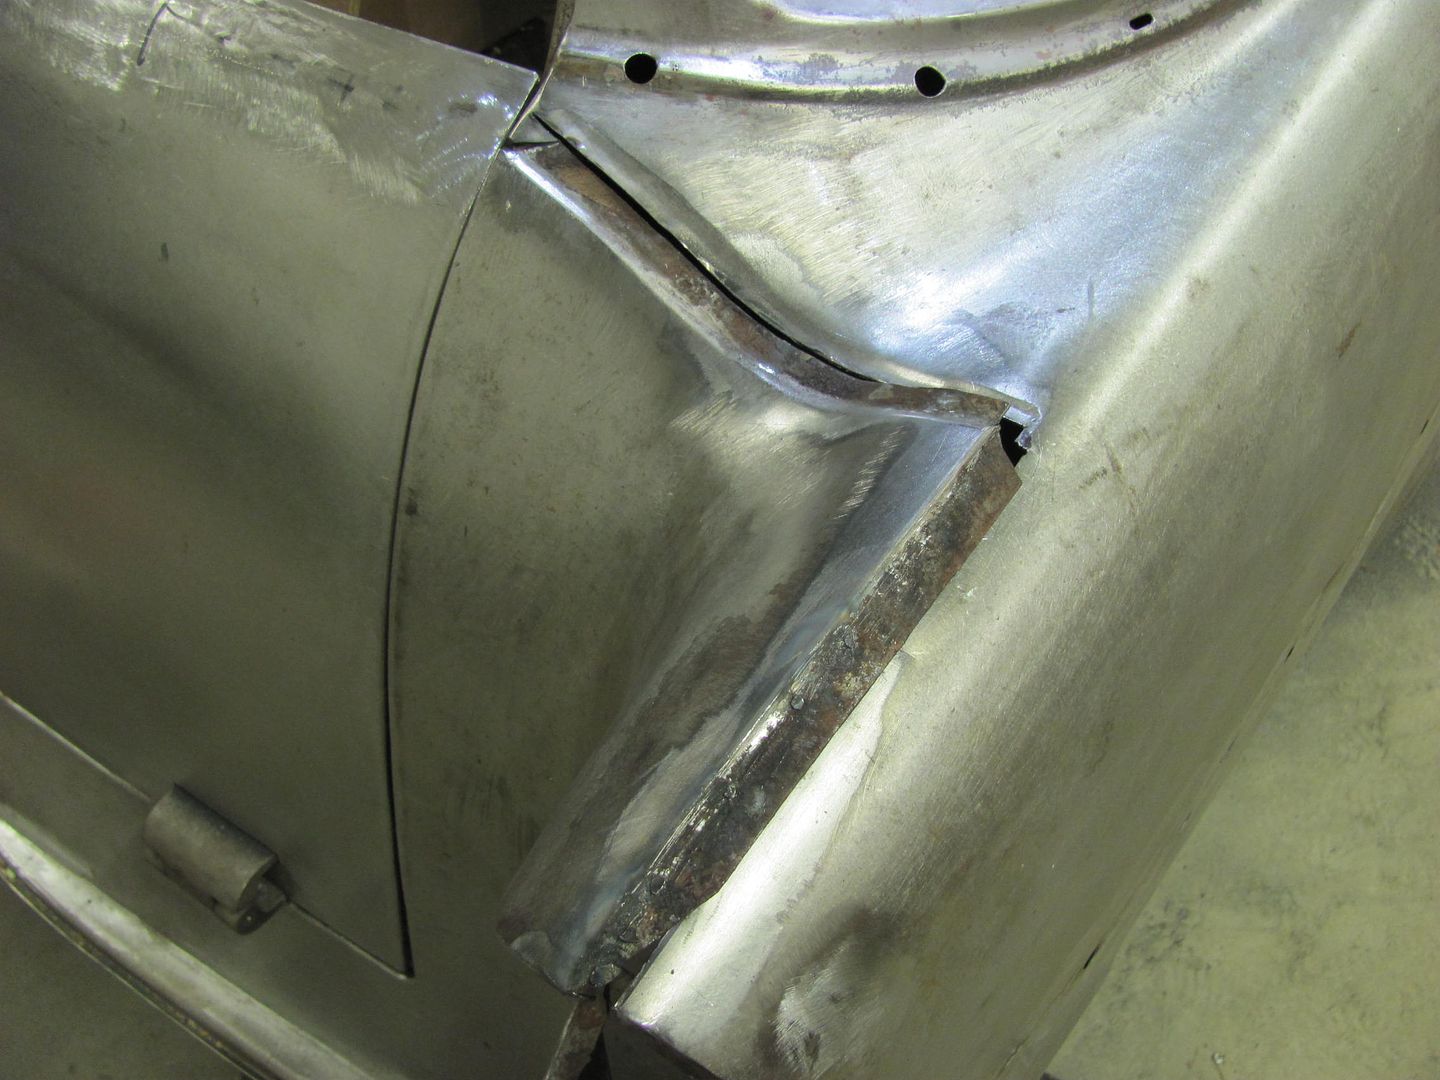 Flattening out the creases.... 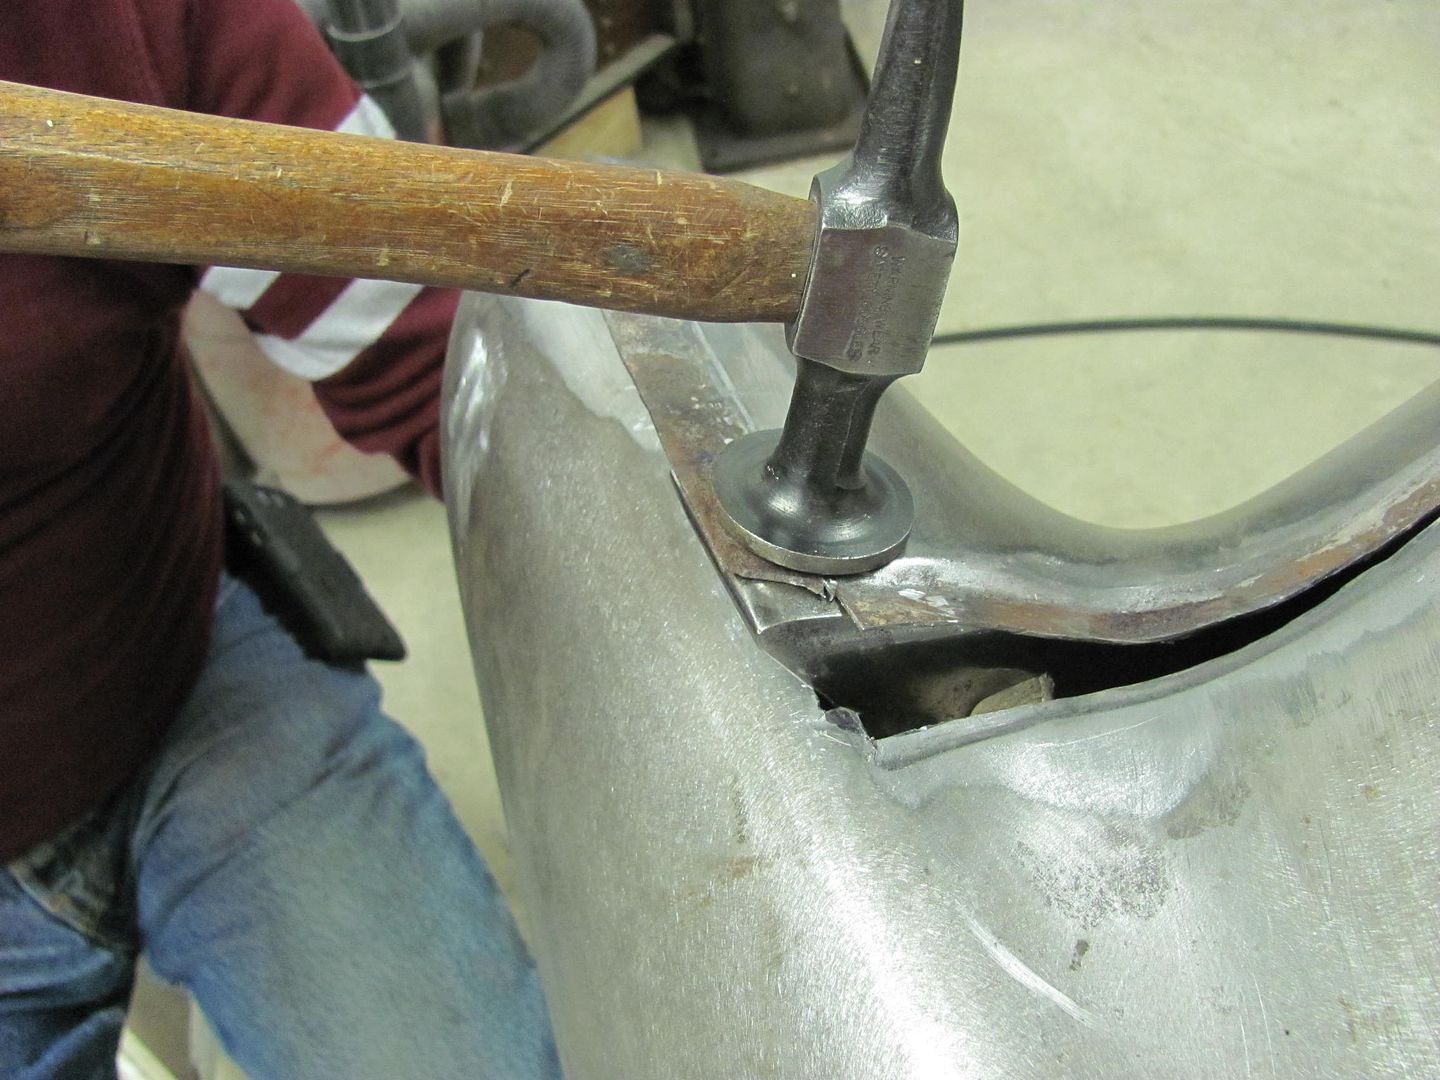 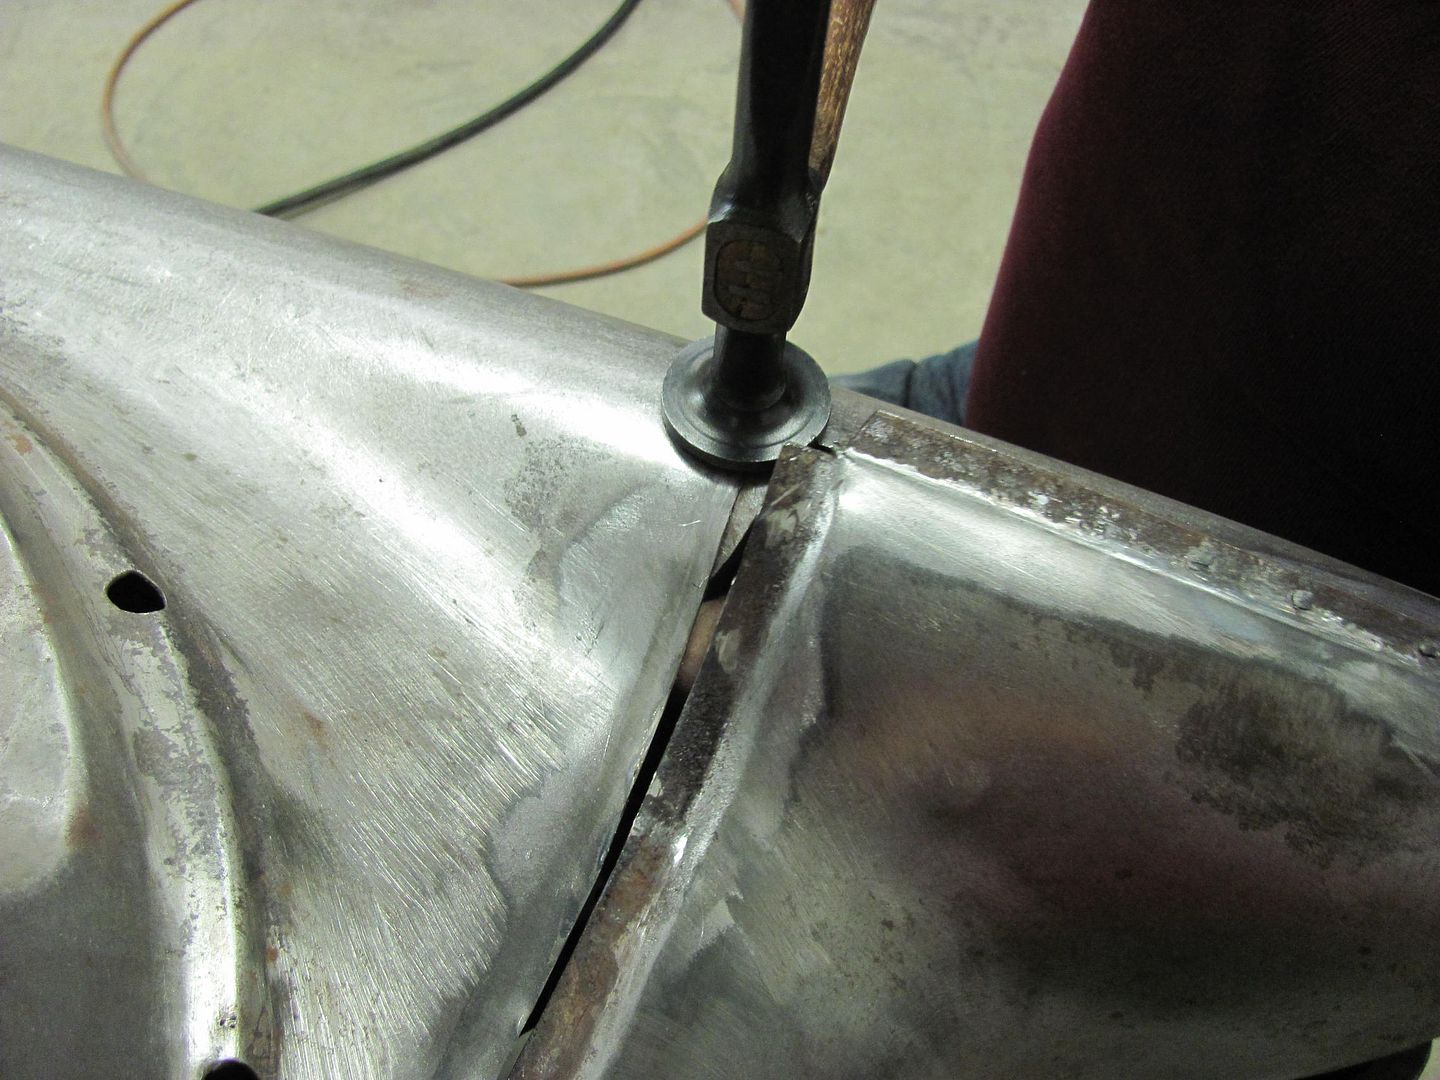 Tacked in place, and test fitting a tail light before trimming our gap filler.... 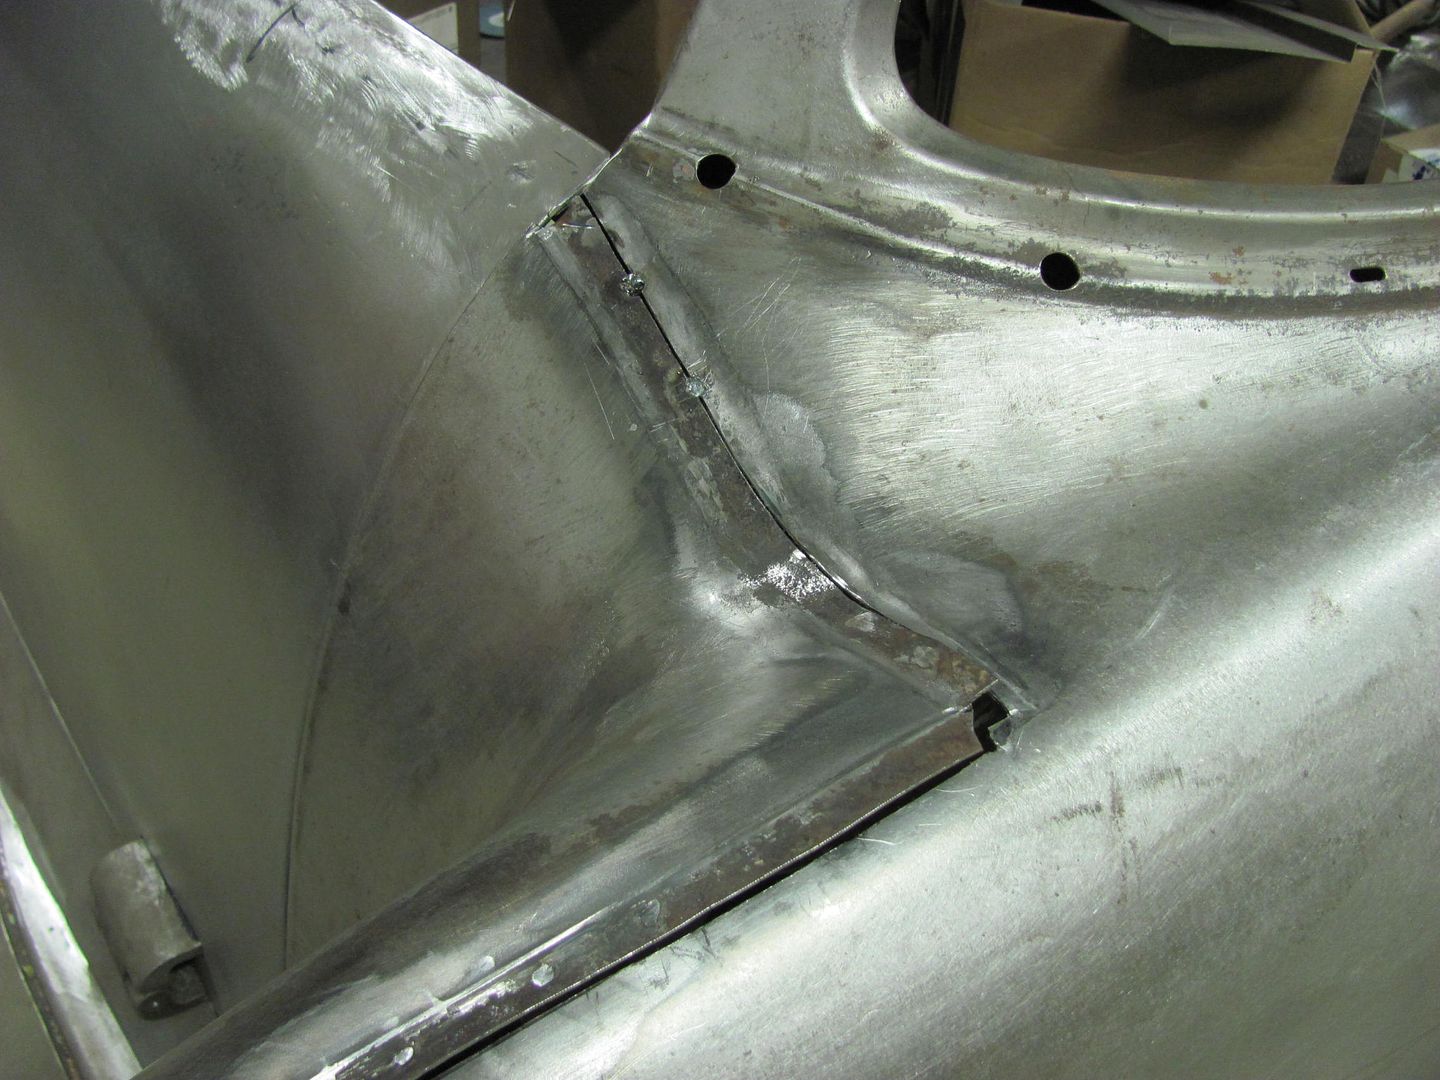 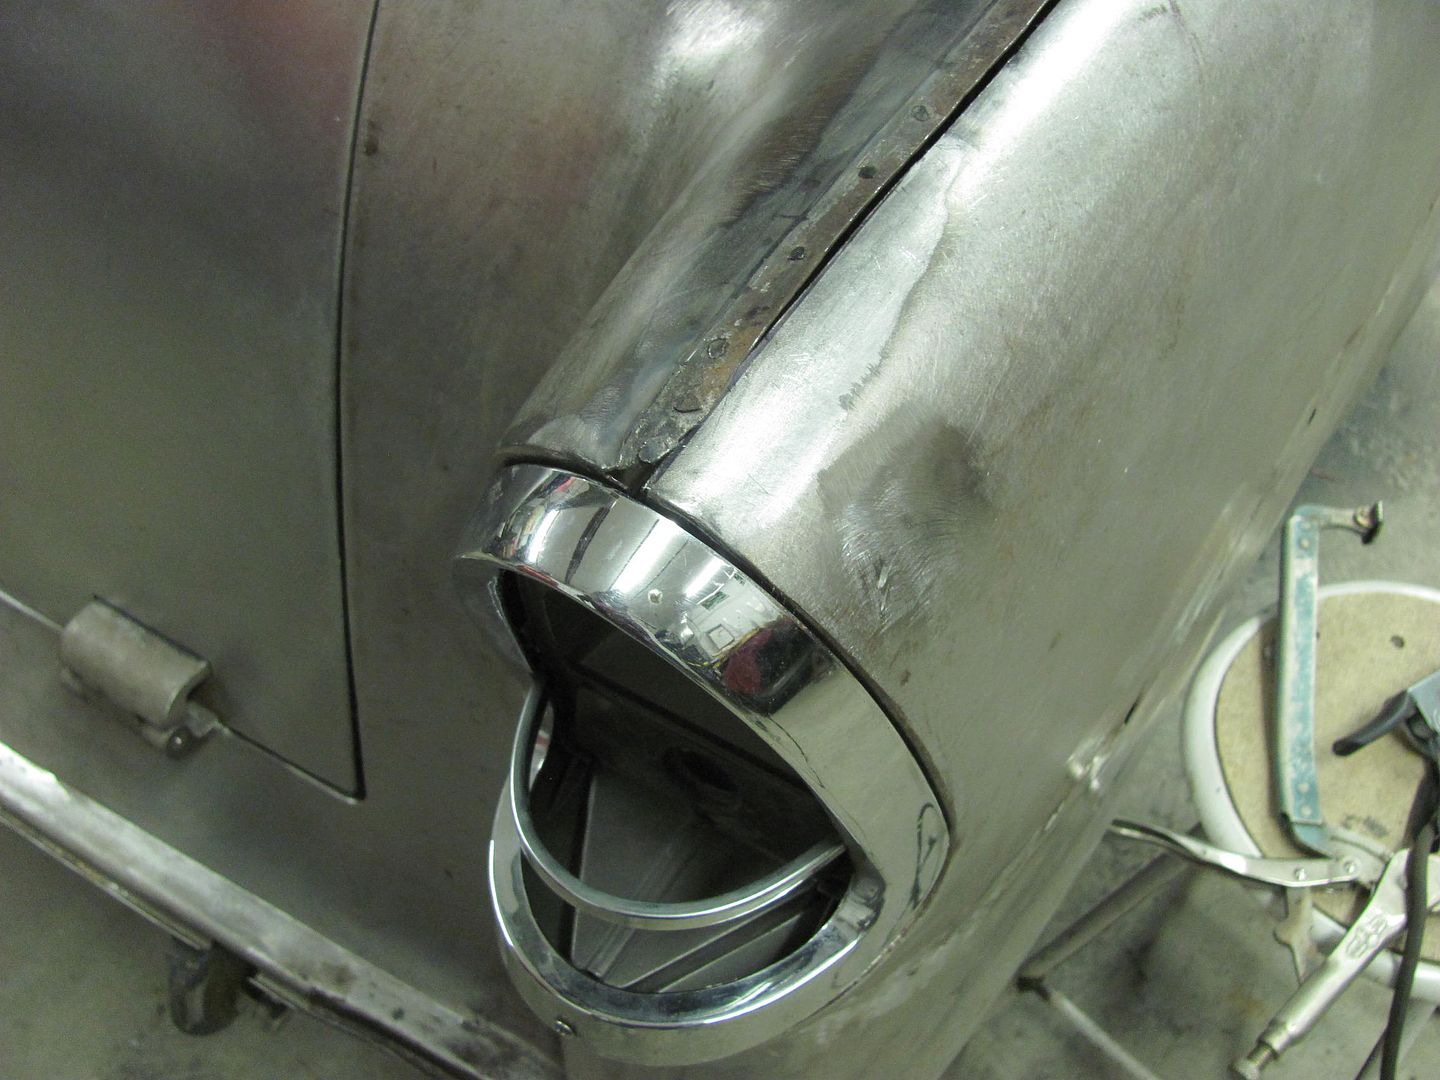 ....and we'll get the rest of the de-leading finished on Saturday...
__________________
Robert |
|
|
|
|
01-25-2015, 08:46 PM
|
#17 |
|
Registered User
Join Date: Jan 2013
Location: Leonardtown, MD
Posts: 1,647
|
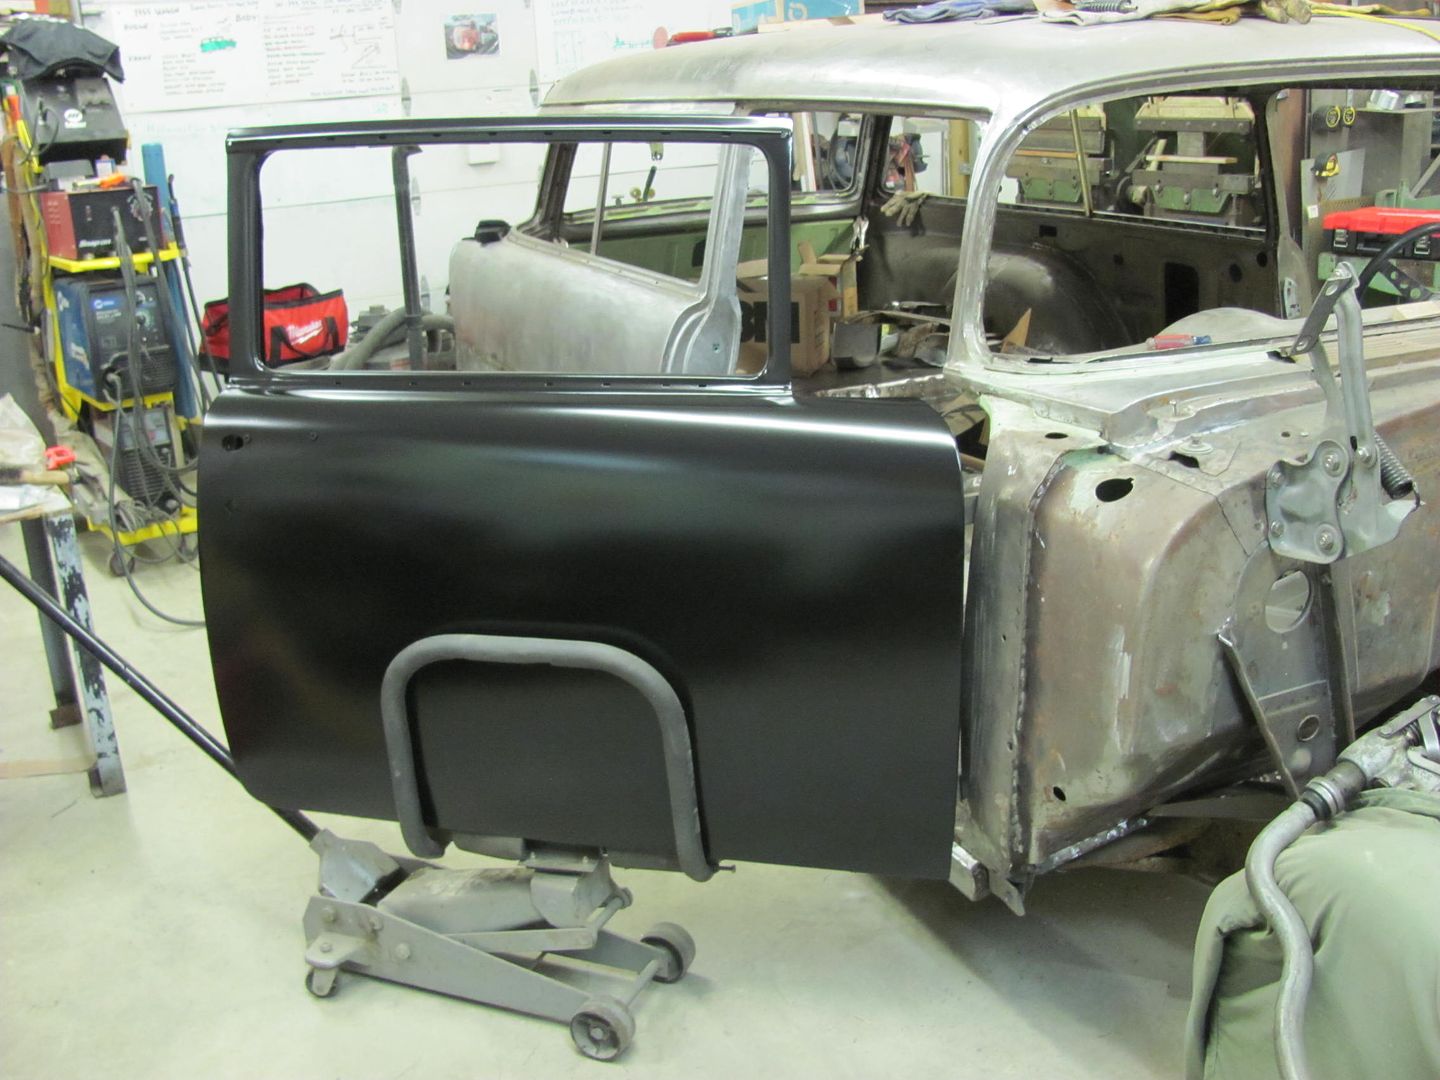
Re: 55 Wagon Progress
A bit late posting the progress from yesterday.. We were supposed to finish up the passenger rear quarter, but looks like some reproduction tail light bezels are on the way. So just to be on the safe side, we'll post pone that so any final fitment will be to those parts once they get here... In the meantime, we got the primed body parts re-assembled yesterday, here installing the doors.....
     The SPI epoxy does a good job of providing it's own "guide coat". I blocked this with 180 grit... 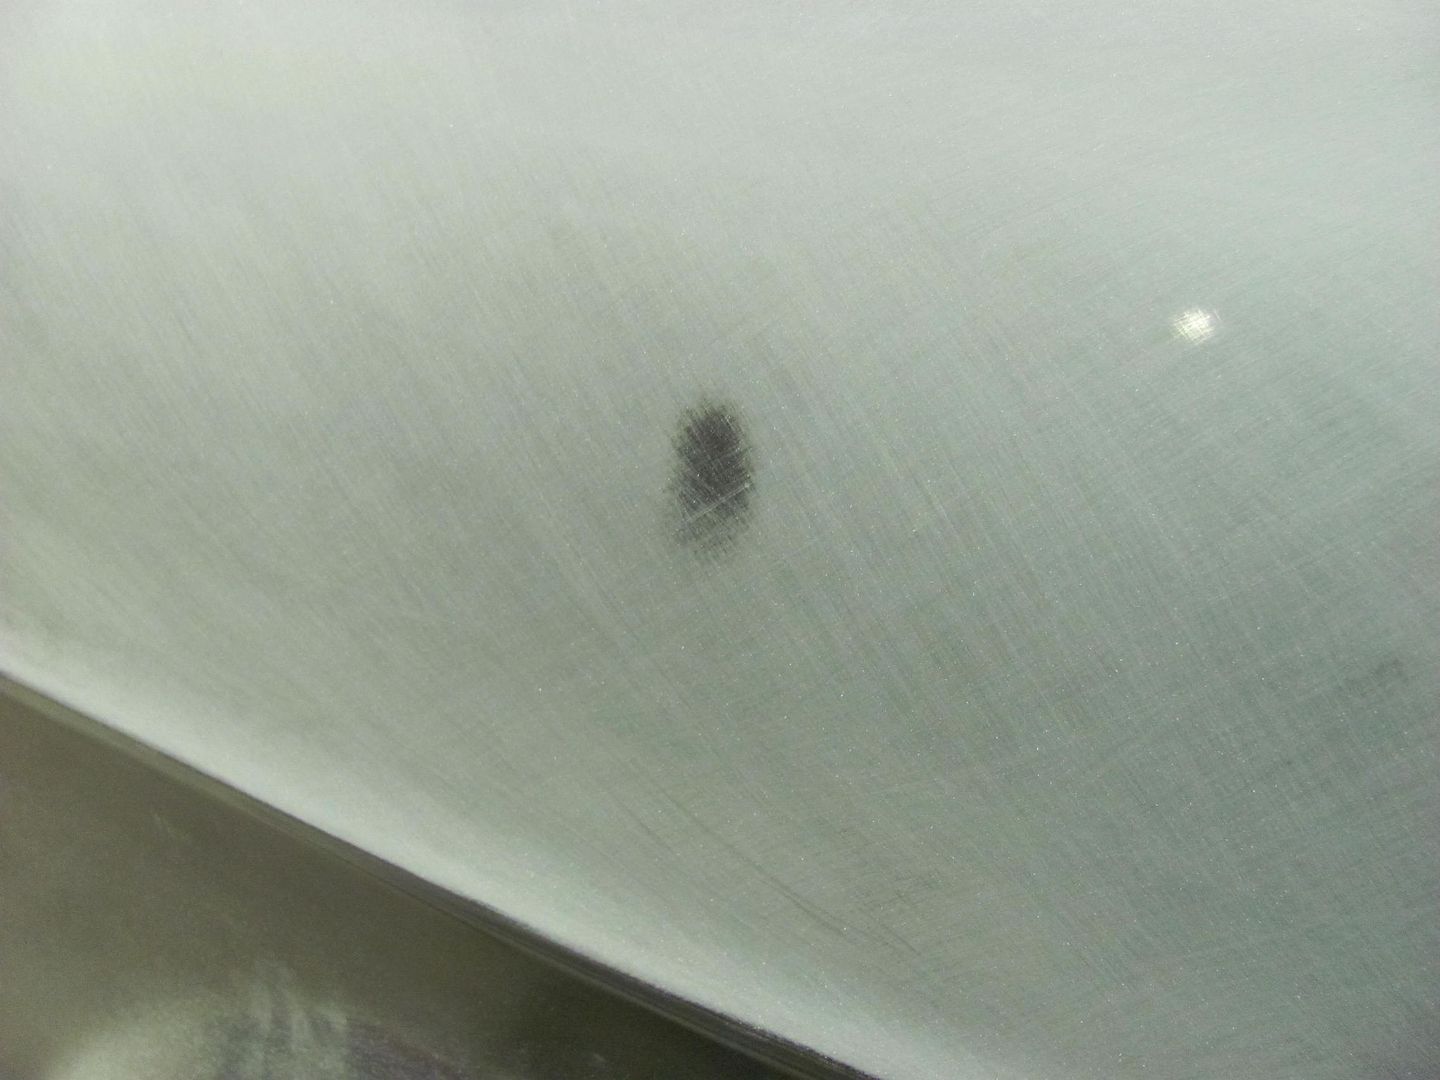 Here's some of the low spots filled with some evercoat... 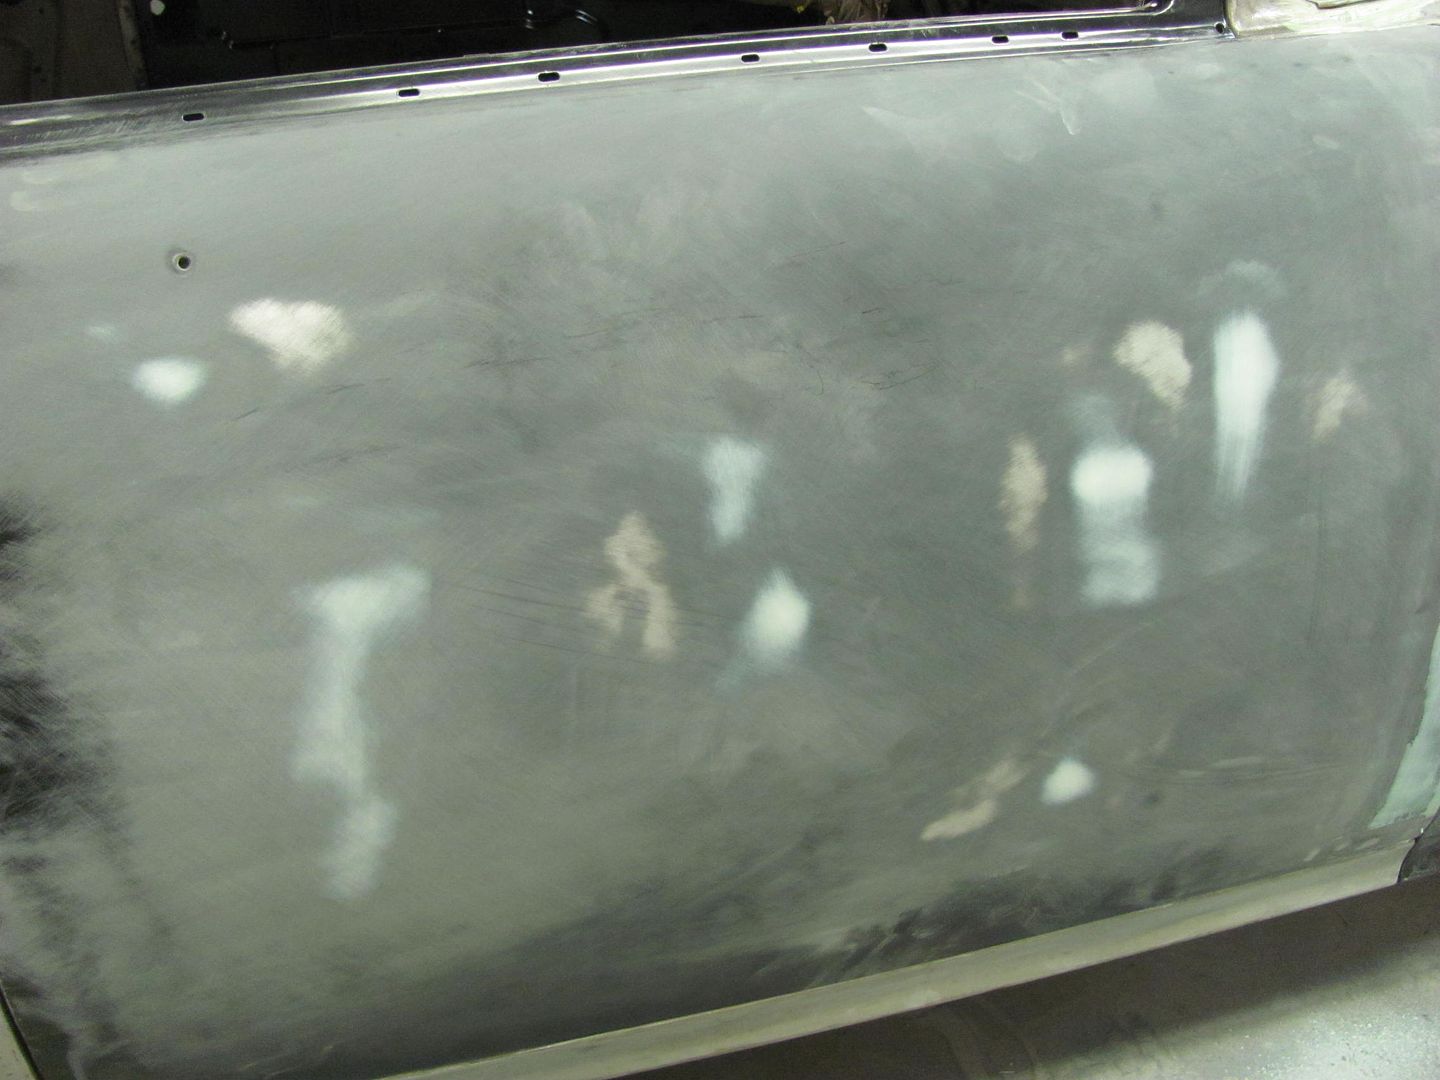 While I was block sanding, Kyle started modifying the hold down bracket for the battery. The post cutouts were on catty corner and didn't match todays battery posts. We had test fit the bracket on a 24F series Interstate today at Big Ed's Tires. Here's the filler piece.... 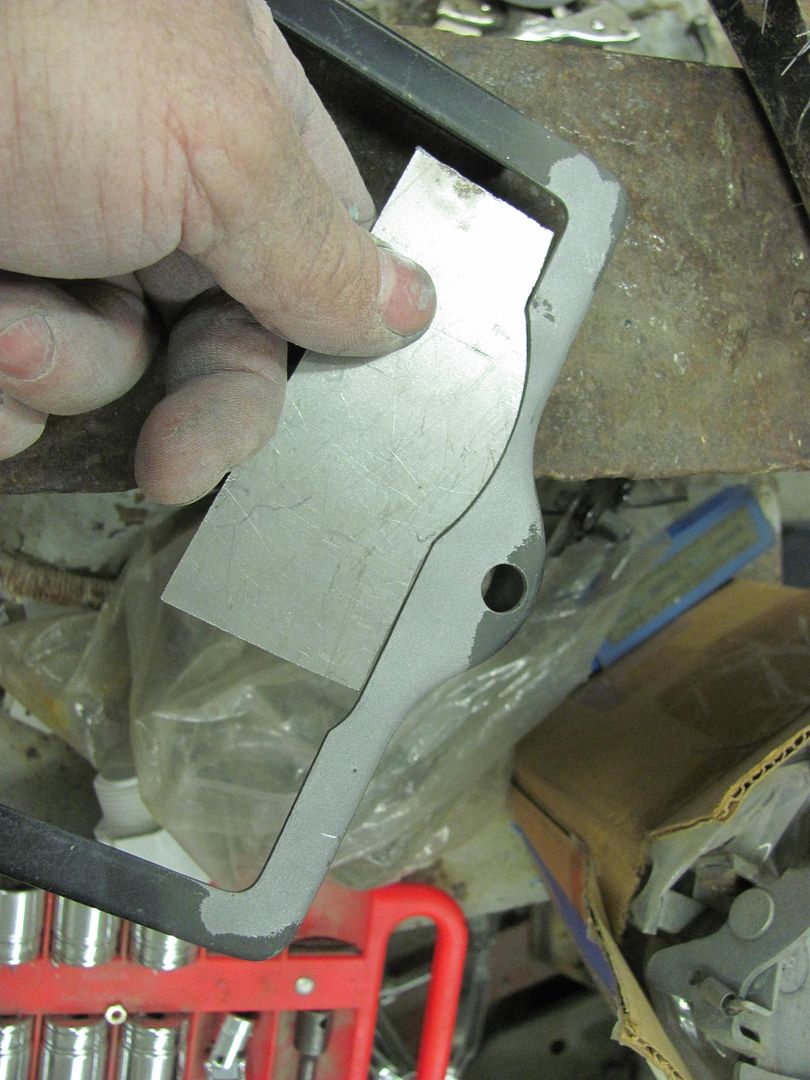 Shown here is the new location... 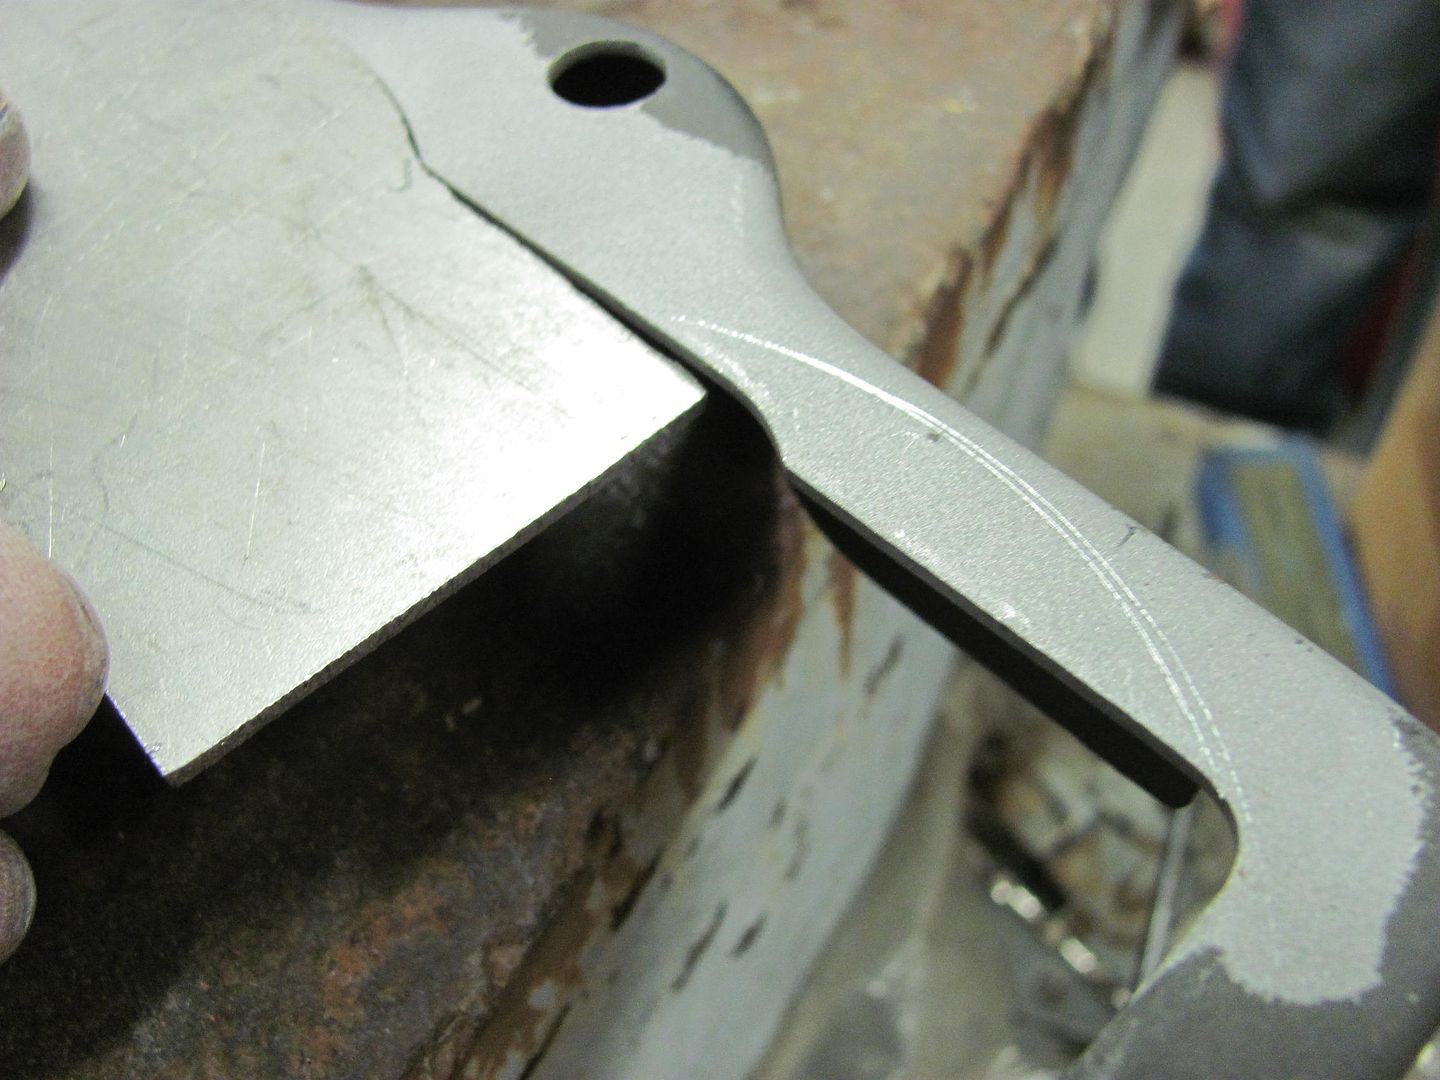 Filler welded in place, and the new relief cut out... 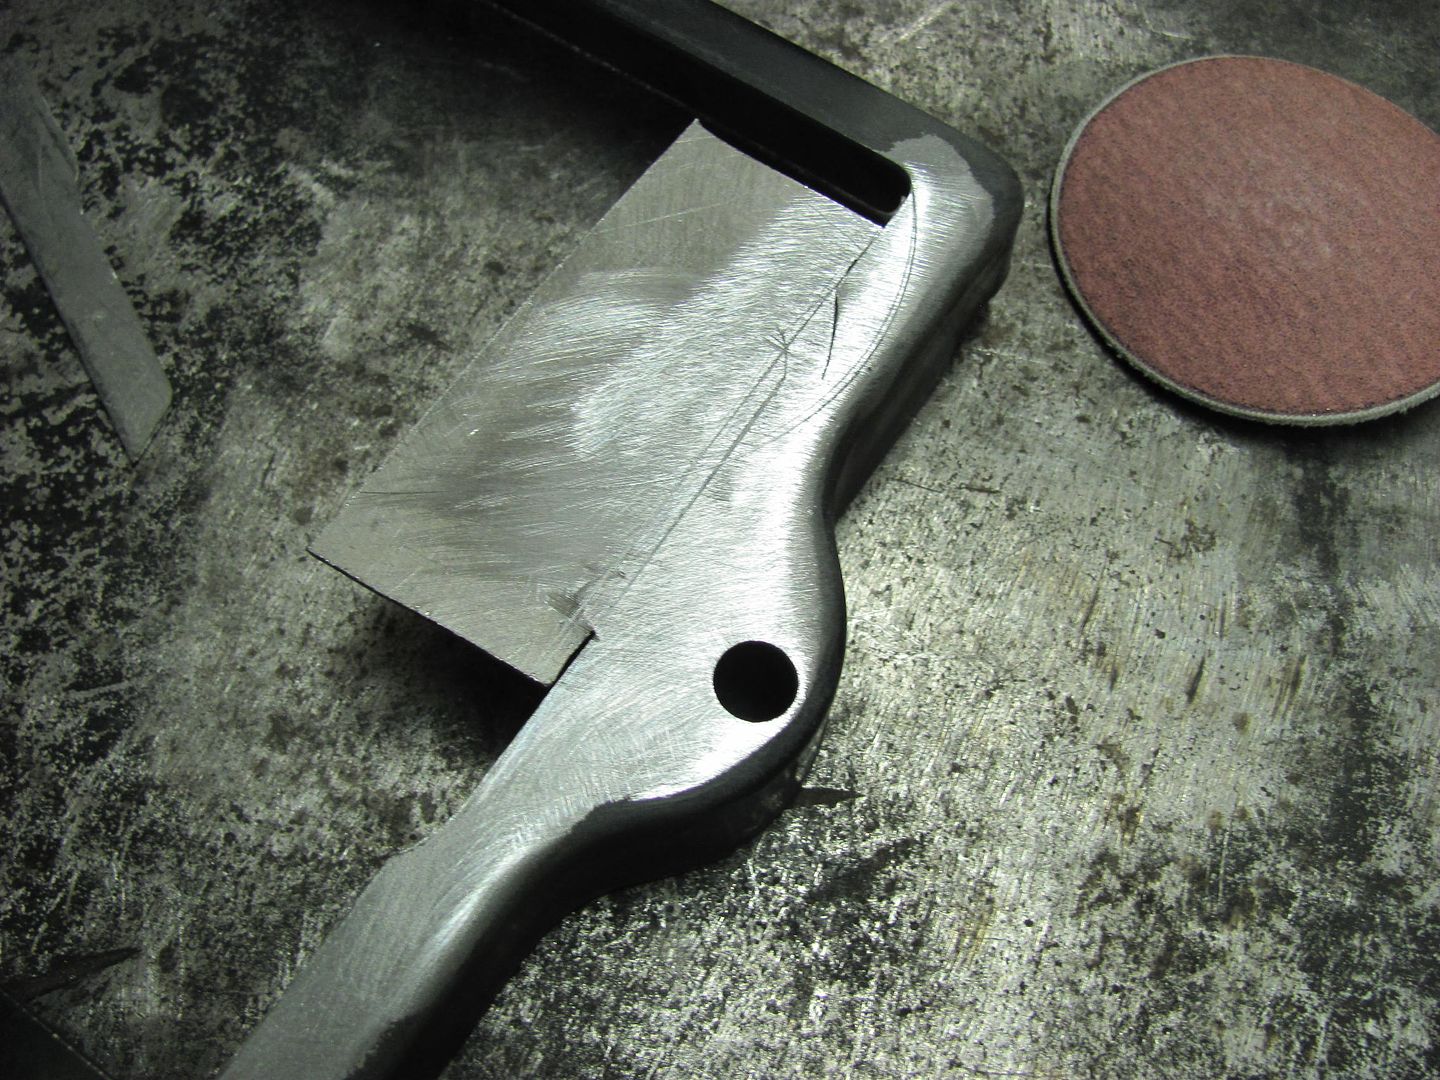 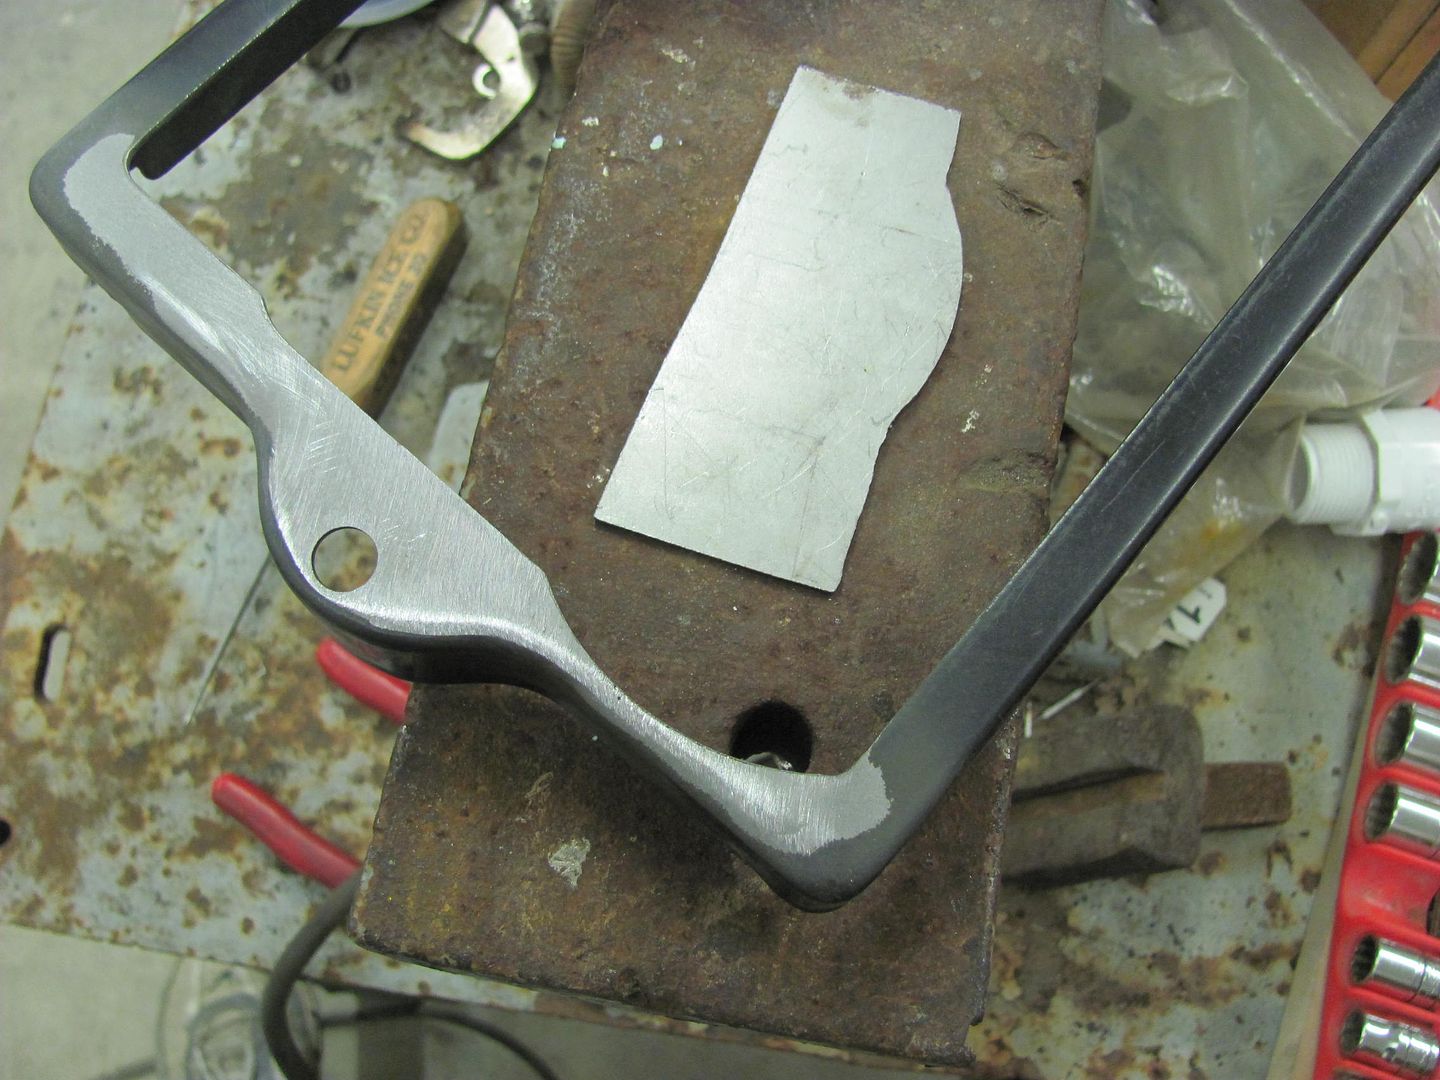 One down, one to go...
__________________
Robert |
|
|
|
|
01-26-2015, 07:36 AM
|
#18 |
|
Registered User
Join Date: Dec 2012
Location: Pendleton, Indiana
Posts: 235
|
Re: 55 Wagon Progress
Is the jack mounted door rack something you made or is it a purchased tool? Looks like a very handy item to have.
Rick |
|
|
|
|
01-26-2015, 02:30 PM
|
#19 |
|
Registered User
Join Date: Jan 2013
Location: Leonardtown, MD
Posts: 1,647
|
Re: 55 Wagon Progress
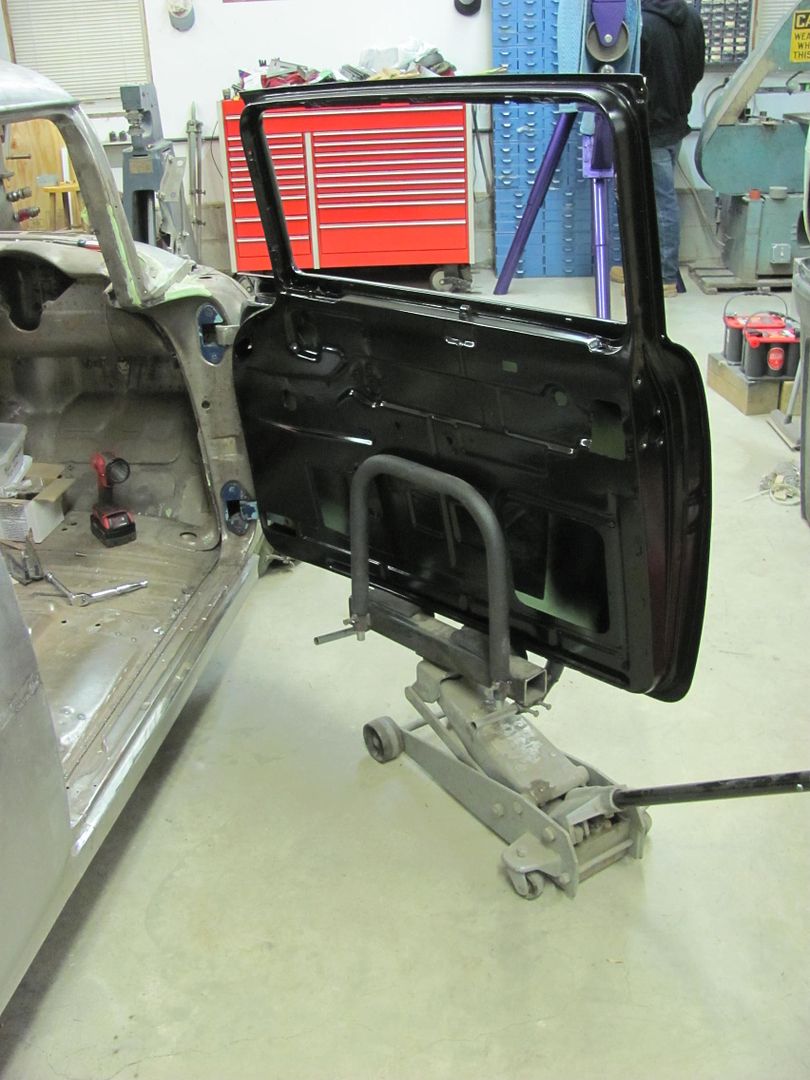
I came up with that while re-assembling the last car we finished in the shop. It' doors were quite heavy and we didn't need any paint chips....
I had seen some of the cradle style that you could add to your floor jack, but I have a problem how the cradle supports the complete weight of the door across the lower edge of a door skin. Too much risk of paint damage in my view. So I came up with another version that would support the weight across a wider area on the inner door, for less risk of damage to any visible area. Here's the basic form, with some pipe receivers using set screws. The support braces are bent from electrical EMT and covered in pipe insulation to protect the finish.. 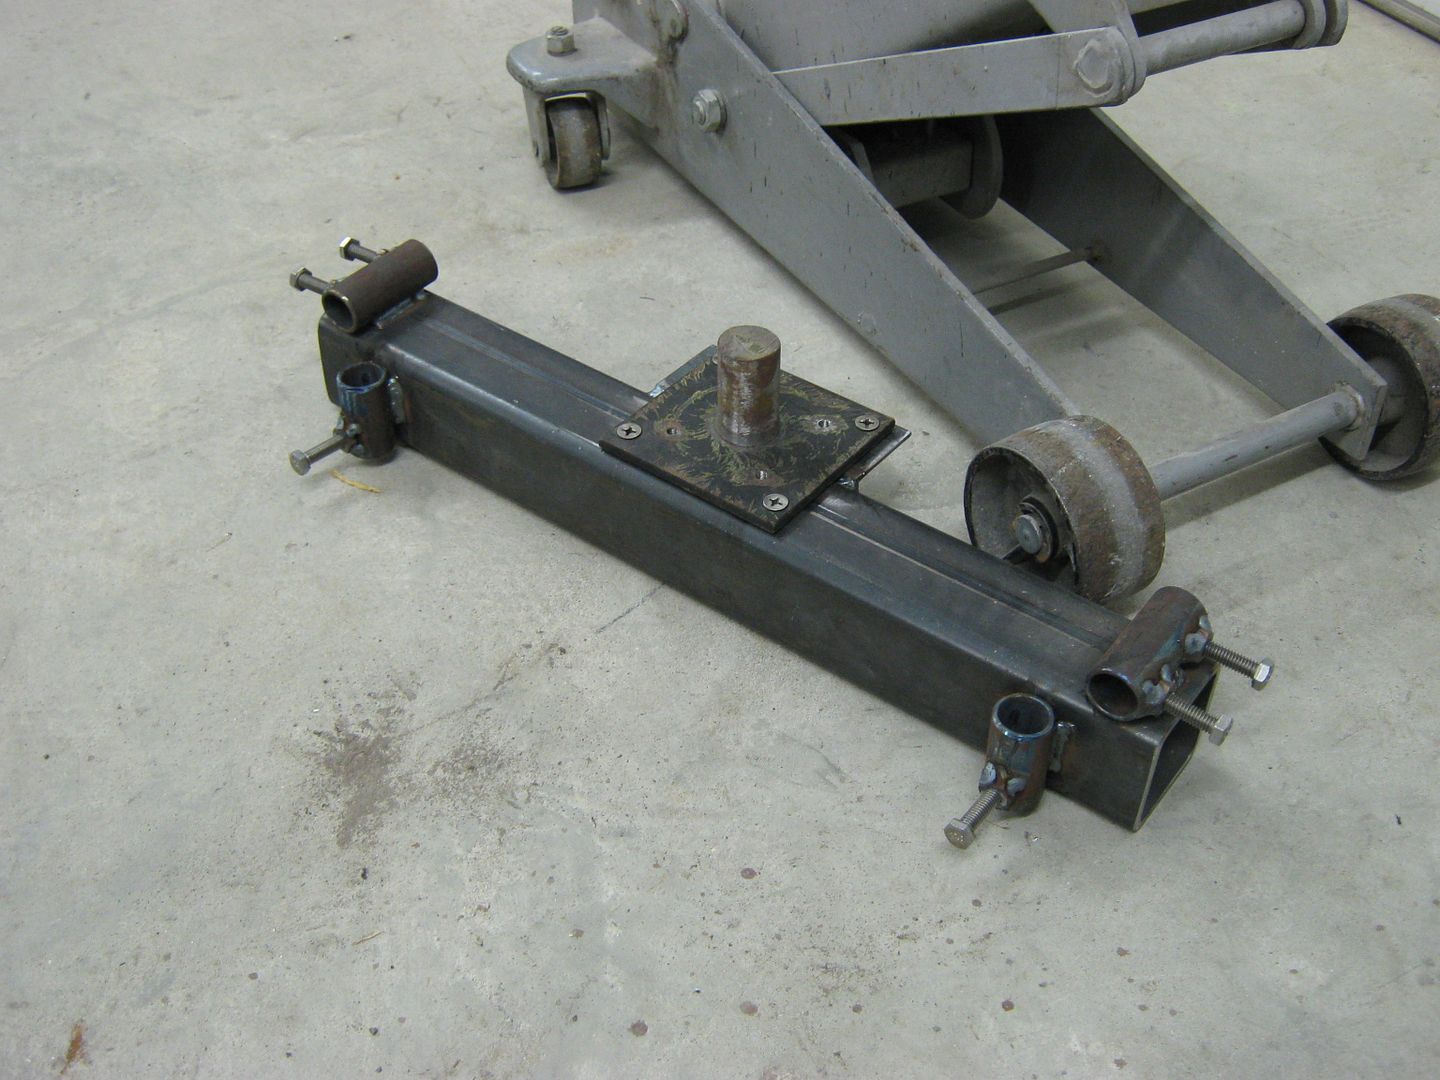 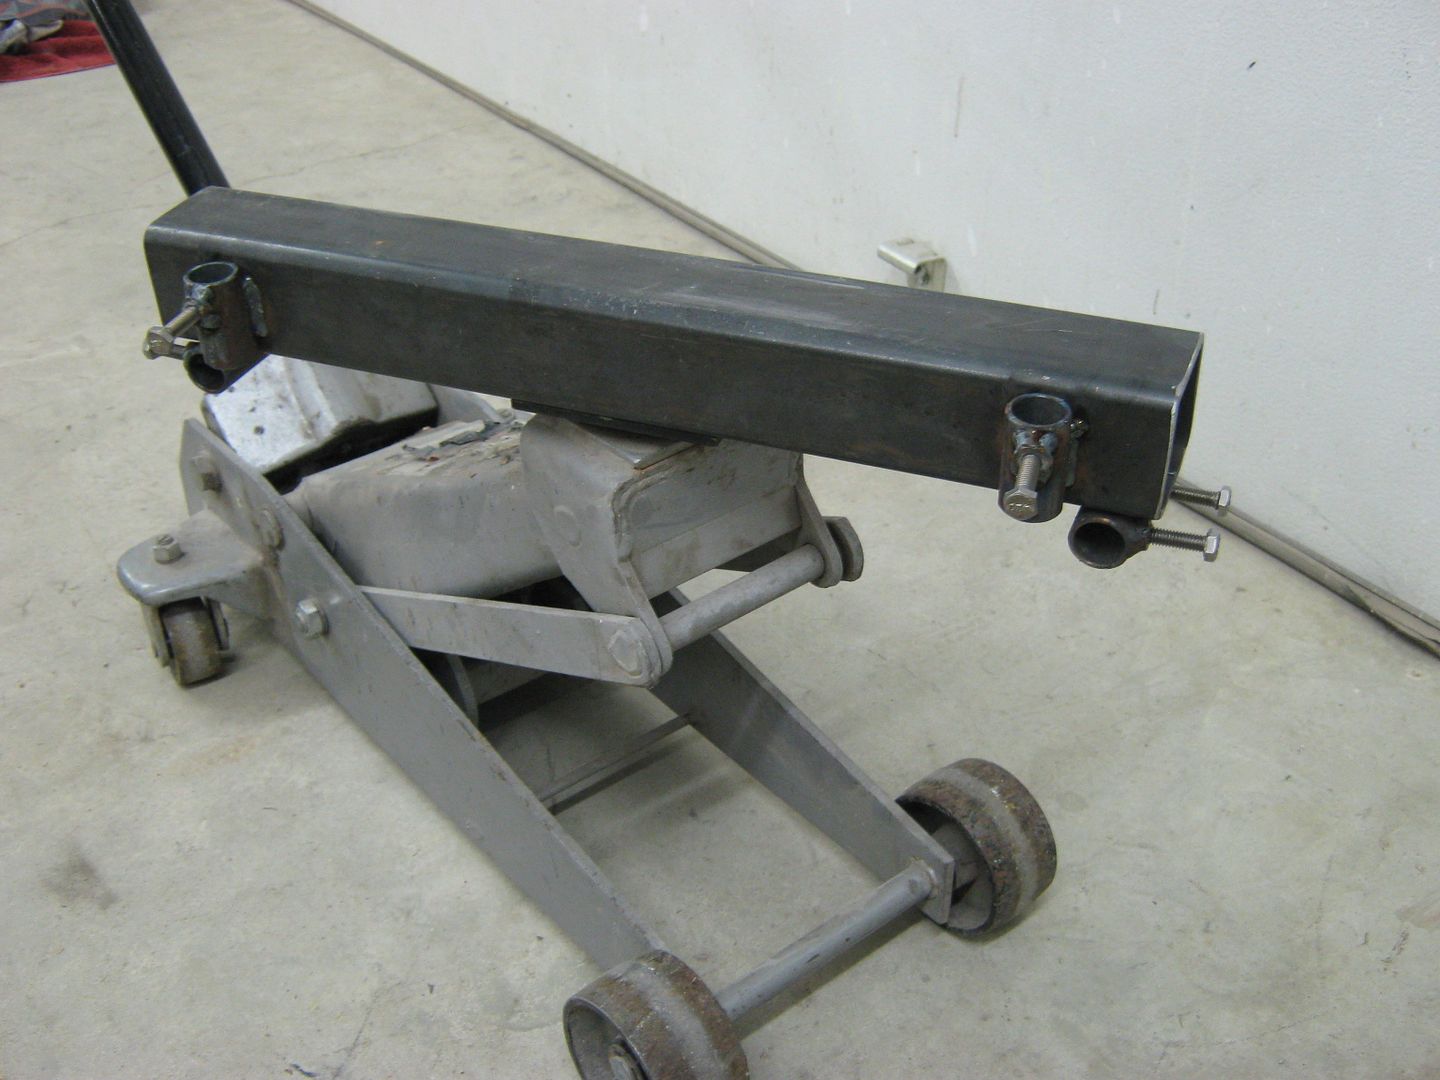 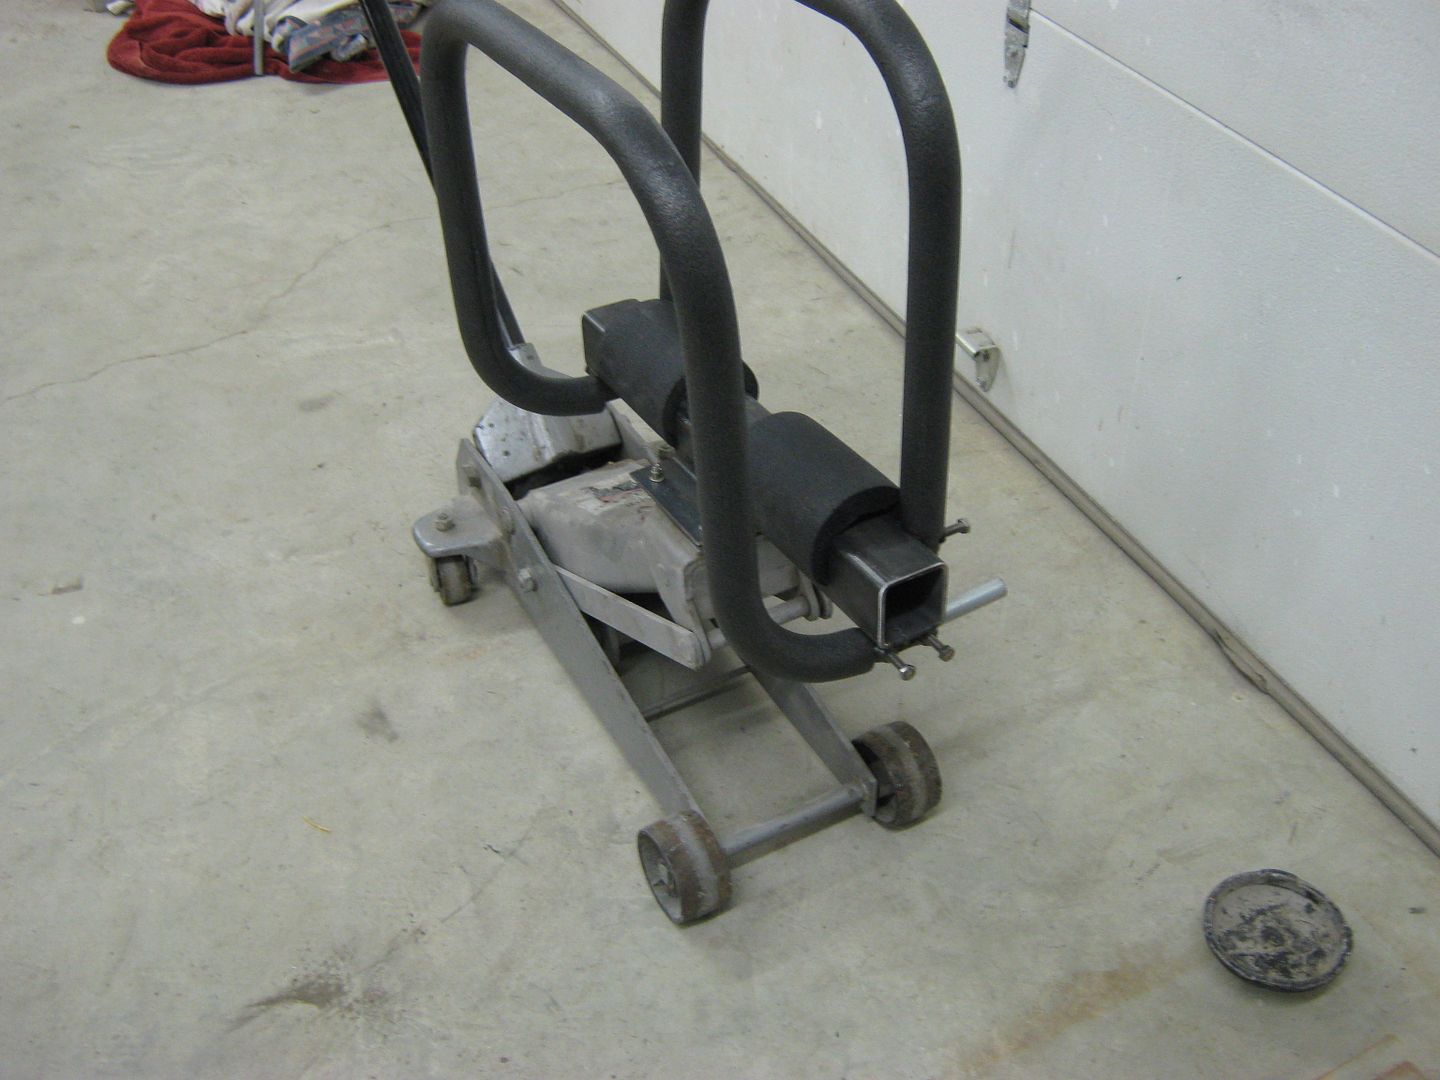 The support braces also help to keep the door oriented in a vertical position, to keep the door from flopping back and forth (as you may experience with the cradle style). This will help prevent paint damage/chips from excessive door movement during the install. 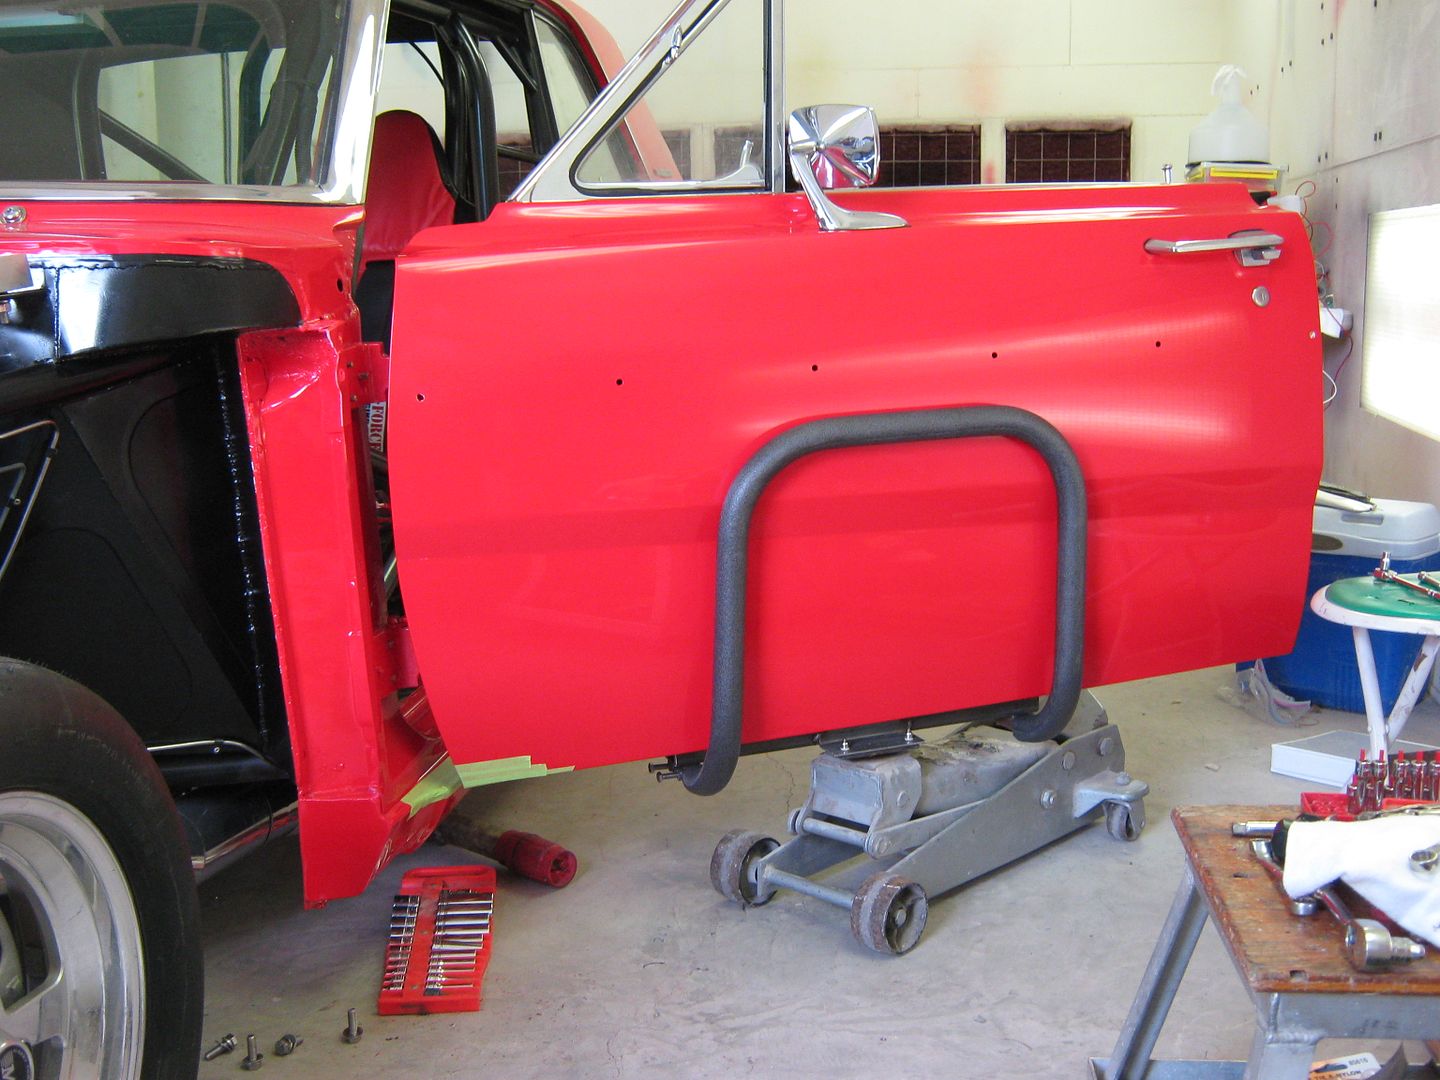 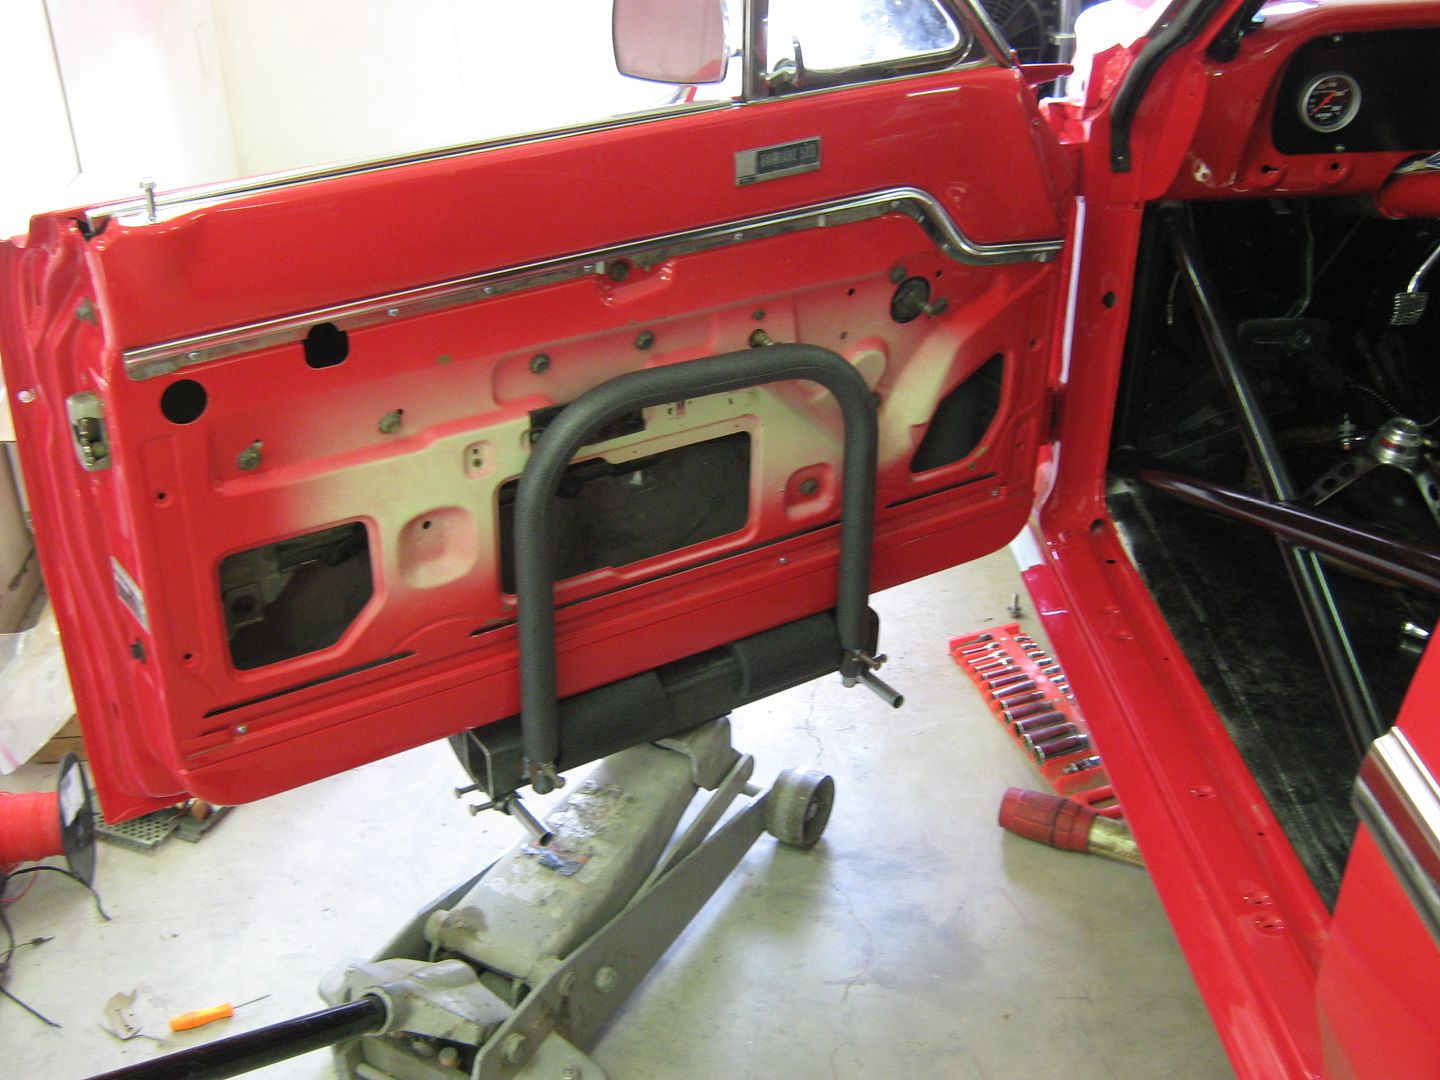 Notice nothing touches the edge of the door skin.... 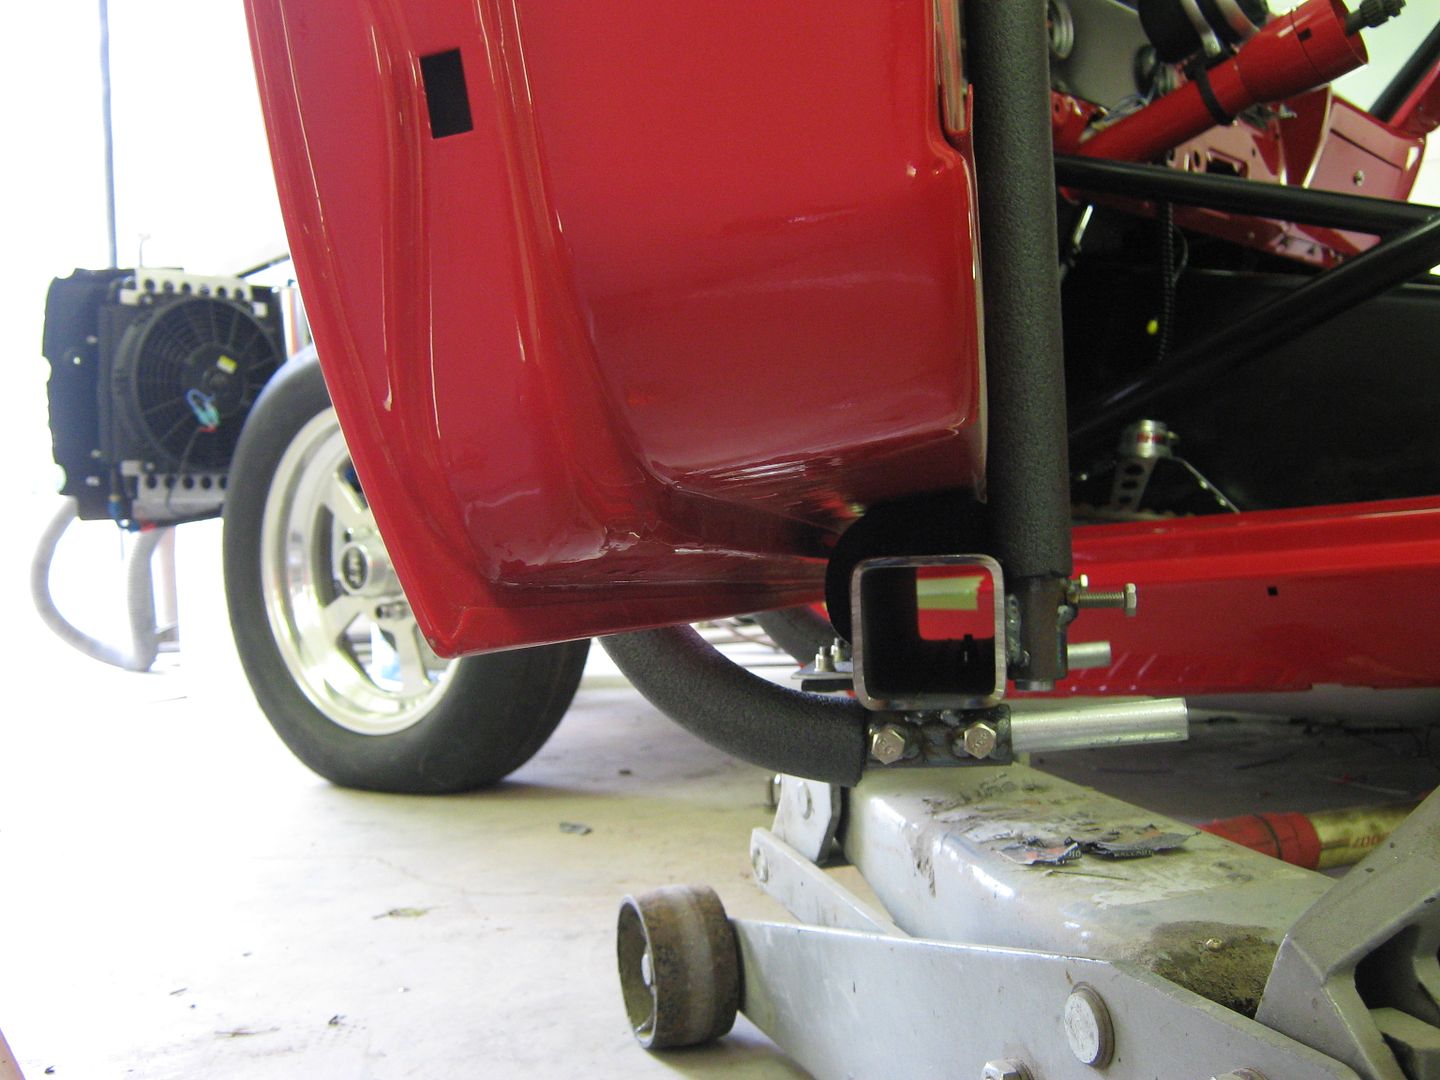 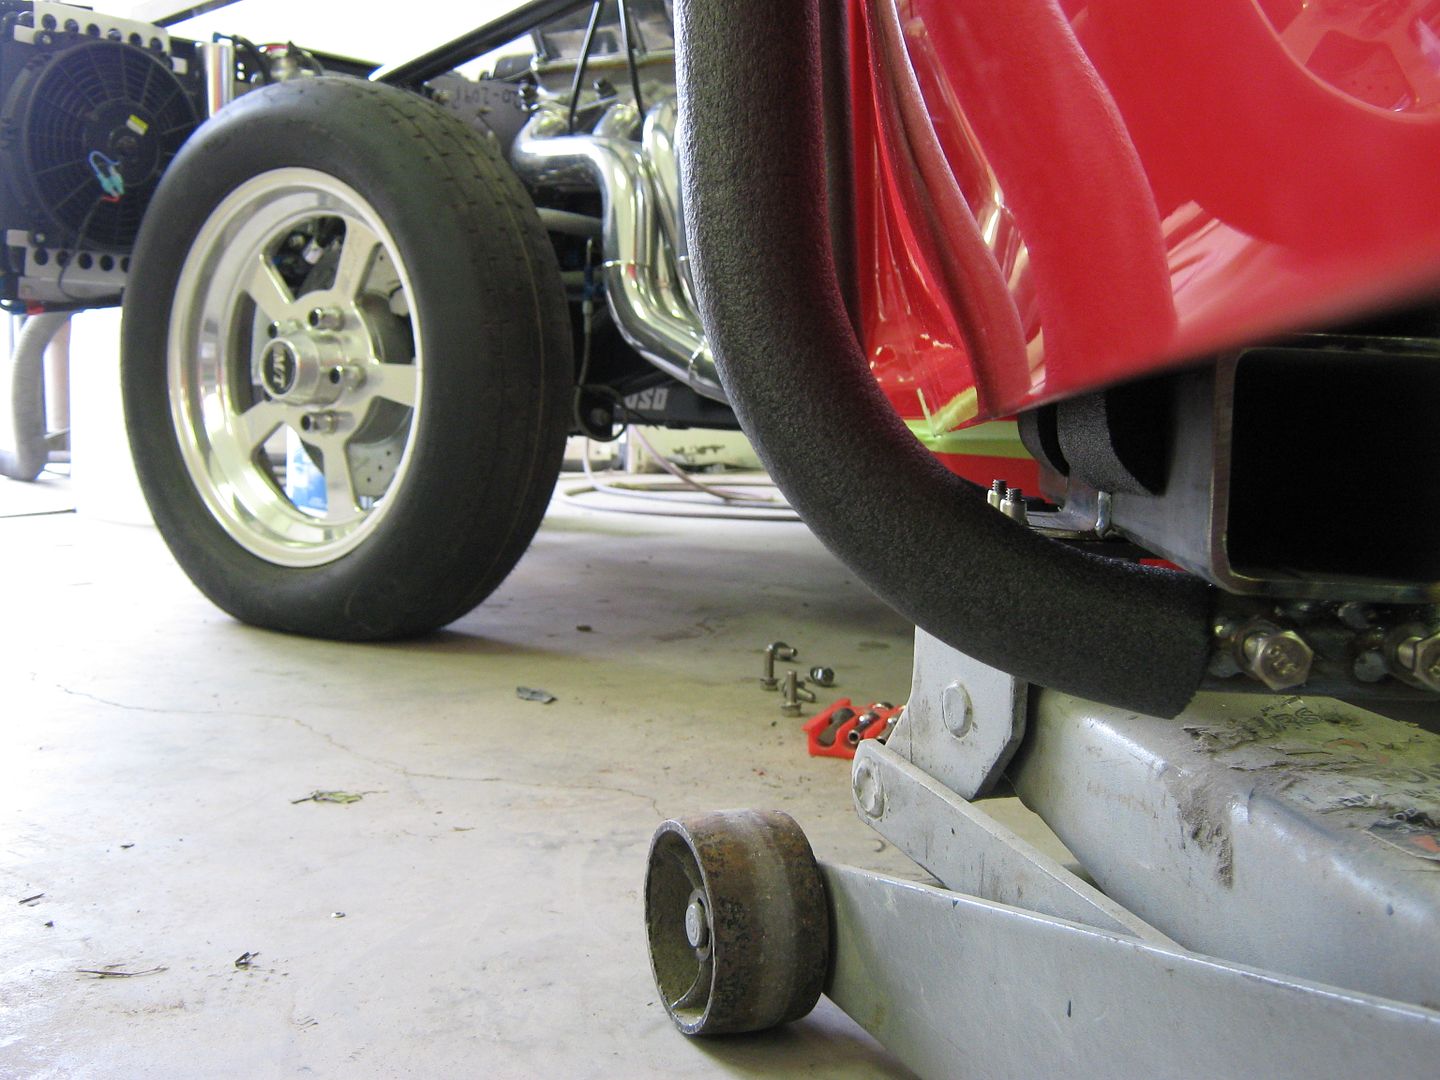 Once hinges are snug, loosen set screws for outer support brace, lower a couple inches, remove outer support brace, and simply pull jack toward rear of car to clear door. 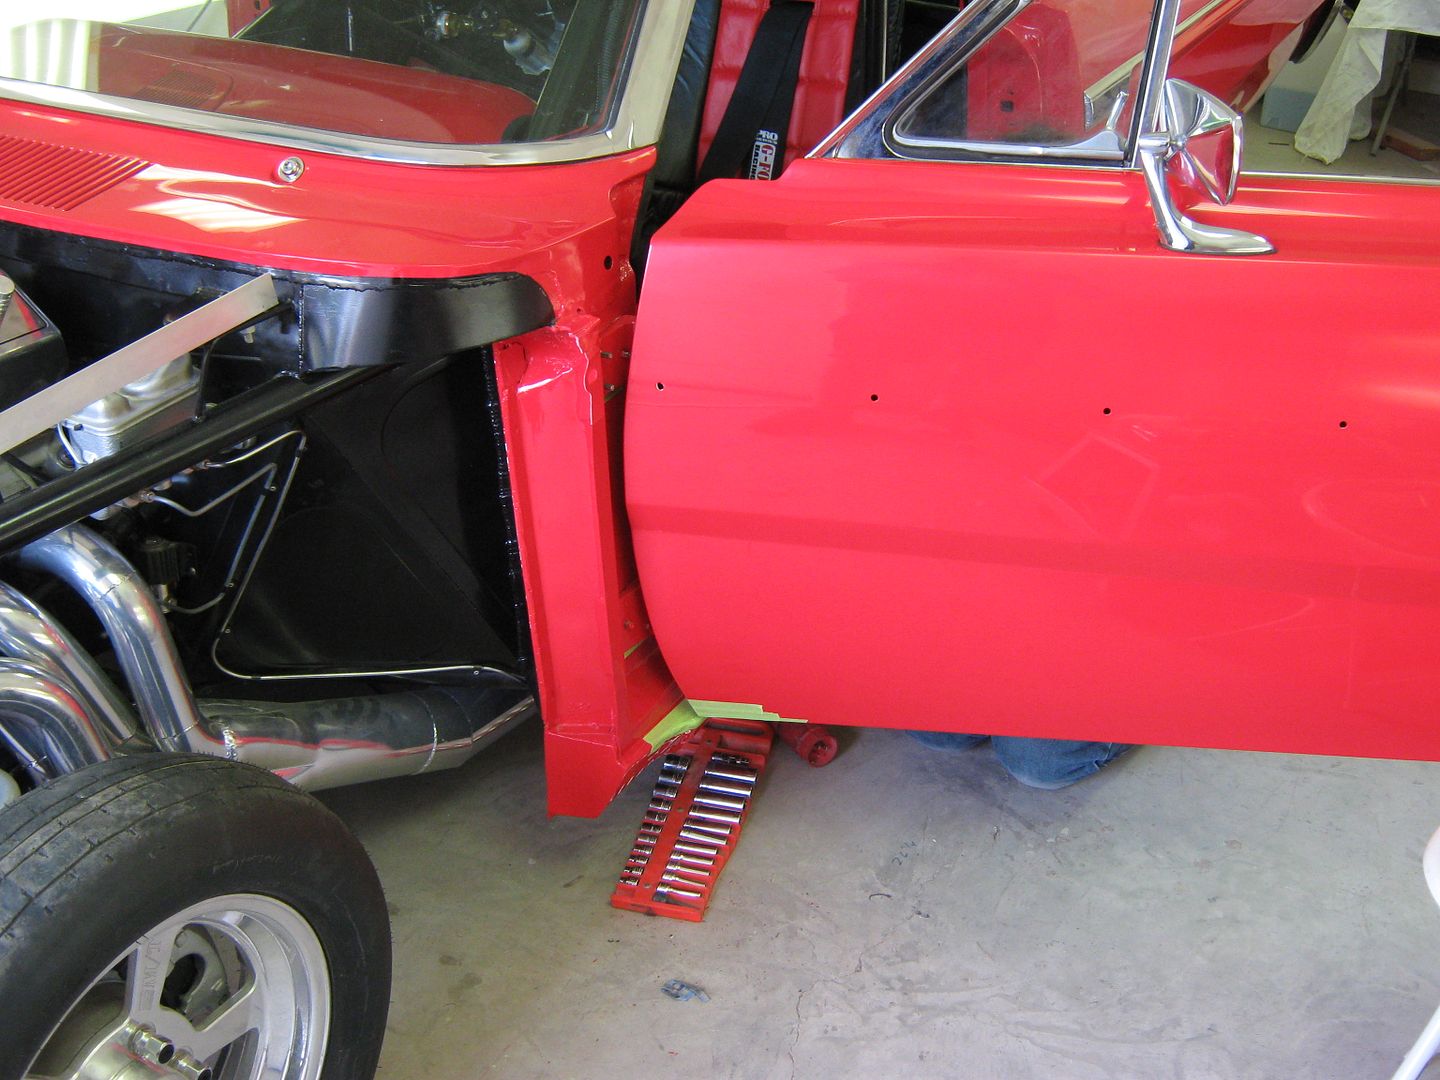 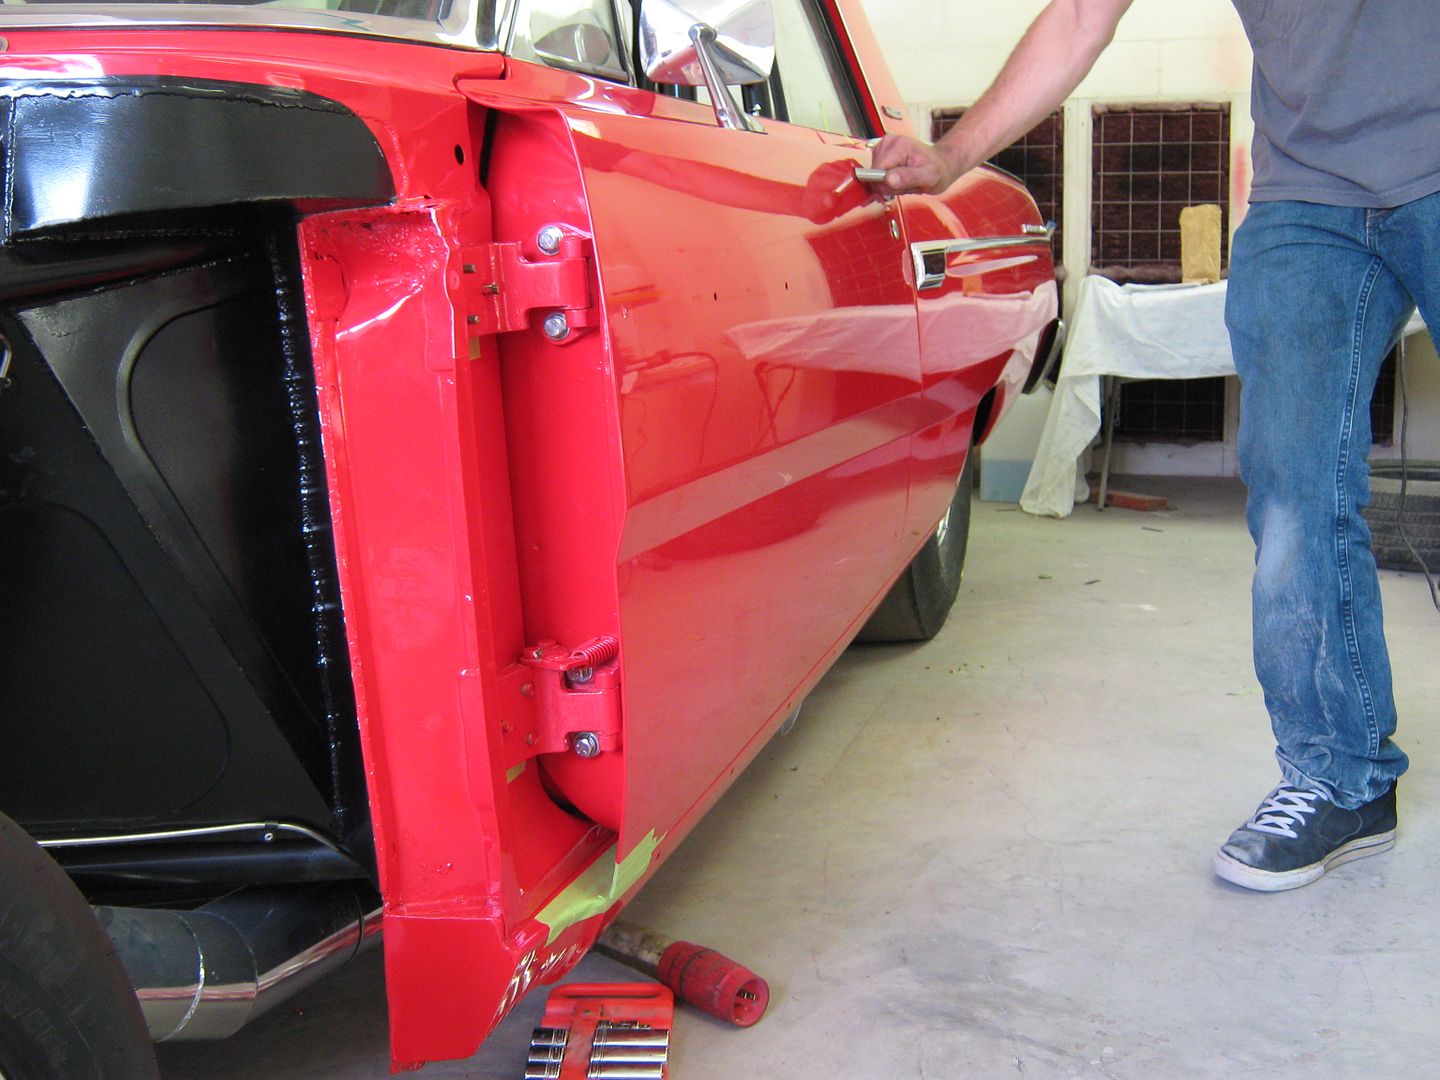 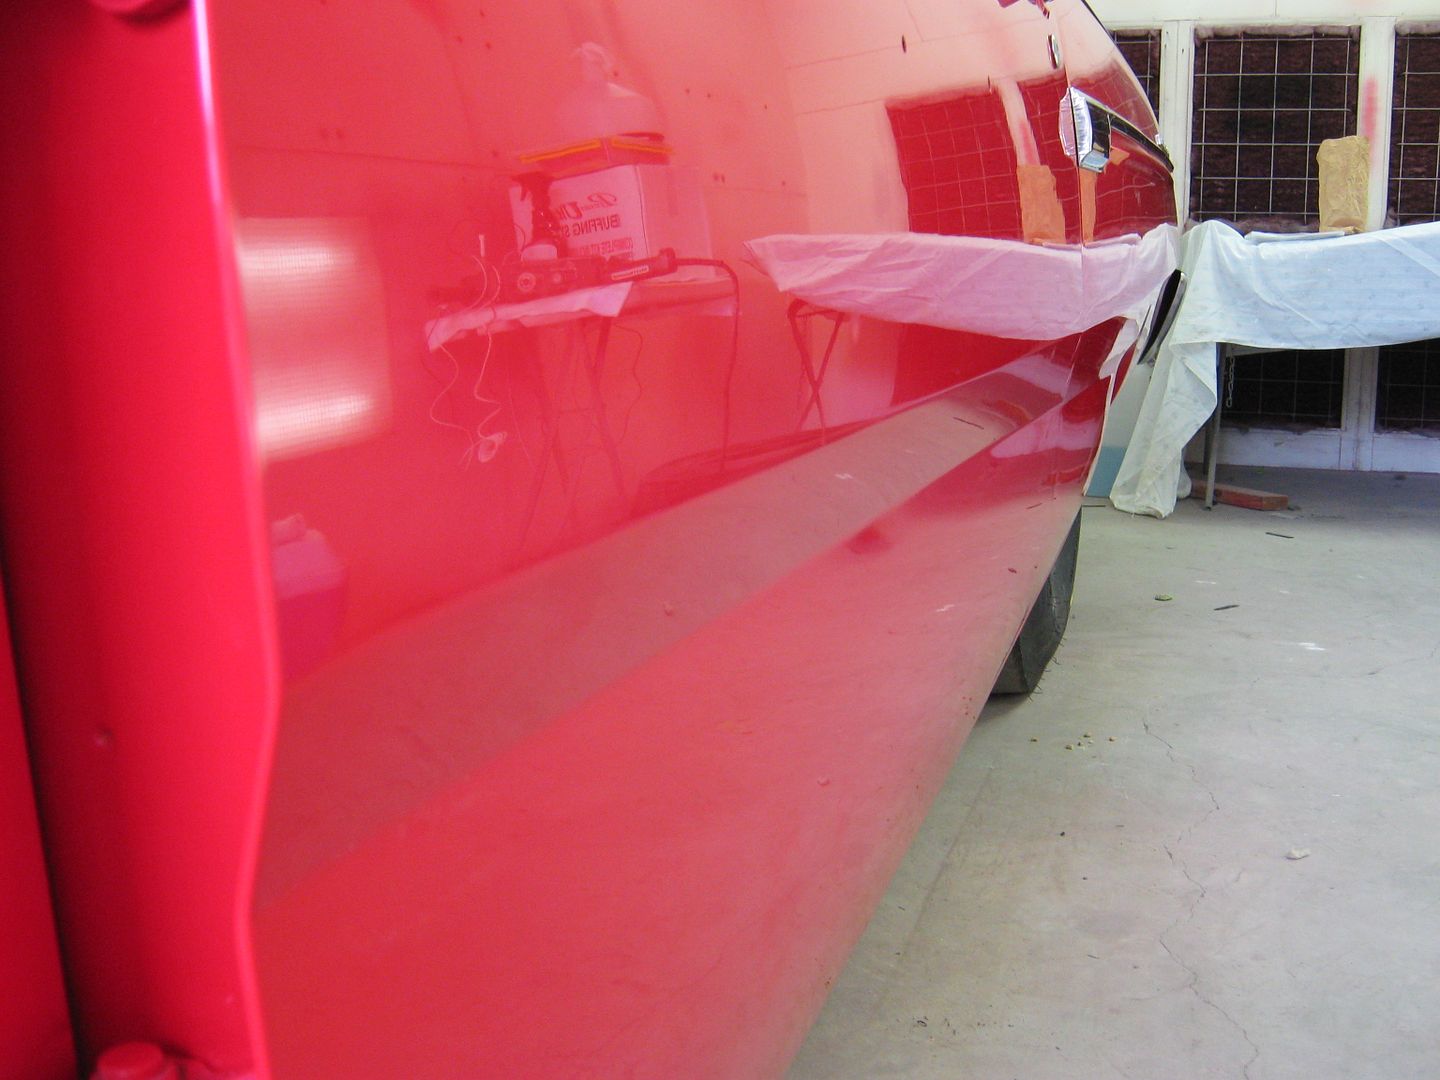
__________________
Robert |
|
|
|
|
01-26-2015, 03:26 PM
|
#20 |
|
Registered Cruiser
Join Date: Mar 2010
Location: Mesa, AZ
Posts: 918
|
Re: 55 Wagon Progress
Pretty slick!
__________________
77' Chevy SB Dropmembered Front and Rear 5.3/4l60e combo |
|
|
|
|
01-26-2015, 06:07 PM
|
#21 |
|
Registered User
Join Date: Jul 2012
Location: Rosenberg, Texas
Posts: 3,506
|
Re: 55 Wagon Progress
Nice! I hope I remember this tool the next time I take a door off a vehicle. This would save a lot of headaches.
I found your thread through another thread suggesting to read your build because you have a lot of great ideas and many of them helped. I can't remember who's thread it was or I'd give him credit. I haven't read everything yet (I'm at work...shhh, don't tell my boss I'm on here.) but from what I've seen so far, he's right. You do some nice work!
__________________
-Duane C/10 Club Texas member 1971 Chevy C10 "Brutus" SWB Fleetside 2016 6.0L (L96) 6L90E (driver/project) 1965 Pontiac GTO "Royal Goat" 400/TH400 w/AC (my baby) |
|
|
|
|
01-26-2015, 09:12 PM
|
#22 |
|
Senior Member
Join Date: Jul 2012
Location: Oblong, Illinois
Posts: 7,028
|
Re: 55 Wagon Progress
The door cradle is a great idea. You should get that patented if you haven't.
Nice straight red paint too! Great approach to replacing the lead seam. Rather than cutting it out, replacing and having two weld seams to planish you will only have one seam. Cool! I agree with Duane's comment above...lots of great ideas and really nice work shared in this thread. |
|
|
|
|
01-28-2015, 12:10 PM
|
#23 |
|
Registered User
Join Date: Jan 2013
Location: Leonardtown, MD
Posts: 1,647
|
Re: 55 Wagon Progress
In the past I've had guys ask what primer I was using and then why the switch to SPI, here's a home-brewed video (not mine) of a torture test on some panels sprayed with SPI... Pretty tough stuff...
https://www.youtube.com/watch?v=-yA8q4K-_Bo .
__________________
Robert |
|
|
|
|
01-28-2015, 02:37 PM
|
#24 |
|
Registered User
Join Date: Mar 2007
Location: Scotts, Michigan
Posts: 3,773
|
Re: 55 Wagon Progress
Nice work, I love the detail of your metal work. You make it look so easy. Also nice work creating a special tooling to accomplish a challenge we are all faced with when adjusting doors.
Ok, here is my dumb question. I have never worked with removing lead from seams. I need to do this on two large seems across the back roof of my 53 suburban. Question - I don't have a access to an acetylene torch. Can a person heat the lead up enough using a propane torch? Thanks Marc
__________________
...........__________ .................. ((__|__||___\____ ..;.;;.:;:;.,;..;((_(O))____ (_(O)) 1948 Chevy Truck - Finished SOLD!! 1953 Chevy Suburban "Family Truckster" Completed: Spring of 2021 http://67-72chevytrucks.com/vboard/s...d.php?t=605484 1994 4x4 Blazer - "Field Find" https://67-72chevytrucks.com/vboard/...ferrerid=30857 |
|
|
|
|
01-28-2015, 05:07 PM
|
#25 |
|
Registered User
Join Date: Jan 2013
Location: Leonardtown, MD
Posts: 1,647
|
Re: 55 Wagon Progress
Should be able to, just watch you don't get the heat too far away from the creases where the panel wants to warp. I normally just watch the lead. When it starts to bubble a little, brush..
__________________
Robert |
|
|
|
 |
| Bookmarks |
|
|


 Hybrid Mode
