
 |
|
|
|
|
#1 |
|
Registered User
Join Date: Sep 2010
Location: Lebanon NH
Posts: 14
|
Re: Project "49 No Buck$"
cool build KB!!
I too plan on using a bench seat from a mid 90's Astro van in my 50... er eventually... can you share any tips, tricks, or pics on the install? Thanks, Roger |
|
|

|
|
|
#2 |
|
Registered User
 Join Date: Nov 2010
Location: McDowell, Ky
Posts: 61
|
Re: Project "49 No Buck$"
i love this whole thread, great work and very nice detail man.
|
|
|

|
|
|
#3 |
|
MY EX DRIVES A BROOM
Join Date: Nov 2003
Location: Herington, KS
Posts: 869
|
Re: Project "49 No Buck$"
subscribing, awesome build
__________________
They say nobody's perfect. I'm a nobody, so I must be perfect. Building Nemo -1968 C10 Long Bed FRED -1947 KB-2 International |
|
|

|
|
|
#4 |
|
Registered User
Join Date: Nov 2008
Location: So. Cal.
Posts: 452
|
Re: Project "49 No Buck$"
Thanks so much for the kind words! I've tried to cover every aspect of what I've done and make it it simple enough for most any car/truck nut! And not to sound like a bad guy, but to everyone who PMs me asking questions, READ the captions next to the pictures as I explain everything and tell what parts are from what. Thanks again!
Posted via Mobile Device
__________________
It's all about the stance, baby! http://67-72chevytrucks.com/vboard/s...d.php?t=320546 |
|
|

|
|
|
#5 | |
|
Certified Car Nut
Join Date: Jan 2005
Location: Inglewood, California
Posts: 3,118
|
Re: Project "49 No Buck$"
Quote:
Last edited by Kabwe; 04-07-2011 at 04:41 PM. |
|
|
|

|
|
|
#6 |
|
Registered User
Join Date: Nov 2008
Location: So. Cal.
Posts: 452
|
Re: Project "49 No Buck$"
I went out and took this to show my latest addition to the truck. I found it on EBAY and had to have it for the whole look!
 and yes it's freakin' raining! I'll be back at it in a couple weeks, so we can finish this thing up! and yes it's freakin' raining! I'll be back at it in a couple weeks, so we can finish this thing up!
__________________
It's all about the stance, baby! http://67-72chevytrucks.com/vboard/s...d.php?t=320546 |
|
|

|
|
|
#7 |
|
SSN 706
Join Date: Mar 2009
Location: Pocatello Idaho
Posts: 3,821
|
Re: Project "49 No Buck$"
 good ideas and good pictures. good ideas and good pictures.
__________________
 Daverods 64 C10 Daily driver 292 3 speed "Driver" Daverods 64 C10 Daily driver 292 3 speed "Driver"   Daverods 66 Build C10 Bags 350/350(On Hold) Daverods 66 Build C10 Bags 350/350(On Hold)  Daverods 52 Build 3100 S10 chassis,Bags, 350/700r4 Daverods 52 Build 3100 S10 chassis,Bags, 350/700r4  "Click it" "Click it"
Last edited by daverod; 04-13-2011 at 10:05 PM. |
|
|

|
|
|
#8 |
|
Registered User
Join Date: Nov 2008
Location: So. Cal.
Posts: 452
|
Re: Project "49 No Buck$"
Hey Guys, I'm back on it!!!! Sheesh, finally I can wrap this thing up! Finish cleaning up my garage tonight and it's game on! I'm dying to drive this thing and this is what I have to look at every day
 and I can't stand it anymore! First step is to fire up the motor and break in the cam, finish all that stuff in the engine compartment up and then do the interior! You guys are gonna LOVE the interior plans! Stay tuned!!! and I can't stand it anymore! First step is to fire up the motor and break in the cam, finish all that stuff in the engine compartment up and then do the interior! You guys are gonna LOVE the interior plans! Stay tuned!!!
__________________
It's all about the stance, baby! http://67-72chevytrucks.com/vboard/s...d.php?t=320546 |
|
|

|
|
|
#9 | |
|
Registered User
Join Date: Aug 2006
Location: St. Albans, Vt
Posts: 2,520
|
Re: Project "49 No Buck$"
Quote:
|
|
|
|

|
|
|
#10 |
|
VA72C10
 Join Date: Mar 2008
Location: Midlothian, VA
Posts: 25,269
|
Re: Project "49 No Buck$"
sweet! Glad you're finishing it up!!!!
__________________
Looking for a 67-72 swb or blazer project in or around VA. 
|
|
|

|
|
|
#11 |
|
Registered User
 Join Date: Mar 2005
Location: apple valley, ca
Posts: 2,670
|
Re: Project "49 No Buck$"
It'll be awesome to see that thing finally in the garage. That old '47 Ford was growing roots! If there was any good thing that came out of it being stored outside for so long, it was the fact that the elements helped make the patina even better.
__________________
Check out my latest endeavor: https://roundsixpod.com My build threads: '55 Chevy: http://67-72chevytrucks.com/vboard/s...d.php?t=247512 '64 C-20: http://67-72chevytrucks.com/vboard/s...d.php?t=446527 Last edited by chevyrestoguy; 05-20-2011 at 11:08 AM. |
|
|

|
|
|
#12 |
|
Registered User
Join Date: Nov 2008
Location: So. Cal.
Posts: 452
|
Re: Project "49 No Buck$"
I'm pretty stoked I'm back on this thing! I do need a little help though. I need to find some hood emblems that have the "Thriftmaster" logo on them. I have these
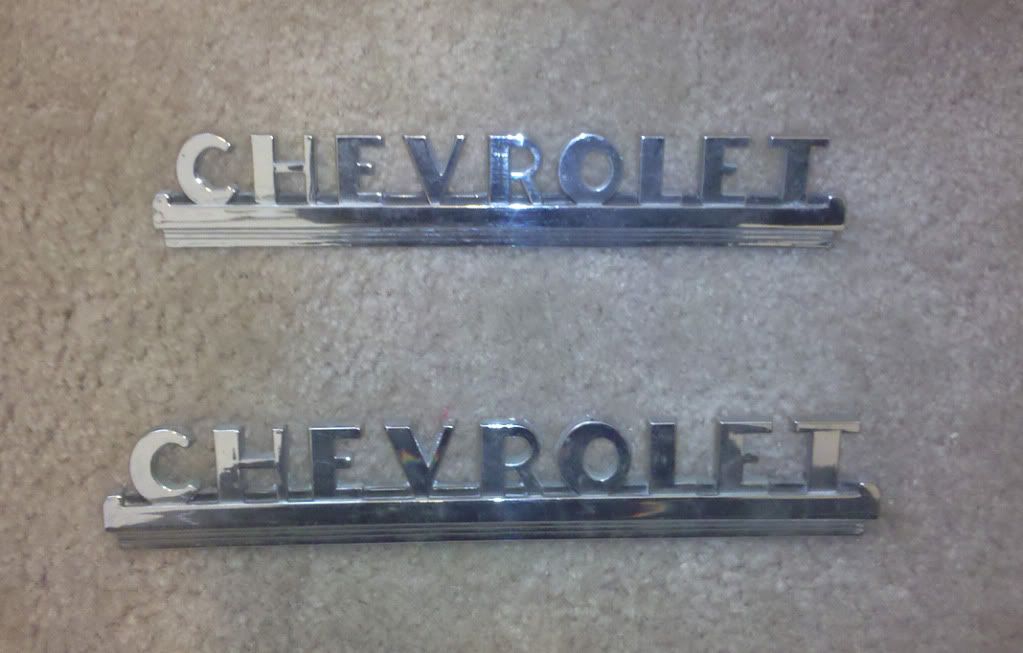 (not in too bad of shape) and wanted to see if anyone had some that weren't too pitted that they'd trade for. (not in too bad of shape) and wanted to see if anyone had some that weren't too pitted that they'd trade for.
__________________
It's all about the stance, baby! http://67-72chevytrucks.com/vboard/s...d.php?t=320546 |
|
|

|
|
|
#13 |
|
Registered User
Join Date: Nov 2008
Location: So. Cal.
Posts: 452
|
Re: Project "49 No Buck$"
I installed door weatherstrip this weekend and what a PAIN! Wow, was that fun! After cleaning up the jambs of the old glue with an old screwdriver and small wire brush, I rinsed it off with water and did a quick squirt of brake cleaner (be careful and dont get any on the rest of the truck) to make sure it was really clean
 Next I unrolled the rubber and lined the ends up Next I unrolled the rubber and lined the ends up 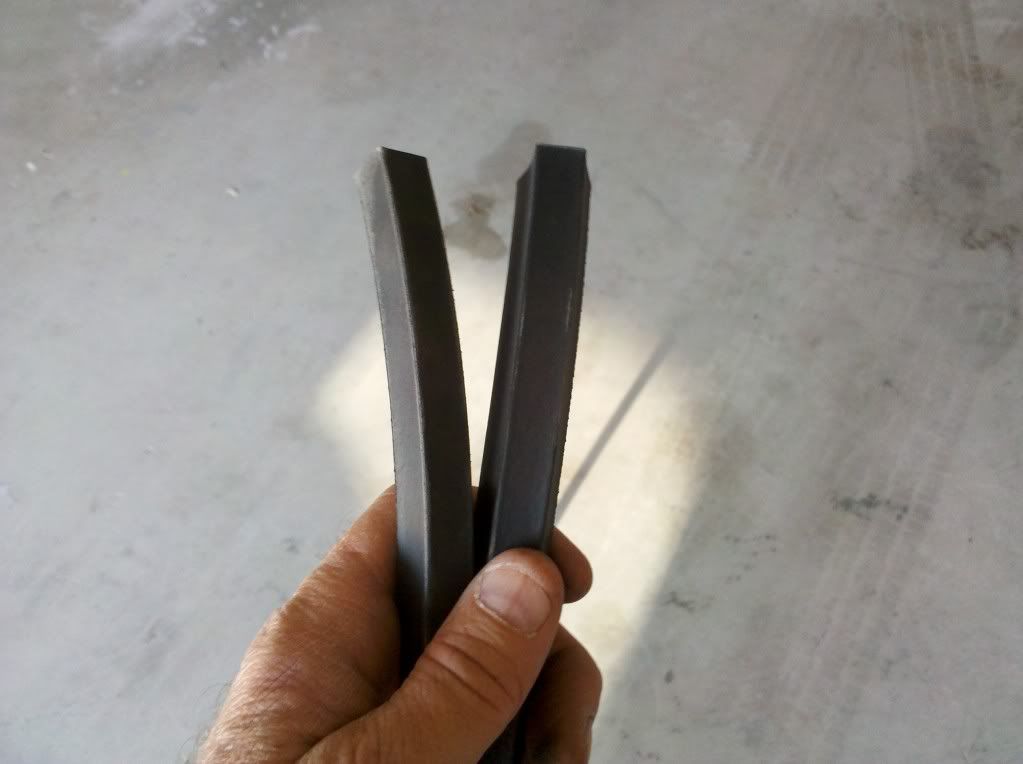 then flipped it around to find the center and marked it with a sharpie then flipped it around to find the center and marked it with a sharpie  . I then put the center mark at the center moulding screw . I then put the center mark at the center moulding screw 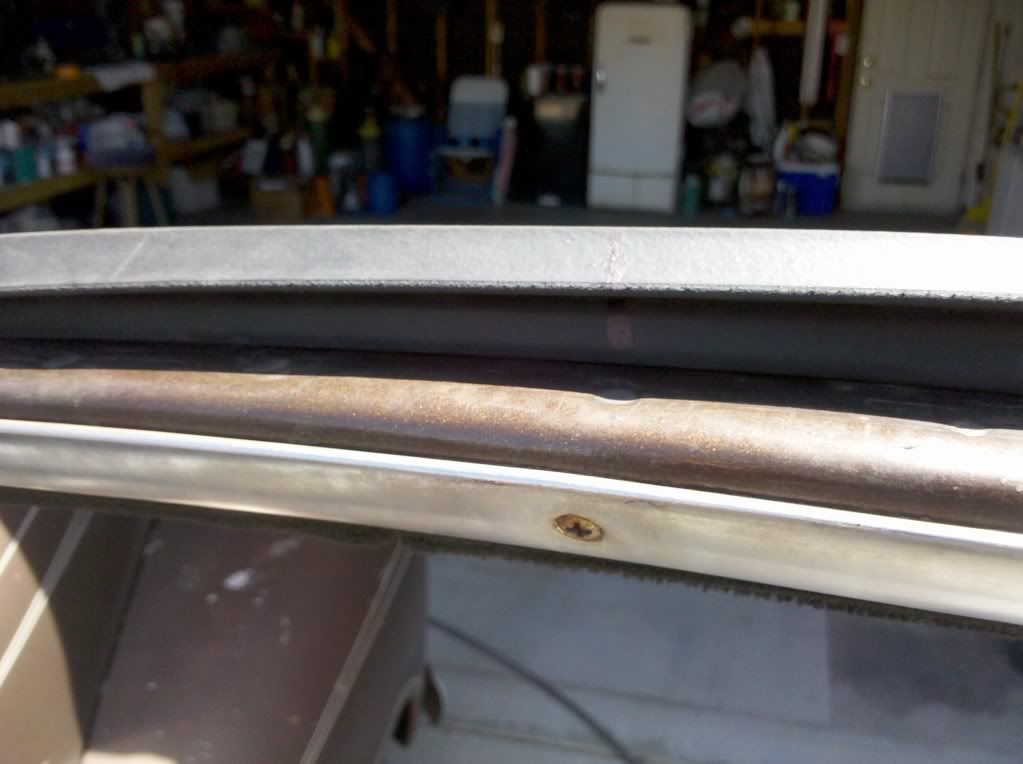 , so my ends would be at the bottom and I could center them when I trimmed them. I took masking tape and taped up the outside leading edge of the door and also the backside of the fender lip (that way if I got any glue there, it would come right off) I used 3M Weatherstrip adhesive and after covering about a 3 ft. area on both the door AND the rubber, I let them get tacky (go do the other side while the first is drying) . After lining my mark back up I stuck the 2 together and used some 2" masking tape to hold it in place , so my ends would be at the bottom and I could center them when I trimmed them. I took masking tape and taped up the outside leading edge of the door and also the backside of the fender lip (that way if I got any glue there, it would come right off) I used 3M Weatherstrip adhesive and after covering about a 3 ft. area on both the door AND the rubber, I let them get tacky (go do the other side while the first is drying) . After lining my mark back up I stuck the 2 together and used some 2" masking tape to hold it in place 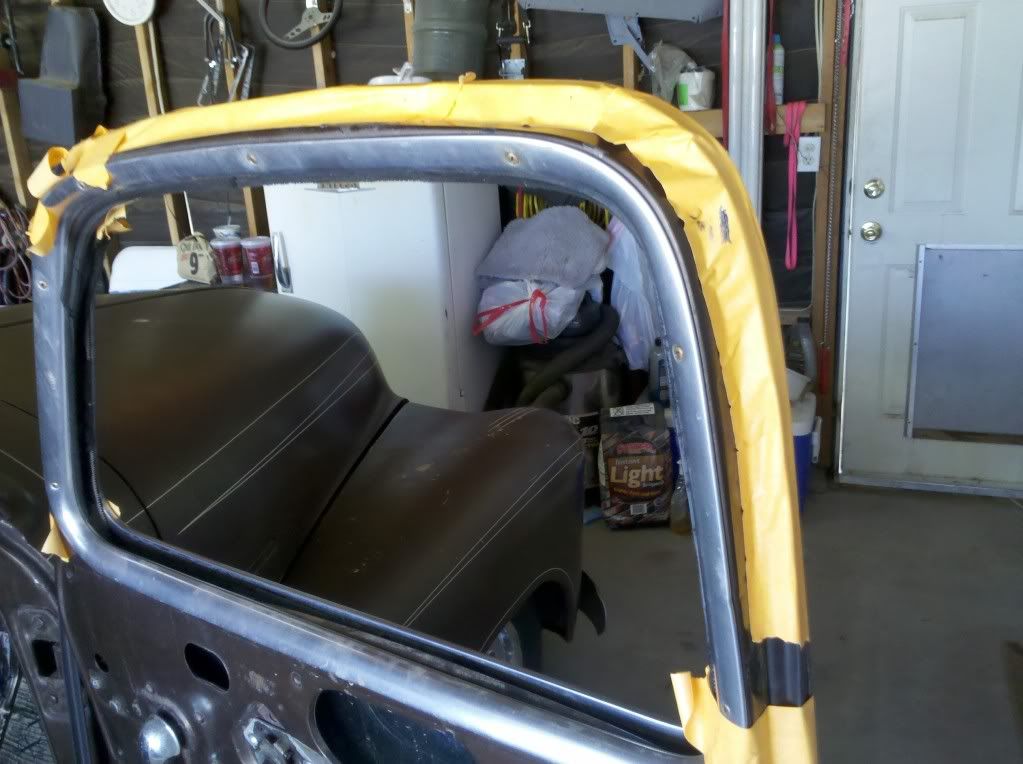 I took my time and worked my way around I took my time and worked my way around 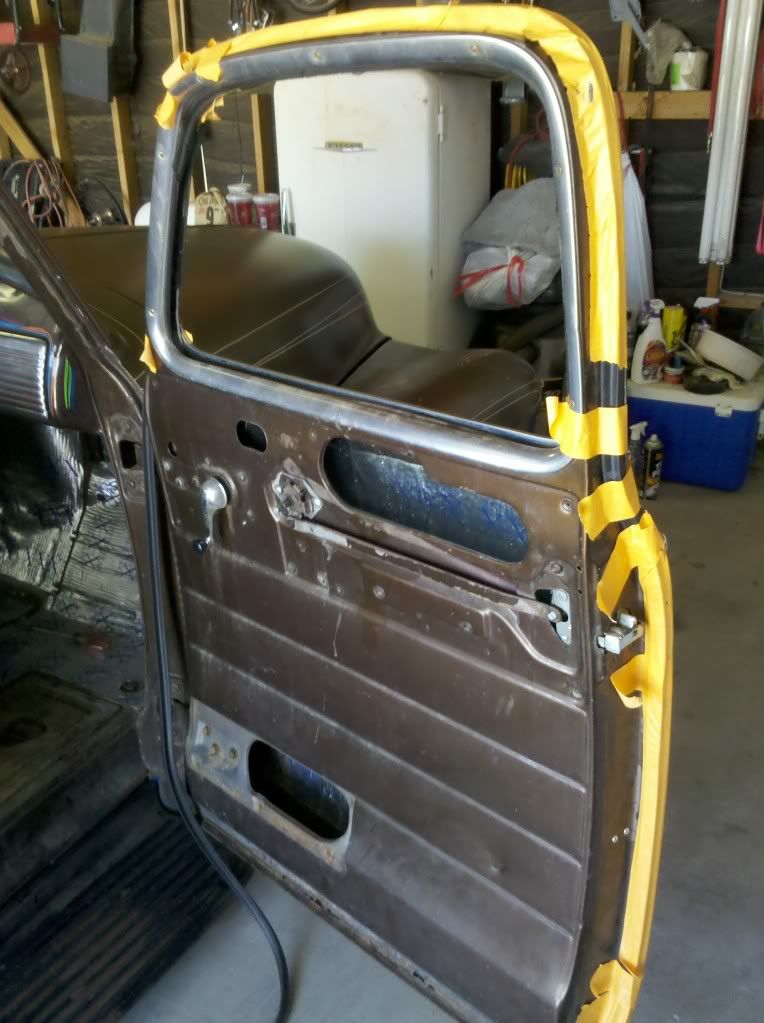 until it went all the way around then took a razor blade and made my ends butt together in the center/bottom of the door! It's kind of time consuming, but it looks pretty good until it went all the way around then took a razor blade and made my ends butt together in the center/bottom of the door! It's kind of time consuming, but it looks pretty good 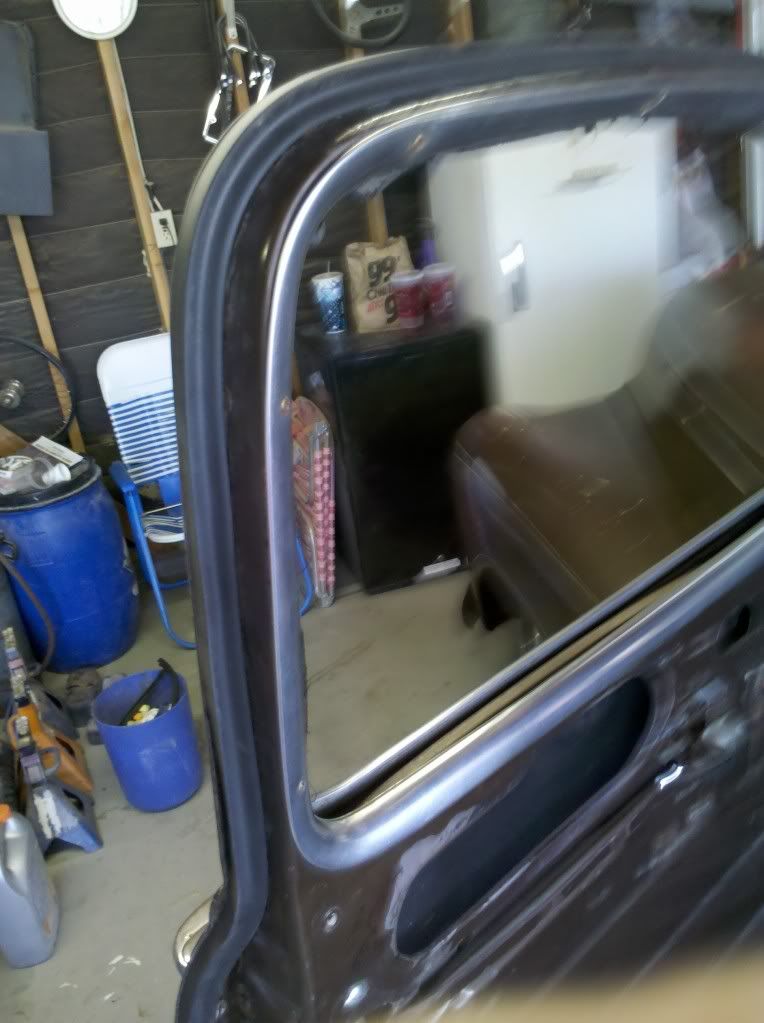 and it's one more thing out of the way! After that was done I rebuilt my 750 Holley and took one more thing off the checklist. and it's one more thing out of the way! After that was done I rebuilt my 750 Holley and took one more thing off the checklist.
__________________
It's all about the stance, baby! http://67-72chevytrucks.com/vboard/s...d.php?t=320546 Last edited by kustombrad; 05-23-2011 at 02:36 PM. Reason: spelling |
|
|

|
|
|
#14 |
|
Registered User
Join Date: Nov 2008
Location: So. Cal.
Posts: 452
|
Re: Project "49 No Buck$"
Now this is a hose trick I learned years ago and even though I had an idea of what I needed, I figured I'd show it. Take a piece of welding rod and bend it to the shape of how you want your radiator hose to go. Take the wire to the parts store and match it up. Mine were pretty simple, but you get the idea
 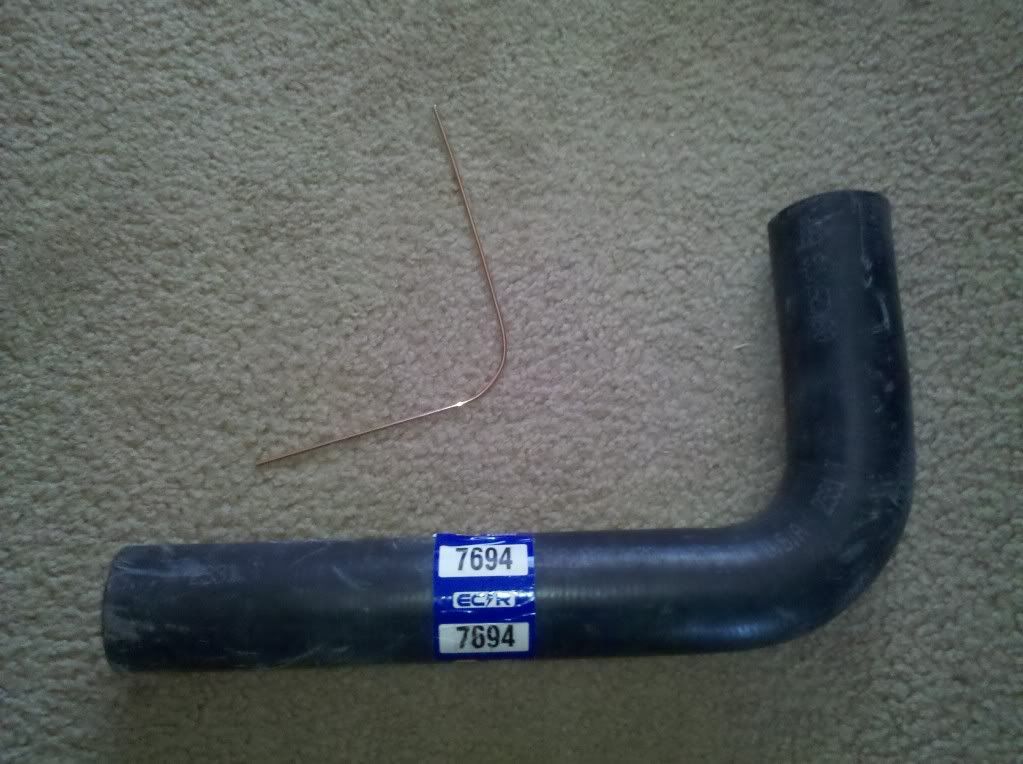 Got the hoses at NAPA and used part#7240 UPPER and #7694 LOWER. Had to cut to fit and they worked perfect! Got the hoses at NAPA and used part#7240 UPPER and #7694 LOWER. Had to cut to fit and they worked perfect!
__________________
It's all about the stance, baby! http://67-72chevytrucks.com/vboard/s...d.php?t=320546 Last edited by kustombrad; 05-31-2011 at 01:30 AM. |
|
|

|
|
|
#15 |
|
Registered User
Join Date: Nov 2008
Location: So. Cal.
Posts: 452
|
Re: Project "49 No Buck$"
My friend Alex and myself went on another wrecking yard mission and scored some of these lights that are on early to late 90's Chevy pickups and mounted on the inside passenger side fender.
 Whats really cool is they roll out and are around 17'-18' long! Whats really cool is they roll out and are around 17'-18' long! 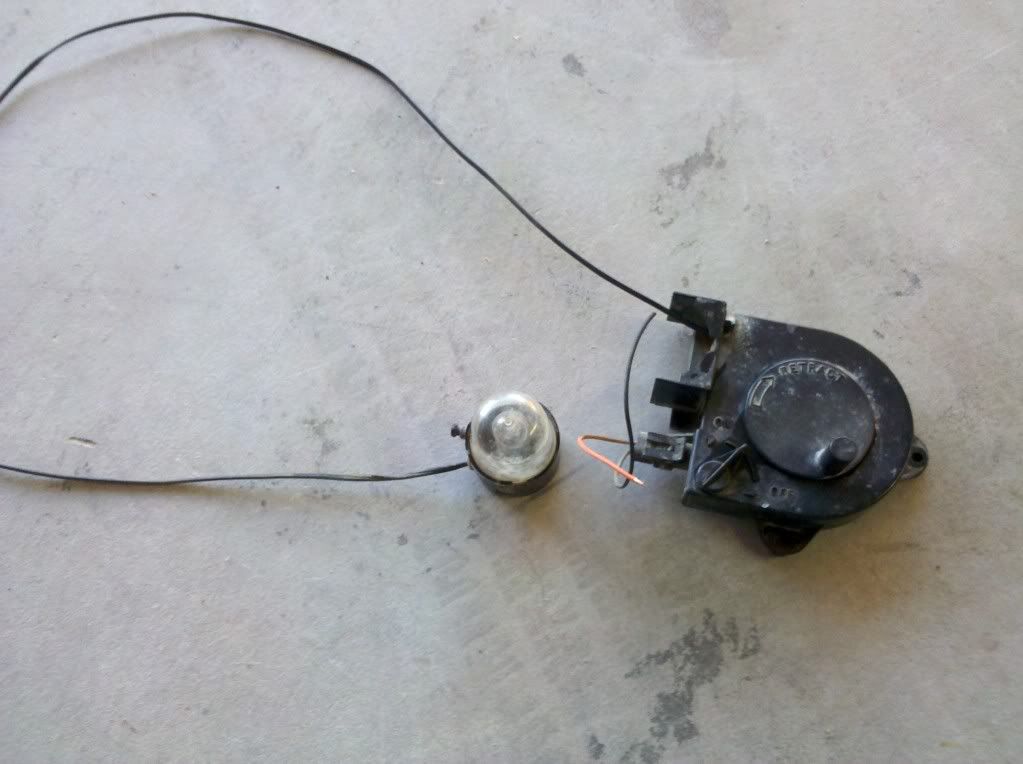 I took a piece 5 1/2"x6" steel drilled some holes and mounted it to the back of the front part of the hood I took a piece 5 1/2"x6" steel drilled some holes and mounted it to the back of the front part of the hood 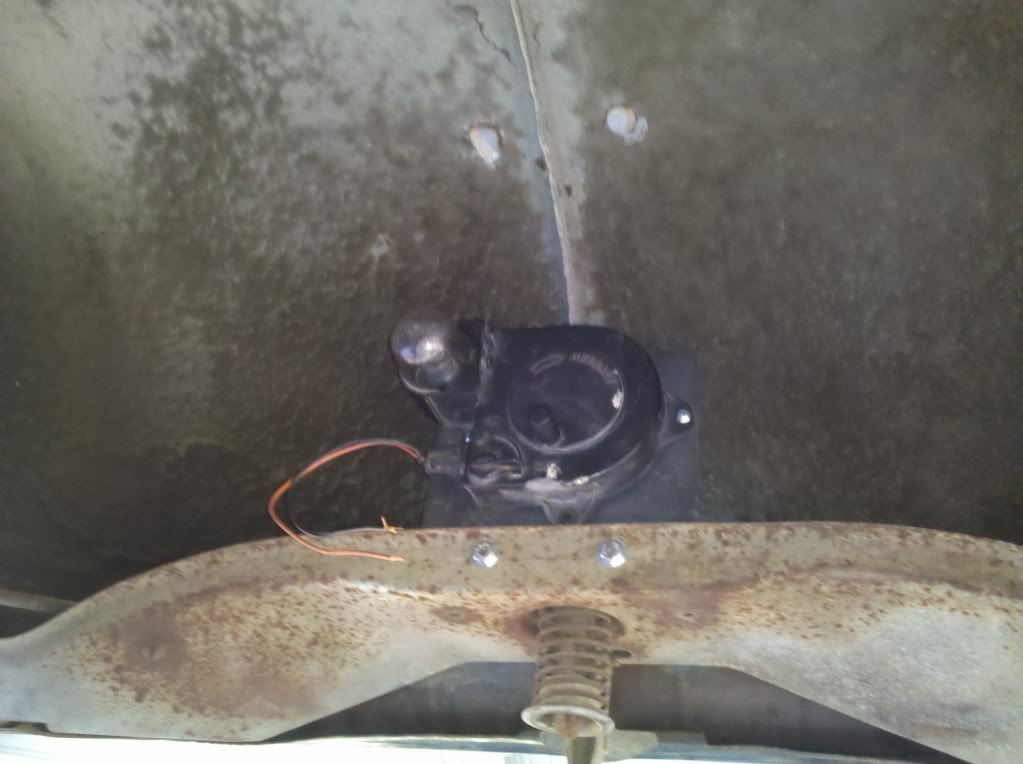  A little cleanup of the light and paint on the steel and it will be perfect! A little cleanup of the light and paint on the steel and it will be perfect!
__________________
It's all about the stance, baby! http://67-72chevytrucks.com/vboard/s...d.php?t=320546 |
|
|

|
|
|
#16 |
|
Registered User
Join Date: Nov 2008
Location: So. Cal.
Posts: 452
|
Re: Project "49 No Buck$"
Yeah! Fired up the motor today and got the cam broke in! Was so awesome to finally hear that thing run! It's not much, but I put a short video on Youtube just to give you an idea of how it sounds. It sounds waaaaay better in person!
__________________
It's all about the stance, baby! http://67-72chevytrucks.com/vboard/s...d.php?t=320546 |
|
|

|
|
|
#17 |
|
VA72C10
 Join Date: Mar 2008
Location: Midlothian, VA
Posts: 25,269
|
Re: Project "49 No Buck$"
cool!!! And I love those lights....think they're the best under hood option!
__________________
Looking for a 67-72 swb or blazer project in or around VA. 
|
|
|

|
|
|
#18 |
|
Registered User
 Join Date: Mar 2005
Location: apple valley, ca
Posts: 2,670
|
Re: Project "49 No Buck$"
Yes, it was a good day yesterday. To hear it light off for the first time and run for the cam break in was a bit nerve racking (the longest 20 minutes you'll ever spend), but once the little issues were sorted out, it ran really nice. That little 350 suprised me in how quick it revs, and it really sounds good in person. The Magnaflows sound mellow at idle but come alive when you romp on it. I was really impressed by them as well. No Flowmasters for me!
__________________
Check out my latest endeavor: https://roundsixpod.com My build threads: '55 Chevy: http://67-72chevytrucks.com/vboard/s...d.php?t=247512 '64 C-20: http://67-72chevytrucks.com/vboard/s...d.php?t=446527 |
|
|

|
|
|
#19 |
|
Registered User
Join Date: Jun 2009
Location: Atlanta, Ga.
Posts: 1,104
|
Re: Project "49 No Buck$"
Sounds great ... gotta feel good now.
Ratty 46 |
|
|

|
|
|
#20 |
|
Registered User
Join Date: Sep 2009
Location: Tucson , Az
Posts: 89
|
Re: Project "49 No Buck$"
how tall are your blocks in the back and how many springs do you have left. Im trying to figure out the cheapest way to lower my truck. I already have 3" blocks and there are a tottal of 5 leafs in the back. Have a mono leaf up front and getting ready to install a drop axle. Your build is amazing I enjoy checking it out.
|
|
|

|
|
|
#21 |
|
Registered User
Join Date: Jan 2010
Location: Titusville, PA
Posts: 3,585
|
Re: Project "49 No Buck$"
engine sounds great, what carb you running?
also you can get repro thriftmaster emblems from classicparts.com It would be great to find some originals, but if you really need them it is nice to have the repro option. I once bought an original set off ebay and only to find out they were loadmasters, when they showed up. I guess I was seeing what I was thinking. I'm def a fan of magnaflow from all the ones I have heard
__________________
51' 99toLife finished 2011,355 sbc,5speed, patina, redoing whole truck, inter, bags, etc http://67-72chevytrucks.com/vboard/s...d.php?t=382481 49Hardtimes s/10 susp- bagged, vortec sbc, 5 speed, patina, sold http://67-72chevytrucks.com/vboard/s...d.php?t=594874 VIDEOS https://youtu.be/E8zHhjgS_lA https://youtu.be/E8zHhjgS_lA Geronimo 54' LS engine, static drop IFS, Client build, just about done http://67-72chevytrucks.com/vboard/s...62#post7399162 52' 3100 Slowly in progress, will be painted two toned, have 235 with a t-5, lowered OG frame Other projects, 49' farmuse 3100, killer Patina, will be slammed, LS engine, full done interior up next! www.coffeeandcustoms.com |
|
|

|
|
|
#22 |
|
Registered User
Join Date: Dec 2008
Location: Nebraska
Posts: 390
|
Re: Project "49 No Buck$"
sounds real helthy!
love the truck.
__________________
1950 3600. 370cid, th400, 9", billet 80mm turbo under the bed, 4 link coilovers, hoping for a single digit! http://67-72chevytrucks.com/vboard/s...d.php?t=380212 |
|
|

|
|
|
#23 |
|
Registered User
Join Date: Nov 2008
Location: So. Cal.
Posts: 452
|
Re: Project "49 No Buck$"
I have 3" blocks with TCI rear springs. The carb is a 3310 750 Holley that I took the stock rear (non-adjustable) jet plate off and put a standard plate for jets. Now I can fine tune it and make it work good! Thanks for all the compliments guys, I really do appreciate them! It's getting closer to being a driver...
__________________
It's all about the stance, baby! http://67-72chevytrucks.com/vboard/s...d.php?t=320546 |
|
|

|
|
|
#24 |
|
Registered User
Join Date: Nov 2008
Location: So. Cal.
Posts: 452
|
Re: Project "49 No Buck$"
Seat Belts! I found some 3 point belts on Ebay for $80 and here's how I installed them. The first thing I did was drill a hole in the flat area between the quarter window and the door jamb. I went about halfway up (I sat in my Blazer and used that mount height from where I sit) and drilled my hole.
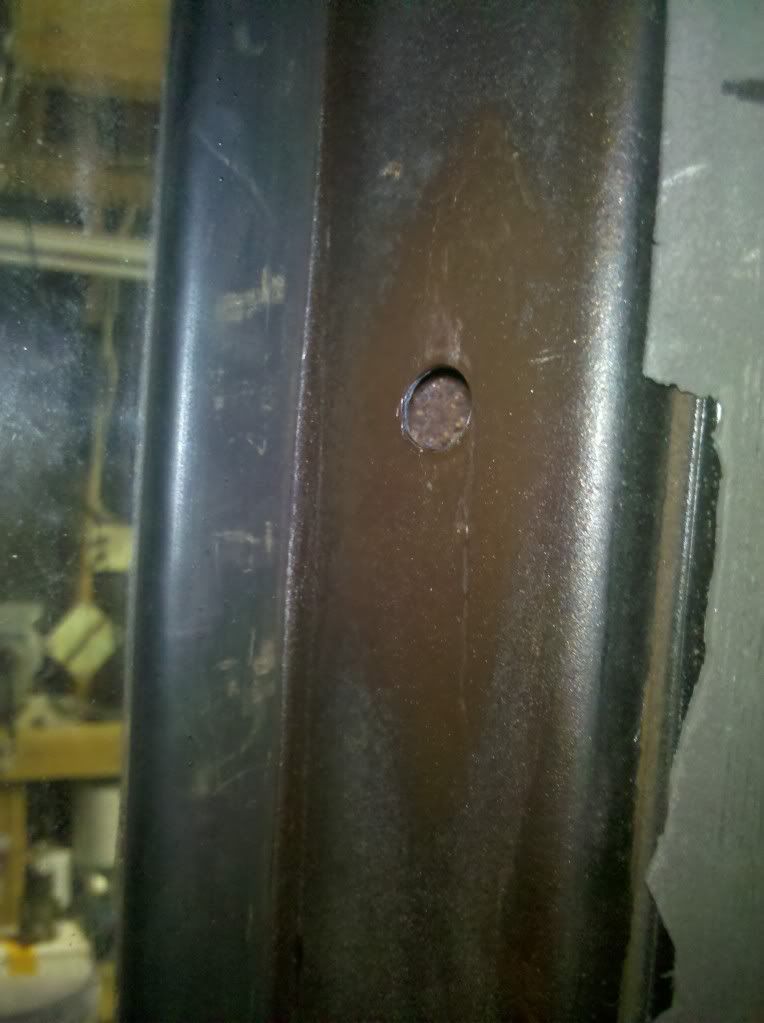 Next I took the flat mounting plate they give you and drilled a hole in the end. Next I took the flat mounting plate they give you and drilled a hole in the end. 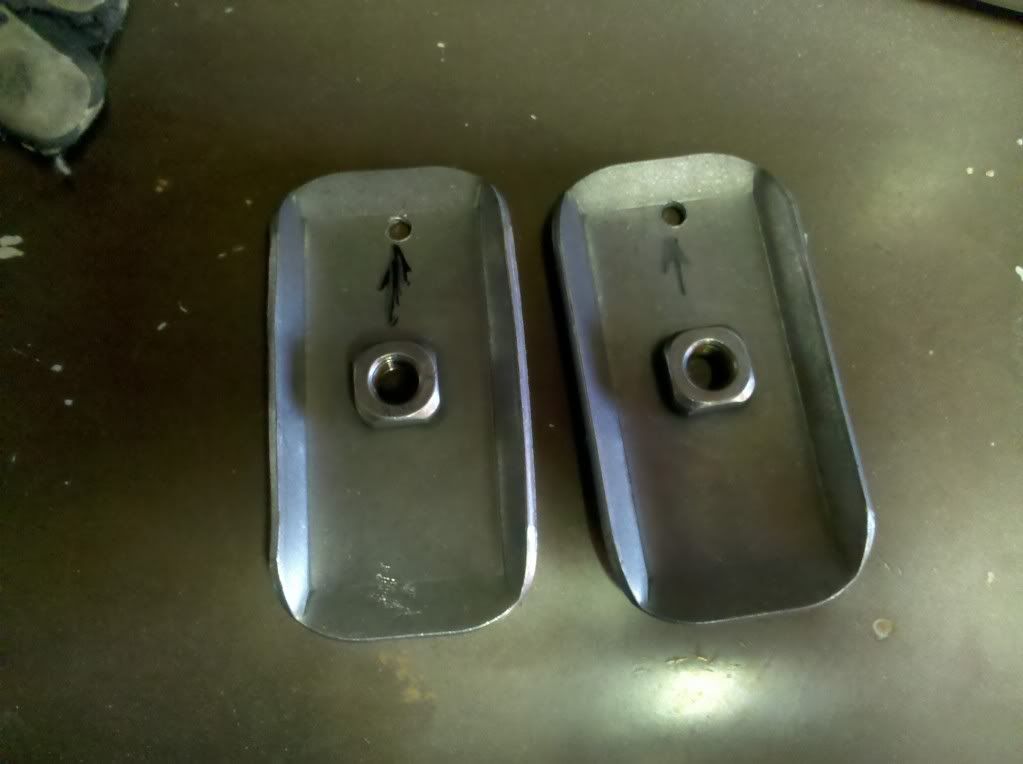 The hole is to hook a piece of wire to and then lower it down from inside the top area (it fits perfect) until you see it in your drilled hole. It's a little work, but once you get the bolt about halfway in you can pull the wire out and tighten it up The hole is to hook a piece of wire to and then lower it down from inside the top area (it fits perfect) until you see it in your drilled hole. It's a little work, but once you get the bolt about halfway in you can pull the wire out and tighten it up 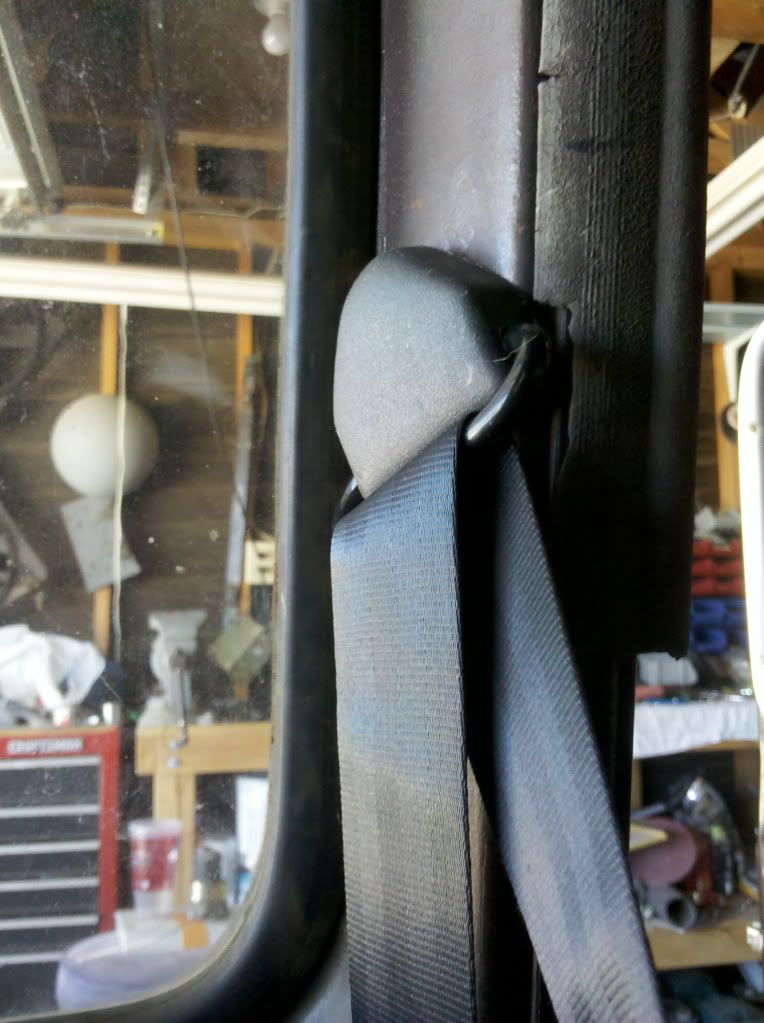 Now I used the back plate/rail area behind the seat to mount the retractable part of the seatbelt. Next I made a couple of mounts from 1 1/2" x .125" angle, drilled some holes Now I used the back plate/rail area behind the seat to mount the retractable part of the seatbelt. Next I made a couple of mounts from 1 1/2" x .125" angle, drilled some holes 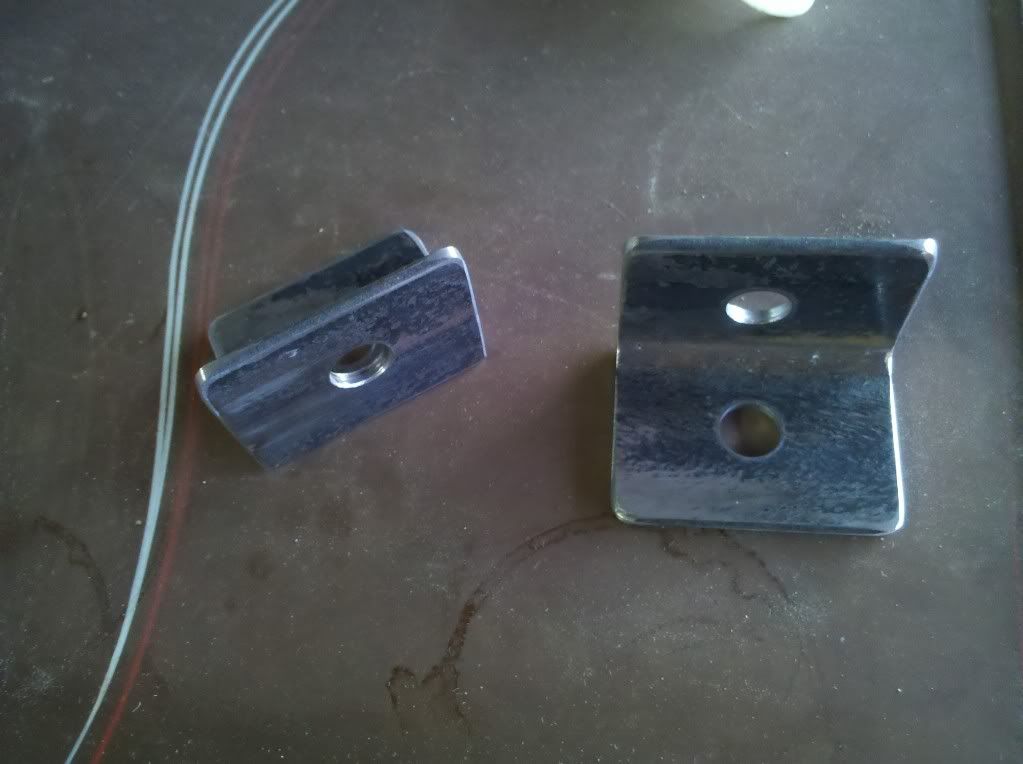 and mounted these to the floor. I used another set of plates that I had (like I used in the door jamb) and used it under the floor to hold the bracket in place and mounted these to the floor. I used another set of plates that I had (like I used in the door jamb) and used it under the floor to hold the bracket in place 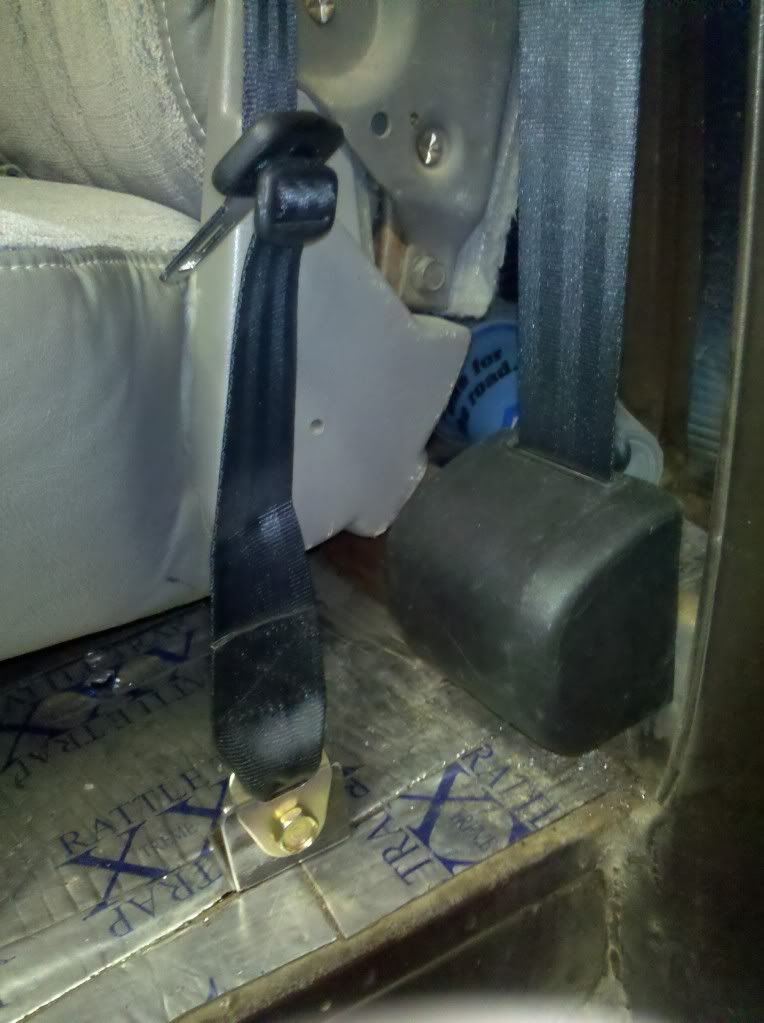 After I finish the carpet and seat, I'll paint the brackets and then it'll look finished. After I finish the carpet and seat, I'll paint the brackets and then it'll look finished.
__________________
It's all about the stance, baby! http://67-72chevytrucks.com/vboard/s...d.php?t=320546 Last edited by kustombrad; 06-08-2011 at 12:39 PM. |
|
|

|
|
|
#25 |
|
Registered User
Join Date: Jun 2010
Location: Vancouver Island BC
Posts: 652
|
Re: Project "49 No Buck$"
Nice work and report, I've been wondering how these systems install. I thought the shoulder harness wouldn't look factory. Thanks for the insight, the install looks great, I'll be looking to add this come winter. Great project and teaching.
But could you show and explain a little more on positioning the shoulder plate. Is there a hole above to plug? I'm not visualizing it well. Thanks Last edited by 65Pickup; 06-08-2011 at 02:37 PM. |
|
|

|
 |
| Bookmarks |
|
|