
|
 07-13-2011, 09:54 PM
|
#3251 | ||||||
|
1 thing at a time is progress.
Join Date: Jun 2007
Location: Ball Ground GA
Posts: 5,511
|
Re: Project Vitamin C-10
Quote:
 Quote:
 Quote:
 At your alignment problems. At your alignment problems. They offered to get us a swamp cooler at work, but thought it wouldn't be a good idea around bare metal and filler. Quote:
Quote:
Quote:
 Here are some pics of all the bed and cab mounts. I got the cab bushings from a guy on ebay that said he didn't like them. The other thing I thought about is the cab bolts are not tight. Do y'all think the bushings will compress that much? They are poly bushings and I don't think they will. One the bed I installed the 1/4" rubber blocks that are repops form some supplier.  The two top cab bushings look differrent. I thought they should be the same. I just noticed that while reviewing the pics. I don't know if there is a thickness difference yet.     Radiator support  
__________________
Alan
Philippians 2:14-16 |
||||||

|

|
|
07-13-2011, 10:08 PM
|
#3252 |
|
Daring to be Different
Join Date: Aug 2008
Location: Hesperia, Ca
Posts: 4,499
|
Re: Project Vitamin C-10
Swamp coolers do not work in humidity. Air conditioning dries the air, swamp coolers add moister to the air. They work great in a dry climate like here in the high desert.
__________________
Dennis  Check out my 65/73 Cheap Build Thread. Check out my 65/73 Cheap Build Thread. http://www.67-72chevytrucks.com/vboa...d.php?t=327644 KUSTOM RIDES FACE BOOK PAGE: https://www.facebook.com/groups/291198124258863/ 1965 C-10 Short Bed 350/700r4 2012 Silverado 1500 Crew Cab 2016 Honda Accord w/ 18" rims 2007 Honda Goldwing Trike w/ NAVI 2001 Yamaha Roadstar Indian look alike "Life's journey is not to arrive at the grave safely in a well preserved body, but rather to skid in sideways, totally worn out, shouting "...WOW!...what an amazing ride!" Live Life Passionately!!! [/COLOR]  I AM WE TODD IT, I AM SOFA KING WE TODD IT |
|
|
|
|
07-13-2011, 10:09 PM
|
#3253 |
|
Registered User
 Join Date: Nov 2009
Location: Longview, Texas
Posts: 775
|
Re: Project Vitamin C-10
Alan, Is that a spacer i see between the cross sill and the frame pedestals? If so, that is your problem. Take it out, the cross sills sit down flat on the pedestals.

Last edited by CVA59; 07-13-2011 at 10:14 PM. |
|
|
|
|
07-13-2011, 10:42 PM
|
#3254 | |
|
1 thing at a time is progress.
Join Date: Jun 2007
Location: Ball Ground GA
Posts: 5,511
|
Re: Project Vitamin C-10
Quote:
Here are the rubber blocks that I am referring to. By the discription it says "bed wood mounting pads." Does that mean they go between the wood and the crossmembers? That still doesn't make sense. Pic Courtesy of truckandcarshop
__________________
Alan
Philippians 2:14-16 |
|
|
|
|
|
07-14-2011, 08:31 AM
|
#3255 |
|
Registered User
Join Date: Nov 2009
Location: Longview, Texas
Posts: 775
|
Re: Project Vitamin C-10
That is interesting Alan. I have never seen any such thing on any of these trucks originally. I would leave them out and see how the bed sits. A 1/4 inch there might make a big difference on the exterior body lines. My 61, 64, & 66 beds did not have these when i torn it down from their original condition. If i used anything at all i would not use anything thicker than a bicycle tube. There is really no need for it anyway. Once the bed is pulled down tight it should not be moving on the pedestal. Let me know if taking them out helps.
|
|
|
|
|
07-14-2011, 01:51 PM
|
#3256 |
|
Registered User
Join Date: May 2009
Location: Rathdrum, Idaho
Posts: 1,135
|
Re: Project Vitamin C-10
When I disassembled my bed there were no pads present and I was wondering why Mar-K had included them. Now I know I'm not the only one that didn't have the rubber spacers between the cross sills....Vernski

|
|
|
|
|
07-14-2011, 11:04 PM
|
#3257 | ||
|
1 thing at a time is progress.
Join Date: Jun 2007
Location: Ball Ground GA
Posts: 5,511
|
Re: Project Vitamin C-10
Quote:
Quote:
Removed the rubber pads. It is better, but not there yet. the passenger side is actually really close to where it needs to be. I looked at the passenger side rear cab mount and it has an extra washer just under the cab. There is one that stayed on the cab during the repair process. It looks like a permenant piece. Could it have been added at the factory? More than likely it was added during it's life. The driver side is still 3/8" off. I'm going to install a spacer under the drivers side rear cab mount to see if it will match the other side.
__________________
Alan
Philippians 2:14-16 |
||
|
|
|
|
07-14-2011, 11:07 PM
|
#3258 |
|
Registered User
Join Date: Apr 2009
Location: Dawson, Ga
Posts: 512
|
Re: Project Vitamin C-10
Alan,
I know what is part of the problem!!! One of your floor supports is wrong size in height. The middle floor brace should be a thin floor brace your pics appear to have a standard height one in there which would throw it off about that 1/2 inch or more per mar-k site the middle one is the short one you should have three one short in height and 2 taller ones I also remember when I disassembled mine it had the short floor brace in the middle in front of the wheel tubs Last edited by 65Custom; 07-14-2011 at 11:26 PM. |
|
|
|
|
07-15-2011, 10:40 PM
|
#3259 |
|
Registered User
Join Date: May 2009
Location: Loganville, Ga.
Posts: 1,408
|
Re: Project Vitamin C-10
Alan here's a couple pics of the wheels......Their dirty.
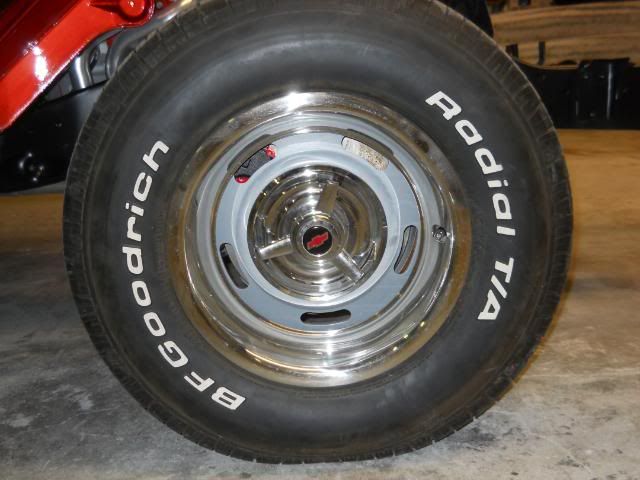 Here's a couple more...... 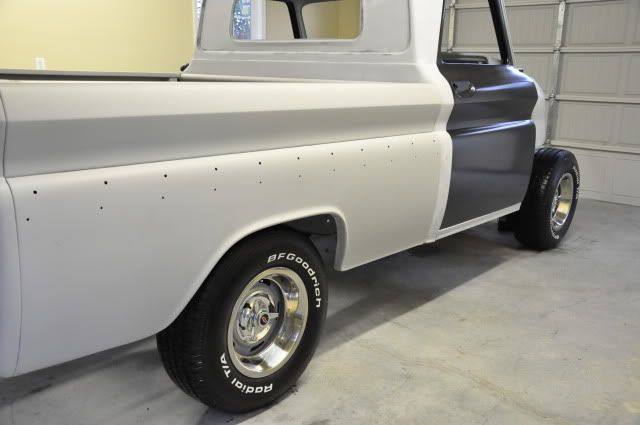  Here's a clearance shot....... 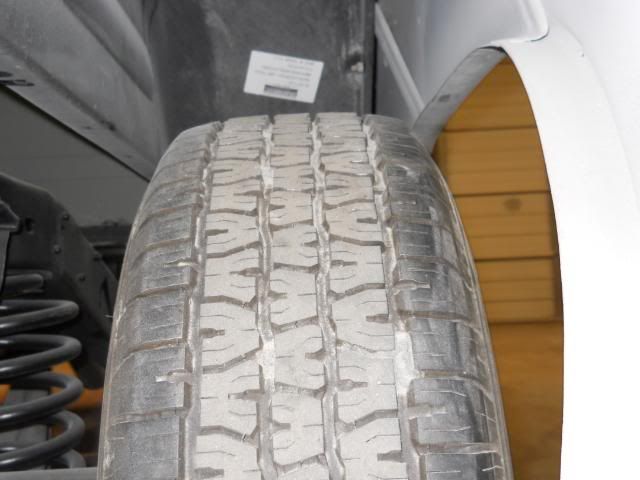 They really need a good home 
__________________
My Build http://67-72chevytrucks.com/vboard/s...d.php?t=346597 https://www.facebook.com/pages/198-C...1434001?ref=hl |
|
|
|
|
07-15-2011, 11:46 PM
|
#3260 | ||
|
1 thing at a time is progress.
Join Date: Jun 2007
Location: Ball Ground GA
Posts: 5,511
|
Re: Project Vitamin C-10
Quote:
Quote:
Worked on lining up the bed and cab. I ended up installing 2 of the old cab mount washers under the left rear cab support. Then I installed 2 of the rubber cushions under the right rear of the bed and one on the left rear bed sill. That also leveled my bed out with the cab looking at it from the rear. I will install the rear bumper and check the alignment with the bed. In hindsight I should have done more checking of body lines and shim placement (if they exist) during teardown. Also check the frame. The lessons we learn.
__________________
Alan
Philippians 2:14-16 Last edited by Alan's Classic; 07-15-2011 at 11:51 PM. |
||
|
|
|
|
07-16-2011, 12:21 AM
|
#3261 |
|
Registered User
Join Date: Jan 2008
Location: oldfort tn
Posts: 1,183
|
Re: Project Vitamin C-10
looking good.you will be driving it before long.
|
|
|
|
|
07-16-2011, 07:07 PM
|
#3262 | |
|
Registered User
Join Date: Apr 2009
Location: Dawson, Ga
Posts: 512
|
Re: Project Vitamin C-10
Quote:
|
|
|
|
|
|
07-22-2011, 04:20 PM
|
#3263 |
|
Registered User
Join Date: Mar 2011
Location: tulsa,ok.
Posts: 1,803
|
Re: Project Vitamin C-10
alan have any updates?? it's been a week, lol!! i know i know this heat sucks!!
|
|
|
|
|
07-22-2011, 10:57 PM
|
#3264 | |
|
1 thing at a time is progress.
Join Date: Jun 2007
Location: Ball Ground GA
Posts: 5,511
|
Re: Project Vitamin C-10
Quote:
Got my old rear bumper installed to check alignment. Alos some pics of my new work area at my day job. More room and less interuptions. There is one other bodyman in here with me. Ronnie, I also included a pic of the clearance between my bed and tire. You can also see your bumper on the metal shelf at my work.
__________________
Alan
Philippians 2:14-16 Last edited by Alan's Classic; 07-23-2011 at 12:23 AM. |
|
|
|
|
|
07-22-2011, 11:03 PM
|
#3265 |
|
1 thing at a time is progress.
Join Date: Jun 2007
Location: Ball Ground GA
Posts: 5,511
|
Re: Project Vitamin C-10
Got my shirts made.
__________________
Alan
Philippians 2:14-16 |
|
|
|
|
07-22-2011, 11:11 PM
|
#3266 |
|
HOW long until spring??
Join Date: Mar 2009
Location: Star Idaho
Posts: 1,413
|
Re: Project Vitamin C-10
Shirts look good Alan ... what is the plan for tire clearance???
__________________
69 chevelle convertible 71-C-10 short-wide and low 64 C-10 custom shortbox "Bubba"s Recycling project" |
|
|
|
|
07-23-2011, 12:25 AM
|
#3267 | |
|
1 thing at a time is progress.
Join Date: Jun 2007
Location: Ball Ground GA
Posts: 5,511
|
Re: Project Vitamin C-10
Quote:
__________________
Alan
Philippians 2:14-16 |
|
|
|
|
|
07-23-2011, 07:09 AM
|
#3268 |
|
Registered User
Join Date: Jan 2008
Location: oldfort tn
Posts: 1,183
|
Re: Project Vitamin C-10
shirts really look good,trucks coming along nicely too.
|
|
|
|
|
07-23-2011, 10:35 AM
|
#3269 | |
|
HOW long until spring??
Join Date: Mar 2009
Location: Star Idaho
Posts: 1,413
|
Re: Project Vitamin C-10
Quote:
I wanted to stay with my 6 lug rims and had to look quite a while to find a '69 6-stud axle in a 3.07 ratio. The later axles are wider by about 1.5" Things are coming together nicely So any long range rough estimate of the first drive?? I bet you are ready.....
__________________
69 chevelle convertible 71-C-10 short-wide and low 64 C-10 custom shortbox "Bubba"s Recycling project" |
|
|
|
|
|
07-23-2011, 09:00 PM
|
#3270 | |
|
Registered User
Join Date: May 2009
Location: Loganville, Ga.
Posts: 1,408
|
Re: Project Vitamin C-10
I'm liking the shirts, why ya blocking out the number.......If you don't want to show your number just put mine on there
Quote:
__________________
My Build http://67-72chevytrucks.com/vboard/s...d.php?t=346597 https://www.facebook.com/pages/198-C...1434001?ref=hl |
|
|
|
|
|
07-23-2011, 09:01 PM
|
#3271 | |
|
Registered User
Join Date: May 2009
Location: Loganville, Ga.
Posts: 1,408
|
Re: Project Vitamin C-10
Nice work area !!!!
Quote:
__________________
My Build http://67-72chevytrucks.com/vboard/s...d.php?t=346597 https://www.facebook.com/pages/198-C...1434001?ref=hl |
|
|
|
|
|
07-24-2011, 01:04 AM
|
#3272 |
|
Registered User
Join Date: Mar 2002
Location: Forney TX
Posts: 4,512
|
Re: Project Vitamin C-10
Looking very nice. So how did you end up getting the bed lined up right?
Posted via Mobile Device
__________________
Troy 1965 Chevy Bagged,361 sbc,voodoo cam,1.5 full roller rockers,patriot 185cc vortec heads 2.02-1.60,vortec weiand polished intake,demon carb my truckhttp://67-72chevytrucks.com/vboard/s...d.php?t=332884 Big Red Dog build http://67-72chevytrucks.com/vboard/s...d.php?t=572274 |
|
|
|
|
07-24-2011, 07:37 AM
|
#3273 |
|
Registered User
Join Date: Dec 2010
Location: Texas
Posts: 246
|
Re: Project Vitamin C-10
Not sure if your still dealing with the bed, but here is a shot of my 65, right after i pulled it, did not have any type of bushings in it
|
|
|
|
|
07-24-2011, 12:52 PM
|
#3274 | ||||||
|
1 thing at a time is progress.
Join Date: Jun 2007
Location: Ball Ground GA
Posts: 5,511
|
Re: Project Vitamin C-10
Quote:
Quote:
At the rate I'm going it will be another 4 years before it is on the road. J/K I don't think I will make any shows this year with it. Quote:
Quote:
Quote:
Quote:
__________________
Alan
Philippians 2:14-16 |
||||||
|
|
|
|
07-24-2011, 03:40 PM
|
#3275 | |
|
Registered User
Join Date: Mar 2009
Location: Daphne, Al
Posts: 1,120
|
Re: Project Vitamin C-10
Quote:
Posted via Mobile Device
__________________
1965 c-10 swb 1997 c-1500 extended cab 2004 tahoe 1993 mustang gt BUILD THREAD:http://67-72chevytrucks.com/vboard/s...d.php?t=336653 |
|
|
|
|
 |
| Bookmarks |
| Tags |
| 1959, 1960, 1964, 1965, 1966, c10, hugger, impala, orange |
|
|


 Linear Mode

