
 |
|
|
|
|
#1 |
|
Registered User
Join Date: May 2005
Location: Washington
Posts: 848
|
Re: [PROJECT] Laidout53 Part II
Wow I haven't updated this in Months!
Well good news here is an update. So the next order of business was to tub the firewall...  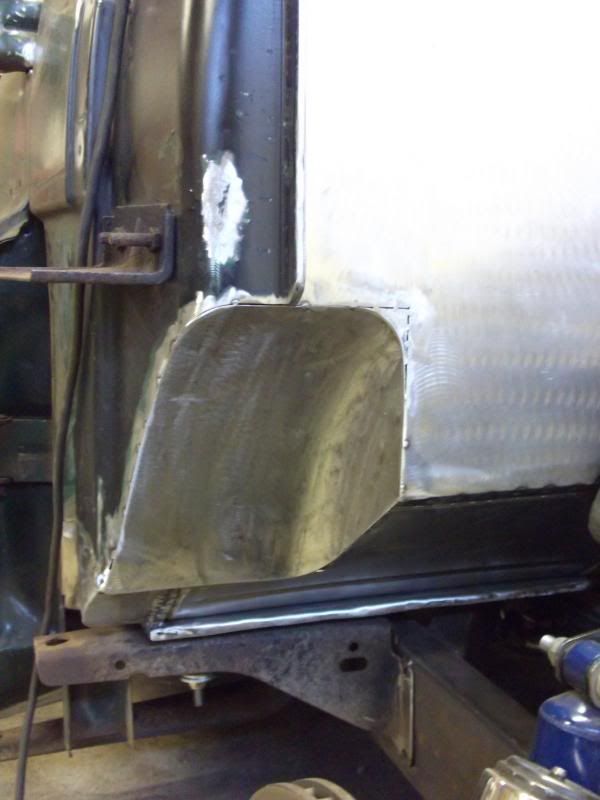  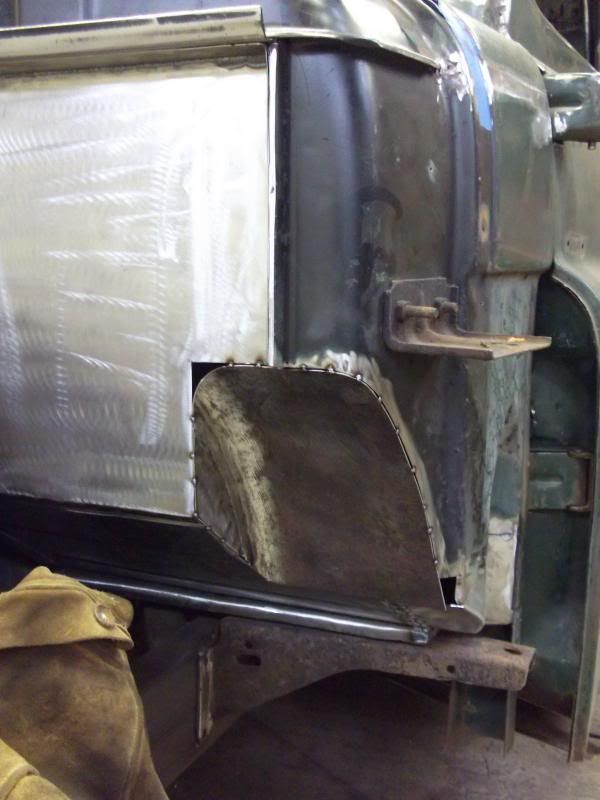 and done with some clearance...  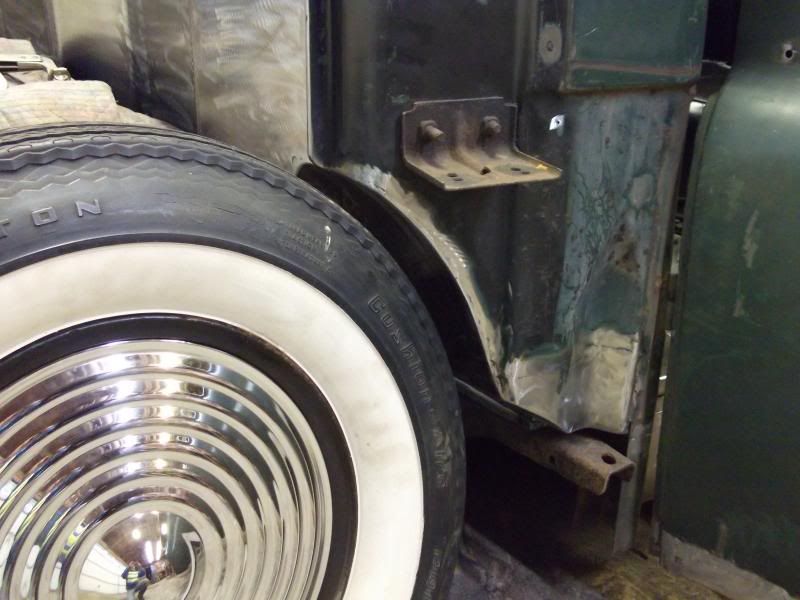 So after that I hade to move the gauge over about 2 3/4" to center up with were the steering column would be...  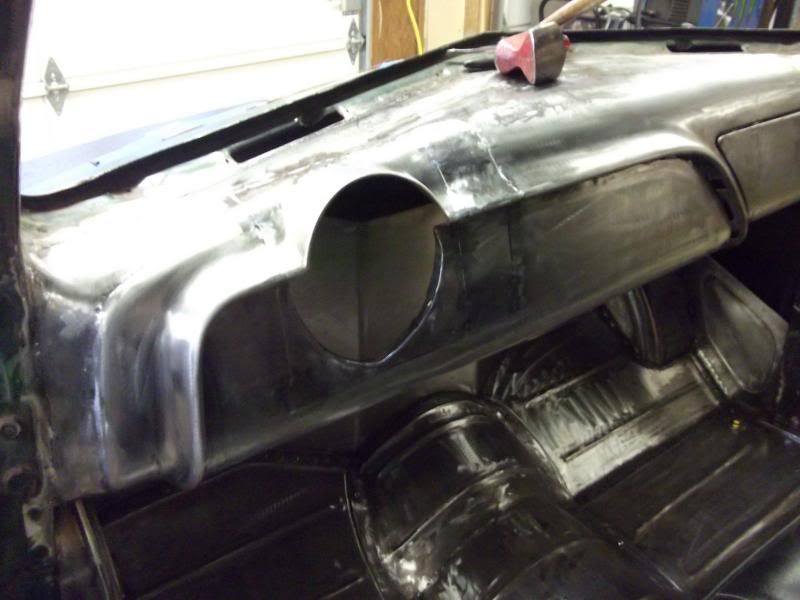 Then I pushed it out side to get a good look at everything... 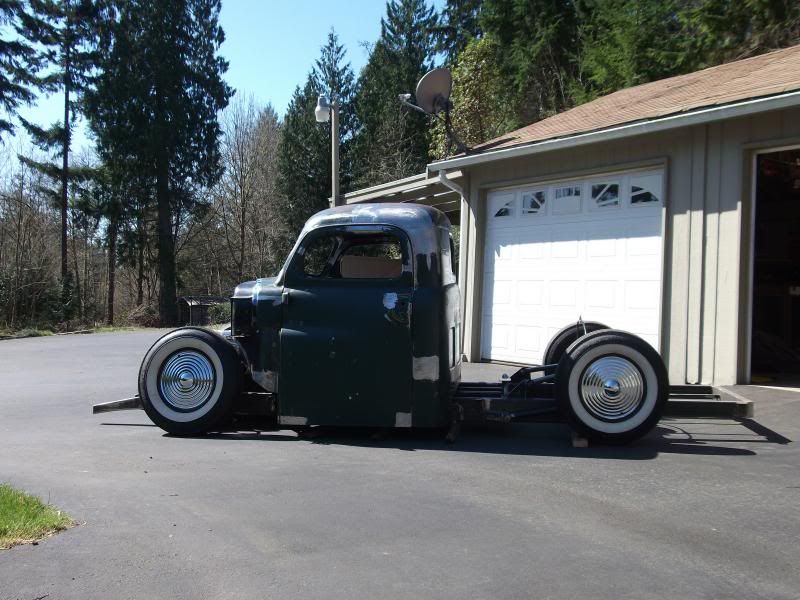  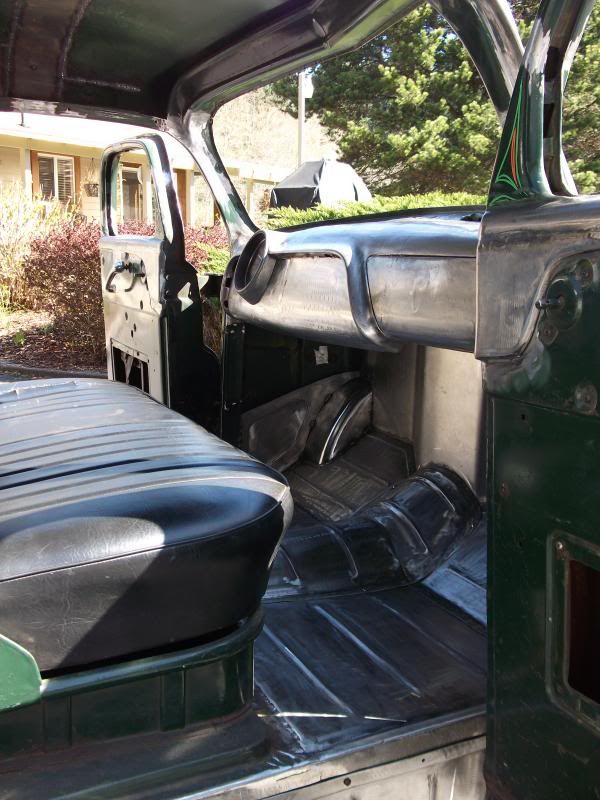 I decide to use the button for the glove box, so I centered it to make it look right 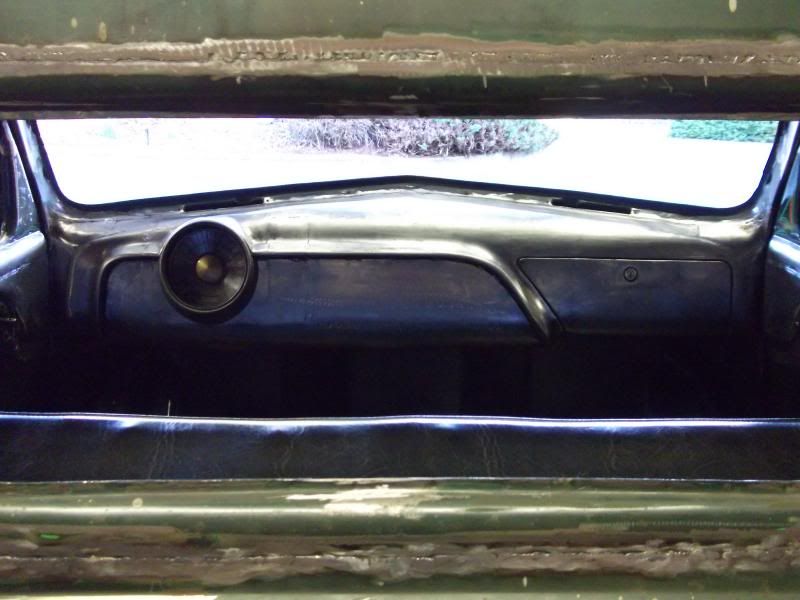
__________________
[PROJECT] FnLow69- 69 C-10 Full frame & layin' doors [PROJECT] Laidout53 - 53' Dodge Pickup, Full Kustom Build [PROJECT] "Hot Rod" 1931 Model A Bonneville style "Dream as if you'll live forever, Live as if you'll die today" ~ James Dean |
|
|

|
|
|
#2 |
|
Registered User
Join Date: May 2005
Location: Washington
Posts: 848
|
Re: [PROJECT] Laidout53 Part II
Now it was time to start on the front bumper, man this was a big job for just a bumper. Anyways I cut up the front and rear bumpers for a 51 ford car. the ends are from the rear bumper and the middle section is the front. I wanted the contour to run full length.
Here are the pictures the parts needed... 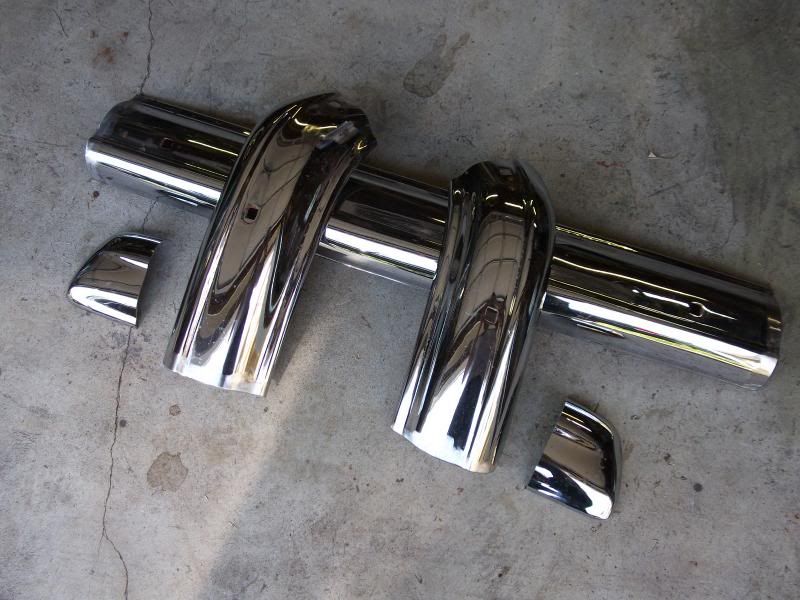 tacked  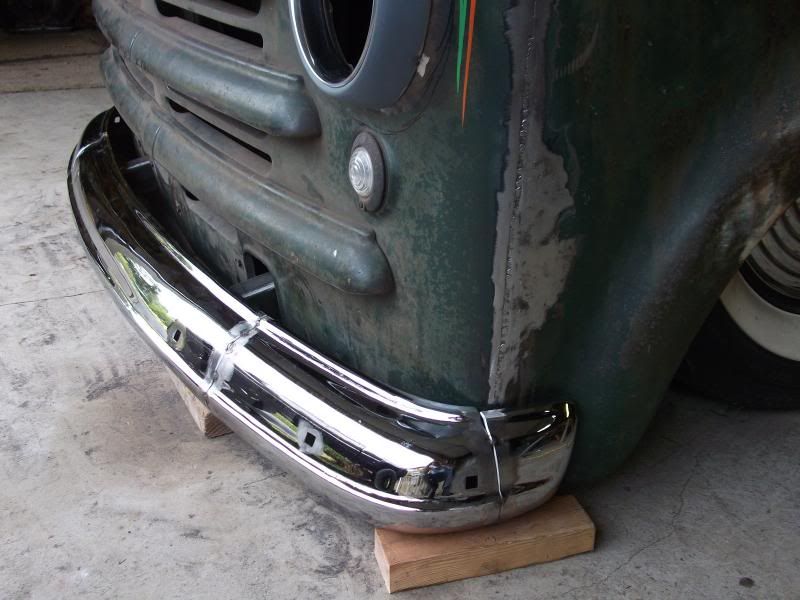 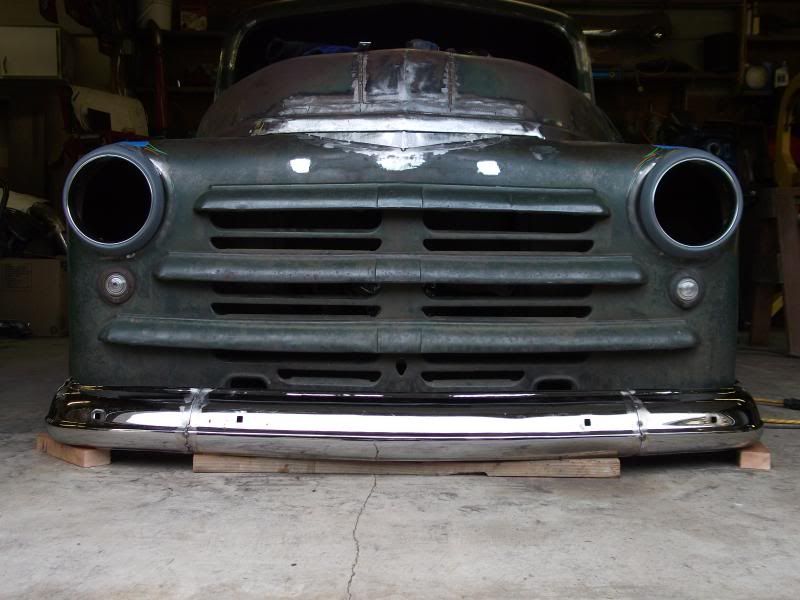 once welded you can see the ends don't line up   after some cutting and grinding they do 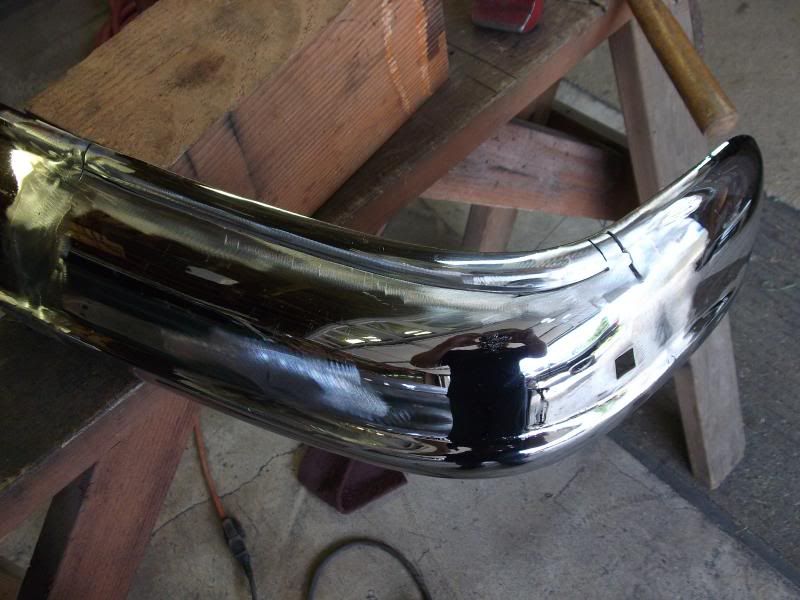  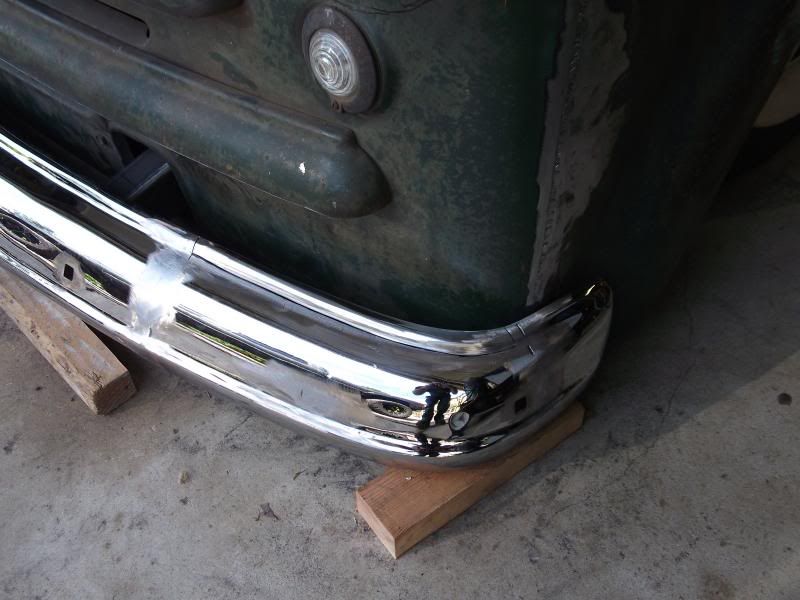 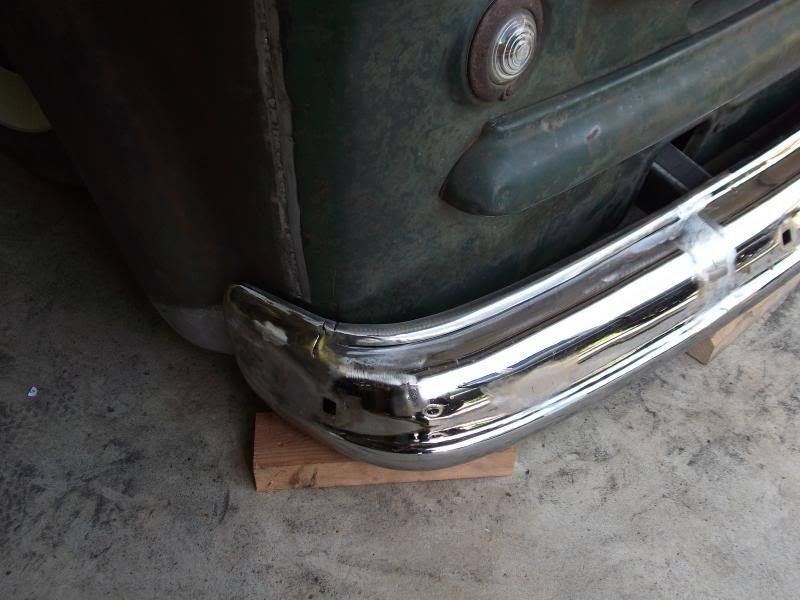 Next it was time to make mounts  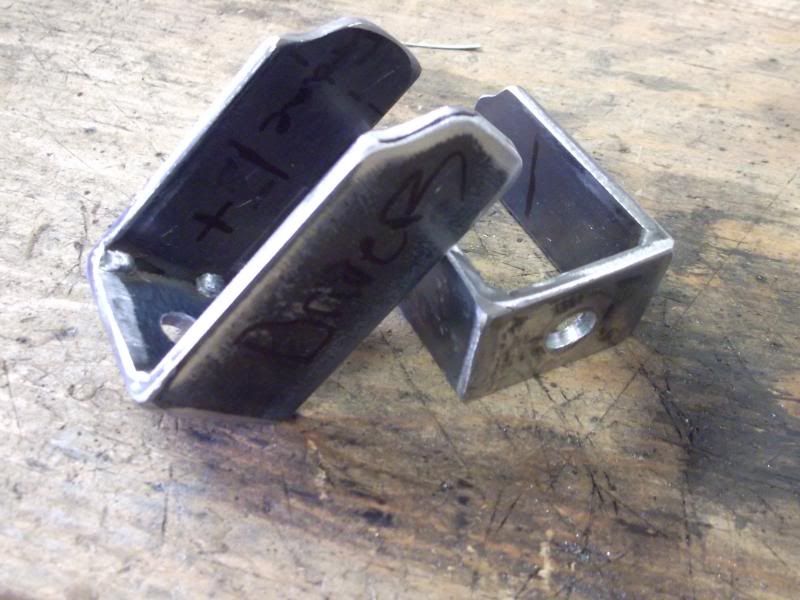 and mounted and smoothed  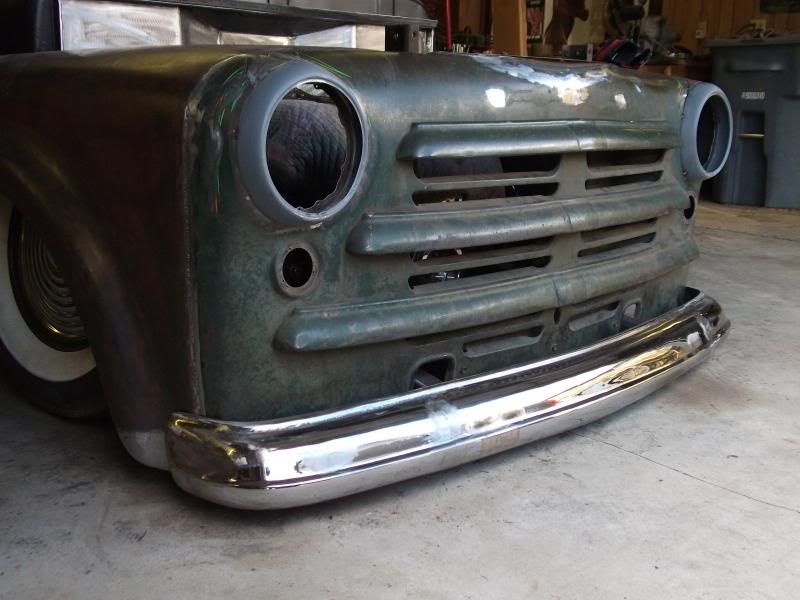 Continuing with the frontend I started to modify the 54' ford headlight bezels so the were removable. First I TIG welded a tab of stainless to the backside on the bottom to hold it in. 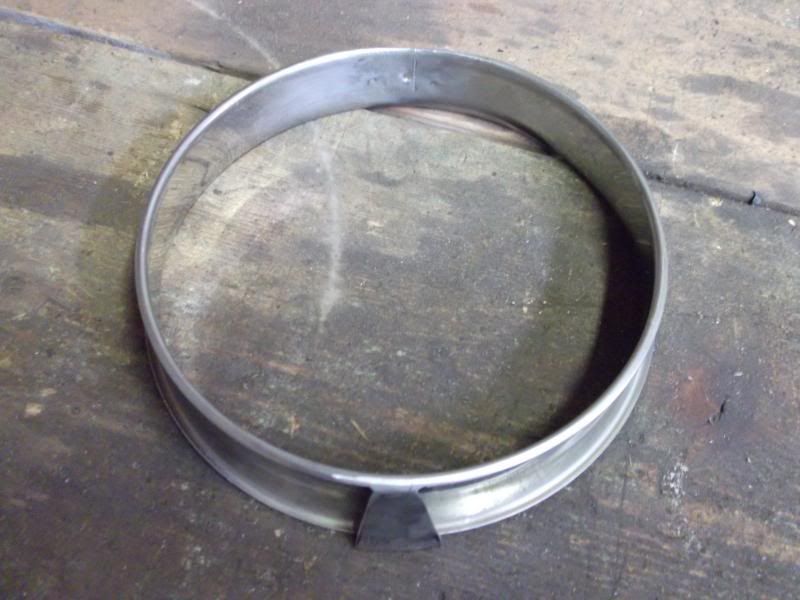 then I bent up a mounting tab for the top for the screw to go into 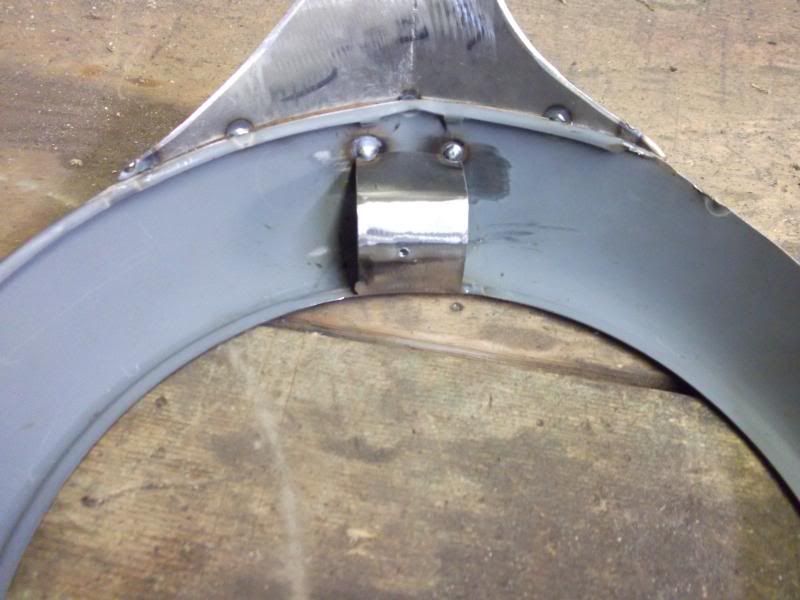 together, had to add a tack on either side of the tab to keep it from moving around (still need to counter sink the screw hole a little more) 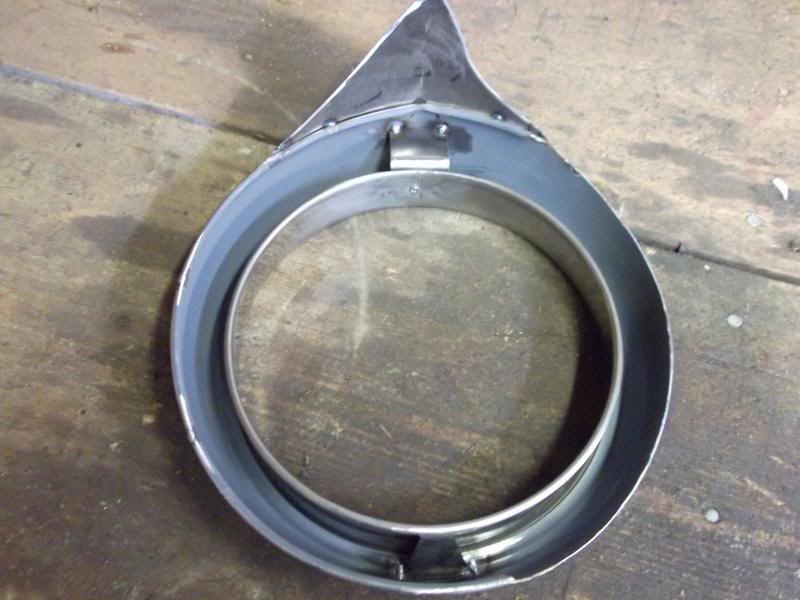 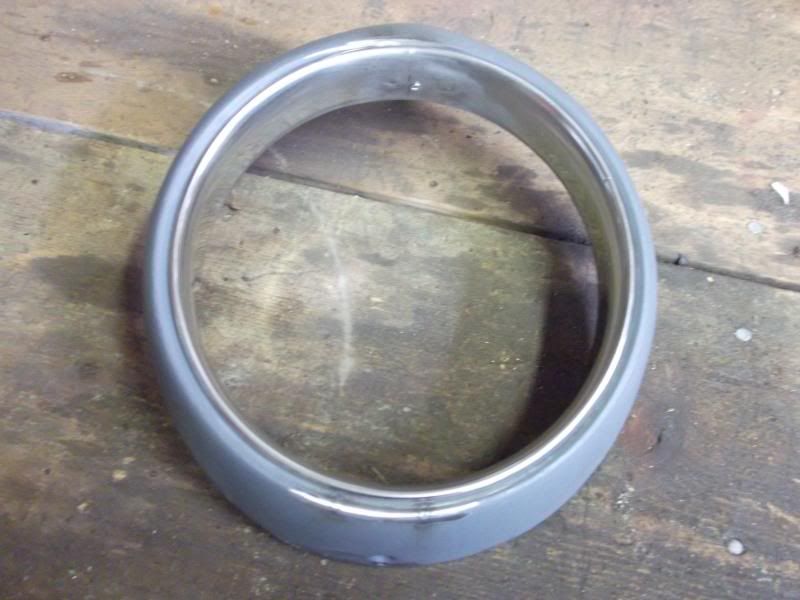 Now I decide to mount the steering column. First up I made a steering column clamp mount  welded one half to the dash 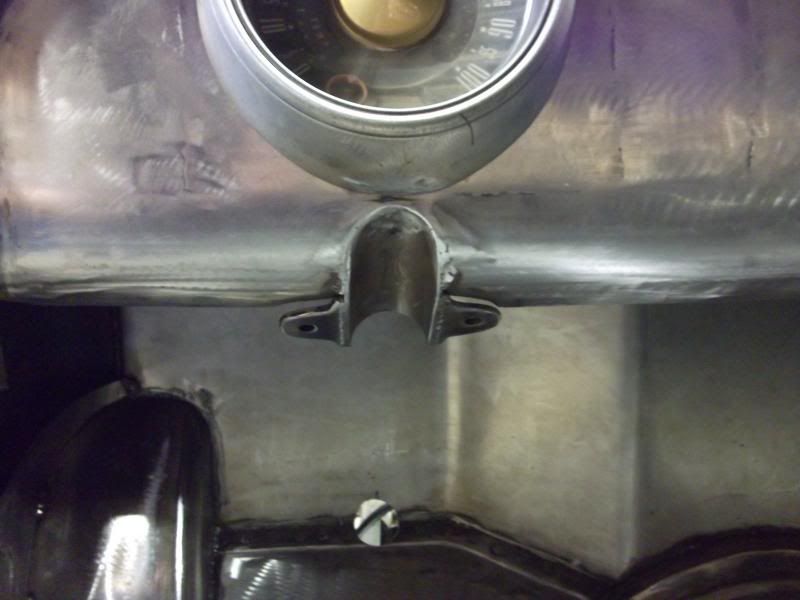 bolted together  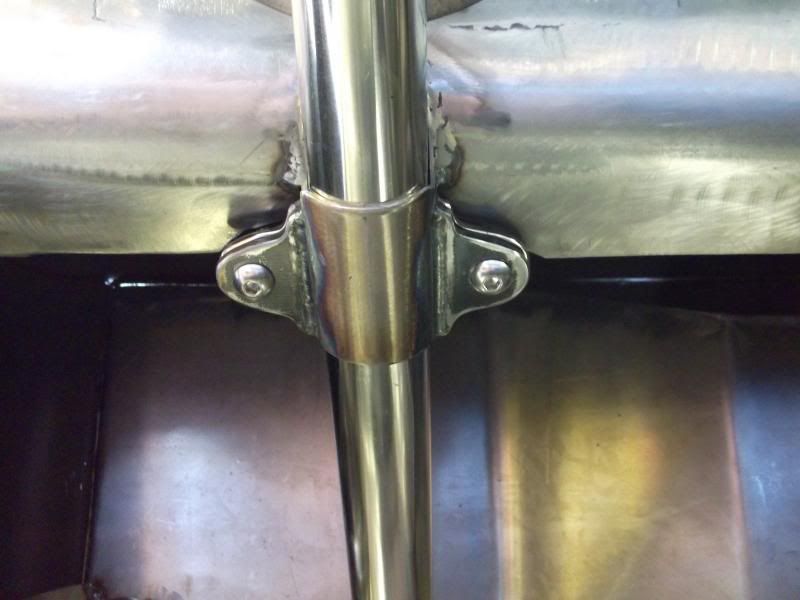 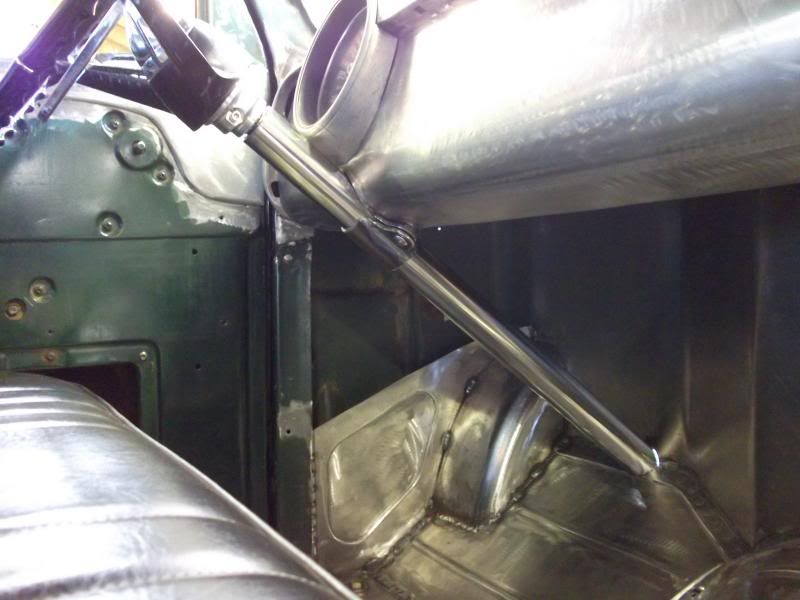 and seen from the engine bay 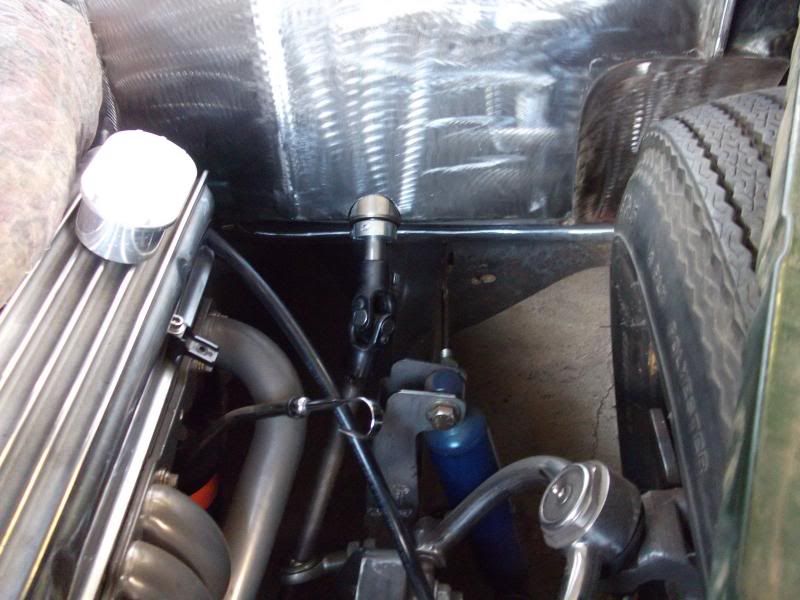 sand lastly I fab a little panel to hold the key switch and headlight switch 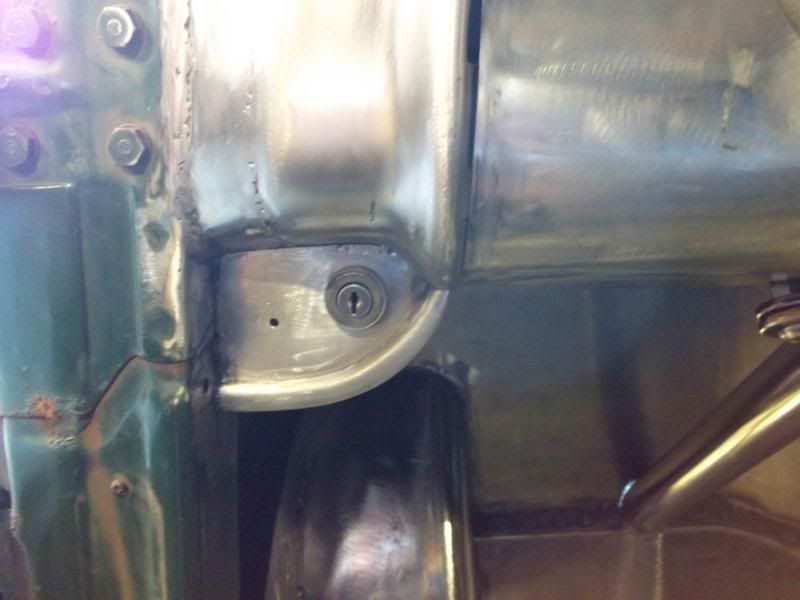  Ok now this is up to date! Ill try to not go so long next time... Thanks for looking, let me know what you all think? Justin
__________________
[PROJECT] FnLow69- 69 C-10 Full frame & layin' doors [PROJECT] Laidout53 - 53' Dodge Pickup, Full Kustom Build [PROJECT] "Hot Rod" 1931 Model A Bonneville style "Dream as if you'll live forever, Live as if you'll die today" ~ James Dean Last edited by FnLow69; 09-10-2013 at 12:03 AM. Reason: more update |
|
|

|
|
|
#3 |
|
Registered User
Join Date: Aug 2010
Location: Lafayette In.
Posts: 252
|
Re: [PROJECT] Laidout53 Part II
Your a metal God! So precise. No miss cuts, then fixing with extra metal and weld. Looks like you cut once to make a perfect match, then welded seemlessly. Its one thing to cut up a old rusty bumper, then weld it to the way you like, but it looks like you started with a new, perfect bumper. That took a pair. Good stuff!
|
|
|

|
|
|
#4 |
|
Registered User
 Join Date: Dec 2012
Location: sparta tennessee
Posts: 345
|
Re: [PROJECT] Laidout53 Part II
You got some Skills
__________________
1946 car hauler 1948 surburban 1937 chevy sedan 1940 olds sedan (project) 1967 ss396 chevelle 1999 dually crewcab(24000 miles) |
|
|

|
|
|
#5 |
|
Hittin E-Z Street on Mud Tires
 Join Date: Nov 2004
Location: Greenville, SC
Posts: 23,090
|
Re: [PROJECT] Laidout53 Part II
I had to go back to the first few pics to see what it started as, it's changed so much. You have good taste, it's hard to make a dodge look bad ass, and it does.
__________________
Jesse James 1967 C10 SWB Stepside: 350/700R4/3.73 1965 Ford Mustang: 289/T5-5spd/3.25 Trac-Loc 1968 Pontiac Firebird: Project Fire Chicken! 2015 Silverado Double Cab 5.3L Z71 2001 Jeep Wrangler Sport 4.0L 5spd 2020 Chevrolet Equinox Premium 2.0L Turbo 2011 Mustang V6 ~ Wife's ride  American Born, Country by the Grace of God  1967 CST Shop Truck Rebuild! My 1967 C-10 Build Thread My Vintage Air A/C Install Project "On a Dime" Trying my hand at Home Renovation! 1965 Mustang Modifications! |
|
|

|
|
|
#6 |
|
Registered User
 Join Date: Mar 2010
Location: Piper, KS
Posts: 683
|
Re: [PROJECT] Laidout53 Part II
I agree with all the previous fella's. Great work.
|
|
|

|
|
|
#7 | |||
|
Registered User
Join Date: May 2005
Location: Washington
Posts: 848
|
Re: [PROJECT] Laidout53 Part II
Quote:
Quote:
Quote:
thank you, how's your build going?
__________________
[PROJECT] FnLow69- 69 C-10 Full frame & layin' doors [PROJECT] Laidout53 - 53' Dodge Pickup, Full Kustom Build [PROJECT] "Hot Rod" 1931 Model A Bonneville style "Dream as if you'll live forever, Live as if you'll die today" ~ James Dean |
|||
|
|

|
|
|
#8 |
|
Registered User
 Join Date: Mar 2010
Location: Piper, KS
Posts: 683
|
Re: [PROJECT] Laidout53 Part II
It should be picking up here in the next few weeks.
Keep posting up those pic's. I have seen lots of great ideas on how to simplify certain processes. Again awesome work. |
|
|

|
|
|
#9 |
|
Registered User
Join Date: Aug 2009
Location: Edmonton, Alberta
Posts: 818
|
Re: [PROJECT] Laidout53 Part II
just awesome, you got skills!!
|
|
|

|
|
|
#10 | |
|
Registered User
Join Date: May 2005
Location: Washington
Posts: 848
|
Re: [PROJECT] Laidout53 Part II
Quote:
thanks man
__________________
[PROJECT] FnLow69- 69 C-10 Full frame & layin' doors [PROJECT] Laidout53 - 53' Dodge Pickup, Full Kustom Build [PROJECT] "Hot Rod" 1931 Model A Bonneville style "Dream as if you'll live forever, Live as if you'll die today" ~ James Dean |
|
|
|

|
|
|
#11 |
|
Registered User
Join Date: Jan 2010
Location: Tonasket, Washington
Posts: 316
|
Re: [PROJECT] Laidout53 Part II
Ok, I've been watching this build from time to time for quite awhile and I really like everything your doing with it. Your work is top notch!!! Love the dash btw.
-Aaron
__________________
-Aaron '15.5 Chevy Duramax LTZ/Z71, LML, CC/SB '77 Chevy K10, 4" lift, 33-12.50, 350/350 '55 Chevy Short Box (In Pieces)MII,4-link,Bagged,383 Stroker,700r4,3.73posi (SOLD) My 55.2 Chevy 3100 Build |
|
|

|
|
|
#12 |
|
Registered User
Join Date: May 2005
Location: Washington
Posts: 848
|
Re: [PROJECT] Laidout53 Part II
Thanks Aaron!
__________________
[PROJECT] FnLow69- 69 C-10 Full frame & layin' doors [PROJECT] Laidout53 - 53' Dodge Pickup, Full Kustom Build [PROJECT] "Hot Rod" 1931 Model A Bonneville style "Dream as if you'll live forever, Live as if you'll die today" ~ James Dean |
|
|

|
|
|
#13 |
|
Registered User
Join Date: May 2005
Location: Washington
Posts: 848
|
Re: [PROJECT] Laidout53 Part II
I've been working on the inner fenders lately. I wanted them to cover all the suspension to give it a clean look. They were going to be smooth but that just looked to plain. so I came up with a simple design to bead roll into them. The inner fenders utilize factory bolt holes and are completely removable.
   Next the steering u-joint was right were the driver side fender needed to go so I decided to make a cover for it. 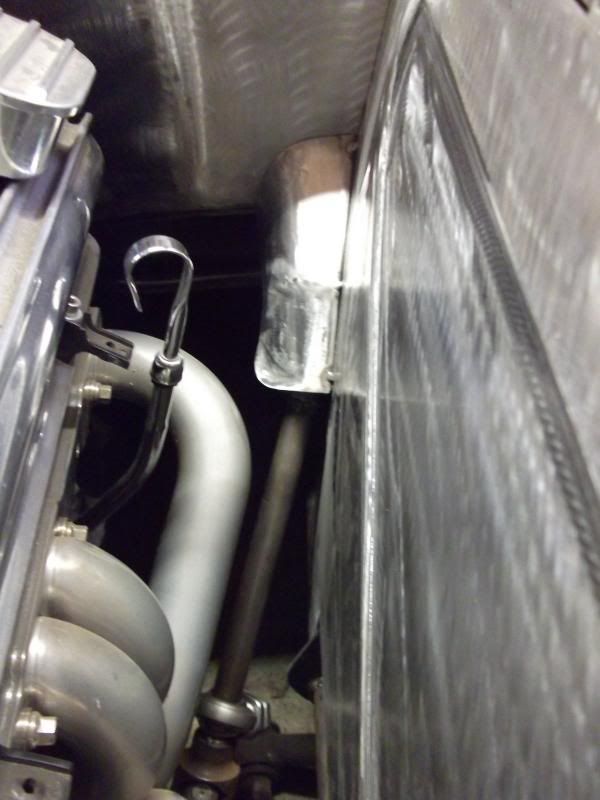 Here is the firewall support/mount that ties into the lip around the firewall 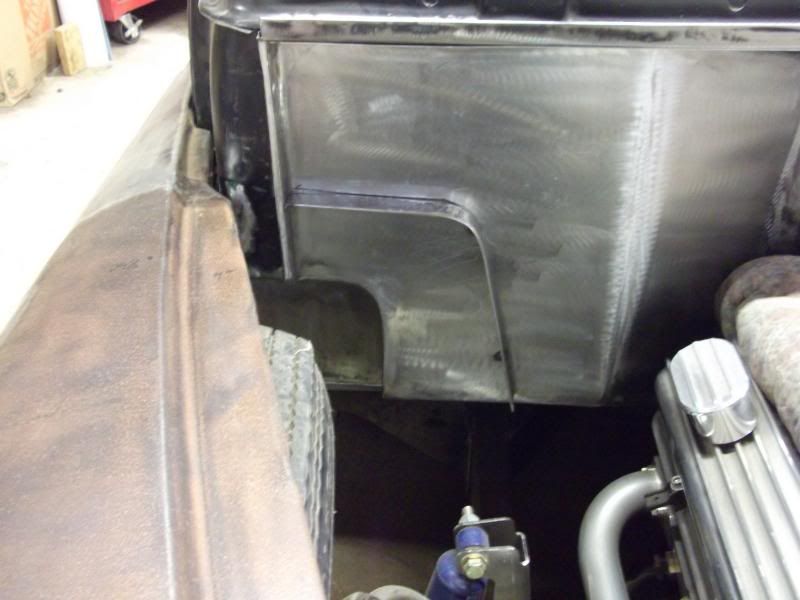 Well after bead rolling the fenders the firewall now looks to flat so here is my proposed design for it?  Next was time to make the triangle pieces that go under the floor of the cab. Passenger side 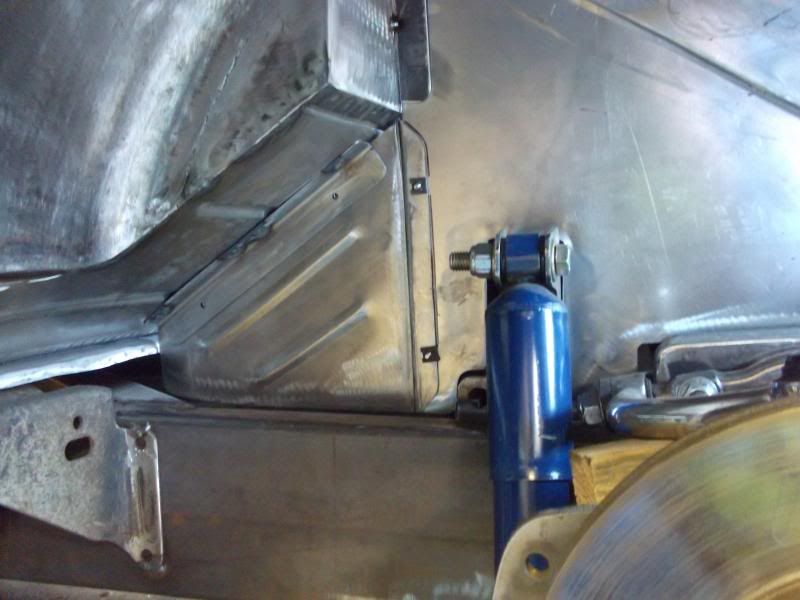 Drivers side 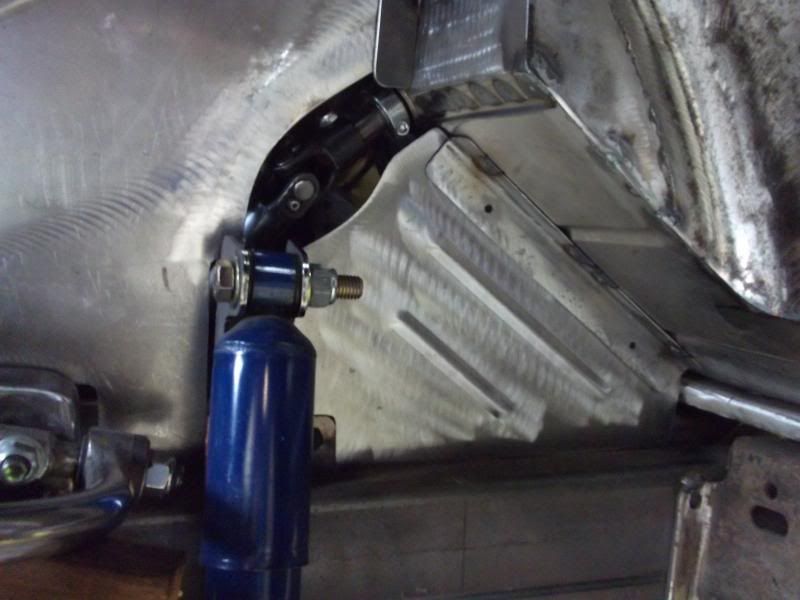 View from inside the fenders 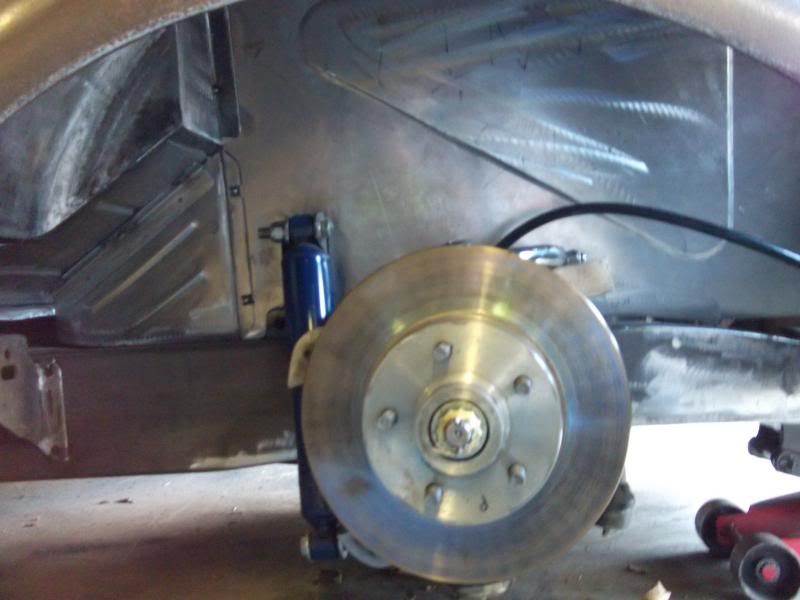  thanks for looking, let me know what you think... Justin
__________________
[PROJECT] FnLow69- 69 C-10 Full frame & layin' doors [PROJECT] Laidout53 - 53' Dodge Pickup, Full Kustom Build [PROJECT] "Hot Rod" 1931 Model A Bonneville style "Dream as if you'll live forever, Live as if you'll die today" ~ James Dean |
|
|

|
|
|
#14 |
|
Registered User
Join Date: Jan 2010
Location: Tonasket, Washington
Posts: 316
|
Re: [PROJECT] Laidout53 Part II
Wow, that's coming out really nice. Great work your very talented.
__________________
-Aaron '15.5 Chevy Duramax LTZ/Z71, LML, CC/SB '77 Chevy K10, 4" lift, 33-12.50, 350/350 '55 Chevy Short Box (In Pieces)MII,4-link,Bagged,383 Stroker,700r4,3.73posi (SOLD) My 55.2 Chevy 3100 Build |
|
|

|
|
|
#15 |
|
Beer Drink'n Knuckle Dragger
Join Date: Mar 2010
Location: Eatonville, WA
Posts: 493
|
Re: [PROJECT] Laidout53 Part II
wish I had the know how to do stuff like that...I mean I can cut and bend sheet metal...hell I can even weld it together, but never tried my hand at bead rolling. looks really good and clean, can't wait to see what you do with the firewall and see it all painted and pretty
__________________
 GOD BLESS MY BROTHERS & SISTERS THAT SERVE WITH US GOD BLESS MY BROTHERS & SISTERS THAT SERVE WITH US - 67 GMC Long-Wide 350/SM420 My BACON Wrapped Meatloaf Recipe |
|
|

|
|
|
#16 | ||
|
Registered User
Join Date: May 2005
Location: Washington
Posts: 848
|
Re: [PROJECT] Laidout53 Part II
Quote:
Quote:

__________________
[PROJECT] FnLow69- 69 C-10 Full frame & layin' doors [PROJECT] Laidout53 - 53' Dodge Pickup, Full Kustom Build [PROJECT] "Hot Rod" 1931 Model A Bonneville style "Dream as if you'll live forever, Live as if you'll die today" ~ James Dean |
||
|
|

|
|
|
#17 |
|
Beer Drink'n Knuckle Dragger
Join Date: Mar 2010
Location: Eatonville, WA
Posts: 493
|
Re: [PROJECT] Laidout53 Part II
well i'm taking notes...are you running a tig on this stuff?
__________________
 GOD BLESS MY BROTHERS & SISTERS THAT SERVE WITH US GOD BLESS MY BROTHERS & SISTERS THAT SERVE WITH US - 67 GMC Long-Wide 350/SM420 My BACON Wrapped Meatloaf Recipe |
|
|

|
|
|
#18 |
|
Registered User
Join Date: May 2005
Location: Washington
Posts: 848
|
Re: [PROJECT] Laidout53 Part II
thanks, anything I can I try to TIG. The fenders are about 50/50 MIG/TIG, the chop and dash were TIG and the floor was MIG.
__________________
[PROJECT] FnLow69- 69 C-10 Full frame & layin' doors [PROJECT] Laidout53 - 53' Dodge Pickup, Full Kustom Build [PROJECT] "Hot Rod" 1931 Model A Bonneville style "Dream as if you'll live forever, Live as if you'll die today" ~ James Dean |
|
|

|
|
|
#19 |
|
PROJECT 7DEUCE
 Join Date: Dec 2002
Location: GRANTS PASS OR
Posts: 21,592
|
Re: [PROJECT] Laidout53 Part II
Nice work justin good to see ya back at it..
__________________
GO BIG GREEN  GO DUCKS GO DUCKSMEMBER #6377 72 k-5 daily driver 6'' lift 35'' 350-350-205 slowly getting rust free. Project "7DEUCE" check out my build http://67-72chevytrucks.com/vboard/s...d.php?t=267665 Tim Powell..R.I.P EastSideLowlife..... R.I.P.. |
|
|

|
|
|
#20 |
|
Registered User
Join Date: May 2005
Location: Washington
Posts: 848
|
Re: [PROJECT] Laidout53 Part II
Thanks
__________________
[PROJECT] FnLow69- 69 C-10 Full frame & layin' doors [PROJECT] Laidout53 - 53' Dodge Pickup, Full Kustom Build [PROJECT] "Hot Rod" 1931 Model A Bonneville style "Dream as if you'll live forever, Live as if you'll die today" ~ James Dean |
|
|

|
|
|
#21 |
|
Registered User
Join Date: May 2005
Location: Washington
Posts: 848
|
Re: [PROJECT] Laidout53 Part II
__________________
[PROJECT] FnLow69- 69 C-10 Full frame & layin' doors [PROJECT] Laidout53 - 53' Dodge Pickup, Full Kustom Build [PROJECT] "Hot Rod" 1931 Model A Bonneville style "Dream as if you'll live forever, Live as if you'll die today" ~ James Dean |
|
|

|
|
|
#22 |
|
Registered User
Join Date: Jan 2010
Location: Tonasket, Washington
Posts: 316
|
Re: [PROJECT] Laidout53 Part II
Oh yea!!! Looks awesome!!!
__________________
-Aaron '15.5 Chevy Duramax LTZ/Z71, LML, CC/SB '77 Chevy K10, 4" lift, 33-12.50, 350/350 '55 Chevy Short Box (In Pieces)MII,4-link,Bagged,383 Stroker,700r4,3.73posi (SOLD) My 55.2 Chevy 3100 Build |
|
|

|
|
|
#23 |
|
Registered User
Join Date: May 2005
Location: Washington
Posts: 848
|
Re: [PROJECT] Laidout53 Part II
Thanks Flames97!
__________________
[PROJECT] FnLow69- 69 C-10 Full frame & layin' doors [PROJECT] Laidout53 - 53' Dodge Pickup, Full Kustom Build [PROJECT] "Hot Rod" 1931 Model A Bonneville style "Dream as if you'll live forever, Live as if you'll die today" ~ James Dean |
|
|

|
|
|
#24 |
|
Registered User
Join Date: May 2005
Location: Washington
Posts: 848
|
Re: [PROJECT] Laidout53 Part II
Well I've been working on the bed for a little bit now, Got the damaged fixed in the rolled part at the rear. Started on the rear bed mounts this last weekend. Next up is the front bed mount and custom front panel support, And lastly I'll be making a new tailgate. Then I'll get into the major reworking of the rear fenders.
Here are the bed tops before. 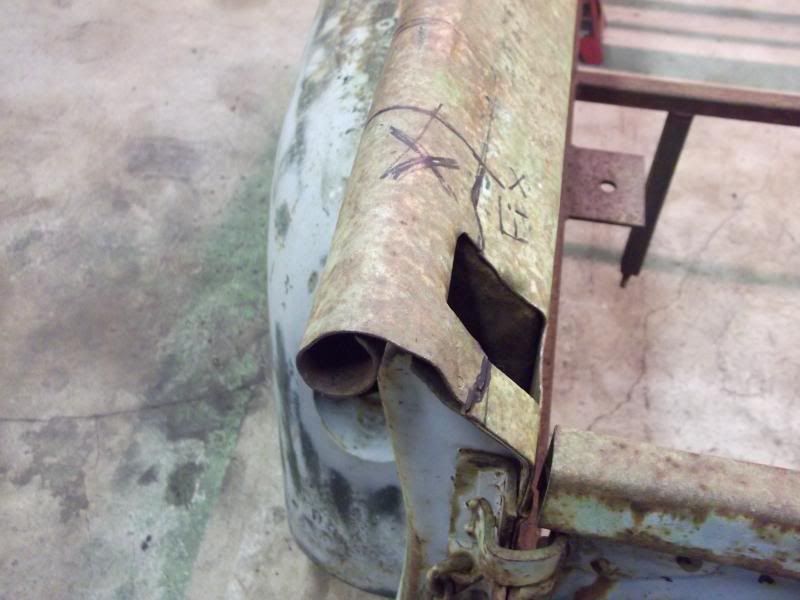  During   And done with stake pocket holes filled 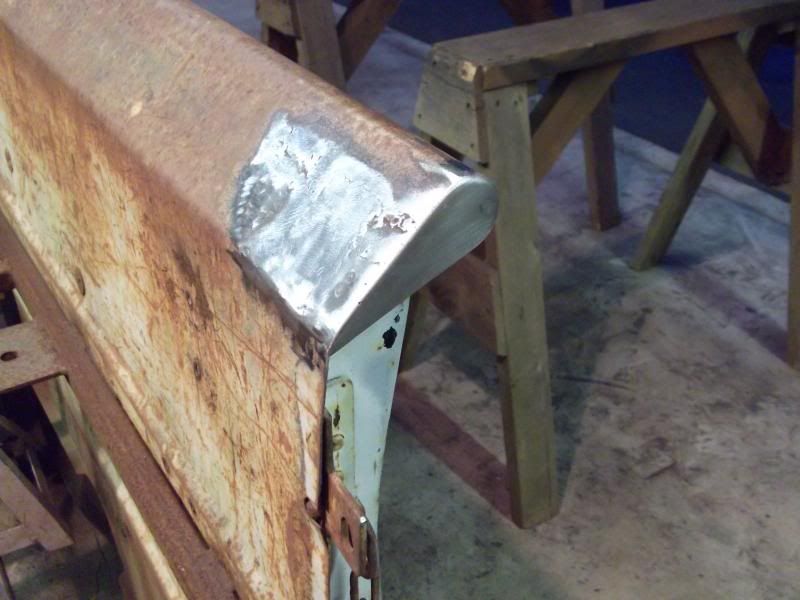  Here's what I came up with for rear bed mounts  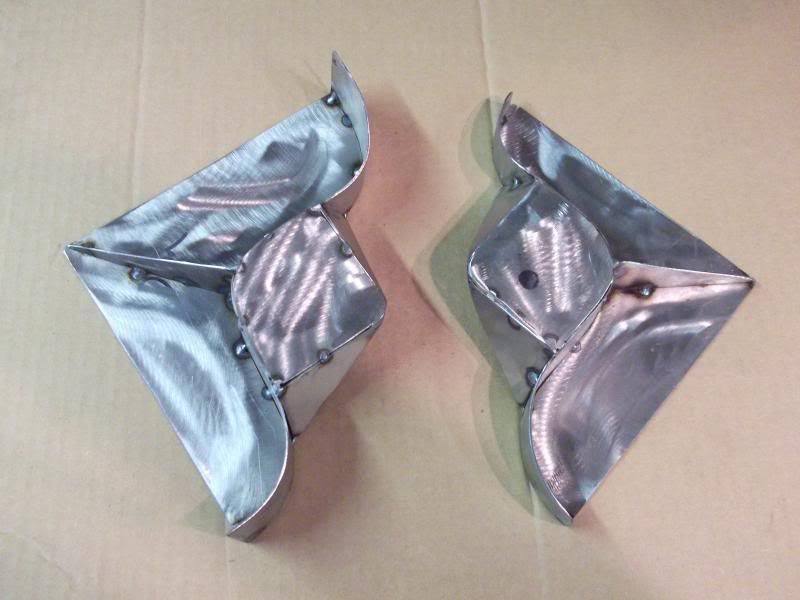 ready to be welded to the bed   More to come hopefully this weekend ill start on the front mount. Justin
__________________
[PROJECT] FnLow69- 69 C-10 Full frame & layin' doors [PROJECT] Laidout53 - 53' Dodge Pickup, Full Kustom Build [PROJECT] "Hot Rod" 1931 Model A Bonneville style "Dream as if you'll live forever, Live as if you'll die today" ~ James Dean |
|
|

|
|
|
#25 |
|
Registered User
Join Date: Feb 2007
Location: Marana, Arizona
Posts: 3,416
|
Re: [PROJECT] Laidout53 Part II
I wish my brain worked the way yours does. Love how you approach mods and repairs. I'm a bit confused as to how your bed mounts work?
Good thing we have this internet thing. I can now steal ideas from guys like you! 
__________________
"I feel the need for speed!"... as soon as I am done with my nap. |
|
|

|
 |
| Bookmarks |
|
|