
 |
|
|
#326 |
|
Registered User
Join Date: Aug 2007
Location: Corona, California
Posts: 7,998
|
Re: 1957 Chevy truck re-rebuild
Looks real nice.
The front fender gills look good. Kim |
|
|

|
|
|
#327 |
|
Registered User
Join Date: Dec 2011
Location: Southern Oklahoma
Posts: 181
|
Re: 1957 Chevy truck re-rebuild
I really like the stance and ride height. Really nice! You have most definitely got that wire welding figured out. You have really made some nice, clean mods that were well thought out. This is definitely one super nice truck!
Barry |
|
|

|
|
|
#328 |
|
Registered User
Join Date: Aug 2012
Location: Salem Mo
Posts: 652
|
Re: 1957 Chevy truck re-rebuild
Thanks Kim, for those who stop by the shop, they are a conversation piece.
A huge thanks papastrk, I really appreciate it. Well, about 2 weeks ago I was ready to tear the truck down, now, 2 weeks later, I'm still on tear down mode. The reality of it all is, as I start the tear down I find small items that need refinement, small items that I certainly don't want to deal with later. One item has to do with the seat belts. One belt is retractable, this one is fine. The other is not retractable and wants to fall between the seat and the center counsel. This is a hassle I don't want to deal with. If I leave the seat belt laying on the seat I fear puncturing the seat if I sit on the belt when getting in, I need a seat belt holder..... Finding yet one more purpose for the stainless steel rod, here we go. By bending one piece and cutting another to length I placed a couple nuts in between to give me the spacing I want. 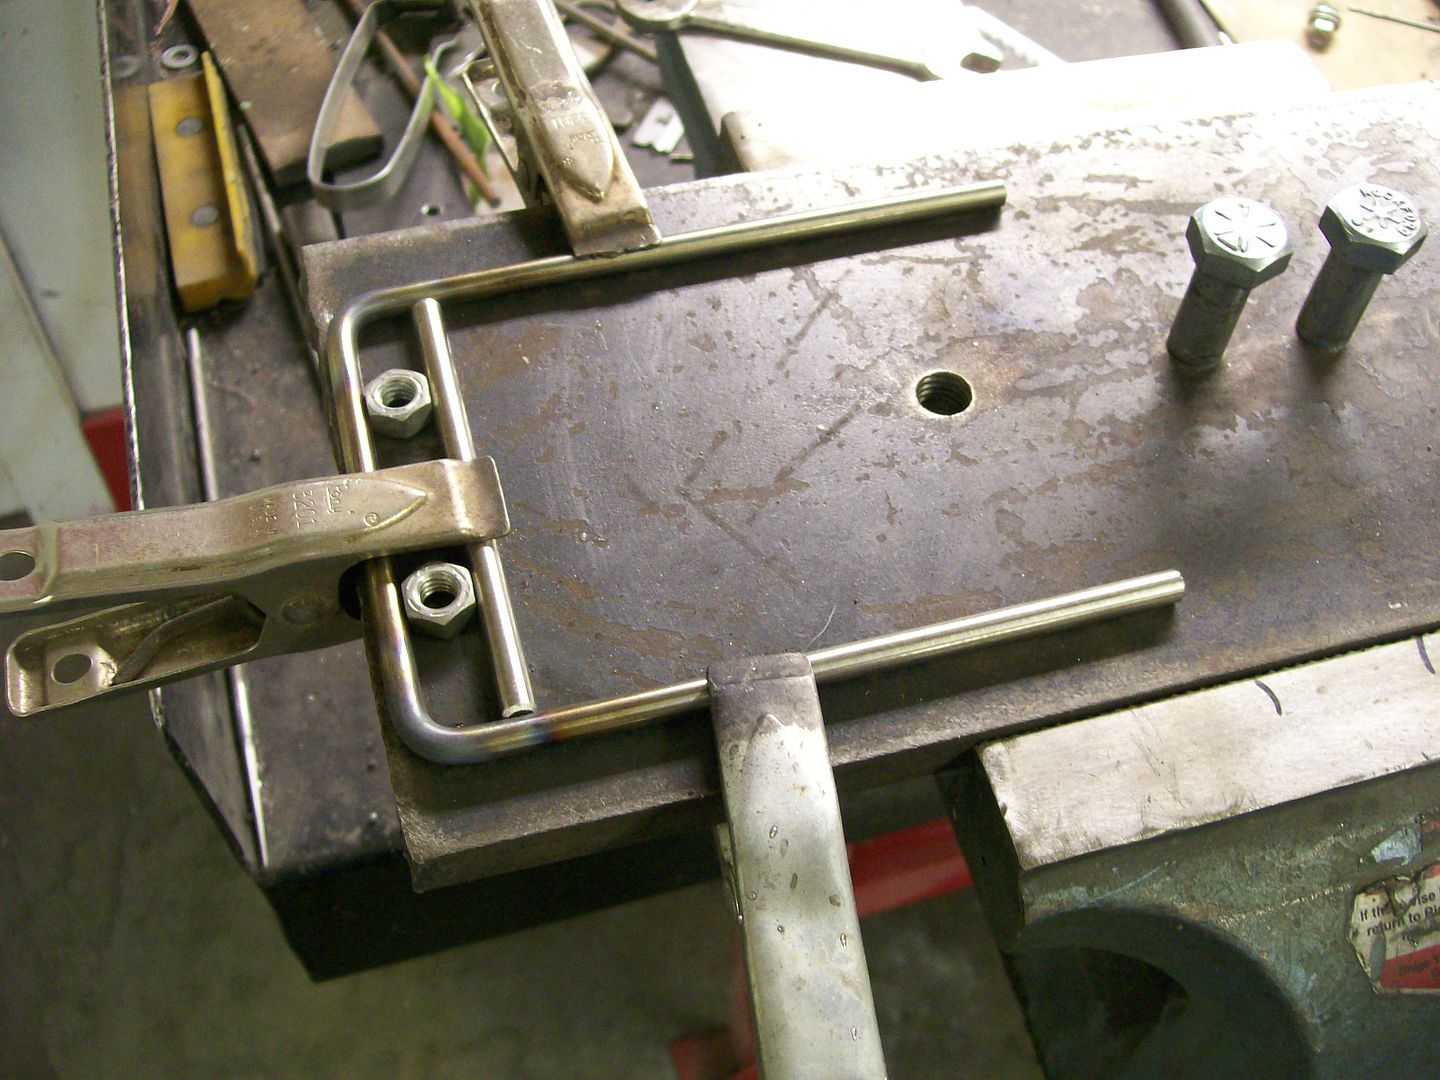 Yeah, the weld is ugly, but the left side shows it can be saved. 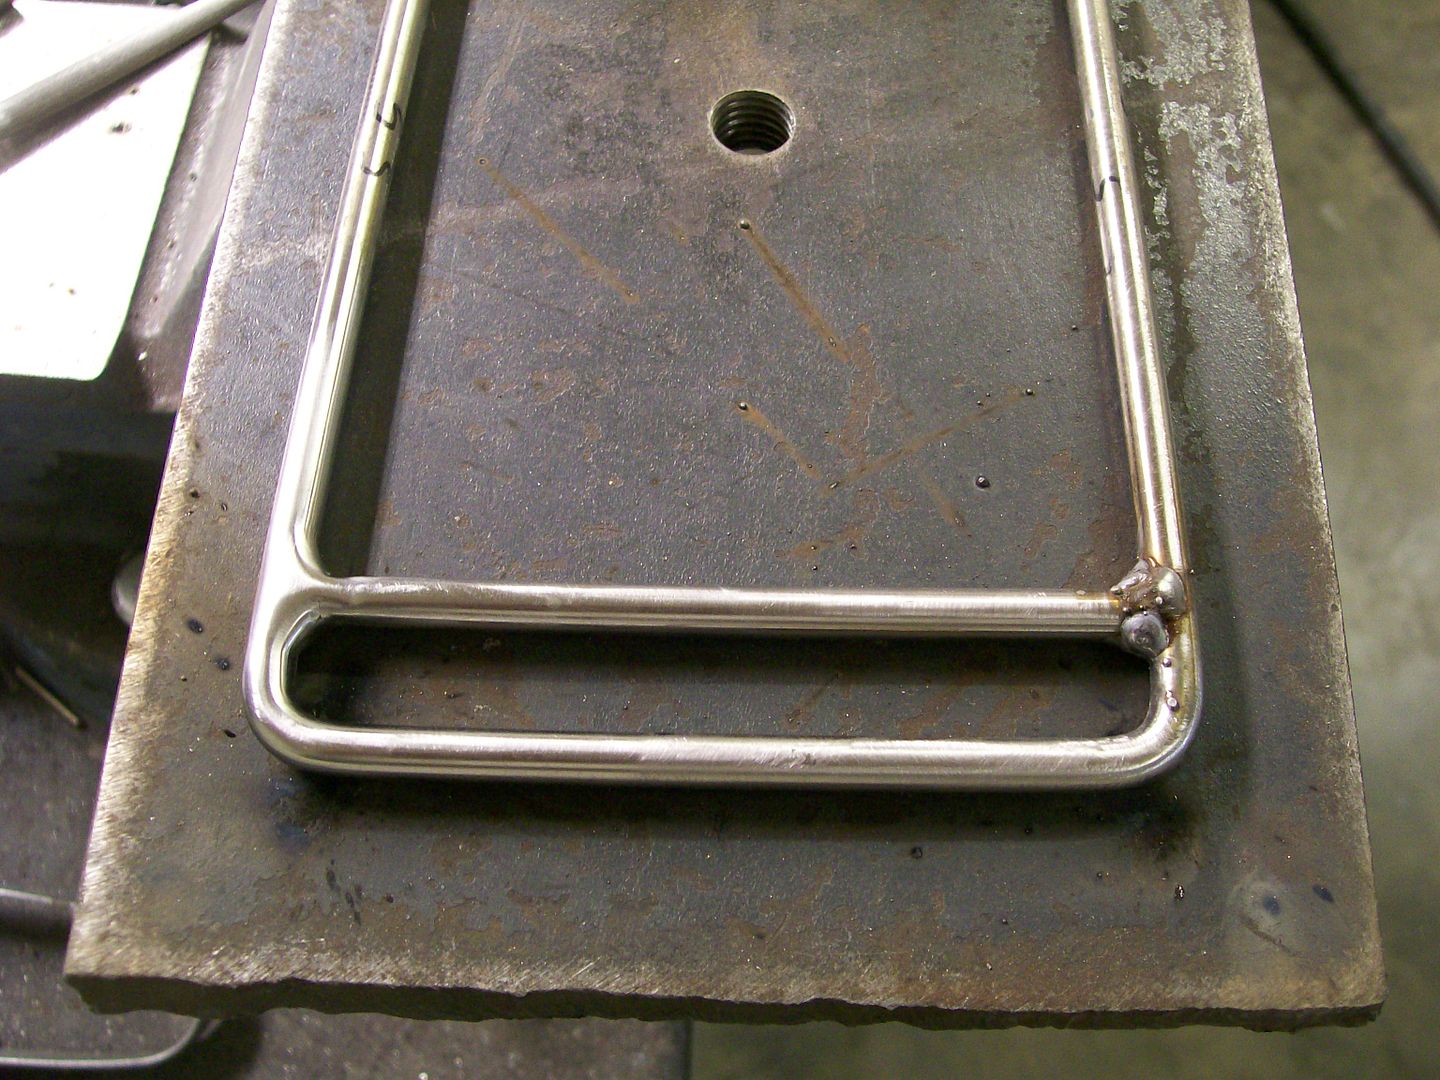 After some grinding and filing then polishing. Then threading and bending, I have my seat belt holders. 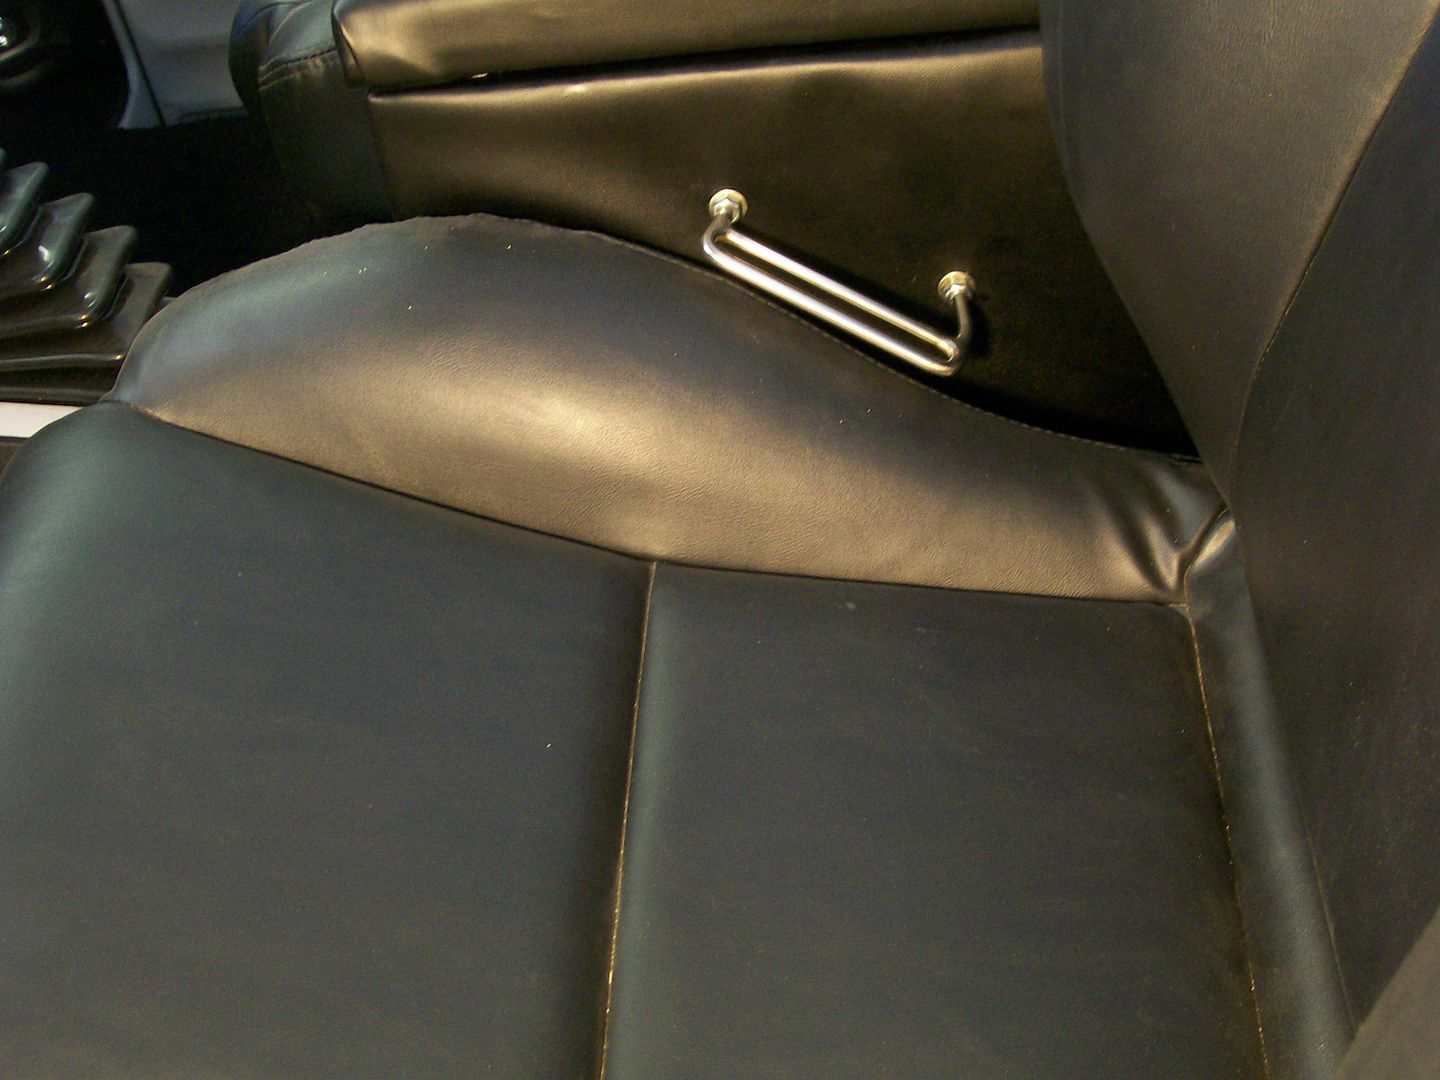 And the holder doing it's job.  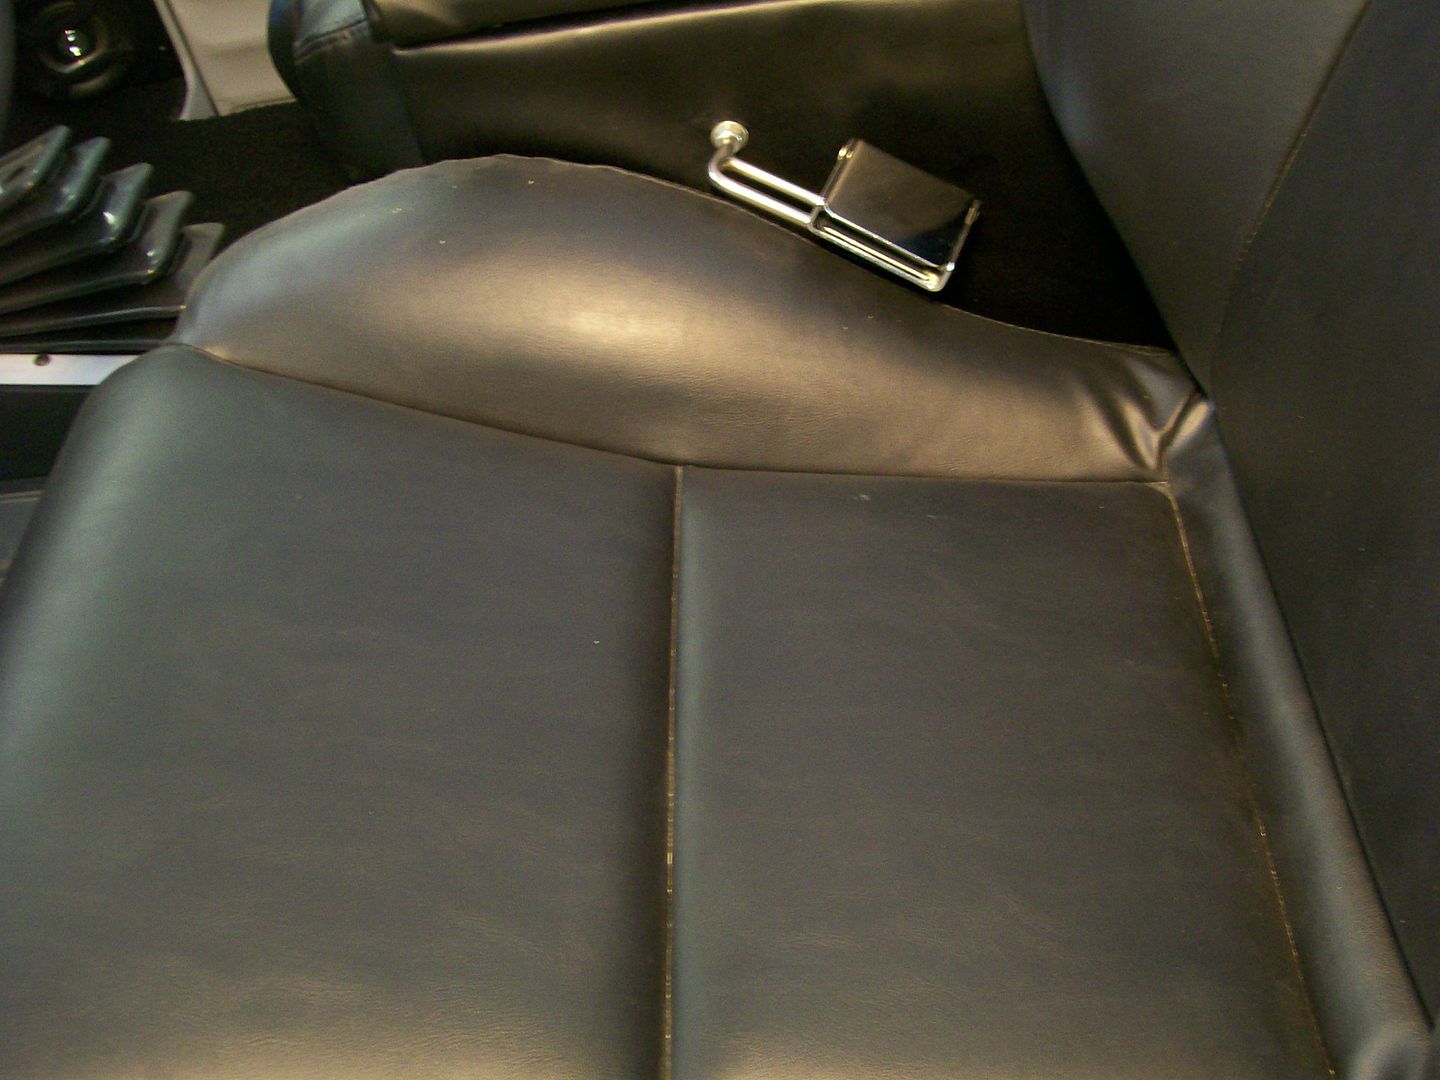 I will probably cut a stainless plate where the holder attaches to the counsel and get more decorative nuts also. Seat belt holders... Check. |
|
|

|
|
|
#329 |
|
Registered User
Join Date: Aug 2007
Location: Corona, California
Posts: 7,998
|
Re: 1957 Chevy truck re-rebuild
Those came out nice.
Kim |
|
|

|
|
|
#330 |
|
Registered User
Join Date: Apr 2013
Location: LA, CA
Posts: 22
|
Re: 1957 Chevy truck re-rebuild
As usual, you nailed it StepsideJim.

|
|
|

|
|
|
#331 |
|
Registered User
Join Date: Nov 2010
Location: SoCal
Posts: 914
|
Re: 1957 Chevy truck re-rebuild
You and Kim57 must be related, you guys make every thing, lol. GR8 JOB

__________________
I'm not tail-gating, I'm drafting.  http://67-72chevytrucks.com/vboard/s...d.php?t=432758 |
|
|

|
|
|
#332 |
|
Registered User
Join Date: Feb 2011
Location: Boise, Idaho
Posts: 610
|
Re: 1957 Chevy truck re-rebuild
You know its like they are Truck-gyver!
|
|
|

|
|
|
#333 |
|
Registered User
Join Date: Aug 2012
Location: Salem Mo
Posts: 652
|
Re: 1957 Chevy truck re-rebuild
Thanks everybody... hey Kim, we've been grouped together, certainly an honor for me.

|
|
|

|
|
|
#334 | |
|
Registered User
Join Date: Aug 2007
Location: Corona, California
Posts: 7,998
|
Re: 1957 Chevy truck re-rebuild
Quote:
I've never thought of my self as any kind of guru at this. Most times it's the lack of funds and just having the time that gets me making what I need. Kim |
|
|
|

|
|
|
#335 |
|
Registered User
Join Date: Aug 2012
Location: Salem Mo
Posts: 652
|
Re: 1957 Chevy truck re-rebuild
Still on the tear down...... I'm struggling with wanting to finish the tear down but at the same time there's a couple items I still want to fabricate before the truck is totally finished. I know if I don't build these last couple pieces now I will be unhappy with myself come assembly time. Nobody seems to sell after market Traction Bars for a 1957 Chevy Truck, so here goes.
Sooo, taking a deep breath and committing to building the last pieces I knew I wanted traction bars. I understand the design and the theory behind the slapper bars, ladder bars and the 4 link. My goal for this truck is for it to be toy, I want burn outs, drifting, donuts, ect, I will focus on that. It will not be drag raced. The truck will have the electric cut outs for the exhaust and it will have line lock to lock the front tires. I don't want to have to snap the accelerator to start a burn out, I want to lock the front tires and apply the gas and do a nice controlled burn out. This, along with the open exhaust should be fun. Ok, I want to control wheel hop, this is my biggest concern. As for weight transfer, not my big concern. The ladder bars and 4 link not only control wheel hop but they also do a great job of weight transfer. Slapper bars are my choice. I didn't run the springs under the axle so the usual slapper with the square tube under the leaf spring are out of the question. As a matter of fact I never much liked the look of all that hanging under the axle. Well I take that back, they look good under other peoples cars, just not mine. These trucks also have long leaf springs, I figure they are a prime candidate for wheel hop. 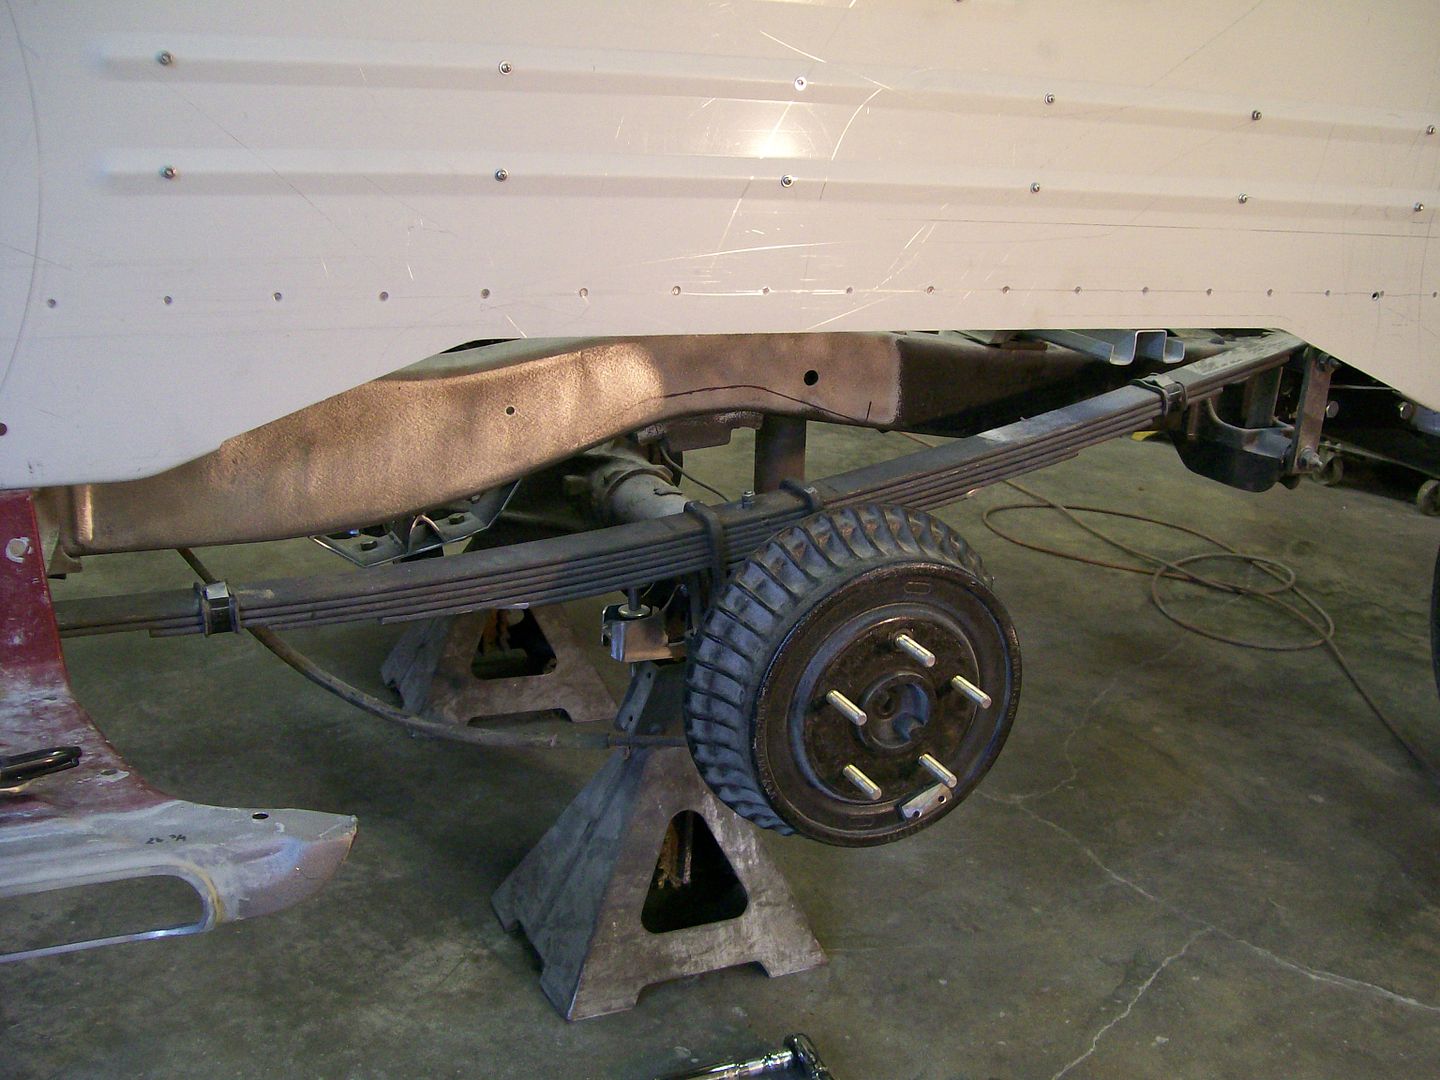 My plan is to have a bolt on system to control wheel hop from the top leaf spring plate and send to twisting force to the bottom of the leaf spring mounting bolt. Back to the torchmate, I started with cutting a top plate that will serve two purposes, attach to the leaf spring, and attach to the traction bar assembly.  Here the plate fitted and shaped. Somebody many years ago when they put this 10 bolt GM axle under the truck did a poor job of deciding on a resting plate for the spring to axle, this will be changed.  In the final design I wanted to strengthen the first plate, by stacking this next plate I not only spread the force of the traction bar to a larger contact area and I created a great way to locate and hold the u bolts in place.   As you all know from the rest of my build I'm willing to step out on the edge to set my truck apart from the norm. The traction bars will be no different. If I have this figured right I will be able to stabilize the wheel hop, I won't have much of anything hanging under the axle, it's one of a kind and it should raise an eye brow or two when done.   If I have it figured right it should work great, if it's a flop, I can simple unbolt and redo, nothing is welded permanently in place. Ha ha, for now.... traction bars... Check. Last edited by Stepside Jim; 10-29-2013 at 10:25 PM. |
|
|

|
|
|
#336 |
|
Registered User
Join Date: Aug 2007
Location: Corona, California
Posts: 7,998
|
Re: 1957 Chevy truck re-rebuild
That is very cool looking.
I hope they work like you planned. Kim |
|
|

|
|
|
#337 |
|
Registered User
Join Date: Feb 2013
Location: Lakeside Ariz
Posts: 445
|
Re: 1957 Chevy truck re-rebuild
|
|
|

|
|
|
#338 |
|
Registered User
Join Date: Nov 2010
Location: SoCal
Posts: 914
|
Re: 1957 Chevy truck re-rebuild
  Rods 57 you are so right. Rods 57 you are so right.
__________________
I'm not tail-gating, I'm drafting.  http://67-72chevytrucks.com/vboard/s...d.php?t=432758 |
|
|

|
|
|
#339 |
|
Registered User
Join Date: Nov 2010
Location: SoCal
Posts: 914
|
Re: 1957 Chevy truck re-rebuild
Stepside Jim that is ingenious. I will be surprised it it doesn't work. I don't see how it couldn't. GR8 idea. I had a similar problem with traction bar placement and and wanting the traction bars not to be so obvious to the eye.
I went with the No Limit Engineering traction bars because my springs were on top like yours. Fortunatlly for me when I wanted to use a flip kit and get a slightly lower stance I was still able to use the same traction bars and hardware and just change out the leaf u-bolts. Lord knows us truck guys can use all the help we can get. So many mods and hardware/ parts are not readily available over the counter. This idea of yours should fly and help out the folks that see this that have the same delima. LOL maybe it's too soon for me to tip my hat to ya , but I think it will work just fine.... and if not you and Kim57 can put your heads together and come up with something    
__________________
I'm not tail-gating, I'm drafting.  http://67-72chevytrucks.com/vboard/s...d.php?t=432758 |
|
|

|
|
|
#340 | |
|
Registered User
Join Date: Aug 2007
Location: Corona, California
Posts: 7,998
|
Re: 1957 Chevy truck re-rebuild
Quote:
It is a great idea. Kim |
|
|
|

|
|
|
#341 |
|
Registered User
Join Date: Aug 2012
Location: Salem Mo
Posts: 652
|
Re: 1957 Chevy truck re-rebuild
Thanks again everyone. I do believe that with sticking to the theory behind the slapper bars I should be right on with these.
I can say, I've spent a couple of hours laying under the truck trying to imagine this set up, hey wait, that's almost as long as I laid under the truck trying to figure out the exhaust also, I probably need to get a more comfortable creeper. A picture from a top view takes away from the slight bulkiness of the side rails.  The "x" brace isn't welded in yet but I feel it would be good to add a support between the two outer rails. I've seen the slapper bars hanging loose in many applications so you'll find a top rubber snub that can be adjusted so the bar doesn't drop down under de-celleration, plus this snubber helps maintain the gap of the front snup to touching the leaf spring. As for hanging down when it's all assembled, when I look across the bottom of one bed step to the other the front tip of the traction bars are only about 1/2" below the bottom of the steps, I'm very happy with that. It took a few tries to get the arc I was looking for. Always save your cardboard, it may come in handy.  This one's for Ogre. I once mentioned I have my strange ways of getting my ideas on to a computer cad screen. In this case I lay my cardboard templet on something I've marked off in inches. Then trace the design over the grid. Now mark in inches where the pattern crosses the grid. Now on the computer screen grid mark the crossings and connect the dots. I've got my real size pattern ready to cut. 
|
|
|

|
|
|
#342 | |
|
Registered User
Join Date: Jan 2012
Location: Motown
Posts: 7,680
|
Re: 1957 Chevy truck re-rebuild
Quote:
 too many trees died making your paterns i'm an enginerd, i think and design in autocad. 4 measurements and an hour in cad would have accomplished the same for me. our 4x8 plasma table should ship in a couple of weeks i may need to get a new project 
__________________
cool, an ogre smiley  Ogre's 58 Truk build Ogre's 58 Truk buildhow to put your truck year and build thread into your signature shop air compressor timer |
|
|
|

|
|
|
#343 |
|
Registered User
 Join Date: Oct 2013
Location: Pryor Oklahoma
Posts: 29
|
Re: 1957 Chevy truck re-rebuild
Your doing work that looks gret and motivates me
|
|
|

|
|
|
#344 |
|
Registered User
Join Date: Aug 2012
Location: Salem Mo
Posts: 652
|
Re: 1957 Chevy truck re-rebuild
johnlq6975, nothing pleases me more than to motivate someone. I wish I had the internet to gather ideas about 30 years ago, who knows what I'd be building now.
_Ogre, although I agree with the auto cad, there is still something for me about having a replica of what will be made out of steel to check the flow of the design before committing to the cut. I've got more pictures and know people like pictures..... The front mount for the rubber snubber had to be removable. In the last pictures you'll see 4 bolts holding the side plates of the traction bar to the spring plate. I have a concern of these working loose over time and the traction bar coming loose. When this is done and I have full vehicle weight on the springs I will weld the side plates to the spring plates, after that I will leave the bolts in place mainly for cosmetics. To remove the traction bar I need to remove the front mount to slip the traction bar out. Ogre and I are discussing cad systems but one thing I am sure we will both agree on is the ability to combine different cuts to create strength and adjustability. I want to front mount to be strong and secure, I want it adjustable and I want it to interlock with the side plates.  The rubber snubber is set back from center about a 1/2" inch, this is as far back as I'd ever need it. I can set it forward if necessary. The kick outs will interlock with the side plates and the small plates in the picture above will be fully welded to the bottom plate. Then four bolts will hold it in place.  By time the project is done, (actually as of last night), the nuts have been welded in place. It's so much easier than having to hold the nuts in place later.  Done and welded. Now when I need to remove it, take out the bolts, spread the side plates and it pops out. One thing I've also been practicing is welding areas that will not be ground down and the will be seen to a nice visually pleasing look. It's still using the wire feed welder but trying to get a tig welded look. Don't worry, it's a very strong weld. I call it a Wig weld, a mixture of wire feed and tig. lol. 
|
|
|

|
|
|
#345 |
|
Registered User
Join Date: Aug 2007
Location: Corona, California
Posts: 7,998
|
Re: 1957 Chevy truck re-rebuild
Looking real nice.
Kim |
|
|

|
|
|
#346 |
|
Registered User
Join Date: Aug 2013
Location: Ruidoso, NM
Posts: 290
|
Re: 1957 Chevy truck re-rebuild
Nice design and I'll bet it took a few hours of figuring.
__________________
http://67-72chevytrucks.com/vboard/s...d.php?t=592642 '48 Chev extended cab with attitude http://67-72chevytrucks.com/vboard/s...d.php?t=592769 My daughter's '46 International PU |
|
|

|
|
|
#347 |
|
Registered User
Join Date: Jun 2005
Location: New Hampshire
Posts: 86
|
Re: 1957 Chevy truck re-rebuild
Wow, nice! Wish I could wig weld...
|
|
|

|
|
|
#348 |
|
Registered User
Join Date: Jan 2012
Location: Motown
Posts: 7,680
|
Re: 1957 Chevy truck re-rebuild
i like how you make tabs and slots for all your weldments. nice work.
__________________
cool, an ogre smiley  Ogre's 58 Truk build Ogre's 58 Truk buildhow to put your truck year and build thread into your signature shop air compressor timer |
|
|

|
|
|
#349 |
|
Registered User
Join Date: Aug 2012
Location: Salem Mo
Posts: 652
|
Re: 1957 Chevy truck re-rebuild
slydogg76, thanks, I think once the wig-welds are blasted and painted they should be a nice cosmetic touch.
Moving from the back to the front of the truck.... I wanted to check the inner front fender panels. The drivers side is in good shape, the passenger side however has been modified. Years ago someone cut out a section and fitted a support for the battery, not a bad idea I suppose, it just adds too much clutter for the look I'm going for. I went back and forth for a couple days, should I restore the old one or chance getting a new aftermarket one that I may be to fight to get it to fit right. I decided to get a new one, good decision, it fit near perfect right out of the box. Actually the new one was so good it made the old one with it's crimping marks and wrinkles look bad. I planned on smoothing everything but the main indentations anyway so both got the unnecessary holes welded shut and a light sandblasting. Once again, definitely take time to check all these panels before committing to paint. It could be the simplest filing of a mounting hole that can make reassembly time so much easier. 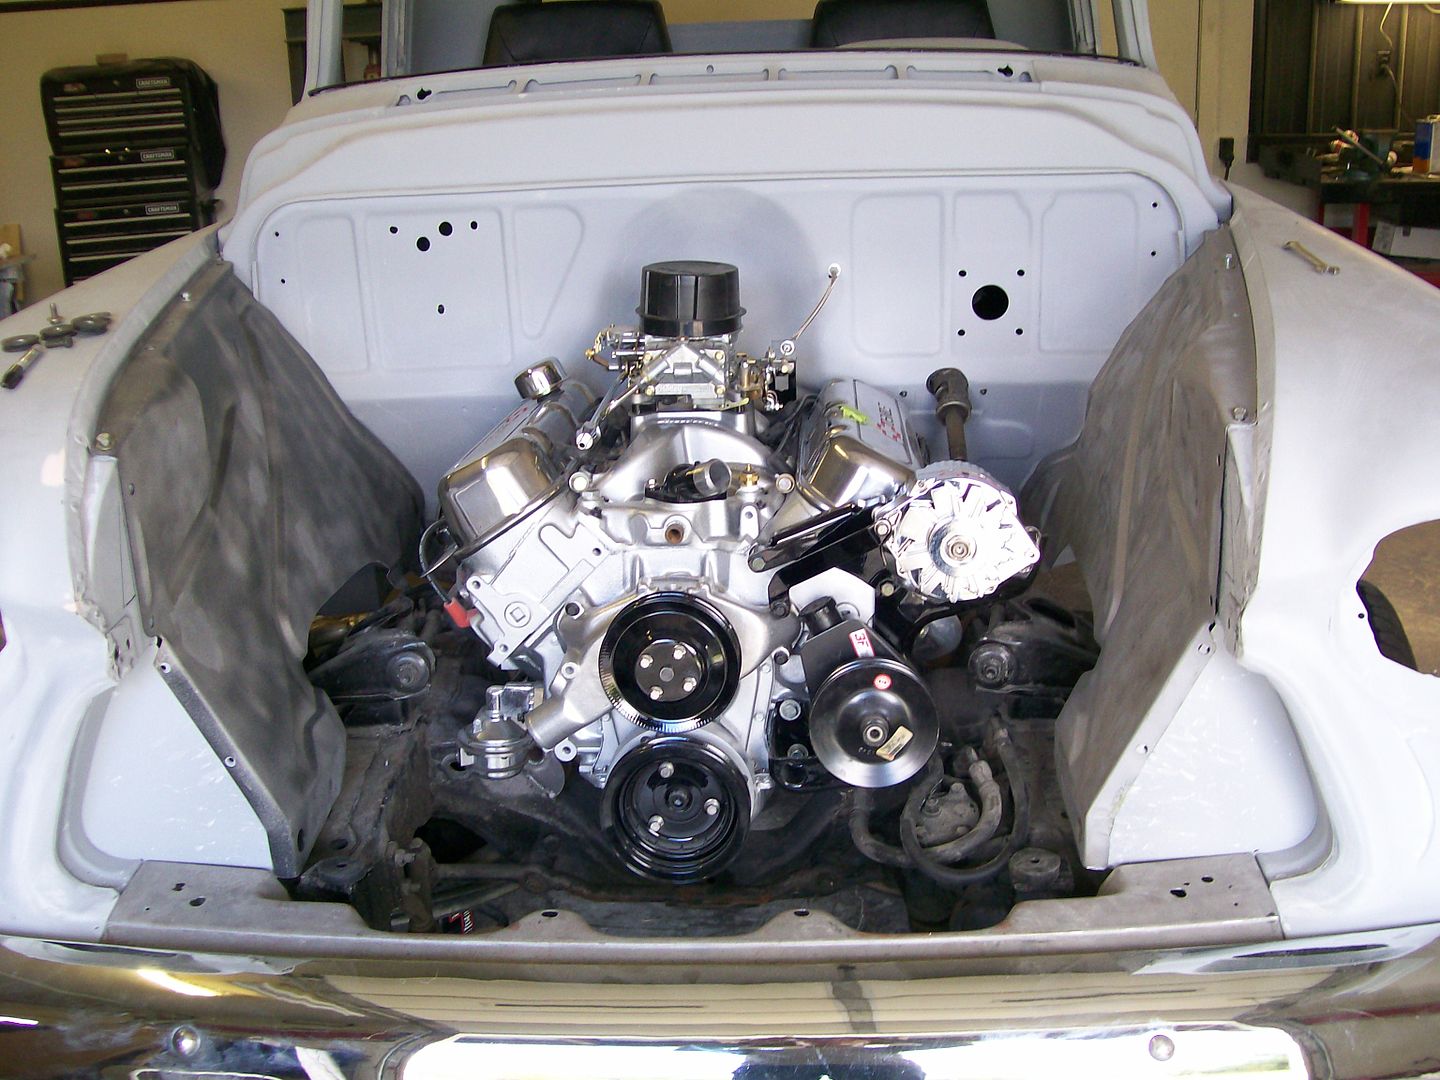 Here's the Couterpart brand panel, very good fit. 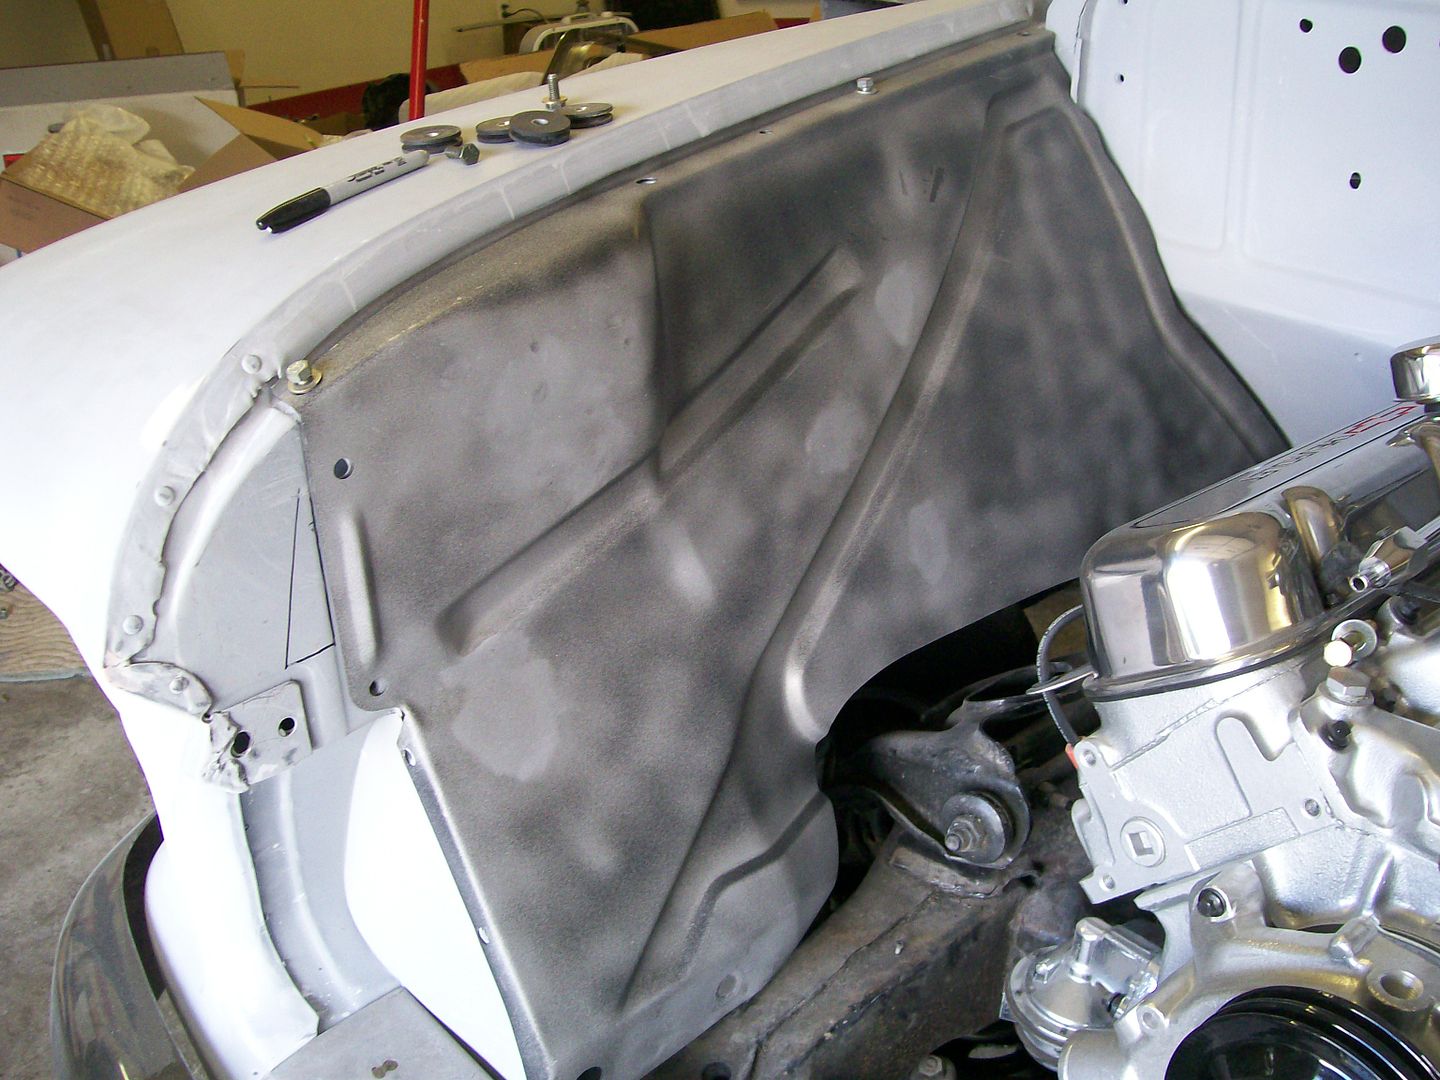 And the original drivers side. 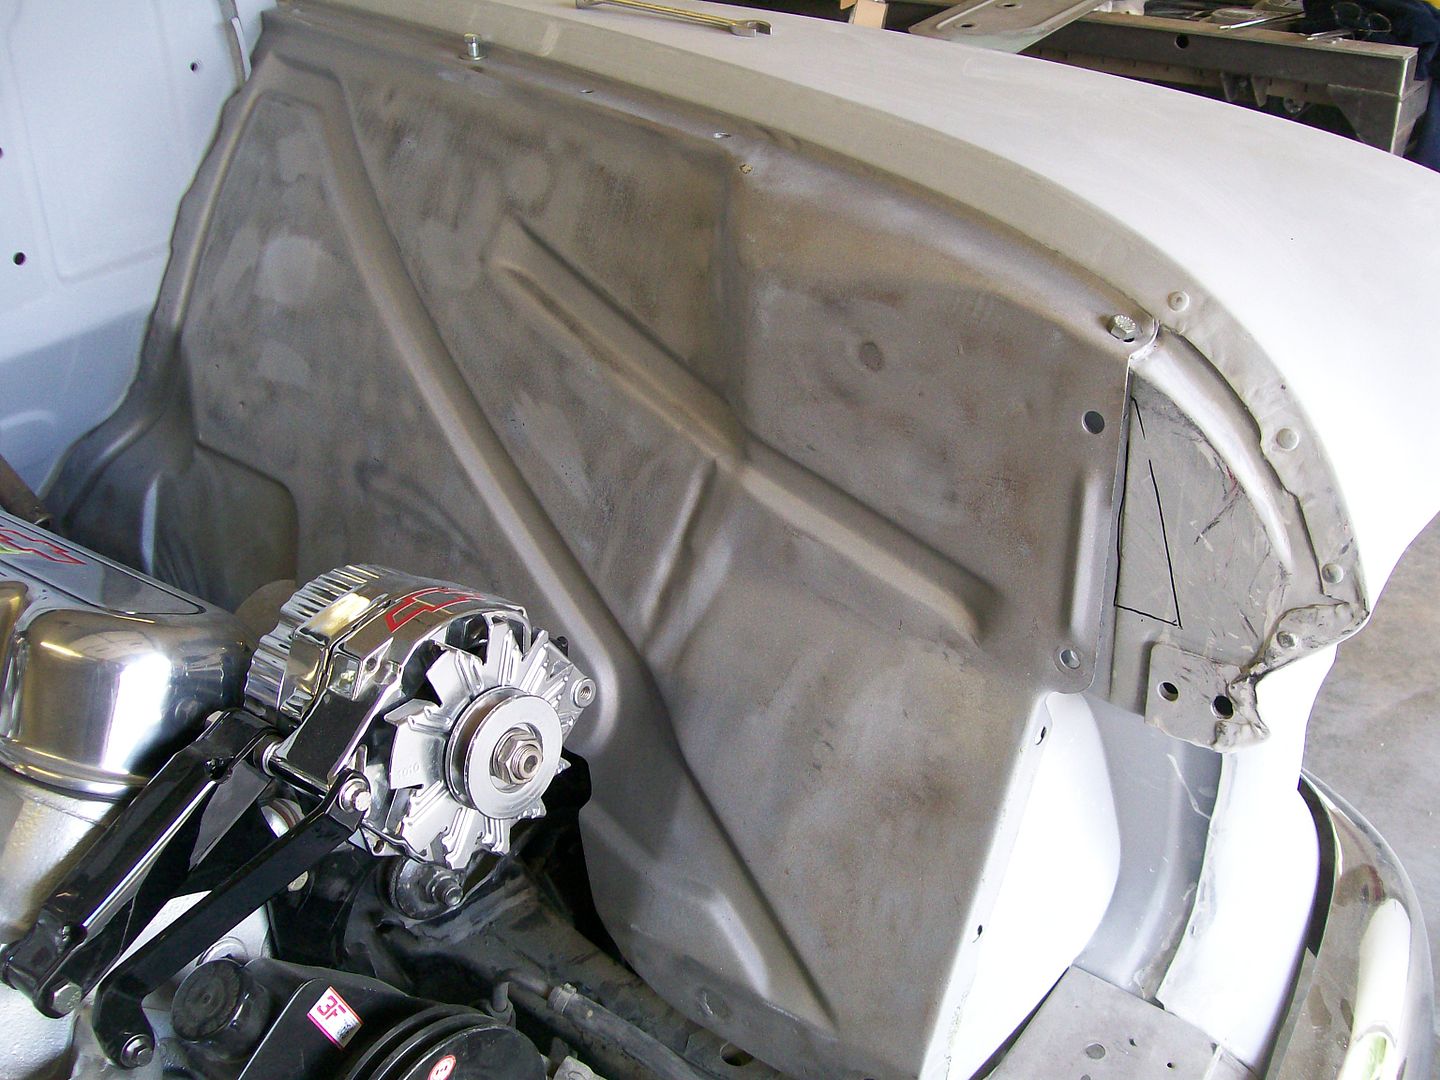 I haven't yet, but, I'd like to get some rubber material to make inner fender flaps to cover the upper control arms kinda like cars have covering their upper control arms. I don't figure the rubber flaps would be that hard to make, it's the inner fender not being flat, they have dips where I would attach the rubber flaps.....hmmmm, I gotta think about this one. |
|
|

|
|
|
#350 |
|
Registered User
Join Date: Aug 2007
Location: Corona, California
Posts: 7,998
|
Re: 1957 Chevy truck re-rebuild
Sure looks nice with that BB in there.
Kim |
|
|

|
 |
| Bookmarks |
|
|