
|
|
|
 04-07-2010, 09:35 PM
|
#1 | ||
|
Registered User
Join Date: Jul 2006
Location: Central PA
Posts: 12,201
|
Re: Project - '69 4x4 named "Patches"
Quote:
Quote:

__________________
The Garage: 1968 K-10 SWB - "Project Money Pit" 1996 Z-71 - "huntin rig" 1969 C-10 LWB (SOLD) "Project flip that truck or else" 1993 Passport, F@rd 1-ton (SOLD)"Project Cousin Eddie" My Garage Build "The 1,000 footer" |
||

|

|
|
04-07-2010, 10:48 PM
|
#2 | |
|
Registered User
Join Date: Aug 2008
Location: Cedar Creek, TX
Posts: 167
|
Re: Project - '69 4x4 named "Patches"
Quote:
|
|
|
|
|
|
04-09-2010, 07:02 AM
|
#3 |
|
Registered User
Join Date: Jul 2006
Location: Central PA
Posts: 12,201
|
Re: Project - '69 4x4 named "Patches"
oaks69, post your question in the 4x4 section and add some pictures if able... Make sure that you measure the leaf width too...
__________________
The Garage: 1968 K-10 SWB - "Project Money Pit" 1996 Z-71 - "huntin rig" 1969 C-10 LWB (SOLD) "Project flip that truck or else" 1993 Passport, F@rd 1-ton (SOLD)"Project Cousin Eddie" My Garage Build "The 1,000 footer" |
|
|
|
|
04-13-2010, 10:51 AM
|
#4 |
|
The Few, The Proud
 Join Date: Jun 2007
Location: Ball Ground, Georgia
Posts: 1,830
|
Re: Project - '69 4x4 named "Patches"
A small update...
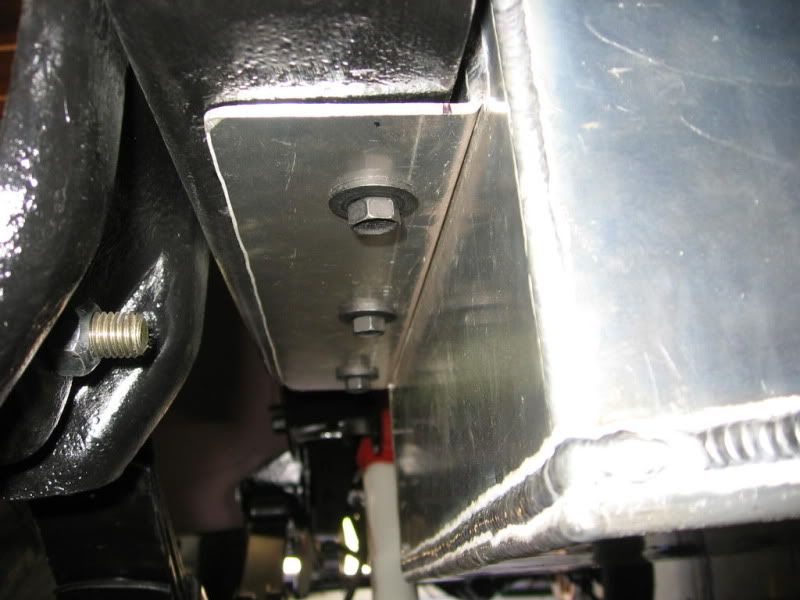
I've been working on getting the fuel tank mounted to the frame for the last week or so. Last week I about knocked myself out hitting my head on the frame and since then I haven't been in the mood to work on it much. The soreness has finally subsided and I decided to get back at it.Alan and I had set the old bed floor on the frame last week to check the fitment of the fuel tank height and the location of the filler neck compared to the location of the crossmembers for the bed floor. 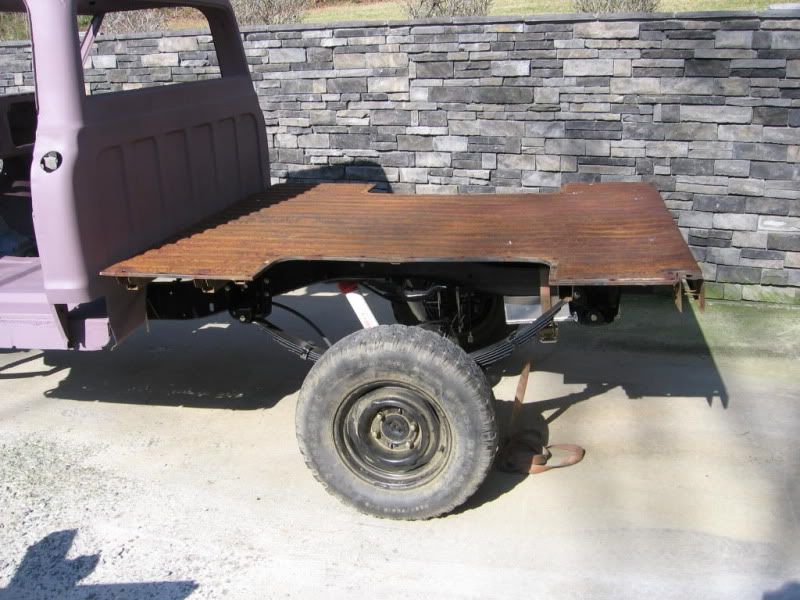 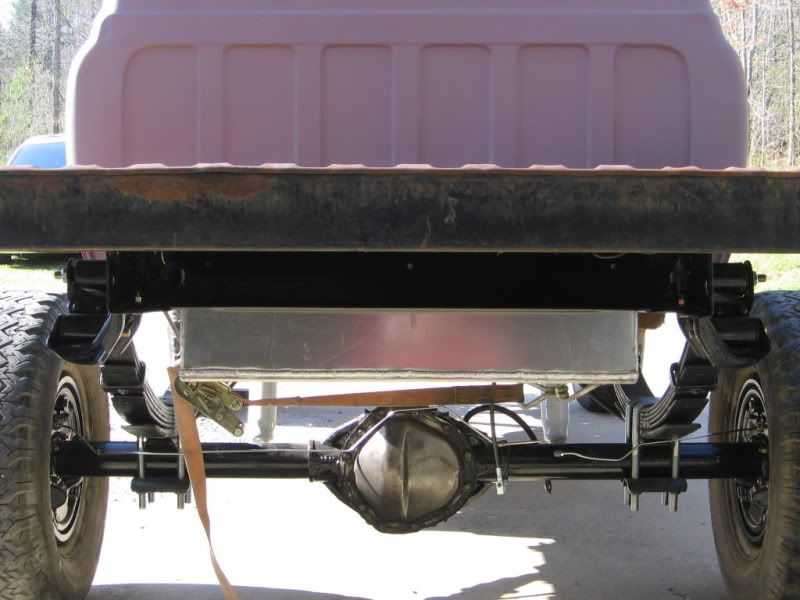 Luckily, everything fit and lined up well..... 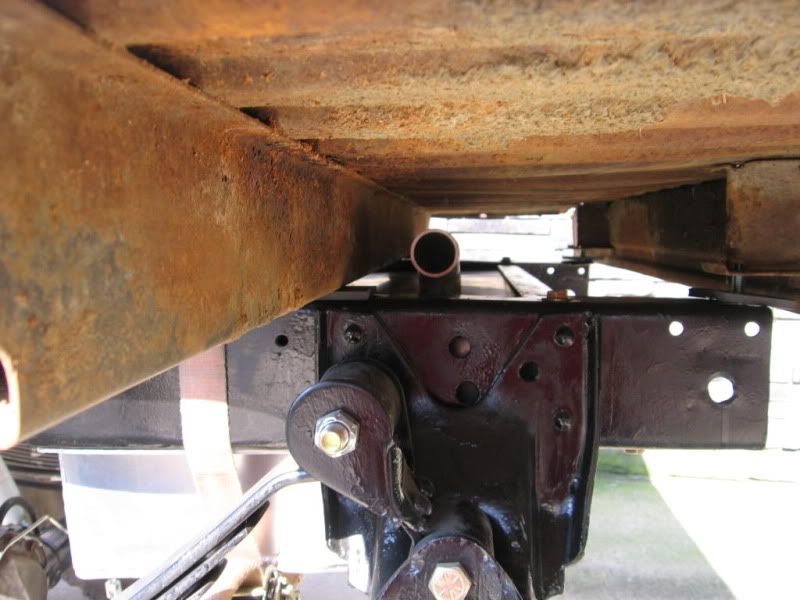 Laying on my back on the basement floor trying to drill through the tank mounting flanges and the frame proved to be real tiring, real quick. Looking around at the tools I had I came up with the "Low Budget Drill Press". I was always taught to adapt and overcome. So here it is... 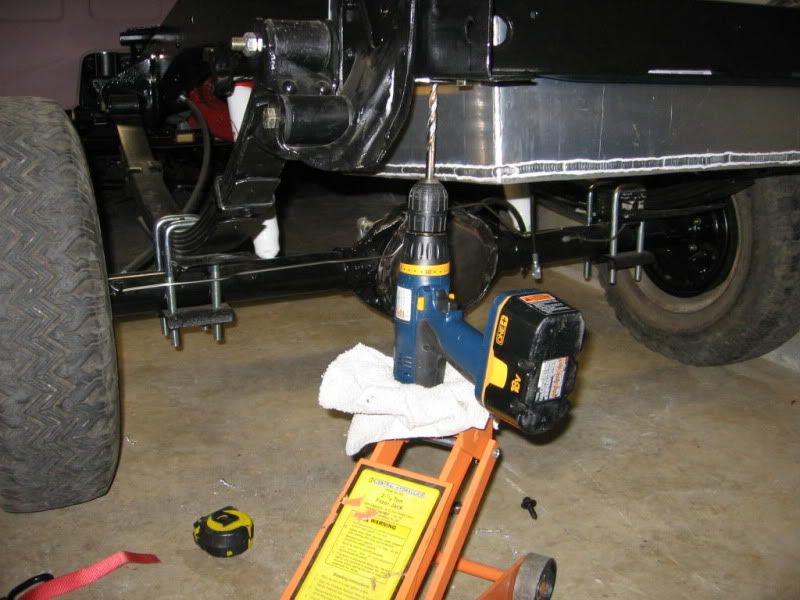 I was able to drill (3) holes in no time and I didn't even break a sweat. I didn't have enough room between the basement wall and the frame to drill the passenger side holes, but I'll roll the frame outside later to get to that side. That's one more thing to check off the list.  I decided a while back to go with an A/C setup from Classic Air, so I went ahead and ordered one of their billet controls to use for mock up before we start bodywork. 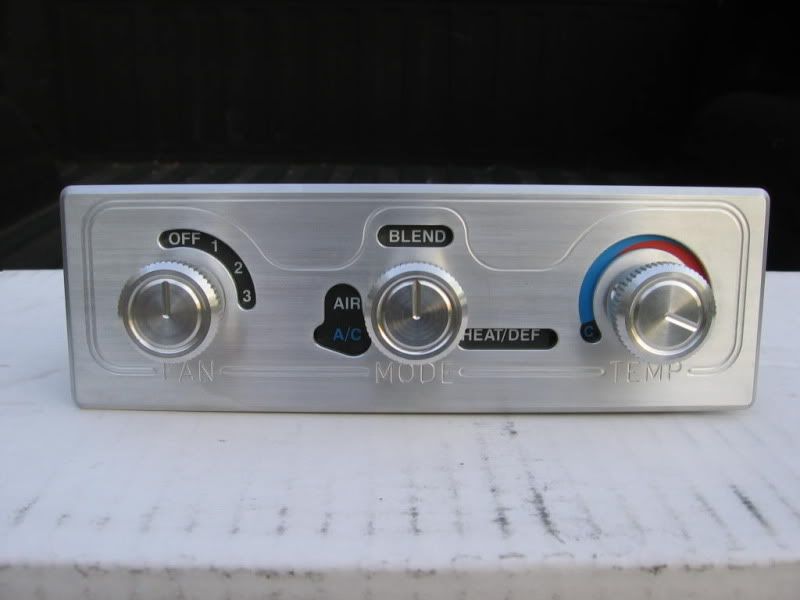 I plan on putting it in the same location as the factory control, but I can't decide how to mount it. I cut the dash out of my old cab to use as a template. The two options that I have for mounting it are (1) having an aluminum "faceplate" machined to mount in the factory opening, similar to the piece that member "Mekdad" made for the radio location... 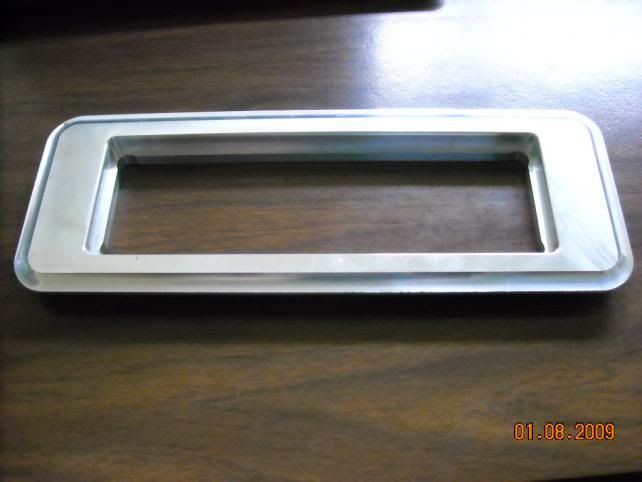 or (2) weld up the opening all together and cut a hole just big enough for the control to mount into. 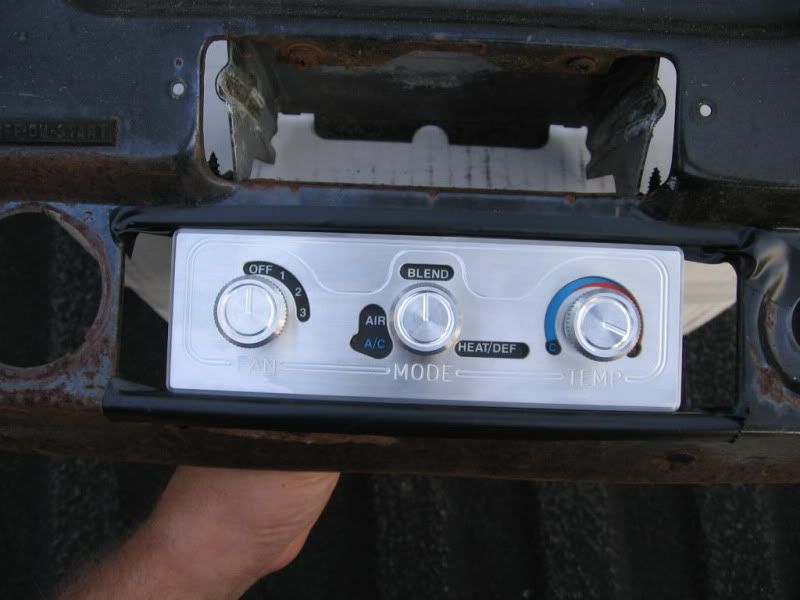 Personally, I'm leaning towards welding it up and cutting a new hole for it, but I'm open for any other thoughts or opinions. .
__________________
Shannon |
|
|
|
|
04-13-2010, 11:20 AM
|
#5 |
|
Daring to be Different
Join Date: Aug 2008
Location: Hesperia, Ca
Posts: 4,499
|
Re: Project - '69 4x4 named "Patches"
Shannon, Your drill press cracks me up.
 Love the A/C controls. If you put it where the radio goes, then where will you put the radio? Love the A/C controls. If you put it where the radio goes, then where will you put the radio?
__________________
Dennis  Check out my 65/73 Cheap Build Thread. Check out my 65/73 Cheap Build Thread. http://www.67-72chevytrucks.com/vboa...d.php?t=327644 KUSTOM RIDES FACE BOOK PAGE: https://www.facebook.com/groups/291198124258863/ 1965 C-10 Short Bed 350/700r4 2012 Silverado 1500 Crew Cab 2016 Honda Accord w/ 18" rims 2007 Honda Goldwing Trike w/ NAVI 2001 Yamaha Roadstar Indian look alike "Life's journey is not to arrive at the grave safely in a well preserved body, but rather to skid in sideways, totally worn out, shouting "...WOW!...what an amazing ride!" Live Life Passionately!!! [/COLOR]  I AM WE TODD IT, I AM SOFA KING WE TODD IT |
|
|
|
|
04-13-2010, 12:59 PM
|
#6 |
|
The Few, The Proud
Join Date: Jun 2007
Location: Ball Ground, Georgia
Posts: 1,830
|
Re: Project - '69 4x4 named "Patches"
Whatever it takes, right Dennis?
I was lying on my back with one hand on the jack handle and the other on the drill. Everytime the drill would "free up" I would work the jack handle until I had good pressure on the drill bit again. Believe it or not it worked like a charm. As far as the a/c control goes, I'll be mounting it in the stock ac/heat control location. I just referenced the aluminum plate, that "Mekdad" makes to give everyone an idea about another possible mounting idea, which would be having a piece of flat aluminum stock turned down to fit the factory a/c opening. Here's his original thread about the aluminum plate that he offered for the radio opening. http://67-72chevytrucks.com/vboard/s...d.php?t=322847 As far as my radio goes, it will be mounted in the glove box or either in the center console. I'll be using this factory radio delete plate to hide the stock radio opening. 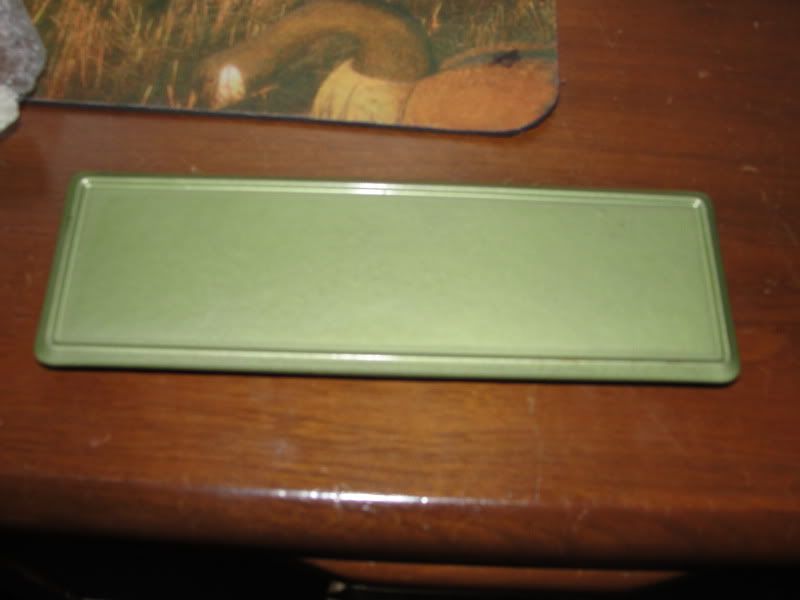
__________________
Shannon |
|
|
|
|
04-13-2010, 10:34 PM
|
#7 | |
|
Registered User
Join Date: Aug 2008
Location: Cedar Creek, TX
Posts: 167
|
Re: Project - '69 4x4 named "Patches"
Quote:
I vote weld up the space and cut it in. Last edited by tiggamonsta; 04-13-2010 at 10:35 PM. |
|
|
|
|
|
04-14-2010, 09:17 AM
|
#8 | ||
|
The Few, The Proud
Join Date: Jun 2007
Location: Ball Ground, Georgia
Posts: 1,830
|
Re: Project - '69 4x4 named "Patches"
Quote:
Thanks David. As I'm getting older I'm really starting to figure out this "work smarter not harder" thing I've heard about from old timers over the years. Quote:
I knew that I couldn't be the only one that had the idea of using a floor jack that way. Yeah, I'm pretty much sold on welding up the opening and cutting it to fit the control as well. Thanks for your input.
__________________
Shannon |
||
|
|
|
|
04-13-2010, 10:16 PM
|
#9 |
|
Shloooooong bed member #2
Join Date: Aug 2008
Location: Millington Tn.
Posts: 1,864
|
Re: Project - '69 4x4 named "Patches"
Nice work Shannon on the AC controls relly looks slick,
And I agree with Dennis on the drill press, That's using your head.
__________________
David, Daughters 66 truck: http://67-72chevytrucks.com/vboard/s...d.php?t=484601 Learning to drive a 3 on the tree: http://www.youtube.com/watch?v=CcCMvRgBo1Q |
|
|
|
|
04-14-2010, 08:46 PM
|
#10 |
|
Registered User
Join Date: Jul 2006
Location: Central PA
Posts: 12,201
|
Re: Project - '69 4x4 named "Patches"
Put the new radio in the old A/C control area, and mount the new A/C controls in the ashtray or radio delete area...
__________________
The Garage: 1968 K-10 SWB - "Project Money Pit" 1996 Z-71 - "huntin rig" 1969 C-10 LWB (SOLD) "Project flip that truck or else" 1993 Passport, F@rd 1-ton (SOLD)"Project Cousin Eddie" My Garage Build "The 1,000 footer" Last edited by msgross; 04-14-2010 at 08:46 PM. |
|
|
|
|
04-18-2010, 07:44 PM
|
#11 |
|
The Few, The Proud
Join Date: Jun 2007
Location: Ball Ground, Georgia
Posts: 1,830
|
Re: Project - '69 4x4 named "Patches"
I fired up the low budget drill press again this weekend and drilled the last holes needed to finish mounting the fuel tank, so at least that's checked off the list now. I still haven't decided whether to paint it or have it powdercoated or just leave it natural.
 It looks like I'll be buying a new hood since the one I have seems to have been damaged when I had it sandblasted. Alan and I both looked it over before it was blasted and there wasn't anything wrong with it other than the small dents on the front of it. When I picked up the hood from the blaster it looked good. That was until we primed it. Once it was primed you could see (2) distinct ridges the entire length of the hood. Look at the picture below to see if you can spot them. I'll give you a hint, look at the area where the hood braces run. 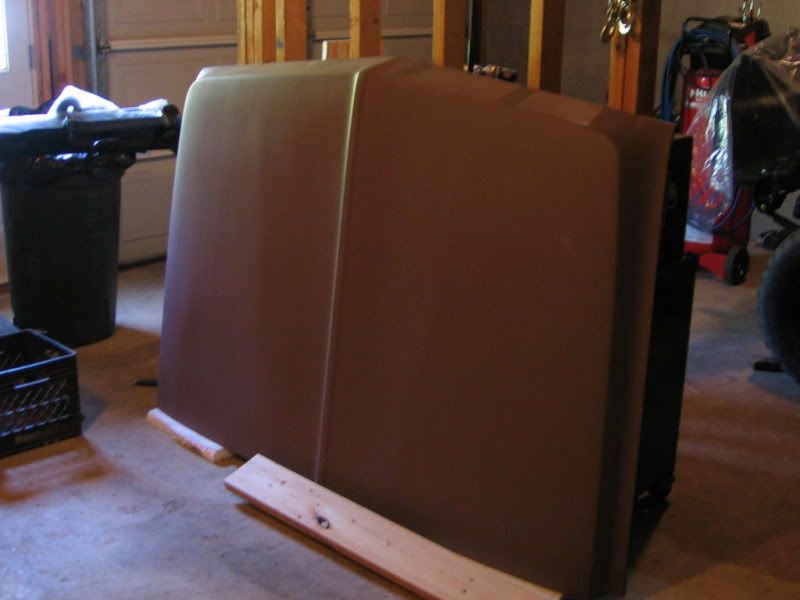 Alan thinks it would be easier and less time consuming to find a new hood compared to working the metal on this one. Luckily, I found a "new" hood fairly close to home. I'll be sure to take the time to sand this one by hand instead of having it blasted. Lesson learned. I also mocked up LFD's 71-72 gas pedal conversion (for 67-70 trucks) and it fit like a glove. http://67-72chevytrucks.com/vboard/s...d.php?t=371099 I then disassembled everything and gave it a shiny coat of paint. 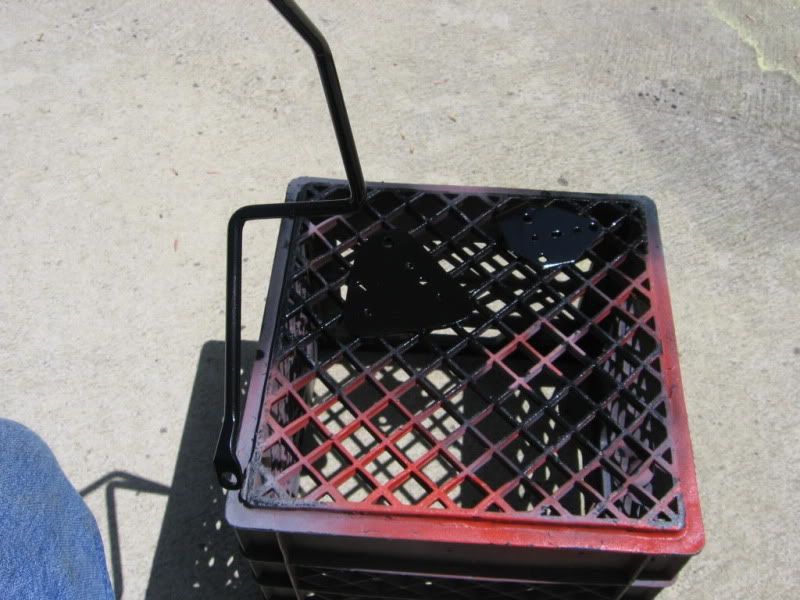 Here's the bracket painted and temporarily installed for a quick picture. 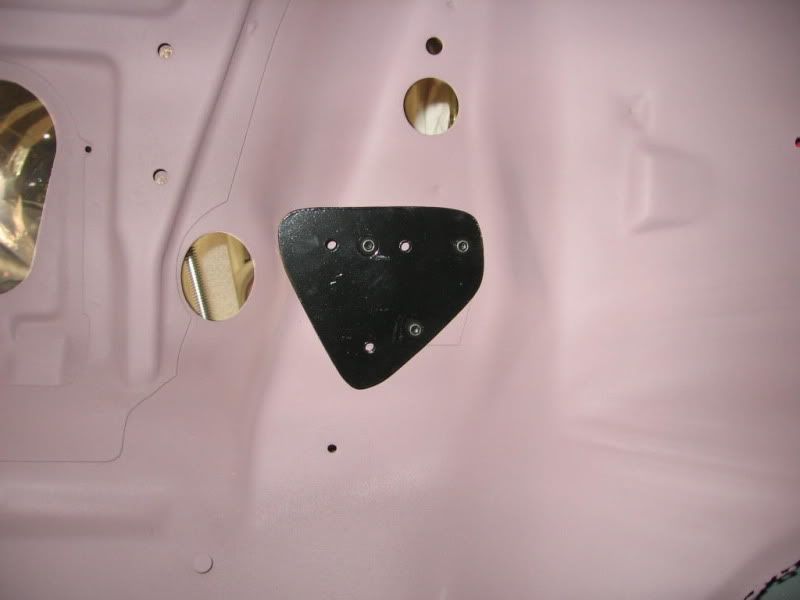 Fully installed with a "modified" '72 pedal assembly. 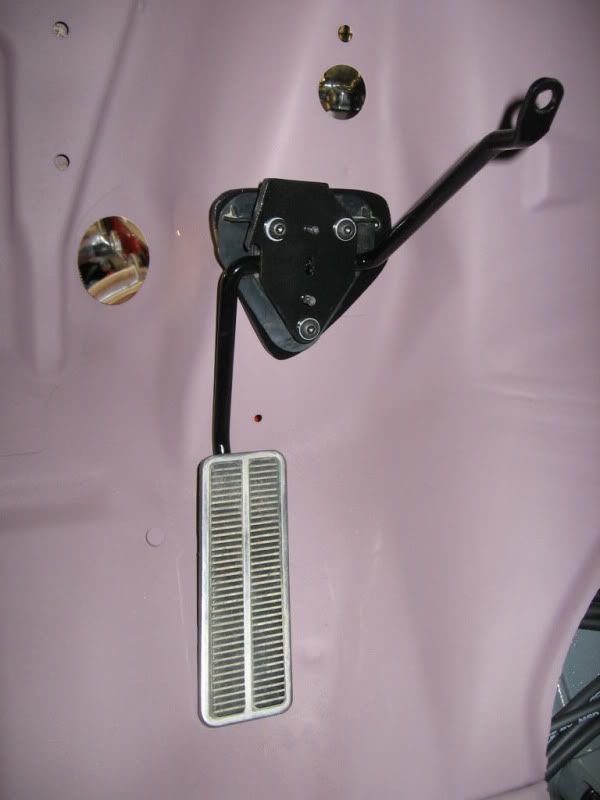 I took it all apart, boxed it up and put it back in the parts pile for later. Not much else going on this weekend. .
__________________
Shannon Last edited by sdailey; 04-18-2010 at 08:34 PM. |
|
|
|
|
04-18-2010, 09:37 PM
|
#12 |
|
1 thing at a time is progress.
Join Date: Jun 2007
Location: Ball Ground GA
Posts: 5,511
|
Re: Project - '69 4x4 named "Patches"
Nice progress. Looks great!!
__________________
Alan
Philippians 2:14-16 |
|
|
|
|
04-18-2010, 09:42 PM
|
#13 |
|
Chevy Enthusiast
Join Date: Jul 2009
Location: Canyon Lake Texas
Posts: 2,024
|
Re: Project - '69 4x4 named "Patches"
Everything looks great, and that sucks about the hood.
__________________
Tony 1985 GMC K2500 restoration Project: Rust, White & Blue 1989 Chevy R3500 CC Cummins & 4X4 swap some day... 1989 Burb (D60, 14BFF, 12V, NV4500, NP205, 37" tires in progress) |
|
|
|
|
04-18-2010, 10:12 PM
|
#14 |
|
SWBs: 67 2x4, 67 4x4, 70 4x4
Join Date: Nov 2007
Location: Conroe, TX
Posts: 483
|
Re: Project - '69 4x4 named "Patches"
I am going to Raptor my tank.
It is almost the same as yours, and although it looks good now, it is going to look like crap soon, so I am going to coat it and go down the road. I also had some warping in my hood from blasting, although not that much. They make a seam sealer/glue for cars that you can use to glue the hood support to the hood. We did that and it is hell for stout now, especially after we Raptored the bottom. Don't trash that hood, it can be saved.
__________________
FINISHED Project thread: 67 SWB 4x4 FINISHED Project thread: 67 SWB 6 cyl cruiser Project thread: Road Toad 70 SWB Step, 4x4, 292, 3OT 01 C5 convertable 08 Z06 |
|
|
|
|
04-19-2010, 07:58 AM
|
#15 | |
|
Registered User
Join Date: Jul 2006
Location: Central PA
Posts: 12,201
|
Re: Project - '69 4x4 named "Patches"
Quote:
__________________
The Garage: 1968 K-10 SWB - "Project Money Pit" 1996 Z-71 - "huntin rig" 1969 C-10 LWB (SOLD) "Project flip that truck or else" 1993 Passport, F@rd 1-ton (SOLD)"Project Cousin Eddie" My Garage Build "The 1,000 footer" |
|
|
|
|
|
04-19-2010, 08:08 AM
|
#16 | |||
|
The Few, The Proud
Join Date: Jun 2007
Location: Ball Ground, Georgia
Posts: 1,830
|
Re: Project - '69 4x4 named "Patches"
Quote:
Thanks Alan. Quote:
 Quote:
I forgot about Line-X, Lizard Skin, Raptor and those kind of products. That may be the route I take with this tank. Thanks for the reminder. Do you have any opinions on how to fix the hood? There are (2) ridges that run the entire length of the hood where the braces are located. Do you just hammer them back down?
__________________
Shannon |
|||
|
|
|
|
04-19-2010, 07:55 AM
|
#17 |
|
Under Construction
Join Date: Oct 2007
Location: Midlothian,TX (DFW)
Posts: 4,555
|
Re: Project - '69 4x4 named "Patches"
looking good shannon......
__________________
Heath subscribe to the board here: http://67-72chevytrucks.com/vboard/payments.php http://67-72chevytrucks.com/vboard/s...d.php?t=157669 FAQ how to's 1956 Chevy Apache 1967 C10 SWB FleetSide (under construction) 1969 K10 SWB FleetSide (Future Build) 1972 C10 SWB Stepside (Future Build) 56 chevy truck : http://www.cardomain.com/ride/2955823/1 67 truck build: http://www.67-72chevytrucks.com/vboard/showthread.php?t=281357/1 69 k10: http://67-72chevytrucks.com/vboard/s...d.php?t=389470 |
|
|
|
|
04-20-2010, 11:45 AM
|
#18 |
|
I'M TRUCK CRAZY!
Join Date: Oct 2006
Location: Sachse, TEXAS
Posts: 1,737
|
Re: Project - '69 4x4 named "Patches"
Just read your build thread yesterday and finished it just now. Your truck is going to be very nice. I really like it allot. I like that you are going with green. It reminds me of my grandparents 69 Firebird convertible. It had green interior too.
The hood. I am just guessing but I am thinking the hood stretched around the braces and hammering them would not do it. But, I am just guessing. I have no body experience. It's just a thought. Thinking how blasting works and metal heating up and maybe creating a crater affect around the braces. Keep up the good work and pics! |
|
|
|
|
04-20-2010, 12:15 PM
|
#19 | |
|
The Few, The Proud
Join Date: Jun 2007
Location: Ball Ground, Georgia
Posts: 1,830
|
Re: Project - '69 4x4 named "Patches"
Quote:
Thanks Drew. Like you, I have no bodywork experience either. What happened to the hood is just like said. The combination of the blasting process and the rigidity of the hood braces formed (2) nice ridges. Out of curiousity though I'd like to know how to fix the hood. I guess you could remove the braces and hammer the ridges back down.  I guess it doesn't really matter at this point though because I have another hood lined up already. I guess it doesn't really matter at this point though because I have another hood lined up already. .
__________________
Shannon |
|
|
|
|
|
04-20-2010, 12:17 PM
|
#20 |
|
I'M TRUCK CRAZY!
Join Date: Oct 2006
Location: Sachse, TEXAS
Posts: 1,737
|
Re: Project - '69 4x4 named "Patches"
I guess that could be done. But hay, another good hood would be much easier.
|
|
|
|
|
04-20-2010, 01:18 PM
|
#21 | |
|
The Few, The Proud
Join Date: Jun 2007
Location: Ball Ground, Georgia
Posts: 1,830
|
Re: Project - '69 4x4 named "Patches"
Quote:

__________________
Shannon |
|
|
|
|
|
04-20-2010, 03:01 PM
|
#22 |
|
Shloooooong bed member #2
Join Date: Aug 2008
Location: Millington Tn.
Posts: 1,864
|
Re: Project - '69 4x4 named "Patches"
Nice work Shannon and sorry to hear about the hood.
You really need to name your drill press instead of "budget drill press" That way I can look for it at the hdwr stores.
__________________
David, Daughters 66 truck: http://67-72chevytrucks.com/vboard/s...d.php?t=484601 Learning to drive a 3 on the tree: http://www.youtube.com/watch?v=CcCMvRgBo1Q |
|
|
|
|
04-20-2010, 03:59 PM
|
#23 |
|
I'M TRUCK CRAZY!
Join Date: Oct 2006
Location: Sachse, TEXAS
Posts: 1,737
|
Re: Project - '69 4x4 named "Patches"
you would be looking for the drill press attachment for your floor jack.
Last edited by LOW DOUGH; 04-20-2010 at 04:00 PM. |
|
|
|
|
04-20-2010, 05:10 PM
|
#24 | ||
|
The Few, The Proud
Join Date: Jun 2007
Location: Ball Ground, Georgia
Posts: 1,830
|
Re: Project - '69 4x4 named "Patches"
Quote:
How about "The Hydraulic Arm Saver"? Quote:
__________________
Shannon |
||
|
|
|
|
04-30-2010, 08:37 AM
|
#25 |
|
Local Redneck Authority
Join Date: Mar 2009
Location: Grand Rapids, MI
Posts: 584
|
Re: Project - '69 4x4 named "Patches"
Catching up on many of the builds on the site. Another very nice build! Look forward to seeing the progress.
|
|
|
|
 |
| Bookmarks |
|
|


 Hybrid Mode
