
|
|
|
 02-12-2015, 10:23 AM
|
#1 |
|
Registered User
Join Date: Nov 2011
Location: West Plains Missouri
Posts: 2,088
|
Re: 55 Wagon Progress
Looking good Guys...
__________________
http://67-72chevytrucks.com/vboard/s...d.php?t=645774 Project Orangepeel 52 A.D. http://67-72chevytrucks.com/vboard/s...d.php?t=653337 John's LS 49 dodge http://67-72chevytrucks.com/vboard/s...d.php?t=655780 Blake's 67 GMC LS stepside http://67-72chevytrucks.com/vboard/s...d.php?t=690527 Reed 78 FJ40 Rebuild http://67-72chevytrucks.com/vboard/s...d.php?t=733259 Barger's 78 FJ40 |

|

|
|
02-12-2015, 10:54 AM
|
#2 |
|
Senior Member
 Join Date: Mar 2011
Location: West Plains, Missouri
Posts: 7,555
|
Re: 55 Wagon Progress
Nice work, thanks for the update...Jim
__________________
my build thread: http://67-72chevytrucks.com/vboard/s...d.php?t=459839 Jimbo's long bed step build:http://67-72chevytrucks.com/vboard/s...t=464626<br /> |
|
|
|
|
02-13-2015, 12:28 AM
|
#3 |
|
Senior Member
Join Date: Mar 2011
Location: West Plains, Missouri
Posts: 7,555
|
Re: 55 Wagon Progress
Very nice work...Jim
__________________
my build thread: http://67-72chevytrucks.com/vboard/s...d.php?t=459839 Jimbo's long bed step build:http://67-72chevytrucks.com/vboard/s...t=464626<br /> |
|
|
|
|
02-14-2015, 09:53 PM
|
#4 |
|
Registered User
Join Date: Jan 2013
Location: Leonardtown, MD
Posts: 1,637
|
Re: 55 Wagon Progress
Thanks Jim!
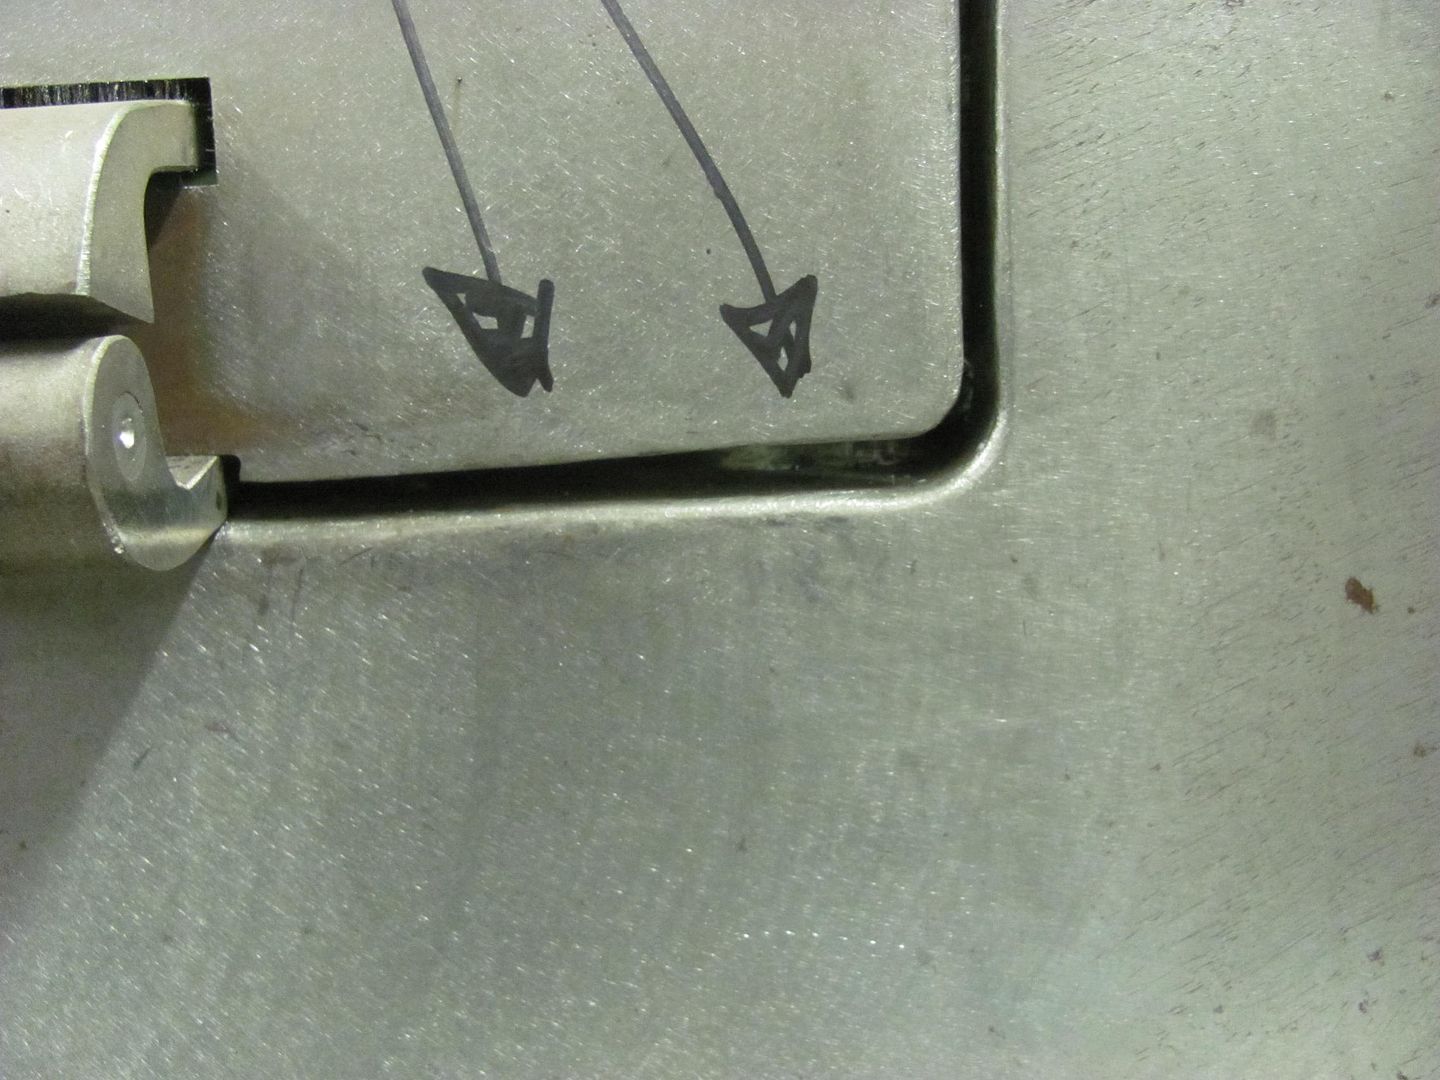
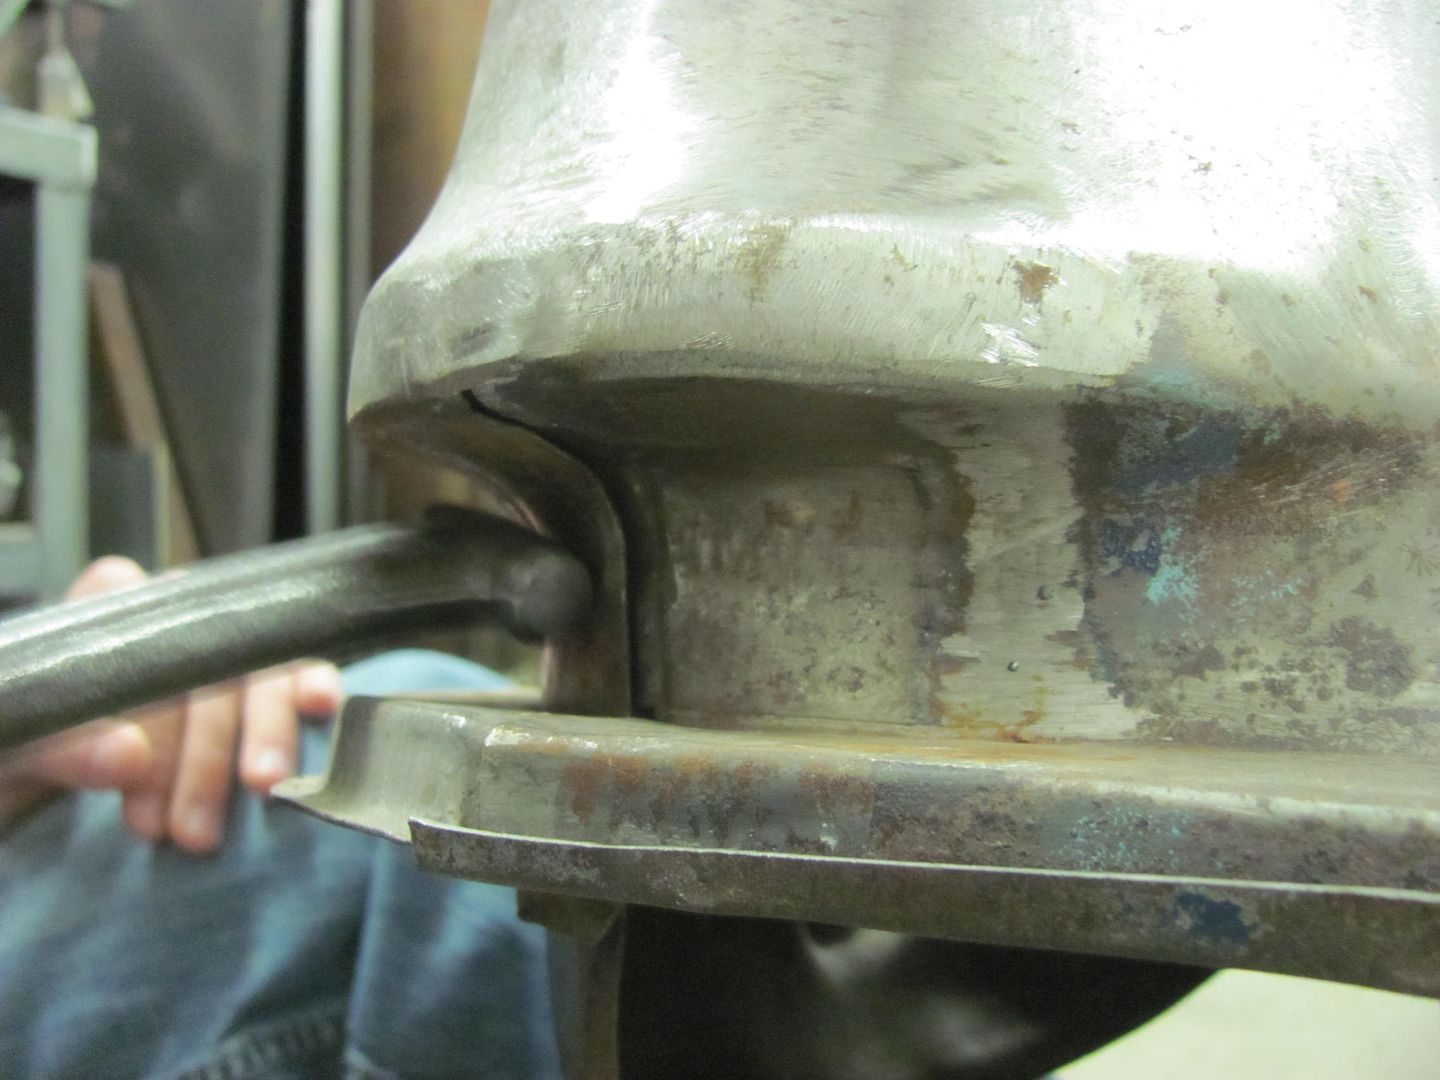
Today's progress, Kyle finishing up the hood brace.. 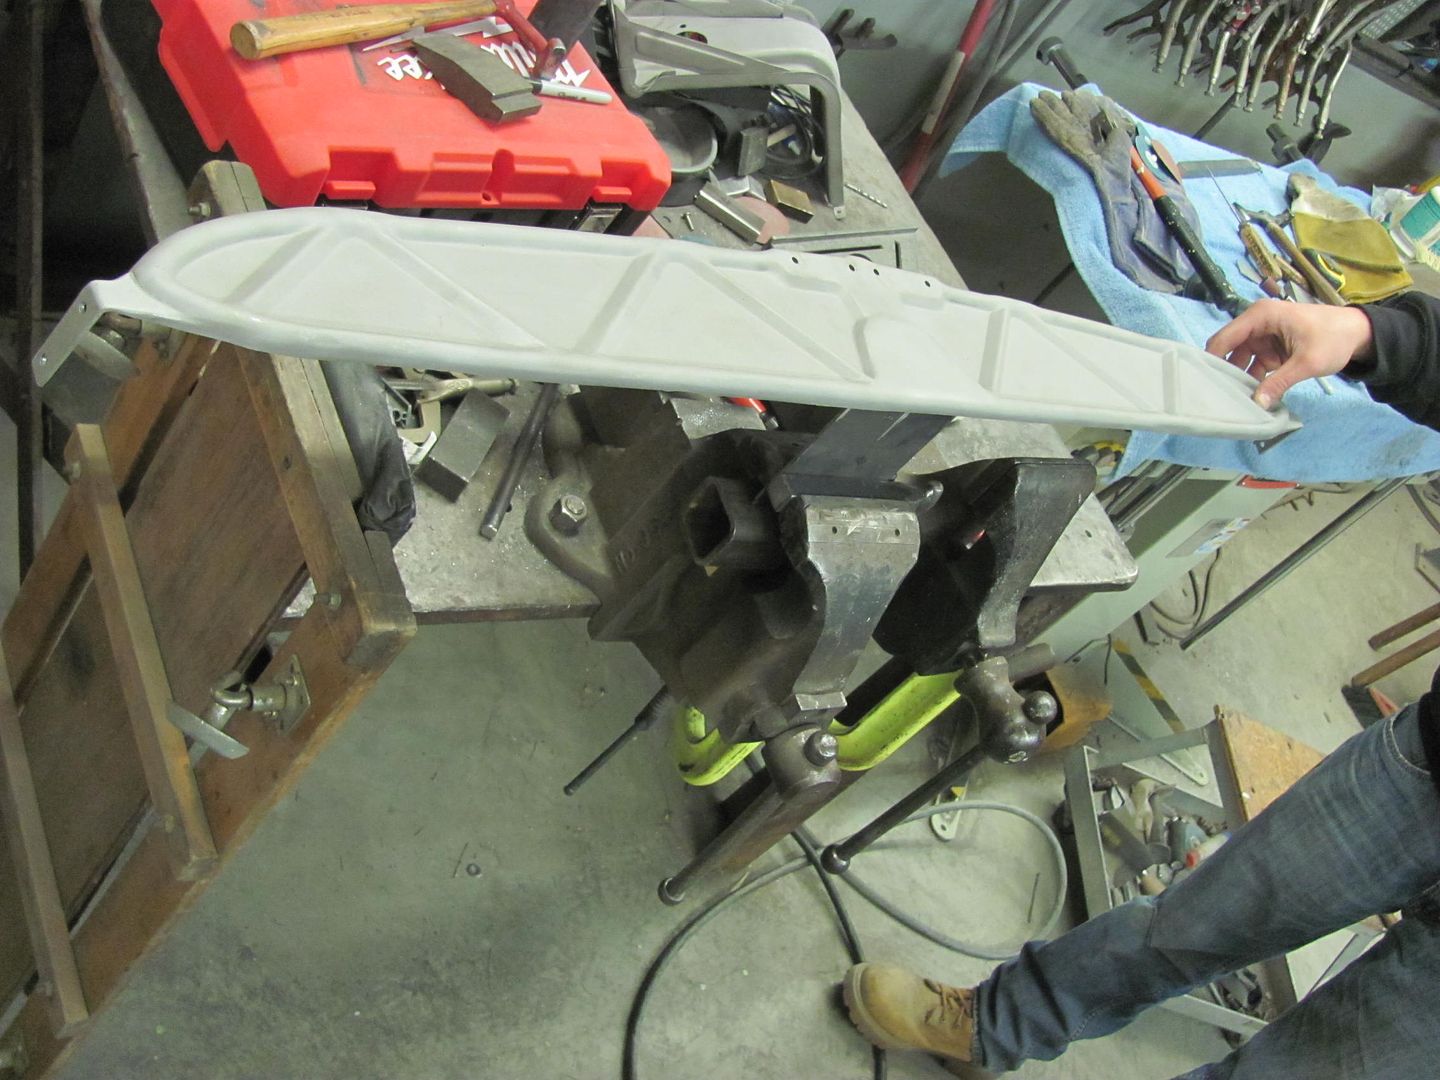 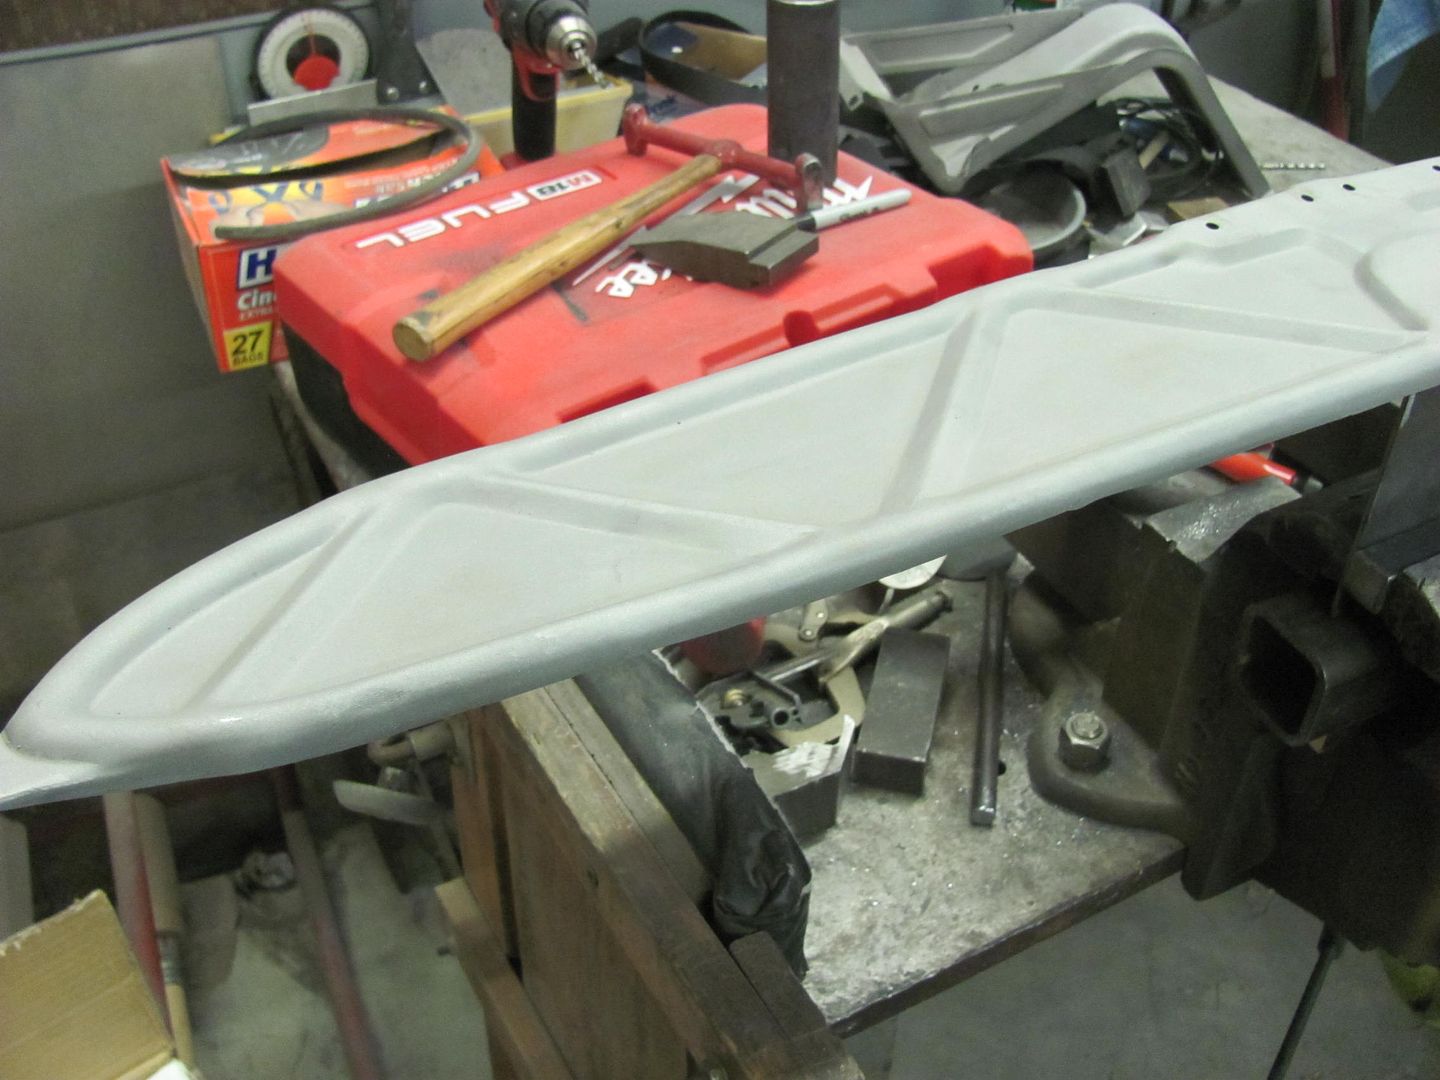 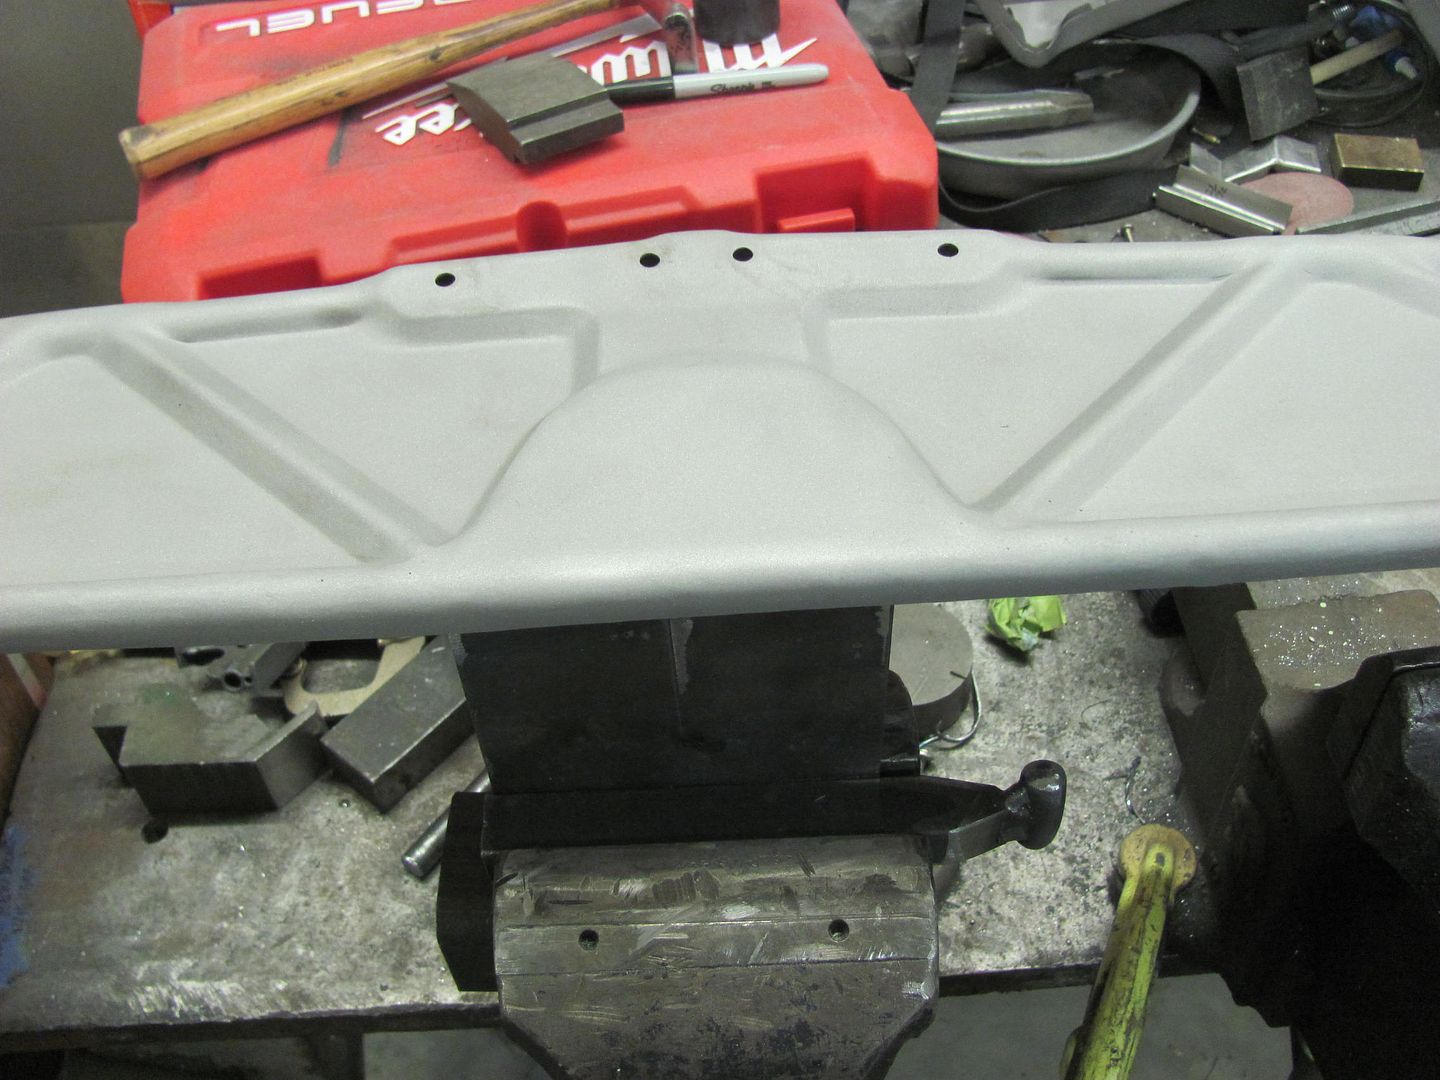 While I continue to generate dust on the floor... 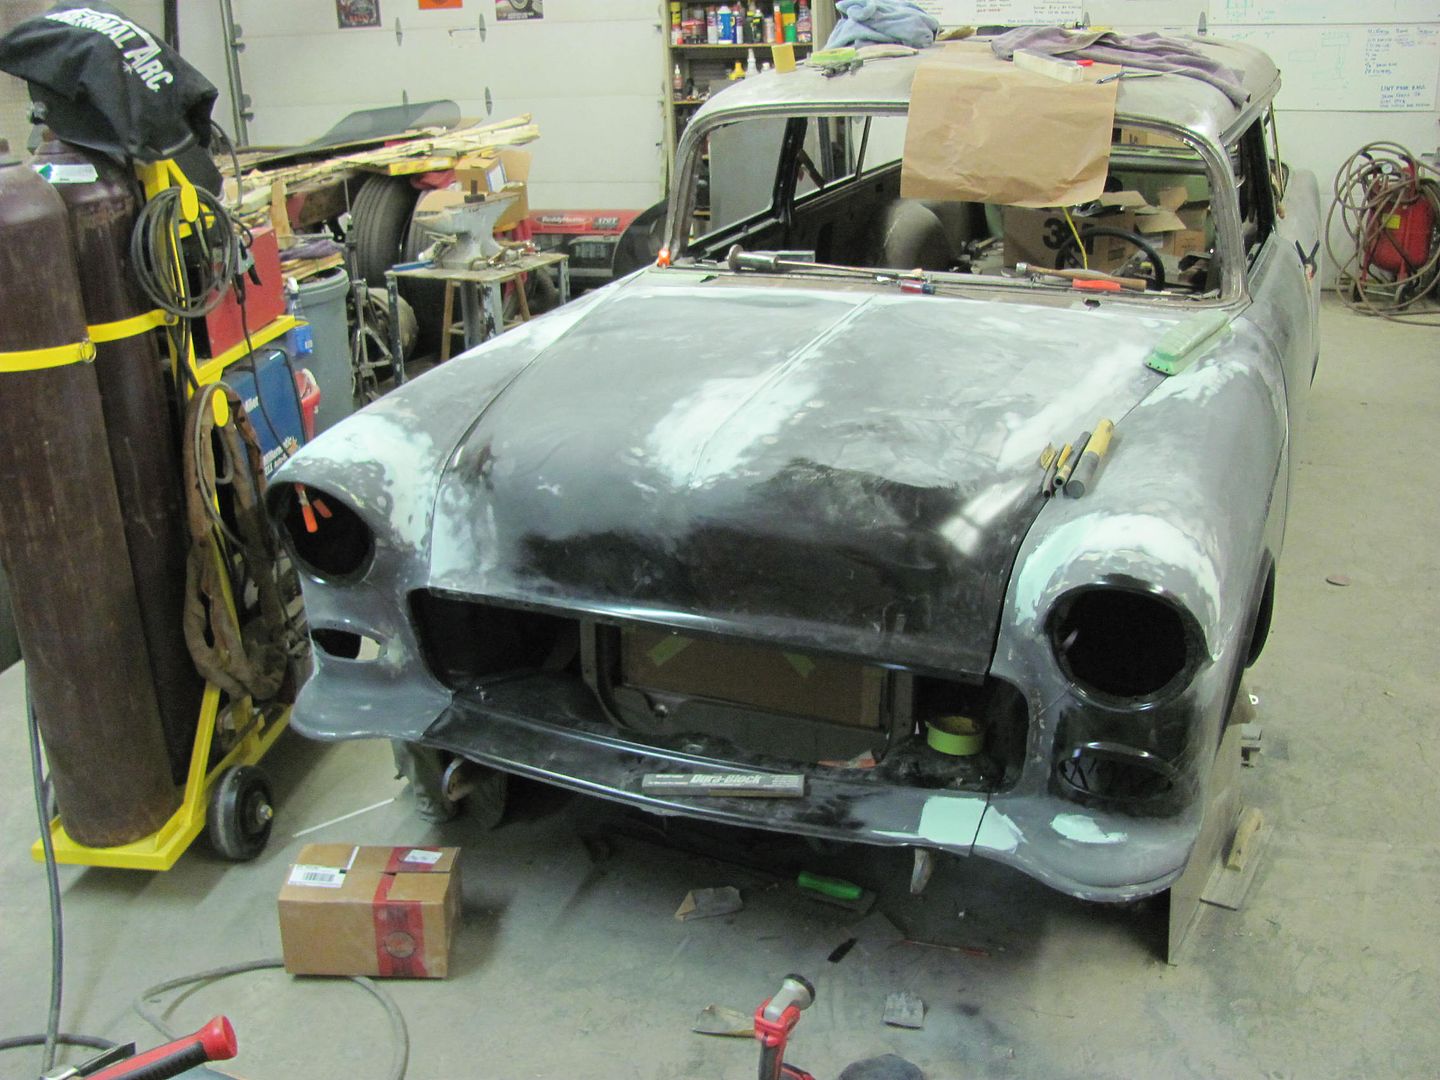 Recently we installed a used core support that was quite a bit nicer than our original, but still showed some issues... 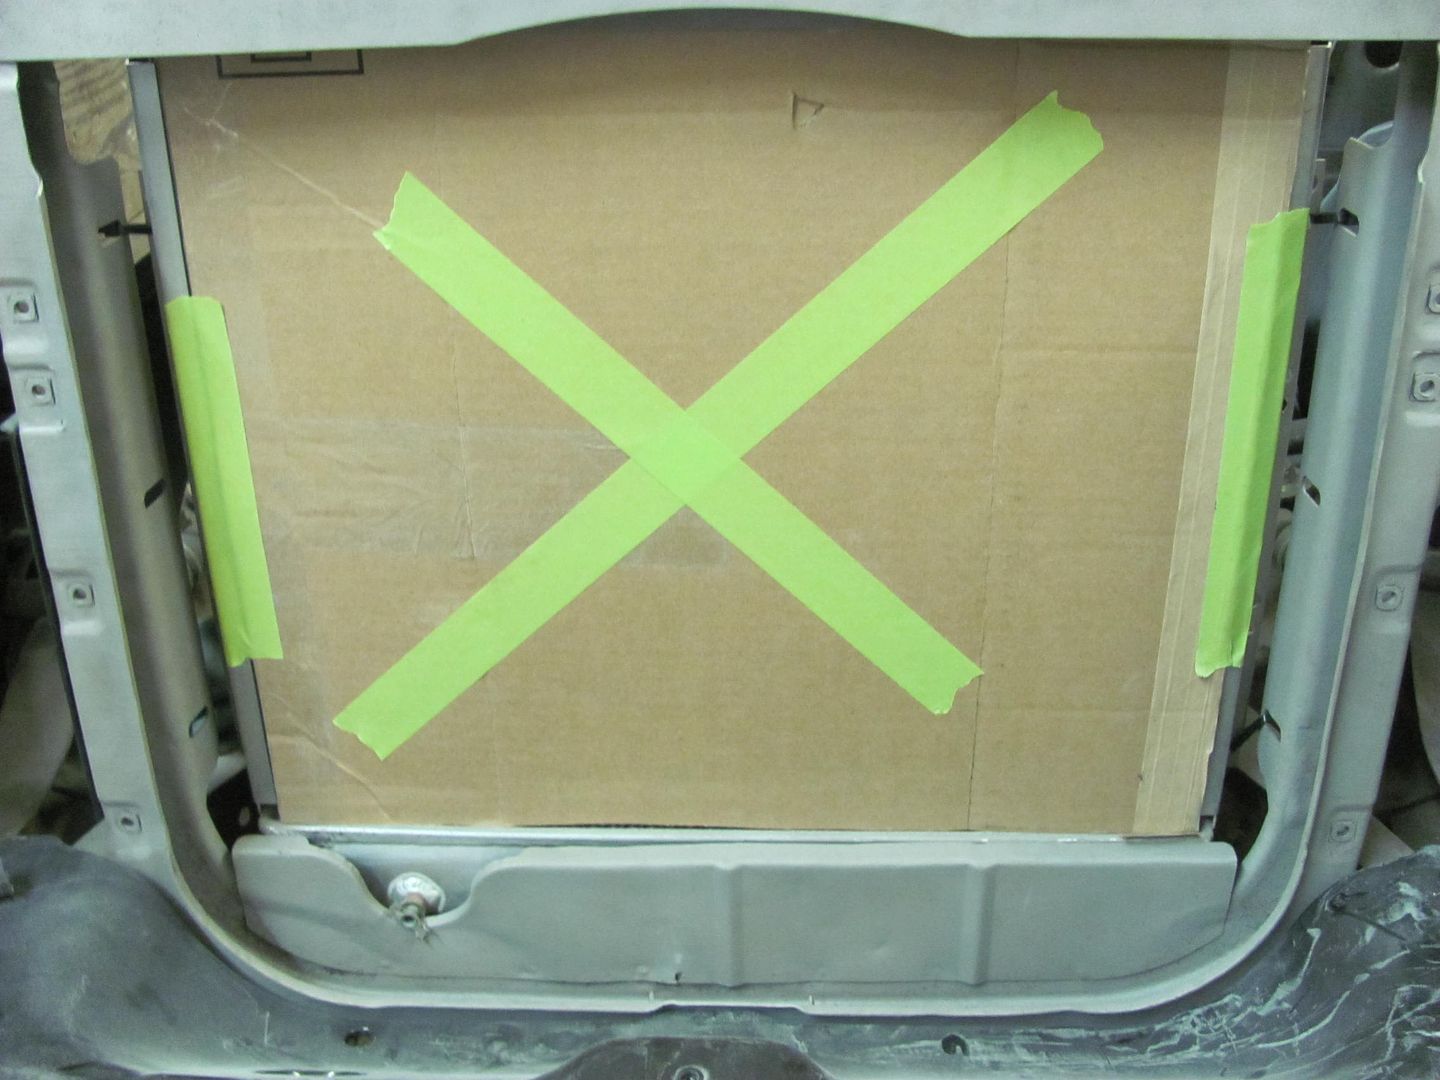 Here we see some rust... 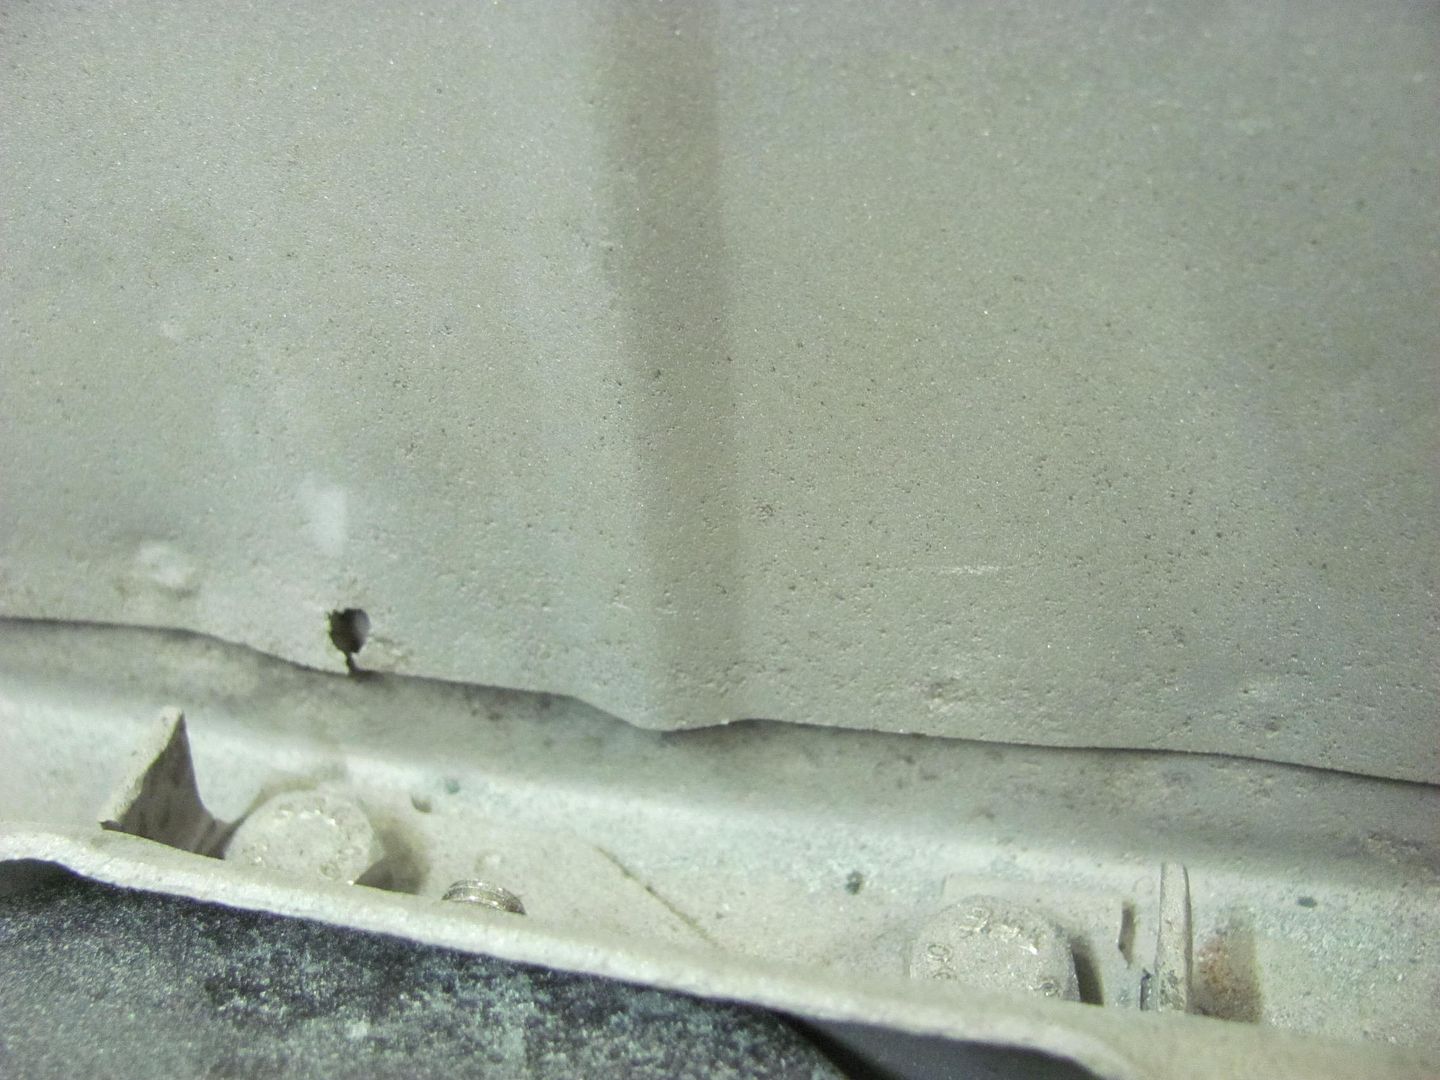 And not quite enough clearance to the petcock.. 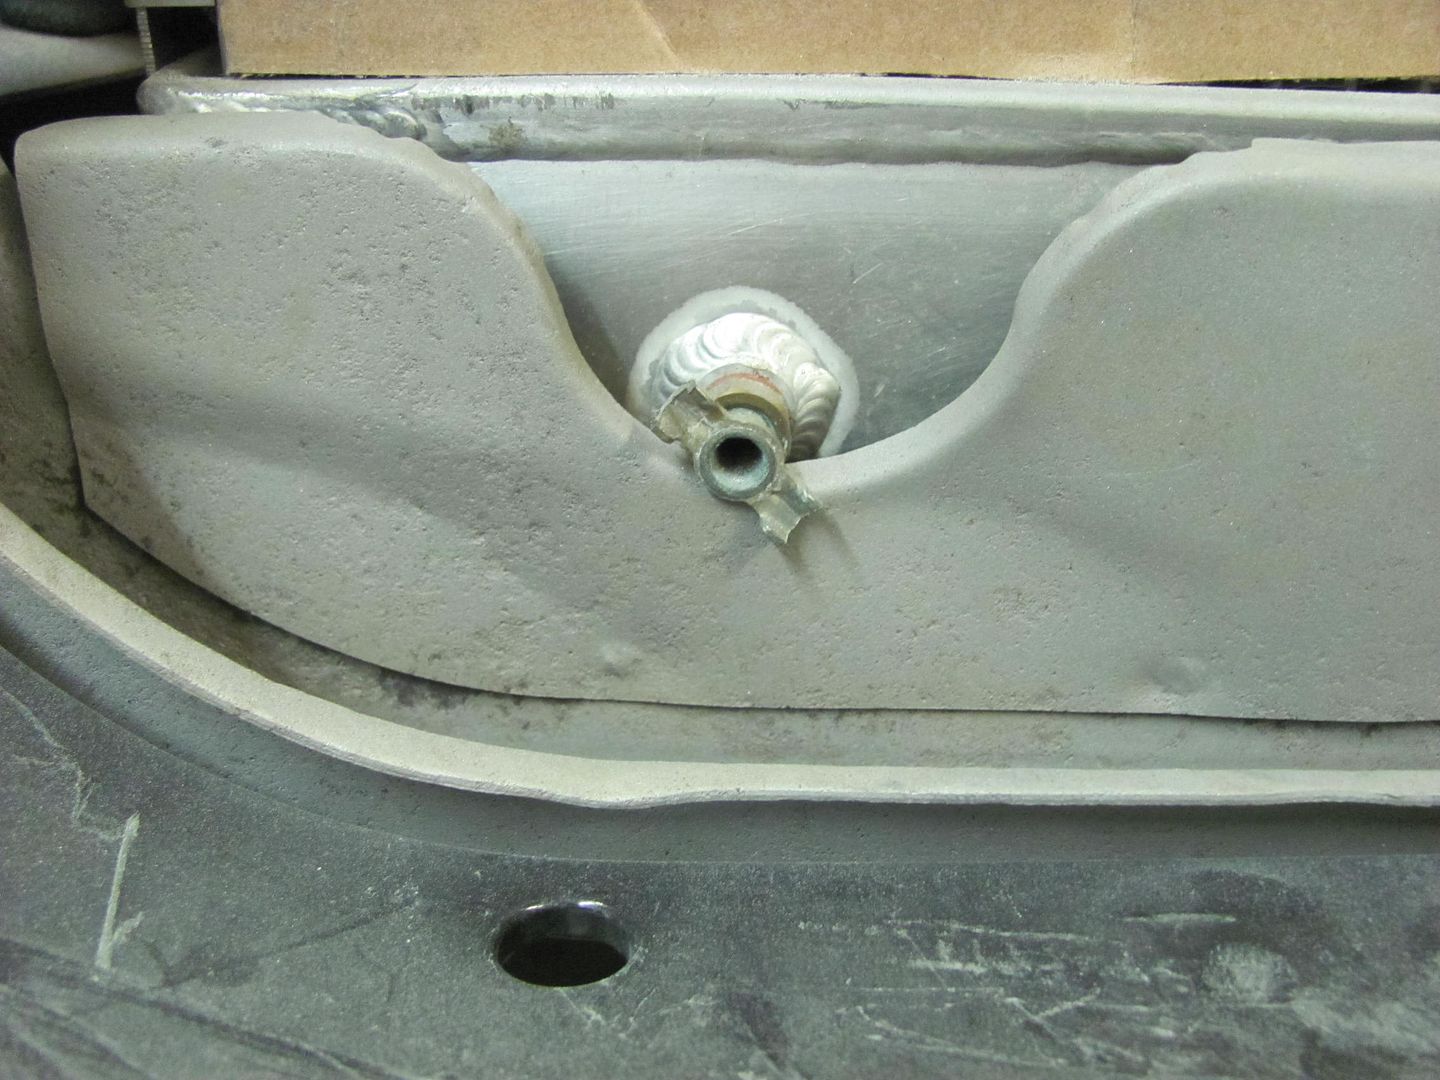 So this will be next on the list, cutting out a new one with a bit better fitment.
__________________
Robert |
|
|
|
|
02-15-2015, 12:10 AM
|
#5 |
|
Senior Member
Join Date: Mar 2011
Location: West Plains, Missouri
Posts: 7,555
|
Re: 55 Wagon Progress
Brace came out really nice, young man is doing some great work...Jim
__________________
my build thread: http://67-72chevytrucks.com/vboard/s...d.php?t=459839 Jimbo's long bed step build:http://67-72chevytrucks.com/vboard/s...t=464626<br /> |
|
|
|
|
02-15-2015, 10:14 AM
|
#6 |
|
Senior Member
Join Date: Jul 2012
Location: Oblong, Illinois
Posts: 7,017
|
Re: 55 Wagon Progress
You guys make a great team.
|
|
|
|
|
02-16-2015, 08:15 PM
|
#7 |
|
Registered User
Join Date: Jan 2013
Location: Leonardtown, MD
Posts: 1,637
|
Re: 55 Wagon Progress
Thanks for the comments guys... We had an early schedule today to try and miss the weather.. As I still hadn't finished blocking the front end, rather than pull the core support just yet, Kyle will start on the rear of the wagon in wrapping up some details there. Before pulling the tailgate, there was one gap that was inconsistent, so I gave him a hand with the rework before he got welding..
  First to unfold the flange a bit... 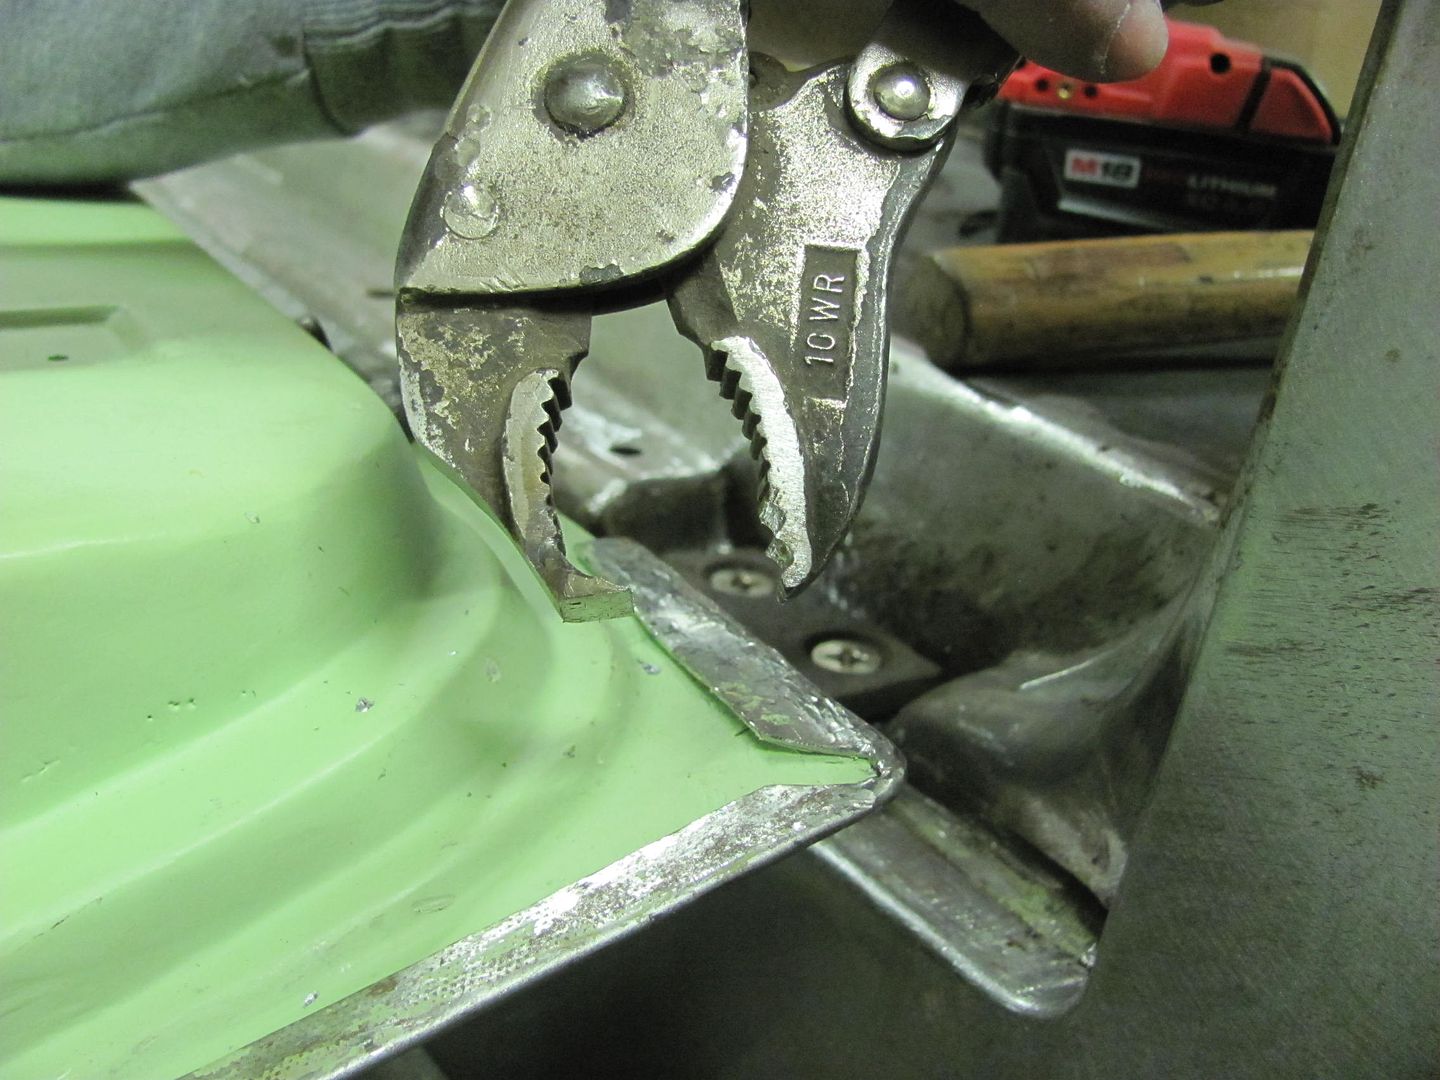 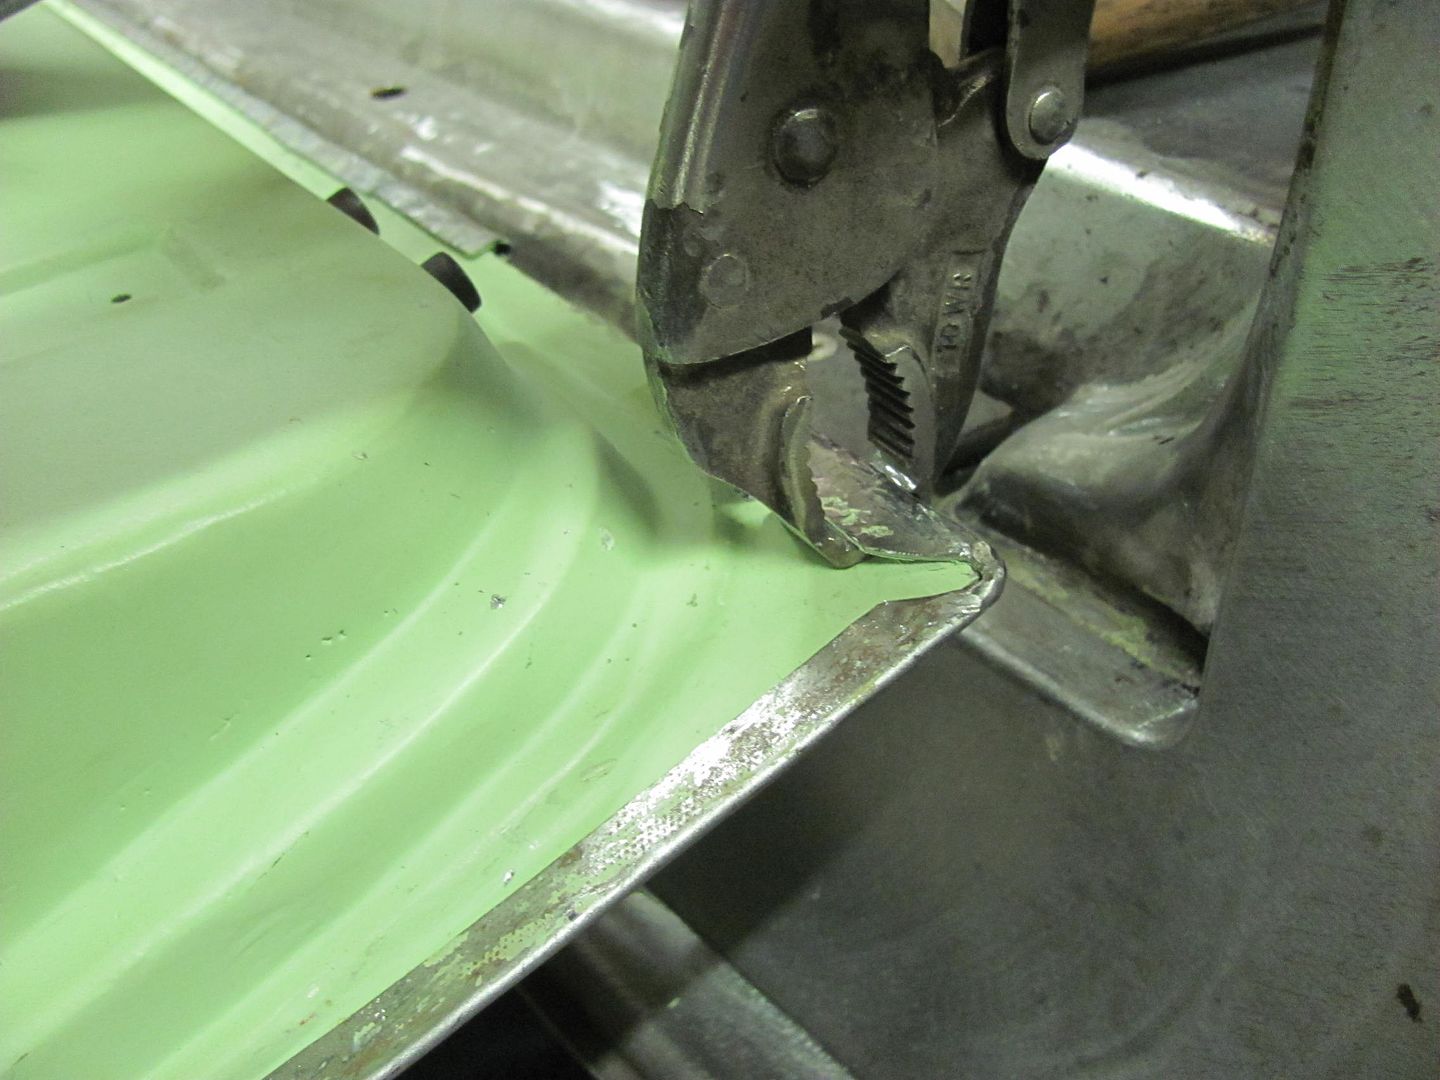 Next, some 14 gauge steel was cut out and a strengthening bend added to use for some friendly persuasion.. 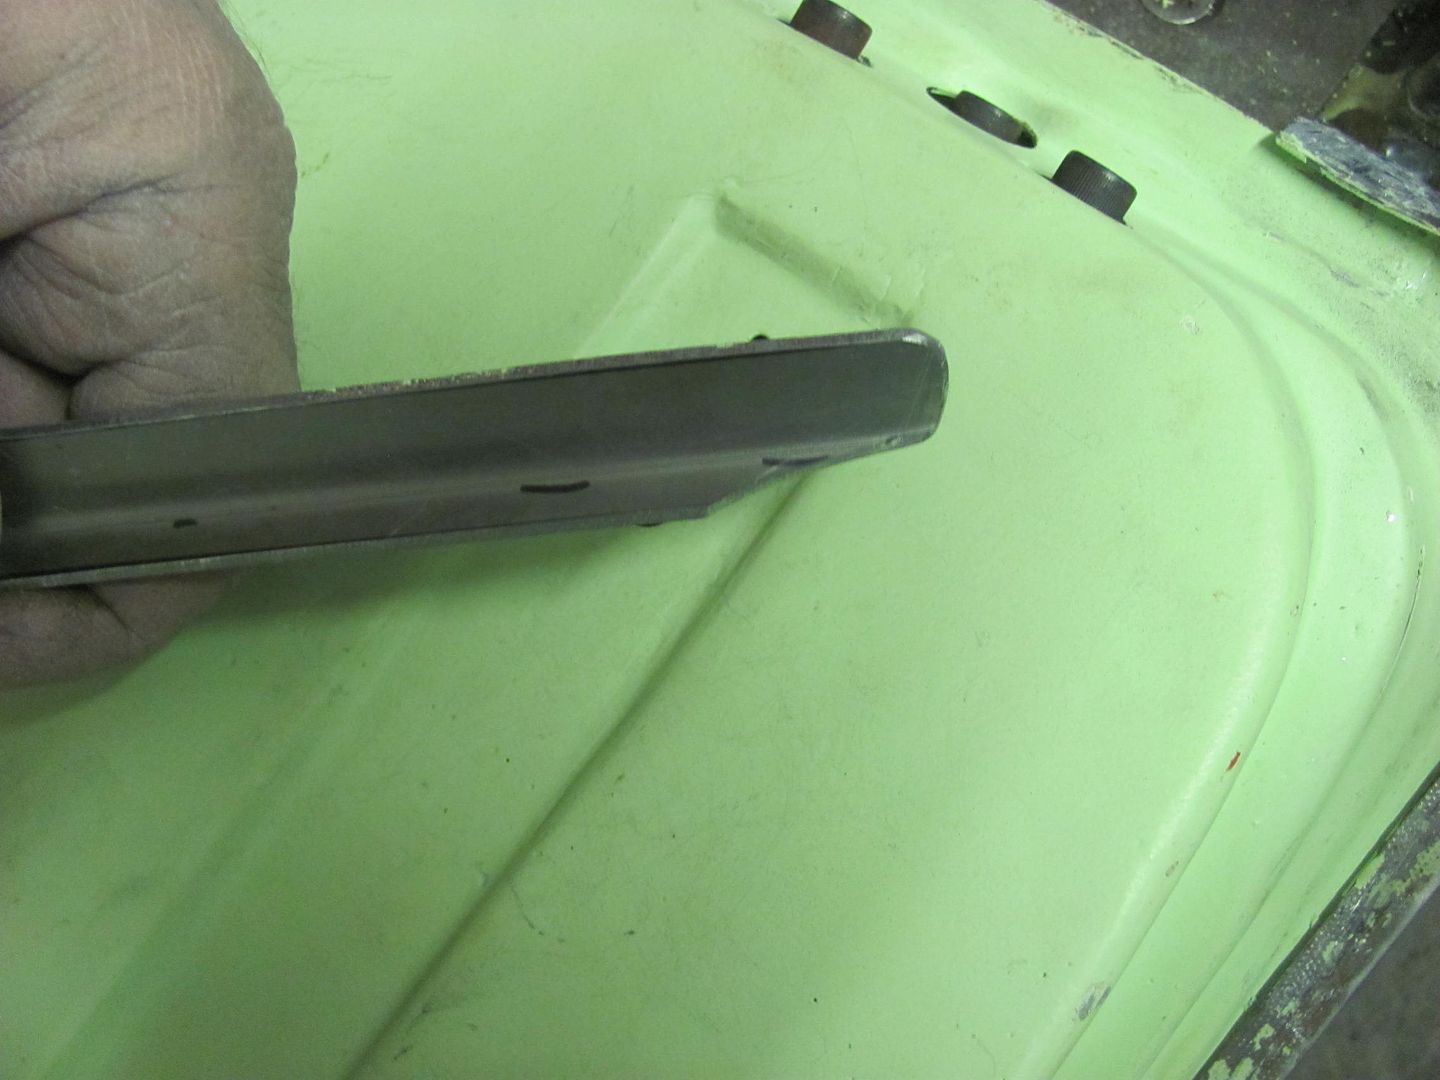 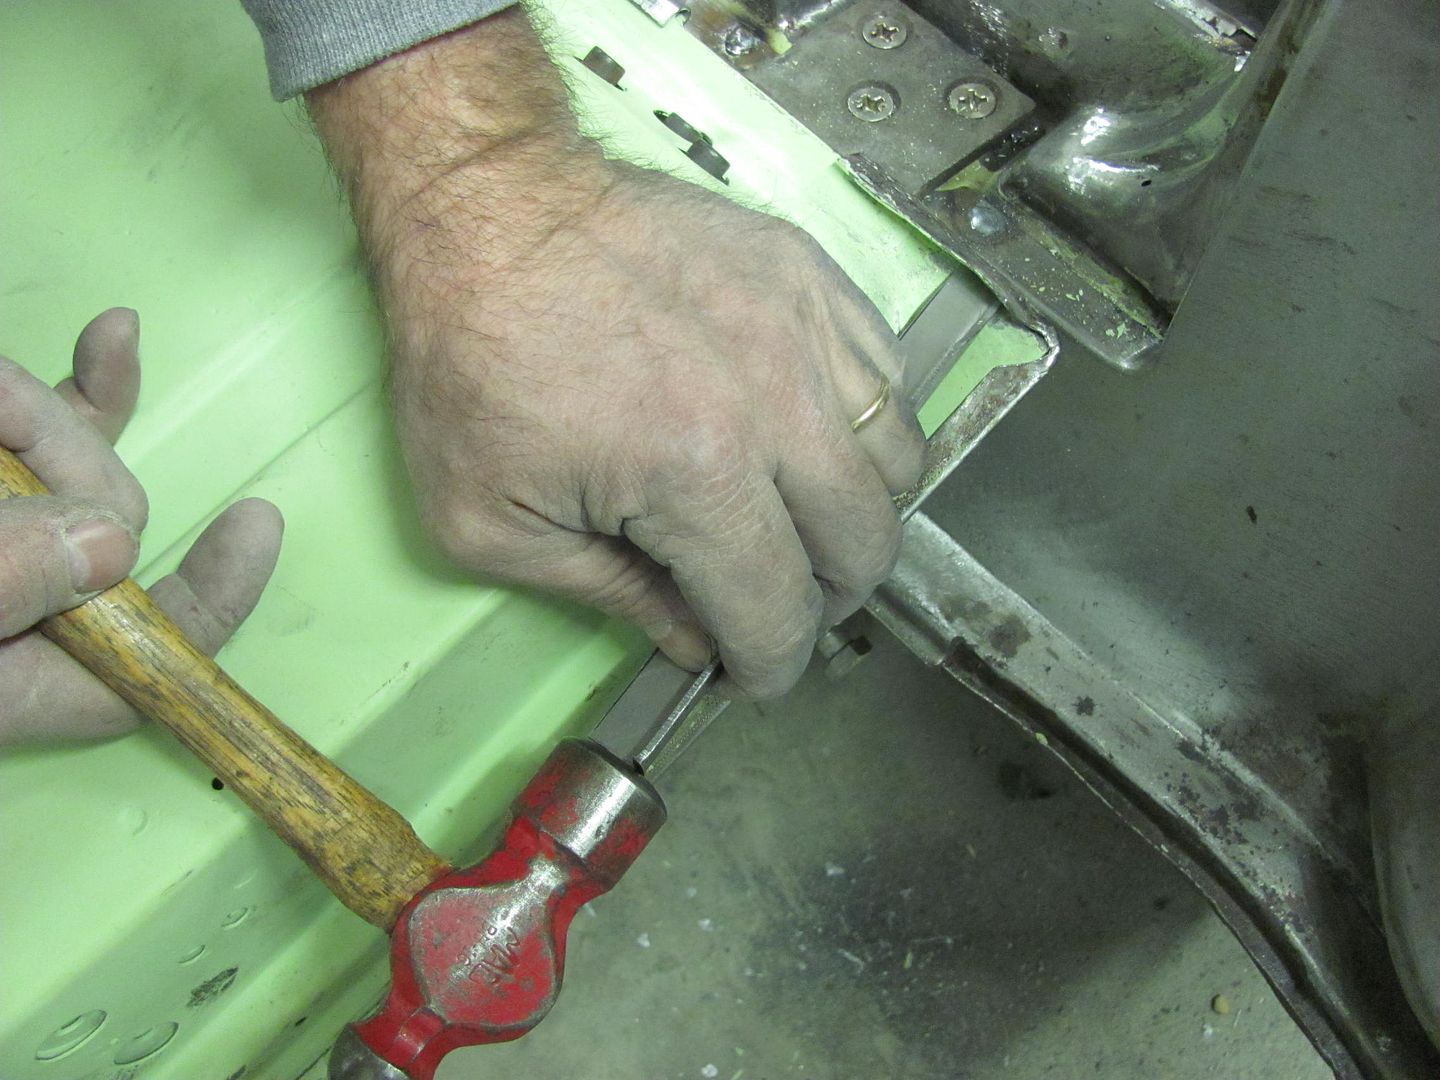 Refolded... 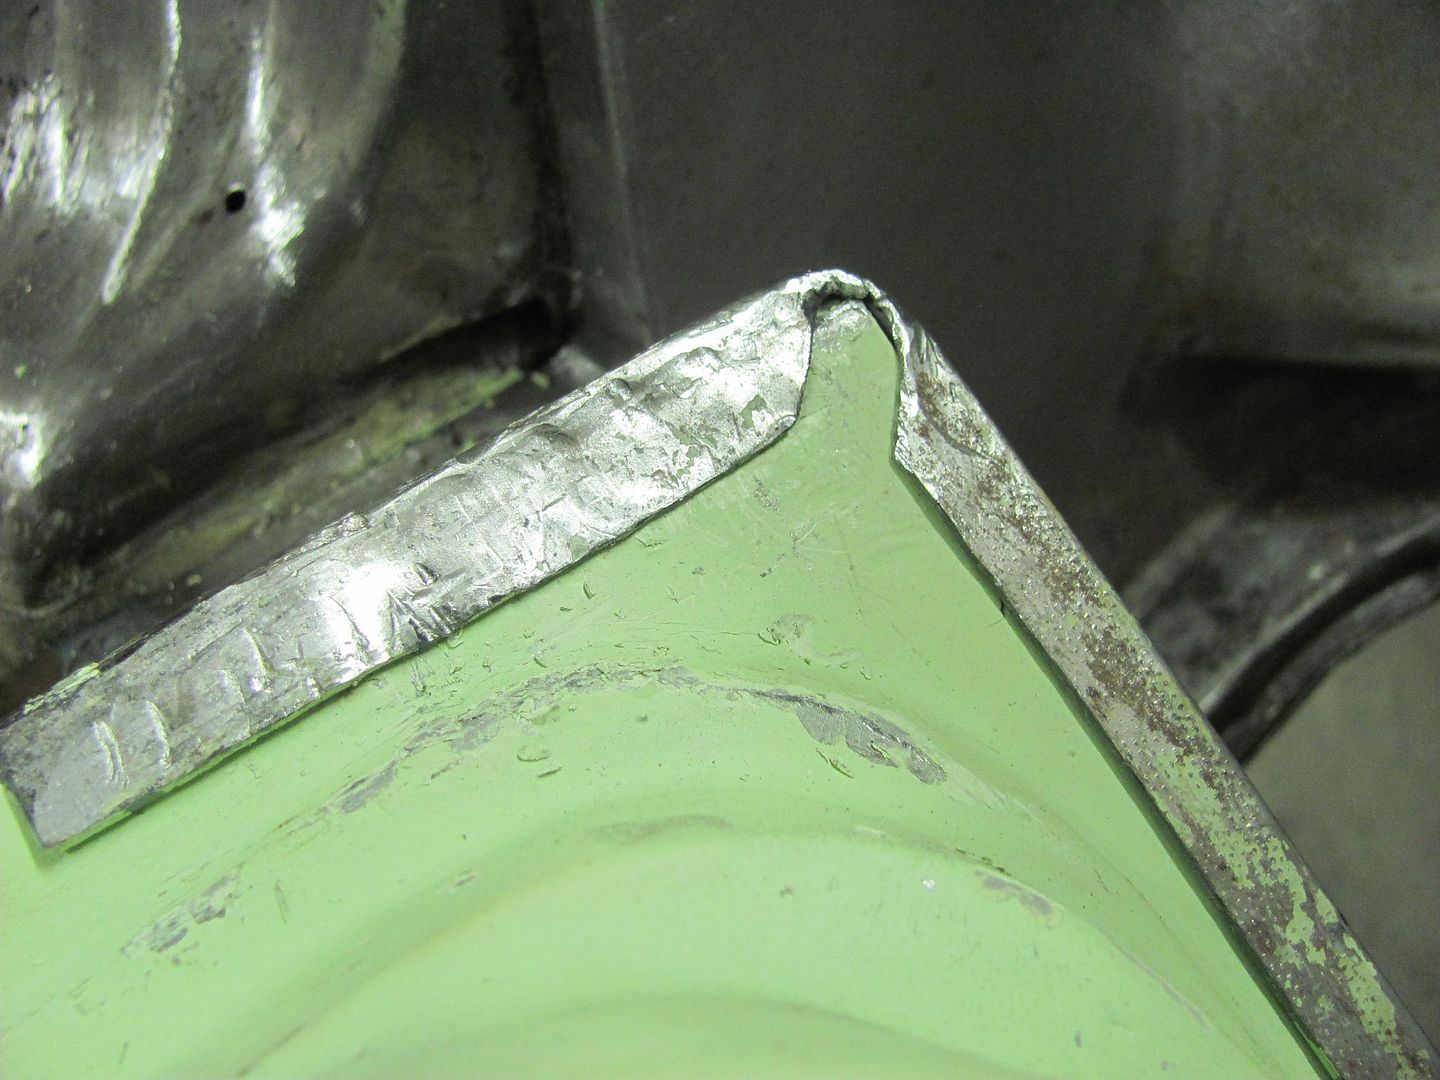 For comparison, before: After: 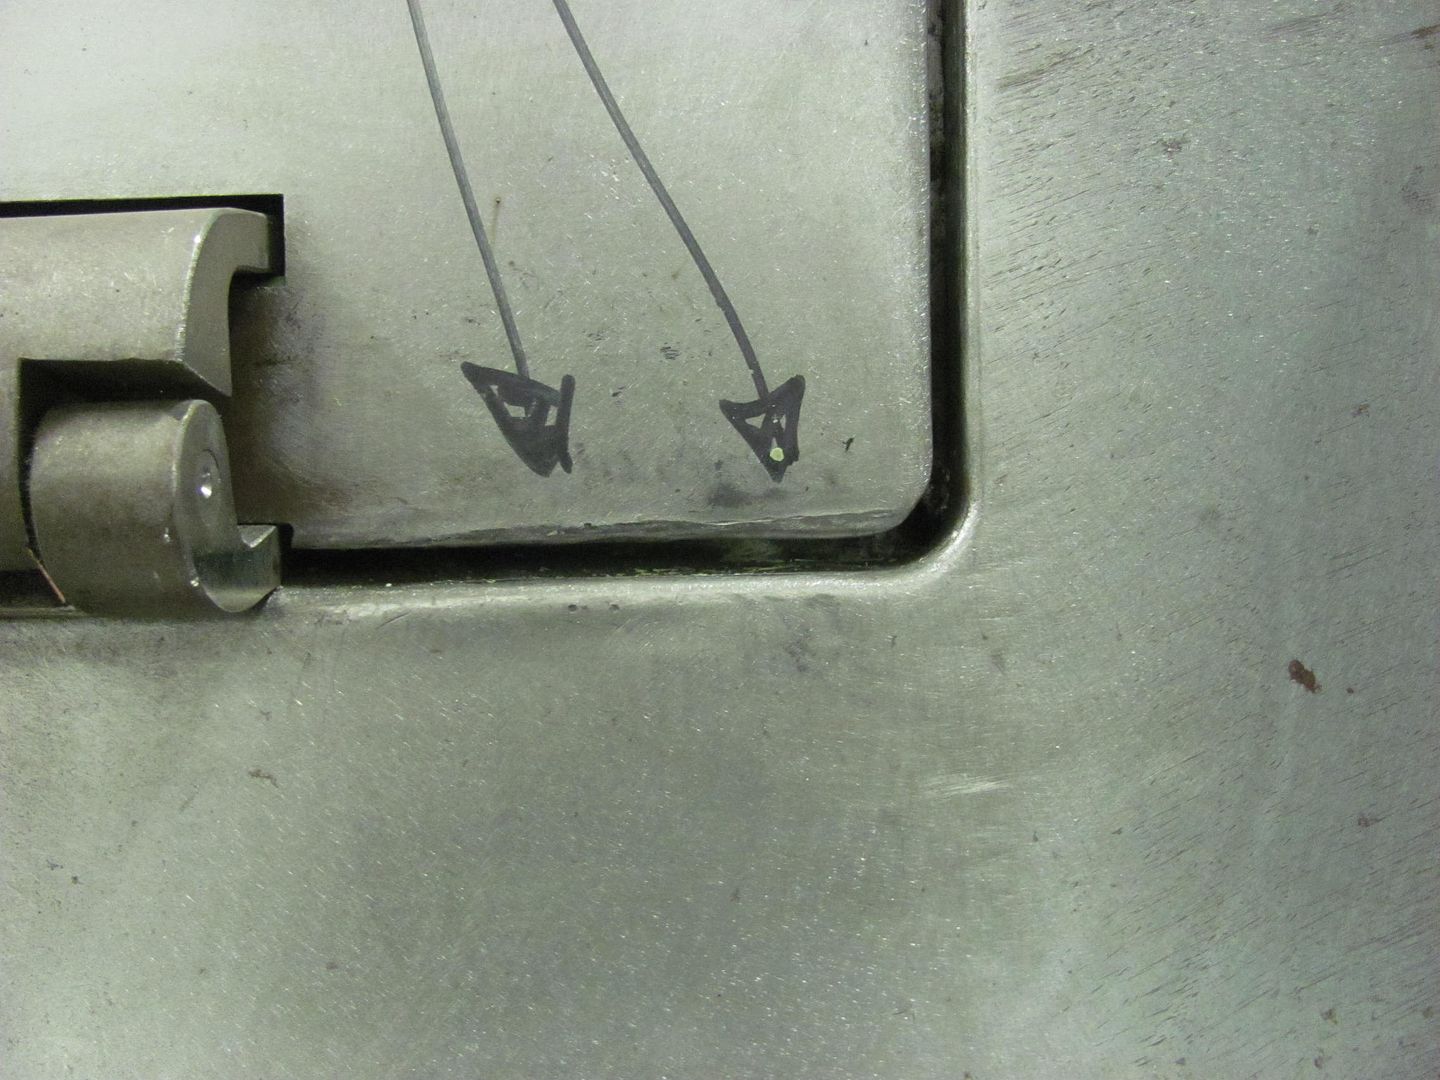 Then we tweaked the twist of the tailgate for good fitment to the opening and Kyle added three plug welds down each side to lock the skin to the inner tail gate.  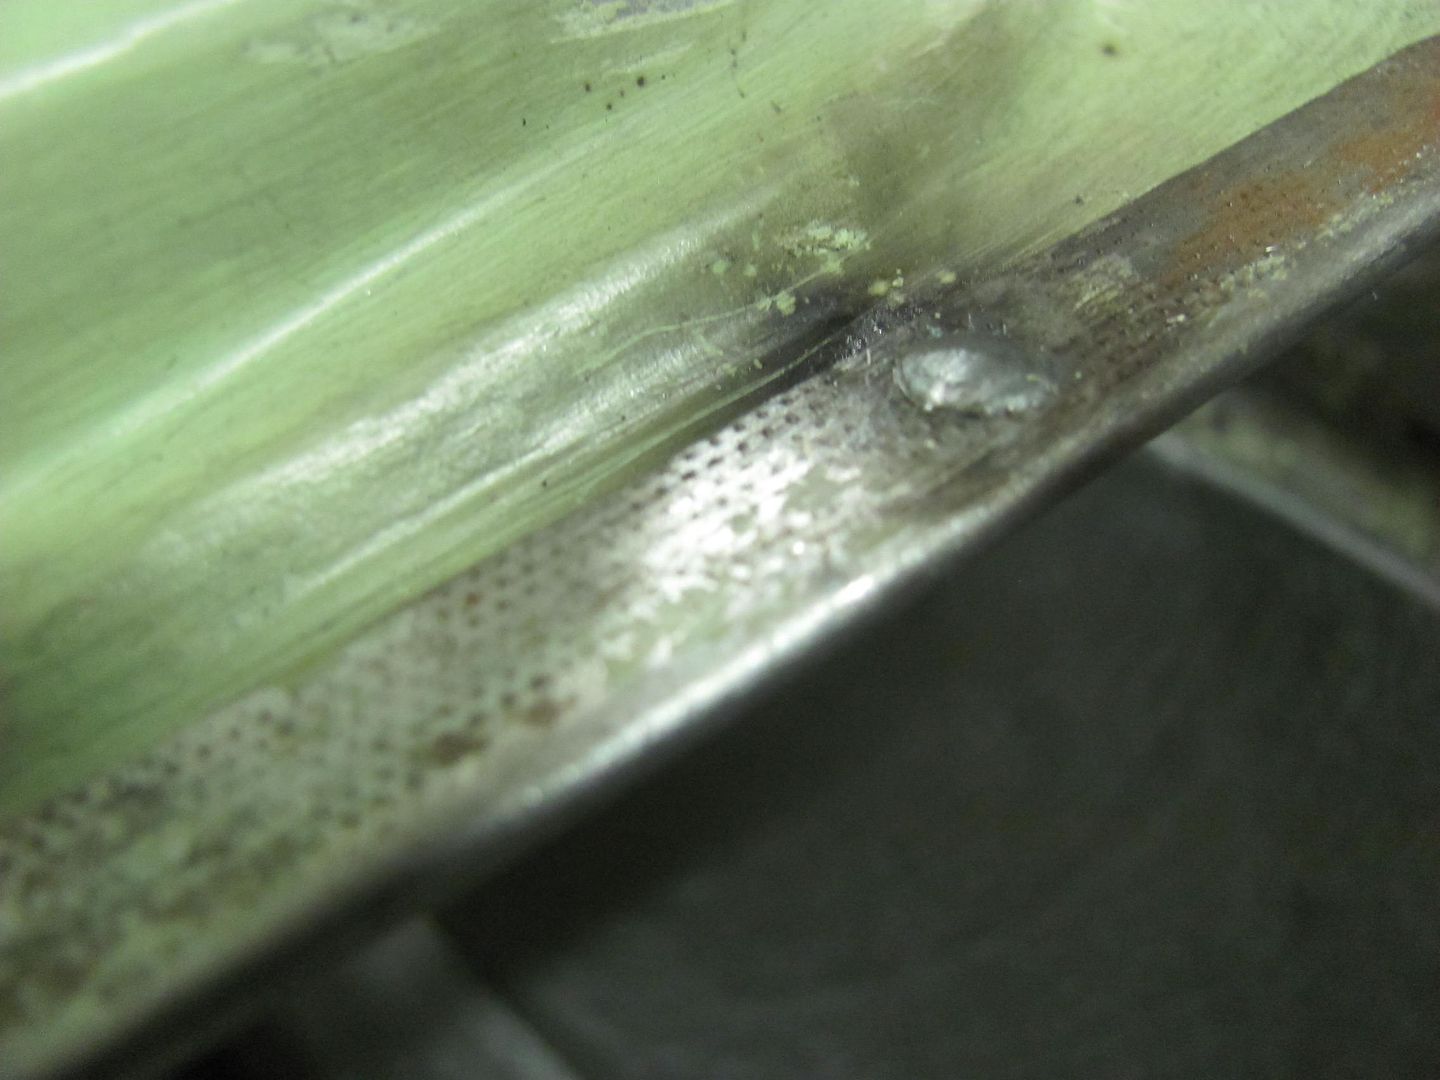 ...Then we removed the tail gate so he could finish the plug welds for the top flange of the tail pan, I had only tacked it in place when the tailpan was installed, so this should help check off another item from the list...... Meanwhile I continued blocking out the front end..  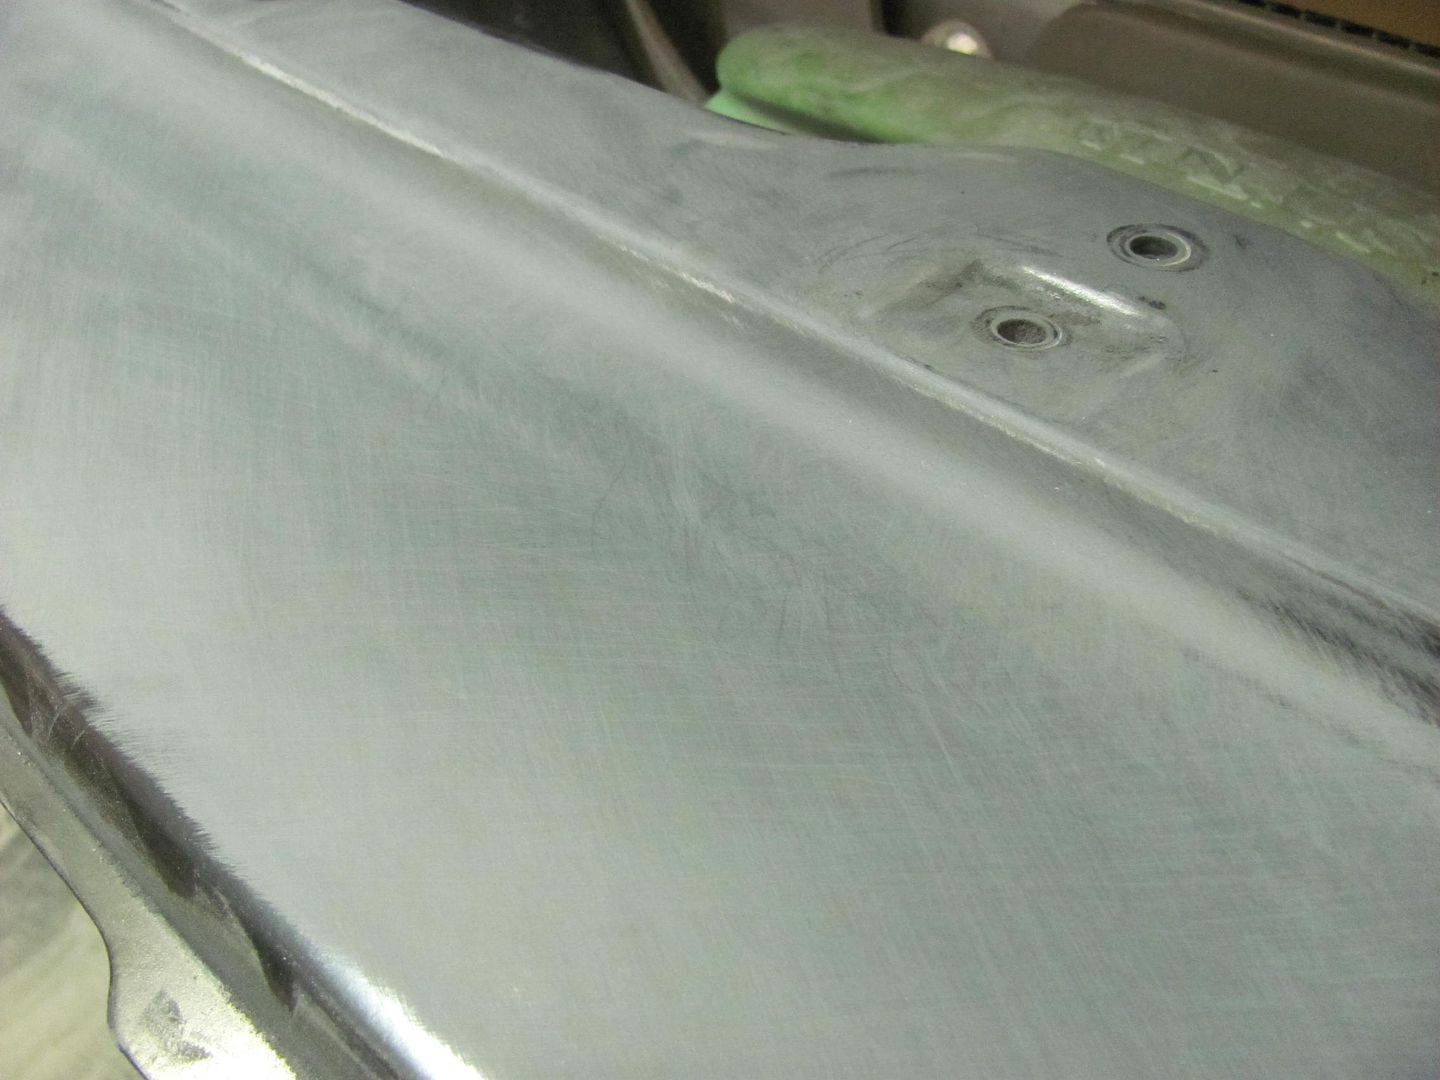 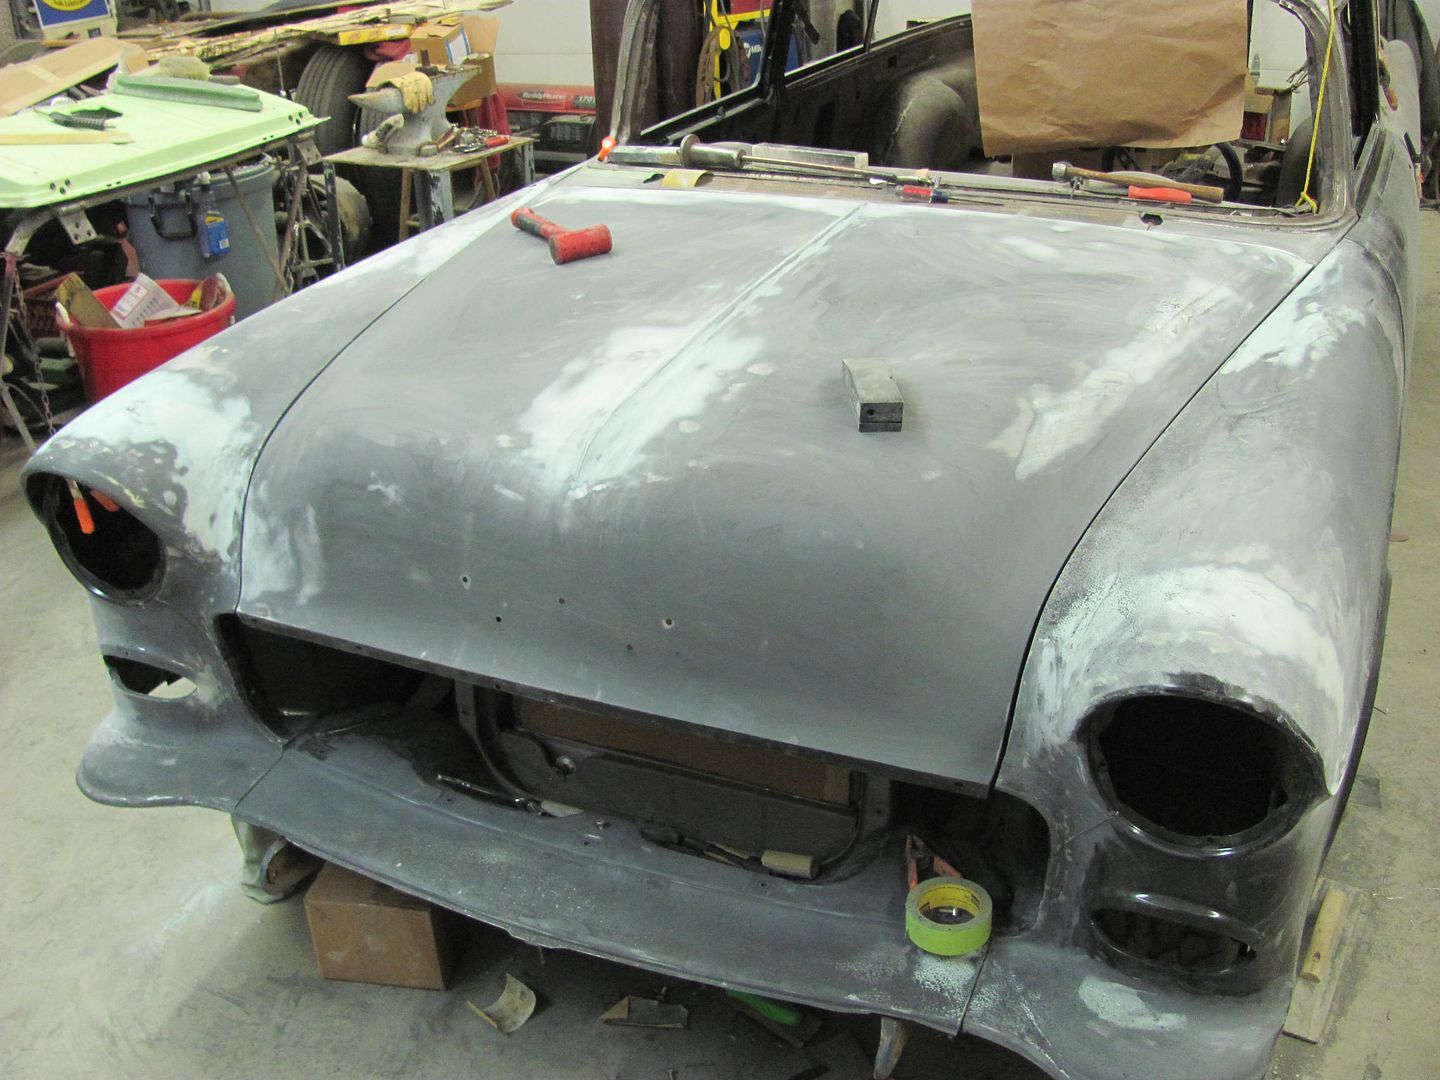 
__________________
Robert |
|
|
|
|
02-16-2015, 09:54 PM
|
#8 |
|
Senior Member
Join Date: Jul 2012
Location: Oblong, Illinois
Posts: 7,017
|
Re: 55 Wagon Progress
Wow, this is going to be about the most perfect 55 wagon on the planet. Nice process on the tail gate gap...I am learning a lot following along.
|
|
|
|
|
02-18-2015, 11:32 PM
|
#9 |
|
Registered User
Join Date: Jan 2013
Location: Leonardtown, MD
Posts: 1,637
|
Re: 55 Wagon Progress
Thanks!
Well Kyle skipped out on me tonight, something about a birthday and his parents taking him out to dinner.. and here he could have been welding!  So I took the opportunity to have dinner with the family, so tonight was a short night... One of the other areas I skipped over at the rear of the wagon was when the tail pan was installed. The factory version with the pinch welded flanges has a gap in the crimp seam for the rear bumper seal: 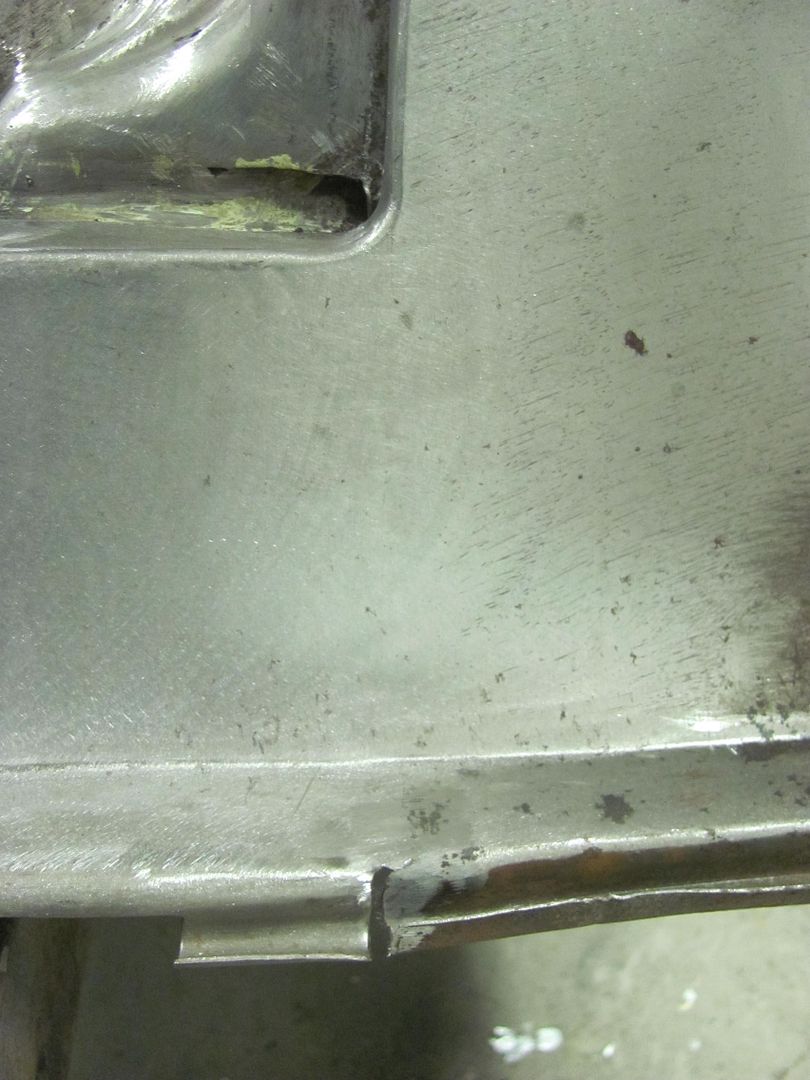 As I got rid of all the pinch weld seams at the rear of the wagon to eliminate those rust traps, the gap at the crimp seam will be filled in. To assist in filling in the wide gap, a piece of copper flat bar is used as a backer.. 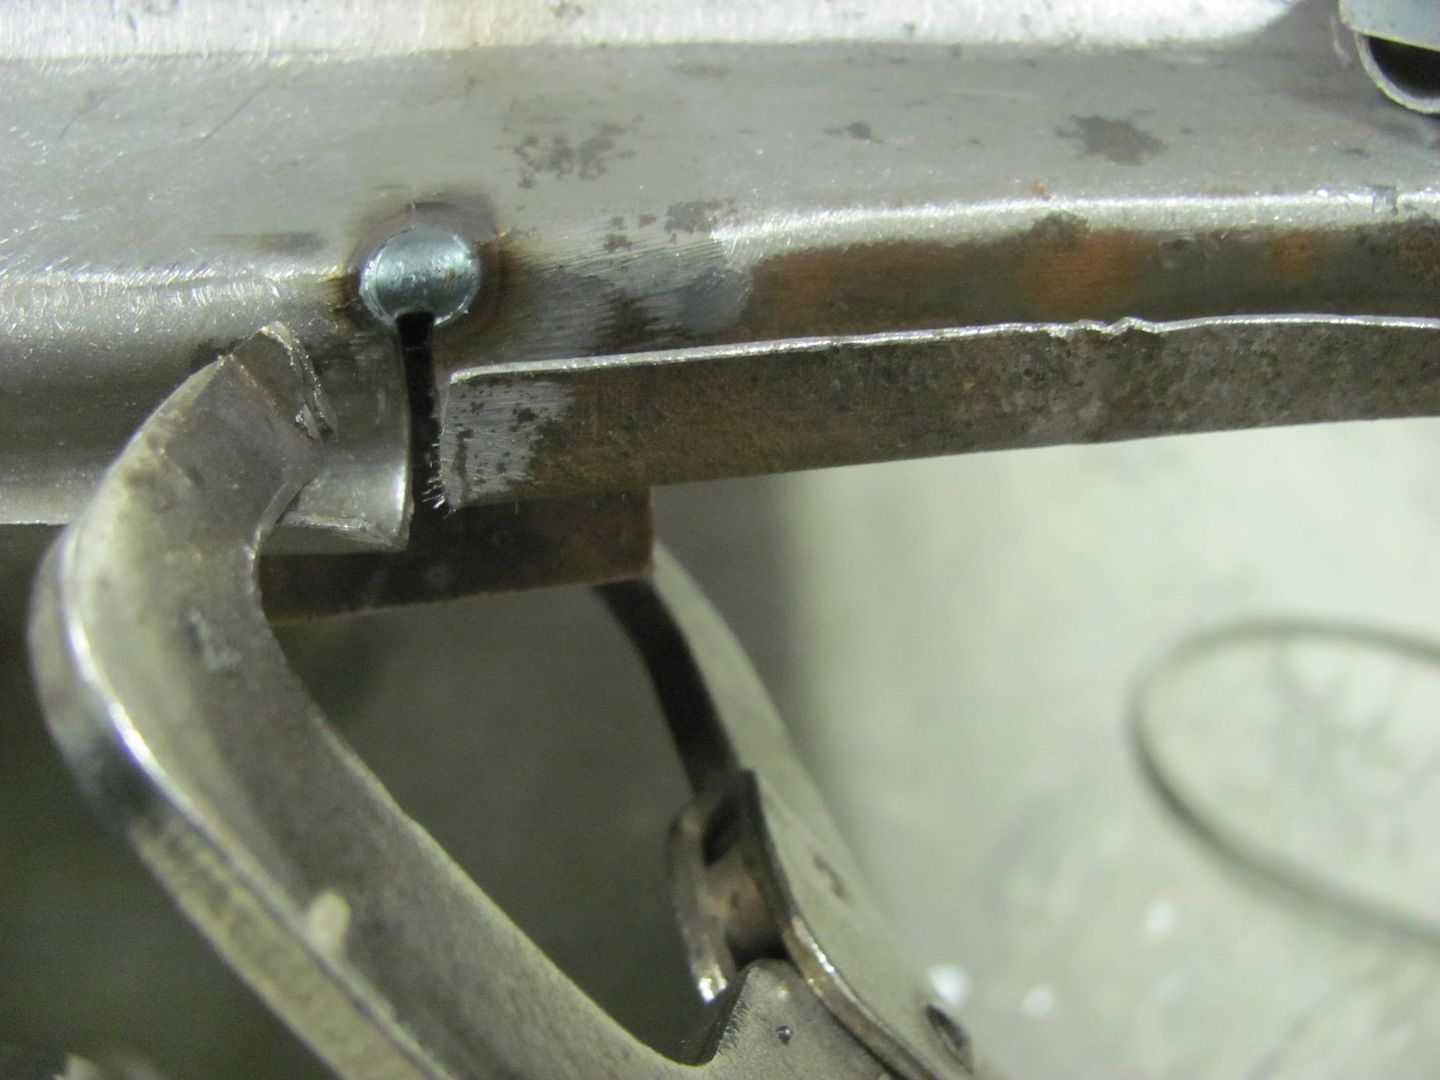 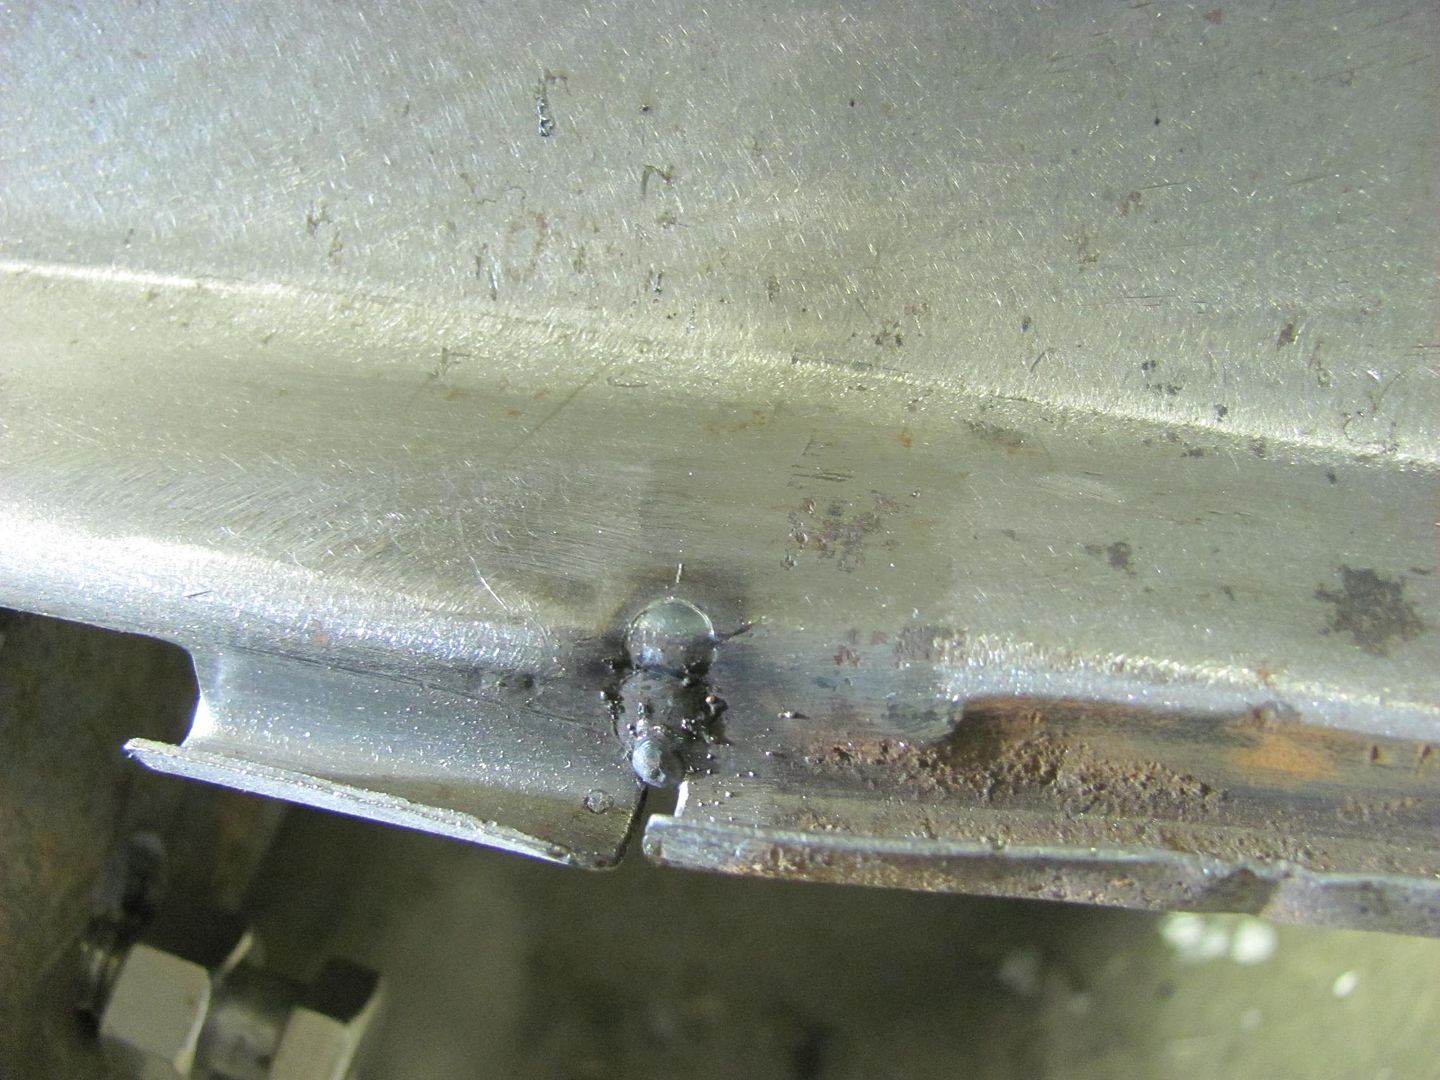 Next, as the reproduction tail pan has a rounded crimp seam and the area on the original quarters is more of a square, we'll add some hammer action here. The remaining piece of the flat bar is clamped in and used as an anvil.. 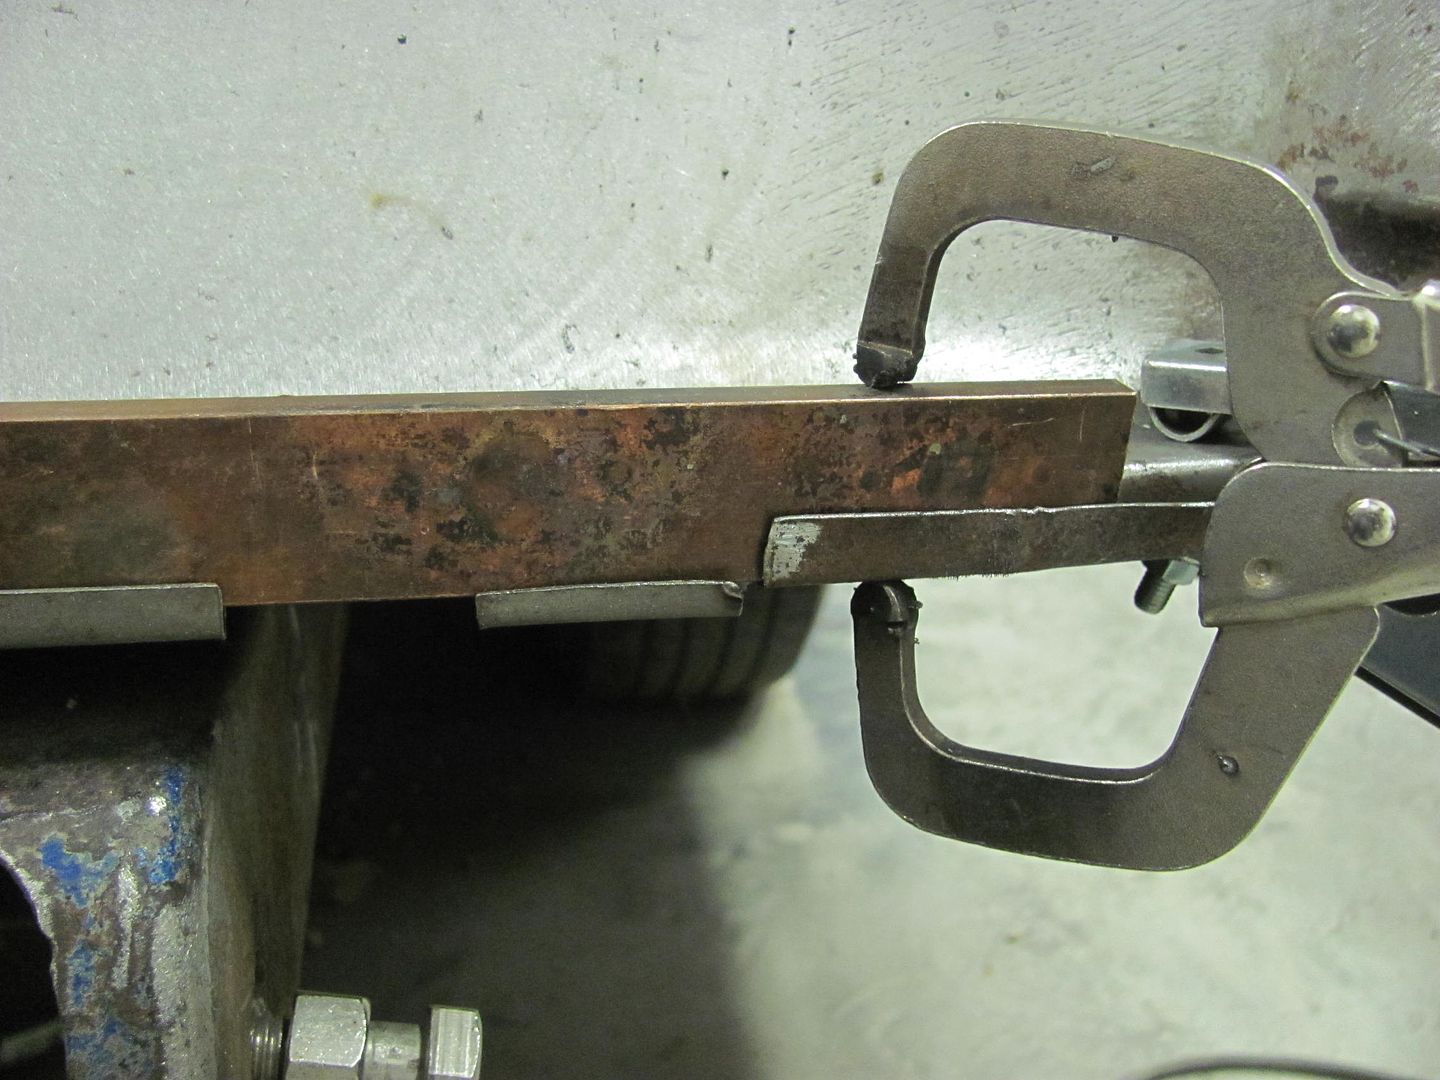 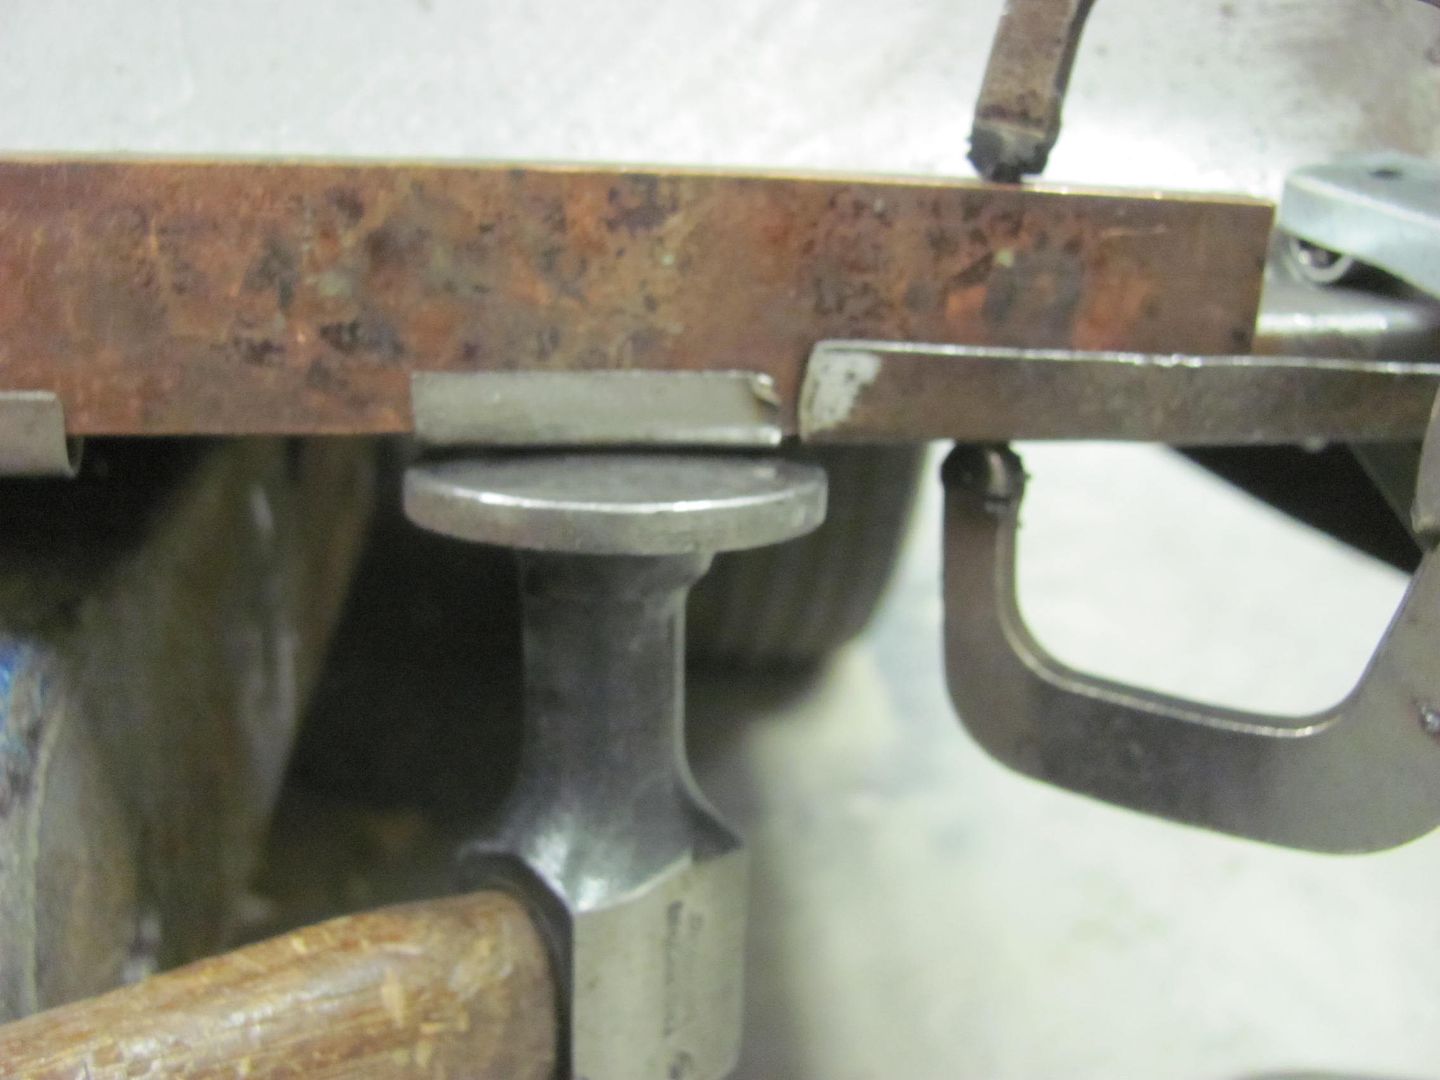 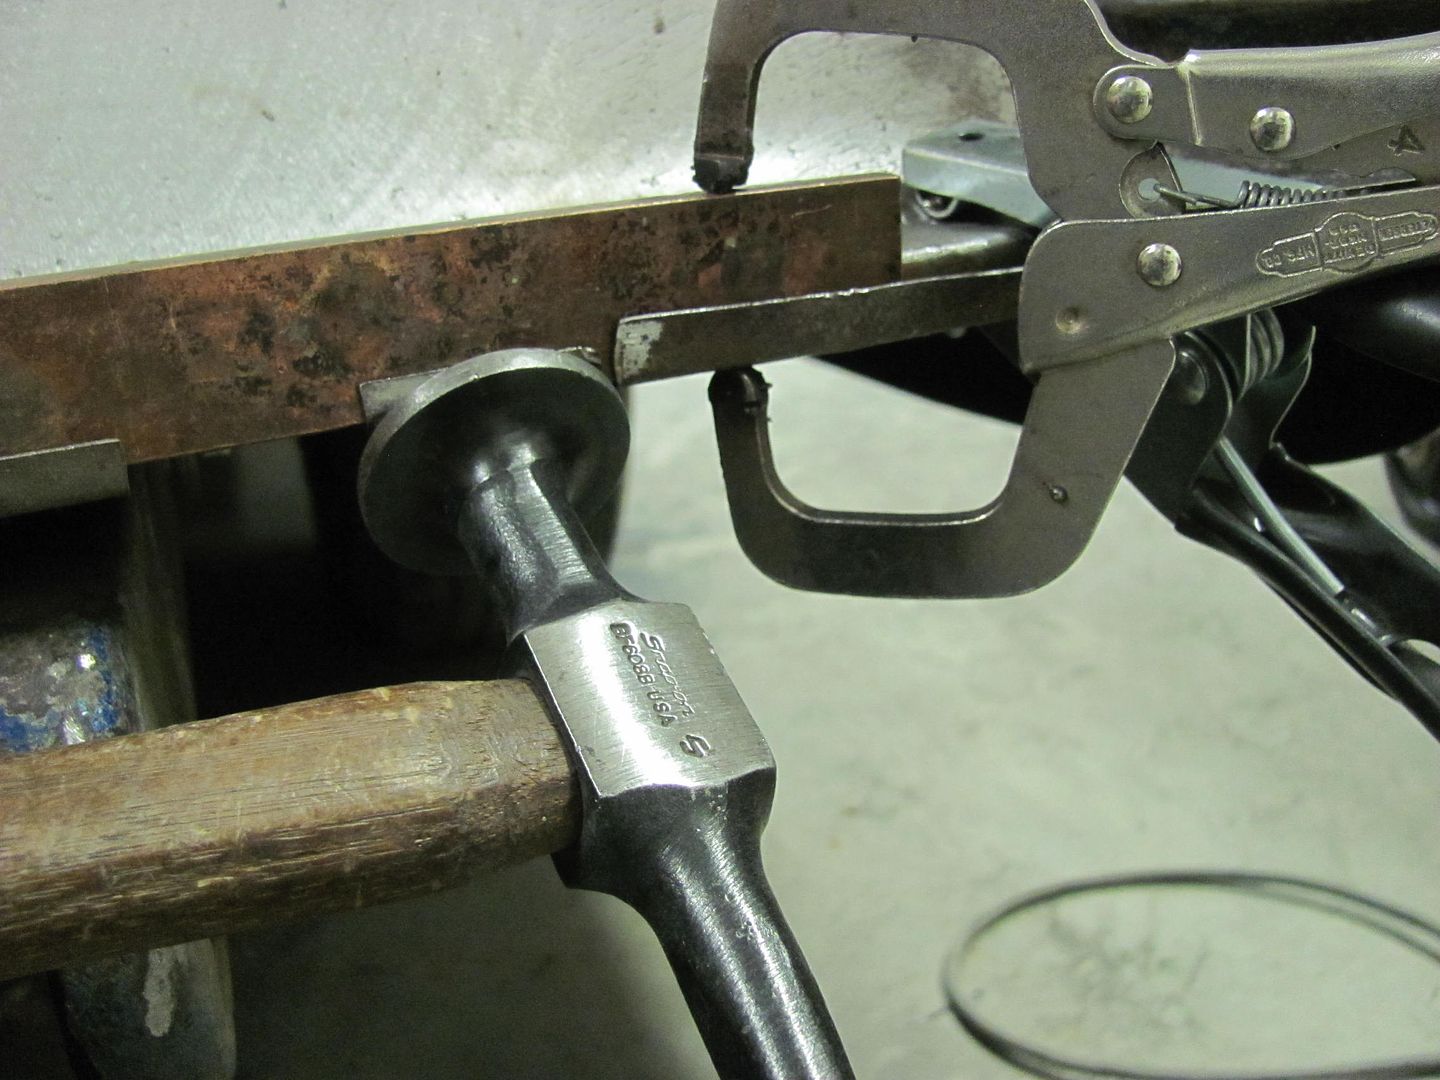 Continuing welding... 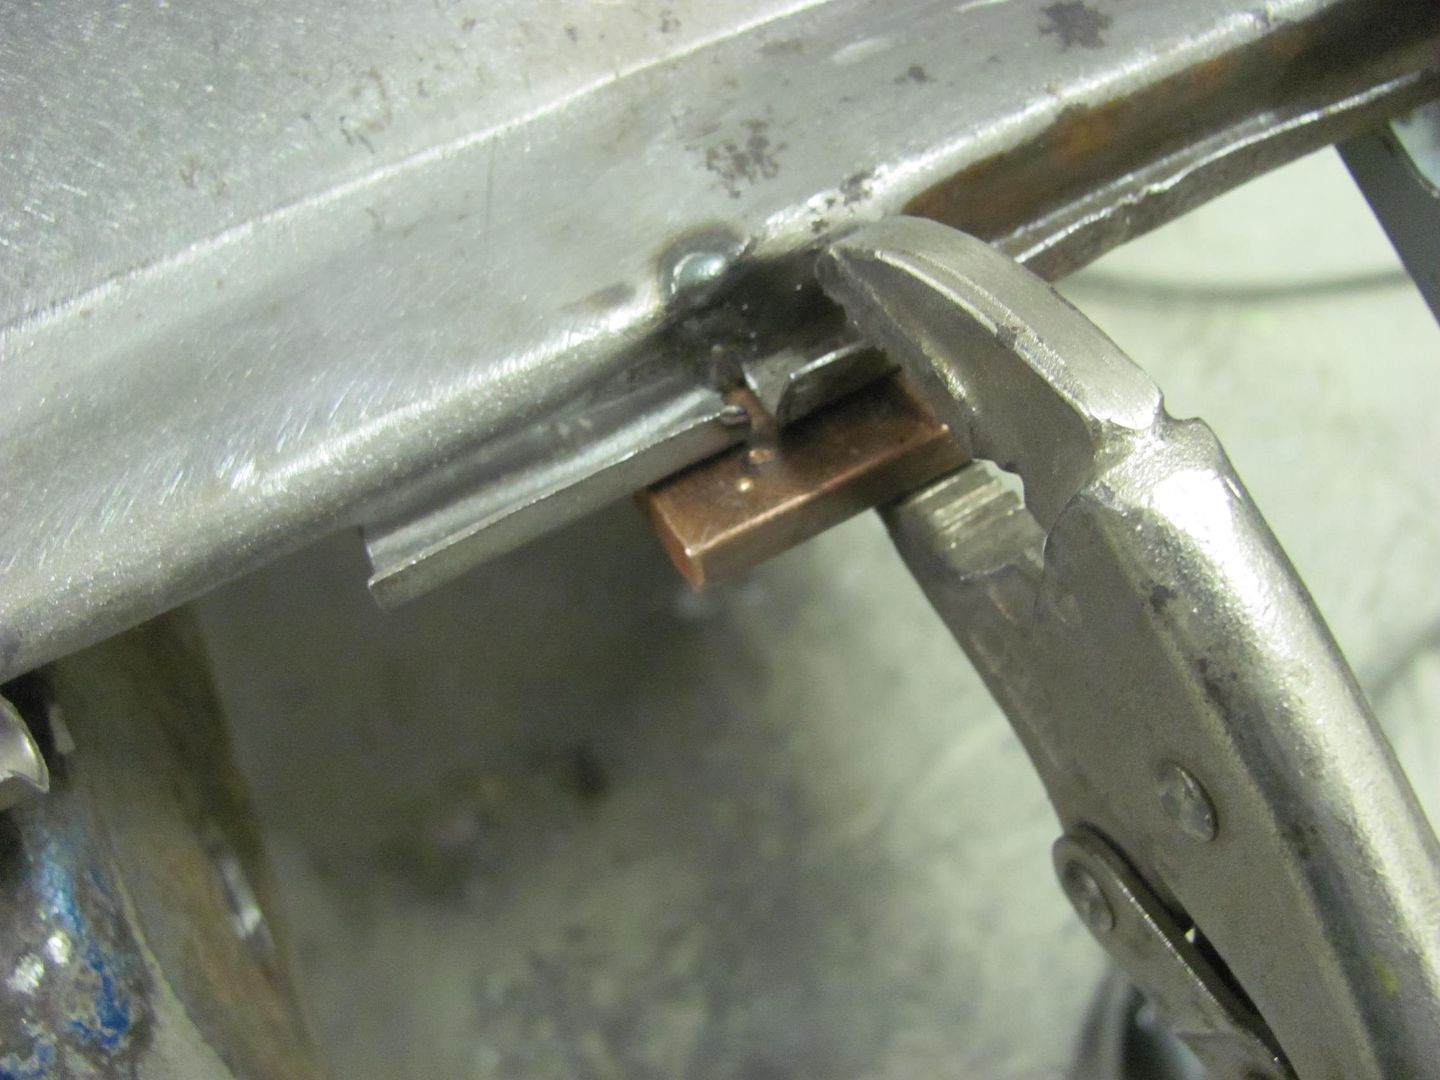 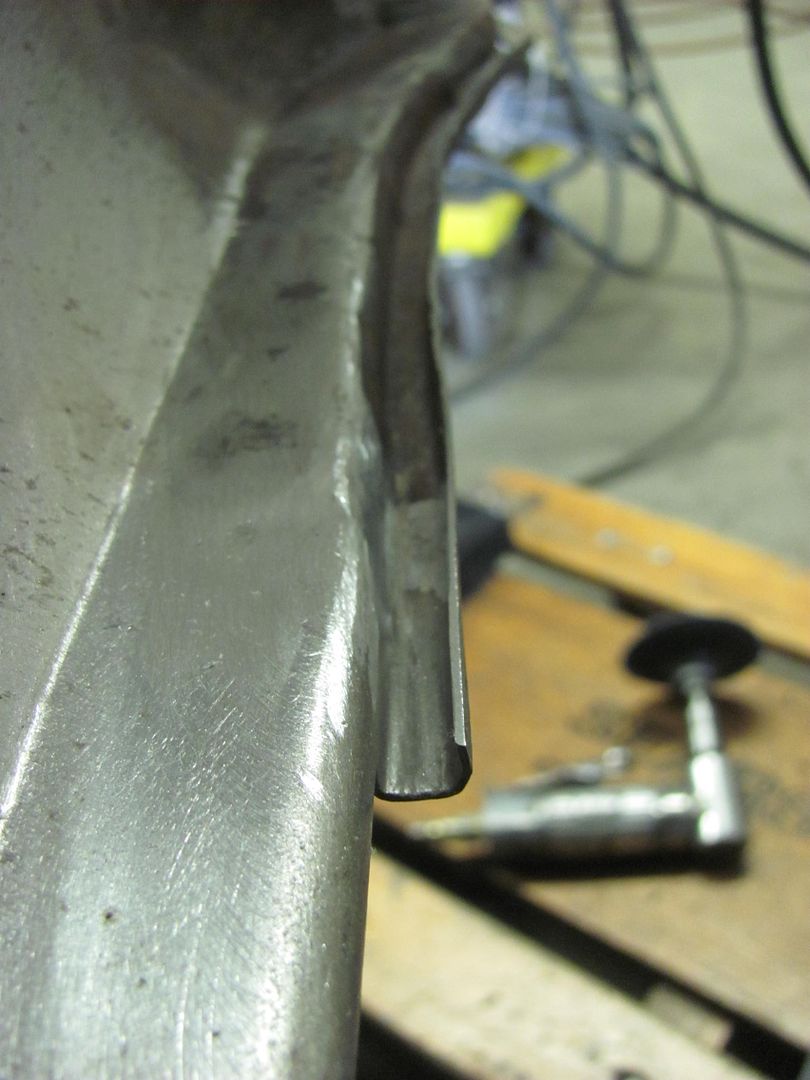 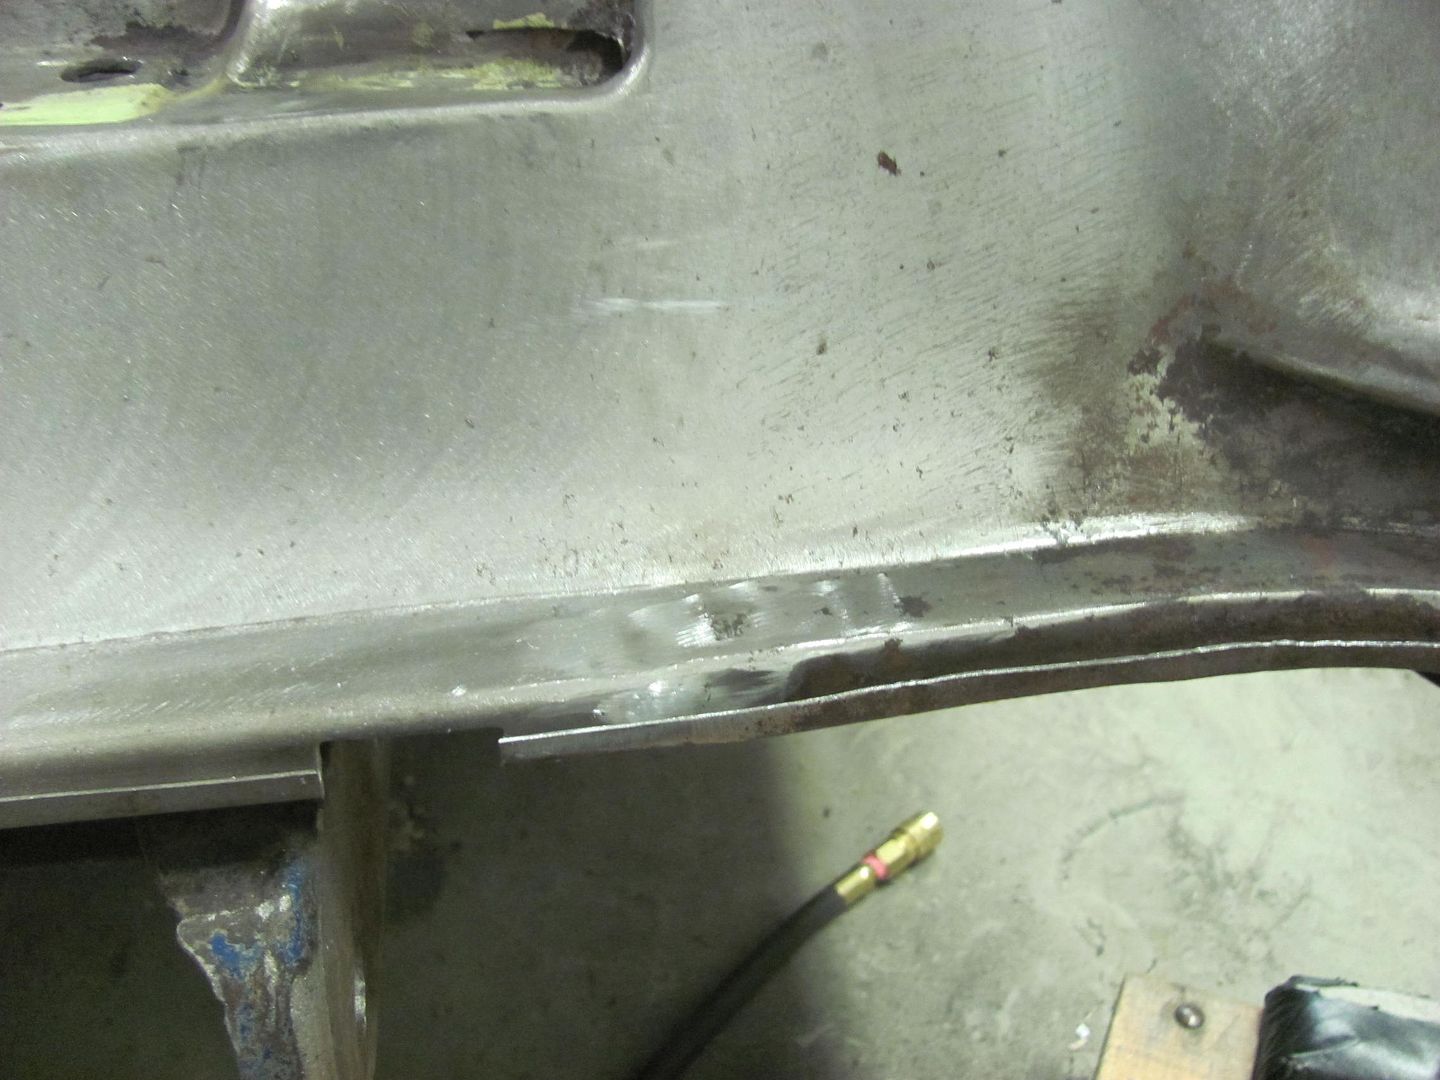 .....and a repeat on the driver's side... 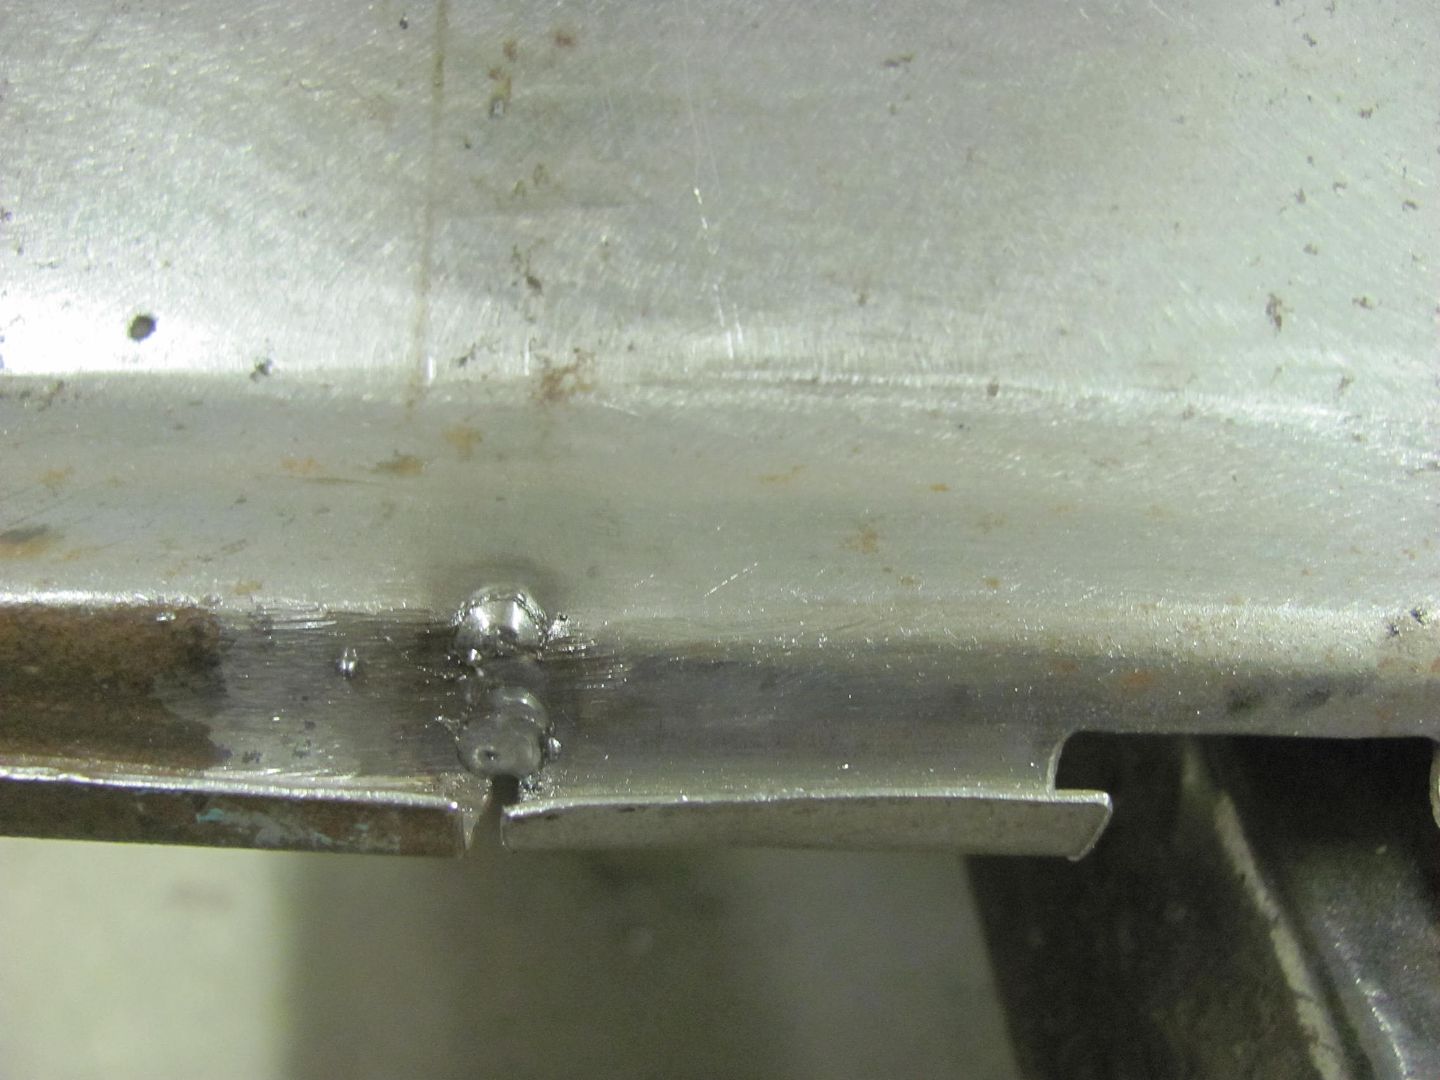 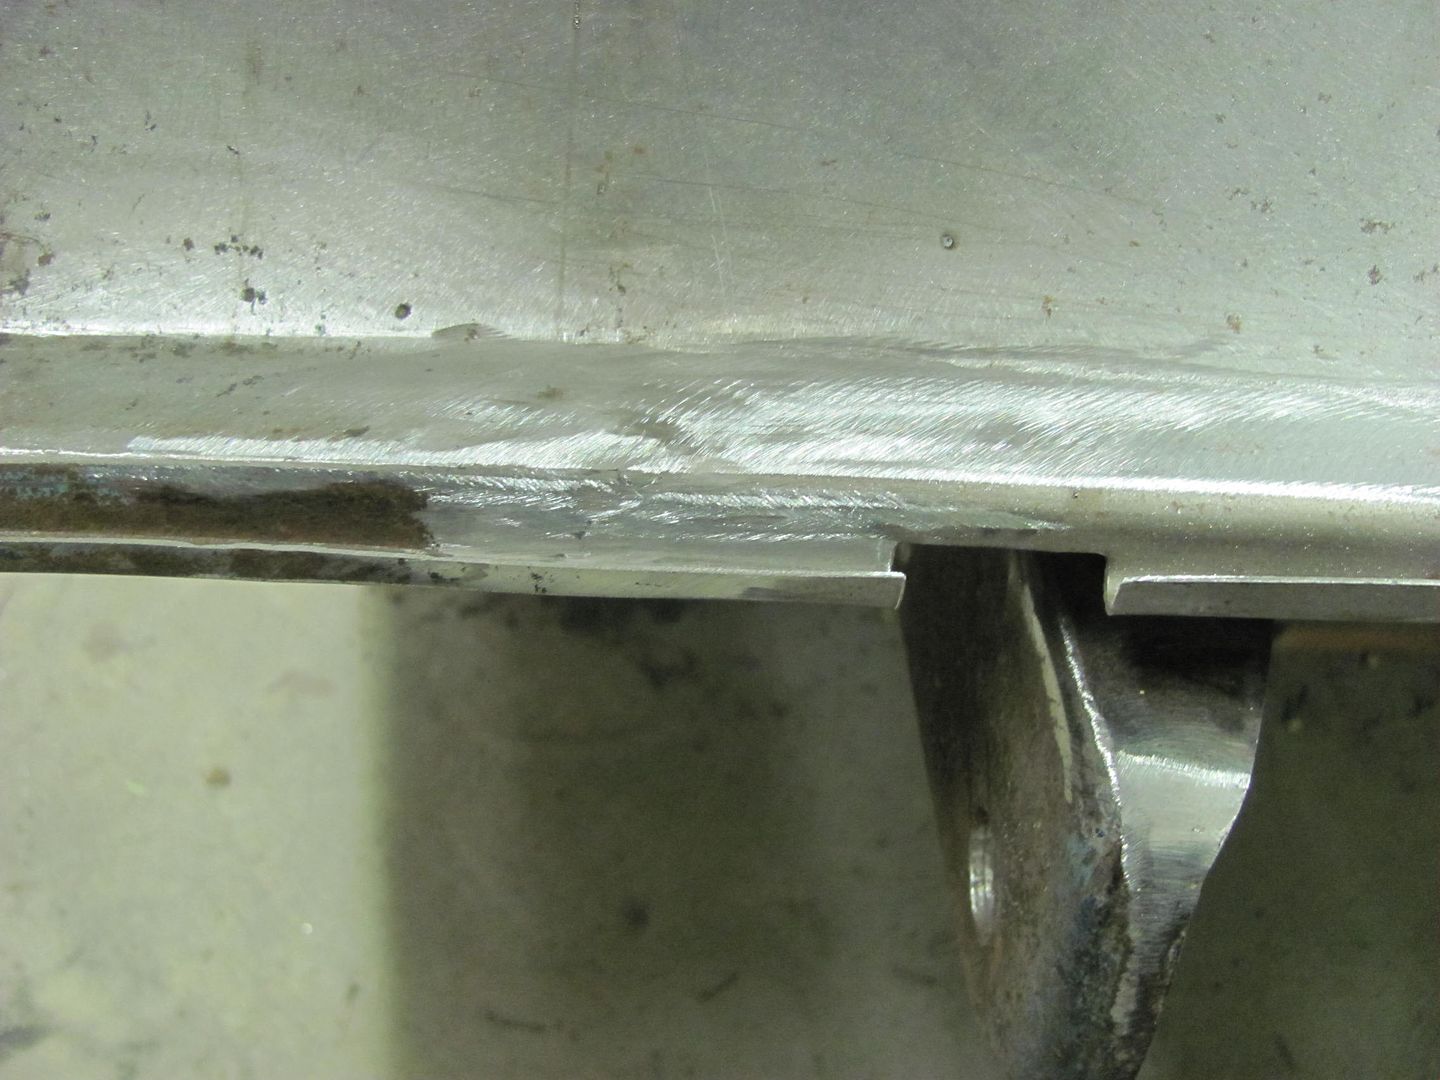 
__________________
Robert |
|
|
|
|
02-19-2015, 12:18 AM
|
#10 |
|
Registered User
Join Date: Sep 2010
Location: carthage,tx
Posts: 7
|
Re: 55 Wagon Progress
Wow! Very amazing work! I really like the fabrication of the factory style A/C battery box. It gets that ugly battery off the firewall and will let everyone focus on the engine when the hood is open. I am helping a friend with a 55 handyman wagon and there is no trunk to hide the battery. So why not hide it in plain sight? Genius! I see that you made an extra bracket so if one comes up for sale I would be first in line.
|
|
|
|
|
02-19-2015, 05:15 PM
|
#11 |
|
Registered User
Join Date: Jan 2013
Location: Leonardtown, MD
Posts: 1,637
|
Re: 55 Wagon Progress
Thanks, but I only have the one set here. All the other sets were sent to WI..
__________________
Robert |
|
|
|
|
02-19-2015, 05:41 PM
|
#12 |
|
Registered User
Join Date: Sep 2010
Location: carthage,tx
Posts: 7
|
Re: 55 Wagon Progress
Well if you decide to build more, keep me in mind. Thanks!!
|
|
|
|
|
02-21-2015, 07:08 AM
|
#13 |
|
Registered User
Join Date: Nov 2014
Location: Omaha
Posts: 558
|
Re: 55 Wagon Progress
I have already started using your welding process on my project. this is just too cool! Rock on bro!

|
|
|
|
|
02-21-2015, 07:18 AM
|
#14 |
|
Registered User
Join Date: Nov 2014
Location: Omaha
Posts: 558
|
Re: 55 Wagon Progress
And another thing, I can see that you make most of your body tools
but where do you buy them at and what brand do you prefer?
|
|
|
|
|
02-22-2015, 12:29 AM
|
#15 |
|
Registered User
Join Date: Jan 2013
Location: Leonardtown, MD
Posts: 1,637
|
Re: 55 Wagon Progress
Today Kyle finished up another loose end, tying in the bottom of the NOS quarter panel.. A bit of hammer bumping to get the panels aligned...
 Plug weld holes drilled and filled..... 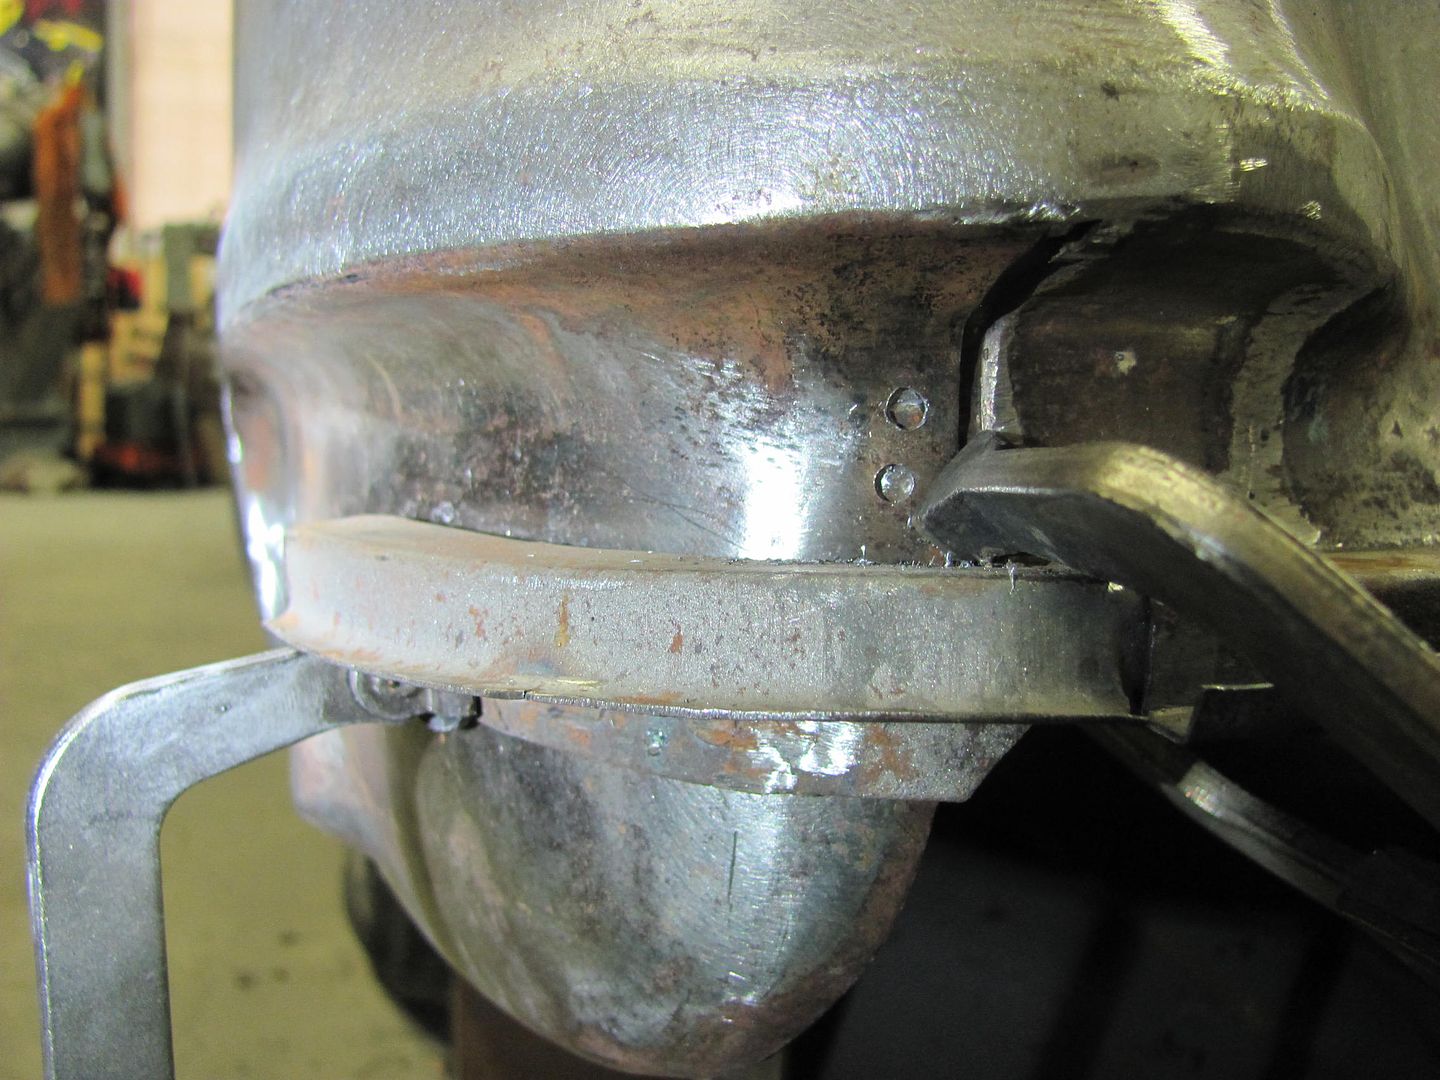 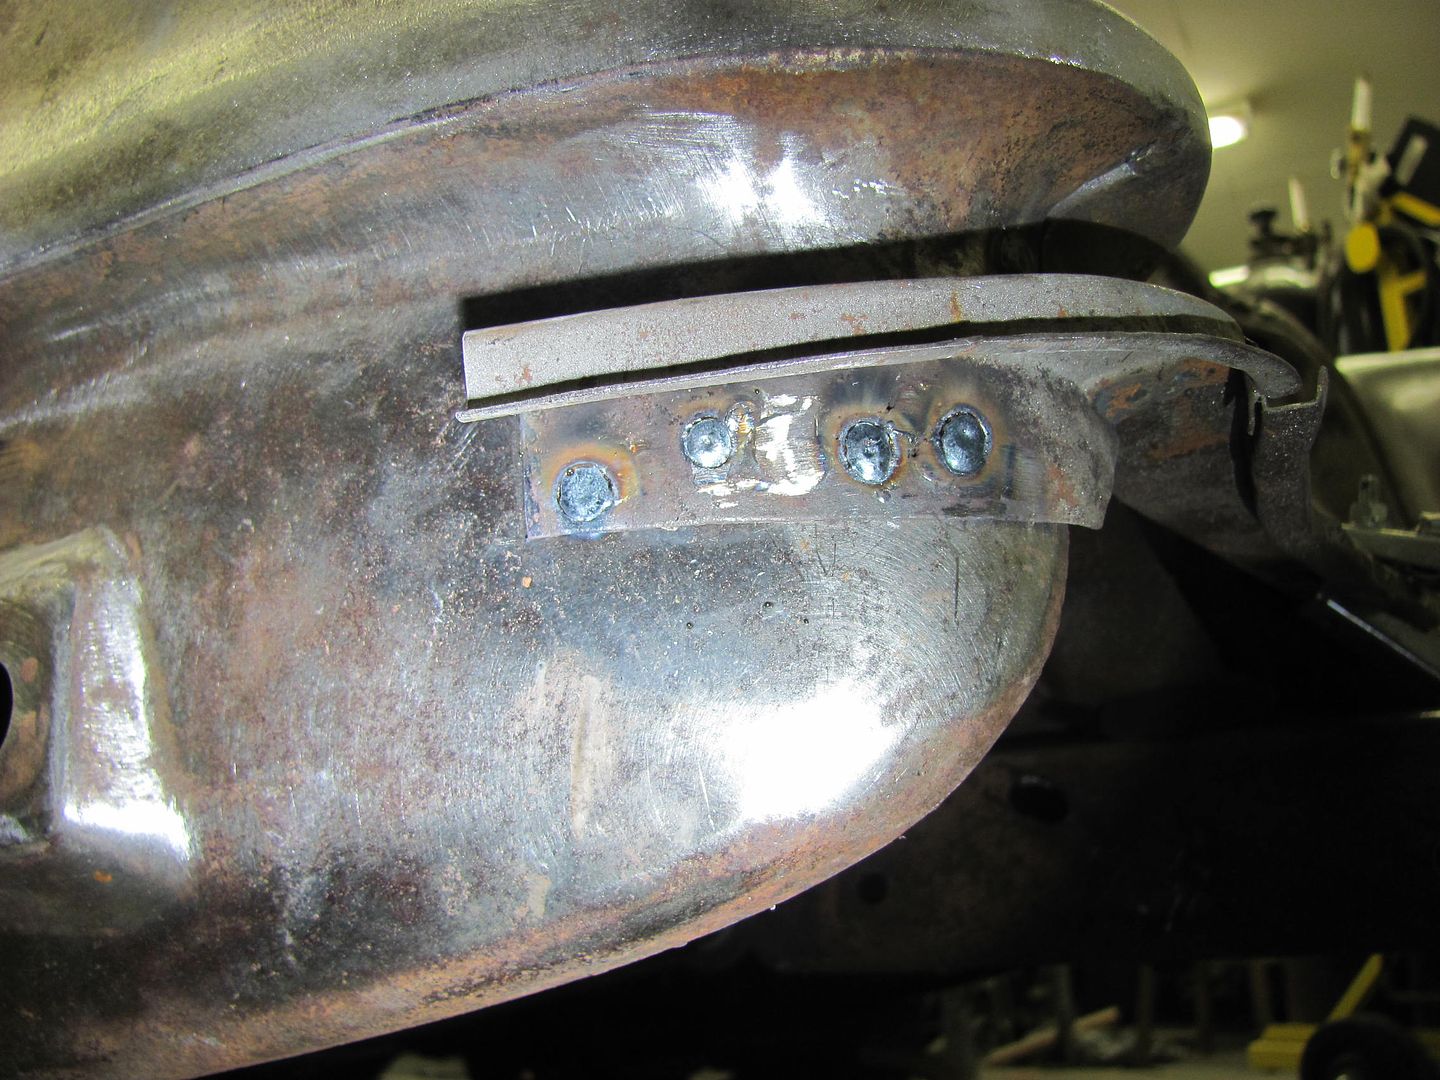 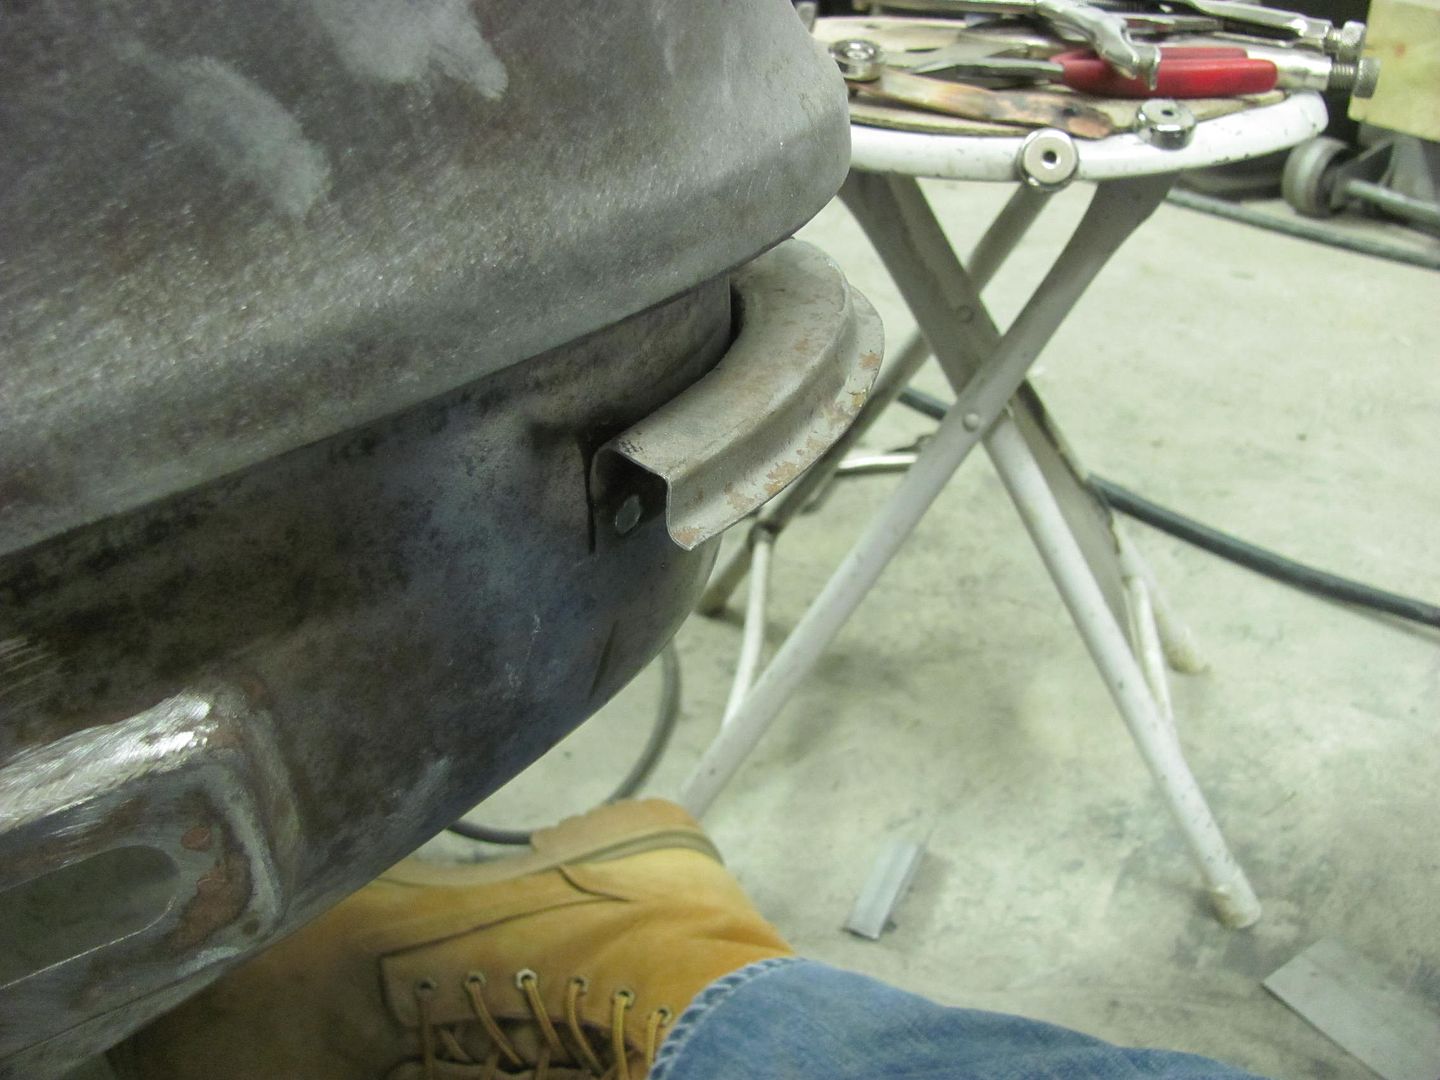 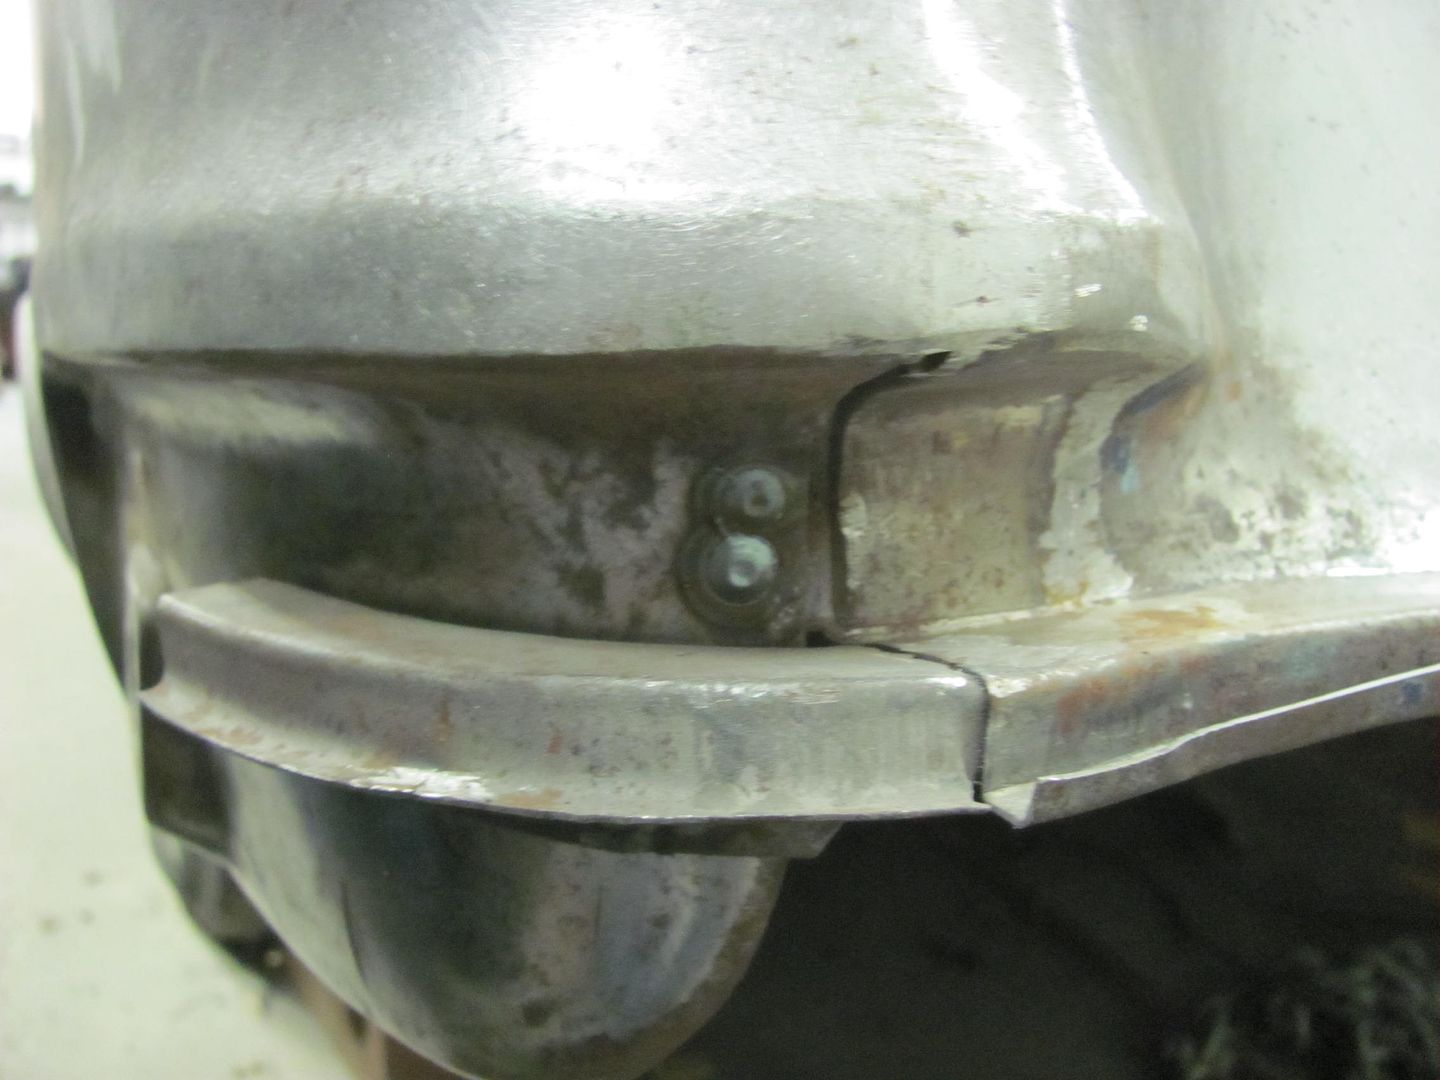 Then he turned his attention to duplicating a second half for the front divider panel for the rear seat. 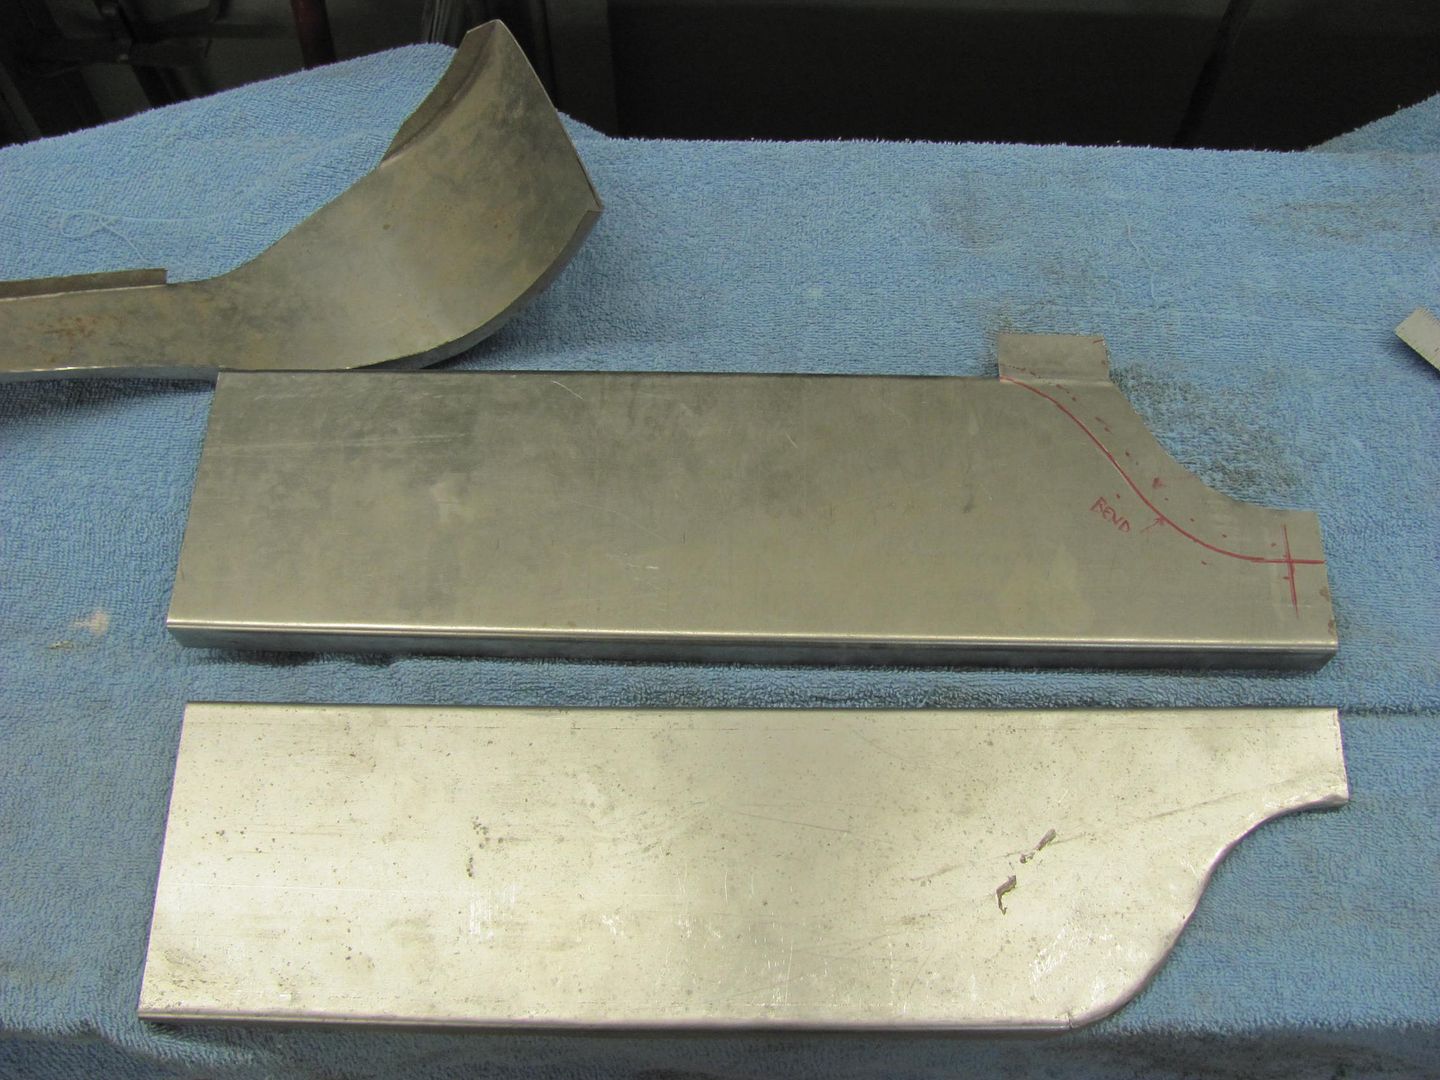 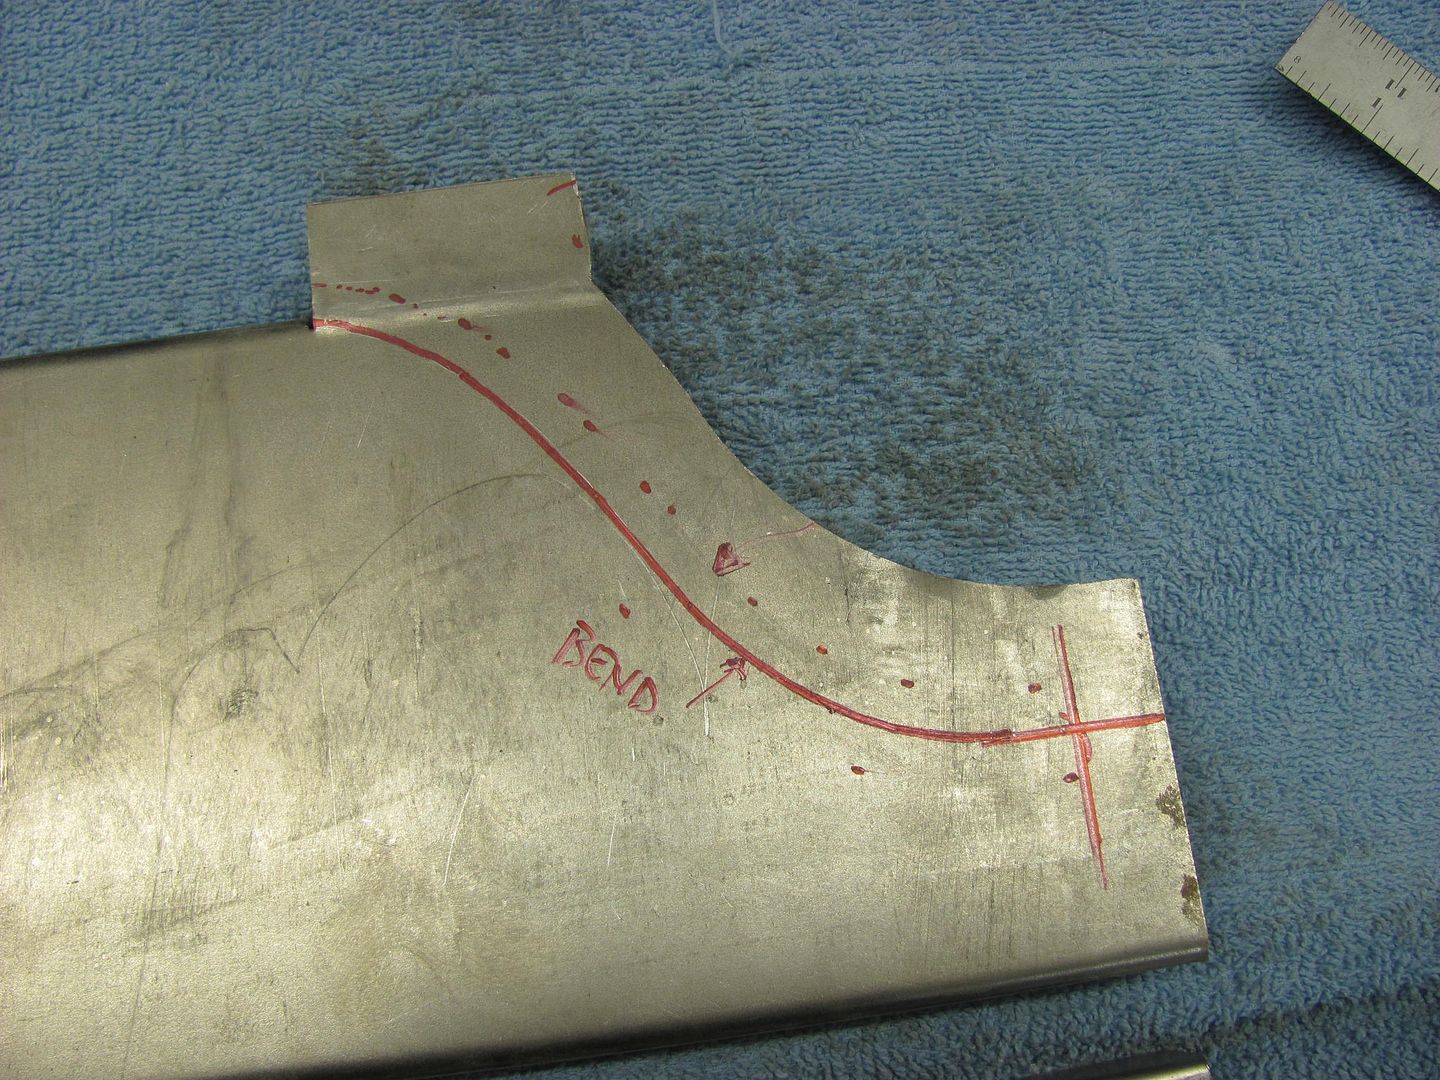 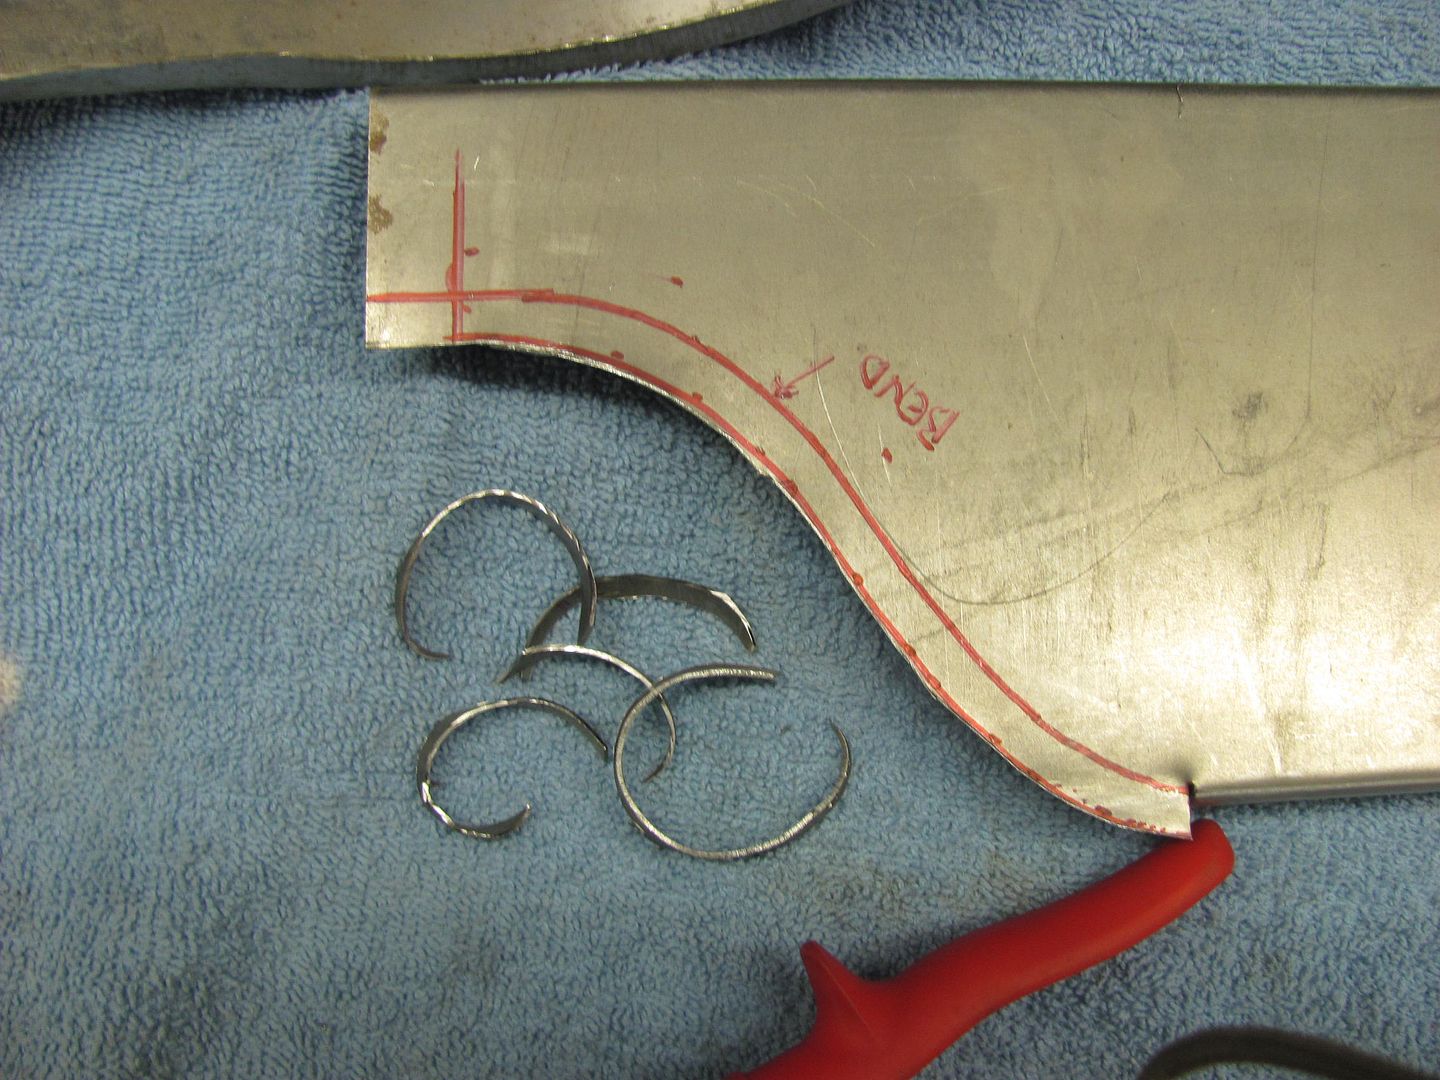 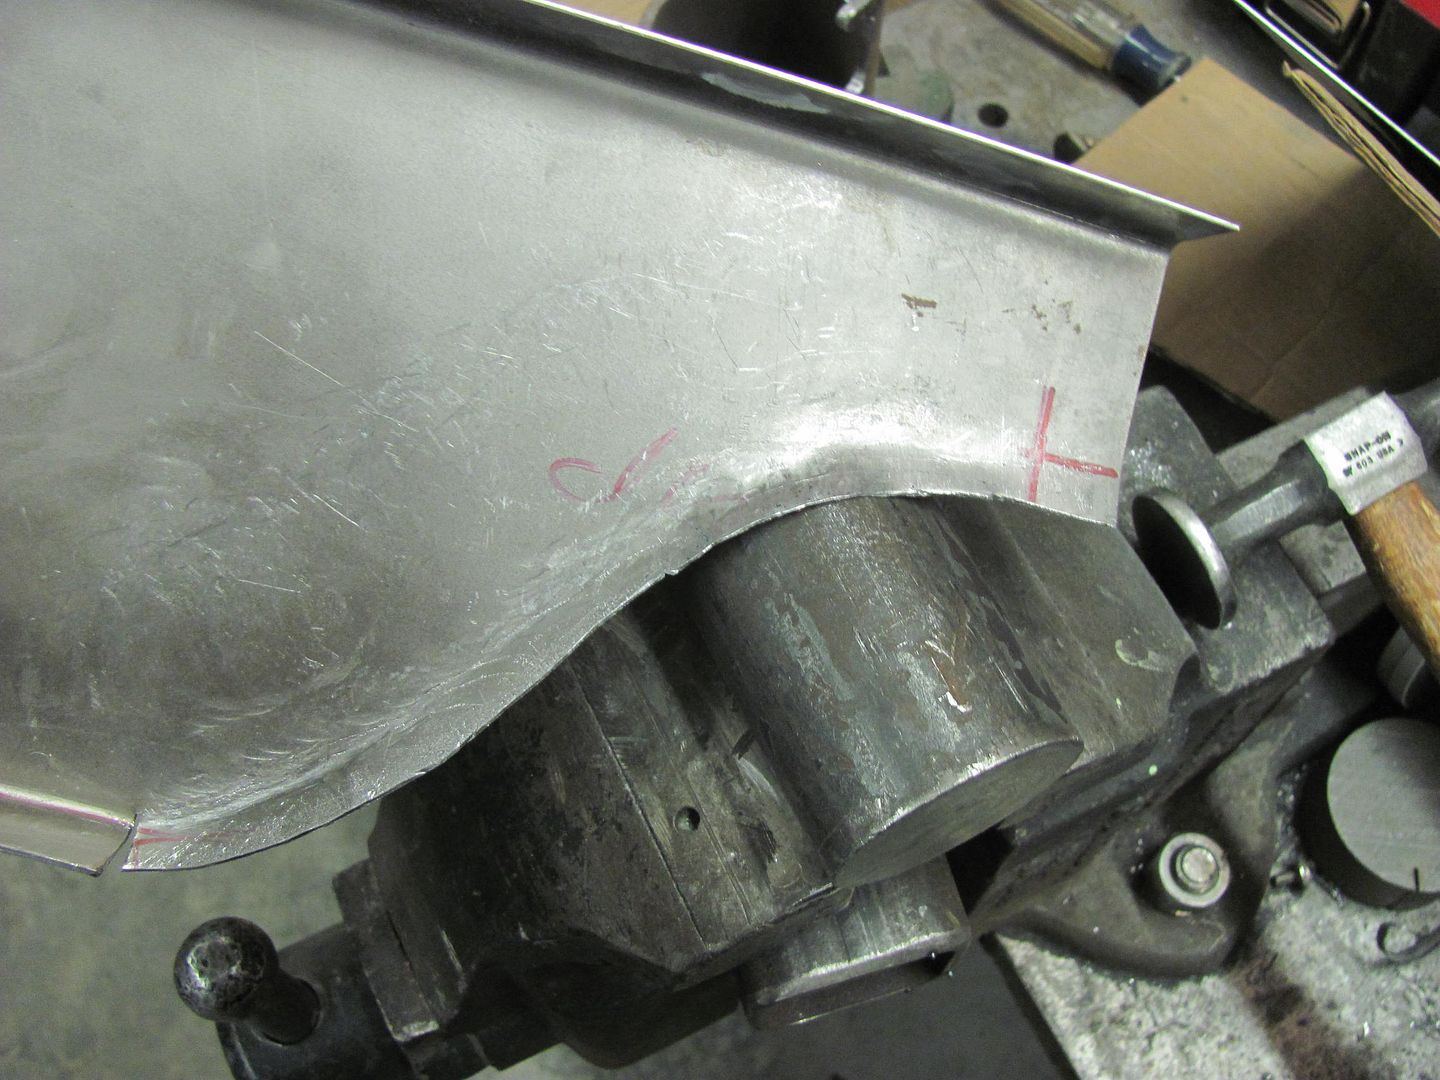 Using the Erco kick shrinker.... 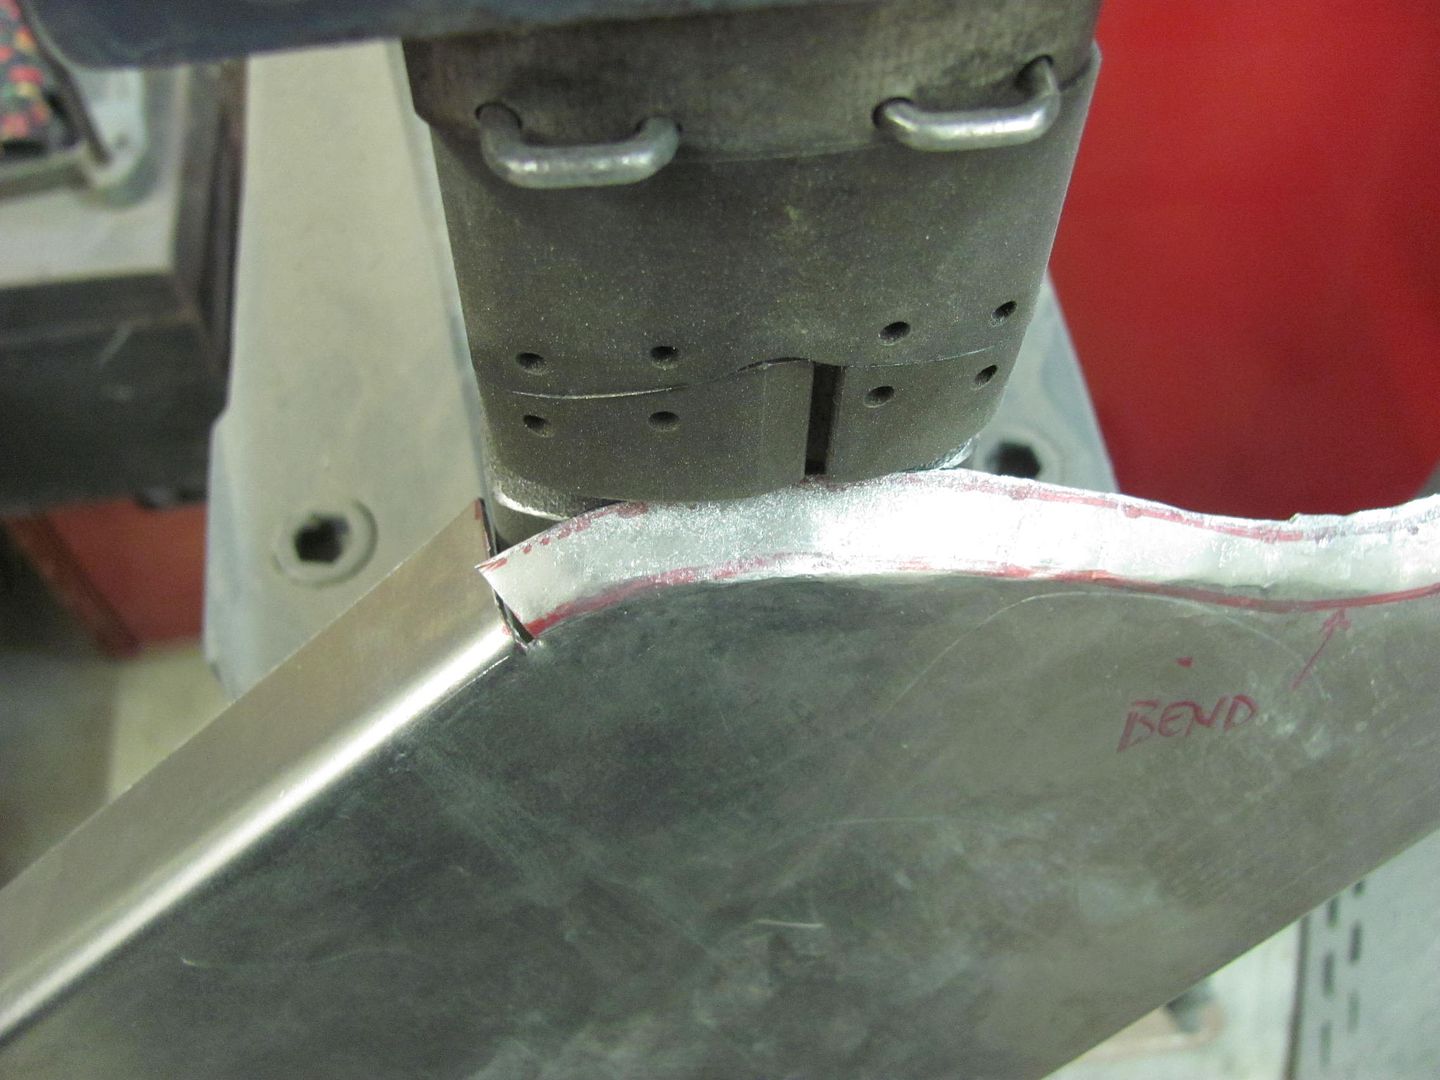 Needs a bit of fine tuning still but he's getting there... 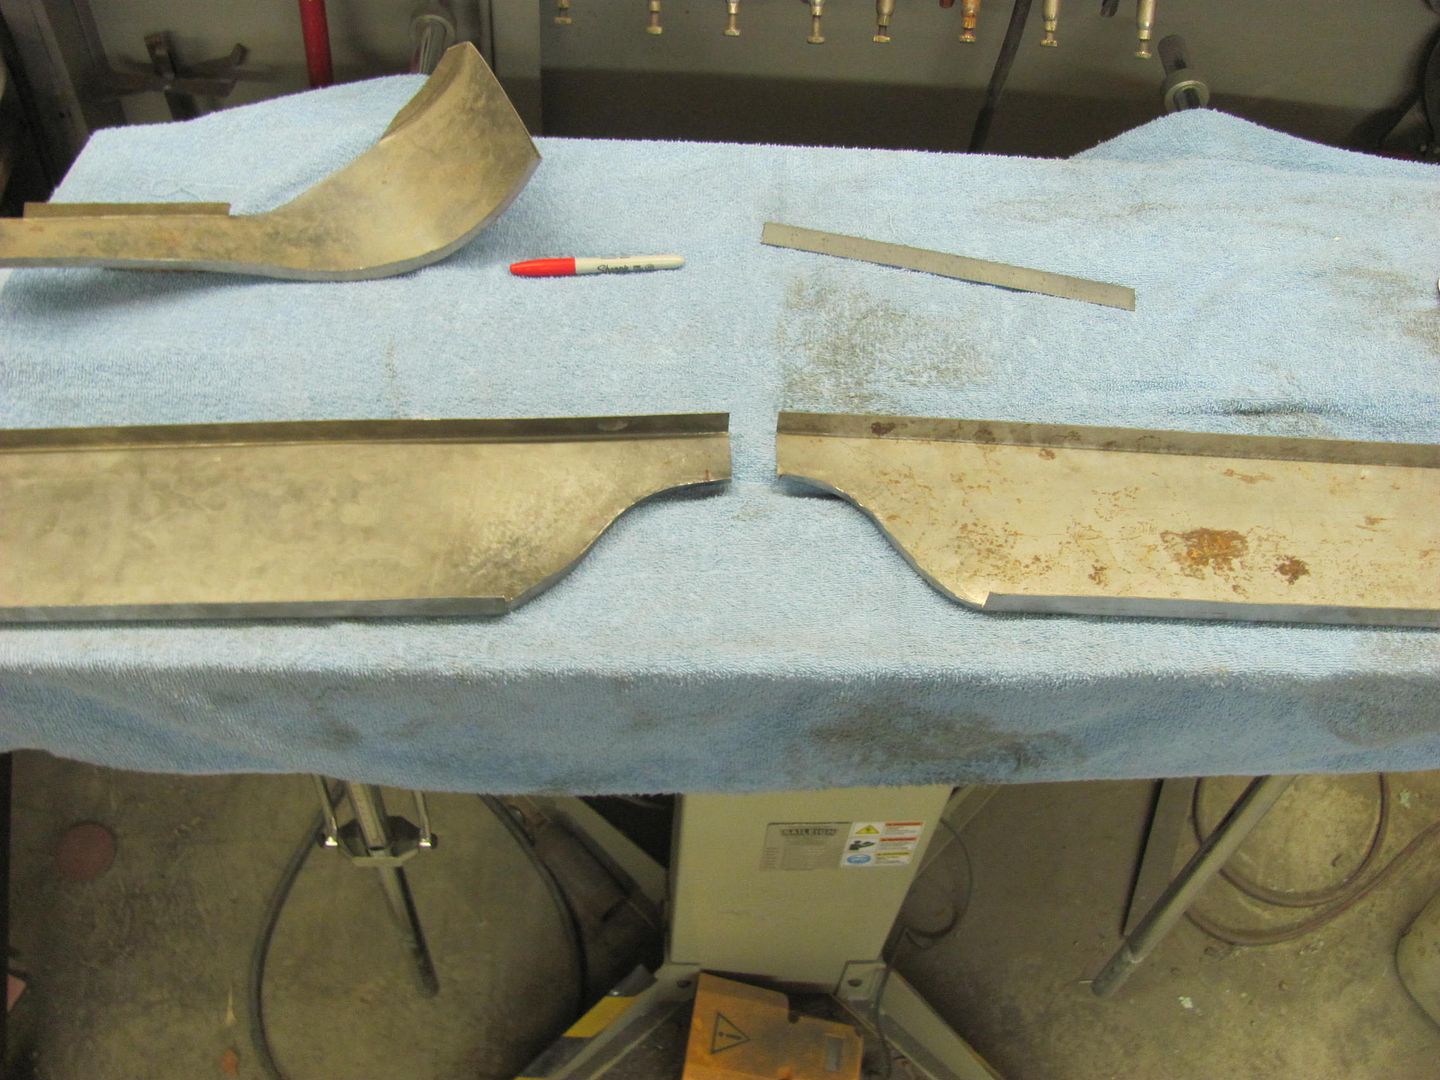 And I was making progress on more blocking of the front end body parts, at least until an emergency phone call from one of our tenants indicated some water pipe issues from the recent low temps... This is what I was greeted with.... 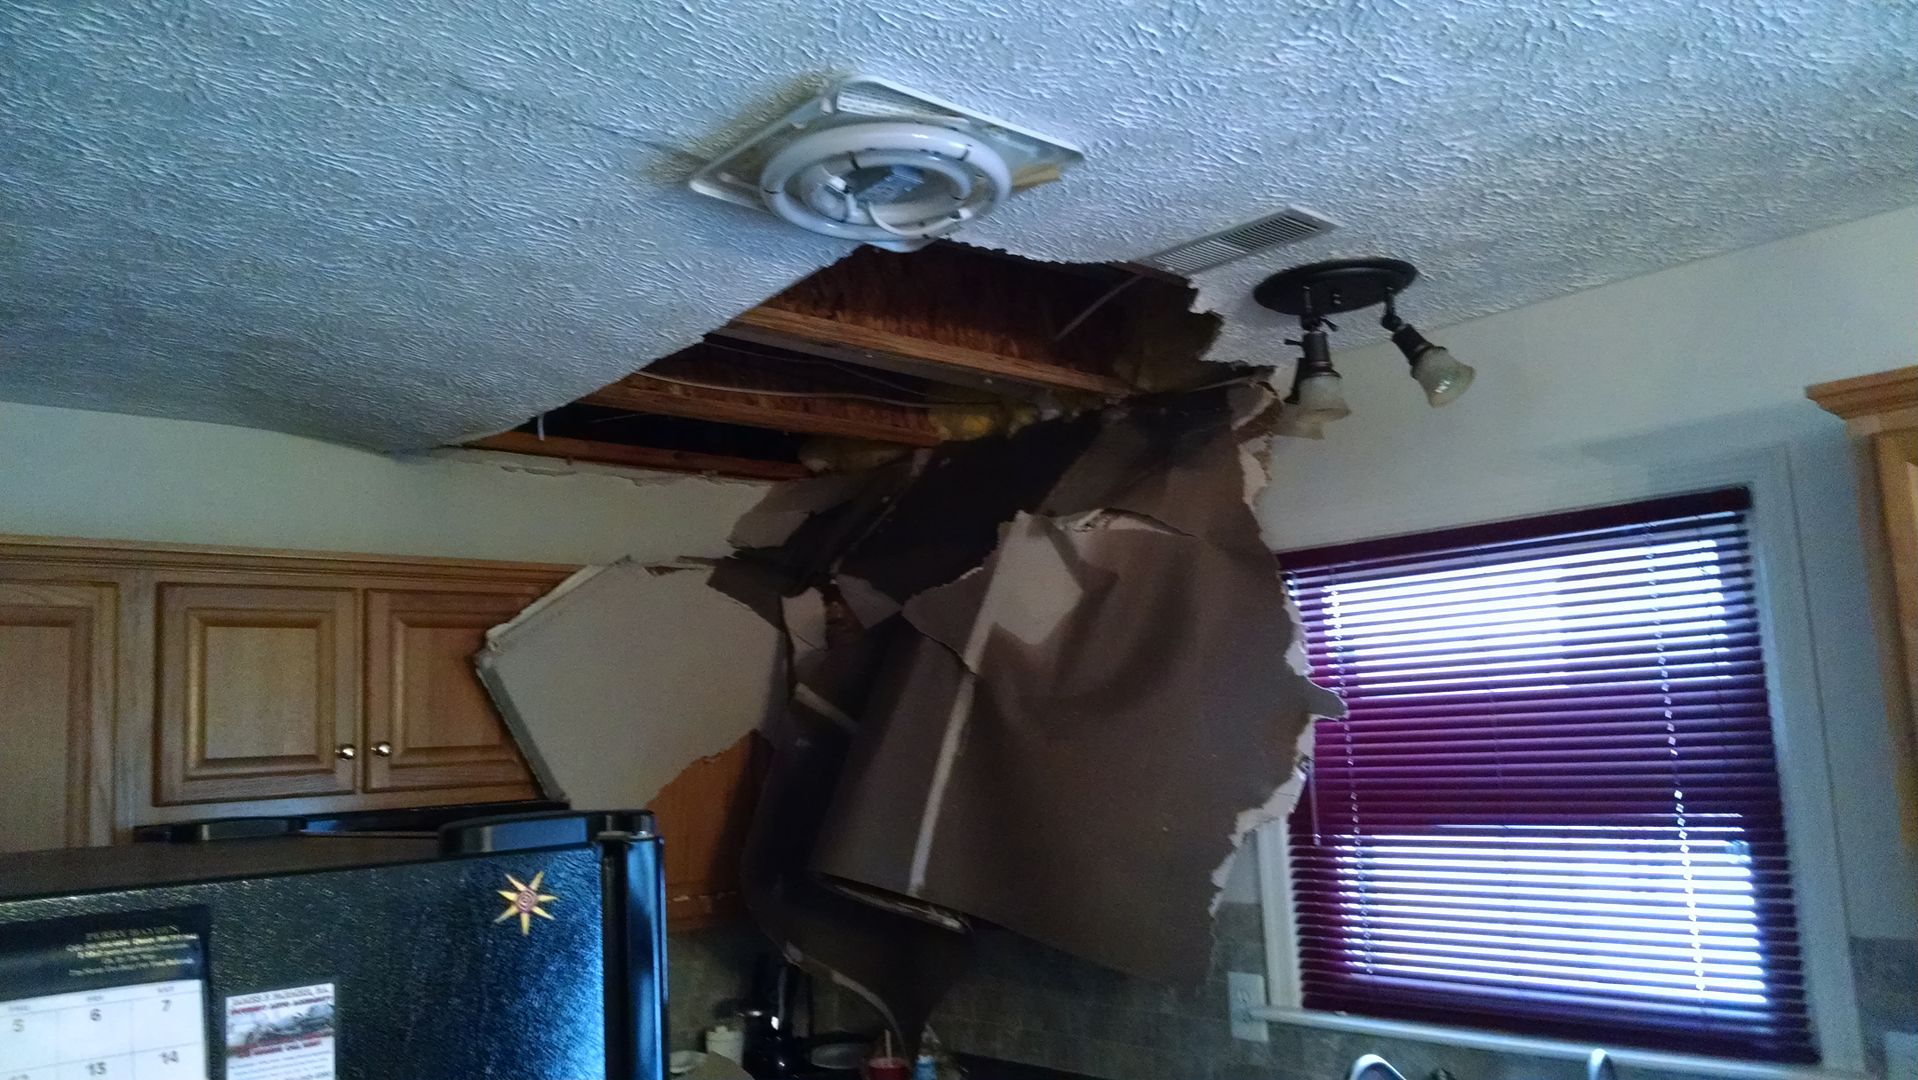 The hole to the left is where the plumber had put the pipe through, right against the outside wall. Then the brainiac insulators failed to caulk, and then put insulation over TOP of the pipes, keeping them well acclimated to any outside temps. I cut some access holes in the wall and relocated the one pipe farther away from the outer wall board where insulation could go between the pipe and the wall, as it should have been done from the get go. 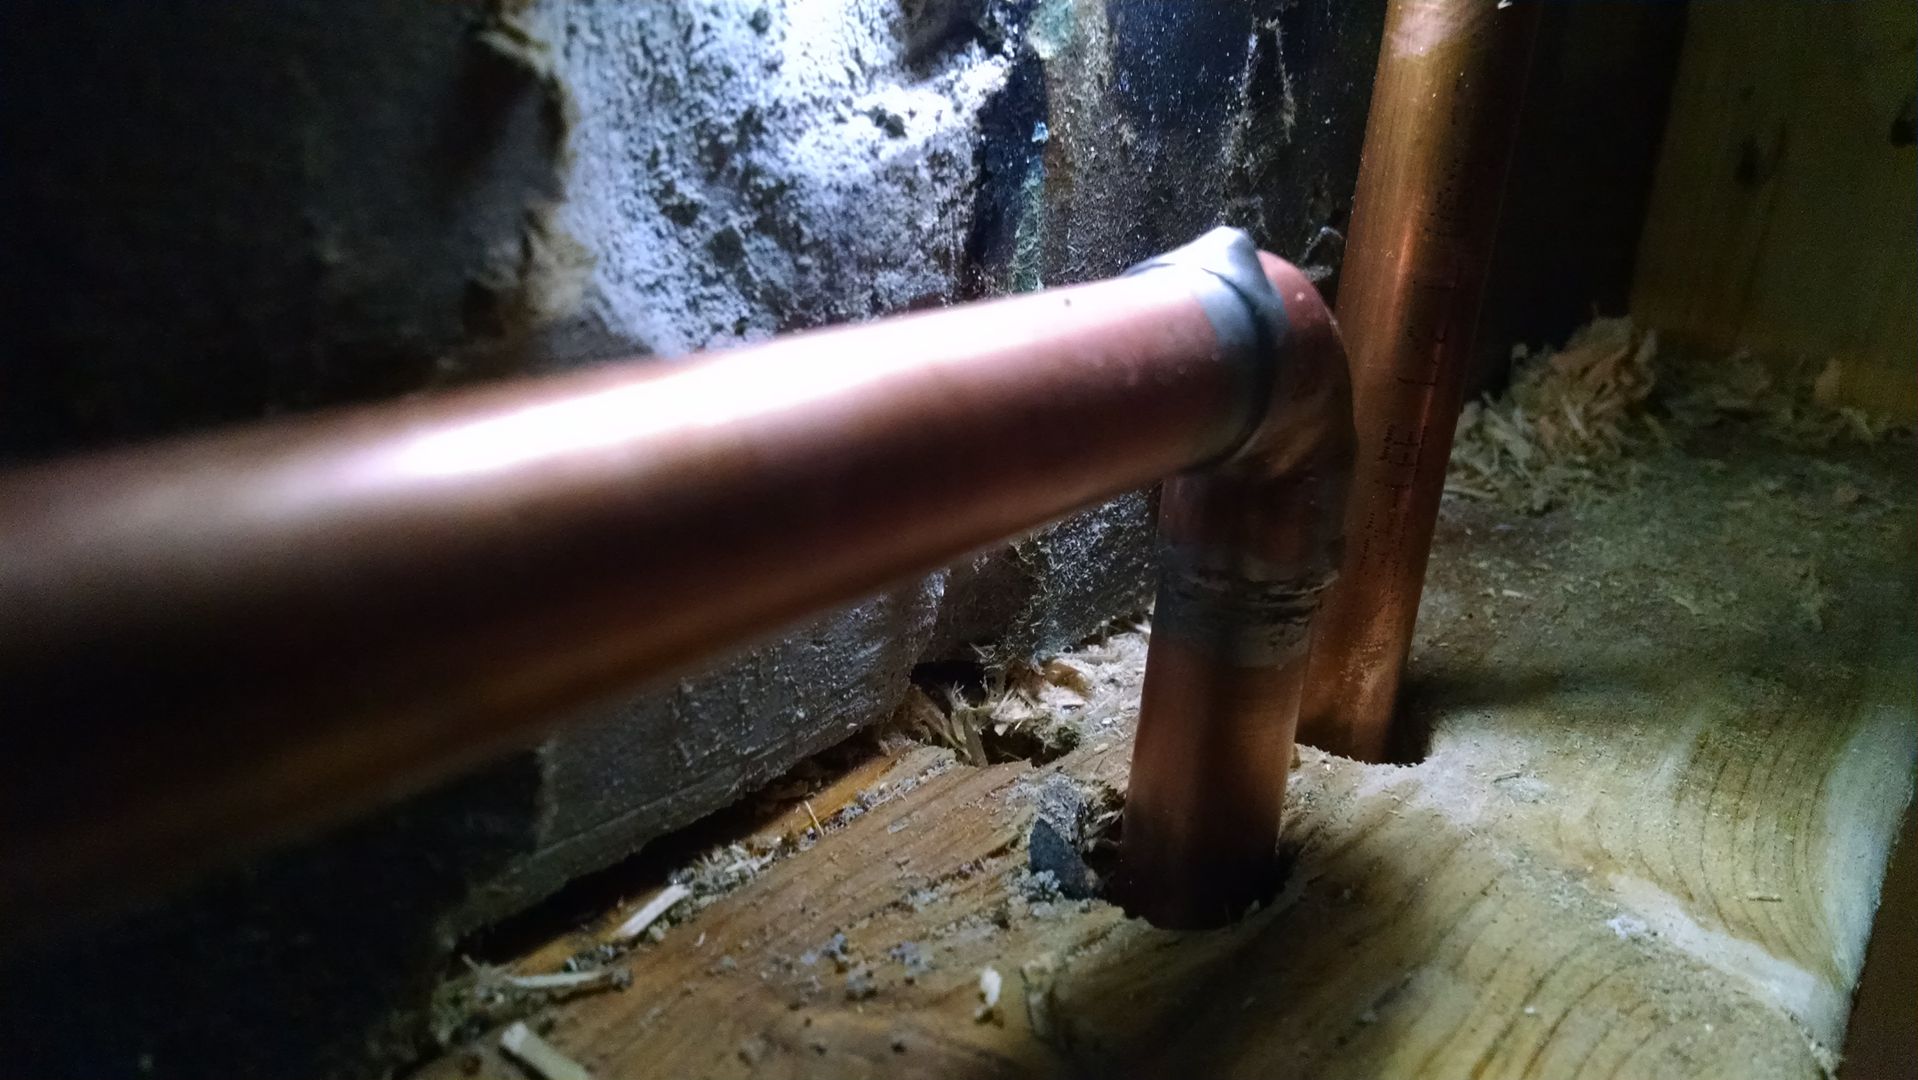  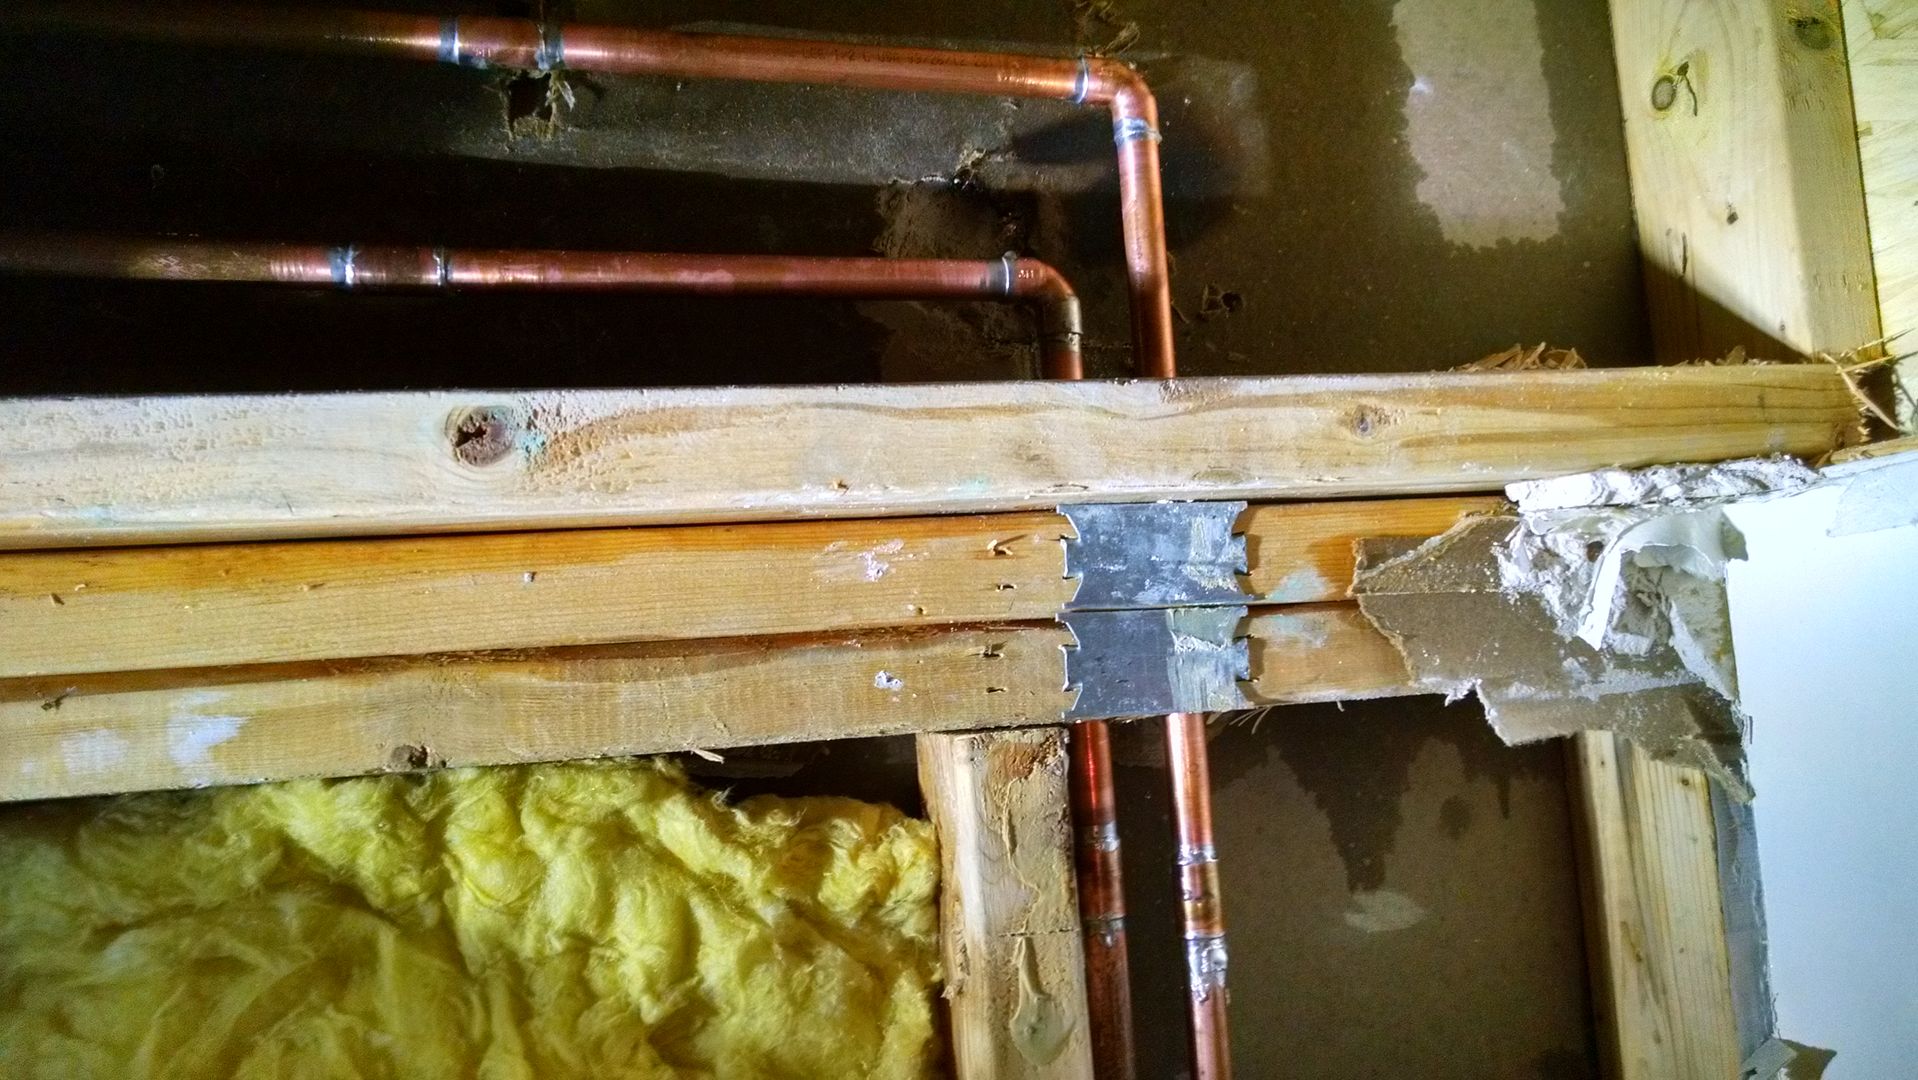 And here's the culprit... 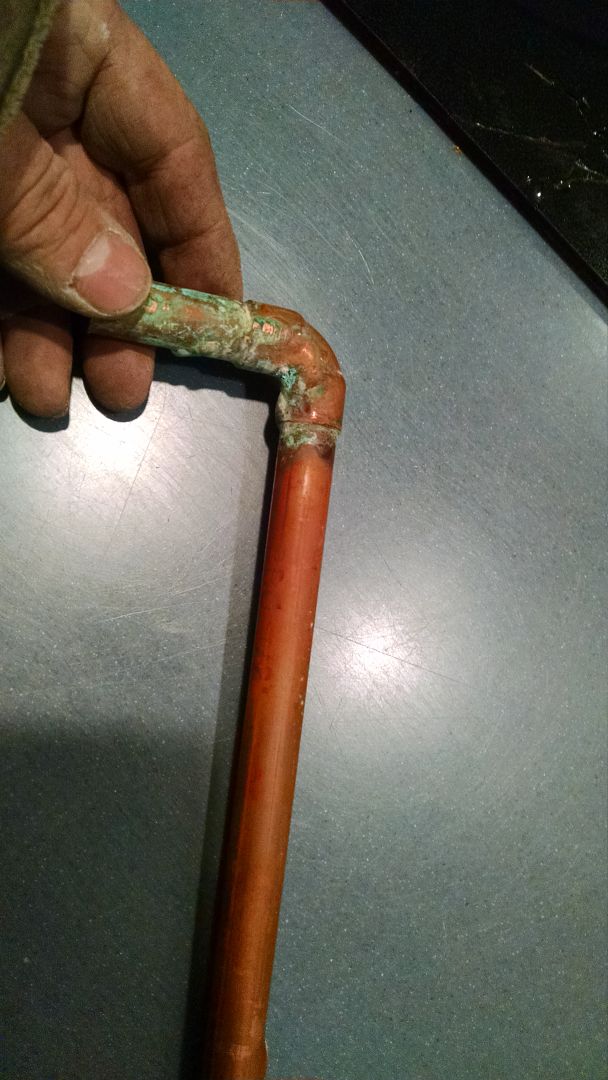 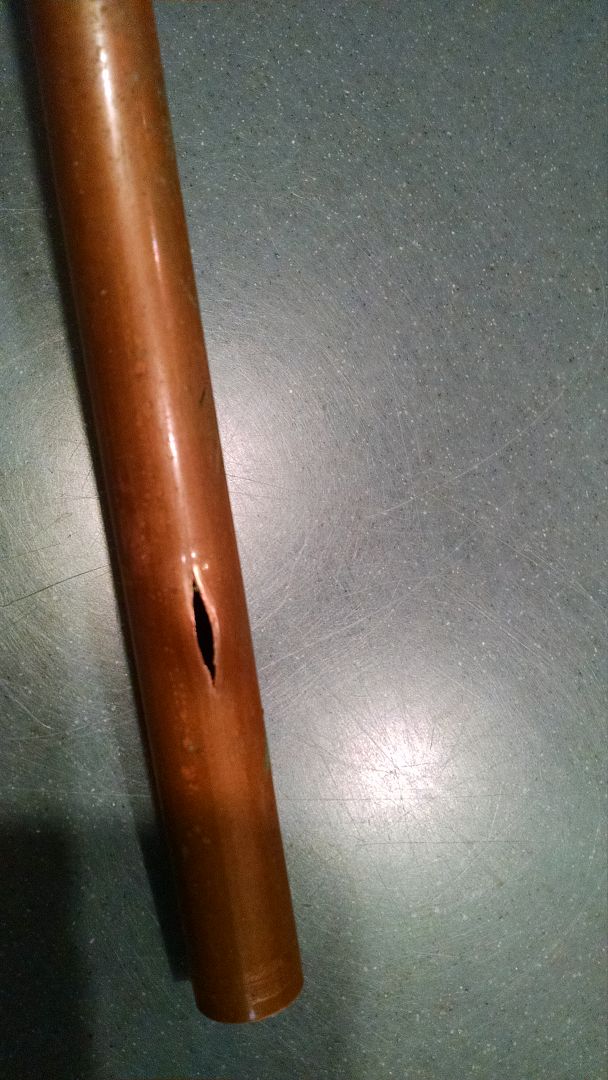 I'll let things dry out overnight, and finish tomorrow with adding a bit of caulk and insulation. Drywall/painter due in early this week to close things up..
__________________
Robert |
|
|
|
|
02-22-2015, 12:28 AM
|
#16 |
|
Registered User
Join Date: Jan 2013
Location: Leonardtown, MD
Posts: 1,637
|
Re: 55 Wagon Progress
Most of my purchases are local CL or online auction. For the body tools I have Snap-on, Mac Tools, Plomb, Proto, Martin, etc... Most people have some steep pricing on ebay, but if you are persistent you can find them at a decent price..
__________________
Robert |
|
|
|
|
02-22-2015, 07:57 AM
|
#17 |
|
Registered User
Join Date: May 2013
Location: Centerville,Ma.
Posts: 1,223
|
Re: 55 Wagon Progress
After buying tools for body work for the last 41 years I can say that Mac and Snap On are about the same quality for hammers and dollys. I have some Martin dollys too and use them the most. I use a slap file a lot for final finishing of larger areas. I think if I were to start fresh I would be looking on Craigs list for used tools from guys retiring as they are as good if not better at much less money. If I died next week I know my wife wouldn't have a clue as to what I have invested in my shop but would likely take whatever was offered.
|
|
|
|
|
02-25-2015, 11:07 PM
|
#18 | |
|
Registered User
Join Date: Jan 2013
Location: Leonardtown, MD
Posts: 1,637
|
Re: 55 Wagon Progress
Quote:
Isn't that the truth! More work on the rear seat supports.. Once the welds by the tunnel relief were dressed, the sharp corners (inside and out) were removed to help prevent any cracks from starting..  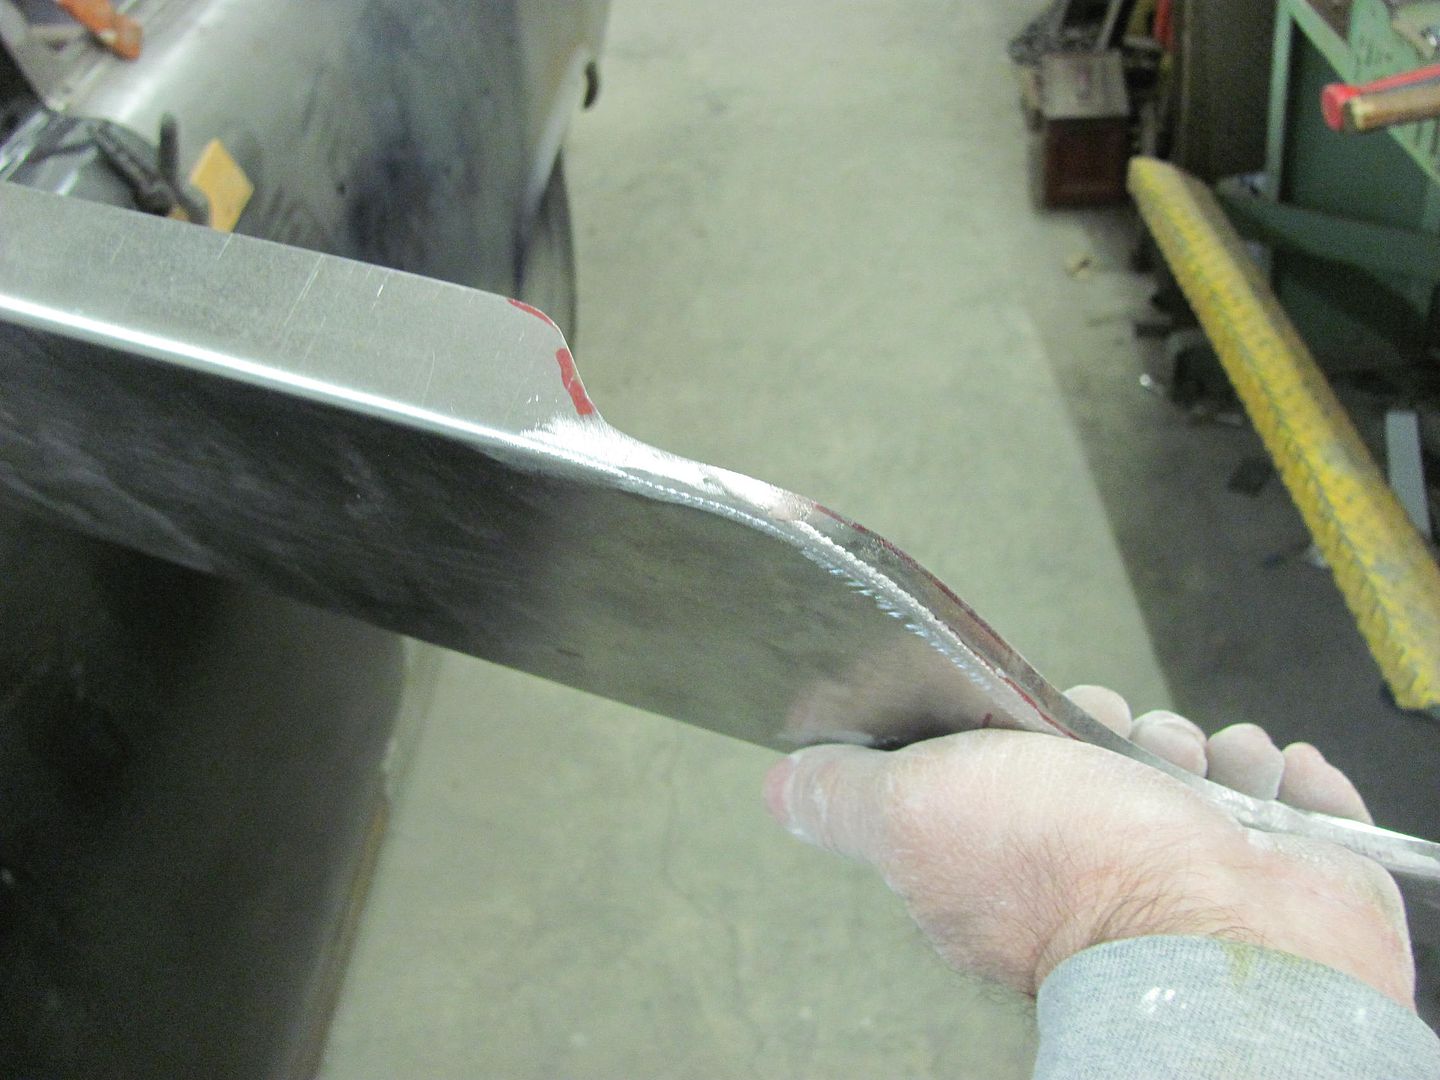 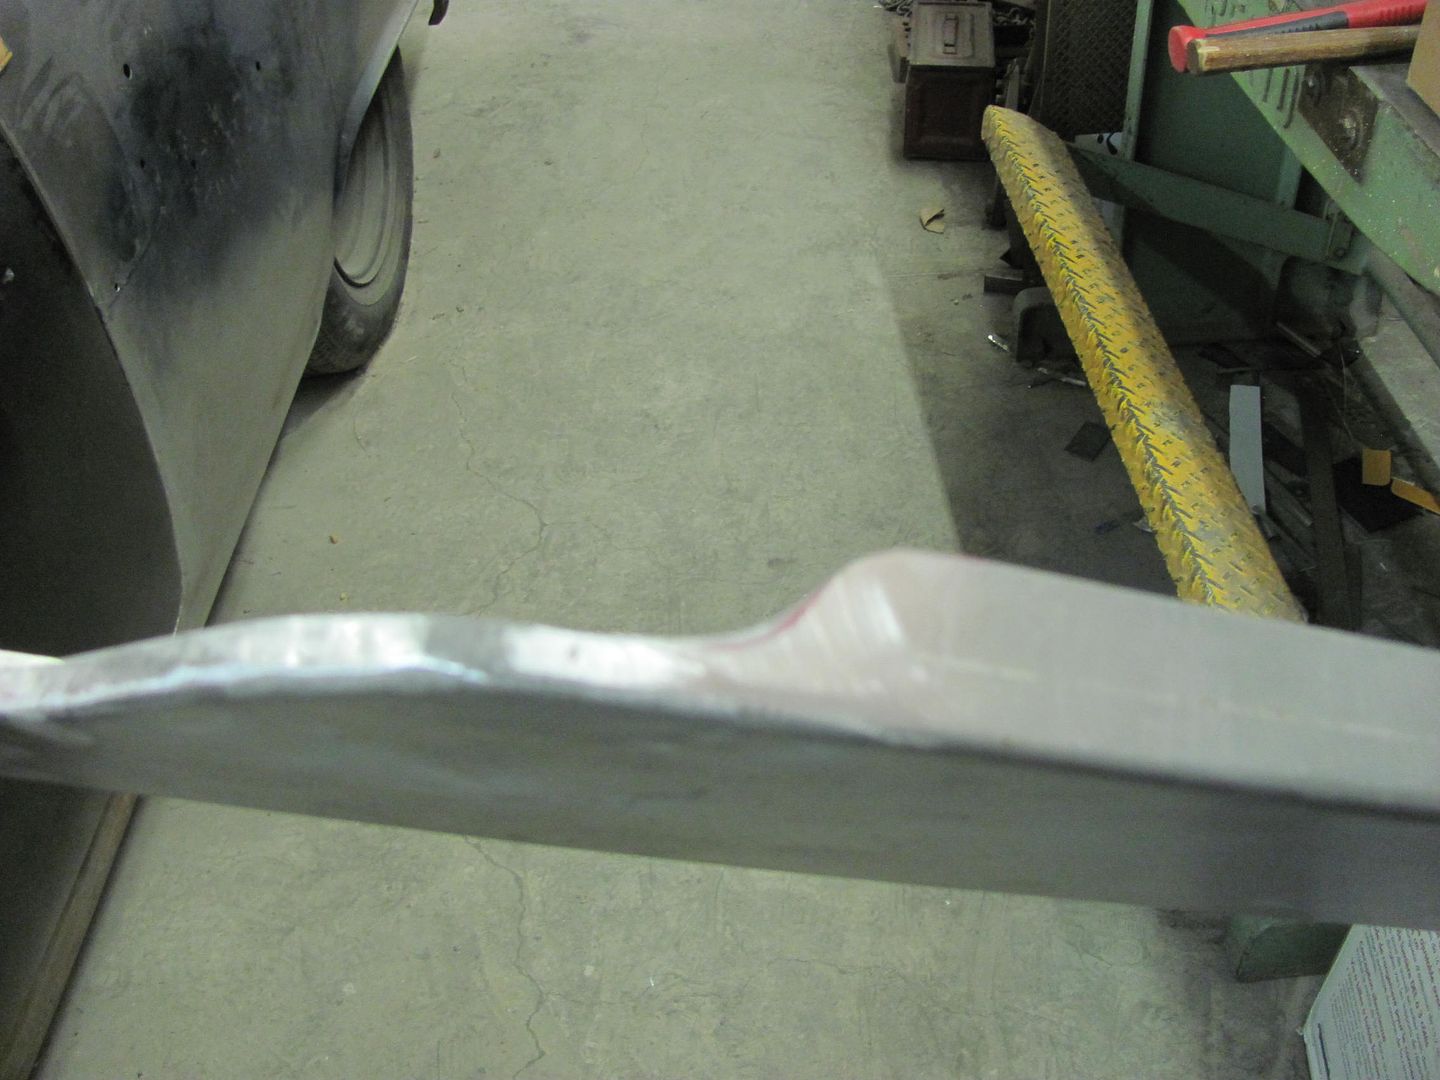 Then on to fabbing up the other side.. 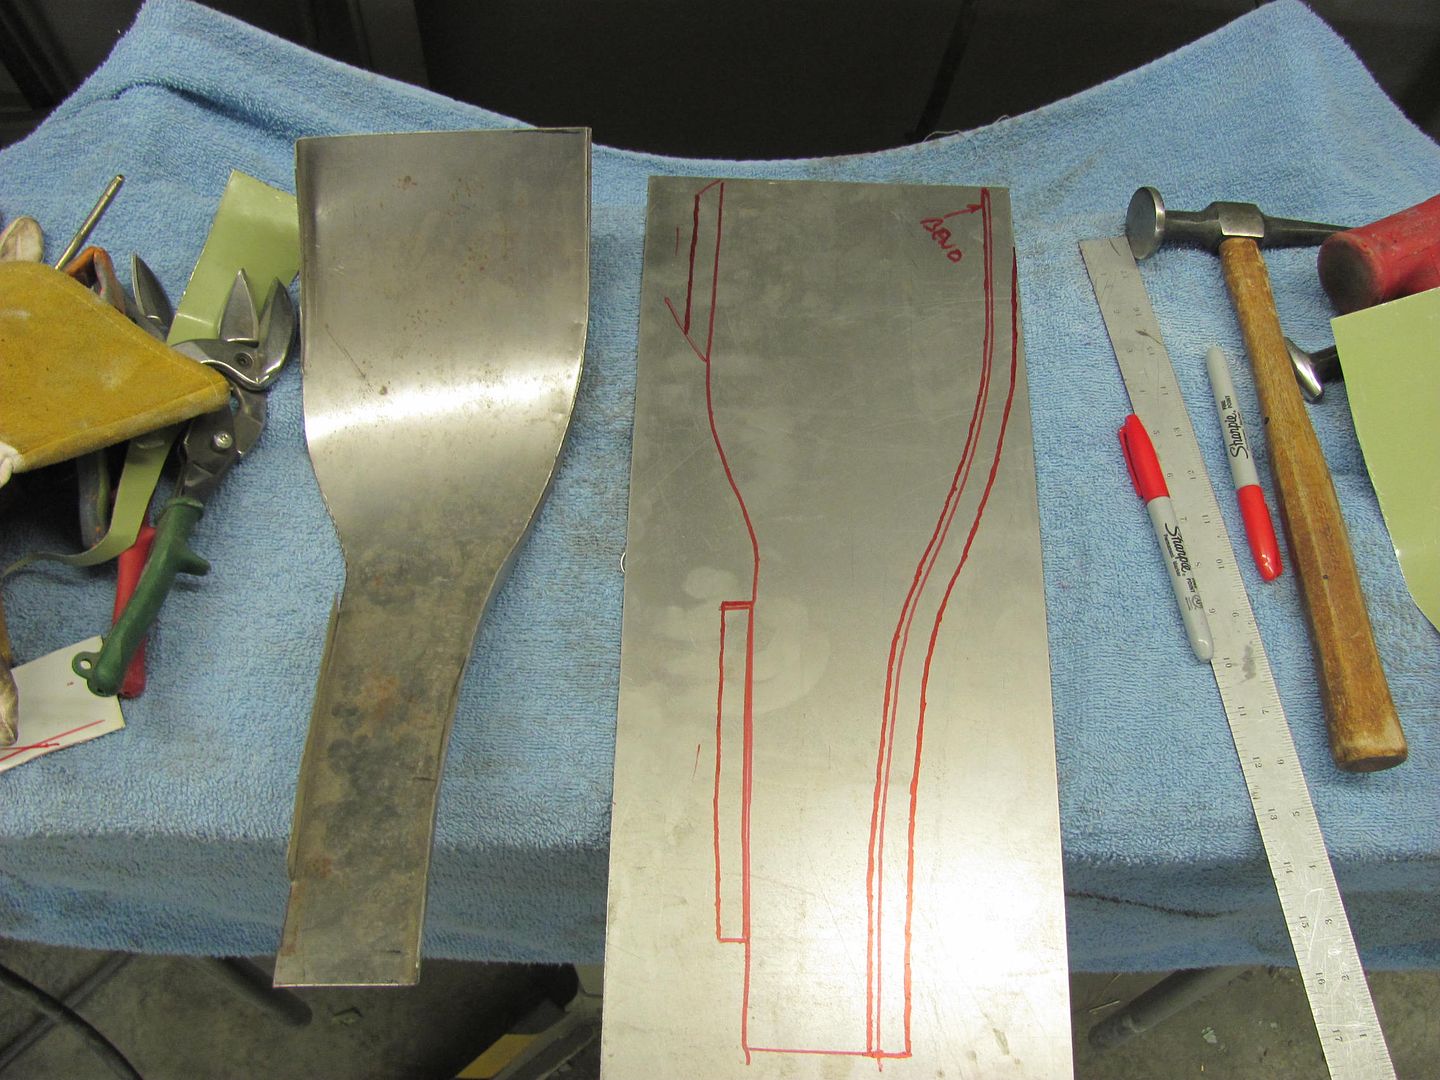 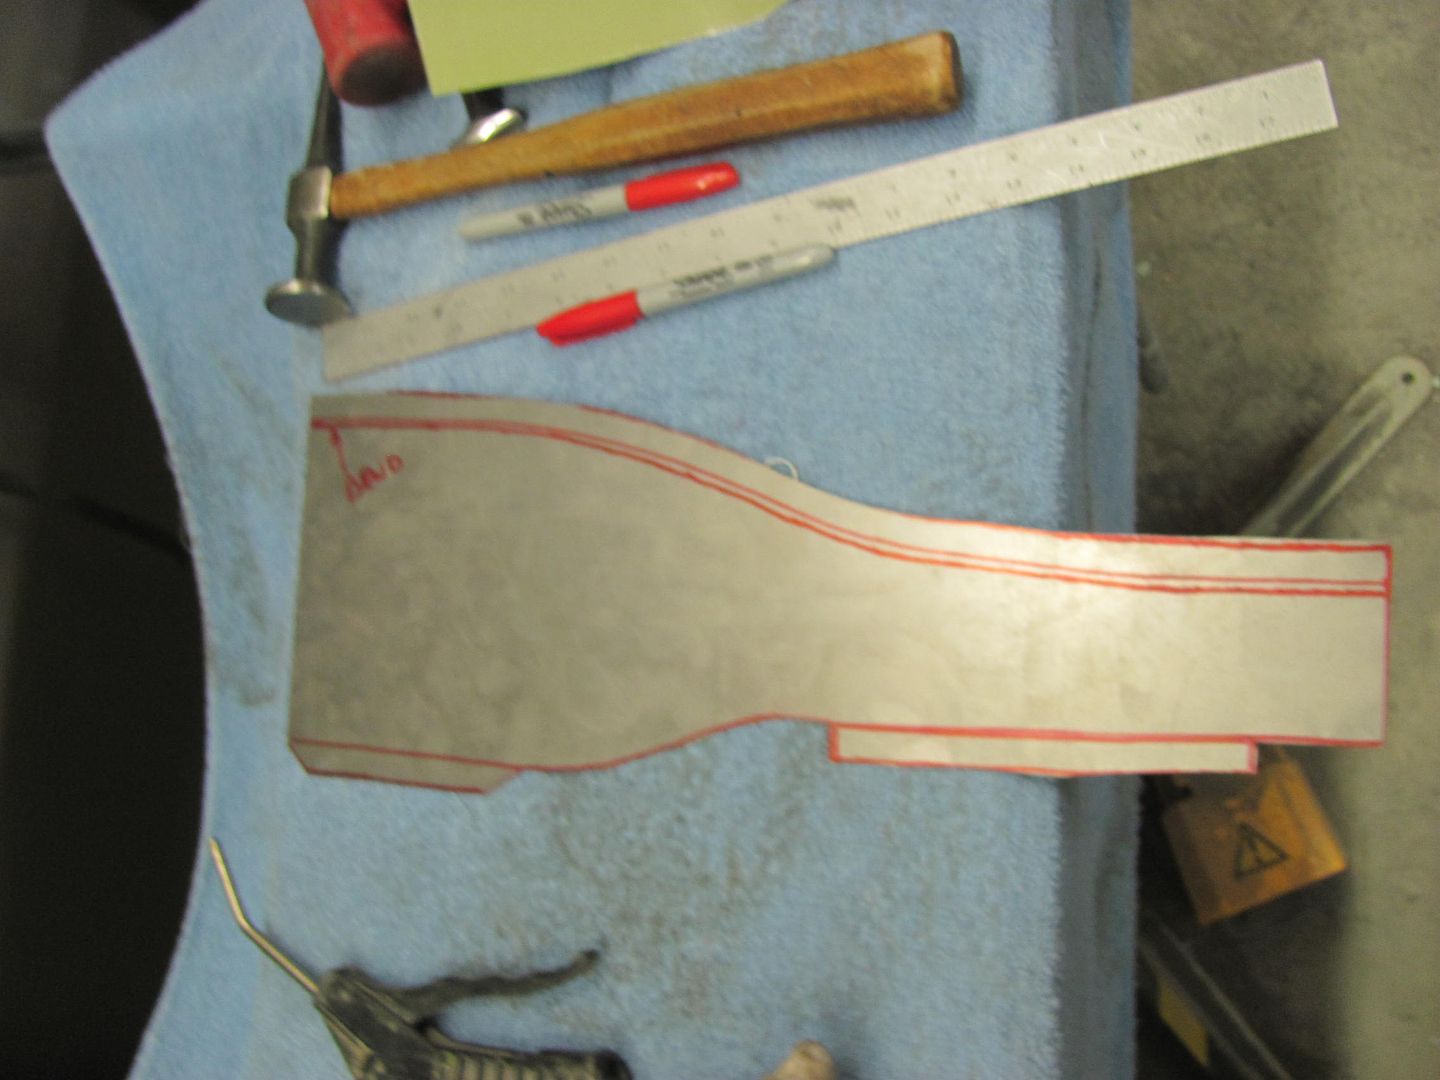 Kyle using the tipping die, I was relegated to bead roller powered option... 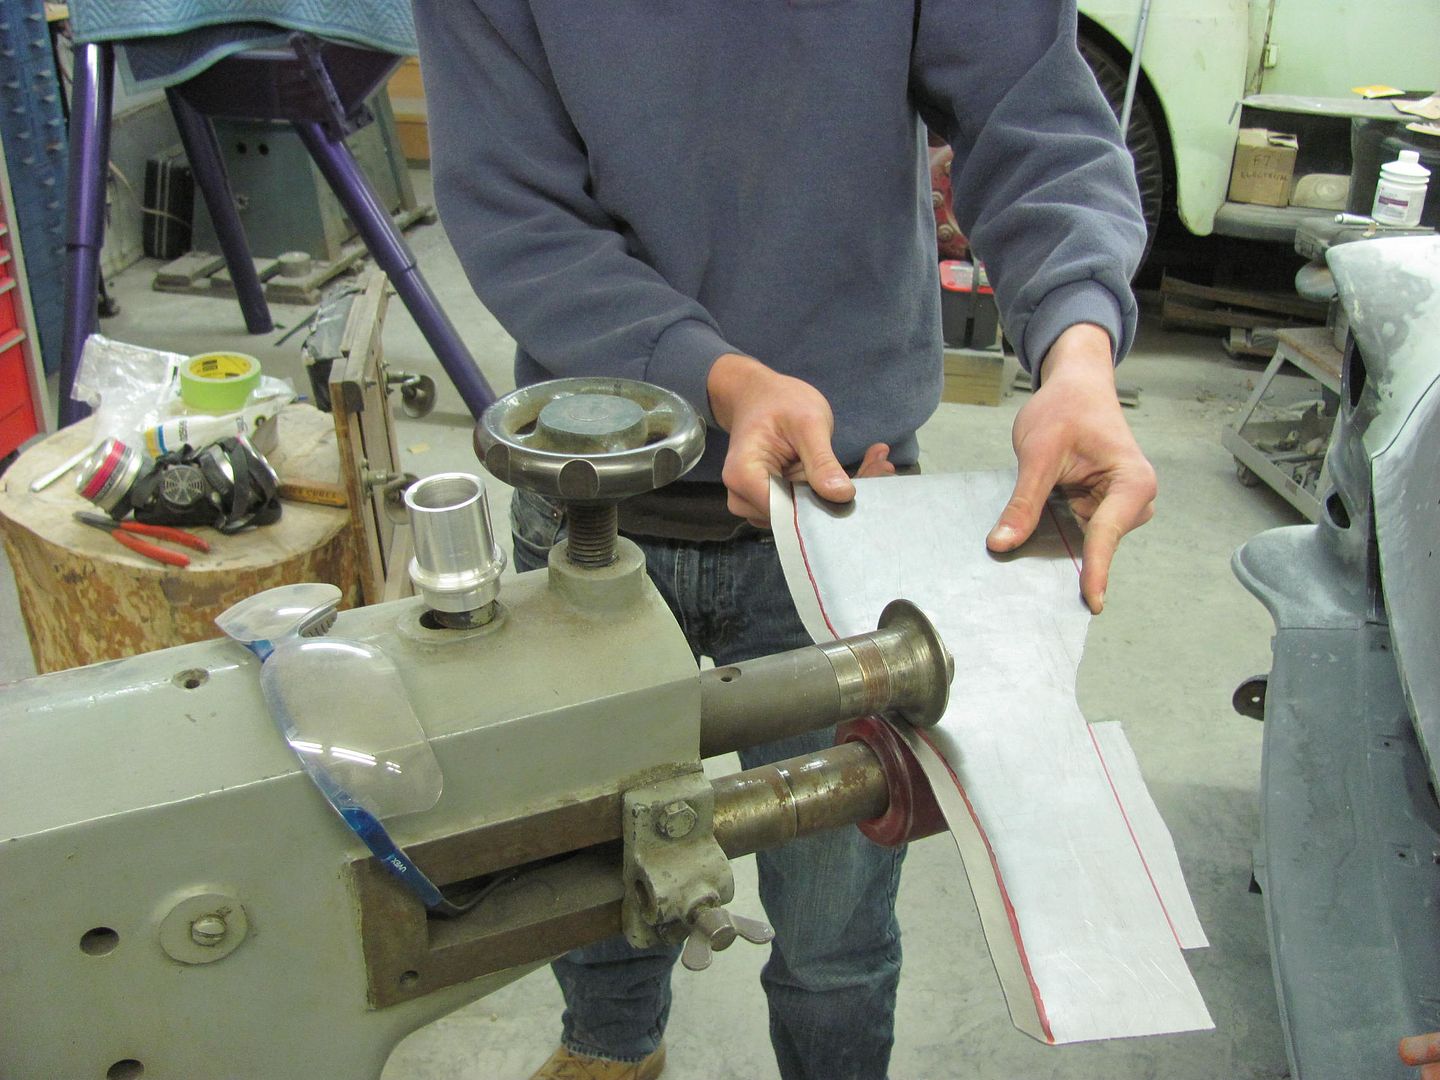 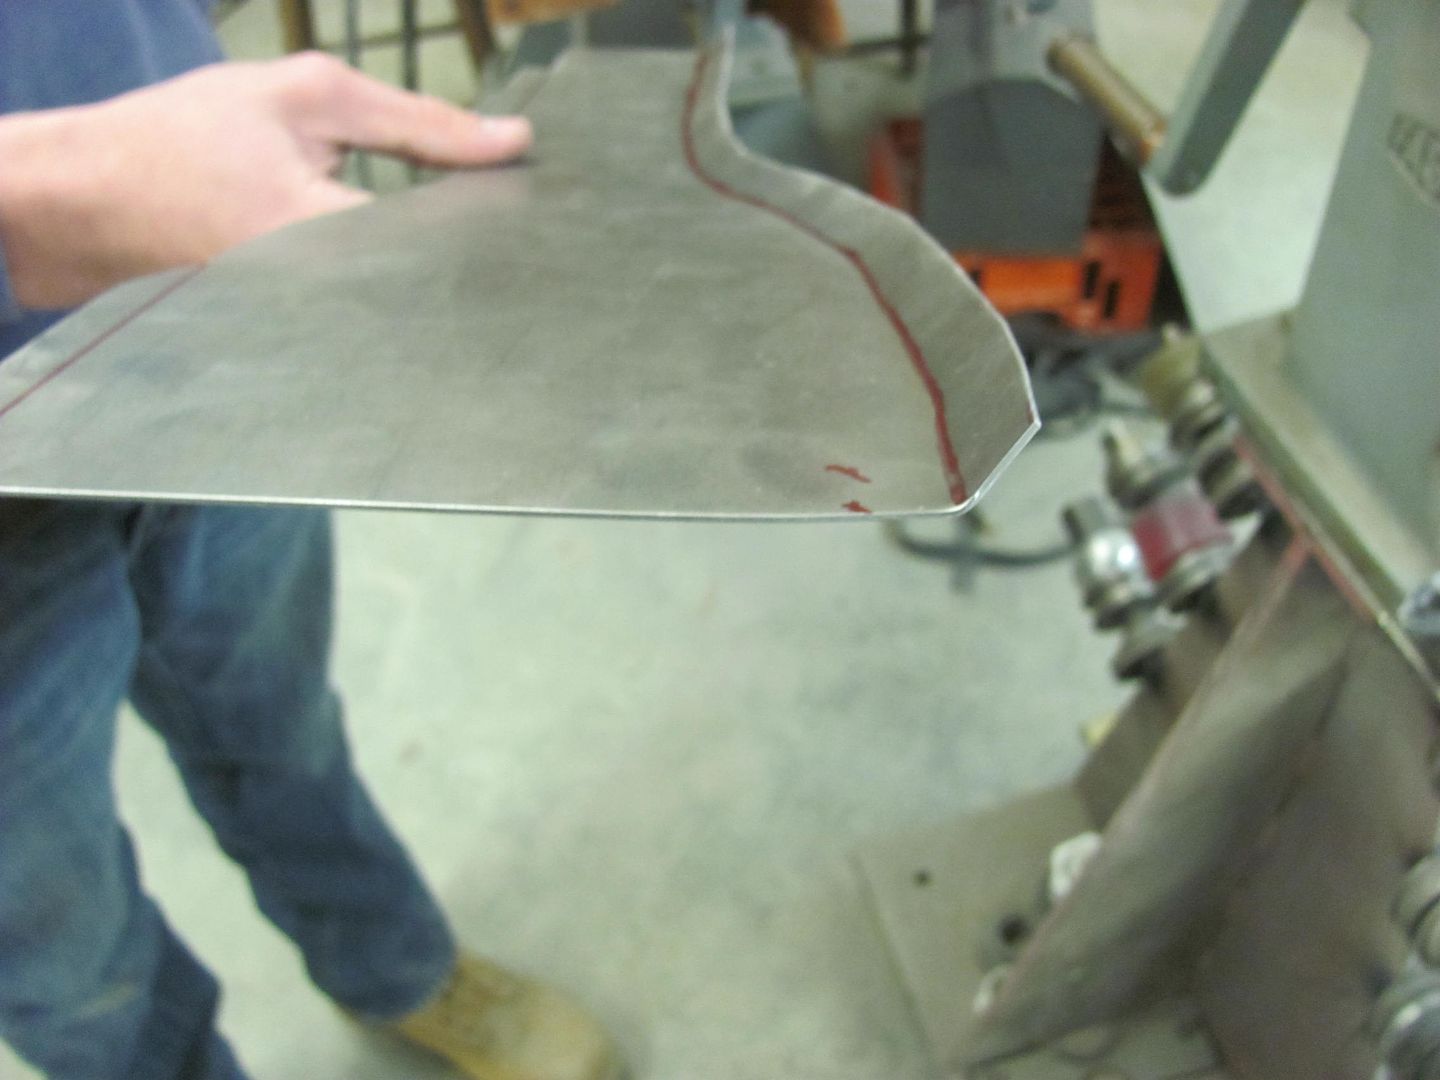 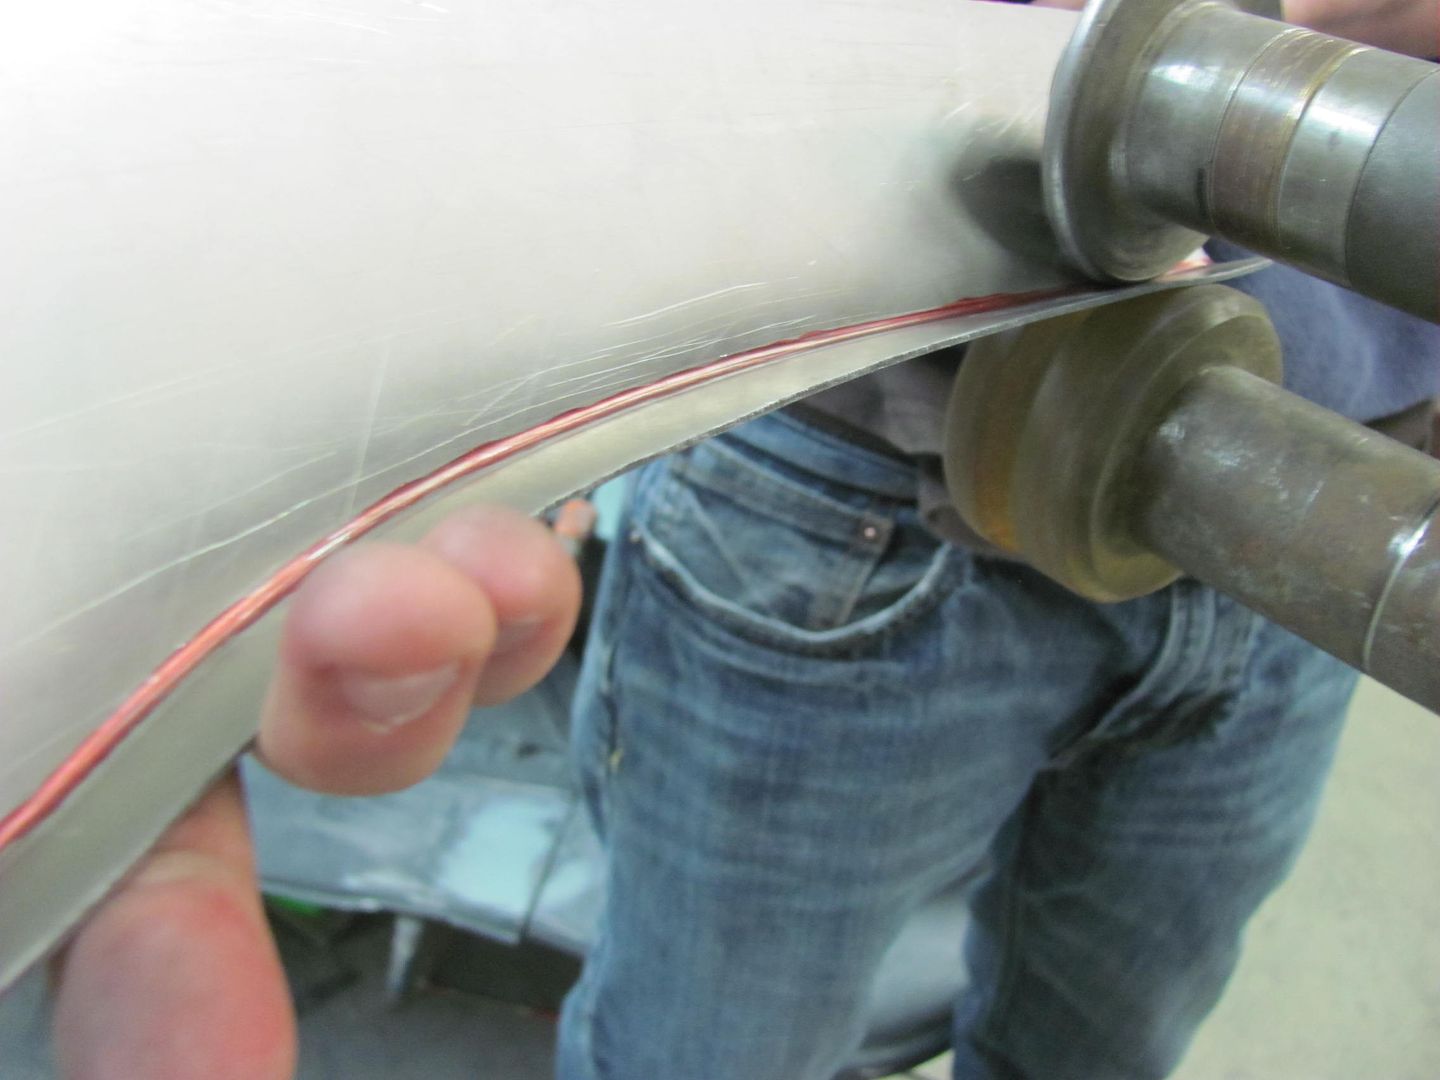 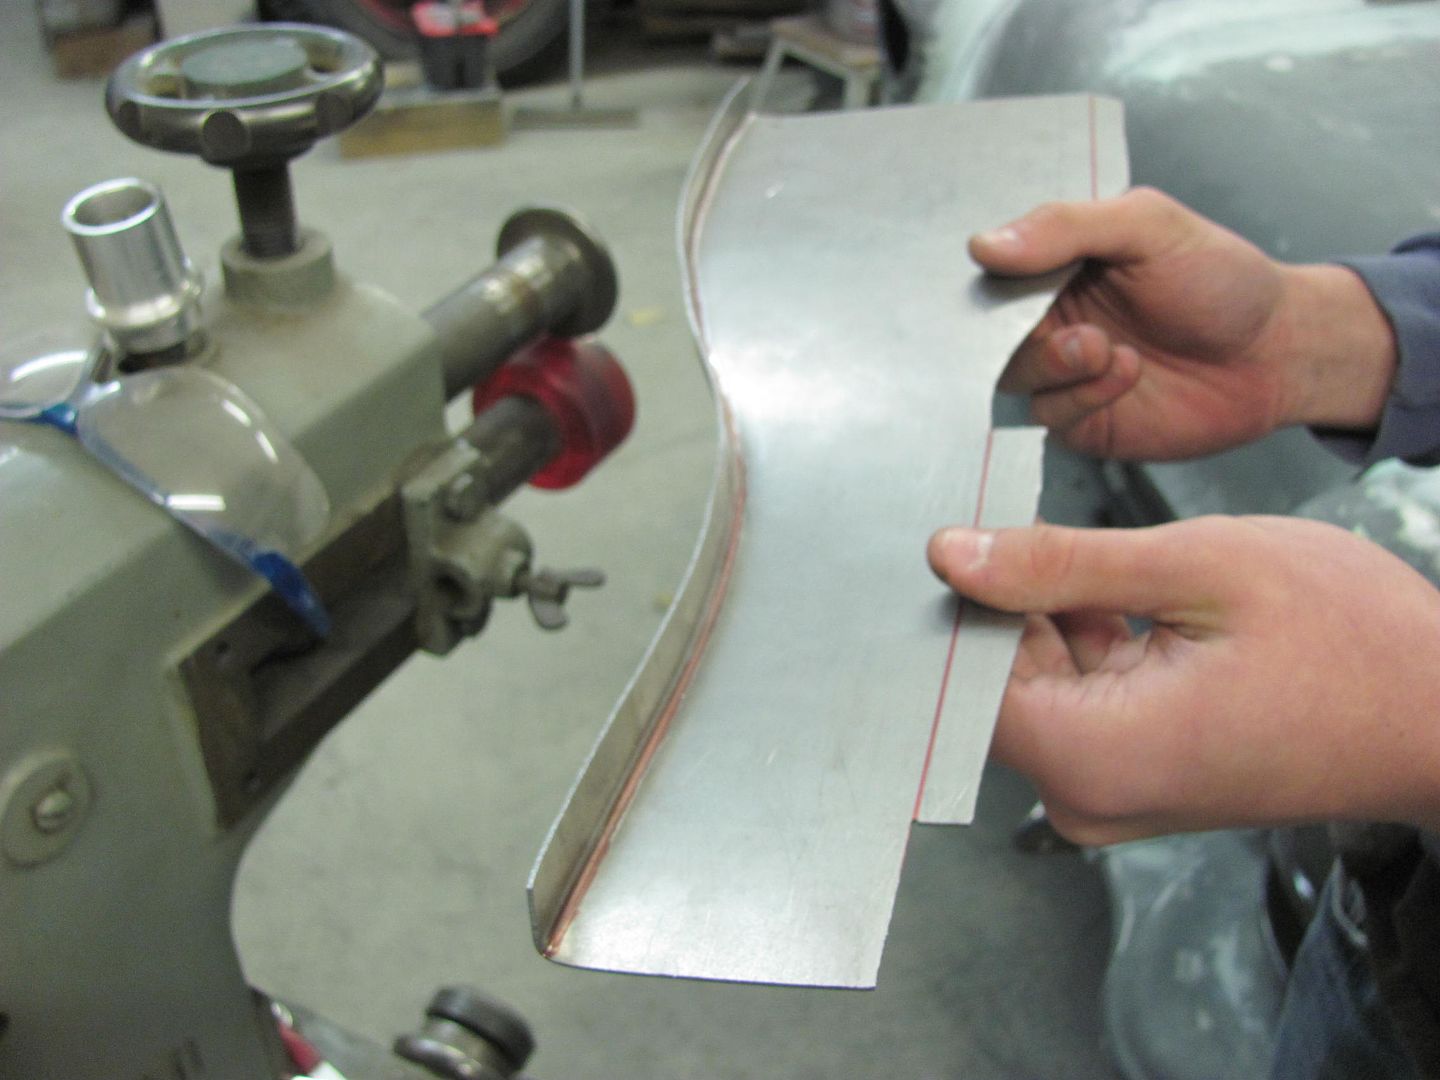 The two short flanges were bent in the press brake.. Then on to shrinking the flanges in the Erco. You'll have to visualize this one as we didn't get pictures. Comparing the two... 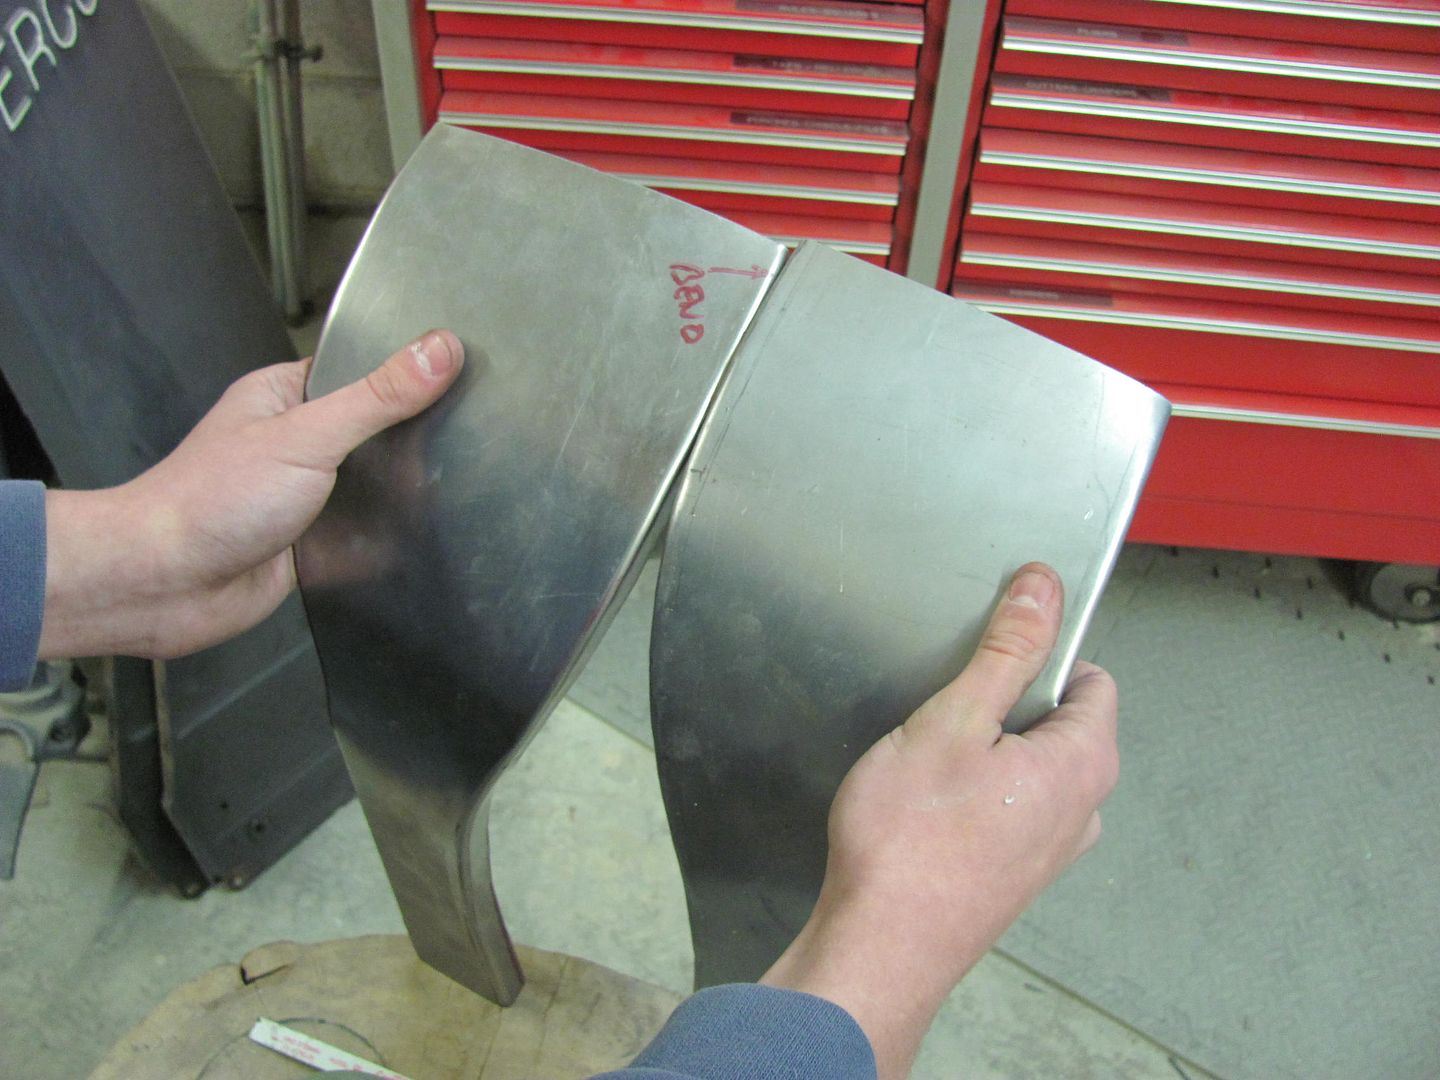 Test fit... 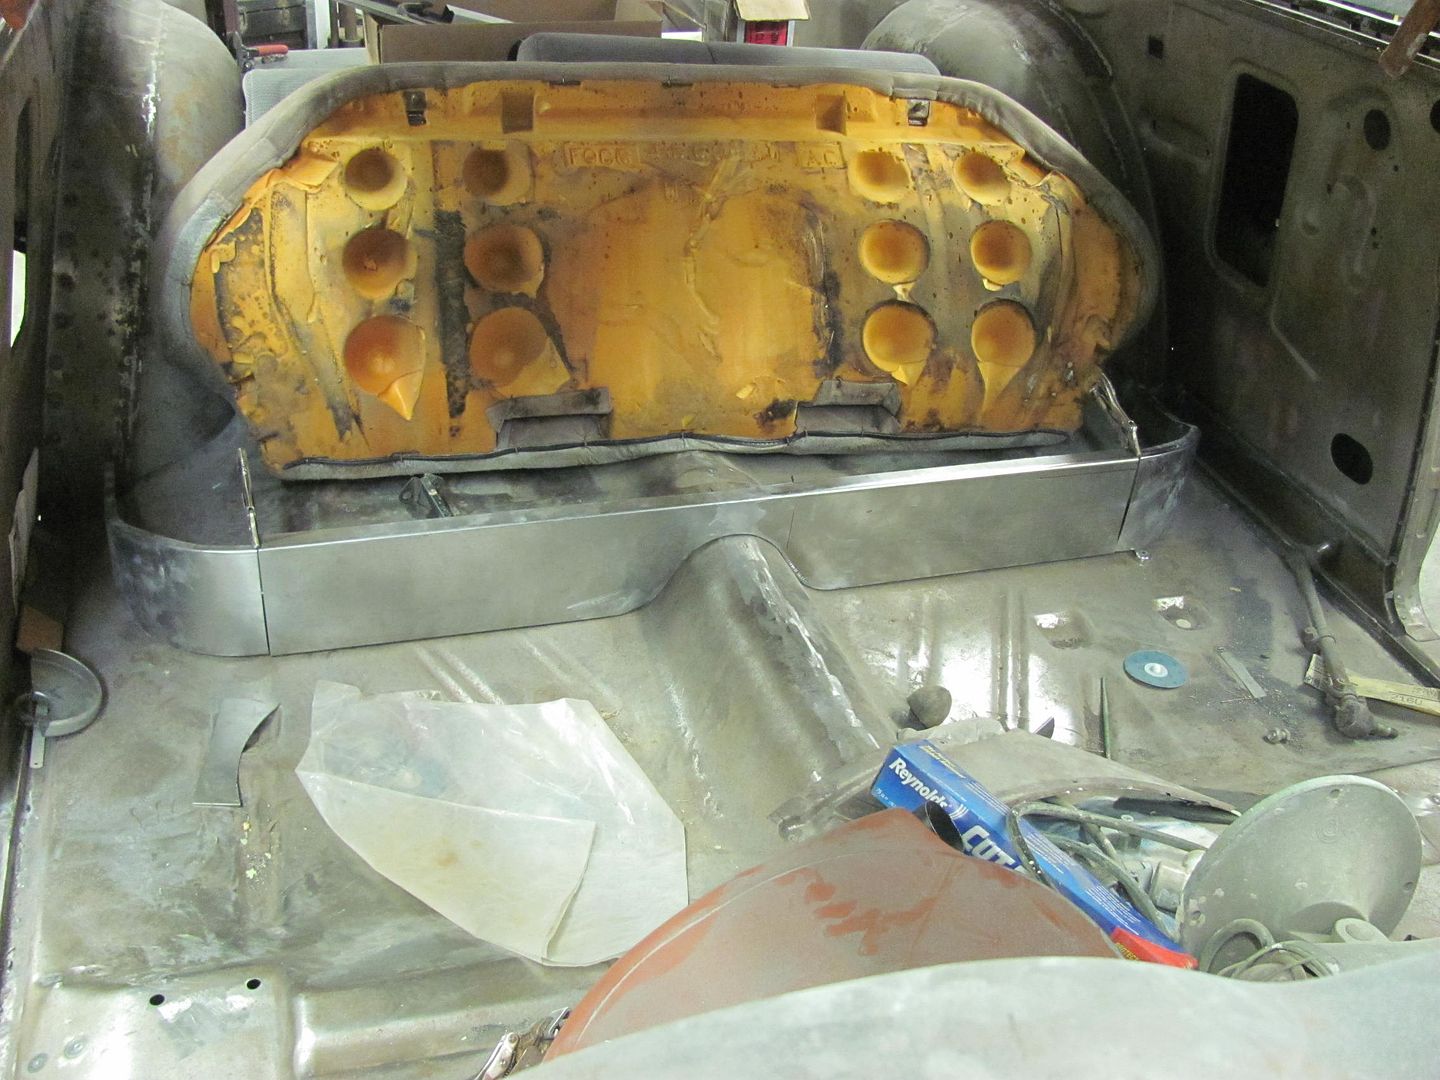 Seat cushion will need a widening kit.. 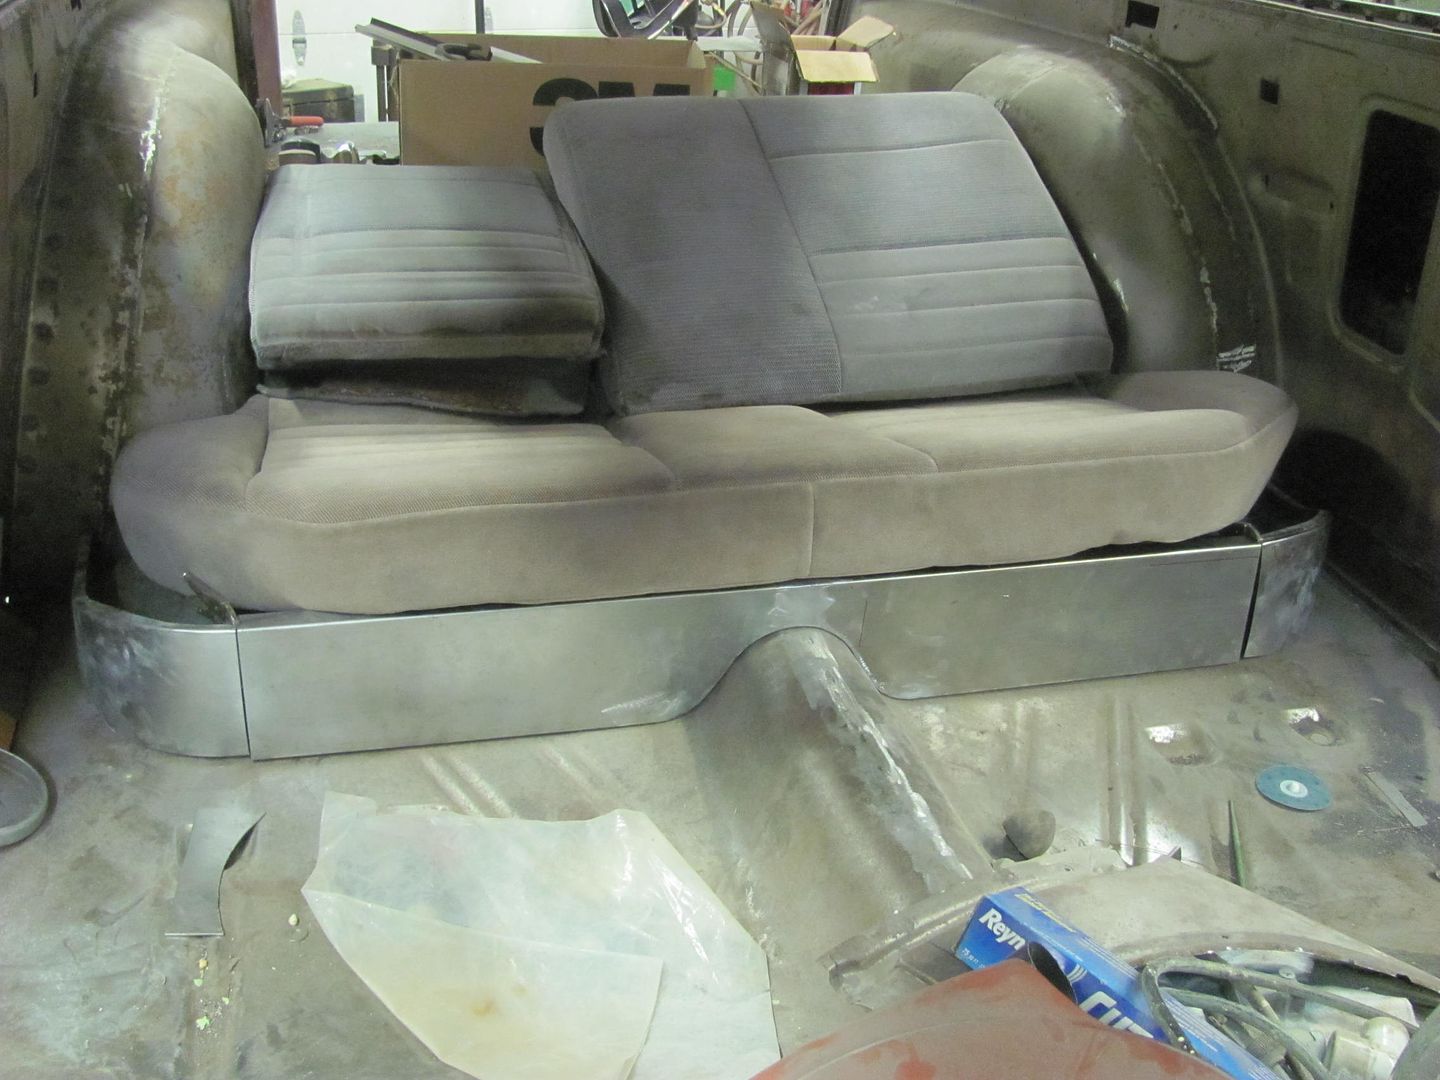
__________________
Robert |
|
|
|
|
|
02-27-2015, 02:22 AM
|
#19 | |
|
Registered User
Join Date: Aug 2005
Location: Hillsboro Oregon
Posts: 6,449
|
Re: 55 Wagon Progress
Quote:
Impressive work as always! |
|
|
|
|
|
03-02-2015, 12:07 PM
|
#20 |
|
Registered User
Join Date: Feb 2012
Location: Memphis, TN
Posts: 285
|
Re: 55 Wagon Progress
I will echo everyone else - thanks so much for taking the time to document this build. Your metalworking ideas and processes will make my life much easier when I get back to my truck.
__________________
Rick's 55 TF/Fleetside/LSx build 1958 Corvette LS1/T56 Build 1966 GTO LQ9/T56 Restomod |
|
|
|
|
03-23-2015, 01:40 PM
|
#21 |
|
Registered User
Join Date: Jan 2013
Location: Leonardtown, MD
Posts: 1,637
|
Re: 55 Wagon Progress
Sorry, been slipping with the updates. Let me catch up here...
Our upholsterer paid us a visit and discussed interior components. We are going to make some arm rests for the rear seat similar to what is used in the 55 convertible. To make room, we're going to keep the bottom seat cushion it's original width and just add foam to the corners to form the radius. So the sides for the seat risers were trimmed once more and test fitted... 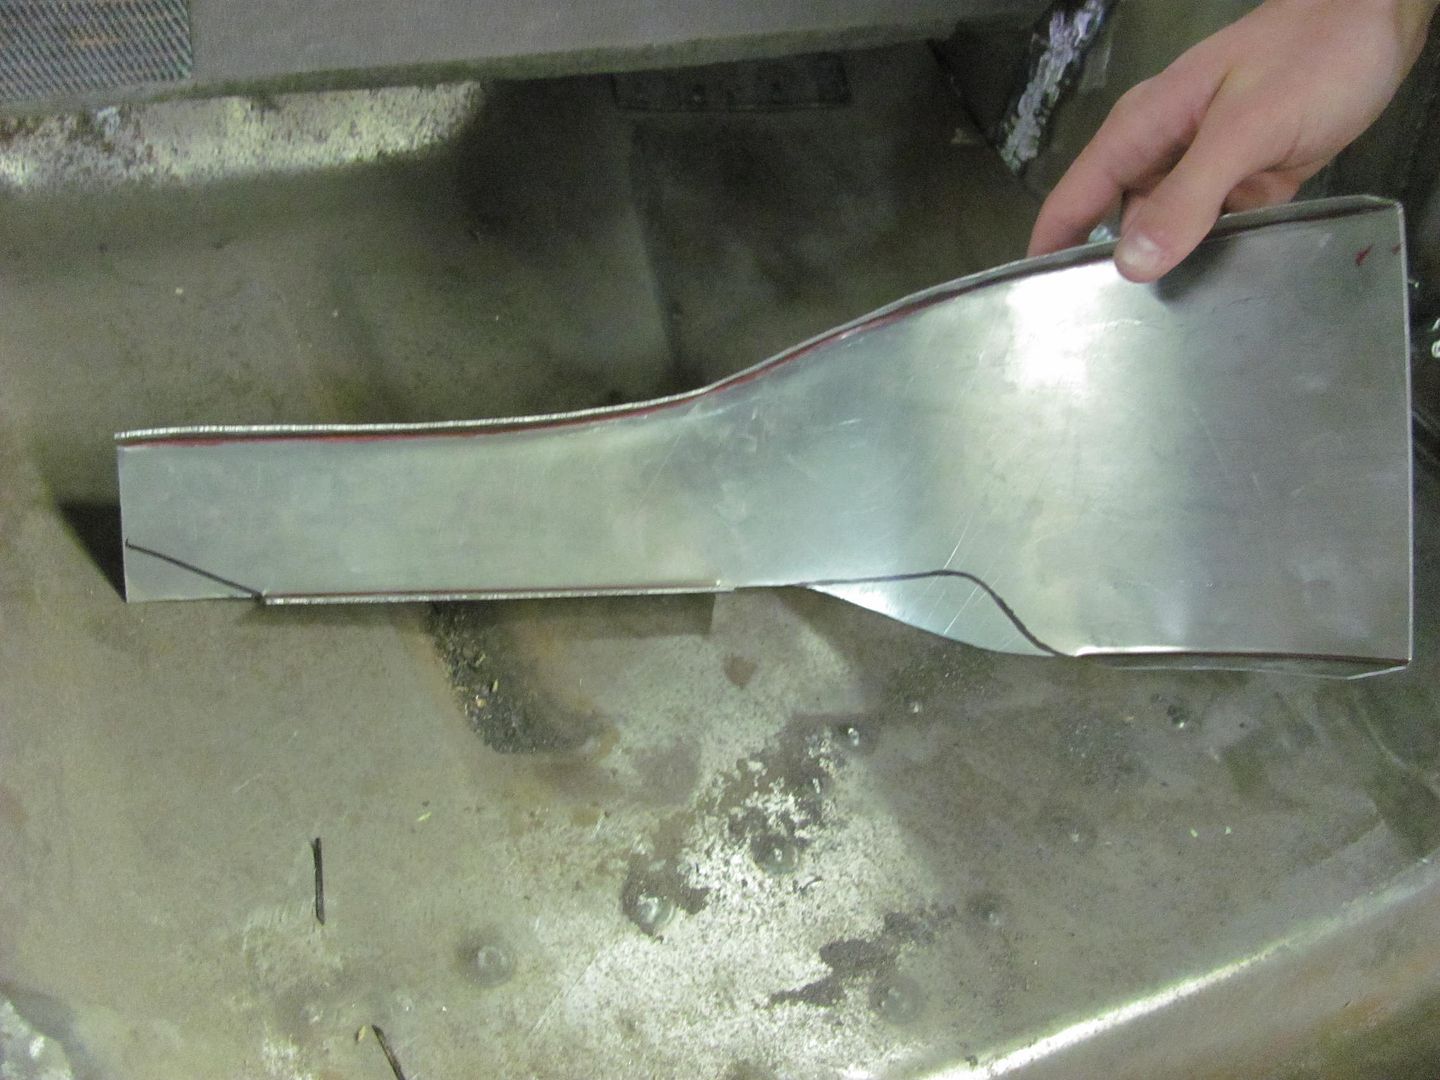 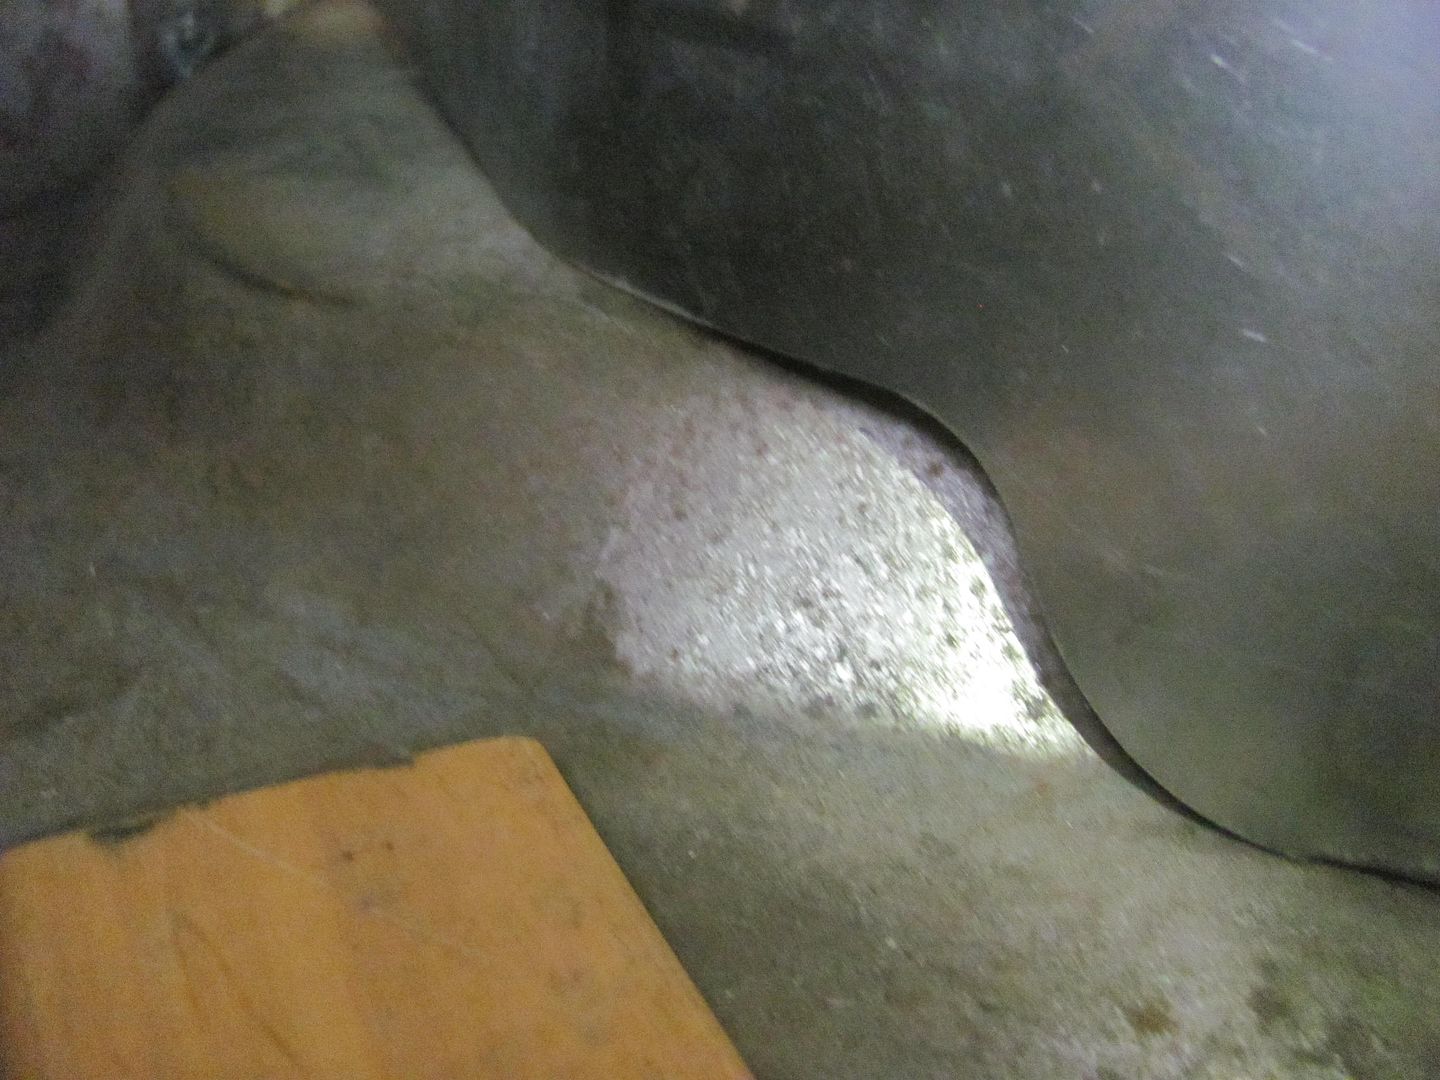 The center of the seat riser was trimmed for the new size while leaving the flanges intact for later trimming.. 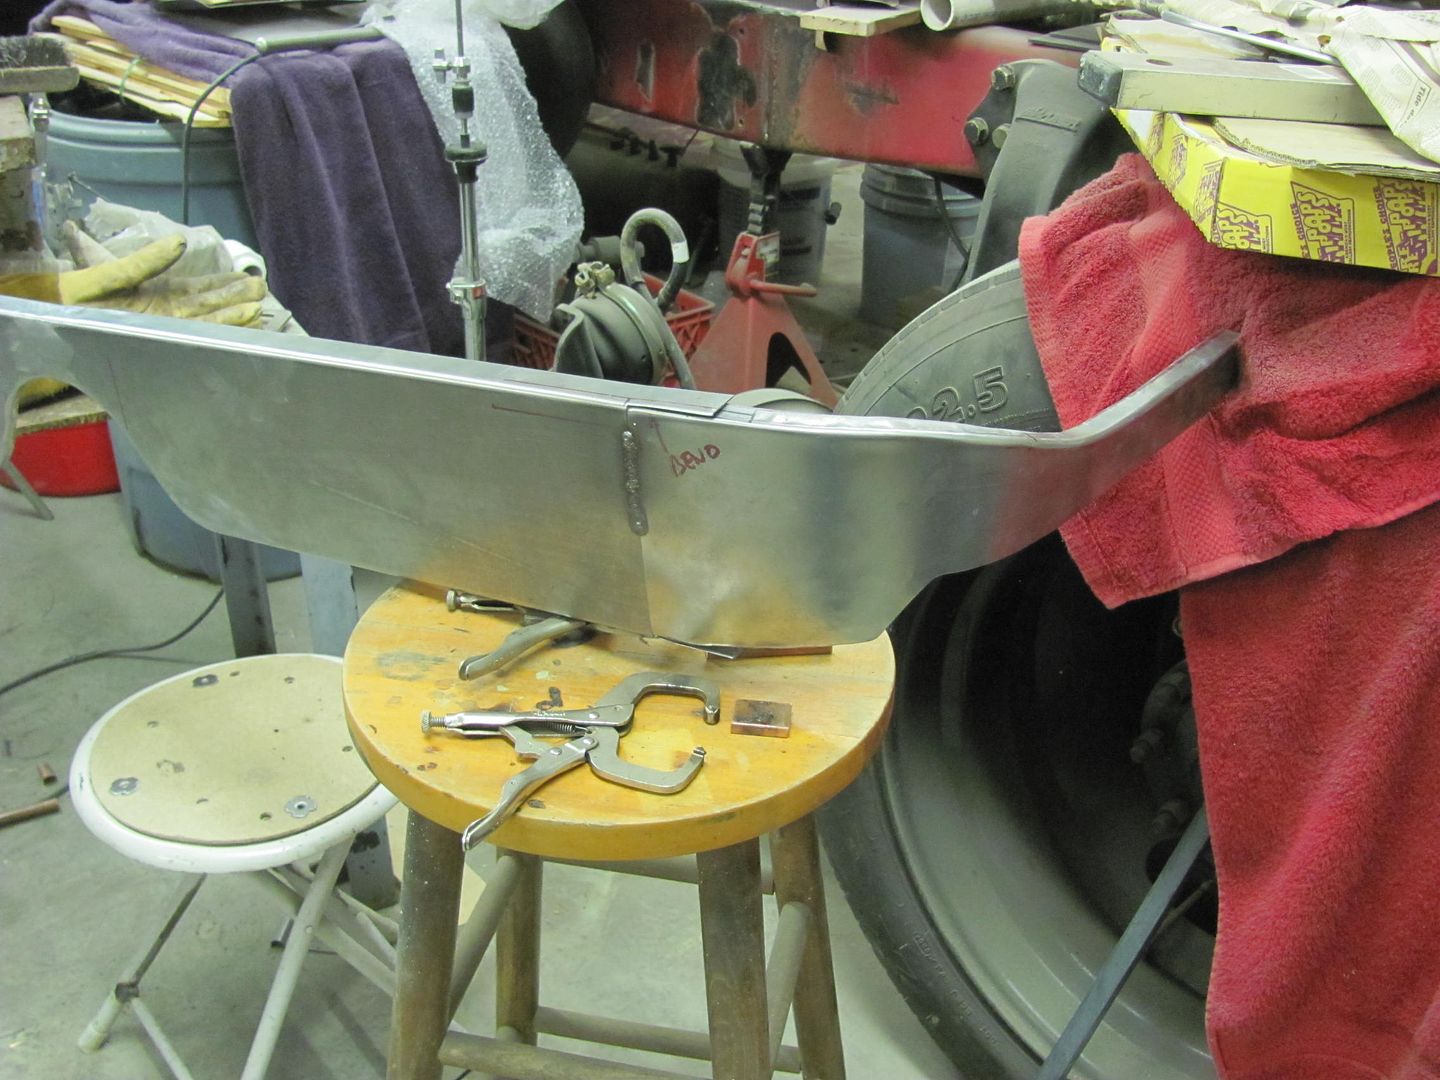  Relief cuts added to tweak the radius, test fit into the car, and the top flanges clamped in place.. While clamped, the bottom flanges are trimmed for welding. 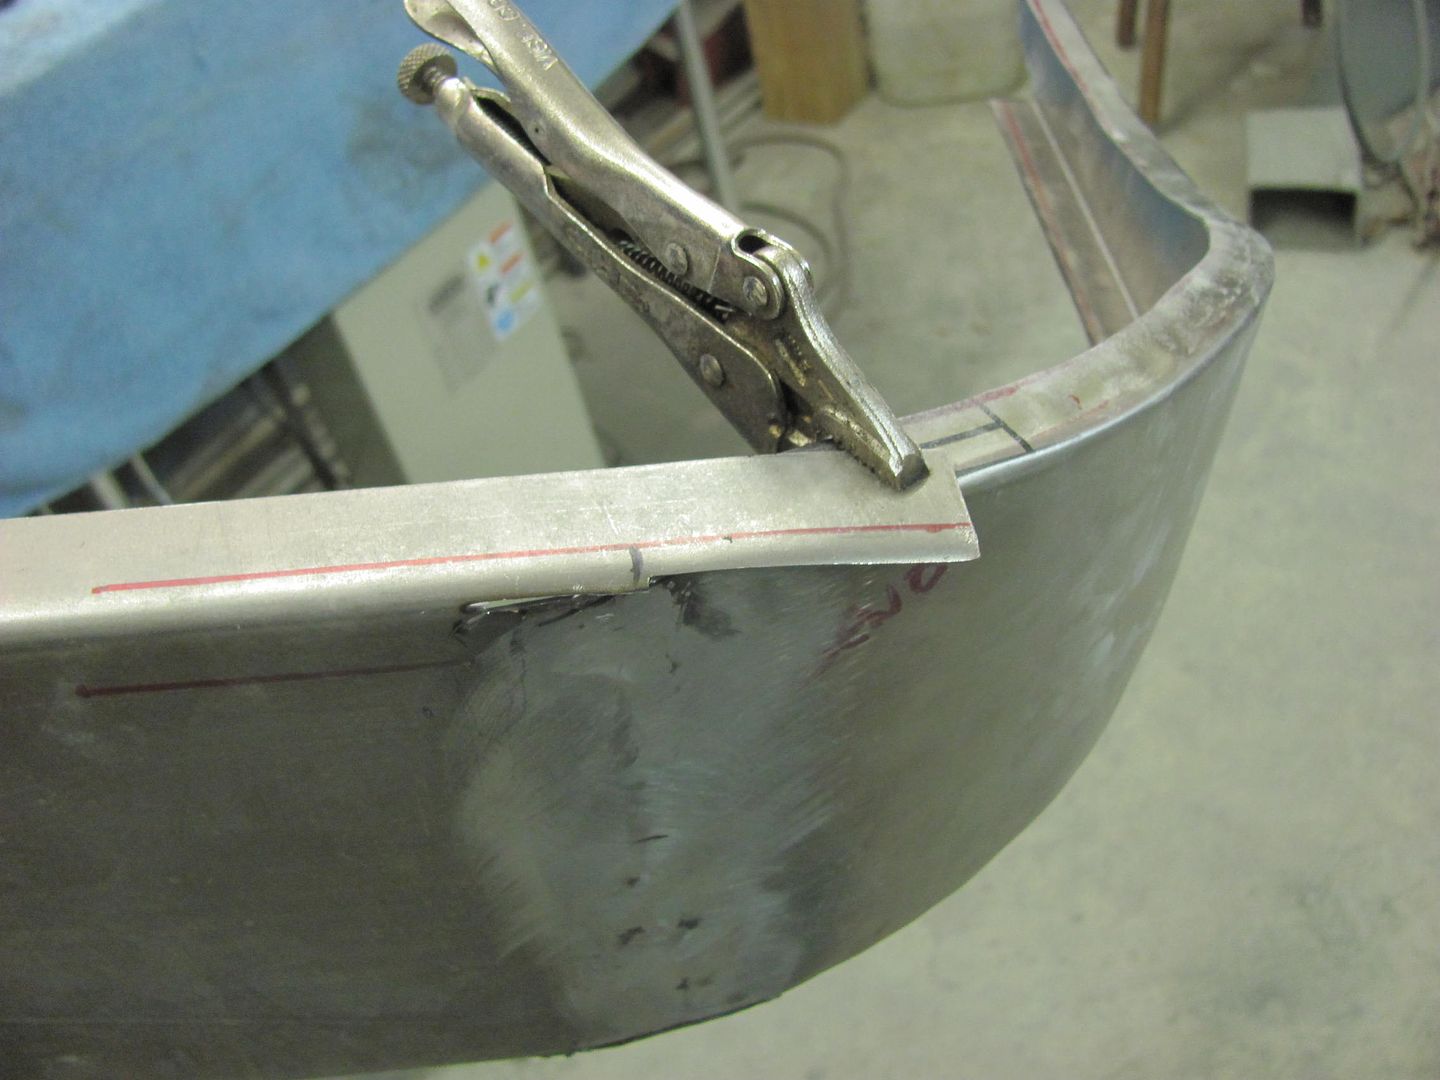 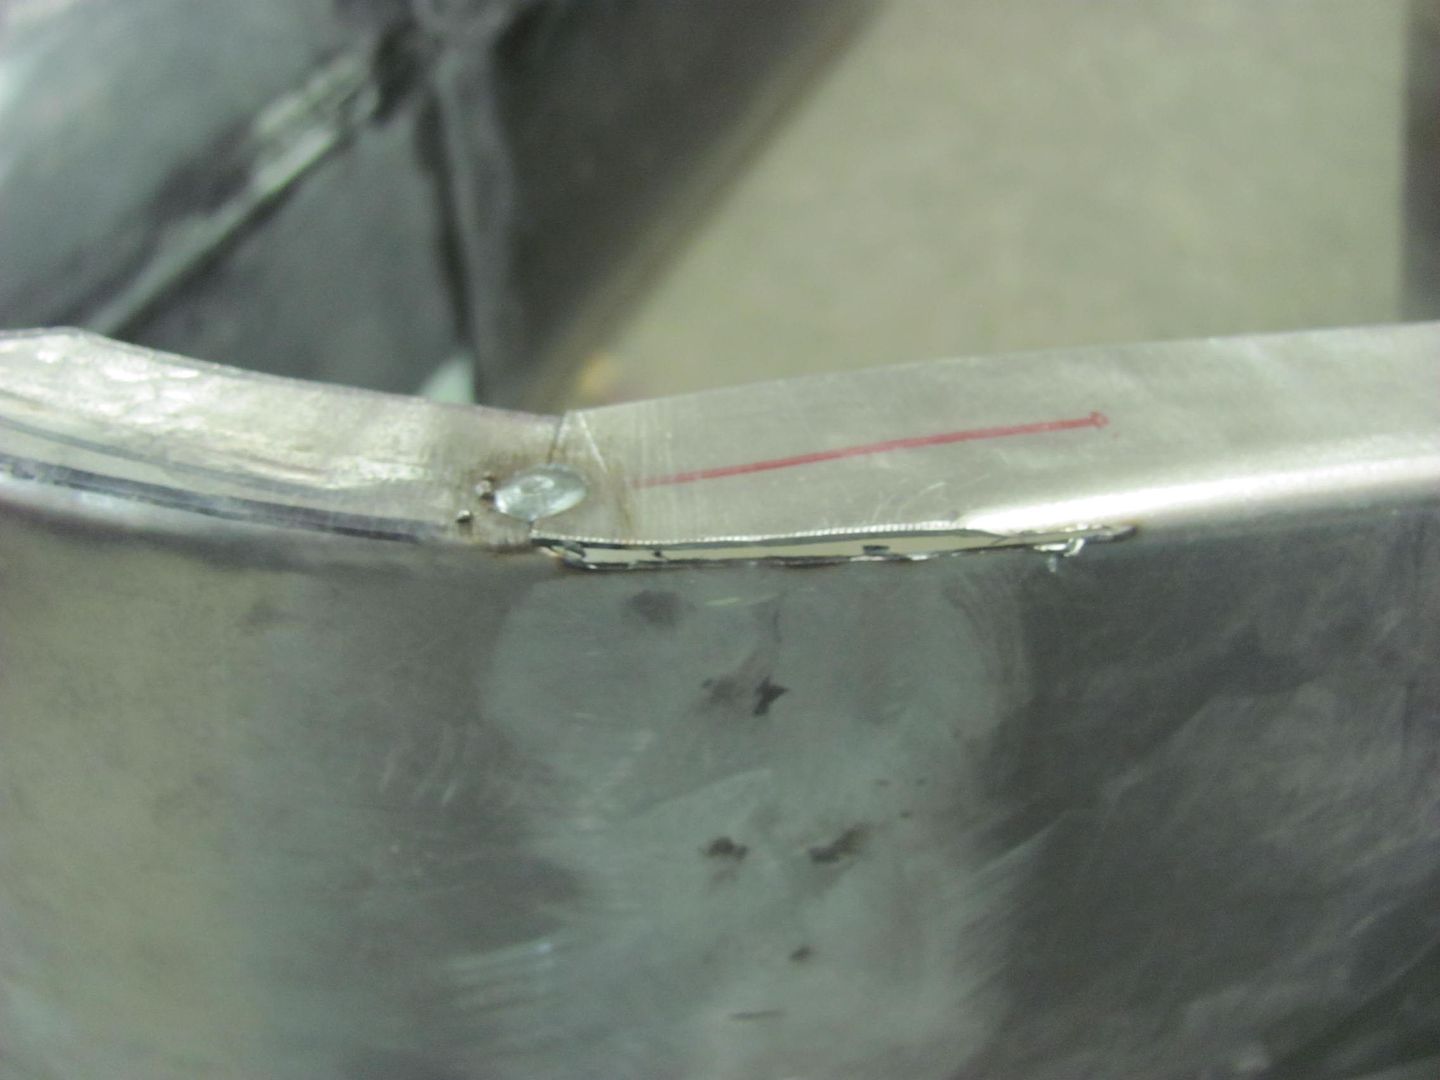  Copper backer made for welding up the corner.. 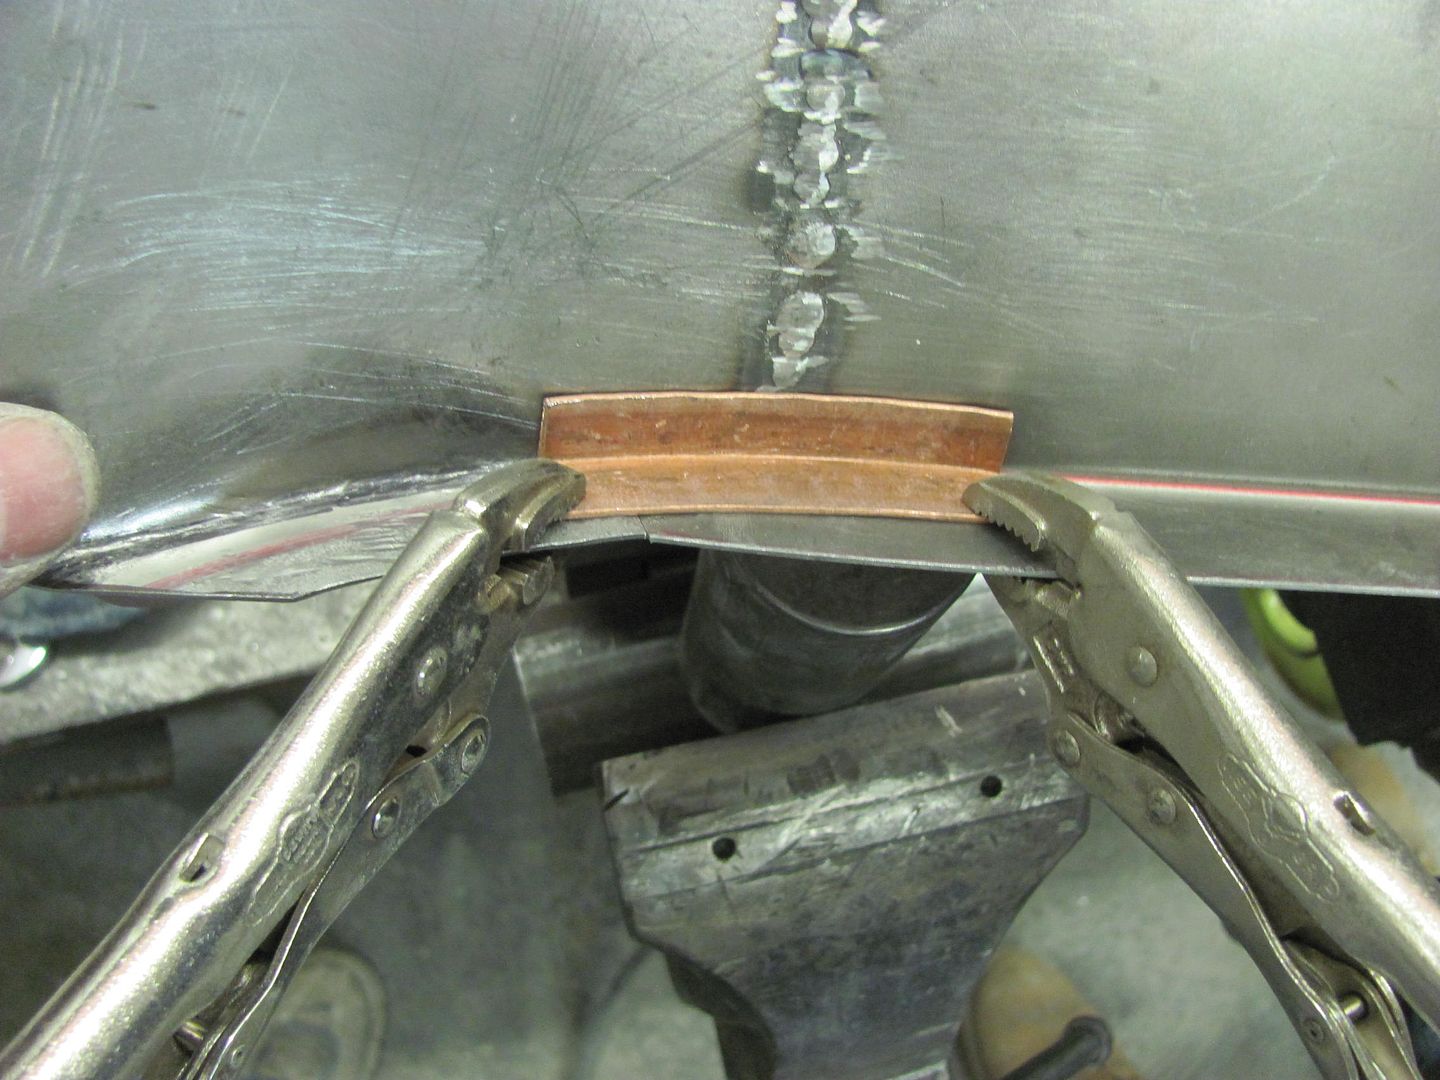 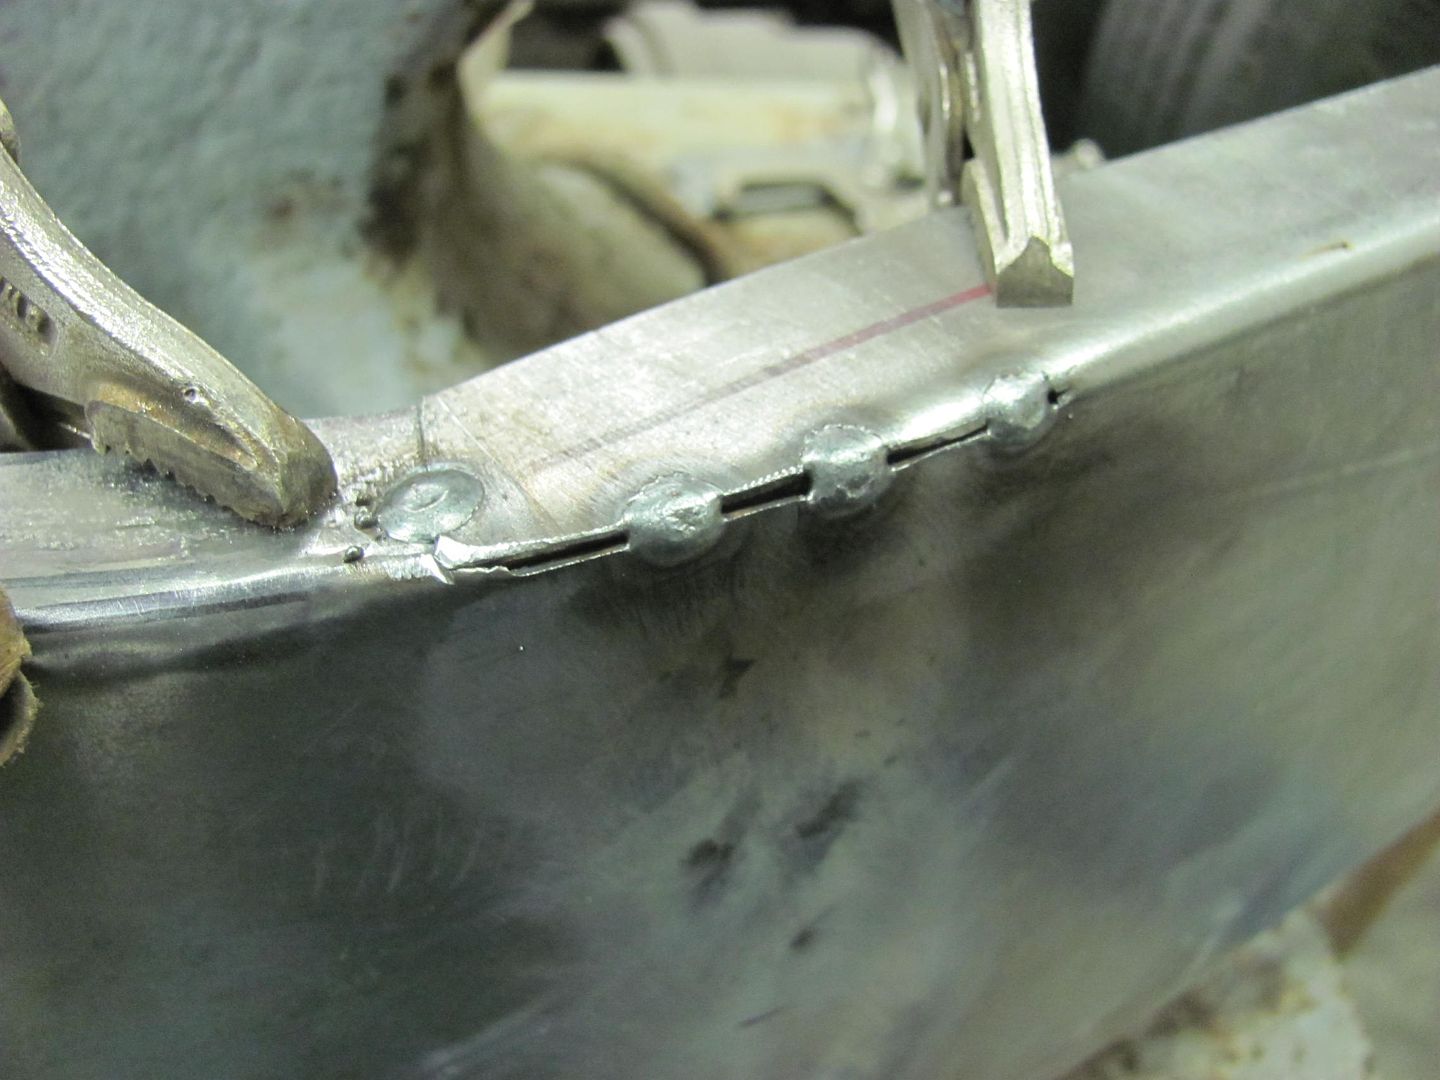 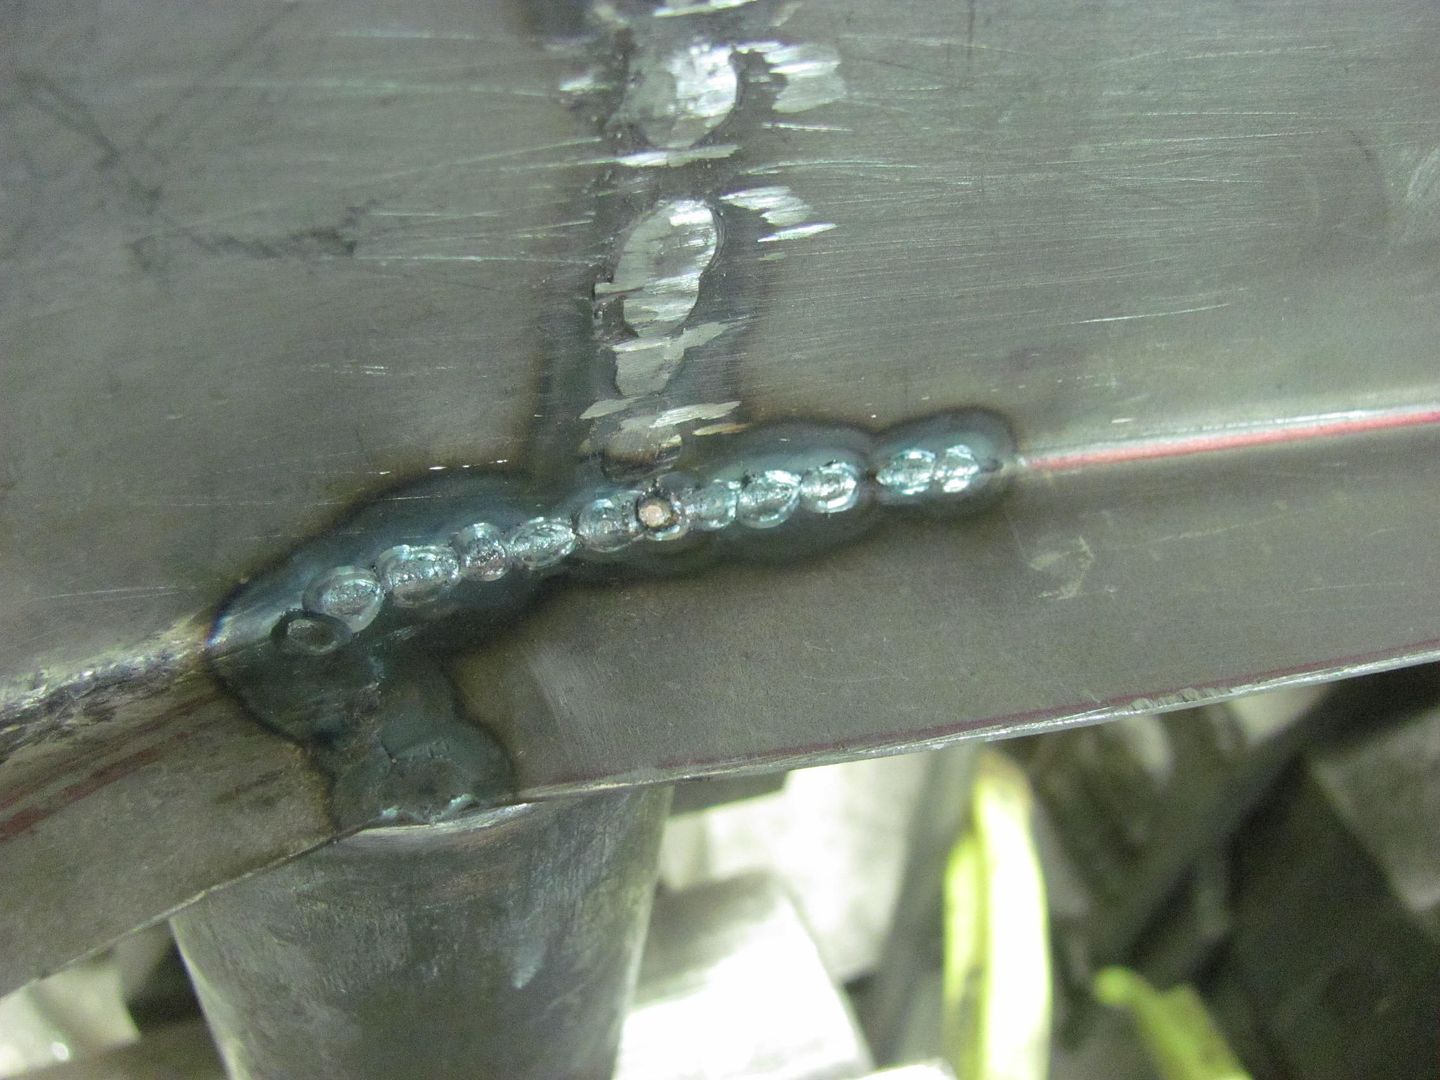 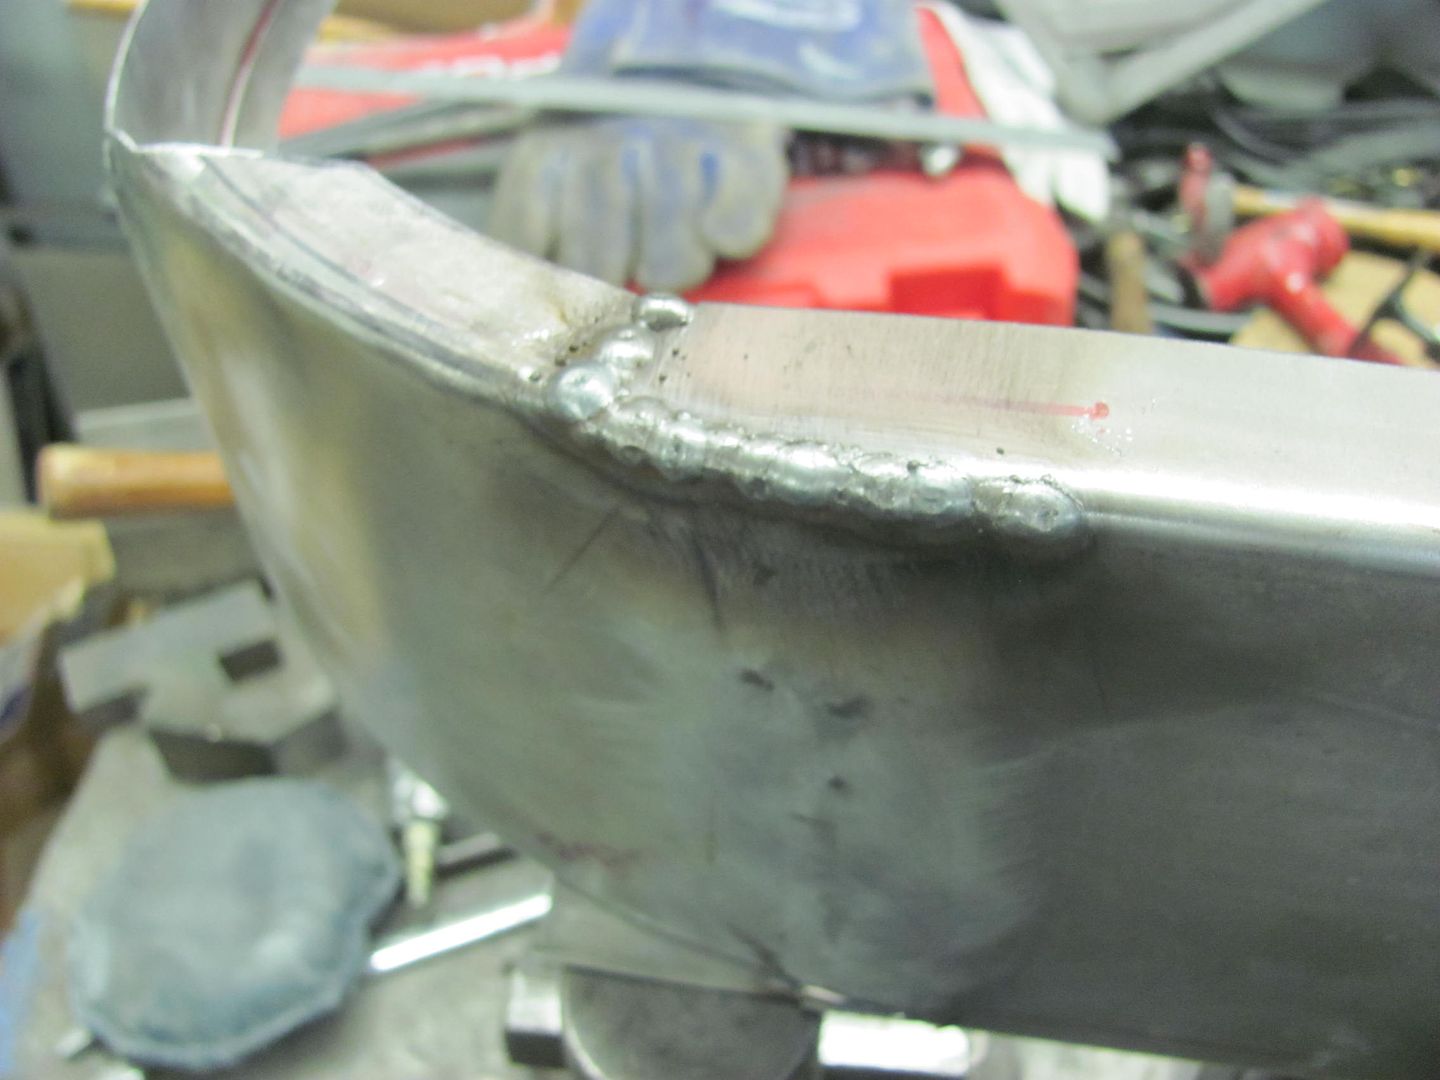 All clamped up for the next one... 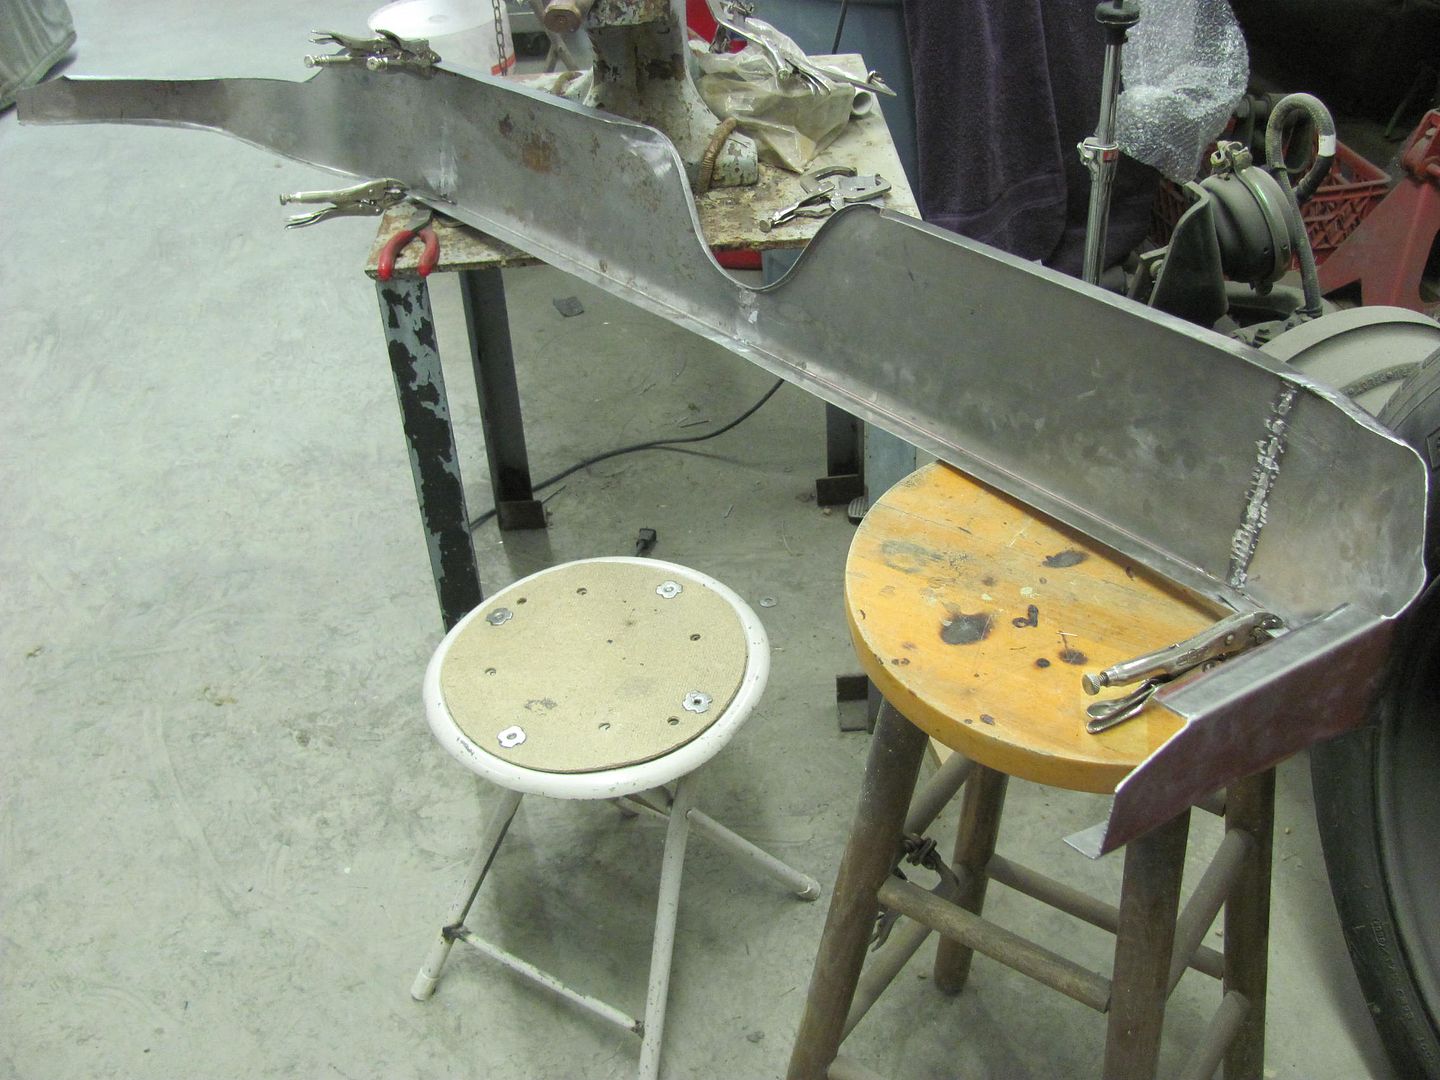 Skipping ahead a bit (photographer is really slipping here... ) Seat riser completed, test fit of the rear seat... 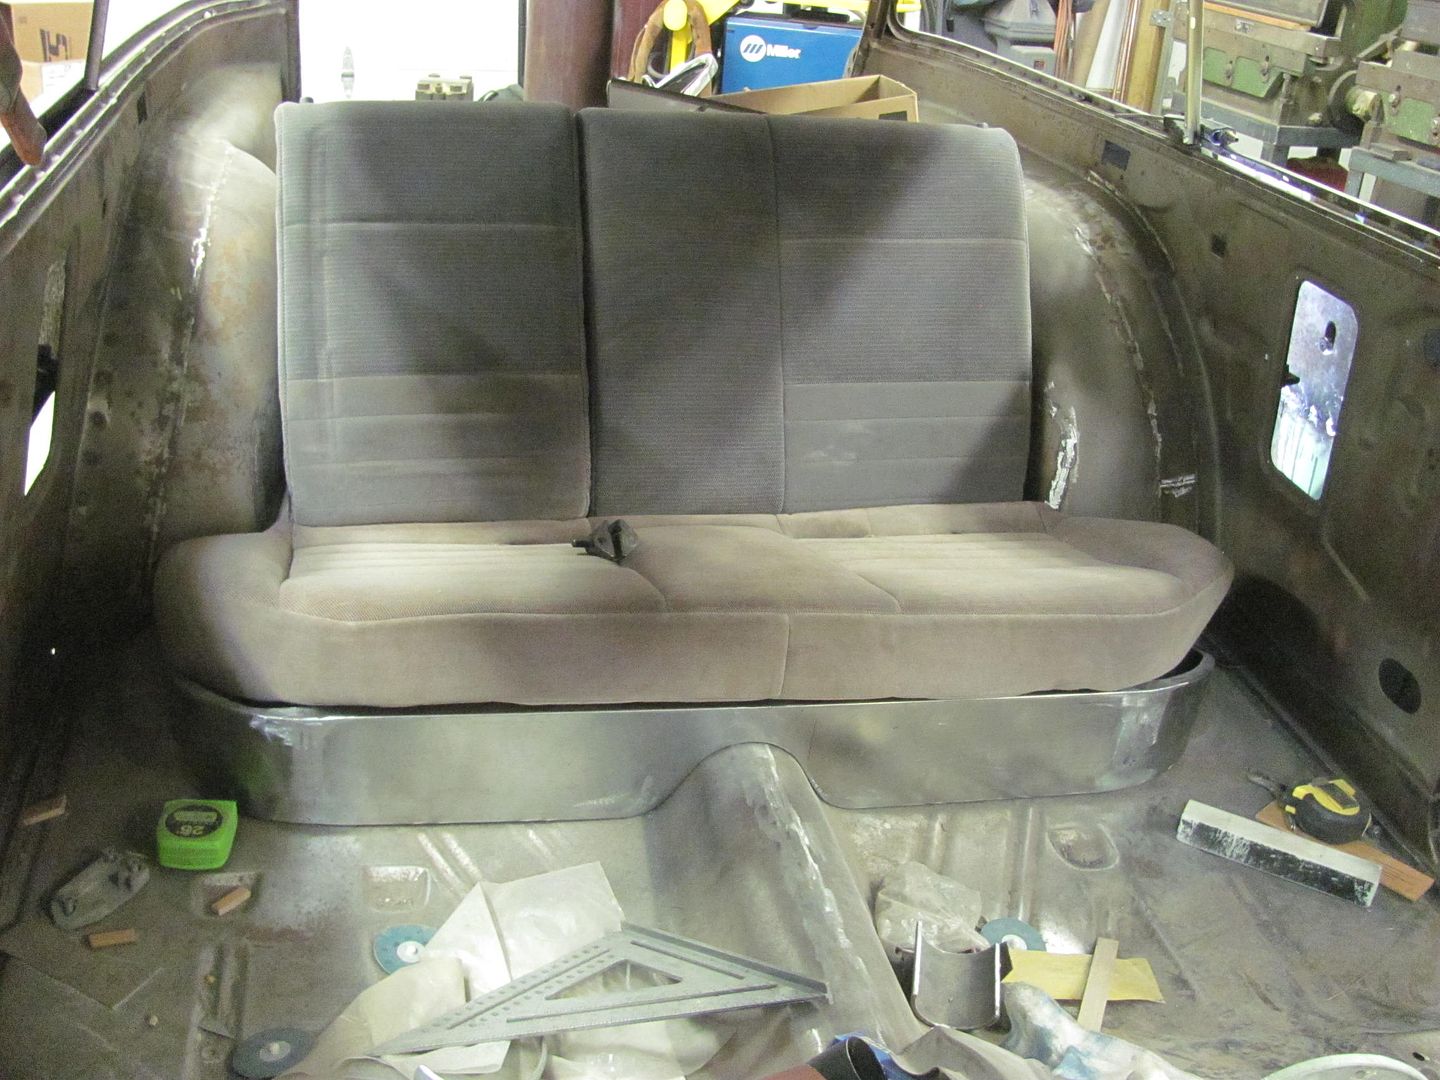 Corners of the lower cushion will have some foam added to fill out to a radius. Seat back will have some end cushions added to match the width of the lower seat.. Blocking out of the driver's door is the last to go, and all the front sheet metal will be ready to come off for the next round of epoxy primer..  And here's the before and after of the frozen water pipe damage...  A bit of paint touch up and this will be done!
__________________
Robert |
|
|
|
|
02-25-2015, 11:18 PM
|
#22 |
|
Registered User
Join Date: Nov 2014
Location: Omaha
Posts: 558
|
Re: 55 Wagon Progress
Oh man i wish I had your set up! Rock on
|
|
|
|
|
02-26-2015, 11:09 AM
|
#23 |
|
Registered User
Join Date: Nov 2011
Location: West Plains Missouri
Posts: 2,088
|
Re: 55 Wagon Progress
Very nice work guys...
__________________
http://67-72chevytrucks.com/vboard/s...d.php?t=645774 Project Orangepeel 52 A.D. http://67-72chevytrucks.com/vboard/s...d.php?t=653337 John's LS 49 dodge http://67-72chevytrucks.com/vboard/s...d.php?t=655780 Blake's 67 GMC LS stepside http://67-72chevytrucks.com/vboard/s...d.php?t=690527 Reed 78 FJ40 Rebuild http://67-72chevytrucks.com/vboard/s...d.php?t=733259 Barger's 78 FJ40 |
|
|
|
|
02-26-2015, 05:06 PM
|
#24 |
|
6>8 Plugless........
 Join Date: Sep 2007
Location: Prairie City, Ia
Posts: 17,140
|
Re: 55 Wagon Progress
Those seat skirt pieces turned out great!
__________________
Ryan 1972 Chevy Longhorn K30 Cheyenne Super, 359 Inline 6 cylinder, Auto Trans, Tilt, Diesel Tach/Vach, Buckets, Rare Rear 4-link and air ride option Build Thread 1972 GMC Sierra Grande Longhorn 4x4 1972 Chevy Cheyenne Super K20 Long Step side tilt, tach, tow hooks, AC, 350 4 speed 1972 C10 Suburban Custom Deluxe 1969 Chevy milk truck 1971 Camaro RS 5.3 BTR STG3 Cam Super T10 1940 Ford 354 Hemi 46RH Ford 9" on air ride huge project Tired of spark plugs? Check this out. |
|
|
|
|
02-26-2015, 09:21 PM
|
#25 |
|
Senior Member
Join Date: Jul 2012
Location: Oblong, Illinois
Posts: 7,017
|
Re: 55 Wagon Progress
Bummer about the frozen pipe. Really nice work on the seat mounts.
|
|
|
|
 |
| Bookmarks |
|
|


 Hybrid Mode
