
|
|
|
 07-21-2014, 05:44 PM
|
#1 |
|
Registered User
Join Date: Apr 2001
Location: DALLAS,TX
Posts: 21,938
|
Re: My daily driver/beater : How I turned lemons in lemonade
Really??
Guys, guys, guys.... It's 132nd's of an inch w/one eye closed & the other squintin' through the magnifying glass. Gotta get it right. It's all in the details! 
__________________
67SWB-B.B.RetroRod 64SWB-Recycle 89CCDually-Driver/Tow Truck 99CCSWB Driver All Fleetsides @rattlecankustoms in IG Building a small, high rpm engine with the perfect bore, stroke and rod ratio is very impressive. It's like a highly skilled Morrocan sword fighter with a Damascus Steel Scimitar..... Cubic inches is like Indiana Jones with a cheap pistol. |

|

|
|
07-21-2014, 08:03 PM
|
#2 |
|
Watch out for your cornhole !
 Join Date: Jun 2003
Location: Azle, Texas
Posts: 14,162
|
Re: My daily driver/beater : How I turned lemons in lemonade
Nate, try not to be offended by my words. I'm not a good communicator. I'd have felt a lot better if he'd have said "maybe yes, maybe no depending on your specific combo". When he didn't ask what engine or trans I'm running, I just had the perception that he threw out his answer to expedite the conversation without getting into it any further. I can easily grasp a "maybe" answer since there so many different variables.
I'm sure the new website will go a long way towards clearing up some questions folks have.
__________________
I'm on the Instagram- @Gearhead_Kevin |
|
|
|
|
07-21-2014, 08:14 PM
|
#3 | |
|
Senior Member
Join Date: Dec 2003
Location: Mesa,Az
Posts: 3,981
|
Re: My daily driver/beater : How I turned lemons in lemonade
Quote:
At times we all lack on the communication end.... it happens, we are human. One guy takes a "maybe" as "you told me so" another guy takes it as a "you said it would never work". Since at times there is ambiguity when it comes to this custom stuff, we have learned that it's best to error on the side of caution when making recommendations. With that said, we are always looking for ways to make communication more clear on all ends. Our new site will be a huge help as we are in the process of revising all our install guides where than can be accessed on the site, along with a FAQ section. It's in the works.... just taking a bit of time. Do me a favor and follow up with me as progress continues and I will do all I can to help provide you with all the information you need. Even if it means giving a sliver of hope with the word "maybe" attached.  Nate
__________________
www.PorterbuiltFabrication.com Phone: 480-297-2621 E-mail: sales@pbfab.com Find us on FaceBook under Porterbuilt Fabrication Specializing in Chassis and Suspension Components for your Classic Chevrolet Truck. We offer components from the following manufacturers: Porterbuilt Accuair Ridetech (Air Ride Technologies) Air Lift Wilwood Intro Unisteer ECE Gotta Show Air Lift Borgeson CPP Supporting this forum since 2003! |
|
|
|
|
|
07-22-2014, 03:46 PM
|
#4 |
|
Hot Rods For Life
Join Date: Sep 2001
Location: Waxahachie, TX
Posts: 3,305
|
Re: My daily driver/beater : How I turned lemons in lemonade
Cheese and rice this truck is straight up ill'n.
|
|
|
|
|
07-23-2014, 09:48 AM
|
#5 |
|
Registered User
Join Date: Oct 2011
Location: Emory TX
Posts: 900
|
Re: My daily driver/beater : How I turned lemons in lemonade
Not sure how I missed this build, but I like it.
__________________
___________________ 78 ccsb dually 5.3 4l60e http://67-72chevytrucks.com/vboard/s...d.php?t=491551 |
|
|
|
|
07-26-2014, 11:14 PM
|
#6 |
|
Watch out for your cornhole !
Join Date: Jun 2003
Location: Azle, Texas
Posts: 14,162
|
Re: My daily driver/beater : How I turned lemons in lemonade
I've been putting in the hours lately. The rear suspension is basically complete. All I have left to do is build lower shock mounts and set pinion angle and burn the saddles in place. I'll wait to do the pinion angle and saddle deal until after I get my dropmember in place since the engine, trans relocation will come into play there. At that time I'll set the angle then remove the entire rearend for welding and clean and paint it also.
Today I built a rear crossmember for my air supply stuff. The tank mounts to the front of it and the compressors sit on shelves on the rear of it. 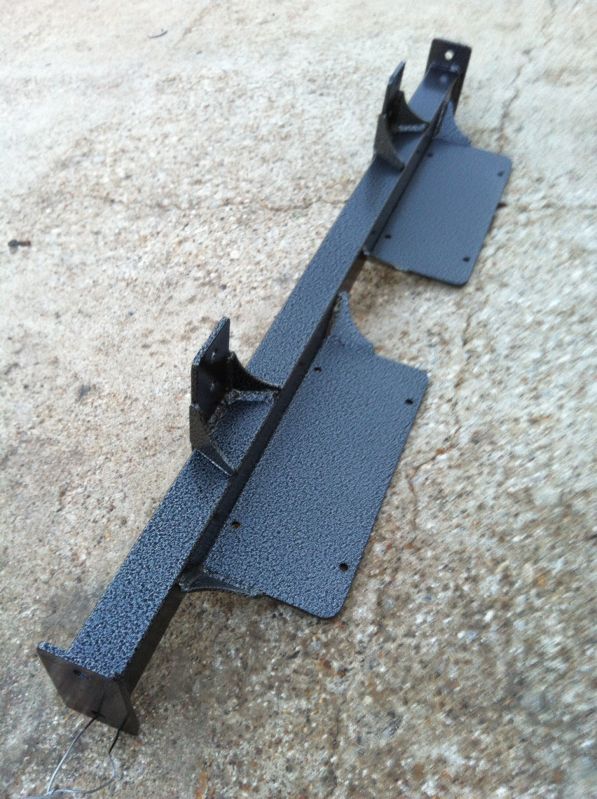 I did throw the cheesy Viair rubber grommet vibration mounts away and ordered some proper bolt in vibration absorbing feet from McMaster Carr. 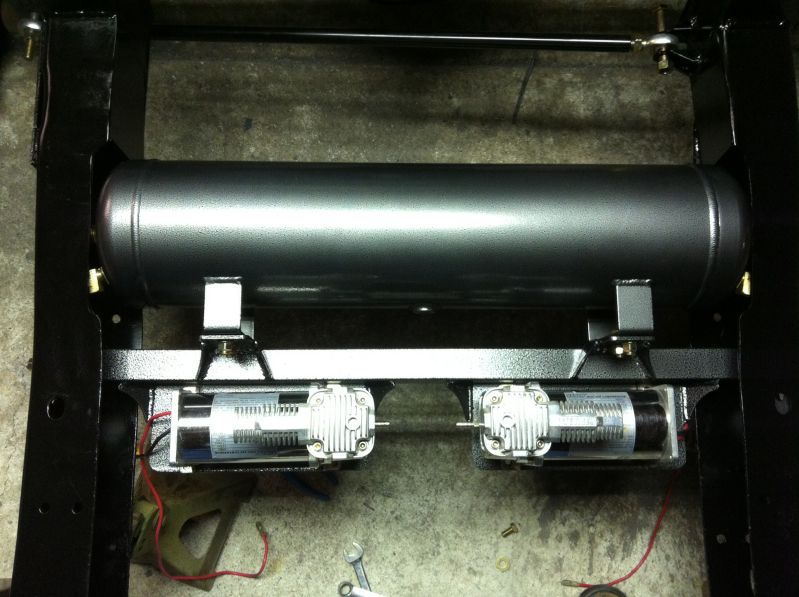 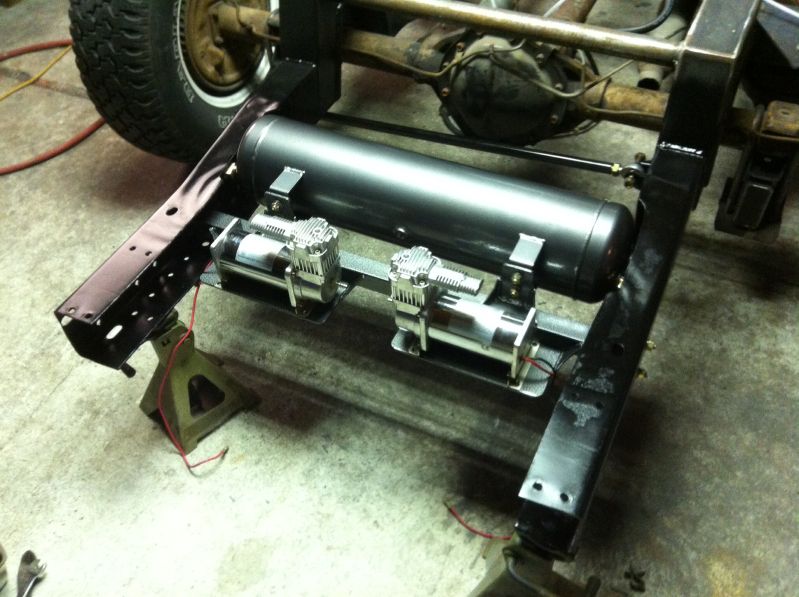 I got my panhard bar parts from Speedway Motors. Good pricing there. I built a stud into the left side link bar and welded brackets to the right frame rail. My goal was to have the bar be close to horizontal at ride height and as long as possible. I think both goals were pretty much met within reason.
__________________
I'm on the Instagram- @Gearhead_Kevin |
|
|
|
|
07-28-2014, 12:28 PM
|
#7 | |
|
Registered User
Join Date: Apr 2001
Location: DALLAS,TX
Posts: 21,938
|
Re: My daily driver/beater : How I turned lemons in lemonade
Quote:
__________________
67SWB-B.B.RetroRod 64SWB-Recycle 89CCDually-Driver/Tow Truck 99CCSWB Driver All Fleetsides @rattlecankustoms in IG Building a small, high rpm engine with the perfect bore, stroke and rod ratio is very impressive. It's like a highly skilled Morrocan sword fighter with a Damascus Steel Scimitar..... Cubic inches is like Indiana Jones with a cheap pistol. |
|
|
|
|
|
07-27-2014, 04:06 AM
|
#8 |
|
Registered User
Join Date: May 2008
Location: 505
Posts: 447
|
Re: My daily driver/beater : How I turned lemons in lemonade
That is super clean!
__________________
'68 SWB Fleetside '98 K1500 Silverado |
|
|
|
|
07-27-2014, 06:29 AM
|
#9 |
|
Registered User
Join Date: May 2009
Location: Monroe, LA
Posts: 2,103
|
Re: My daily driver/beater : How I turned lemons in lemonade
Very nice work, as always Kevin. You are really moving on this truck!
__________________
Keith SOLD - 1963 C10 Short Fleet 350/700R4 4/6 drop 1967 GMC Super Custom - Short Fleet COPO concept w/427 BBC T-400 w/Doug Nash overdrive 4/6 Drop, Buddy Buckets, etc... Frame Off (In Progress) I call it "Vulgar Display of Power" 1980 Silverado Original paint 49k Original miles 4/6 drop Check out my build thread here: http://67-72chevytrucks.com/vboard/s...=1#post6209941 |
|
|
|
|
07-27-2014, 09:14 AM
|
#10 |
|
67-72 parts collector,
Join Date: Nov 2002
Location: Mid-MO
Posts: 22,690
|
Re: My daily driver/beater : How I turned lemons in lemonade
Looks great!
I'm pretty sure you could sell that air tank/compressor crossmember. Here's a few pics of a slammed stepside and the mods they did to tuck a BIG wheel. The bed was raised and the fenders were stretched. I seen a few other builds like this. That's why I had concerns for your stepside bed. Obviously your total tire height will be less than this one.
__________________
Keith Convert to disc brakes. http://67-72chevytrucks.com/vboard/s...d.php?t=444823 |
|
|
|
|
07-27-2014, 09:16 AM
|
#11 |
|
67-72 parts collector,
Join Date: Nov 2002
Location: Mid-MO
Posts: 22,690
|
Re: My daily driver/beater : How I turned lemons in lemonade
Another pic,...
__________________
Keith Convert to disc brakes. http://67-72chevytrucks.com/vboard/s...d.php?t=444823 |
|
|
|
|
07-27-2014, 09:25 AM
|
#12 |
|
Watch out for your cornhole !
Join Date: Jun 2003
Location: Azle, Texas
Posts: 14,162
|
Re: My daily driver/beater : How I turned lemons in lemonade
Ive already bought the paint and the wheels and tires. I can promise, no one is gonna see the end product coming. It's going to be different than any other truck I've seen built out there.
I've got another month minimum waiting on the drop member so I'll start body work this week. Much work to do before February.
__________________
I'm on the Instagram- @Gearhead_Kevin |
|
|
|
|
07-27-2014, 10:12 AM
|
#13 |
|
Registered User
Join Date: Oct 2009
Location: canton ga
Posts: 12,728
|
Re: My daily driver/beater : How I turned lemons in lemonade
Cant wait to see how this one turns out .
|
|
|
|
|
07-27-2014, 11:51 AM
|
#14 |
|
Watch out for your cornhole !
Join Date: Jun 2003
Location: Azle, Texas
Posts: 14,162
|
Re: My daily driver/beater : How I turned lemons in lemonade
One reflection I can make as I've worked on this project.
A lot of guys throw out very unrealistic prices as to what it costs to do an air suspension. Frankly, some are so unrealistic as to be completely full of sh1t. Its expensive and just wears you out with nickel and dime stuff. Fittings are expensive. You could spend 75 dollars just in wiring for your compressors if you do it right. 4ga wiring ain't cheap. And, the more sanitary you want the end result to be, the more expensive it gets.
__________________
I'm on the Instagram- @Gearhead_Kevin |
|
|
|
|
07-27-2014, 06:19 PM
|
#15 |
|
Registered User
Join Date: Sep 2012
Location: Midway, NC
Posts: 3,275
|
Re: My daily driver/beater : How I turned lemons in lemonade
That's always been my consensus with pricing of doing airbags and doing them right. It looks like you've got a pretty good handle on this bad boy. I like the mount for the tank and compressors. Kool.
__________________
http://67-72chevytrucks.com/vboard/s...d.php?t=581873 The low buck build threads. Check'em out! http://67-72chevytrucks.com/vboard/s...d.php?t=666022 My build thread Crossmembers CC |
|
|
|
|
07-28-2014, 11:18 AM
|
#16 |
|
Registered User
Join Date: Oct 2011
Location: Emory TX
Posts: 900
|
Re: My daily driver/beater : How I turned lemons in lemonade
Did you post any pics of the lower bars that you made?
I have been thinking of build a 4 link for the rear of my dually.
__________________
___________________ 78 ccsb dually 5.3 4l60e http://67-72chevytrucks.com/vboard/s...d.php?t=491551 |
|
|
|
|
07-28-2014, 11:37 AM
|
#17 |
|
I'm just glad to be here!
Join Date: Jan 2008
Location: Longview, TX
Posts: 4,788
|
Re: My daily driver/beater : How I turned lemons in lemonade
Tank/Compressor mount looks great!
What size tank did you use? Where did you get it from?
__________________
Karl  1965 Chevy Stepside(Grandpa's Old Blue) and (July 2015 Shop Build!)(2020, the Saga Continues) http://67-72chevytrucks.com/vboard/s...d.php?t=372424 The LST Challenge: http://67-72chevytrucks.com/vboard/s...=1#post7812257 Korbin's 1st Square: "Sunburn" http://67-72chevytrucks.com/vboard/s...d.php?t=418618 1985 GMC Sierra: "White Trash", Korbin's 2nd now... http://67-72chevytrucks.com/vboard/s...d.php?t=632305 Henry - 1984 Chevrolet, Owen's 1st Square |
|
|
|
|
07-28-2014, 07:15 PM
|
#18 |
|
Registered User
Join Date: Jun 2004
Location: Spartanburg, SC
Posts: 1,963
|
Re: My daily driver/beater : How I turned lemons in lemonade
Did you post the picture of the link bars in here? I was looking for it to show a friend....
__________________
Paul '78 GMC Serria 15 Heavy Half. 361/NV3500/3.73. Former LWB NV3500 swap Trailing arm swap '98 ECSB Z71 daily driver -traded  '03 burb. Family cruiser http://upstategmtrucks.com/ |
|
|
|
|
08-02-2014, 11:34 AM
|
#19 |
|
Farm Truck
Join Date: Aug 2006
Location: Jersey Village, Texas
Posts: 547
|
Re: My daily driver/beater : How I turned lemons in lemonade
Nice Work.
__________________
1969 CST/10 1984 K5 Blazer 4x4 2016 Dodge Ram 2500 4x4 Mike Jersey Village, Tx |
|
|
|
|
08-03-2014, 06:33 AM
|
#20 |
|
Watch out for your cornhole !
Join Date: Jun 2003
Location: Azle, Texas
Posts: 14,162
|
Re: My daily driver/beater : How I turned lemons in lemonade
Not much updating recently. I'm working on it all day every day though.
I'm one month in since I ordered the dropmember. I have all steering rack stuff, air bags, etc here just waiting. I'm not really expecting anything in that area until nearly September though, per my conversation with Travis when I placed the order initially. First, the rear suspension. I tried several different ways, but I just couldn't be happy with the 2 link setup. I could set it up to where I was satisfied with the pinion angle range, but the side to side was what killed it for me. I set it up with a 36 inch long panhard bar mounted from the bottom of the frame to the opposite side lower link. Much like a typical ECE Super Track Bar. Then I tacked my shock mounts in place and cycled the suspension. When I did that, it smartly ripped all of the shock mounts off. From dump to lift, the rearend shifted 2 inches side to side. Hell no. There's a reason that Ekstensive mounts their shocks sideways rather than up and down like they ideally should be. I had wondered why, until I saw it with my own two eyes, then it became clear. Facepalm moment. So I took all of that off and thinned my spring pack down to two leafs and built a lowering block and set up an AOL system. Much better. At least the suspension stays lined up during cycle from bottom to top. After testing to see if I'd be happy with AOL, I went ahead and ordered two sleeve Firestone bags and am mounting them from the side of the step notch down to the old leaf spring pad on top of the axle. So, for all keeping score out there and preparing with the "I told you so's".....yes, I went down a dead end street with that whole 2 link idea. Lesson learned. I paid for it financially and labor wise. I got proper mounts for the compressors instead of that cheesy grommet crap Viair supplies with them stock. 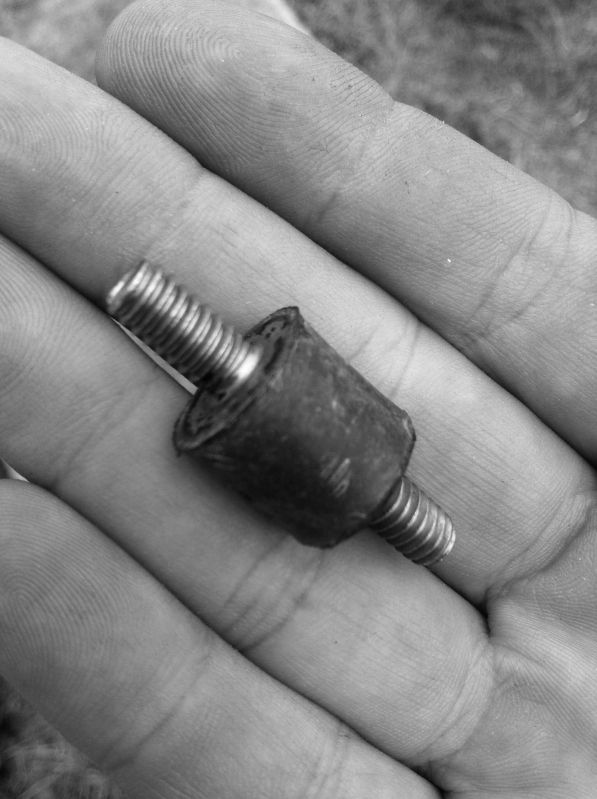 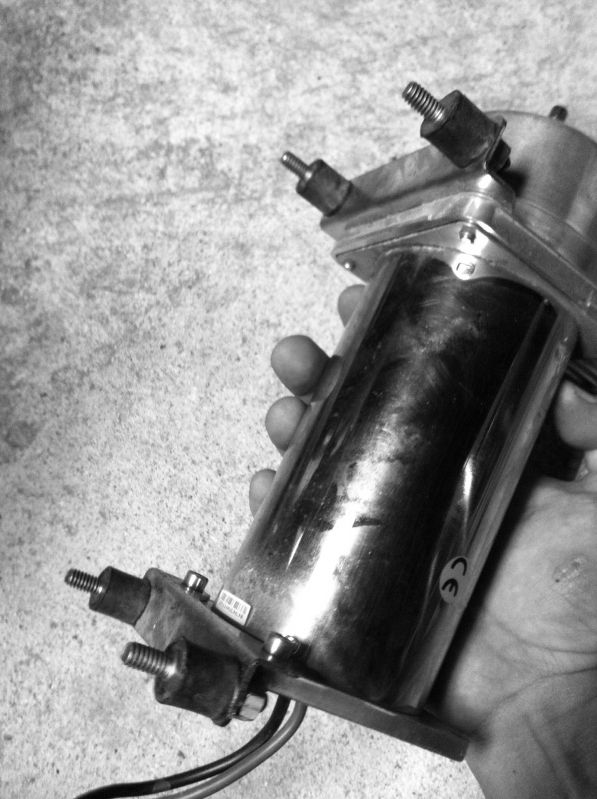 Built a bracket for my electrical stuff back there. 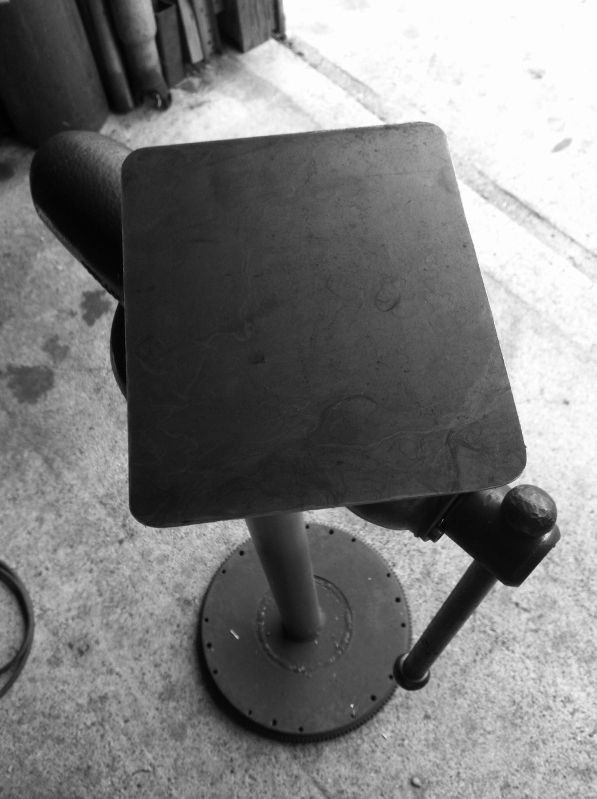 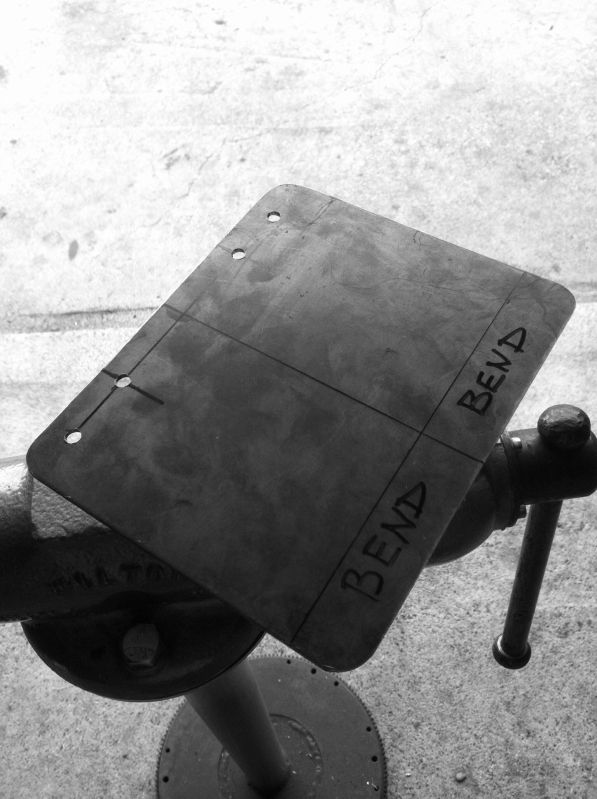 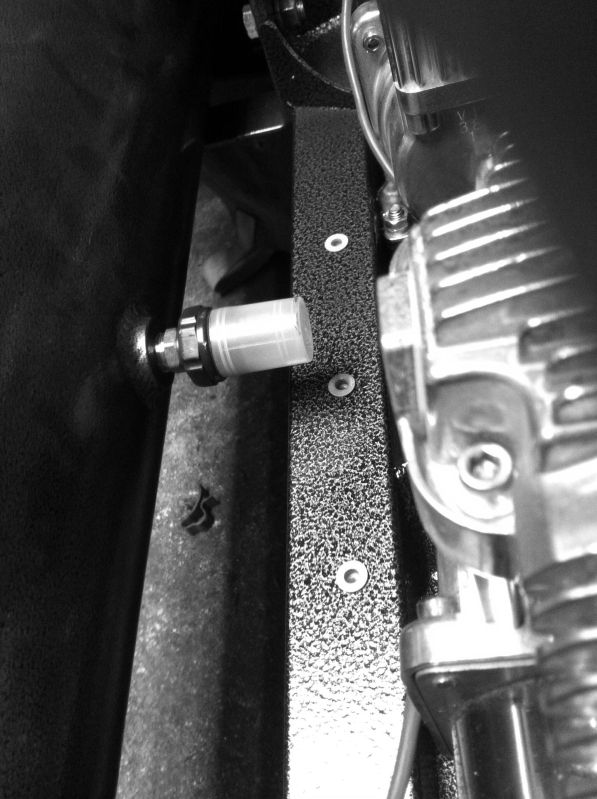 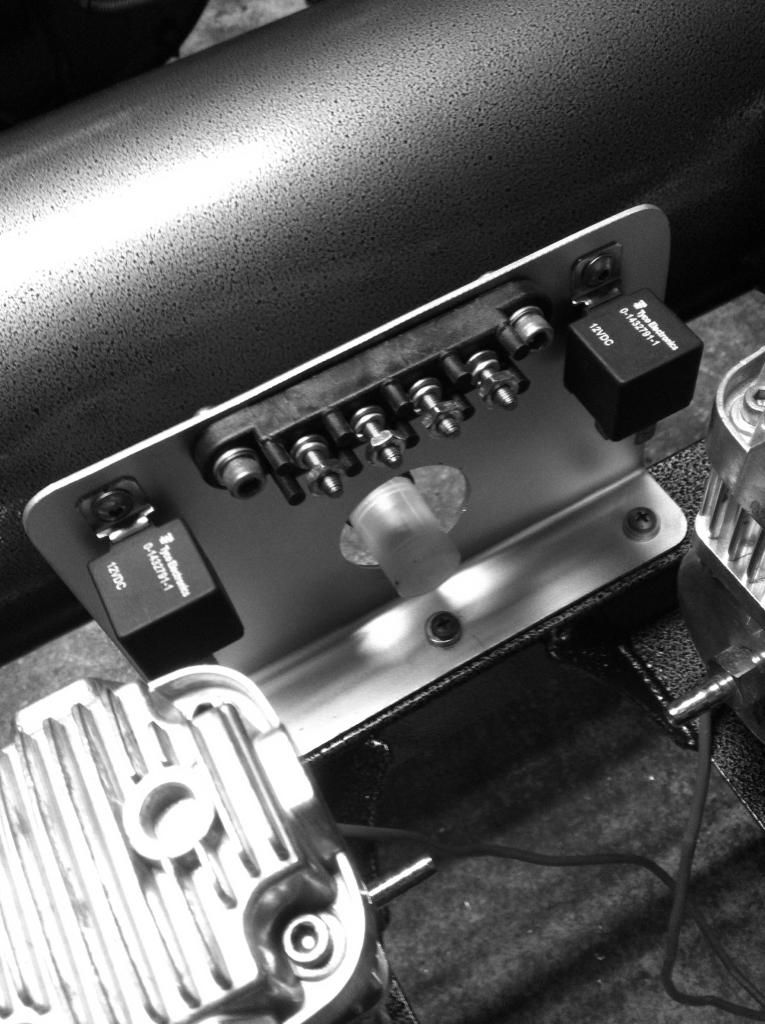 And I have all paint supplies here on hand. I had to place an order this weekend for some Rage filler, Evercoat Glazing Putty, Epoxy primer, and 2k primer. So, from here forth, if you don't see me posting much, it's because I'm doing paint and body work. Color pictures will be forthcoming when I'm ready to debut the truck in color.
__________________
I'm on the Instagram- @Gearhead_Kevin |
|
|
|
|
08-05-2014, 07:37 PM
|
#21 |
|
Senior Member
Join Date: Dec 2003
Location: Mesa,Az
Posts: 3,981
|
Re: My daily driver/beater : How I turned lemons in lemonade
[QUOTE=Tx Firefighter;6786379]I set it up with a 36 inch long panhard bar mounted from the bottom of the frame to the opposite side lower link. Much like a typical ECE Super Track Bar. Then I tacked my shock mounts in place and cycled the suspension. When I did that, it smartly ripped all of the shock mounts off. From dump to lift, the rearend shifted 2 inches side to side. Hell no. There's a reason that Ekstensive mounts their shocks sideways rather than up and down like they ideally should be. I had wondered why, until I saw it with my own two eyes, then it became clear. Facepalm moment.QUOTE]
Kevin- Curious on more of the details in regards to how you mocked up the panhard bar with your earlier suspension. When I simulate a 36" bar and start with it parallel to the ground, it only shifts .35" from ride height to 5" of compression (or from ride height to 5" of lift). A 25" bar only shifts the axle .511". The 2 inches doesn't sound right, that's why I am asking. I am a huge fan of the panhard bar. It allows for a low roll center and when long enough the side to side shift is negligible. It's simplicity and advantages make it a shoe-in for most rear set-ups. Nate
__________________
www.PorterbuiltFabrication.com Phone: 480-297-2621 E-mail: sales@pbfab.com Find us on FaceBook under Porterbuilt Fabrication Specializing in Chassis and Suspension Components for your Classic Chevrolet Truck. We offer components from the following manufacturers: Porterbuilt Accuair Ridetech (Air Ride Technologies) Air Lift Wilwood Intro Unisteer ECE Gotta Show Air Lift Borgeson CPP Supporting this forum since 2003! |
|
|
|
|
08-05-2014, 09:35 PM
|
#22 | |
|
Watch out for your cornhole !
Join Date: Jun 2003
Location: Azle, Texas
Posts: 14,162
|
Re: My daily driver/beater : How I turned lemons in lemonade
[quote=Porterbuilt Street Rods;6789918]
Quote:
I didn't take many pictures of the panhard bar specifically during that phase. About the best I have is the two I posted on the page before this one. I did go measure the bar though (its on my bench) and it came out to 34 inches. I'd say rough guesstimate, it was 10 odd degrees off of horizontal when installed at ride height, which is top of axle tube even with bottom plane of the stock frame rails. I won't deny it, I went down the 2 link road somewhat out of ignorance and perceived ease. I knew up front the inherent compromise in pinion angle due to the design. I figured I could live with it. But, once built, as I cycled the suspension with a magnetic angle finder on the pinion, I'd flinch a little bit watching the angle swing. Then the side to side movement once I secured the panhard just kind of put it over the top for me. I sat there on the frame rails with my air hose and ball valve and cycled it a bunch of times with my angle finder and my tape measure and it just didn't speak to me any more. So I took it out and returned to square one. I will say, I've plenty happy with what I have now with the AOL. The only reason I didn't go AOL in the first place was my concern for spring fatigue. Then I figured the worst that could happen is I have to replace some leaf springs sometime in the future. I have a super fantastic local spring shop I can use if I need to. I'm using a pair of Firestone sleeve bags and my existing Belltech Nitro Drop shocks. The way I have it set up now, at full shock extension, the bag is limited at 11 inches. At full shock compression, the bag is at 5 inches. Ride height is about 8.5 inches. I've read that the 9000 series bags are critical to have positive limits to their range of motion. I'll also set up my bolt in bumpstops to assure the max dump doesn't hammer the shocks fully compressed. One area of this project I have enjoyed a lot is making my own brackets. It allowed me to get better with my plasma cutter and press brake. Of course, if a man changes directions as much as I have, I suppose being able to make multiple sets of brackets is necessary simply for self preservation. Lesson learned. There are my mistakes and failures for all to see. And Nathan, don't take this as blatant ass kissing, but I'm real excited to get your crossmember under this truck. You've done the calculating and design so all I have to do is the install. That I can do no problem. I figure after all of my train wreck on the rear suspesnion, the dropmember install should be a welcome relief. Travis had told me he figured I'd have my crossmember by September 1 when I ordered it July 1. At that time he had a pre-existing order placed through you and he earmarked one of them for me. In the mean time, I have a gallon of body filler, gallon of epoxy primer, gallon of 2K primer, and two gallons of paint sitting here. I won't be lacking for things to do.
__________________
I'm on the Instagram- @Gearhead_Kevin Last edited by Tx Firefighter; 08-05-2014 at 09:53 PM. |
|
|
|
|
|
08-06-2014, 12:29 PM
|
#23 | |
|
Senior Member
Join Date: Dec 2003
Location: Mesa,Az
Posts: 3,981
|
Re: My daily driver/beater : How I turned lemons in lemonade
[quote=Tx Firefighter;6790101]
Quote:
I was just curious on the set-up and original layout for mock-up. I am not a big fan of the short bar 2-link due to the pinion angle change... and I could see how that coupled with some lateral shift could turn you off rather quickly.  Sounds like you have plenty to do before the front parts arrive! Nate
__________________
www.PorterbuiltFabrication.com Phone: 480-297-2621 E-mail: sales@pbfab.com Find us on FaceBook under Porterbuilt Fabrication Specializing in Chassis and Suspension Components for your Classic Chevrolet Truck. We offer components from the following manufacturers: Porterbuilt Accuair Ridetech (Air Ride Technologies) Air Lift Wilwood Intro Unisteer ECE Gotta Show Air Lift Borgeson CPP Supporting this forum since 2003! |
|
|
|
|
|
08-06-2014, 12:54 PM
|
#24 | |
|
Registered User
Join Date: Apr 2001
Location: DALLAS,TX
Posts: 21,938
|
Re: My daily driver/beater : How I turned lemons in lemonade
[quote=Porterbuilt Street Rods;6790748]
Quote:
So I did comparisons between a 67-72 T/A & a short (</=24" length) bar for pinion change & there was a significant difference from what I recall (I wrote down the info but that was years ago). Combine that w/the fixed poly bushings most use & I don't see how they can work well much less be be 'great'. That being said, we discussed the use of the swivel joint (you know how much I like 'em ) to compensate for the possible binding but didn't discuss shock layout & I feel there prob wouldn't have been the dramatic 'snap' of the tacked mounts had they been set-up to allow lateral shift to compensate for axle movement during suspension travel. I know my original concept for my 'tweaked' 4-bar was similar until I considered that axle had the ability to shift approx .500" through it's 4.5" of movement from ride height (approx 26" Panhard bar). With mine set-up to allow the side shift, there are no issues w/bind (I can install the shocks @ full extension or compression; but it's gets REAL tight between the PHB axle mount & the pass side shock when on the bumpstops). There's not much room for the PHB, PHB mount, shocks & 2.5" exhaust pipe.....
__________________
67SWB-B.B.RetroRod 64SWB-Recycle 89CCDually-Driver/Tow Truck 99CCSWB Driver All Fleetsides @rattlecankustoms in IG Building a small, high rpm engine with the perfect bore, stroke and rod ratio is very impressive. It's like a highly skilled Morrocan sword fighter with a Damascus Steel Scimitar..... Cubic inches is like Indiana Jones with a cheap pistol. |
|
|
|
|
|
08-03-2014, 07:10 PM
|
#25 |
|
Registered User
Join Date: Aug 2004
Location: Eastern Shore VA
Posts: 366
|
Re: My daily driver/beater : How I turned lemons in lemonade
Did you entertain the idea of a watts link to locate the rear axle before ya scrapped the two link? Looking forward to seeing progress on this thing.
__________________
-j-rod '06 3500 LWB CC 4wd, 8.1 Allison |
|
|
|
 |
| Bookmarks |
|
|


 Andy
Andy 


 Hybrid Mode
