
 |
|
|
#376 |
|
Registered User
Join Date: Aug 2012
Location: Salem Mo
Posts: 652
|
Re: 1957 Chevy truck re-rebuild
G&R's57GMC, one thing they mention is the firm shift of the overdrive under full throttle, with the light weight of the 57 truck itself I figure I can expect alot of upshift tire chirps not only from the firm shift of a built turbo 350 but the overdrive will also provide tire chirps also, works for me.
 Reading your story and your experience with the Gear vendors I see you will be investing in one for your 57 GMC, is it the overdrive you desire or do you also enjoy the "gear splitting feature" of the product? I notice you mentioned transferring the unit from one vehicle to another, that is one thing I like, that I merely need to purchase an adapter to mount it to another vehicle. I do realize the adapter is not cheap, yet quite a savings vs buying a whole new unit. You're the first person I have spoken to that has actually used one, thanks for your personal experience. |
|
|

|
|
|
#377 |
|
Senior Member
 Join Date: Aug 2010
Location: Shasta Lake, CA.
Posts: 1,619
|
Re: 1957 Chevy truck re-rebuild
I got the GV for splitting the gears. In the mountains 2nd over was perfect, on the flat or rollies 3rd over was just right when towing. 4th over was great when not towing.
All 3 have a 4L60E so I wouldn't need to buy anything to change from the Avalanche to the GMC if I didn't put it in the Tahoe. But I did have to buy the short sump like you have to clear the Tahoe's Y pipe. Looking at your output shaft you don't have the weak link the 4L60E has machined into the splines. I used the petroleum based gear oil because I would change the gear oil every other oil change or 5000 to 7500 miles because of trailer towing. In my GMC I'll most likely continue using the cheap stuff as it will see towing our 25' Airstream. But then again I might just use the spendy synthetic as the GMC won't see much towing duty.
__________________
Glen & Jane's Rides ‘57 GMC NAPCO Long Bed V8 4 speed Bought 2008 7 other cars & trucks , 5 trailers '56 Chevy Long Bed I6, 4 speed Bought 1990 Sold 8.22.2020 ’56 GMC Suburban Pickup V8, 4 speed Hydramatic Bought 1996 Sold 10.11.2020 My Other Tinkerings http://67-72chevytrucks.com/vboard/s...75#post8967275 |
|
|

|
|
|
#378 |
|
Registered User
Join Date: Aug 2012
Location: Salem Mo
Posts: 652
|
Re: 1957 Chevy truck re-rebuild
Ok, great, good to hear my situation doesn't have a weak link.
Sounds like you're sold on the product and the gear splitting works well with yours. I'm getting so excited to get this truck on the road, right now I'm waiting to get the driveshaft back so I can confirm it's fit. Once I see the drive shaft fit, the rest of the truck comes apart for final clean ups and preparation for paint. Now as long as I don't find more gadgets to add, I should get there. Thanks for checking in G&R's57GMC. |
|
|

|
|
|
#379 |
|
Senior Member
 Join Date: Aug 2010
Location: Shasta Lake, CA.
Posts: 1,619
|
Re: 1957 Chevy truck re-rebuild
Another reason the GMC will get a GV is I put 4.11 gears in the Currie and 28" Coker wide whites.
But the more I think about it the truck should come in around 3600 # it may or may not need it except when pulling the Airstream. What am I thinking ? It's getting one !
__________________
Glen & Jane's Rides ‘57 GMC NAPCO Long Bed V8 4 speed Bought 2008 7 other cars & trucks , 5 trailers '56 Chevy Long Bed I6, 4 speed Bought 1990 Sold 8.22.2020 ’56 GMC Suburban Pickup V8, 4 speed Hydramatic Bought 1996 Sold 10.11.2020 My Other Tinkerings http://67-72chevytrucks.com/vboard/s...75#post8967275 |
|
|

|
|
|
#380 | |
|
Registered User
Join Date: Aug 2012
Location: Salem Mo
Posts: 652
|
Re: 1957 Chevy truck re-rebuild
Quote:
 Still taking care of odds and ends I had to decide the battery location...I chose one of the under the cab units that drop down to get to the battery. Of course this leads to the issue of having to get to the battery to charge or jump the truck or jump start from the truck. I decided on the charging posts often used on race cars and I hid then within the wheel well area. 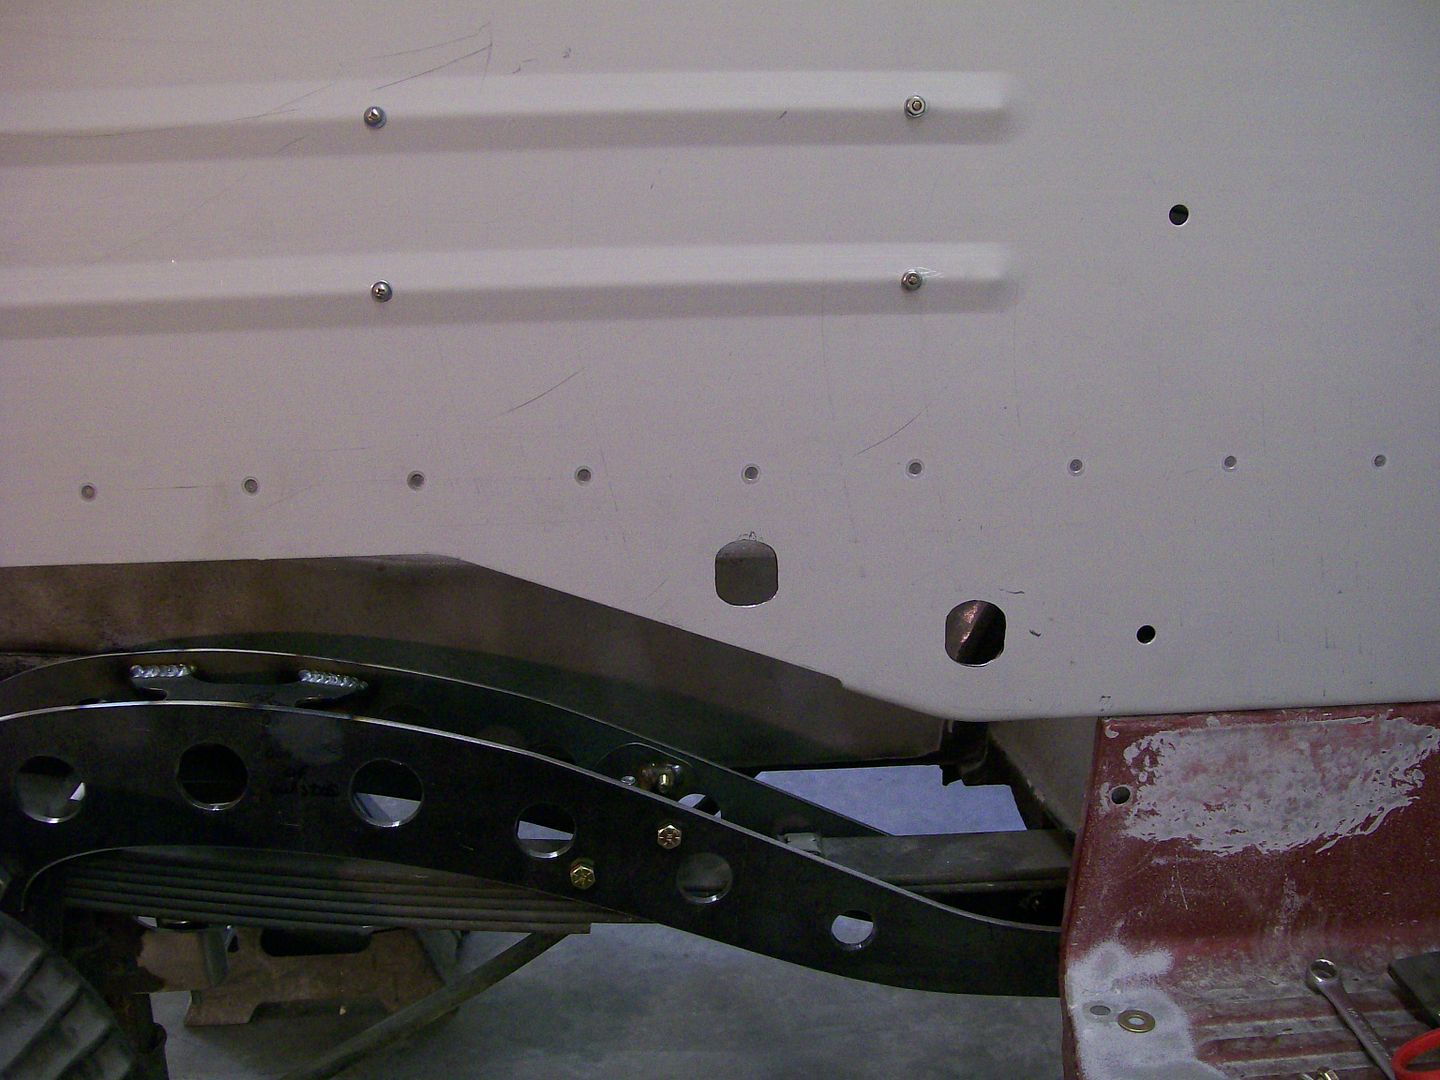 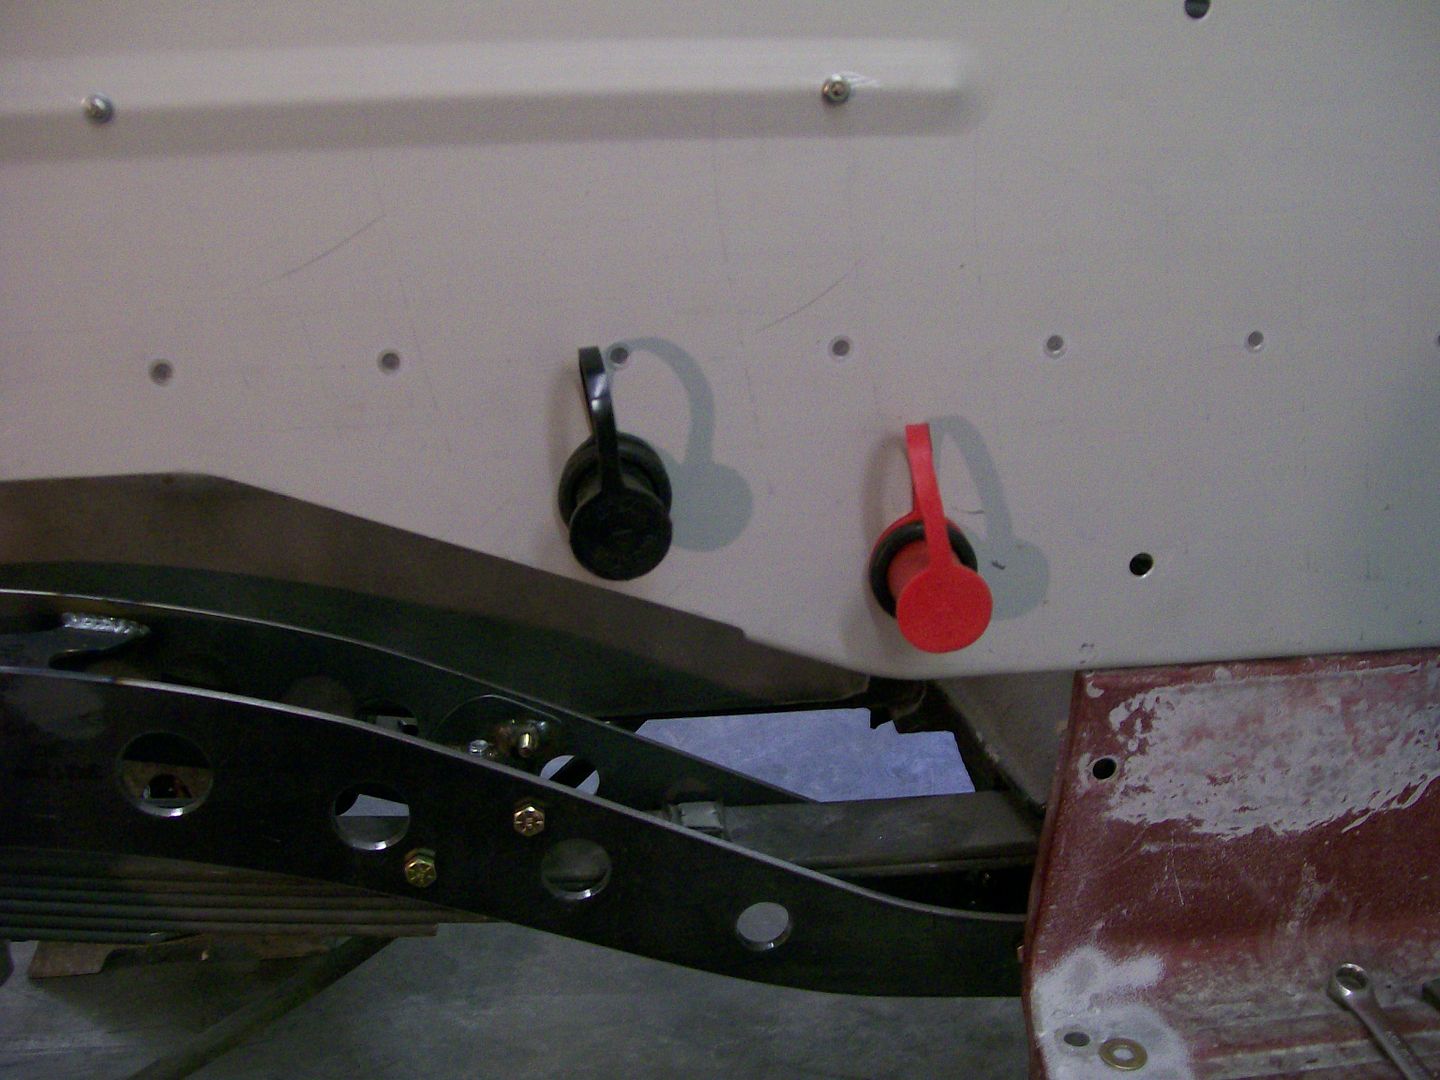 Although the sheet metal is 16 gauge and plenty strong I still like to reinforce the area. I cut a piece of stainless to add strength to the area without worrying about rust or scratching the paint as I tighten the battery post nuts. 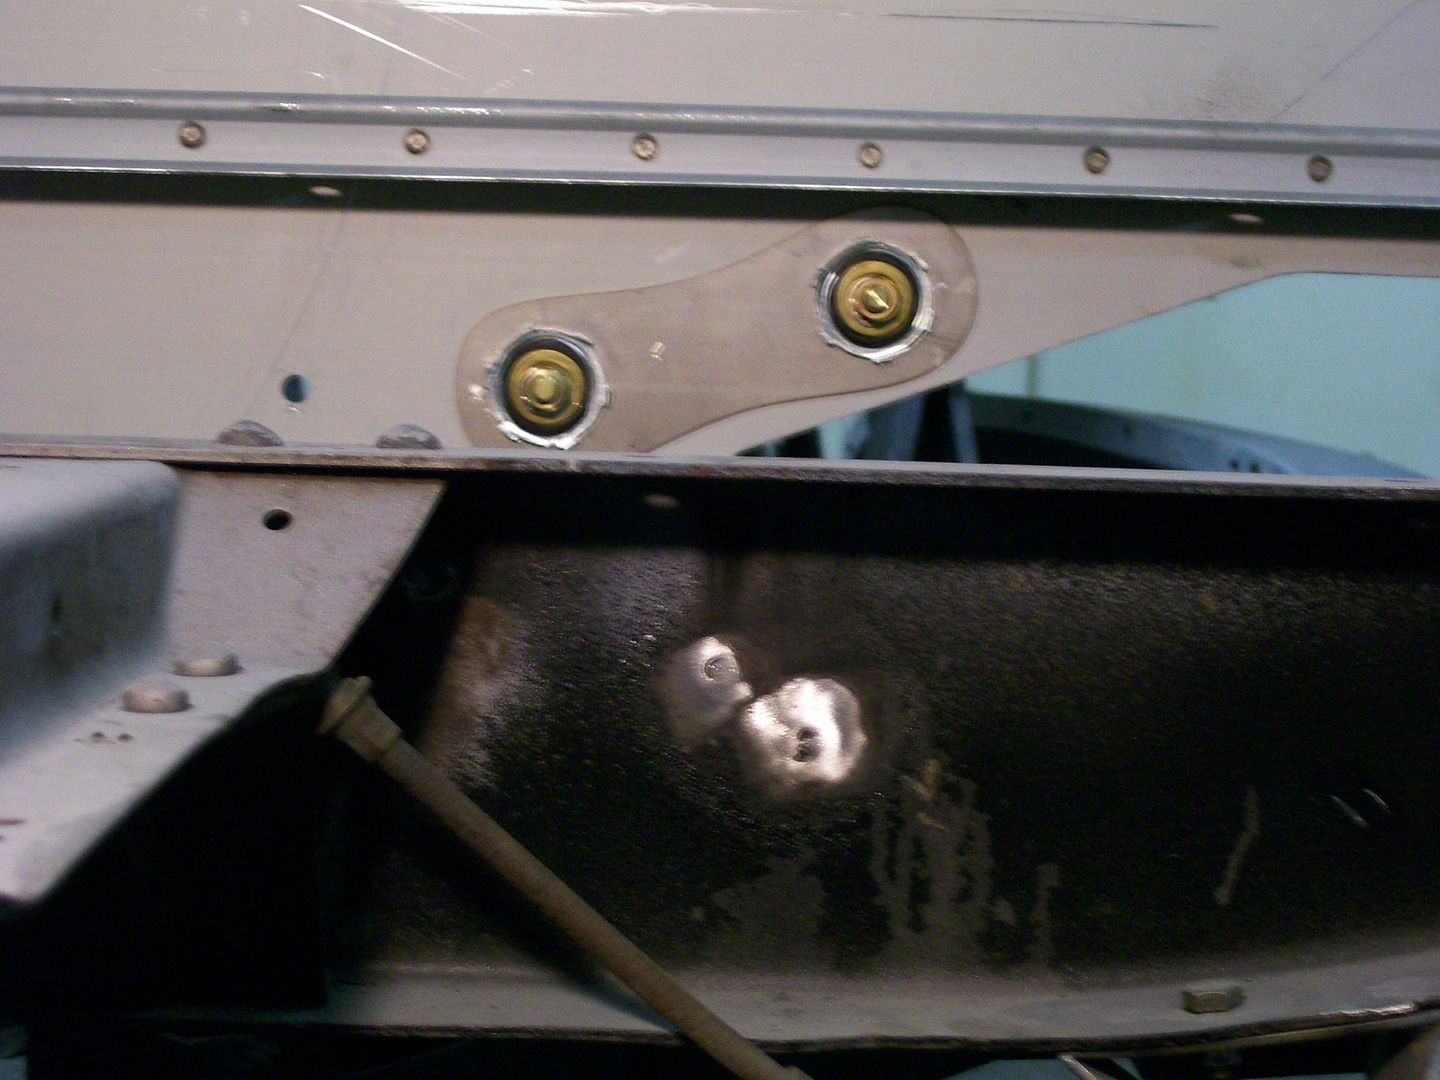 A look with the fender on. 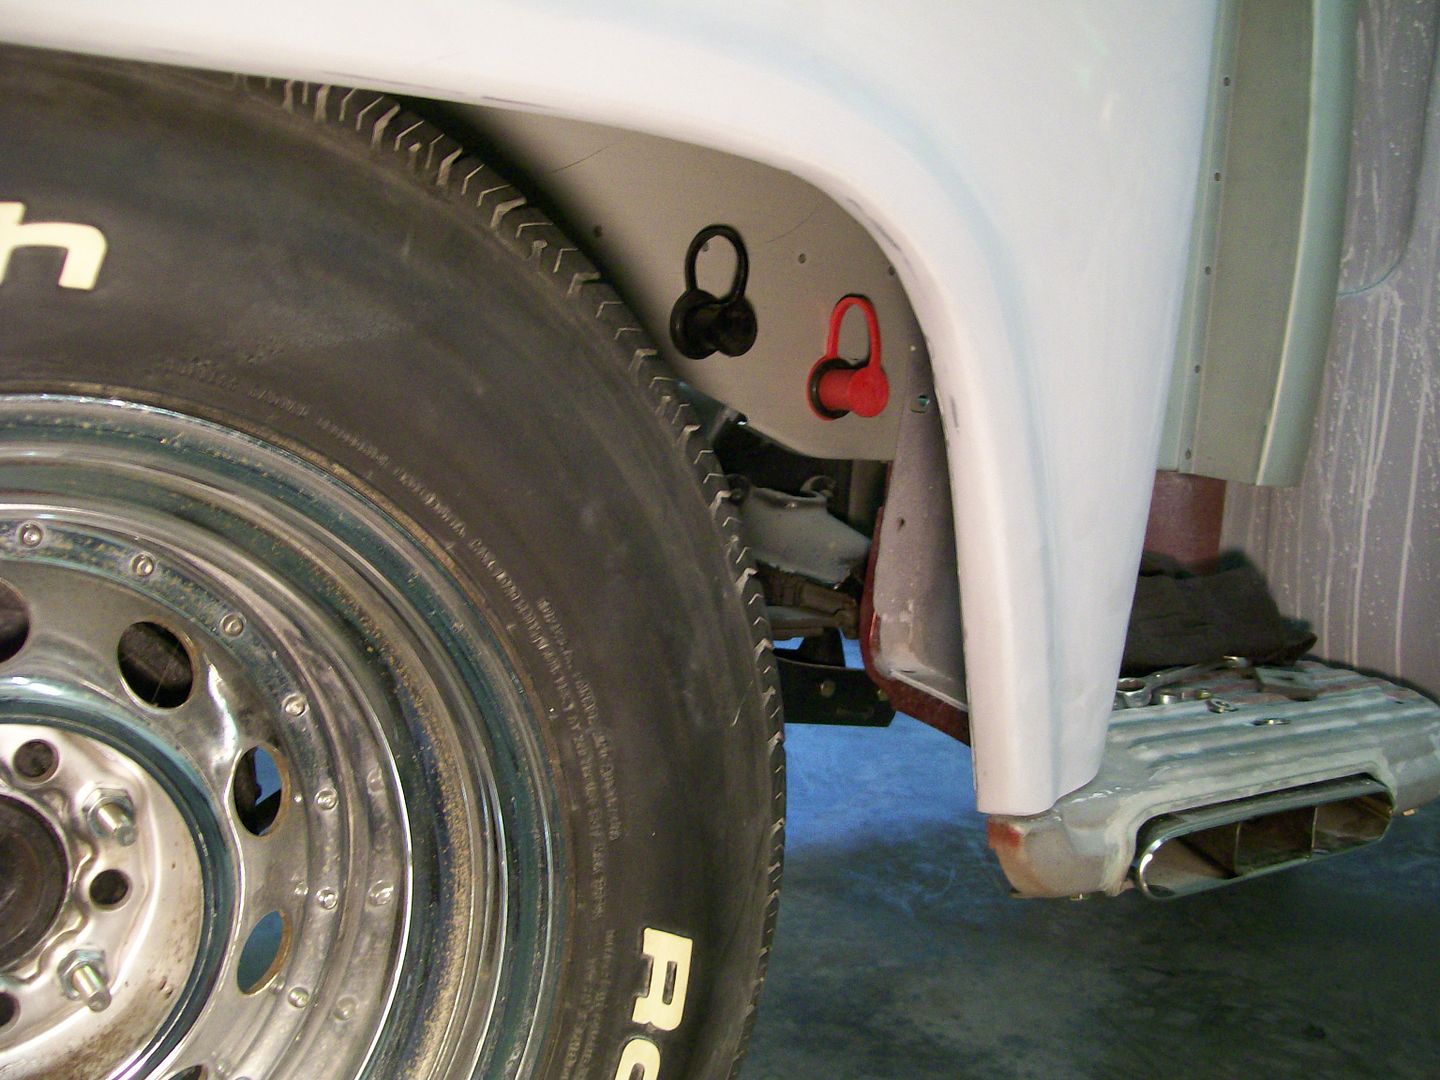 A look to see how well they are hidden with normal view. 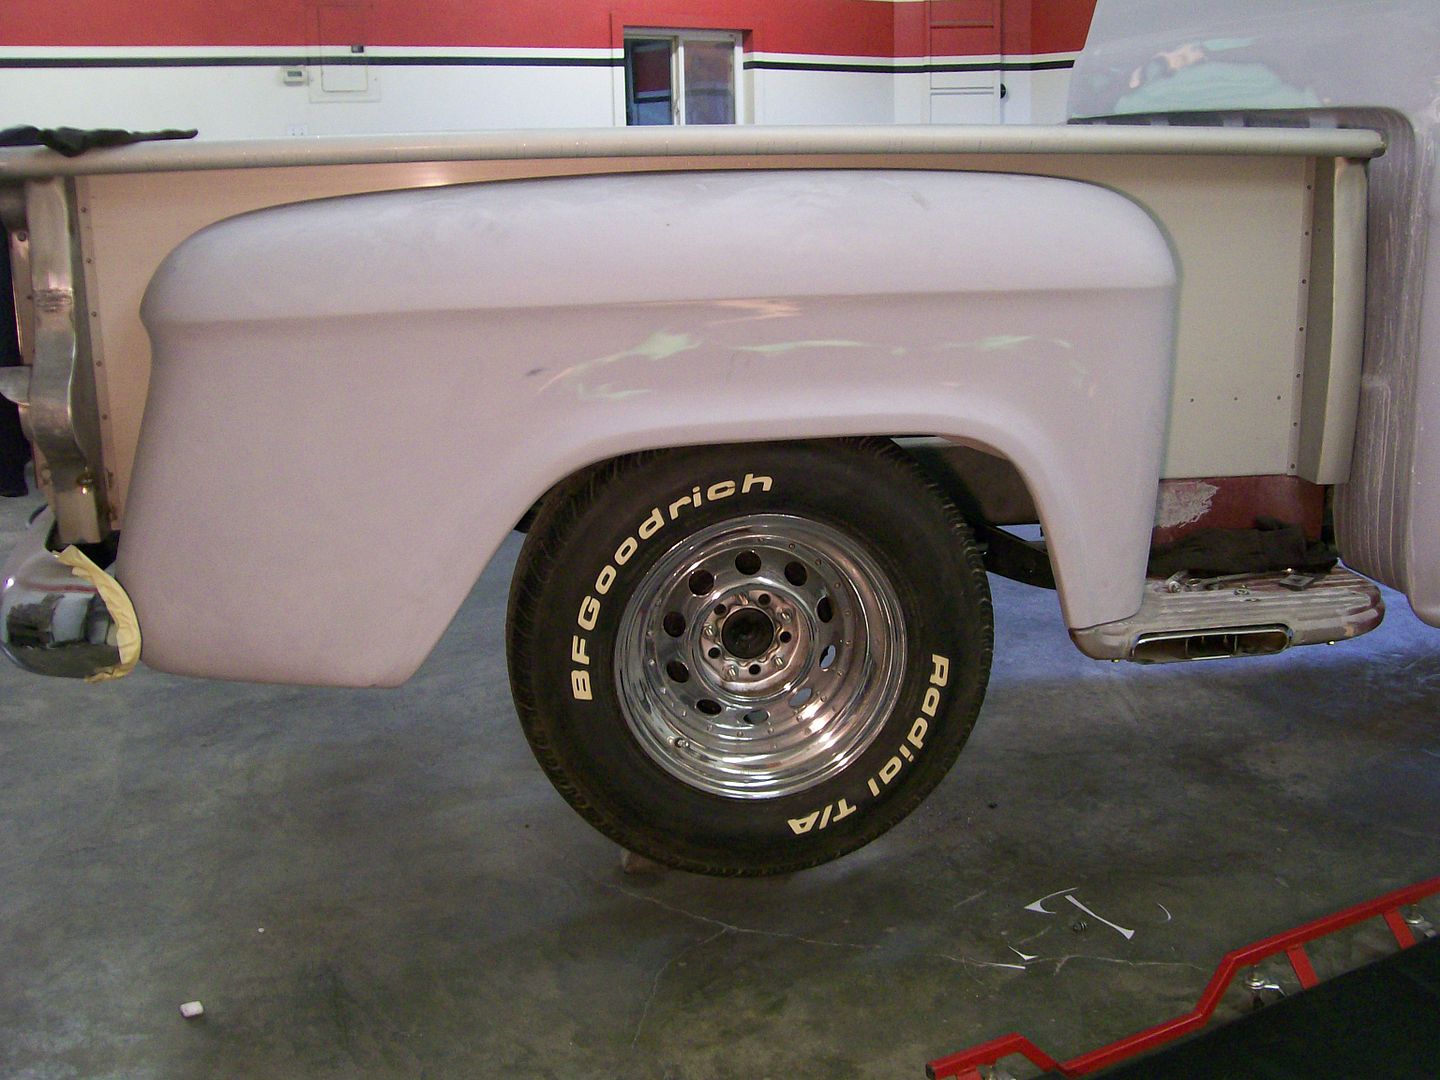
|
|
|
|

|
|
|
#381 |
|
Senior Member
 Join Date: May 2011
Location: Cypress, Tx.
Posts: 1,504
|
Re: 1957 Chevy truck re-rebuild
Good morning Jim!
I lost more sleep on figuring out where to put my battery posts! I like where you put them, out of the way, but accessible! That's about where my electric fuel pump is on the inner frame. I don't drive my truck all that often, but I really would like to hard wire in my battery tender plug to keep my battery hot, i know what to do~ just need to do it! Right now I just keep connecting the alligator clips to accessible posts to keep the battery tender on it. I do dread ever having to get my battery out, or down! I wonder if the dry batteries are lighter?  dne' 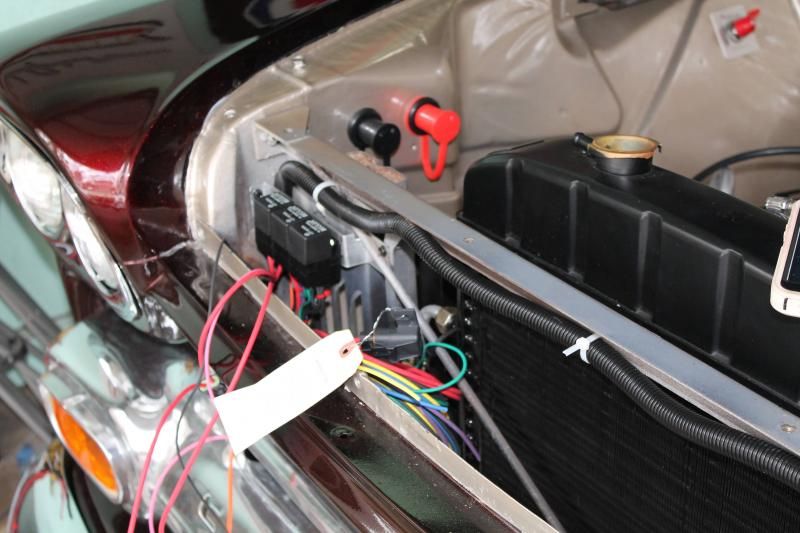
__________________
'72 Ford Bronco project(July 17 2021-?) https://67-72chevytrucks.com/vboard/...d.php?t=828015 59 Apache (sold 6-25-2021) 67 Ford Mustang (re-restored after Harvey) 1968 Jeep Cj5 (2-8-2020 to present) 1992 Jeep Yj (8-17-20 to present) (Jurassic build) www.Classiccarsandtools.com |
|
|

|
|
|
#382 |
|
Registered User
Join Date: Aug 2007
Location: Corona, California
Posts: 7,998
|
Re: 1957 Chevy truck re-rebuild
Nice job on the battery posts.
I'm going to have to do something similar as my battery is also mounted under my cab. Kim |
|
|

|
|
|
#383 |
|
Registered User
Join Date: Aug 2012
Location: Salem Mo
Posts: 652
|
Re: 1957 Chevy truck re-rebuild
Ok Ladies, thanks for checking in. Denee007, I think you made a good choice with yours, many vehicles have the battery exactly where you located the posts on your truck, works for me.
And yes, although under the truck is nice to hide the battery, I don't look forward to removing it, they are not light and I'm not sure if batteries like the Optima series are any lighter.? I usually like to post a post with pictures, I have many, I shall post many.  Some time back I made my own front fender emblem, it was basically a test run to see if I could do it with the tools and equipment I had in my shop. It turned out well but it was made out of 1/8" stainless material. When finished it just didn't have the depth I would like to have. I had a choice, make the second one for the other side out of 1/8" and be done, or..... start all over with 3/16" and make two the way I want them to be. They are a pain to make but of course I opted to make two of what I wanted. Tricky part is after the torchmate cuts them and after the clean up, I still need to have mounting studs. Back to working with stainless, the upside is it will last nearly forever and will always polish like new. The down side is....every flaw is exposed, there is no primer, there is no filler, there is no paint. Basically my first goal is drilling and tapping the holes. 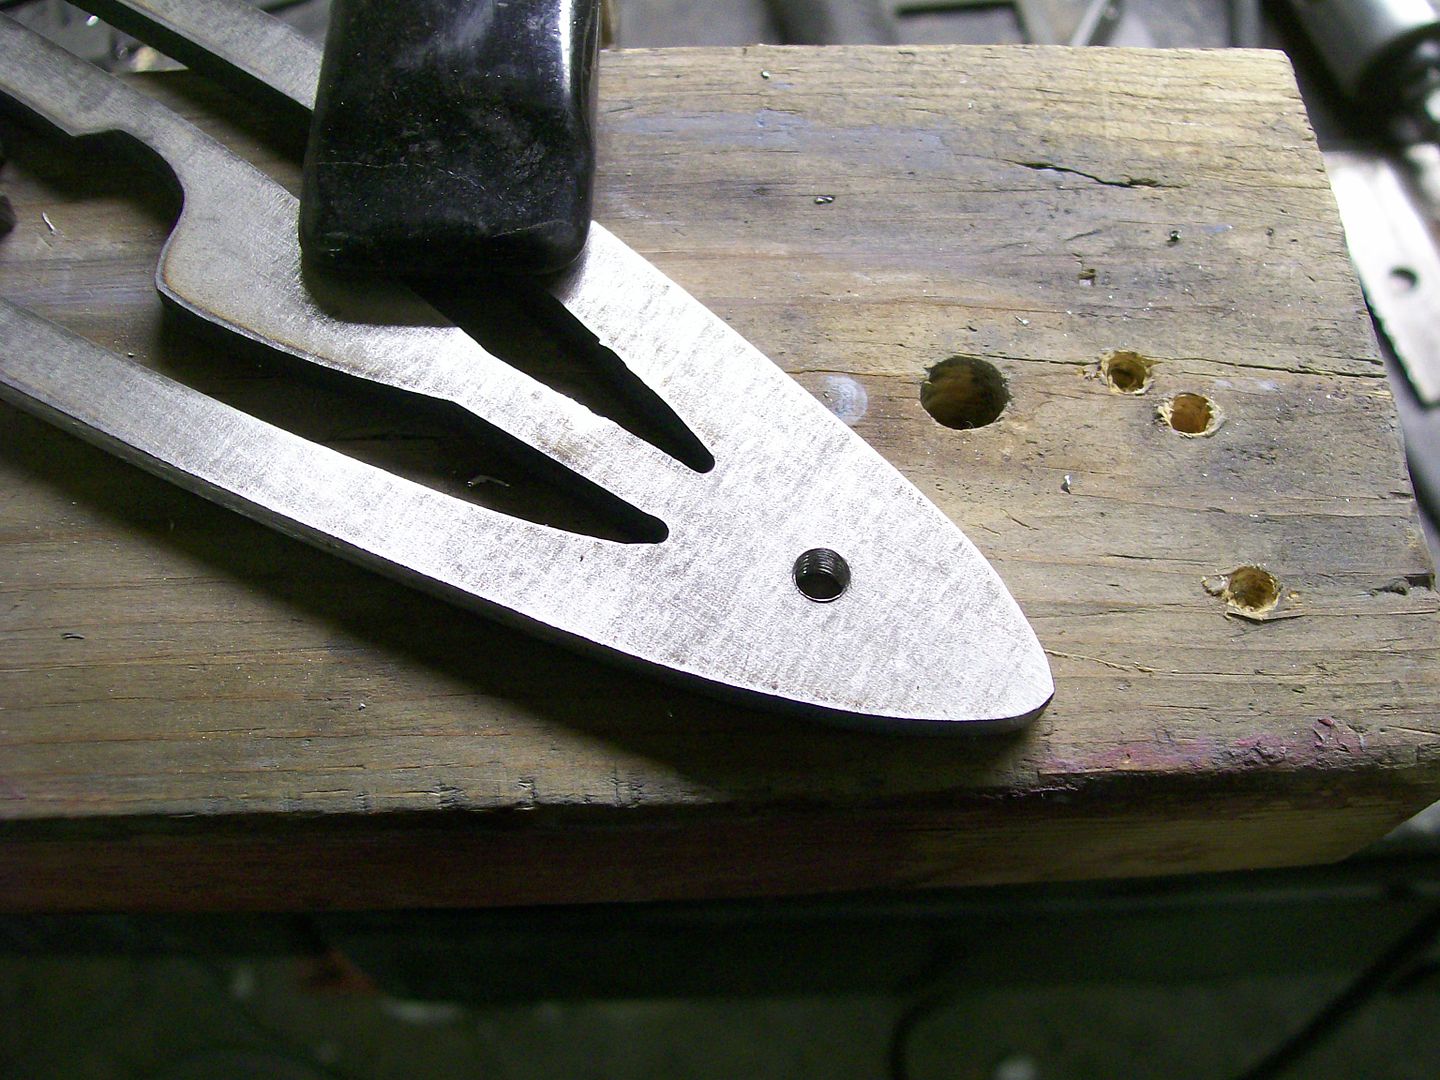 Then from the backside inserting a screw. Tightening the nut here helps keep the screw centered in case there is any slop in the threads. 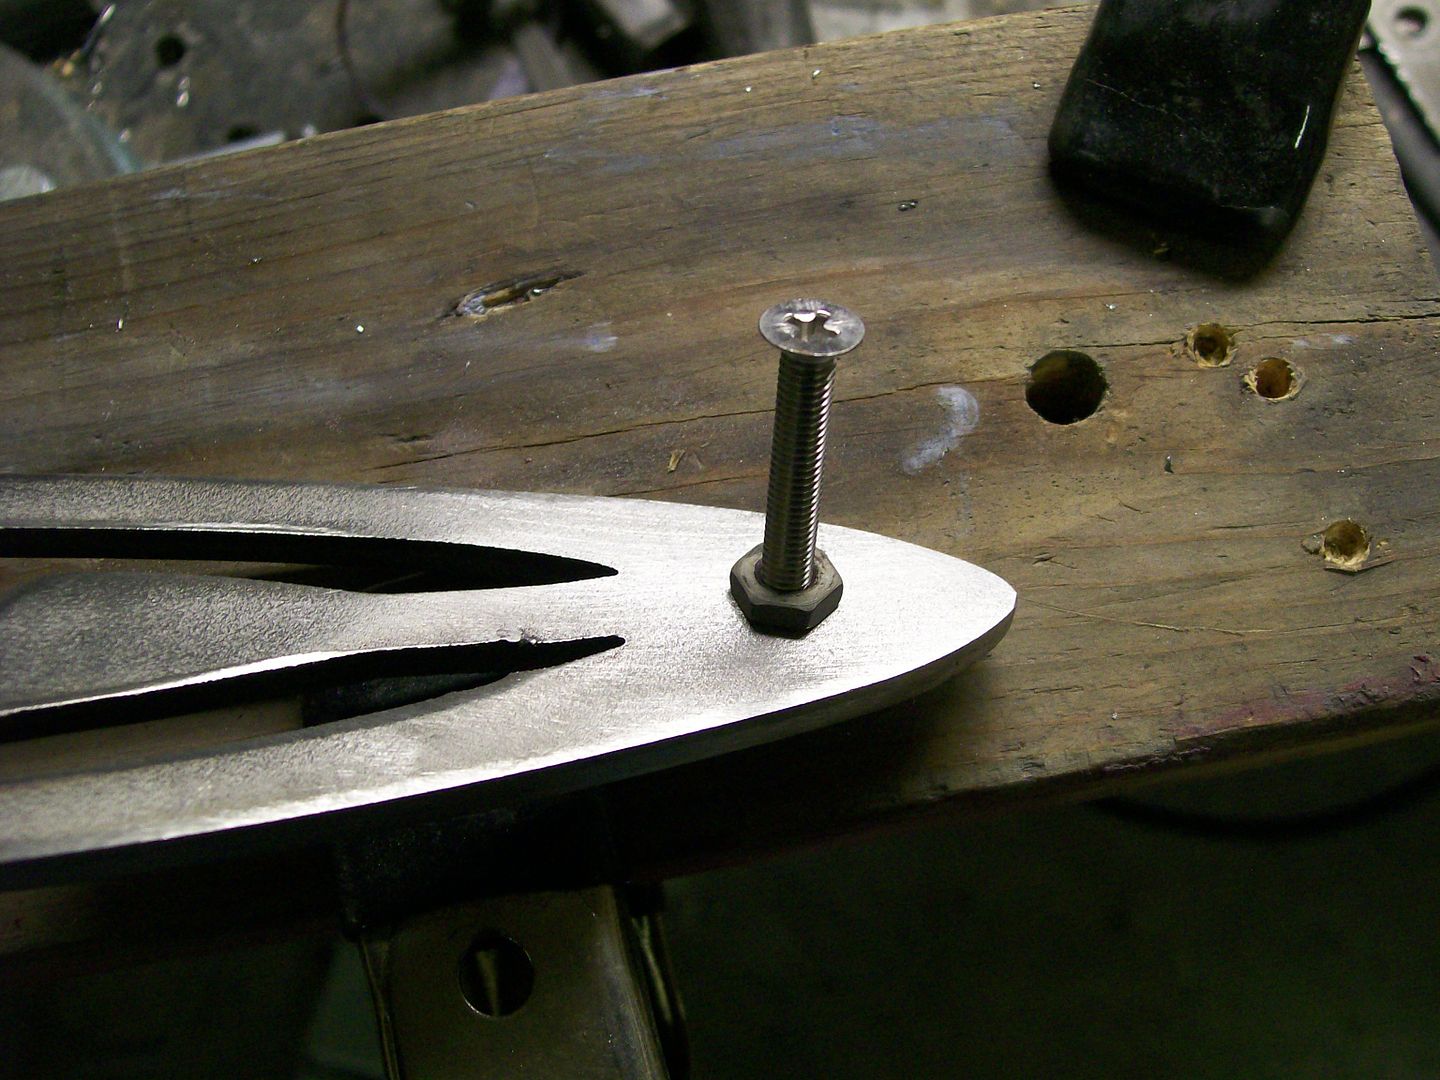 A look from the top side, I keep the screw slightly under the surface, this way I can use a tig welder to melt the screw and the emblem together, once they melt together I can add stainless filler rod. 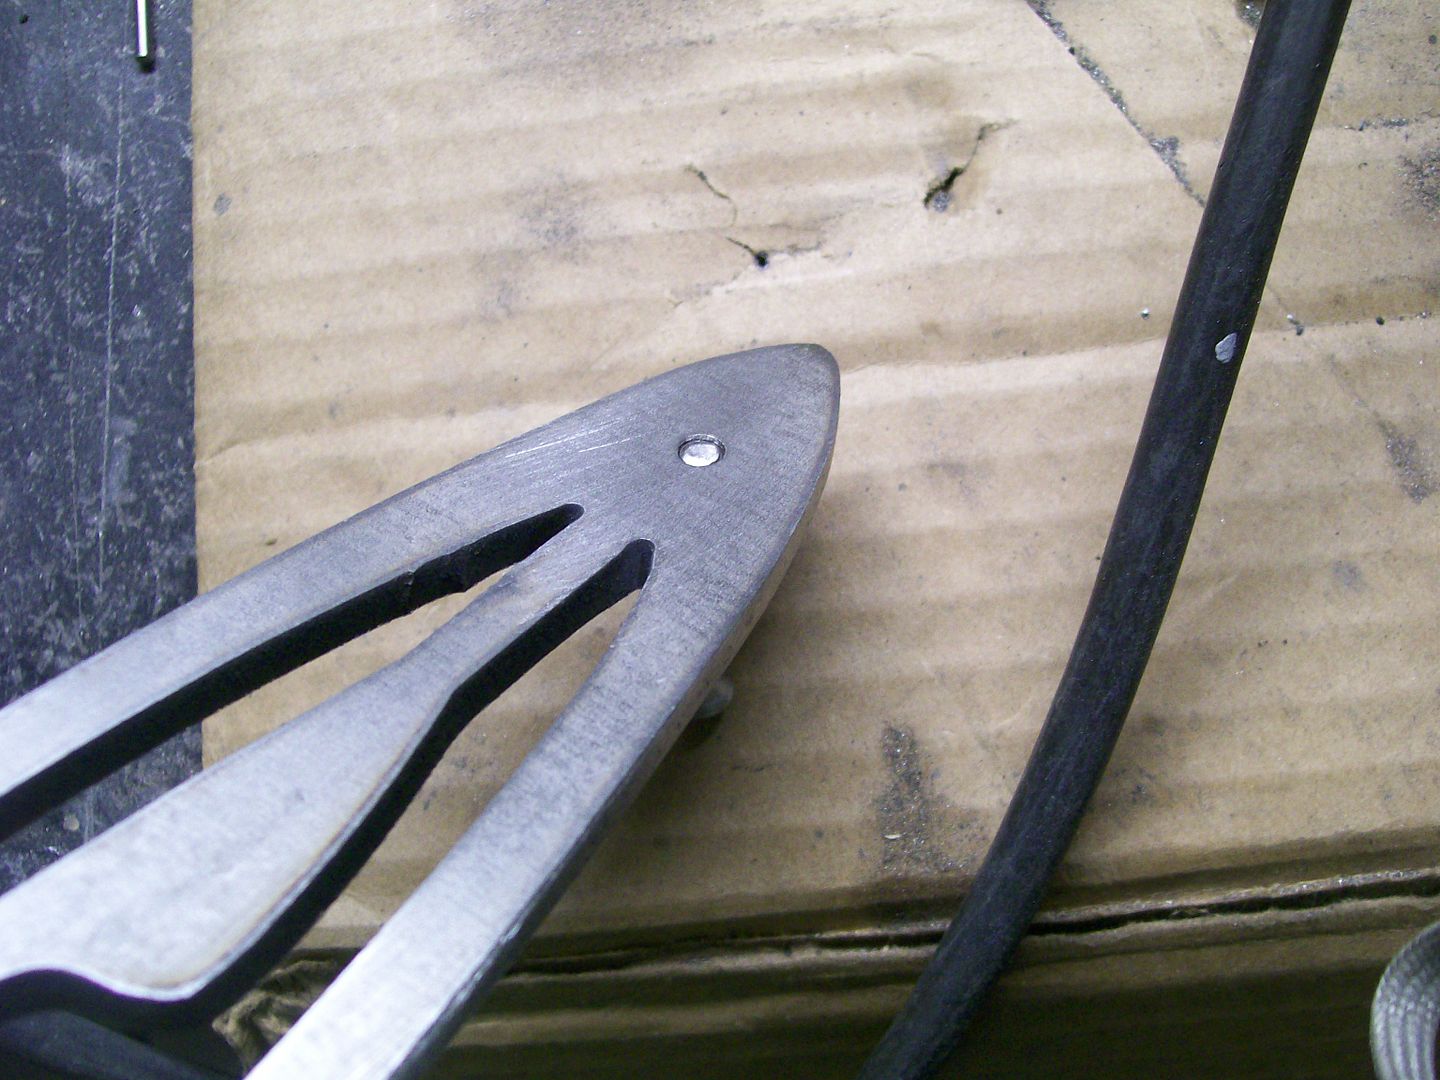 I fill beyond to give myself some working room. 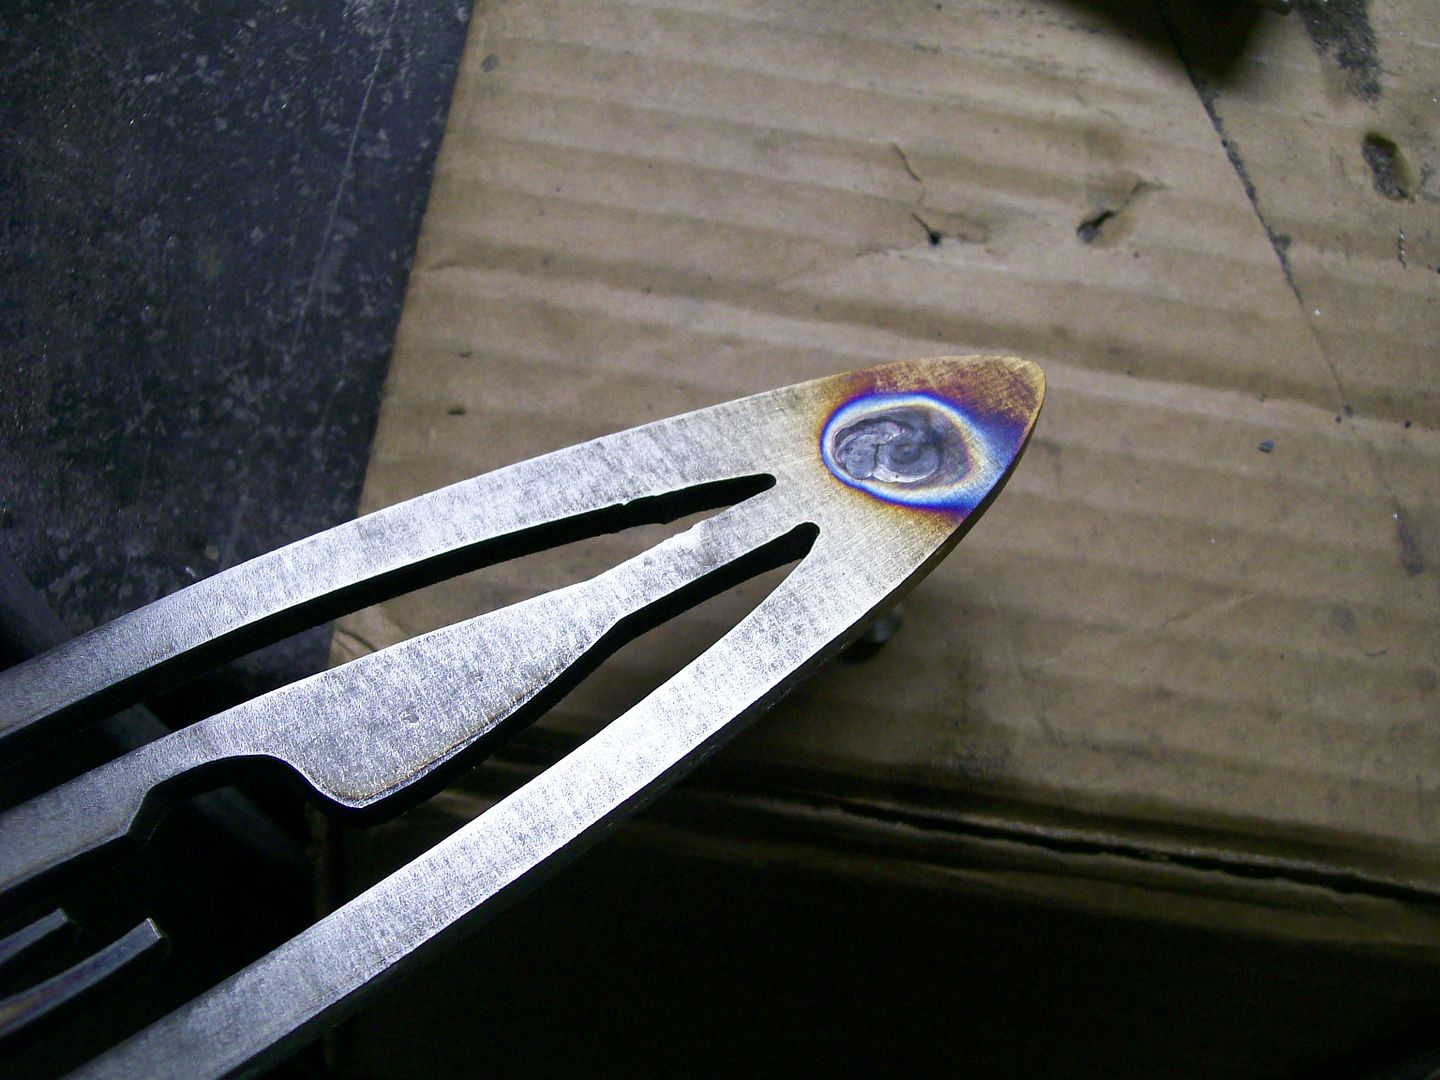 Now with emery cloth and a hand held belt sander I can pretty well level the surface. 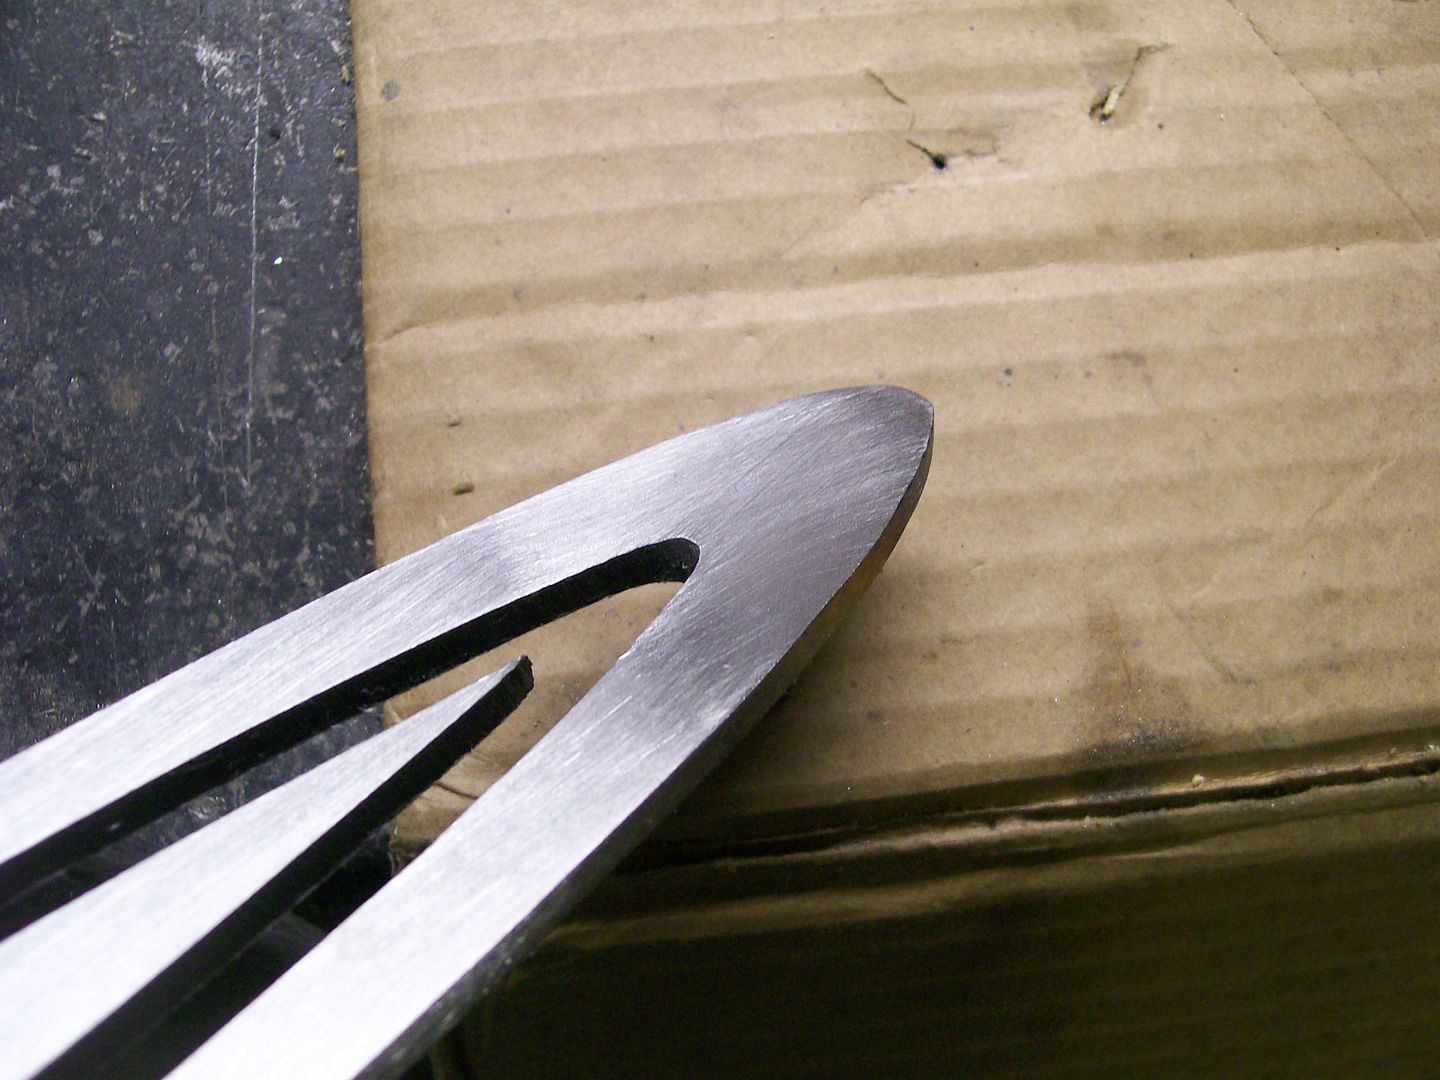 This next picture is the end result. Sorry, I took 10 pictures this was the best. Either the light reflected back real bad or the images in the refection made the finish look wierd. 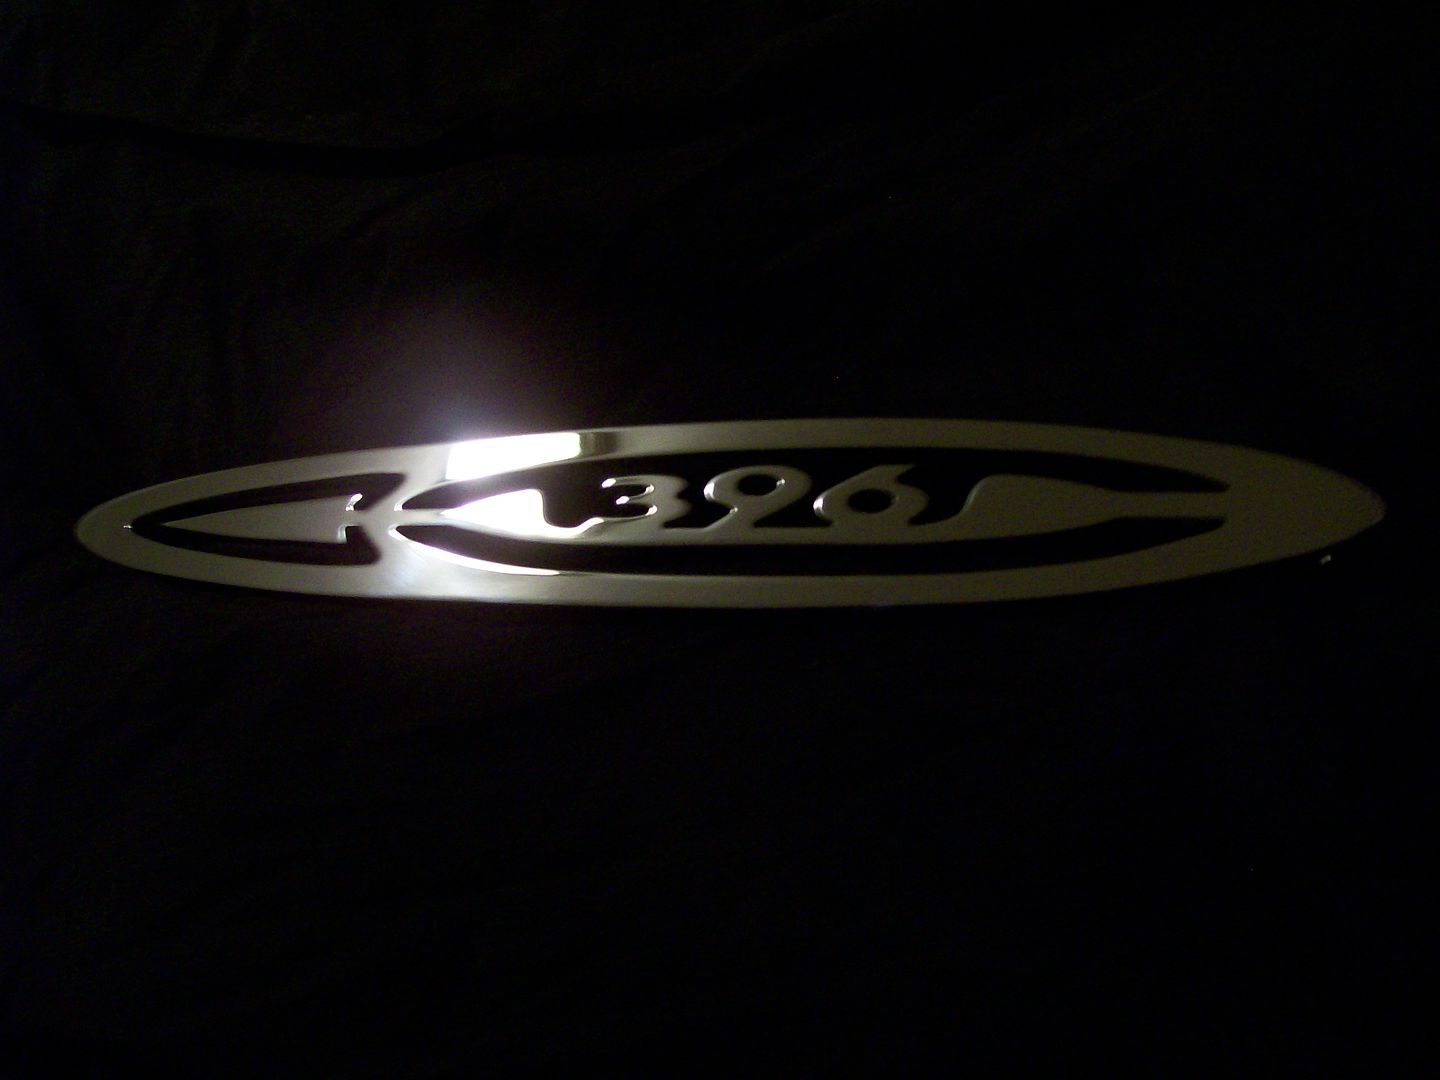 One place I can not polish well is the insides of the design and the numbers. I now will send them to an electro-polisher for the final polish. I had it done to the other one I made, it came back sweet. Even the hand polished finish benefited from it. Fender emblems finished....check. |
|
|

|
|
|
#384 |
|
Registered User
Join Date: Apr 2012
Location: Gilbert, Arizona
Posts: 454
|
Re: 1957 Chevy truck re-rebuild
hey Jim, very nice work on your truck. Just a thought, if you have to reach in under the fender to attach battery cables, won't the 'hot' clamp accidently touch the fender and ground out? If you swap the two posts and put the hot closer to the tire, it might reduce any accidental grounding.
mike |
|
|

|
|
|
#385 | |
|
Registered User
Join Date: Aug 2012
Location: Salem Mo
Posts: 652
|
Re: 1957 Chevy truck re-rebuild
Quote:

|
|
|
|

|
|
|
#386 |
|
Senior Member
 Join Date: May 2011
Location: Cypress, Tx.
Posts: 1,504
|
Re: 1957 Chevy truck re-rebuild
I'd love to see the torch mate that you cut those on? So obviously cutting this "thin" metal doesn't warp when it's cutting. Is it a regular cutting torch mounted on a little motor and follows a template? I saw something like that somewhere in my life~lol.
Looks great!!! dne'
__________________
'72 Ford Bronco project(July 17 2021-?) https://67-72chevytrucks.com/vboard/...d.php?t=828015 59 Apache (sold 6-25-2021) 67 Ford Mustang (re-restored after Harvey) 1968 Jeep Cj5 (2-8-2020 to present) 1992 Jeep Yj (8-17-20 to present) (Jurassic build) www.Classiccarsandtools.com |
|
|

|
|
|
#387 |
|
Registered User
Join Date: Aug 2007
Location: Corona, California
Posts: 7,998
|
Re: 1957 Chevy truck re-rebuild
Beautiful work on the emblems.
Kim |
|
|

|
|
|
#388 | |
|
Registered User
Join Date: Aug 2012
Location: Salem Mo
Posts: 652
|
Re: 1957 Chevy truck re-rebuild
Quote:
I have a couple of pictures from a past project that may answer some of your questions. Not nearly as technical as cutting the emblems but much the same idea. On the Willys I have the frame was rusting bad and needed repair. There is an inner frame brace that needed replacement. I salvaged the old piece best I could. I traced the pattern on to a piece of card board. I then use my scanner to scan the image I traced. In the picture below you can see the traced cardboard has a "V" shape. I had to scan the traced image in 2 sections, doing it as one piece was too large for my scanner. Once I had both pieces scanned I now can work with the computer cad system and attach the two pieces back together. Once the two pieces are attached in the computer I printed what will be the frame brace on paper. Since the original rusty frame piece was so bad I wanted to use this printed paper one to check if I had all the dimensions correct, it's cheaper printing paper than cutting material to check the fit. 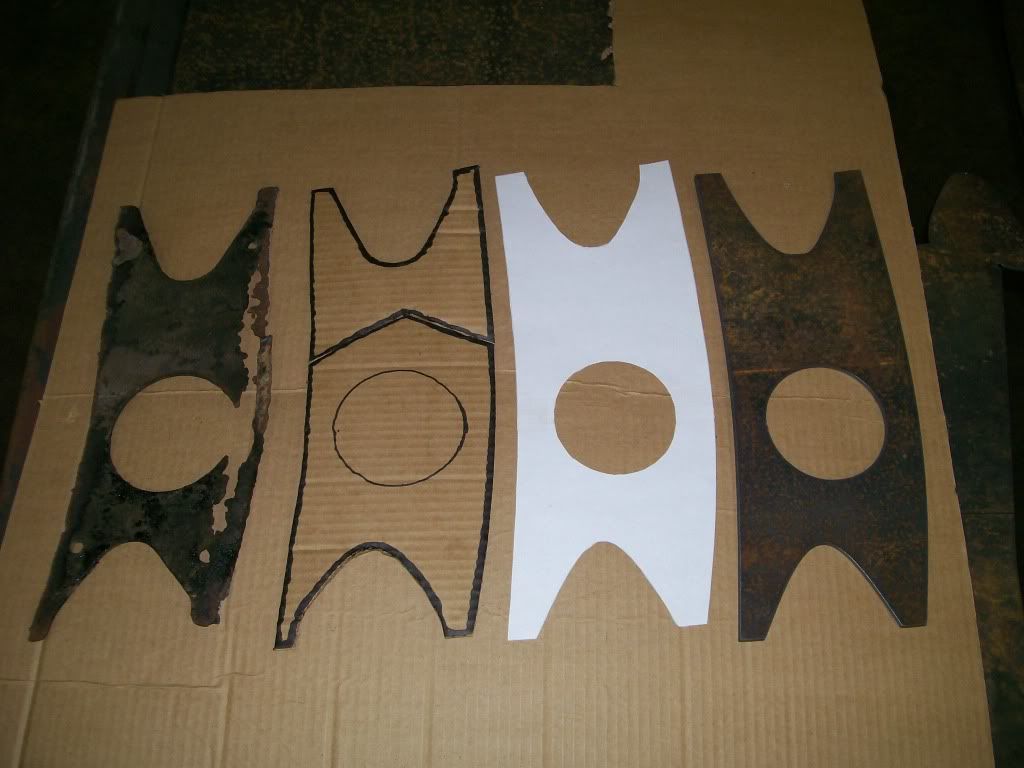 Once I approve the printed paper I transfer the computer image to software that converts the image to a "cut path" that the actual cutter will follow. I do however have to designate which holes to cut first. For instance, if the cutter cut the outside first, the piece would drop away before it cut the hole in the center. Here is the screen of the cut being made. You can see the image, and far left lower represents the place where the cutter rests. Follow the dotted line and it goes to the inner circle, once cut, the dotted line go to the outer edge, once it makes the outer cut, it returns back to it's resting point. 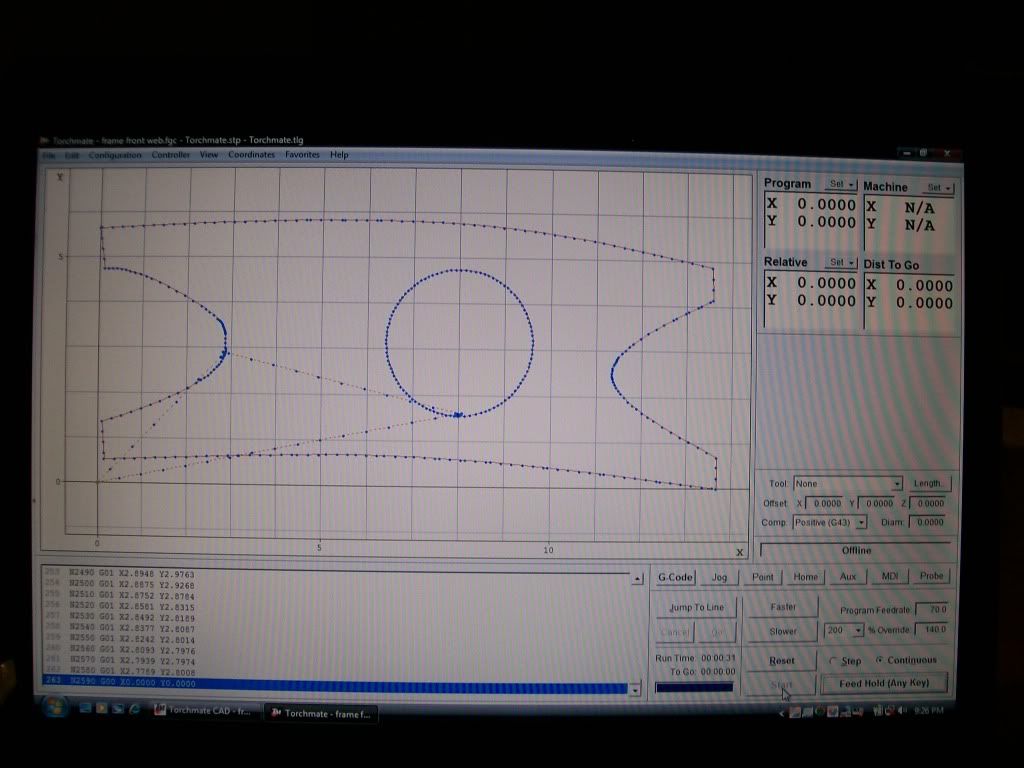 In real life here is the plasma torch being held and directed by small motors that receive a signal from the torch mate electronics that convert my drawings into cuttings. 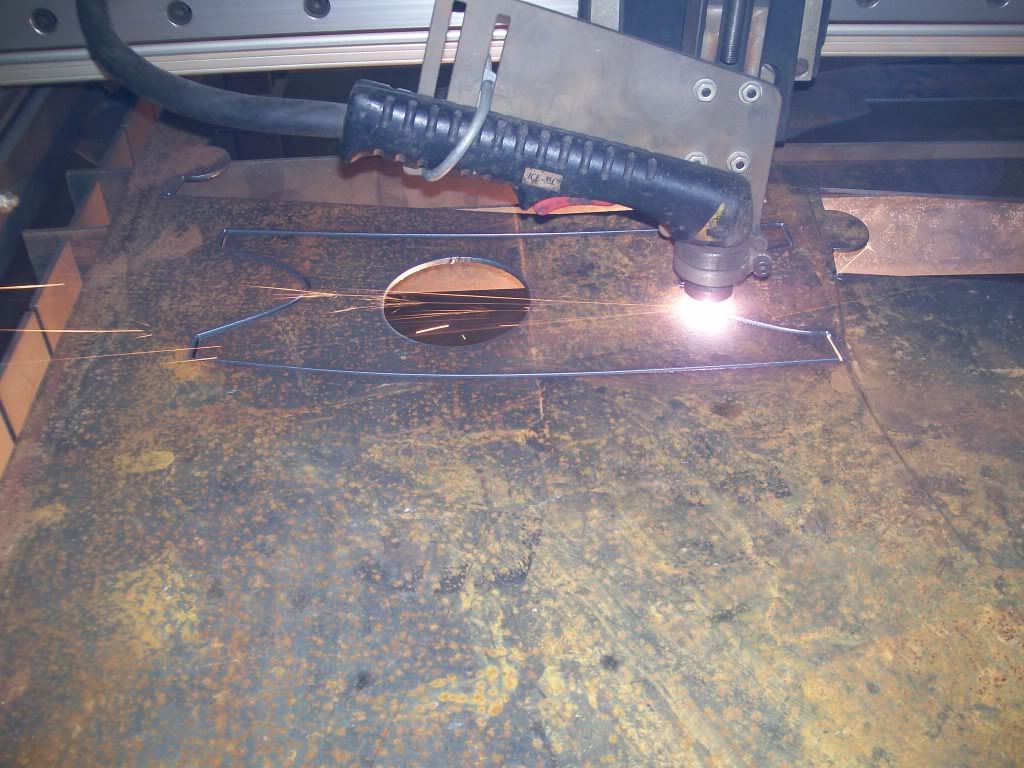 Before, what a mess. 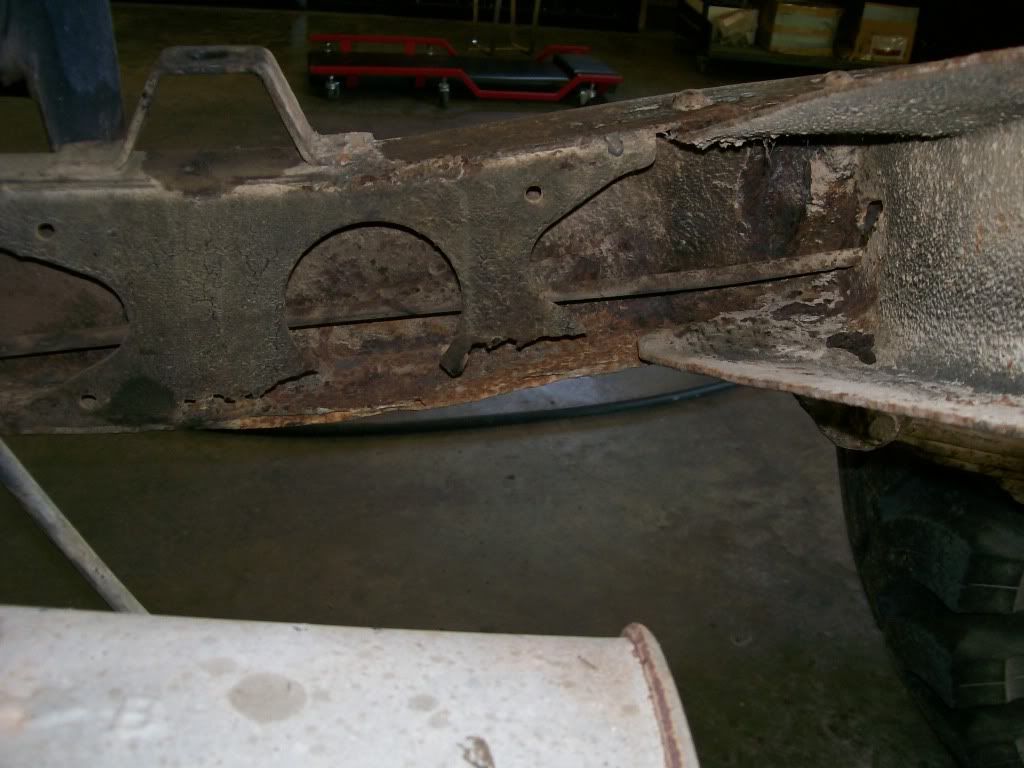 After, just fitting pieces together. 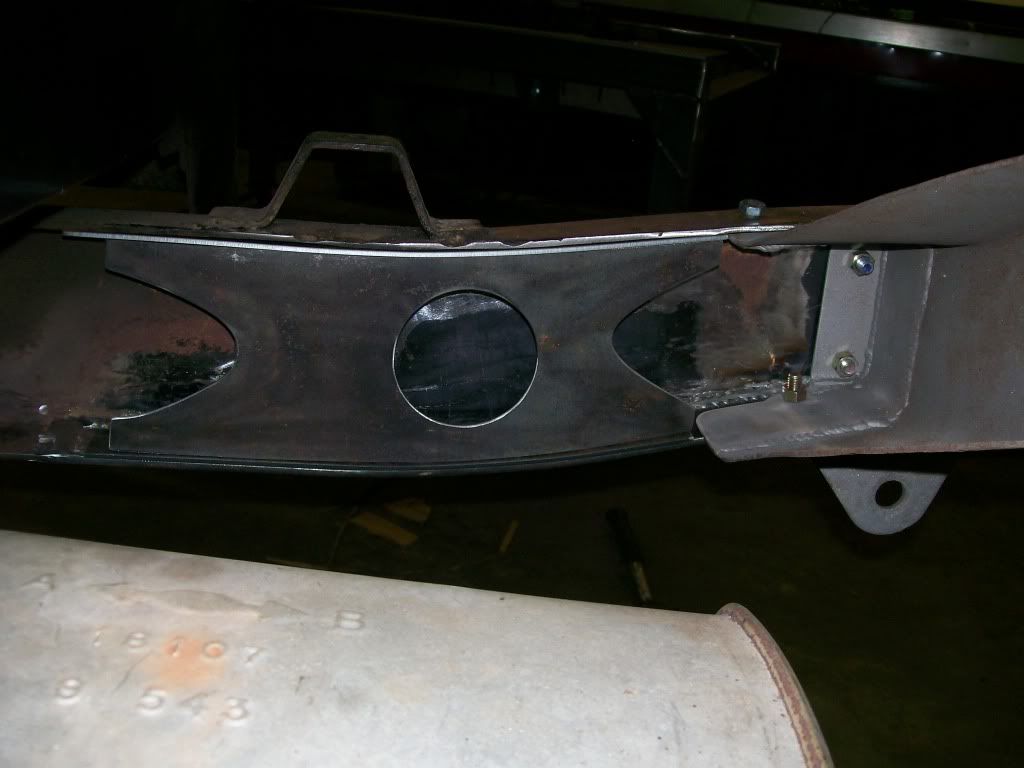 Between the frame repair and the emblems, the cutting is the same. One big difference is creating the cut path. On the frame I drew and scanned an image. On the emblem I had no drawing, in that case it's a plank screen and I started with drawing a couple of ovals, then an arrow, then 396, and blended them all together. Heat, heat is an issue with all cuts. The software allows you to pick a feed rate, the speed at which the plasma cutter will move as is it cutting. Too fast and it won't cut all the way through, too slow, heat and excess slag. Experience comes into play here, I'm sure they provide a printed table to help also. Example....I set the speed for this 1/8" plate to cut the grill, no problem. But we have one other issue, many cuts close to each other. The soft ware already tries to separate the cuts to keep the heat centralization down. I play a part to where I decide I will have the plasma cutter pause a duration of time before making the next cut. Helping all the more to allow heat to dissipate.  Last up is a sheet of 18 gauge sheet metal. Two holes cut, then the outside cut. Very thin, low amperage on the plasma cutter and cut speed as fast as I could and still cut through, worked great. 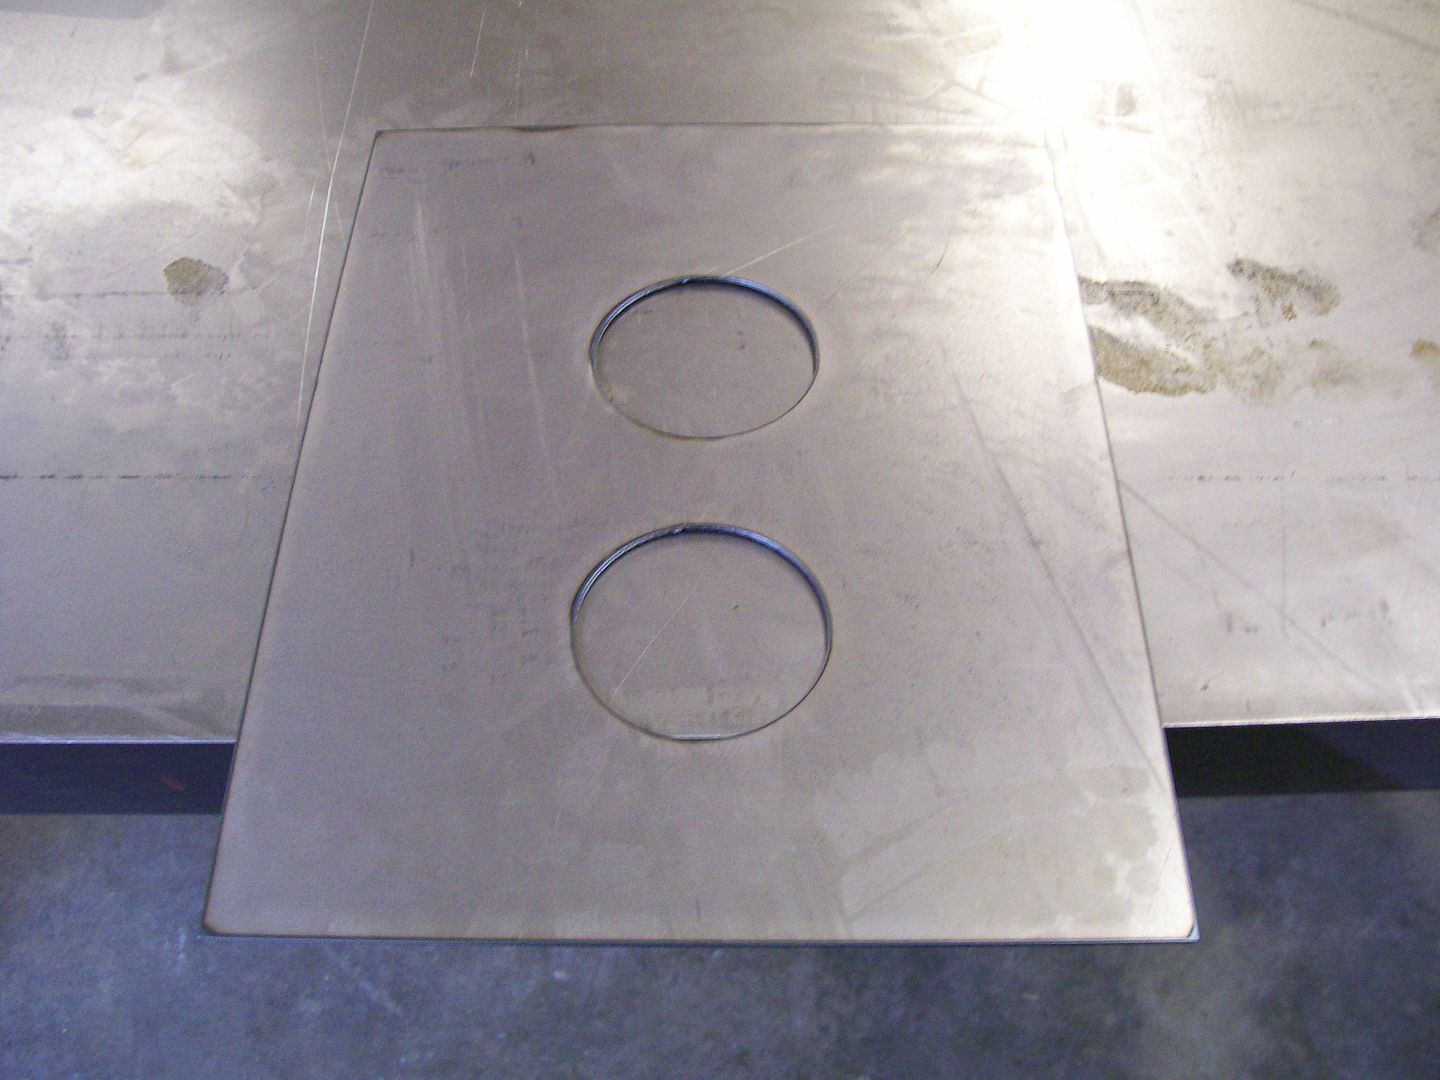 I know you're not the only one curious about the torch mate Denee007, so I posted to cover many questions out there, thanks for checking in. 
|
|
|
|

|
|
|
#389 |
|
Registered User
Join Date: Jan 2012
Location: Motown
Posts: 7,680
|
Re: 1957 Chevy truck re-rebuild
nice work on the emblems stepside
 your work is outstanding got our 4x8 plasma table a while back. been working on getting everything set up and working well. and welcome back denee
__________________
cool, an ogre smiley  Ogre's 58 Truk build Ogre's 58 Truk buildhow to put your truck year and build thread into your signature shop air compressor timer |
|
|

|
|
|
#390 |
|
Registered User
Join Date: May 2010
Location: Lawrenceville, Ga
Posts: 2,646
|
Re: 1957 Chevy truck re-rebuild
Neat stuff. I wish I had one of those, or lived close to you, LOL.
|
|
|

|
|
|
#391 |
|
Registered User
Join Date: Aug 2012
Location: Salem Mo
Posts: 652
|
Re: 1957 Chevy truck re-rebuild
Ok, let's get this thread up to date... This cold weather has not helped ambition at all, but the few things I've gotten done in the last couple months has moved this project forward in a big way.
Once I finally decided to get the over drive, my decision on the rear axle gear ratio is easier. I always wanted a 3:73, now I have the 3:73. I knew I wanted a posi-traction and I decided on the Yukon Dura-grip. I went on line to Randy's ring and pinion. A very easy web site to compare and find the parts needed. I ordered and the parts arrived 3 days later. This is the first time I've used the Yukon brand, and I used all Yukon parts for this 10 bolt 8.5 GM axle including the rebuild kit. If I may say, every thing fit together perfect, the rebuild kit was complete, the machining and pressing the bearings on went great. I heated the ring gear on the stove and cooled the carrier in the cold weather and they went together great also. 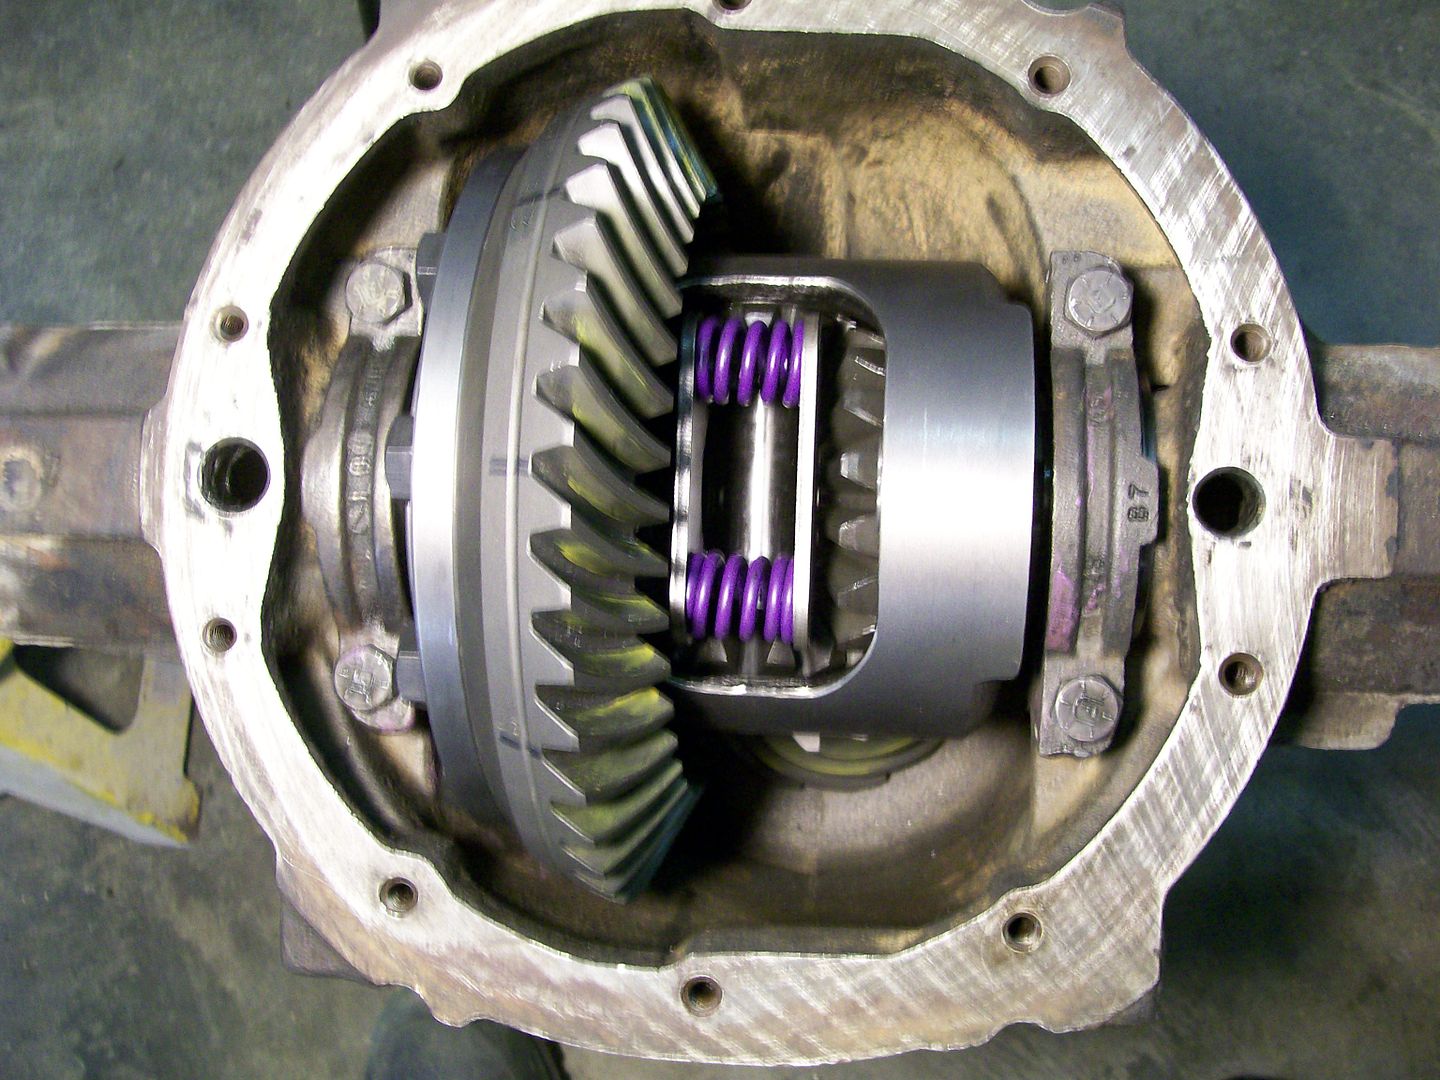 The rebuild kit had a nice way to shim the carrier. The original had one shim of a specific size for each side. The kit had a split apart shim that you added or removed thin shims to obtain the size you need. The two shims in the middle are the original. The left side is the individual pieces of the new one. The one on the right is the pieces all together. 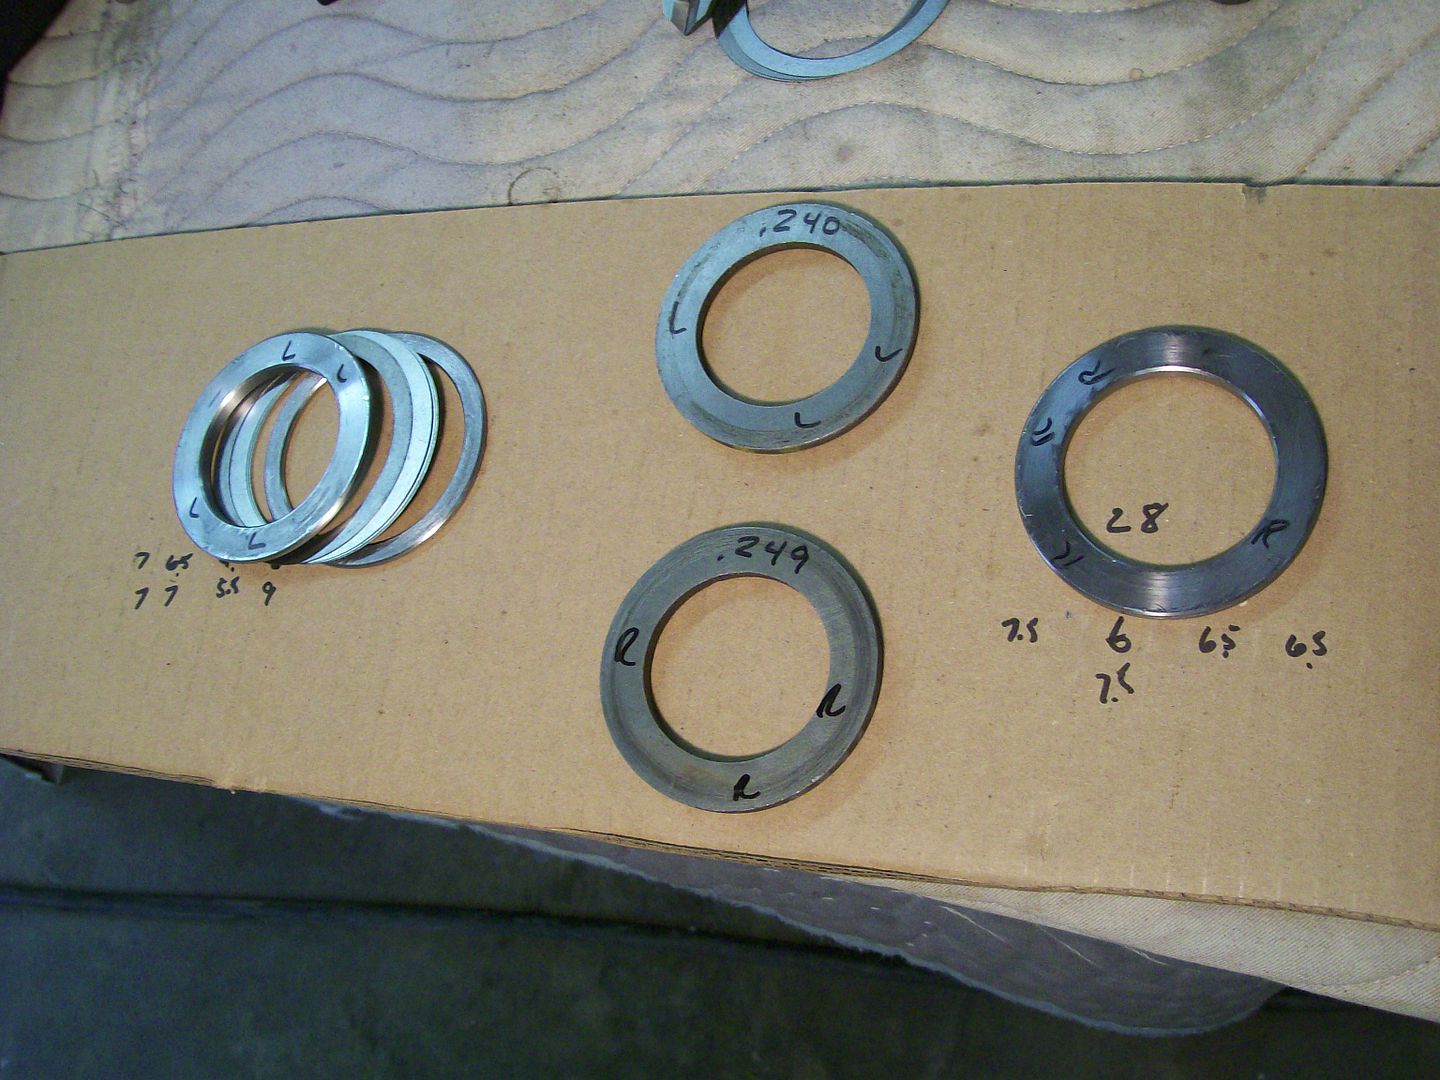 Everything in place. I mark left and right on everything as I'm fitting. A piece can be off one thousands of an inch from side to side, a simple sharpe can save a headache. 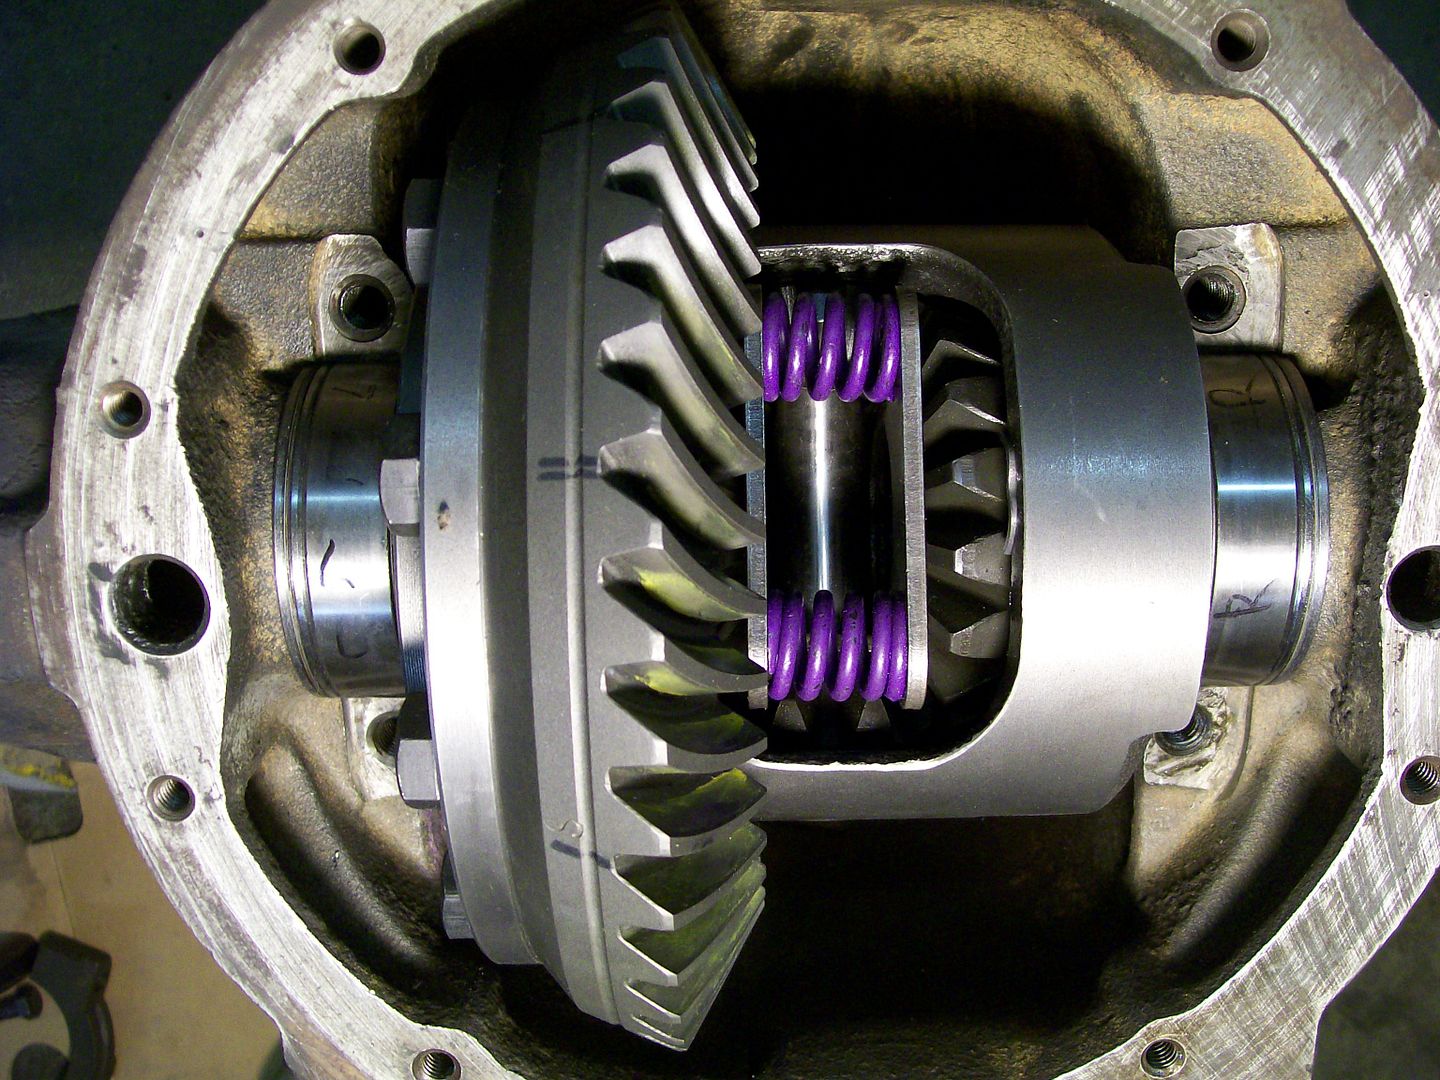 I don't think there has been one item that has been tampered with in the past that I haven't upgraded, spring perches being the next item. 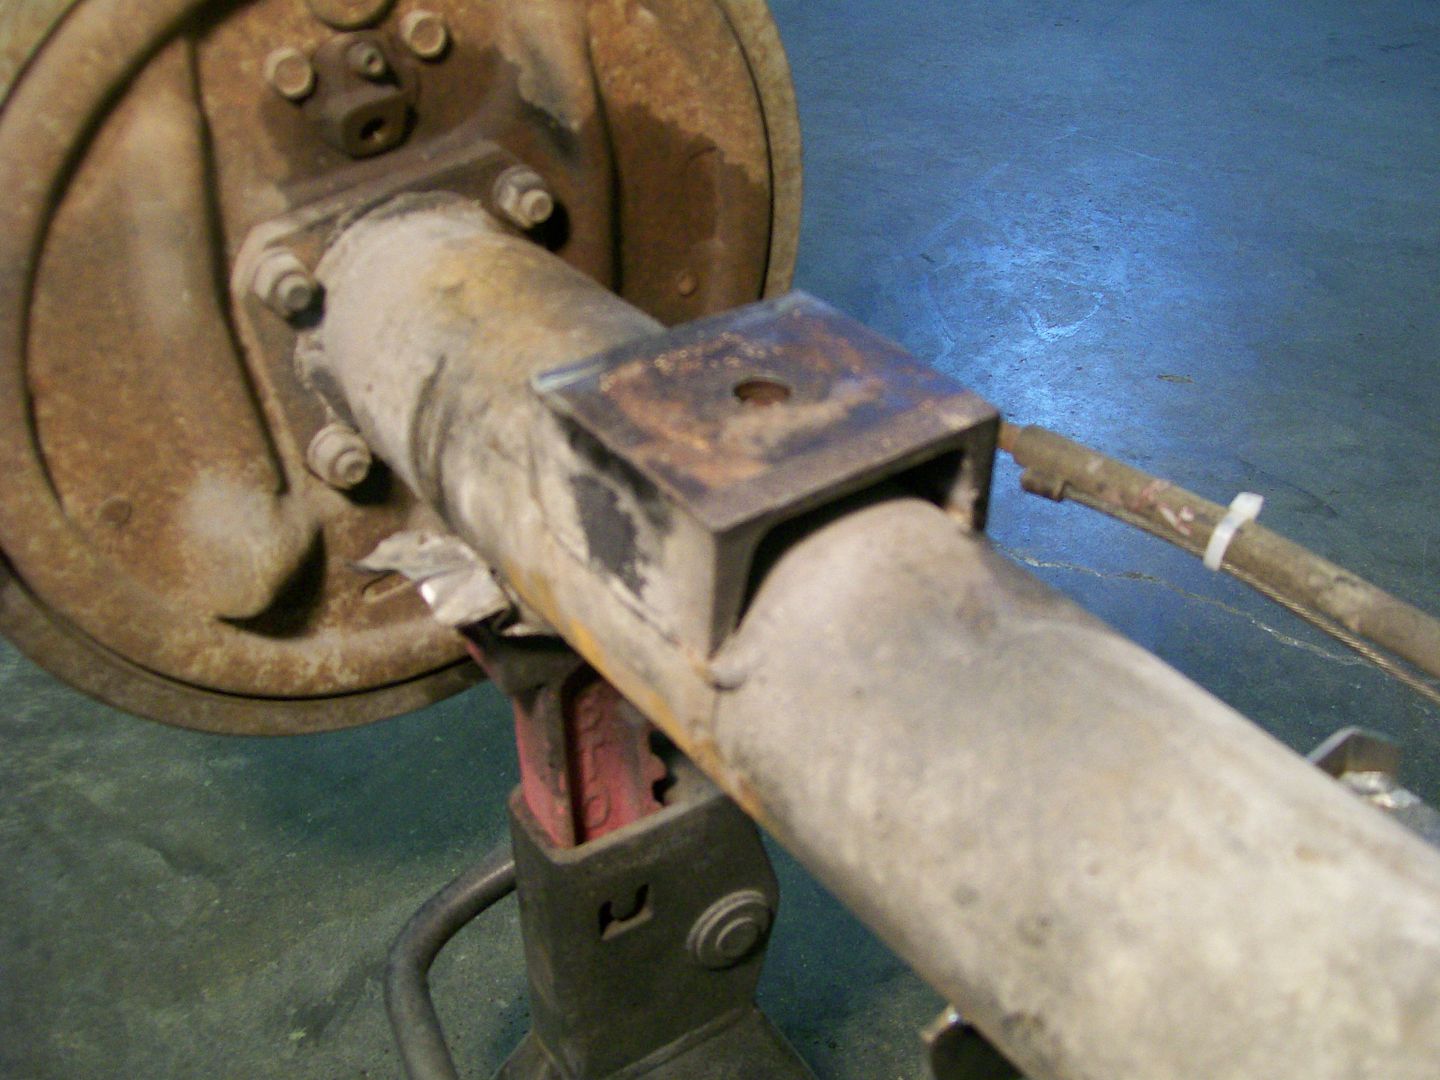 Back to the tochmate and some cutting I made the top and sides then welded it all together and now I have perches that will spread the load across a larger area of the springs. 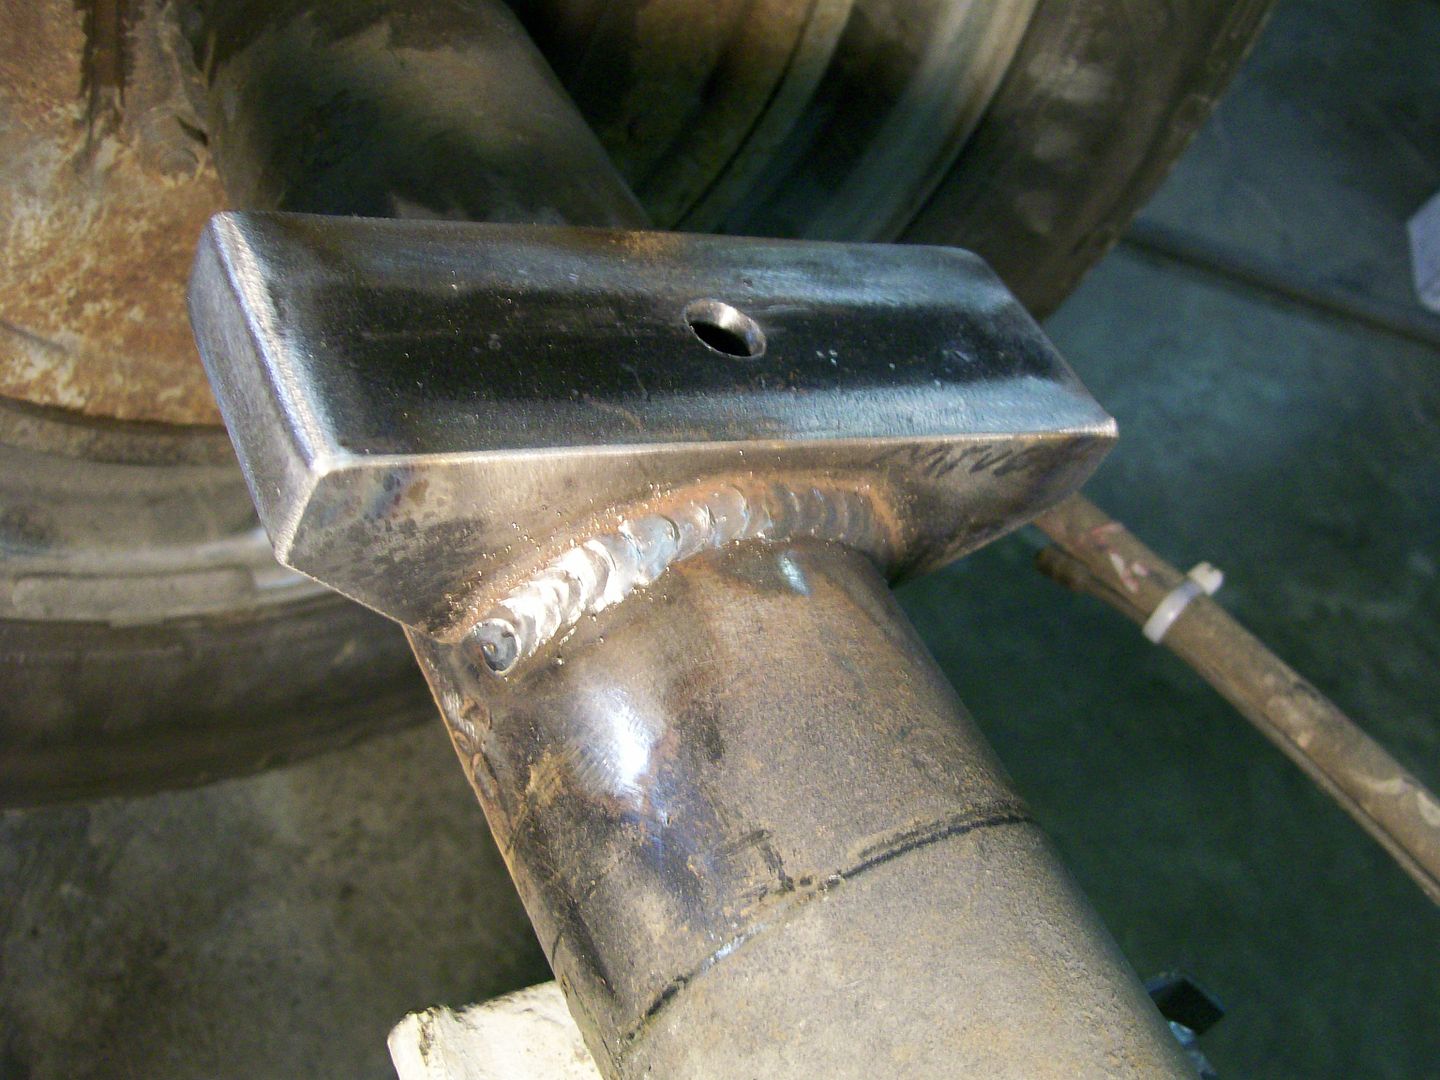 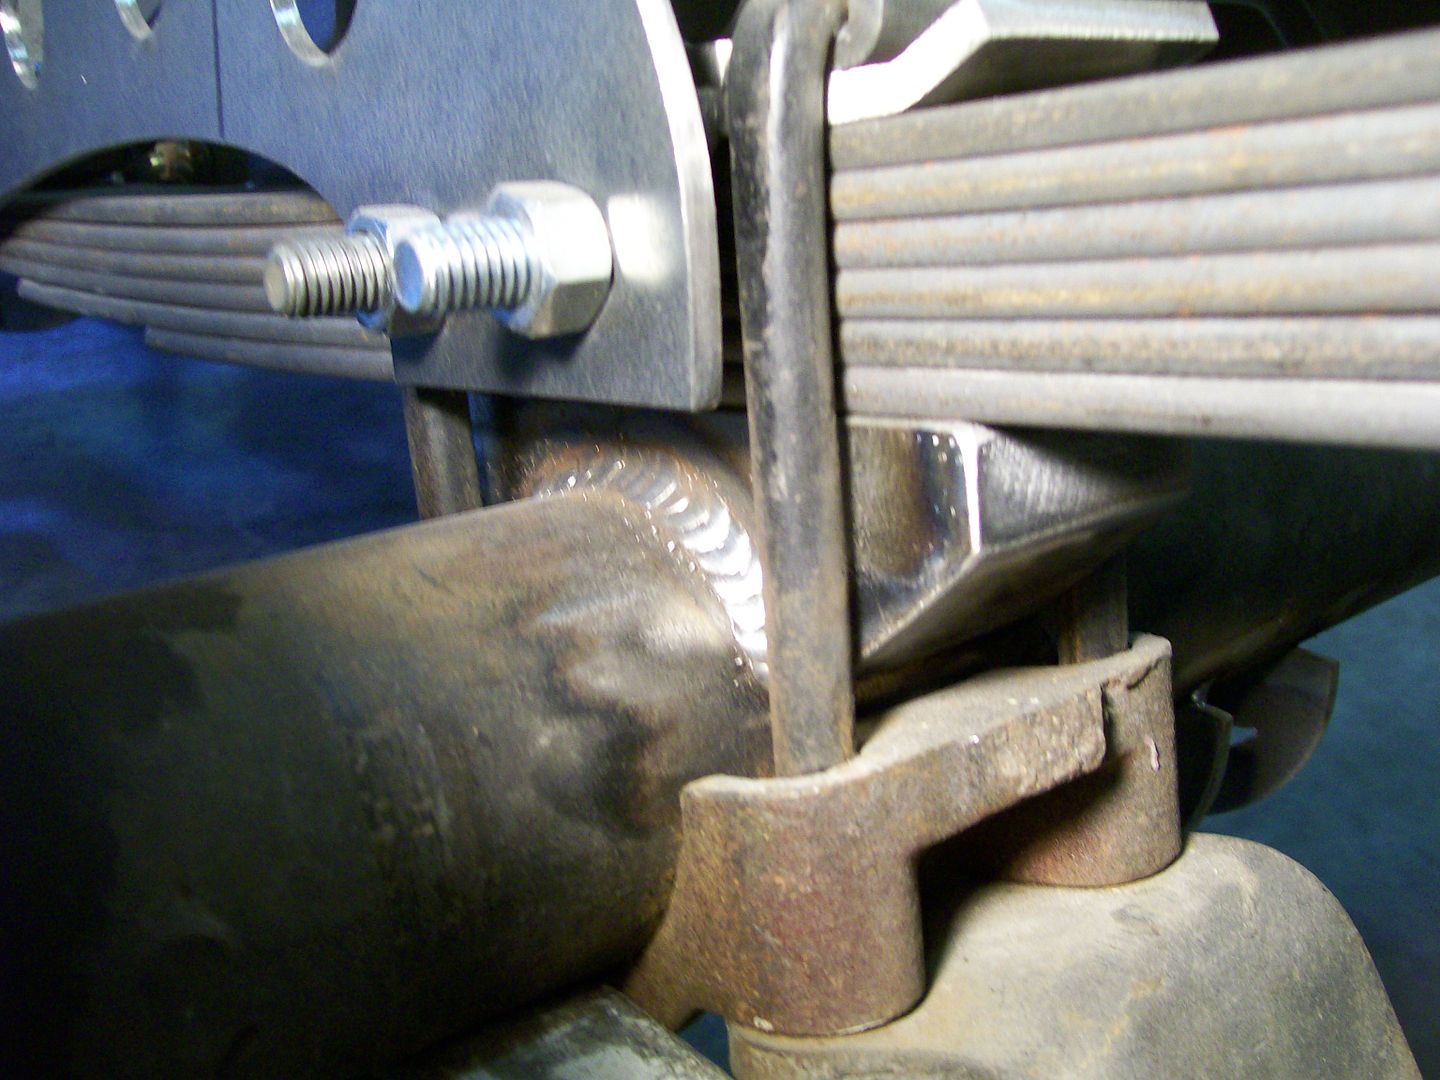 I figure there's gonna be some stress exerted on the spring perch and top plate with this set-up. 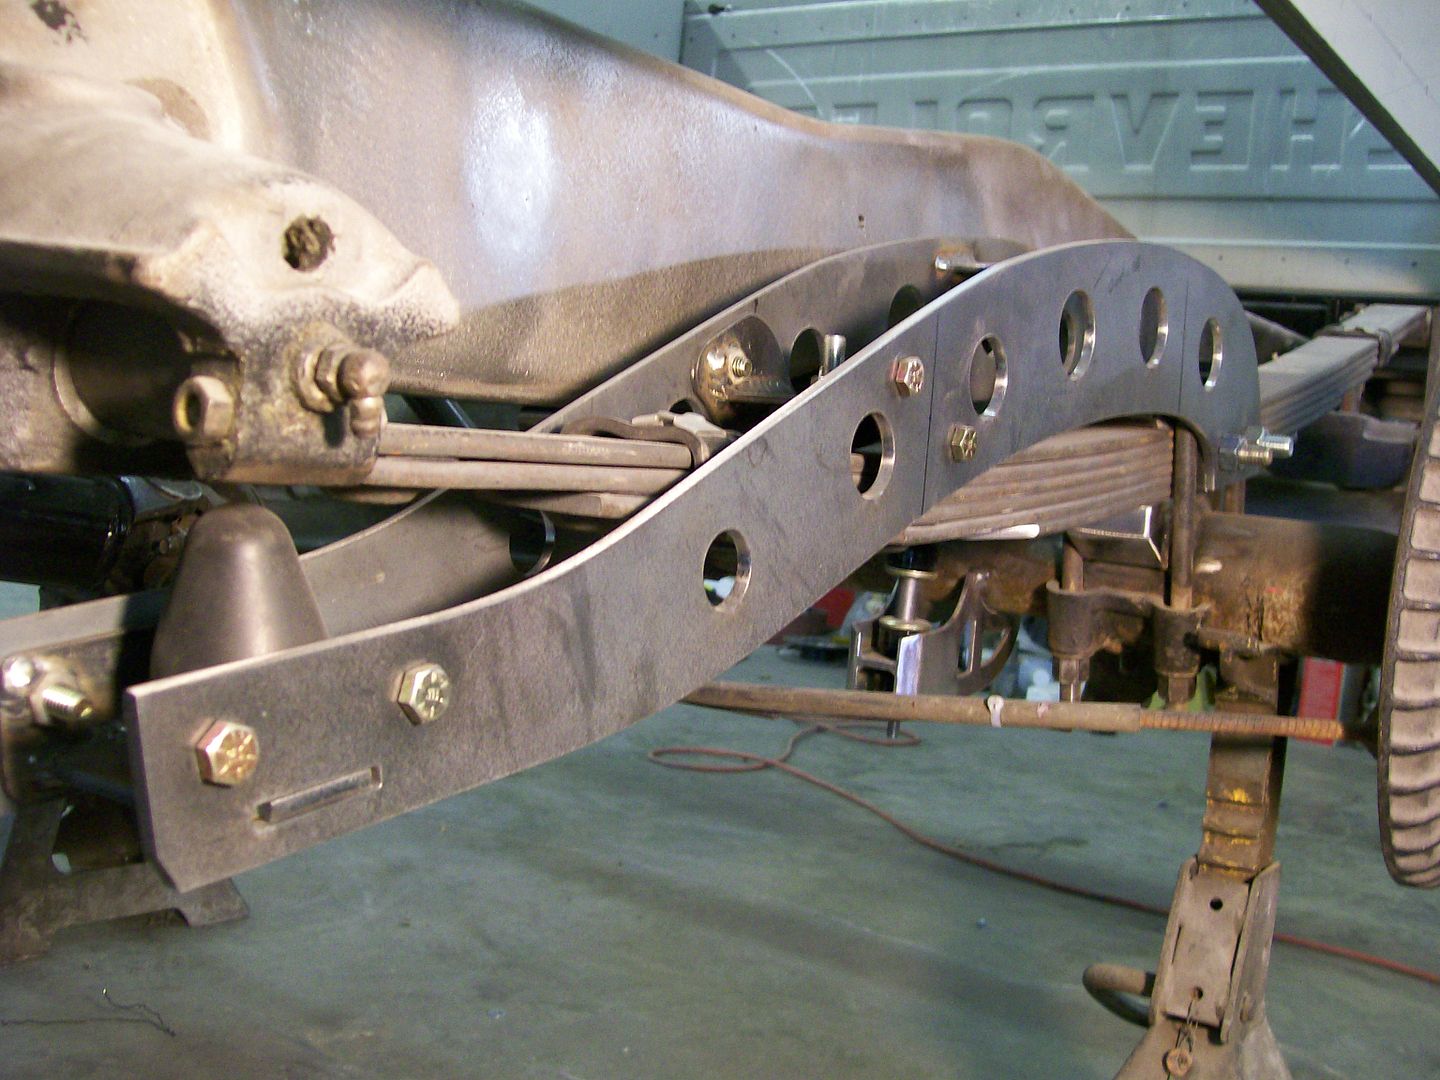 Wow, without the exhaust system in place I've got some open space under here. 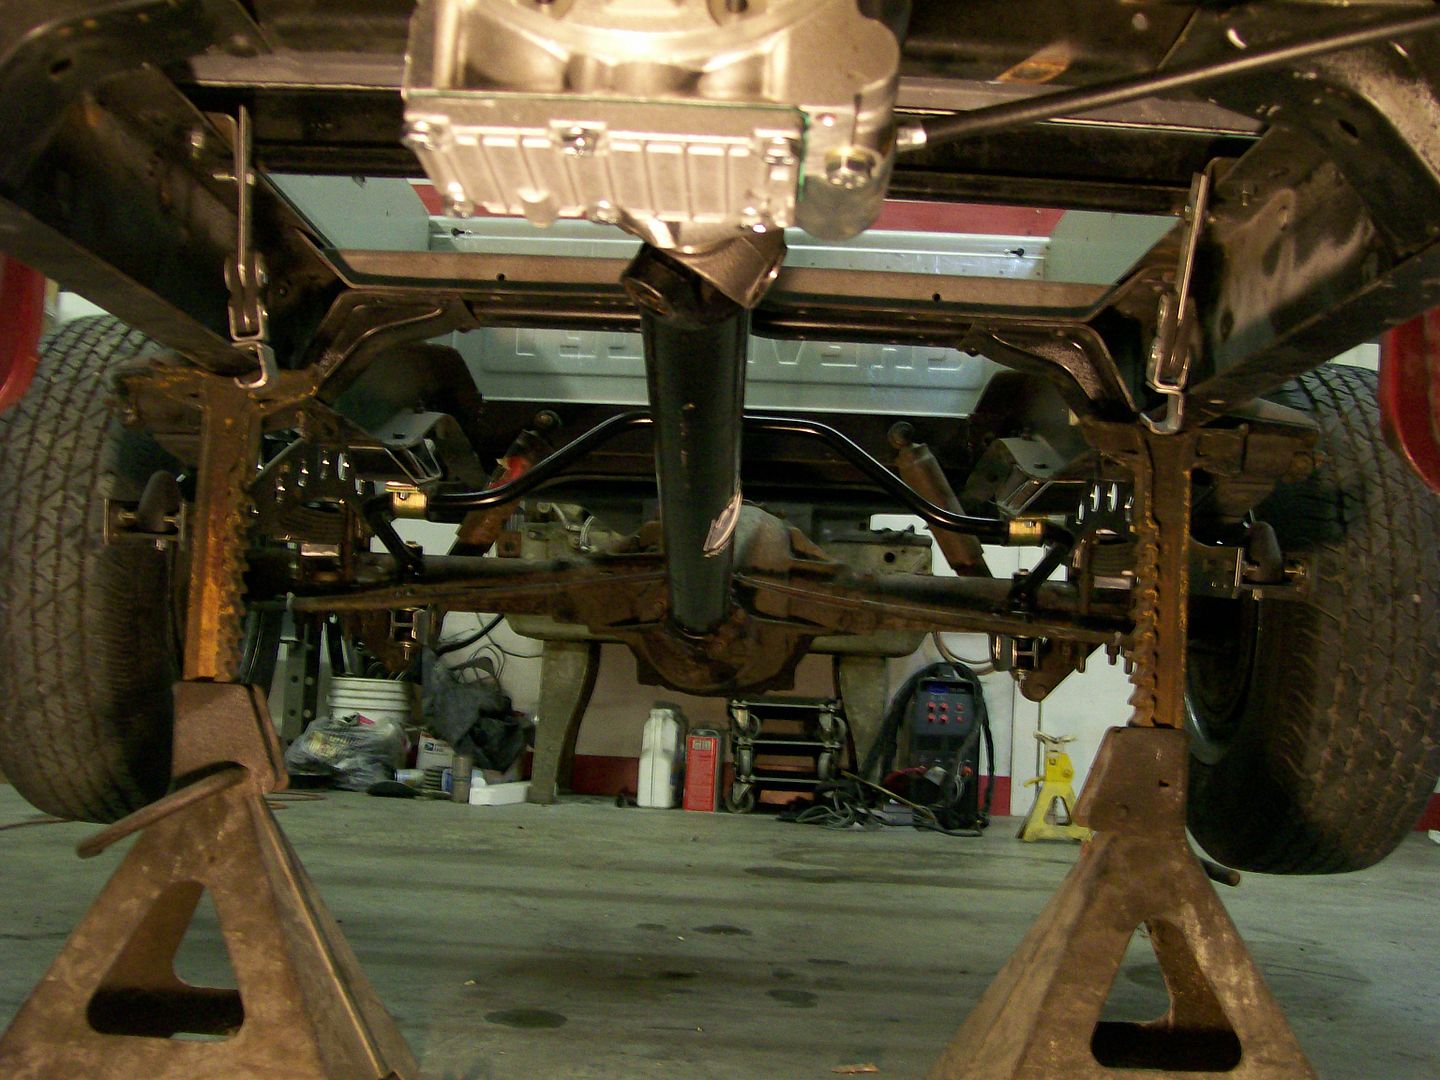 Now to remove the bed and cab and start finalizing some odds and ends on the frame. With any luck, maybe, just maybe, when it gets warm out I'll be ready for some paint. 
|
|
|

|
|
|
#392 |
|
Registered User
Join Date: Aug 2007
Location: Corona, California
Posts: 7,998
|
Re: 1957 Chevy truck re-rebuild
It sure is looking nice.
Kim |
|
|

|
|
|
#393 |
|
Registered User
Join Date: Aug 2012
Location: Salem Mo
Posts: 652
|
Re: 1957 Chevy truck re-rebuild
I'm starting to get excited about finally spraying paint soon, even if it will be inner fender panels and such, it will be good to get some color down.
Speaking of paint, the inside of the doors will be black just as some of the outside of the truck. One thing I don't want is a tape line or dealing with masking and taping to separate the inside painting from the outside. Finding one more use for the cherry picker I decided to hang both doors so on paint day I can do inside, outside, top and bottom all at one time. 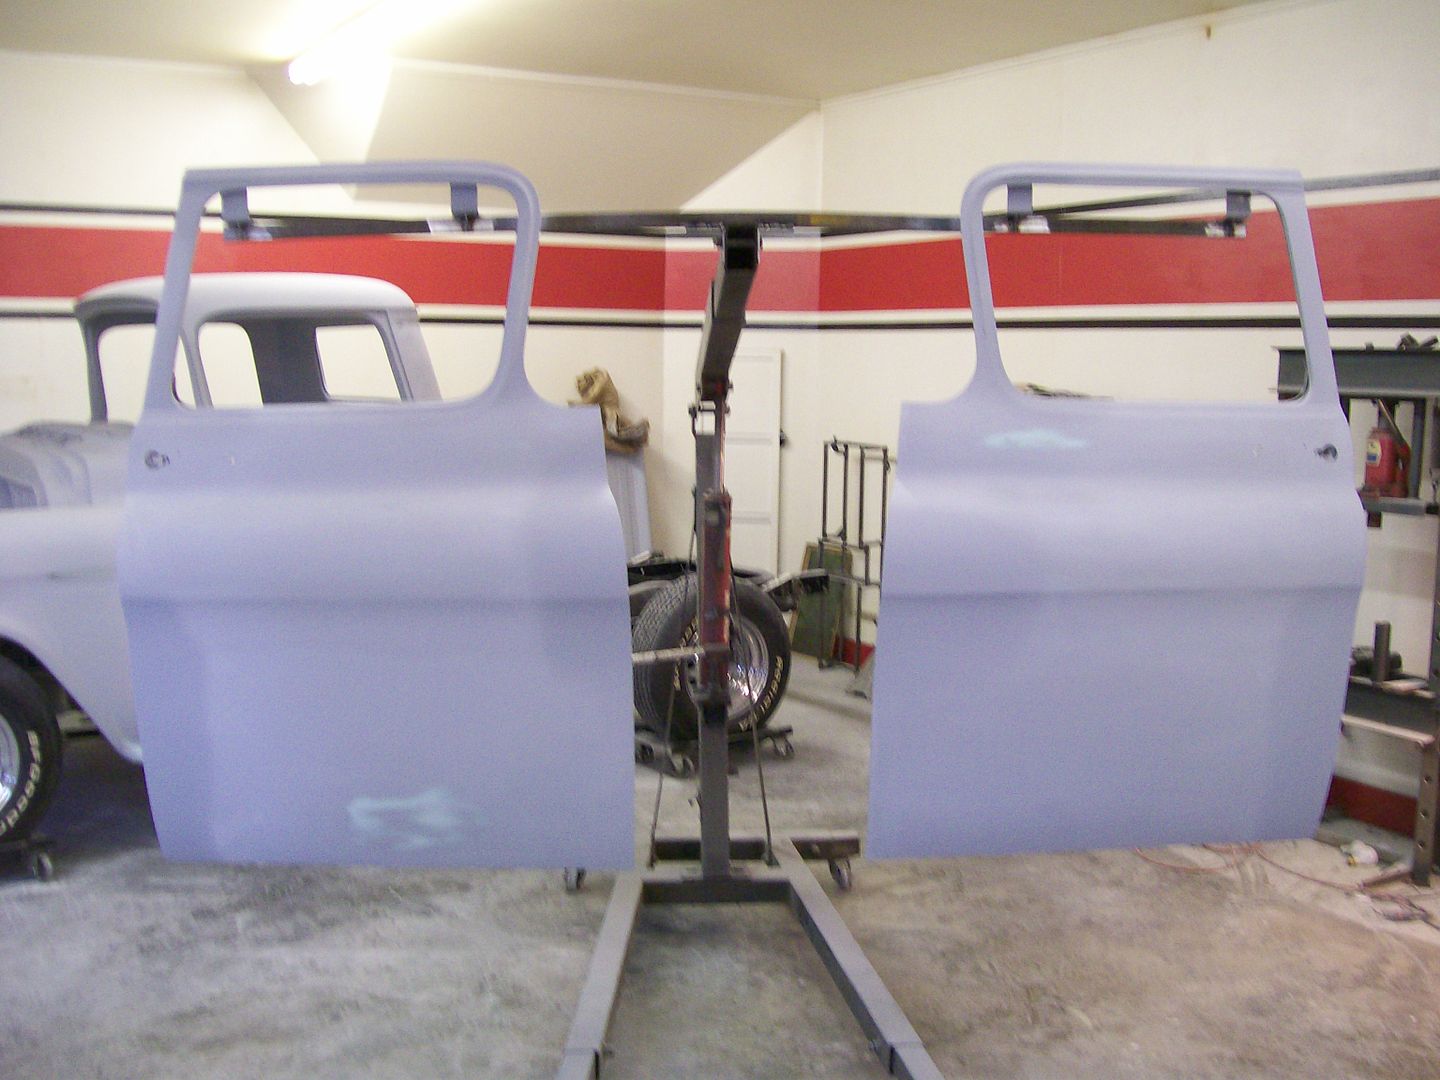 The bar looks to be bending but it's a bent piece I've had for years but couldn't use it due to the bend, it works perfect for this project. The design of the doors work great for this idea. 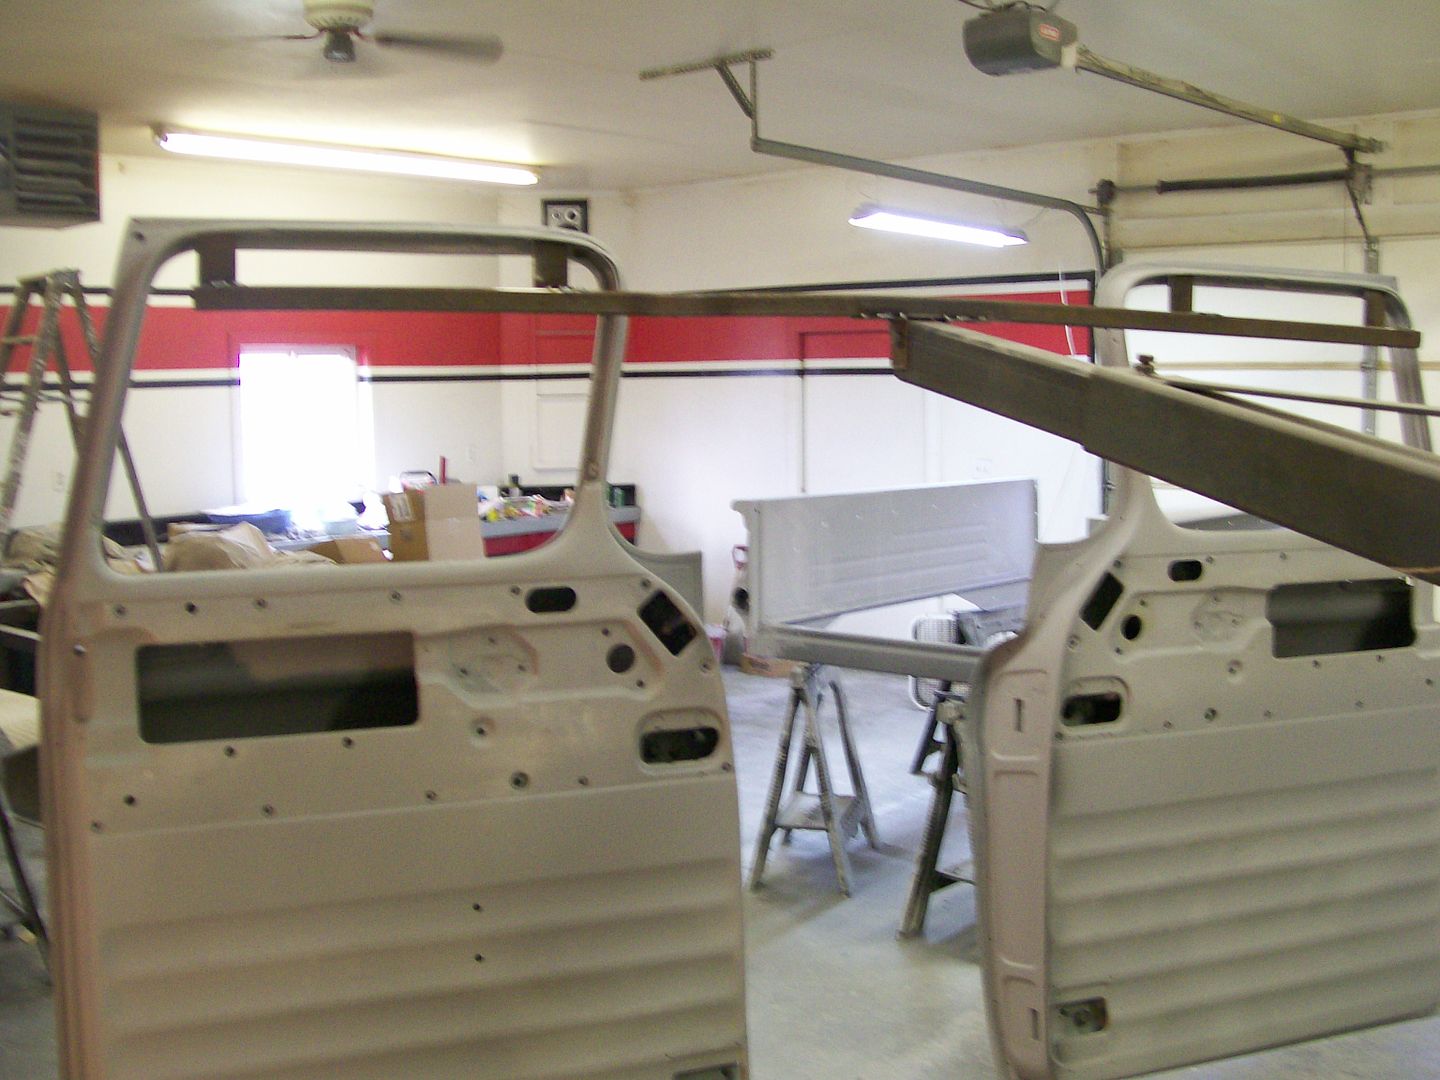 The holders stay within the door frame. 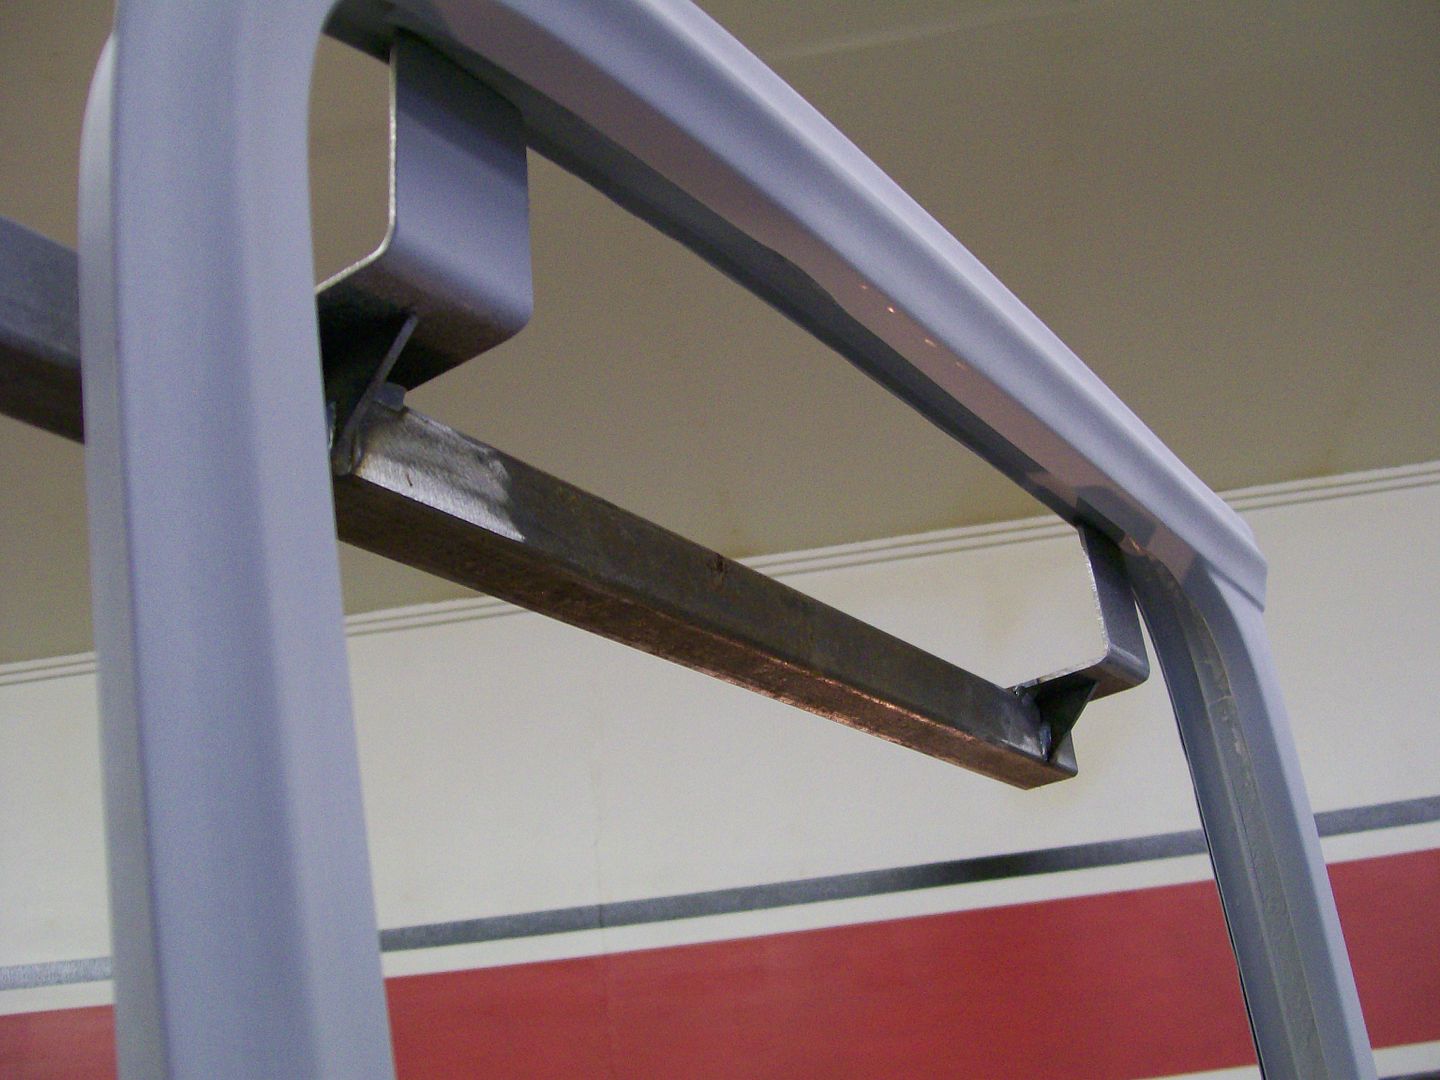 Surprising, I feared when there was only one door on the holder it would tend to fall over, it seems very steady with one door or two on it.
__________________
My 57 Chevy truck build.http://67-72chevytrucks.com/vboard/s...d.php?t=541132 |
|
|

|
|
|
#394 |
|
Registered User
Join Date: Aug 2007
Location: Corona, California
Posts: 7,998
|
Re: 1957 Chevy truck re-rebuild
That's cool. I might have to steal that idea.
Kim |
|
|

|
|
|
#395 |
|
Registered User
Join Date: Feb 2013
Location: Lakeside Ariz
Posts: 445
|
Re: 1957 Chevy truck re-rebuild
Good idea> What color are you going with?
Rich My build http://67-72chevytrucks.com/vboard/s...d.php?t=576185 |
|
|

|
|
|
#396 |
|
Registered User
Join Date: Aug 2012
Location: Salem Mo
Posts: 652
|
Re: 1957 Chevy truck re-rebuild
Hi Kim, that's why I posted the pics
 , these projects are enough work, sharing ideas is what it's all about. , these projects are enough work, sharing ideas is what it's all about.Baldeagle SR, I'm going with two tone Black/Silver. I plan on following the main body line on the cab with black on top and silver lower. I'll split the two colors with a med/bright 1/4" red pin stripe. I plan to carry the colors across the bed as many do, I'll have to drop the line before I reach the back of the cab in order to match up with the body line that goes across the rear fenders. Still planning on gloss black in the cab with flat black vinyl on the door panels seats and the center and floor counsels. The dash has all new chrome switches, and new chrome handles for the doors. This along with the stainless steel trim pieces I've made should give the feeling of a no nonsense performance feel with everything in it's place. Lol, now it's time to make my dream come true... 
__________________
My 57 Chevy truck build.http://67-72chevytrucks.com/vboard/s...d.php?t=541132 |
|
|

|
|
|
#397 |
|
Registered User
Join Date: Aug 2012
Location: Salem Mo
Posts: 652
|
Re: 1957 Chevy truck re-rebuild
On the progress side I'm still on the tear down mode and checking the fit of most of the parts, I'm trying to eliminate possible headaches during the reassemble time.
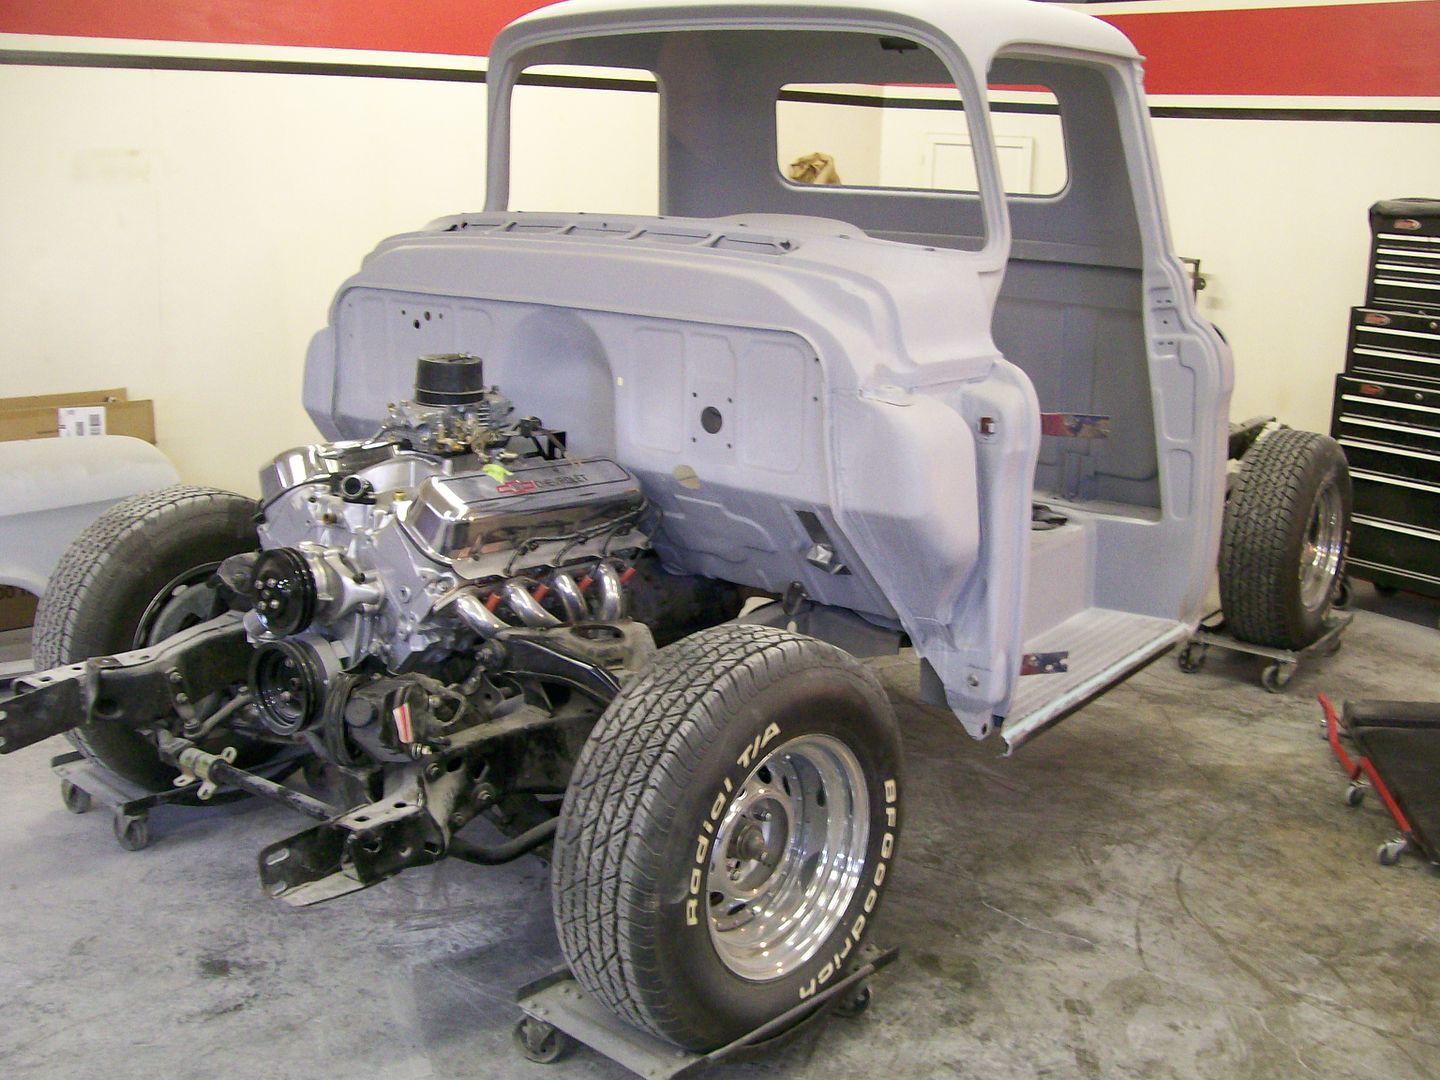 It's one busy cherry picker. 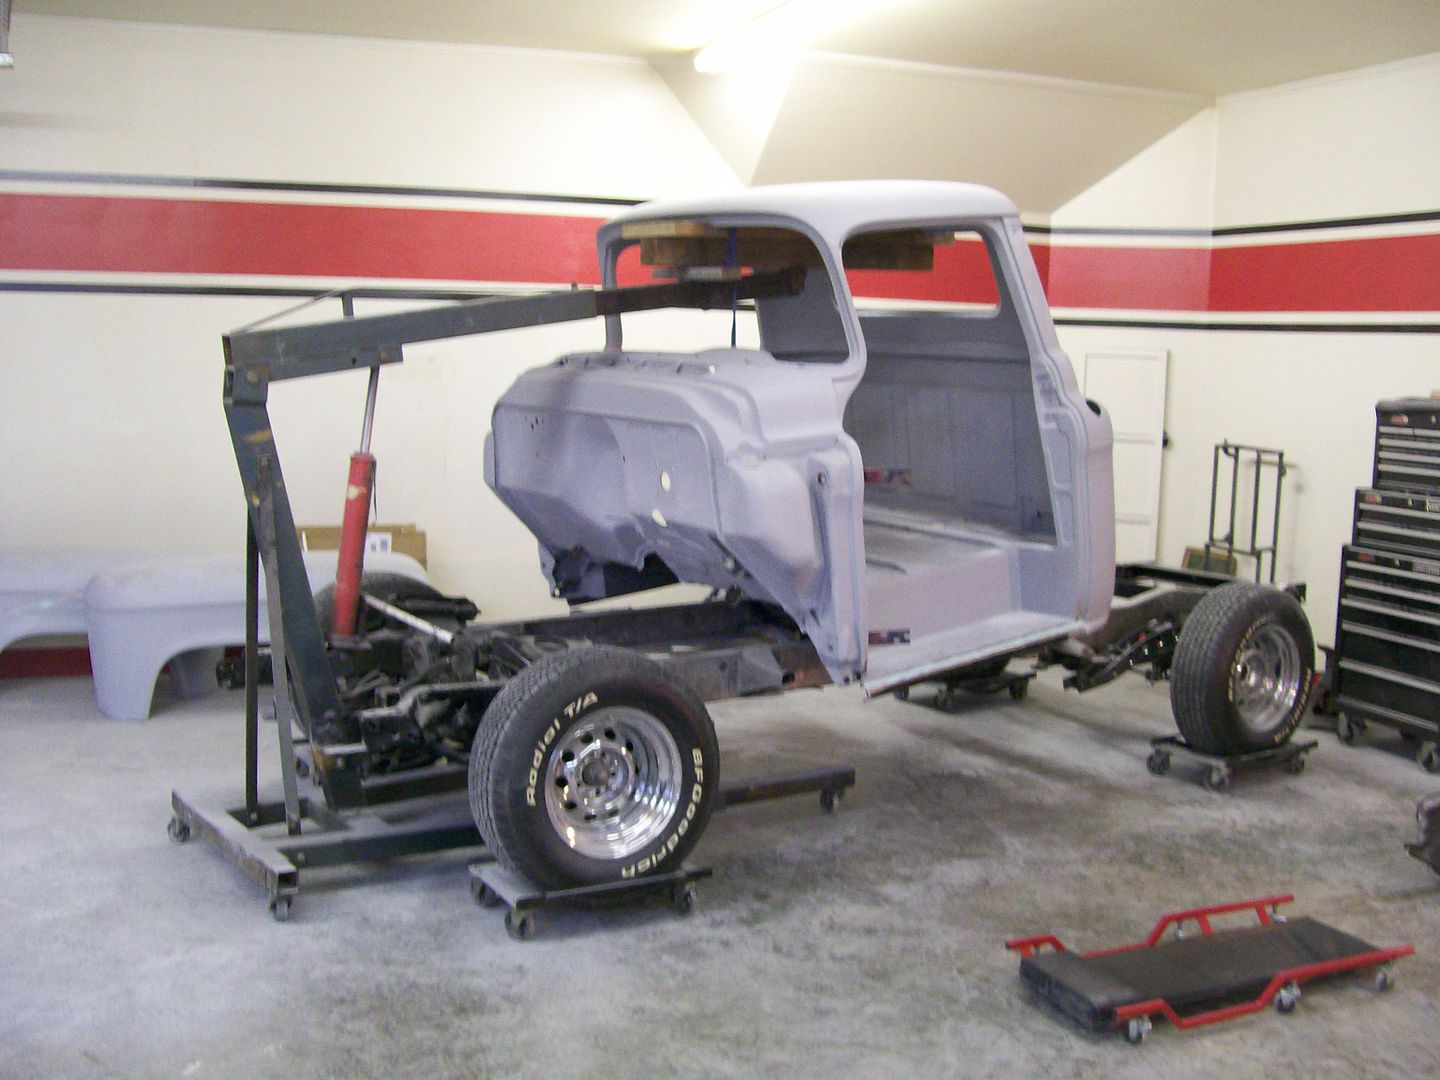 I rolled the frame outside and sand blasted most of it. There are a few areas I wanted to weld and this sand blasting gave me good clean areas to weld. 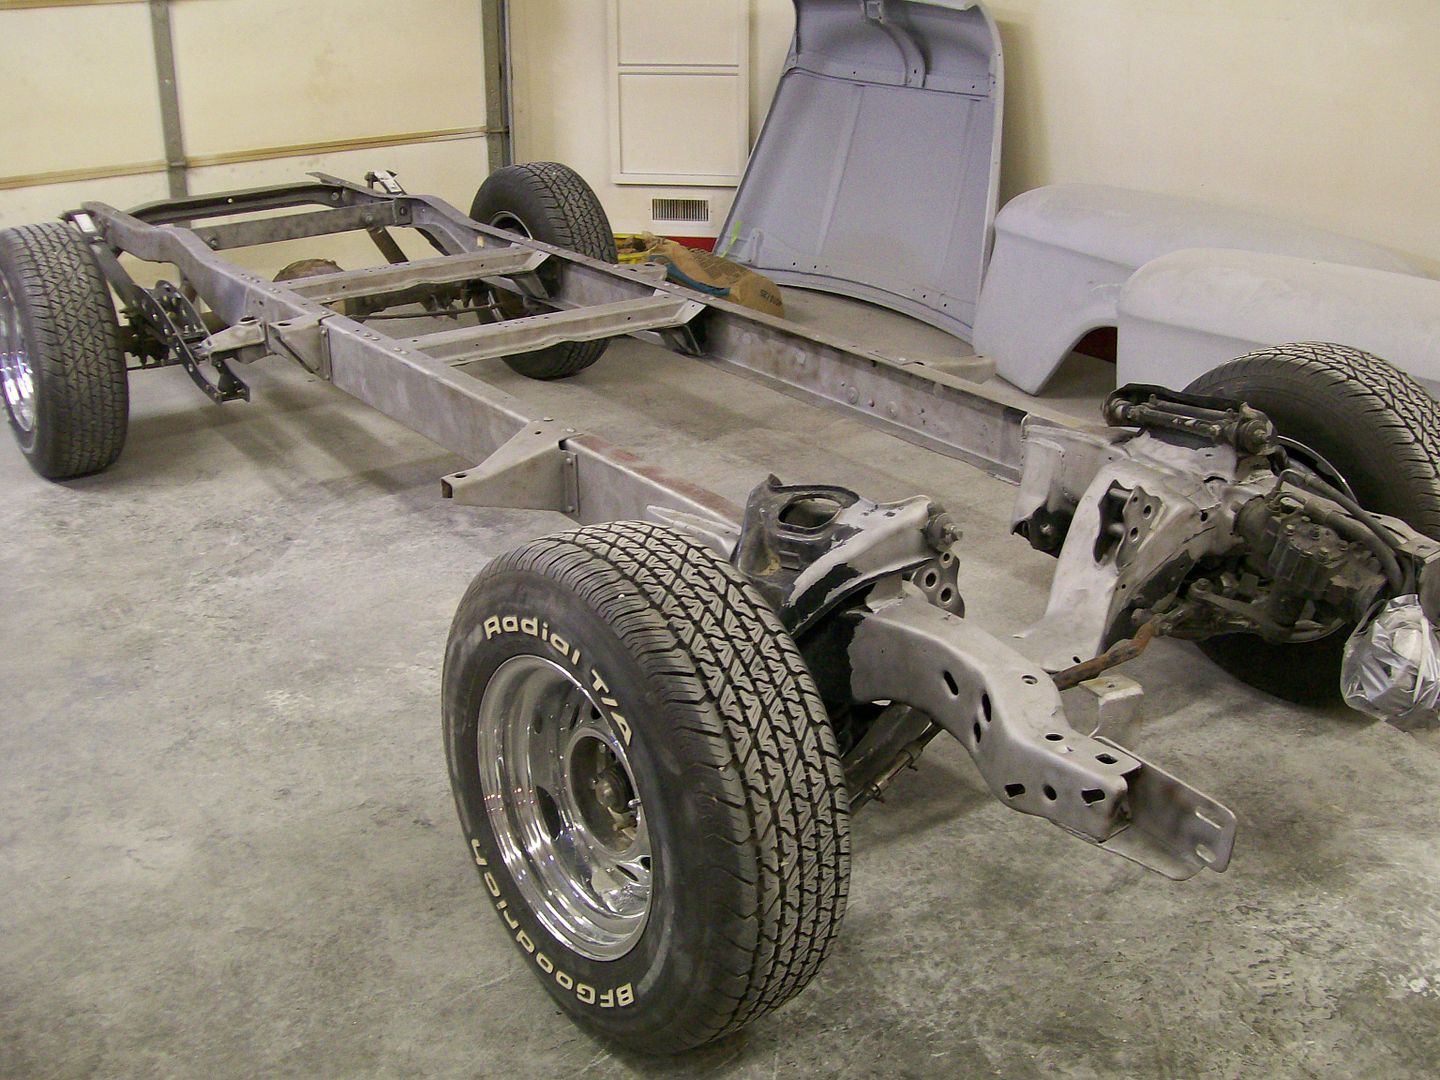 After the welding I'll roll it back out and re-blast these welded areas, I just like the fresh clean look of the blasted metal.
__________________
My 57 Chevy truck build.http://67-72chevytrucks.com/vboard/s...d.php?t=541132 |
|
|

|
|
|
#398 |
|
Registered User
Join Date: Aug 2007
Location: Corona, California
Posts: 7,998
|
Re: 1957 Chevy truck re-rebuild
It's looking good.
Kim |
|
|

|
|
|
#399 | |
|
Registered User
Join Date: Feb 2013
Location: Lakeside Ariz
Posts: 445
|
Re: 1957 Chevy truck re-rebuild
Quote:
|
|
|
|

|
|
|
#400 |
|
A320 Pilot/USAF Retired
Join Date: Mar 2009
Location: Charleston, SC
Posts: 2,629
|
Re: 1957 Chevy truck re-rebuild
Nice!
__________________
JJ My 1957 build: http://67-72chevytrucks.com/vboard/s...d.php?t=334552 http://www.trifive.com/forums/showthread.php?t=22037 Instagram - Chuckdriver57 |
|
|

|
 |
| Bookmarks |
|
|