
|
|
|
 03-23-2015, 01:54 PM
|
#1 |
|
Registered User
Join Date: Jan 2013
Location: Leonardtown, MD
Posts: 1,637
|
Re: 55 Wagon Progress
Progress from this past Wednesday..... Got the 55 moved into the paint booth....
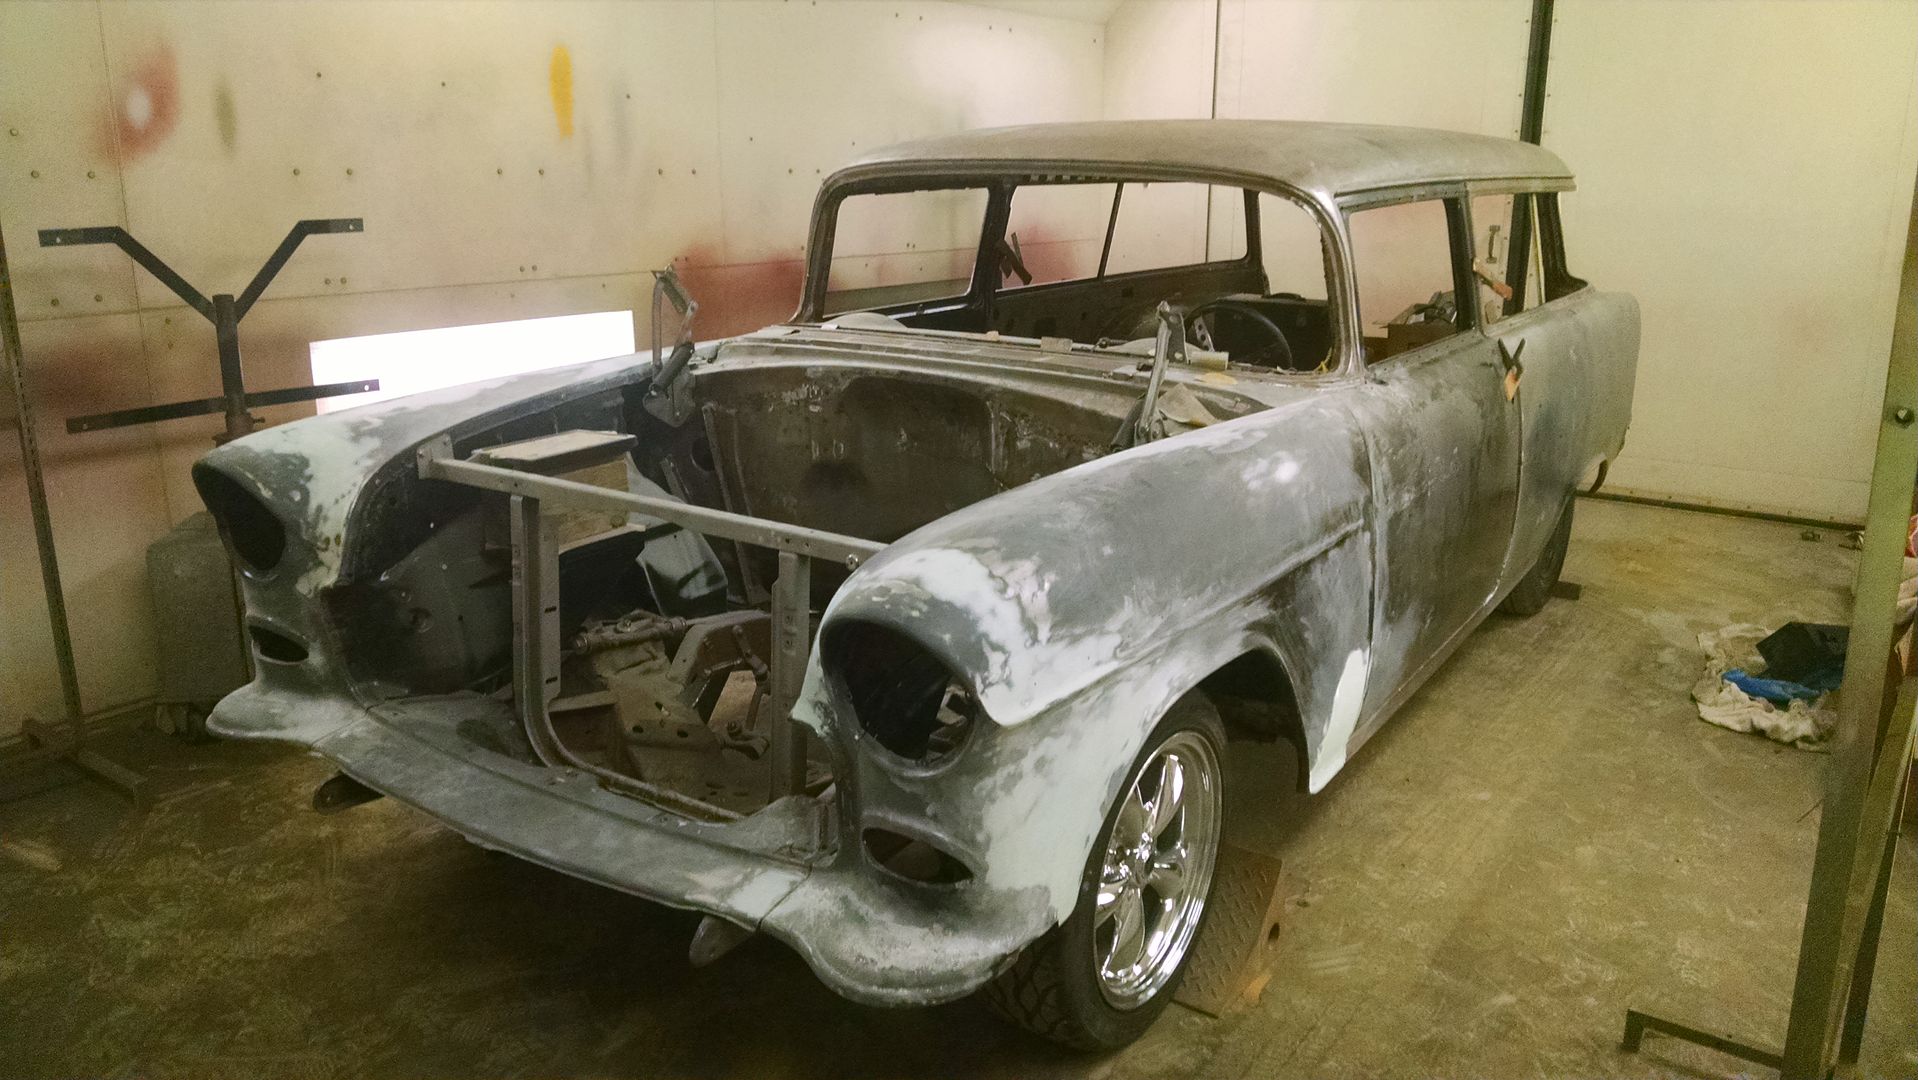 .....but only temporarily, not quite ready for paint yet.. Shuffling some stuff around to make room for bringing in the new shear on Saturday, and needed the car out of the way. The new shear is just shy of 7 feet long, so it wouldn't fit in the same spot as the old one without moving something else as well. In measuring the tool box, it looked like a good fit in that spot, so moving it and the kick shrinker will make a better spot for the new shear against the back wall. 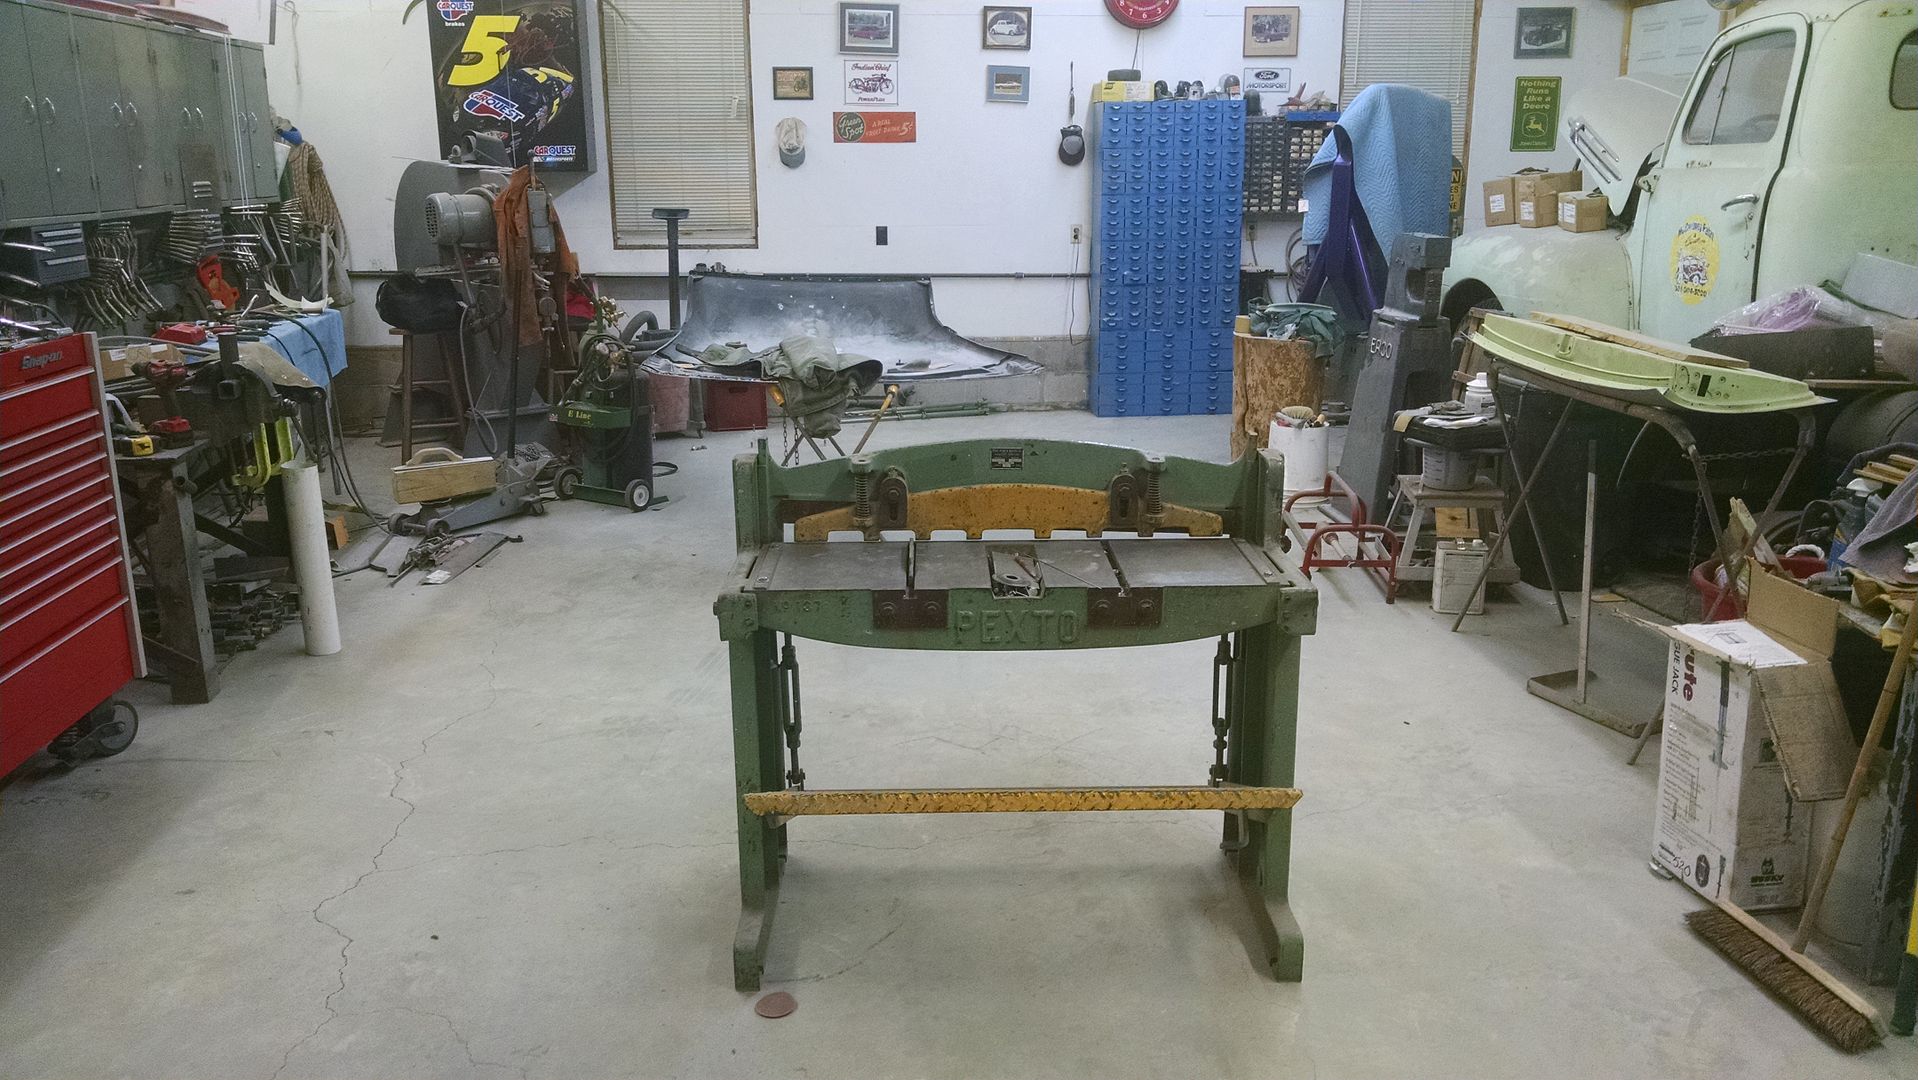 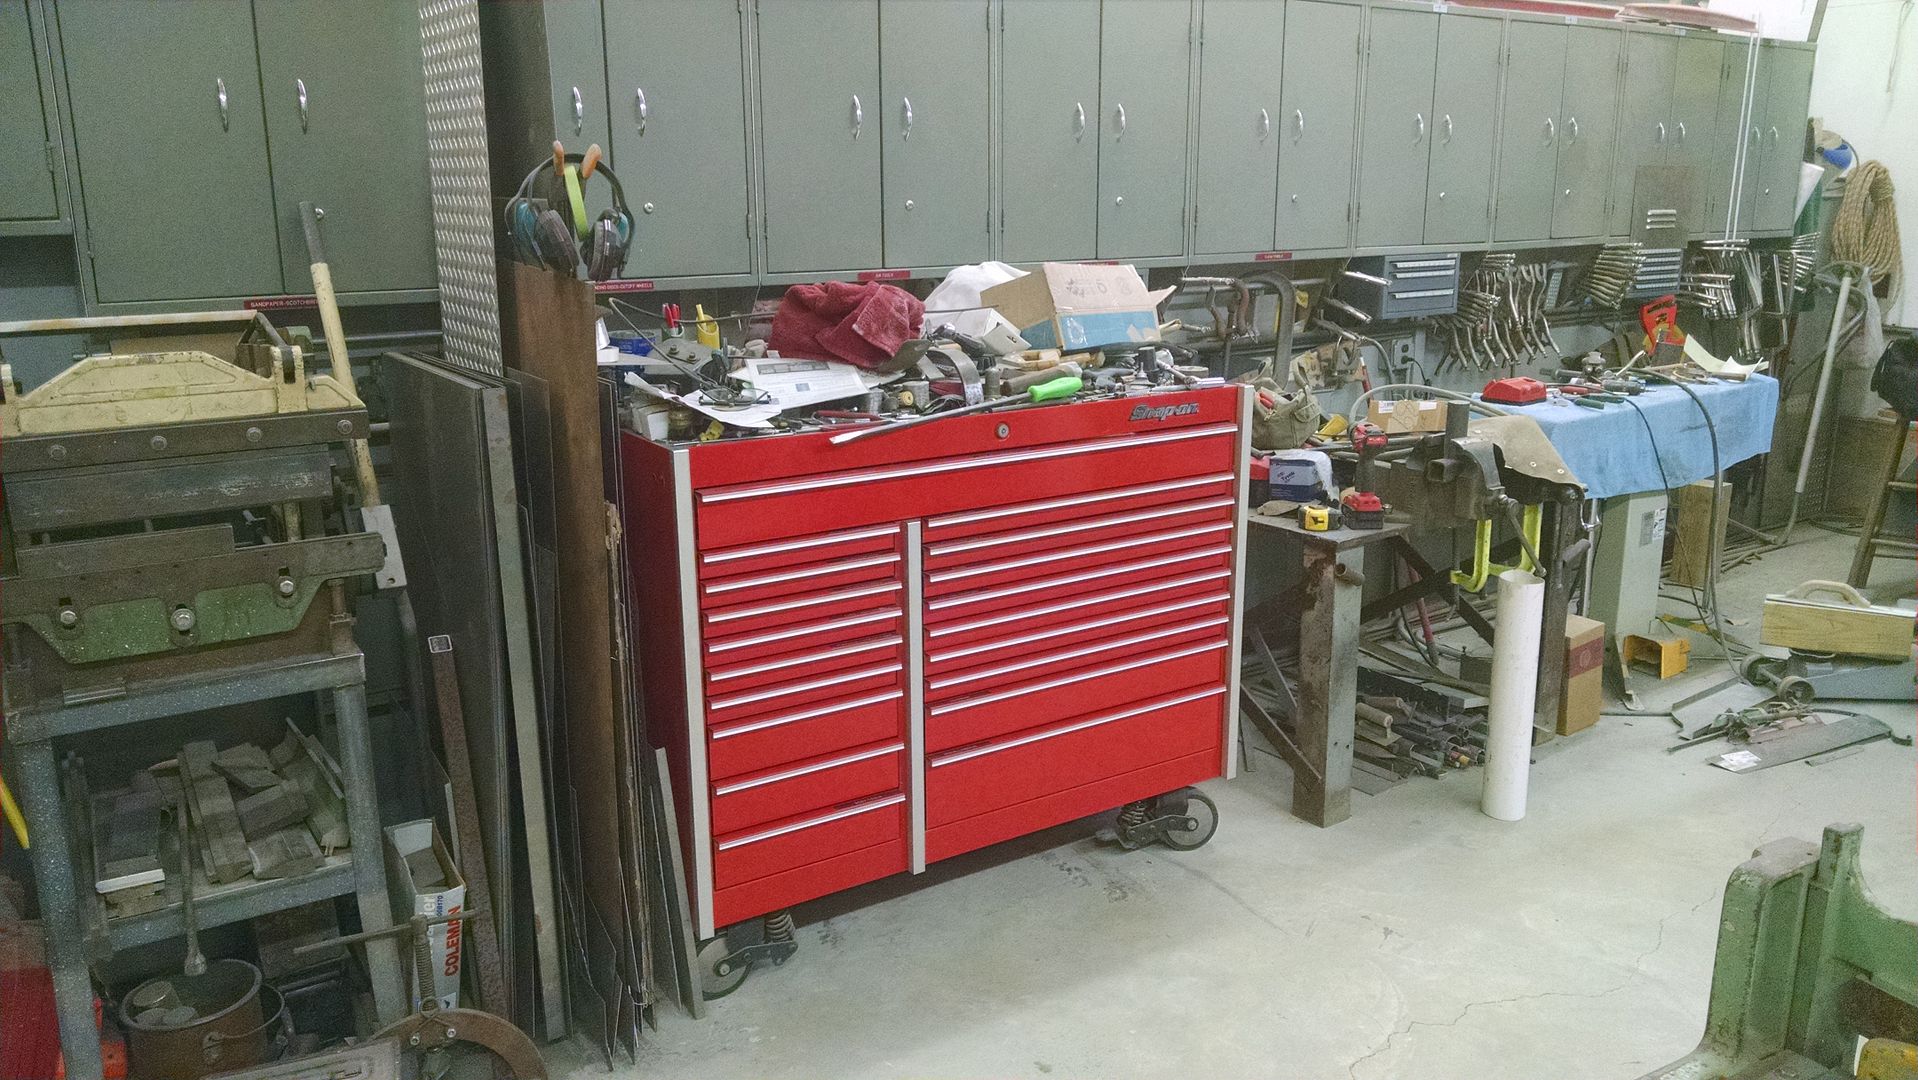  .....and as we haven't used the radial arm drill press in over a year, I think that's getting ready to go on CL to make room for the planishing hammer, when that gets finished up..
__________________
Robert |

|

|
|
03-23-2015, 01:56 PM
|
#2 |
|
Registered User
Join Date: Jan 2013
Location: Leonardtown, MD
Posts: 1,637
|
Re: 55 Wagon Progress
This past Saturday morning started at my brother-in-laws to pick up the new shear. It's been parked in his garage since the week before while my driveway has been drying out..
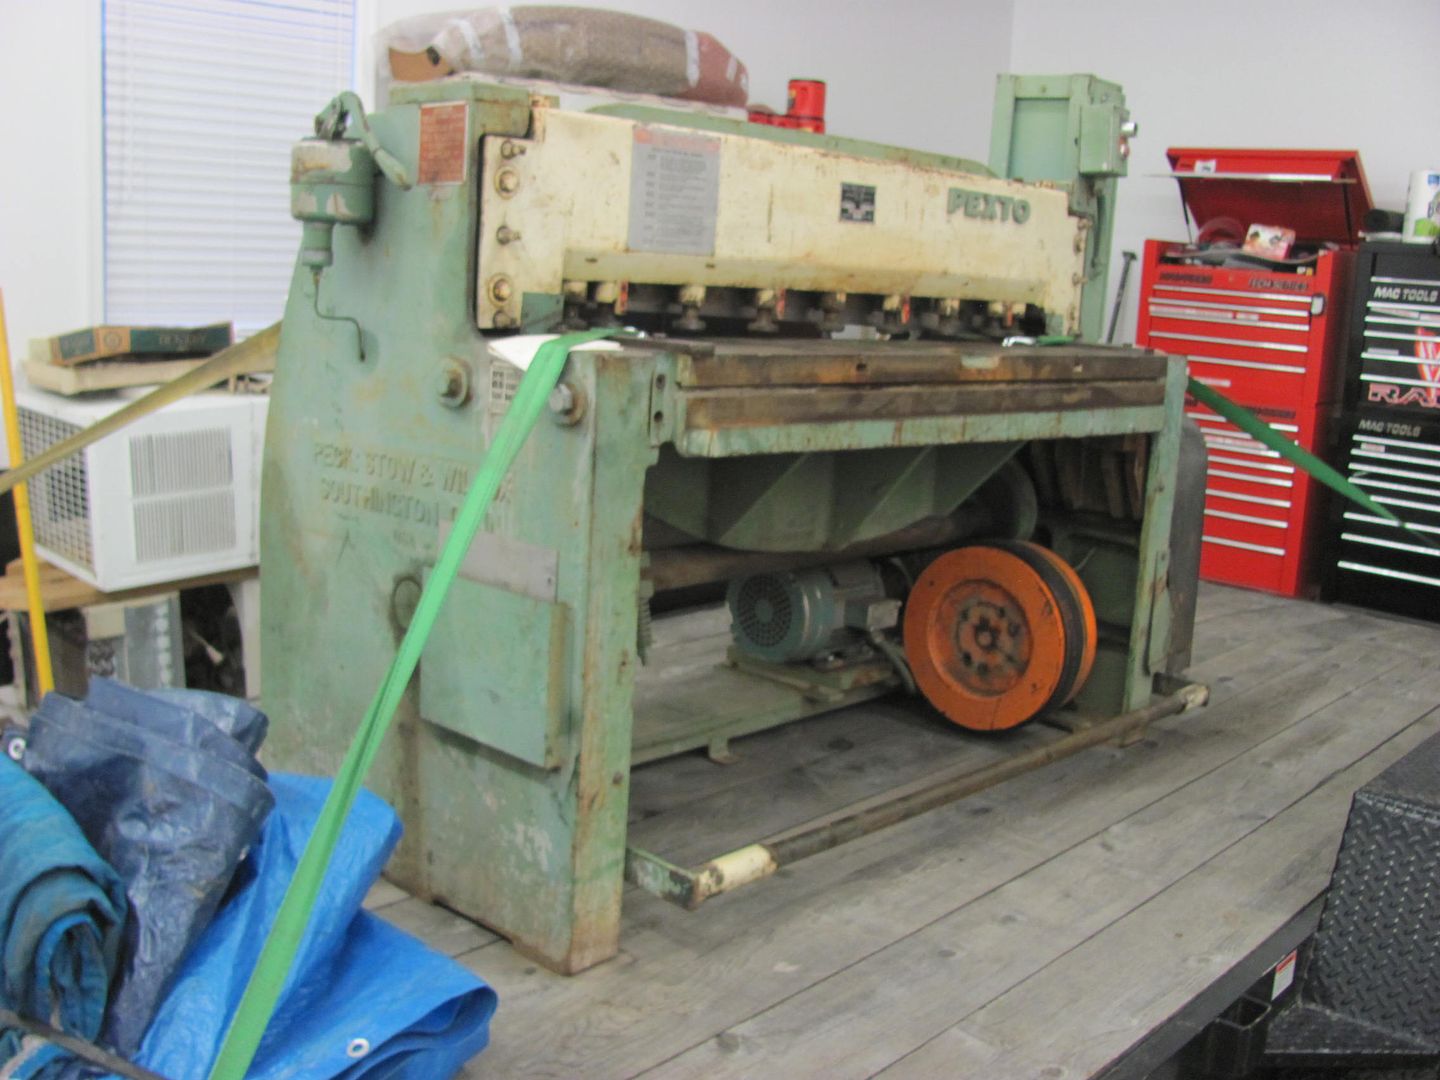 Here's his El Camino project, narrowing the frame rails in the rear....  One of the neighbors a few miles down the road has a Pettibone forklift. I had him lined up to help lift the shear off the trailer today. He made it about 1/4 mile and had the brakes locking up and frying, so we had to back up and punt. Another buddy has a skid steer with the fork attachment, but the shear was on his trailer. So we dropped off the trailer/shear at the shop, went and got another trailer and picked up the skid steer.. I will say this shear is about at the limits of the lifting capacity of this skid steer, the back end was trying to go airborne when lifting it off the trailer. So we inched it up in the air and then pulled the trailer out from under it. Here's the placement... 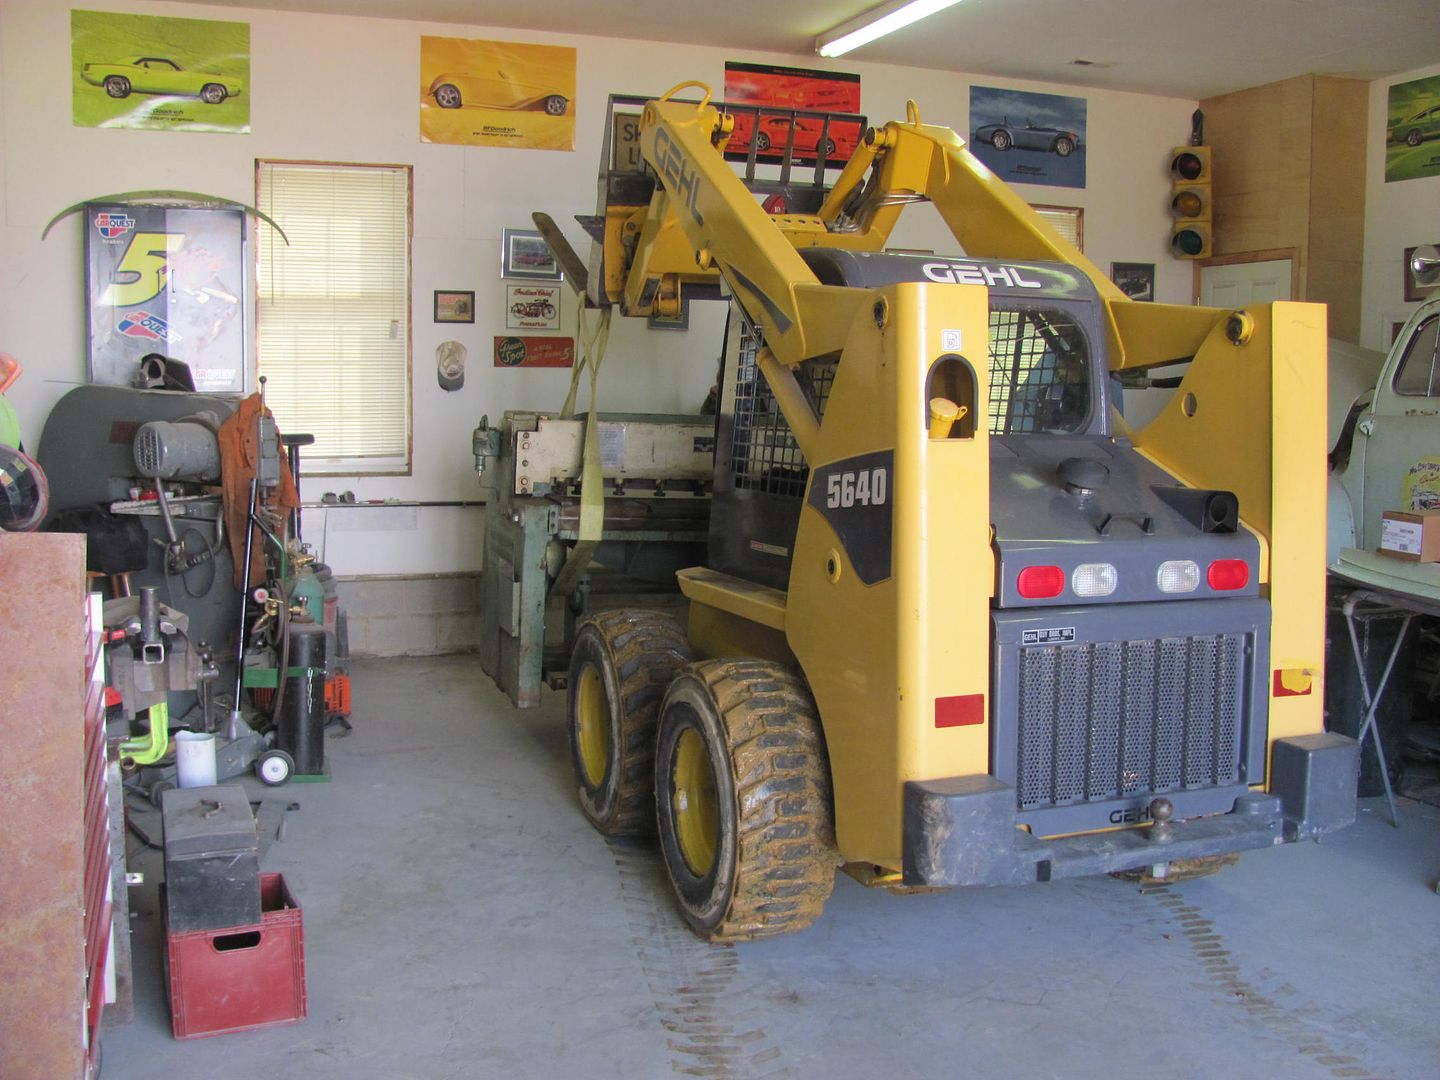 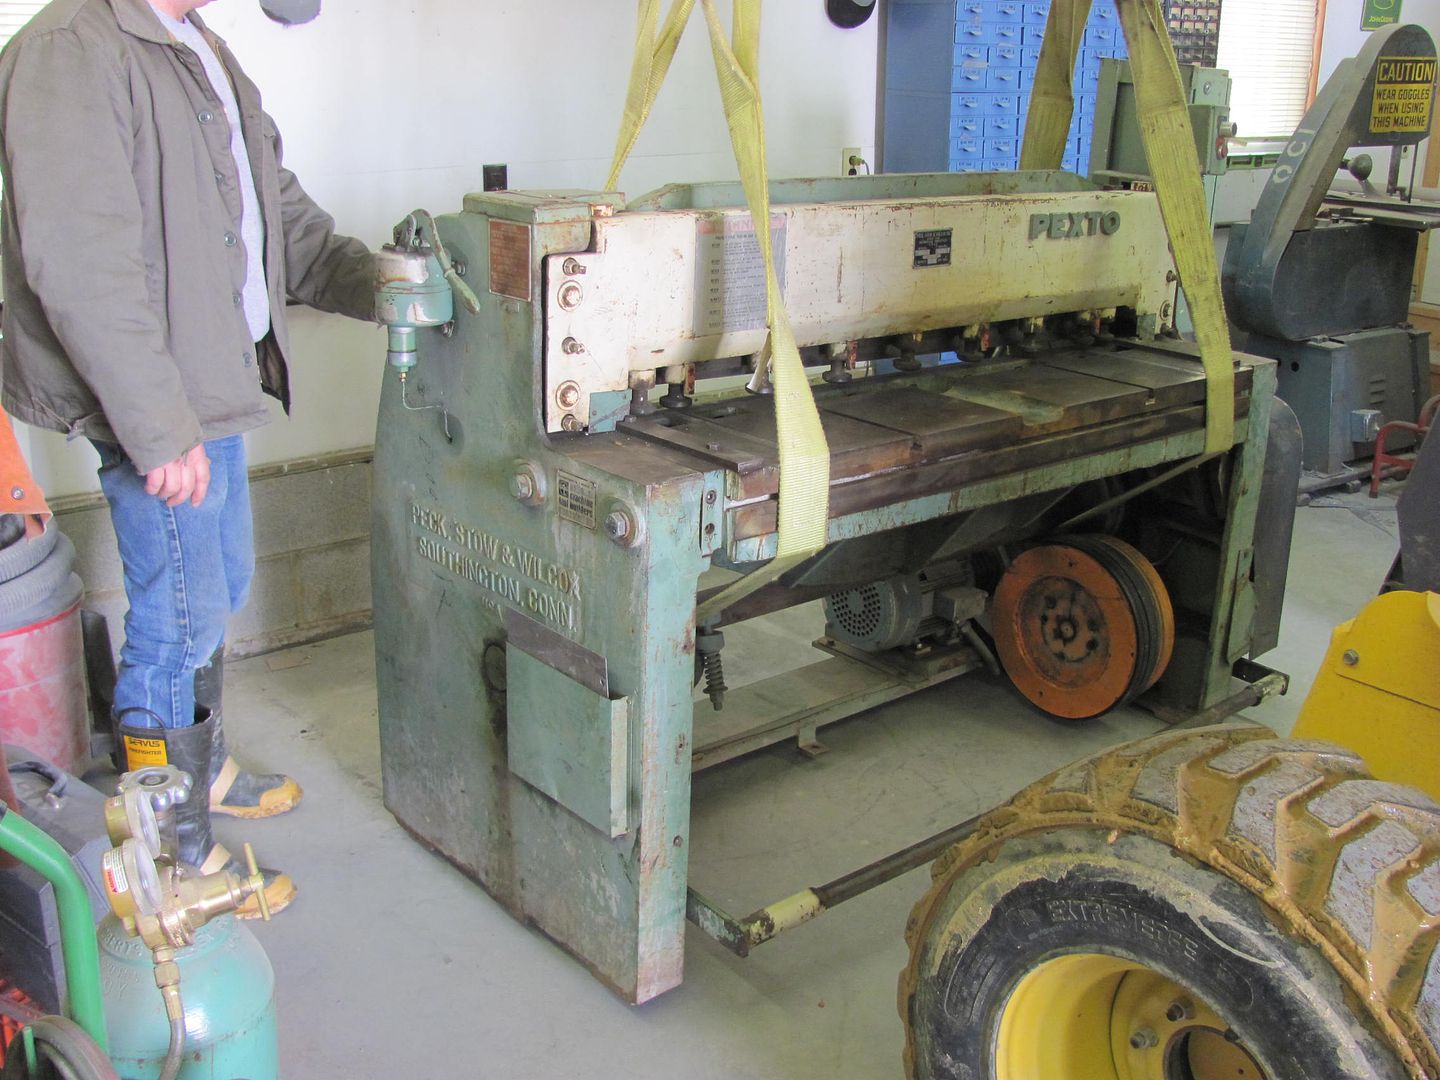 Now just need to finish the electrical hookup... 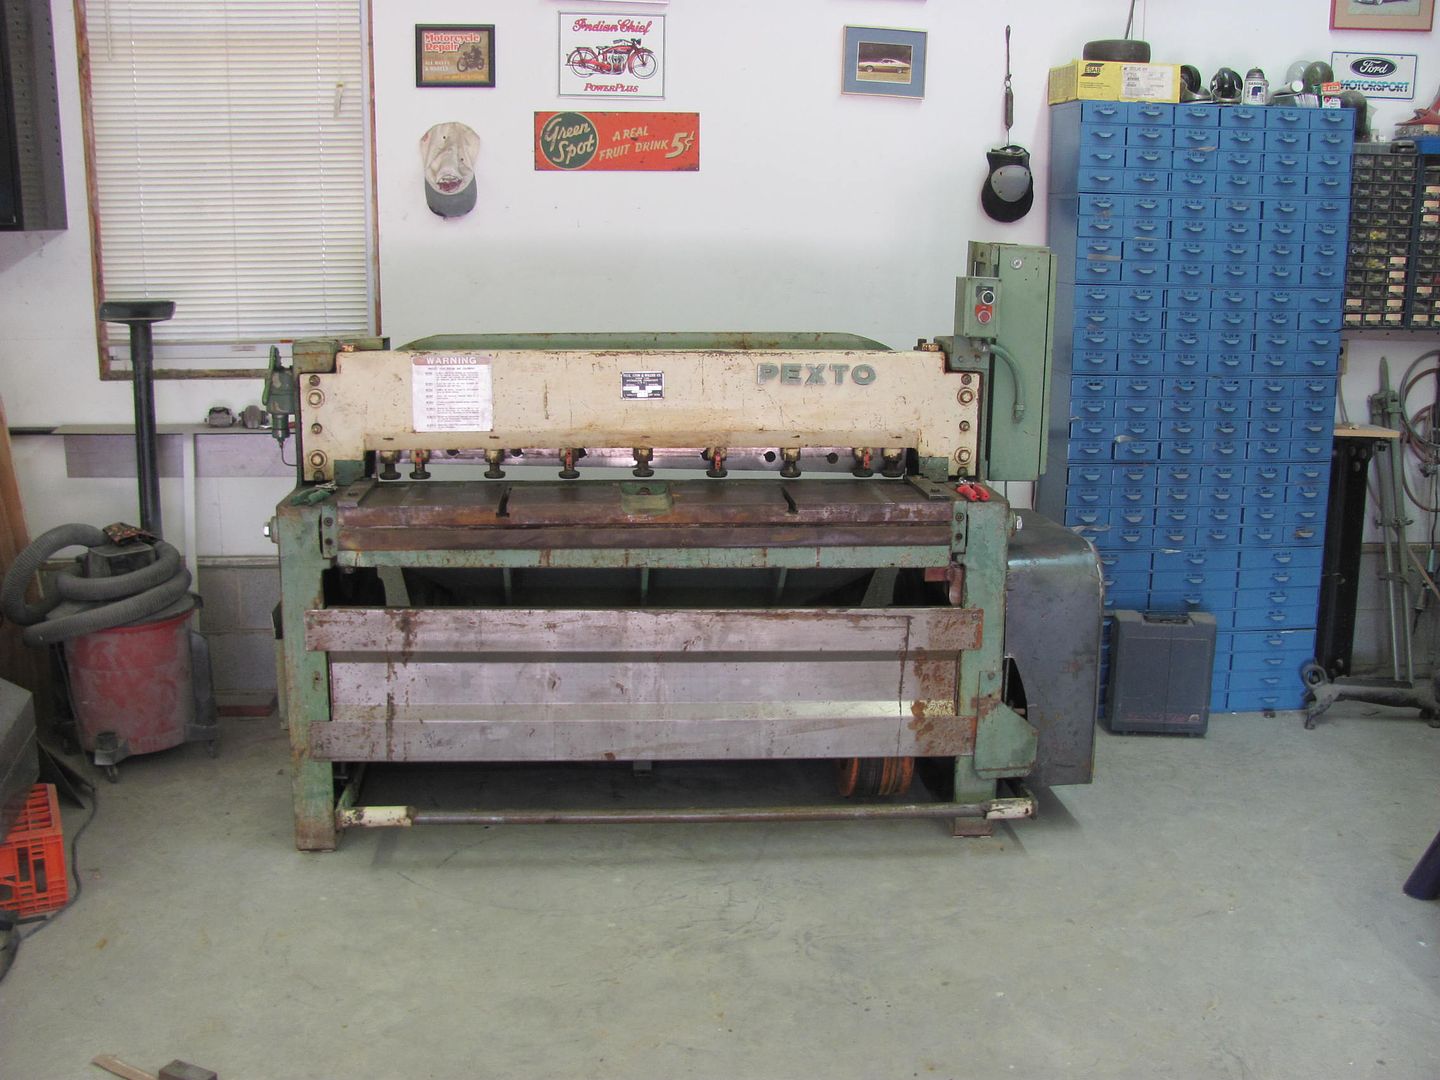
__________________
Robert |
|
|
|
|
03-23-2015, 08:25 PM
|
#3 |
|
Registered User
 Join Date: May 2007
Location: Deale Md
Posts: 4,663
|
Re: 55 Wagon Progress
I'll have to re read this BIG update
__________________
James 63 GMC V6 4speed carryall 65 chevy swb bbw V8 auto 68 K20 327/4 speed, buddy buckets 2002 GMC CC Dually Duramax 64 GMC lwb 3/4 V6 4speed SOLD 66 GMC swb bbw buddy buckets SOLD IG duallyjams The only thing that stays the same is constant change! |
|
|
|
|
03-23-2015, 09:37 PM
|
#4 |
|
Senior Member
Join Date: Mar 2011
Location: West Plains, Missouri
Posts: 7,555
|
Re: 55 Wagon Progress
Great story, love the tools...Jim
__________________
my build thread: http://67-72chevytrucks.com/vboard/s...d.php?t=459839 Jimbo's long bed step build:http://67-72chevytrucks.com/vboard/s...t=464626<br /> |
|
|
|
|
03-23-2015, 11:39 PM
|
#5 |
|
Registered User
Join Date: Jan 2013
Location: Leonardtown, MD
Posts: 1,637
|
Re: 55 Wagon Progress
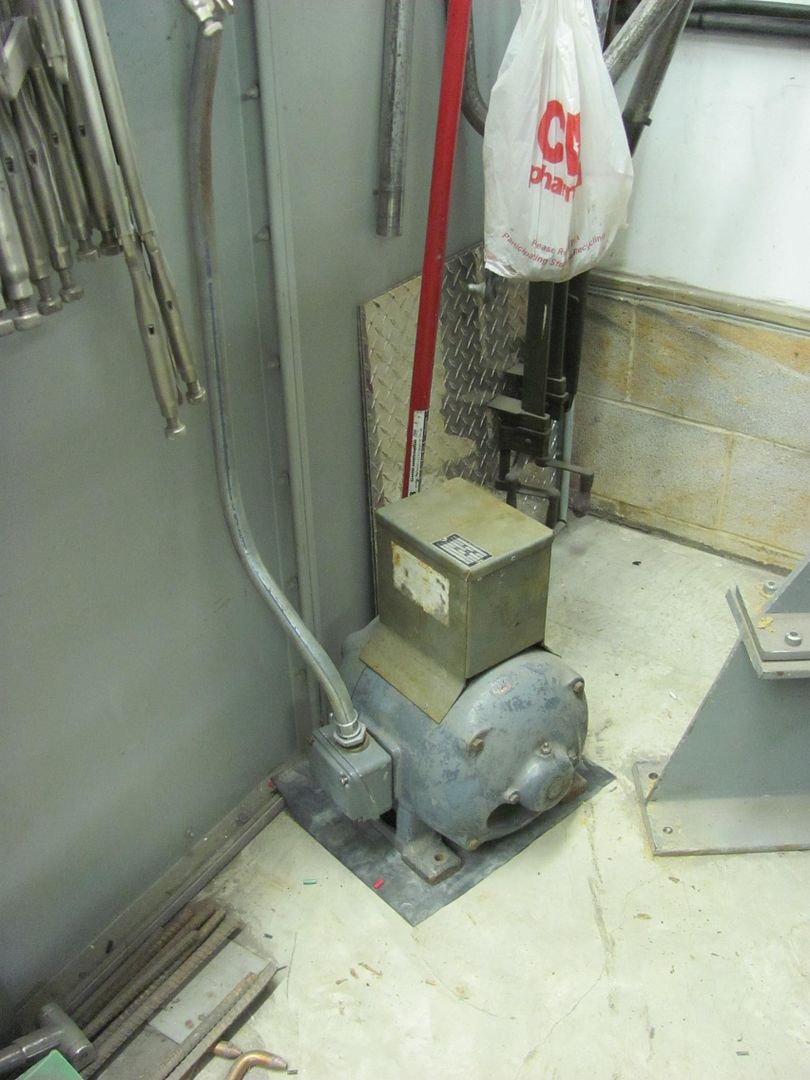
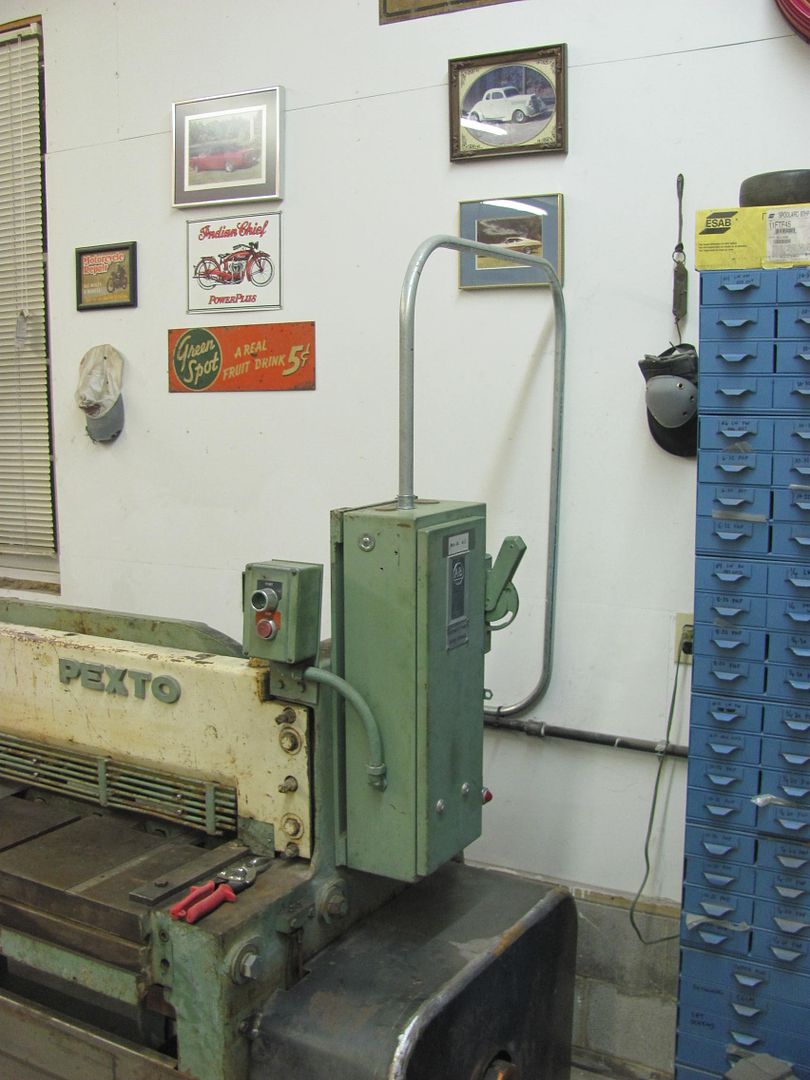
Got some electrical work done this evening, wired up the phase converter first, checked the voltage, then wired up the shear..
  When I went to Minnesota to pick up the shear, I noticed that Dan had a couple pair of snips laying on the shear.. Didn't put two and two together at first. 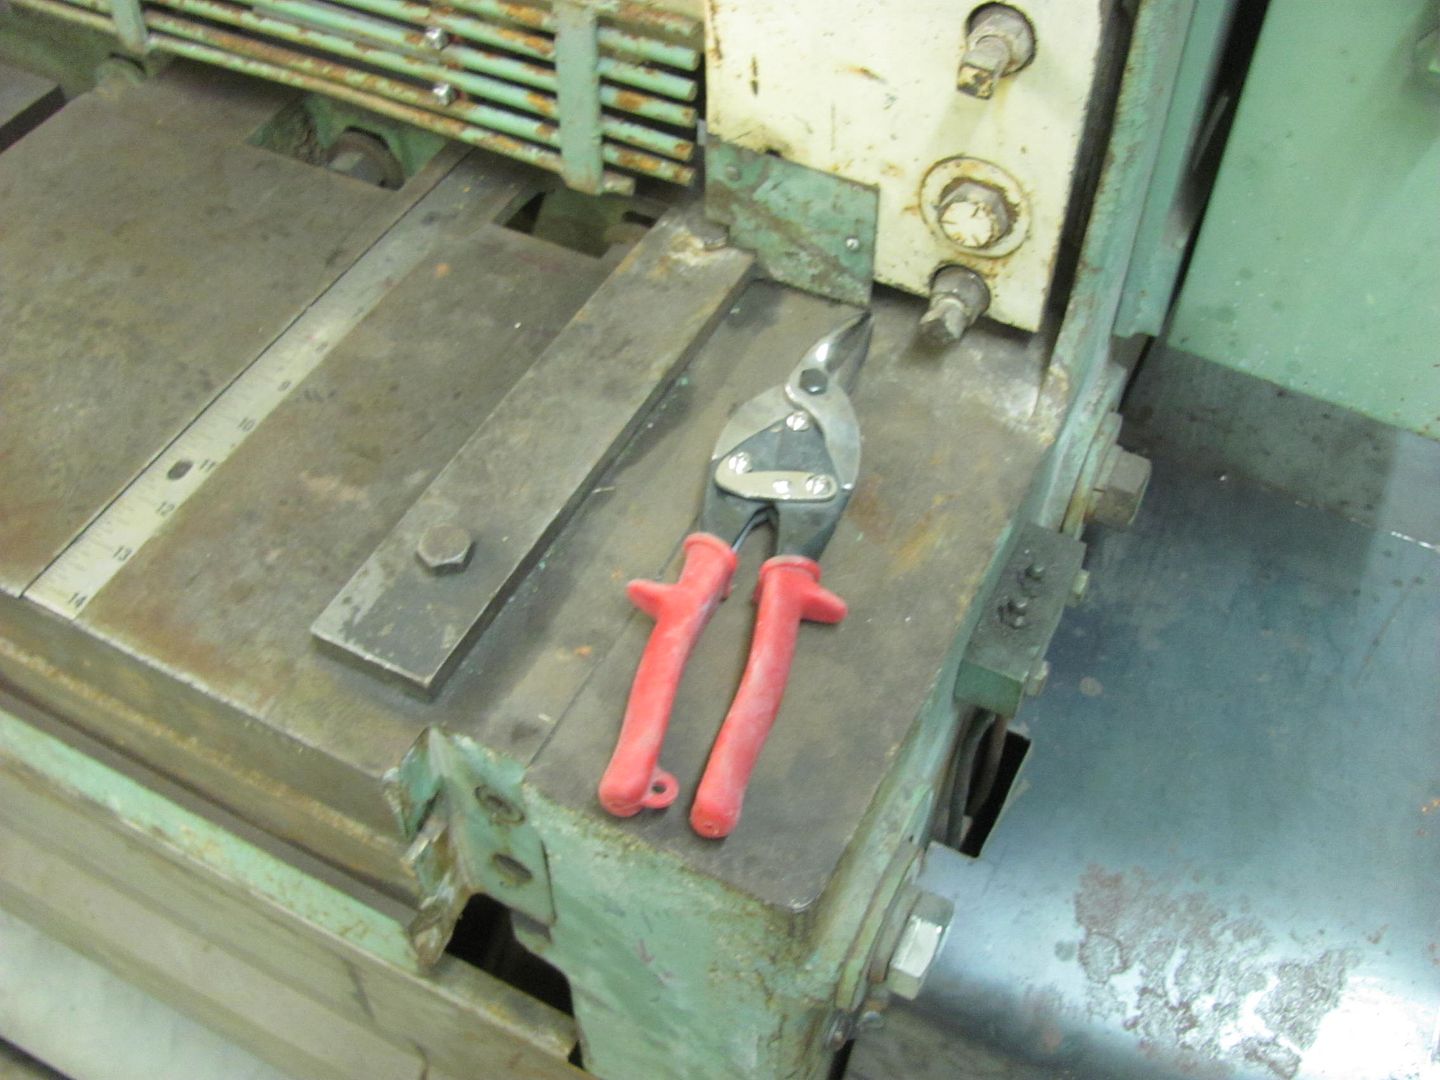 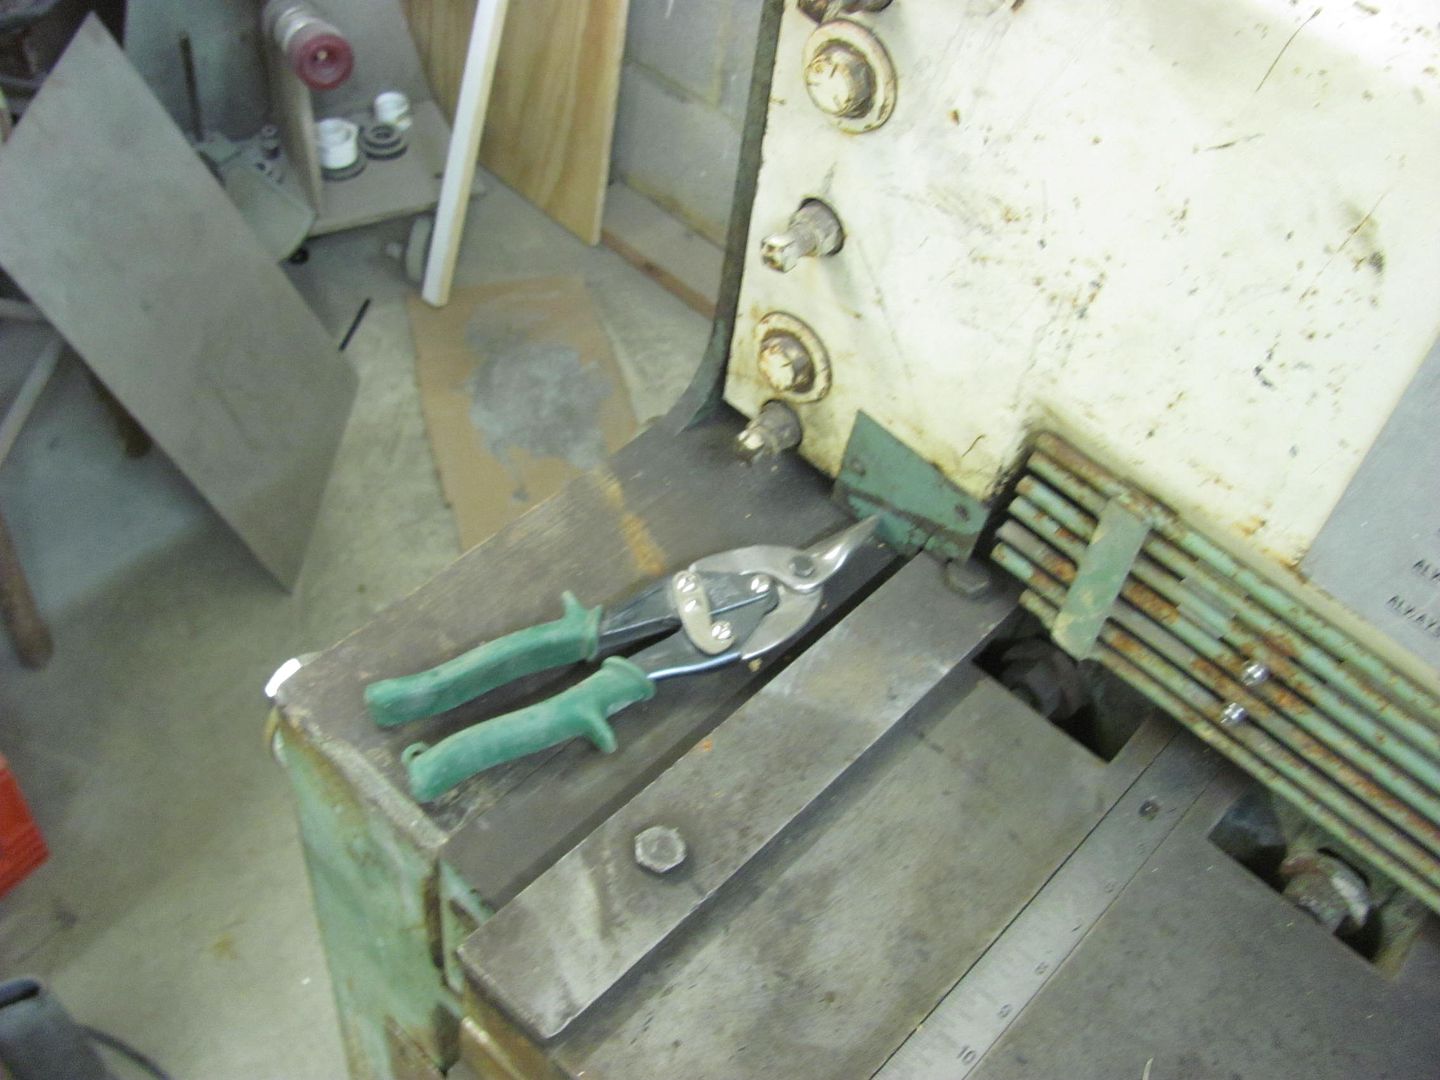 He had the shear installed without the back gauge due to the space requirements, and I had even less shop room than he did. This is where the snips come in. Mark your panel for the cut line... 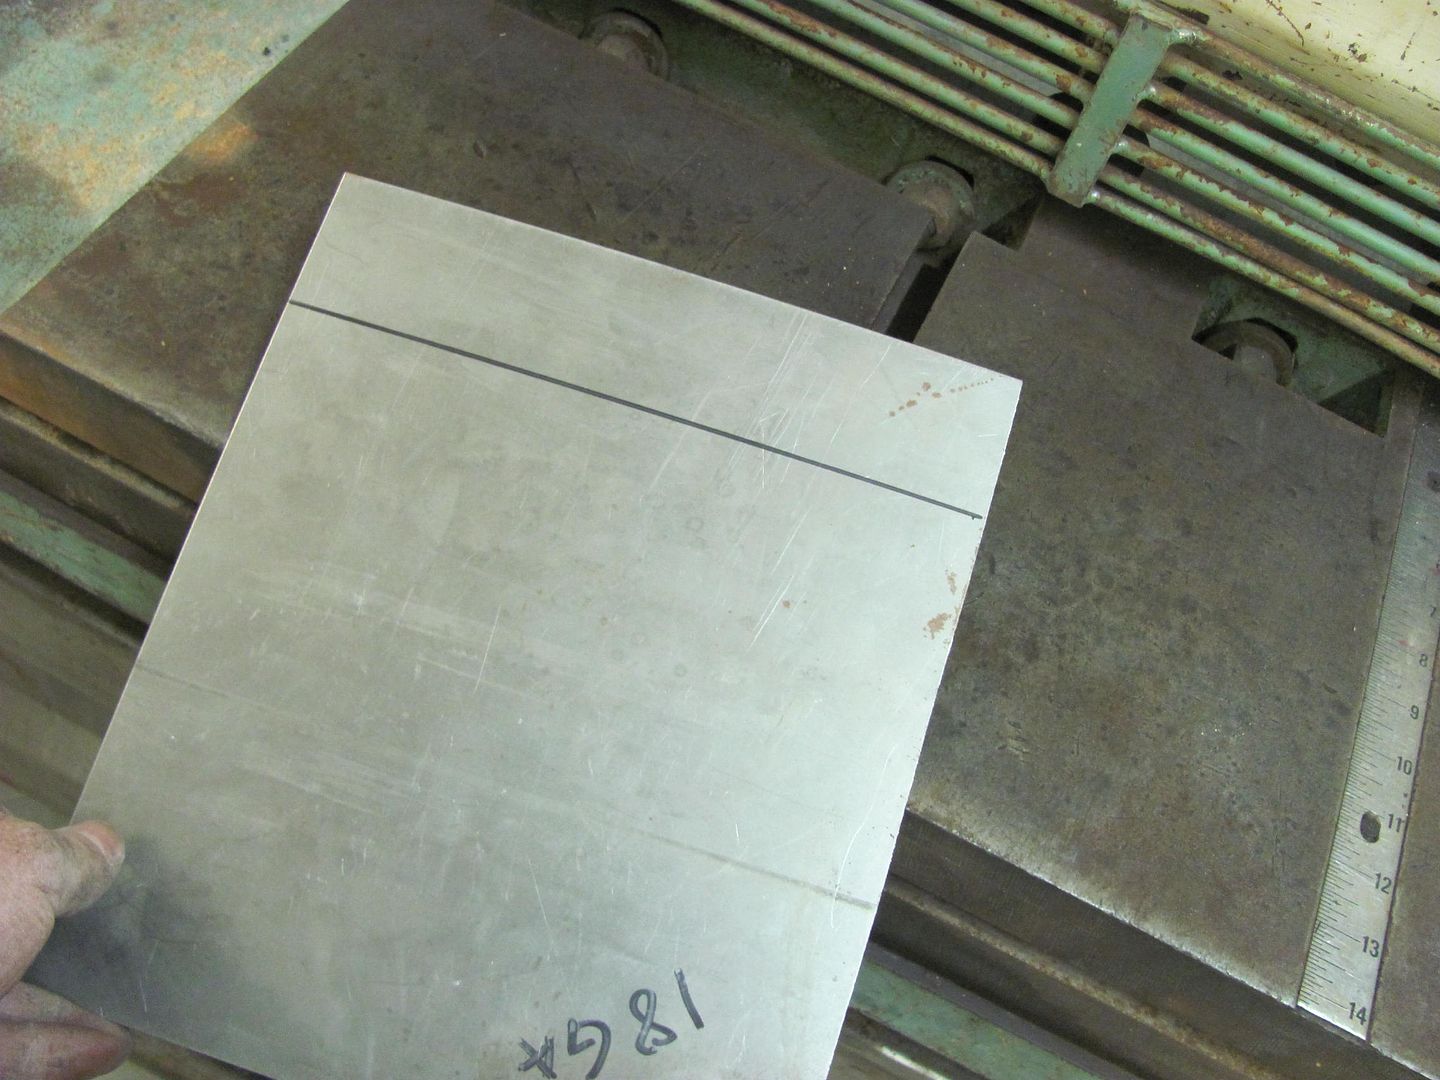 Use the red shears to make a slight cut on the right side of the panel.... 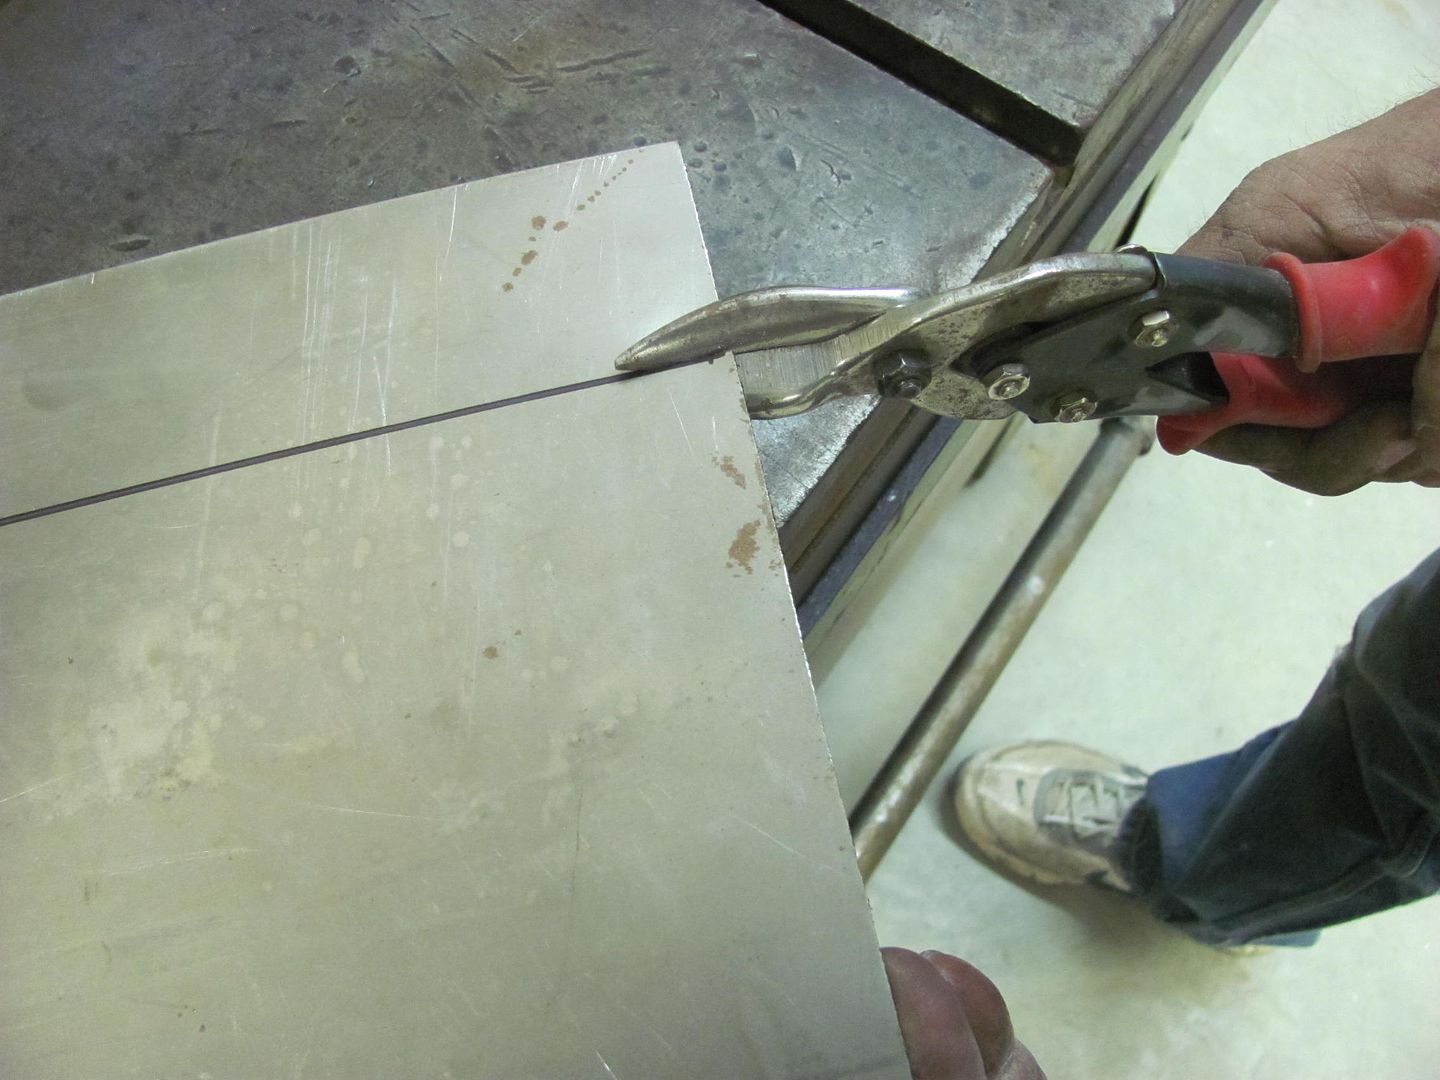 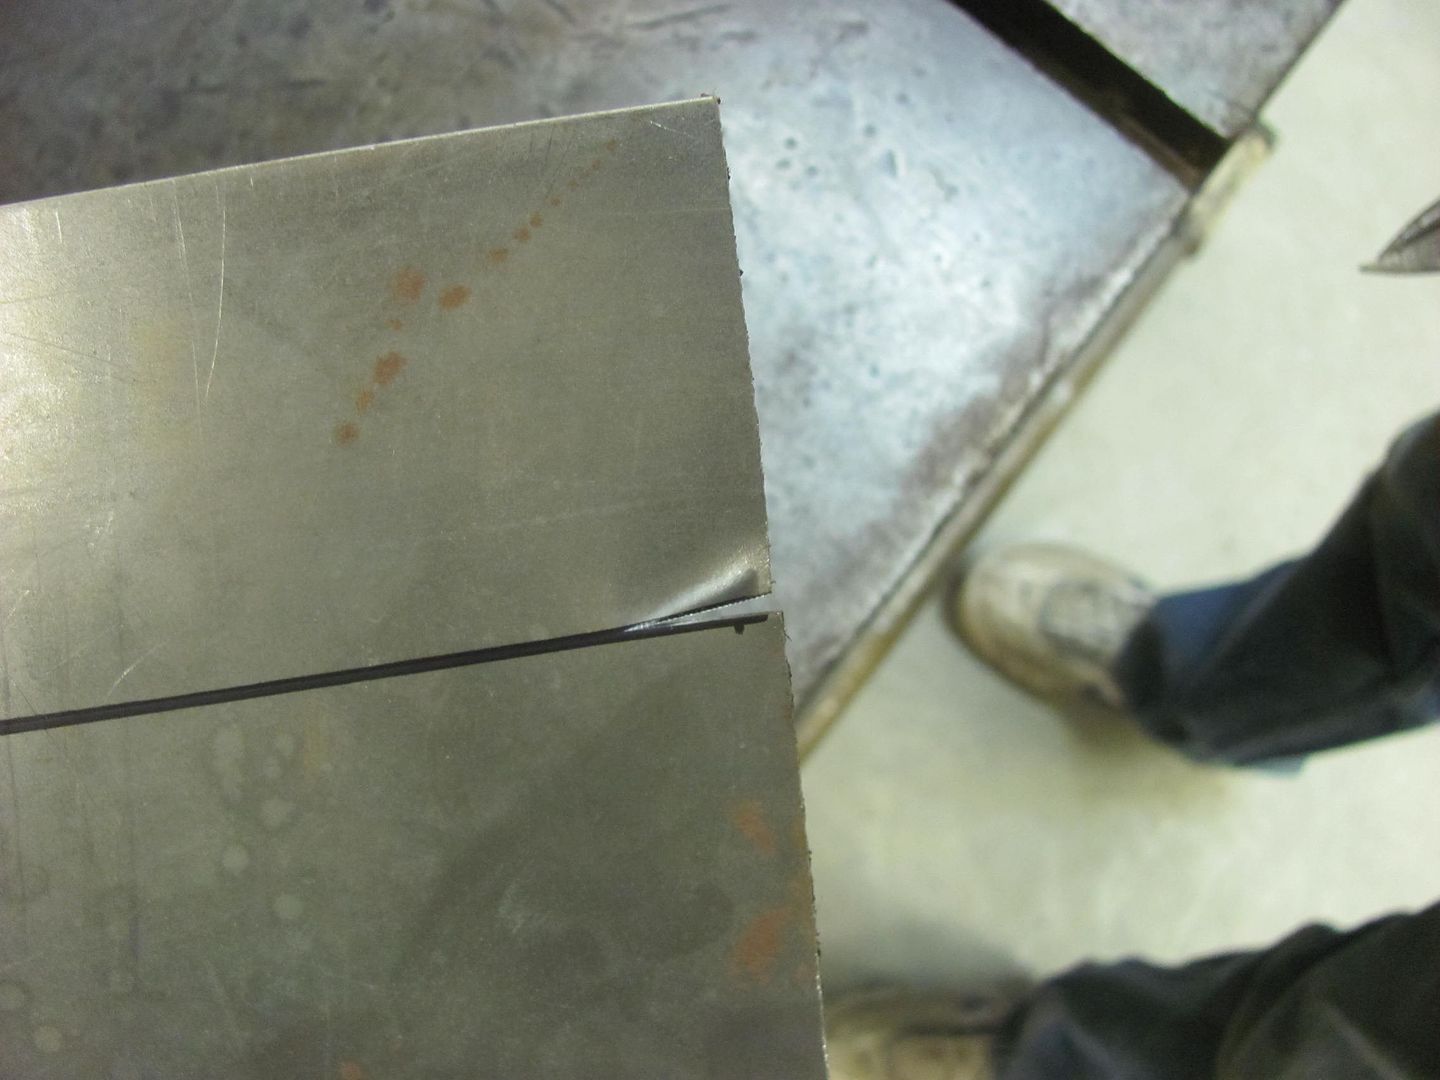 .....and the green shears to make a slight cut on the left side... 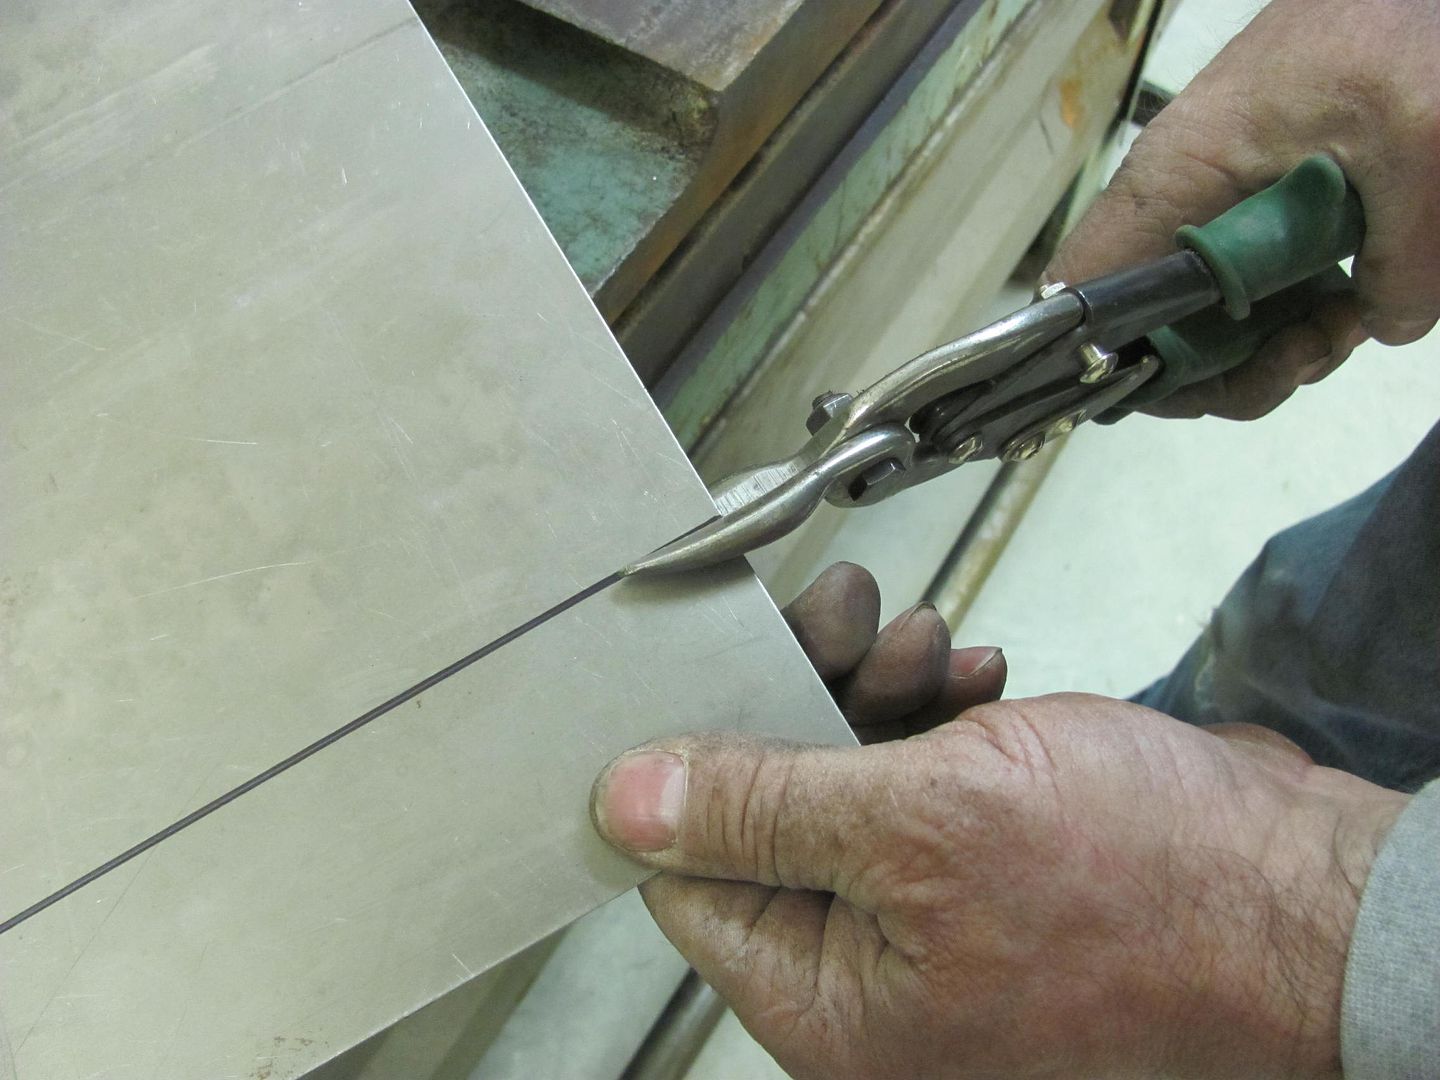 Now you have the cut line "marked" on both ends... 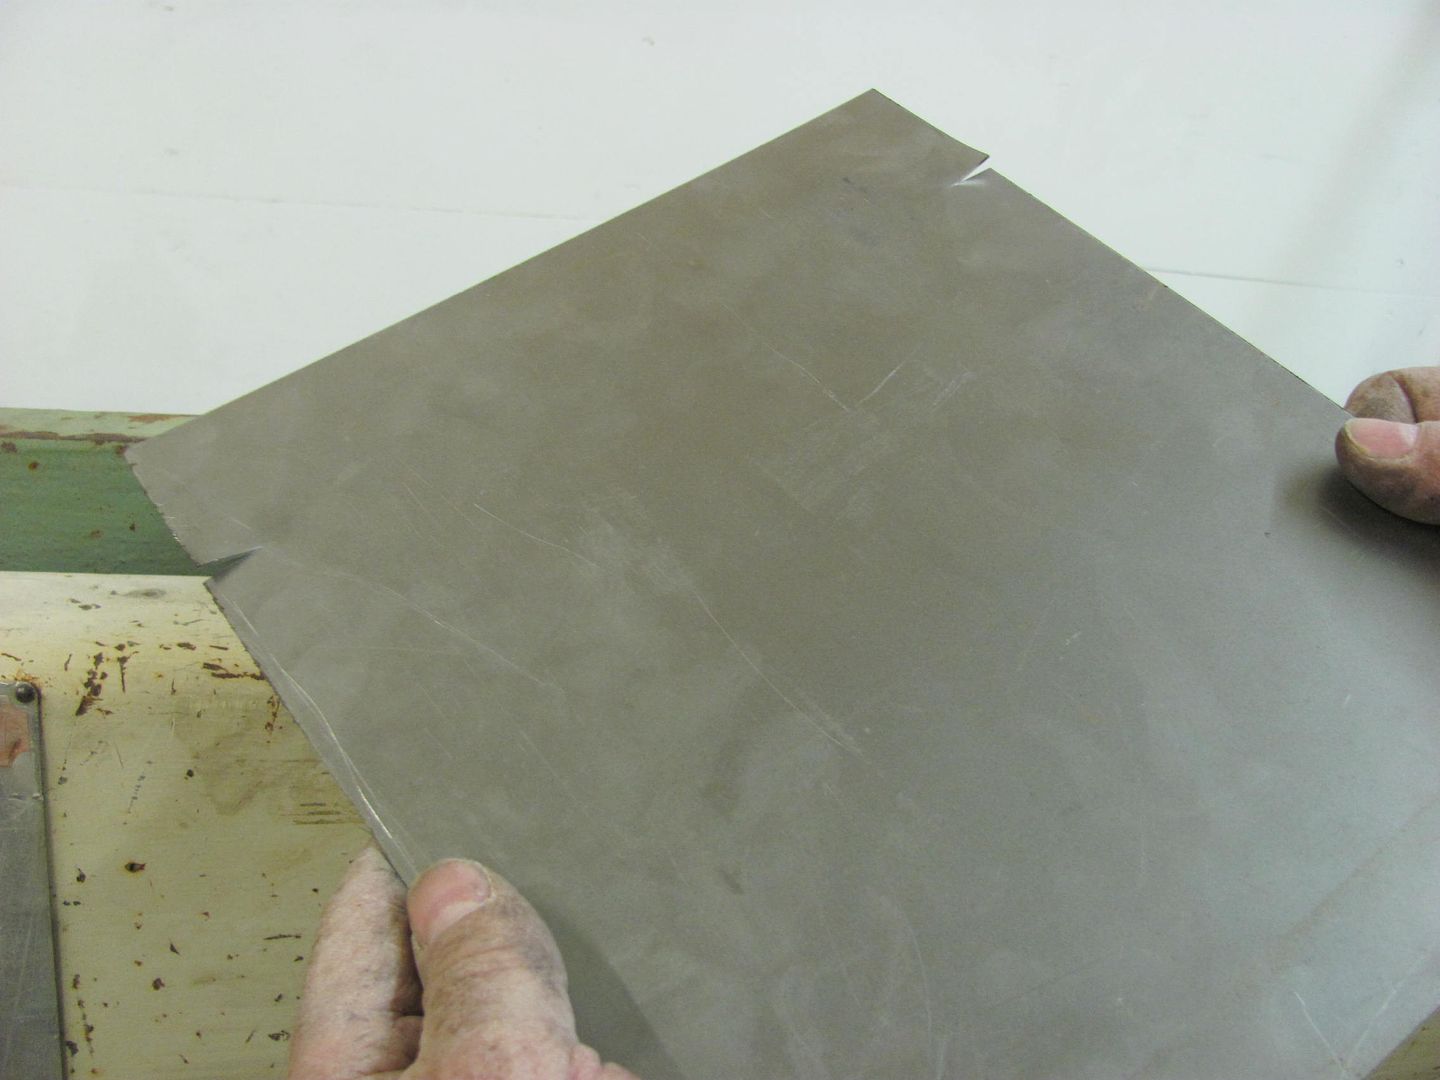 Slide the panel into the shear just past the cut edge, then gently pull back until it stops against the lower blade... 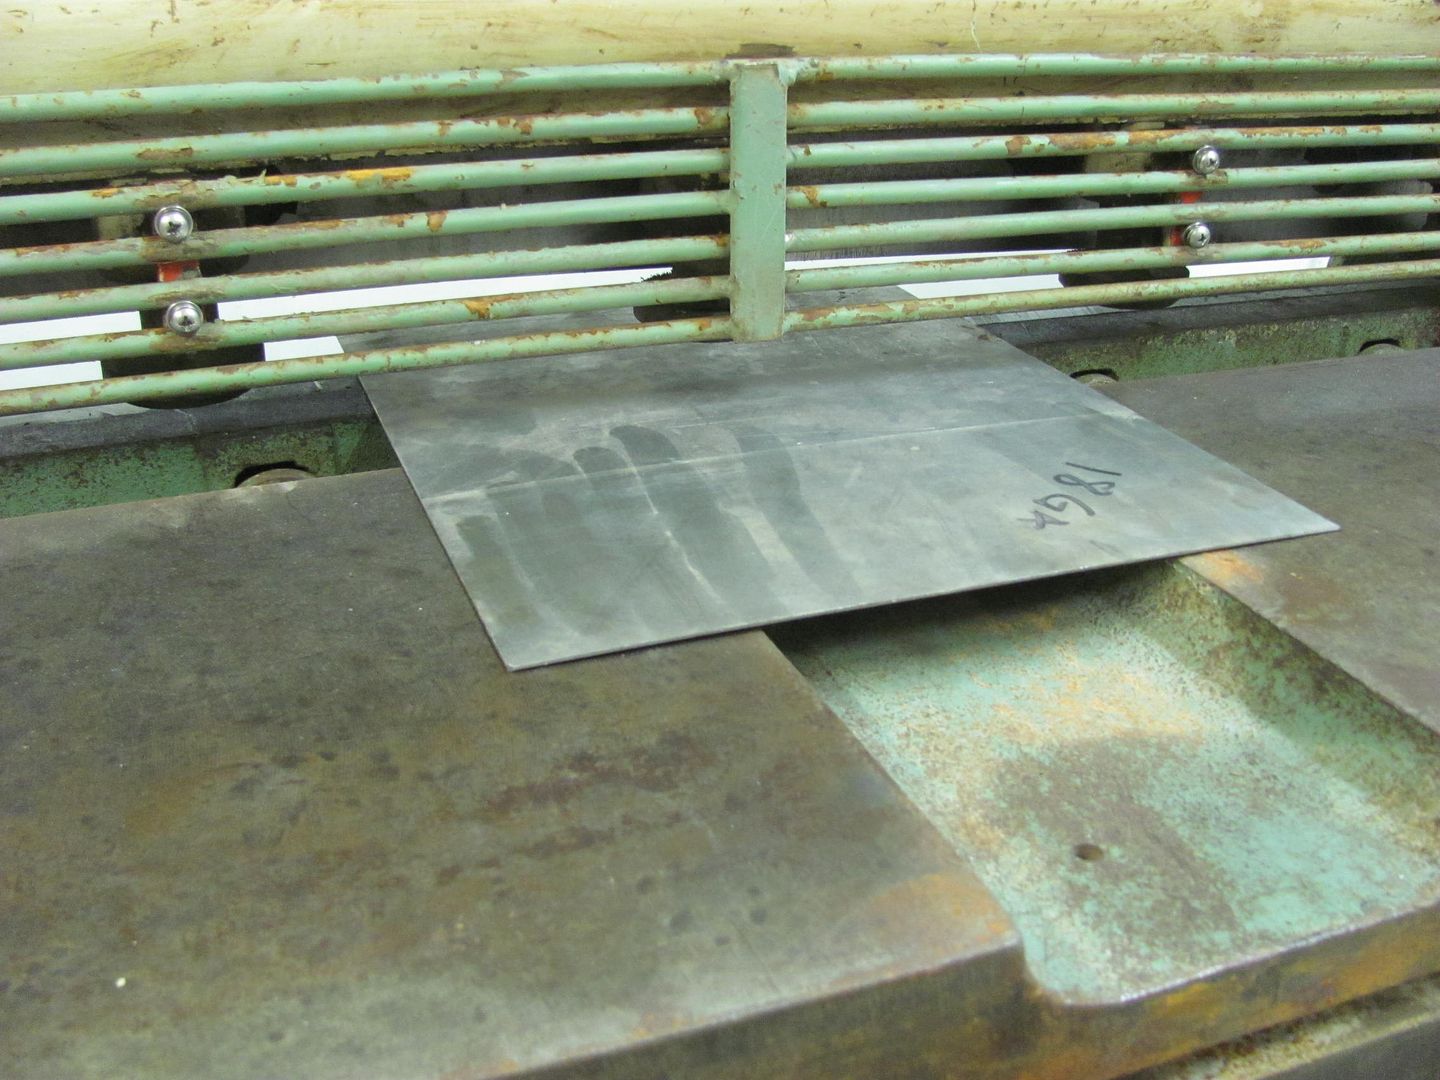 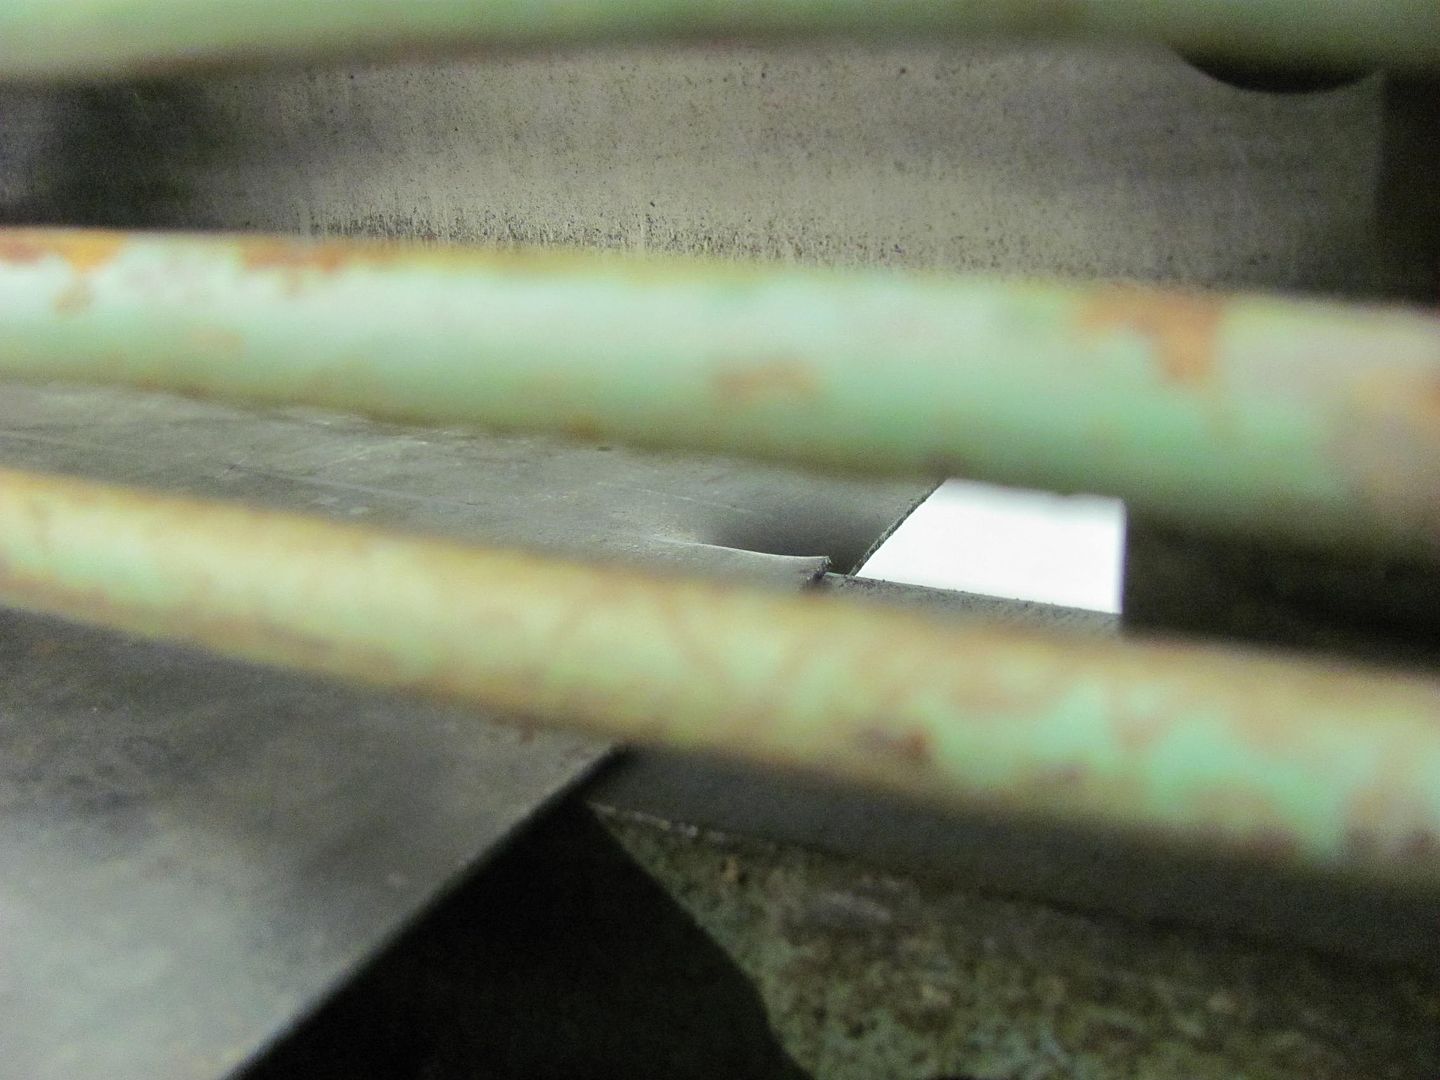  Now shear. No back gauge or second person to help sight in a full width sheet needed.. No fuss no muss. Thanks to Dan for the helpful hint! While I've been playing electrician, Kyle has been plugging along in getting various pieces media blasted so they can get epoxy primed.... 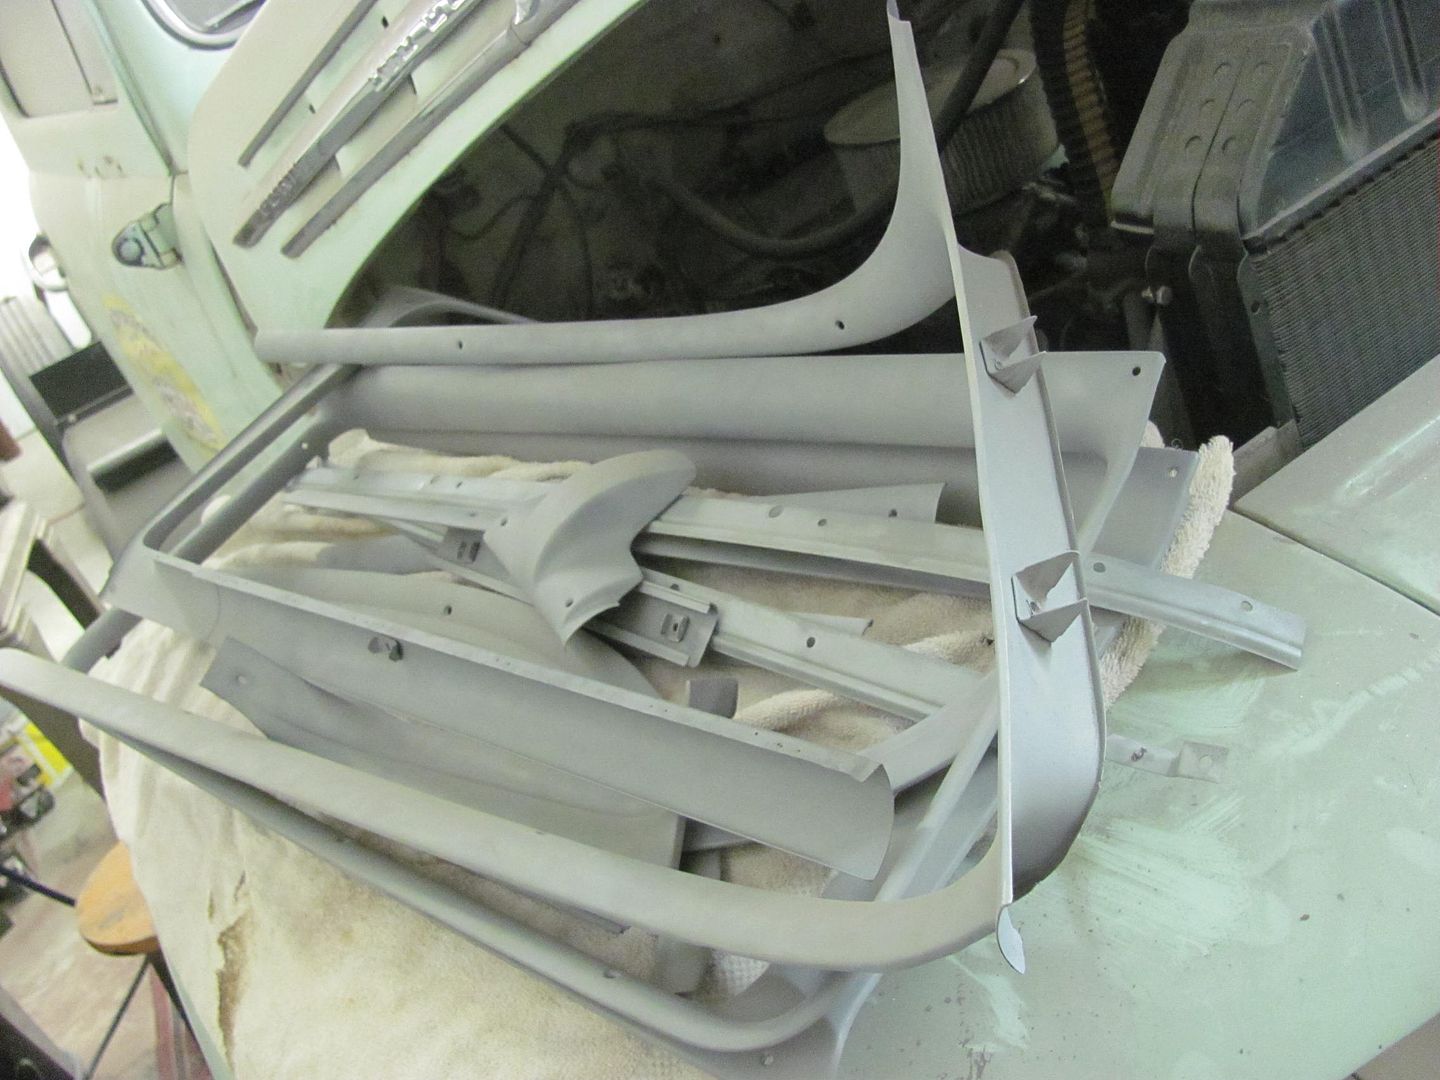 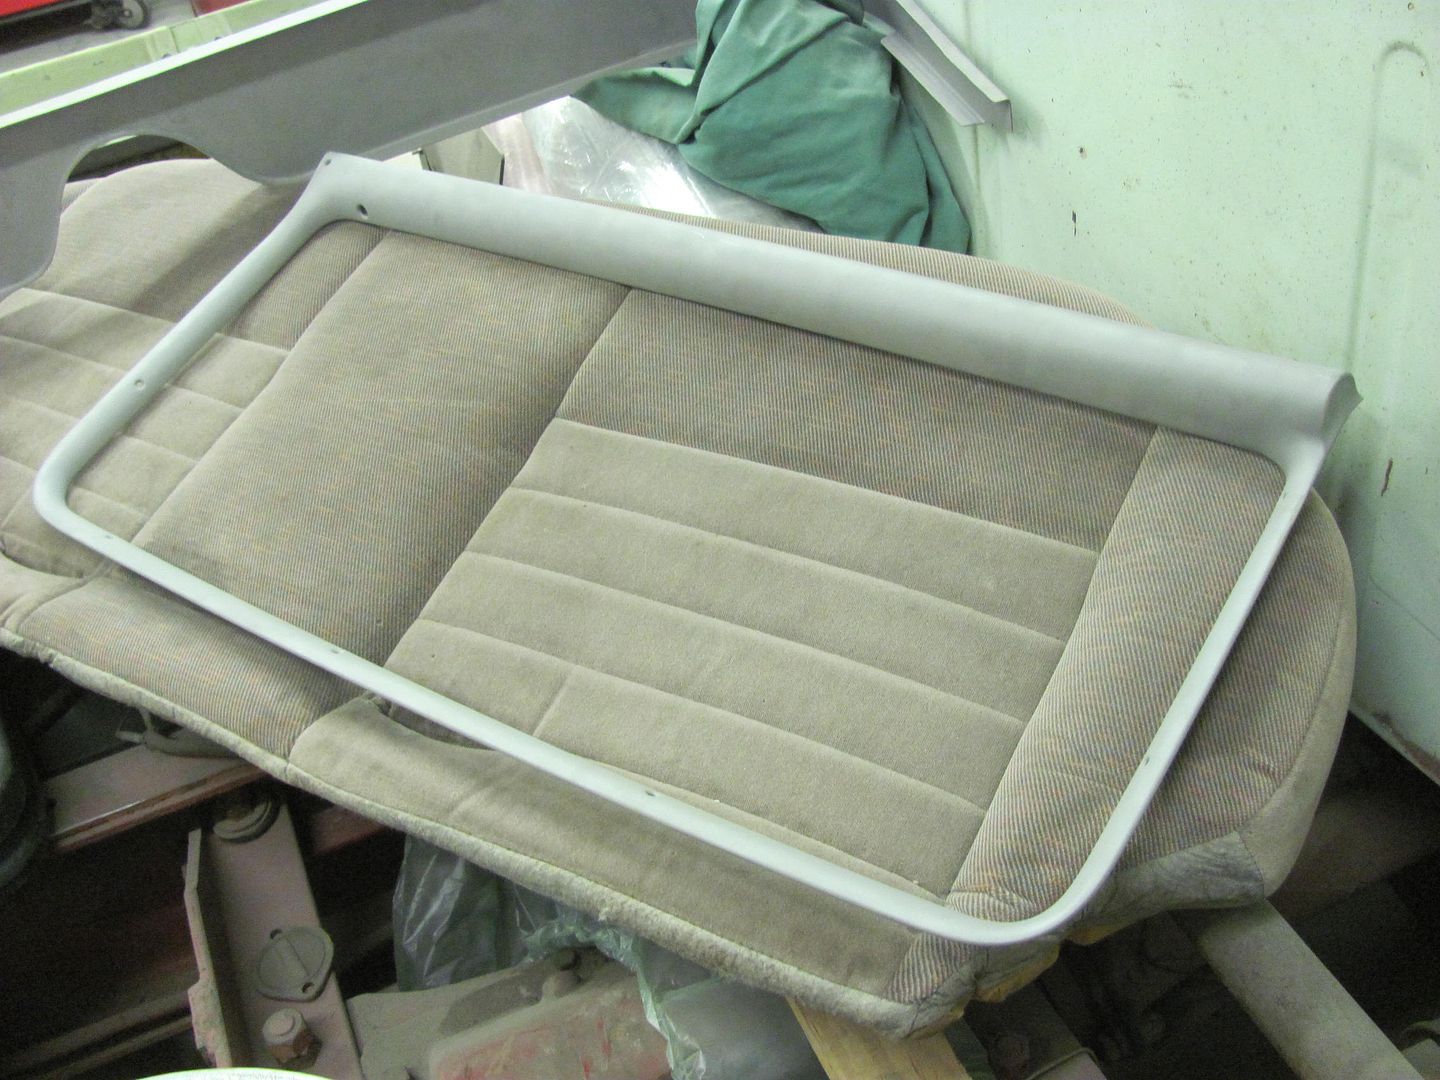 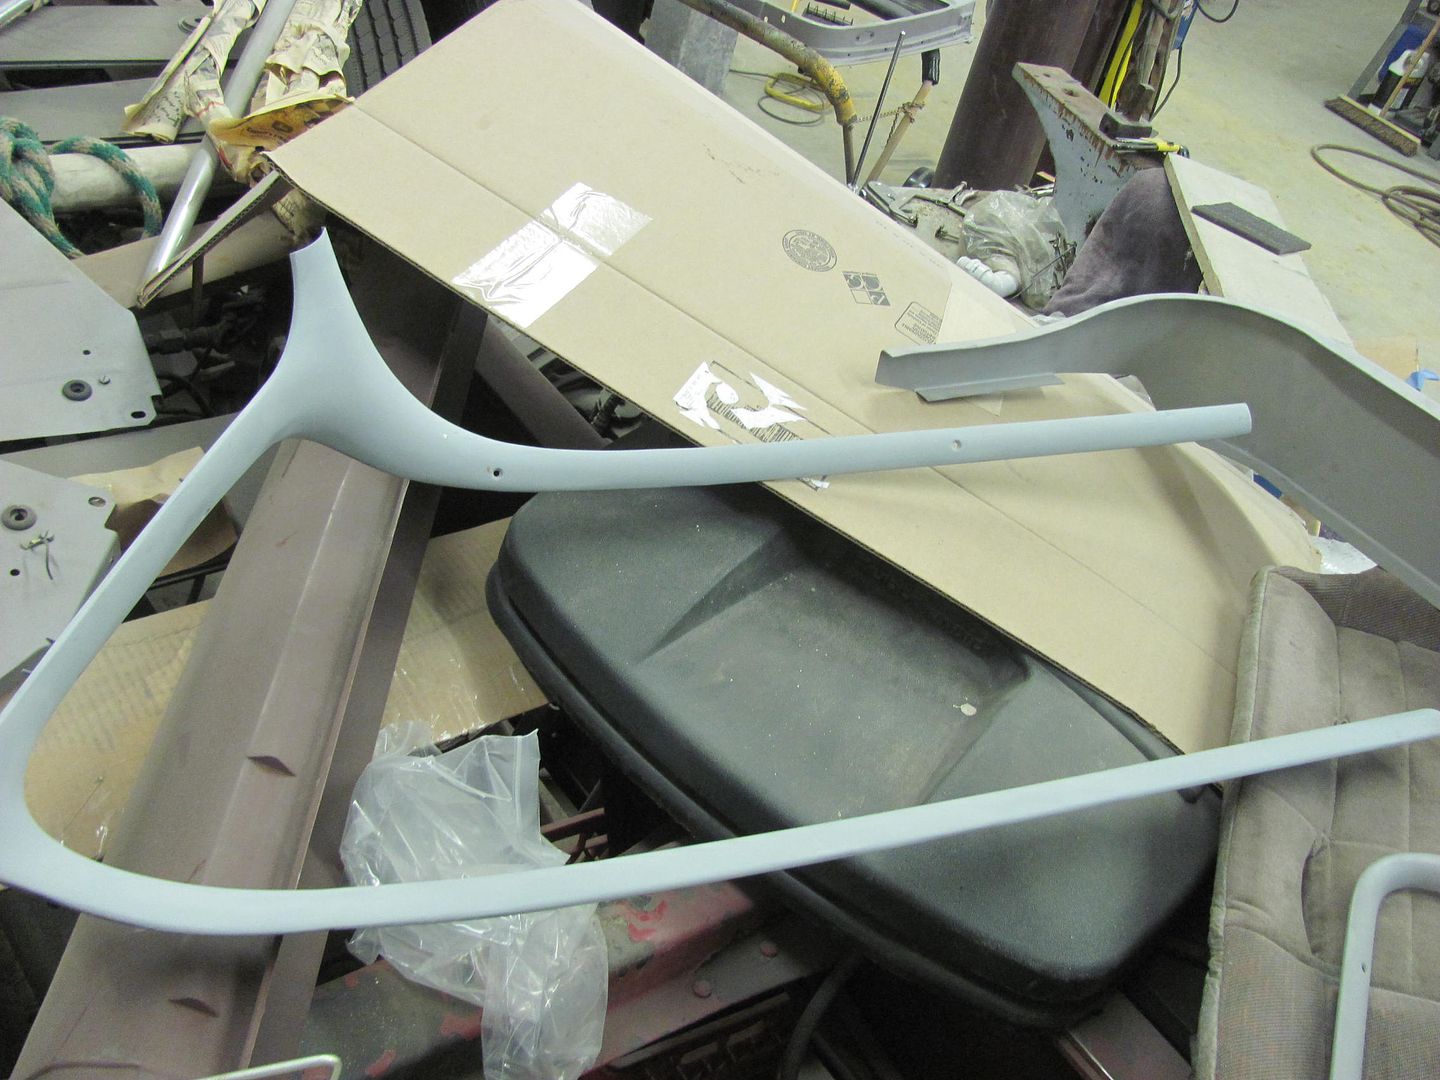 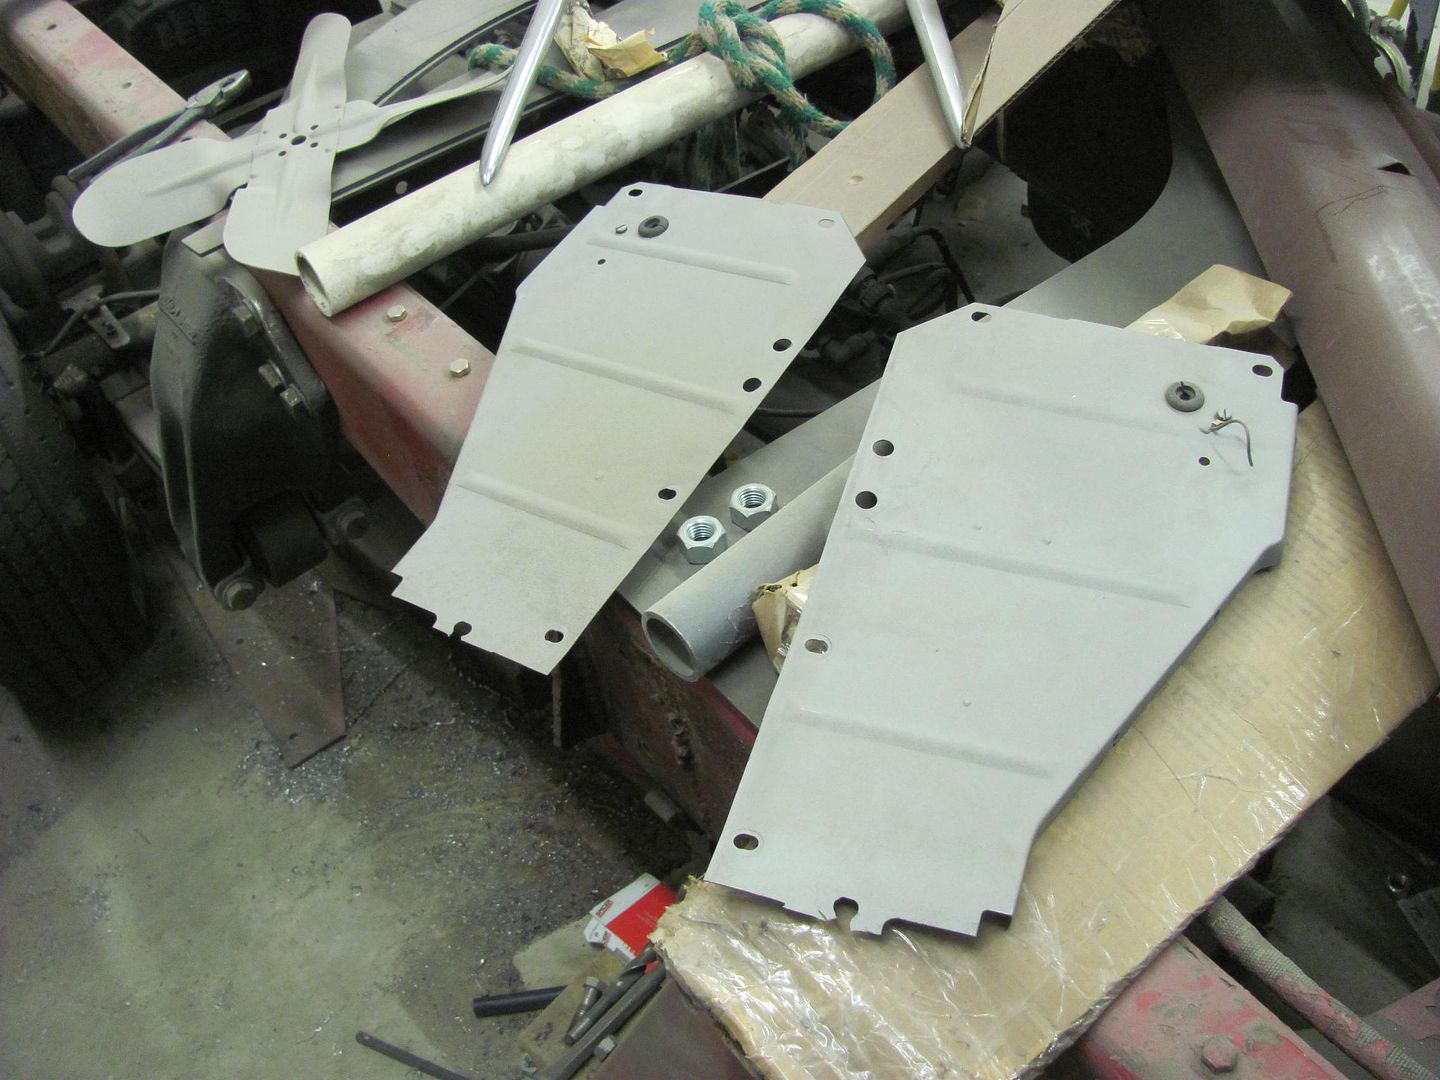
__________________
Robert |
|
|
|
|
03-24-2015, 04:05 PM
|
#6 |
|
Registered User
Join Date: May 2013
Location: Centerville,Ma.
Posts: 1,223
|
Re: 55 Wagon Progress
Kyle does a nice job at sandblasting, I could never seem to get employees to get metal that clean without sending them back out multiple times.
Bob |
|
|
|
|
03-25-2015, 10:35 PM
|
#7 |
|
Registered User
Join Date: Jan 2013
Location: Leonardtown, MD
Posts: 1,637
|
Re: 55 Wagon Progress
He's learning thorough pretty well.
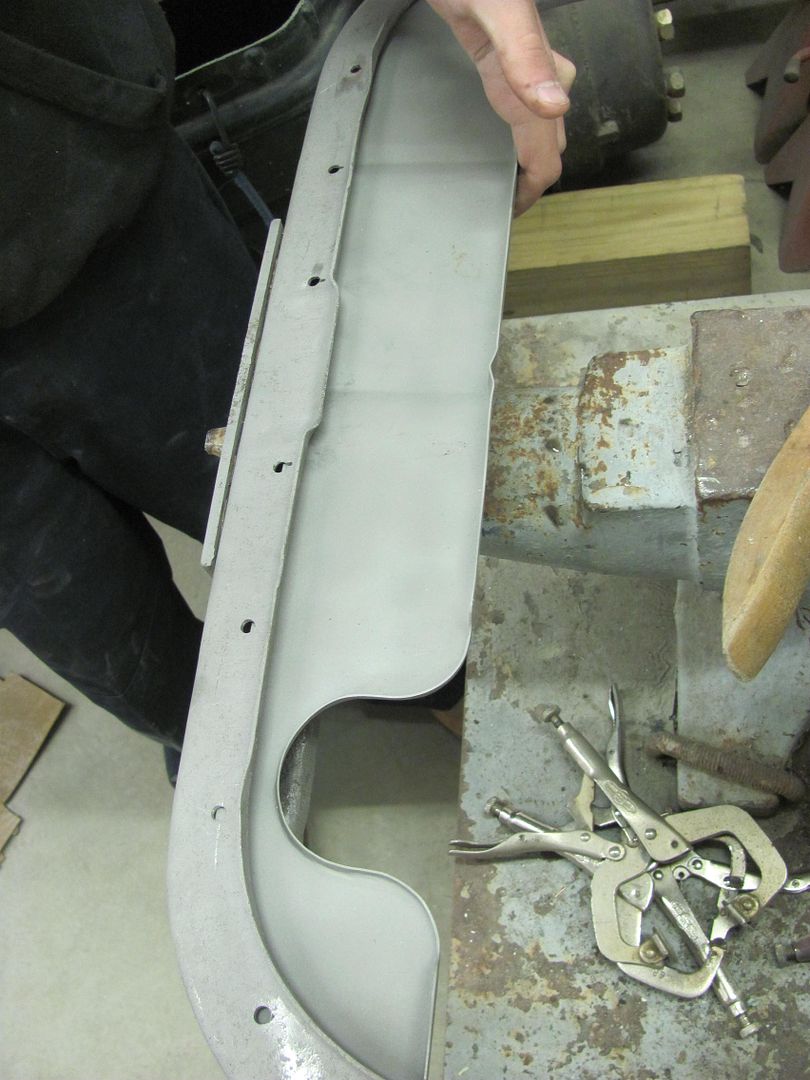
 While the wagon was still in the booth, the floor and welding table got the semi-annual cleaning....  even the top of the tool box... 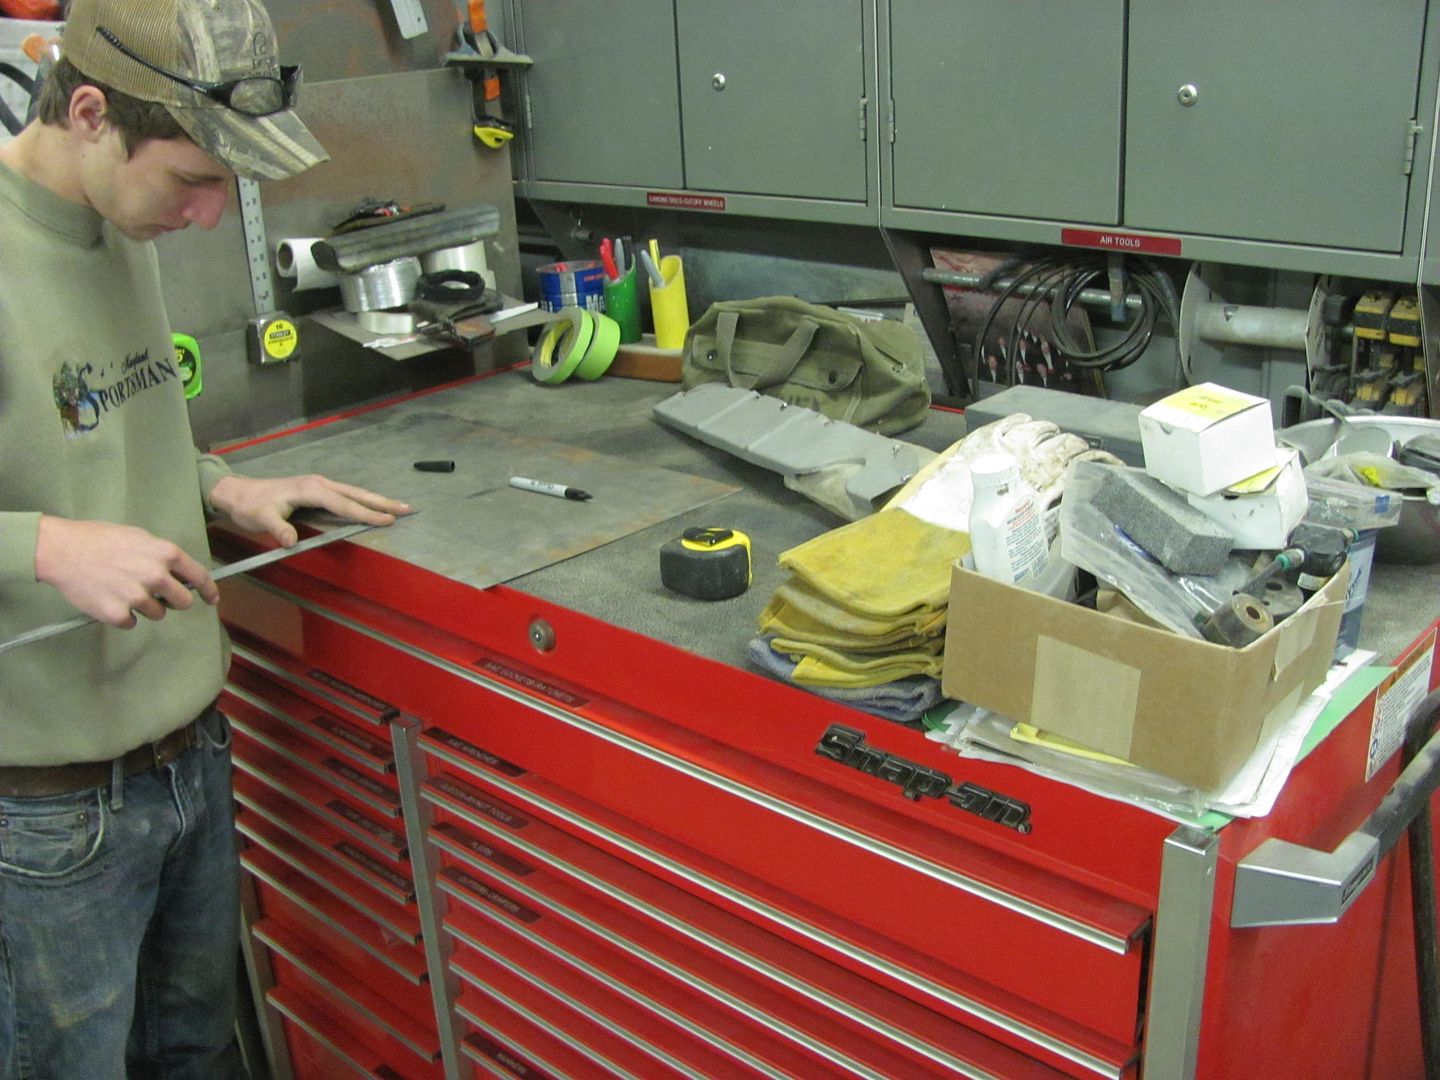 Kyle had finished a bunch of media blasting so they were hung up in the booth to get ready for some epoxy, likely next week....  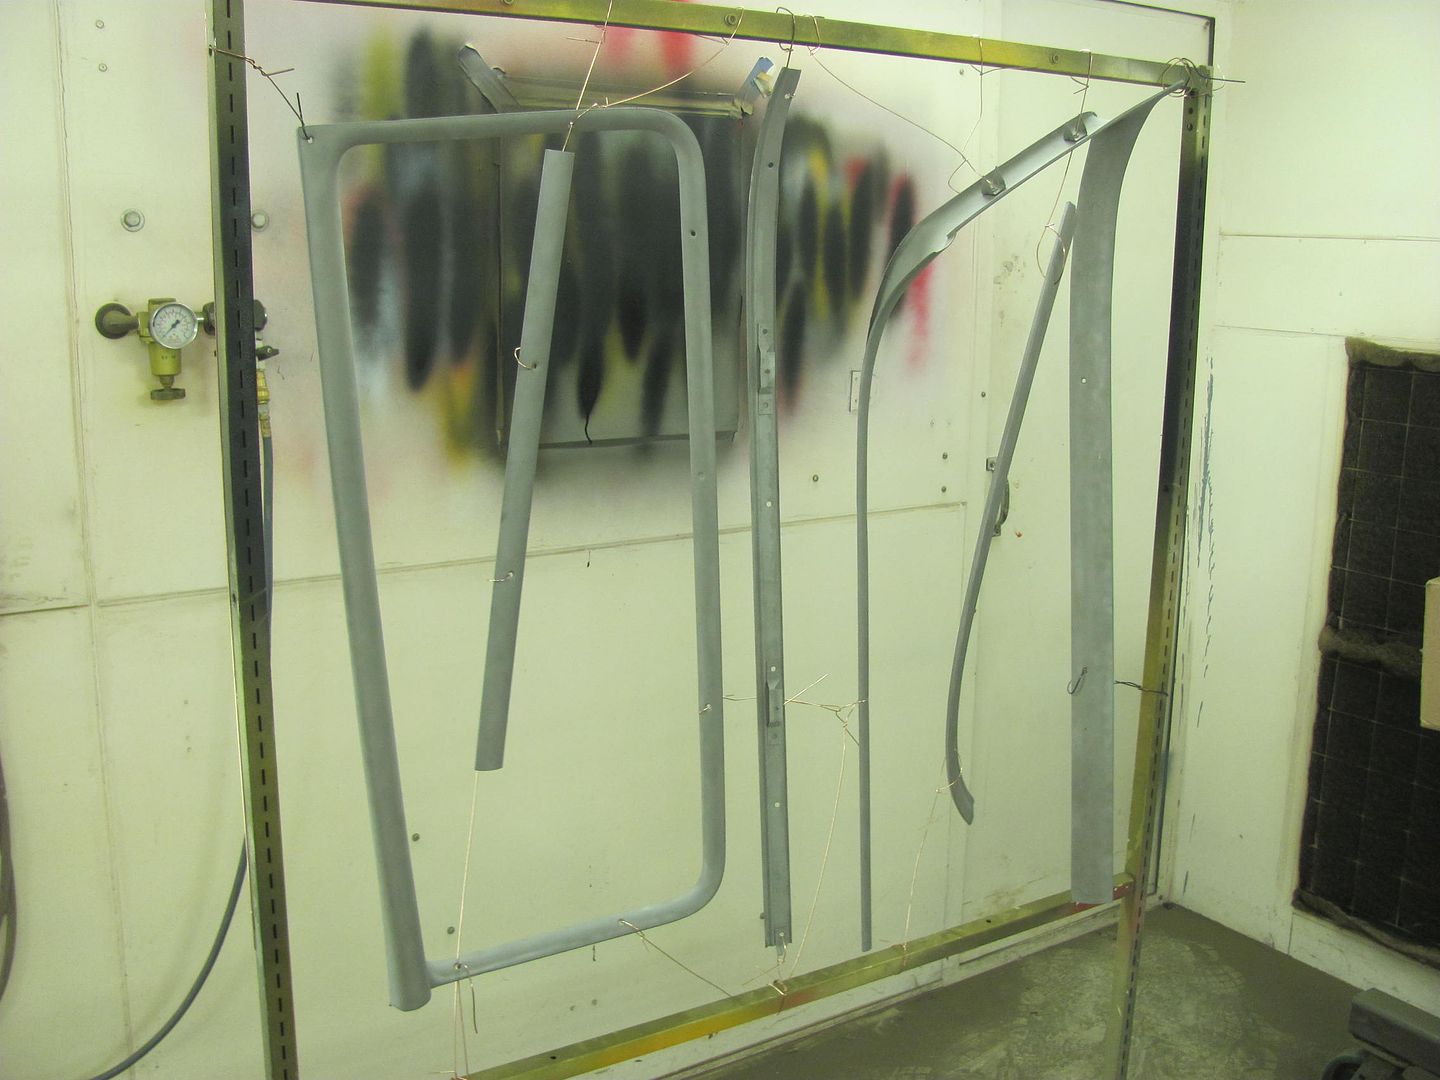 Kyle used the ball end carbide in a die grinder to remove the lower baffle of the core support, so we can get rid of the remaining rust there... 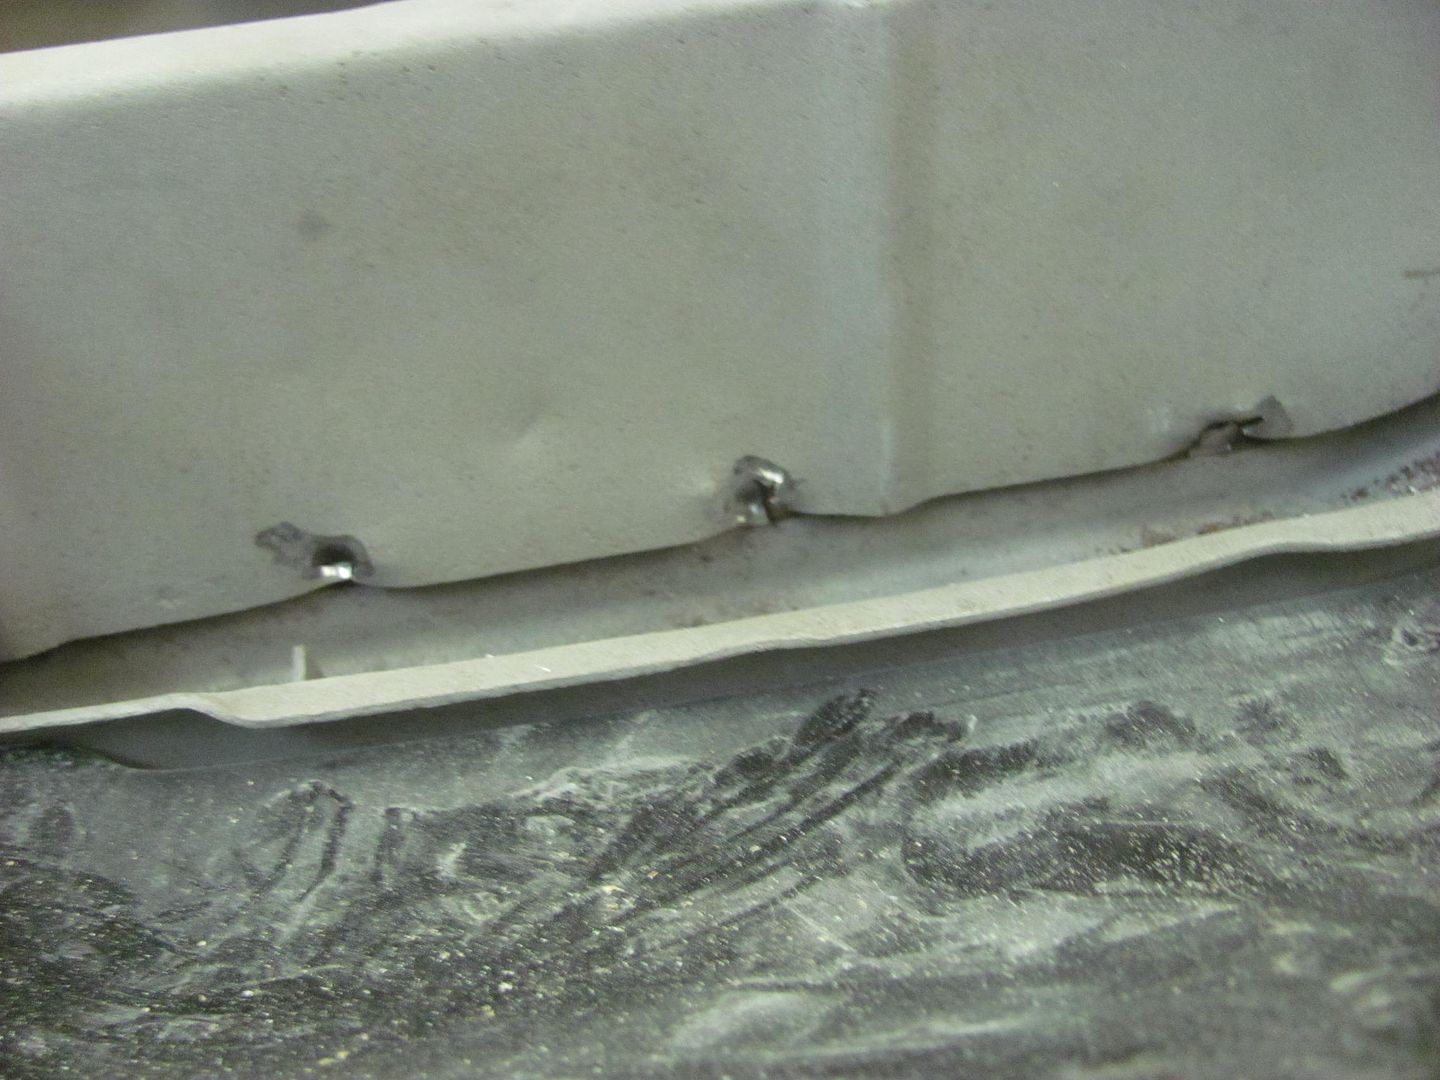 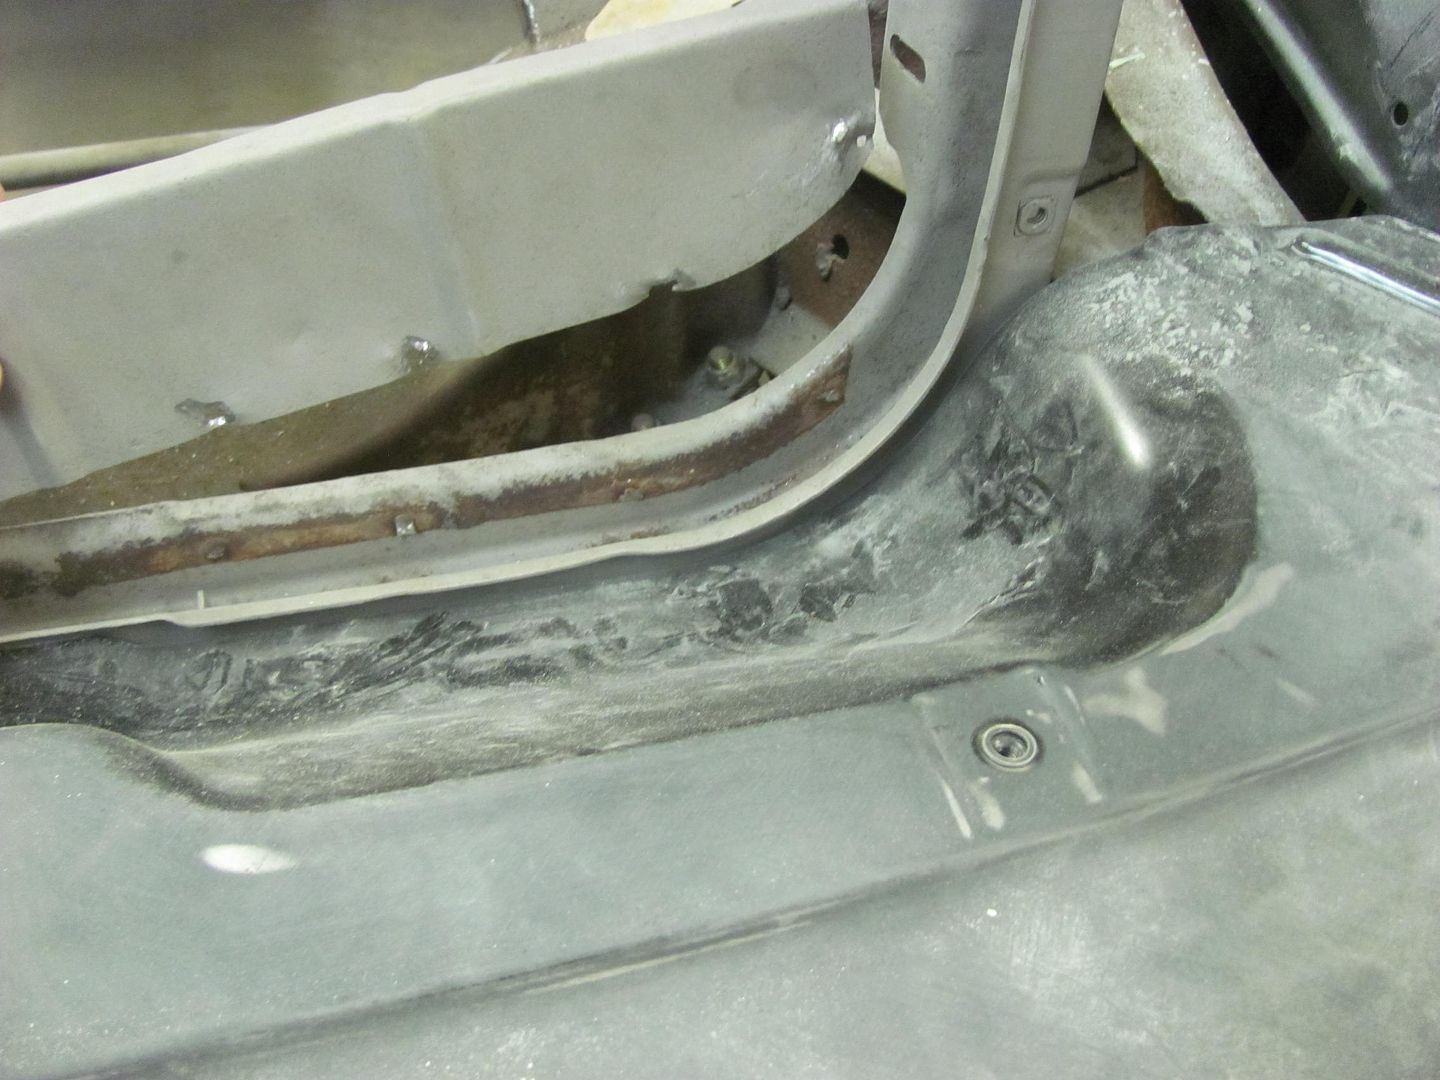 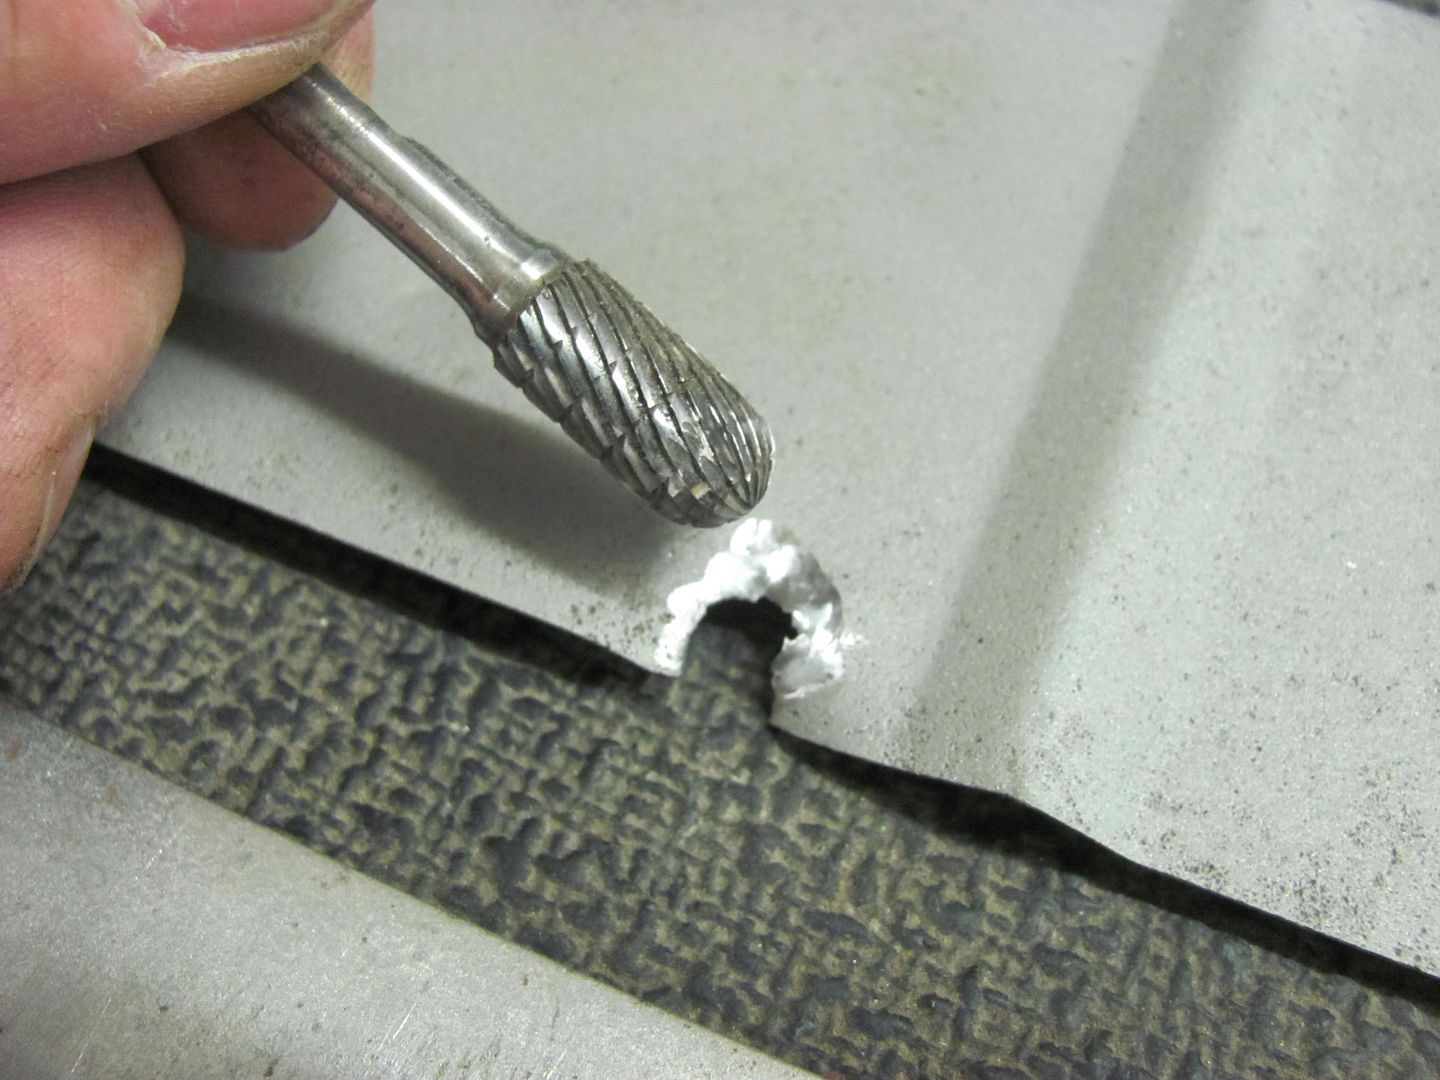 Starting on the replacement piece, we'll get this finished next time.. 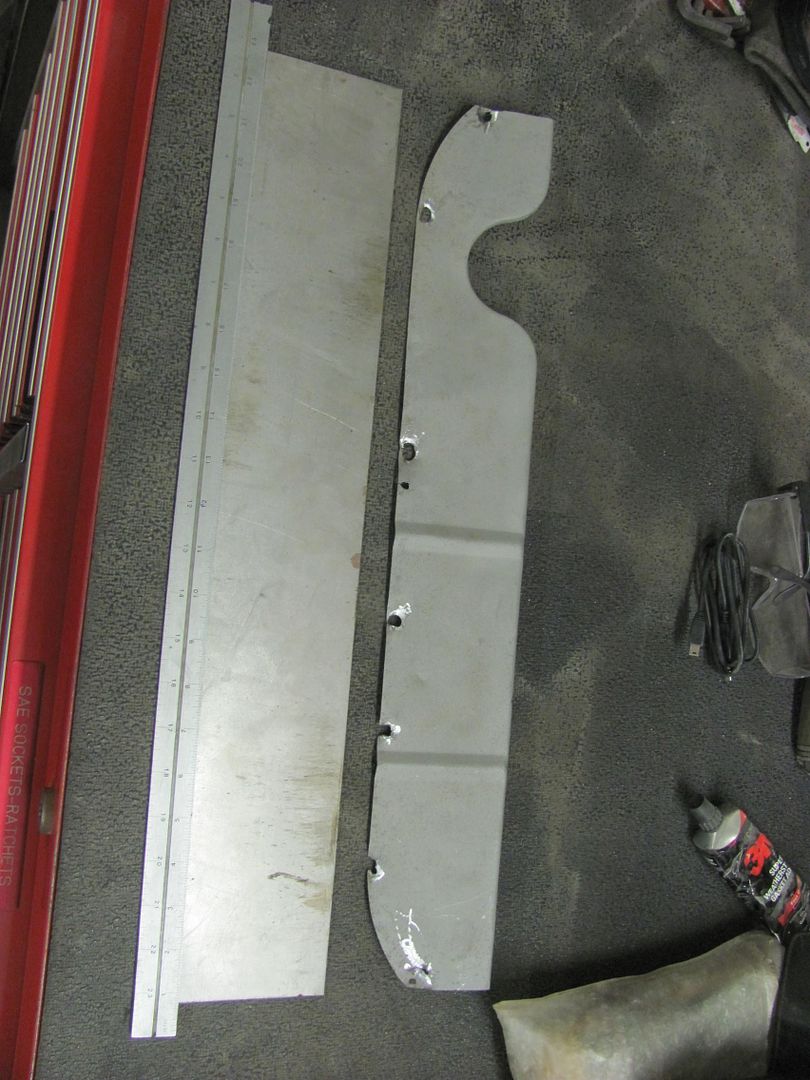 Everything back in place.... 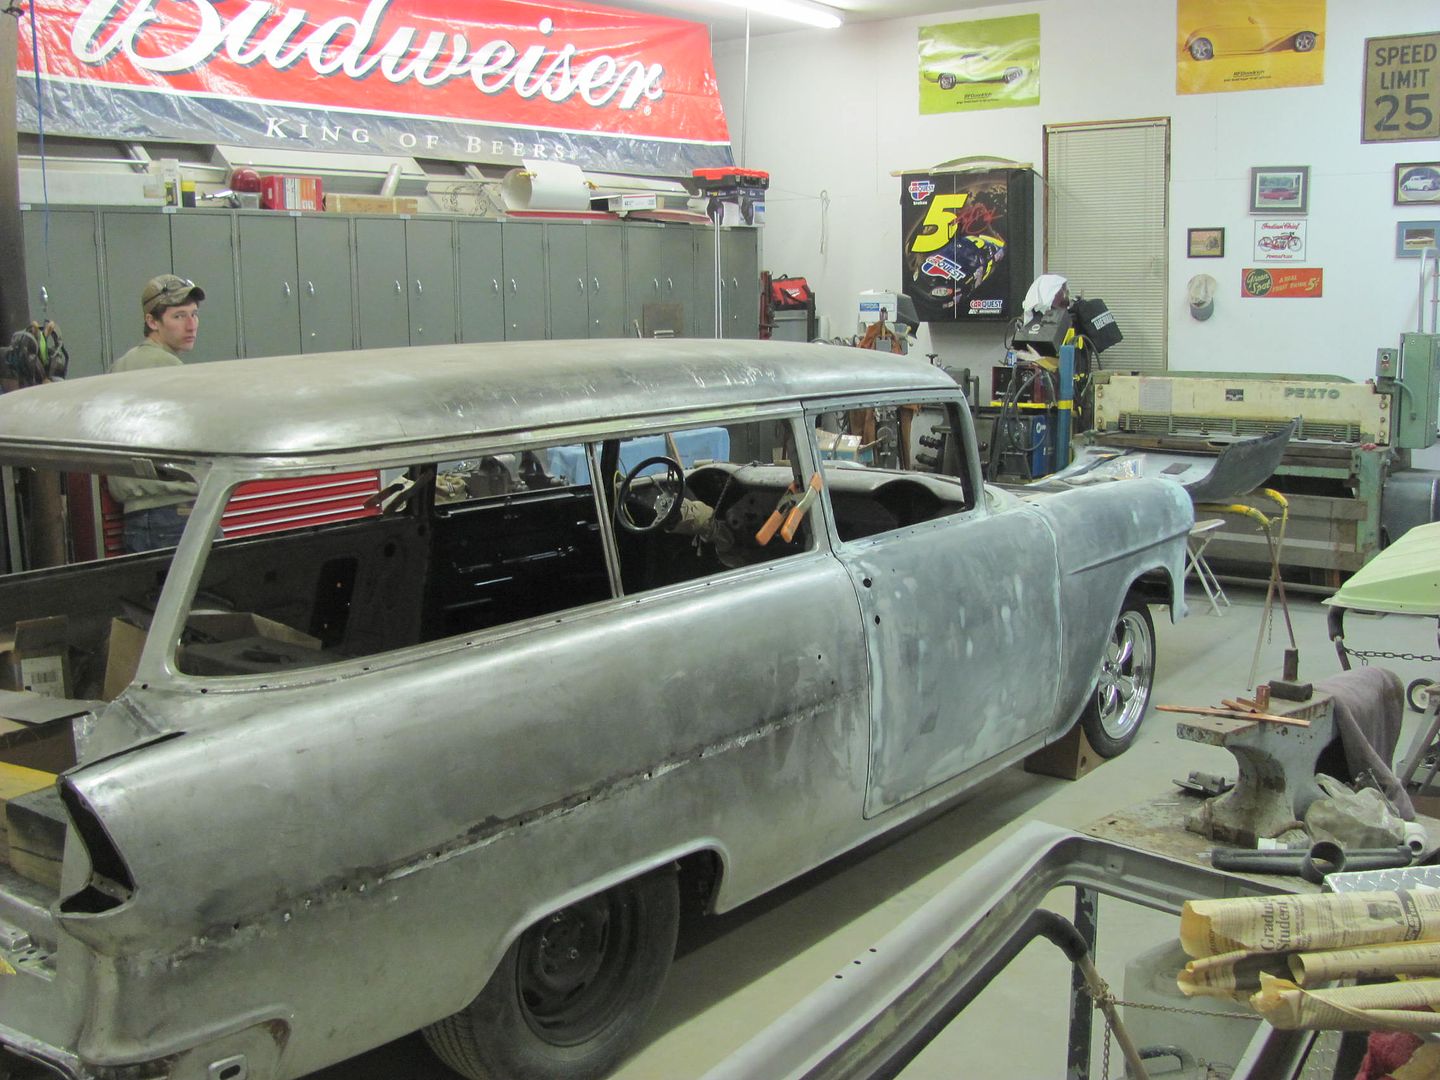
__________________
Robert |
|
|
|
|
03-25-2015, 10:45 PM
|
#8 |
|
Senior Member
Join Date: Jul 2012
Location: Oblong, Illinois
Posts: 7,026
|
Re: 55 Wagon Progress
Great adventure and a nice trick for the shear line.
|
|
|
|
|
03-26-2015, 01:17 AM
|
#9 |
|
Registered User
Join Date: Oct 2007
Location: Spanaway
Posts: 8,451
|
Re: 55 Wagon Progress
Per the band saw leg, we have used them at my work for years but we made them out of a 3/4" sheet of high grade plywood, just lay it out on the plywood and incorperate a
1" high leg that runs to the front of the saw table and C clamp it in place, pretty stable for sheet metal work. I guess you could make them out of just about anything.
__________________
Mike. Swamp Rat build thread : http://67-72chevytrucks.com/vboard/s...d.php?t=595019 72 3/4T 4X4 4" BDS Lift 33" BFG's |
|
|
|
|
03-29-2015, 12:41 AM
|
#10 |
|
Registered User
Join Date: Jan 2013
Location: Leonardtown, MD
Posts: 1,637
|
Re: 55 Wagon Progress
Our Saturday progress had us making more painting fixtures, this time for the rear gates. The lift gate used some square tube and riv-nuts for attachment...
  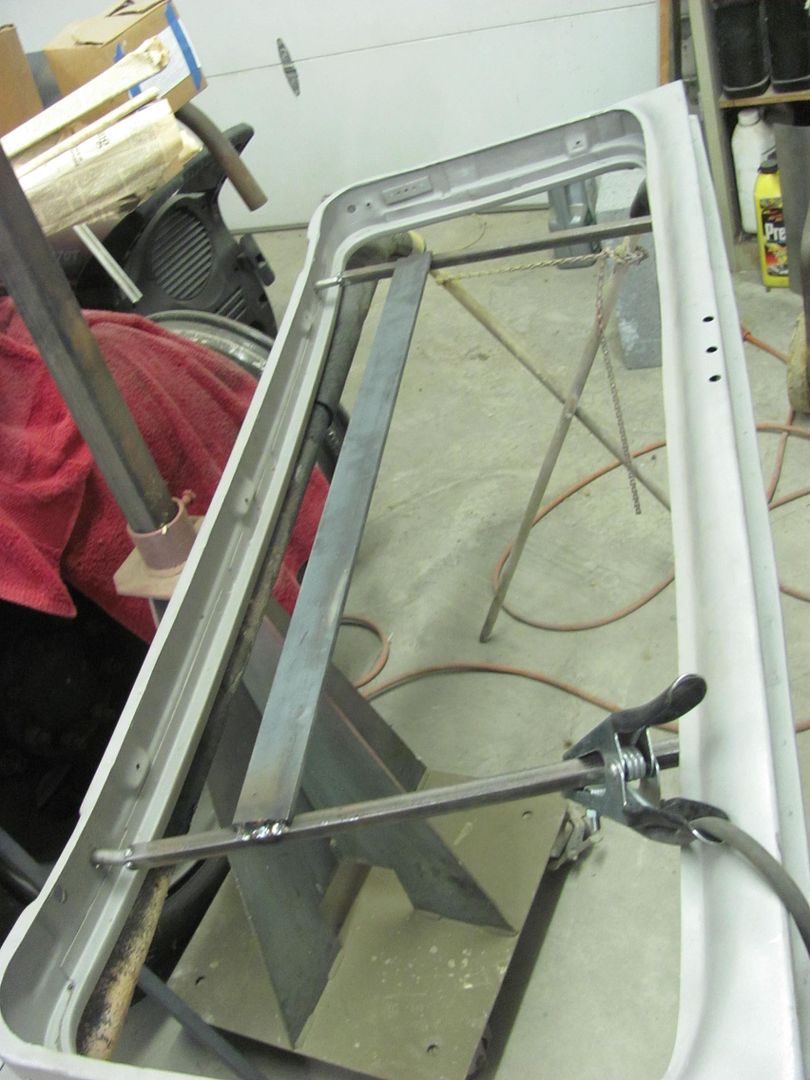 Fixture was made to hold lift gate in same position as on car for spraying... 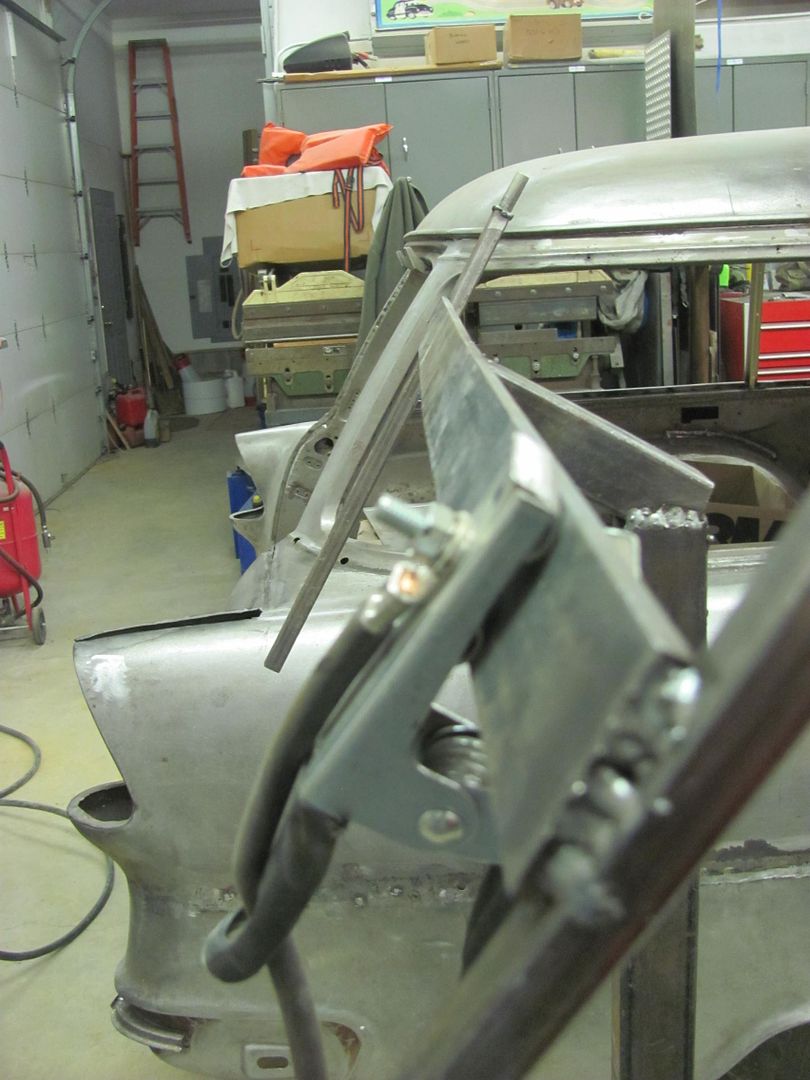  More blocking.... 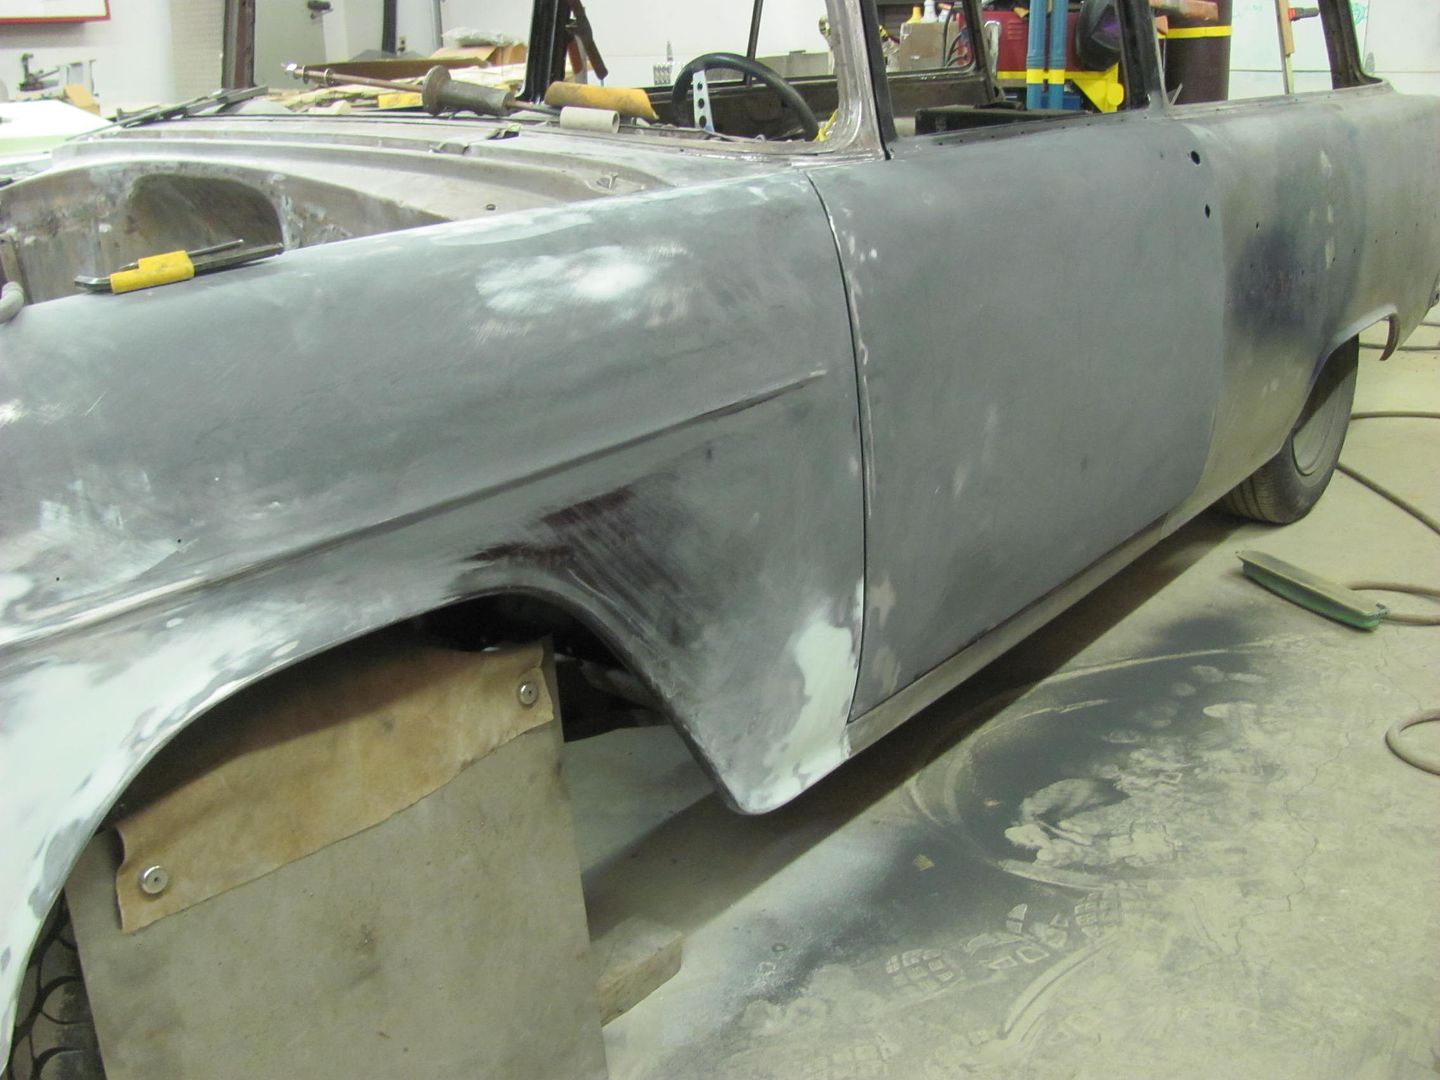 Tail gate painting fixture.... 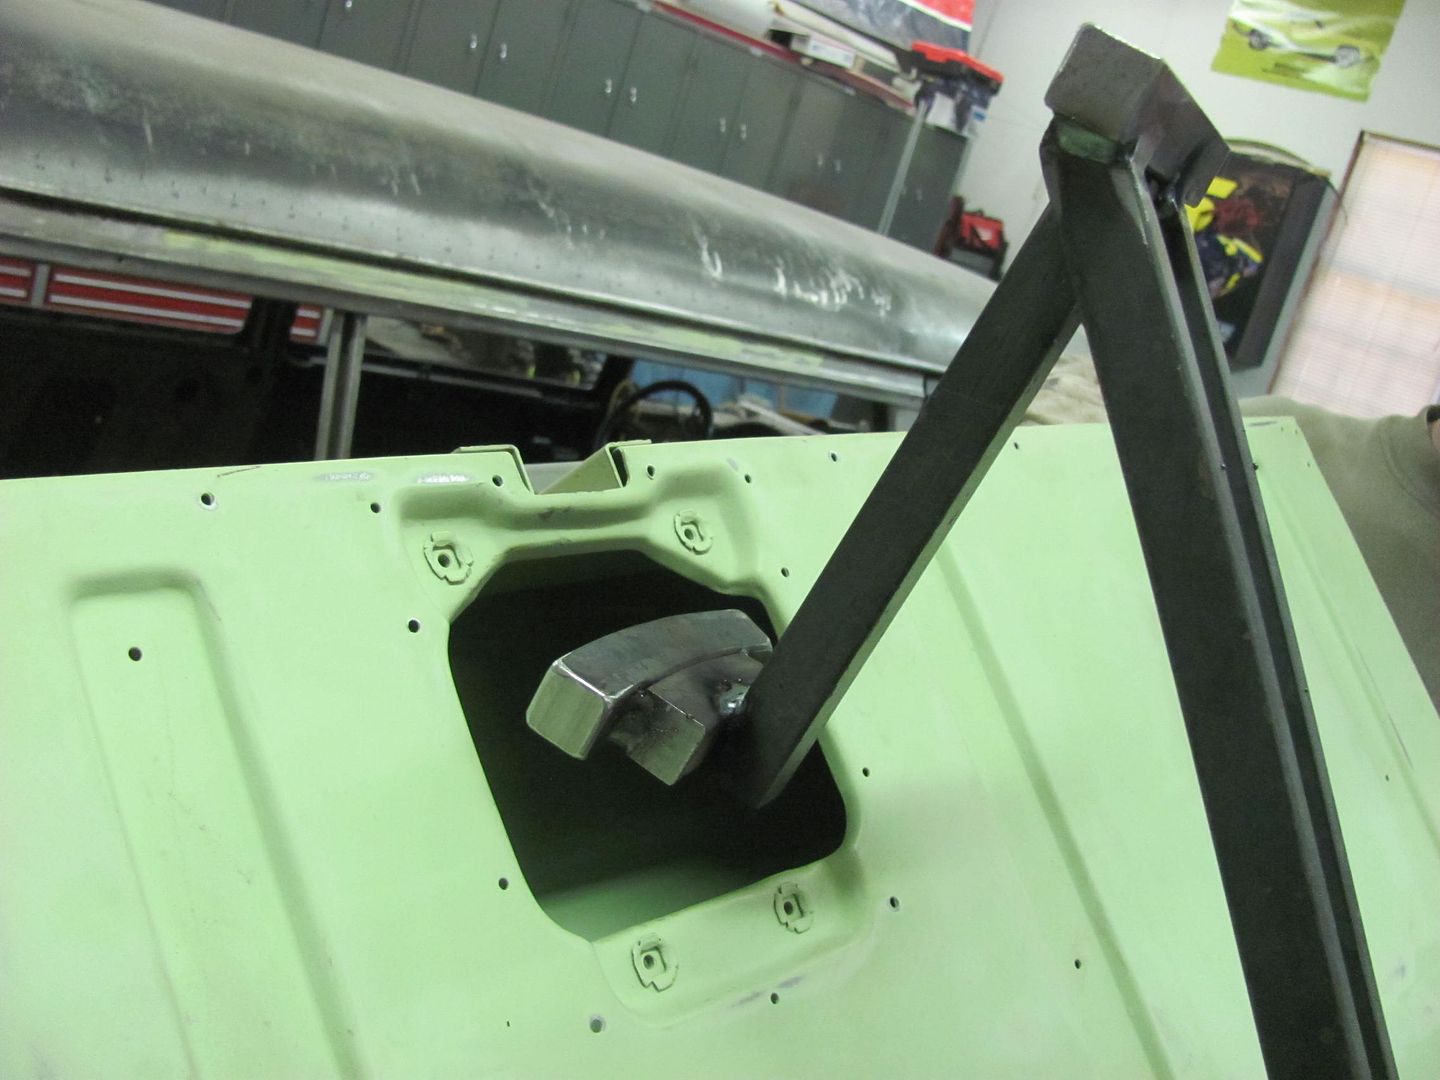 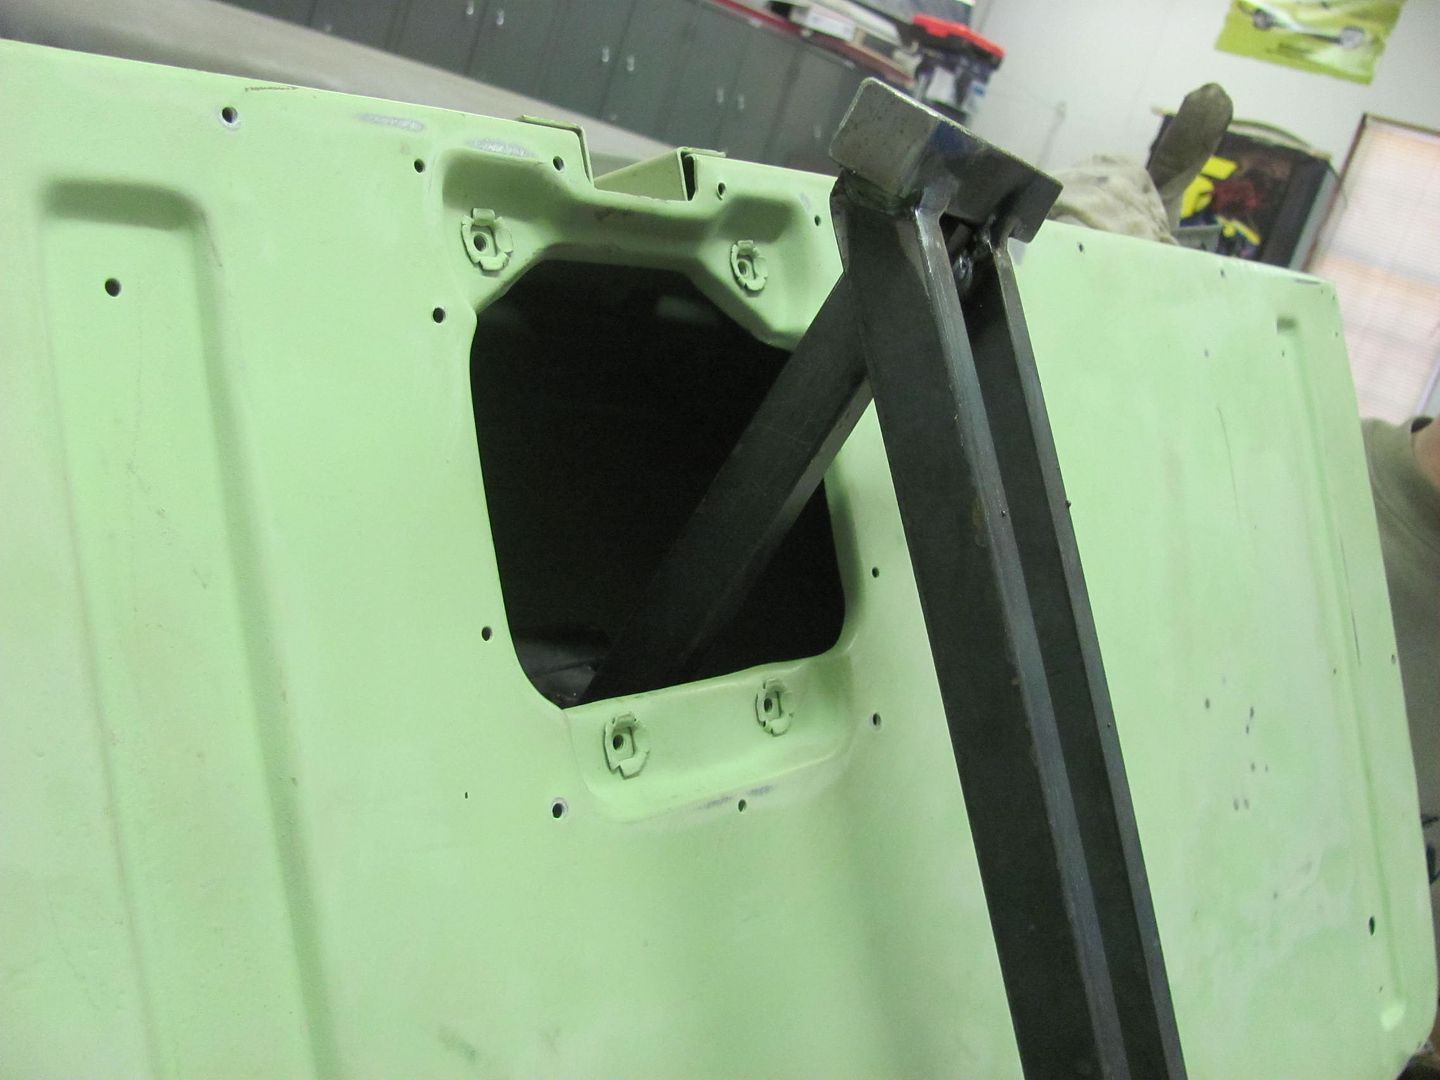 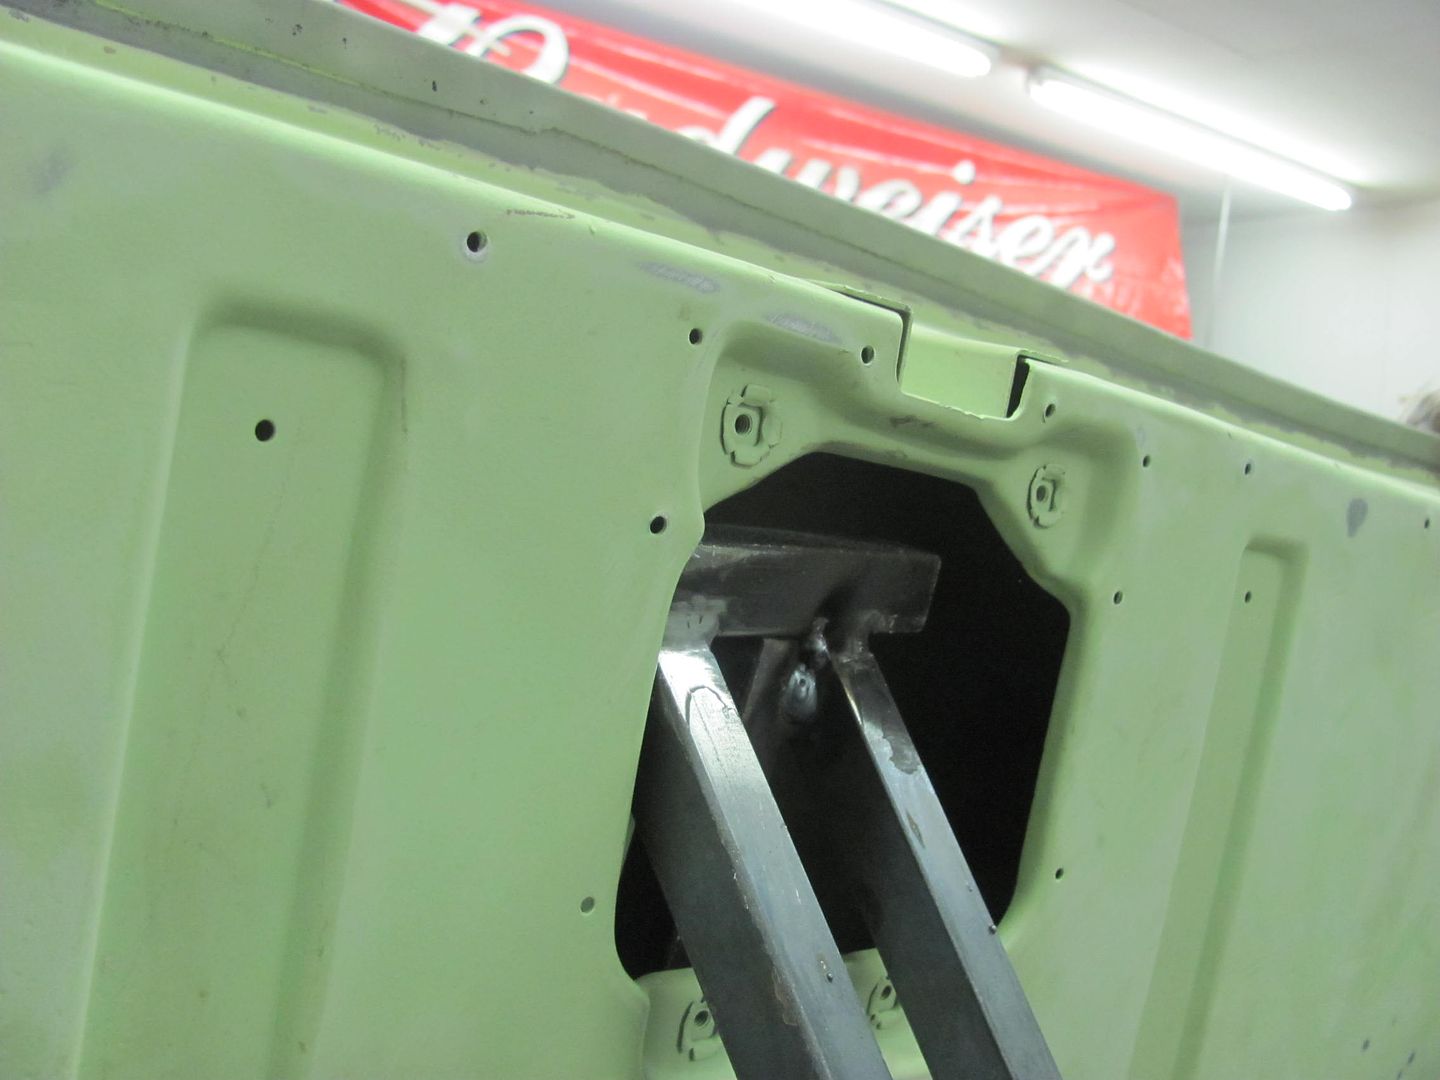 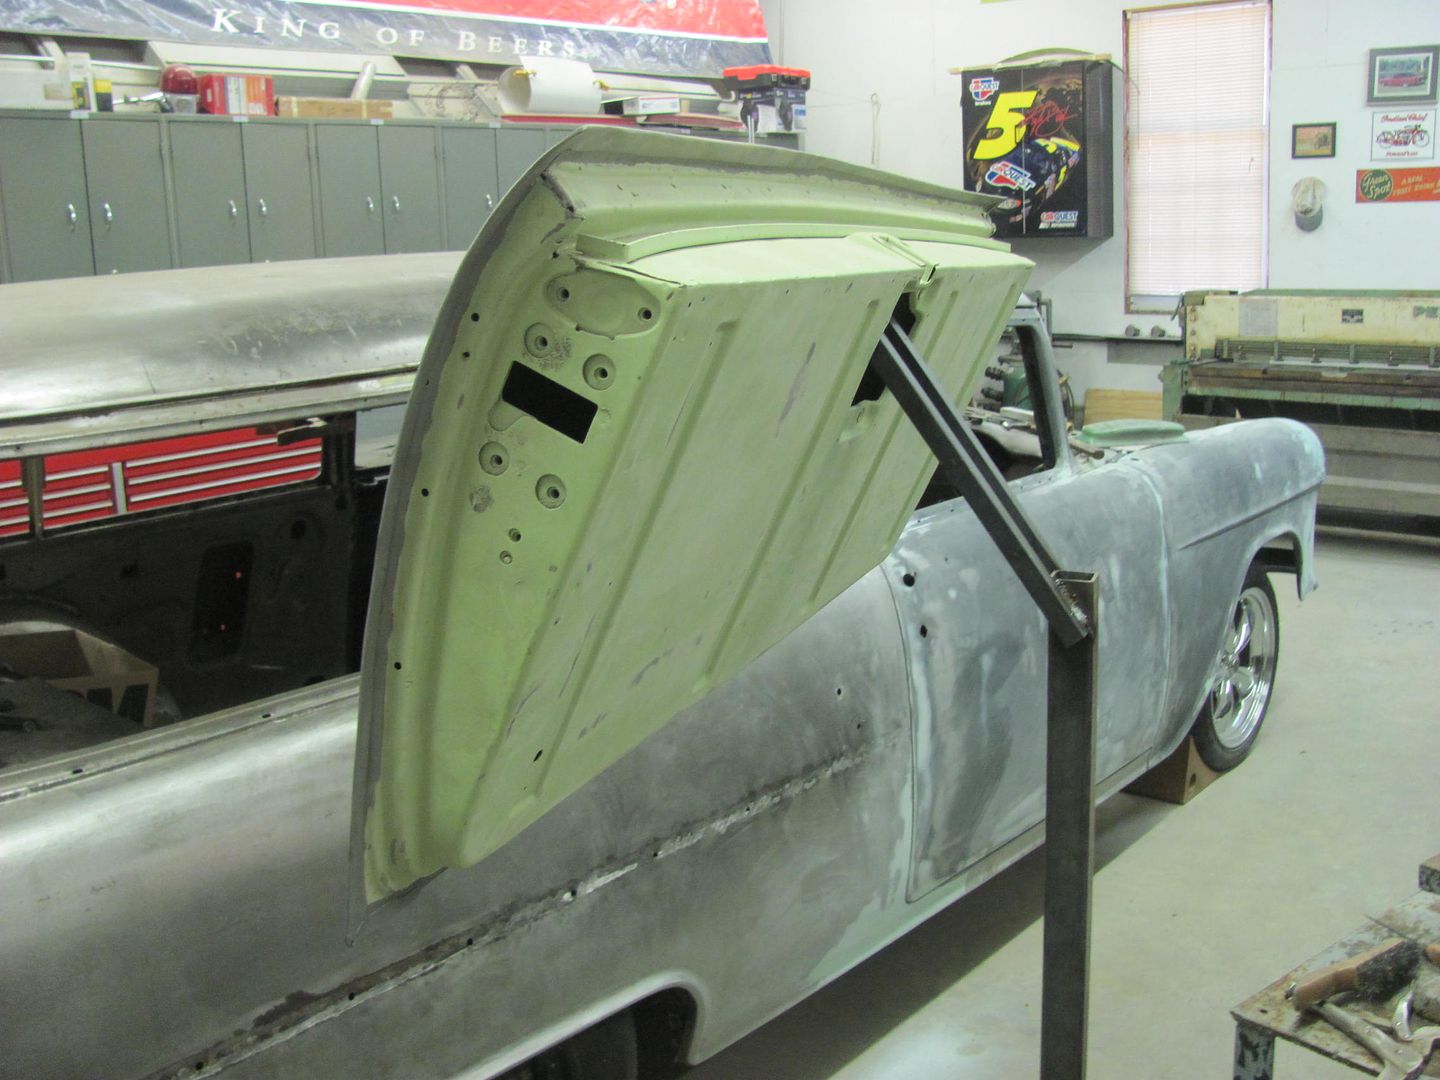 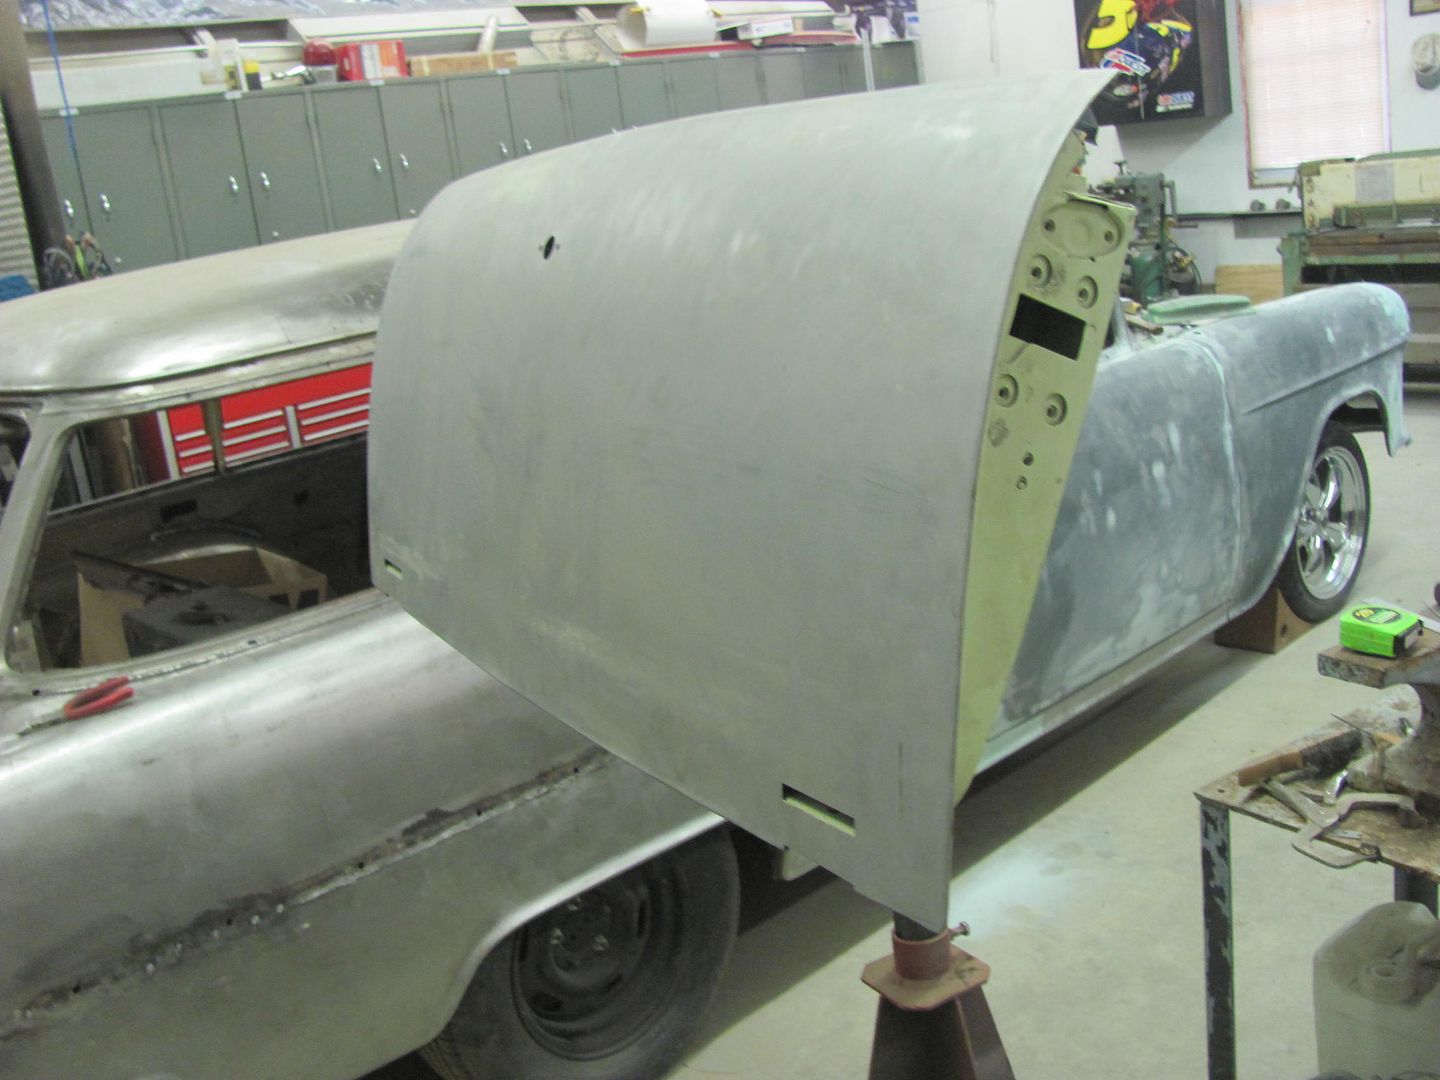 Then a bit of scuffing to get ready for the next coat of epoxy.... 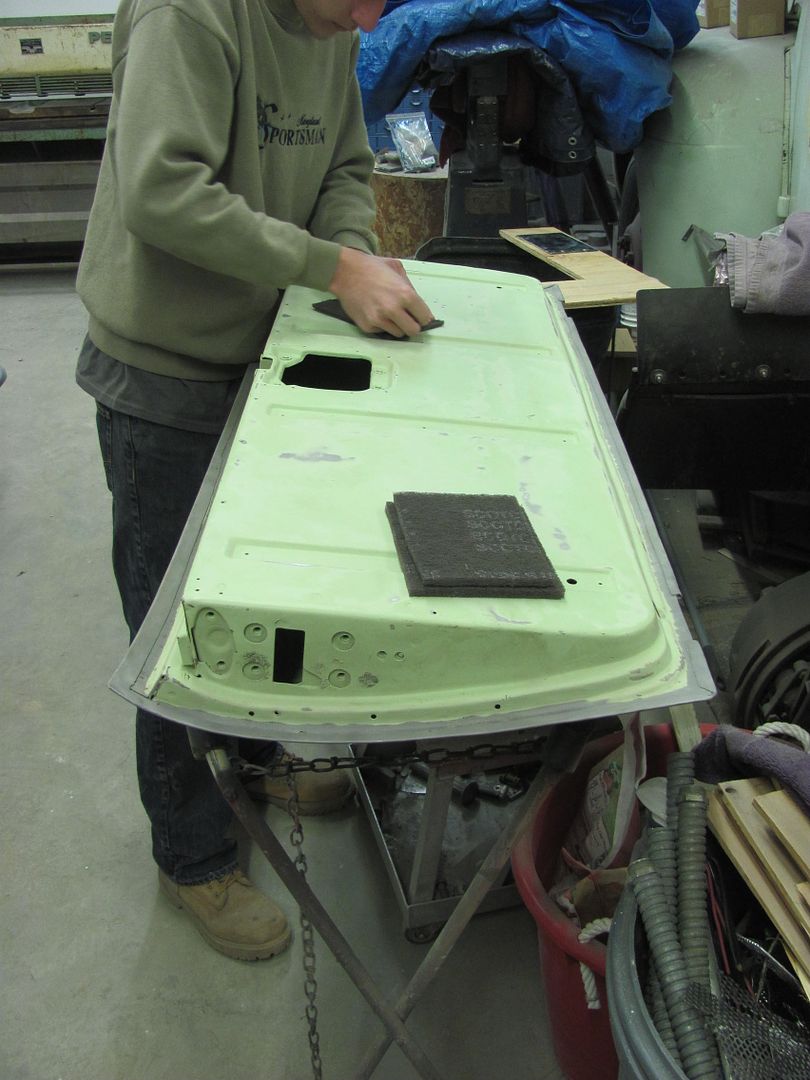
__________________
Robert |
|
|
|
|
03-30-2015, 03:26 AM
|
#11 |
|
Registered User
Join Date: Oct 2007
Location: Spanaway
Posts: 8,451
|
Re: 55 Wagon Progress
I really like how you come up with solutions like the tail gate fixture, as well as all the other home made tools and dies ect..
__________________
Mike. Swamp Rat build thread : http://67-72chevytrucks.com/vboard/s...d.php?t=595019 72 3/4T 4X4 4" BDS Lift 33" BFG's |
|
|
|
|
03-30-2015, 02:36 PM
|
#12 |
|
6>8 Plugless........
 Join Date: Sep 2007
Location: Prairie City, Ia
Posts: 17,140
|
Re: 55 Wagon Progress
Great work! Do you have a goal date to have the car shot by?
__________________
Ryan 1972 Chevy Longhorn K30 Cheyenne Super, 359 Inline 6 cylinder, Auto Trans, Tilt, Diesel Tach/Vach, Buckets, Rare Rear 4-link and air ride option Build Thread 1972 GMC Sierra Grande Longhorn 4x4 1972 Chevy Cheyenne Super K20 Long Step side tilt, tach, tow hooks, AC, 350 4 speed 1972 C10 Suburban Custom Deluxe 1969 Chevy milk truck 1971 Camaro RS 5.3 BTR STG3 Cam Super T10 1940 Ford 354 Hemi 46RH Ford 9" on air ride huge project Tired of spark plugs? Check this out. |
|
|
|
|
03-30-2015, 03:13 PM
|
#13 |
|
Registered User
Join Date: Jan 2013
Location: Leonardtown, MD
Posts: 1,637
|
Re: 55 Wagon Progress
Attempting to make the August TriFive Nationals, but my day job and a travel schedule may cause some interference....
__________________
Robert |
|
|
|
|
04-04-2015, 10:33 PM
|
#14 |
|
Registered User
Join Date: Jan 2013
Location: Leonardtown, MD
Posts: 1,637
|
Re: 55 Wagon Progress
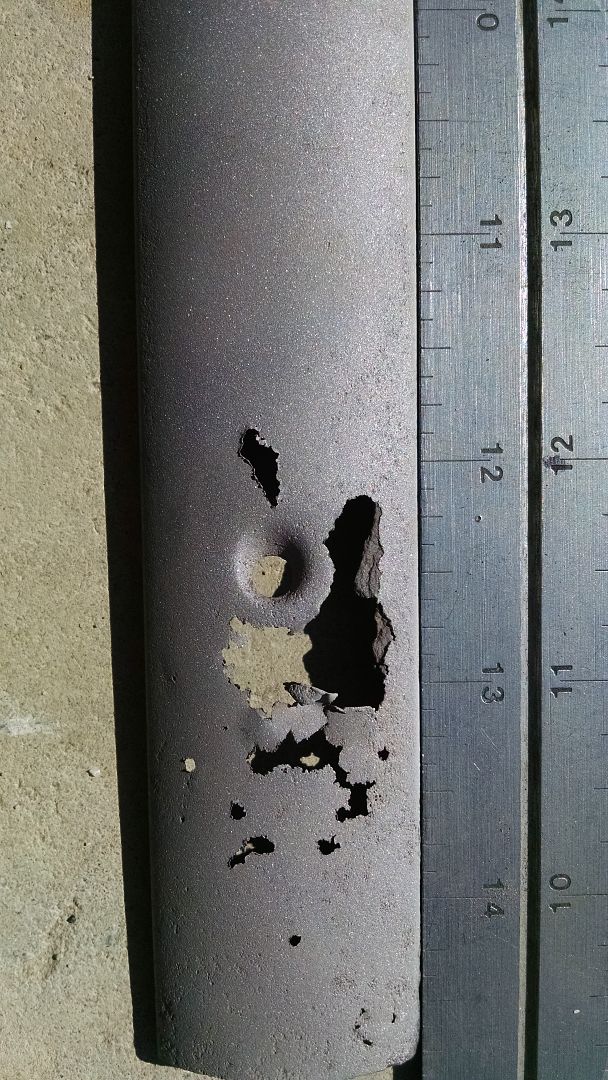
As Kyle was going through the interior trim pieces the last couple weeks he did find one that had a few pits...
 So we got a used replacement from the Stainless Shoppe in Seymour WI. A shame to paint this one  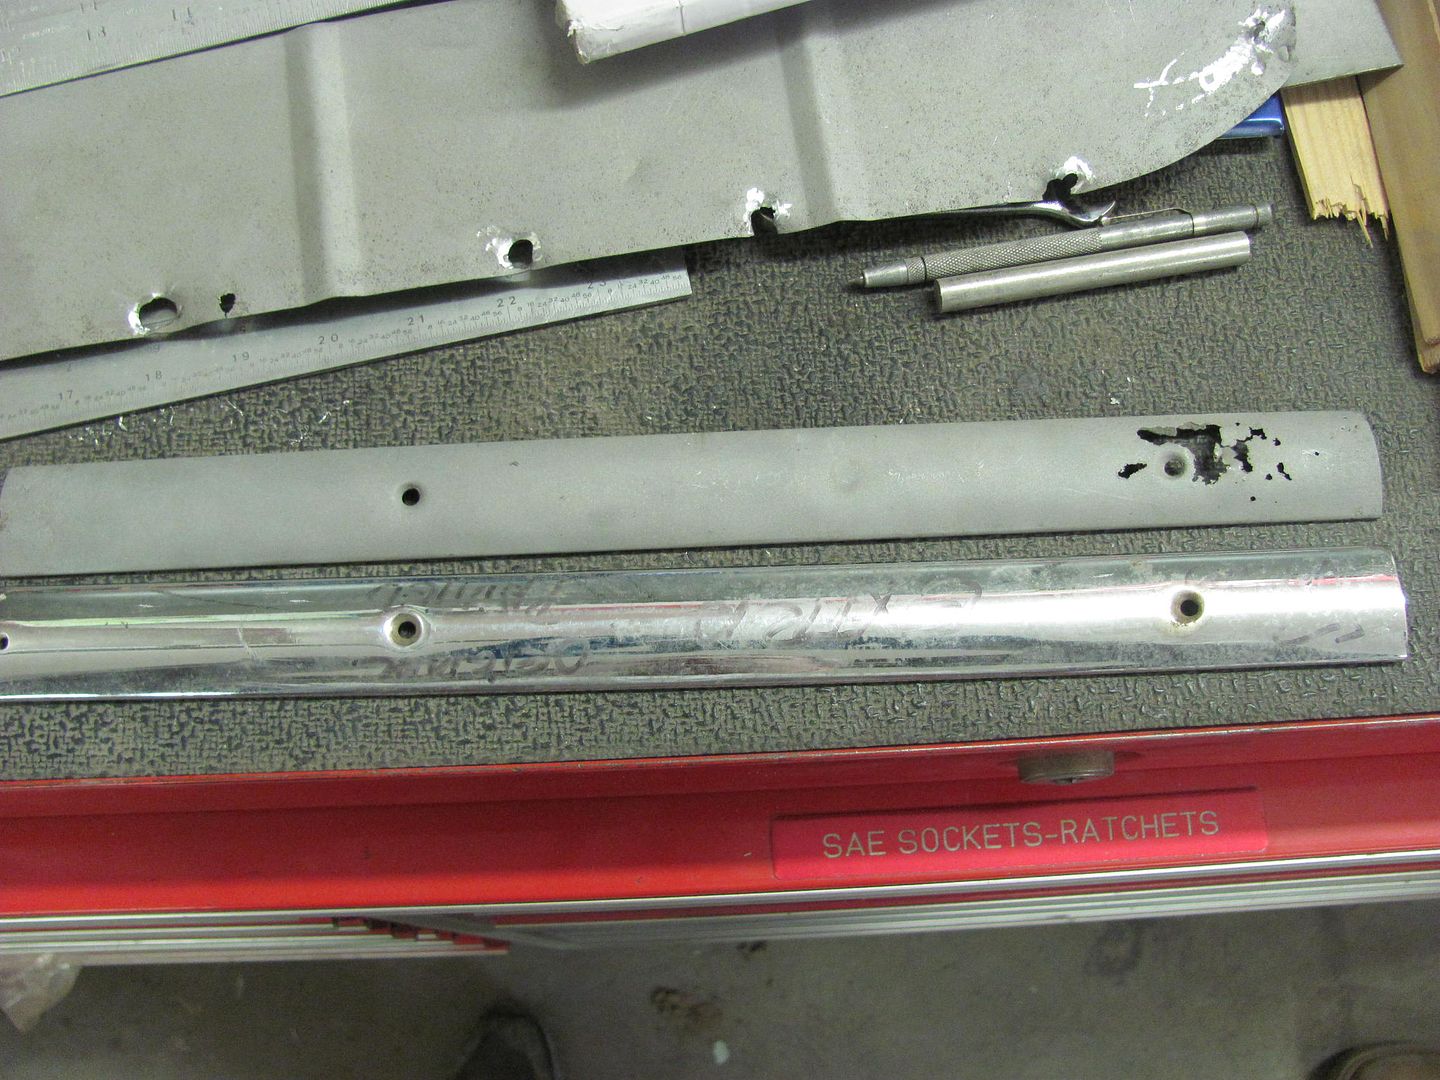 As I was getting the next batch of parts ready for epoxy, Kyle was setting up the bead roller for making the lower baffle of the core support. But looking at the center bead, the Fasti didn't have quite the reach... 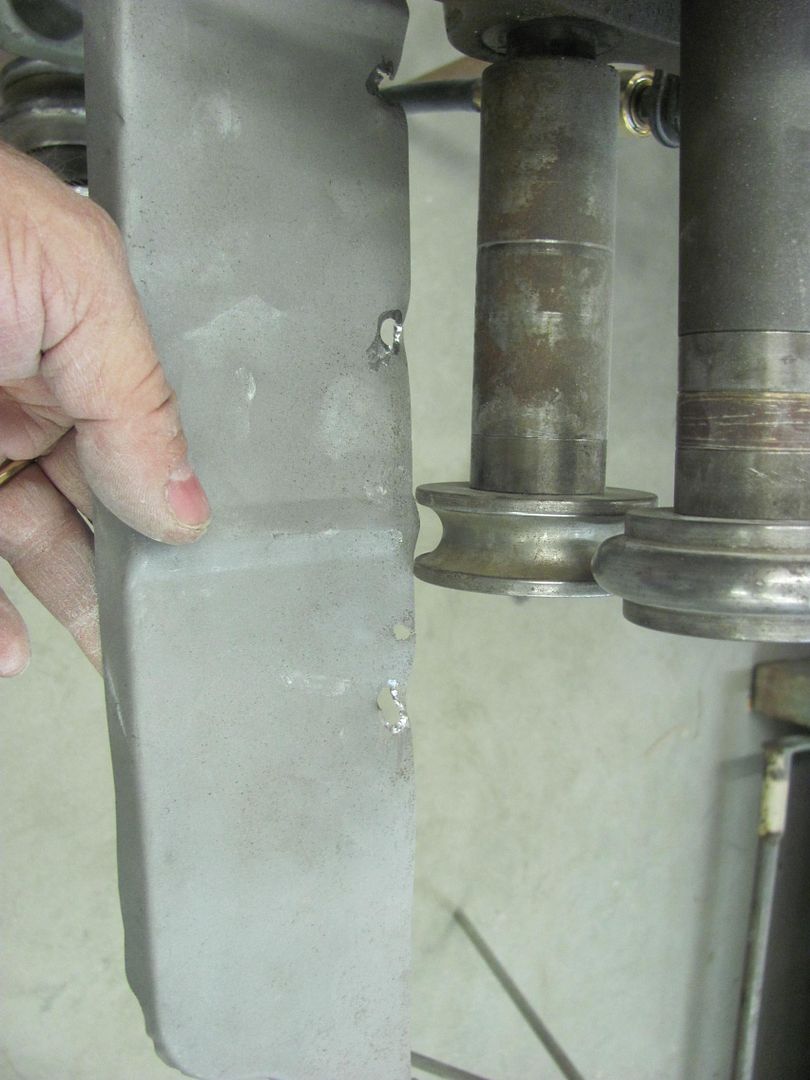 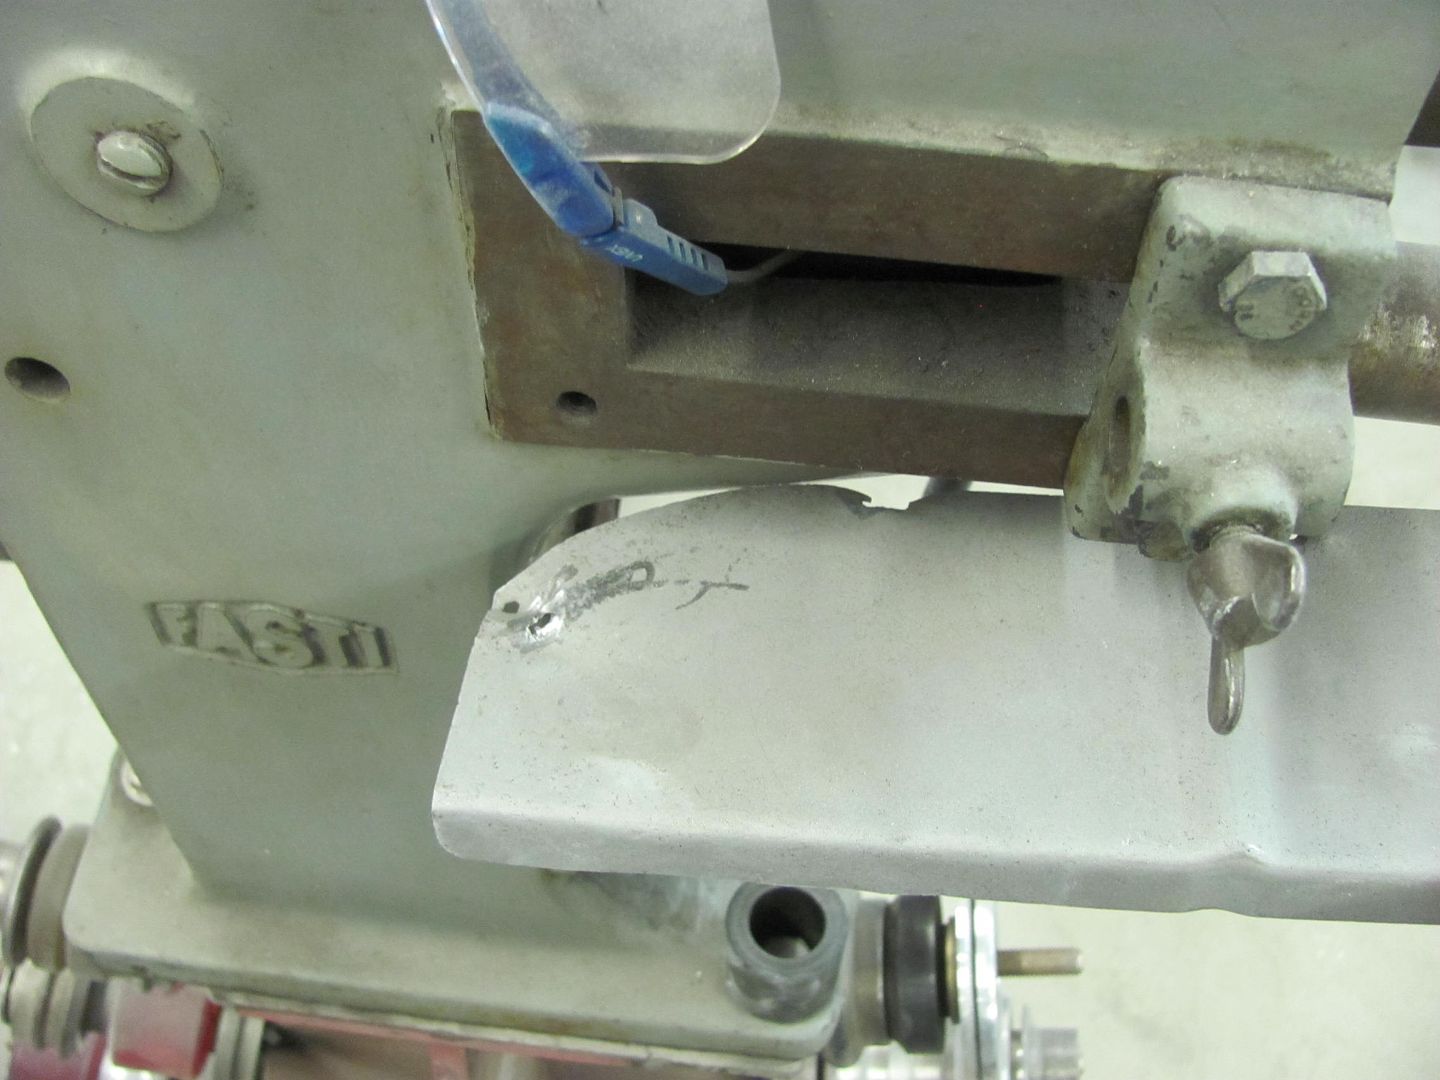 I had wanted to make axles for the bead roller dies to fit the English wheel, so today was as good a day as any. This will give Kyle some practice on the South Bend..   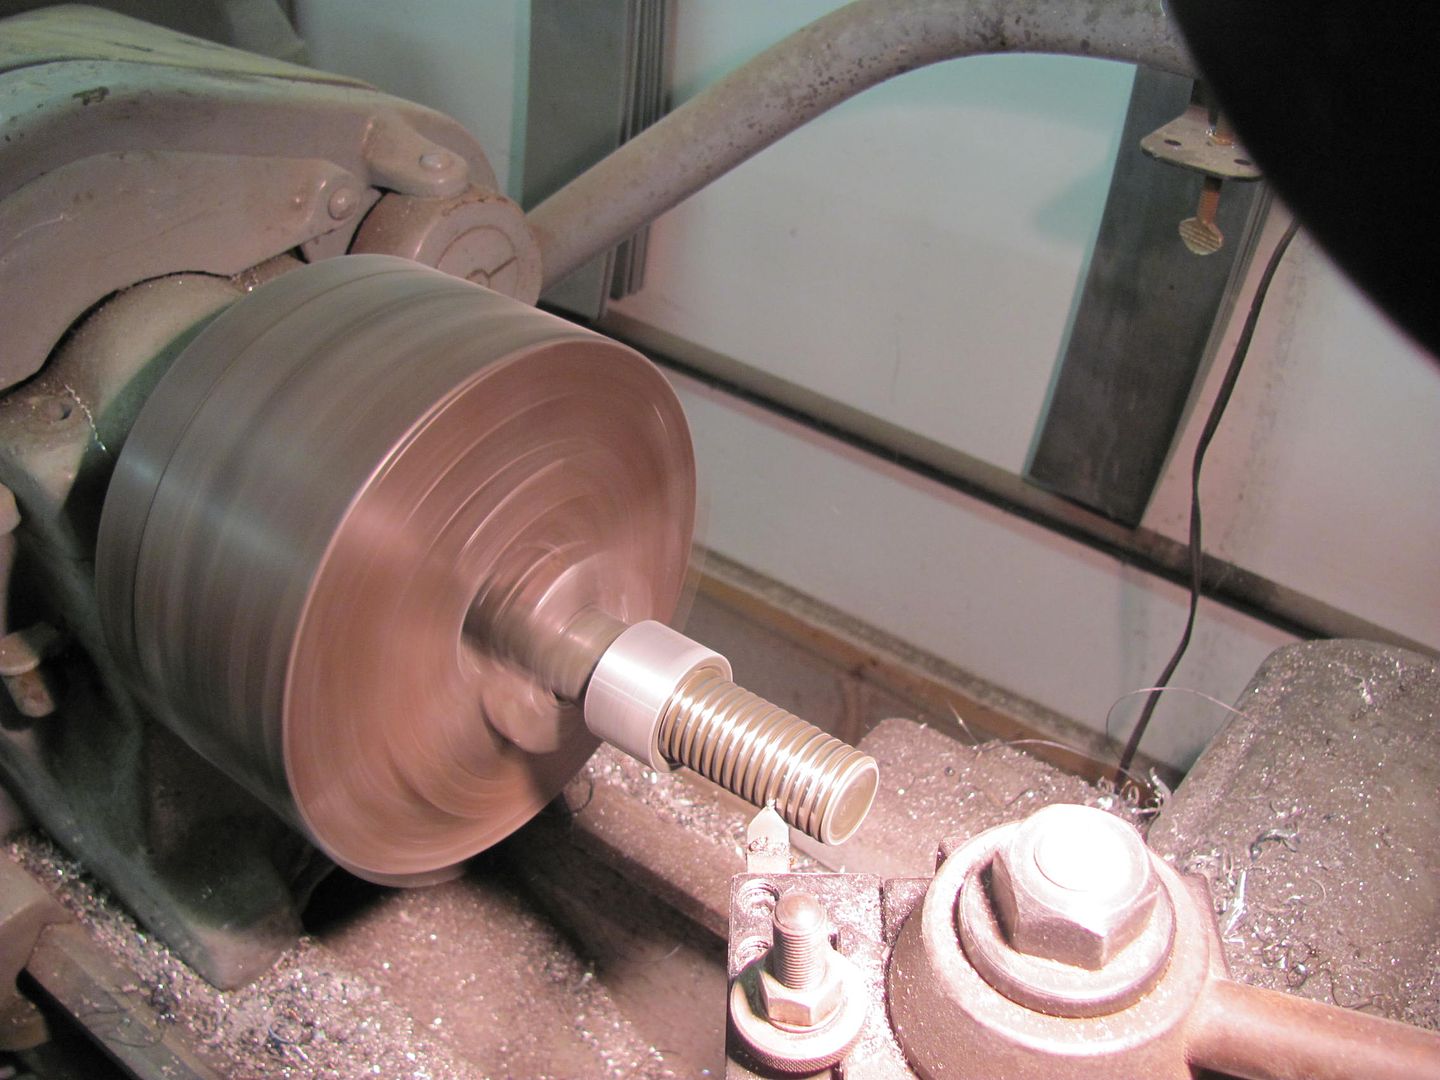 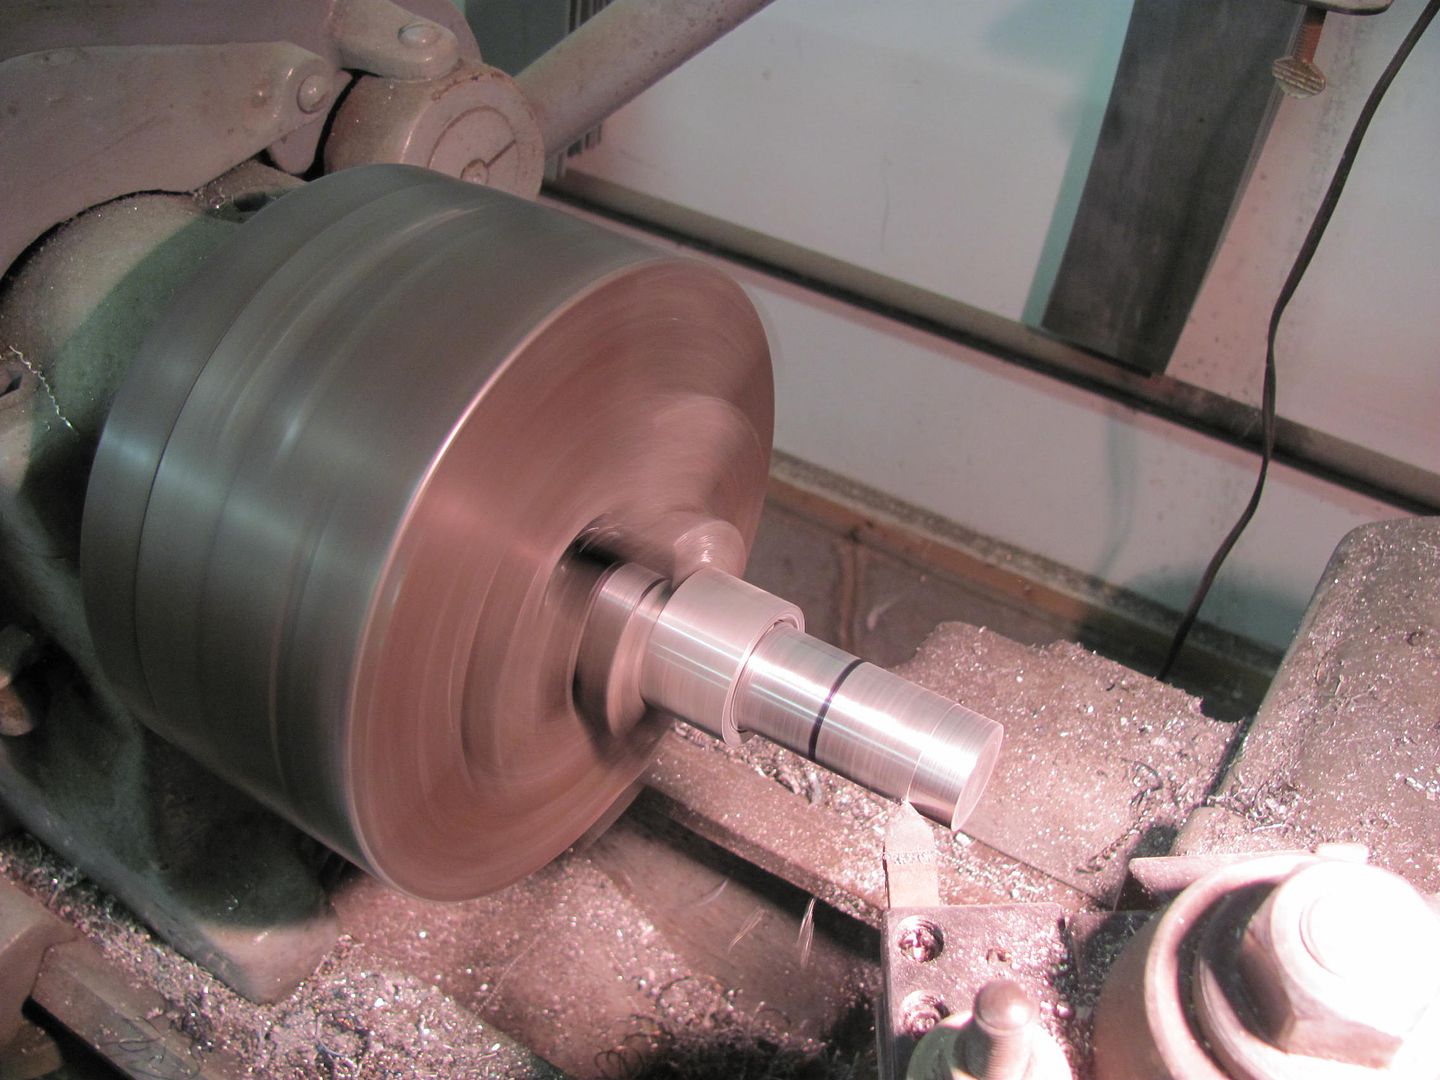 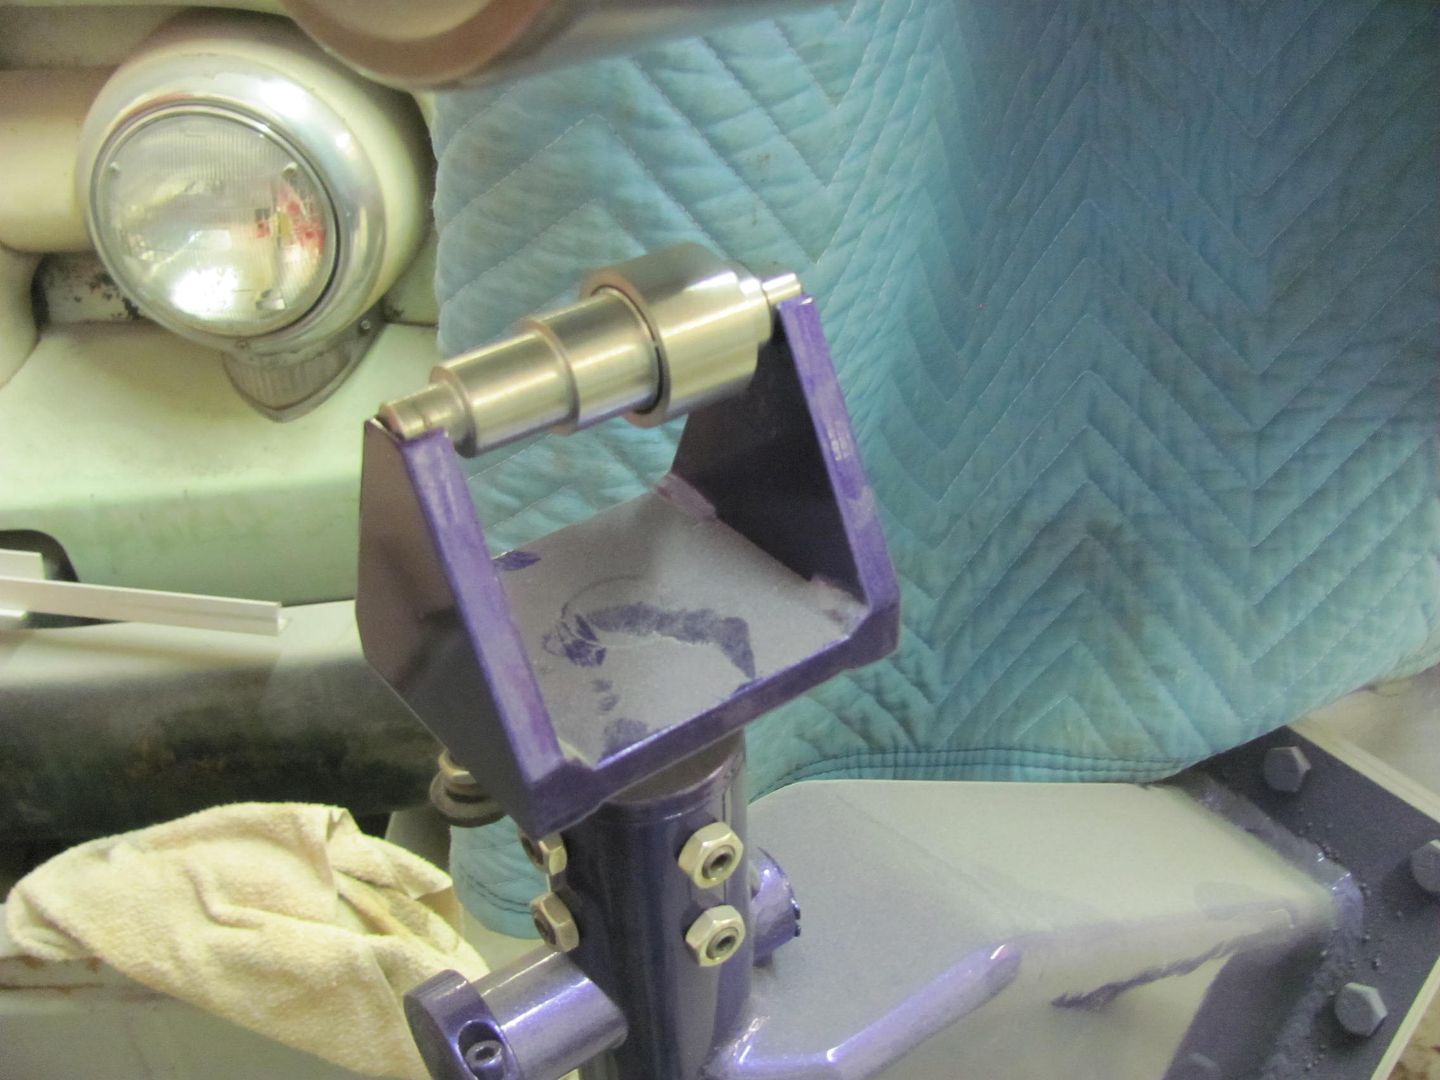 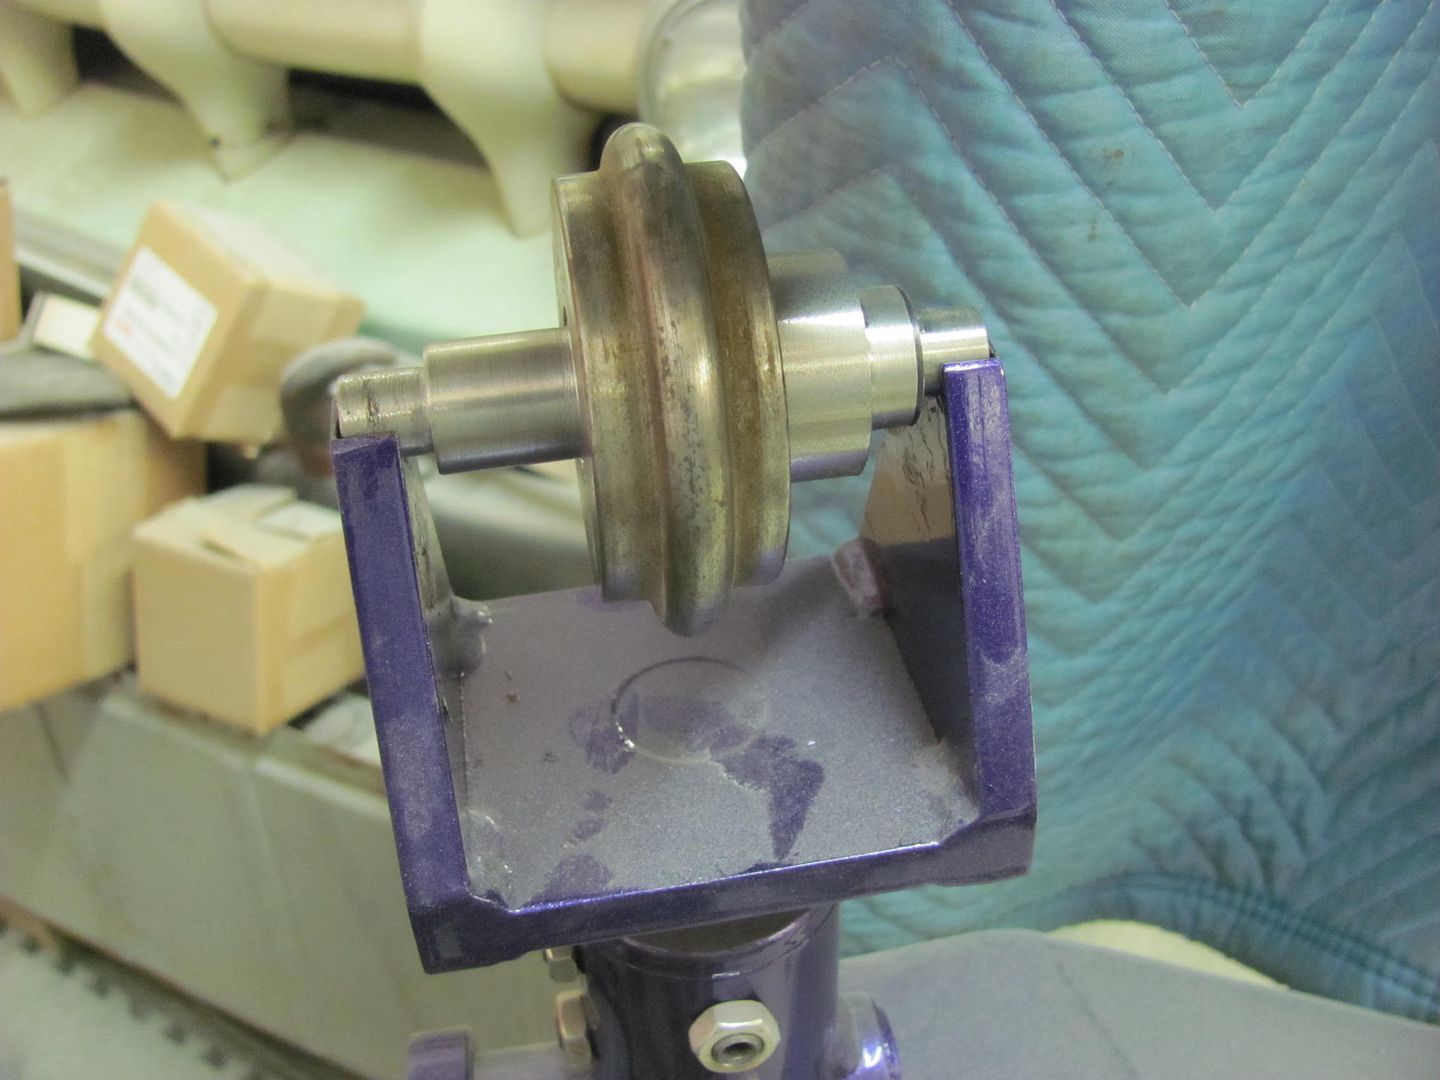 And my accomplishments for today...  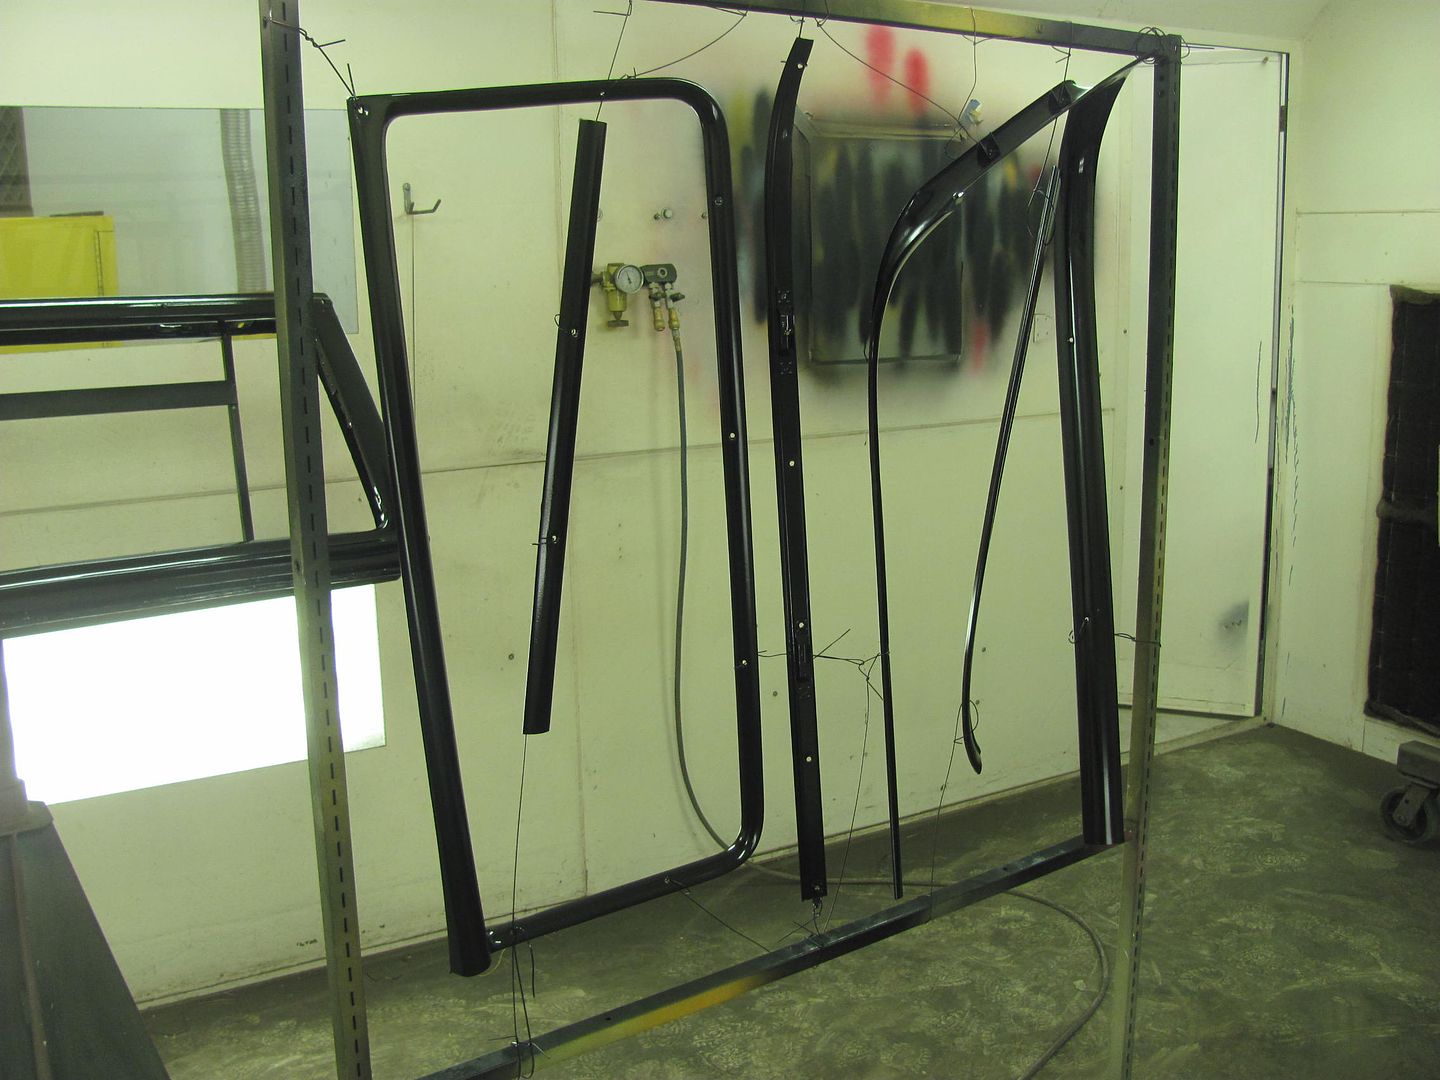 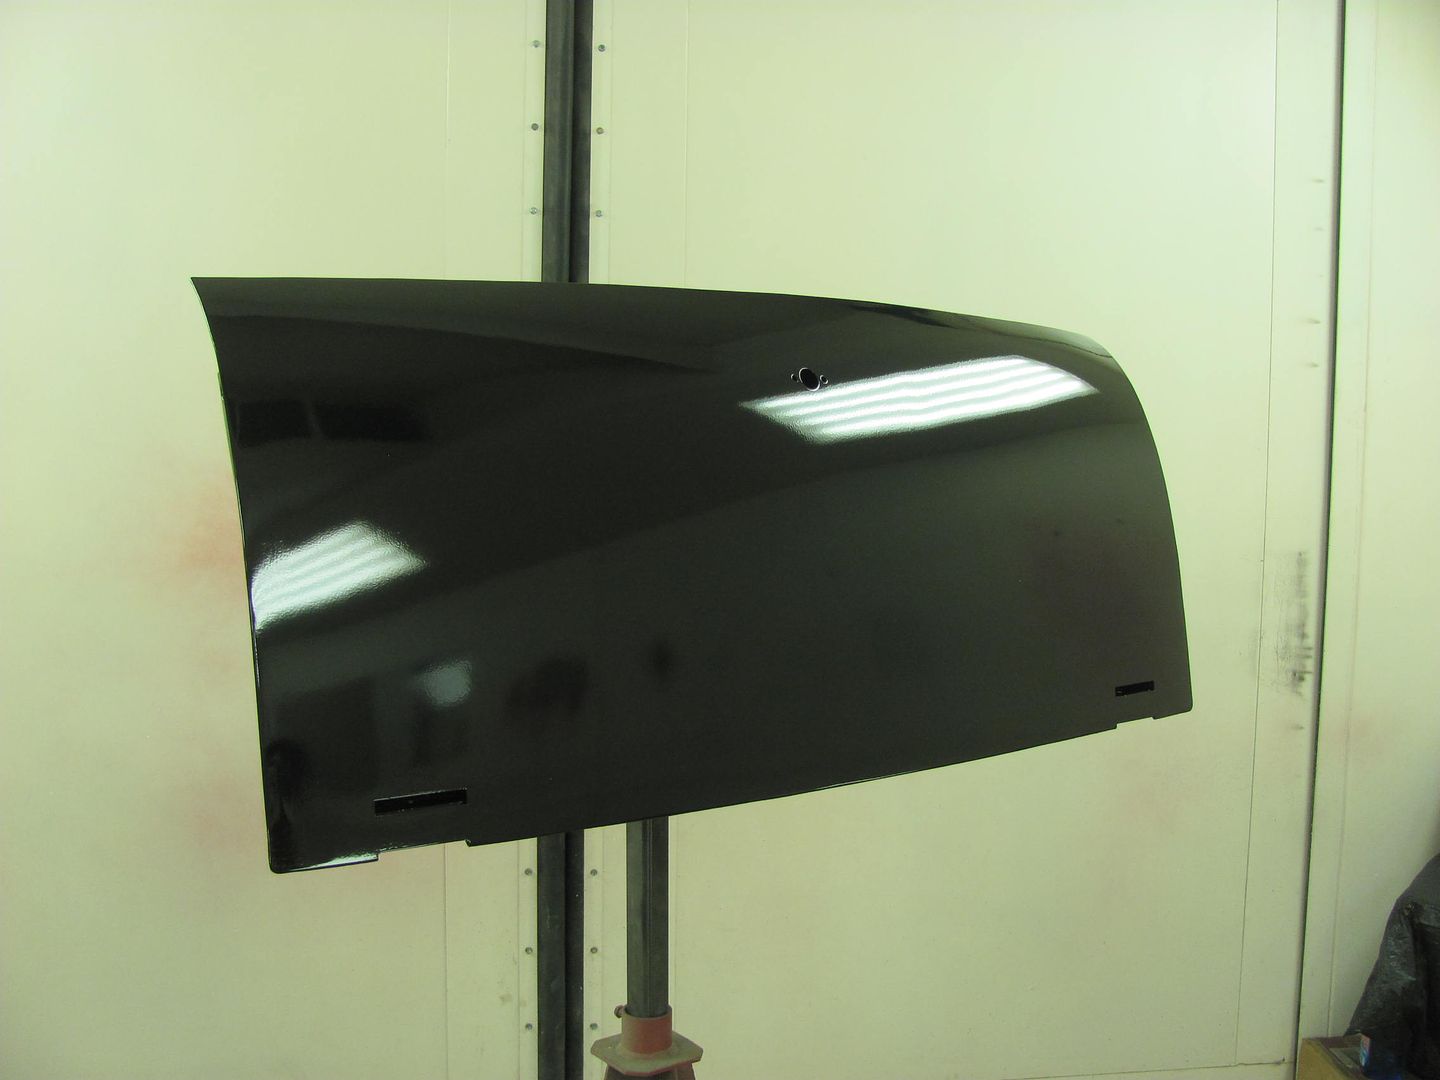 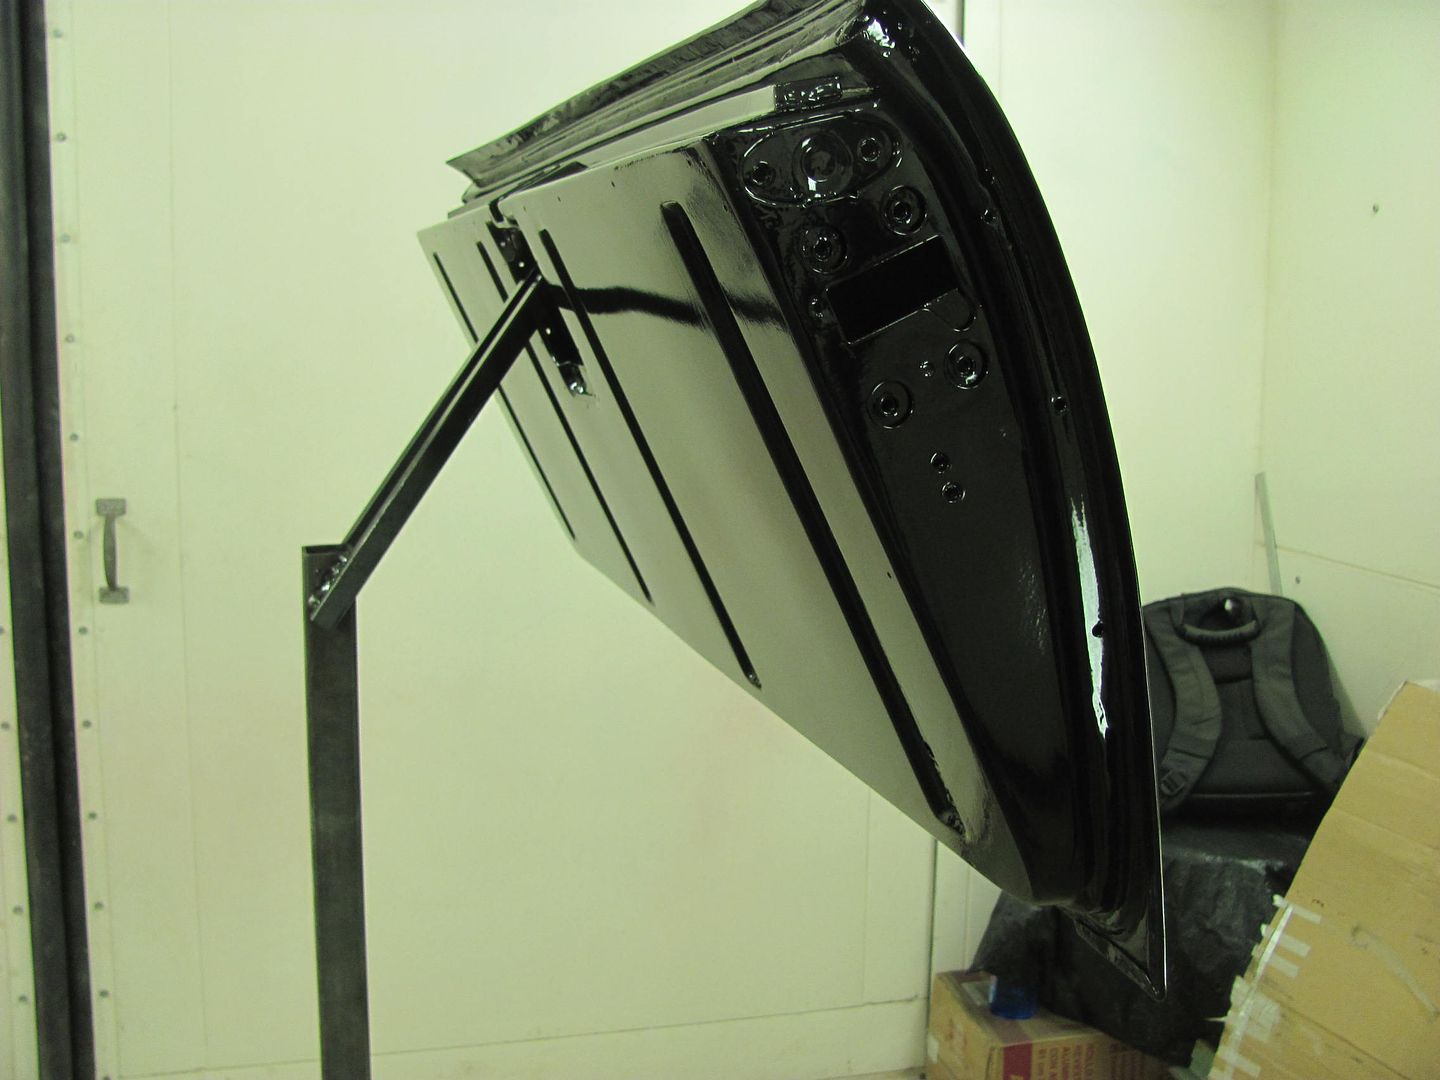 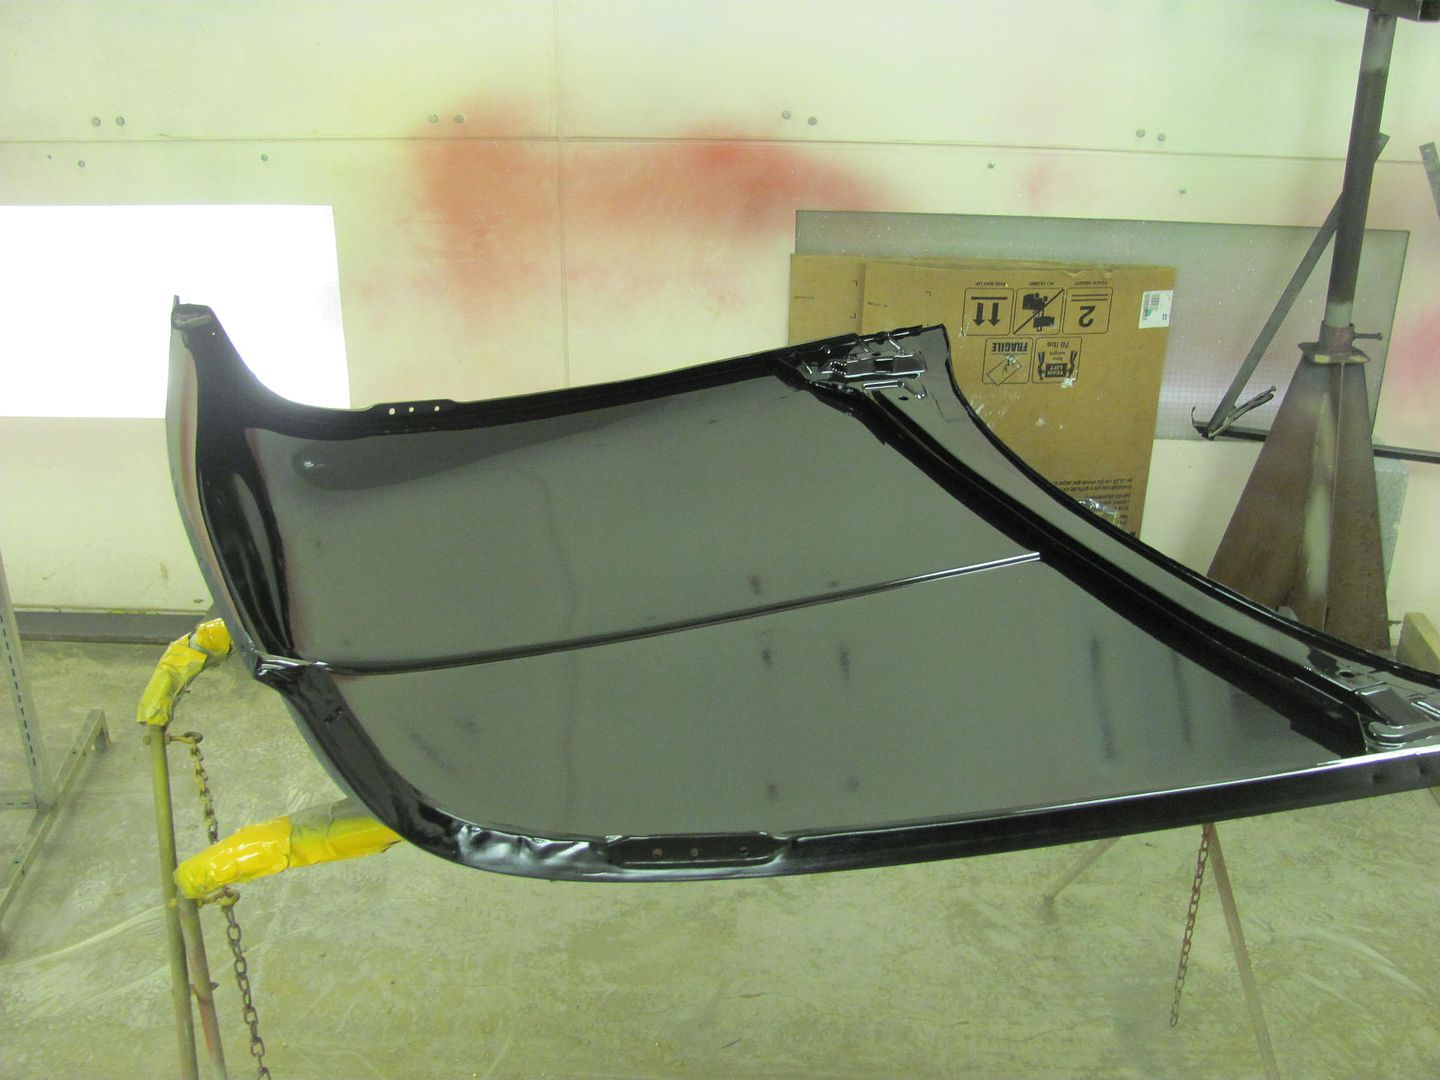  And as I had a bit of epoxy left over, time to seal the inner door to the door skin.. Both had been primed before assembly... 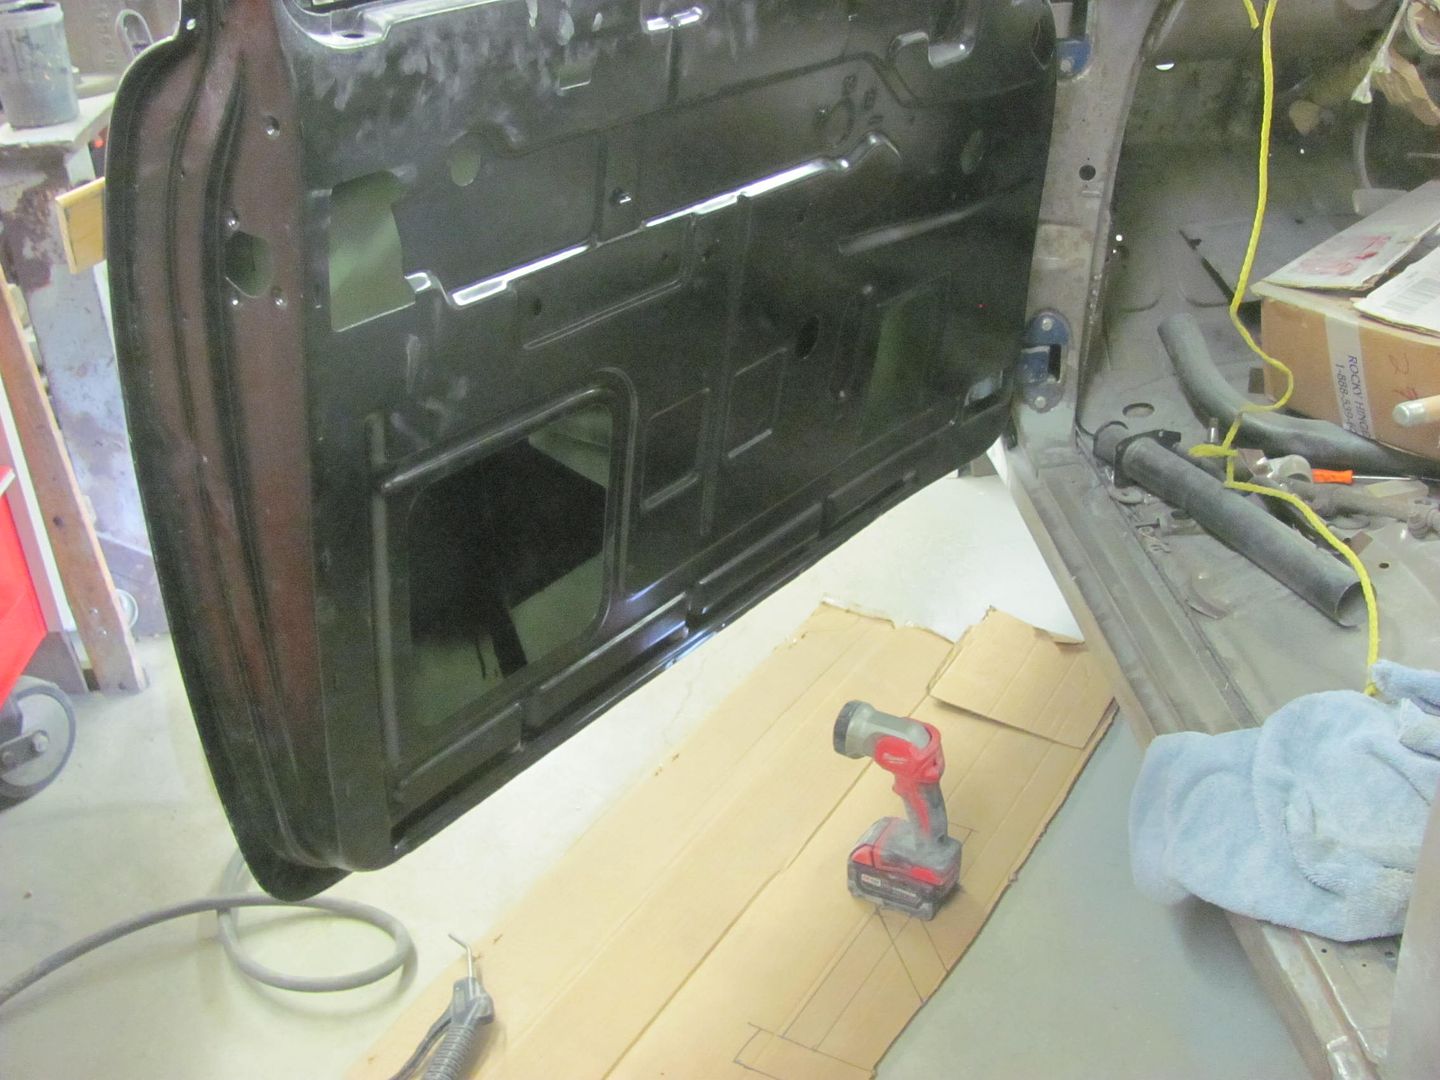  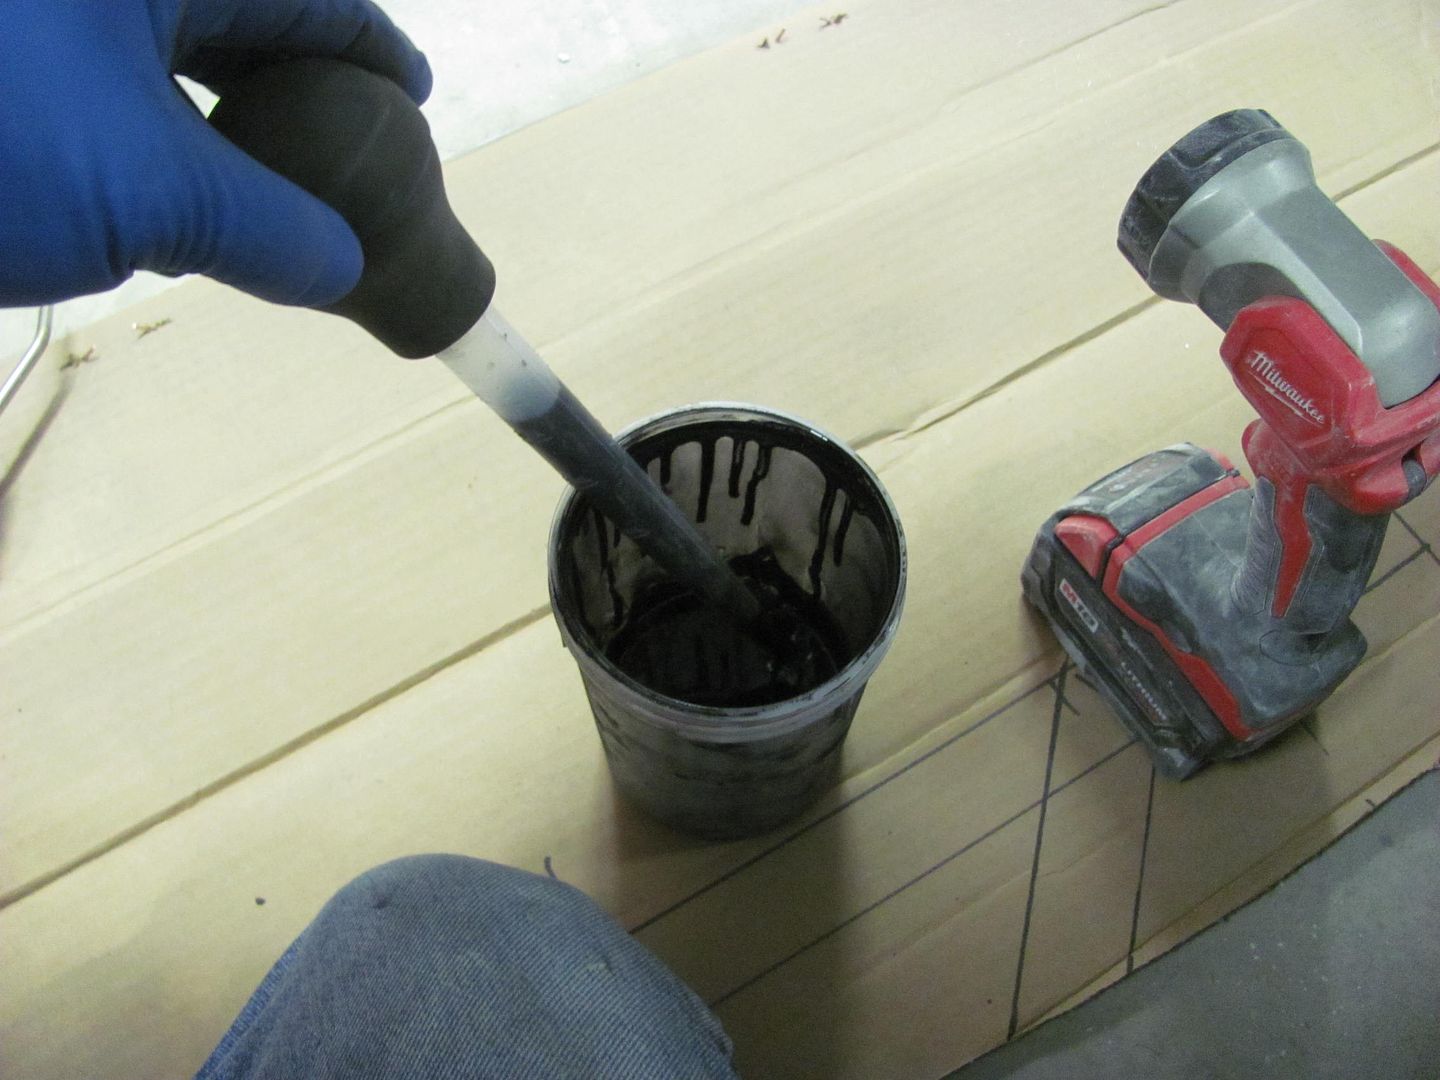 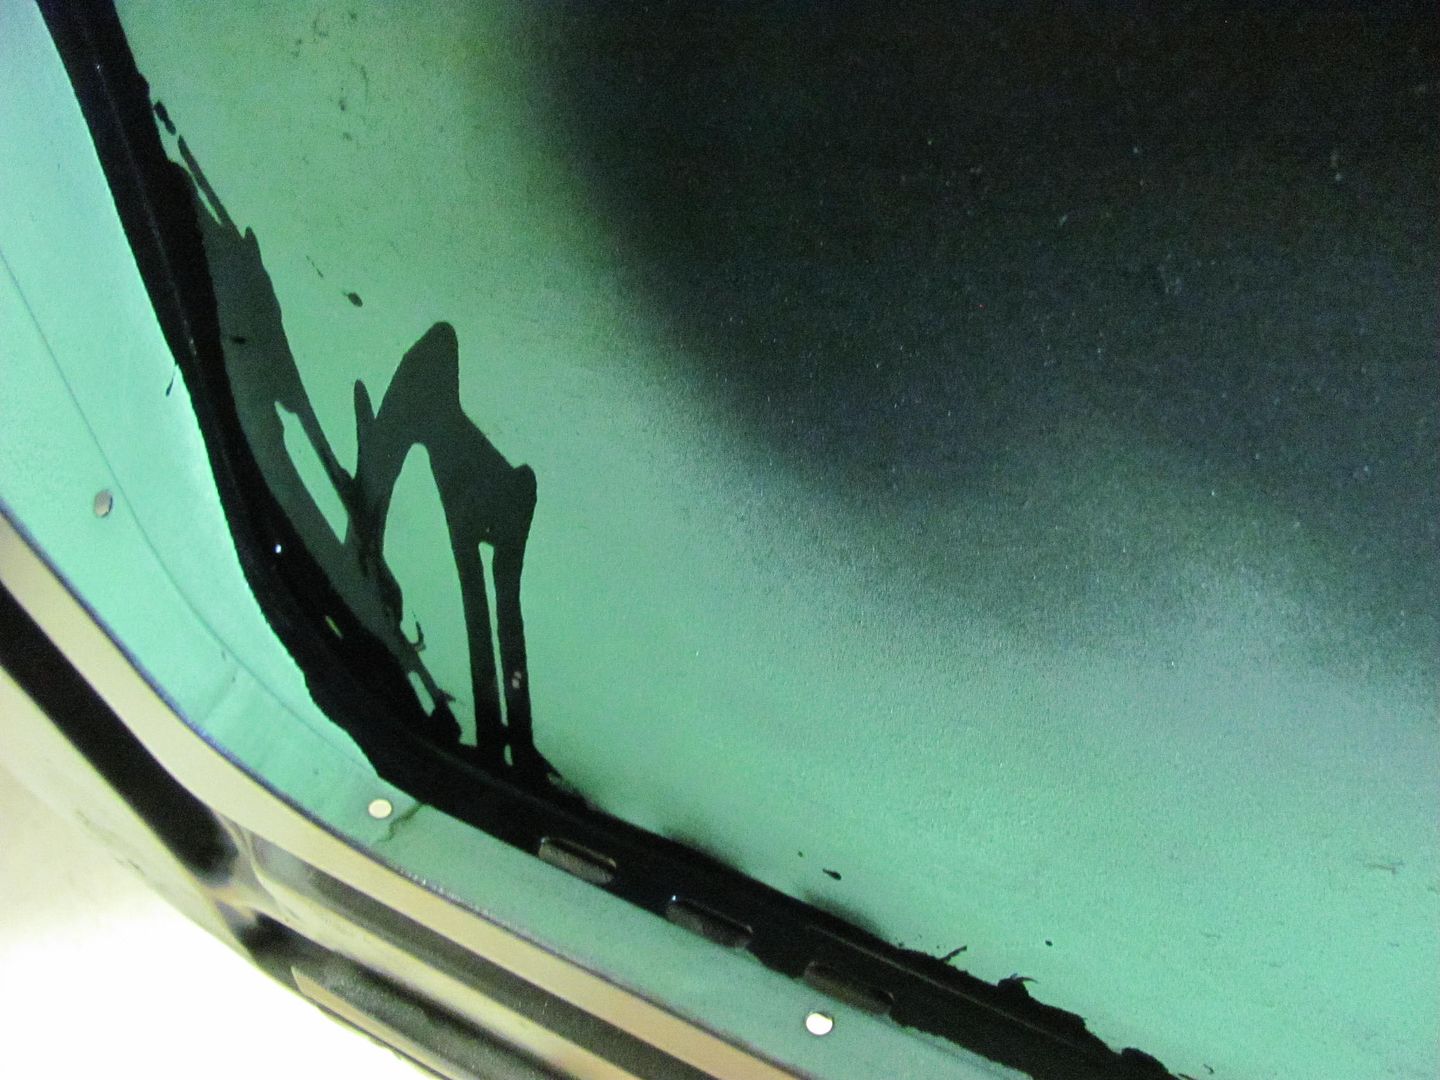 Definitely want to cover the floor in doing this... 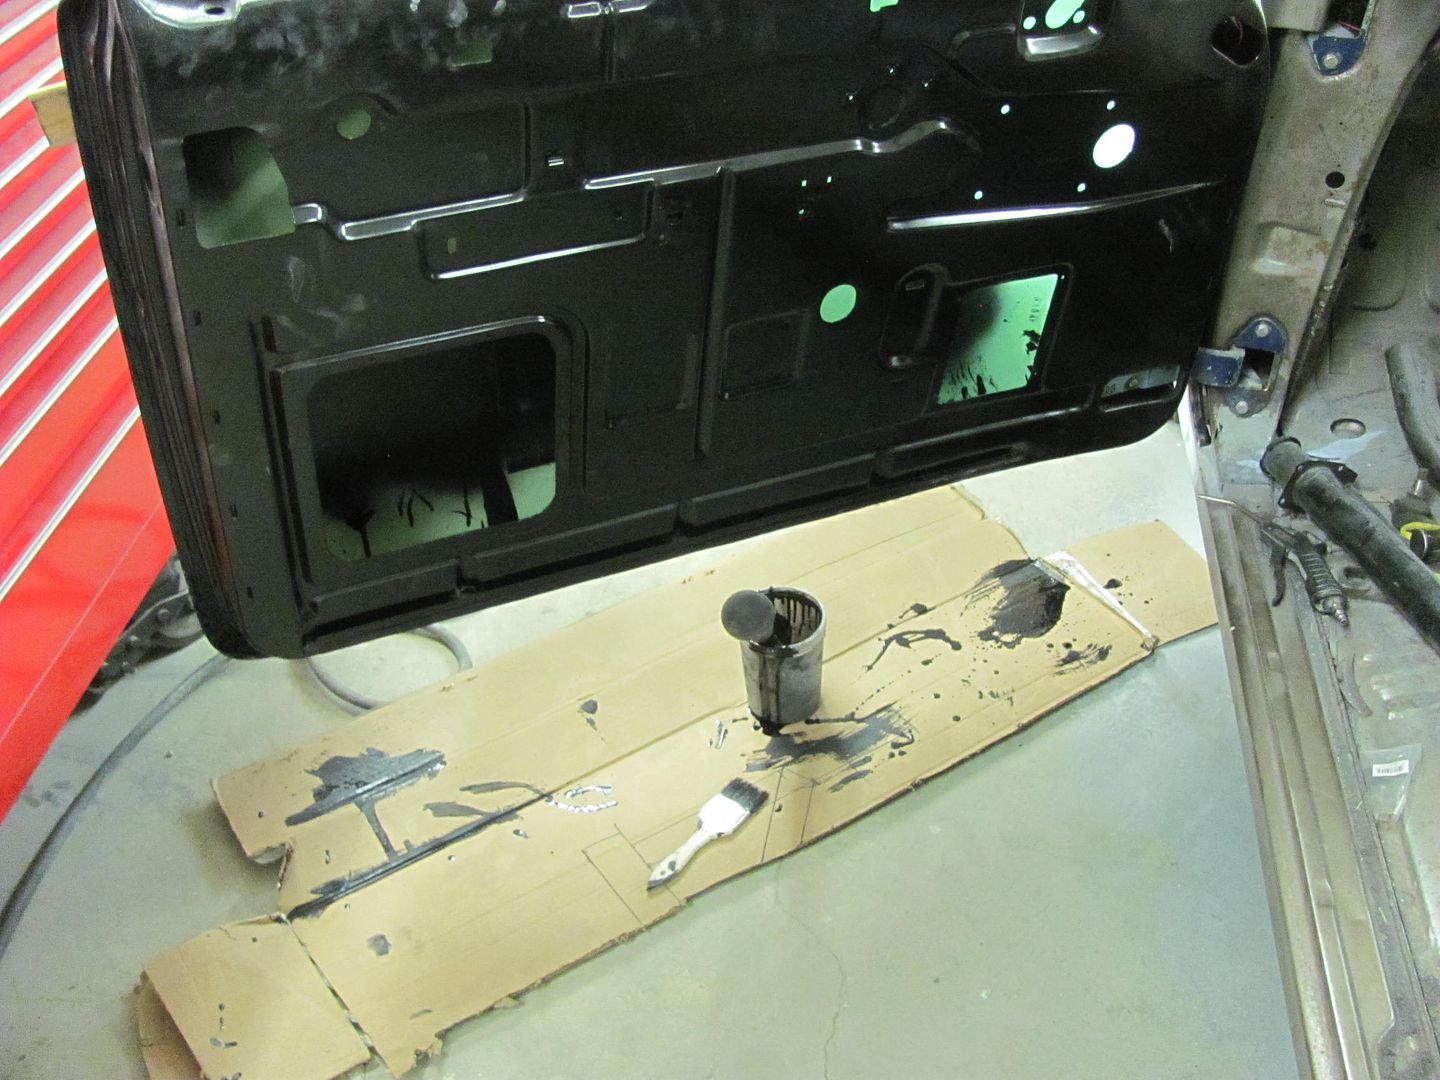 Had enough to do both doors, should keep the rust bugs gone for a long time to come..
__________________
Robert |
|
|
|
|
04-04-2015, 11:05 PM
|
#15 |
|
Registered User
Join Date: Jun 2013
Location: Somewhere
Posts: 3,068
|
Re: 55 Wagon Progress
I see some welds look pretty large diameter in comparison to the vise-grip next to them. Using a circular motion or? I'm just admiring the nice flat welds. Mine come out smaller and more proud.
You grind welds with a thin cutting wheel? Any advice for straightening a 67-72 front bed wall bowed forward a bit from junk hitting it over the years? |
|
|
|
|
04-04-2015, 11:48 PM
|
#16 |
|
Senior Member
Join Date: Mar 2011
Location: West Plains, Missouri
Posts: 7,555
|
Re: 55 Wagon Progress
Wow, the inside of the hood looks better that a lot of top sides...Jim
__________________
my build thread: http://67-72chevytrucks.com/vboard/s...d.php?t=459839 Jimbo's long bed step build:http://67-72chevytrucks.com/vboard/s...t=464626<br /> |
|
|
|
|
04-07-2015, 11:07 PM
|
#17 | ||
|
Registered User
Join Date: Jan 2013
Location: Leonardtown, MD
Posts: 1,637
|
Re: 55 Wagon Progress
Quote:
Quote:
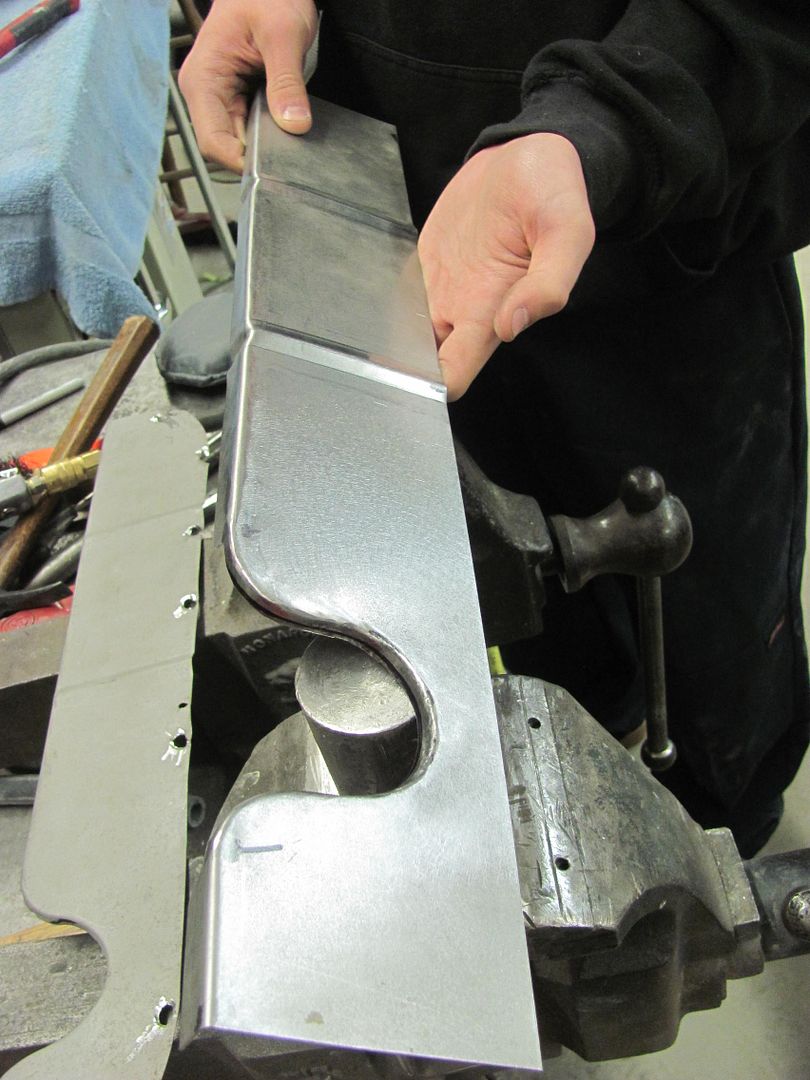
Thanks Jim, the semi gloss is nice for showing any remaining defects.. Well it was taking a little longer on the English wheel adapter kit than I thought, and since that is on the shop's dime, I thought we'd try something that we could get done a little quicker. So the other machine with plenty of throat was the Lennox, so let's make some dies for it..... Also got in some more block sanding while Kyle was cutting out pieces for the dies. 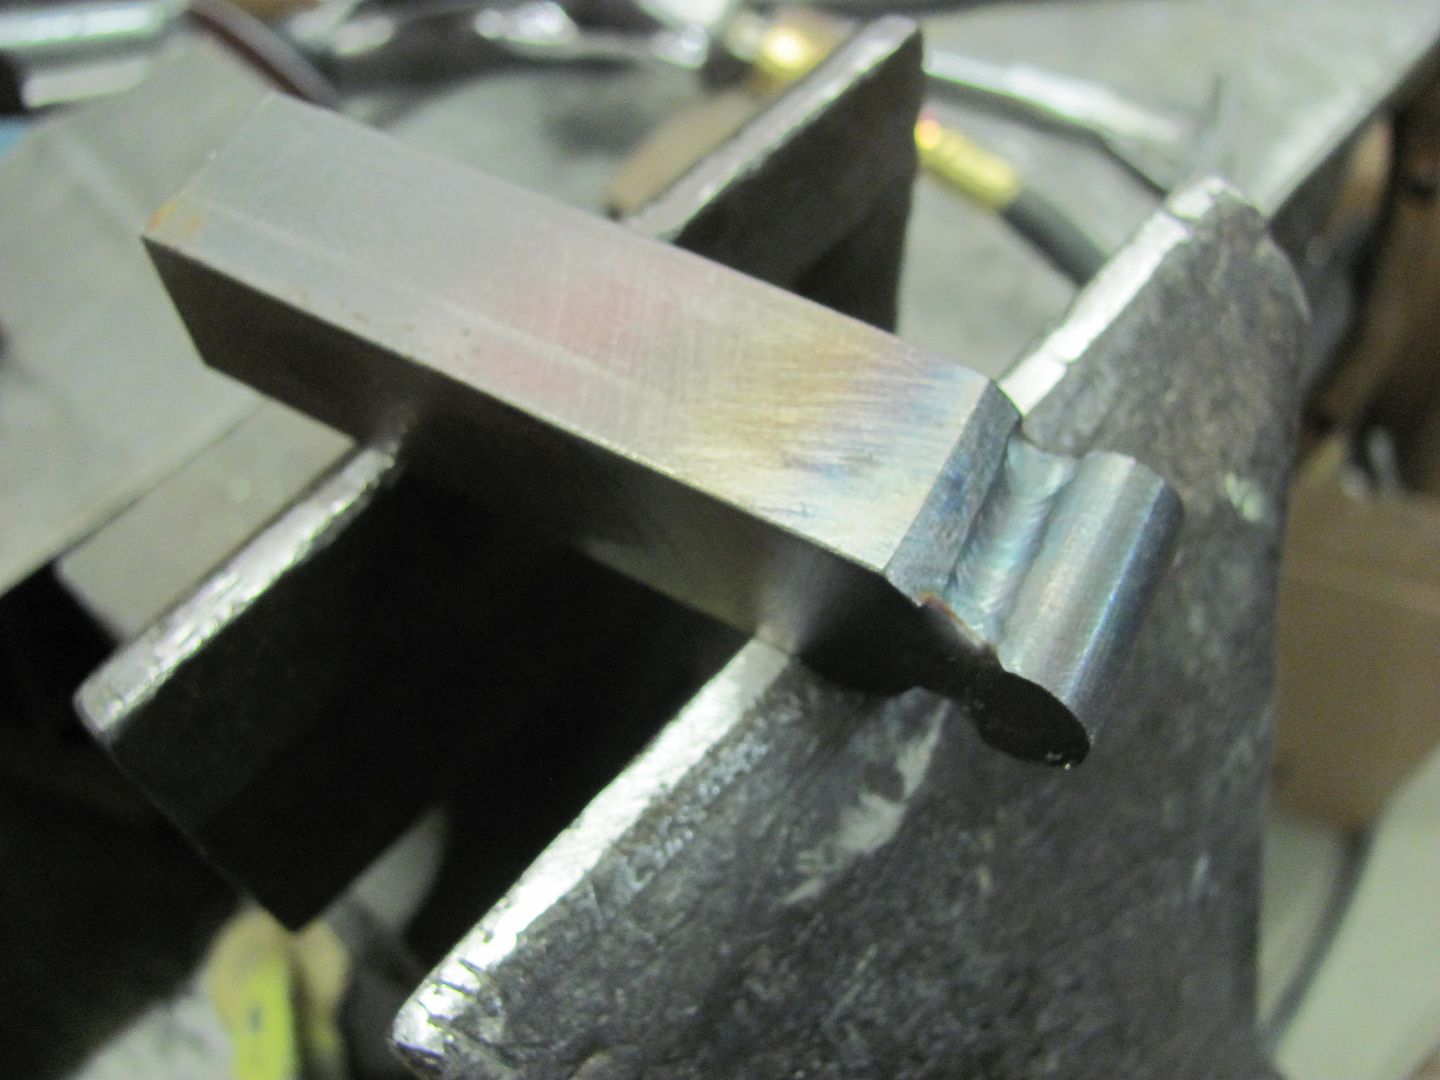 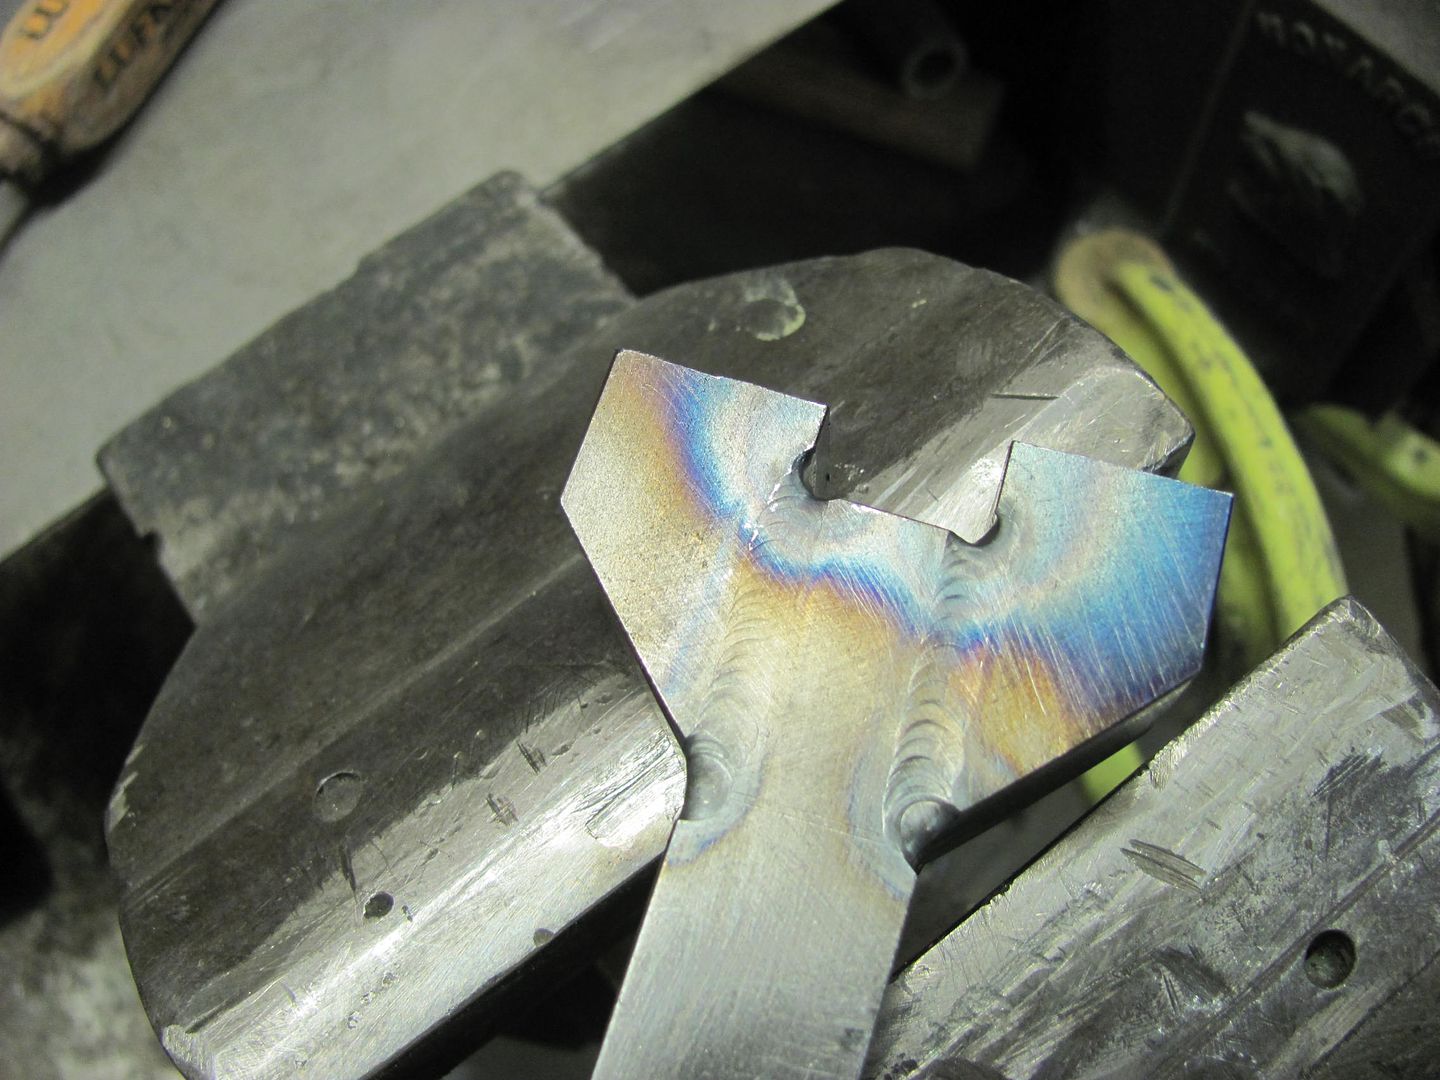 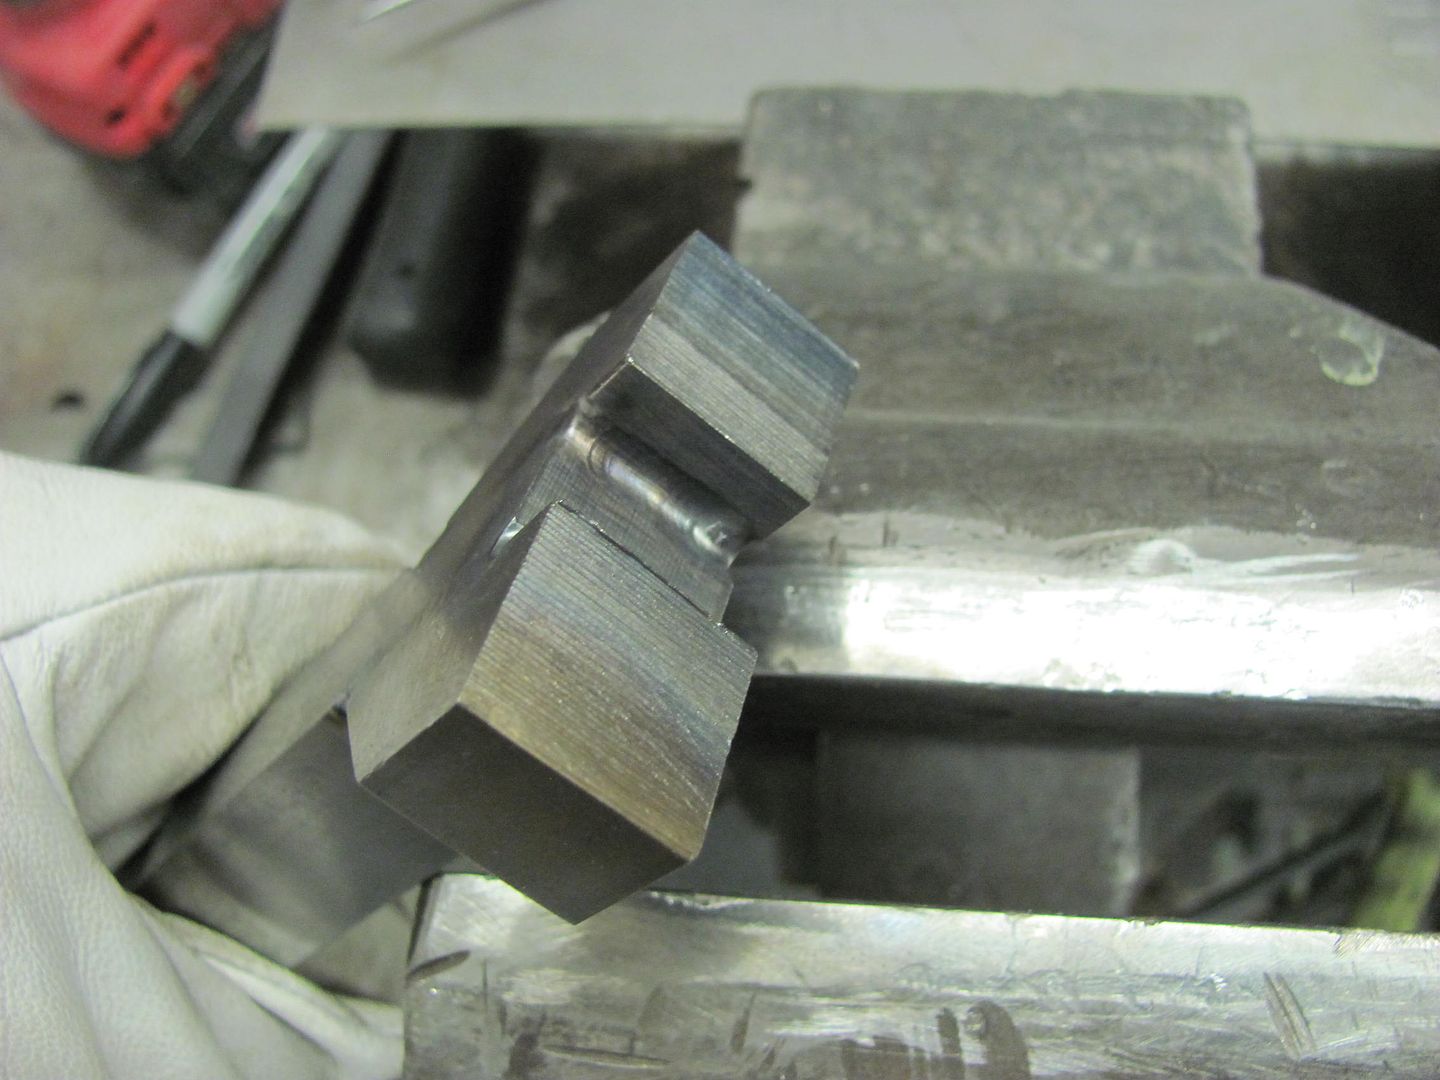 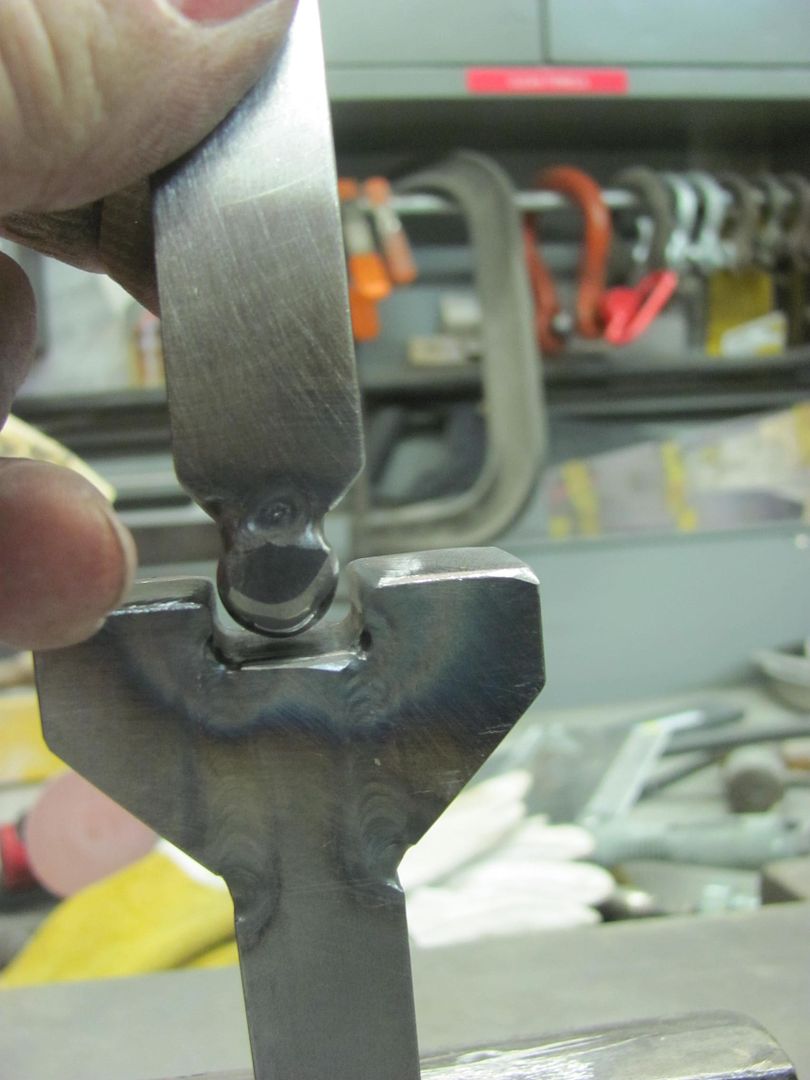 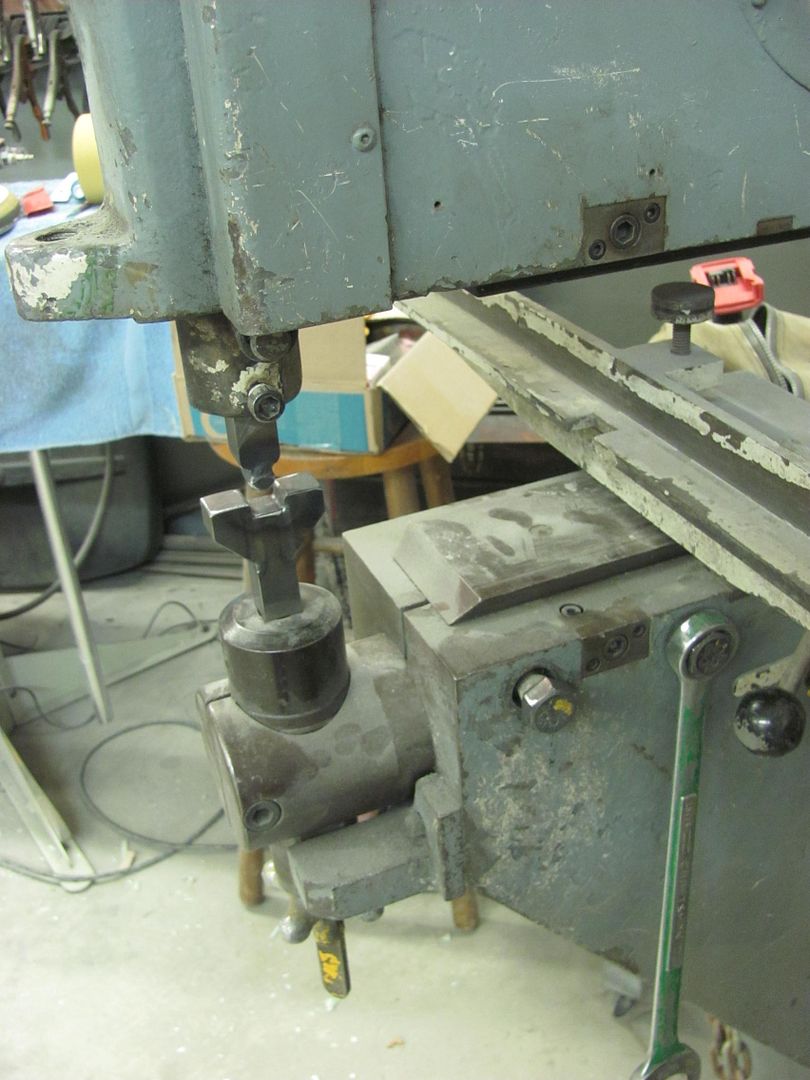 Pre-stretching the bead areas of the baffle... 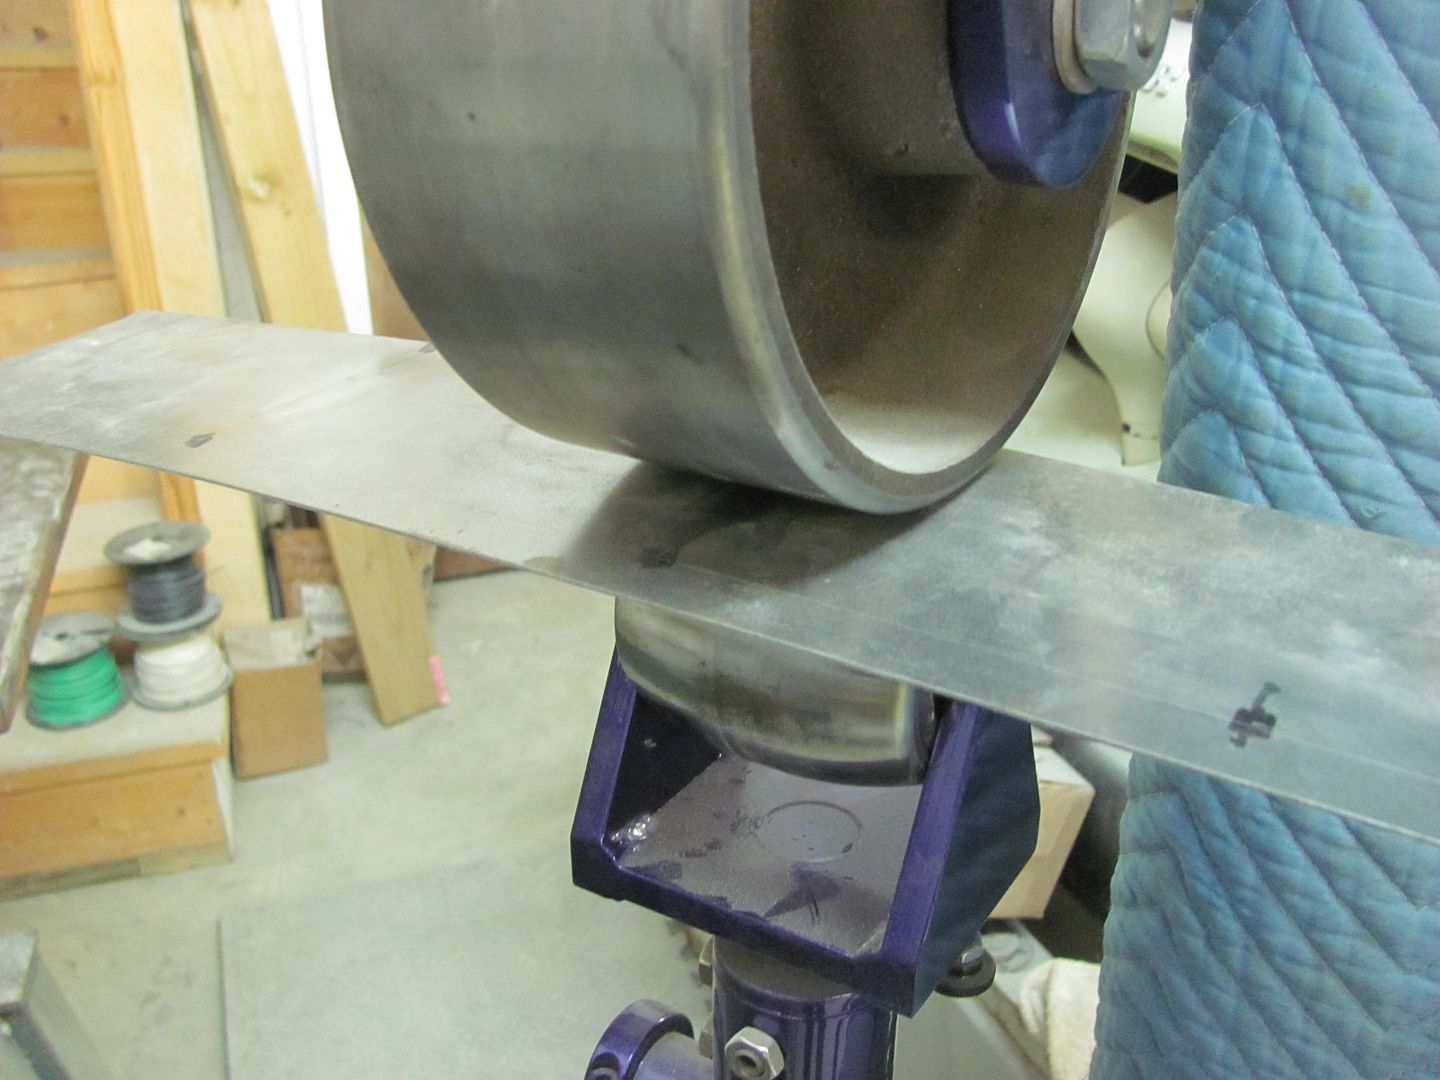  Adding the bead, using the backstop... 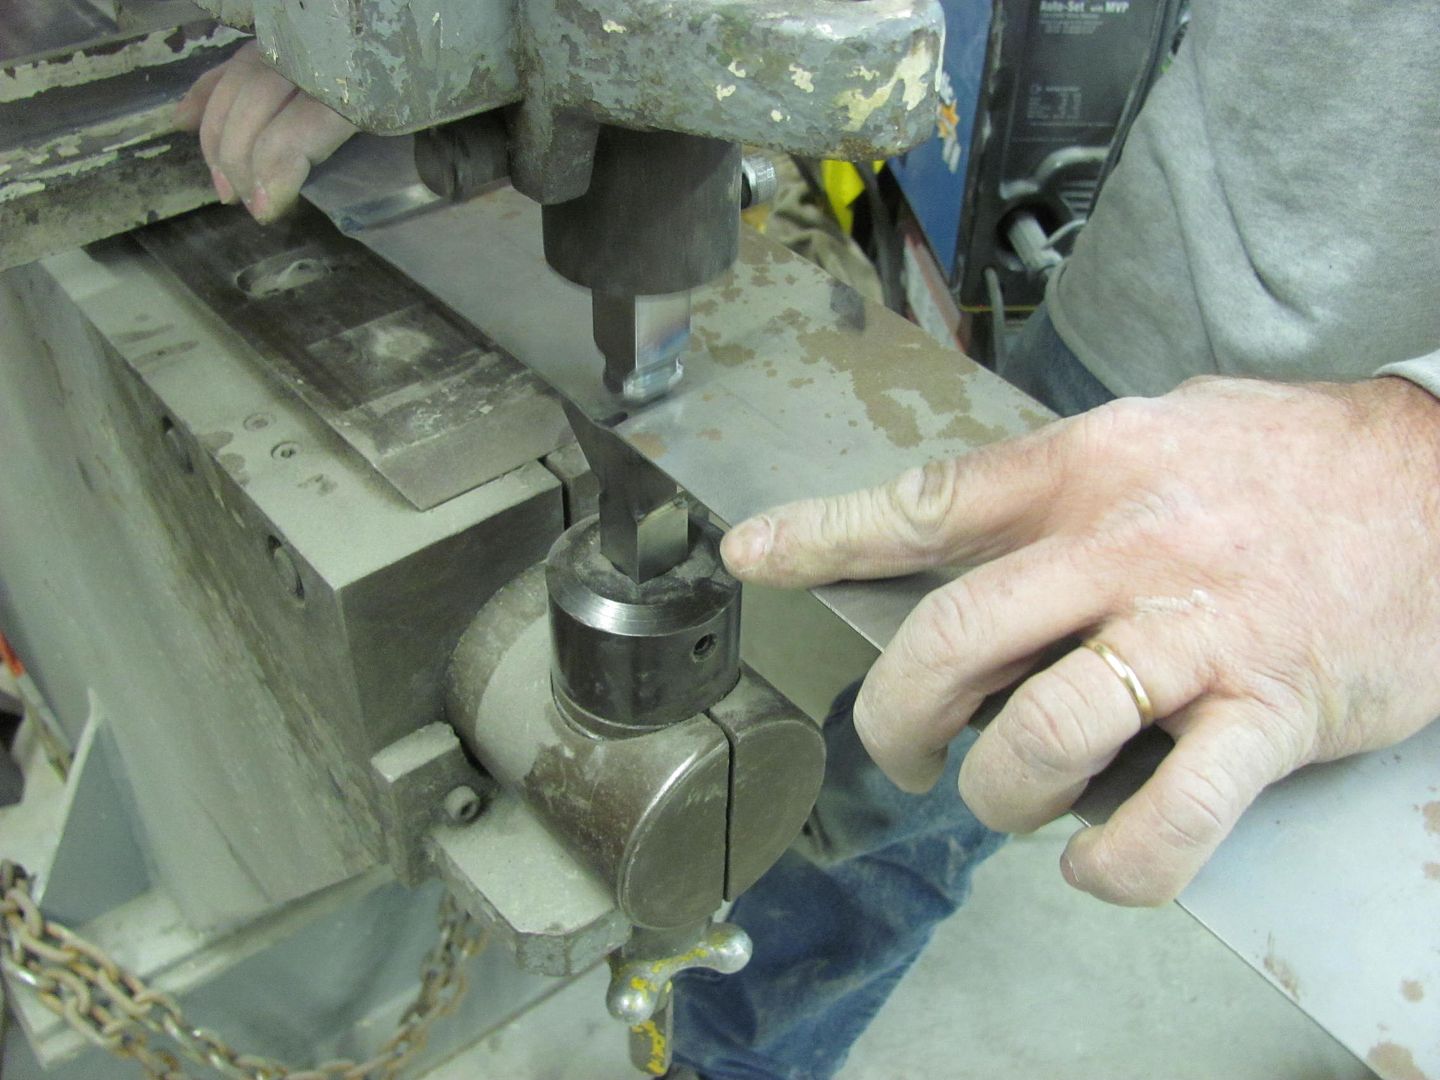  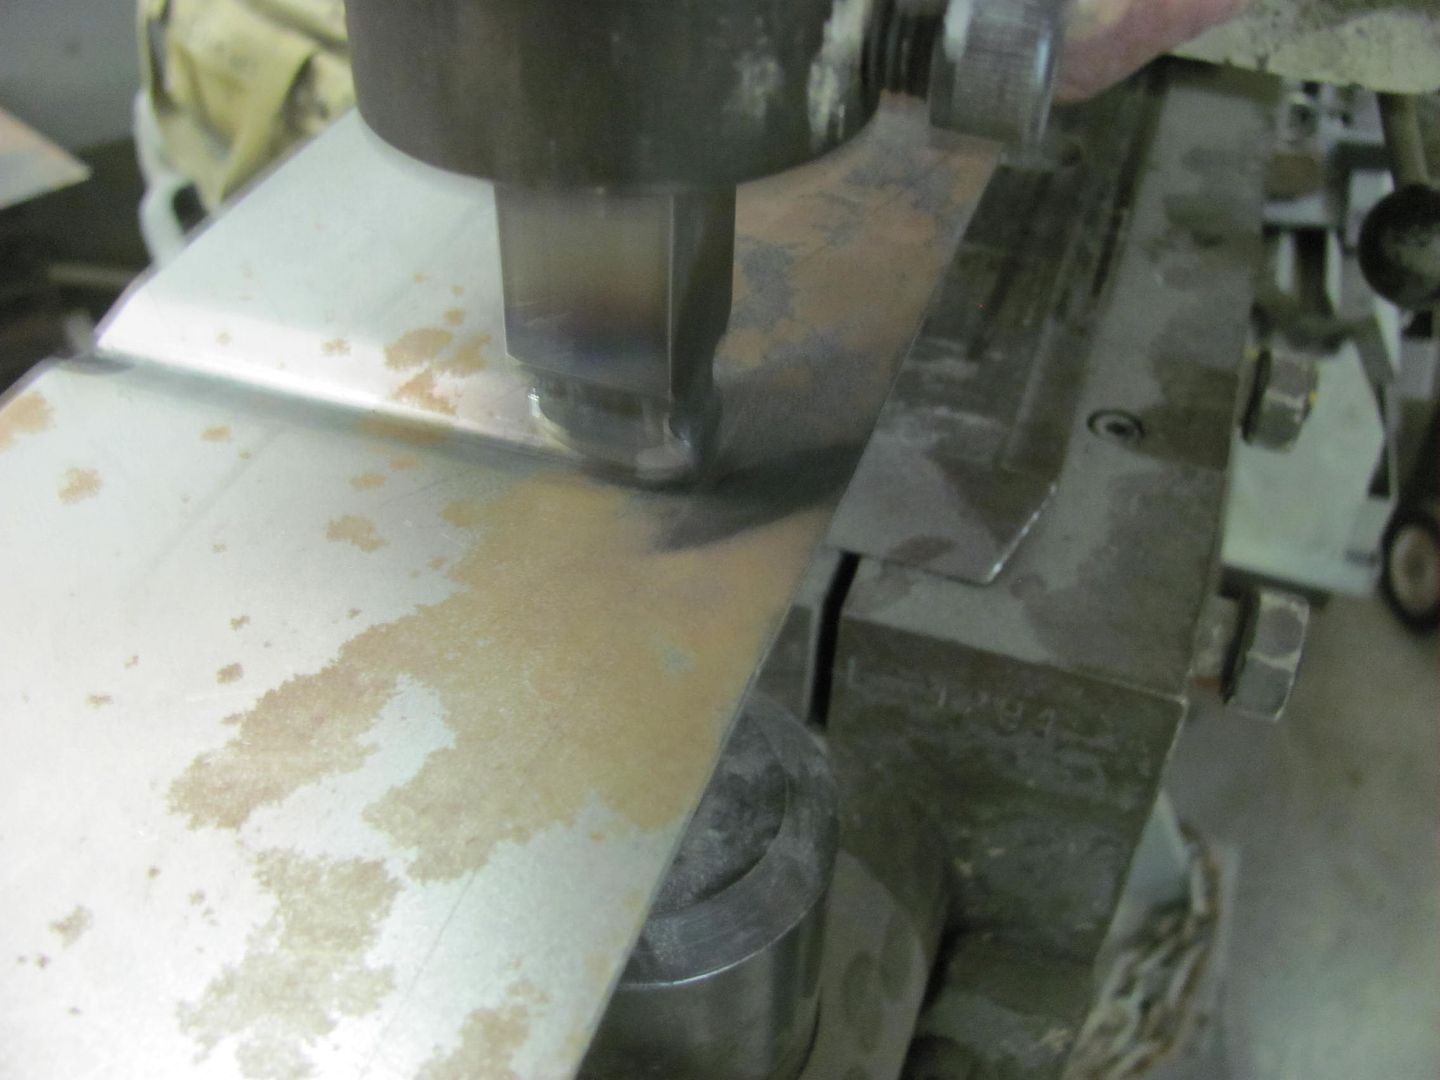 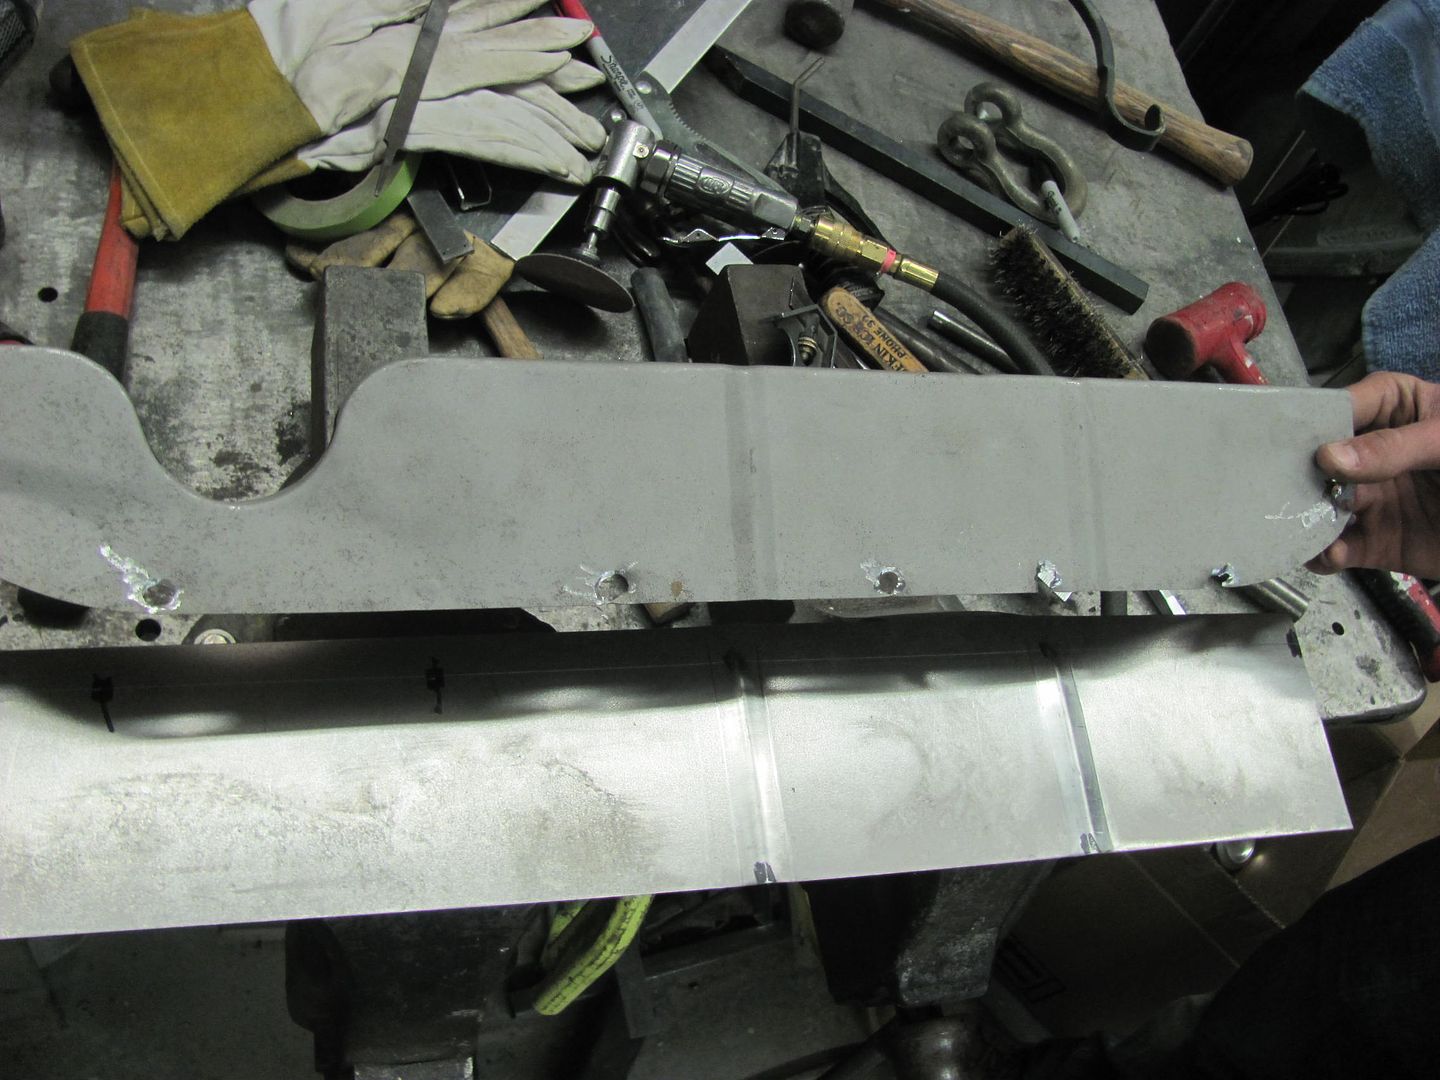 Laying out the petcock recess. This is about a 1/2" lower than the factory to alleviate the clearance issue.. 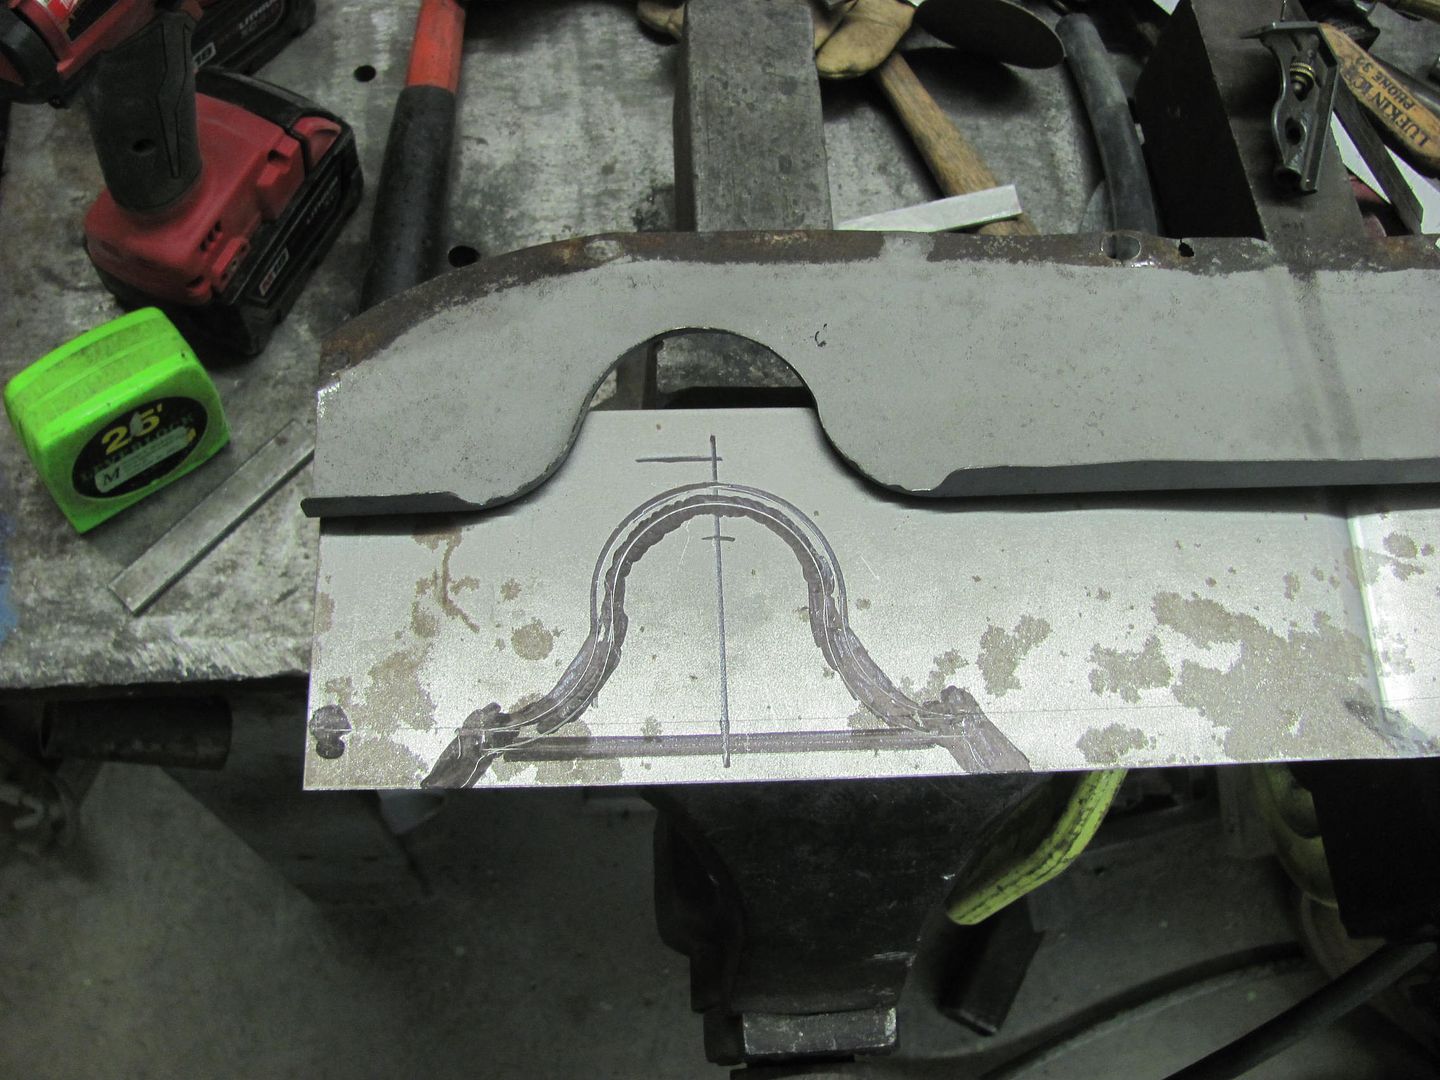 The tipping and skateboard wheels are used to "trace" the bend line to make any hammering a bit easier to locate the correct "edge"..... 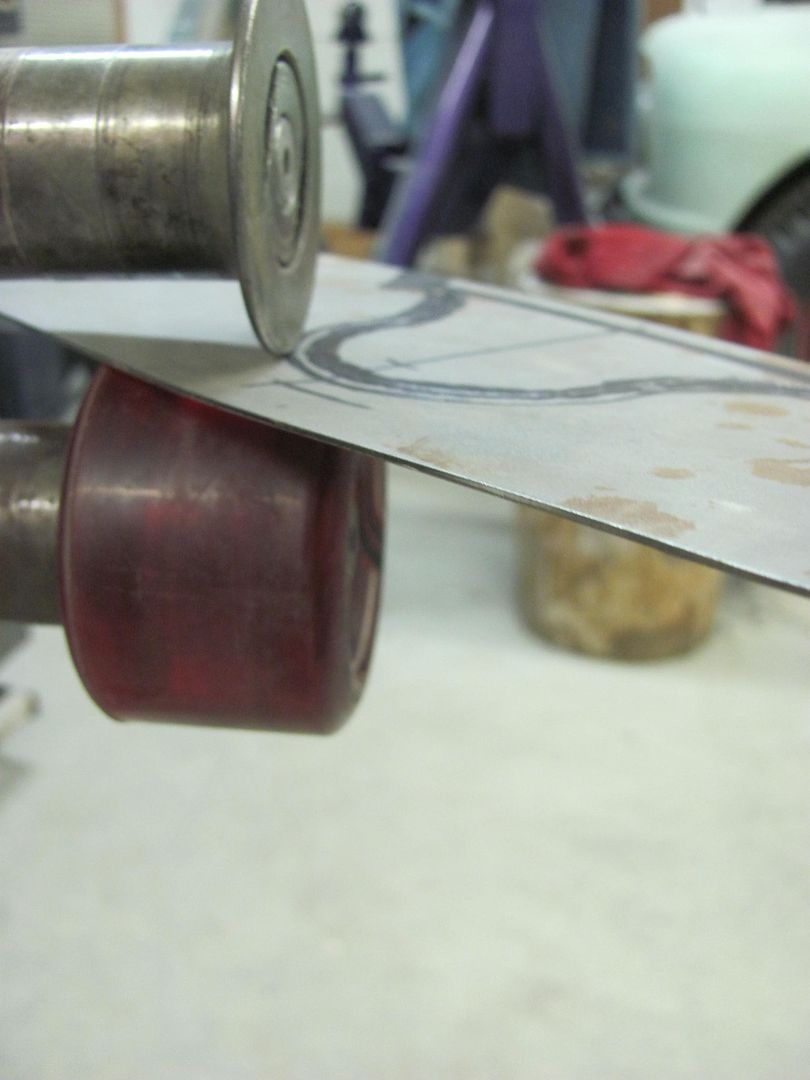 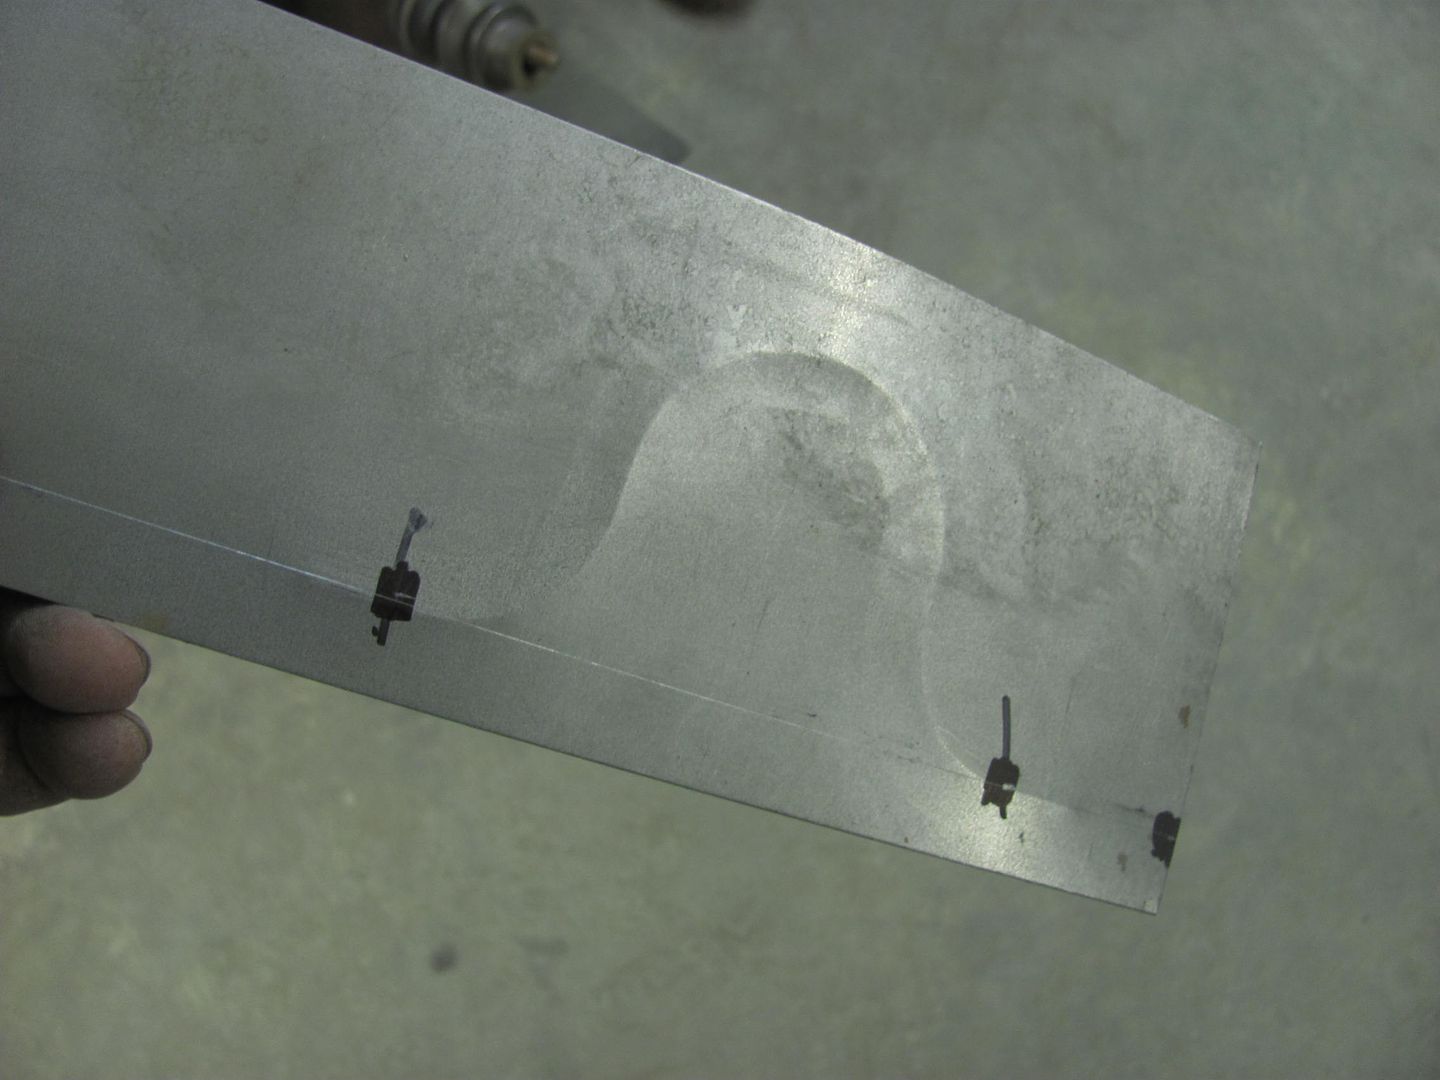 Relief trimmed, ready to make the folds.... 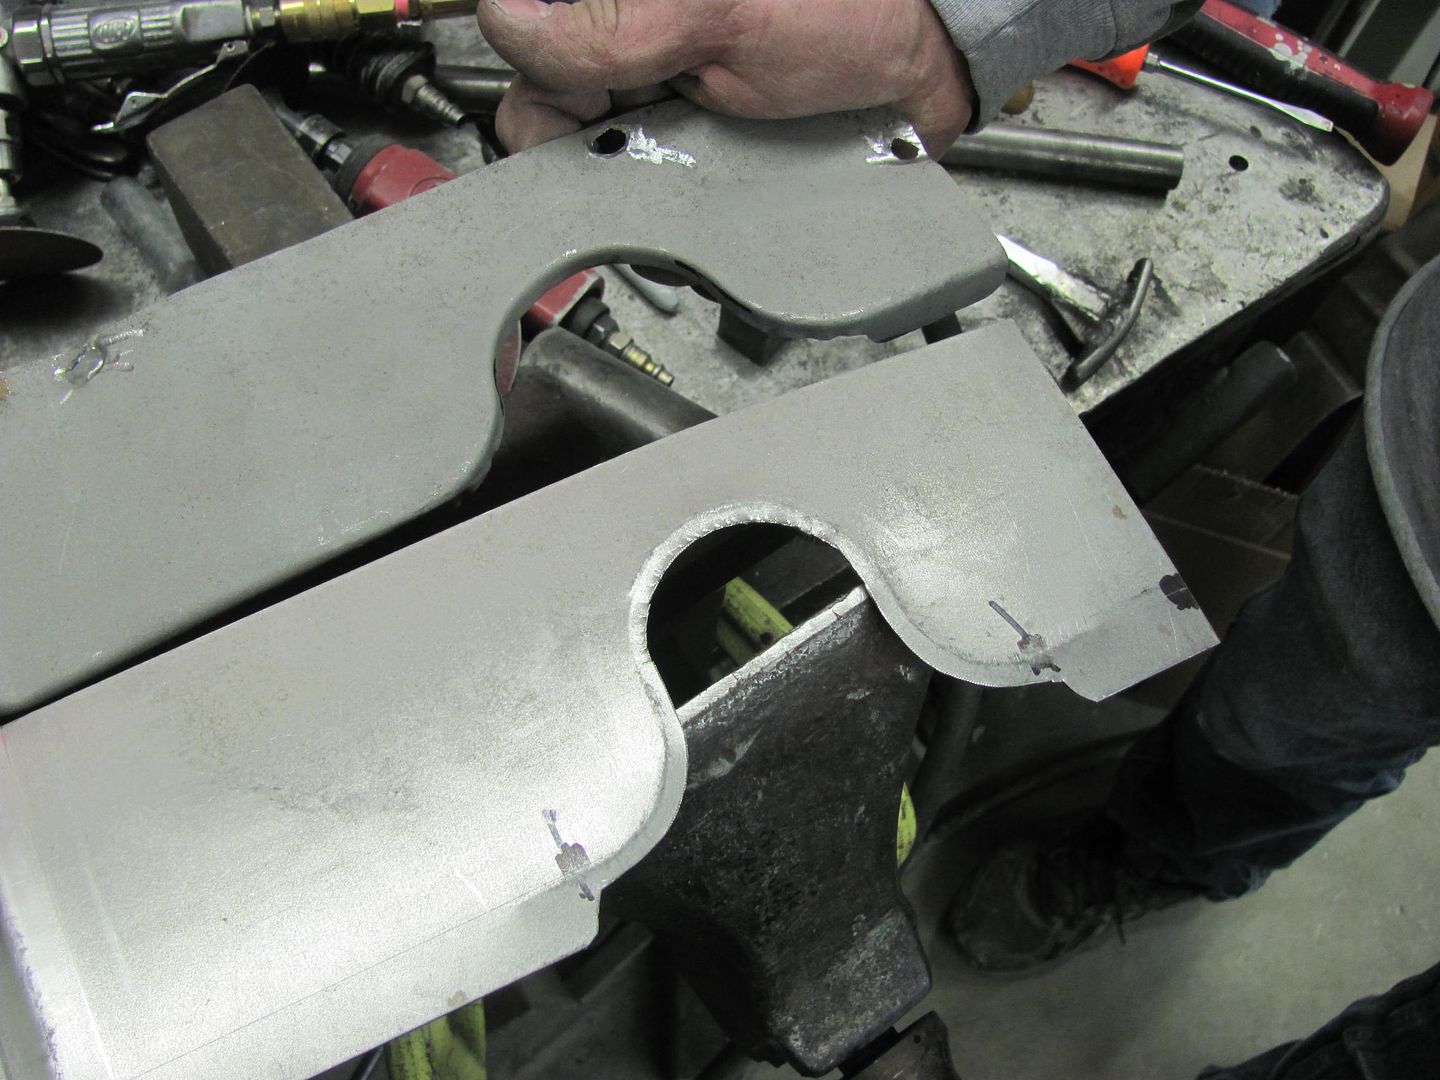 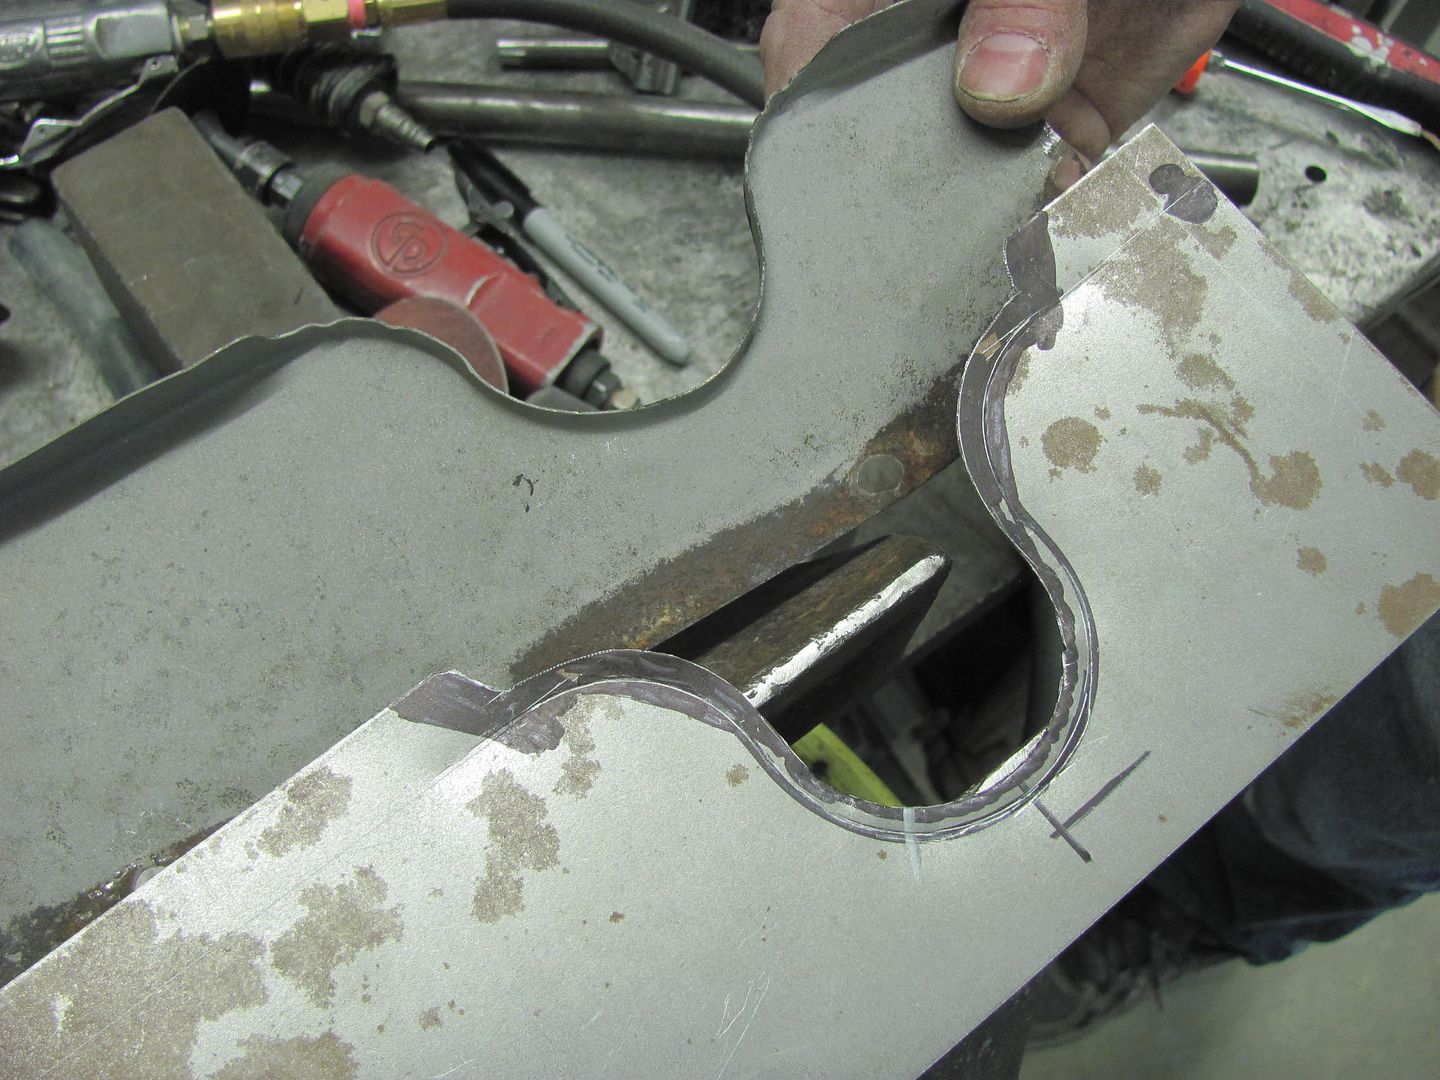
__________________
Robert |
||
|
|
|
|
04-08-2015, 11:09 PM
|
#18 |
|
Registered User
Join Date: Jan 2013
Location: Leonardtown, MD
Posts: 1,637
|
Re: 55 Wagon Progress
Tonight we got the recess finished on the baffle plate.
  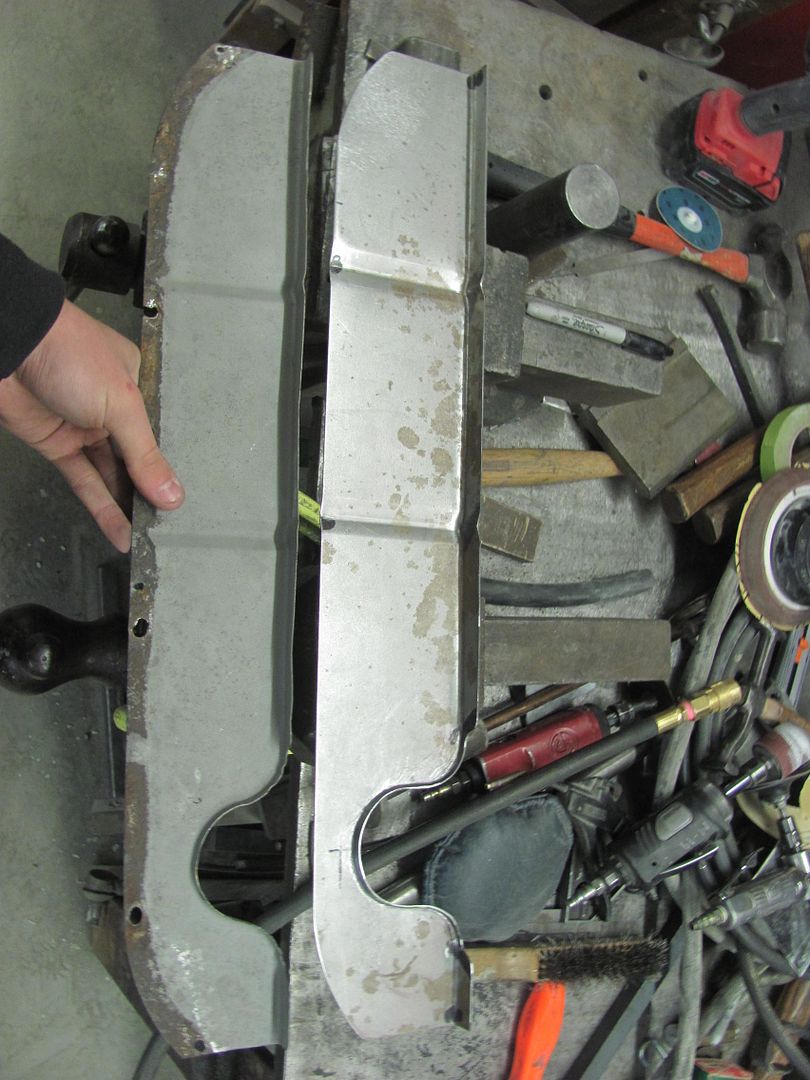 Test fitted... 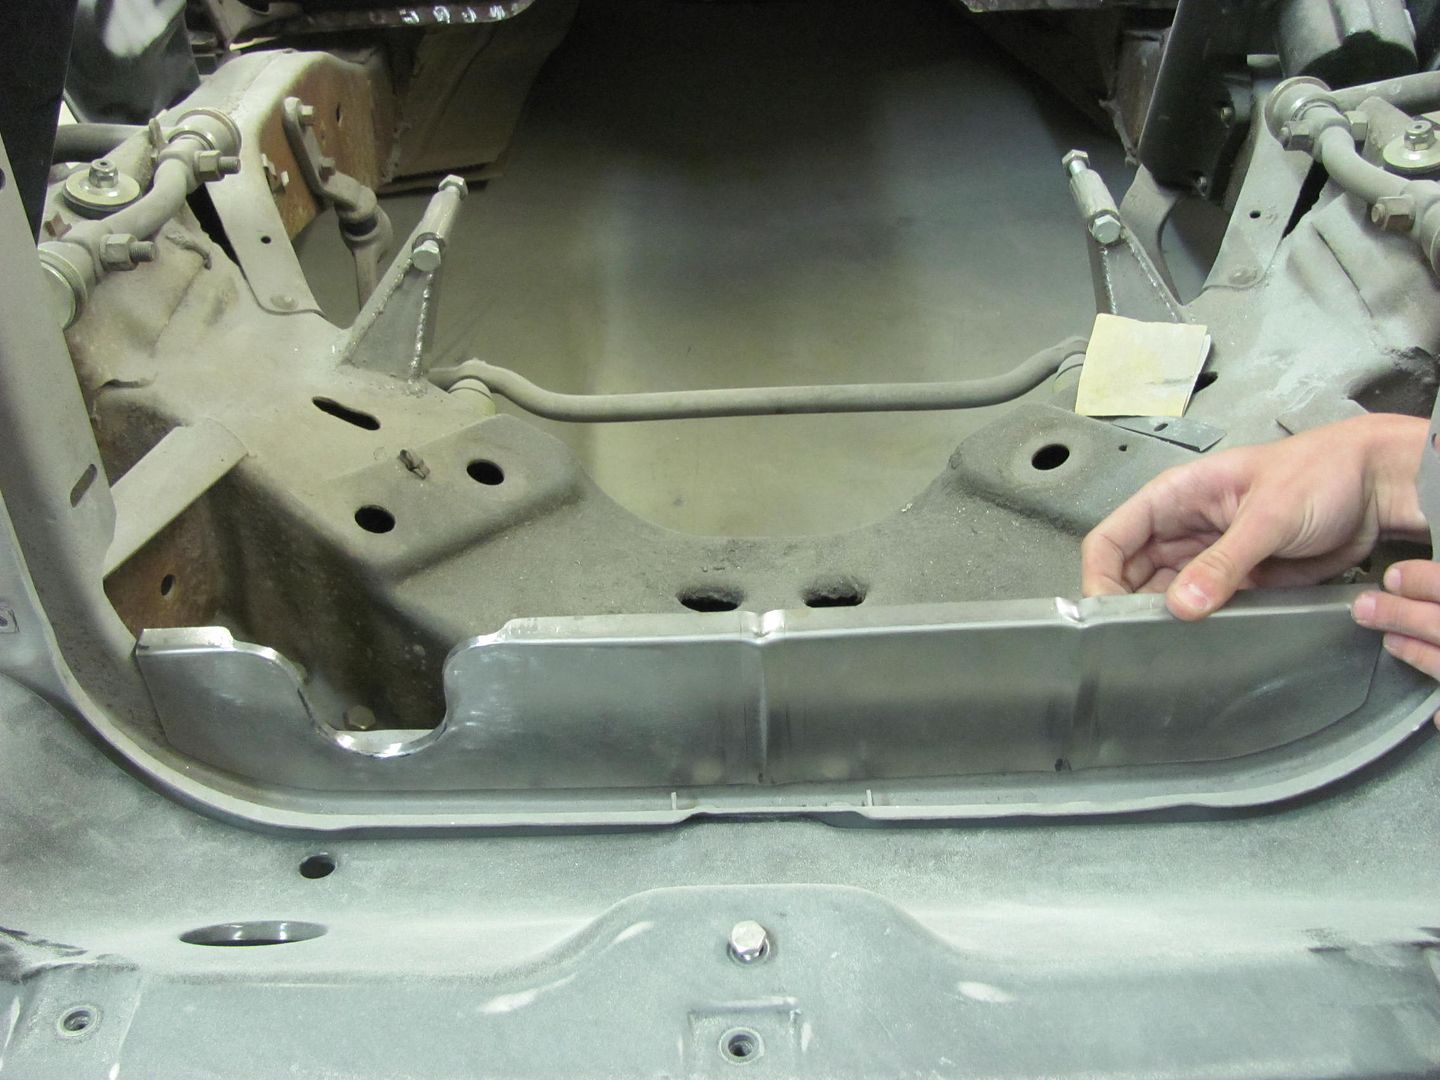 Media blasted, ready to install.... 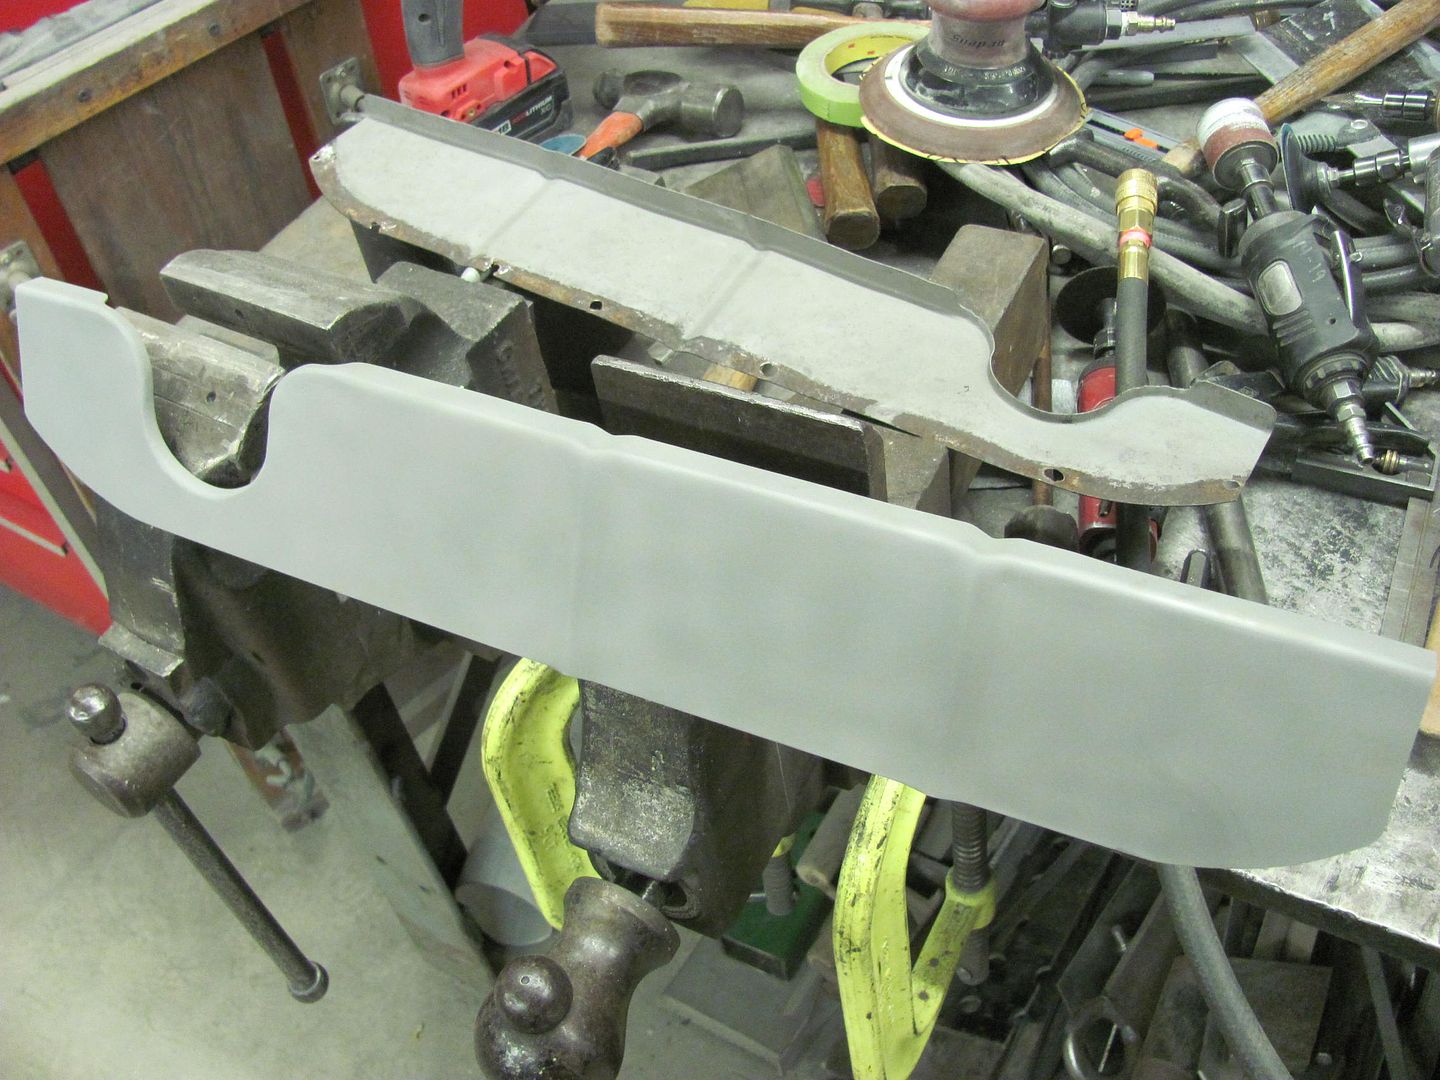 Then Kyle removed the splash pan so he could clean up the core support prior to welding it in.... 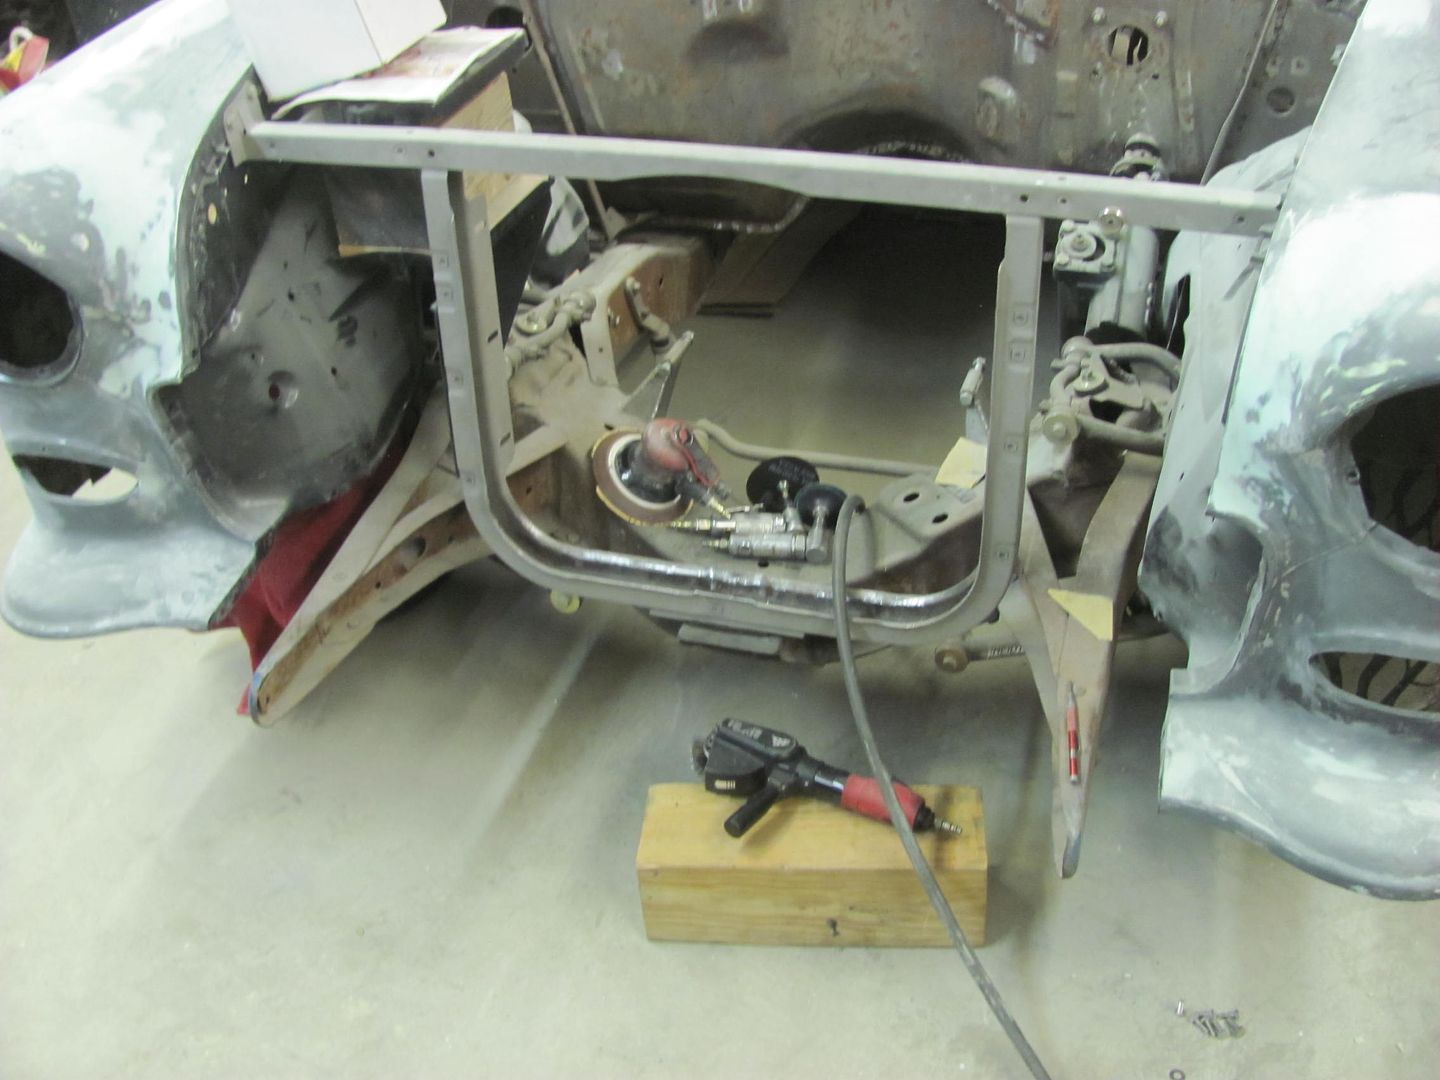 We also got started on some blocking of the parts sprayed last week.  
__________________
Robert |
|
|
|
|
04-09-2015, 07:41 AM
|
#19 |
|
Registered User
Join Date: Jan 2012
Location: Eastern Ontario, Canada
Posts: 1,041
|
Re: 55 Wagon Progress
Nice work! Mind stopping by my place and banging some of my sheet metal into shape...........
__________________
1952 Canadian Chevy 1300 C4 IFS & D44 IRS 5.3 HO L33 My Build: http://67-72chevytrucks.com/vboard/s...d.php?t=632938 
|
|
|
|
|
04-09-2015, 08:20 AM
|
#20 |
|
Registered User
Join Date: Jan 2013
Location: Leonardtown, MD
Posts: 1,637
|
Re: 55 Wagon Progress
Sid, are you going to the Hogtown meet? See the events listed on allmetalshaping...
__________________
Robert |
|
|
|
|
04-09-2015, 10:44 AM
|
#21 |
|
Registered User
Join Date: Jan 2012
Location: Eastern Ontario, Canada
Posts: 1,041
|
Re: 55 Wagon Progress
Probably not. My daughter has a swim meet that weekend. I've been in the past. Awesome talent there. Learned quite a bit.
__________________
1952 Canadian Chevy 1300 C4 IFS & D44 IRS 5.3 HO L33 My Build: http://67-72chevytrucks.com/vboard/s...d.php?t=632938
|
|
|
|
|
04-09-2015, 01:40 PM
|
#22 |
|
Registered User
Join Date: May 2007
Location: Deale Md
Posts: 4,663
|
Re: 55 Wagon Progress
Are you going to the coming out show in Charlotte Hall.
__________________
James 63 GMC V6 4speed carryall 65 chevy swb bbw V8 auto 68 K20 327/4 speed, buddy buckets 2002 GMC CC Dually Duramax 64 GMC lwb 3/4 V6 4speed SOLD 66 GMC swb bbw buddy buckets SOLD IG duallyjams The only thing that stays the same is constant change! |
|
|
|
|
04-09-2015, 10:37 PM
|
#23 |
|
Registered User
Join Date: Jan 2013
Location: Leonardtown, MD
Posts: 1,637
|
Re: 55 Wagon Progress
Not bringing anything (everything in pieces) but will be there to see the sights. If you see a bright yellow t-shirt with
< < This on the back, then give me a holler... <
__________________
Robert |
|
|
|
|
04-11-2015, 09:30 PM
|
#24 |
|
Registered User
Join Date: Jan 2013
Location: Leonardtown, MD
Posts: 1,637
|
Re: 55 Wagon Progress
Today the baffle got welded into the core support, here with the plug weld holes drilled.
 The modified relief we fabricated shows to be about as low as we could have made it.. 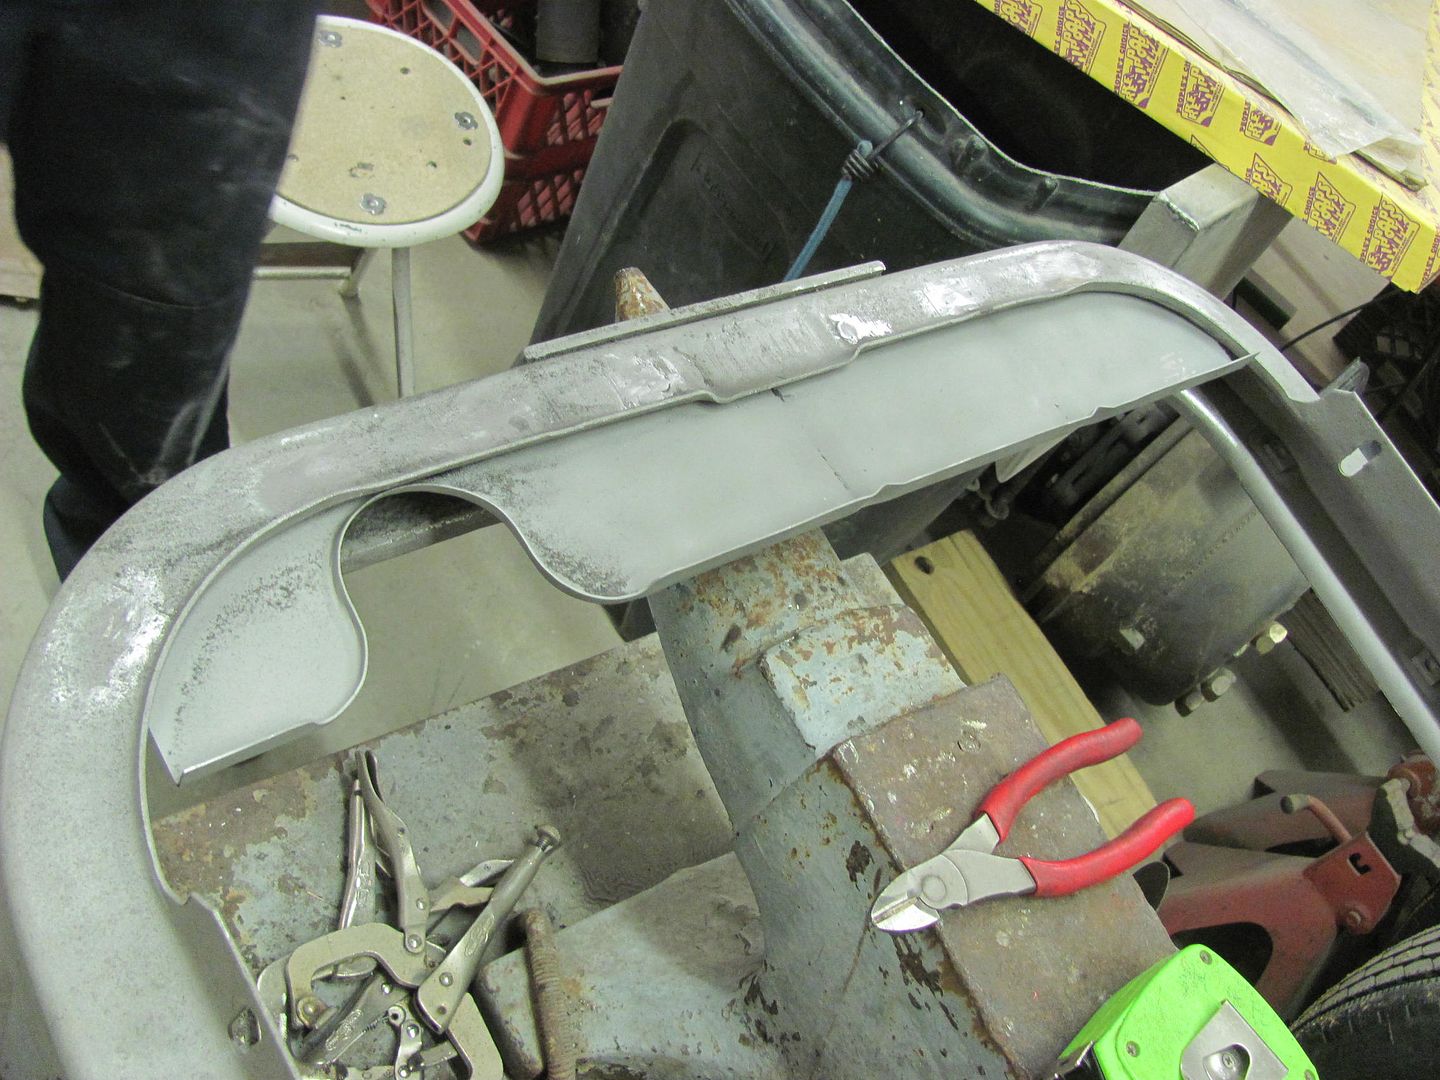 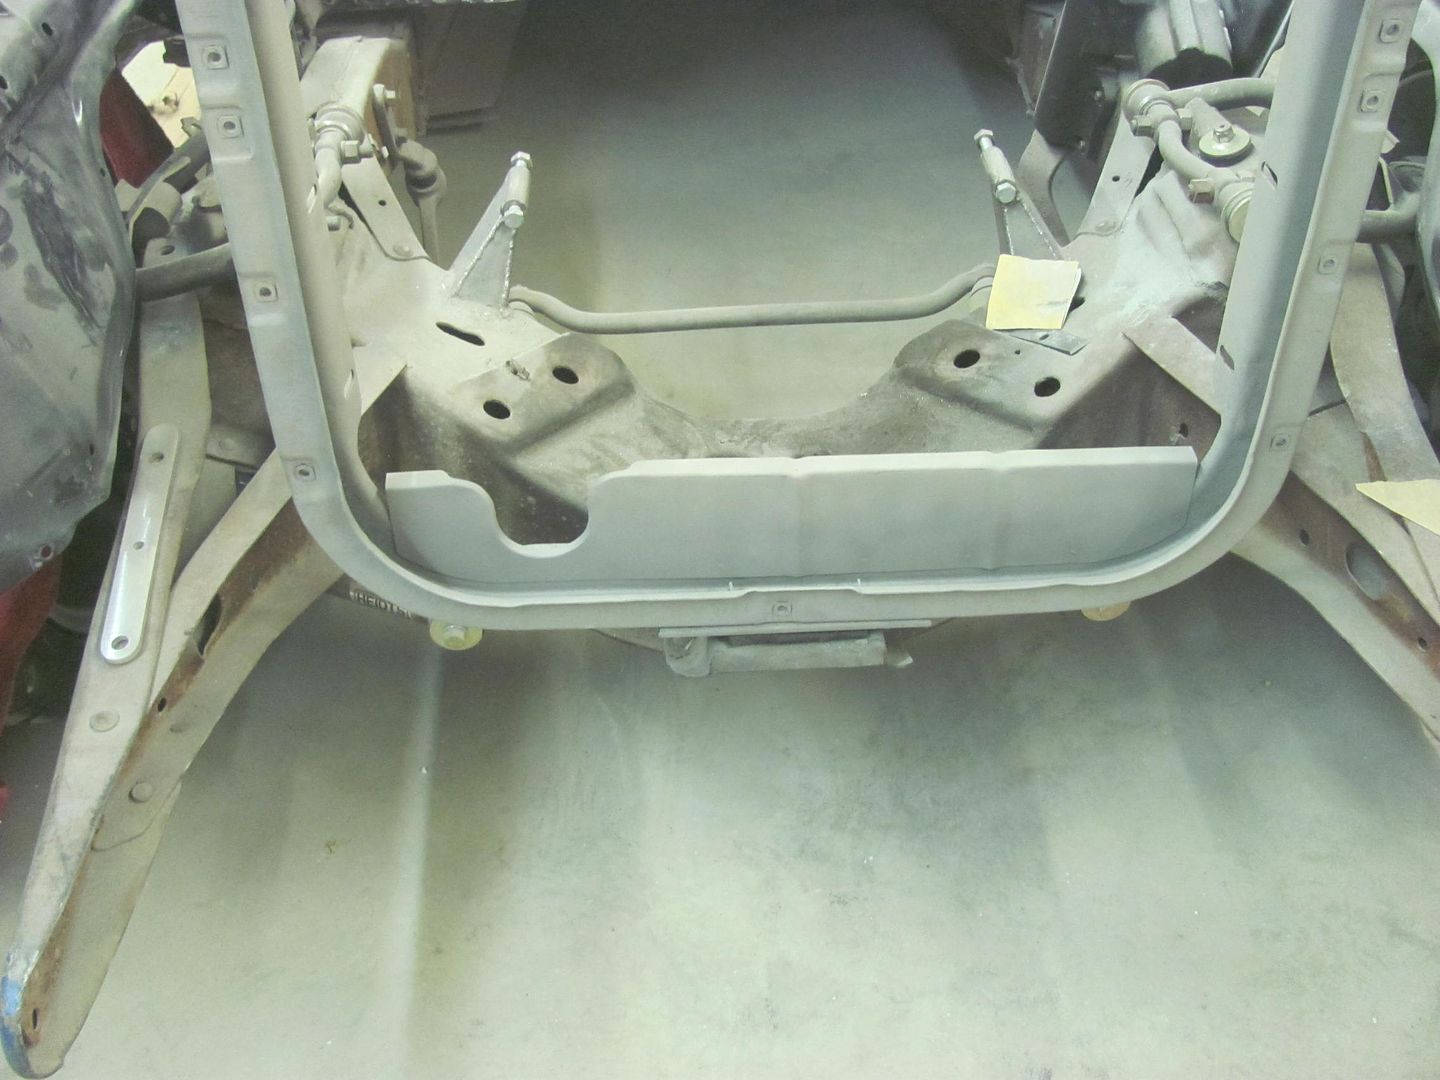 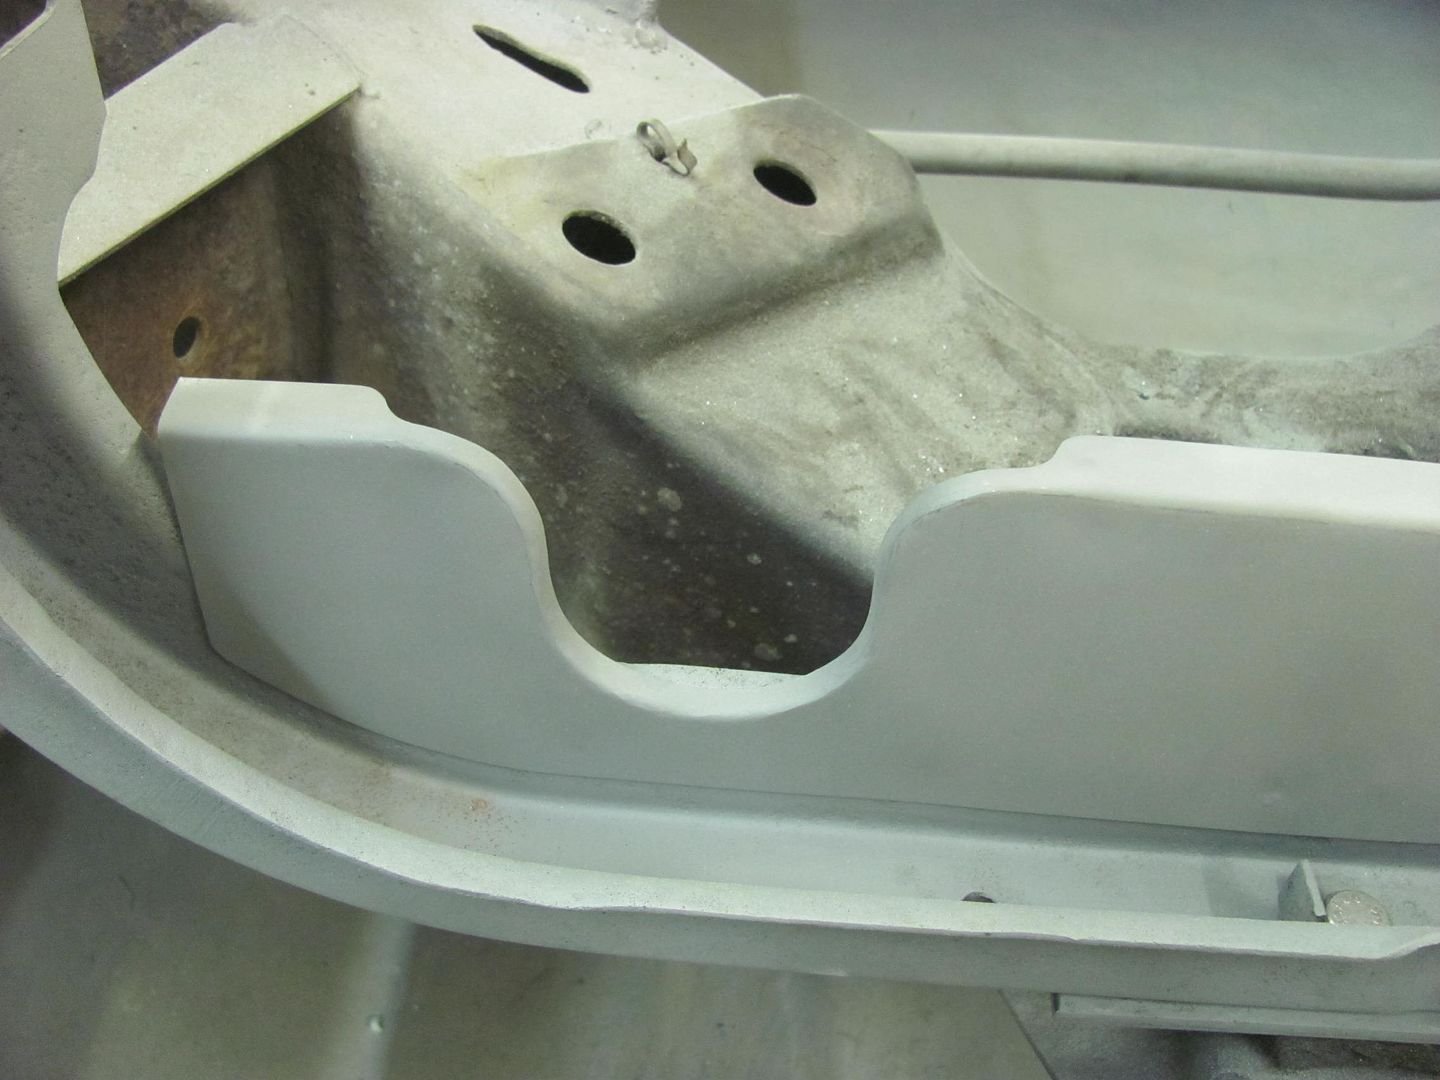 Then attention was turned to the rear quarter on the passenger side where we had shaved the lead seam.. 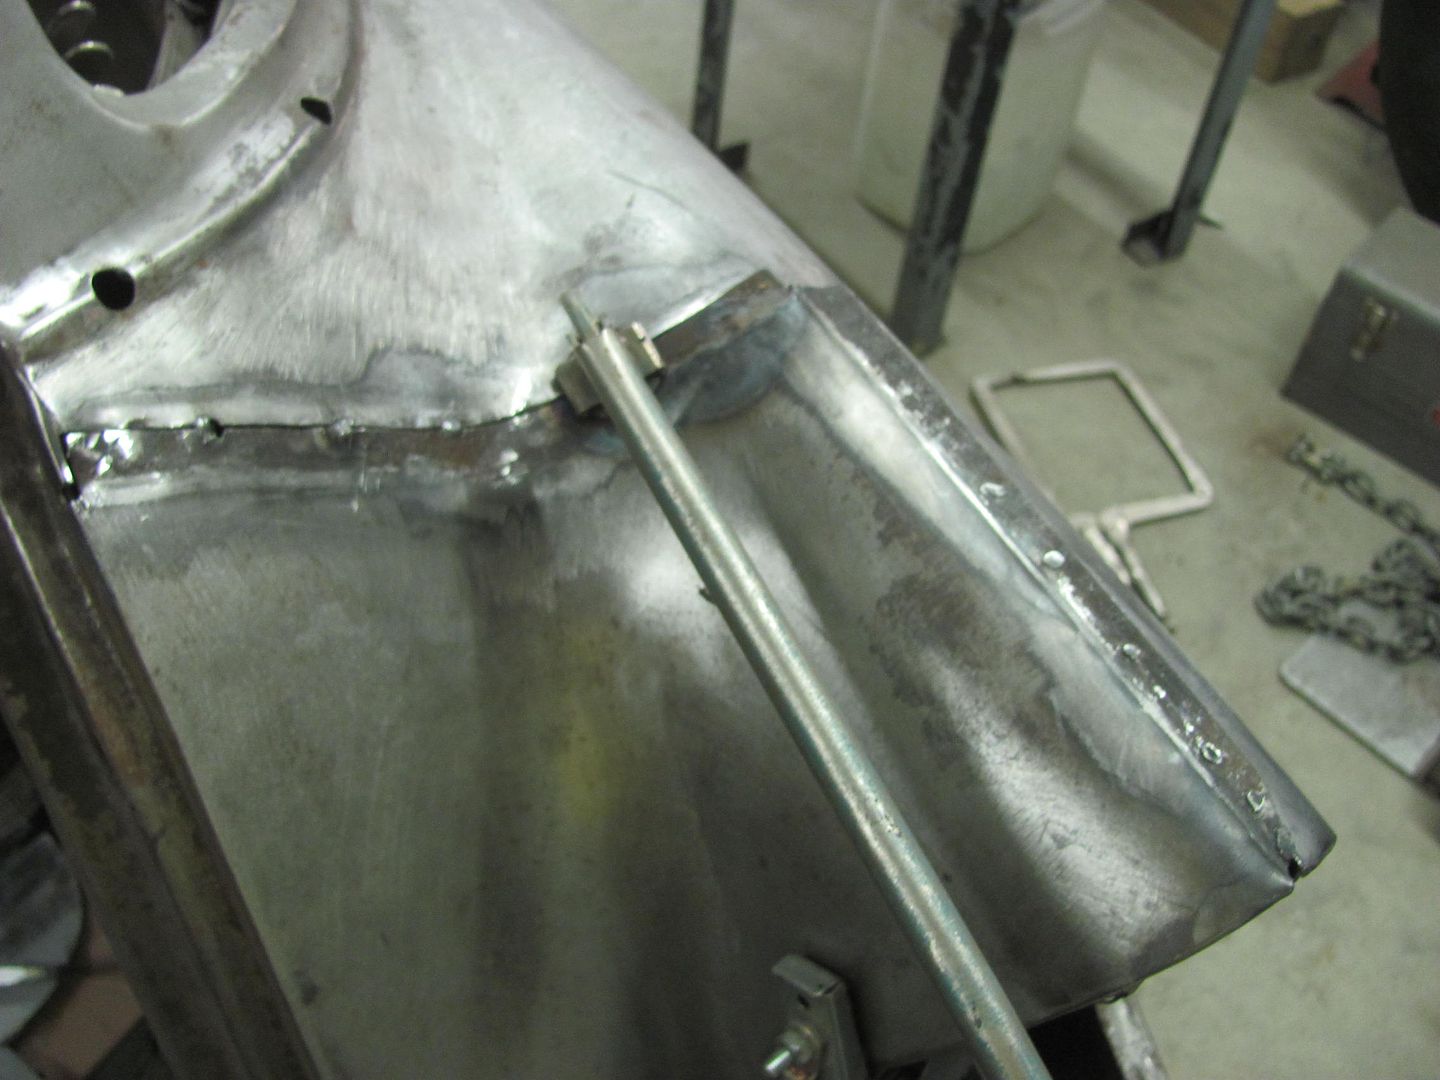  We had held off on the tail light opening as we wanted to fit the opening to the light bezels. We had received the reproduction chrome light bezels a couple weeks ago, and gave them a protective layer to keep the chrome nice and shiny.. 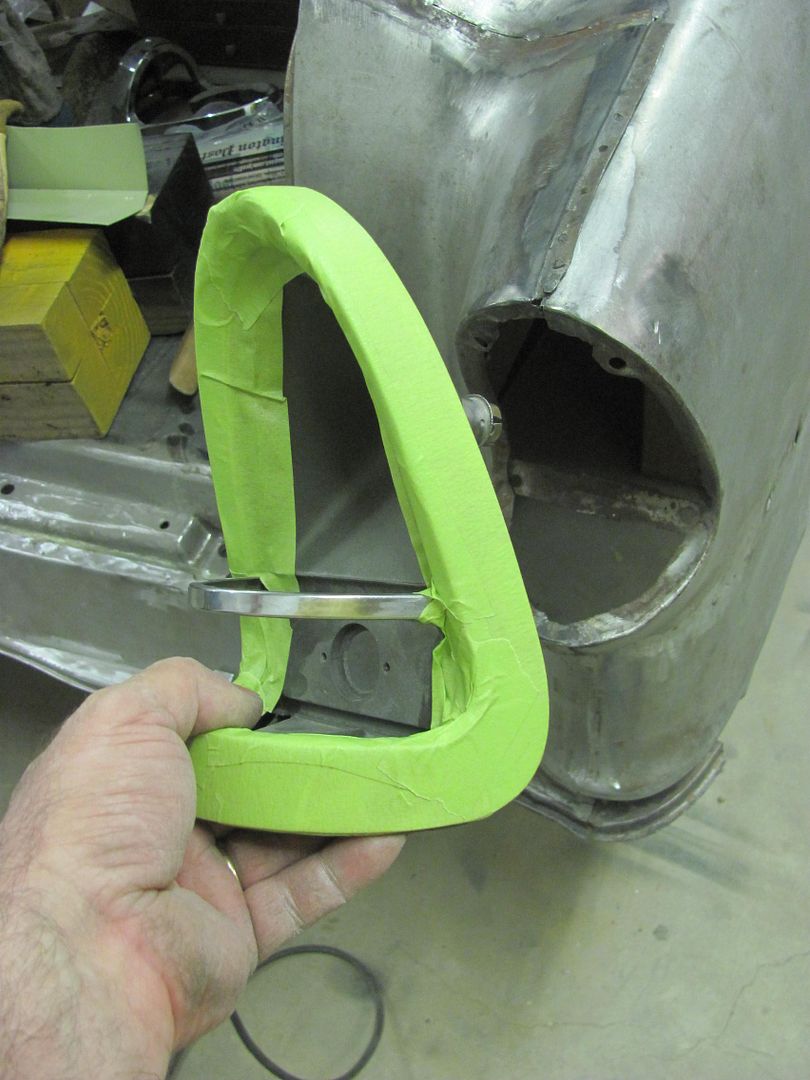 The light opening seemed all out of sorts, with a bulge protruding out past the corner of the bezel here.... 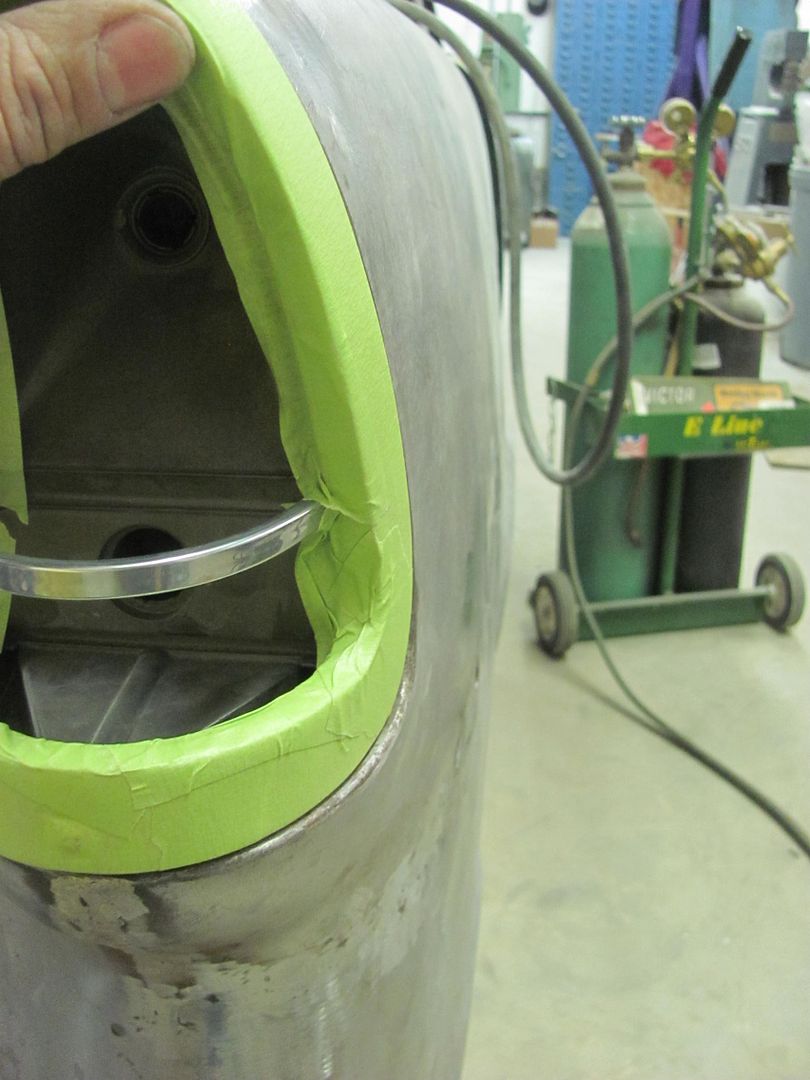 Let the modifications begin! 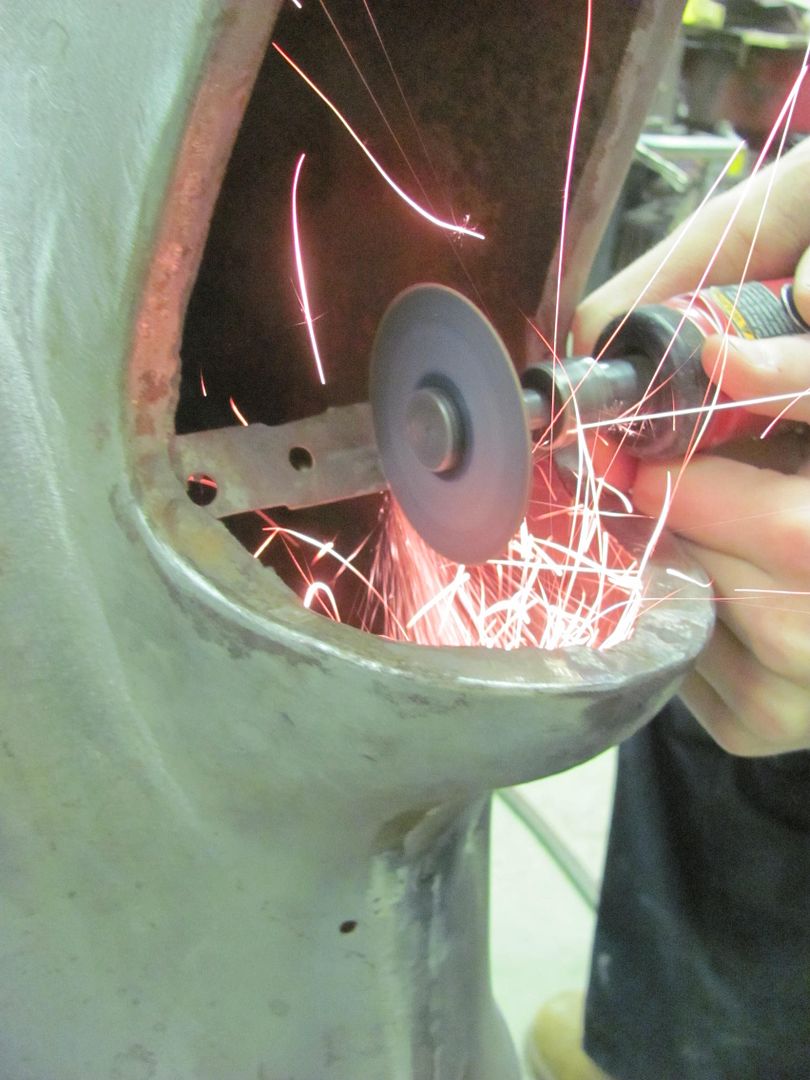 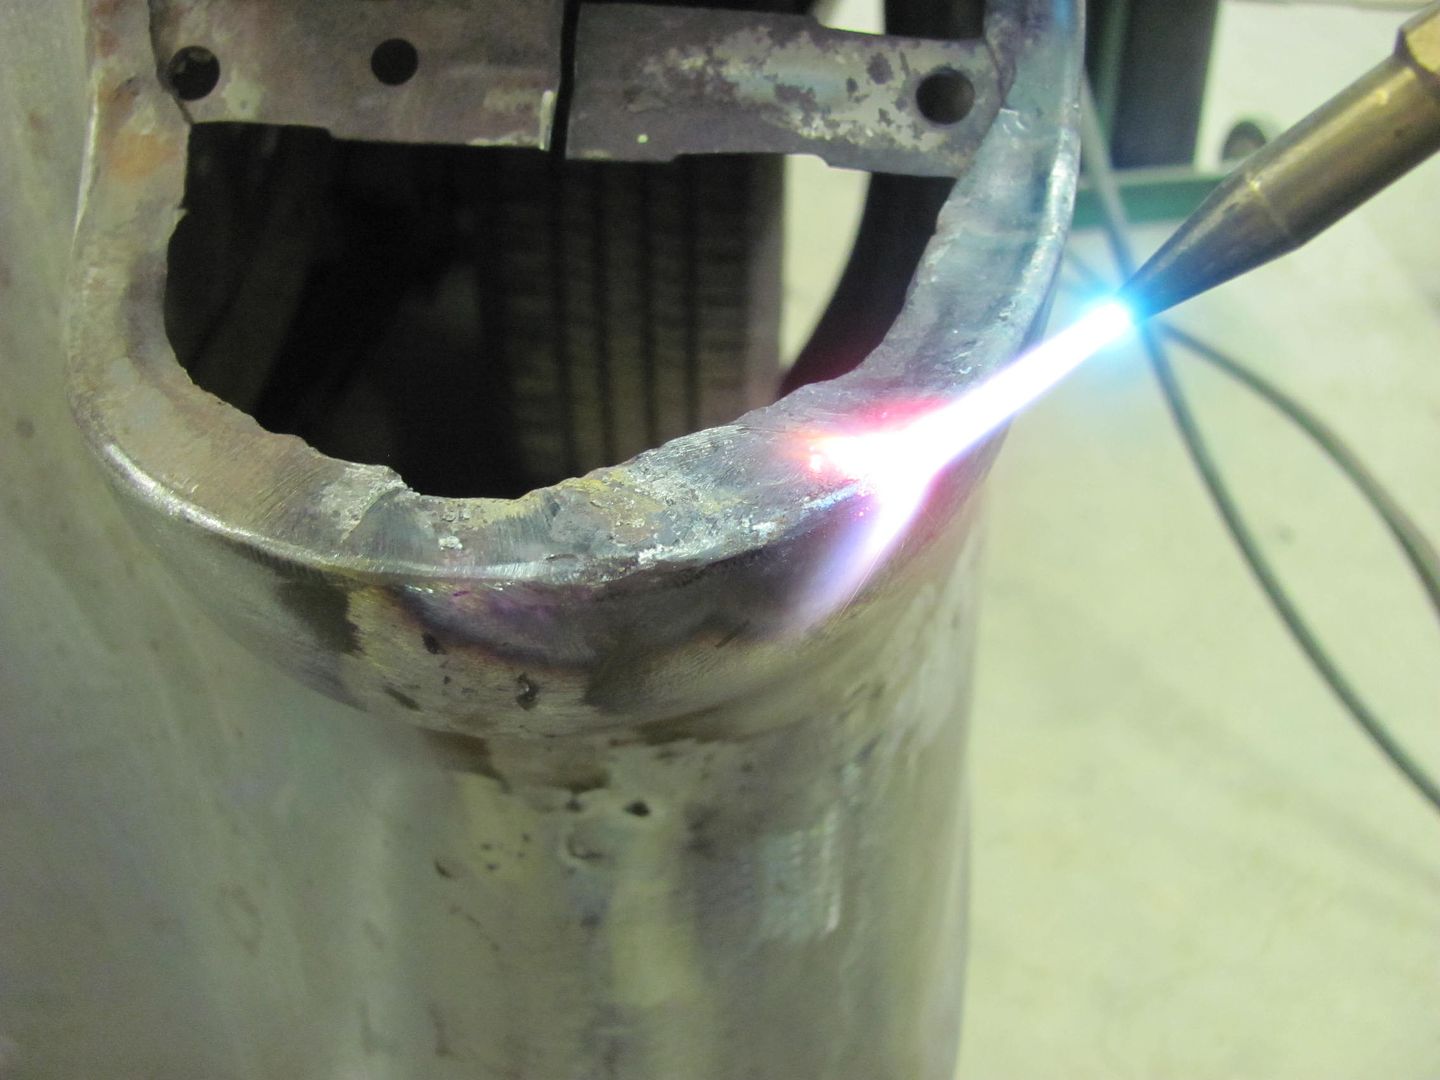 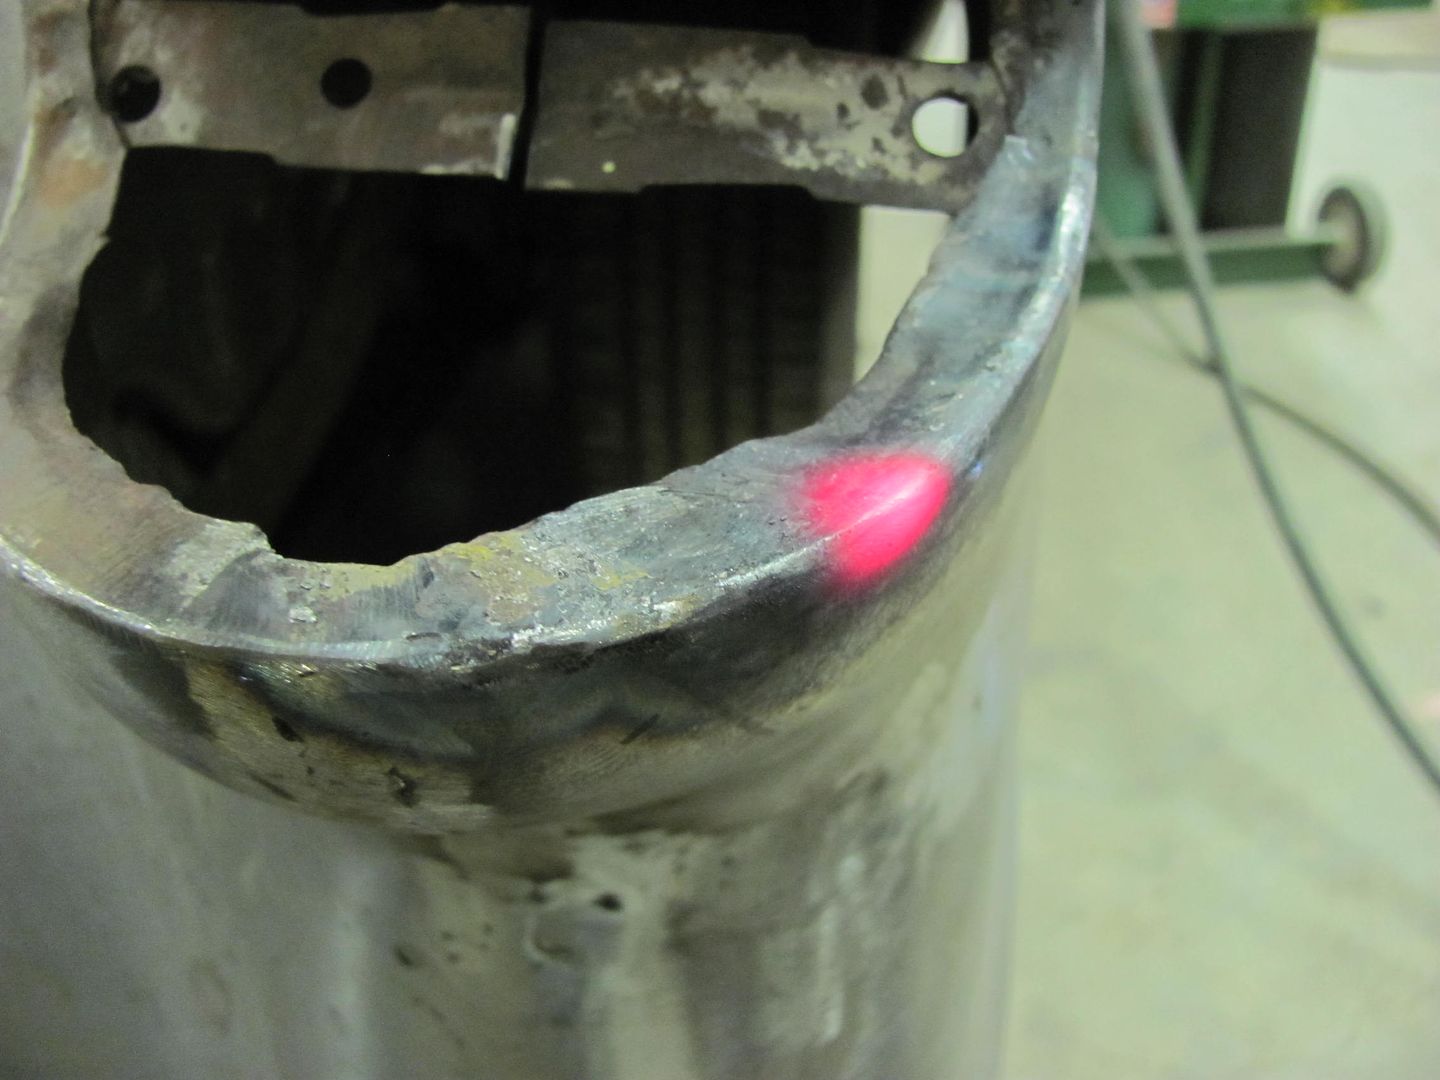 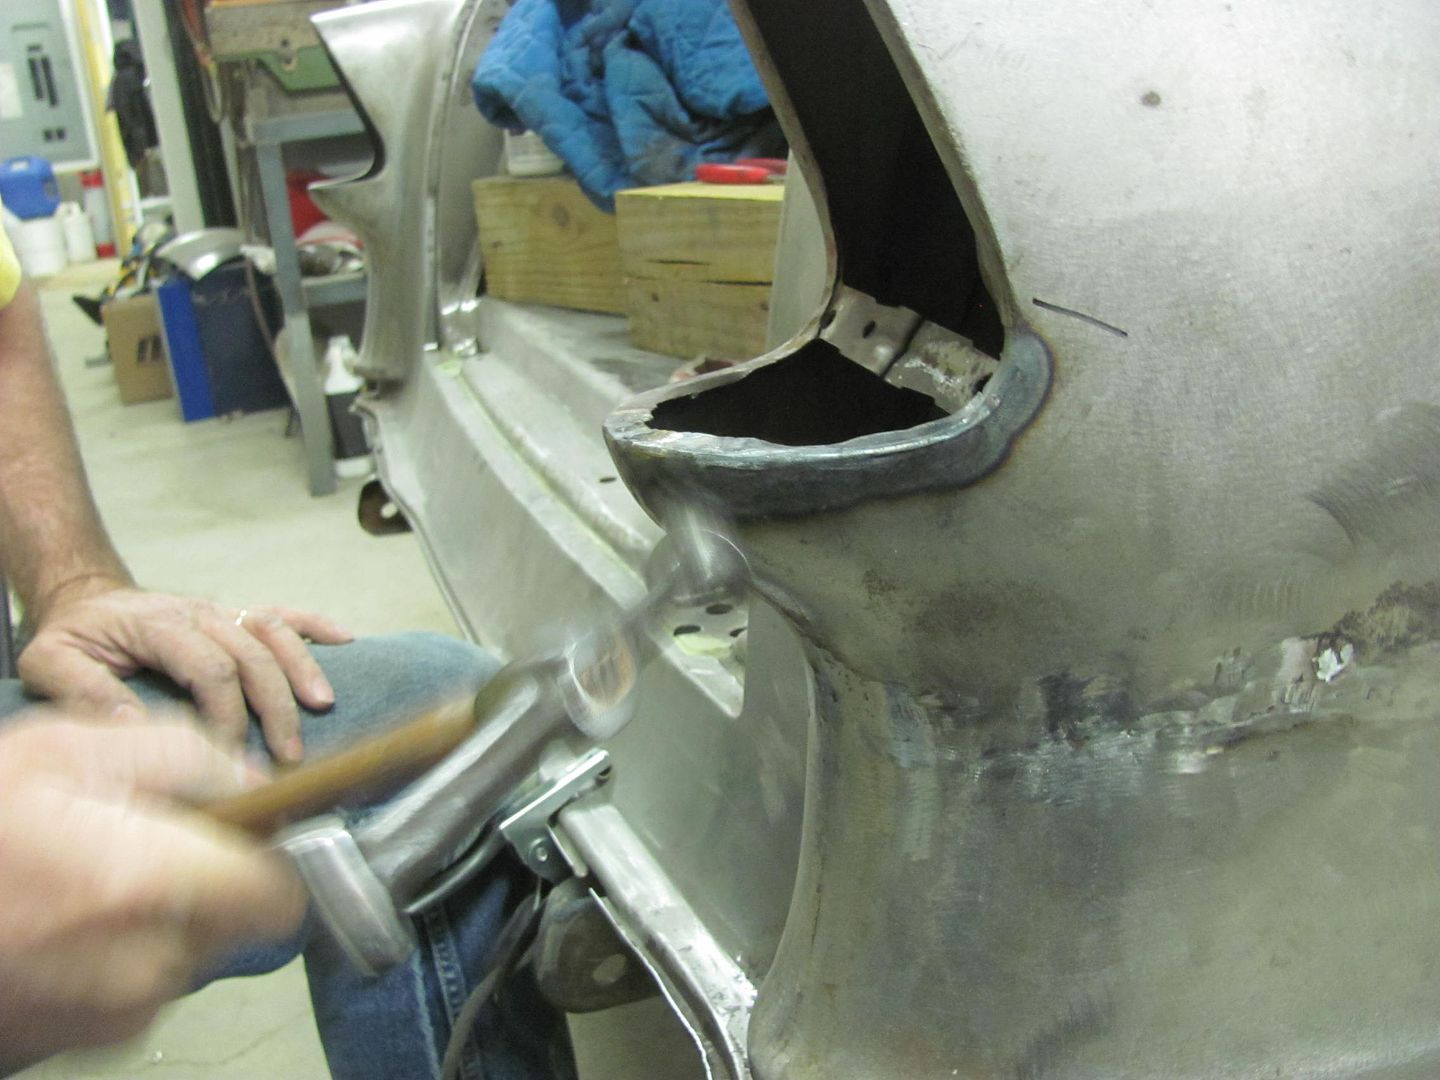 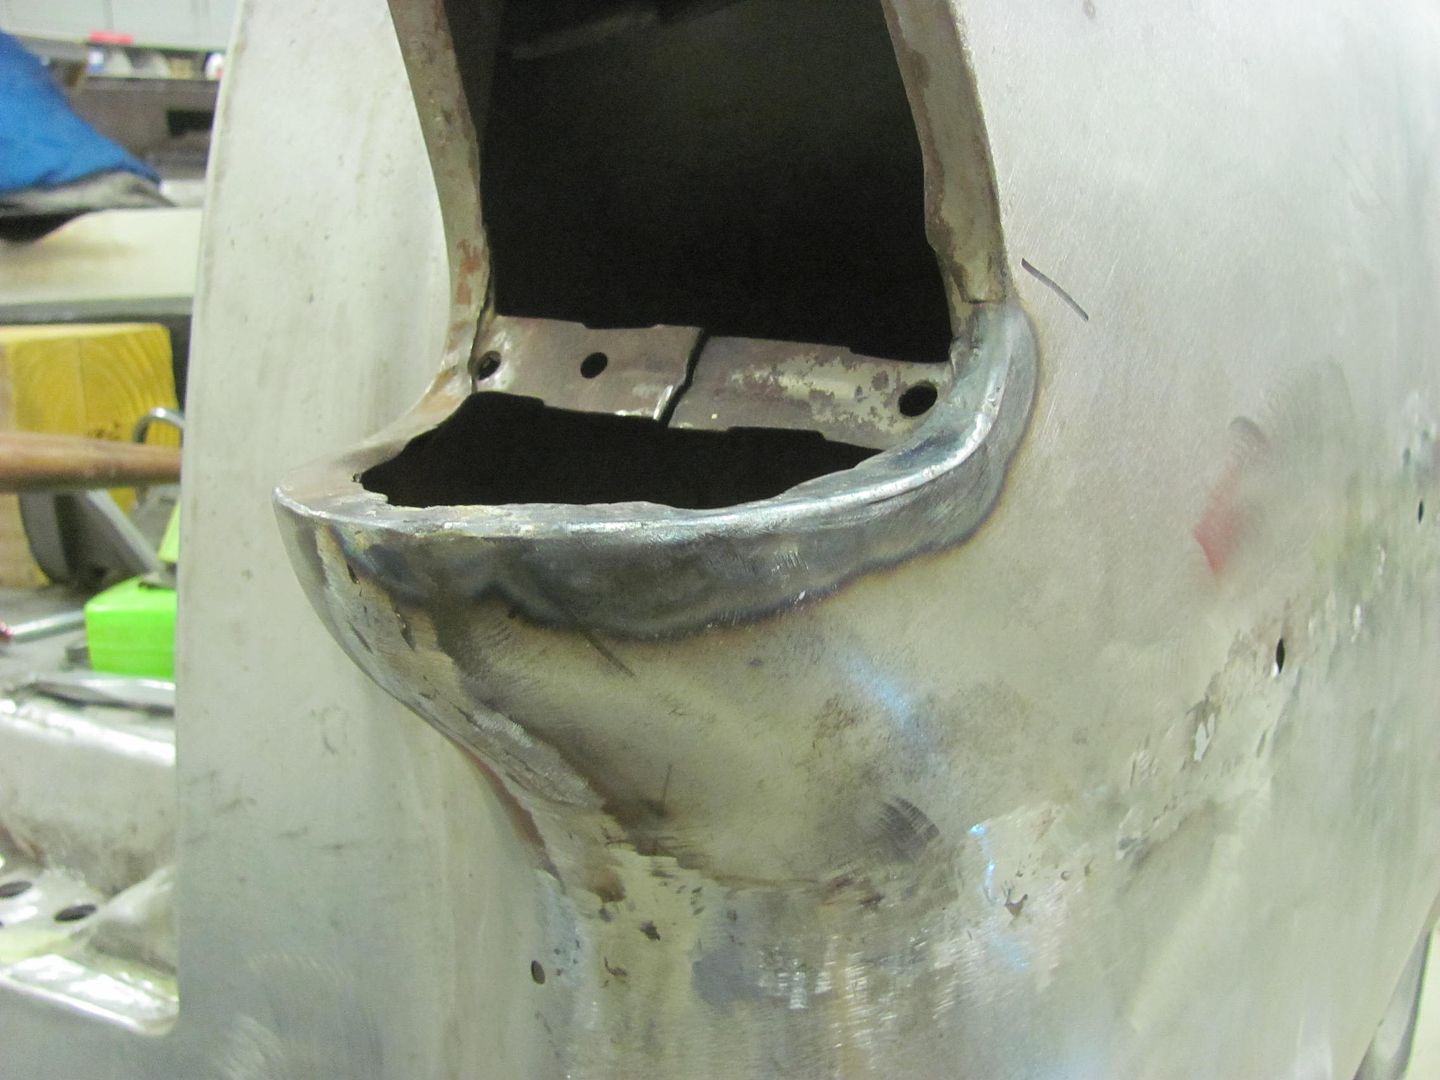 And we had the opposite problem on the inner side... 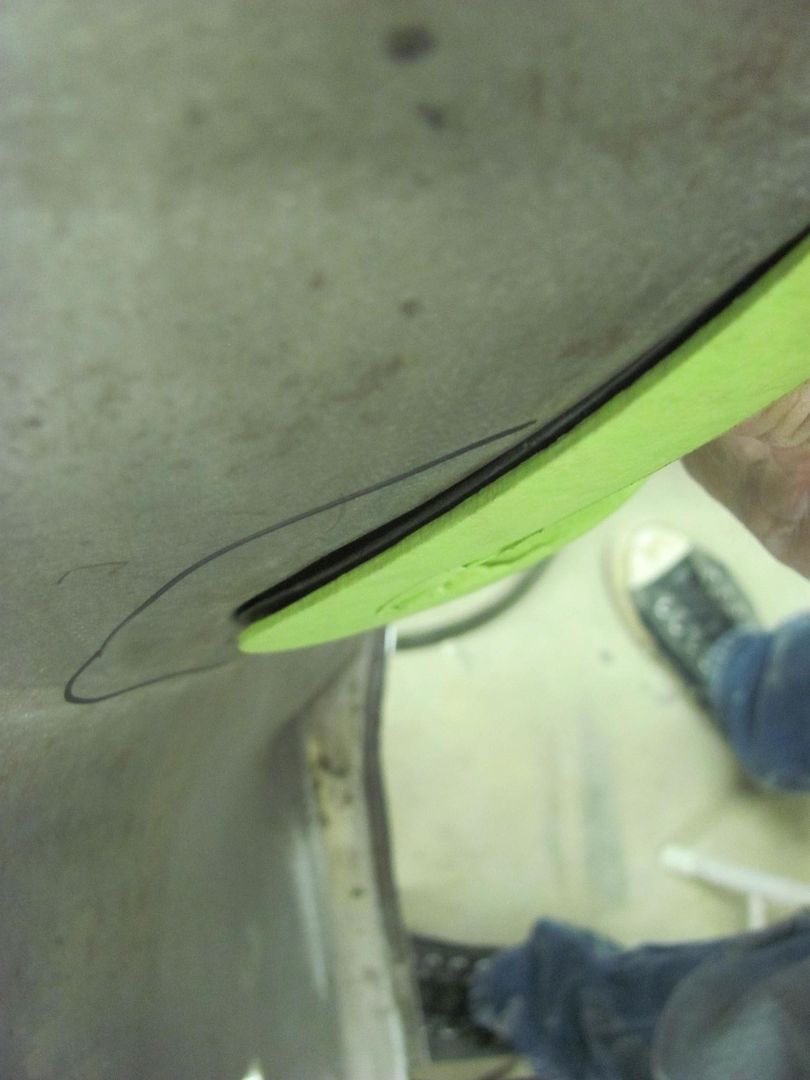 The vise grip dent puller and the special hook was used to spread the opening... 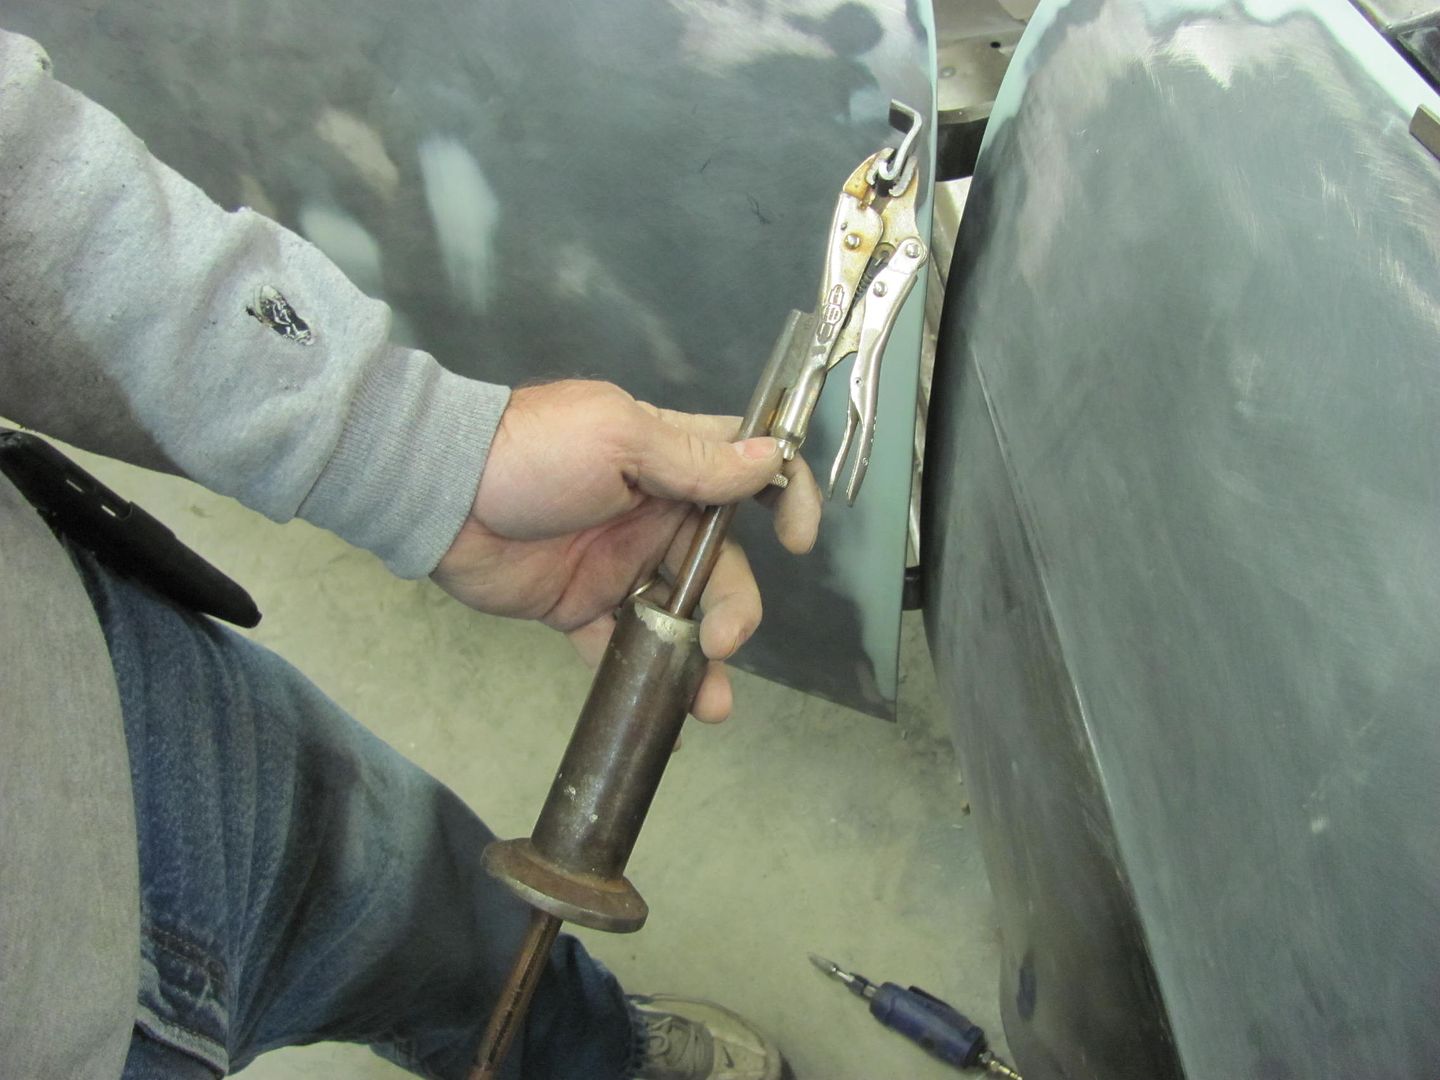 A bit better.....  ...and the tail light bracket is welded back together.. This mod seemed to make the attaching holes align better as well.. 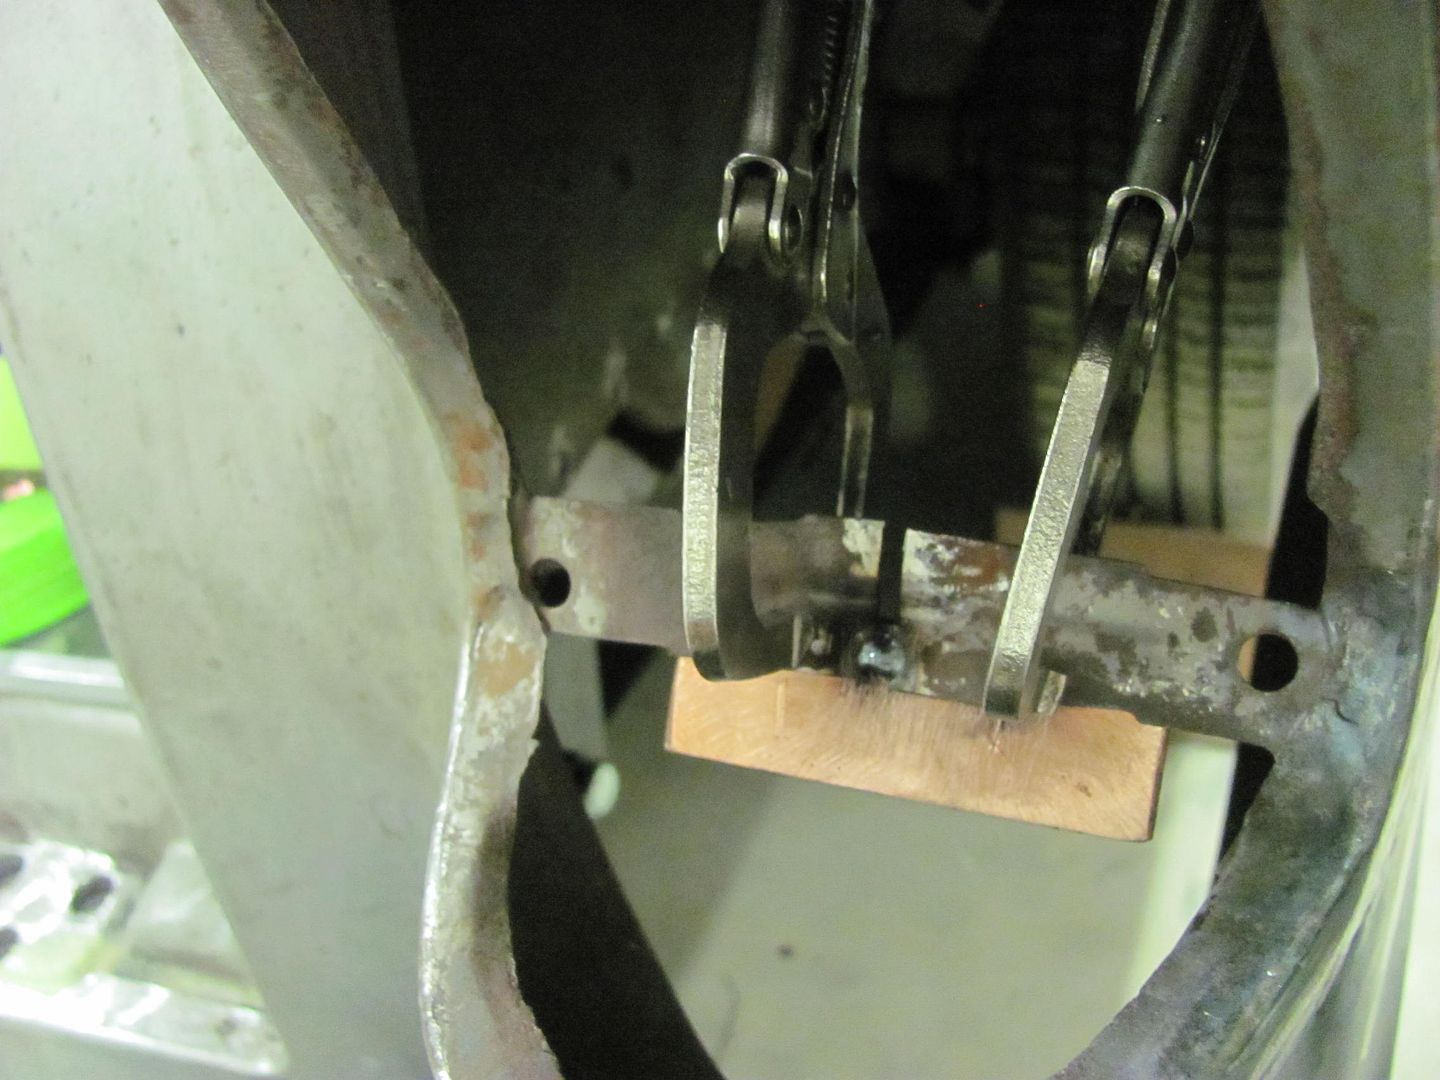 And Kyle continues to finish up the seam and we'll fine tune the opening once more when the welding and planishing is complete. 
__________________
Robert |
|
|
|
|
04-11-2015, 10:37 PM
|
#25 |
|
Senior Member
Join Date: Jul 2012
Location: Oblong, Illinois
Posts: 7,026
|
Re: 55 Wagon Progress
Wow, that is some nice detail fitting of the housing. Great work!
|
|
|
|
 |
| Bookmarks |
|
|


 Hybrid Mode
