
 |
|
|
#451 | ||
|
Registered User
Join Date: Sep 2012
Location: Leander, TX
Posts: 969
|
Re: 64 C10 Stepside "Jaybird"
Quote:
Quote:
Thank You  Like candy! Well I just ordered me some crimpers from Amazon. I did a ton of research on crimpers and open barrel 56 series Packard terminals!!! My brain is fried! I know for sure the crimpers I bought will do single crimping not sure about the double crimps I need to make. If they don't work I will just rent the double crimpers from AAW as I don't have that many double crimps to do. Also for anyone interested in cool electrical stuff download the hot rod catalog on the right of this page from AAW. They have a lot of cool stuff. They have the door jamb switches and they even have a courtesy light delay switch. How cool. http://www.americanautowire.com/download-catalog/ Also been reading these sites. http://www.rowand.net/Shop/Tech/Auto...Connectors.htm http://www.madelectrical.com/ http://www.alanhorvath.com/54chevy/mad_electrical.php http://stovebolt.com/techtips/electr...ade/index.html
__________________
64' Build Thread http://67-72chevytrucks.com/vboard/s...d.php?t=586955 Last edited by bj383ss; 05-14-2015 at 06:32 PM. |
||
|
|

|
|
|
#452 |
|
Senior Enthusiast
Join Date: Feb 2007
Location: Spokane Valley, WA
Posts: 8,356
|
Re: 64 C10 Stepside "Jaybird"
I really like the idea of their "intelligent fuses" that glow when they blow out. I'm going to need a set of those eventually!
__________________
My Build Thread: http://67-72chevytrucks.com/vboard/s...d.php?t=444502 |
|
|

|
|
|
#453 |
|
Registered User
Join Date: Sep 2012
Location: Leander, TX
Posts: 969
|
Re: 64 C10 Stepside "Jaybird"
I saw those. Why didn't they think of that before.
__________________
64' Build Thread http://67-72chevytrucks.com/vboard/s...d.php?t=586955 |
|
|

|
|
|
#454 |
|
I'm just glad to be here!
Join Date: Jan 2008
Location: Longview, TX
Posts: 4,788
|
Re: 64 C10 Stepside "Jaybird"
When you say double crimps, do you mean that the wire strands are crimped to the terminal and then there is a crimp of the terminal around the insulation?
If so, the single crimp tools can do that. Just crimp the wire strands first then do the crimp on the insulation. The economy tool that I linked earlier is what I used and does the job well. I have not had an issue with any wires that I have done that way with that tool. Thanks for those links, I think the rowand one will be helpful down the road...
__________________
Karl  1965 Chevy Stepside(Grandpa's Old Blue) and (July 2015 Shop Build!)(2020, the Saga Continues) http://67-72chevytrucks.com/vboard/s...d.php?t=372424 The LST Challenge: http://67-72chevytrucks.com/vboard/s...=1#post7812257 Korbin's 1st Square: "Sunburn" http://67-72chevytrucks.com/vboard/s...d.php?t=418618 1985 GMC Sierra: "White Trash", Korbin's 2nd now... http://67-72chevytrucks.com/vboard/s...d.php?t=632305 Henry - 1984 Chevrolet, Owen's 1st Square |
|
|

|
|
|
#455 | |
|
Registered User
Join Date: Sep 2012
Location: Leander, TX
Posts: 969
|
Re: 64 C10 Stepside "Jaybird"
Quote:
__________________
64' Build Thread http://67-72chevytrucks.com/vboard/s...d.php?t=586955 |
|
|
|

|
|
|
#456 |
|
Registered User
Join Date: Sep 2012
Location: Leander, TX
Posts: 969
|
Re: 64 C10 Stepside "Jaybird"
Update...
Spent all day Sunday wiring. Even though my pictures don't really show the work. I was very picky about where the wires ran and being organized. So on the engine harness I started with the 3 wires running to the starter. Two reds and a purple. One of the reds was a heavy 8 gauge that runs to the Alternator. The other red and purple went inside to the starter switch. I routed them all together and close to the block to keep them away from the header and put 3/4" convoluted tubing around them. I would have run 1/2" but it wouldn't contain the 2 big fusible links on the red wires. 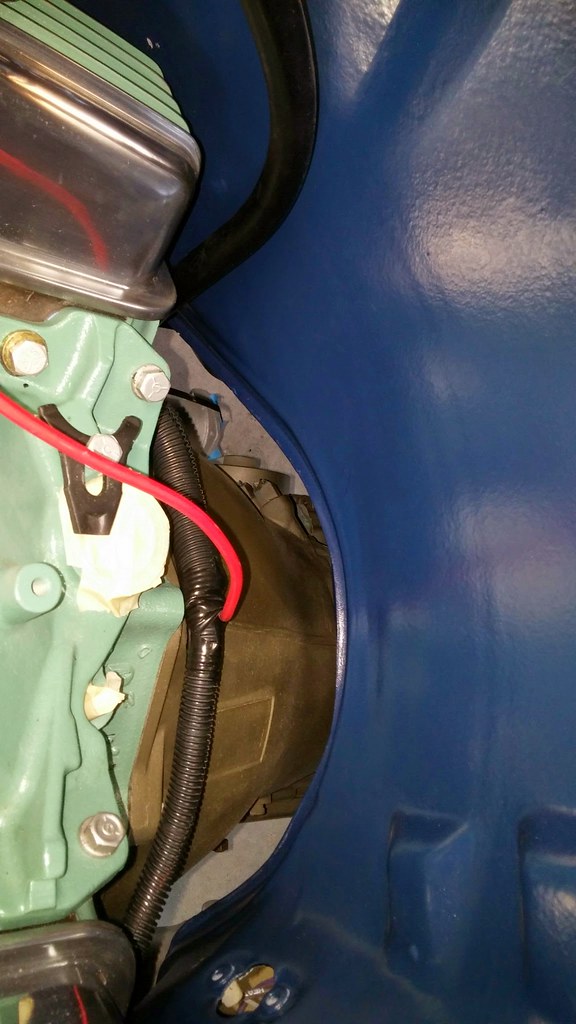 20150517_153325 by bjohnson388, on Flickr 20150517_153325 by bjohnson388, on FlickrSo I came across the back of the engine and the big 8 gauge wire came out to run up to the Alternator. I ran the other two to this top firewall grommet as I all I had planned for here is the oil pressure line and it is very close to the plug on the dash harness. I ran 1/2' convoluted tubing for these 2 wires down to the 3/4" and taped together. 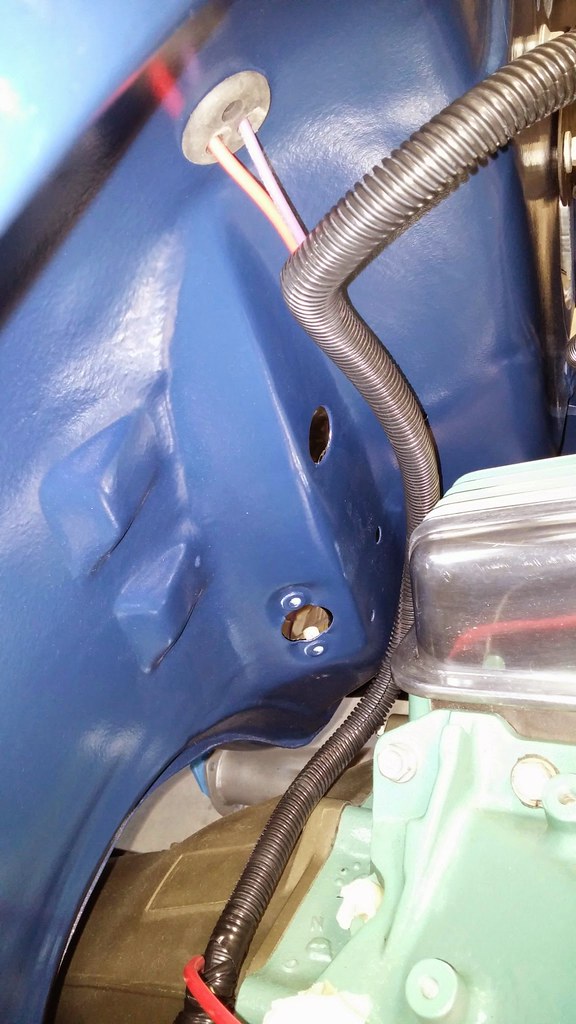 20150517_153343 by bjohnson388, on Flickr 20150517_153343 by bjohnson388, on FlickrHere are those 2 wires. My first and second crimps. Not too bad. The Crimper was adjusted a little tight so I loosened it one notch. 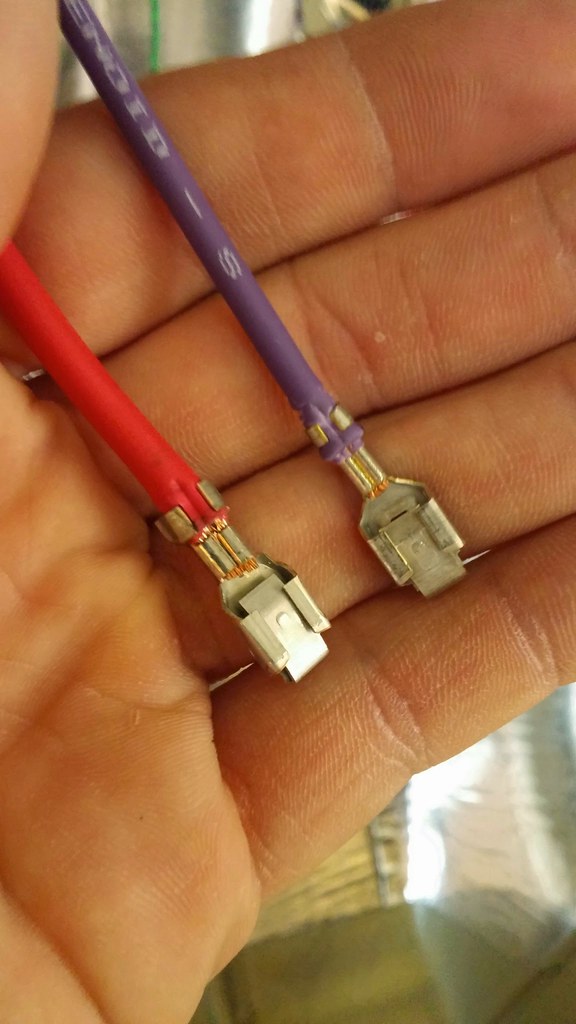 20150517_161447 by bjohnson388, on Flickr 20150517_161447 by bjohnson388, on FlickrHere is the big red 8 gauge wire along with the brown wire from engine harness running to alternator. I used some 1/2" rubber insulated clamps bolted to the valve covers to hold in place. I also ran the hot wire for the electric choke in this tubing which is 3/8" back up to the firewall. I will crimp a male terminal on it and insert it into the engine harness. I removed 2 wires from the engine harness plug I didn't need. The Oil sending unit(since I have gauges) and the other was for alternate temp w/cold light. 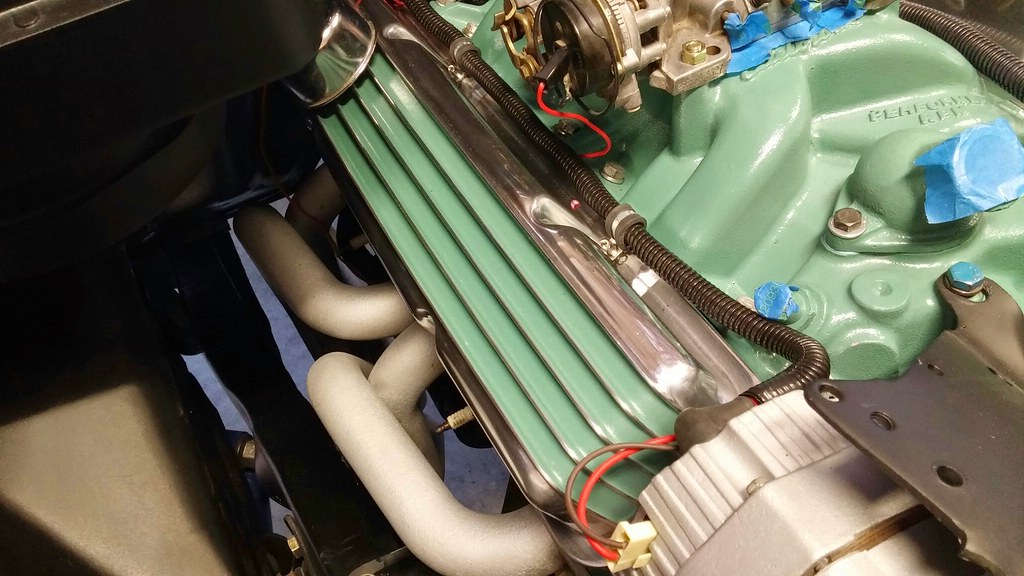 20150517_182226 by bjohnson388, on Flickr 20150517_182226 by bjohnson388, on FlickrSo in this pic you can see the engine harness coming down from the left and the pink and white wires are for the ignition and I ran the green temp wire behind the driver valve cover and down the side. Going to attach it with rubber clamps as well to the valve cover. 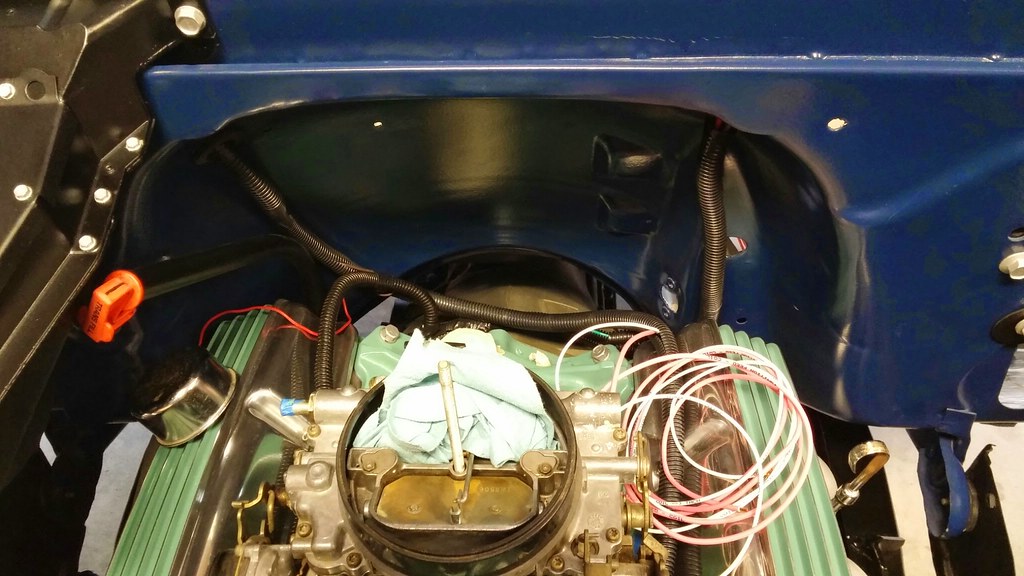 20150517_182207 by bjohnson388, on Flickr 20150517_182207 by bjohnson388, on FlickrIn this pic you can see the green wire on the driver side. I didn't cut any of the tubing yet it looks like a mess. 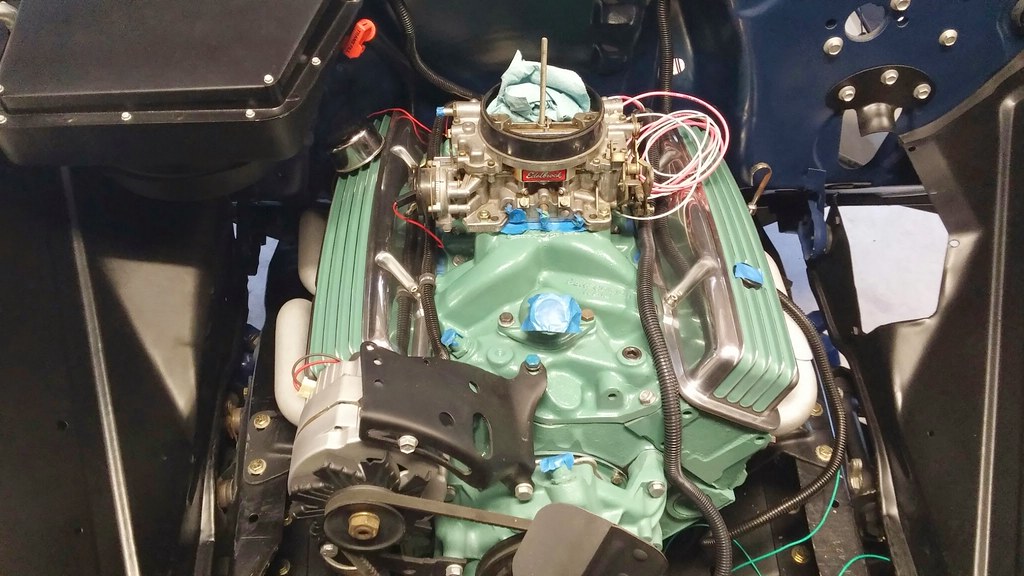 20150517_182156 by bjohnson388, on Flickr 20150517_182156 by bjohnson388, on FlickrI pulled the MSD box, Distributor, coil, and wires from my Caprice to run in the 64'. I painted the cap black to look more like stock. I need to paint the coil black as well and clean up the wires. I originally was going to mount the box under the dash, but have since decided to either mount it under the battery tray or on the other side of the core support behind the battery. Will have to mock that up and see what fits best. The reason I choose to not mount it inside was because I would have to run 4 wires through firewall and I don't want to drill any holes. One last thing. Here are the crimpers I bought. They work really well except for that 8 gauge wire was to big for them so I had to crimp it best I could and them some solder to make sure it was solid. 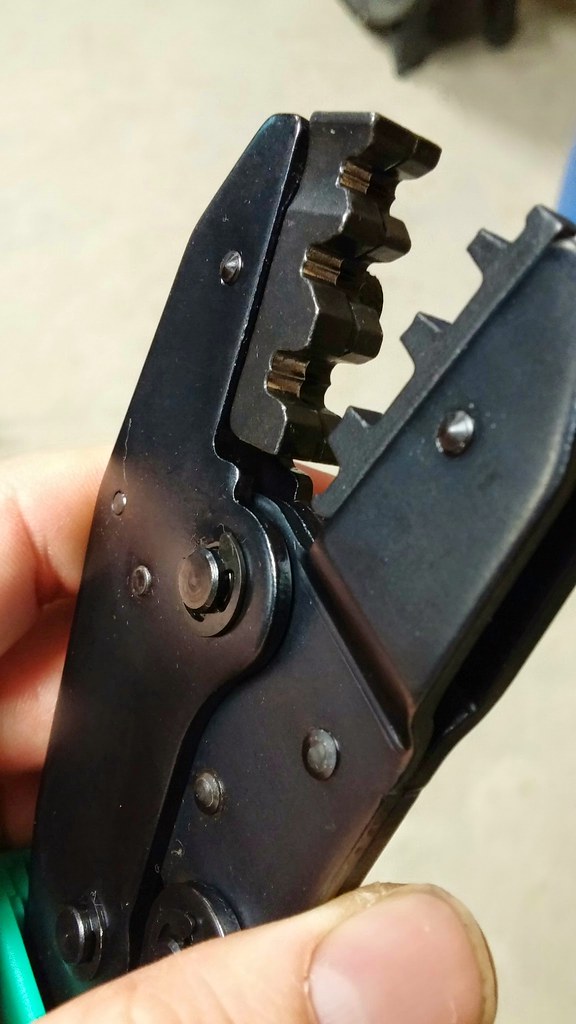 20150517_113055 by bjohnson388, on Flickr 20150517_113055 by bjohnson388, on Flickr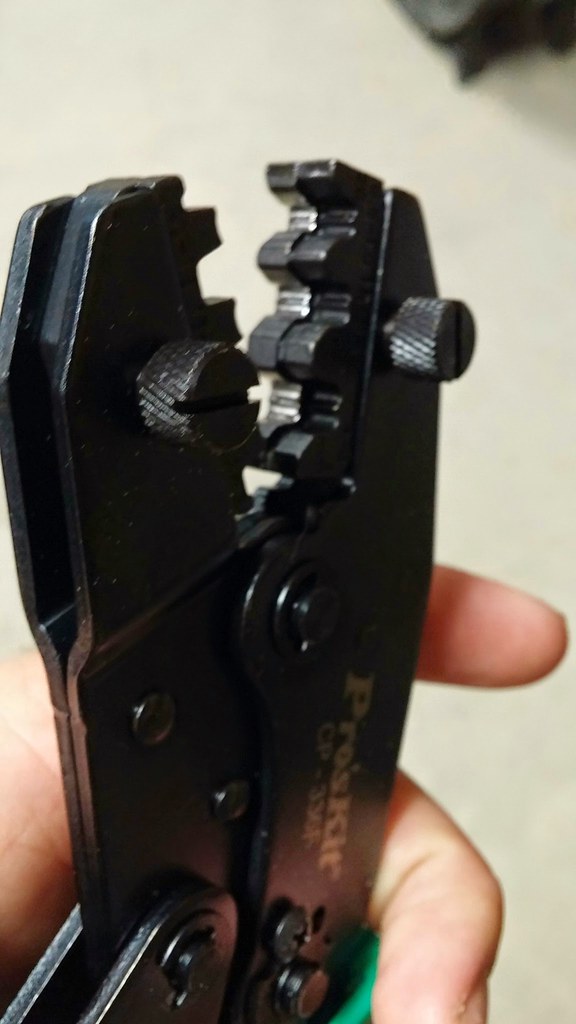 20150517_113042 by bjohnson388, on Flickr 20150517_113042 by bjohnson388, on Flickr
__________________
64' Build Thread http://67-72chevytrucks.com/vboard/s...d.php?t=586955 |
|
|

|
|
|
#457 |
|
Registered User
 Join Date: Mar 2013
Location: Southern Oregon
Posts: 10,384
|
Re: 64 C10 Stepside "Jaybird"
Doing good work man!
__________________
1966 Chevy C10 "Project Two Tone" http://67-72chevytrucks.com/vboard/s...d.php?t=596643 1964 GMC "Crustine" semi-build:http://67-72chevytrucks.com/vboard/s...d.php?t=665056 My youtube channel. Username "Military Chevy": https://www.youtube.com/channel/UC_h...fzpcUXyK_5-uiw |
|
|

|
|
|
#458 |
|
Registered User
Join Date: Apr 2012
Location: Searcy, AR
Posts: 4,203
|
Re: 64 C10 Stepside "Jaybird"
Looking Sweet!
__________________
DON Proverbs 27:17  US Air Force Retarded errr Retired My '65 Stepper Build:http://67-72chevytrucks.com/vboard/s...d.php?t=533920 My '60 Rusty Patina Build:http://67-72chevytrucks.com/vboard/s...66#post7402266 My '72 http://67-72chevytrucks.com/vboard/s...59#post7204359 SOLD |
|
|

|
|
|
#459 | |
|
I'm just glad to be here!
Join Date: Jan 2008
Location: Longview, TX
Posts: 4,788
|
Re: 64 C10 Stepside "Jaybird"
Quote:
Wiring looks good and those crimps look great. I like the look of the crimper in the pics. Can you post a link or part number to the ones you bought??
__________________
Karl  1965 Chevy Stepside(Grandpa's Old Blue) and (July 2015 Shop Build!)(2020, the Saga Continues) http://67-72chevytrucks.com/vboard/s...d.php?t=372424 The LST Challenge: http://67-72chevytrucks.com/vboard/s...=1#post7812257 Korbin's 1st Square: "Sunburn" http://67-72chevytrucks.com/vboard/s...d.php?t=418618 1985 GMC Sierra: "White Trash", Korbin's 2nd now... http://67-72chevytrucks.com/vboard/s...d.php?t=632305 Henry - 1984 Chevrolet, Owen's 1st Square |
|
|
|

|
|
|
#460 |
|
Registered User
Join Date: Sep 2013
Location: Strawberry Arkansas
Posts: 1,137
|
Re: 64 C10 Stepside "Jaybird"
Looks good!
__________________
http://67-72chevytrucks.com/vboard/s...d.php?t=605217 |
|
|

|
|
|
#461 |
|
Registered User
Join Date: Feb 2014
Location: Pulaski, ny
Posts: 117
|
Re: 64 C10 Stepside "Jaybird"
Very neat and organized.
Ryan. |
|
|

|
|
|
#462 |
|
Registered User
Join Date: Dec 2011
Location: Donaldsonville, La.
Posts: 1,024
|
Re: 64 C10 Stepside "Jaybird"
Good looking work.
|
|
|

|
|
|
#463 |
|
Registered User
Join Date: Sep 2012
Location: Leander, TX
Posts: 969
|
Re: 64 C10 Stepside "Jaybird"
Thanks guys for all the comments. Karl here is the link for the crimpers.
__________________
64' Build Thread http://67-72chevytrucks.com/vboard/s...d.php?t=586955 |
|
|

|
|
|
#464 |
|
Registered User
Join Date: Feb 2012
Location: Grand Rapids, Michigan, otherwise known as Beer City U.S.A.
Posts: 1,081
|
Re: 64 C10 Stepside "Jaybird"
Nice!
I wish that I had those crimpers when I did my wiring... I still may buy a set!
__________________
My Build: http://67-72chevytrucks.com/vboard/s...d.php?t=512904 |
|
|

|
|
|
#465 |
|
Registered User
Join Date: Dec 2012
Location: Rochester, KENT
Posts: 10,565
|
Re: 64 C10 Stepside "Jaybird"
Your build is definitely one of those addictive ones that I keep going back into Bret.
Was looking at that Russian guys woodwork this morning, and along with your work again realised just how "hammer, nails, saw " my woodwork is. You really do put a lot of skill, thought and effort into everything you do. Crimping looks great, thankfully I have Martin to do my crimping when we get to it.
__________________
MY BUILD LINK: http://67-72chevytrucks.com/vboard/s...585901]Redneck Express - 1966 C10 Short Fleetside MY USA ROADTRIPS http://forum.retro-rides.org/thread/...2018-humdinger IF YOU CAN'T FIX IT WITH A HAMMER, YOU'VE GOT AN ELECTRICAL PROBLEM MATE. |
|
|

|
|
|
#466 |
|
Senior Member
 Join Date: Oct 2009
Location: Fayetteville, Arkansas
Posts: 1,923
|
Re: 64 C10 Stepside "Jaybird"
nice clean work man... and wiring is one of those things that i choose not to do. i buy the reproduction wiring kits that just plug together. but i appreciate the challenge of doing it yourself. great job...
|
|
|

|
|
|
#467 | ||
|
Registered User
Join Date: Sep 2012
Location: Leander, TX
Posts: 969
|
Re: 64 C10 Stepside "Jaybird"
Quote:
Quote:
I can understand that. After I'm done with this I may feel the same way...
__________________
64' Build Thread http://67-72chevytrucks.com/vboard/s...d.php?t=586955 |
||
|
|

|
|
|
#468 |
|
Registered User
Join Date: Nov 2014
Location: Omaha
Posts: 558
|
Re: 64 C10 Stepside "Jaybird"

|
|
|

|
|
|
#469 |
|
Registered User
Join Date: Sep 2012
Location: Leander, TX
Posts: 969
|
Re: 64 C10 Stepside "Jaybird"
Updates from yesterdays work
Bought a bus bar at Lowe's and mounted it under that dash. Scrapped the paint on the outside where the bolt and washer contact to ground to the cab. Hooked the ground from the fuse box to this bolt along with a jumper wire to the bus bar. You can't really see the jumper wire in this photo. 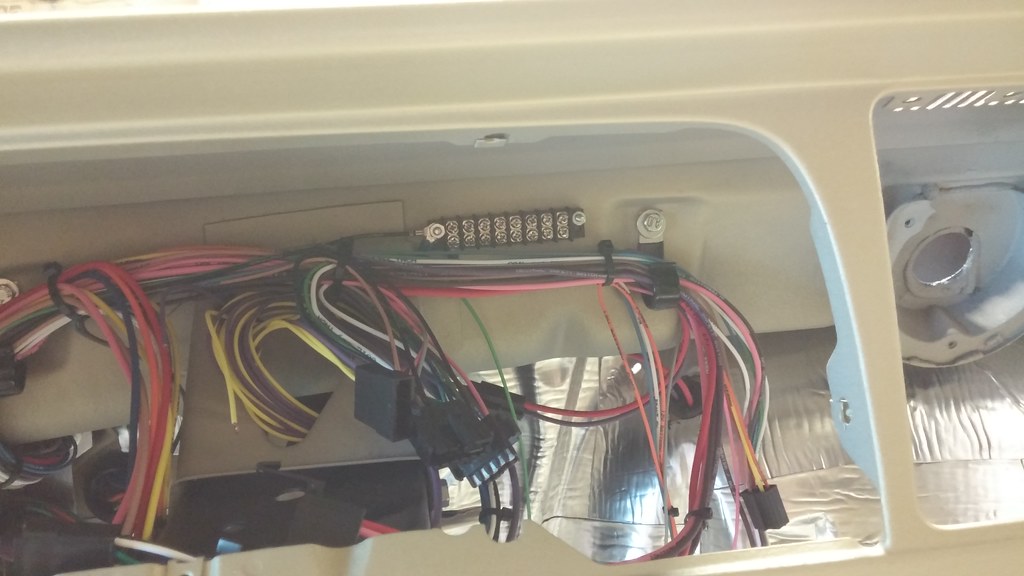 20150521_111247 by bjohnson388, on Flickr 20150521_111247 by bjohnson388, on FlickrGot my MSD box mounted and started routing the wires. I have to extend the two that go to the coil and the two that go to the distributor. 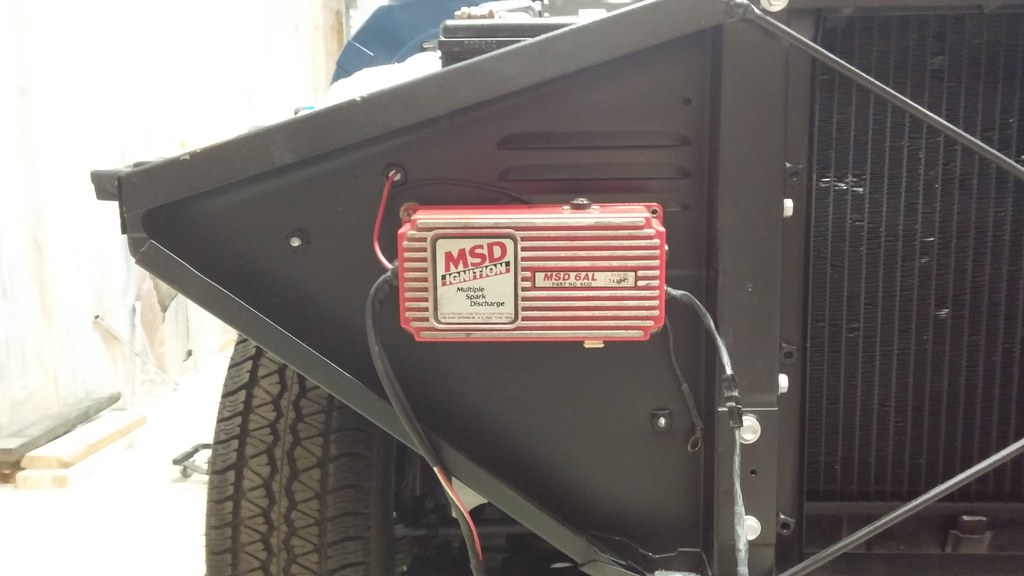 20150521_101034 by bjohnson388, on Flickr 20150521_101034 by bjohnson388, on FlickrI mocked up the grille support and grille. I will have to notch the grill support about a 1/4" in one spot 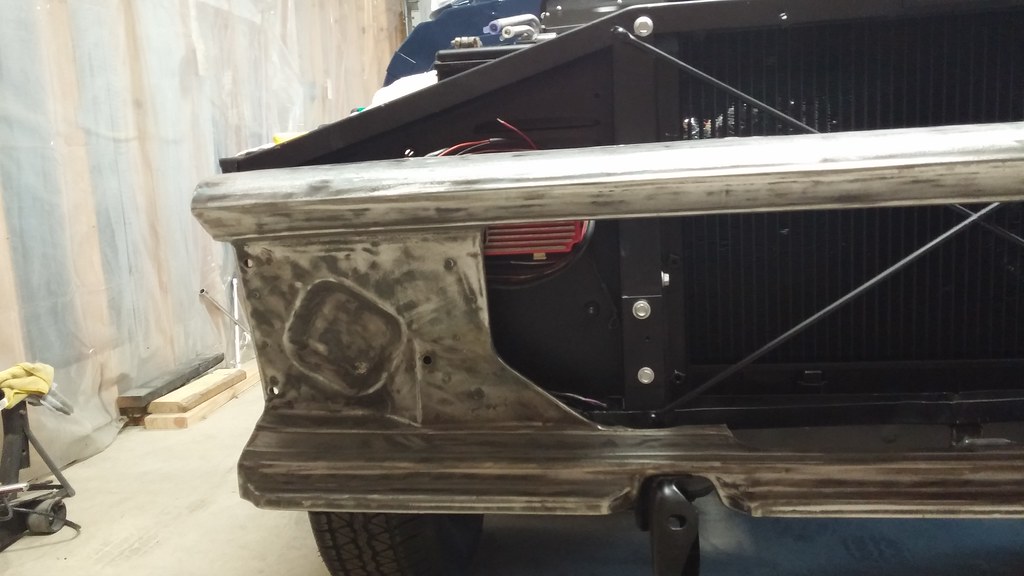 20150521_100910 by bjohnson388, on Flickr 20150521_100910 by bjohnson388, on Flickr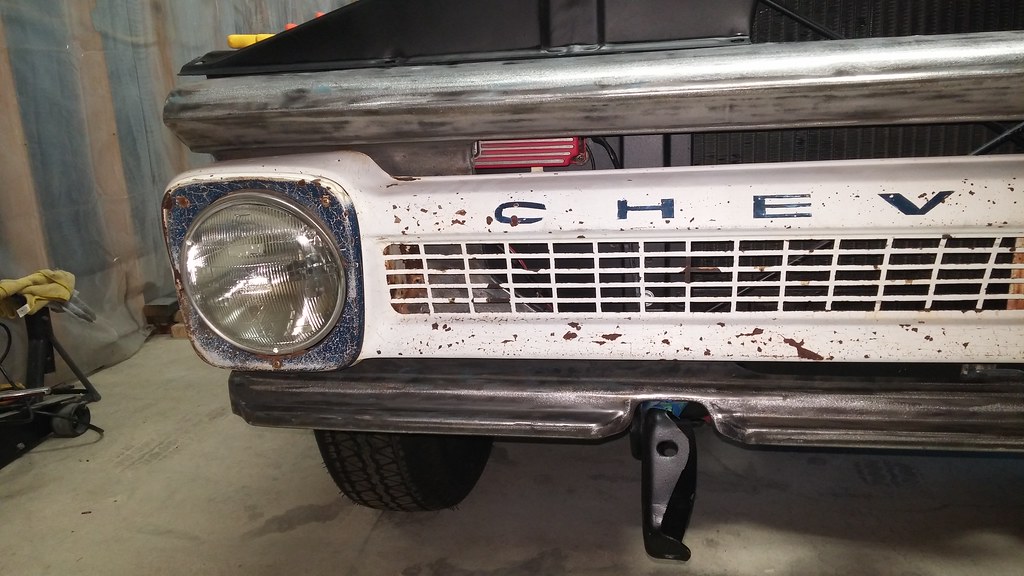 20150521_111151 by bjohnson388, on Flickr 20150521_111151 by bjohnson388, on FlickrAfter I got all the holes drilled and mounted I was feeling proud about its placement until I realized it will get wet if driven in the rain! Fortunately I don't ever plan on driving this thing in the rain. If there is even a chance it won't leave the garage. And I think the MSD box is sealed. I can play FEF for the moment 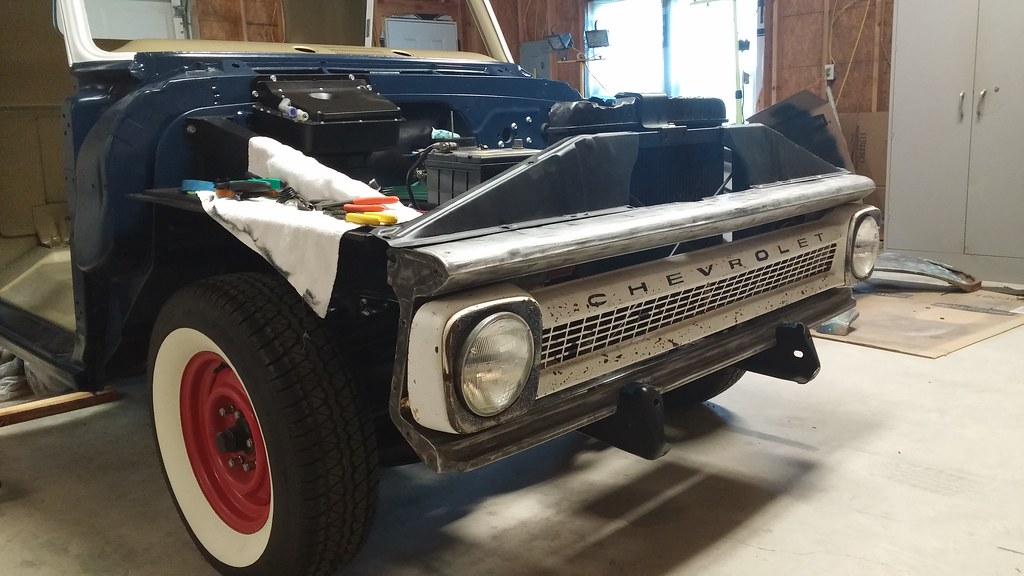 20150521_111109 by bjohnson388, on Flickr 20150521_111109 by bjohnson388, on Flickr
__________________
64' Build Thread http://67-72chevytrucks.com/vboard/s...d.php?t=586955 |
|
|

|
|
|
#470 |
|
Registered User
Join Date: Sep 2012
Location: Leander, TX
Posts: 969
|
Re: 64 C10 Stepside "Jaybird"
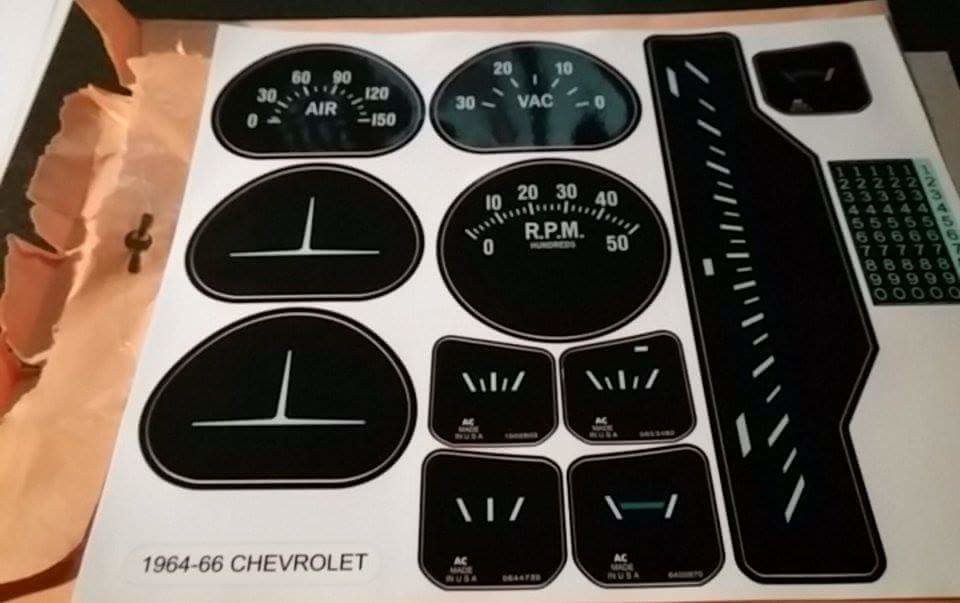
So a good friend of mine (Mjminino) whom I met on this board had a random act of kindness. He bought me the gauge cluster decal set and had it mailed to me. Arrived in the mail yesterday. I can't thank him enough. It's guys like him that make this forum such a great place to be and share ideas.
 received_1088916494458889 by bjohnson388, on Flickr received_1088916494458889 by bjohnson388, on FlickrSo this was the last thing I needed to restore my gauge cluster. So that's what I did today. Everything was sandblasted and primered last year 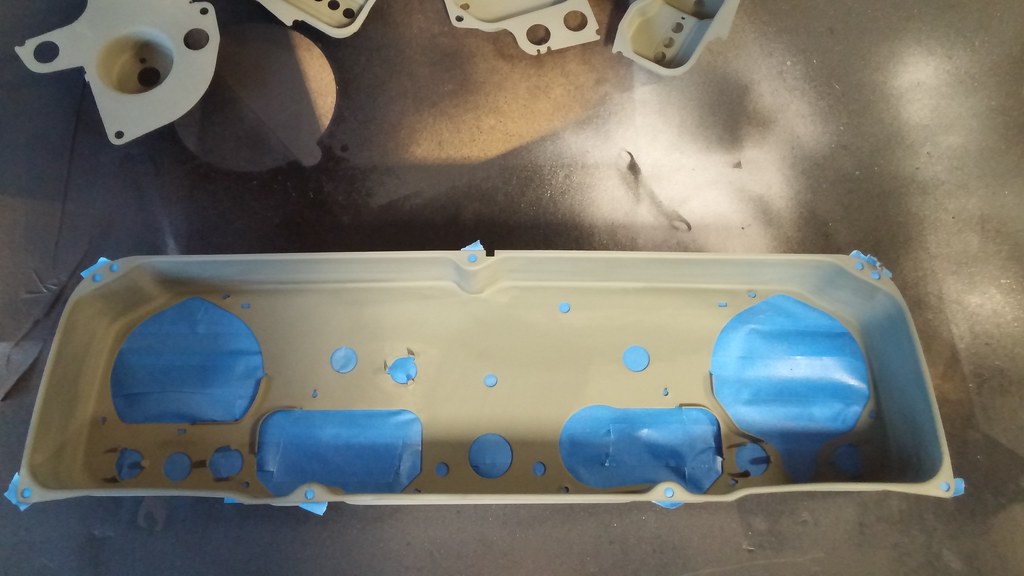 20150523_183823 by bjohnson388, on Flickr 20150523_183823 by bjohnson388, on FlickrKrylon Satin Jade 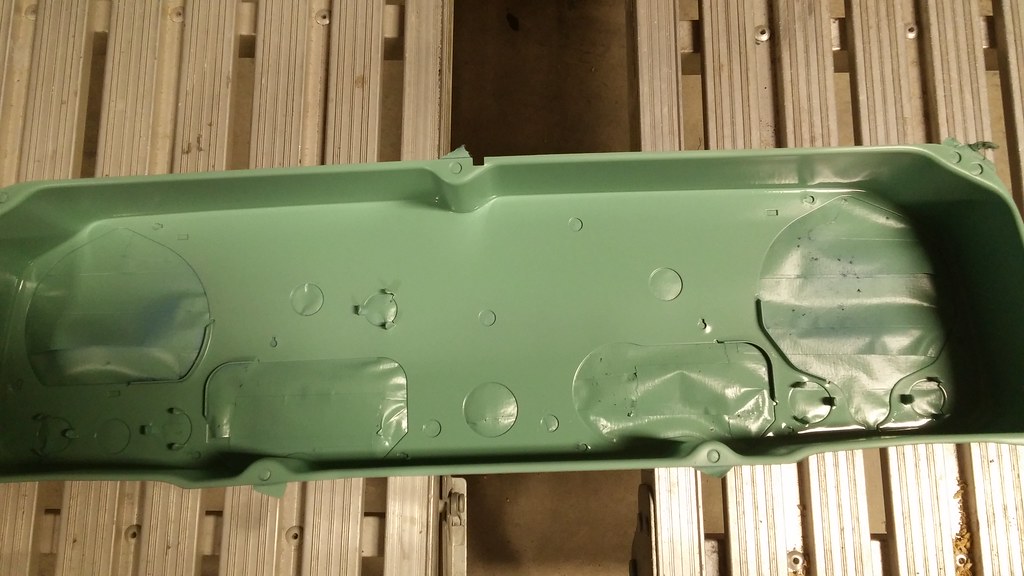 20150523_191439 by bjohnson388, on Flickr 20150523_191439 by bjohnson388, on FlickrShot the back and all the gauge cups with VHT Aluminum Engine Paint. 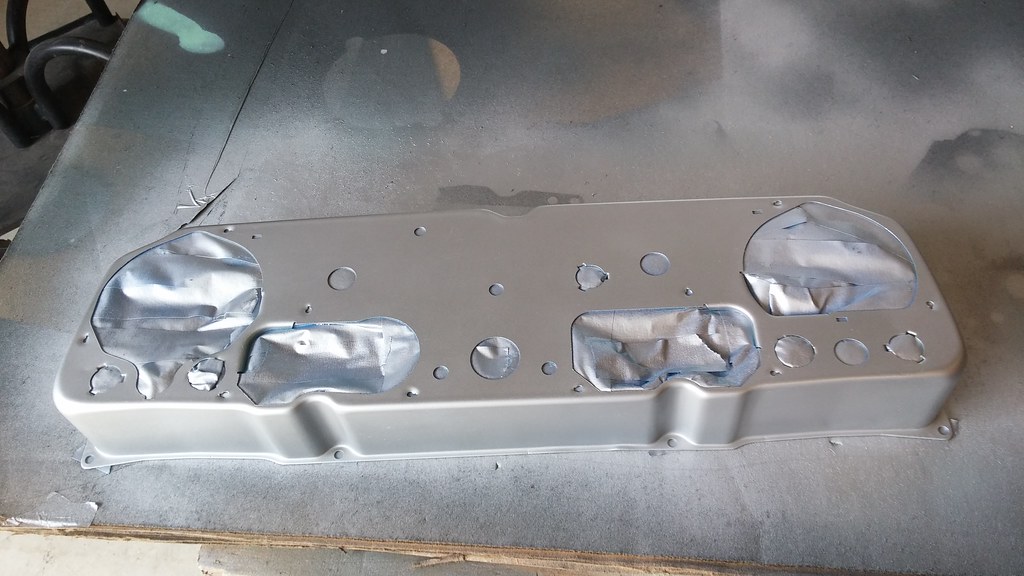 20150524_104115 by bjohnson388, on Flickr 20150524_104115 by bjohnson388, on FlickrNeedles painted with Model Masters fluorescent paint 2 coats. 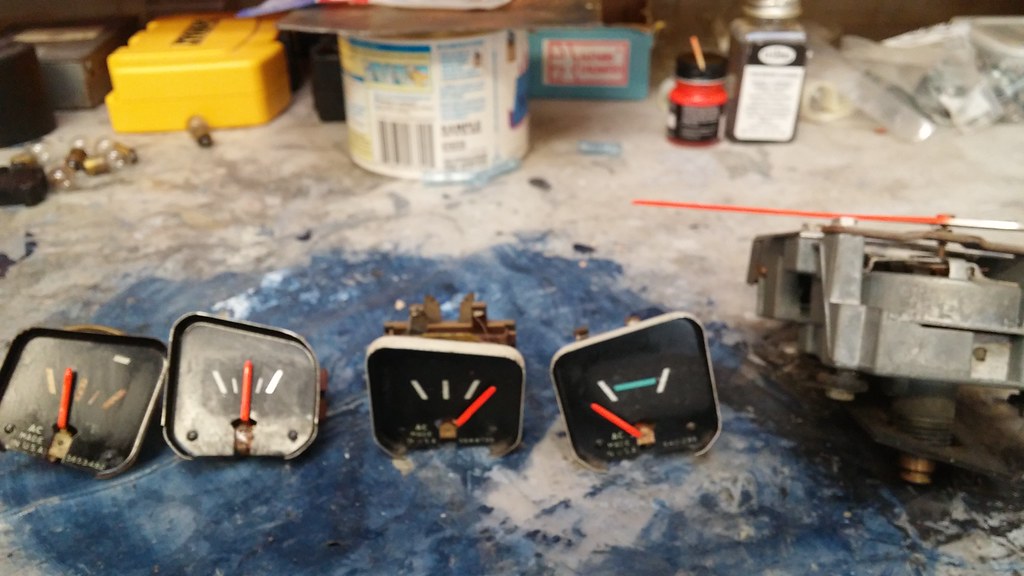 20150524_104105 by bjohnson388, on Flickr 20150524_104105 by bjohnson388, on FlickrPut the new decals on speedo first. Thought it would be hard. Turned out it was the easiest. 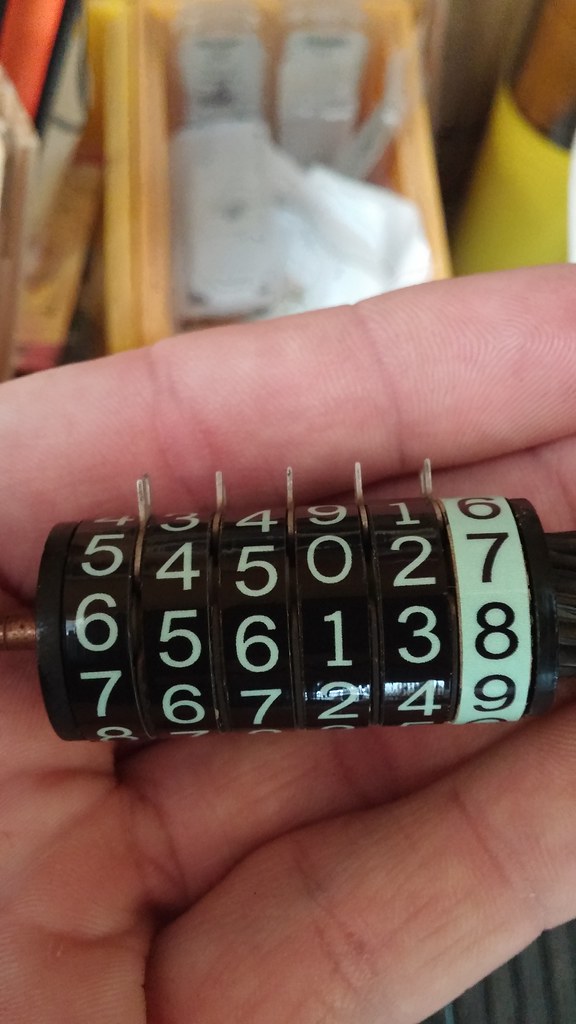 20150524_110550 by bjohnson388, on Flickr 20150524_110550 by bjohnson388, on FlickrI lined all the tubes with Reflectex Aluminum tape. It makes a huge difference. Crappy pic. 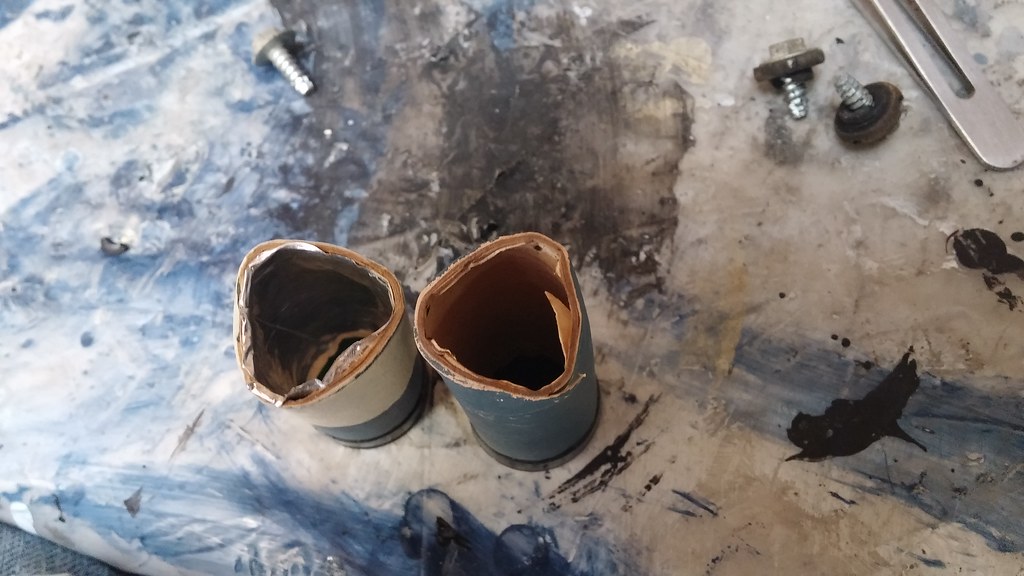 20150524_124131 by bjohnson388, on Flickr 20150524_124131 by bjohnson388, on FlickrAlmost there. Had to trim a 1/4" by 7/16" slot for each small gauge to allow the decals to go on. They were a little tricky to get on but used a pair of tweezers and then ironed all the bubbles and wrinkles out with a qtip. This decal set was of very high quality and I would recommend it to anyone. It is from http://parklane410.wix.com/home 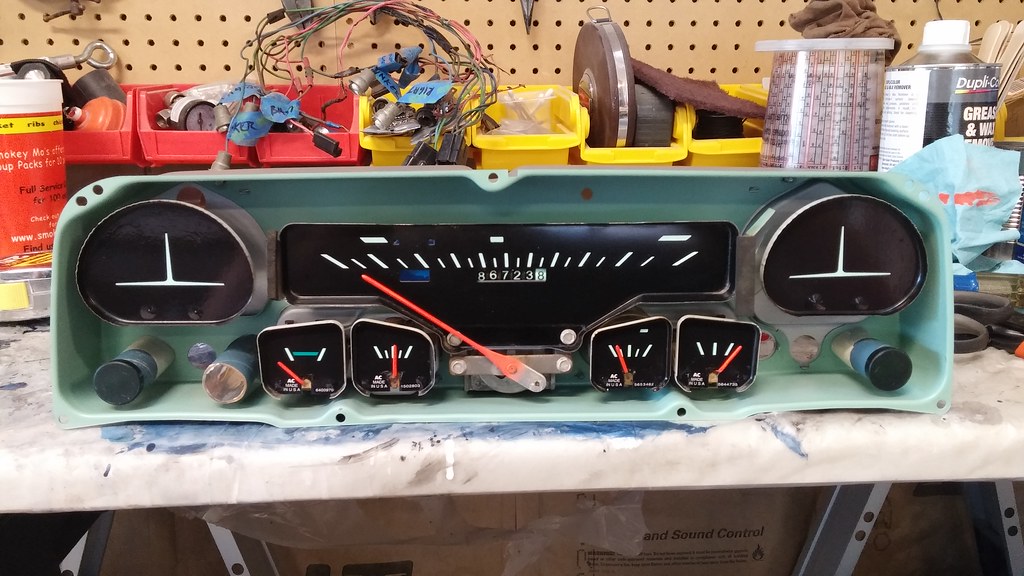 20150524_133034 by bjohnson388, on Flickr 20150524_133034 by bjohnson388, on FlickrI'm very pleased with how it came out. Everything is original except for the gauge faces with new decals. 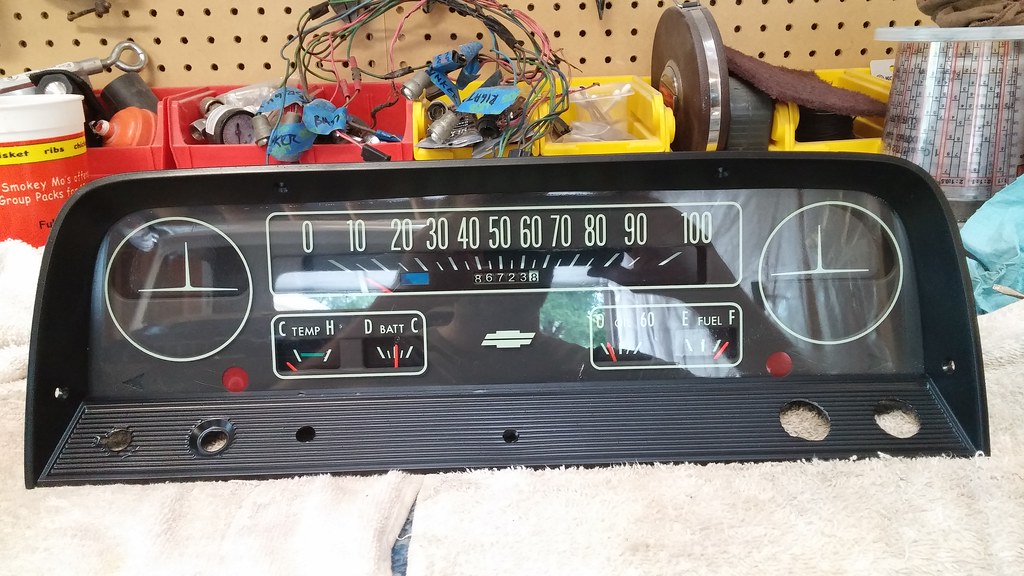 20150524_133930 by bjohnson388, on Flickr 20150524_133930 by bjohnson388, on Flickr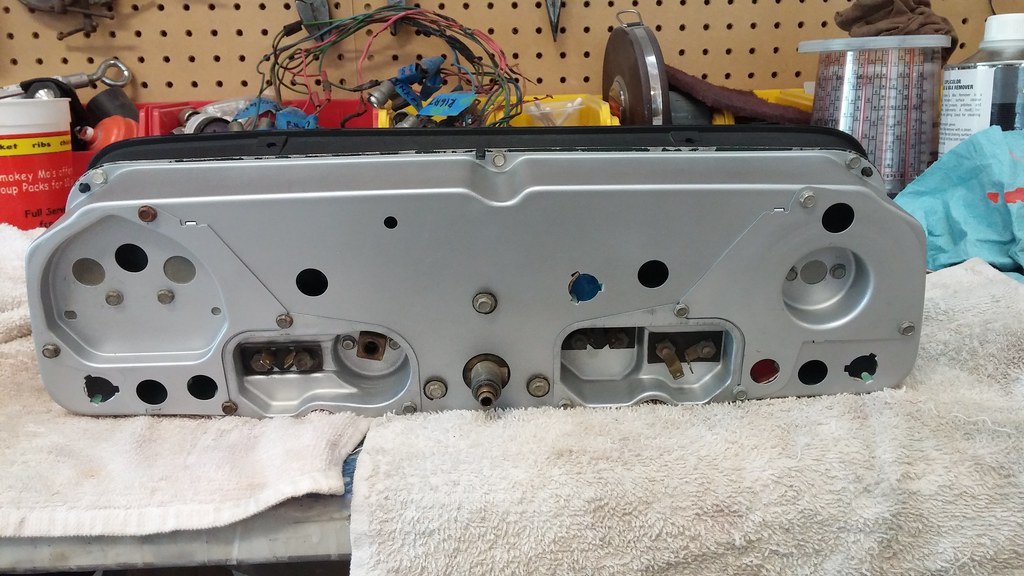 20150524_133940 by bjohnson388, on Flickr 20150524_133940 by bjohnson388, on FlickrGot the wire harness all done for it. 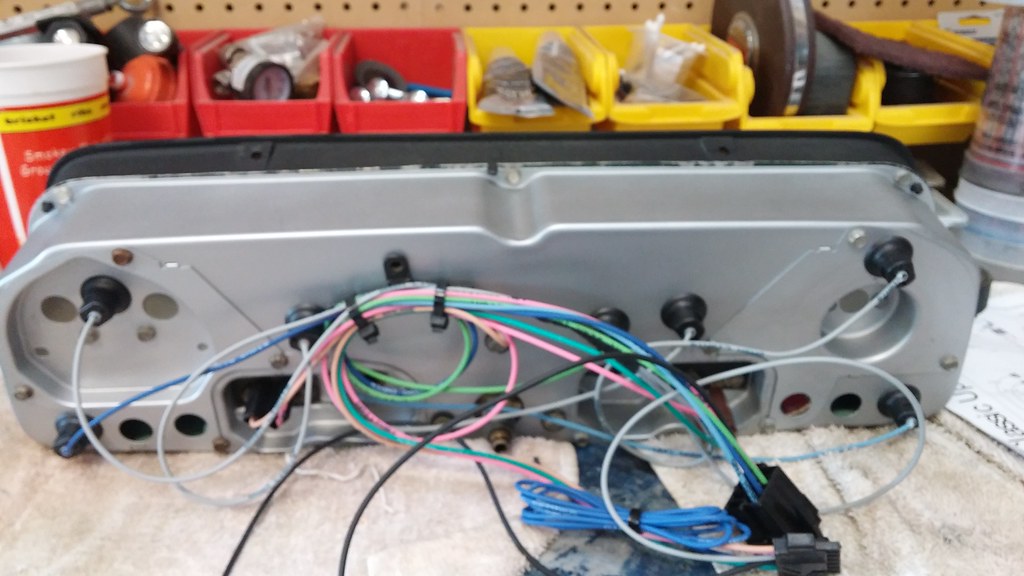 20150524_161053 by bjohnson388, on Flickr 20150524_161053 by bjohnson388, on FlickrInstalled with all the cleaned switches and hooked up. 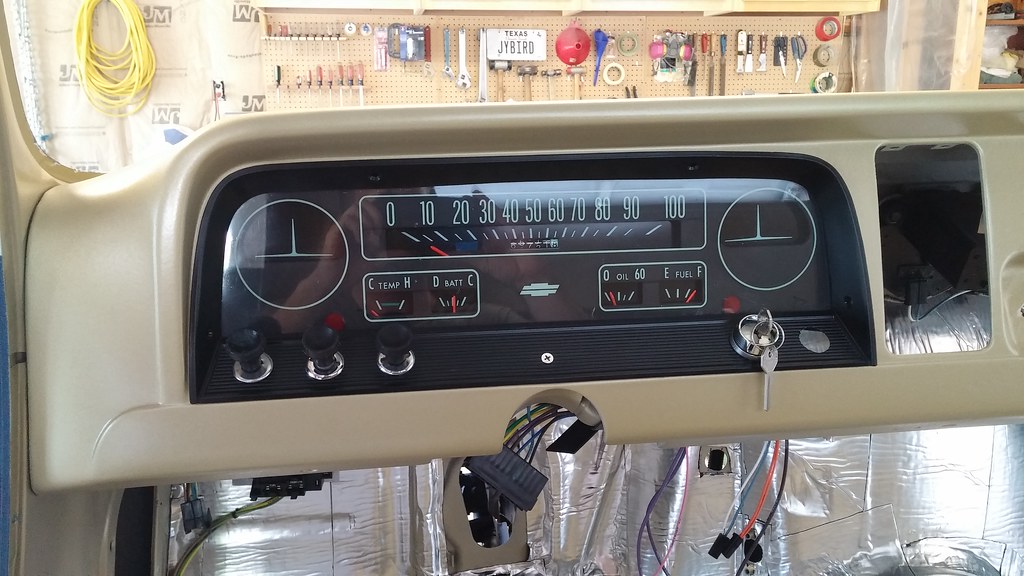 20150524_173350 by bjohnson388, on Flickr 20150524_173350 by bjohnson388, on FlickrAlso cleaned, painted and reinstalled wiper motor and wired it. I love the new ignition switch that came with AAW harness. I can't wait to start it. I pretend started several times today. HA 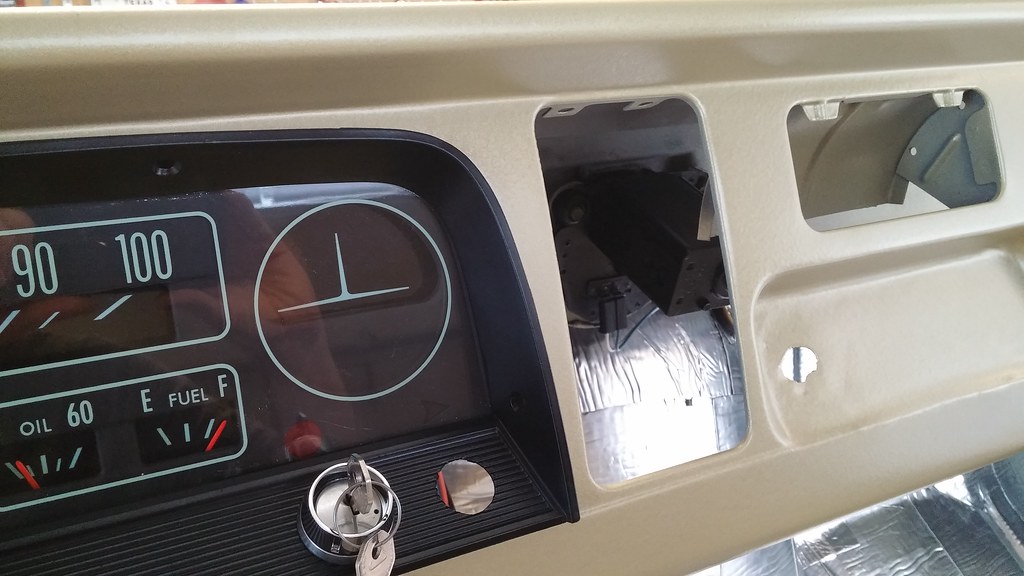 20150524_173356 by bjohnson388, on Flickr 20150524_173356 by bjohnson388, on FlickrStill need to do some tidying under the dash but it is so nice to have everything clean, painted and new again. 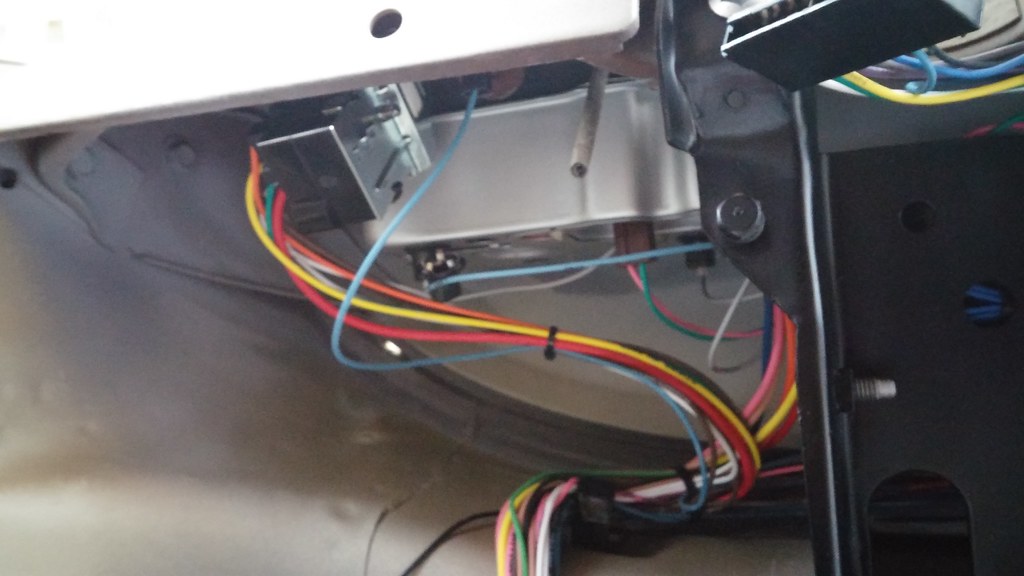 20150524_173507 by bjohnson388, on Flickr 20150524_173507 by bjohnson388, on Flickr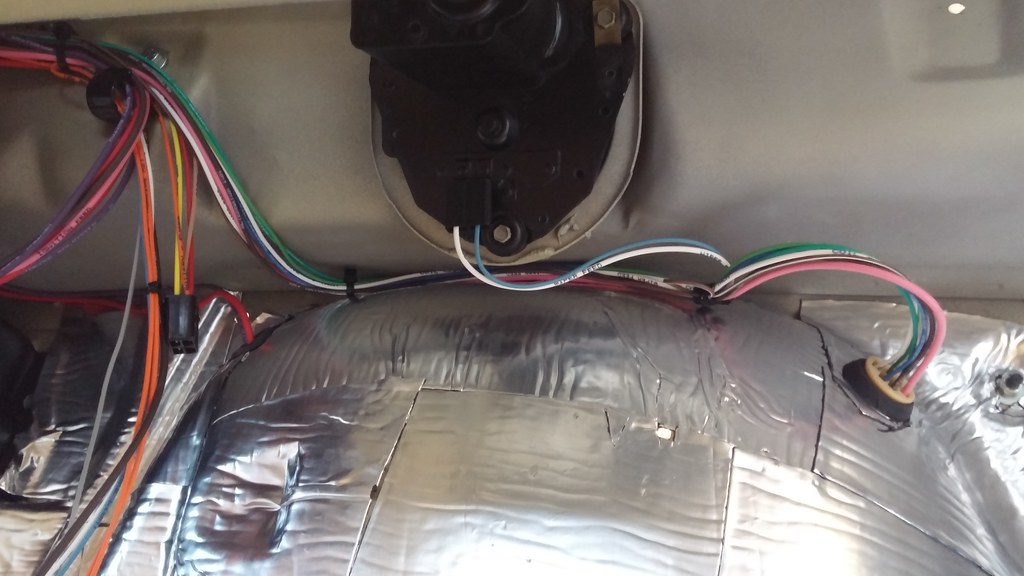 20150524_173743 by bjohnson388, on Flickr 20150524_173743 by bjohnson388, on FlickrTomorrow's plan is to work on the steering wheel and get all the column parts painted and the glovebox.
__________________
64' Build Thread http://67-72chevytrucks.com/vboard/s...d.php?t=586955 Last edited by bj383ss; 05-24-2015 at 10:10 PM. |
|
|

|
|
|
#471 |
|
Registered User
 Join Date: Mar 2013
Location: Southern Oregon
Posts: 10,384
|
Re: 64 C10 Stepside "Jaybird"
Awesome dude!
 Great work! Gotta love these days off. lol Great work! Gotta love these days off. lol 
__________________
1966 Chevy C10 "Project Two Tone" http://67-72chevytrucks.com/vboard/s...d.php?t=596643 1964 GMC "Crustine" semi-build:http://67-72chevytrucks.com/vboard/s...d.php?t=665056 My youtube channel. Username "Military Chevy": https://www.youtube.com/channel/UC_h...fzpcUXyK_5-uiw |
|
|

|
|
|
#472 |
|
Registered User
Join Date: Sep 2013
Location: Kent England
Posts: 1,025
|
Re: 64 C10 Stepside "Jaybird"
Looking really good Bret
Wiring looks nice and tidy . There's nothing worse than sorting out other people's wiring when it's a complete mess . That's one of my pet hates . The gauge cluster looks like brand new .
__________________
FINALLY PUTTING IT BACK TOGETHER AT LONG LAST MY BUILD THREAD: http://67-72chevytrucks.com/vboard/s...d.php?t=611614 |
|
|

|
|
|
#473 |
|
Registered User
Join Date: Dec 2012
Location: Rochester, KENT
Posts: 10,565
|
Re: 64 C10 Stepside "Jaybird"
What they all say Bret.
Looking just so right.
__________________
MY BUILD LINK: http://67-72chevytrucks.com/vboard/s...585901]Redneck Express - 1966 C10 Short Fleetside MY USA ROADTRIPS http://forum.retro-rides.org/thread/...2018-humdinger IF YOU CAN'T FIX IT WITH A HAMMER, YOU'VE GOT AN ELECTRICAL PROBLEM MATE. |
|
|

|
|
|
#474 |
|
Registered User
Join Date: Apr 2012
Location: Searcy, AR
Posts: 4,203
|
Re: 64 C10 Stepside "Jaybird"
Gauge cluster is sweet...
 What did you use to clean the lens that has the speedo and gauge printing on it? just a side note, are you leaving the mileage as is or rolling back to zero? Happy Memorial Day! 
__________________
DON Proverbs 27:17  US Air Force Retarded errr Retired My '65 Stepper Build:http://67-72chevytrucks.com/vboard/s...d.php?t=533920 My '60 Rusty Patina Build:http://67-72chevytrucks.com/vboard/s...66#post7402266 My '72 http://67-72chevytrucks.com/vboard/s...59#post7204359 SOLD |
|
|

|
|
|
#475 | |
|
Registered User
Join Date: Sep 2012
Location: Leander, TX
Posts: 969
|
Re: 64 C10 Stepside "Jaybird"
Quote:
To answer your questions I used 3M mico polishing compound with a machine. I was going to reset the speedo but couldn't figure out how. I actually increased the mileage! It doesn't really matter to me as the engine and trans are not new. Have a good Memorial Day. Remember what is important. The Heroes who died for or freedom!
__________________
64' Build Thread http://67-72chevytrucks.com/vboard/s...d.php?t=586955 |
|
|
|

|
 |
| Bookmarks |
|
|