
 |
|
|
#26 |
|
Registered User
Join Date: Jun 2010
Location: Vancouver Island BC
Posts: 652
|
Re: '55 International Metal/Body/Paint Work
Looks complicated, but great solution, technology worked beautifully.
__________________

|
|
|

|
|
|
#27 | |
|
Registered User
Join Date: May 2011
Location: Anderson SC
Posts: 3,898
|
Re: '55 International Metal/Body/Paint Work
Quote:
Here's some shots of the work done on the roof. It looked like it had been used as a dance floor at some point in the past! It wasn't too hard to straighten since the dents were fairly shallow, and came out 95% with just hammer and dolly work. The rear edge of the roof was in worse shape, and needed heat shrinking and pulling with a stud gun/dent puller. 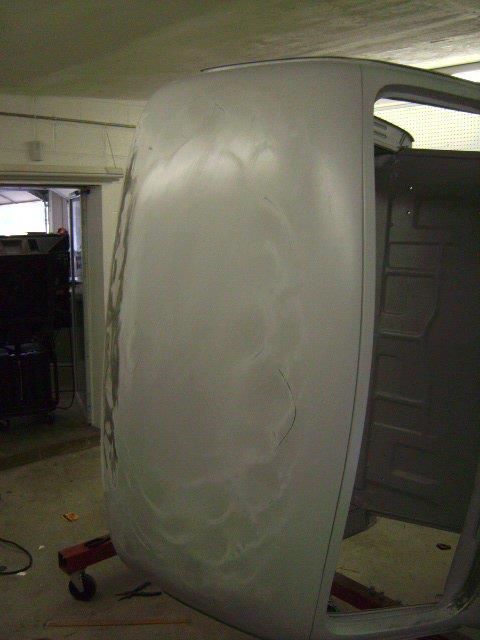 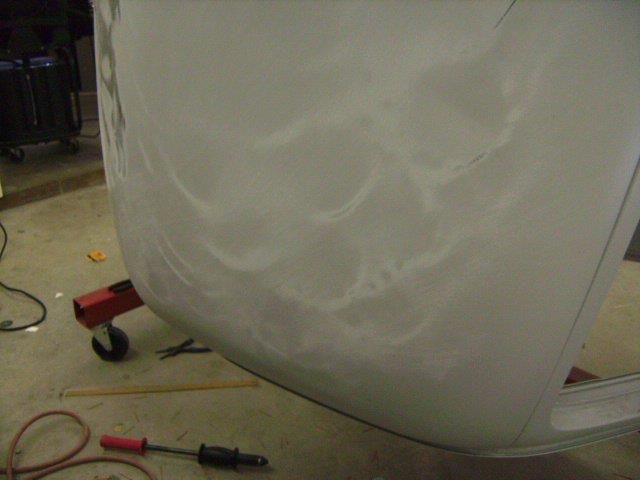 Throughout the process of metalworking the roof, I guide coated it and used a 21" adjustable block to find the high/low spots and work them out with a hammer/dolly. I got the dents out enough so the block was sanding the low spots, so it wouldn't take much filler when skim coating it.  Skim coated and blocked, ready for primer. 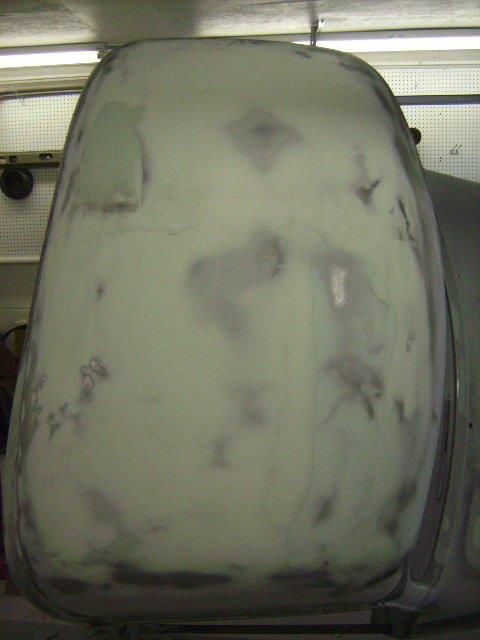 Primed with Slick Sand and guide coated. 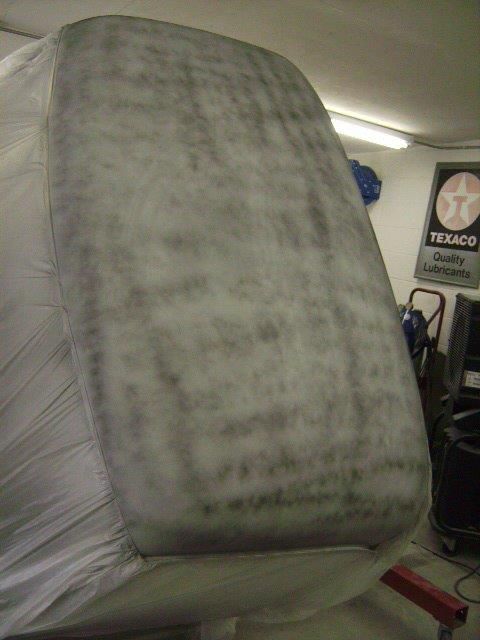
__________________
Project Goldilocks '66 C10 Short Fleet BBW Build '65 C10 Highly Detailed Stock Restoration Thread '78 Camaro Targa Roof Build '55 International Metal/Body/Paint Work '66 F100 Full Rotisserie Restoration '40 Packard 120 Convertible Coupe Restoration How To Restore and Detail an Original Gauge Cluster How To Detail Sand Body Panels, Edges, Corners, Etc |
|
|
|

|
|
|
#28 |
|
Registered User
Join Date: Oct 2009
Location: canton ga
Posts: 12,728
|
Re: '55 International Metal/Body/Paint Work
Very nice work ,I like international trucks ,I think they were ahead of their time. I know of a guy one county over from me that collects every International truck and Scout he can find and he drives and restores them.
|
|
|

|
|
|
#29 |
|
Registered User
Join Date: May 2011
Location: Anderson SC
Posts: 3,898
|
Re: '55 International Metal/Body/Paint Work
More work on the rear cab seam. This took a ton of time to get the seam and body lines reshaped and straight!
After plug welding the flange for the upper seam, I applied epoxy seam sealer to the outside seam. 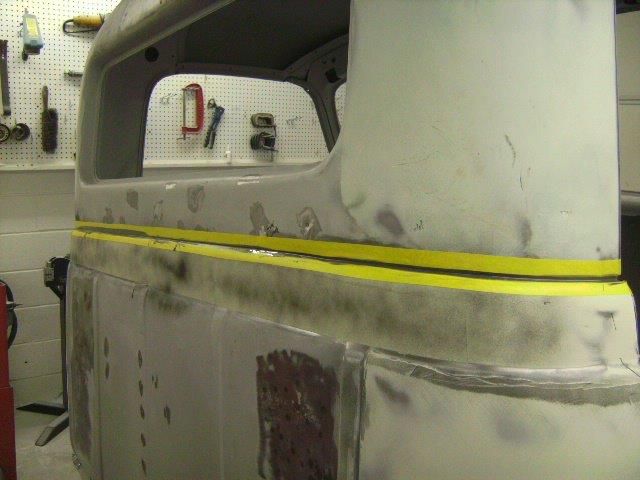 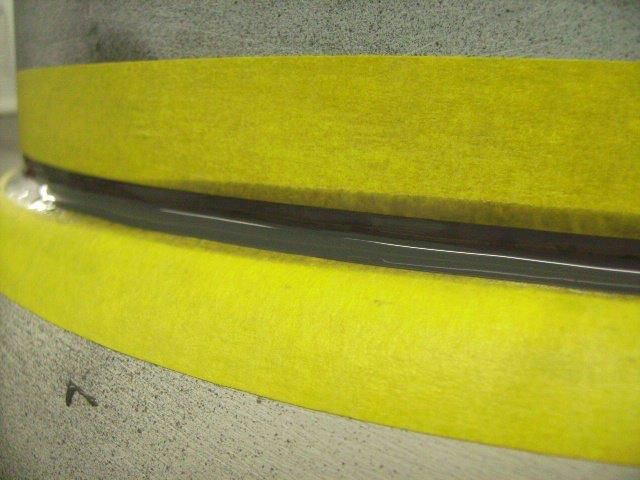 After metalworking, then skim coating and blocking, and priming with Slick Sand. 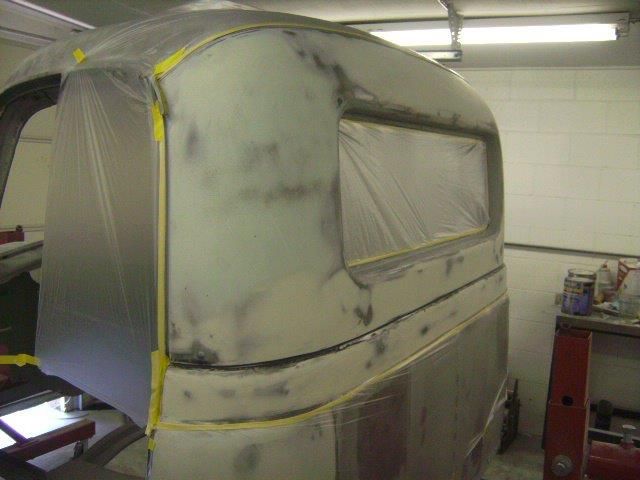 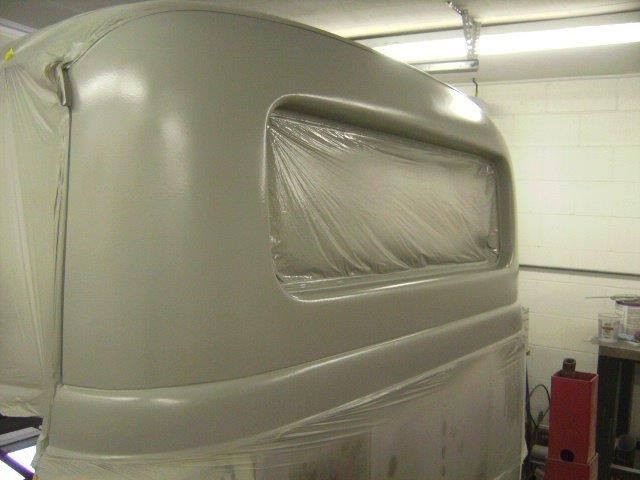 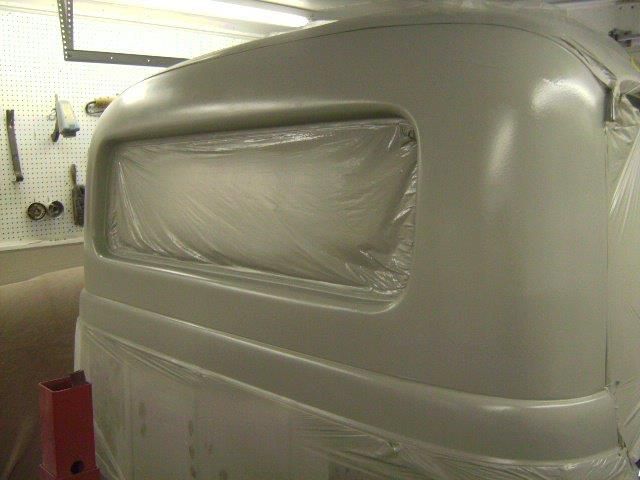 Close up shots of the seam. 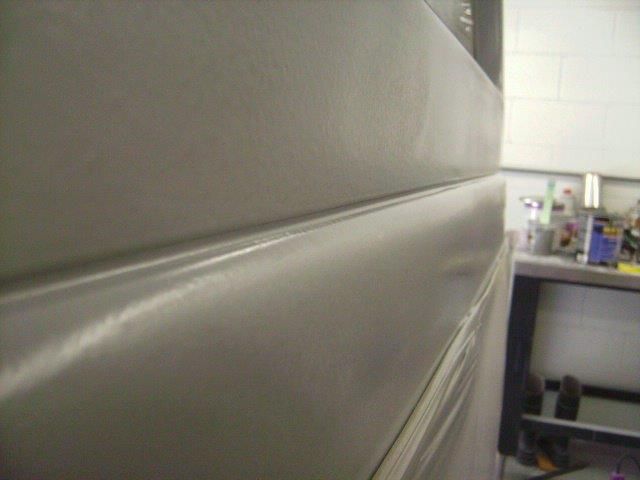 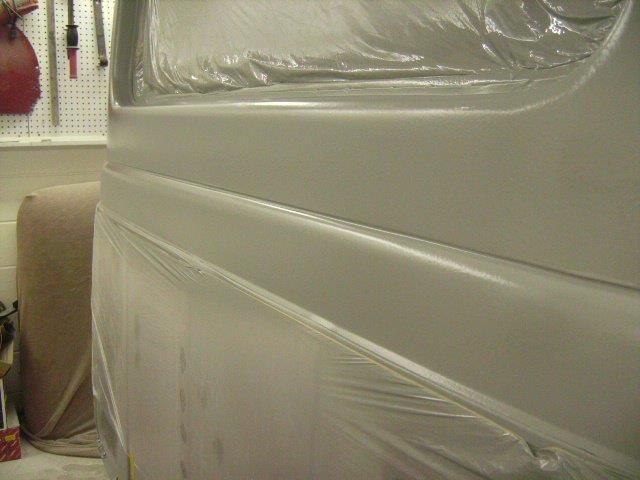 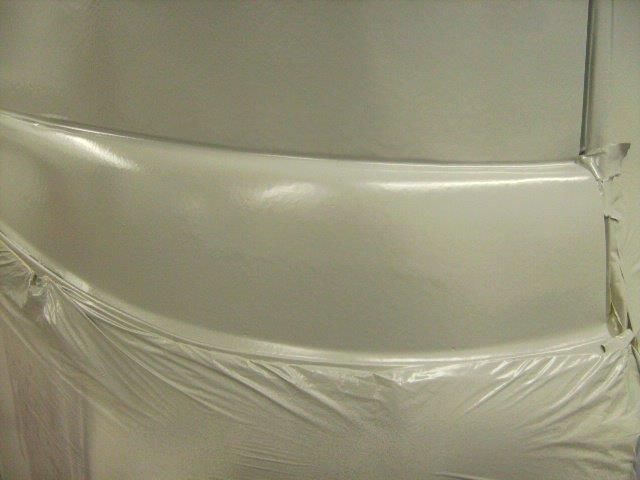 After block sanding, and detail sanding the seam. I sanded it back down to the sealer since I didn't want any primer building up over the flexible seam sealer. 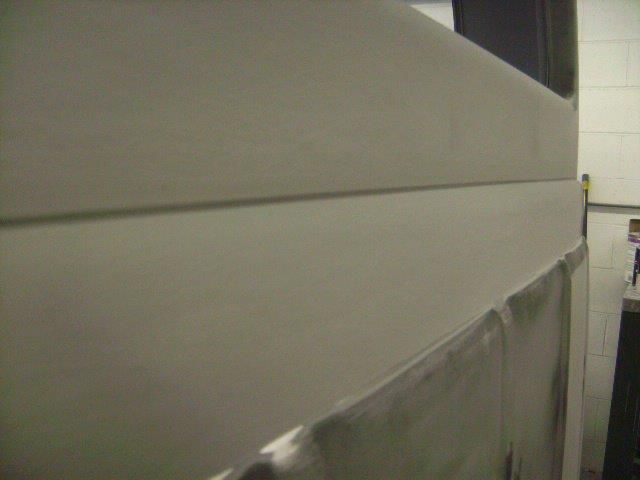 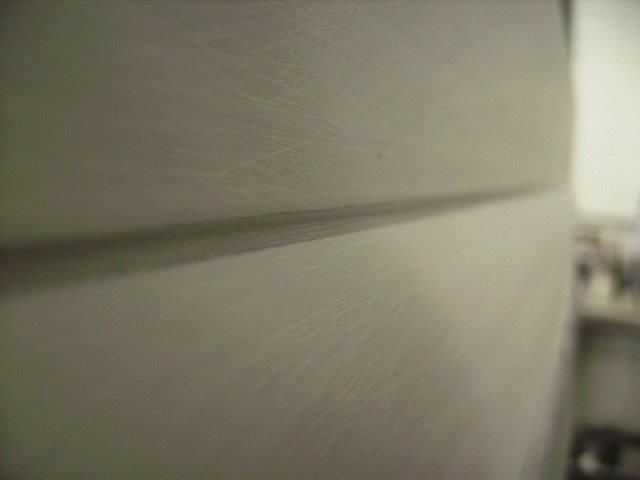 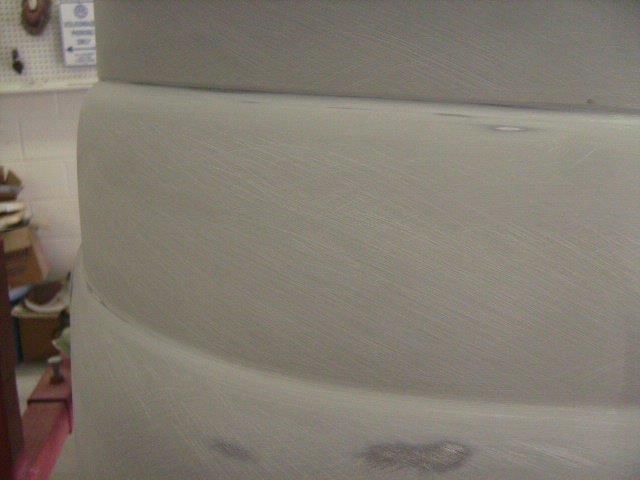
__________________
Project Goldilocks '66 C10 Short Fleet BBW Build '65 C10 Highly Detailed Stock Restoration Thread '78 Camaro Targa Roof Build '55 International Metal/Body/Paint Work '66 F100 Full Rotisserie Restoration '40 Packard 120 Convertible Coupe Restoration How To Restore and Detail an Original Gauge Cluster How To Detail Sand Body Panels, Edges, Corners, Etc |
|
|

|
|
|
#30 |
|
Registered User
Join Date: May 2011
Location: Anderson SC
Posts: 3,898
|
Re: '55 International Metal/Body/Paint Work
I agree. The way the bodies were assembled was pretty neat for that time; the whole floor section bolts in and can be removed easily, and cowl/windshield section also bolted together to the roof skin at the upper seam. That made it easy for International to make the parts interchangeable between their trucks and carryalls, and cab overs. Repairs could be made easier too since there weren't any spot welds to break loose and reweld if those panels needed to be replaced.
__________________
Project Goldilocks '66 C10 Short Fleet BBW Build '65 C10 Highly Detailed Stock Restoration Thread '78 Camaro Targa Roof Build '55 International Metal/Body/Paint Work '66 F100 Full Rotisserie Restoration '40 Packard 120 Convertible Coupe Restoration How To Restore and Detail an Original Gauge Cluster How To Detail Sand Body Panels, Edges, Corners, Etc |
|
|

|
|
|
#31 |
|
Registered User
Join Date: May 2011
Location: Anderson SC
Posts: 3,898
|
Re: '55 International Metal/Body/Paint Work
The owner had already done some rust repair to the floor section, and sealed the seams with silicone when he reinstalled the floor panel. Paint won't stick to silicone though, so I had to remove it and put epoxy sealer back in. I also cleaned all of the old seam sealer out of the firewall and cowl seams and redid those.
You can see the black silicone in the seam, and the epoxy primer had already started coming off just since it had been blasted and primed. 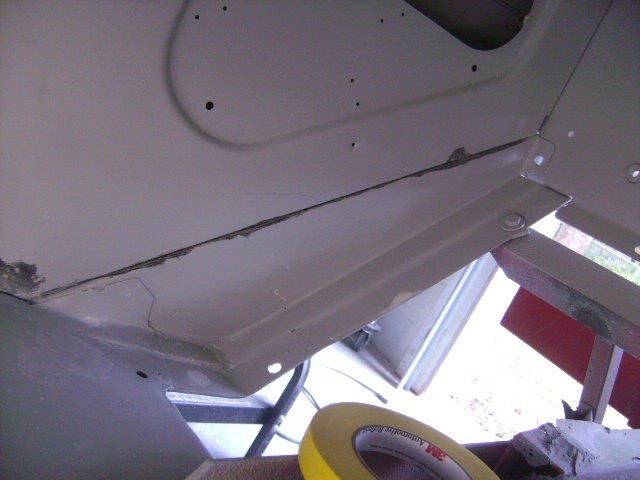 Most of it scraped out, then sanded to get it ready to apply new epoxy sealer. For some reason I can't find the after pics with the new sealer applied. 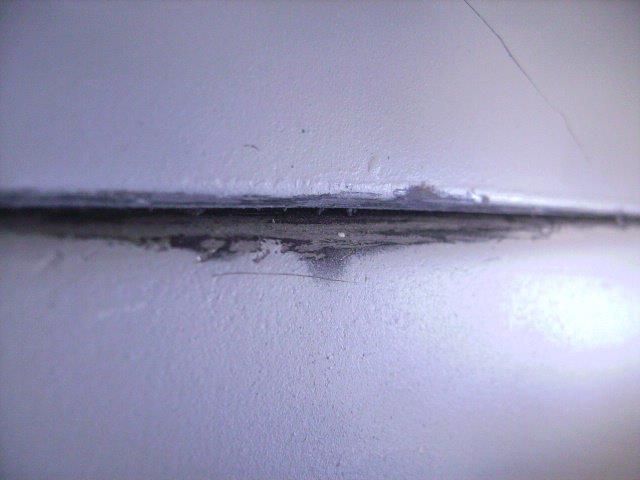 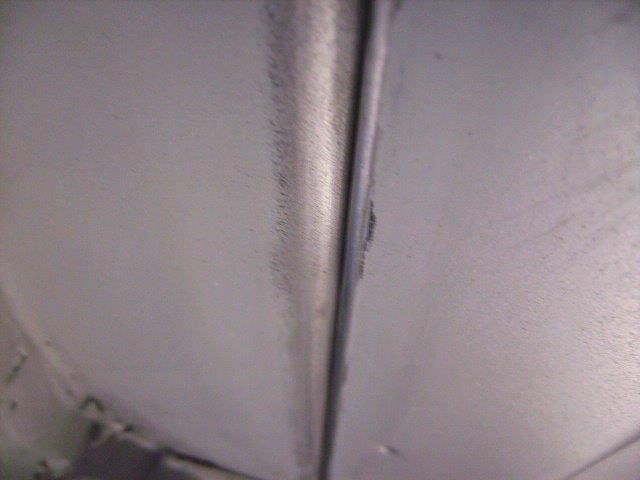 The factory cowl-to-firewall seam sealer was terrible, with large areas thin or missing completly. 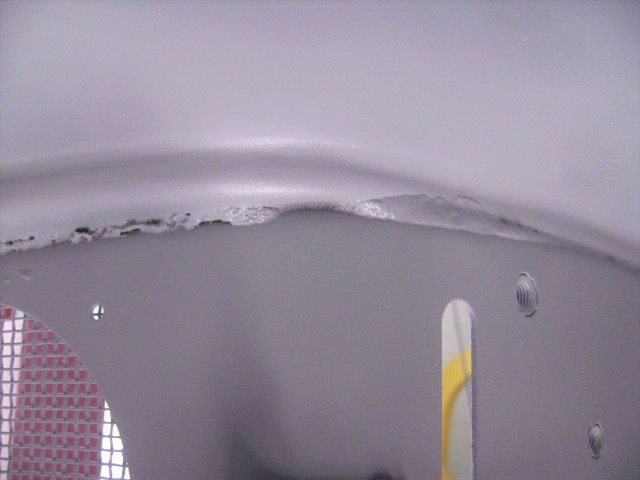 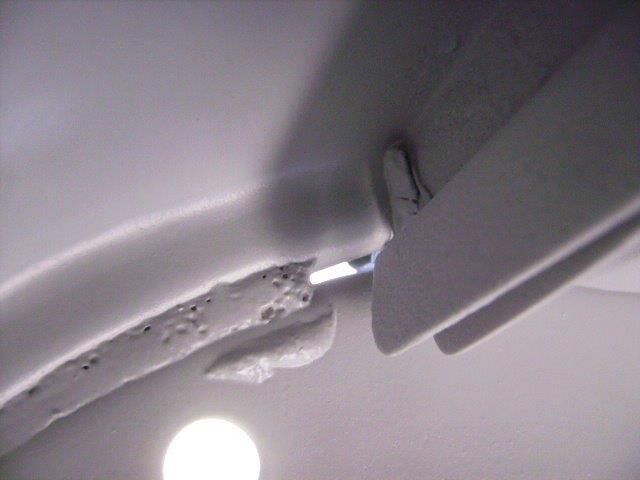 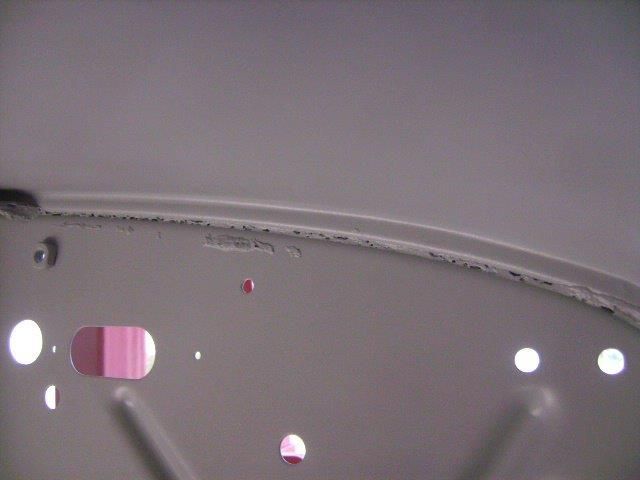 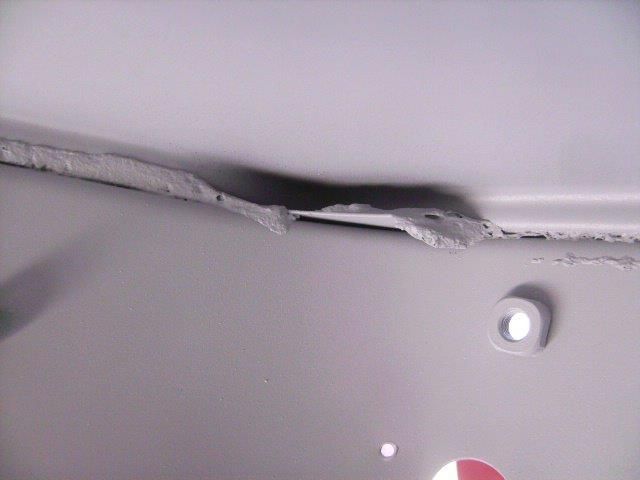 Thankfully the old sealer wasn't hard to remove. I scraped it out and put 3M strip-caulk back in the seams. The strip-caulk is ideal for areas that are hard to reach, or where gaps are too big for epoxy sealer to fill in. It's paintable too. 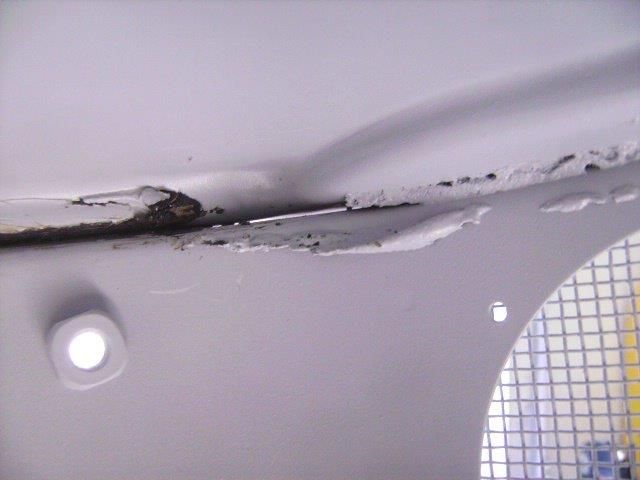 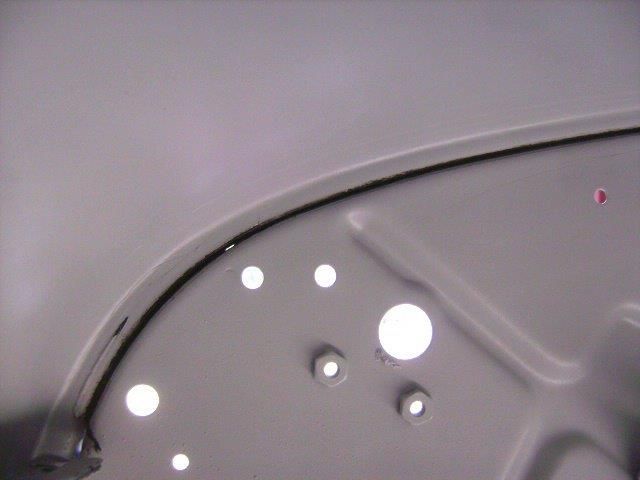 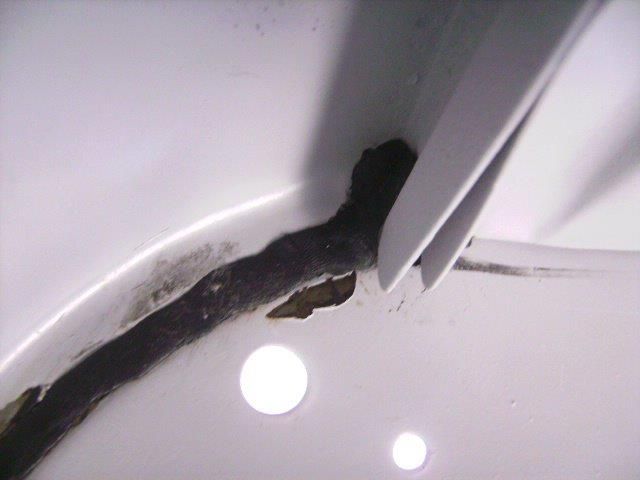 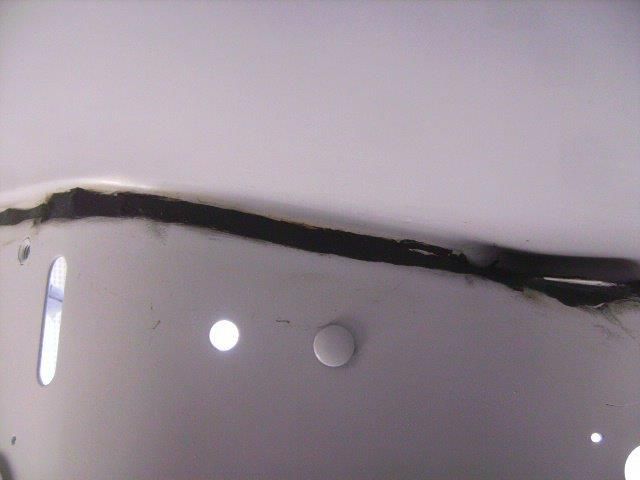
__________________
Project Goldilocks '66 C10 Short Fleet BBW Build '65 C10 Highly Detailed Stock Restoration Thread '78 Camaro Targa Roof Build '55 International Metal/Body/Paint Work '66 F100 Full Rotisserie Restoration '40 Packard 120 Convertible Coupe Restoration How To Restore and Detail an Original Gauge Cluster How To Detail Sand Body Panels, Edges, Corners, Etc |
|
|

|
|
|
#32 |
|
Registered User
Join Date: Jun 2010
Location: Vancouver Island BC
Posts: 652
|
Re: '55 International Metal/Body/Paint Work
Incredible pictures, the detail is impressive and appreciated. Your explanation will make my attempts better, plus no guess work on what products to use. Beautiful restoration.
__________________

|
|
|

|
|
|
#33 |
|
Registered User
Join Date: Jan 2009
Location: Louisville,Ky
Posts: 5,811
|
Re: '55 International Metal/Body/Paint Work
I'm just happy to see someone take the time to restore a old International most don't.
|
|
|

|
|
|
#34 |
|
Senior Member
Join Date: Jun 2005
Location: Clovis Ca.
Posts: 3,311
|
Re: '55 International Metal/Body/Paint Work
Nice work man!
__________________
Classic Trucks Link http://www.classictrucks.com/feature...uck/index.html 1958 GMC.Project Build http://67-72chevytrucks.com/vboard/s...d.php?t=162816 1966 Chevelle Build http://67-72chevytrucks.com/vboard/s...d.php?t=443576 Video http://www.youtube.com/watch?v=prrNKo8F7Zw#GU5U2spHI_4 |
|
|

|
|
|
#35 | ||
|
Registered User
Join Date: May 2011
Location: Anderson SC
Posts: 3,898
|
Re: '55 International Metal/Body/Paint Work
Quote:
Quote:
Thanks!
__________________
Project Goldilocks '66 C10 Short Fleet BBW Build '65 C10 Highly Detailed Stock Restoration Thread '78 Camaro Targa Roof Build '55 International Metal/Body/Paint Work '66 F100 Full Rotisserie Restoration '40 Packard 120 Convertible Coupe Restoration How To Restore and Detail an Original Gauge Cluster How To Detail Sand Body Panels, Edges, Corners, Etc |
||
|
|

|
|
|
#36 |
|
Registered User
Join Date: May 2011
Location: Anderson SC
Posts: 3,898
|
Re: '55 International Metal/Body/Paint Work
With the floor and firewall seams sealed up from the inside, I was ready to spray Lizzard Skin heat and sound insulation. I sprayed two coats of each on the floors, firewall, cowl, rear cab panel, and roof. It dampened the panels so they no longer sound like a tin can when tapped on. If you ever want to do this yourself, use paper masking instead of plastic- it doesn't stick to plastic and blows loose when you start putting on extra coats, making a huge mess.
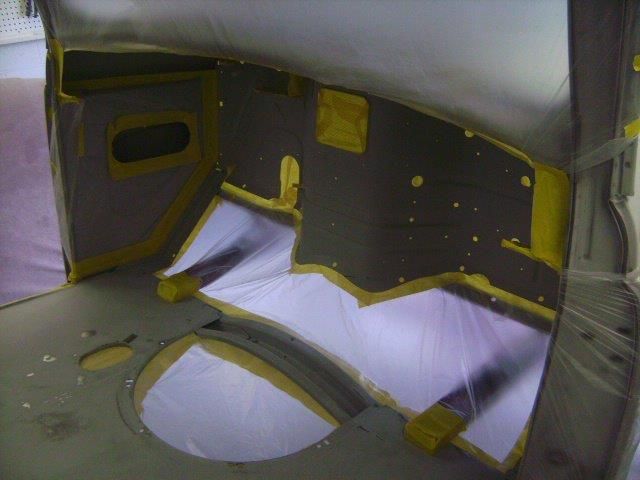 Ever seen this many holes in a firewall before?! 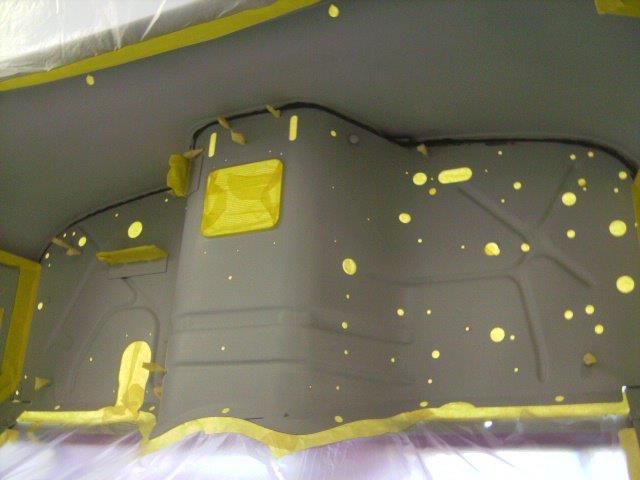 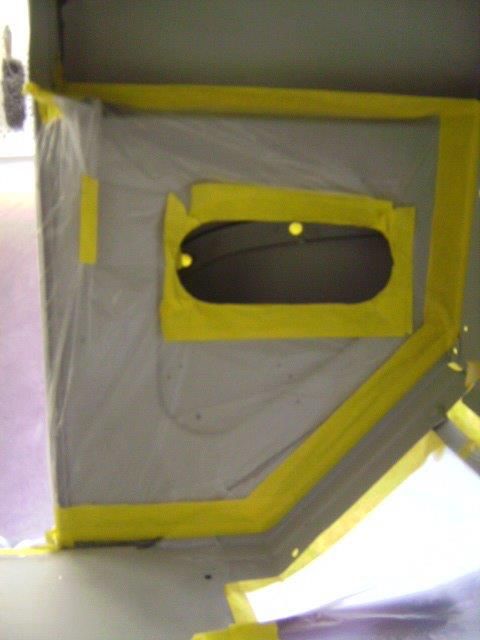 I sprayed epoxy primer over the bare metal spot here before sprayin Lizzard Skin. LS is water based so you don't want it over bare metal. 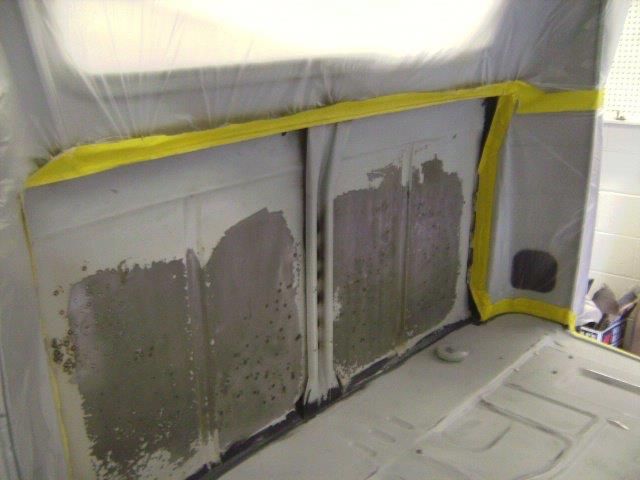 The first two coats of Sound Control. 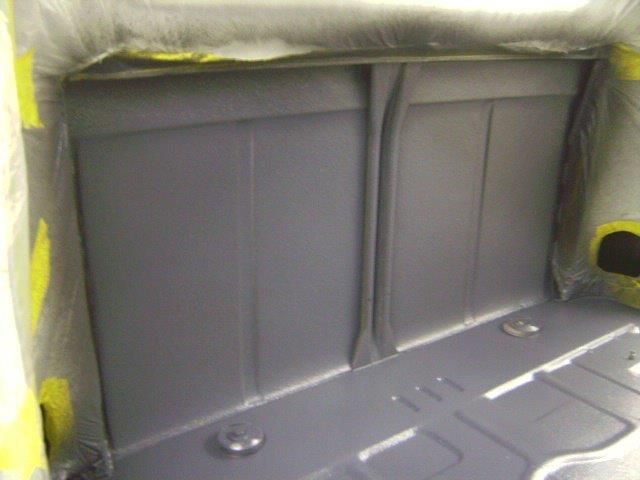 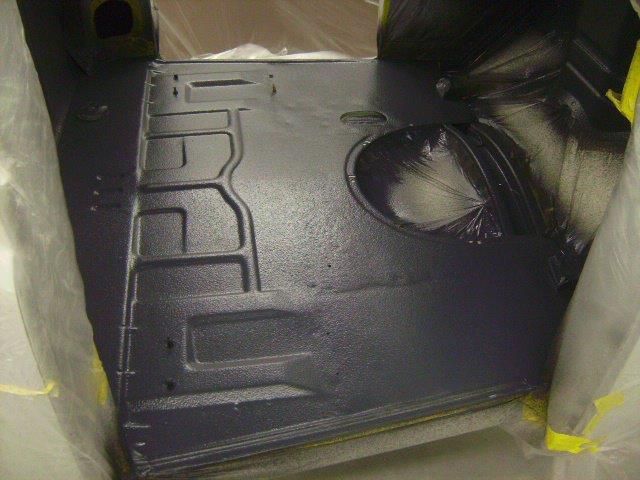 This is why I chose Lizzard Skin over Dynomat or other peel and stick sound deadeners- it's ability to be applied to areas where Dynomat sheets would have a hard time fitting, or sticking, or would have to be extensively trimmed to get even coverage. LS also is waterproof once it dries, is thick enough to seal seams, and won't ever get moisture behind it like peel and stick sheets could. 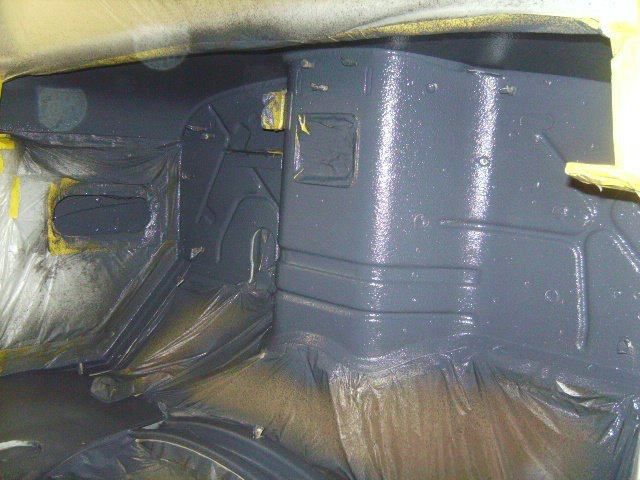 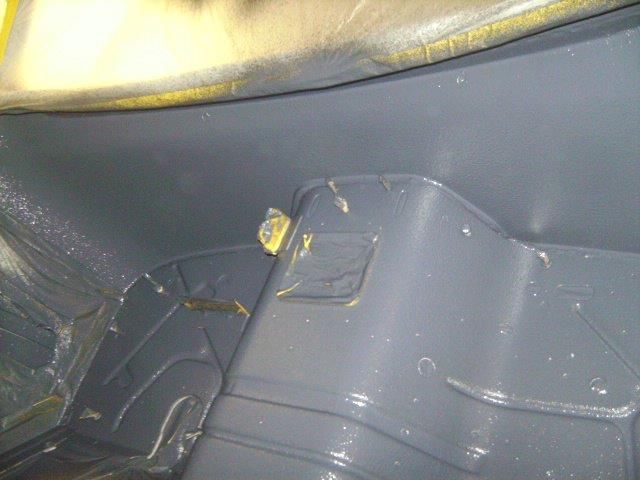 After spraying two coats of Heat Insulation and letting it dry. It dries to a dark gray/black color with a nice texture. If desired, it can be sanded flat and coated with high build primer painted to hide it, while keeping it's sound and heat insulating properties. 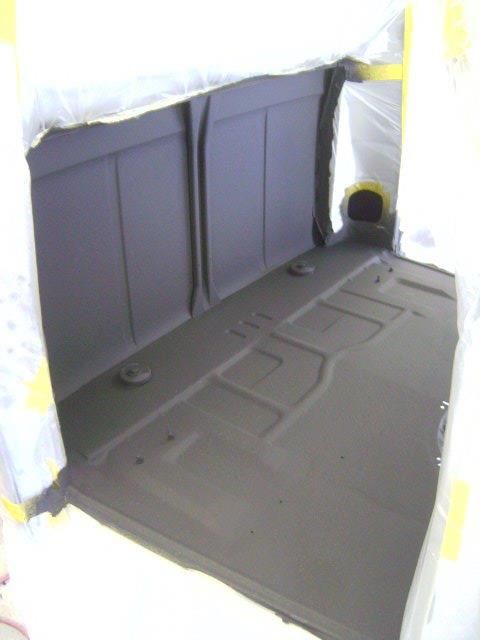 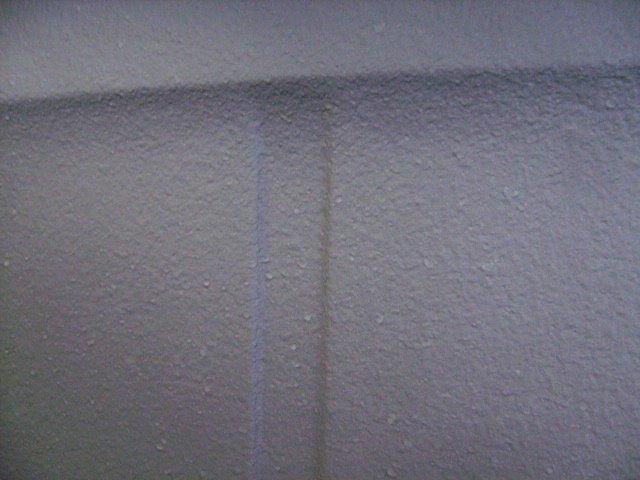 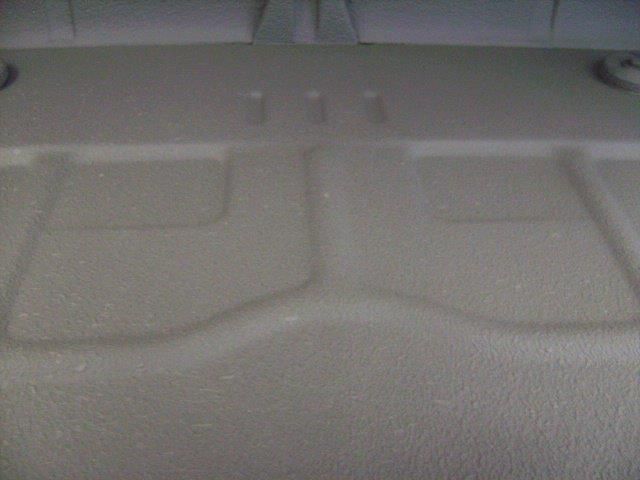 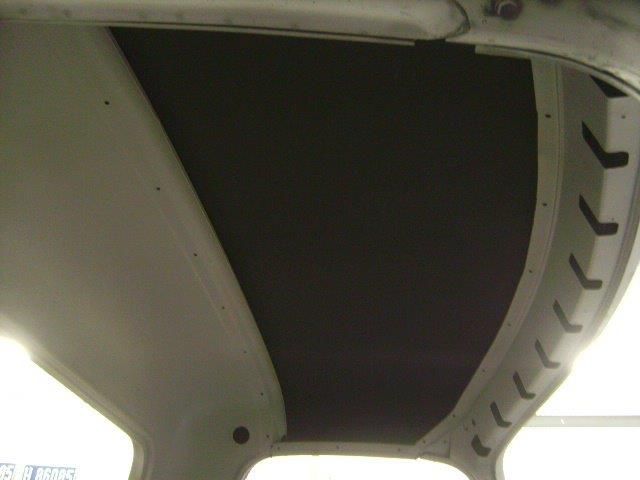
__________________
Project Goldilocks '66 C10 Short Fleet BBW Build '65 C10 Highly Detailed Stock Restoration Thread '78 Camaro Targa Roof Build '55 International Metal/Body/Paint Work '66 F100 Full Rotisserie Restoration '40 Packard 120 Convertible Coupe Restoration How To Restore and Detail an Original Gauge Cluster How To Detail Sand Body Panels, Edges, Corners, Etc |
|
|

|
|
|
#37 |
|
Registered User
Join Date: Nov 2011
Location: mid ga
Posts: 553
|
Re: '55 International Metal/Body/Paint Work
great work astronaut,enjoy watching your work.
__________________
check out SANFORD build thread http://67-72chevytrucks.com/vboard/s...d.php?t=522019 |
|
|

|
|
|
#38 |
|
Registered User
Join Date: May 2011
Location: Anderson SC
Posts: 3,898
|
Re: '55 International Metal/Body/Paint Work
Thanks for following along!
Here's a sneak peek of where I'm at now. I'll work on getting the thread caught up with the progress I've made. I painted the cab and doors this weekend, and started wet sanding and buffing the paint. 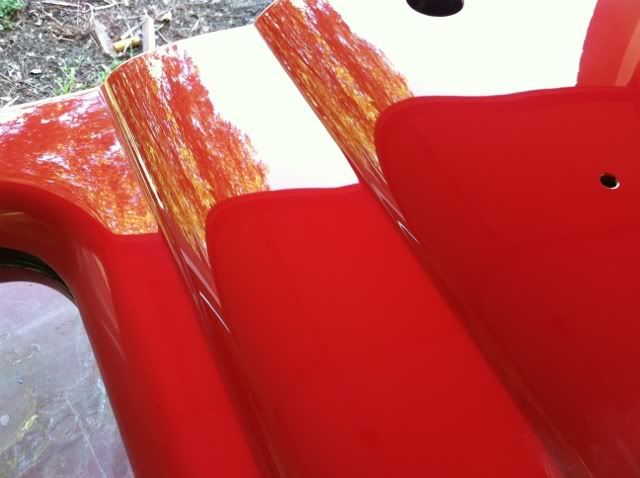 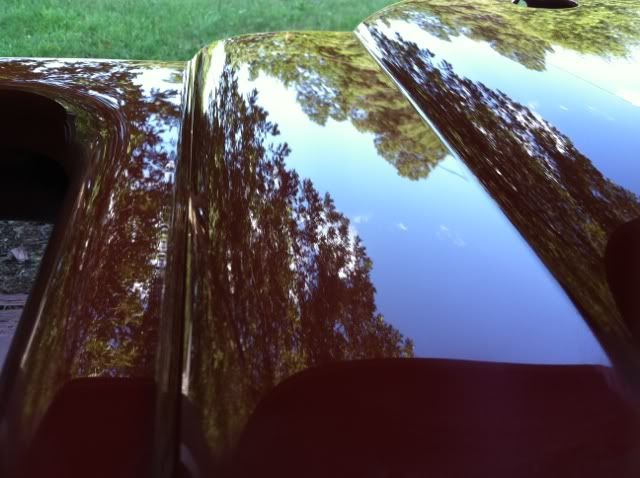 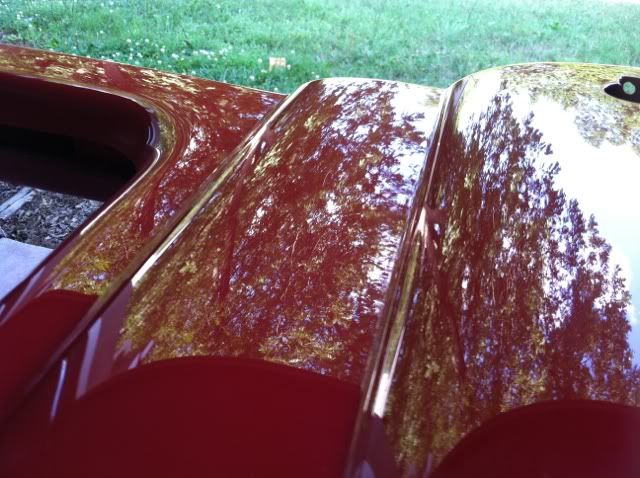 Posted via Mobile Device
__________________
Project Goldilocks '66 C10 Short Fleet BBW Build '65 C10 Highly Detailed Stock Restoration Thread '78 Camaro Targa Roof Build '55 International Metal/Body/Paint Work '66 F100 Full Rotisserie Restoration '40 Packard 120 Convertible Coupe Restoration How To Restore and Detail an Original Gauge Cluster How To Detail Sand Body Panels, Edges, Corners, Etc |
|
|

|
|
|
#39 |
|
Registered User
Join Date: Jan 2009
Location: Louisville,Ky
Posts: 5,811
|
Re: '55 International Metal/Body/Paint Work
I'm the same way i like the odd and ugly stuff most won't touch,I guess it mostly the looks of them or the lack of a aftermarket is part why too.I rather have a 55-57 buick or olds over a chevy just because its different looking.Yeah you do nice work i can't wait to see it done.
|
|
|

|
|
|
#40 |
|
Registered User
Join Date: Jun 2010
Location: Vancouver Island BC
Posts: 652
|
Re: '55 International Metal/Body/Paint Work
[QUOTE=theastronaut;5407919]
 Ever seen this many holes in a firewall before?! Looks like the Milky Way
__________________

|
|
|

|
|
|
#41 |
|
Registered User
Join Date: Jun 2010
Location: Vancouver Island BC
Posts: 652
|
Re: '55 International Metal/Body/Paint Work
Looks like glass, beautiful work!!
Hard to believe that thin coat of Lizard Skin works as good as the thick Dynamat...is it equivalent in heat and sound deadening? Definitely looks more thorough in coverage.
__________________

|
|
|

|
|
|
#42 |
|
Registered User
Join Date: May 2011
Location: Anderson SC
Posts: 3,898
|
Re: '55 International Metal/Body/Paint Work
I've never used Dynomat back-to-back with LS, but the LS did dampen the "tin can" sound a good bit, and I imagine once everything is bolted together it will be even more solid sounding. The LS actually builds up fairly thick; around the thickness of three/four credit cards. I imagine it would be better at insulating against heat transfer since it has "micro ceramic air balloons" in it that has air space, where Dynomat just has a thin skin of aluminum over it.
__________________
Project Goldilocks '66 C10 Short Fleet BBW Build '65 C10 Highly Detailed Stock Restoration Thread '78 Camaro Targa Roof Build '55 International Metal/Body/Paint Work '66 F100 Full Rotisserie Restoration '40 Packard 120 Convertible Coupe Restoration How To Restore and Detail an Original Gauge Cluster How To Detail Sand Body Panels, Edges, Corners, Etc |
|
|

|
|
|
#43 |
|
Registered User
Join Date: Jan 2009
Location: Louisville,Ky
Posts: 5,811
|
Re: '55 International Metal/Body/Paint Work
I like lizard skin because its spray on and water based,Dynamat is nice but sticking it down and taping all the seams takes a lot more time.
|
|
|

|
|
|
#44 | |
|
Registered User
Join Date: Jun 2010
Location: Vancouver Island BC
Posts: 652
|
Re: '55 International Metal/Body/Paint Work
Quote:
I'm in the learning and psych-ing myself up stage, learn from others and plan my attack. My truck needs the usual Chevy rust replaced, and I've just got it back on the road after 8 years (that would have been the time to work on it) so I don't want to loose it for another season. I'll work it out, but for now keep the awesome updates rolling.
__________________

|
|
|
|

|
|
|
#45 |
|
Registered User
 Join Date: Mar 2005
Location: apple valley, ca
Posts: 2,670
|
Re: '55 International Metal/Body/Paint Work
John-
Those teaser shots of the paint job are amazing. That thing looks straight!
__________________
Check out my latest endeavor: https://roundsixpod.com My build threads: '55 Chevy: http://67-72chevytrucks.com/vboard/s...d.php?t=247512 '64 C-20: http://67-72chevytrucks.com/vboard/s...d.php?t=446527 |
|
|

|
|
|
#46 | |||
|
Registered User
Join Date: May 2011
Location: Anderson SC
Posts: 3,898
|
Re: '55 International Metal/Body/Paint Work
Quote:
Quote:
 Quote:
Here's a couple shots of the door.  
__________________
Project Goldilocks '66 C10 Short Fleet BBW Build '65 C10 Highly Detailed Stock Restoration Thread '78 Camaro Targa Roof Build '55 International Metal/Body/Paint Work '66 F100 Full Rotisserie Restoration '40 Packard 120 Convertible Coupe Restoration How To Restore and Detail an Original Gauge Cluster How To Detail Sand Body Panels, Edges, Corners, Etc |
|||
|
|

|
|
|
#47 |
|
Registered User
Join Date: May 2011
Location: Anderson SC
Posts: 3,898
|
Re: '55 International Metal/Body/Paint Work
More body work progress on the back of the cab.
After doing the rough bodywork, spraying with Slick Sand, and guide coating. 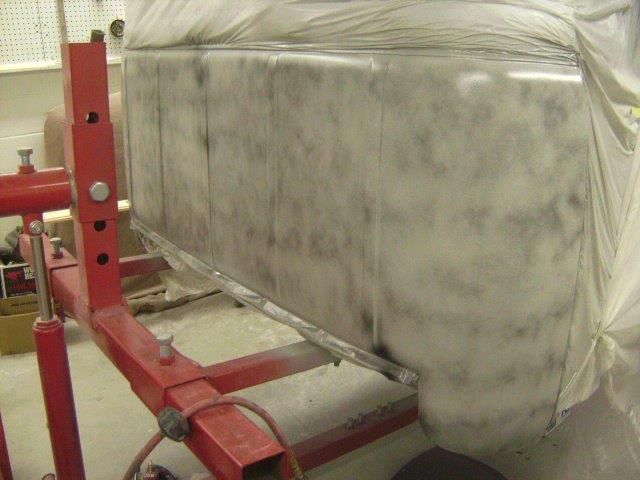 I started blocking the around the stamped ribs to get the rolled edges and surrounding area straight. While holding the block flat against the outer flat areas and using an "X" pattern 45 degrees to the rib line, I use the edge of the block to cut into and shape the edge of the rib. This keeps the outer block edge from making lines that would show up later. Letting the edge of the block dig in and shape the edge of the rib cuts the edge down to the metal and thins out the primer so it can't crack later on too. I had some runs on the cab corner that I trimmed down with a razor blade- those areas got reguidecoated after the pic was taken. 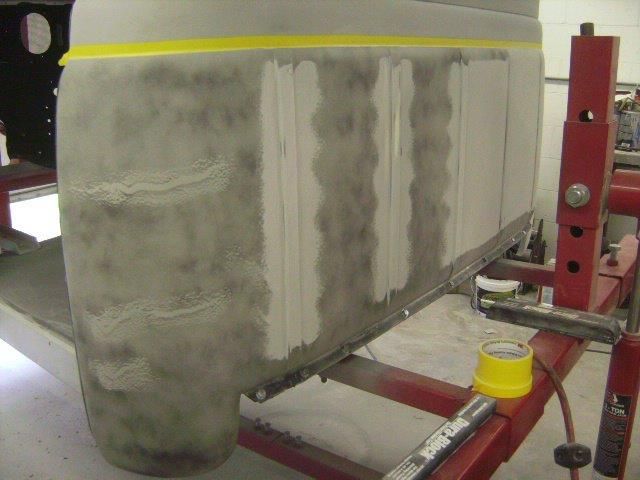 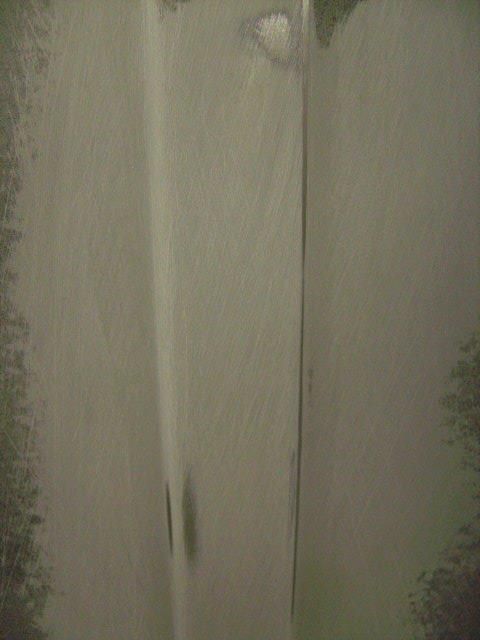 I always block the flat sections first, then go back and do the curved sections with a flexible block. If you do the flat sections last, you'll have a flattened edge where the block stopped contacting the surface where the roll/curve starts. By doing the curved areas last, you can slightly "comb out" the curve into the flat section for an even and smooth transition with no blocking lines. 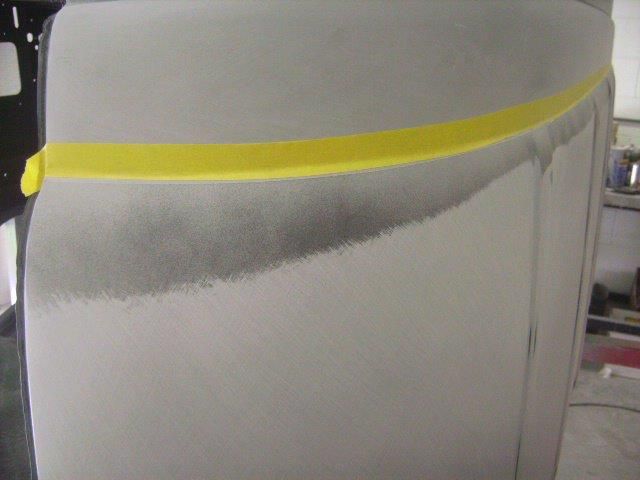 The lower edges were bodyworked just like the top side. 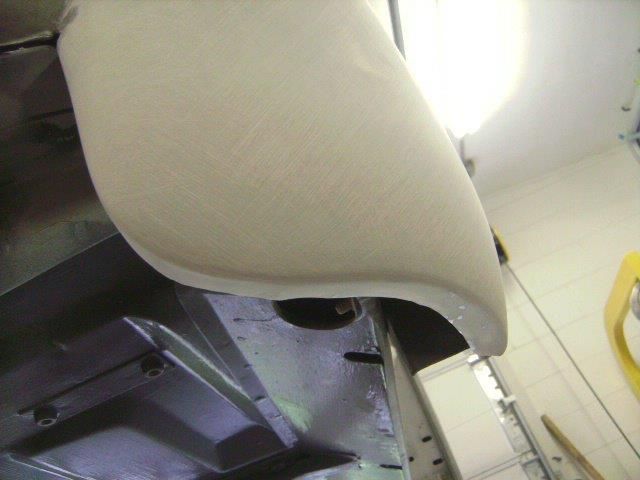
__________________
Project Goldilocks '66 C10 Short Fleet BBW Build '65 C10 Highly Detailed Stock Restoration Thread '78 Camaro Targa Roof Build '55 International Metal/Body/Paint Work '66 F100 Full Rotisserie Restoration '40 Packard 120 Convertible Coupe Restoration How To Restore and Detail an Original Gauge Cluster How To Detail Sand Body Panels, Edges, Corners, Etc |
|
|

|
|
|
#48 |
|
Registered User
Join Date: Jun 2010
Location: Vancouver Island BC
Posts: 652
|
Re: '55 International Metal/Body/Paint Work
Great instruction, it looks like you paint in a regular shop. What fans, and safety gear do you use? What paint, catalyzed, isocyanates? Just awesome work.
__________________

|
|
|

|
|
|
#49 | |
|
Registered User
Join Date: May 2011
Location: Anderson SC
Posts: 3,898
|
Re: '55 International Metal/Body/Paint Work
Quote:
Here's a list of the products I'm using. PPG DX572 and DX520 metal cleaner/conditioner. PPG DPLF40/90 for bare metal. SEM self-leveling dual mix epoxy seam sealer. SEM standard dual mix epoxy seam sealer. 3M Platinum body filler. Slick Sand. PPG K93 tintable surfacer/sealer. PPG/Omni basecoat. Bad decision, sprays and lays down well, but doesn't cover as quick. PPG 2021 Clear. 3M wetordry 1000 & 2000 grit for wetsanding the clear. Over-reduced black basecoat as guidcoat for clear coat wetsanding . Meguiars' Unigrit 2500 grit. Norton Wool Pad with 3M Machine Polish Norton Fine Foam Pad with 3M Machine Polish Griot's Garage Orbital Buffer/Foam Pad/#3 Polish
__________________
Project Goldilocks '66 C10 Short Fleet BBW Build '65 C10 Highly Detailed Stock Restoration Thread '78 Camaro Targa Roof Build '55 International Metal/Body/Paint Work '66 F100 Full Rotisserie Restoration '40 Packard 120 Convertible Coupe Restoration How To Restore and Detail an Original Gauge Cluster How To Detail Sand Body Panels, Edges, Corners, Etc |
|
|
|

|
|
|
#50 |
|
Registered User
Join Date: Jun 2010
Location: Vancouver Island BC
Posts: 652
|
Re: '55 International Metal/Body/Paint Work
Thanks this is a great tutorial.
__________________

|
|
|

|
 |
| Bookmarks |
|
|