
 |
|
|
|
|
#1 |
|
Registered User
Join Date: May 2011
Location: Anderson SC
Posts: 3,898
|
Re: Project Goldilocks, '66 C10 SWB BBW Build
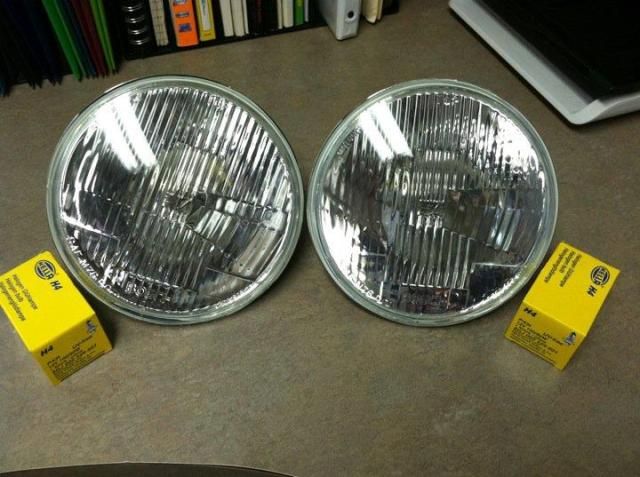
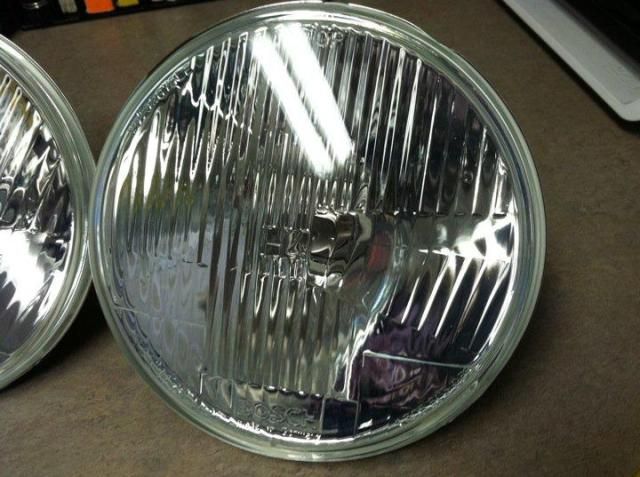
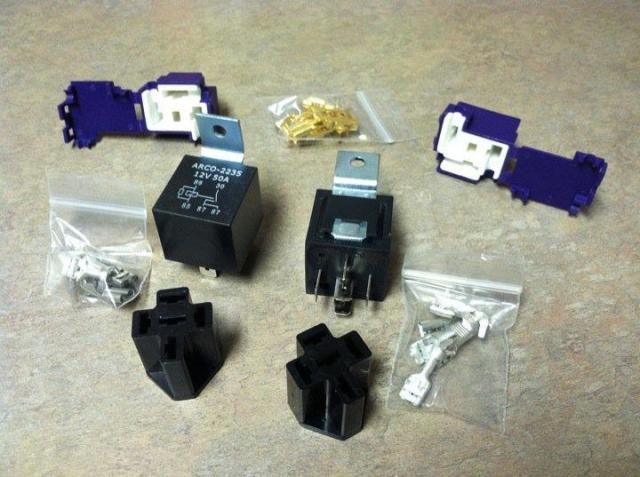
More goodies came in the mail today. New pair of German Bosch H4 headlight housings, 80/100 watt Hella bulbs, a pair of 50 amp relays and sockets, and a pair of ceramic H4 connectors. This will let me make a 10 gauge headlight relay harness to take the load off the stock headlight wiring and get full voltage to the headlight bulbs. These should light up the road pretty good. We live about 15 miles out of town in the country so there's plenty of critters in the road to avoid at night!
__________________
Project Goldilocks '66 C10 Short Fleet BBW Build '65 C10 Highly Detailed Stock Restoration Thread '78 Camaro Targa Roof Build '55 International Metal/Body/Paint Work '66 F100 Full Rotisserie Restoration '40 Packard 120 Convertible Coupe Restoration How To Restore and Detail an Original Gauge Cluster How To Detail Sand Body Panels, Edges, Corners, Etc Last edited by theastronaut; 12-07-2012 at 02:02 PM. Reason: Fix dead pic links |
|
|

|
|
|
#2 |
|
Registered User
Join Date: May 2011
Location: Anderson SC
Posts: 3,898
|
Re: Project Goldilocks, '66 C10 SWB BBW Build
Small update. Been trying to figure out how to make a set of low-buck 18" smoothies. I put a want ad on craigslist for a set of '08 up Nissan Titan steel wheels and got a call a few weeks later. The plan is to cut the centers out and reverse the rims to change the offset, get a set of moon disc and cut them down to cover just the wheel centers (to get the smoothie look), and make clips to mount the original hubcaps on top of the moon disc. Its a plan atleast, I'll have to get the truck back together and on its wheels with the suspension work done to see if the offset from the reversed rims will fit.
Can't beat $75 buck 18's! 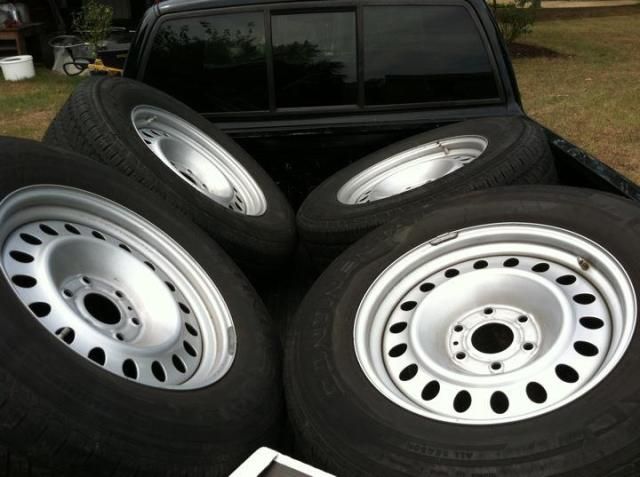 Threw one under the bed for kicks and grins. Tire is way too big and the center will be flipped around but you get the idea... 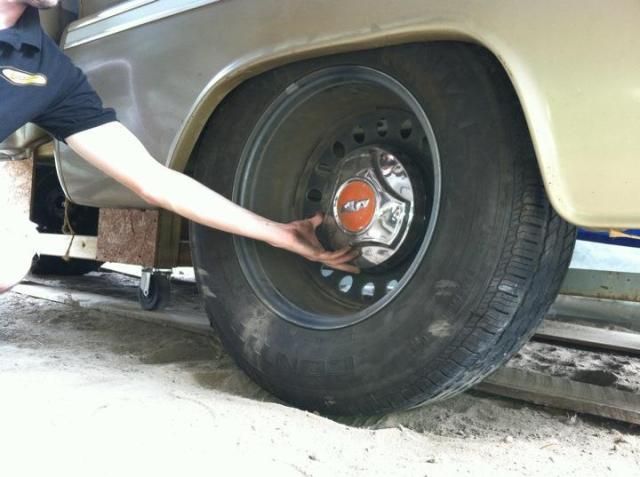 Also bought a C notch kit and adjustable track bar from CPP. The C notches will get substantial bracing before they go on the truck; I'm not too comfortable with hacking away over half of the height of the frame rail without adding some extra bracing. Planning on adding a couple 1/4" steel "ribs" down the length of the cut out and also boxing the inside of the frame rails once the C notches are installed. 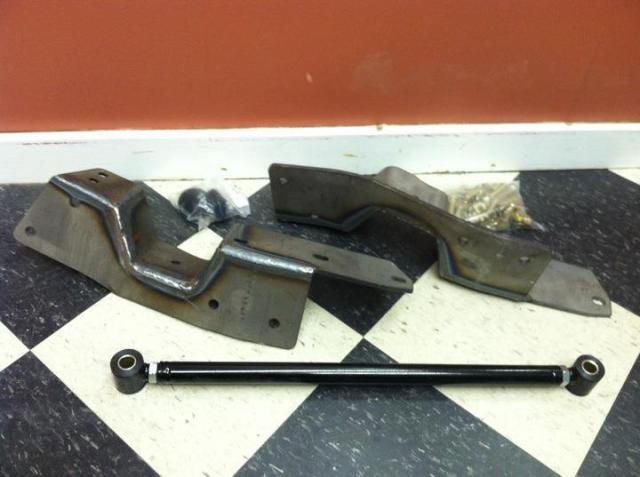 Not sure what "fragile" means to the guys at UPS...  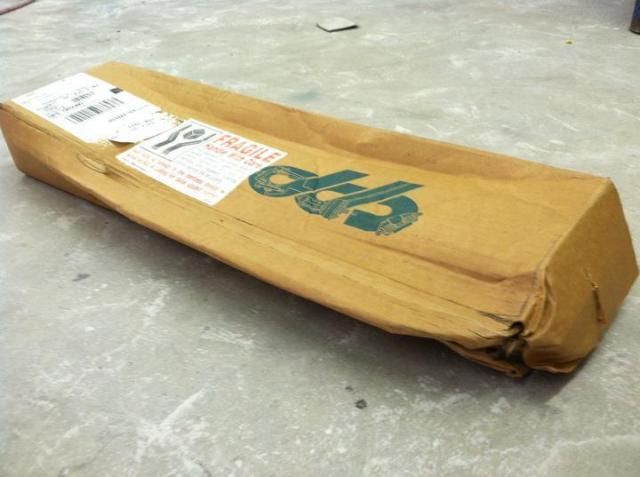 Next steps are to get the brake and fuel lines installed and then set the bed back on the frame. I'm thinking of using a black stain and satin clear coat on the wood for the bed to semi-replicate the black painted wood on a factory built truck. The stain and satin clear would show the grain of the wood better.
__________________
Project Goldilocks '66 C10 Short Fleet BBW Build '65 C10 Highly Detailed Stock Restoration Thread '78 Camaro Targa Roof Build '55 International Metal/Body/Paint Work '66 F100 Full Rotisserie Restoration '40 Packard 120 Convertible Coupe Restoration How To Restore and Detail an Original Gauge Cluster How To Detail Sand Body Panels, Edges, Corners, Etc Last edited by theastronaut; 12-07-2012 at 02:03 PM. Reason: Fix dead pic links |
|
|

|
|
|
#3 |
|
Registered User
 Join Date: Mar 2012
Location: Shallow Lake Ontario,Canada
Posts: 201
|
Re: Project Goldilocks, '66 C10 SWB BBW Build
Great purchace and some nice work . You have got me tuned in from Canada. Not to many in this part of the world in that nice of condition to start with. Great work keep us posted
|
|
|

|
|
|
#4 | |
|
Registered User
Join Date: May 2011
Location: Anderson SC
Posts: 3,898
|
Re: Project Goldilocks, '66 C10 SWB BBW Build
Quote:
A little more work on the wheel. It's ready to epoxy and start shaping the bare areas. 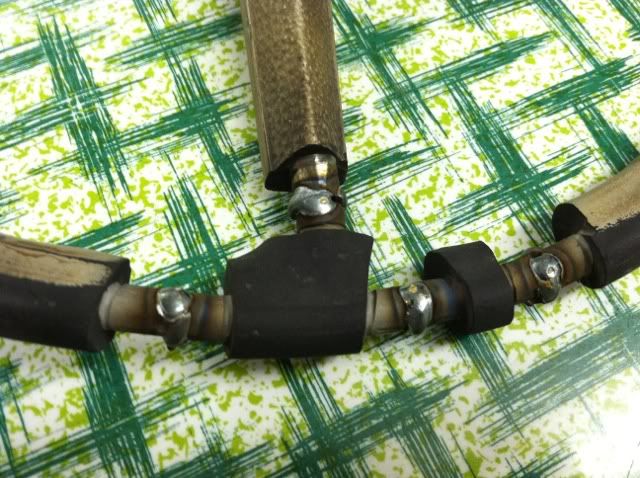 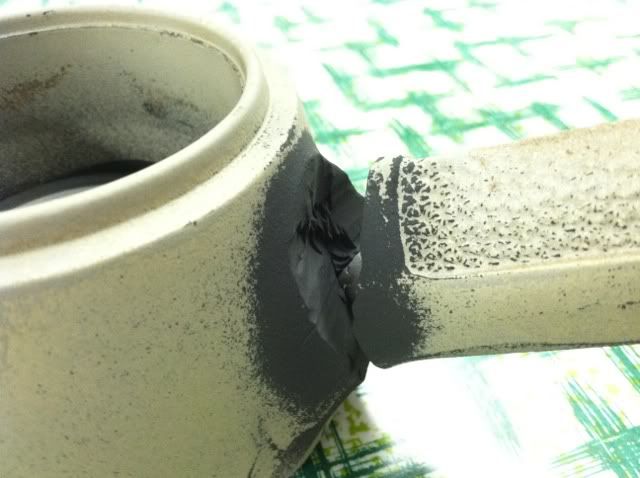
__________________
Project Goldilocks '66 C10 Short Fleet BBW Build '65 C10 Highly Detailed Stock Restoration Thread '78 Camaro Targa Roof Build '55 International Metal/Body/Paint Work '66 F100 Full Rotisserie Restoration '40 Packard 120 Convertible Coupe Restoration How To Restore and Detail an Original Gauge Cluster How To Detail Sand Body Panels, Edges, Corners, Etc |
|
|
|

|
|
|
#5 |
|
Registered User
Join Date: Sep 2010
Location: Tulsa, Oklahoma
Posts: 1,925
|
Re: Project Goldilocks, '66 C10 SWB BBW Build
I used chasis saver satin black, brushed it on, I still need to find another satin black that is uv inhibited to cover the (por 15) product up. We eventually just used rustoleum satin black over the top of the chasis saver, it has worked well so far. Go read the evaluation of clearcoats on Mar-Ks website, the por 15 black with a uv inhibited top coat black was the only combo of finishes that held up in their tests. JMO Kieth
|
|
|

|
|
|
#6 |
|
Registered User
Join Date: May 2011
Location: Anderson SC
Posts: 3,898
|
Re: Project Goldilocks, '66 C10 SWB BBW Build
I actually thought about painting it satin black like I did with the '65 I restored, but I'd really like to see the actual grain of the wood through the clear and not just the "shape" or "outline" of the grain like paint produces.
Here's what I mean when I say the "shape" or "outline" of the grain. The grain of the wood shows but its obviously got black paint on it. Correct for a "correct" restoration but not what I'm after: 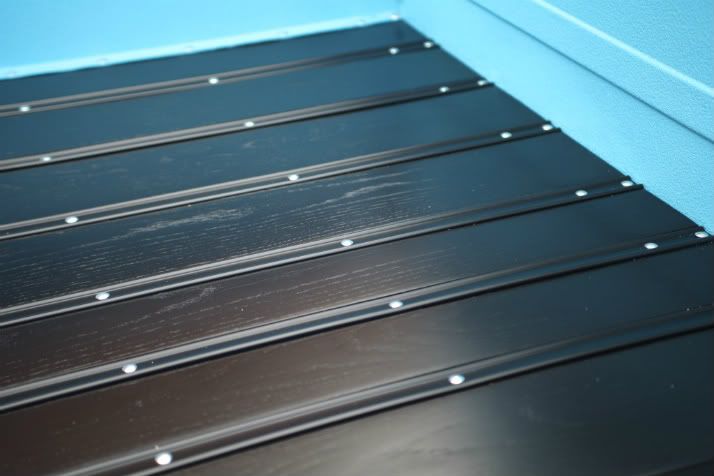 I'd like it to look more like this; dark but showing the full grain of the wood (a little darker though, if possible) At first glance it would look somewhat original- being black, but a closer look would show the detail of the grain of the wood. 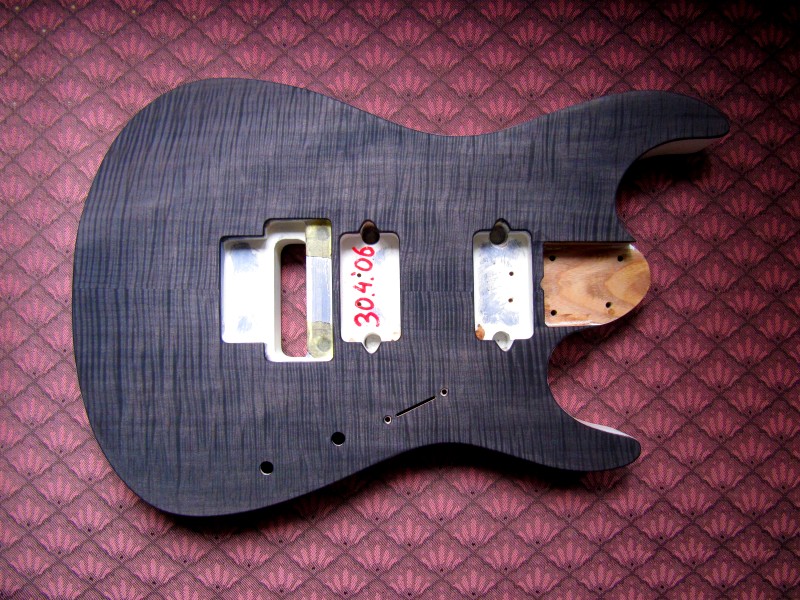
__________________
Project Goldilocks '66 C10 Short Fleet BBW Build '65 C10 Highly Detailed Stock Restoration Thread '78 Camaro Targa Roof Build '55 International Metal/Body/Paint Work '66 F100 Full Rotisserie Restoration '40 Packard 120 Convertible Coupe Restoration How To Restore and Detail an Original Gauge Cluster How To Detail Sand Body Panels, Edges, Corners, Etc Last edited by theastronaut; 12-07-2012 at 02:05 PM. Reason: Fix dead pic links |
|
|

|
|
|
#7 |
|
Registered User
Join Date: Mar 2011
Location: tulsa,ok.
Posts: 1,803
|
Re: Project Goldilocks, '66 C10 SWB BBW Build
astronaut- if you do as good of a job on this one as you did on the blue truck then you have nothing to worry about! you do REALLY nice work, i would say the best ive seen on the site with as much detail as you did on that blue truck! i wont let anyone talk you into doing it different, you work speaks for its self!! i look forward to seeing any and all progress you do on this truck! i like the idea of the rims
|
|
|

|
|
|
#8 |
|
Registered User
Join Date: May 2011
Location: Anderson SC
Posts: 3,898
|
Re: Project Goldilocks, '66 C10 SWB BBW Build
Thanks Chad! I won't be restoring this one to the same level of finish as the blue '65 (I'm not even going to paint it) as I want it to be more of a solid beater to drive and use it for what it is; a truck. I will be painting and detailing the firewall and engine compartment though, and I havn't completely ruled out fully restoring the interior. As good of condition the original seat is in though I'll prolly just leave it alone and super clean/detail the parts and run it as-is for awhile. Maybe one day I'll take it back down and restore it to the level of finish and detail of the blue '65, but for now I want one I can use and enjoy daily without worrying about if all the swirl marks are polished out, or if it gets rock chips or parking lot dings.
Posted via Mobile Device Posted via Mobile Device
__________________
Project Goldilocks '66 C10 Short Fleet BBW Build '65 C10 Highly Detailed Stock Restoration Thread '78 Camaro Targa Roof Build '55 International Metal/Body/Paint Work '66 F100 Full Rotisserie Restoration '40 Packard 120 Convertible Coupe Restoration How To Restore and Detail an Original Gauge Cluster How To Detail Sand Body Panels, Edges, Corners, Etc |
|
|

|
|
|
#9 |
|
chevy only
 Join Date: Sep 2006
Location: Phoenix, AZ
Posts: 6,619
|
Re: Project Goldilocks, '66 C10 SWB BBW Build
nice work on both trucks!!
__________________
CHEVY ONLY... Nothin Else ! |
|
|

|
|
|
#10 |
|
Registered User
Join Date: May 2011
Location: Anderson SC
Posts: 3,898
|
Re: Project Goldilocks, '66 C10 SWB BBW Build
Thanks Dino!!
I loaded up the wood for the bed this morning on my trusty "work truck"  and went to Lowe's to pick up some black stain. and went to Lowe's to pick up some black stain. 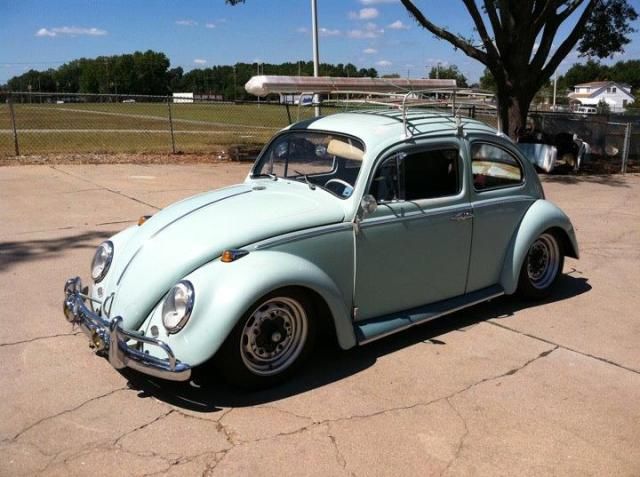 Got to the shop and sanded a couple places smooth on the back side of the strips and brushed some stain on. Let it sit, wiped it off as per the istructions, let it dry, and brushed some more on. Let it sit, wiped it off again, let it dry... three times. The wood is so dense that it isn't soaking up any of the stain so it isn't getting dark as dark as I want it. The grain of the wood isn't showing up like I thought it would either. Sanded smooth (or smooth enough to see if it was going to work): 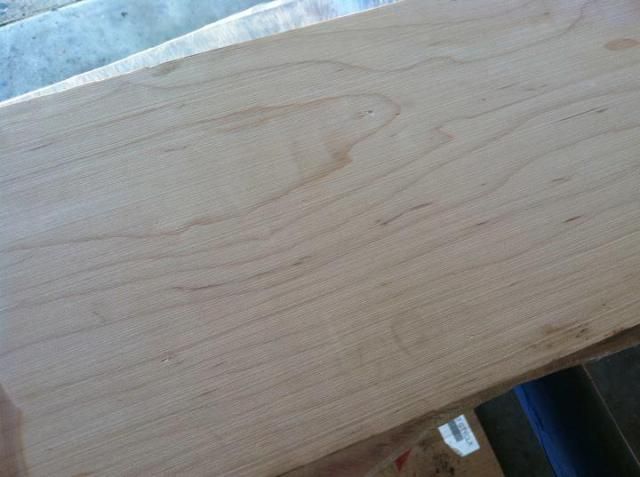 One coat of stain: 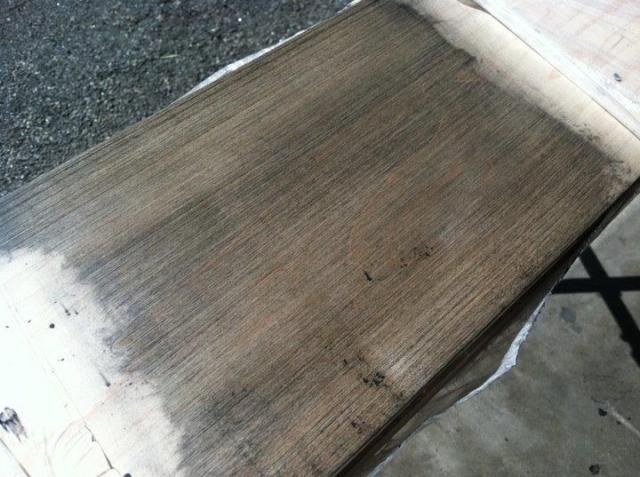 Three coats of stain and a coat of Minwax rattle can satin polyurethane. 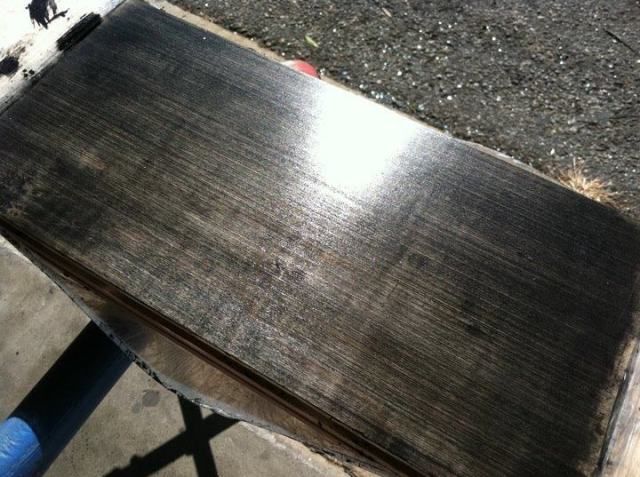 I'm not too happy with the results of the test samples so I'll just paint the wood low gloss black like I did with the '65. On another note, I got all the welds cut loose on one of the wheel centers and now have to go get a big enough hammer to knock the center out (left mine at home.) I'll post pics once I get the center knocked out and flipped around, and take some backspacing measurements. Hopefully from the measurements yall can help me figure out if they'll fit or not.
__________________
Project Goldilocks '66 C10 Short Fleet BBW Build '65 C10 Highly Detailed Stock Restoration Thread '78 Camaro Targa Roof Build '55 International Metal/Body/Paint Work '66 F100 Full Rotisserie Restoration '40 Packard 120 Convertible Coupe Restoration How To Restore and Detail an Original Gauge Cluster How To Detail Sand Body Panels, Edges, Corners, Etc Last edited by theastronaut; 12-07-2012 at 02:06 PM. Reason: Fix dead pic links |
|
|

|
|
|
#11 | |
|
Registered User
Join Date: Feb 2008
Location: Sidney,b.c.
Posts: 4,425
|
Re: Project Goldilocks, '66 C10 SWB BBW Build
Quote:
I think that you wood could have used a good sanding. that stuf looks like you dragged it down the pavement first behind your krauter. you can adj the depth of colour on most of those dyes ron |
|
|
|

|
|
|
#12 |
|
made in america
Join Date: May 2010
Location: baton rouge la
Posts: 653
|
Re: Project Goldilocks, '66 C10 SWB BBW Build
im diggin the work truck man. lol. i may have to turn my wheels inside out. i never even thought of that. good idea!
__________________
2005 gmc sierra- 4/6, t56, cammed 5.3. 4.10, big bars, and brakes. sounds good 1964 c10-283 powerpack, 3 on the tree  2004 corvette- lowered, borla, tuned. slow  my old girl 1966 c10- 305v8, t-5 sold |
|
|

|
|
|
#13 | |
|
Registered User
Join Date: May 2011
Location: Anderson SC
Posts: 3,898
|
Re: Project Goldilocks, '66 C10 SWB BBW Build
Quote:
Shot of the engine.  About the wheels, since you have a set mounted, could you take some measurements- like from the outside edge of the rim to the wheel opening lip front and back so I can get an idea of how much room I have to work with as far as setting the backspacing? Appreciative of any help you could offer! And, we just had the first casualty of the build, the poor thing has suffered major injuries and it's bleeding steel shot. Gunna have to return it and get a real hammer... 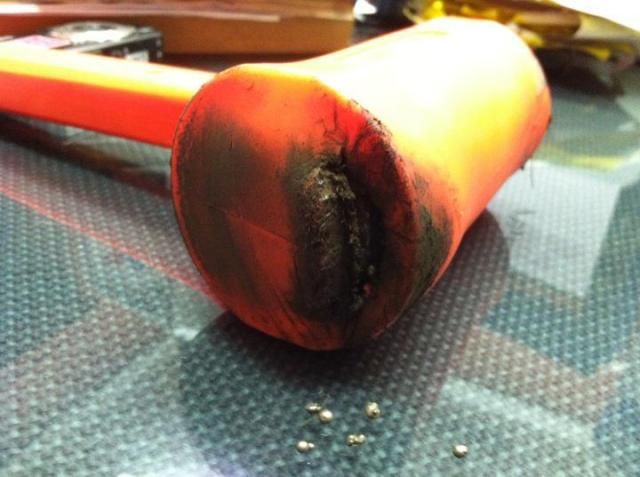
__________________
Project Goldilocks '66 C10 Short Fleet BBW Build '65 C10 Highly Detailed Stock Restoration Thread '78 Camaro Targa Roof Build '55 International Metal/Body/Paint Work '66 F100 Full Rotisserie Restoration '40 Packard 120 Convertible Coupe Restoration How To Restore and Detail an Original Gauge Cluster How To Detail Sand Body Panels, Edges, Corners, Etc Last edited by theastronaut; 12-07-2012 at 02:10 PM. Reason: Fix dead pic links |
|
|
|

|
|
|
#14 |
|
Registered User
Join Date: May 2011
Location: Anderson SC
Posts: 3,898
|
Re: Project Goldilocks, '66 C10 SWB BBW Build
Got the first wheel center knocked out. Still have to grind the welds down before I can put the center back in but here's some pics that will give you an idea of what these will look like.
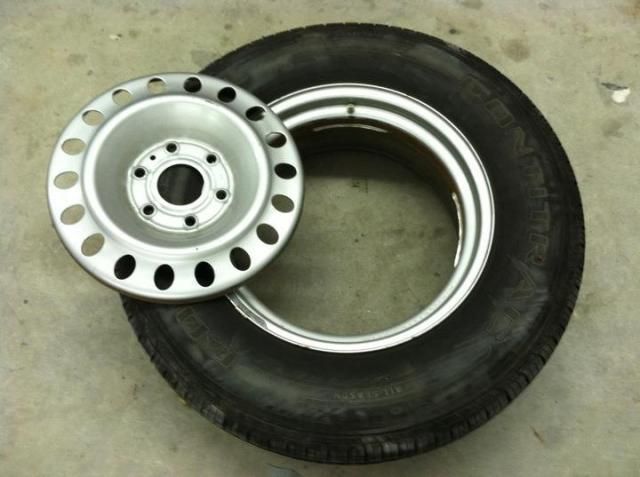 Dropped in backwards, not in place as the center still has to go in another 3/4" or so. 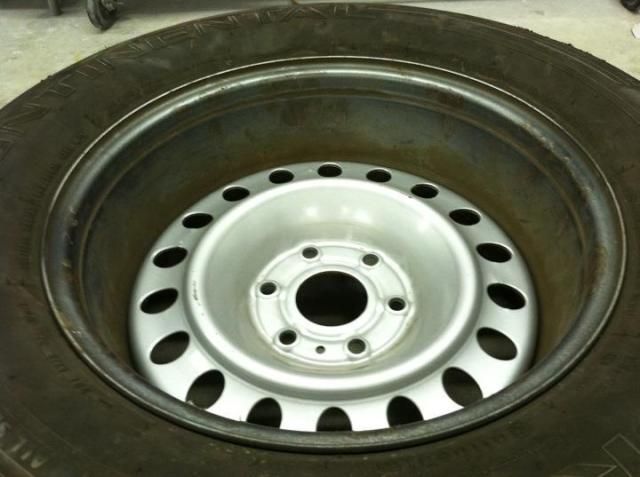 1970's (?) cap layed on top to get an idea of where the cap will sit. 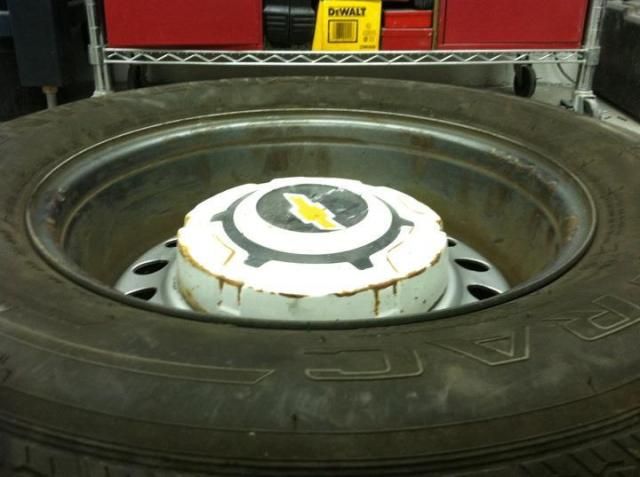 About 6" of lip before the center is knocked all the way in. Backspacing right now (with the center just laying on top of the drop center) is about three inches. That will shrink to about 2-2.25" once the center is in its final location. I've heard of guys running 8" wide rims with 4" back spacing, so these may stick out too far and rub the fenders? I can narrow the rear end to make them fit the rear but might have to find some outer rims with a better drop center placement (more back spacing) for the front. 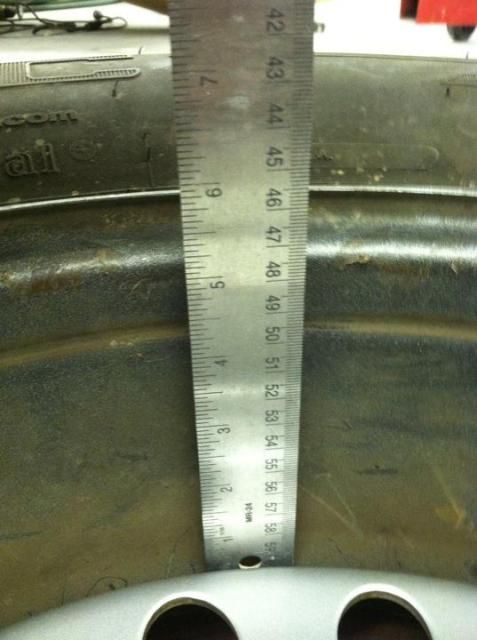
__________________
Project Goldilocks '66 C10 Short Fleet BBW Build '65 C10 Highly Detailed Stock Restoration Thread '78 Camaro Targa Roof Build '55 International Metal/Body/Paint Work '66 F100 Full Rotisserie Restoration '40 Packard 120 Convertible Coupe Restoration How To Restore and Detail an Original Gauge Cluster How To Detail Sand Body Panels, Edges, Corners, Etc Last edited by theastronaut; 12-07-2012 at 02:11 PM. Reason: Fix dead pic links |
|
|

|
|
|
#15 |
|
made in america
Join Date: May 2010
Location: baton rouge la
Posts: 653
|
Re: Project Goldilocks, '66 C10 SWB BBW Build
heres what i got for ya. forgive me of my ghetto rig.
 
__________________
2005 gmc sierra- 4/6, t56, cammed 5.3. 4.10, big bars, and brakes. sounds good 1964 c10-283 powerpack, 3 on the tree  2004 corvette- lowered, borla, tuned. slow  my old girl 1966 c10- 305v8, t-5 sold |
|
|

|
|
|
#16 |
|
Registered User
Join Date: May 2011
Location: Anderson SC
Posts: 3,898
|
Re: Project Goldilocks, '66 C10 SWB BBW Build
Thanks so much for those measurements!
__________________
Project Goldilocks '66 C10 Short Fleet BBW Build '65 C10 Highly Detailed Stock Restoration Thread '78 Camaro Targa Roof Build '55 International Metal/Body/Paint Work '66 F100 Full Rotisserie Restoration '40 Packard 120 Convertible Coupe Restoration How To Restore and Detail an Original Gauge Cluster How To Detail Sand Body Panels, Edges, Corners, Etc |
|
|

|
|
|
#17 |
|
made in america
Join Date: May 2010
Location: baton rouge la
Posts: 653
|
Re: Project Goldilocks, '66 C10 SWB BBW Build
no problem. it was half time anyway.
__________________
2005 gmc sierra- 4/6, t56, cammed 5.3. 4.10, big bars, and brakes. sounds good 1964 c10-283 powerpack, 3 on the tree  2004 corvette- lowered, borla, tuned. slow  my old girl 1966 c10- 305v8, t-5 sold |
|
|

|
|
|
#18 |
|
made in america
Join Date: May 2010
Location: baton rouge la
Posts: 653
|
Re: Project Goldilocks, '66 C10 SWB BBW Build
it just occured to me that the front might be alittle different and so i went out and measured it. it seems the front is wider by half and inch. makin the measurement up front 6inches and 3 inches
not to big of a deal if you wanted them all to be the same but. stiill weird huh?
__________________
2005 gmc sierra- 4/6, t56, cammed 5.3. 4.10, big bars, and brakes. sounds good 1964 c10-283 powerpack, 3 on the tree  2004 corvette- lowered, borla, tuned. slow  my old girl 1966 c10- 305v8, t-5 sold |
|
|

|
|
|
#19 |
|
Registered User
Join Date: May 2011
Location: Anderson SC
Posts: 3,898
|
Re: Project Goldilocks, '66 C10 SWB BBW Build
Do you have disc brakes up front? Pretty sure I've read that they make the front track a little wider. I think the rear track from the factory was narrower anyways. Was expecting that the front of mine wouldn't have as much room for extra width, since its been converted to disc. Thanks again!
Posted via Mobile Device
__________________
Project Goldilocks '66 C10 Short Fleet BBW Build '65 C10 Highly Detailed Stock Restoration Thread '78 Camaro Targa Roof Build '55 International Metal/Body/Paint Work '66 F100 Full Rotisserie Restoration '40 Packard 120 Convertible Coupe Restoration How To Restore and Detail an Original Gauge Cluster How To Detail Sand Body Panels, Edges, Corners, Etc |
|
|

|
|
|
#20 |
|
Registered User
 Join Date: Mar 2005
Location: apple valley, ca
Posts: 2,670
|
Re: Project Goldilocks, '66 C10 SWB BBW Build
Astronaut-
I have been contemplating doing the same rim trick, but I really want a factory-looking center in 5x5 that will accept a dog-dish cap. The tire selection in 15" (and even 16") are rapidly shrinking, and I have been considering 17" and 18" rim sizes. Are you planning on filling the holes in the Nissan rims? Also, I saw somewhere on line where you can buy the clips for the hubcaps. You just have to make sure that you're 100% accurate on where you place them to eliminate any wheel balance issues. Great project, love the ideas!
__________________
Check out my latest endeavor: https://roundsixpod.com My build threads: '55 Chevy: http://67-72chevytrucks.com/vboard/s...d.php?t=247512 '64 C-20: http://67-72chevytrucks.com/vboard/s...d.php?t=446527 |
|
|

|
|
|
#21 |
|
Registered User
Join Date: May 2011
Location: Anderson SC
Posts: 3,898
|
Re: Project Goldilocks, '66 C10 SWB BBW Build
I'm actually going to get a set of Moon disc and trim them to cover just the wheel centers so I won't have to take the time to fill the holes and smooth the centers and their slight dome should mimick the profile of a real smoothie wheel center. The hubcap clips will go on the moon disc to hold the caps on, and I have a machinist friend that can drill the holes for the clips to get them dead centered. I think dodge has 18" and 20" five lug steelies but I'm not sure of the bolt pattern spacing.
Posted via Mobile Device
__________________
Project Goldilocks '66 C10 Short Fleet BBW Build '65 C10 Highly Detailed Stock Restoration Thread '78 Camaro Targa Roof Build '55 International Metal/Body/Paint Work '66 F100 Full Rotisserie Restoration '40 Packard 120 Convertible Coupe Restoration How To Restore and Detail an Original Gauge Cluster How To Detail Sand Body Panels, Edges, Corners, Etc |
|
|

|
|
|
#22 |
|
made in america
Join Date: May 2010
Location: baton rouge la
Posts: 653
|
Re: Project Goldilocks, '66 C10 SWB BBW Build
i still have drums up front. the rear track width is more narrow on my blazer also. must be just somethin that gm does i guess.
__________________
2005 gmc sierra- 4/6, t56, cammed 5.3. 4.10, big bars, and brakes. sounds good 1964 c10-283 powerpack, 3 on the tree  2004 corvette- lowered, borla, tuned. slow  my old girl 1966 c10- 305v8, t-5 sold |
|
|

|
|
|
#23 |
|
chevy only
 Join Date: Sep 2006
Location: Phoenix, AZ
Posts: 6,619
|
Re: Project Goldilocks, '66 C10 SWB BBW Build
duuude love the work truck!!! trick work on the wheels
__________________
CHEVY ONLY... Nothin Else ! |
|
|

|
|
|
#24 | |
|
Registered User
Join Date: May 2011
Location: Anderson SC
Posts: 3,898
|
Re: Project Goldilocks, '66 C10 SWB BBW Build
Quote:
Thanks Dino! Just got the welds ground down on the rims and popped the centers in place. The backspacing measures 2 1/8" and the distance from the hub mounting area to the edge of the outside lip is 7". Going by 66redw/white's measurements, these won't fit on the rear either without hitting the lip of the wheel opening. The buldge of a tire sidewall will make the interference even worse. I guess I could narrow the rear axle to make them fit, and I'm not sure how much clearance I could gain by trimming or rolling the lip of the opening (which I'm not sure I want to do on such a solid truck). Also, I'm planning on upgrading the rear brakes to late 70's K10 drums like SFTorange did in his "Brown Truck" build (http://67-72chevytrucks.com/vboard/s...4&postcount=39). Looking at his pics it seems that the backing plates are dished so the extra width of the drums is all to the inside of the axle; I'll need to get that done so I can get a definite measurement of the rear axle though. Or, are there any factory axles that are already narrower, and the K10 drum assemblies will bolt up to? Preferably with a posi/lsd? I'm new to suspension work on these trucks so I don't know anything about what will interchange. I guess by time I go through the trouble of swapping rear ends, I could just narrow the one I have and add a posi, and I could change the R&P ratio while I'm in there. I don't think I'll be happy with the 3.08 R&P that's in it now, I'd rather have a 3.73 or 4.11 and use a 5 speed with overdrive 5th. Just thinking out loud here, your thoughts would be appreciated!
__________________
Project Goldilocks '66 C10 Short Fleet BBW Build '65 C10 Highly Detailed Stock Restoration Thread '78 Camaro Targa Roof Build '55 International Metal/Body/Paint Work '66 F100 Full Rotisserie Restoration '40 Packard 120 Convertible Coupe Restoration How To Restore and Detail an Original Gauge Cluster How To Detail Sand Body Panels, Edges, Corners, Etc Last edited by theastronaut; 09-11-2011 at 02:54 PM. Reason: add link |
|
|
|

|
|
|
#25 | |
|
chevy only
 Join Date: Sep 2006
Location: Phoenix, AZ
Posts: 6,619
|
Re: Project Goldilocks, '66 C10 SWB BBW Build
Quote:
__________________
CHEVY ONLY... Nothin Else ! |
|
|
|

|
 |
| Bookmarks |
|
|