
 |
|
|
#26 |
|
Registered User
Join Date: Jun 2018
Location: Texas
Posts: 1,353
|
Re: TA_C10: Stage 1
PS: When I watched the videos from eastwood, the guy was using the eastwood 135? and he was saying he likes to turn the welder almost all the way up on the heat setting and when he welds I noticed he would just "tap" the gun trigger for each weld. I was doing that too when I started but my uncle was saying I shouldn't have to do this. But I think this eastwood guy method makes a nice flat puddle but when I transferred this method to my old truck sheet metal, I kept burning through in some weak spots and such so I went back to the welder table settings.
I also feel like I don't know how to aim the welding rod. Seems like I am supposed to hold the gun at an angle and hit the side of one of the panels I am butt welding and then move the gun upright to get the puddle inside the gap to fill? I try that I usually end up burning through. But if I get a blob of weld started somewhere, I usually just use that to aim at from there on so I don't burn through, its my starting point I guess you could say. But I'm pretty sure I was holding the gun at an angle too much so my welds weren't filling up the gap, or I wasn't moving my puddle down into the gap or something. And if I use the high heat quick button trick, there is almost no time to move a puddle that way... Ugh. So many questions I have....
__________________
TA_C10 Stage 1 build - http://67-72chevytrucks.com/vboard/s....php?p=8333444 "It's only money". 
|
|
|

|
|
|
#27 |
|
Senior Member
 Join Date: Dec 1999
Location: TX
Posts: 1,612
|
Re: TA_C10: Stage 1
You couldn't pay me to cut that off. Your welds are fine. I just thought it might help explain why the back side was not filled.
|
|
|

|
|
|
#28 |
|
Registered User
Join Date: Oct 2009
Location: Denton, Texas
Posts: 1,729
|
Re: TA_C10: Stage 1
Howdy neighbor, I live in Denton.
I think you are doing a fine job! Nice project! |
|
|

|
|
|
#29 | ||
|
Registered User
Join Date: Jun 2018
Location: Texas
Posts: 1,353
|
Re: TA_C10: Stage 1
Quote:
Quote:
  I took a break from sheet metal work and started working on the frame again. Rain finally quit so I've had some 65-70 degree weather to work in and its been nice. I cut and installed my new c-notches from brothers trucks. For stage 1 I am leaving them bolted in. I don't have a welder that can weld that thick of steel. At least I don't think that 140 can weld the frame.... But I plan on welding it later on when I strengthen the frame a little as well in stage 2 of my build. The c-notches took some time, but overall not a hard project. I simply made a cardboard template of the c-notch face, lined them up, traced the notch and got to cutting. I used a mix of cutting wheels and sawzaw. Rounded the edges for strength, shot them with some black epoxy, drilled the holes with a step bit, bolted them in. Done.  Here is the kit out of the box. Comes with everything needed to install. The metal is much thicker than factory frame so it makes me feel ok about reinforcement and rigidity. It's a CPP C-Notch kit, but from Brothers Trucks... 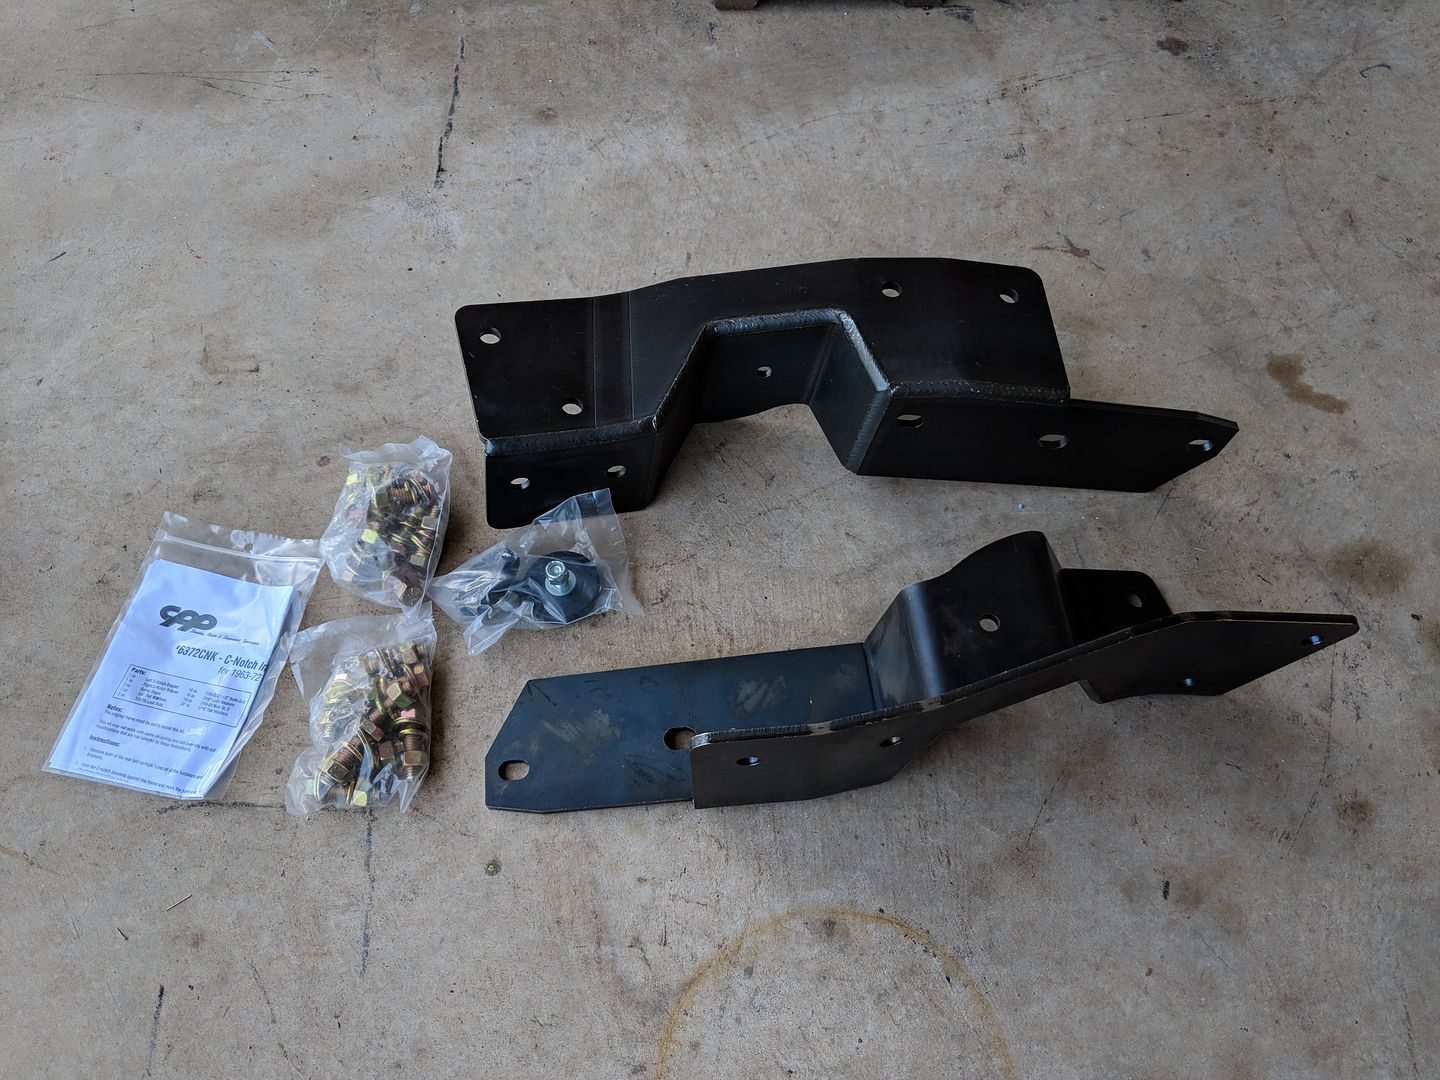 A few shots of the before frame. I got the idea to use two engine stands for a rotisserie from another member. I set it up this way for POR-15. But I was able to support the frame this high while I cut the c-notches. They need to be supported so that during installation you don't bend the frame at the weak point. I also did one side at a time which I'm sure also helped that factor. 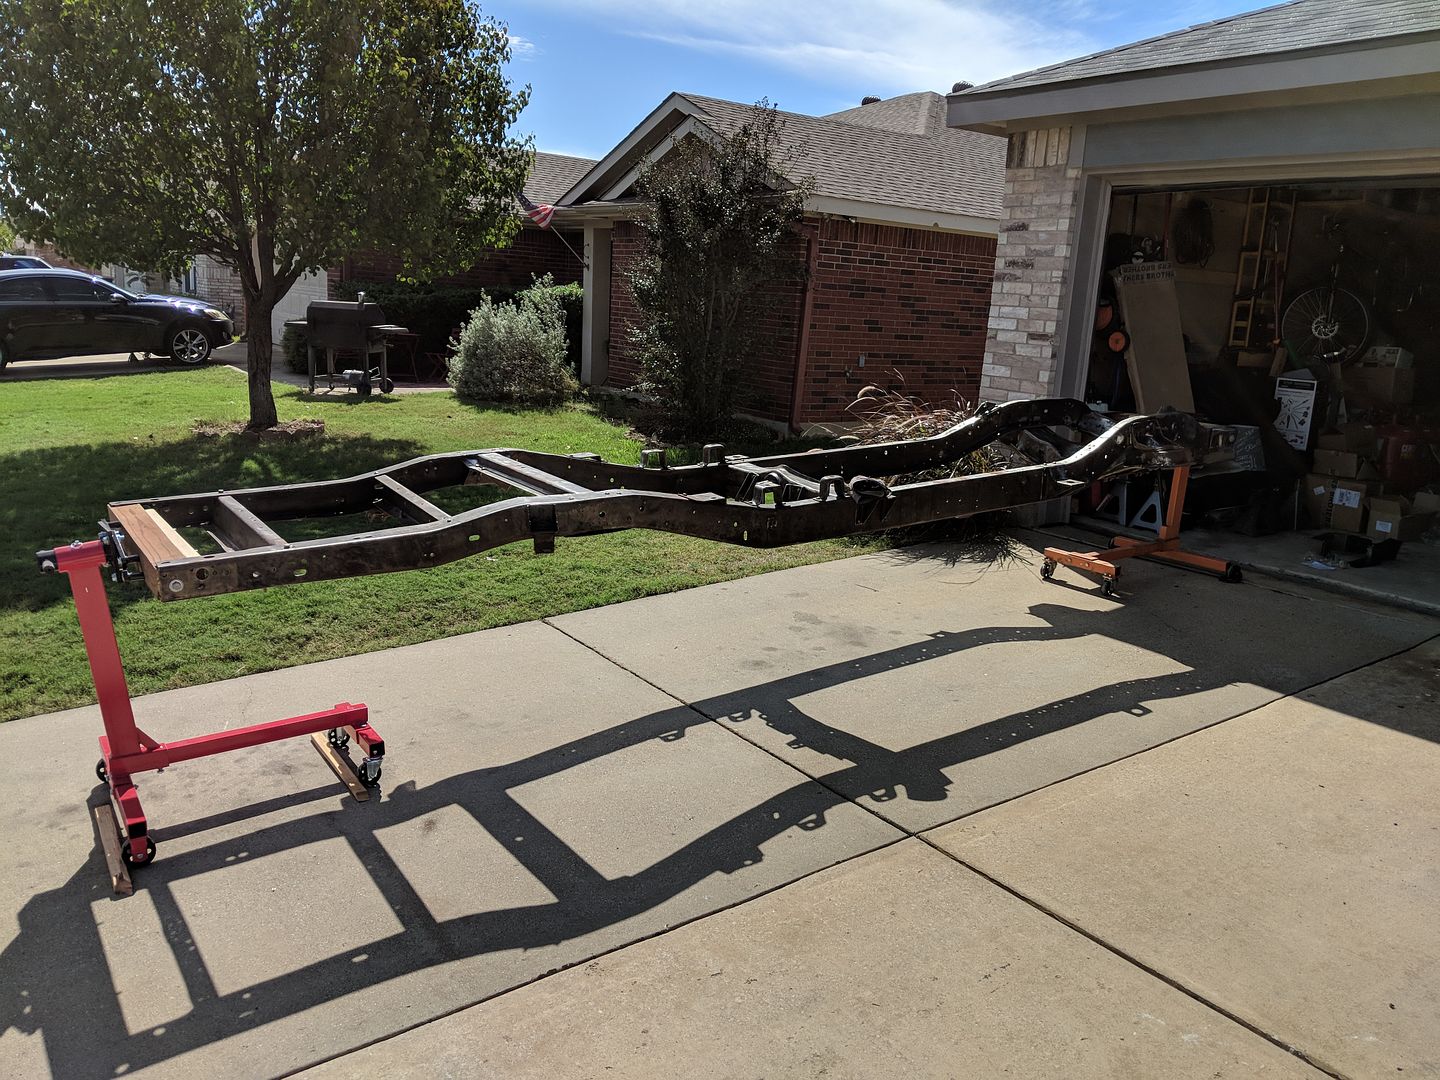 Marked for cutting. 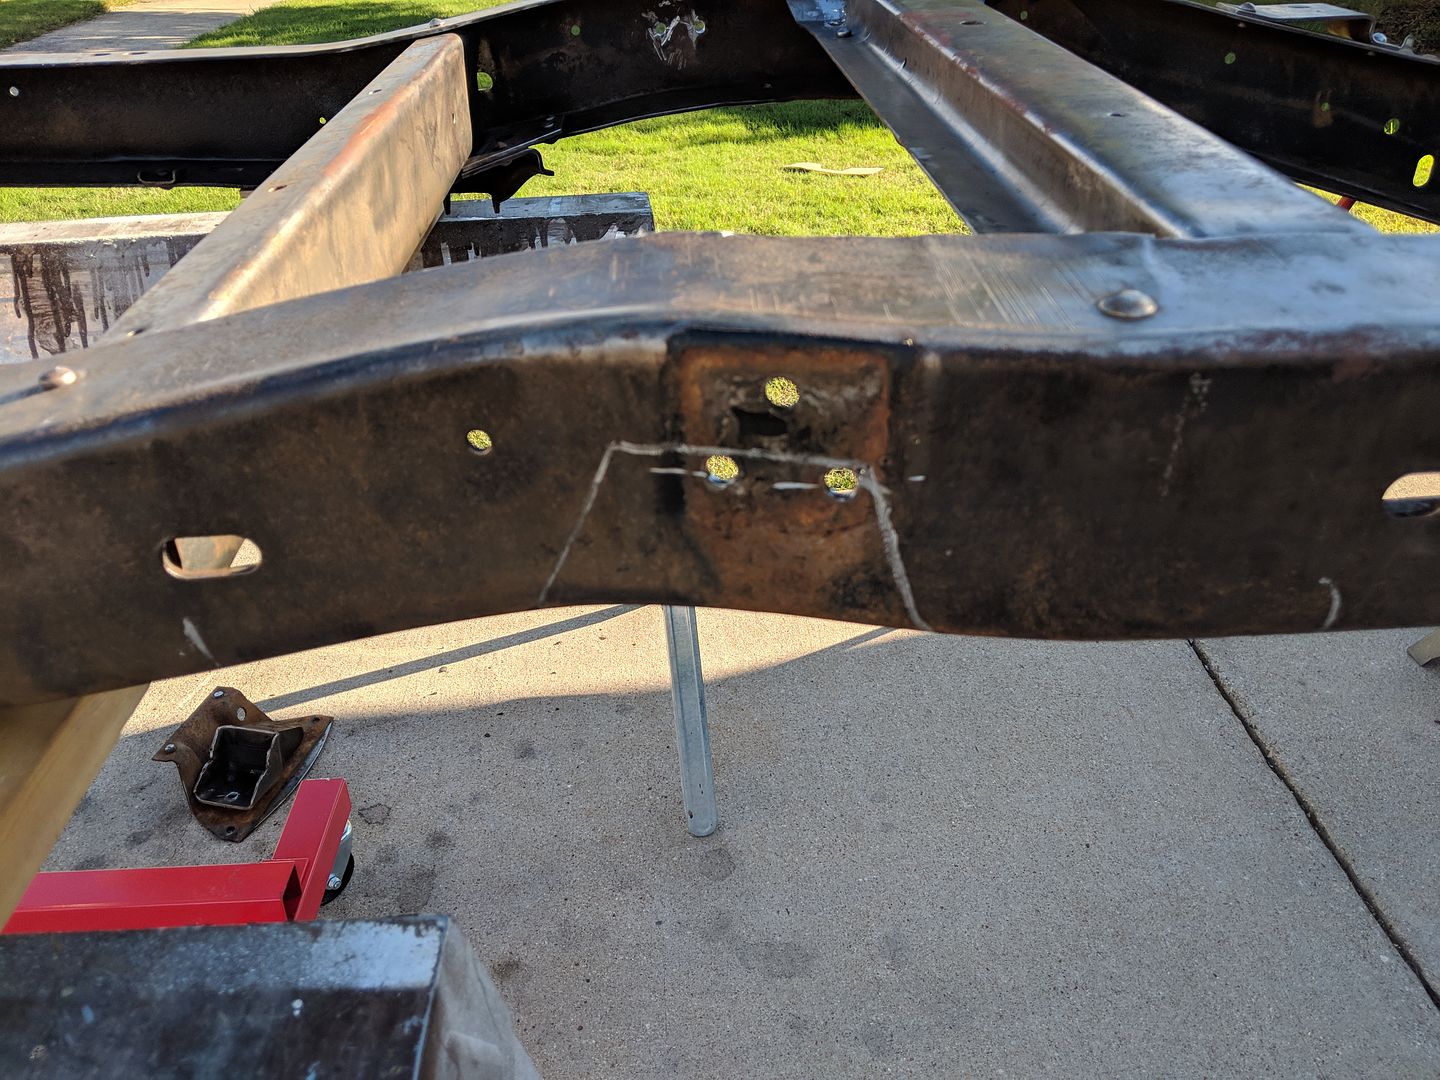 Rounded the edges after cut, shot the frame and the new c-notch with a little black epoxy for rust protection and then bolted her in. I learned that you can pretty much line up the holes at the bottom of the frame(these existing frame holes get re-used with the notches) making it easier to install in the correct position. It's almost fool proof  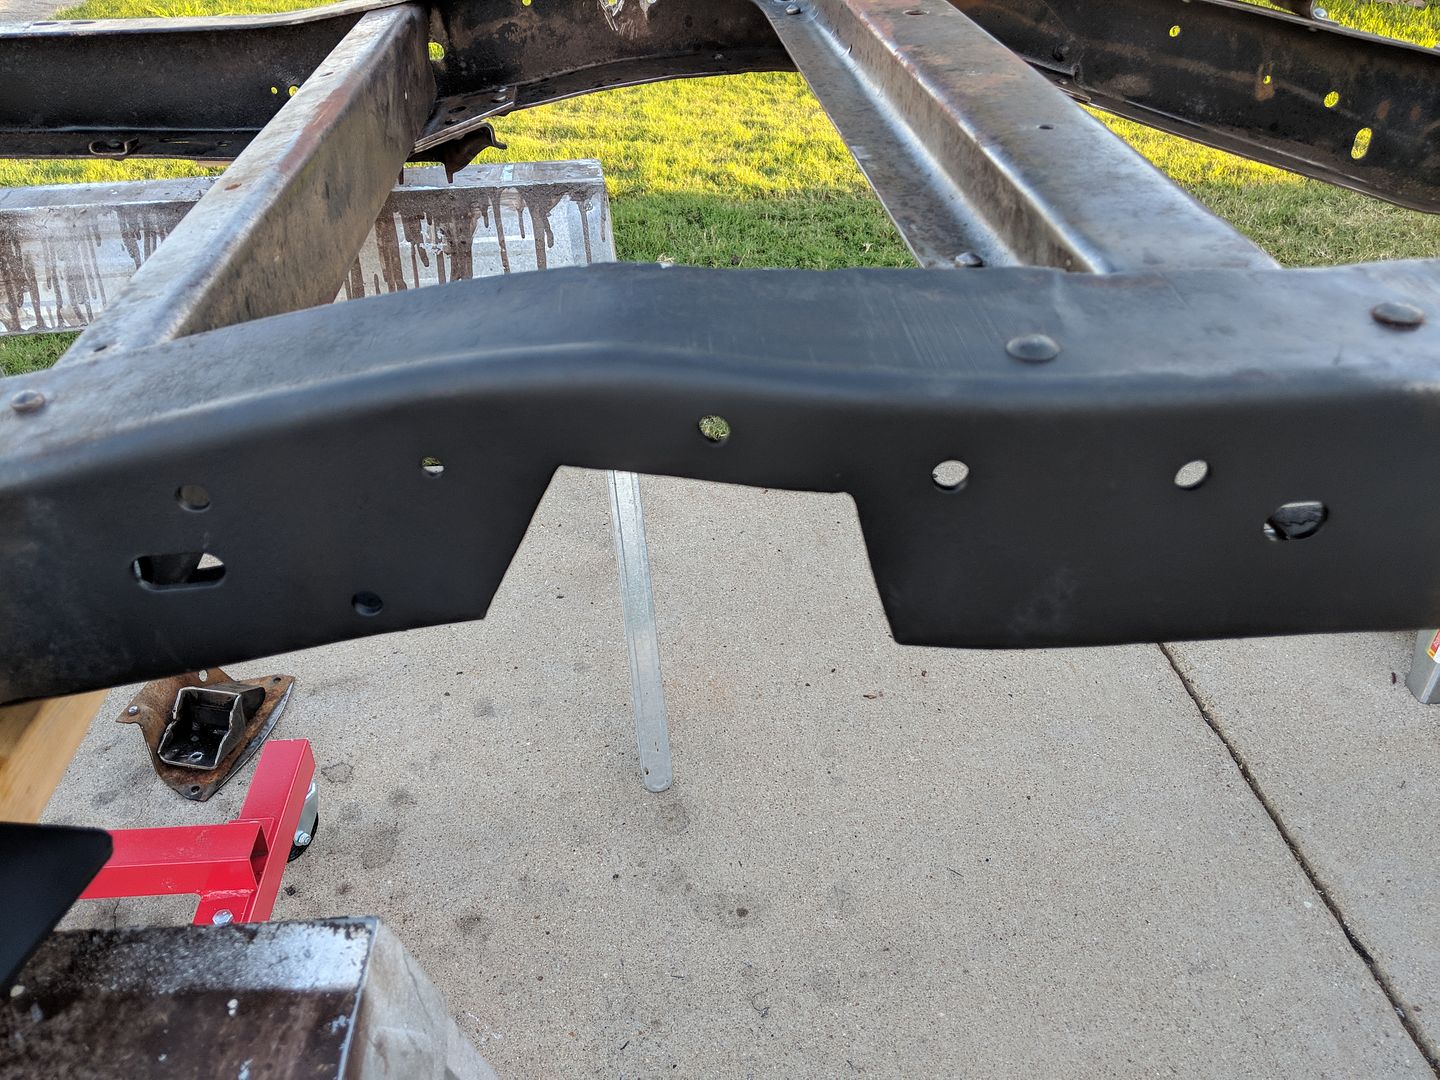 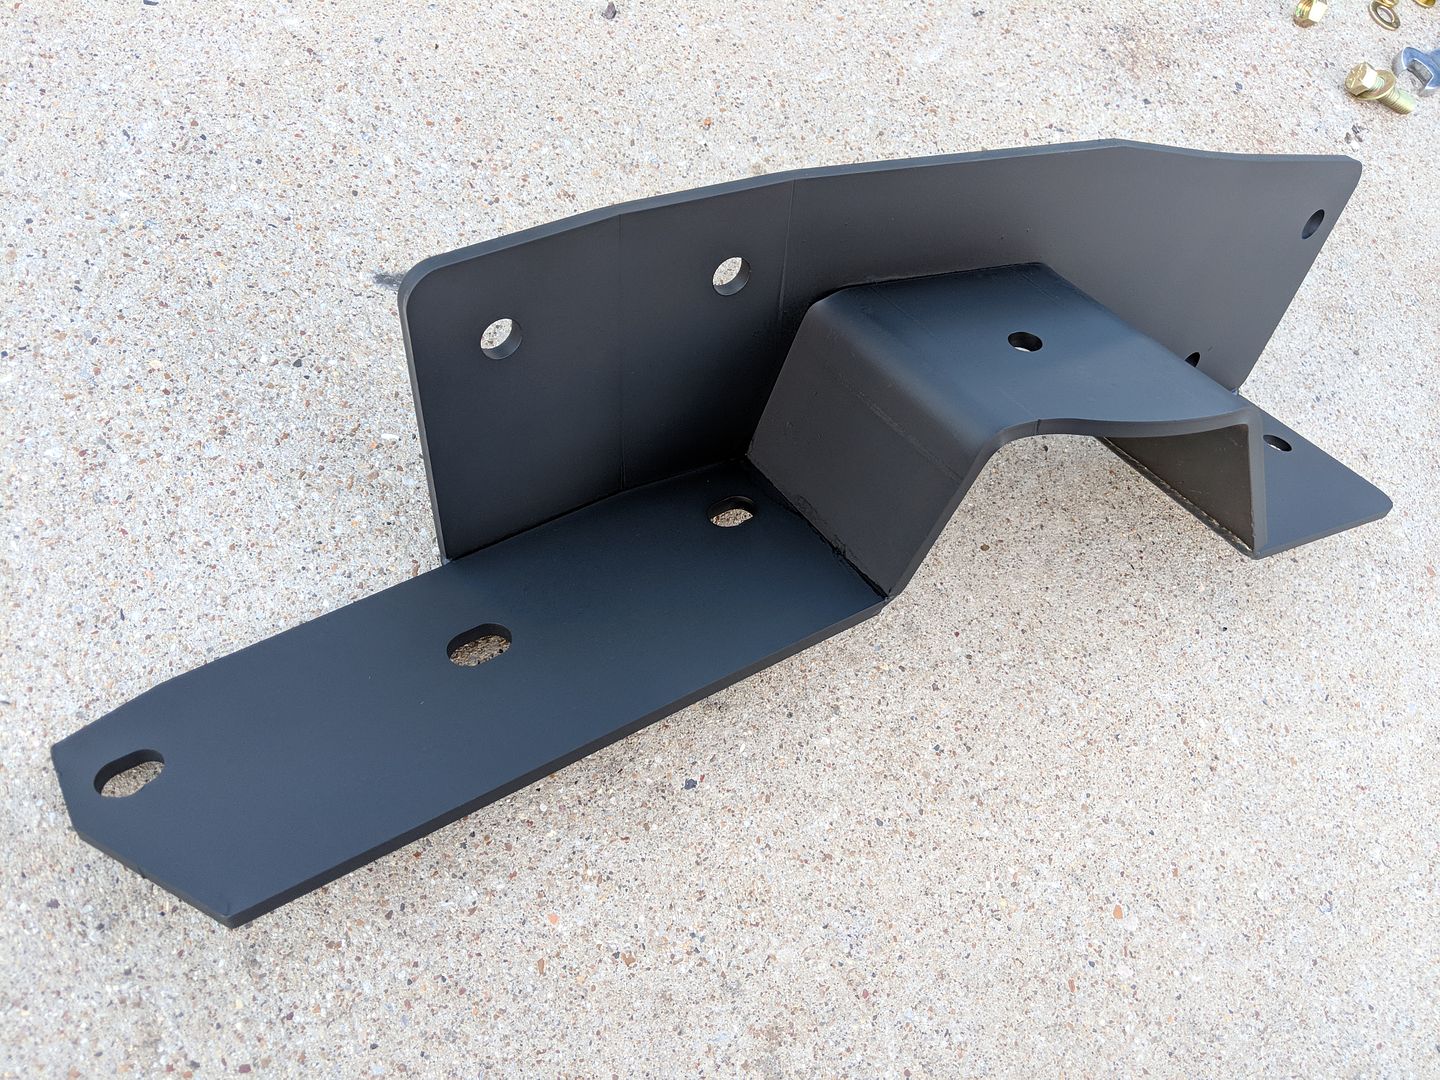 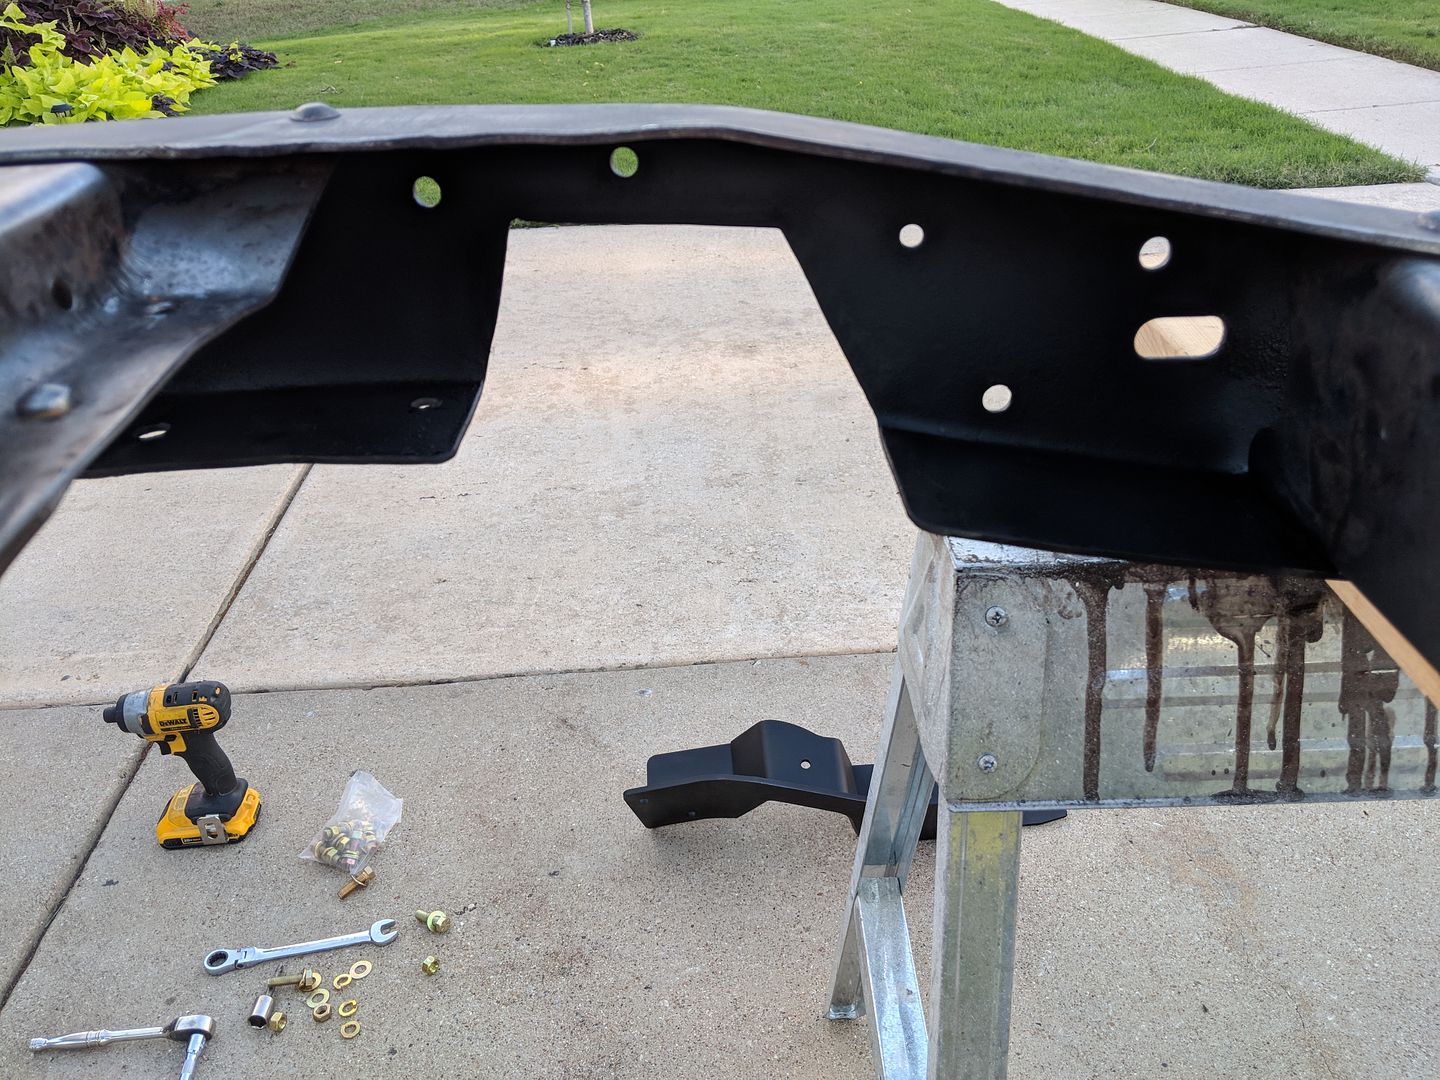 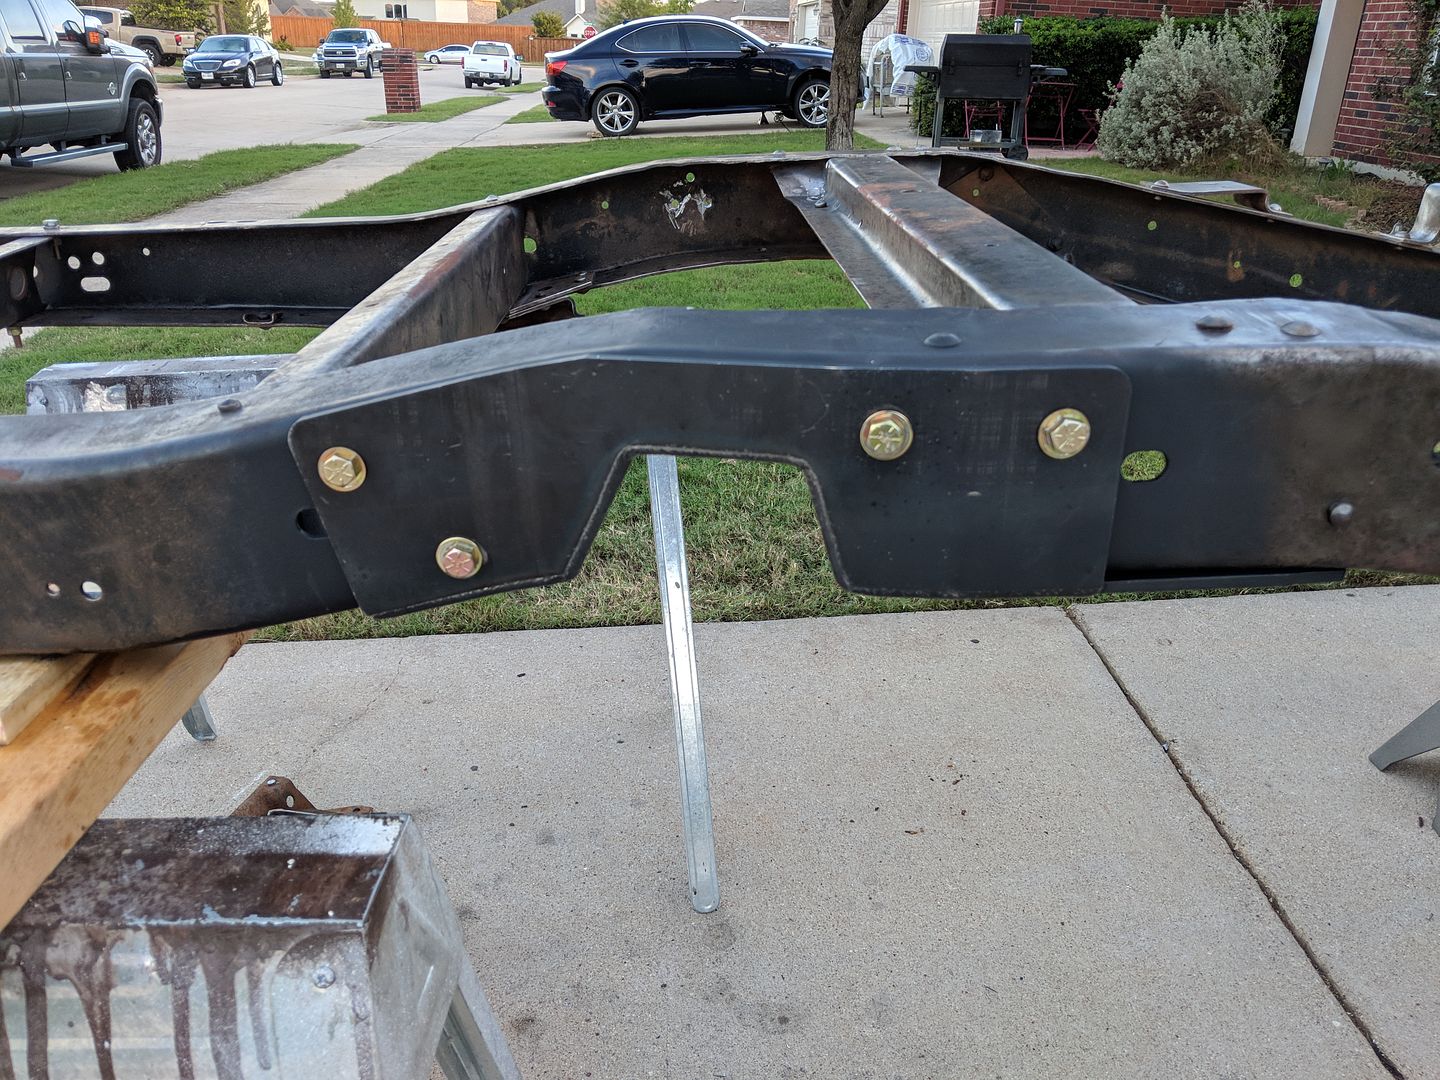 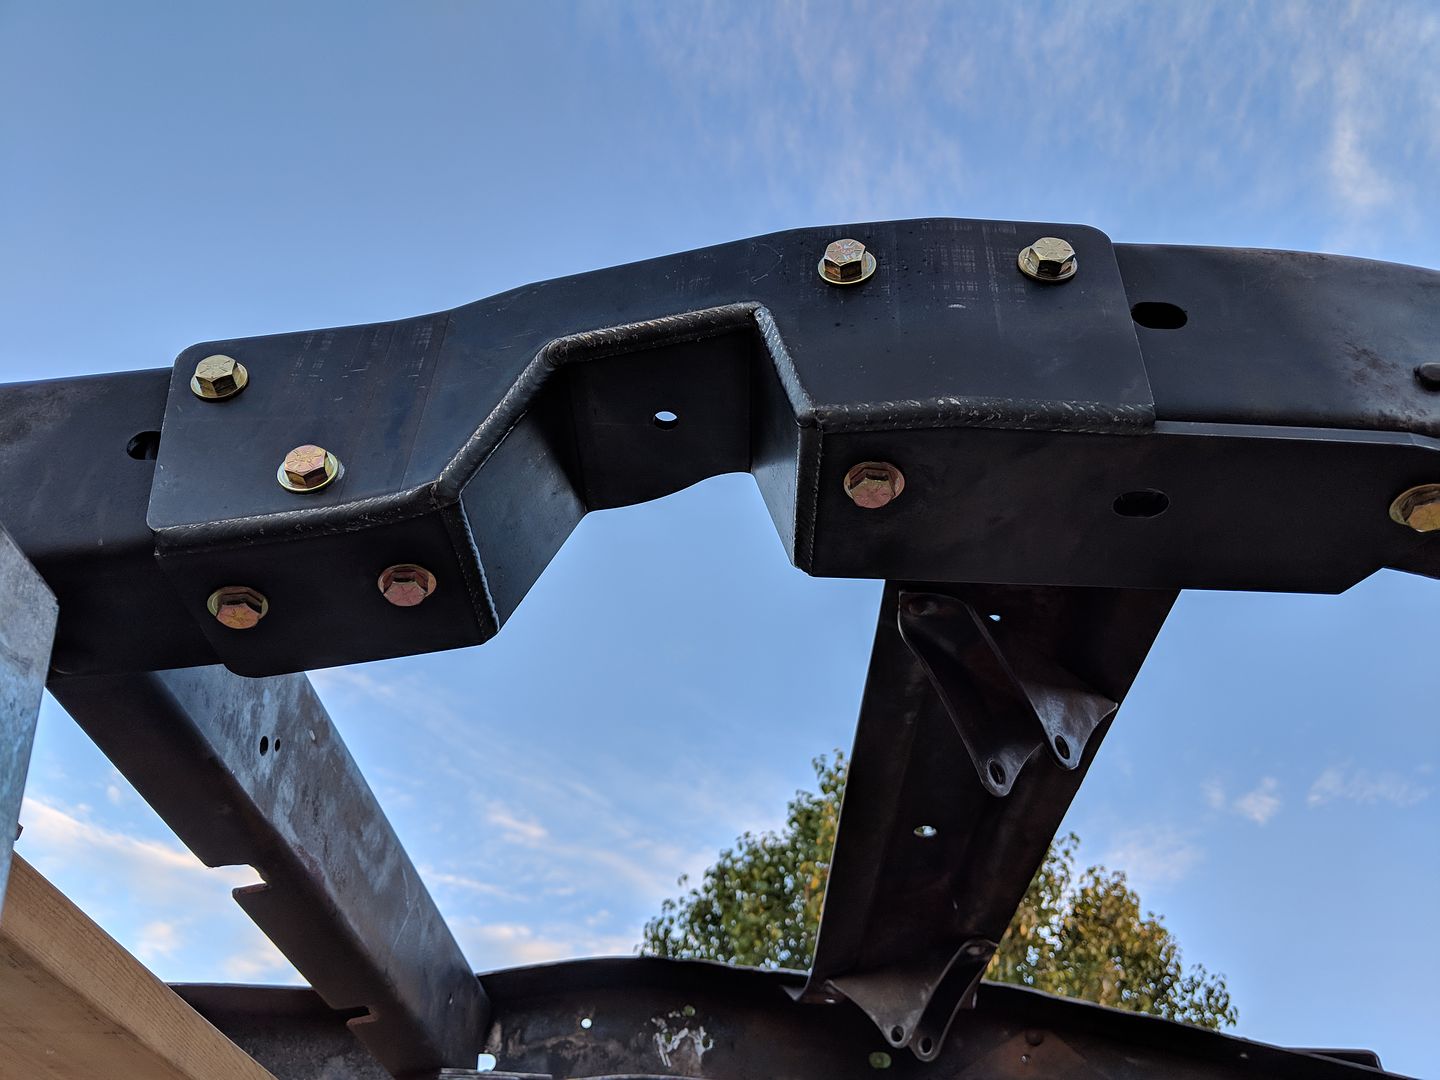 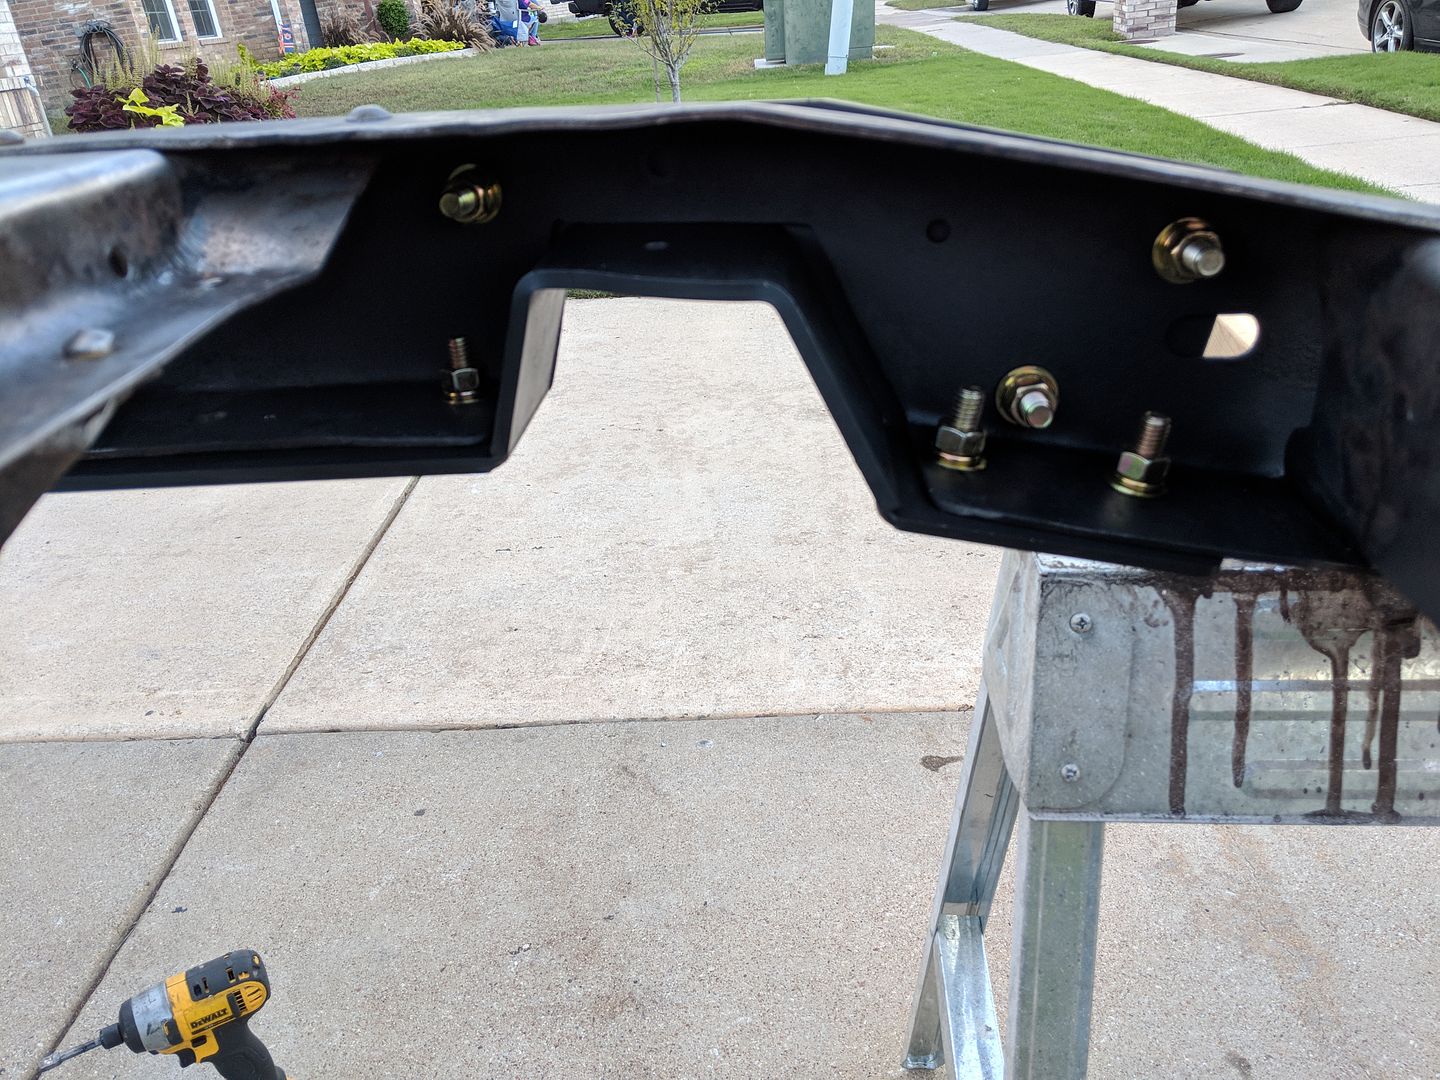 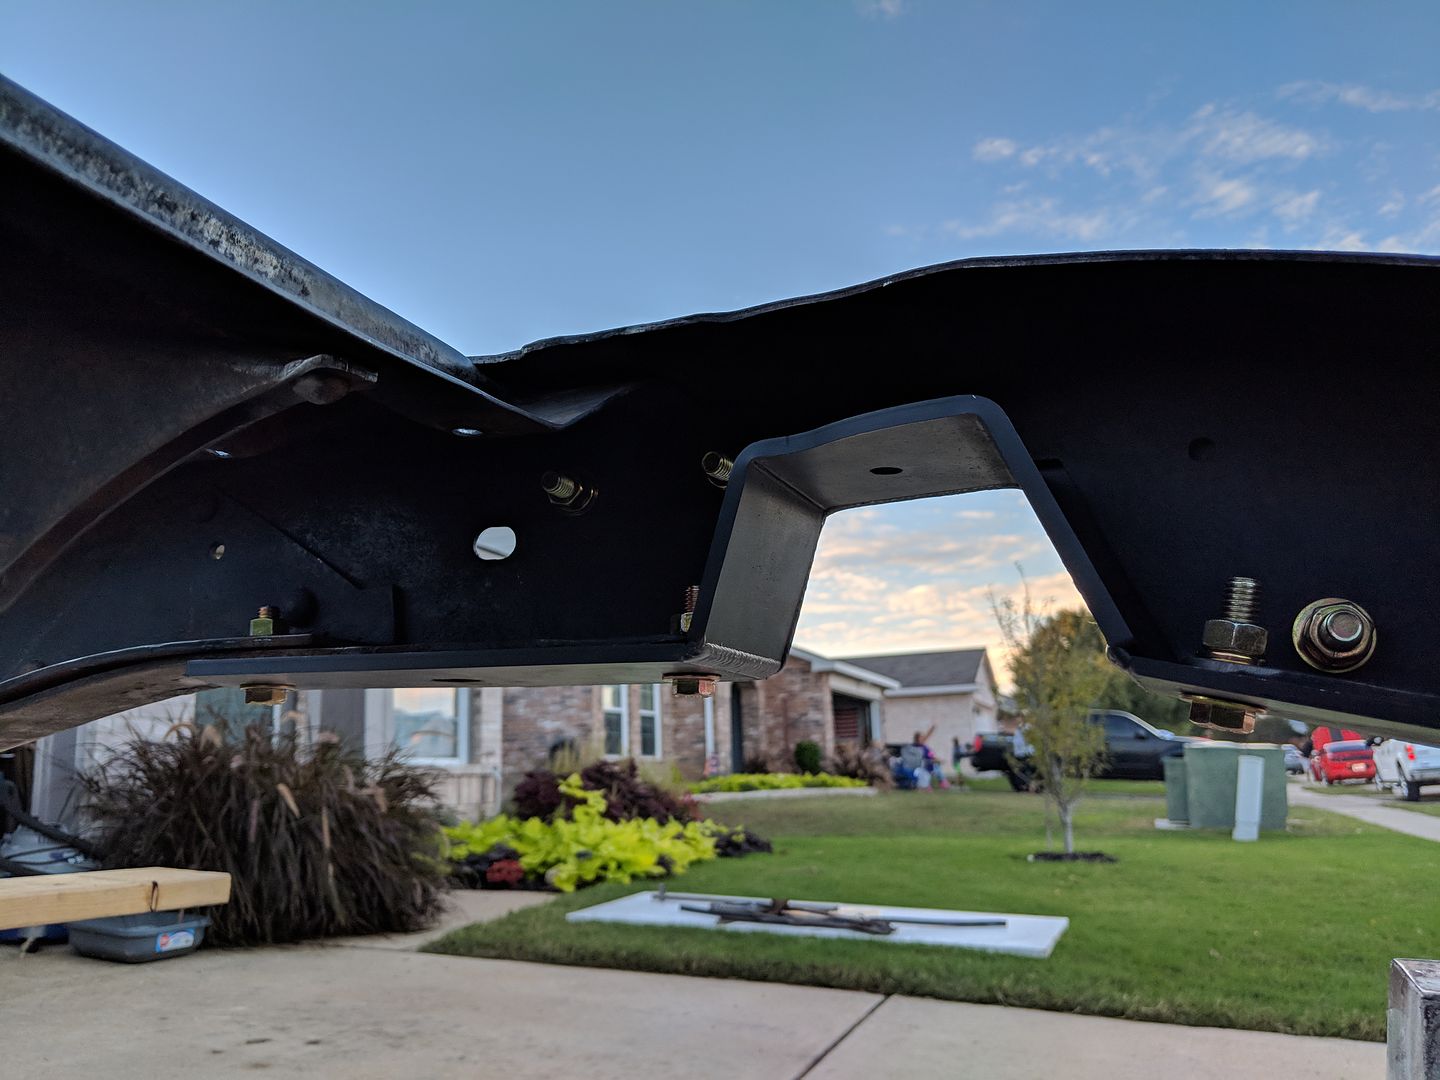 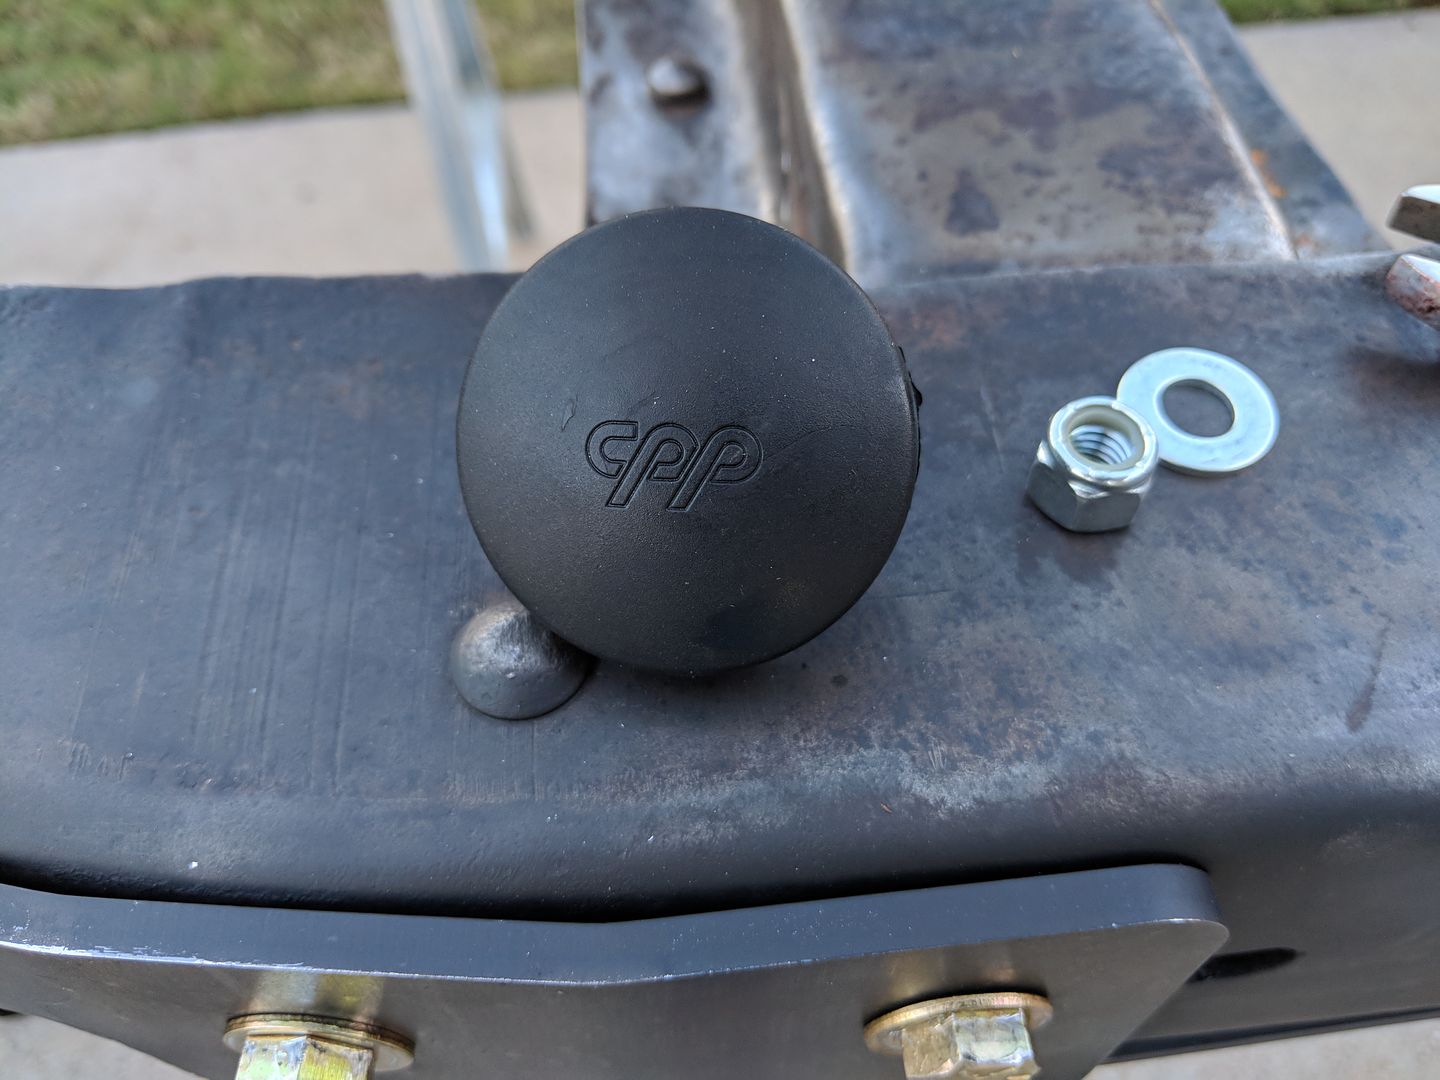 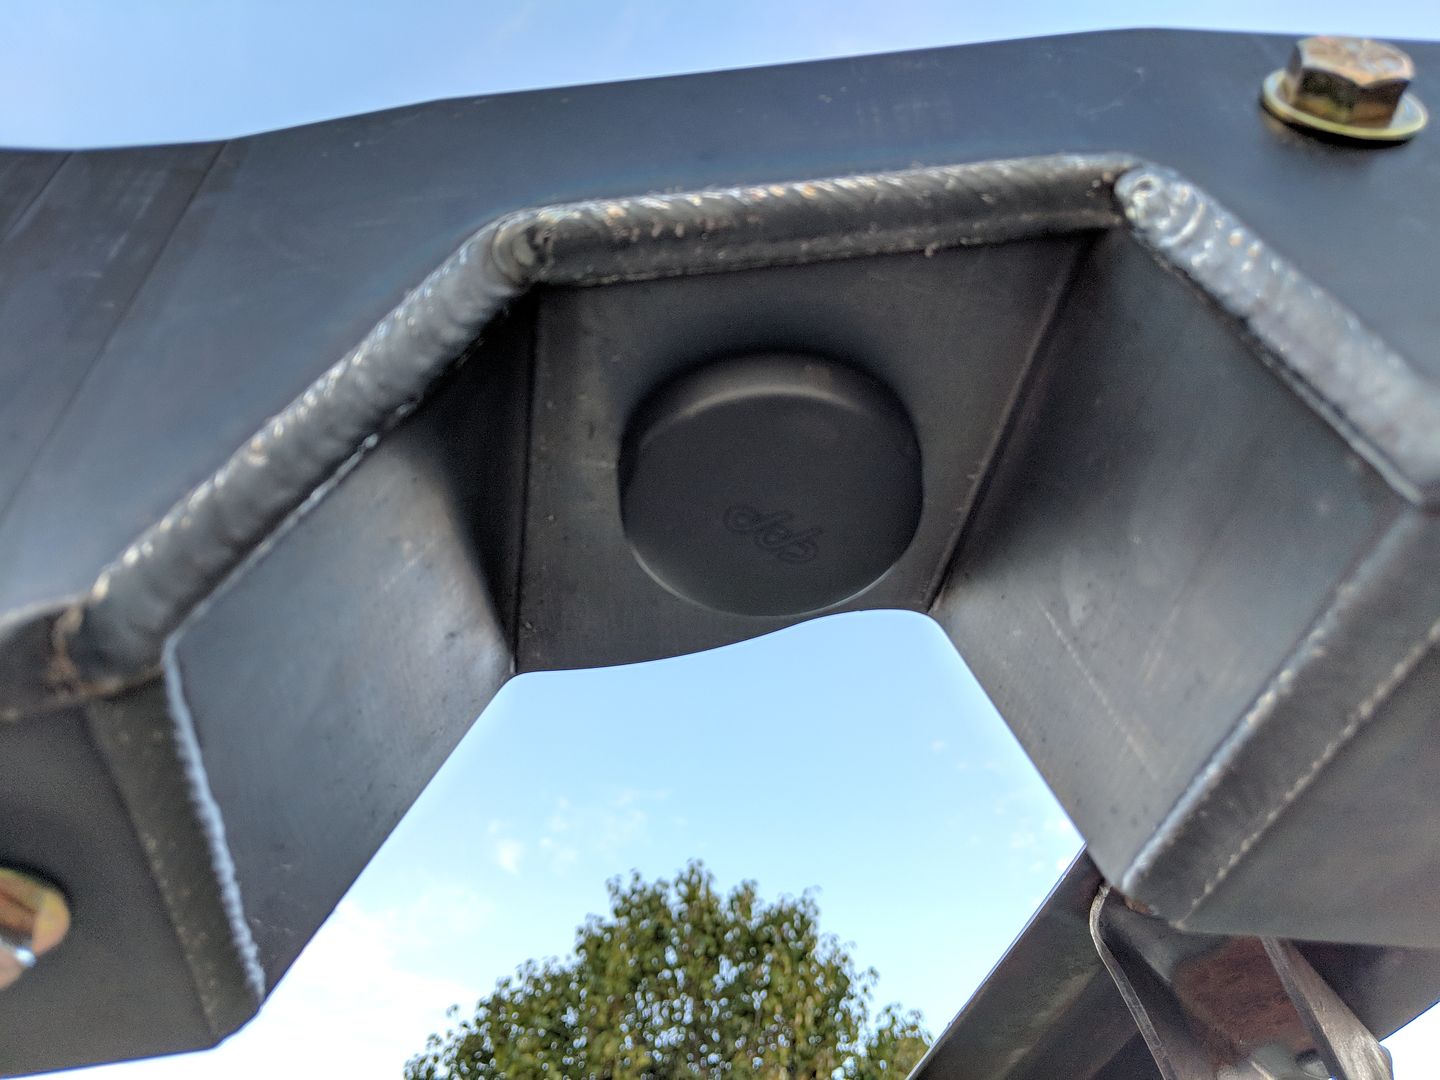 Few final shots... 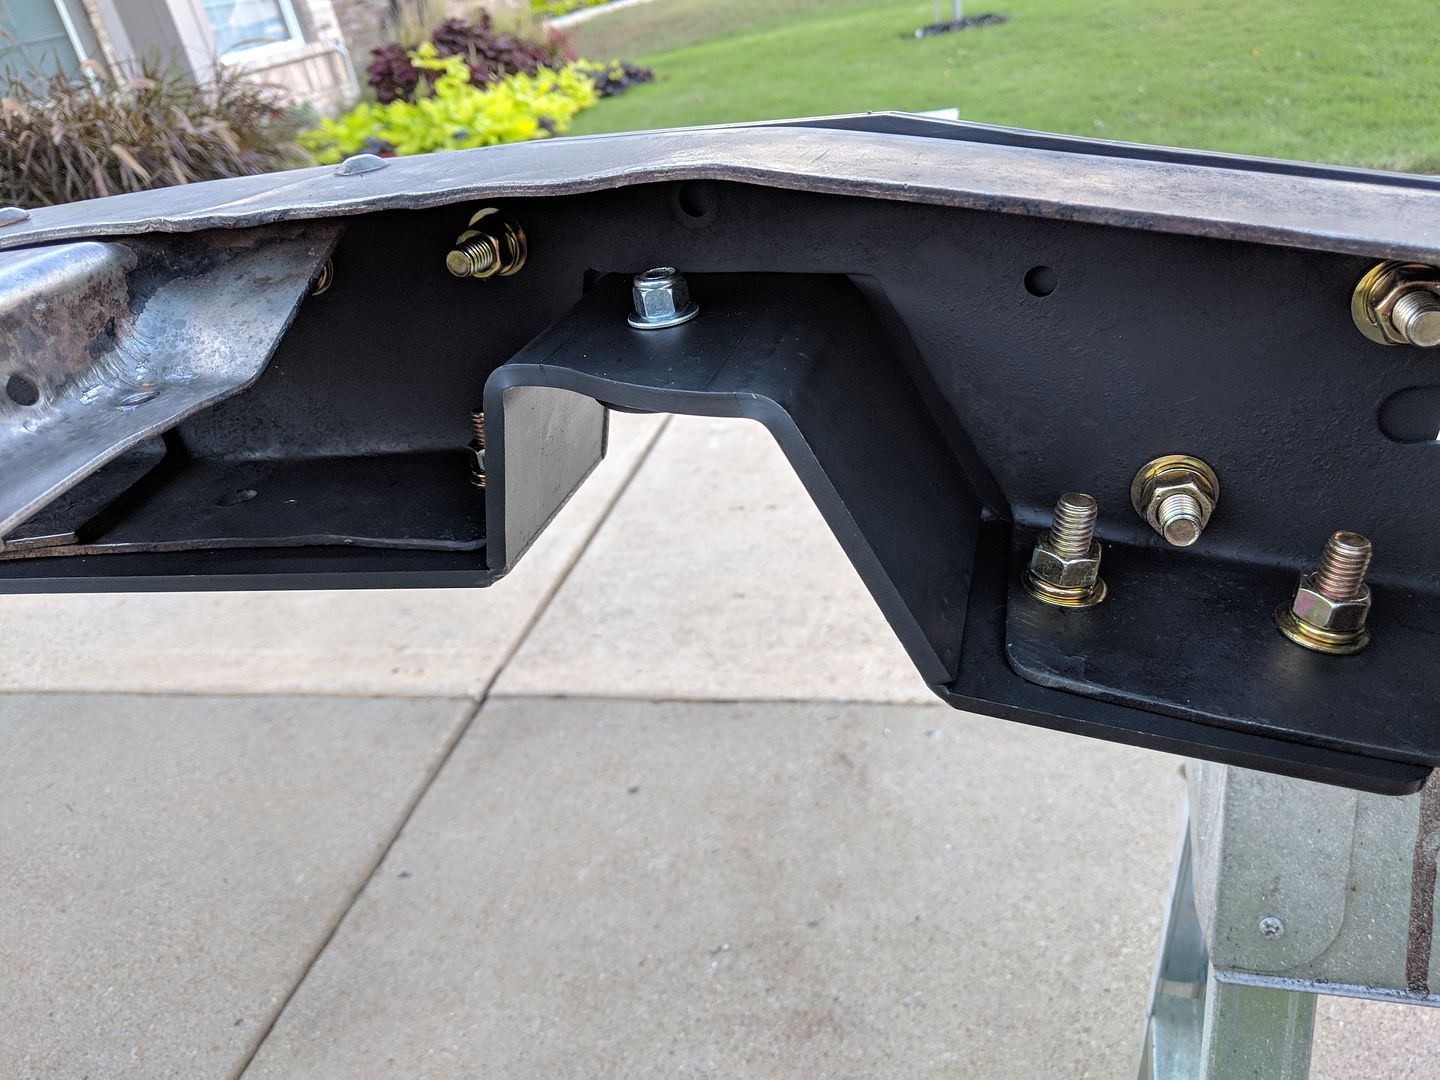 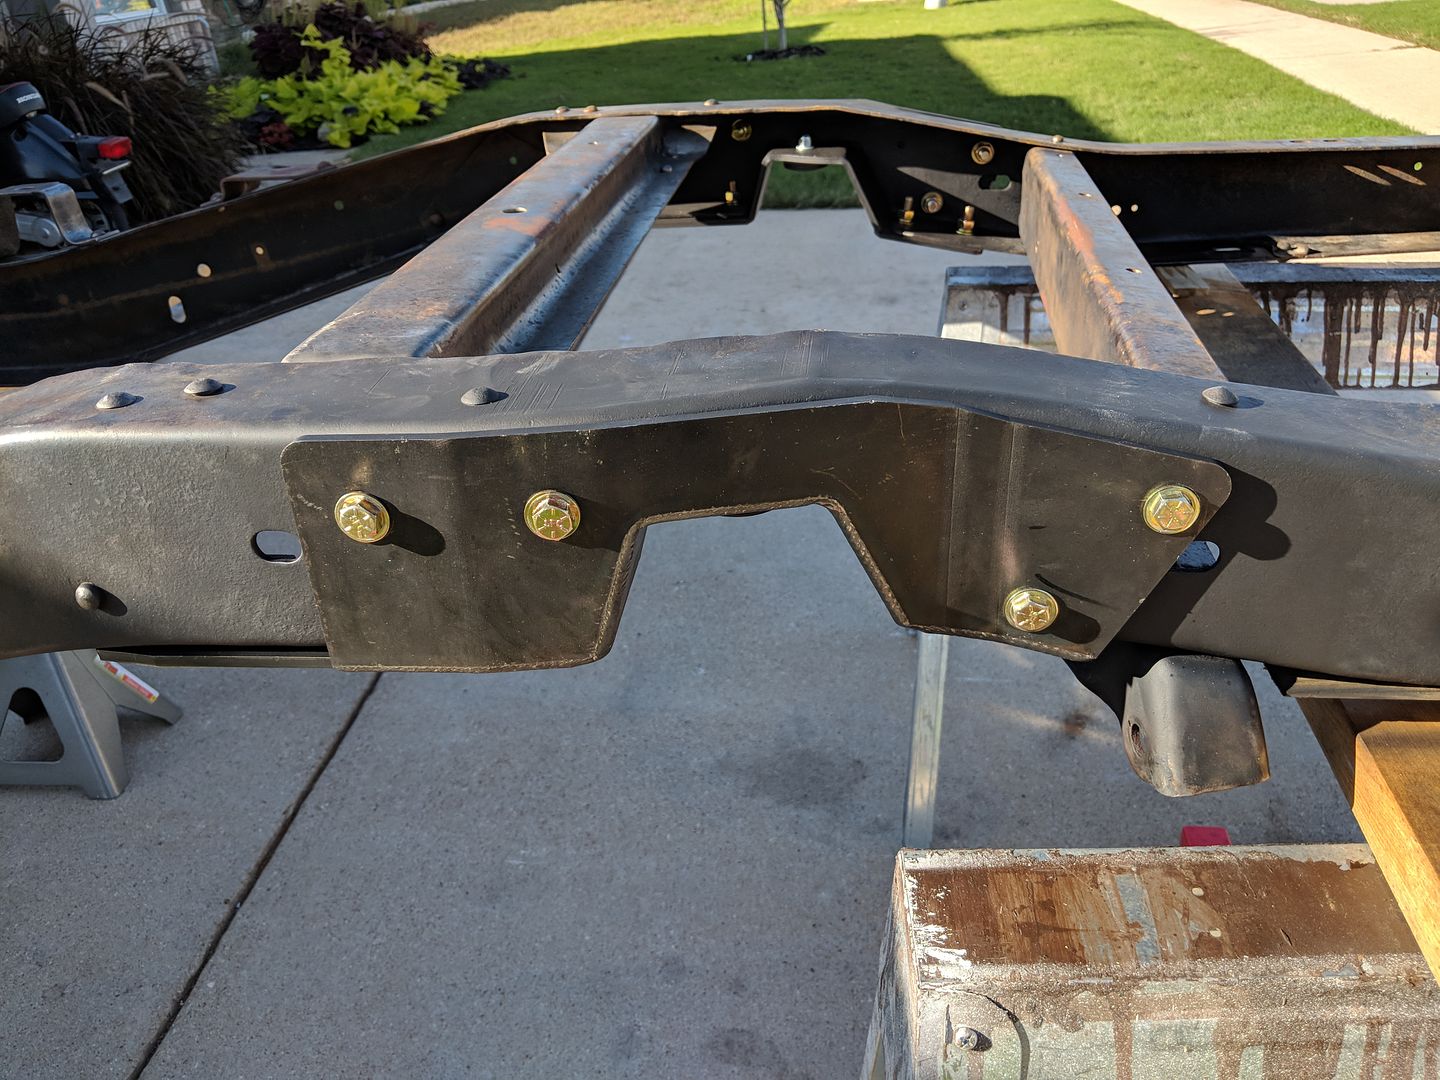 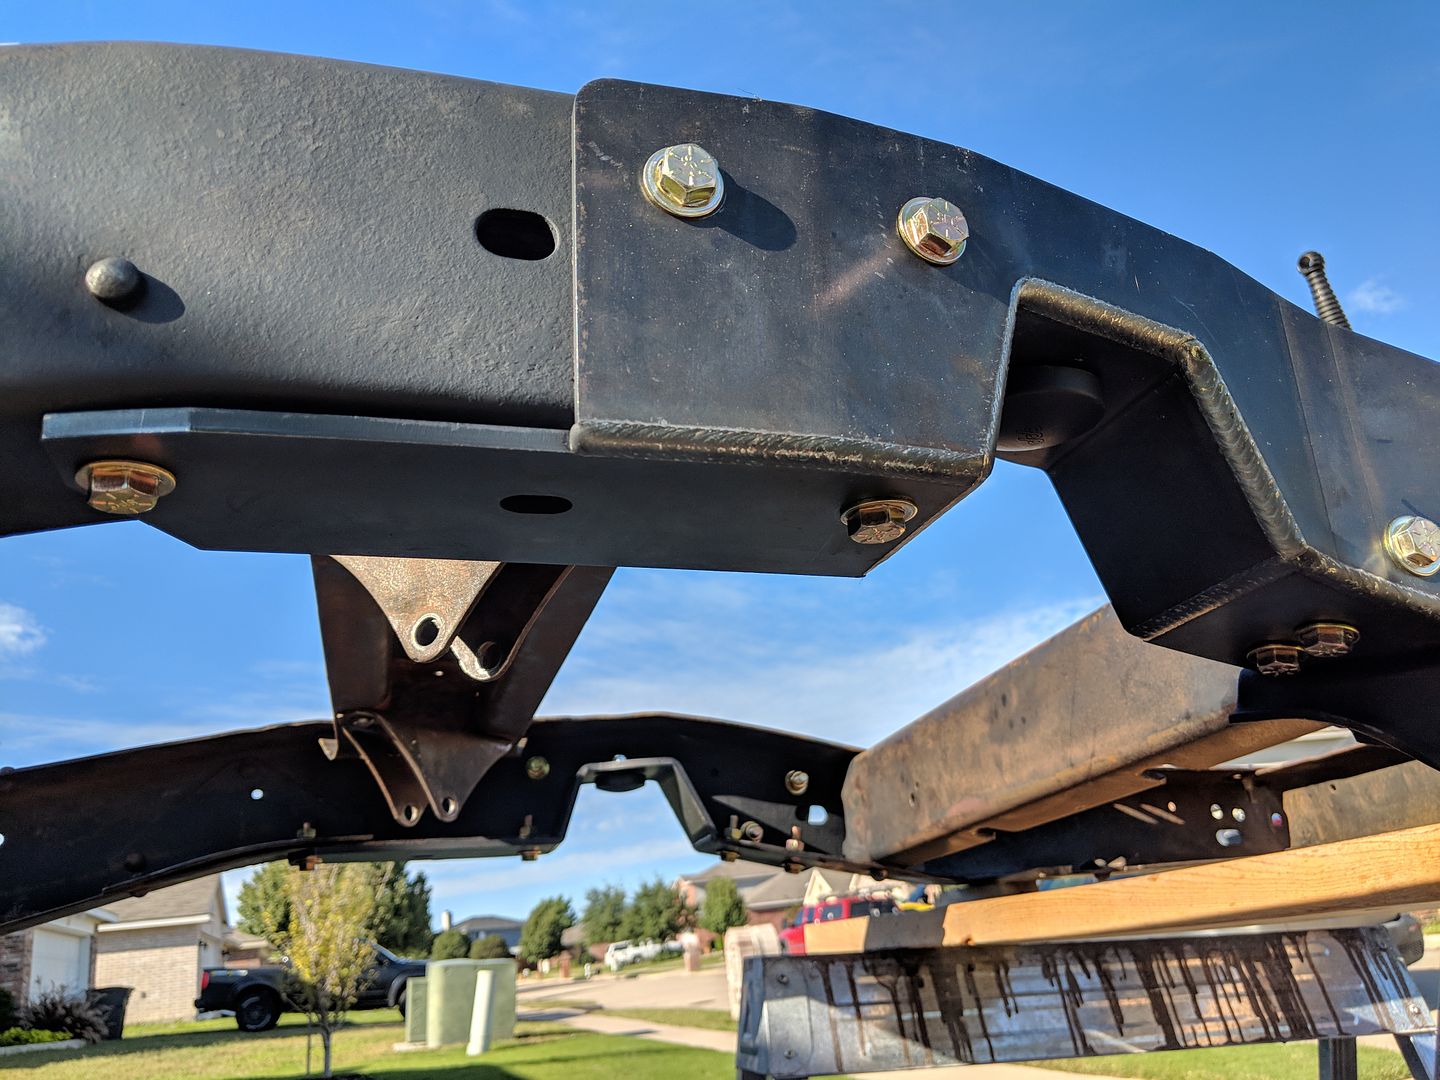 .
__________________
TA_C10 Stage 1 build - http://67-72chevytrucks.com/vboard/s....php?p=8333444 "It's only money". 
Last edited by TA_C10; 10-07-2019 at 10:58 PM. |
||
|
|

|
|
|
#30 |
|
Registered User
Join Date: Apr 2014
Location: Azle,Texas
Posts: 2,248
|
Re: TA_C10: Stage 1
Great pictures of good work. Do you plan to weld in the c-notch? I haven't welded mine yet but plan to, after I think I am low enough. If I dont think it is low enough for my liking I might do a small step notch, so I figure I'll wait so I dont ruin a sell-able part. Hows the sheet metal work going?
|
|
|

|
|
|
#31 |
|
Registered User
Join Date: Jun 2018
Location: Texas
Posts: 1,353
|
Re: TA_C10: Stage 1
I couldn't quit there of course. I went ahead and cleaned up the frame, prepped it, and brushed on some POR-15. Check out this really cool picture. I use my google pixel 2 XL phone to take all my pictures. I also use google photos which has this cool feature where some pics it will auto fix them and then alert you asking if you want to save the photo. It's trying to get you to use their apps to modify pics of course but I like the features so I do use that app. Anyways, I thought this picture it fixed up looked really cool with a crazy Texas sky in the background.
 I can't tell you how ingenious the idea was to make a rotisserie out of engine stands as it make painting the frame SO MUCH EASIER. Thanks to BRUCE88 for that idea you rock sir.  So again, I wire wheeled the whole frame. Yeah I saved time, but it was a hard dirty job. Sandblasting would have been the better and faster way to go. But I saved a little cash so whatever. So Sunday night after the c-notches I cleaned up the frame a little more with a wire brush, then blew off the dust. I sprayed on the POR-15 metal prep with a 1 gallon weed sprayer. Kept doing that for 30 minutes keeping the frame wet. That stuff ate most of the rust and etched the metal turning it almost white like a calcium look. I rinsed it off with a water hose and put the frame inside the garage for the night. Monday night I got home from work and brushed on the first coat of POR. I used semi-gloss black. That stuff is awesome. It really goes a long way with just a little bit of product. Stuffed it back in the garage. Then tonight(Tuesday), after work I pulled it out of the garage again, scuffed the whole frame with a red scotch bright, and gave it a second coat. I did 2 coats with a single quart of POR-15 and still had just a little bit left over. I did my research on this stuff and ended up buying 2 quarts of POR semi-gloss black, and also bought a pint of the POR top coat with UV protectant for my springs and other parts I paint that may see a little sunlight. But they all said get 2 quarts. Well i did it with one quart. But I think I may need the second quart still to do my a-arms, trailing arms, etc so I'm not sending that last quart back... Some pics here. This is after the first coat. I will have more pics of final second coat later when I start putting together the rest of the suspension parts and get her back on her own wheels! But the second coat doesn't look much different than the first coat. This stuff is thick looking when it dries. And it almost looks like a powder coat.  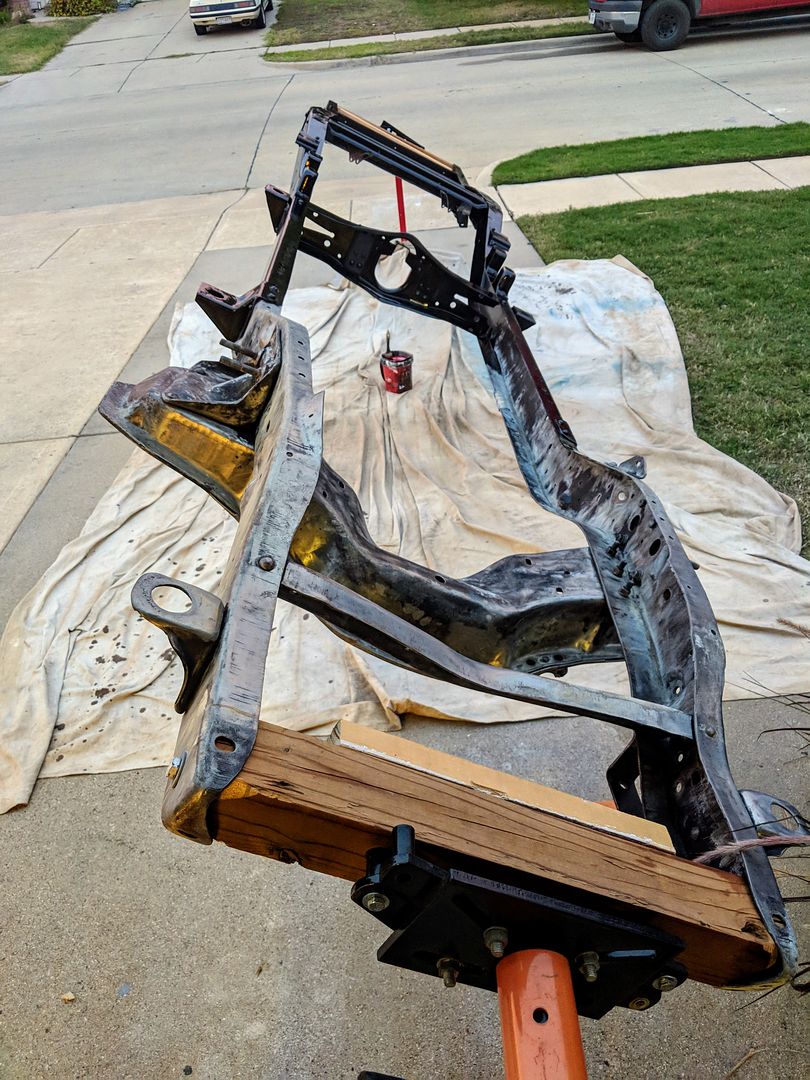 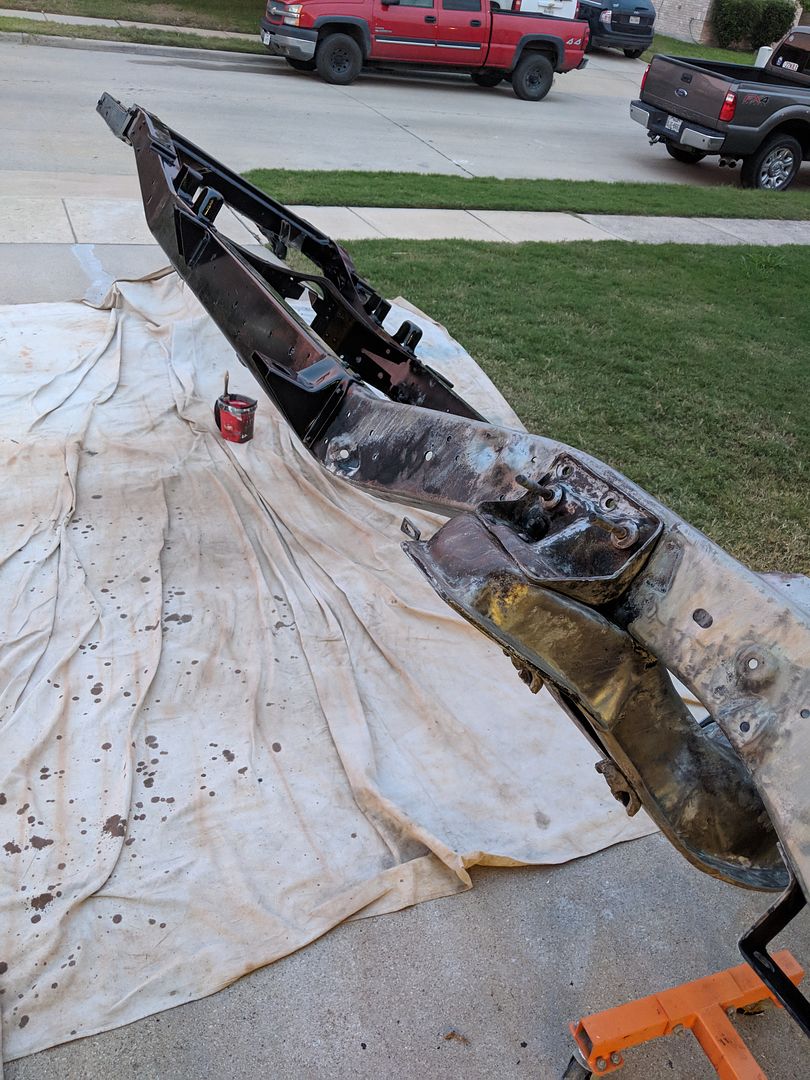 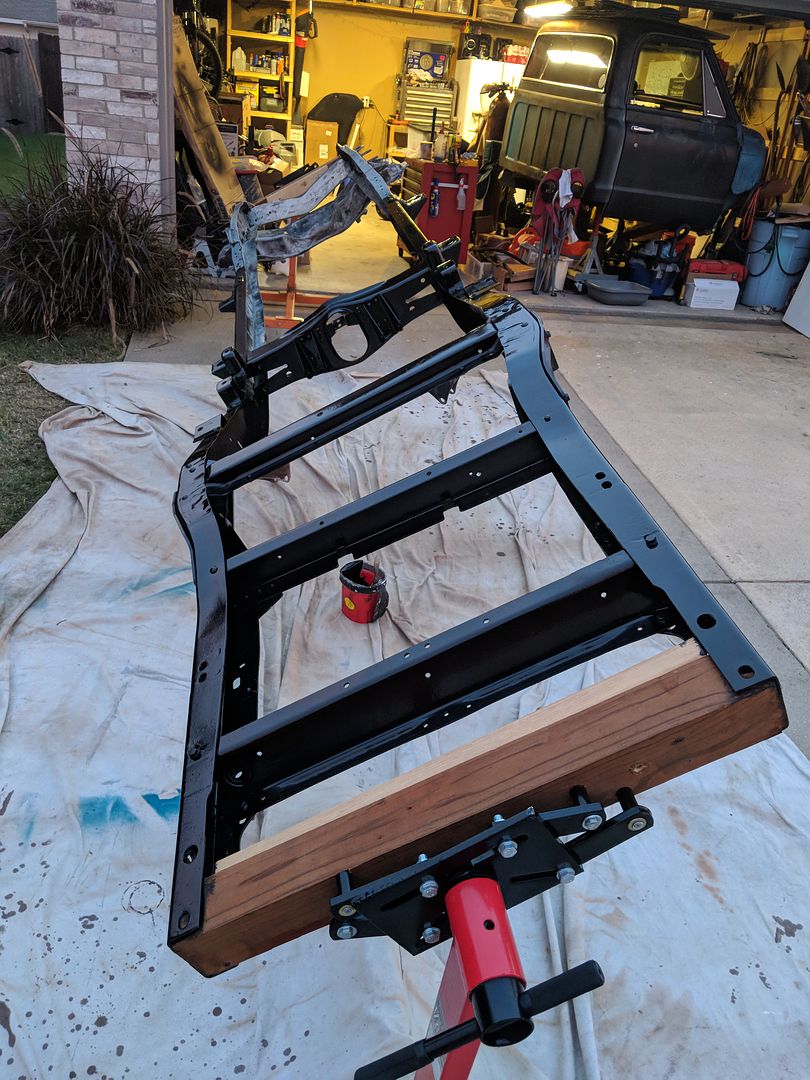 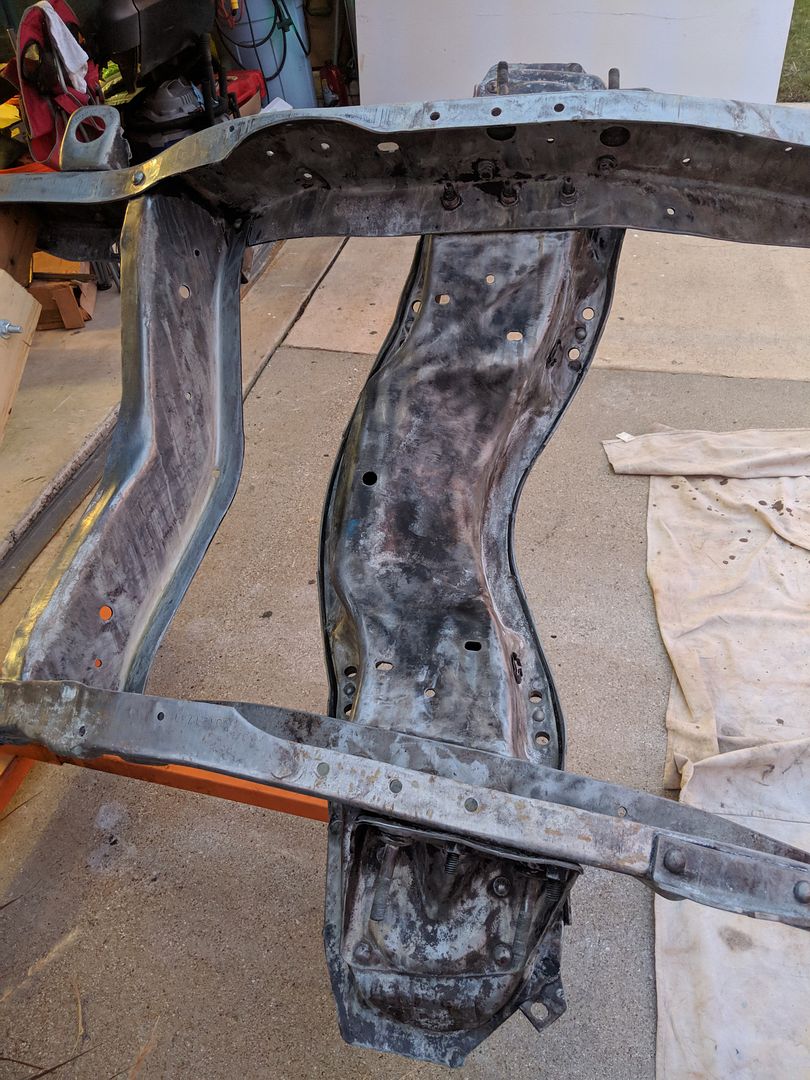 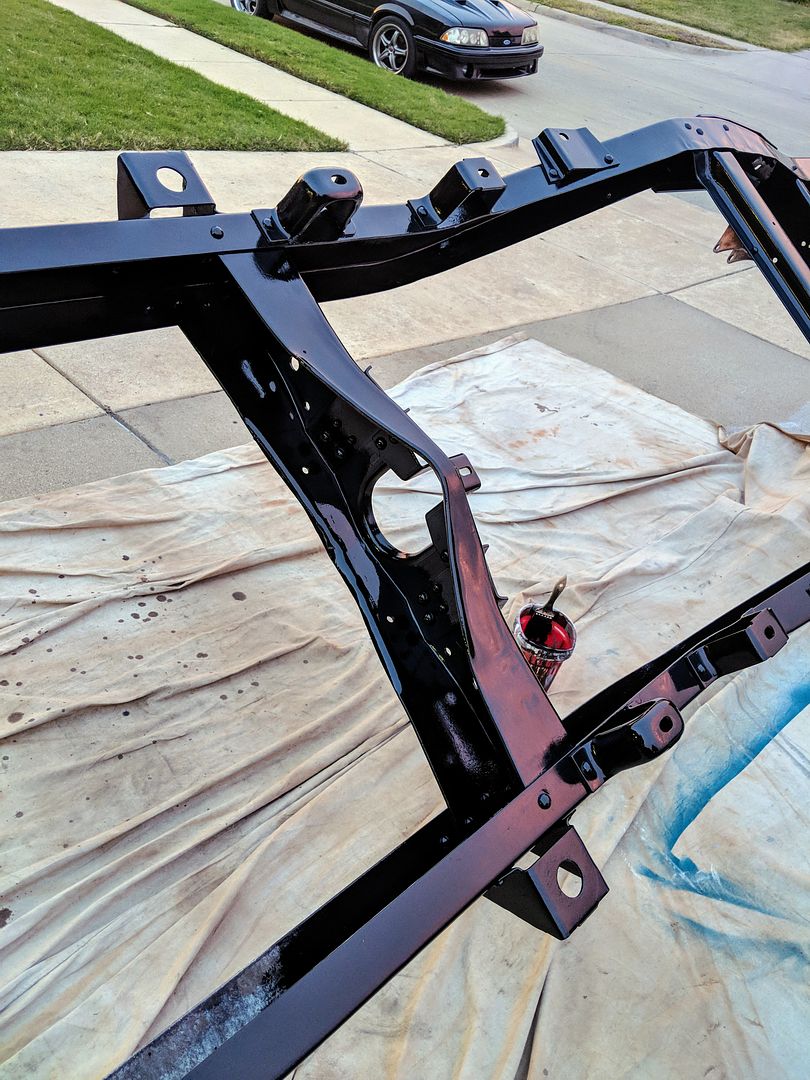 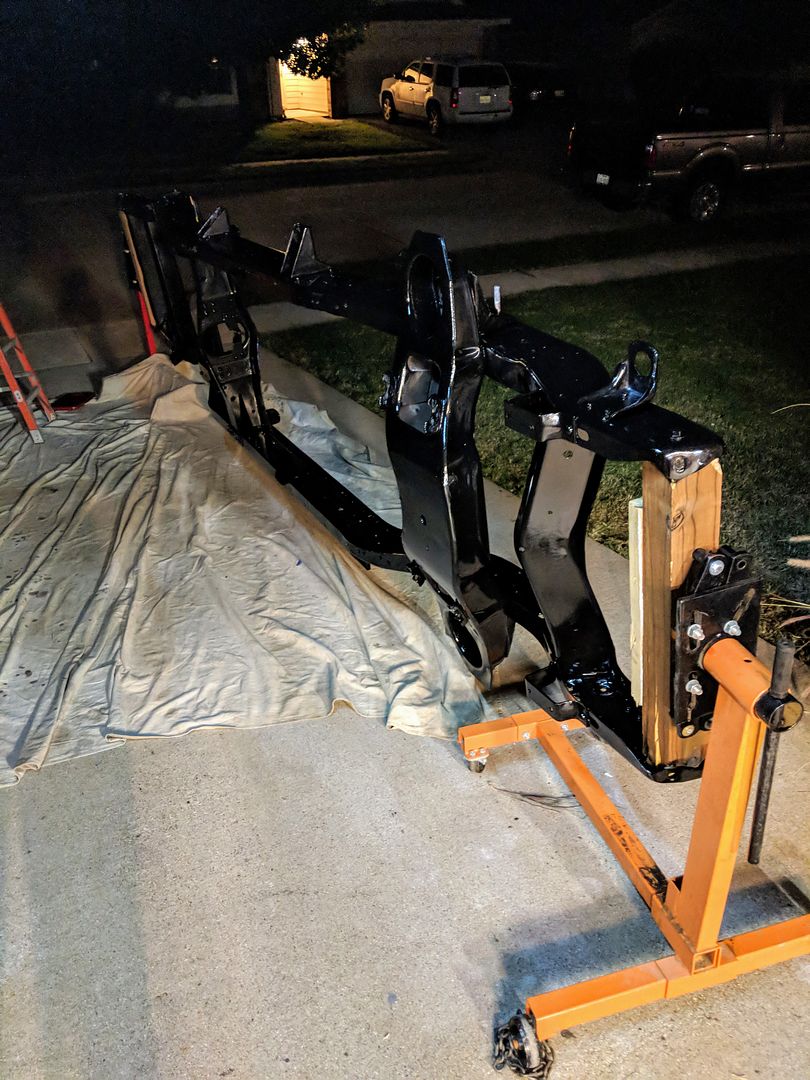 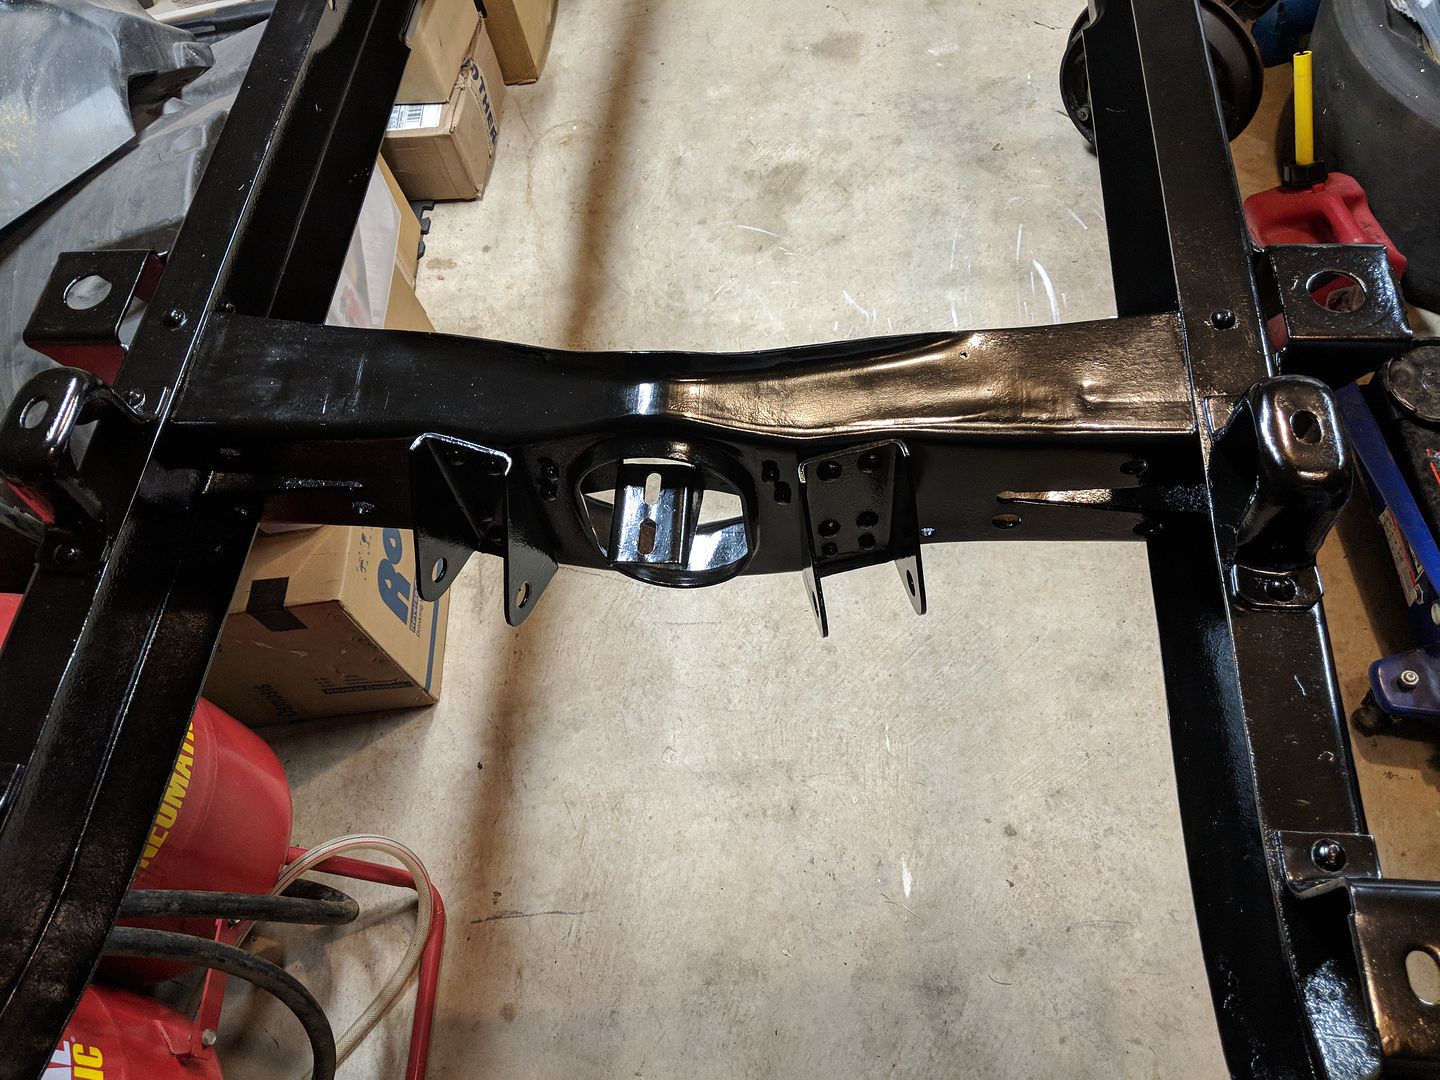 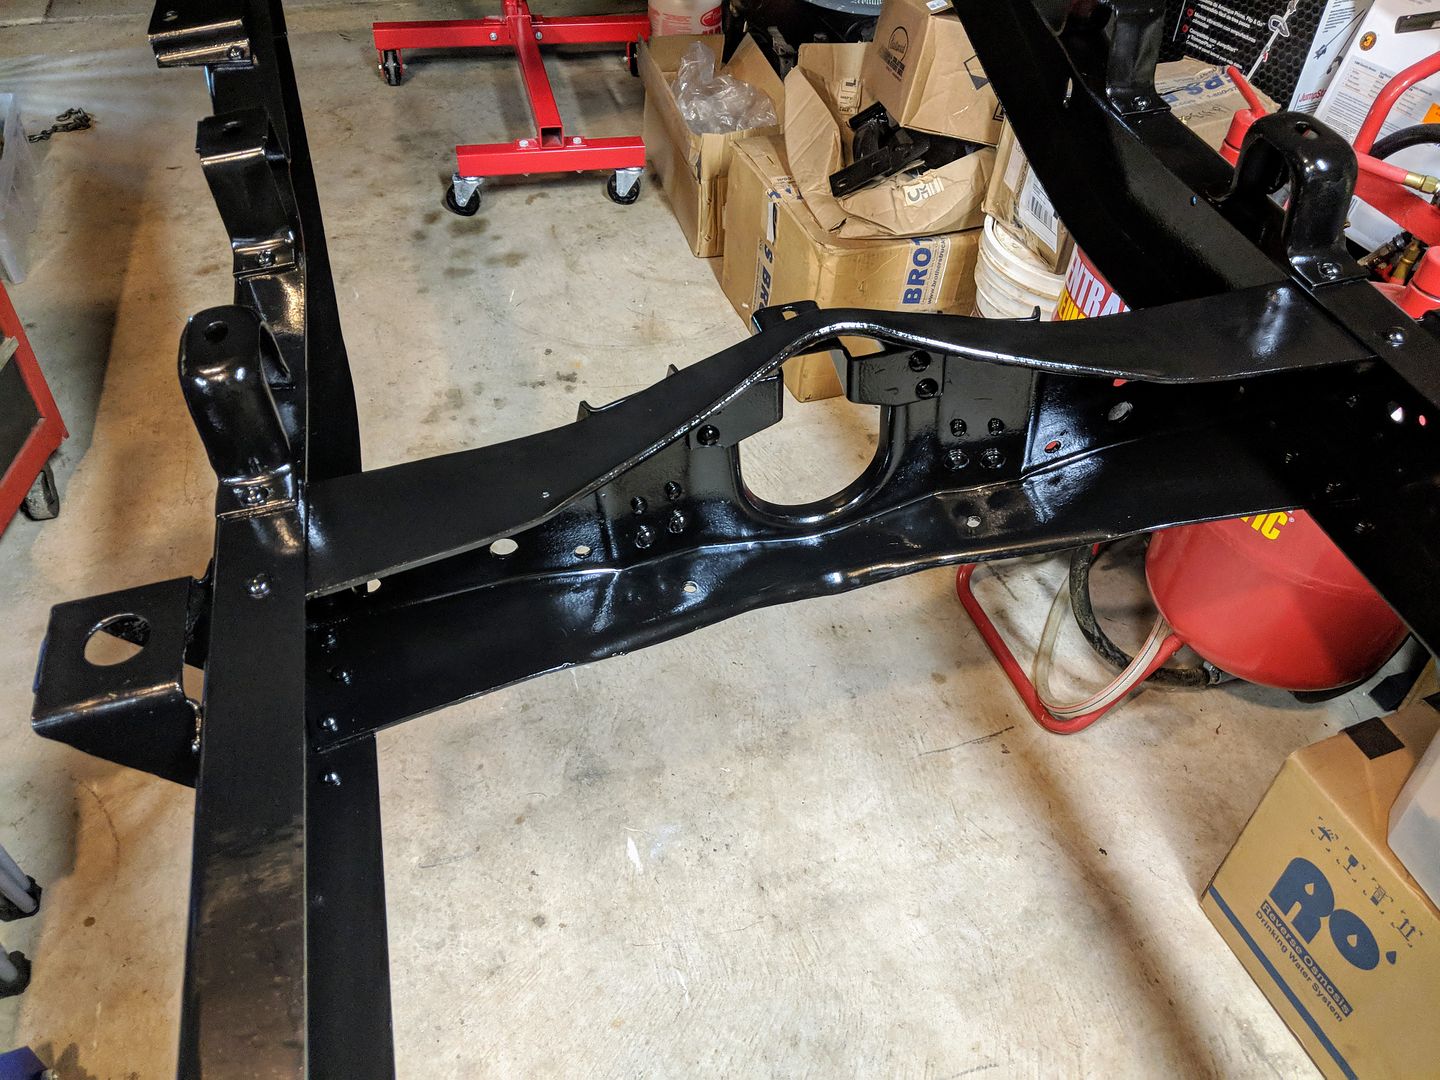 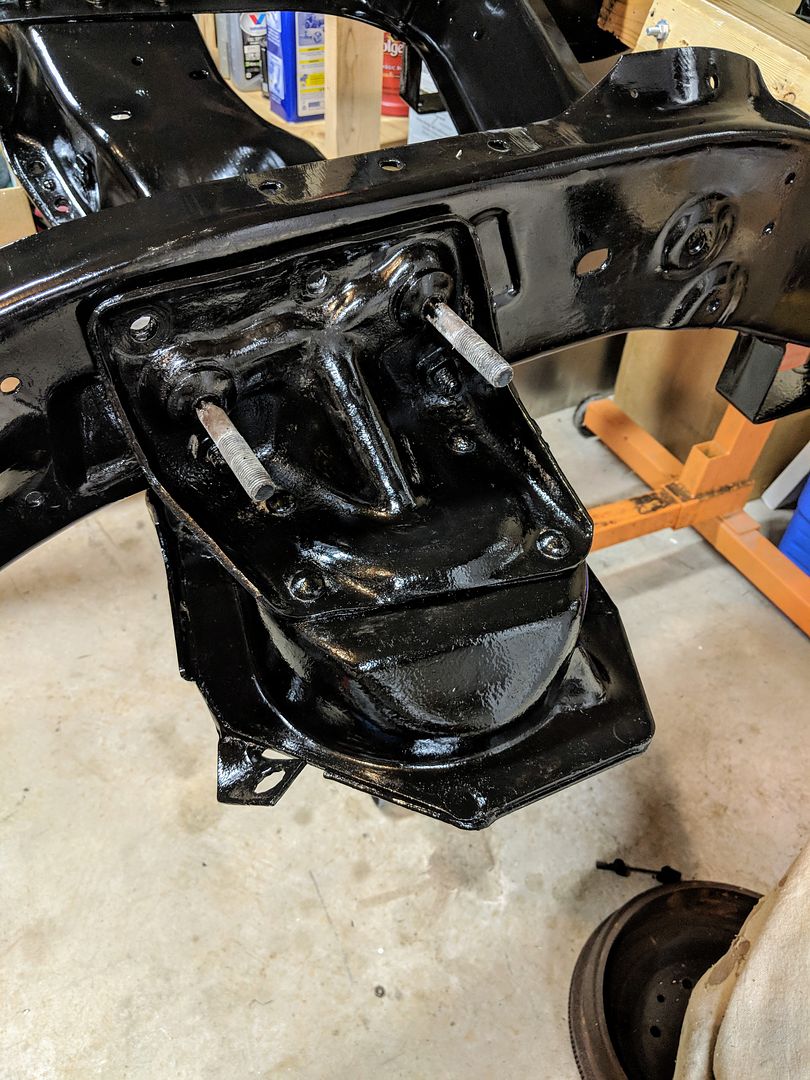 .
__________________
TA_C10 Stage 1 build - http://67-72chevytrucks.com/vboard/s....php?p=8333444 "It's only money". 
Last edited by TA_C10; 10-07-2019 at 10:54 PM. |
|
|

|
|
|
#32 | |
|
Registered User
Join Date: Jun 2018
Location: Texas
Posts: 1,353
|
Re: TA_C10: Stage 1
Quote:
Yeah in stage 2 I plan to box in the frame in a few select areas and when i do that I will get me a 220 volt welder so I can weld on the frame. I just don't trust my current welder to weld the frame. Experience bing the biggest factor. The Vulcan 140 might be able to do it, but I will wait.
__________________
TA_C10 Stage 1 build - http://67-72chevytrucks.com/vboard/s....php?p=8333444 "It's only money". 
|
|
|
|

|
|
|
#33 |
|
Registered User
Join Date: Jun 2018
Location: Texas
Posts: 1,353
|
Re: TA_C10: Stage 1
Progress Update: Still moving along with suspension.
Got the control arms and trailing arms skinned and painted. Seems like this process takes forever. Keep finding parts that need sanding, cleaning, POR... After the POR metal prep: Had to repair one of the trailing arms. The Vulcan 140 seemed to weld this up fine with the heat just right. Used other frame pieces I cut off to get the welder settings right.
__________________
TA_C10 Stage 1 build - http://67-72chevytrucks.com/vboard/s....php?p=8333444 "It's only money". 
Last edited by TA_C10; 10-07-2019 at 11:06 PM. |
|
|

|
|
|
#34 |
|
Registered User
Join Date: Jun 2018
Location: Texas
Posts: 1,353
|
Re: TA_C10: Stage 1
Assembly of new MOOG suspension parts. Got the axle cleaned up and POR15.
.
__________________
TA_C10 Stage 1 build - http://67-72chevytrucks.com/vboard/s....php?p=8333444 "It's only money". 
Last edited by TA_C10; 10-07-2019 at 11:18 PM. |
|
|

|
|
|
#35 |
|
Registered User
Join Date: Jun 2018
Location: Texas
Posts: 1,353
|
Re: TA_C10: Stage 1
Here are a bunch of pics of more suspension parts being installed. Pretty standard. Everything installed as designed. MOOG suspension parts and Brothers Trucks.
Let me know if you guys can see the pics, using a new way to post. These new spindles, rotors, calipers, pads all came assembled and ready to bold on. I removed the calipers and painted everything first then installed. 2.5" drop spindles. In my last post those springs are 2" drop springs all apart of the brothers kit. Converted from drum to disc up front. Boy are they tight in those 15" rims, whew...  Here are a few pics of the rear. 2" lowering blocks, 3.5" lowering springs. Or is it 4" lowering springs and 1.5" blocks.... I can't remember... The c-notches weren't necessary to just drive but if I ever load the truck up(which I plan to use as a daily and it may haul dirt a couple times) the notch allows for full travel. I'm going to have to cut some of those threads off, they are pretty long. I suppose the new ubolts are universal for different size blocks.
__________________
TA_C10 Stage 1 build - http://67-72chevytrucks.com/vboard/s....php?p=8333444 "It's only money". 
Last edited by TA_C10; 10-07-2019 at 11:26 PM. |
|
|

|
|
|
#36 |
|
Registered User
Join Date: Jun 2018
Location: Texas
Posts: 1,353
|
Re: TA_C10: Stage 1
New steering gear, came from rock-auto, got a heavy duty unit instead of standard. Also upgrading to power steering with the new LS going in. I replaced all the tie-rods, and their components as well. Only thing original is the long steering rod and the idler arm bracket.
New trailing arm bushings, these were not easy to replace until i figured out the proper tools to use...  My posts are very pic heavy, I always like pictures to reference 
__________________
TA_C10 Stage 1 build - http://67-72chevytrucks.com/vboard/s....php?p=8333444 "It's only money". 
|
|
|

|
|
|
#37 |
|
Registered User
Join Date: Jun 2018
Location: Texas
Posts: 1,353
|
Re: TA_C10: Stage 1
More progress.
Front and rear sway bars installed. Brothers kit. Rear shock relocation brackets installed. CPP via the Brothers kit. New drop shocks installed on all 4. Brothers kit. Having help from a buddy would have made the job a lot easier but I managed. A neighbor came over and helped me with the front. Basically you just assemble the whole thing. Mock it up. Mark your holes. Drill. Install. But of course I got upgraded sway bar up front, and rear never existed. So the front stock sway bar brackets had to be removed as they didn't work anymore. So that meant cross cutting the rivet heads, air hammer to pop the rivets out, then expanding the holes with a step bit for the new bolts, and all over my new POR15 job. Not that I was too worried about that but wish I mocked it up before I painted.... Same goes for the rear shock relocator brackets. Wish i knew i needed those before I painted. So I ended up using some VHT gloss black enamel(matches the POR15 pretty good) on the holes I cut. The rear shock re-locator brackets were same, pop the rivets out, expand holes, paint for rust. Not much to them really. Rear shock locator bracket next to the old bracket. Lower shock relocator bracket next to original: Installed: I didn't like the bolts that came in the relocator kit for the lower shock mount. It was just a bolt. So I bought 1 new lower shock bolt and reused one of the original ones still in good shape. They seemed to fit and setup the angles a lot better. Also had to enlarge the bracket hole to accept the new bolt. When it came to the rear sway bar install, the kit came with these brackets to attach the poly mount. It mounts under the trailing arms. Well the dang holes didn't line up right to be on one side of the trailing arm nor did they line up right to put one hole on one side of the arm and the other hole on the opposite side. So I found a solution. I enlarged the holes so the bolt had enough room to slide apart to get the bolts installed on opposite sides of the trailing arms. Used a double washer deal to keep the bolt from sliding through the enlarged holes. The nuts on top of the trailing arm lips was far enough away I could get a wrench on the nuts too. I had to use the "small space" washers too, worked out good. And this is the only pic I got of the front sway bar. Sorry guys, spoiler alert, sneak peak of my next post coming soon... 
__________________
TA_C10 Stage 1 build - http://67-72chevytrucks.com/vboard/s....php?p=8333444 "It's only money". 
|
|
|

|
|
|
#38 |
|
Senior Member
Join Date: Aug 2005
Location: tulsa OK
Posts: 3,070
|
Re: TA_C10: Stage 1
so cool, I love the driveway builds and the LS.. keep up the great work
__________________
Twin Turbo 64 nova project http://67-72chevytrucks.com/vboard/s...d.php?t=669163 68 camaro LS2/T56 vs. 06 GTO build http://67-72chevytrucks.com/vboard/s...d.php?t=516310 project incredible hulk build http://67-72chevytrucks.com/vboard/s...d.php?t=269754 project big red build http://67-72chevytrucks.com/vboard/s...d.php?t=342165 project "blue ray" build http://67-72chevytrucks.com/vboard/s...d.php?t=405465 |
|
|

|
|
|
#39 |
|
Registered User
Join Date: Jun 2018
Location: Texas
Posts: 1,353
|
Re: TA_C10: Stage 1
Thanks to 70shortfleet I have a beautifully rebuilt auto steering column. Excellent quality and can't wait to install..!!!
 I'm pretty tall for this truck so he shortened it 2 inches for me. Added cruise control for my LS swap. Tilt column. And painted it gloss black 
__________________
TA_C10 Stage 1 build - http://67-72chevytrucks.com/vboard/s....php?p=8333444 "It's only money". 
|
|
|

|
|
|
#40 |
|
Registered User
Join Date: Jun 2018
Location: Texas
Posts: 1,353
|
Re: TA_C10: Stage 1
Cab and hood went off to blaster. I just couldn't see my trying to use a wire wheel in all those crevices to get all the seam sealer out and trying to get everything clean for paint. Too many different nooks and crannies, angles and hard to reach areas... Sand blasting hit the wallet pretty hard but well worth it for the cab IMO.
I did the hood since it was in need of rust repair as well and sanding the bottom of that hood looked daunting. I may have him do the doors and other parts too later but everything else is pretty easy to sand down easily myself I think. And I got new guns to shoot paint myself... Grabbed from Summit. 3 tips, 1.8, 1.5, and 1.3
__________________
TA_C10 Stage 1 build - http://67-72chevytrucks.com/vboard/s....php?p=8333444 "It's only money". 
|
|
|

|
|
|
#41 |
|
Registered User
Join Date: Jun 2018
Location: Texas
Posts: 1,353
|
Re: TA_C10: Stage 1
I decided to sell my rear gas tank that came with the truck. Previous owner installed a top mount poly tank universal from summit. It was foam baffled and had a gravity feed supply lines at bottom of tank. It just wasn't what I wanted so I sold it on facebook MP and got enough to justify a new blazer tank from LMC. Got the side fill and it fits perfect. I'm am going to install a new TANKS INC PA-4 sending unit and walbro 255lph in tank pump. It will have the rollover valve and return line coming from a corvette filter/regulator. I will use the stock fuel sending unit and vent the tank using the LMC tank vent port.
While I was mocking it up, I realized I wasn't going to have to notch my frame like lots of other folks have to do. This 1970 frame just worked out I guess.. I also didn't want to use the LMC tank straps provided. I saw the boyd tanks use a bracket with nuts welded to them and you slide that on top of the frame rail and run the bolts from underneath. Pretty simple I thought so I built my own using a piece of 14awg sheet strip I found at ACE hardware. Measured out the holes, drilled the frame and then templated my strips and drilled those holes. Welded nuts over the holes and painted them up. Works great and I don't have those crap tank straps!! Boom. These are the brackets I made. This is where they install at in the frame, bolts I run up from beneath the frame. I thought they would be difficult and slide around but they are heavy enough they don't slide around and work great. Here it is installed. We will see what it looks like with new bumper installed and lowered.
__________________
TA_C10 Stage 1 build - http://67-72chevytrucks.com/vboard/s....php?p=8333444 "It's only money". 
|
|
|

|
|
|
#42 |
|
Registered User
Join Date: Apr 2018
Location: Sabattus, maine
Posts: 209
|
Re: TA_C10: Stage 1
Looking good
|
|
|

|
|
|
#43 |
|
Registered User
Join Date: Jun 2018
Location: Texas
Posts: 1,353
|
Re: TA_C10: Stage 1
The hood was in pretty bad shape. The previous owner put a 67-68 front grill and hood on this truck. Maybe the whole front clip. So after sandblast, the front part of grill was found to be swiss cheese.... So I figured I would start there with my metal repair, then cab later.
I started by cutting out the swiss cheese and making little repair strips. Here are some various pics of my work as I progressed. Don't rip me, this is my first metal repair of this kind. After a while I figured out the welder polarity was flipped so I corrected that and my welds started getting better and better. I'm still learning   The right side of hood was so long of a cutout I decided to do this with 2 strips. Burned in and ground down. Next strip. I used a piece of paper, used my dirty fingers and traced over the paper to make the hole edges using pressure. Then I cut out the hole in paper with scissors and traced over sheet metal. Then as I ground down the piece to fit, I would make a mark from left to right and would only grind to the mark I made so I could keep track and not grind down too much after it each section fit. I got some zinc weld thru primer from NAPA and was spraying the inside of hood and back of my patch strips before welding. I would let it setup for an hour before I welded the piece in. Here I started filling the 25 holes drilled for chevrolet letters and other trim stuff I guess. You get the idea, I finished up both sides of the hood like this. Took me 2 days... Cab pics coming soon. 
__________________
TA_C10 Stage 1 build - http://67-72chevytrucks.com/vboard/s....php?p=8333444 "It's only money". 
|
|
|

|
|
|
#44 |
|
Registered User
Join Date: Apr 2014
Location: Azle,Texas
Posts: 2,248
|
Re: TA_C10: Stage 1
More great work! Thanks for the high quality pictures, too. You are a brave man, I think I would have let that hood go and hunted for a cleaner one. Looks awesome for sure.
__________________
Brian 1972 C10, "Loyd", LWB to SWB, 5.3, L83/6L80e, 4:11 Tru Trac, Air Ride, VA, DD, 20" Coys, 4 wheel disc, A quick LS swap turned into a 6 year frame off resto-mod. |
|
|

|
|
|
#45 | |
|
Registered User
Join Date: Jun 2018
Location: Texas
Posts: 1,353
|
Re: TA_C10: Stage 1
Quote:
More updates coming soon!!
__________________
TA_C10 Stage 1 build - http://67-72chevytrucks.com/vboard/s....php?p=8333444 "It's only money". 
|
|
|
|

|
|
|
#46 |
|
Registered User
Join Date: Jun 2018
Location: Texas
Posts: 1,353
|
Re: TA_C10: Stage 1
Started working on cab. You can see my previous work on the driver side floor pan repair. Now I am working on finishing that up and all the other work that needs to be done.
Here i'm working on the passenger side floor pan repairs. I used my same method of marking lines on the panel as a stopping point each section I was grinding till it was all just the way I wanted it. Takes a while but the outcome was good. Here is the fit just before I started tack welding. And here we go, starting to tack her in.  My welding skills are getting a little better after changing the polarity on the welder and getting her dialed in from the hood work. My welding skills are getting a little better after changing the polarity on the welder and getting her dialed in from the hood work.And here it is all burned in.  Didn't get any pics of the next big panel but you can see it ground down in the following pics. And I have pics of the crazy little zig zag pieces I burned in and finished the passenger side floor. You can see how I started my tacks, hammered the piece into position, tacked a little more, formed the piece, tacked, formed, etc.
__________________
TA_C10 Stage 1 build - http://67-72chevytrucks.com/vboard/s....php?p=8333444 "It's only money". 
|
|
|

|
|
|
#47 |
|
Registered User
Join Date: Jun 2018
Location: Texas
Posts: 1,353
|
Re: TA_C10: Stage 1
The kick panel was next. It really needed a lot of work to fit between the floor pan and the pillar. I ended up cutting the pillar out because it had some swiss cheese in bad places, but this made it easier to work on the kick panel.
First I cut it to fit and then realized the door side lip was a lot smaller than the original and didn't match up very well so I cut the lip off the old piece and now it fits much better and I have plenty of metal to spot weld to. The back side I filled in too. It was not fitting so I ended up beating the thing into oblivion...  Here is the piece burned in, still need to weld the seam along the floor. I like filling in the floor seams with weld and then using seam sealer over the top of them. And here is the outside. All burned in. I started welding up the vertical seam as you can see but I think I will stop there and just fill in the rest with seam sealer as its getting hard to weld up in that cavity. Any thoughts on my methods? This is my first time so opinions are welcome. .
__________________
TA_C10 Stage 1 build - http://67-72chevytrucks.com/vboard/s....php?p=8333444 "It's only money". 
Last edited by TA_C10; 02-10-2019 at 03:35 PM. |
|
|

|
|
|
#48 |
|
Senior Member
 Join Date: Jun 2002
Location: Murray, Kentucky
Posts: 3,594
|
Re: TA_C10: Stage 1
Are you using a .030 or .023 wire? When I started using .023 wire I stopped having so many burn-thru issues.
This reminds me of my first blazer, I almost cried once I realized how bad the rust and bondo really was! Good luck, Rg
__________________
Roger '68 Short step - https://67-72chevytrucks.com/vboard/...d.php?t=849675 '69 ('70?) 2wd Blazer '70 GMC Jimmy 2wd '73 Firebird - https://67-72chevytrucks.com/vboard/...d.php?t=853203 |
|
|

|
|
|
#49 |
|
Senior Member
 Join Date: Feb 2014
Location: Erie Colorado
Posts: 1,022
|
Re: TA_C10: Stage 1
You sure are rocking and rolling on that truck
 Thats a ton of work there, but you'll be happy knowing what is really under it now. Looking good Thats a ton of work there, but you'll be happy knowing what is really under it now. Looking good
__________________
1971 LSX "Bonnie" build thread http://67-72chevytrucks.com/vboard/s....php?p=8026381 paypal is curtbarton1971@yahoo.com |
|
|

|
|
|
#50 | ||
|
Registered User
Join Date: Jun 2018
Location: Texas
Posts: 1,353
|
Re: TA_C10: Stage 1
Quote:
 Quote:
Thanks guys!  And stay tuned, more pics and work coming real soon! And stay tuned, more pics and work coming real soon!.
__________________
TA_C10 Stage 1 build - http://67-72chevytrucks.com/vboard/s....php?p=8333444 "It's only money". 
|
||
|
|

|
 |
| Bookmarks |
|
|