
|
|
|
 02-11-2012, 12:18 AM
|
#1 |
|
Registered User
Join Date: Jun 2010
Location: Oklahoma City, OK
Posts: 1,513
|
Re: 1965 Suburban Resto-Rebuild
That's not a bad evening at all, I just wondered around ours in circles wondering what to do or not to do...

__________________
1958 Chevy 1 ton dually 4X4 dump/flat bed My build thread 1966 "Not-So-Original" Chevy Custom Trim Suburban My Time-Killing Project Truck 1966 GMC Extended cab 1 1/4 ton 4X4 My Son's build thread |

|

|
|
02-11-2012, 10:55 PM
|
#2 | |
|
Registered User
 Join Date: Jan 2012
Location: Antioch, IL
Posts: 418
|
Re: 1965 Suburban Resto-Rebuild
Quote:
Well.. I planned on blasting all the heater parts tonight--didn't happen.. I did get a new master cylinder and brake booster as I think I'll go ahead and go with the 1971 setup-but will possibly get the adapter that I believe CaptainFab sells.. I did some more work on the frame after cleaning stuff up. I broke out the welder and fixed some of the grinding grooves I put in the rear frame area while hacking off the old farmer hitch/receiver. I had to beef up the far right rear body mount as it was the only one with too much rust which ate away at it. I did beef up the drivers side/middle mount as well which was getting a little thin. I need to get a burr bit to clean them up and I think I'll add some more weld to make them nice and strong again. I then tended to the trailing arms which had some garfs in them from jacks and jackstands beating them up over the years. I wrapped up by painting the new backing plates for the front brakes.. ..unfortunately it has gotten cold here again and with snow on the ground--it puts my plans on hold to get the chassis outside for a steam bath.. ughh.. 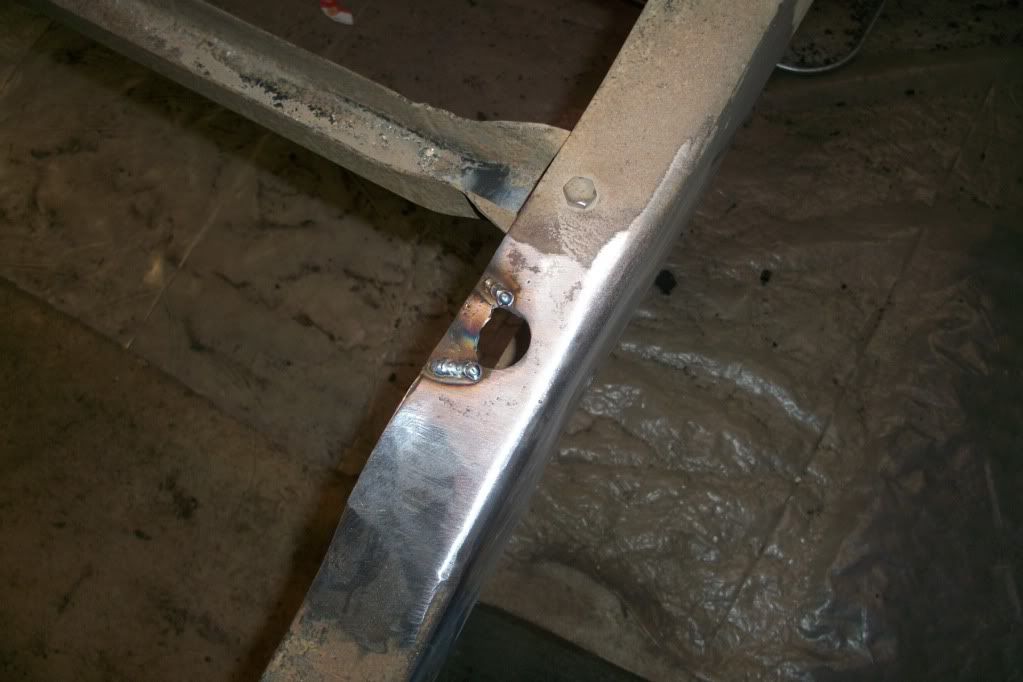 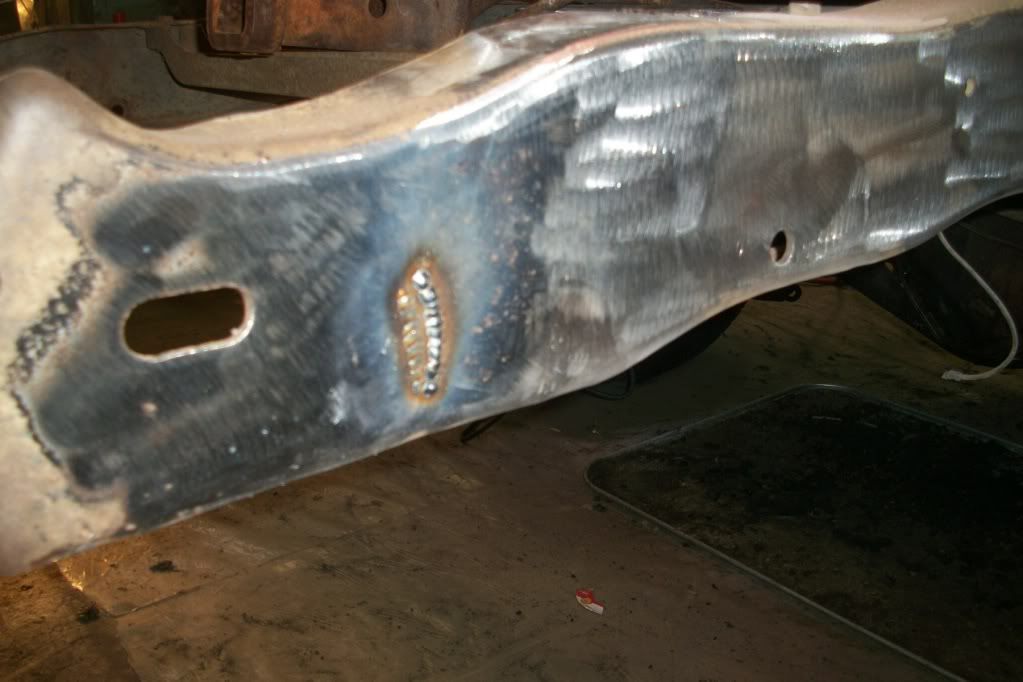 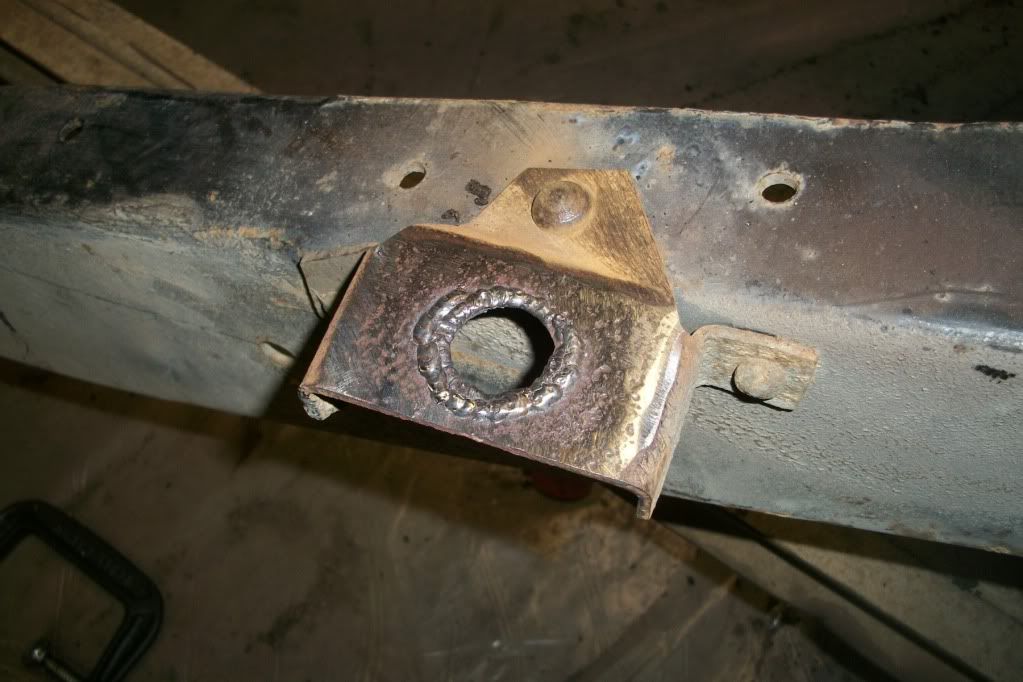
|
|
|
|
|
|
02-12-2012, 11:45 PM
|
#3 |
|
Registered User
Join Date: Jan 2012
Location: Antioch, IL
Posts: 418
|
Re: 1965 Suburban Resto-Rebuild
..no pics after today..
I cleaned up the frame/body mount holes in the rear and smoothed the welds.. I also used a friends blast box and got all the old paint off of the heater box. I'll be painting it black tomorrow and reassembling it this week.. I may start busting apart the chassis tomorrow.. maybe.. :-) |
|
|
|
|
02-14-2012, 12:28 AM
|
#4 |
|
Registered User
Join Date: Jan 2012
Location: Antioch, IL
Posts: 418
|
Re: 1965 Suburban Resto-Rebuild
Tonight.. I got the rear end out from under the chassis.. I didn't disconnect the front of the parking brake cables, so those are still hooked up through the backing plates. I will finish removing the rear end tomorrow and begin disassembling the front suspension. Everything came apart nice and easy with some work from the MAP torch and some PB Blaster (no air tools late at night on a week night.) The passenger side trailing arm forward bolt was a M-----F----R.. The hacksaw took care of that though and the trailing arms are free.. I'll get pics tomorrow..
I also painted up all the heater box pieces.. I'll possibly re-assemble tomorrow--I'm considering getting the heater core checked--just to ensure there aren't any leaks that weren't apparent before.. |
|
|
|
|
02-15-2012, 12:02 AM
|
#5 |
|
Registered User
Join Date: Jan 2012
Location: Antioch, IL
Posts: 418
|
Re: 1965 Suburban Resto-Rebuild
Okay, so here is where I'm at as of tonight.. I have the suspension completely off and out from under the frame.. It was pretty straight forward getting everything undone--but prior to getting going on making a mess and lots of noise for my neighbors... I observed something strange last night. If you look at the first picture, does anything look out of wack?? I noticed the third cross member from the rear end of the frame is unevenly placed. If you look at the pictures, it's pretty obvious.. Yup- the frame was sitting level from side to side on the tires when this first picture was taken.
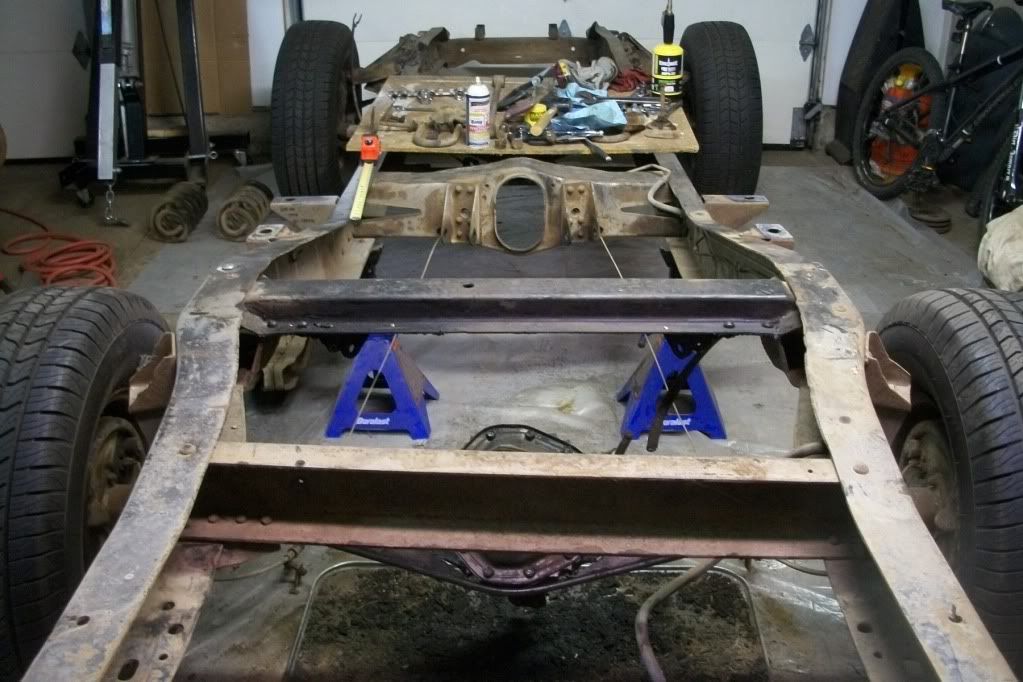 you see in this picture, on the drivers side it is located approximately 14 1/8" behind the next forward x-member 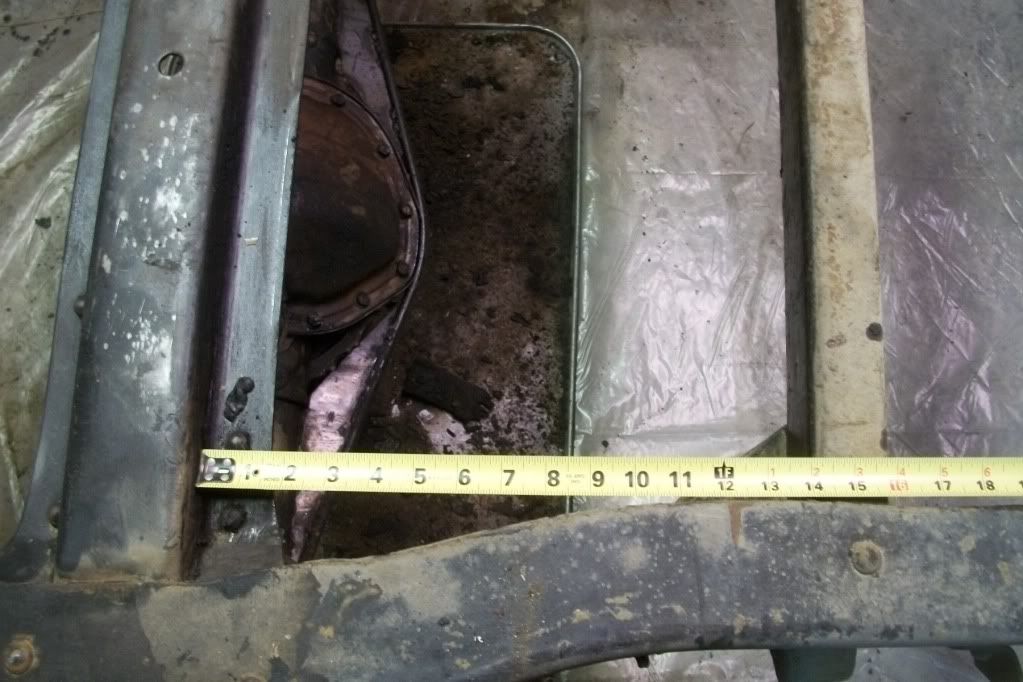 you see in this picture, on the passenger side it is located approximately 15 1/8" behind the next forward x-member 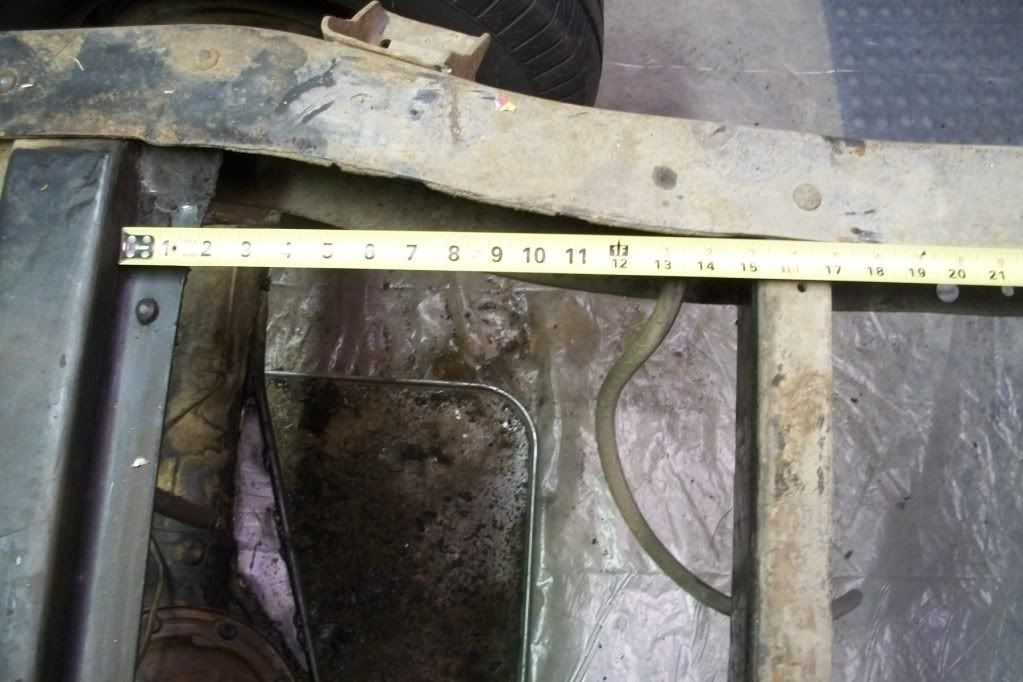 I checked from the tail edges of the frame, and all the other cross members are evenly spaced, but this one is off an inch or so from the drivers to passenger side.. Is there a reason for this? I probably won't straighten it if it was merely a build flaw--as nothing bolts to it except the panhard bar on the one end.. Just kinda curious. this picture is just taken for reference... or for the sake of before-after shots.. 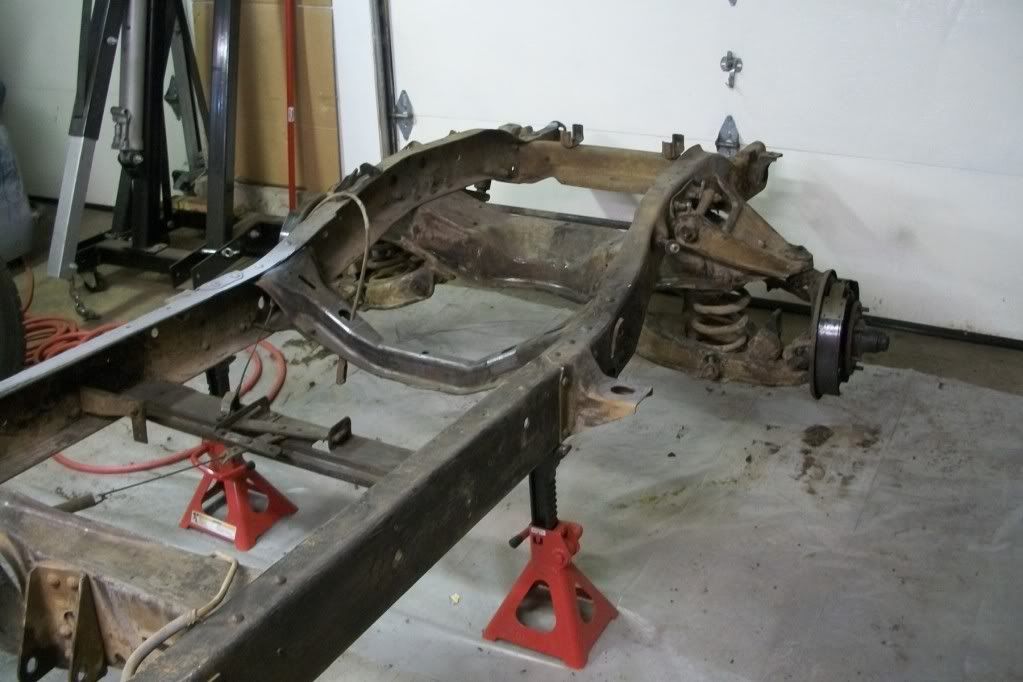 crappy picture of the passenger side 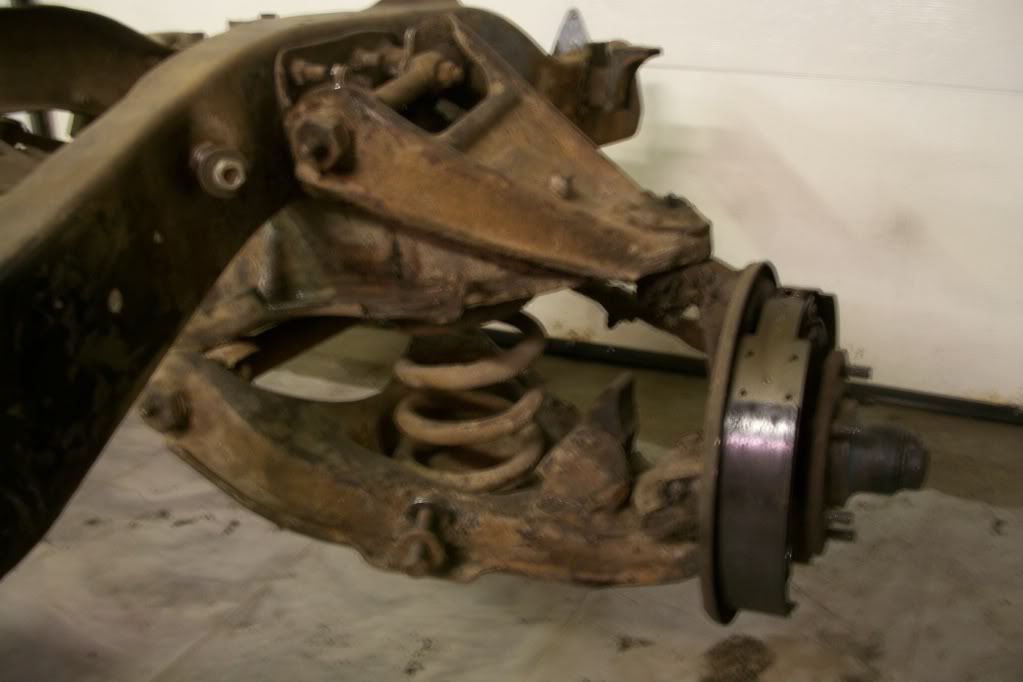 crappy picture of the forward passenger side 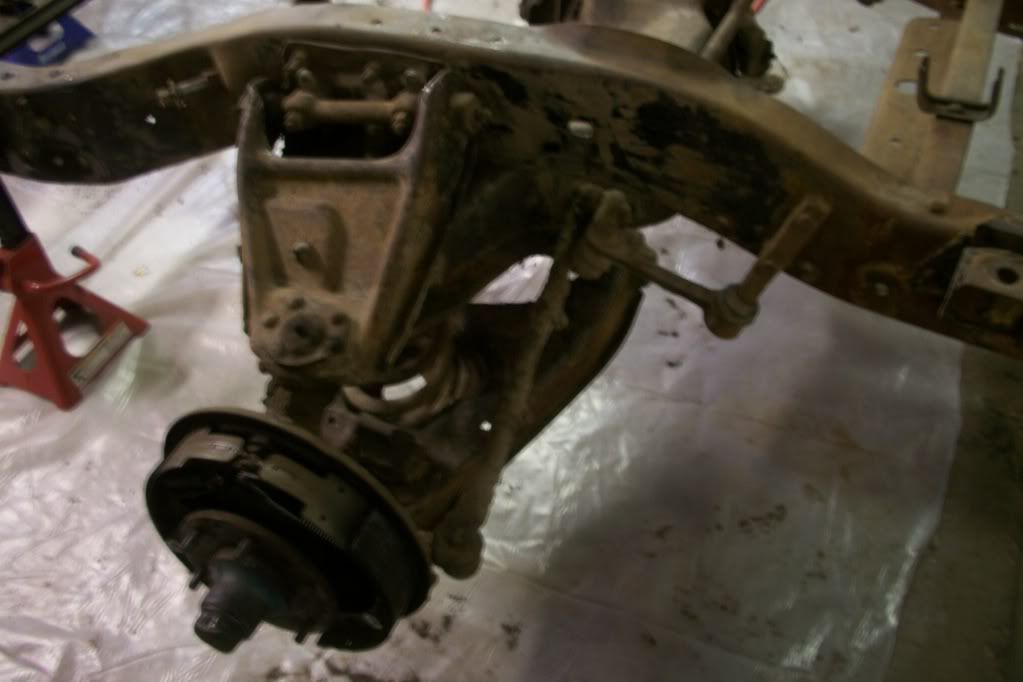 I started hammering away on the drivers side--and working fast to try and get done making lotsa racket for the neighbors..yeah--I try to give them courtesy by not hammering or running my impact late at night--past 9:00pm...  overhead view of the drivers side control arms.. just for reference... 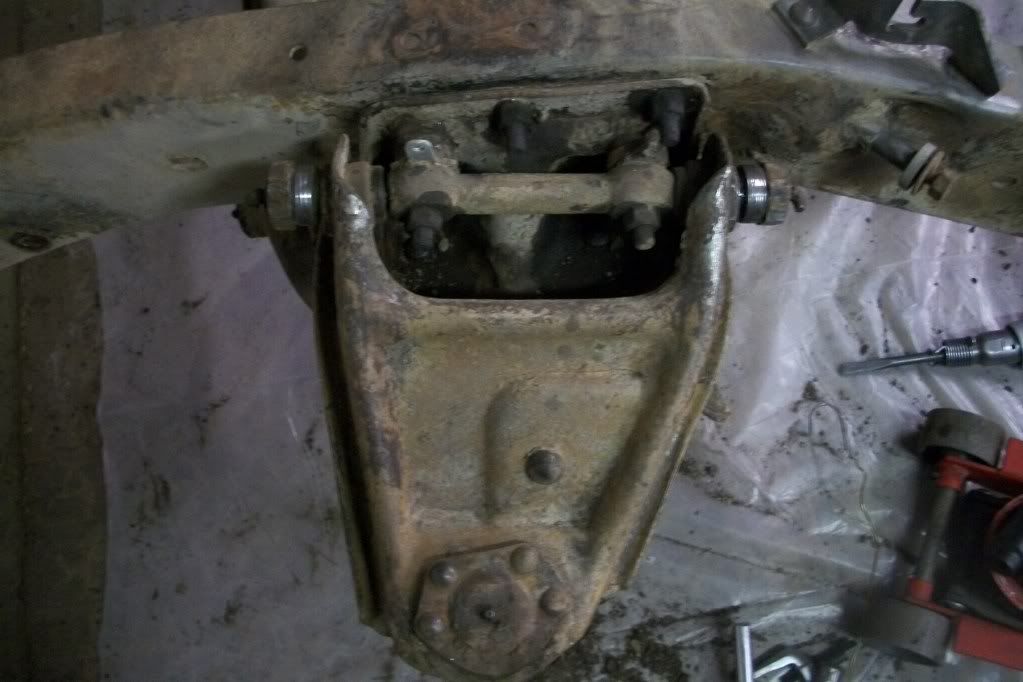 close up with flash on drivers side.. 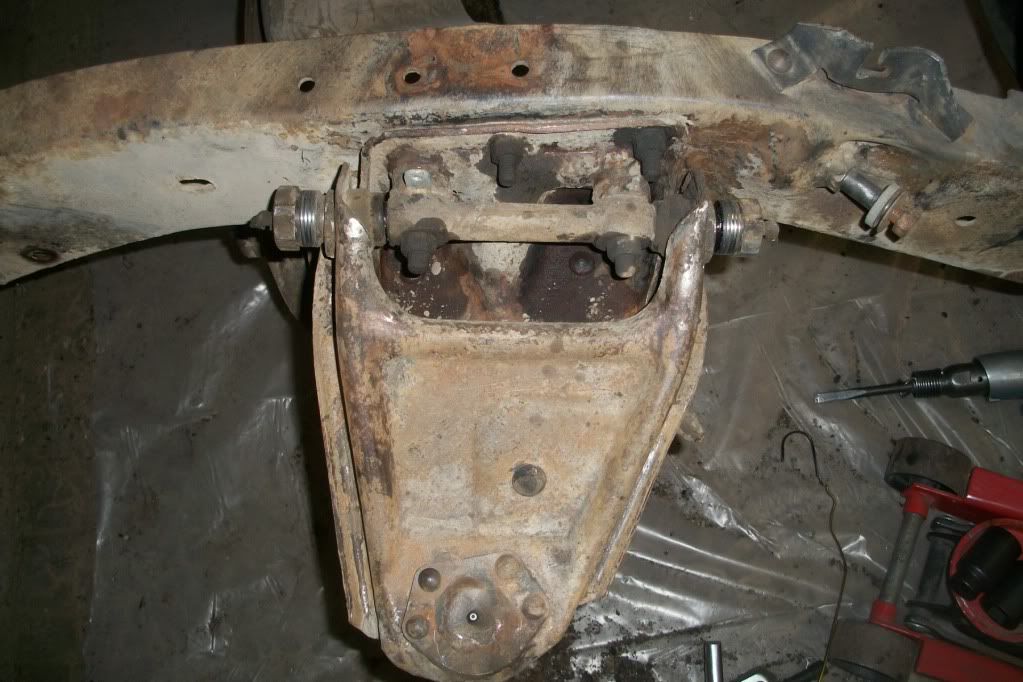 closER up.. 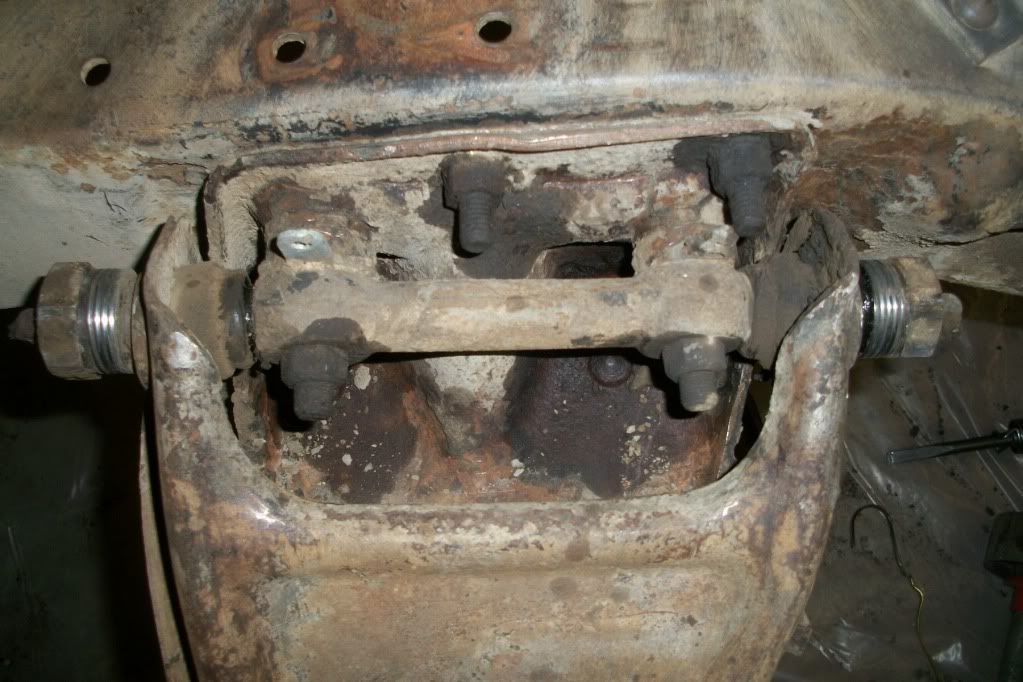 drivers side was done.. passenger side is coming apart.. 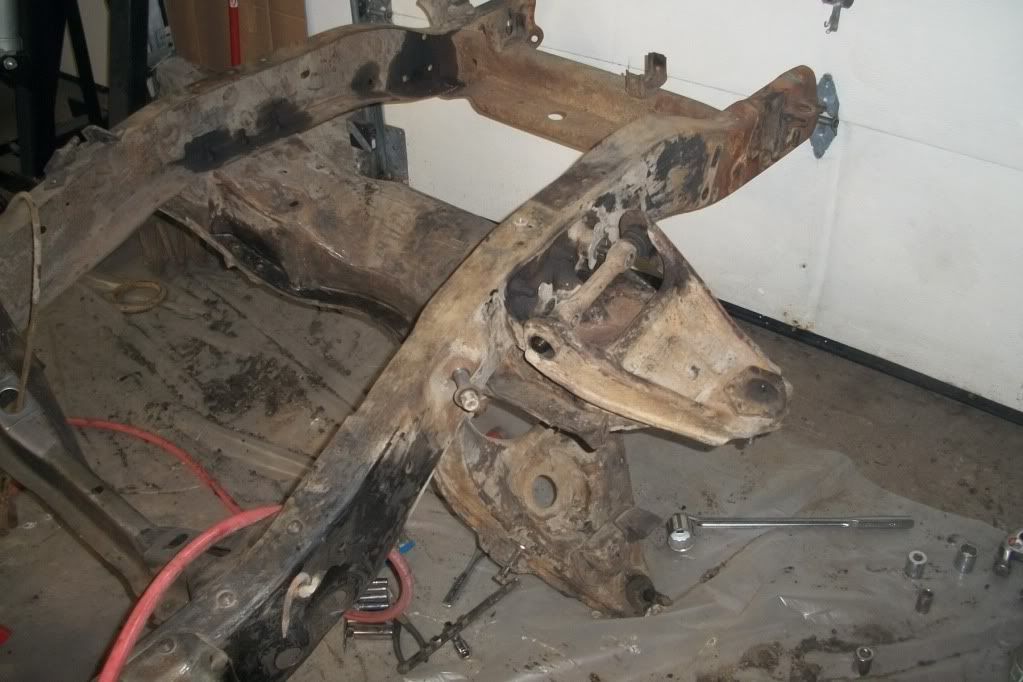 passenger side coming apart.. just for reference.. 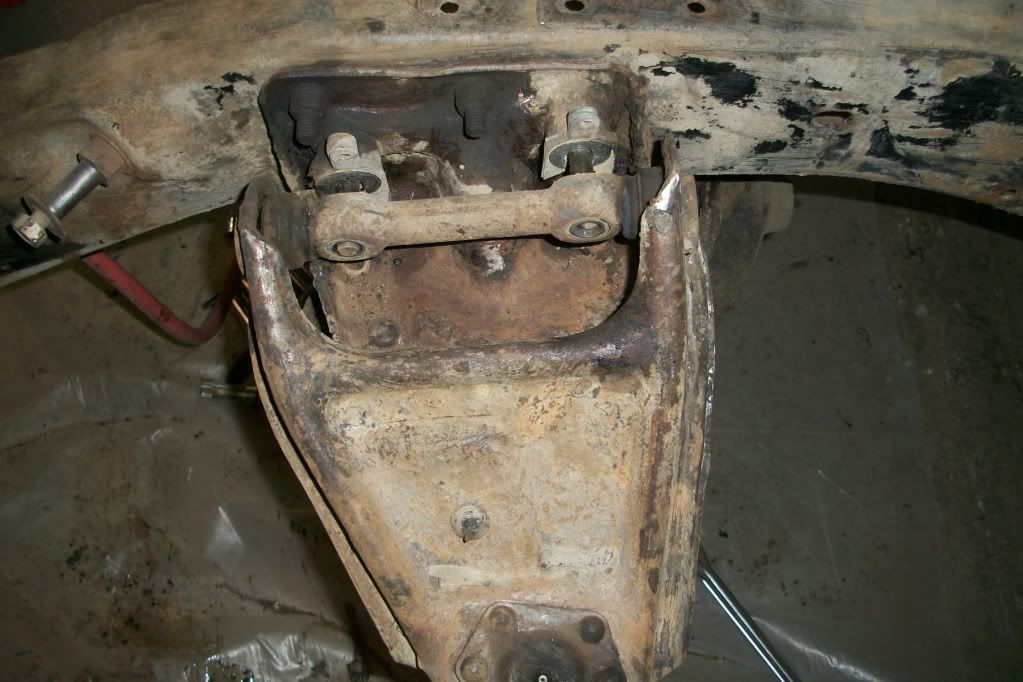 passenger side showing three spacers vice one for each on the drivers side. 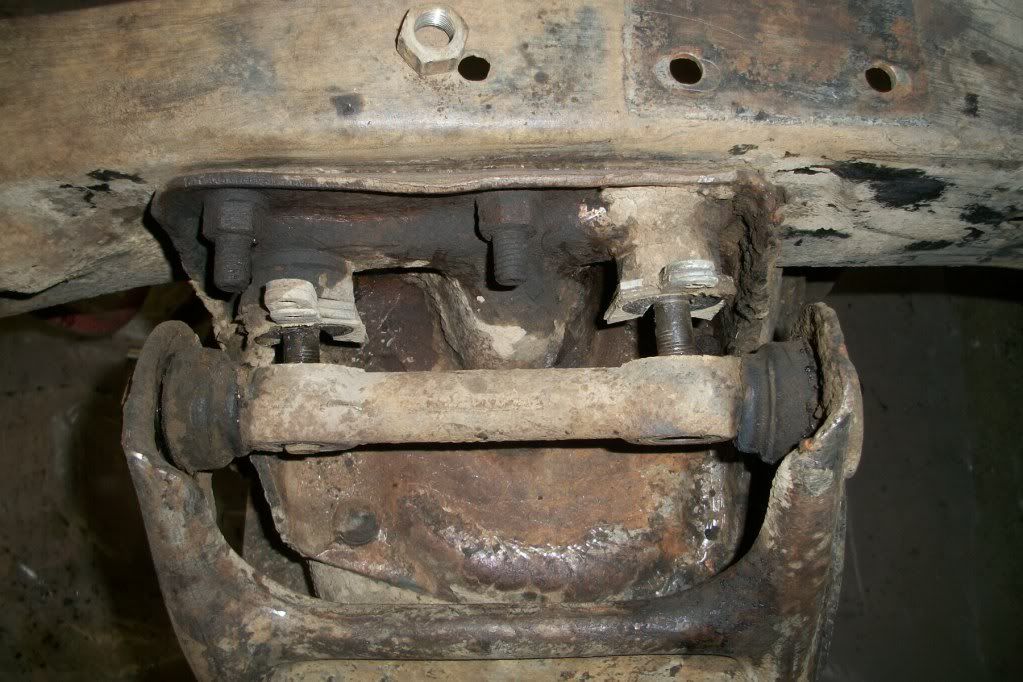 THIS was the drivers side front coil spring.. Guess someone along the line put the quick lift piece in there after the coil spring had broken at the bottom coil...niiice.. 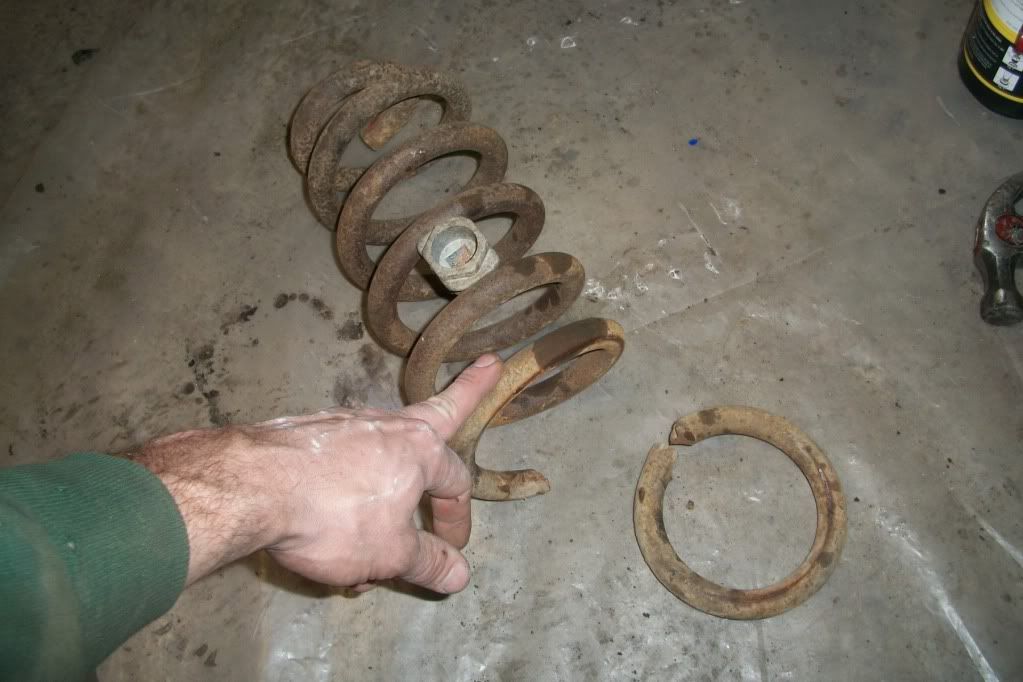 front cross member out... Just needs to be cleaned up really good.. 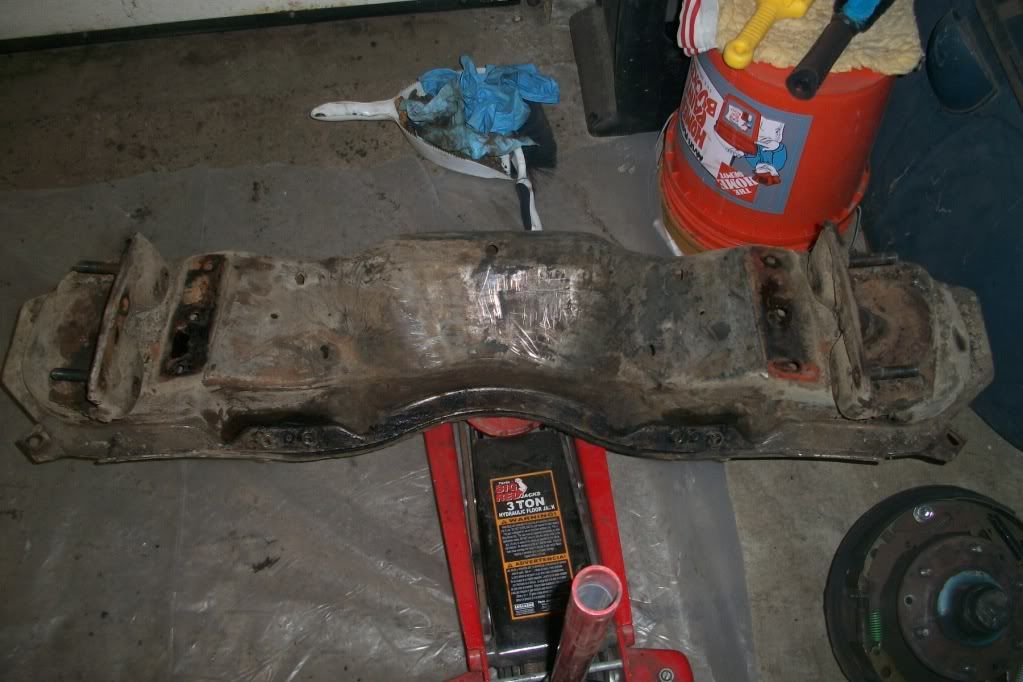 here's the rear axle.. Showing the lovely brace work done some time in the past.. it'll be coming off. 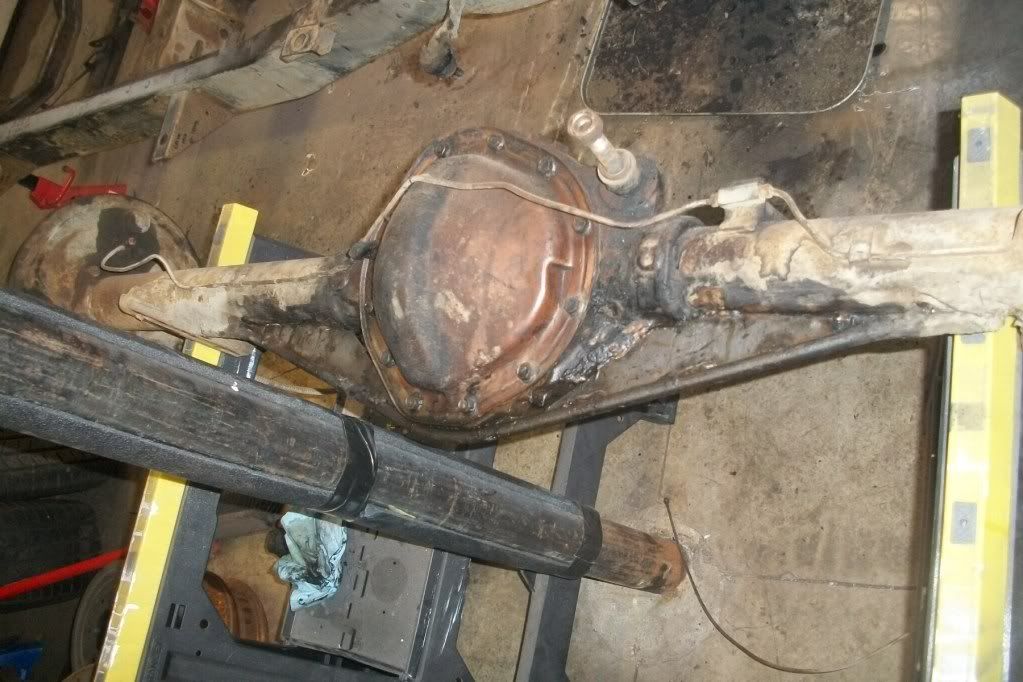 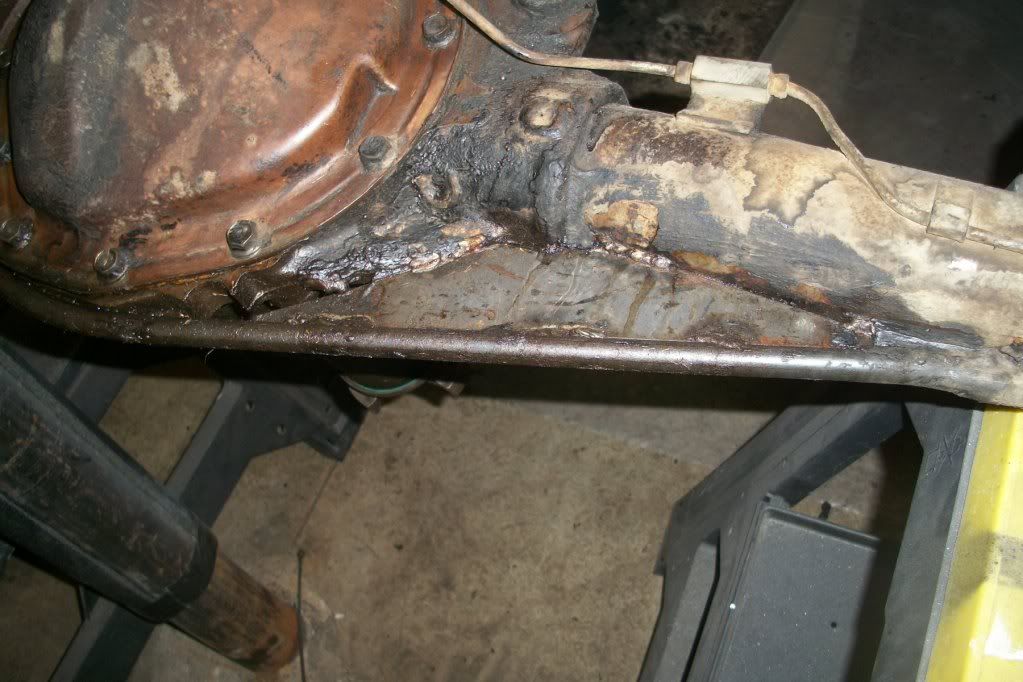 anyone need some extra springs? Howabout drum brake front assembly's with spindles?? 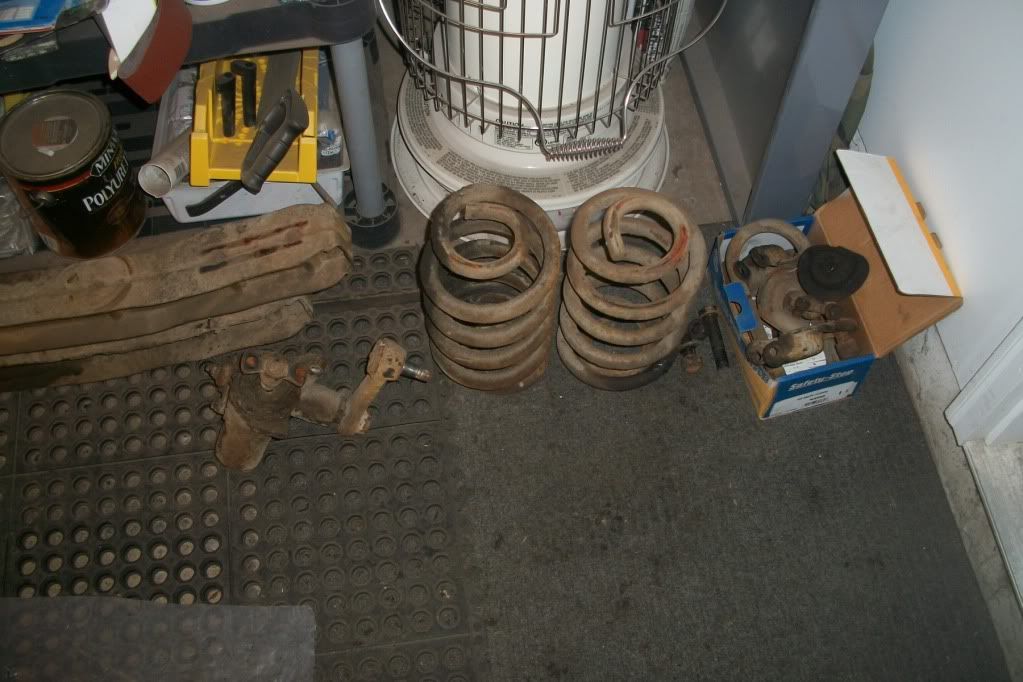 and.. here's the bare frame... 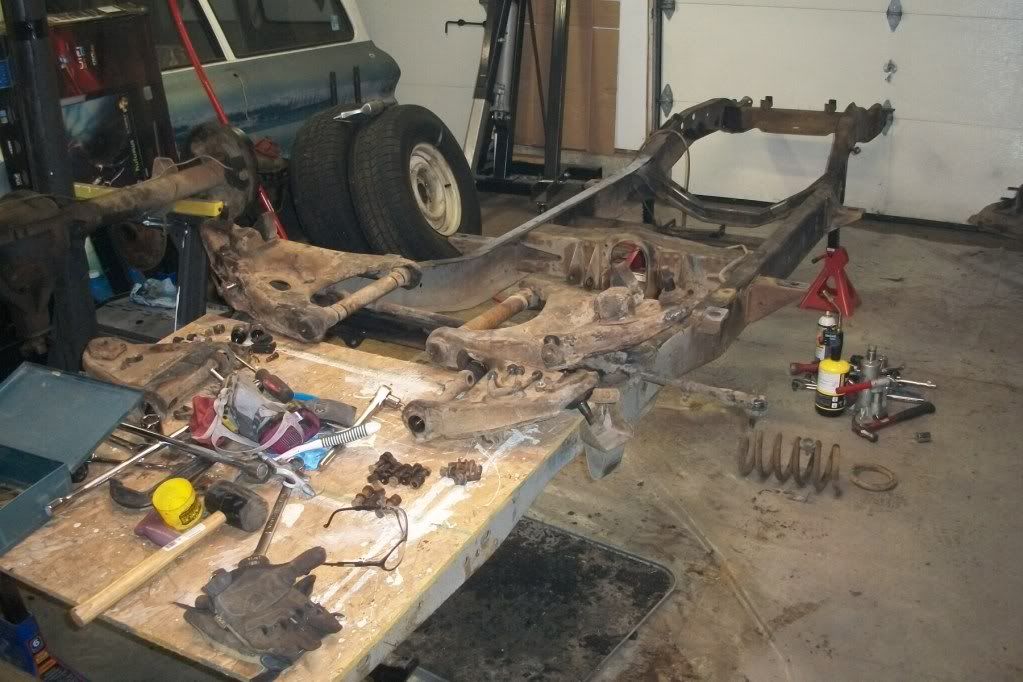 I have some sandblasting do to on the control arms and I have to get the '71 upper and lower ball joints for the front disk spindles. Lots of cleaning now at this point. I'm still waiting on my rear axles from ECE.. And, my rear HD lowering springs are on the way from CPP... all torn apart, now gotta get it all pretty to get put back together.. Last edited by hemifalcon; 02-15-2012 at 12:27 AM. |
|
|
|
|
02-15-2012, 12:15 AM
|
#6 |
|
Registered User
Join Date: Dec 2010
Location: livingston co.mi
Posts: 2,452
|
Re: 1965 Suburban Resto-Rebuild
nice solid rig keep up the good work
__________________
California 65 GTO---Texas 64 burb 283 ---Oklahoma 67 CST SWB BBW wood bed 327 2004r---New Mexico 72 k10 350 350 auto---Georga 72 short step project |
|
|
|
|
02-15-2012, 12:30 AM
|
#7 | |
|
Registered User
Join Date: Jan 2012
Location: Antioch, IL
Posts: 418
|
Re: 1965 Suburban Resto-Rebuild
Quote:
|
|
|
|
|
|
02-15-2012, 02:29 AM
|
#8 |
|
60-66 Nut
 Join Date: Mar 2007
Location: Coeur d'Alene, Idaho
Posts: 23,246
|
Re: 1965 Suburban Resto-Rebuild
That crossmember is supposed to be at a slight angle like that. I believe it has to do with clearance for the panhard bar.
__________________
Power Steering Box Adapter Plates For Sale HERE Power Brake Booster Adapter Brackets For Sale '63-'66 HERE and '67-'72 HERE and '60-'62 HERE and "60-'62 with clutch HERE Rear Disc Brake Brackets For Sale. Impala SS calipers HERE Camaro Calipers HERE D52 Calipers HERE 6 Lug HERE Hydroboost Mounting Plates HERE |
|
|
|
|
02-15-2012, 12:24 PM
|
#9 |
|
Never Ending Projects
Join Date: Jul 2006
Location: San Diego, CA
Posts: 3,836
|
Re: 1965 Suburban Resto-Rebuild
Actually it's angled not so much because of the panhard bar but to keep the frame from "racking". If all of the crossmembers where square to the frame, you could actually push (with enough force) the frame into a parallelogram. The frame rails would still be parallel but one end would stick out further than the other end.
By having this angle crossmember, it creates a triangle effect in which the rails would have to deform and spread apart. The other crossmembers prevent this from happening. Basic geometry. Those GM guys were pretty smart.  BTW great build and can't wait to see it continue.
__________________
. 1965 C10 Panel,  Tiki Express http://www.67-72chevytrucks.com/vboa...d.php?t=506580 SOLD Tiki Express http://www.67-72chevytrucks.com/vboa...d.php?t=506580 SOLD1968 Chevy C10, Long, Fleetside, Hot Rod Hauler http://67-72chevytrucks.com/vboard/s...d.php?t=313233 SOLD 1965 Chevy C10, Long, Fleetside, Hot Rod C10 http://67-72chevytrucks.com/vboard/s...d.php?t=415702 SOLD We were given two ears and one mouth for a reason... listen twice as much and speak half as often... Last edited by chevy_mike; 02-15-2012 at 09:36 PM. Reason: typo |
|
|
|
|
02-15-2012, 05:31 PM
|
#10 | |
|
Registered User
Join Date: Sep 2011
Location: Tacoma, WA
Posts: 2,425
|
Re: 1965 Suburban Resto-Rebuild
Quote:
Thanks for the explanation, I would have gladly squared that off and not given it a second thought!
__________________
Michael McMurphy My 66 Stepside My 64 Tow Truck My 66 Tempest Table Of Contents Added to Page1 |
|
|
|
|
|
02-16-2012, 02:53 PM
|
#11 | |
|
Registered User
Join Date: Jan 2012
Location: Antioch, IL
Posts: 418
|
Re: 1965 Suburban Resto-Rebuild
Quote:
|
|
|
|
|
|
02-15-2012, 02:12 PM
|
#12 |
|
Registered User
Join Date: Aug 2010
Location: Netherlands, The Hague
Posts: 1,518
|
Re: 1965 Suburban Resto-Rebuild
definately want to follow your progress...nice Burb man!
__________________
My dreamride / project:1977 GMC C15 Suburban In storage: Monster - 1974 GMC Suburban 25hundred Sold : Chevrolet Suburban K20 Silverado 1986 Guide: real HID projectors for 4x6 headlights link: DIY LED TAILLIGHTS |
|
|
|
|
02-16-2012, 08:48 PM
|
#13 |
|
Registered User
Join Date: Jan 2012
Location: Antioch, IL
Posts: 418
|
Re: 1965 Suburban Resto-Rebuild
Well.. I'm on my couple days off from work--back at it tomorrow.. I spend yesterday down at the Chicago Auto show seeing all the new stuff on the showroom floors, and drooling over some others.. I decided to do some carving today on the '65 Truck Cab.. Here's what I did.. I chopped the roof off as I'll need the header portion of the roof "eyebrow". I did that surgically with the trusty Sawzall and then decided to see how my Blair 3/8" Spot-Weld cutters worked. I"ve never used these before and this is my first real bodywork job I'm doing with this suburban.. So, why not practice on the truck cab? I decided to start by getting the fresh air boxes separated from the cowl as I'll be doing some cutting from the cowl for repairs on my suburban. I was able to located the spotwelds after some trial and error, and got these things off. I'll not be needing them, so they'll be sold.. Also took the cowl structure off so that I could cut the wiper motor mount off for Nobby. I had decided before hand that I would keep the dash because it's completely uncut. My Suburban dash has a couple extra 'accessory' holes, so I will be putting the one from this cab into the Sub.. There are only a couple dents in this one which will easily come out. But, the radio hole is uncut and there are no extra hillbilly holes in the piece. Pretty easy to get in and out with 6 bolts and about 6 spot welds (give or take). I'll be parting out the rest of the sheetmetal from the cab. I actually am going to try and remove the rockers complete--as the inner rockers are perfect, as are the cab corners.. Anyone need any parts from this thing? I have no plans on letting this go to the scrappers. If nothing else, I'll be saving pieces for later sheetmetal repairs on another project down the road.
Here's the current dash in the Sub..  And, here's what I'll be replacing it with.. I may consider putting in a block off plate for the radio as I plan on having a decent stereo in the sub, but will not be cutting the dash.. 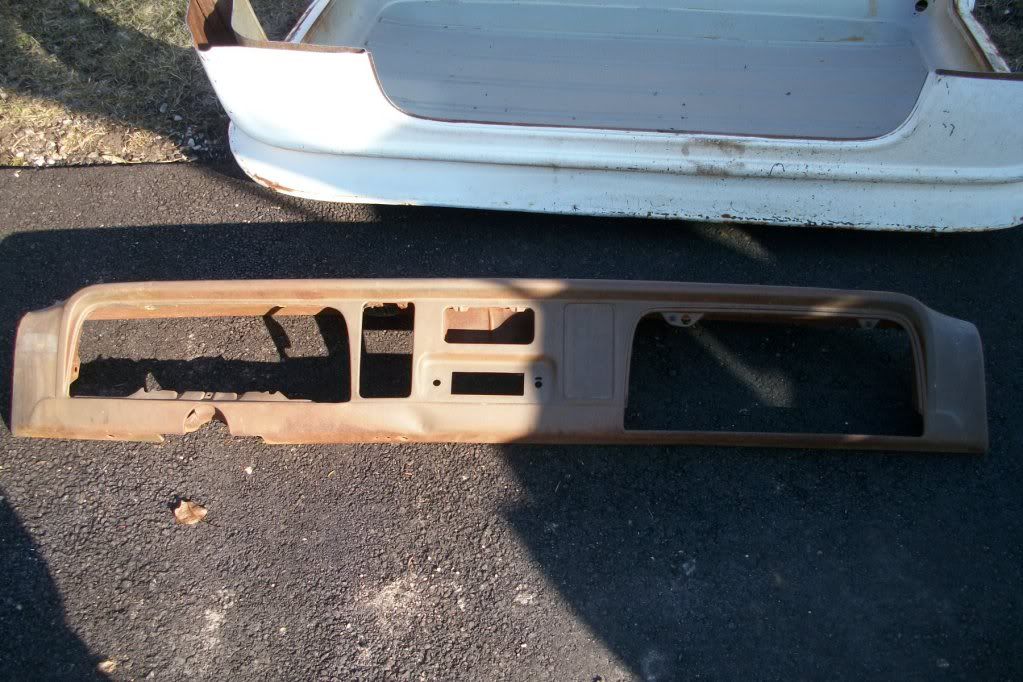  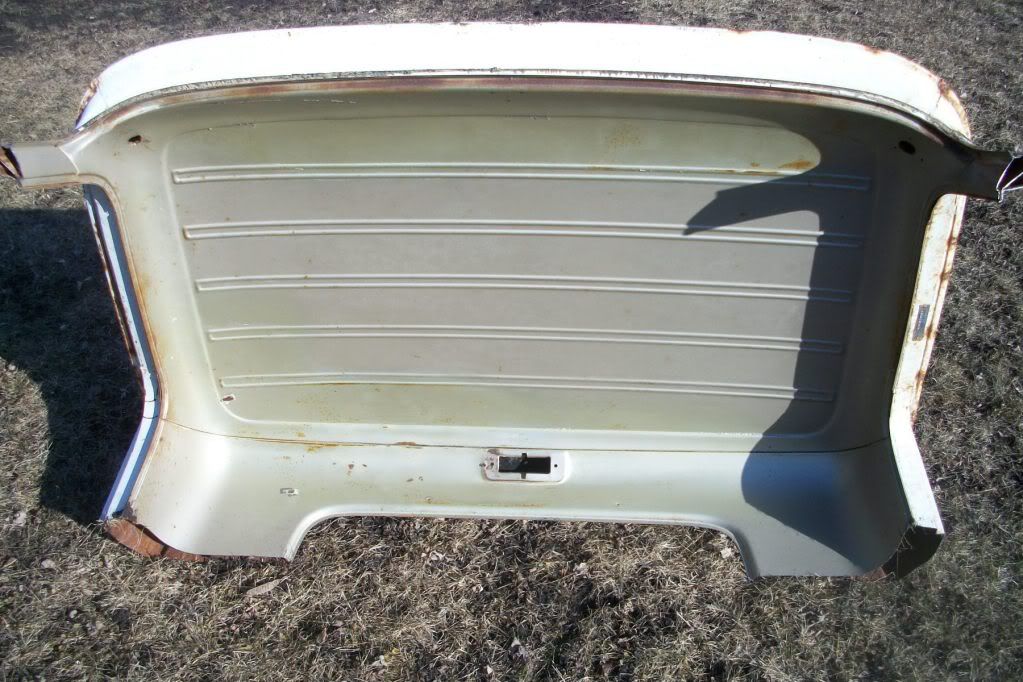 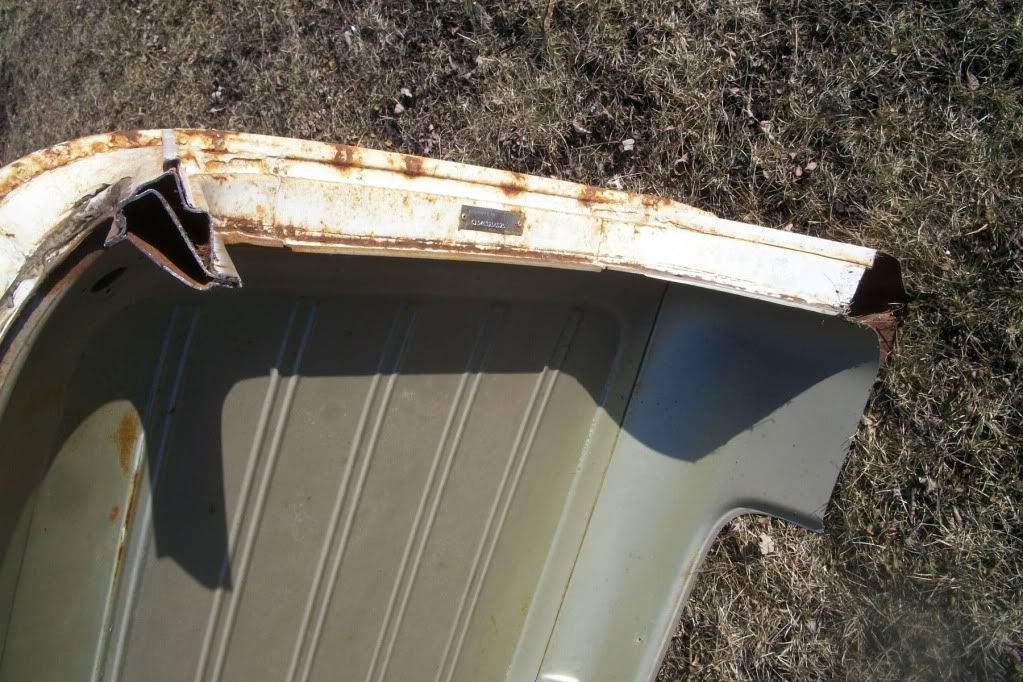     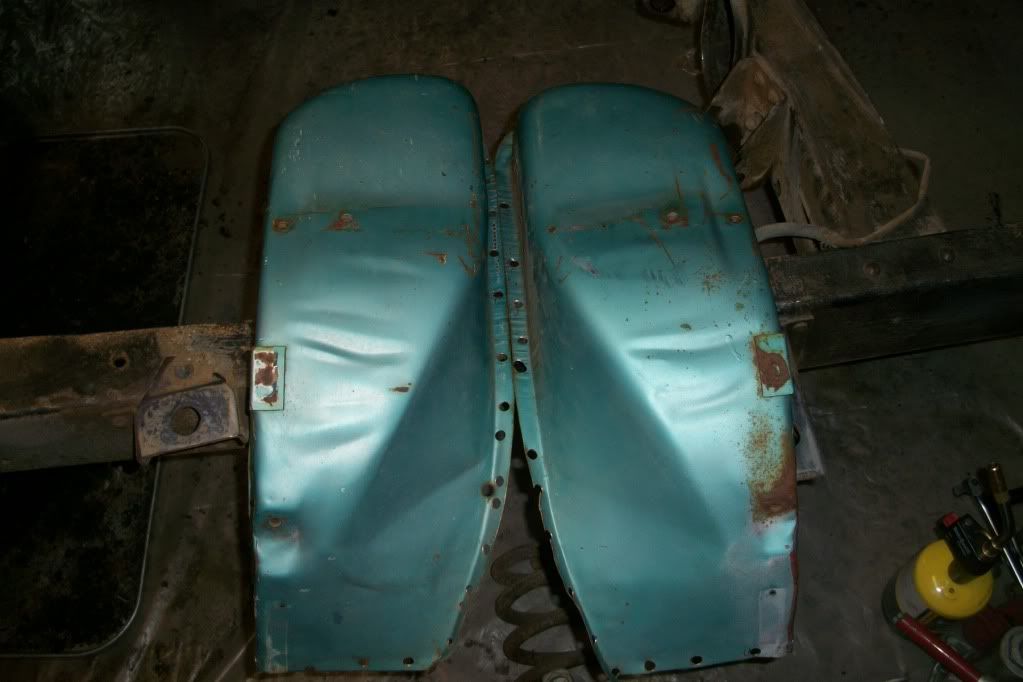 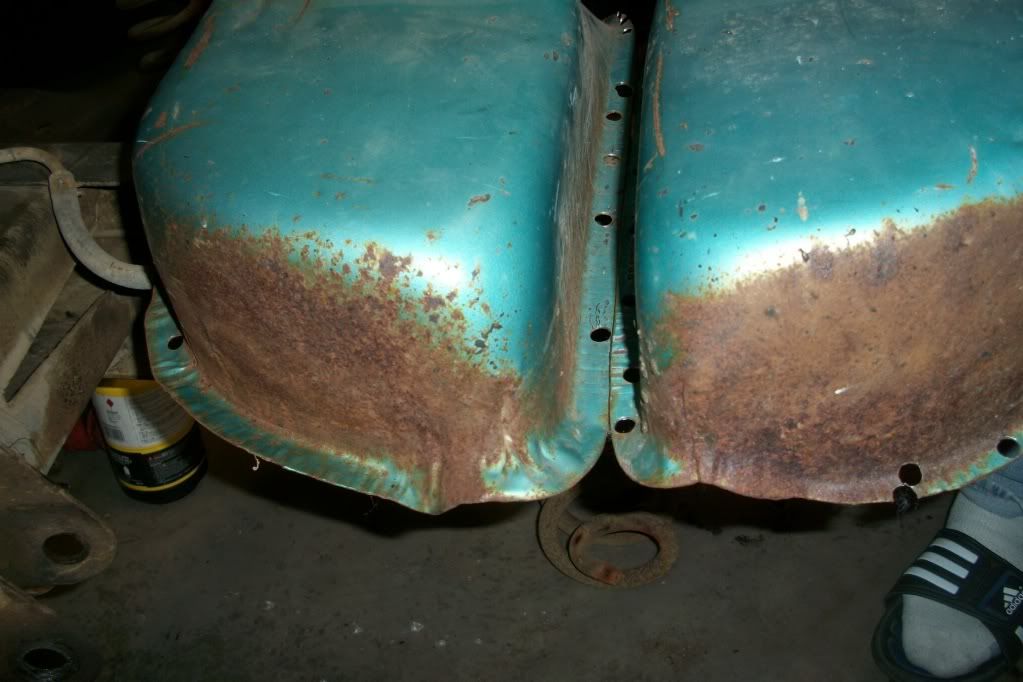 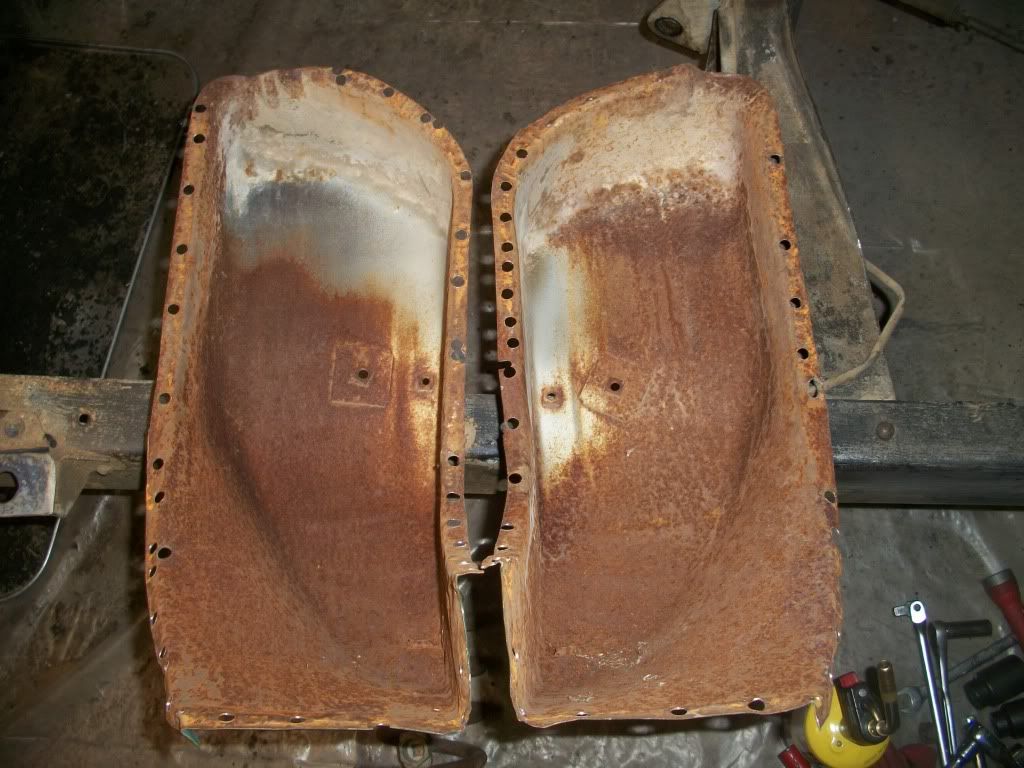
Last edited by hemifalcon; 02-16-2012 at 09:01 PM. |
|
|
|
|
02-17-2012, 11:34 PM
|
#14 |
|
Registered User
Join Date: Jan 2012
Location: Antioch, IL
Posts: 418
|
Re: 1965 Suburban Resto-Rebuild
Here are my pics from today.. I decided to hack all the bull$hit truss material off of the rear end. As it turns out, the only really good weld was on the driver side.. The rest, wacked it right off with a hammer and chisel. Cleaned it all up--couple of weld pits that I need to clean up a little with the welder.. then she'll be good.. Waiting on my axles still from ECE. And, I still haven't popped the cover off of my 12-bolt, but how many of these trucks came with a posi??
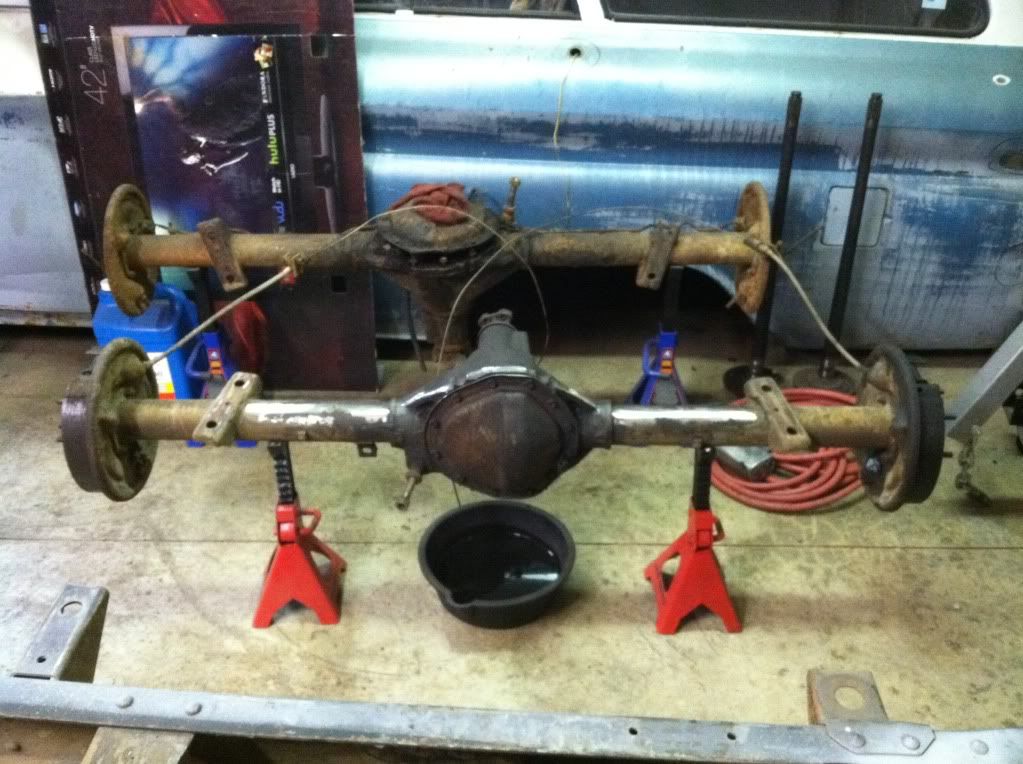  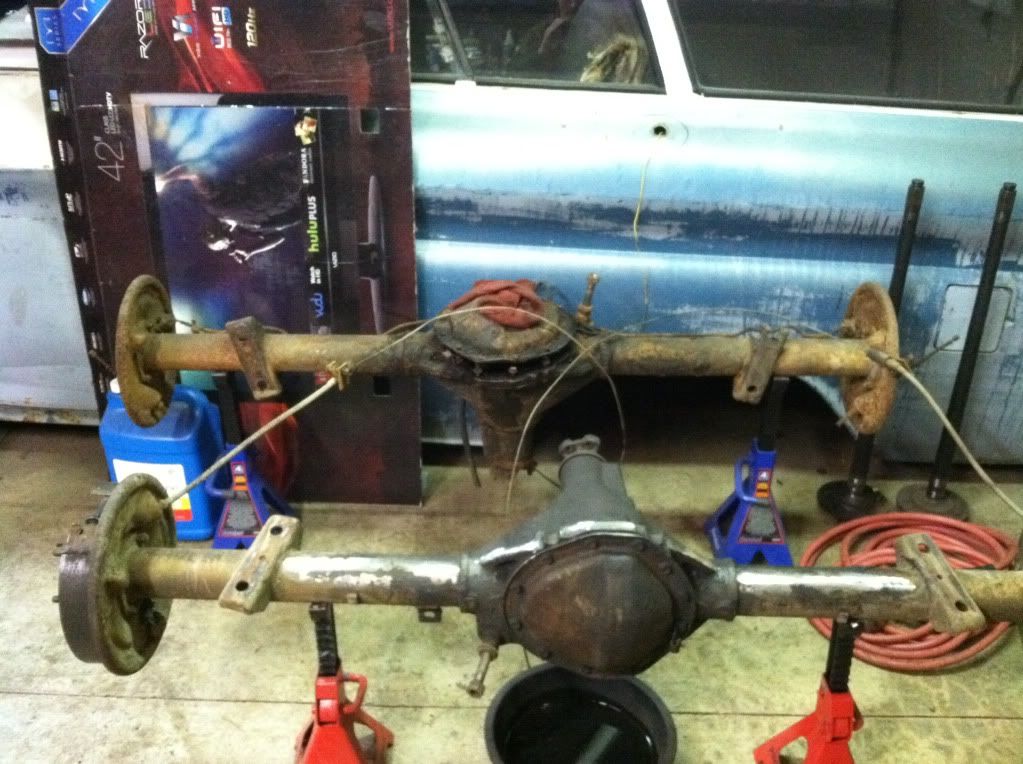   Anyone need a '71 C10 12-bolt with all componets 'cept brakes?? The one in the back of the pics needs to go.. |
|
|
|
|
02-17-2012, 11:39 PM
|
#15 |
|
Registered User
Join Date: Jan 2012
Location: Antioch, IL
Posts: 418
|
Re: 1965 Suburban Resto-Rebuild
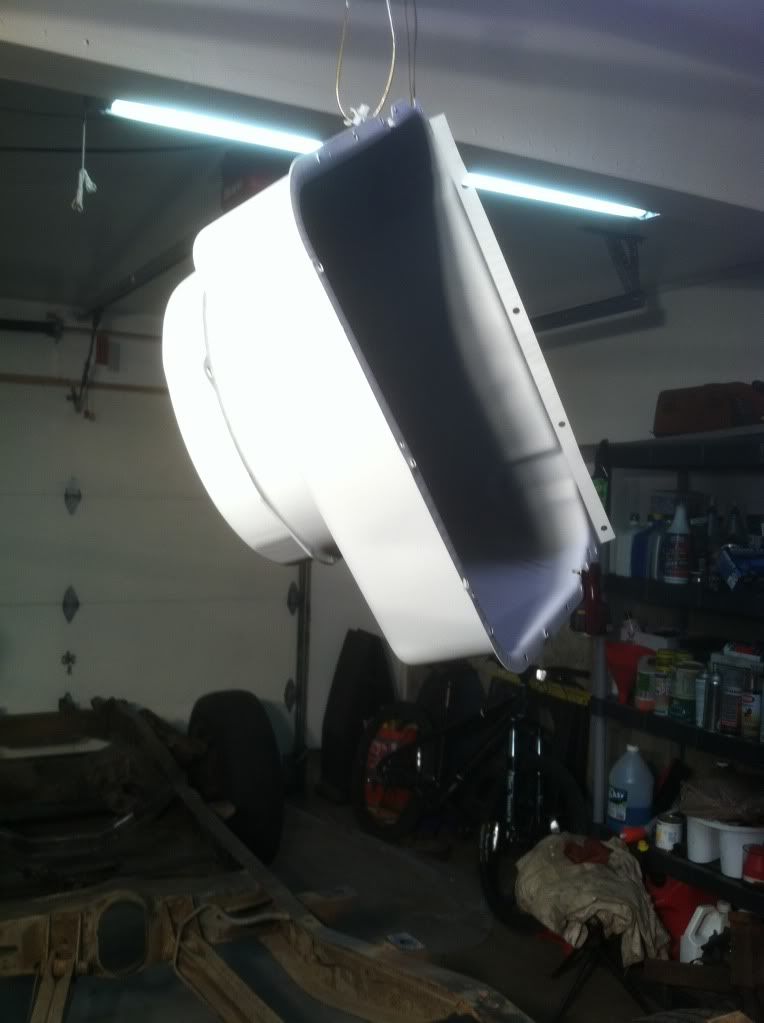
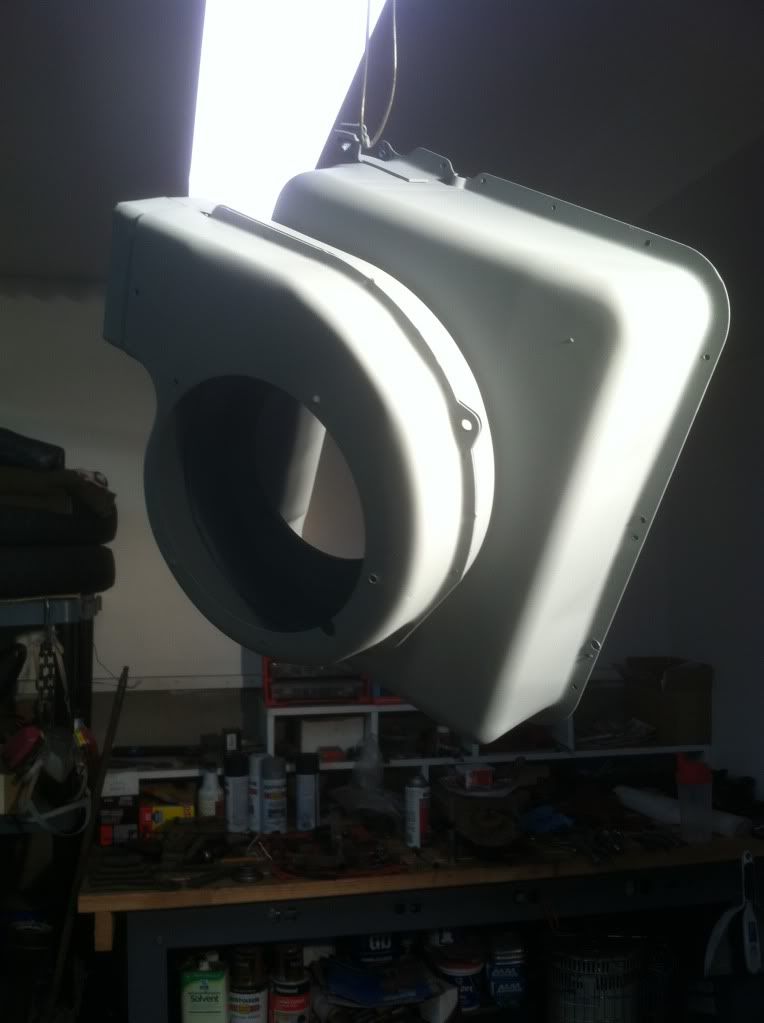
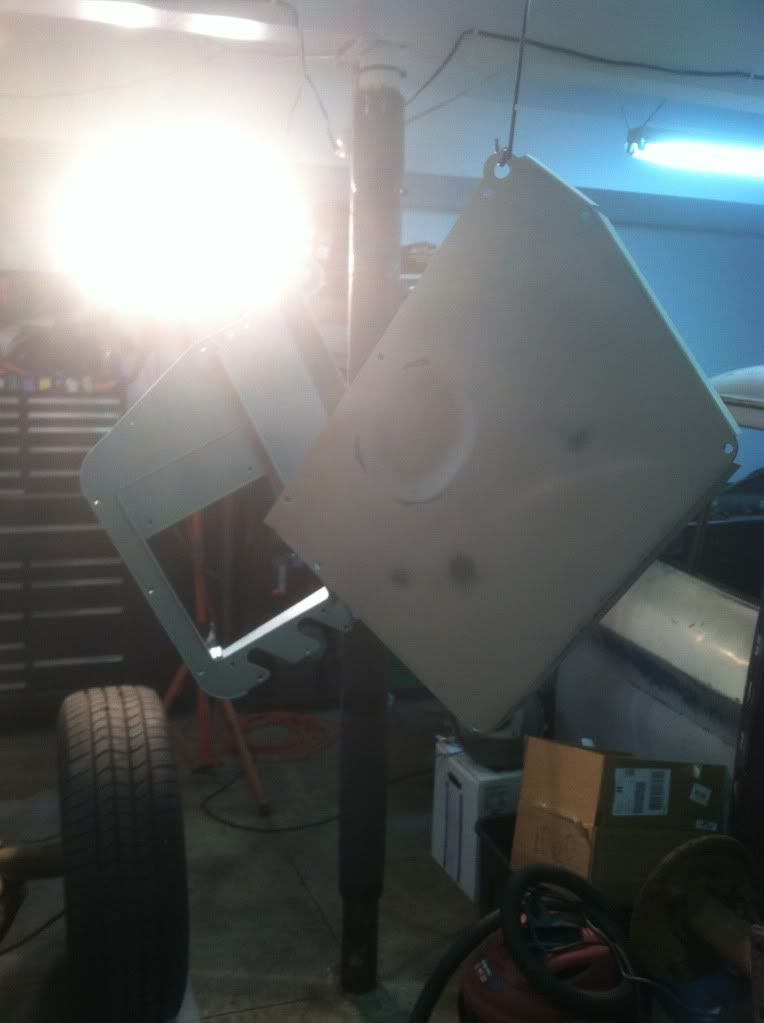
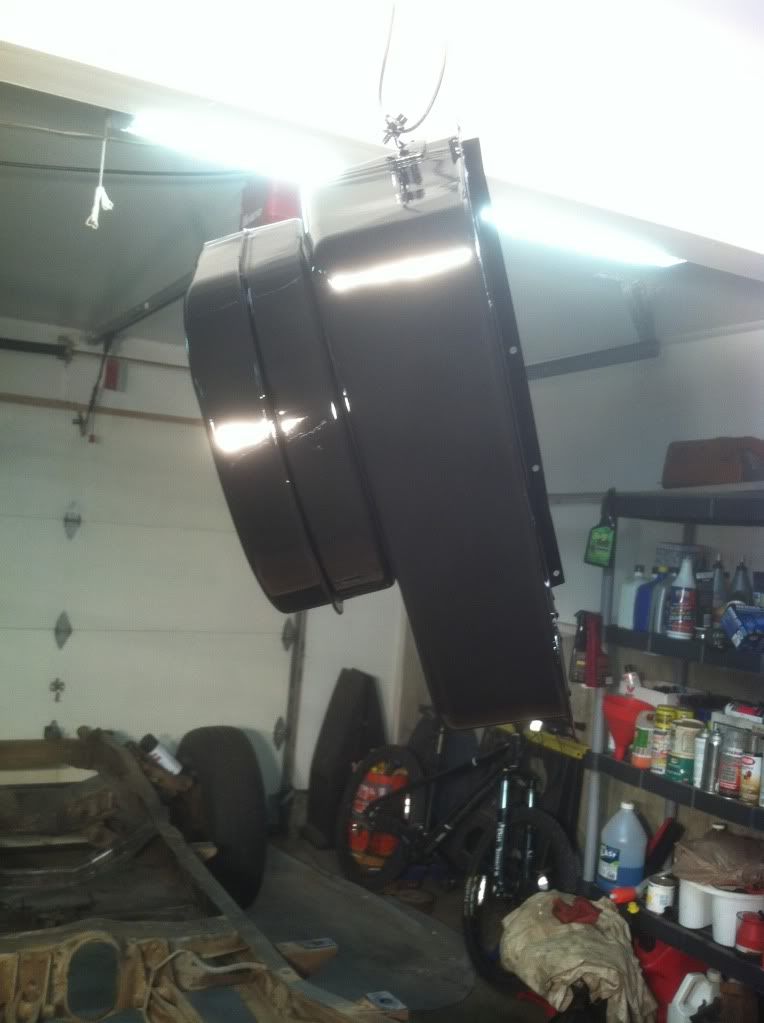
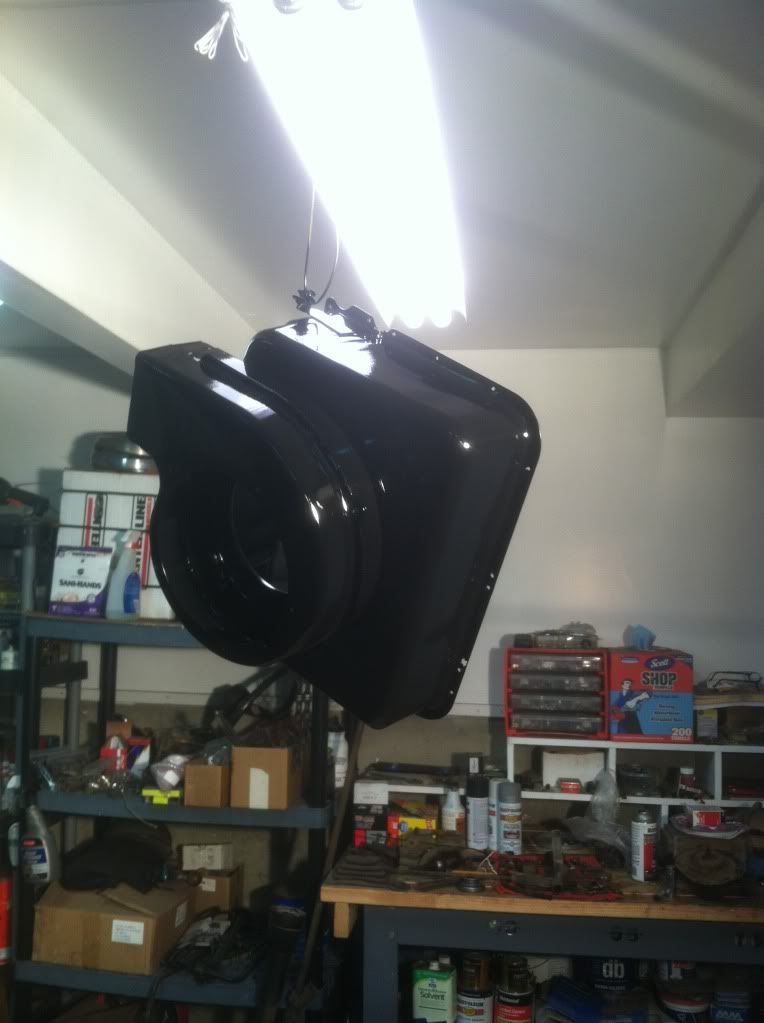
Here are some pictures of the heater box assembly, post-paint.. Not very exciting.. But, it's all black and I'm waiting on some extra cash to get a new blower motor (bad screaming bearing in the old one)..
|
|
|
|
|
02-18-2012, 12:37 PM
|
#16 |
|
Resistance is Futile
Join Date: Dec 2006
Location: Mesa,Arizona
Posts: 3,519
|
Re: 1965 Suburban Resto-Rebuild
Cool build and excellent progress!! I'm really digging all the 'burbs on here as it's inspiring knowing all this work is going on all over the place. Having the body off is definitely the way to go as far as doing the suspension stuff; I've never had the pleasure!
 Where is Antioch? I'm from Peoria originally.
__________________
64 CHEVY PICK-UP > http://67-72chevytrucks.com/vboard/s...otrash+re-hash 64 CARRYALL >http://67-72chevytrucks.com/vboard/s...=1964+suburban 66 LB >http://67-72chevytrucks.com/vboard/s...d.php?t=427852 STRENGTH/DETERMINATION/MERCILESS/FOREVER .......posted via stationary device |
|
|
|
|
02-18-2012, 01:30 PM
|
#17 | |
|
Registered User
Join Date: Jan 2012
Location: Antioch, IL
Posts: 418
|
Re: 1965 Suburban Resto-Rebuild
Quote:
BTW---Antioch is in the far northeast corner of the state on the stateline--25 mins from Lake Michigan... Posted via Mobile Device |
|
|
|
|
|
02-19-2012, 12:02 AM
|
#20 |
|
1 thing at a time is progress.
Join Date: Jun 2007
Location: Ball Ground GA
Posts: 5,511
|
Re: 1965 Suburban Resto-Rebuild
Also taking the numbers off the ring gear 41 divided by 11 also confirms that it's a 3.73.
I bet the posi was a nice surprise. 
__________________
Alan
Philippians 2:14-16 |
|
|
|
|
02-19-2012, 12:23 AM
|
#21 | |
|
Registered User
Join Date: Jan 2012
Location: Antioch, IL
Posts: 418
|
Re: 1965 Suburban Resto-Rebuild
Quote:
Yeah.. it was a great surprise.. when I pulled the rear out--I shoulda known when the wheels wouldn't spin independent of one another when trying to pivot it from under the frame... |
|
|
|
|
|
03-07-2012, 12:25 AM
|
#22 |
|
Registered User
Join Date: Jan 2012
Location: Antioch, IL
Posts: 418
|
Re: 1965 Suburban Resto-Rebuild
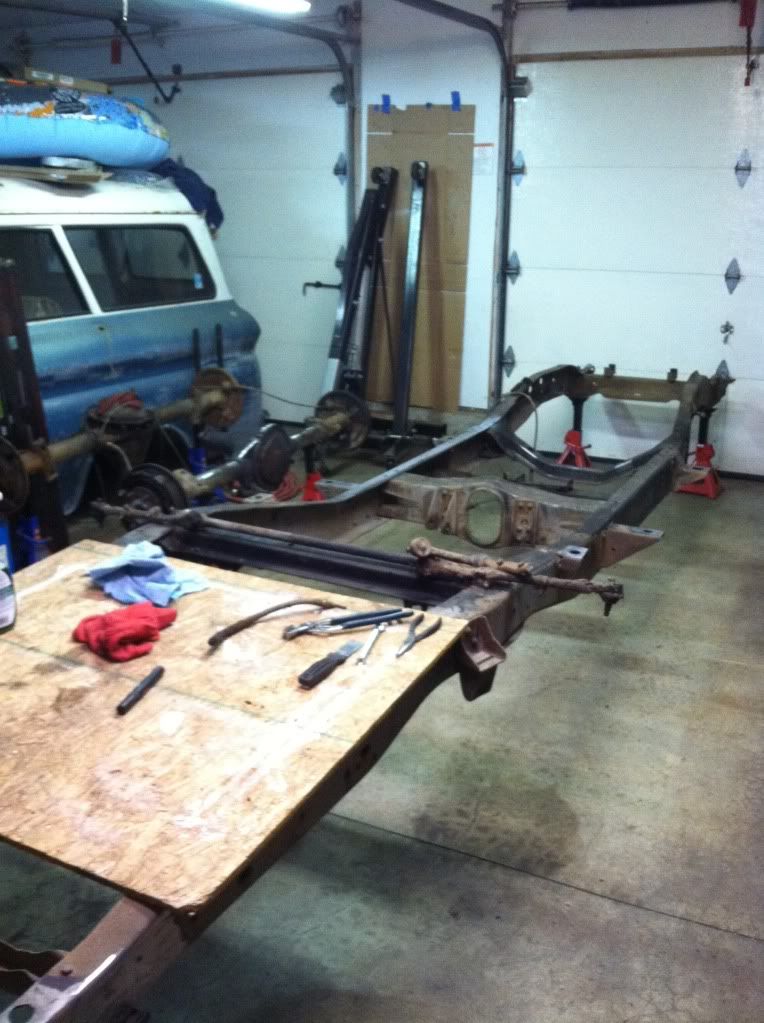
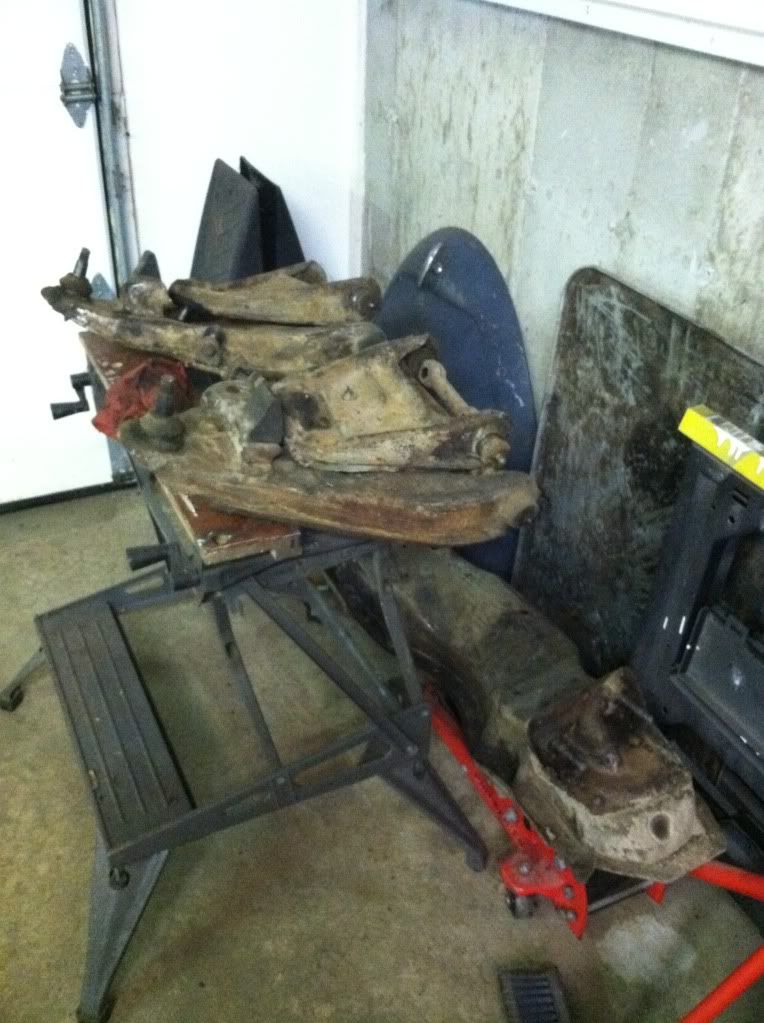
Well.. Here's where I'm at this week.. Just been cleaning parts.. Brake pieces, and slowly working towards getting to the frame for clean up. I spent hours in a blast box blasting some of the small parts.. I'm about ready to put the heater assembly back together, but I want to get the core boiled as I ran some hot water through it for about 10 minutes and junk kept coming and coming and coming... well, you get the point.. I make sure it's clean and all before slapping it all back together. I dropped off the front control arms today at the local NAPA to get boiled before I blast them--they were so dirty.. I spent some time on my new bench grinder/wire wheel cleaning up brake parts a couple days ago and today spent a couple hours cleaning up the front suspension cross member. I'll take it to a blaster to have it roughed up a little bit along with the trailing arms.
I ordered the AG111 Master Series kit to do the frame and suspension bits. I went ahead and Rustoleum'd (Semi-Gloss Black) the rear backing plates and other small pieces. I've always had good luck with the spray can stuff.. So, i'll keep using it until otherwise. I think that's about it. I'm gonna set a goal, that will probably not work out--but I'd like to get the frame/chassis back together by the end of the month.. We shall see. Here's the no-frills pics from the past 10 days or so. I flipped the frame upside down tonight too.. 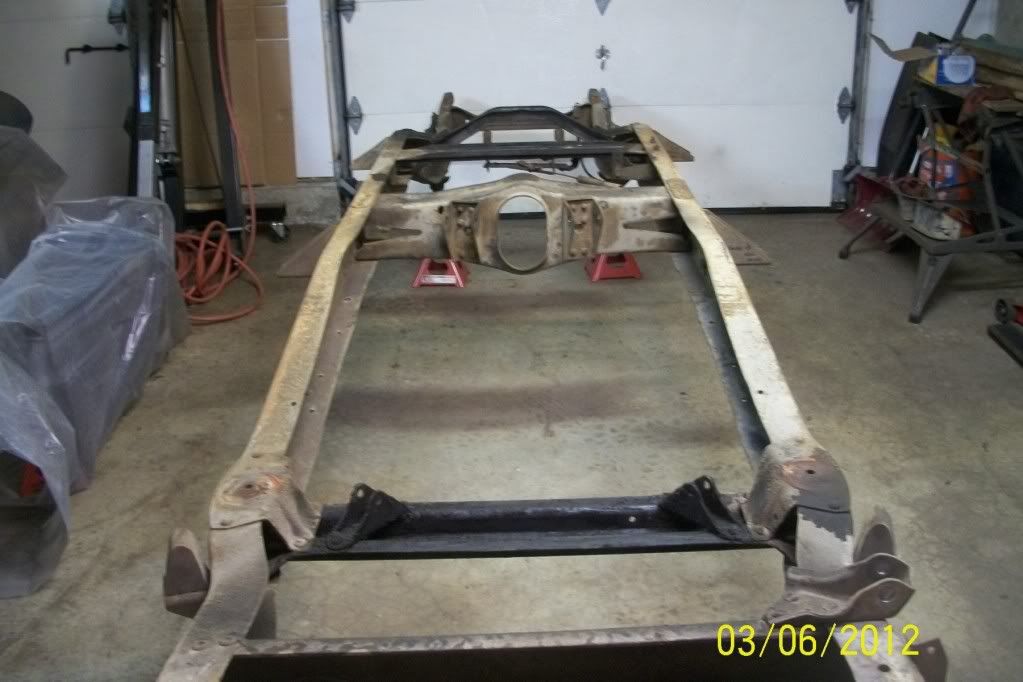 I have one little crack to weld up back here.. 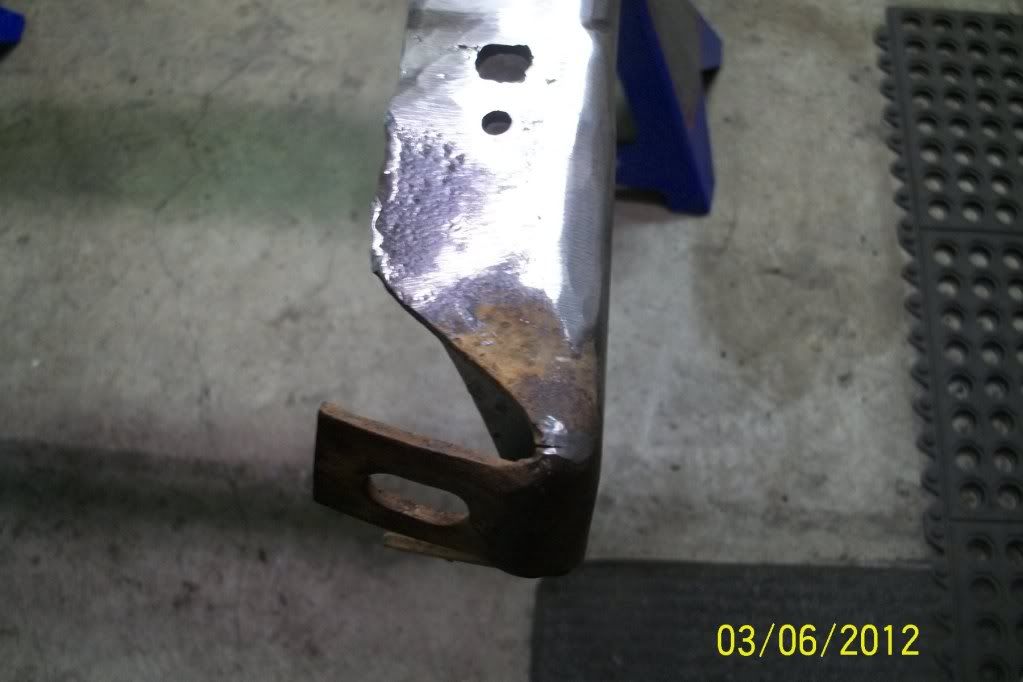 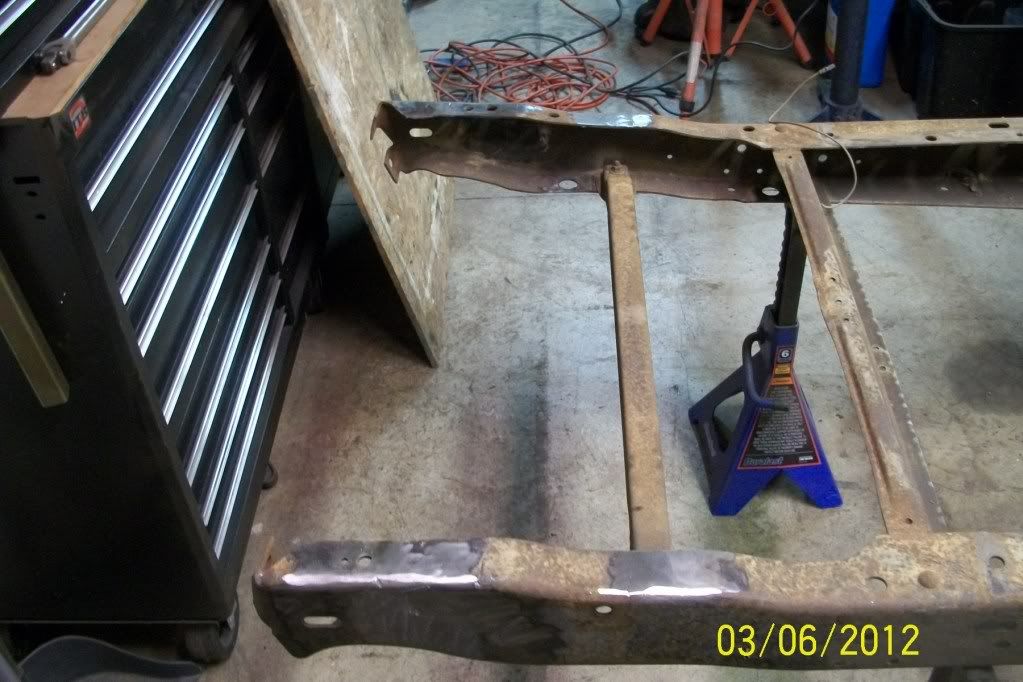 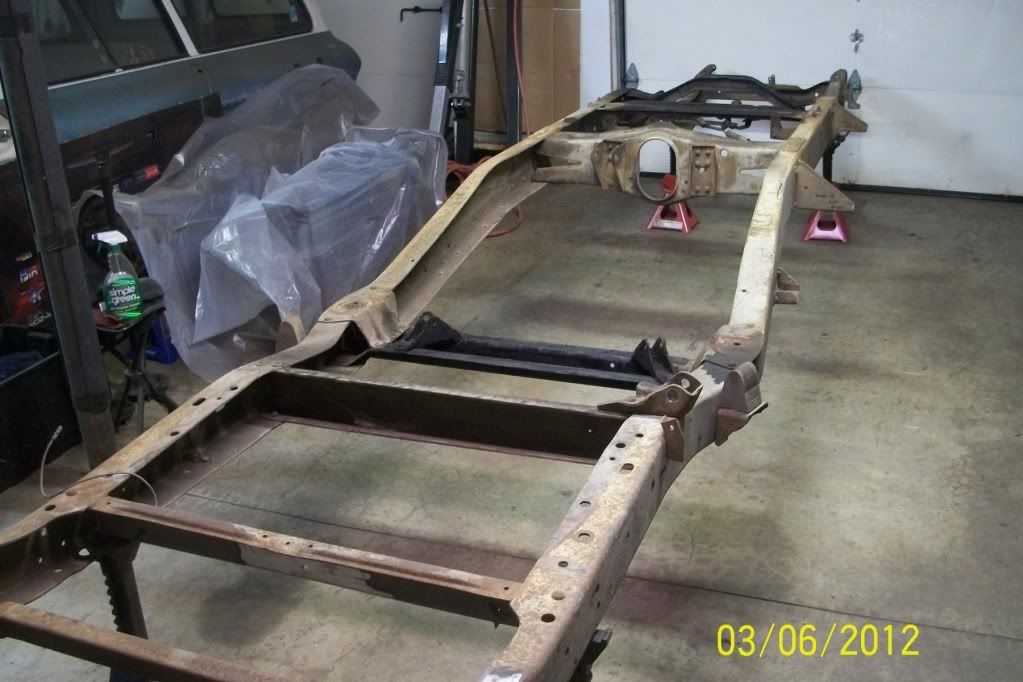 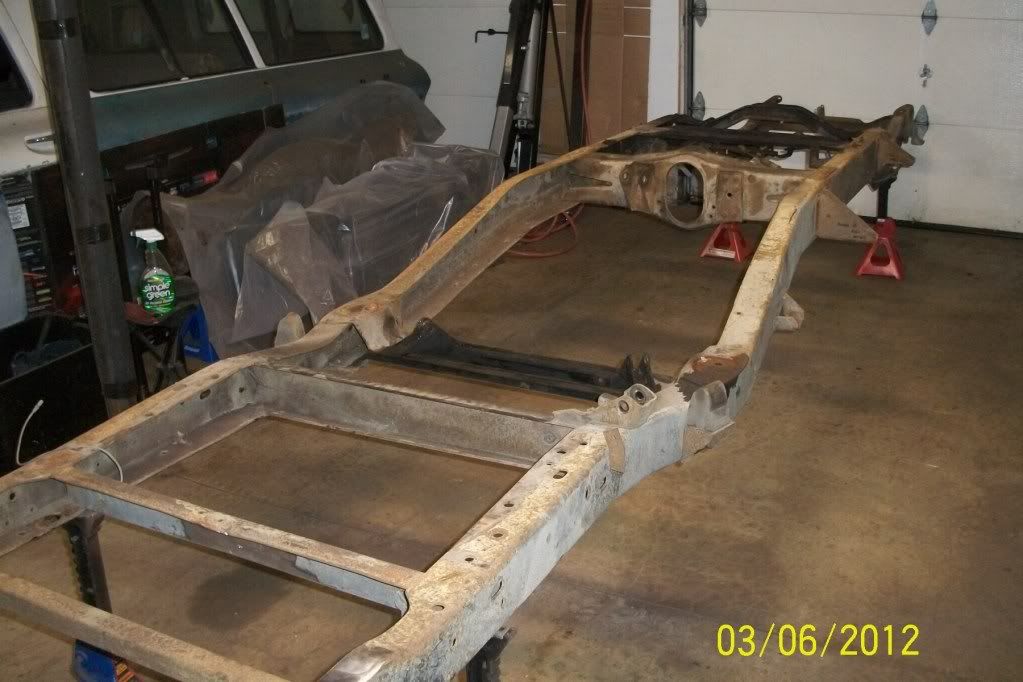 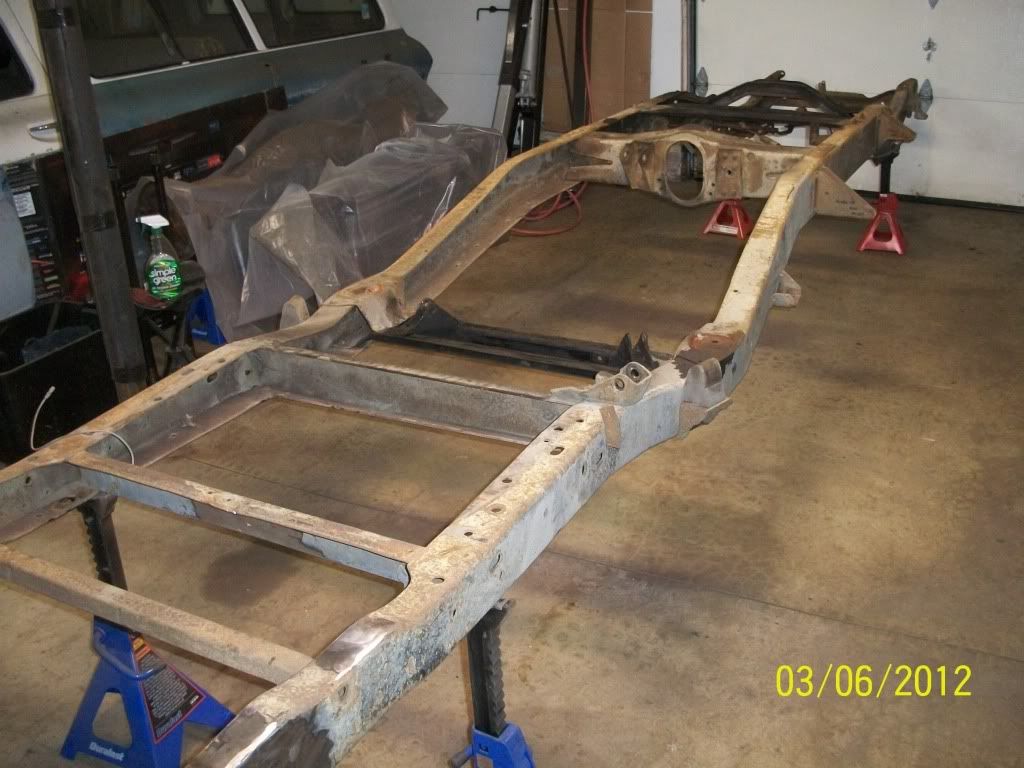 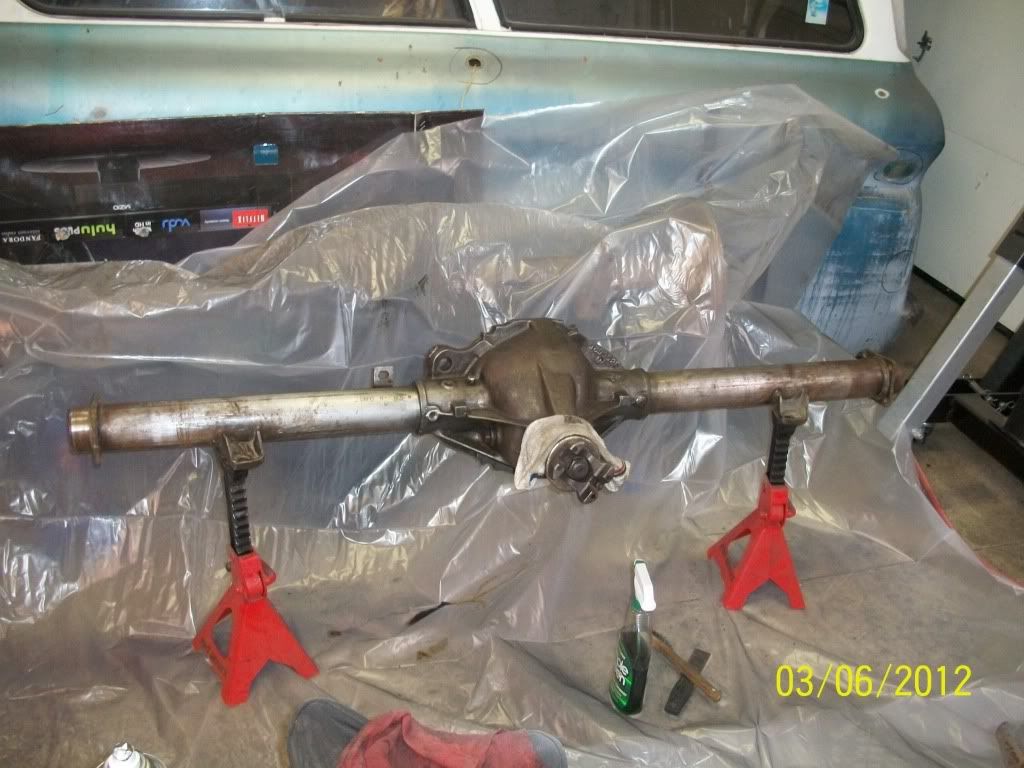 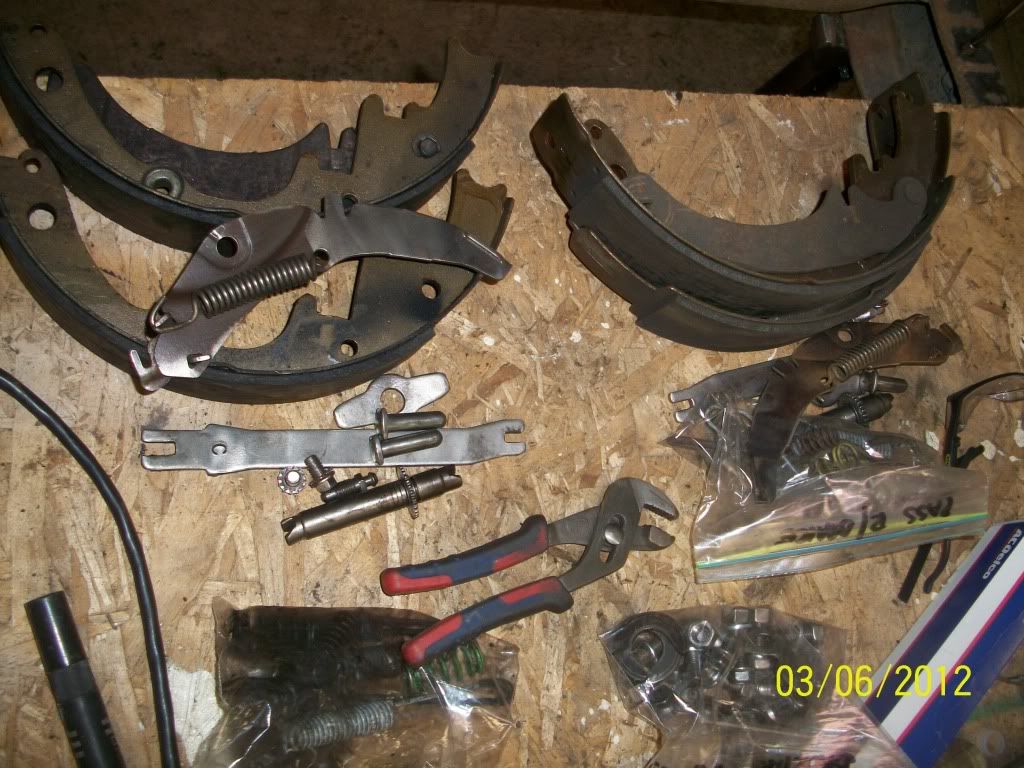 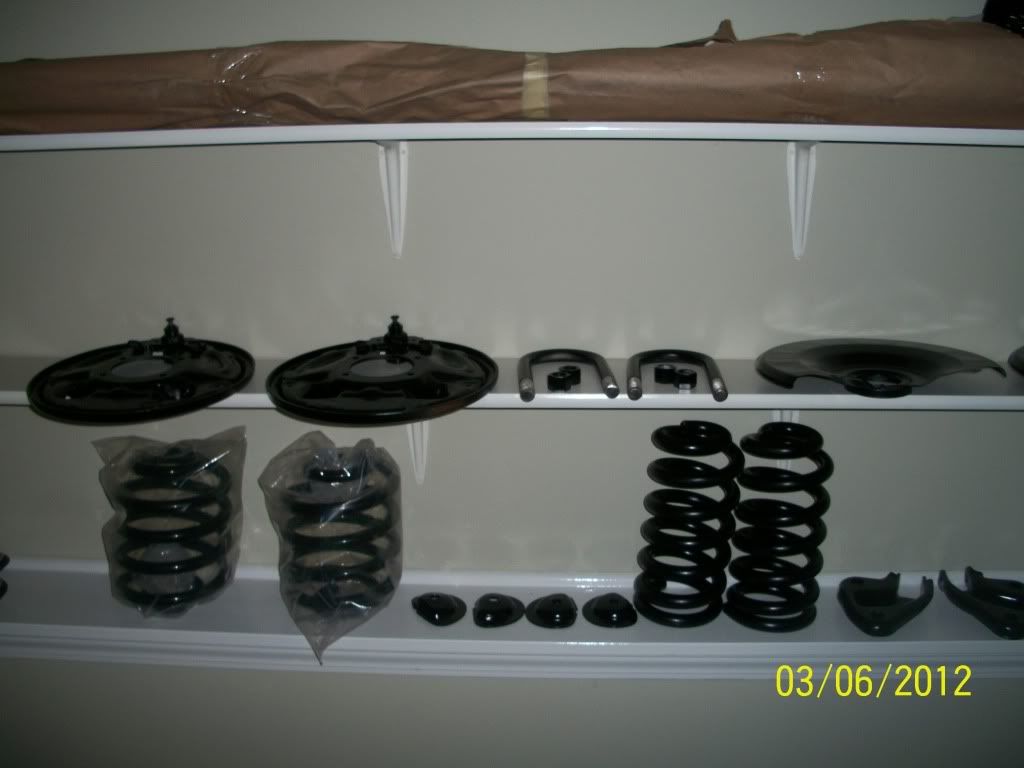 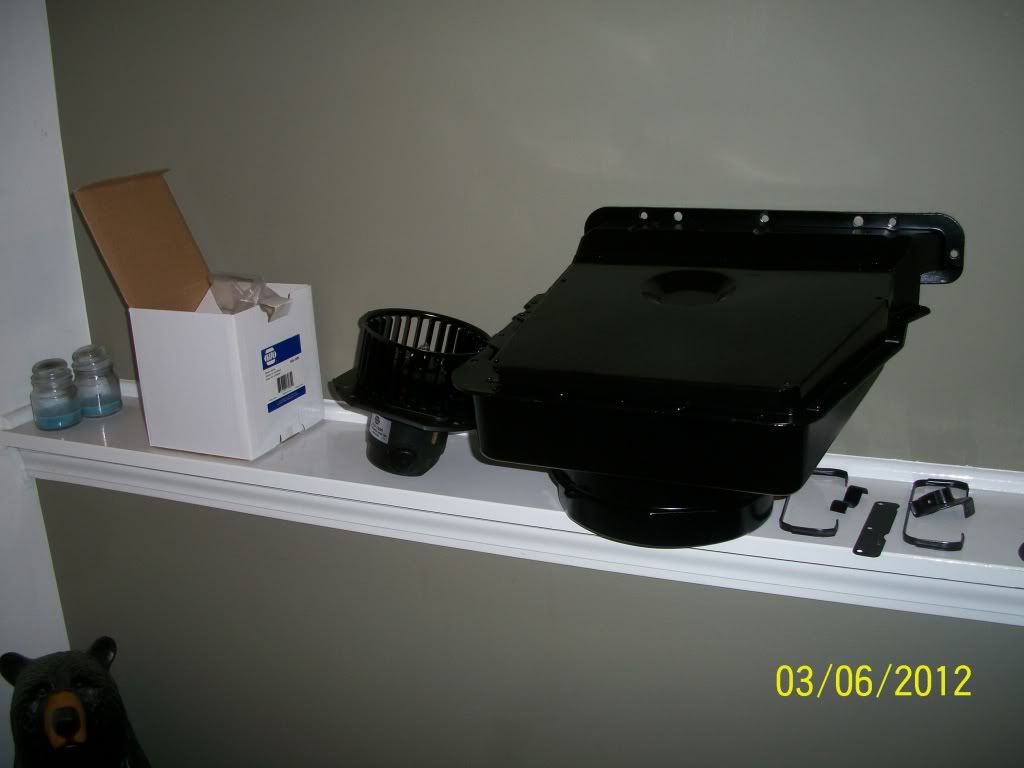 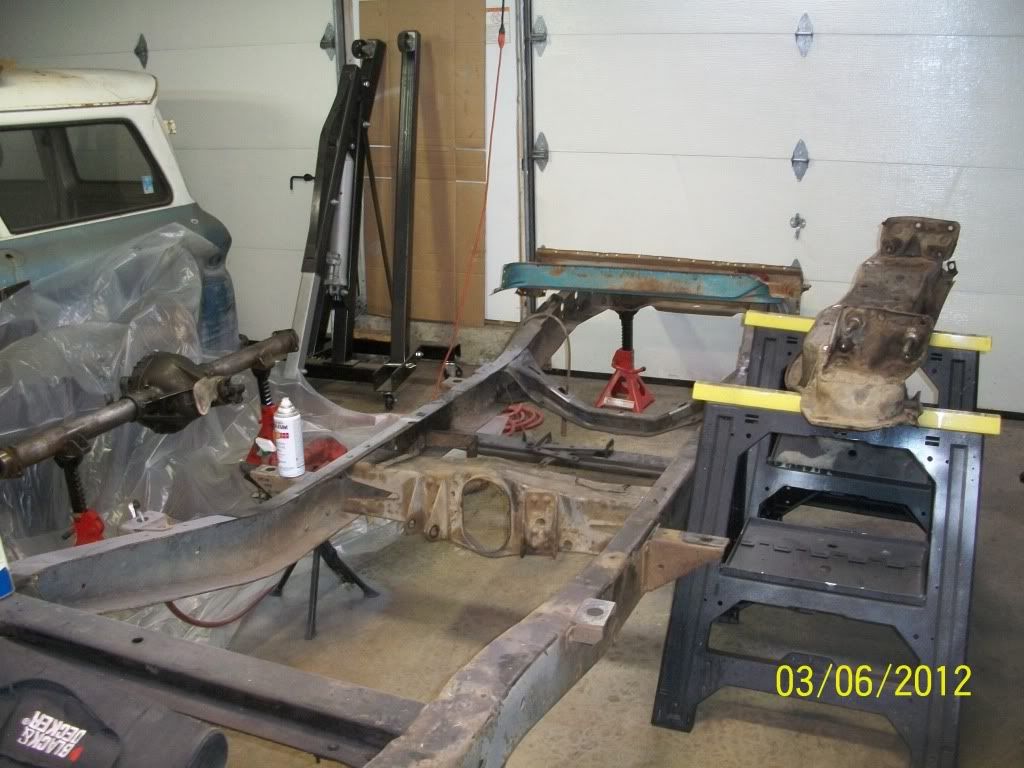 Oh, and I got the '71 ball joints today--they cost $200 for the U.S.A. made ones.. These are the upper and lowers..as much as I don't want to--I don't think I'll be going straight to the local parts store when it comes to prices like this any longer.. I'm building a Chevy, not a Bentley.. :-( Last edited by hemifalcon; 03-07-2012 at 07:56 AM. |
|
|
|
|
03-26-2012, 09:36 PM
|
#23 |
|
Registered User
Join Date: Jan 2012
Location: Antioch, IL
Posts: 418
|
Re: 1965 Suburban Resto-Rebuild
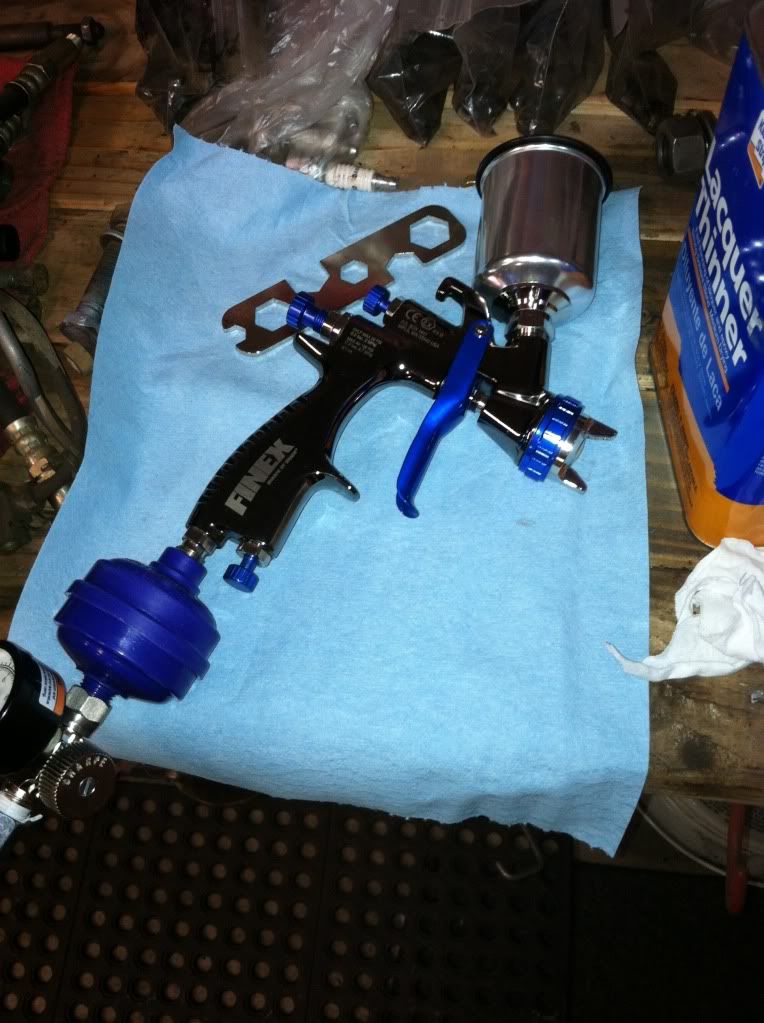
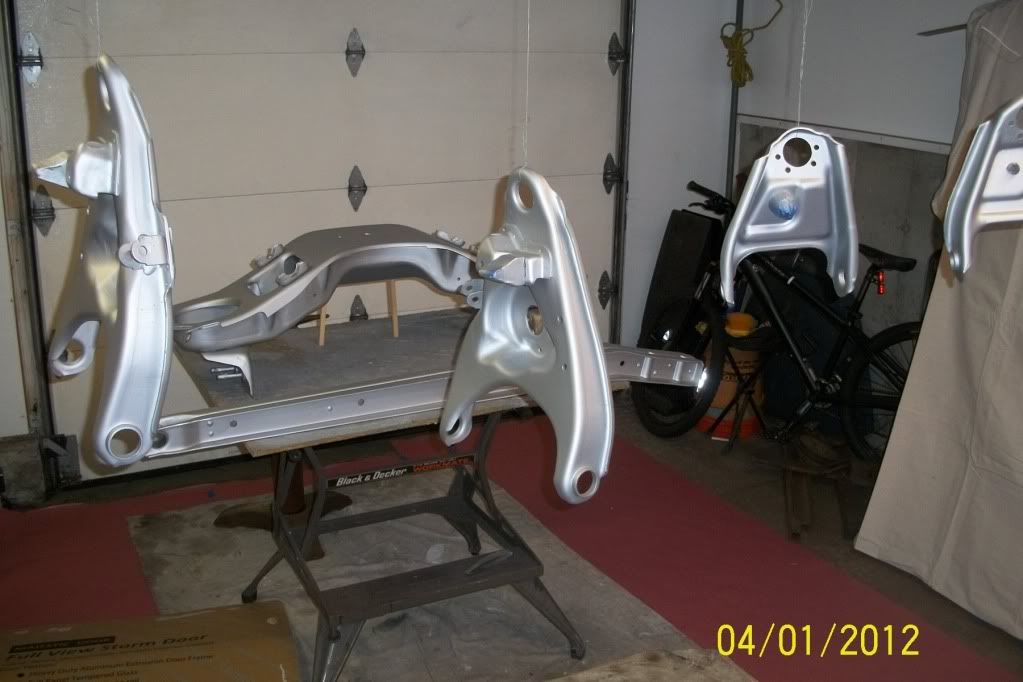
Here’s the most recent pics of “progress” as I’ve not taken any pics lately. It’s been slow moving also since the process of sand-blasting is not all that exciting so I didn’t want to bore any of you with pics of cleaned metal.. I did decide to take the trailing arms and frame to Strip Rite in Union Grove, WI to have them blast them as I had no place to do them myself. The cost was fairly decent and I figured it was the best way of ensuring a good clean surface for proper coating. As far as coatings go—I did chose to go with the Master Series line of coatings to include their sliver primer and their AG111 TractorKote kit. You will see the pictures below as silver is the first part I did. I started with a foam brush applying the primer to the control arms, but I don’t like the way that was looking. I decided to pay out some $$$ for a nice Sharpe FX3000 HVLP gun. I was able to buy it from the local NAPA and they just happened to be on sale so I got a really good price in comparison to some online markets. I also ordered the 1.8 tip for spraying the primer, but they got me the 1.0 on accident. I decided to use the 1.5 tip that came with my gun, and it worked really nice. NOW, “really nice” may be subjective as I’ve never sprayed paint from anything but a spray can before, but the pattern was really decent on a well contrasted background when I tested the gun initially. I really didn’t have to do much as the gun seemed to be spraying very nicely straight out of the box. Along with the gun I ended up buying some extra desiccant filters from Sharpe, another regulator mounted directly to the gun, and a small cup so I don’t have to use the large one for small jobs. The coating went on nicely, no runs in any of the parts, and I like how the spray can get into all the nooks of the parts without trouble. Needless to say, I feel this was a good investment for about $260 in total cost.
 And here are the control arms, trailing arms, and front cross member all coated. 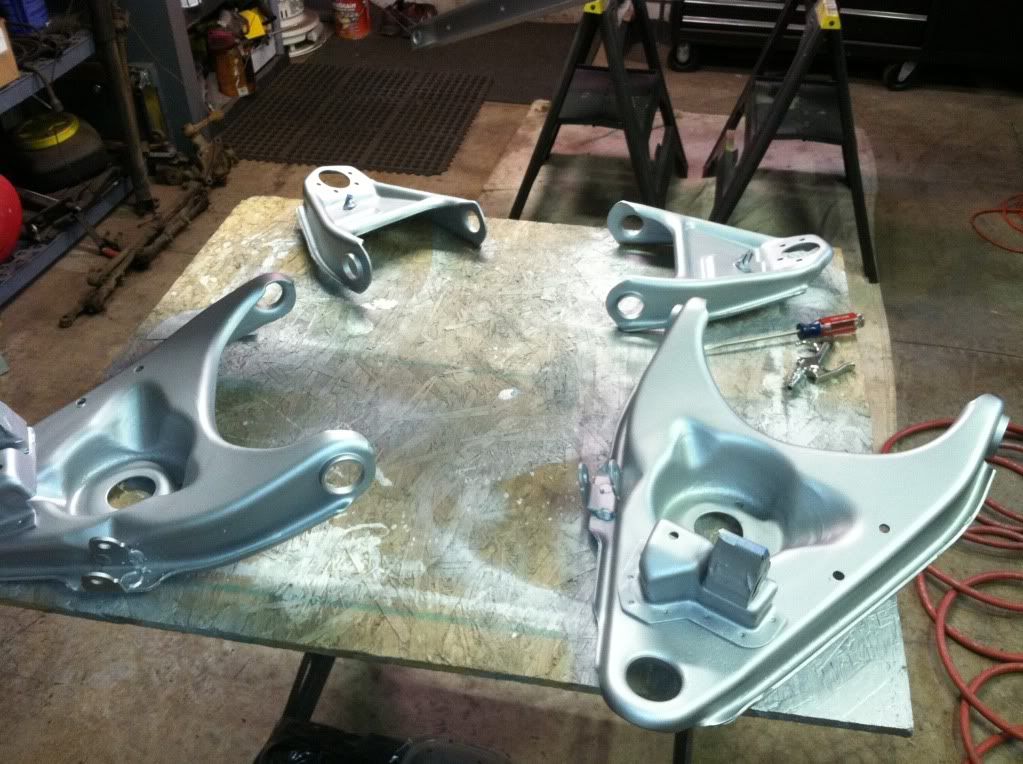 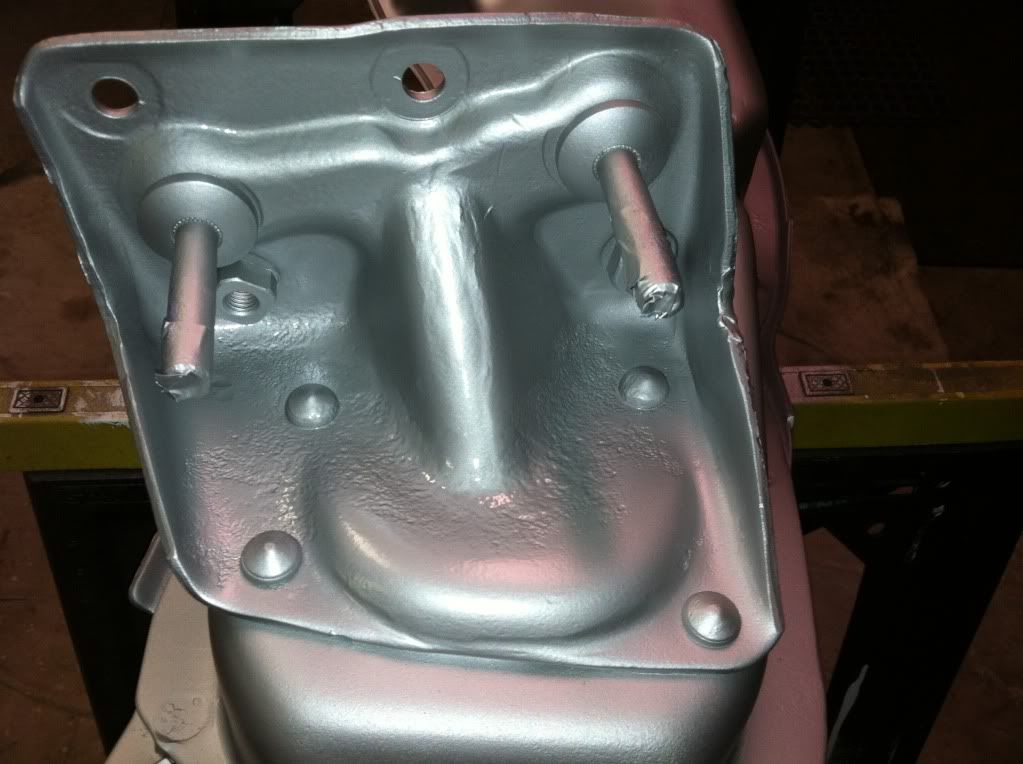 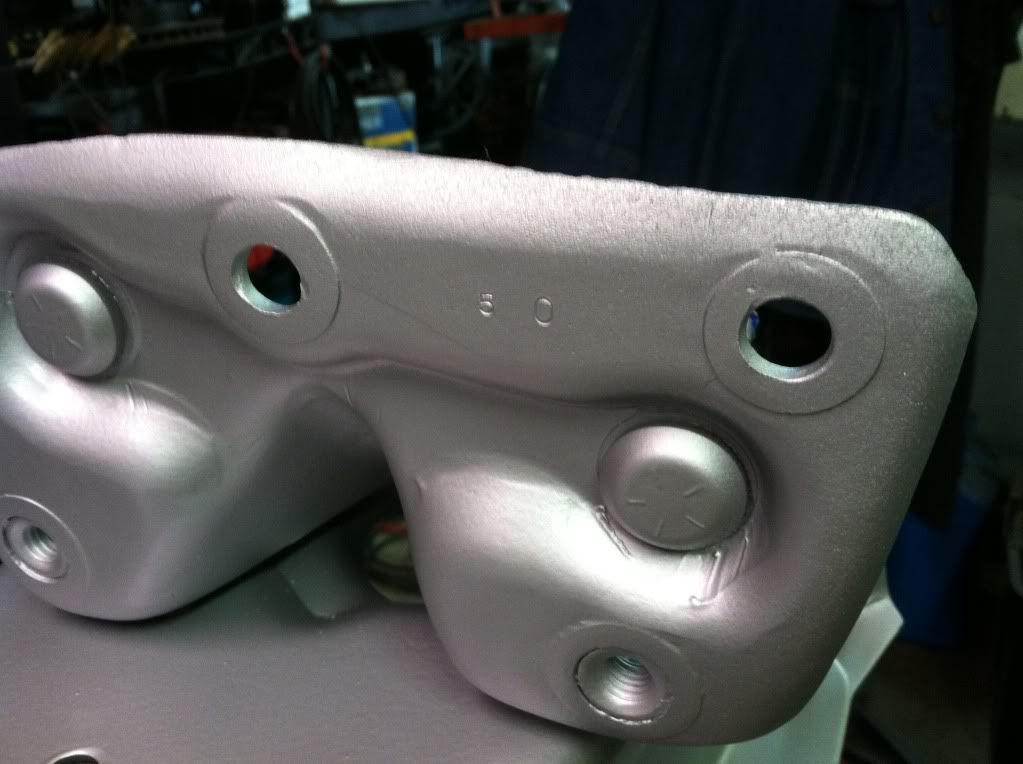 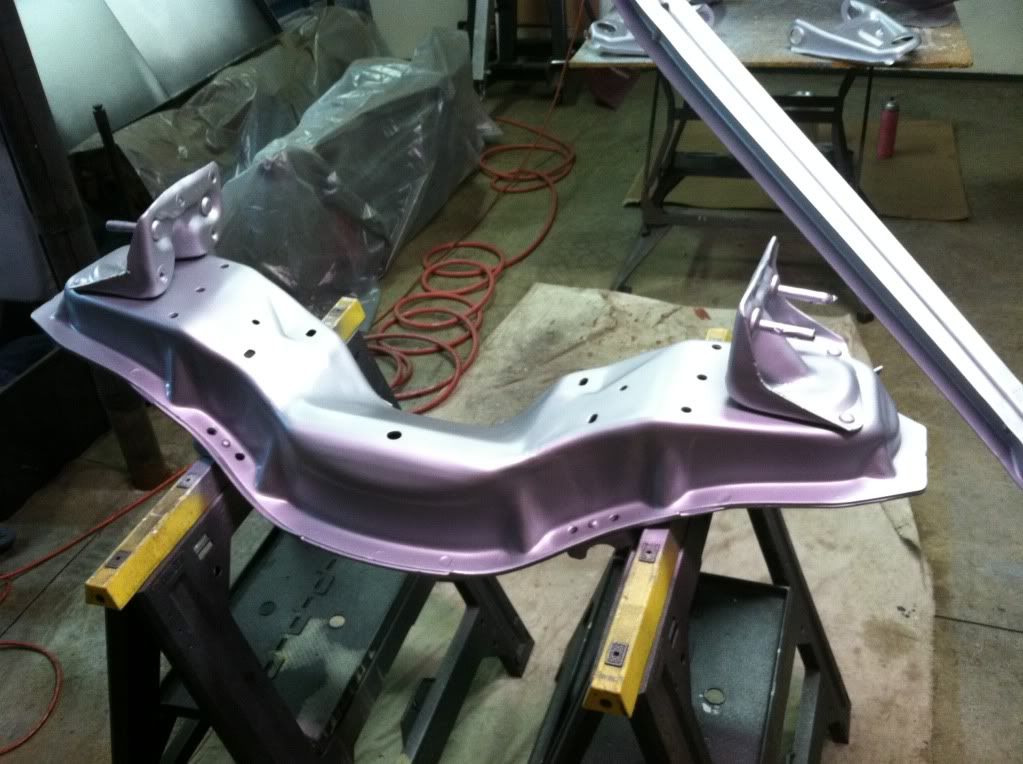 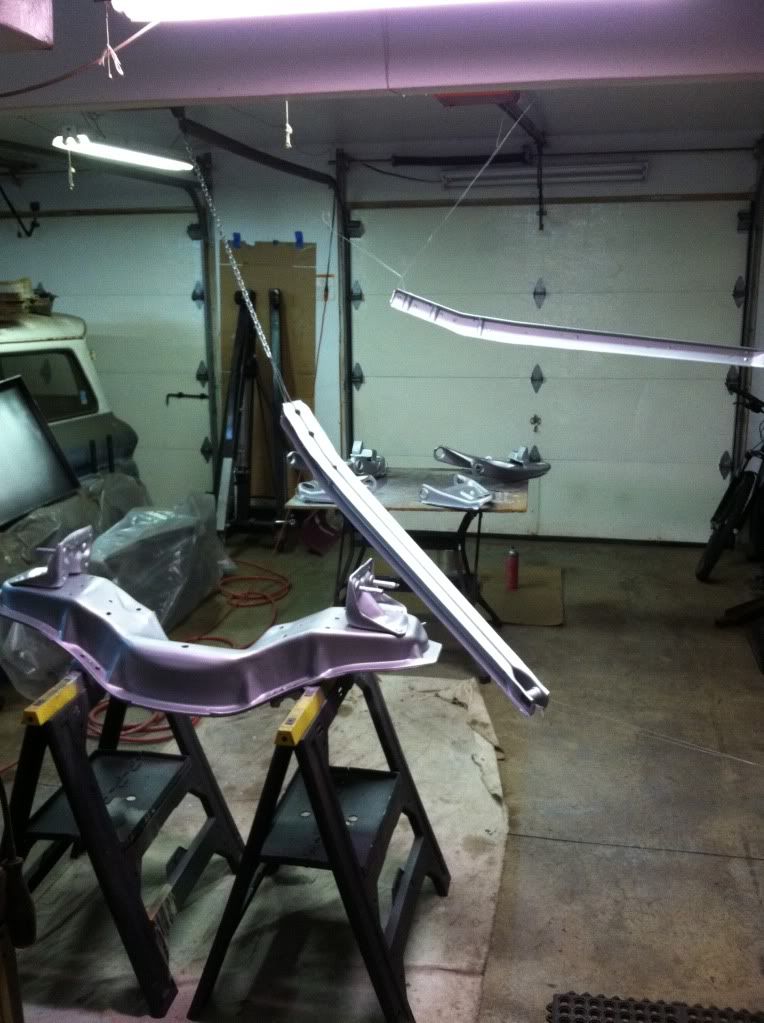 The heater is completely rebuilt with the core having been flushed and pressure tested. (I tried to blow all the crap out and flush it out with hot water—but I had no way of getting all the junk out of it..) I put a new blower motor in as the old one whined really bad—then re-sealed it with some of the rope caulk. I cleaned up each little sheetmetal screw and managed to NOT lose any along the way even after launching them across my garage with my bench grinder/wire wheel 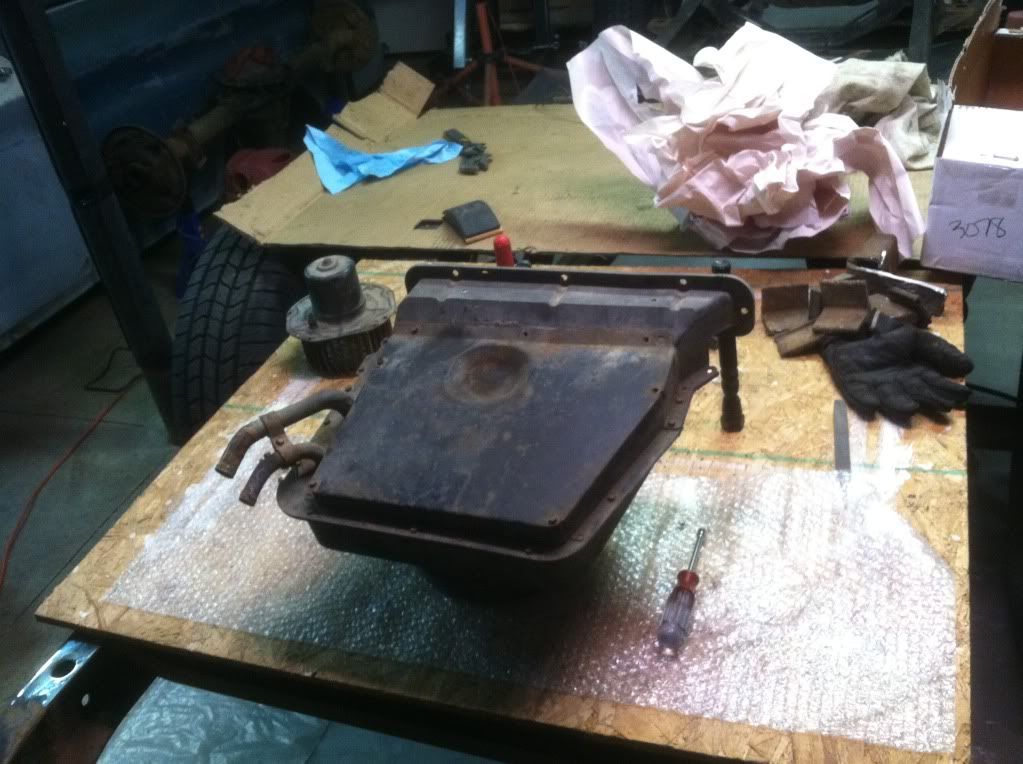 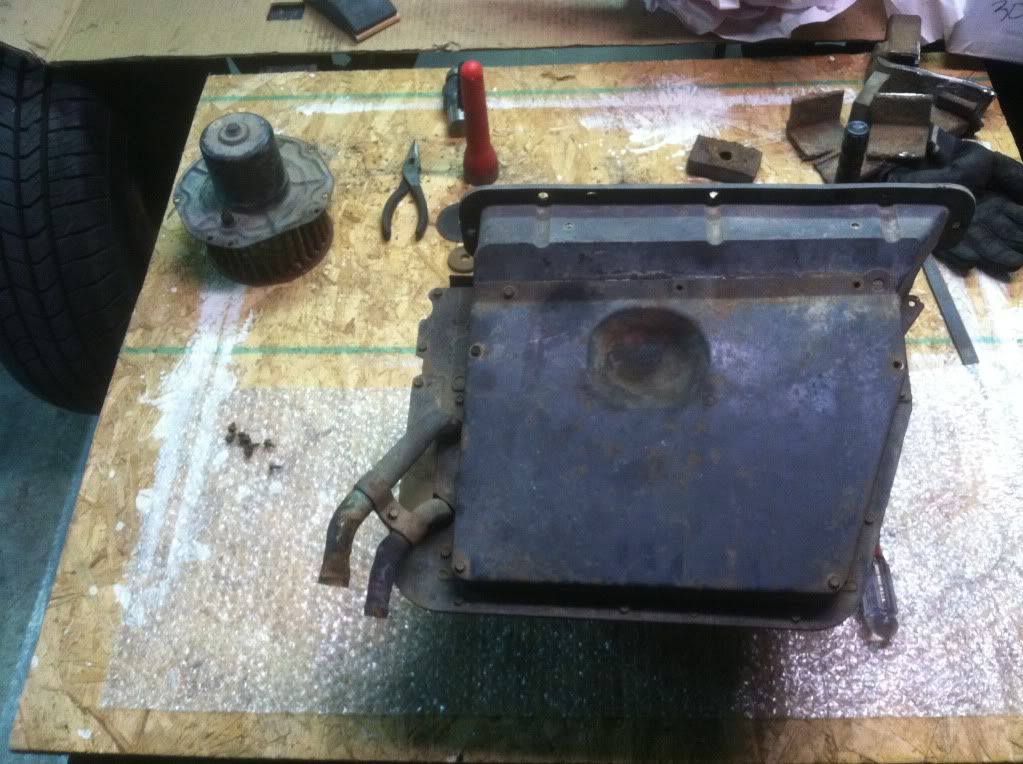 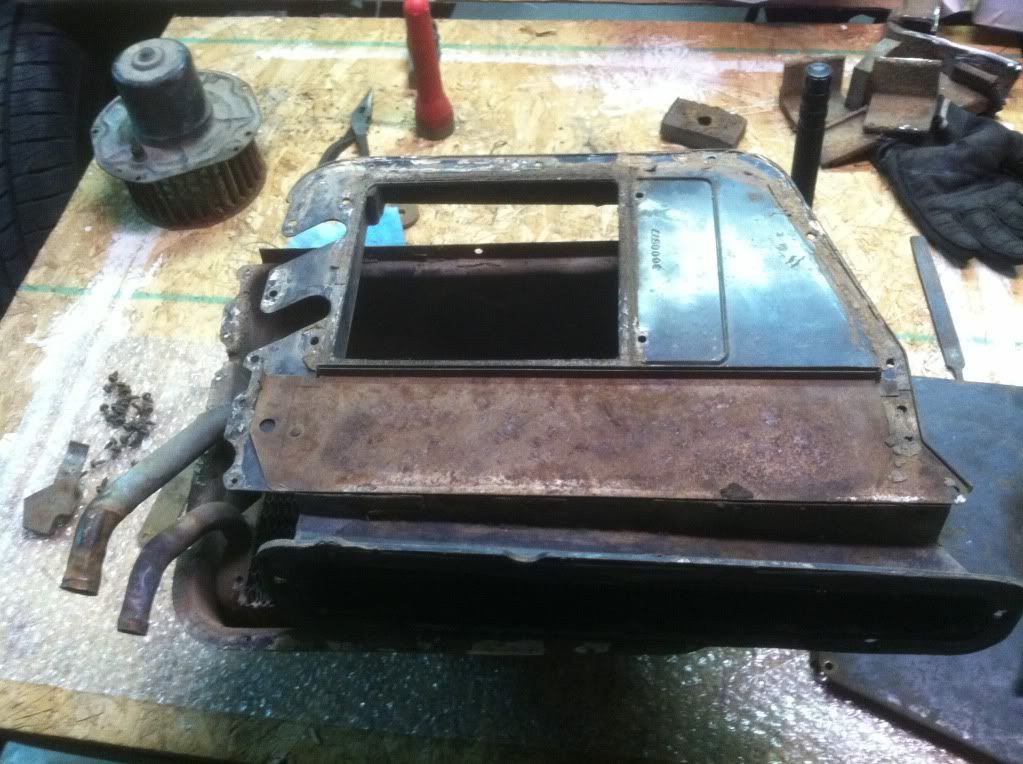 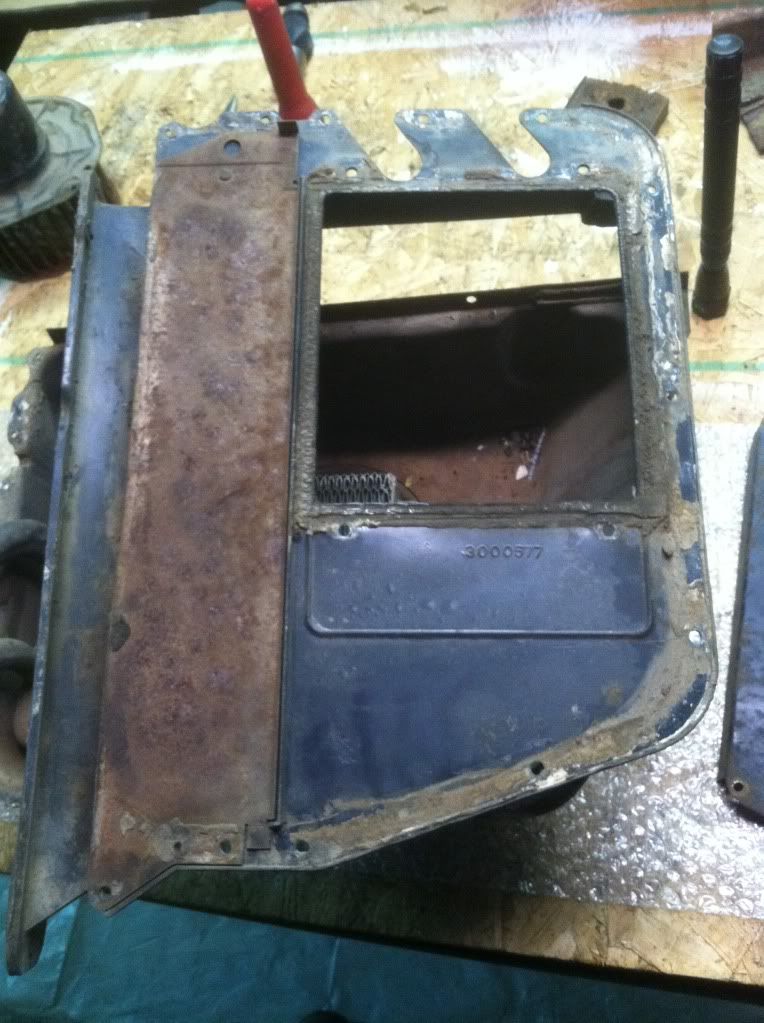 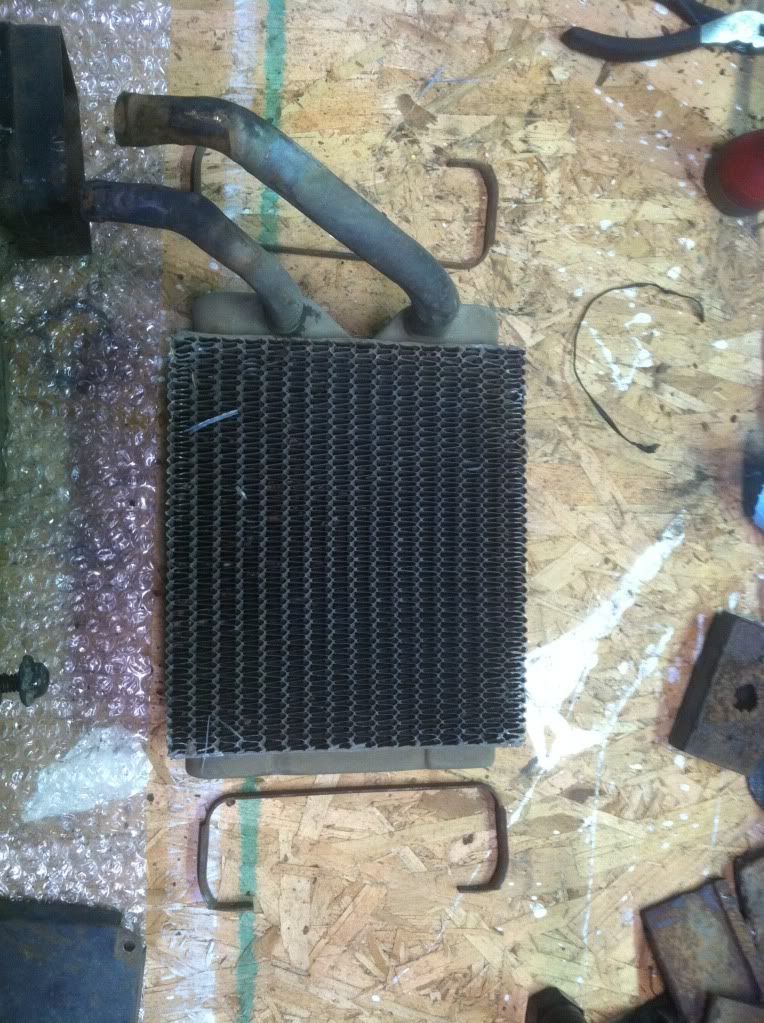 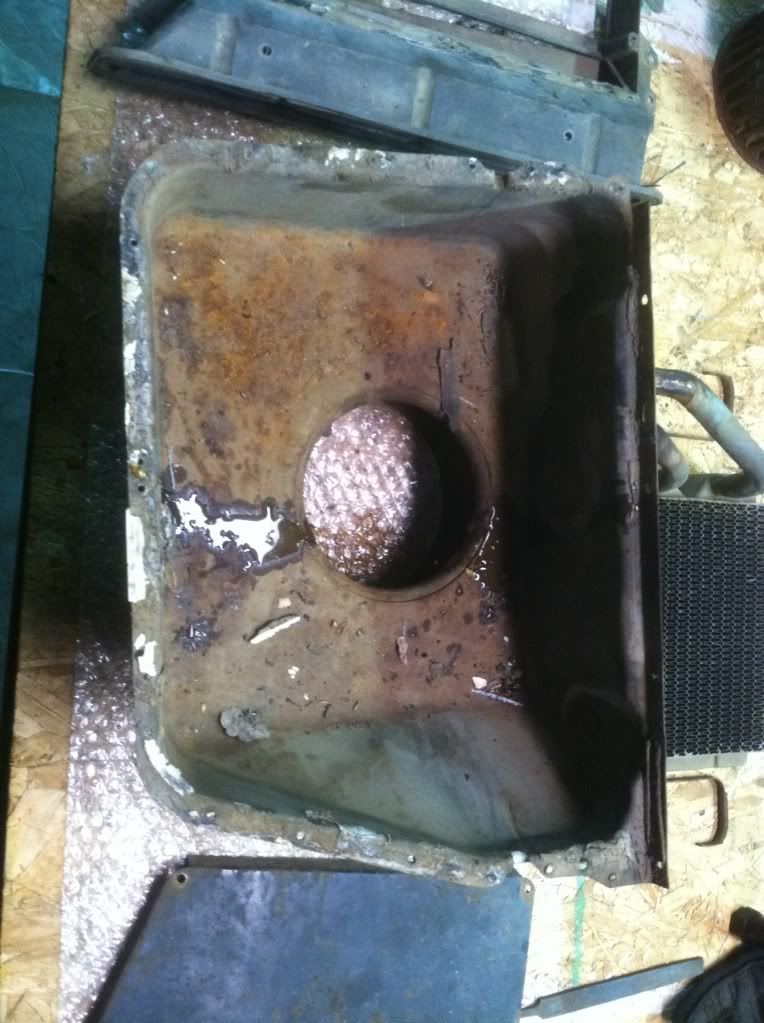  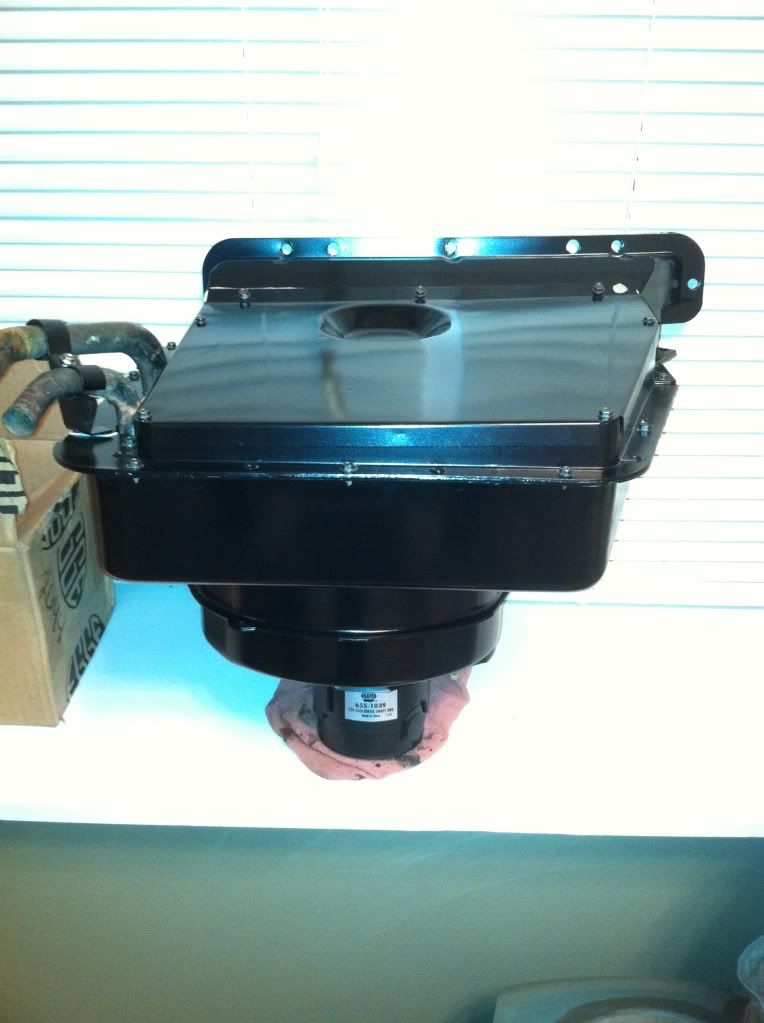  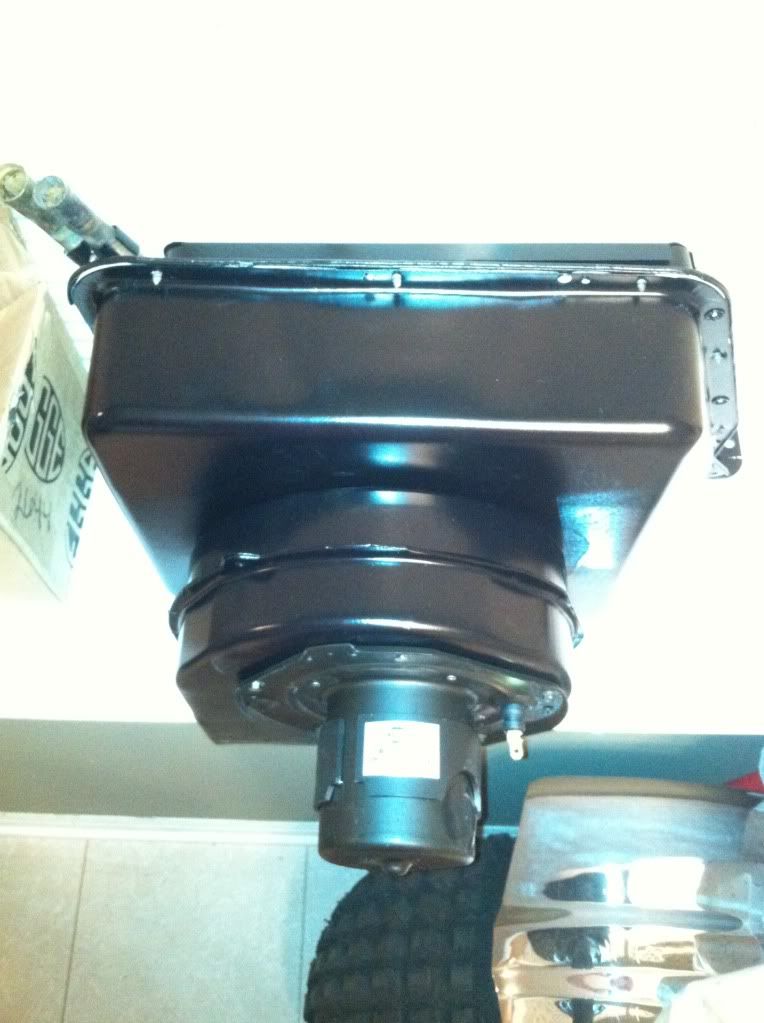 I also bought another toy this past Friday as I have recently been introduced to estate sales hunting. I picked up an old (but brand new) Enco 12-spd floor mount drill press. It runs perfect and had I gotten to the sale a little earlier, I would have had a whole mess of vices and pieces for the work table.. Oh well—I’ll catch those parts at another sale hopefully. ] 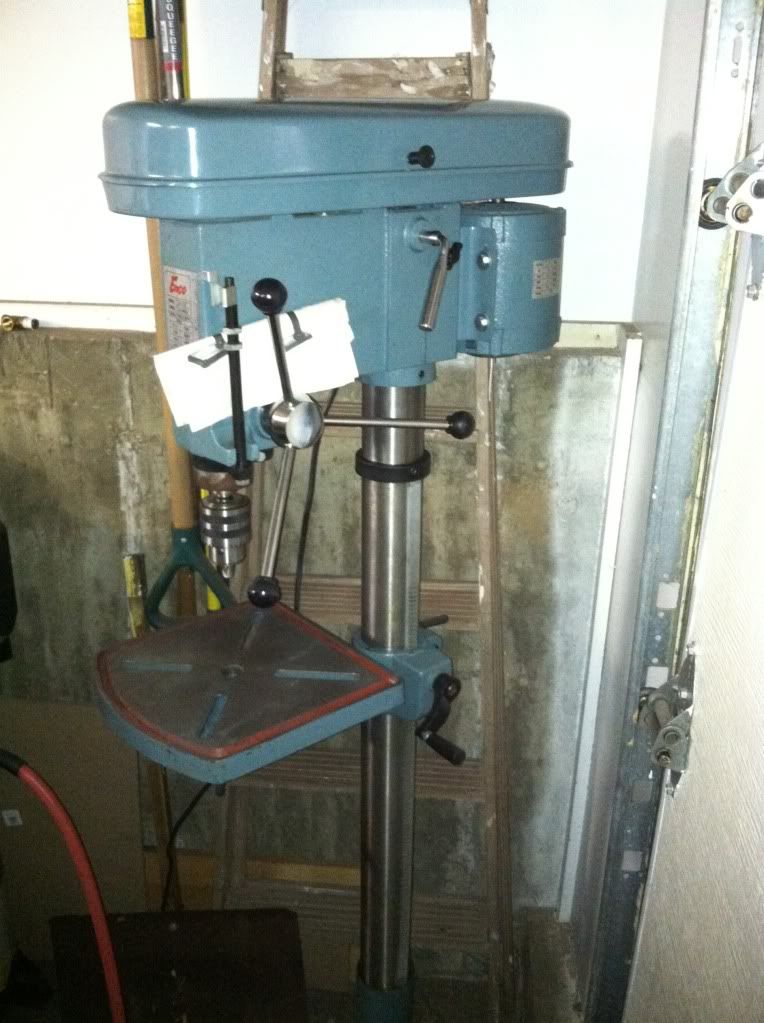
Last edited by hemifalcon; 03-26-2012 at 09:41 PM. |
|
|
|
|
04-01-2012, 10:23 PM
|
#24 |
|
Registered User
Join Date: Jan 2012
Location: Antioch, IL
Posts: 418
|
Re: 1965 Suburban Resto-Rebuild
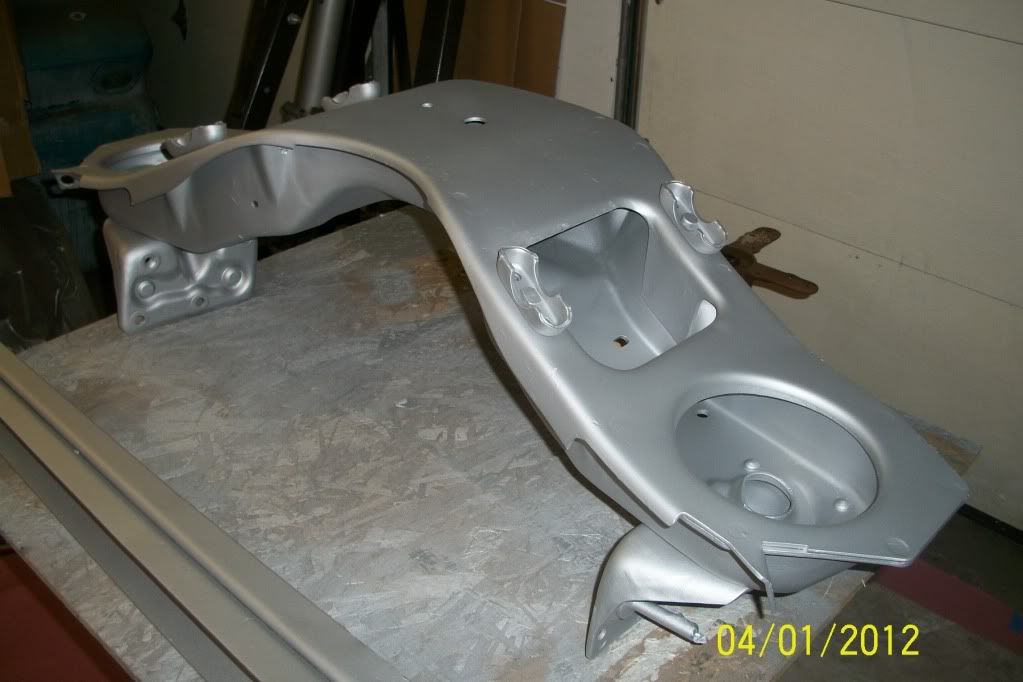
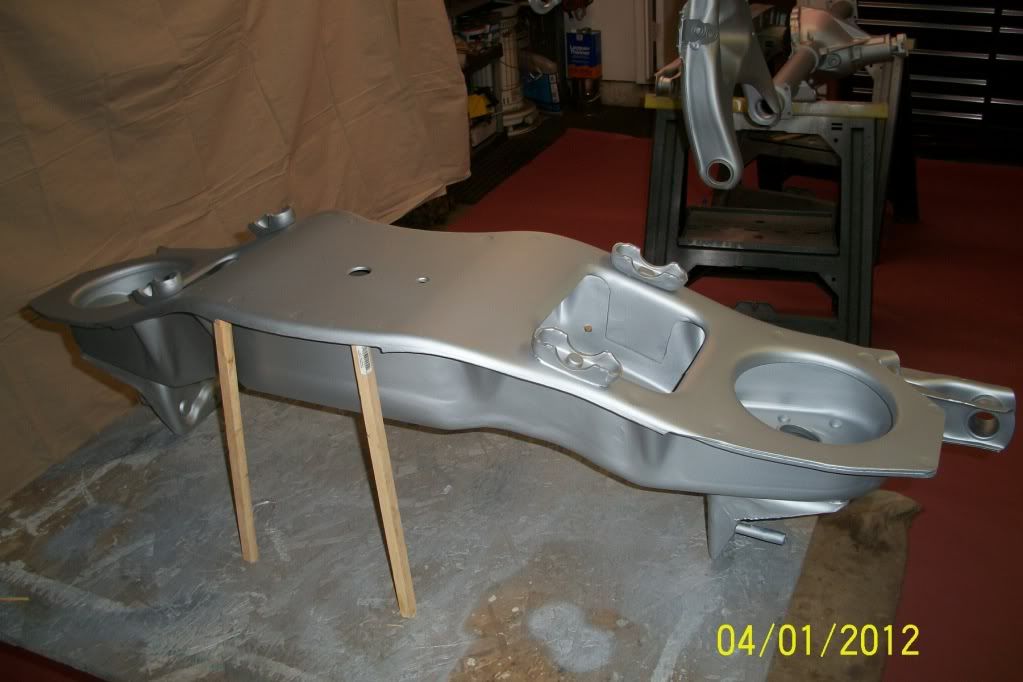
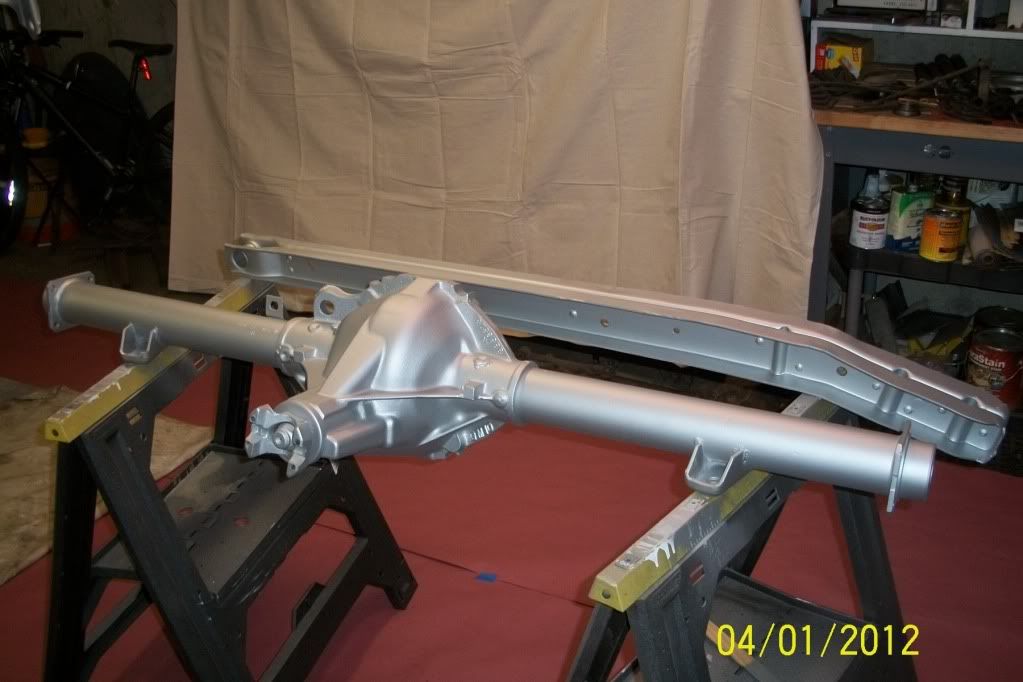
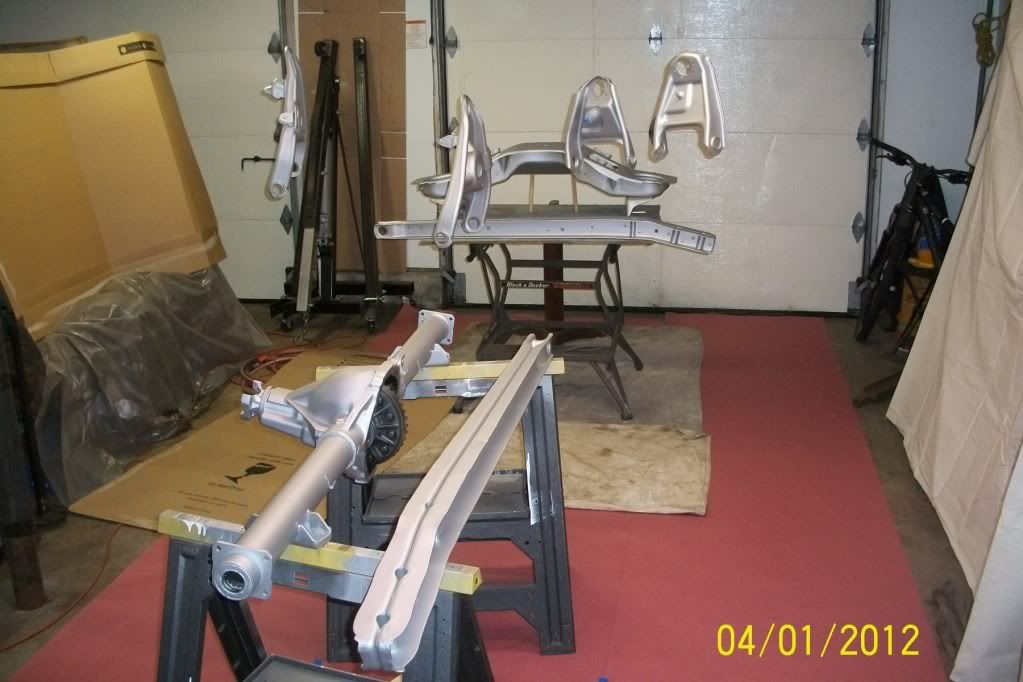
Here's all the bolt on parts to the frame.. Planning on spraying the first coat of the TractorKote Black tomorrow..
|
|
|
|
|
04-01-2012, 10:45 PM
|
#25 |
|
Rollin' Old Skool
Join Date: Jun 2007
Location: Hattiesburg, MS
Posts: 5,371
|
Re: 1965 Suburban Resto-Rebuild
very nice! that's looking really clean
__________________
_____________________________________________ Phillip My Build threads: 1966 Chevy C-10 "Black Betty" shortbed, fleetside, BBW, 327 V8/ Powerglide (under construction) http://67-72chevytrucks.com/vboard/s...ighlight=betty 1997 Chevy Tahoe, 2dr/2wd, mild custom (Daily driver) http://67-72chevytrucks.com/vboard/s...d.php?t=601142 Pics: '66 C-10 https://flic.kr/s/aHsjHWD4h9 '97 Tahoe https://flic.kr/s/aHsjGZ7wKP '93 C-1500 https://flic.kr/s/aHskxdpdnQ '88 S-10 Blazer https://flic.kr/s/aHsjYGx4Md Previous Rides: 1993 Chevy S-10 ext. cab, 4.3L, 4/5 drop (Sold) 1993 Chevy C-1500 short/step Retro-Rod (Sold) 1988 S-10 Blazer 2dr/2wd mild custom (Sold) |
|
|
|
 |
| Bookmarks |
|
|


 Hybrid Mode
