
|
Register or Log In To remove these advertisements. |
|
|
|
|||||||
 |
|
|
Thread Tools | Display Modes |
|
|
 08-16-2016, 11:33 PM
|
#1 | |
|
Registered User
Join Date: Nov 2014
Location: Oakland, CA
Posts: 114
|
Re: Kell's Two Cents - 1946 build
Quote:
|
|

|

|
|
08-17-2016, 12:13 AM
|
#2 |
|
Registered User
Join Date: Nov 2014
Location: Oakland, CA
Posts: 114
|
Re: Kell's Two Cents - 1946 build
Hey guys, I was trying to wait for a bigger update but it's been a while so I'll hit you with a couple sneak peaks
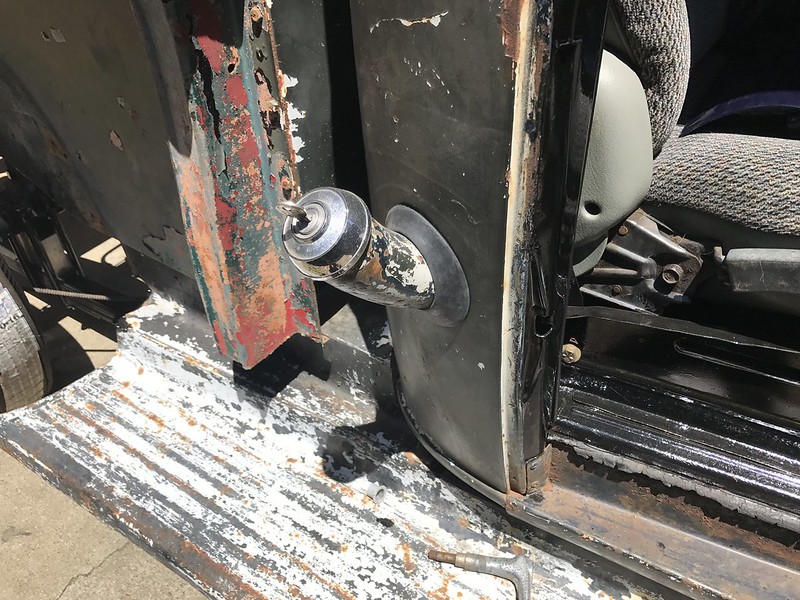
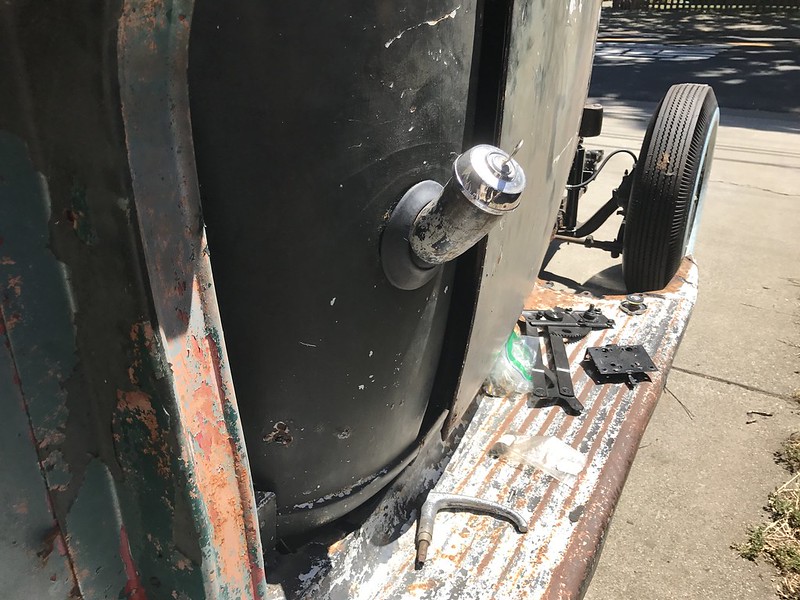
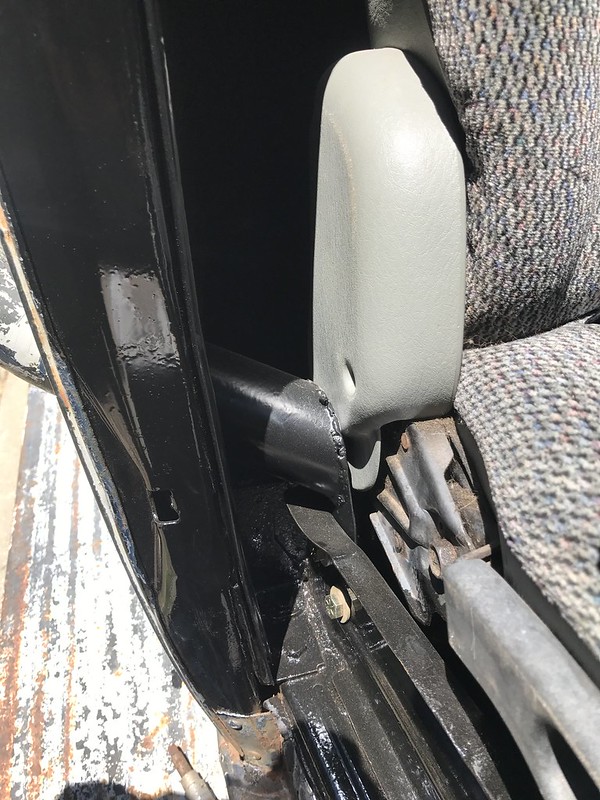
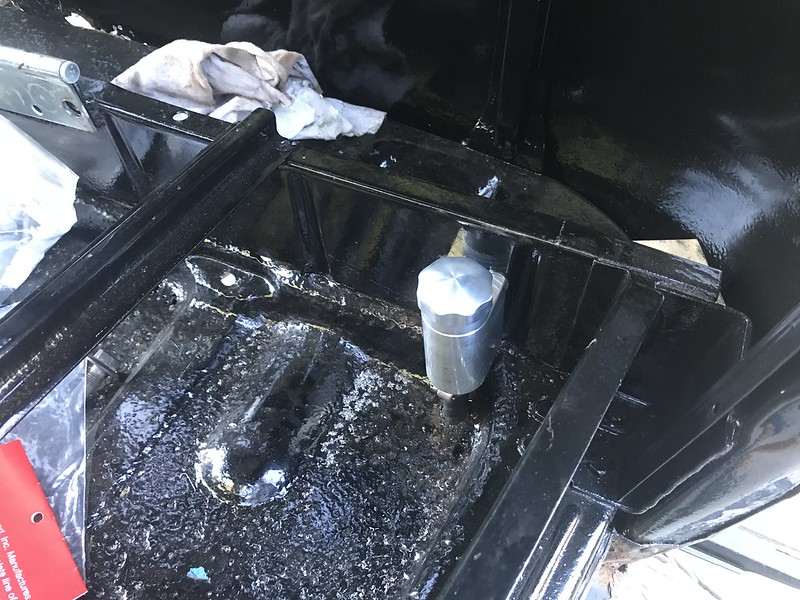
First off, it was way back when, I only had the perches on my rear end tacked in as back then I was verifying my pinion angle and wasn't looking to overly commit.. I wanted to get the thing coated so I pulled a couple measurements and confirmed the axle was center and that everything was good to go. It was. Then suddenly I was completely thrown off, as with the driveshaft installed I could really tell that axle yoke wasn't centered  I'll cut to the chase, cause all the OG's already know where I'm going with this... Turns out Chevy 12 bolts are in fact not centered. I did all my head scratching, double checked all my measurements, did all my research and finally figured out that this was normal and I was good to go. The axle came out of 70's something Blazer some guy was parting out on Craigslist. Everything was in really good shape but the only catch was he wouldn't let me take it without the Dana 44 front end too. By the time I sold the front end though I ended up getting away with what I'd call a hell of a deal. I finalized the perches, coated it, filled it with gear oil, and all is good to go but now the yoke seal is leaking, so I'll have to get to that... The axle seems to fit perfectly into my rear fenders so I don't believe I''ll have to shorten it I also changed the oil pan gasket (confirmed, cannot remove pan with V8 crossmember), transmission pan gasket and filter. Sorry I always have such crap lighting 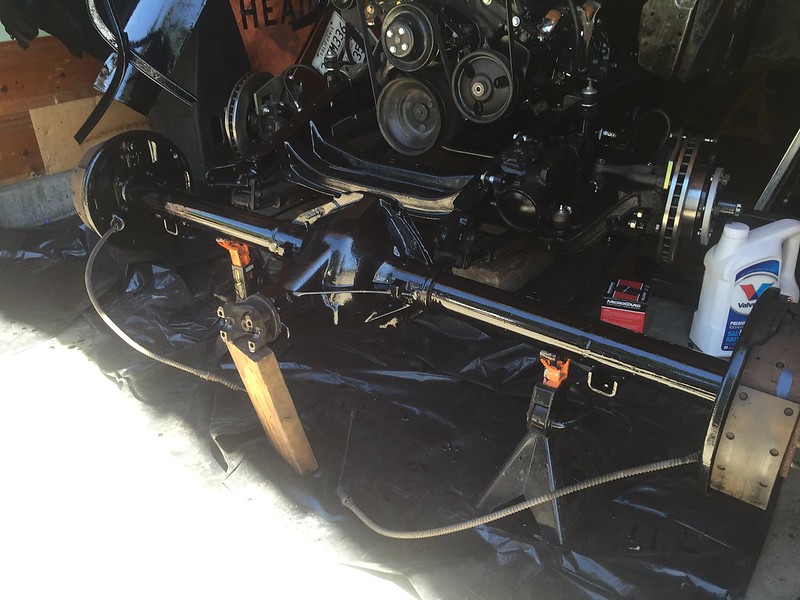 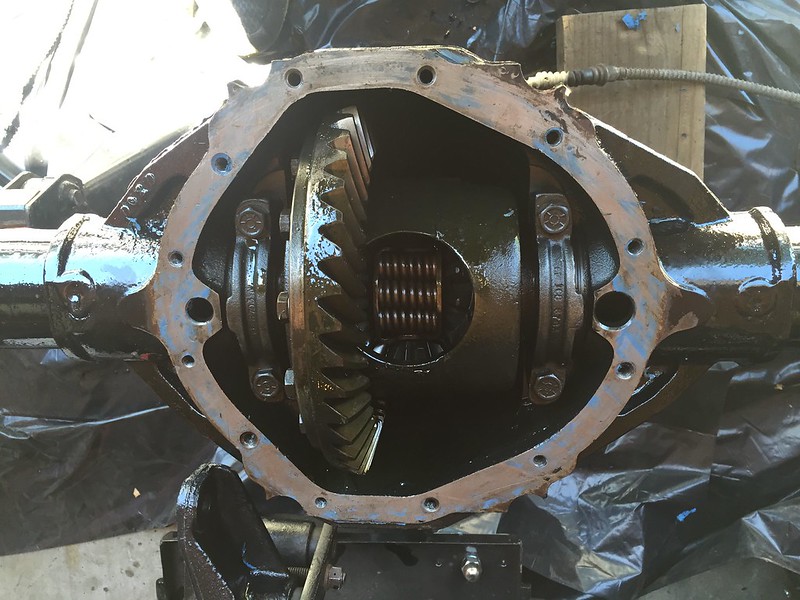 Dashboard's been at the body shop... I used to work for this guy back in high school, he's just a one man shop operating out of his property and has been for 30+ years. I have the dash back now but here's a sneak of the color, GM Bermuda Blue Metallic. I've always been a huge fan of the color so I'm glad I finally get to use it on something. It really only pops in the sun, changes from dark blue to green 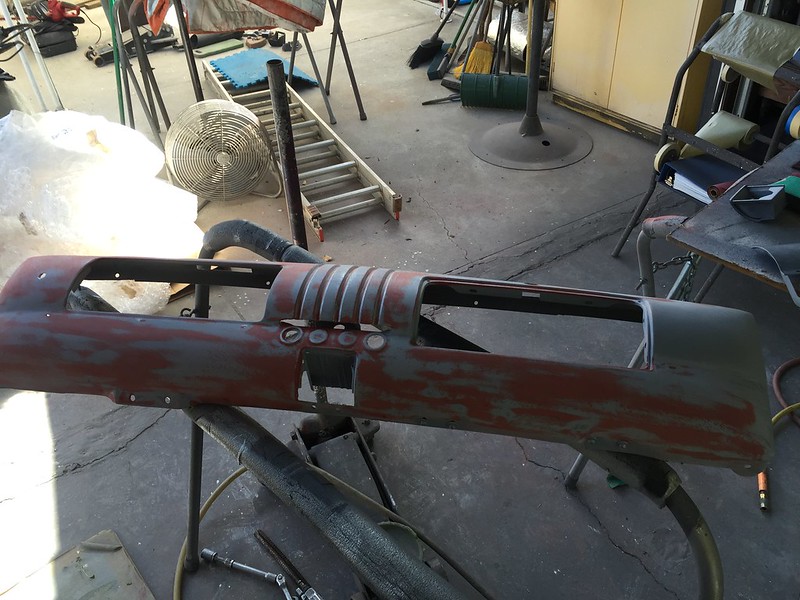 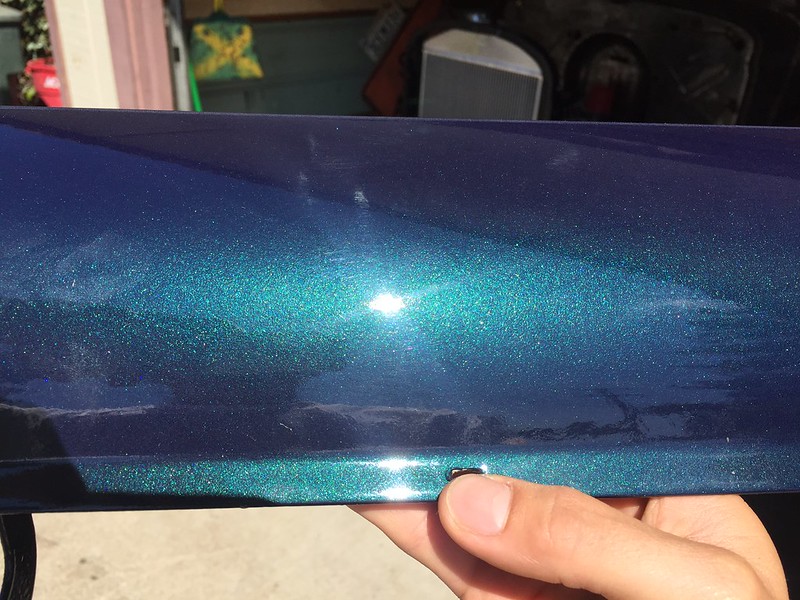 Be smart and always let the Paintman do all the drinking and thinking for you! My radiator support fix looks like his throwaway rough draft  but it's done, thanks brotha! but it's done, thanks brotha!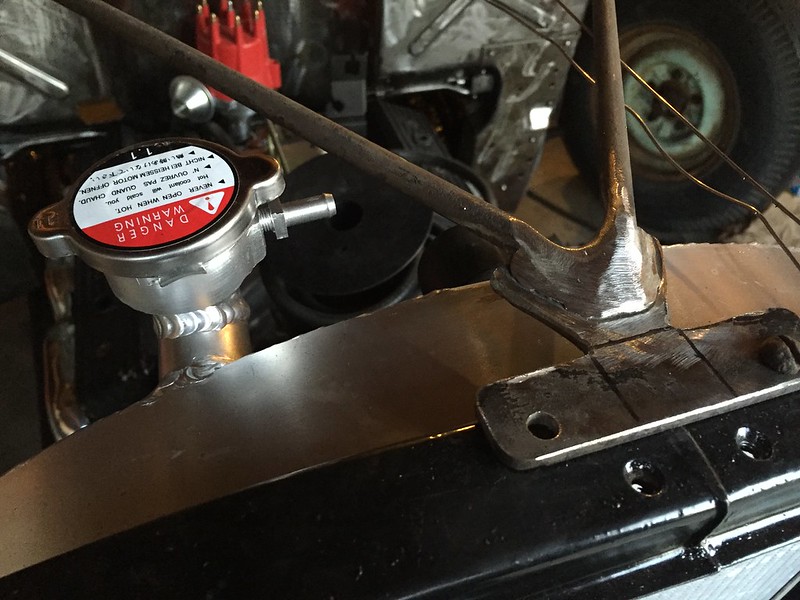 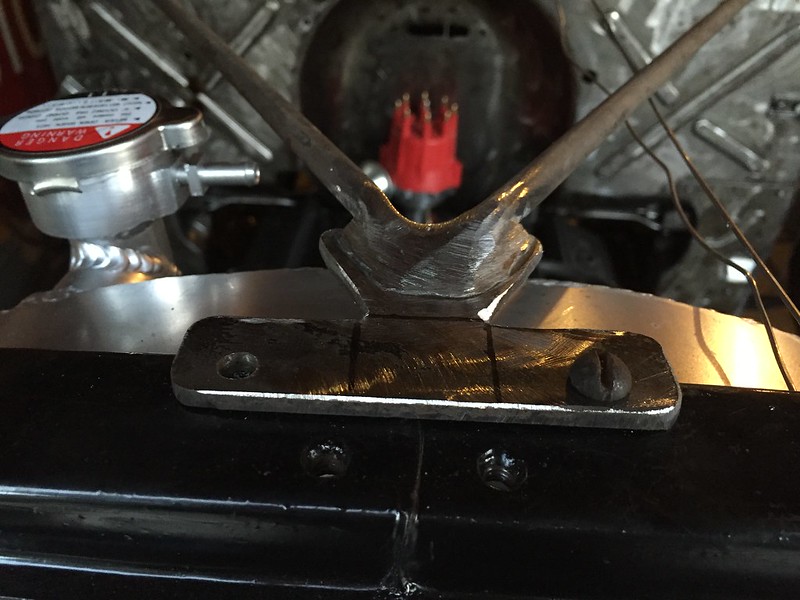 Doors are just about ready to go back together 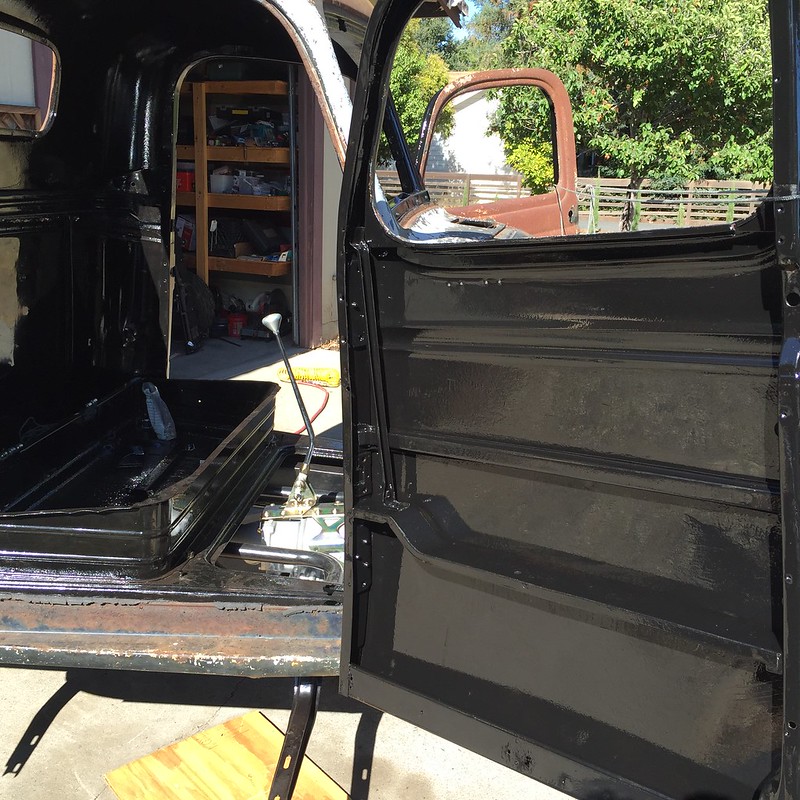 That's about it with the minor update, there's more to follow. Thanks for stopping by, I'll catch you guys later Last edited by gokellurself; 08-19-2017 at 09:47 AM. |
|
|
|
|
08-17-2016, 06:03 PM
|
#3 |
|
Registered User
Join Date: Dec 2010
Location: washington NJ
Posts: 766
|
Re: Kell's Two Cents - 1946 build
Be smart and always let the Paintman do all the drinking and thinking for you! My radiator support fix looks like his throwaway rough draft
but it's done, thanks brotha!I will take no responsibility for any problems that may occur because you copied from someone who doesn't have clue what he is doing. You also have a PM in regards to your questions. paint man |
|
|
|
|
05-05-2017, 03:42 AM
|
#4 |
|
Registered User
Join Date: Nov 2014
Location: Oakland, CA
Posts: 114
|
Re: Kell's Two Cents - 1946 build
what's going on fellas
It's been a few months so I wanted to get a few updates up. I got a few big items checked off so I'm really trying to make a push as we're back into spring and summer now. I don't have it pictured but I have the cooling system all finalized, fan mounted. I had a local hydraulic shop make some power steering lines for me. I used some washers to get the power steering pump to line up just right on the serpentine. One major item I need to face soon is finalizing the steering linkage 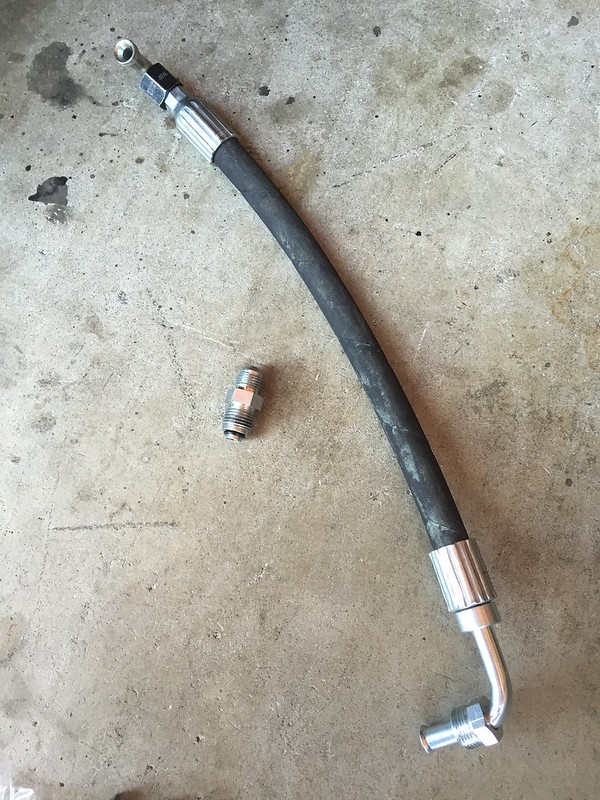 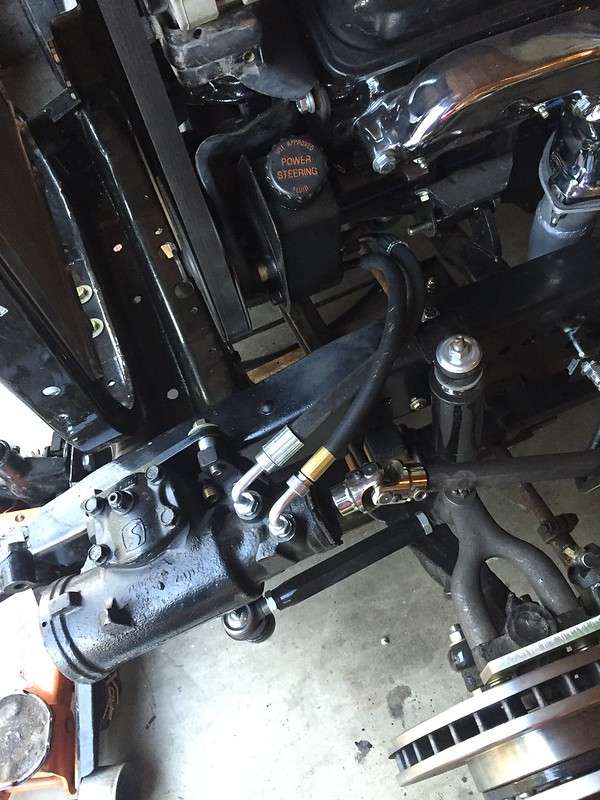 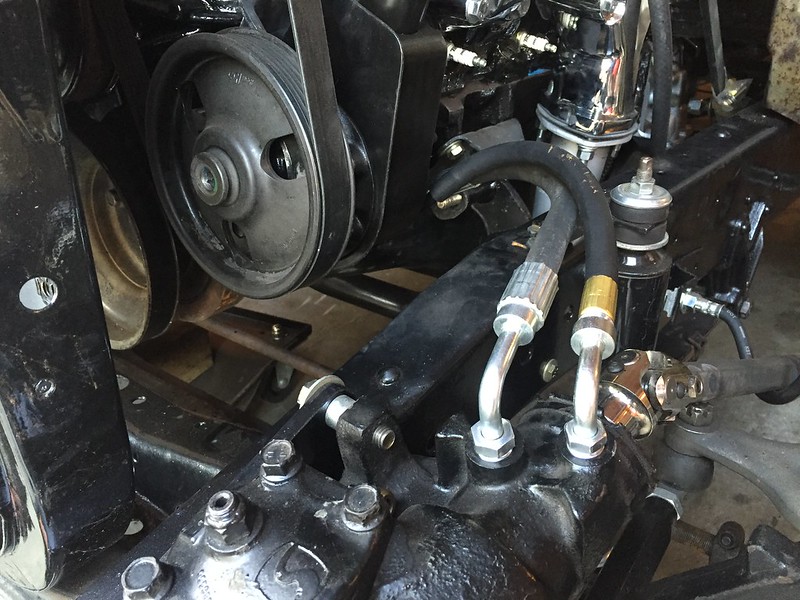 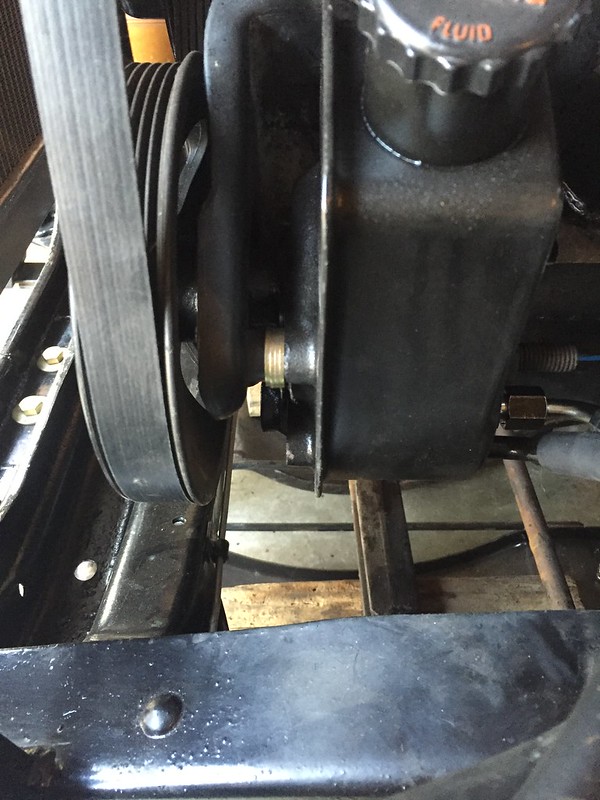 I've got the windows in, all except the windshield. They fit well but are little stiff cranking up and down. I need to grease the channel where the crank slides, but beyond that I'm not sure what else I could do to help it. I still haven't bit the bullet and purchased the new windshield frame, but I don't think the two old ones that I have are going to be worth the work to make either of them work. If anybody is interested in them let me know, or they'll end up on Craigslist or something 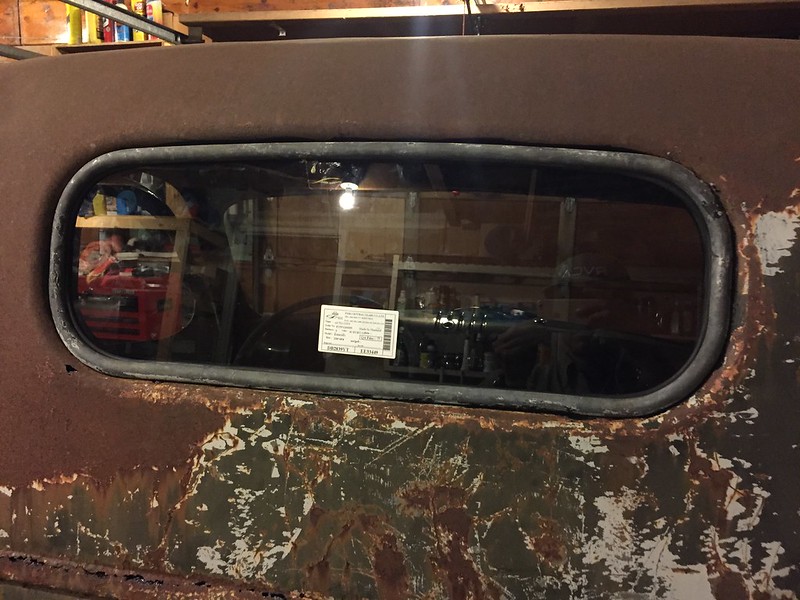 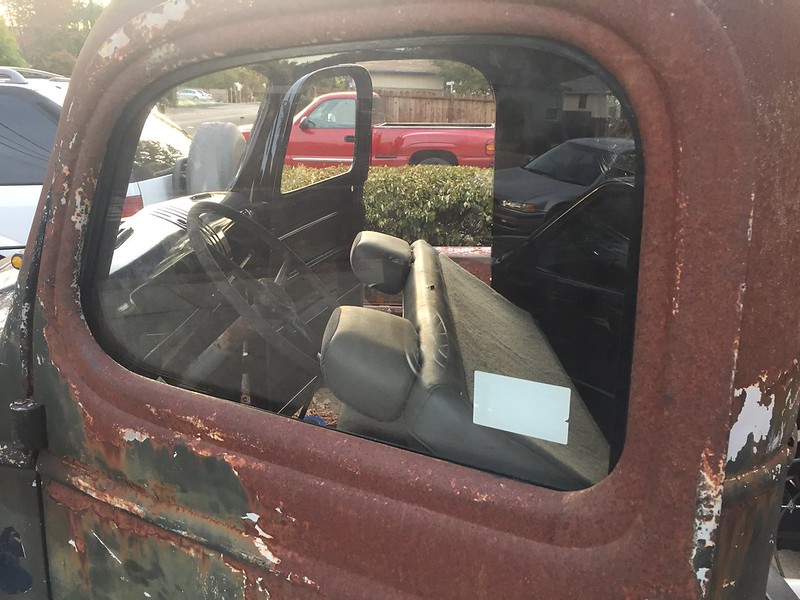 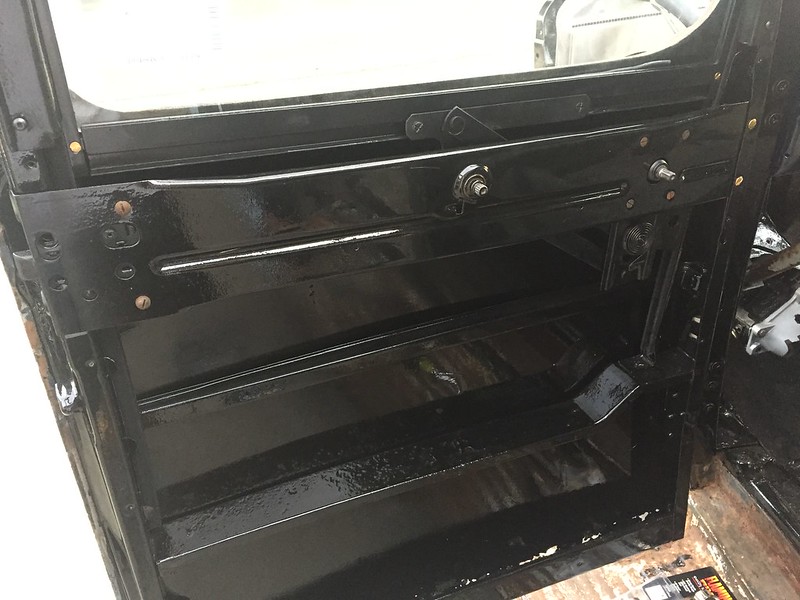
Last edited by gokellurself; 08-19-2017 at 10:18 AM. |
|
|
|
|
05-07-2017, 07:54 PM
|
#5 |
|
Senior Member
 Join Date: May 2007
Location: Doodah Kansas
Posts: 7,748
|
Re: Kell's Two Cents - 1946 build
what a great project, glad you are back on it.
my advice: buy the windshield, seriously. I did some math, figuring that I needed new glass, new hardware, new center bar, new glass tape, new gasket, it would have cost me around $400, AND still need to repair the rust in the lower channel, AND drill out and tap all the rusty hardware, AND put it all back together. for double that I could bolt it in and put my not very rusty one with broken glass on craigslist. bowtie bits is local to me though, so no expensive shipping. jeff is a dynamite human being too, I got a bunch of stuff from him when I stopped in last, and I will get some more this week. 
__________________
the mass of men live lives of quiet desperation if there is a problem, I can have it. new project WAYNE http://67-72chevytrucks.com/vboard/s...d.php?t=844393 |
|
|
|
|
05-11-2017, 02:11 AM
|
#6 | |
|
Registered User
Join Date: Nov 2014
Location: Oakland, CA
Posts: 114
|
Re: Kell's Two Cents - 1946 build
Quote:
my heart can't take it! Hey do you have any more details on how to rebuild the windshield cranks? What size bits did you use? And where/how do I find that copper piece? |
|
|
|
|
|
05-12-2017, 11:14 AM
|
#7 |
|
Senior Member
Join Date: May 2007
Location: Doodah Kansas
Posts: 7,748
|
Re: Kell's Two Cents - 1946 build
well the shaft can be slightly worn and the wear on the bracket can need a larger sized hole so there isnt a how-to really, I am always sanding with high grit.
the brass is just high copper brass I get from the local scrap yard and turn in a drill press to get smooth. on a couple I have needed to make a new bushing that the handle shaft rides on, you have to drill out the rivet and put the new piece in. pull on your handle, if you can move it in and out of teh regulator more than a tiny amount, that bushing will need replaced too.
__________________
the mass of men live lives of quiet desperation if there is a problem, I can have it. new project WAYNE http://67-72chevytrucks.com/vboard/s...d.php?t=844393 |
|
|
|
|
06-02-2017, 01:24 PM
|
#8 |
|
Registered User
Join Date: Dec 2010
Location: washington NJ
Posts: 766
|
Re: Kell's Two Cents - 1946 build
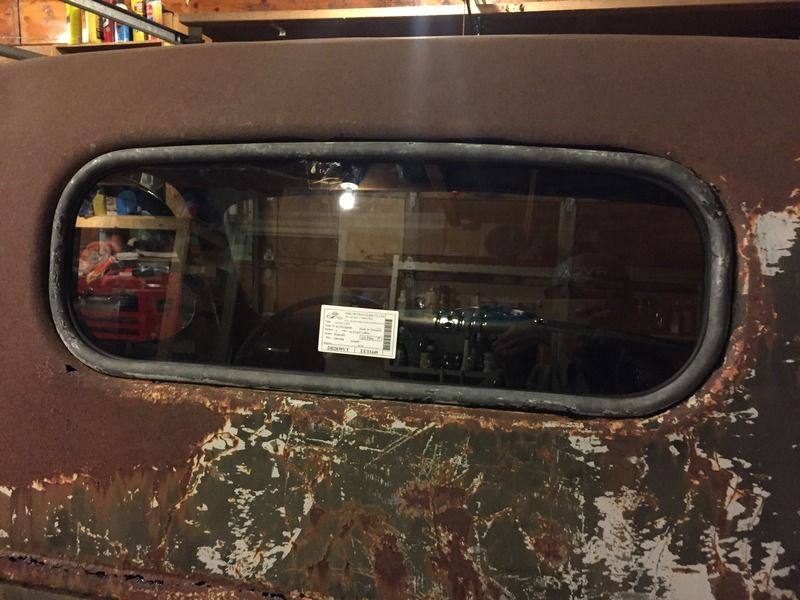
Hey Kell! Can I ask who you bought your gasket from for your window in the back of the cab? Your flange on the outside looks alot bigger then the one I got from Steele. I am having an impossible time getting my glass in. Thanks,the Paintman!
 [/URL] [/URL]
|
|
|
|
|
06-03-2017, 12:50 AM
|
#9 | |
|
Registered User
Join Date: Nov 2014
Location: Oakland, CA
Posts: 114
|
Re: Kell's Two Cents - 1946 build
Quote:
good luck though, here's the link http://www.oldchevytrucks.com/cart/p...2&i=10930||||| |
|
|
|
|
|
06-03-2017, 01:44 AM
|
#10 |
|
Registered User
Join Date: Nov 2014
Location: Oakland, CA
Posts: 114
|
Re: Kell's Two Cents - 1946 build
what's going on fellas, I got some updates
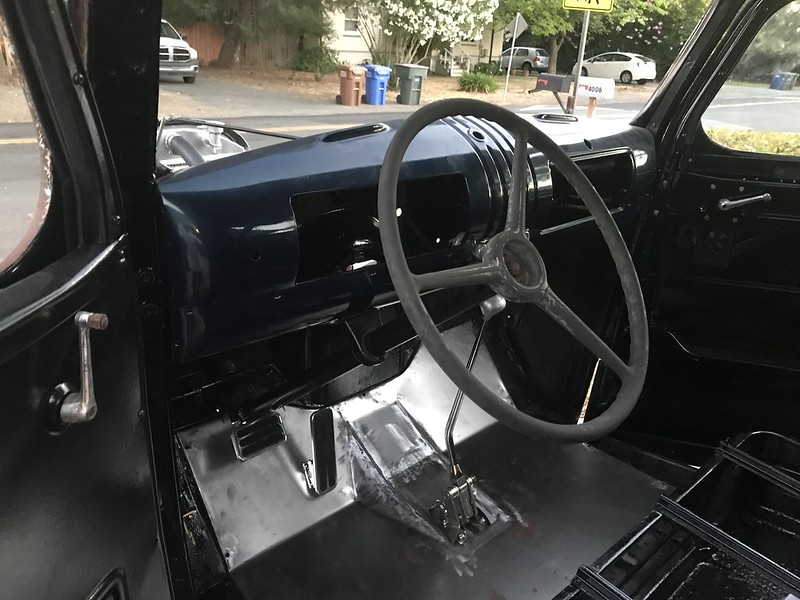
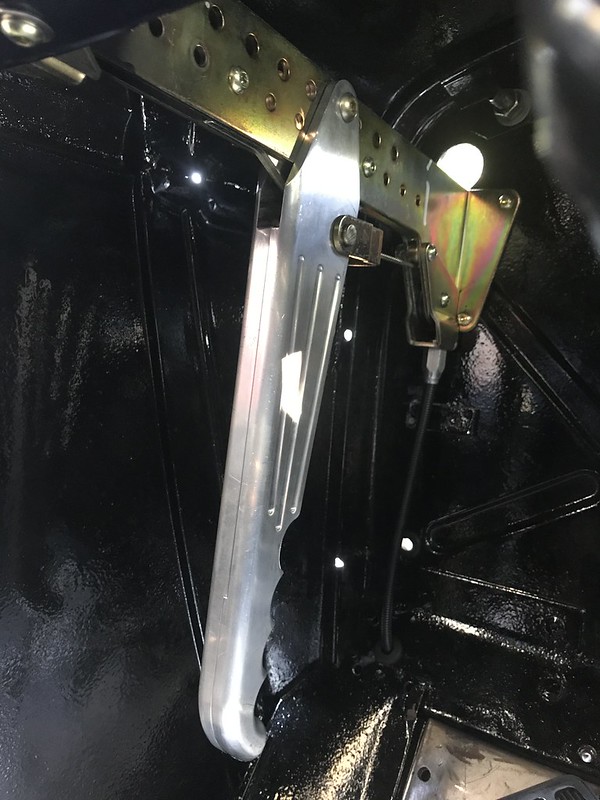
 I could ignore it no longer so I finally picked up a Lokar E brake the other day on Ebay, got a decent deal on it because he bought it and ended up not using it on his project. The kit comes fully adjustable but I still added holes to get it exactly where I wanted. This portion of the install couldn't have been easier really, but a bit nerve wracking drilling bolt holes into already painted dash lol I haven't ran any cables yet but here it is  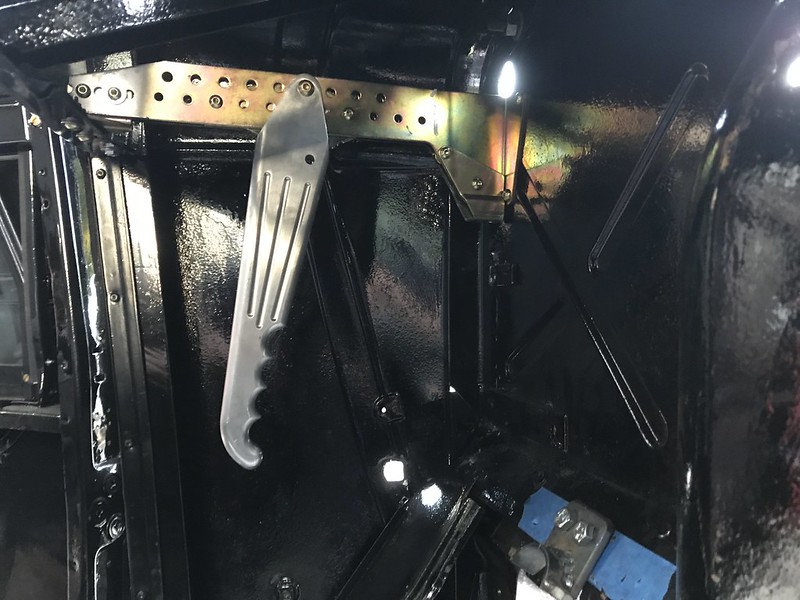 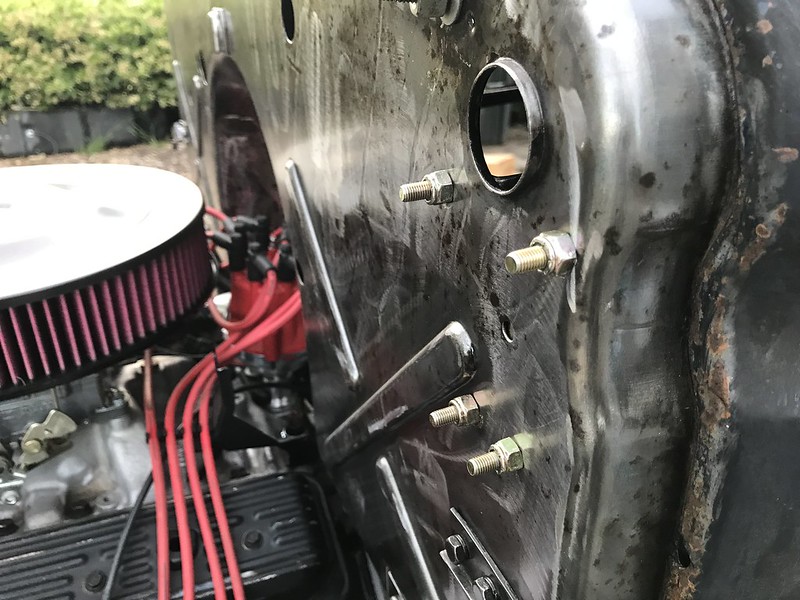
Last edited by gokellurself; 08-19-2017 at 10:46 AM. |
|
|
|
|
06-03-2017, 01:54 AM
|
#11 |
|
Registered User
Join Date: Nov 2014
Location: Oakland, CA
Posts: 114
|
Re: Kell's Two Cents - 1946 build
I meant to post this a while back, but I came up with a secondary gas tank! Key's stuck in the cap so I'm just gonna leave it there lol
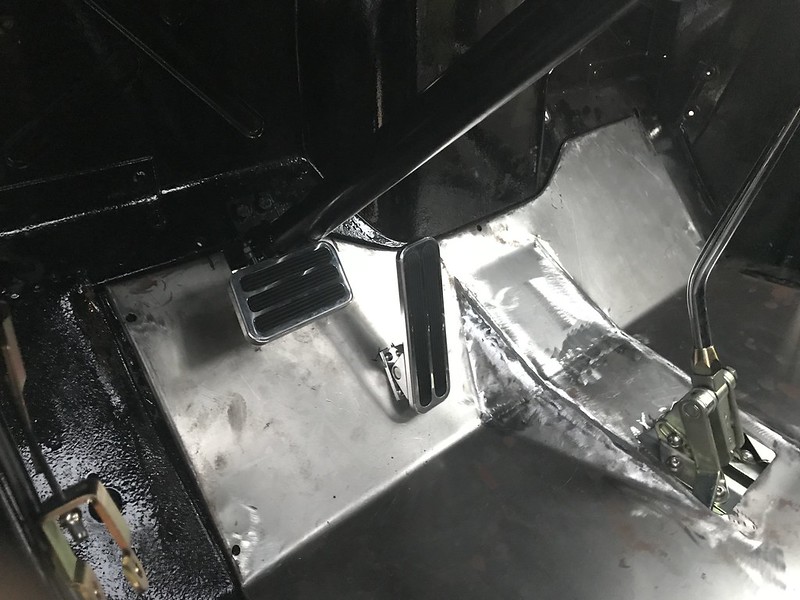
   I really just wanted to fill the filler hole, so this was perfect. I was at the point where my floor, steering, and brake all had to come together at once, so I enlisted the help of a friend for a few tasks because I didn't feel like doing it lol plus couldn't bare to have to own the hack job that would then ensue! After staying in his ear he finally had a few days open up for me and he came and picked it up. 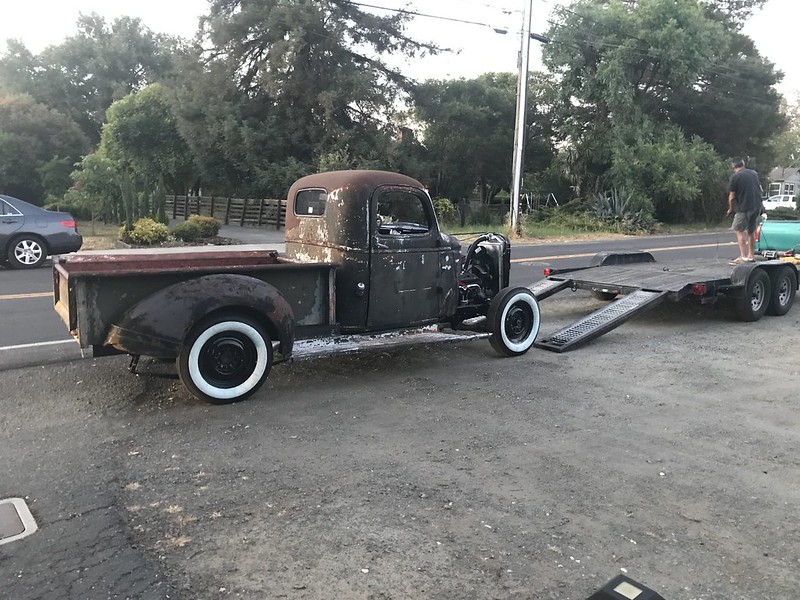 Needed a minor trans hump on the floor. I forgot to snap a photo of the underside but it's super clean with rolled edges and the whole deal. I'll make sure to get it next time, I'm really happy about it. 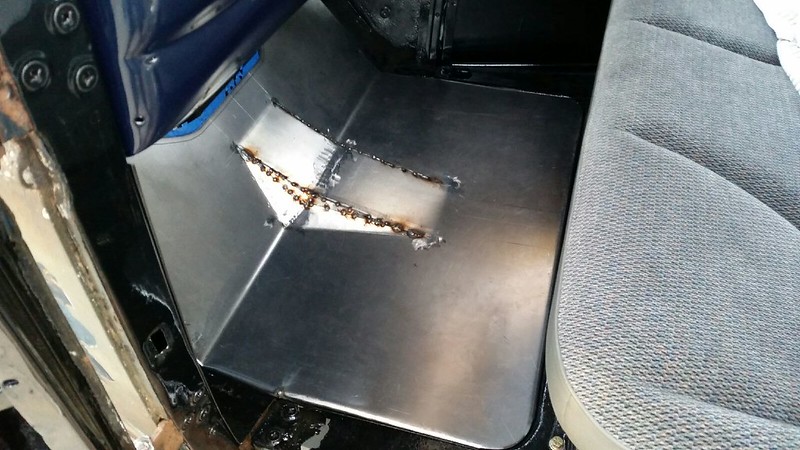
Last edited by gokellurself; 08-19-2017 at 11:00 AM. |
|
|
|
|
06-03-2017, 08:33 AM
|
#12 | |
|
Registered User
Join Date: Dec 2010
Location: washington NJ
Posts: 766
|
Re: Kell's Two Cents - 1946 build
Quote:
|
|
|
|
|
|
06-03-2017, 02:26 PM
|
#13 | |
|
Registered User
Join Date: Nov 2014
Location: Oakland, CA
Posts: 114
|
Re: Kell's Two Cents - 1946 build
Quote:
For mine the screws pass through the big rear interior piece, through the cab, through the rubber then screws into the outside bezel. I know the 41 window is slightly bigger. Hope this helps 
|
|
|
|
|
|
06-03-2017, 09:39 AM
|
#14 | |
|
Senior Member
Join Date: May 2007
Location: Doodah Kansas
Posts: 7,748
|
Re: Kell's Two Cents - 1946 build
wow a lot of work in a short time! nice joerb
Quote:
hey we could trade, my serial and title is 1941 but everything points to it being a 46 (rear glass, headliner, turn signals, dash knobs, outside key). I think a lot of body part swapping went on in the 40s and 50s. I read that, during the war, farmers who were used to replacing their trucks every 2 years (because they didnt last much longer than that in hard use) had to keep these going, wartime production stopped in early 42 and didnt start again until late 45, so a 41 would have almost 5 years work on it by 46 when new trucks were finally available. add to that scrap drives for metal and its amazing anything is left from 41 and earlier.
__________________
the mass of men live lives of quiet desperation if there is a problem, I can have it. new project WAYNE http://67-72chevytrucks.com/vboard/s...d.php?t=844393 |
|
|
|
|
|
06-03-2017, 02:37 PM
|
#15 | |
|
Registered User
Join Date: Nov 2014
Location: Oakland, CA
Posts: 114
|
Re: Kell's Two Cents - 1946 build
Quote:
|
|
|
|
|
|
06-24-2017, 08:59 AM
|
#16 |
|
Registered User
Join Date: Dec 2002
Location: Cactus Patch So. Az
Posts: 4,749
|
Re: Kell's Two Cents - 1946 build
Have you given any thought of tac welding the 90* adapter for the brake pad to the brake arm. Under VERY hard braking you may be able to twist that pad up and lose your effort on the brakes, just say'n
__________________
53 TuTone Extended Cab 350 4-Spd 3:08 (SOLD) 53 Chevy Moldy pearl green ZZ-4 4L60E 9" 3:25 55 GMC 1st Black Mll (ZZ4) ZZ6 TKO 600 5 sp 3:73 62 Solidaxle Corvette Roman Red (327 340hp 4spd 3:36) C4 & C5 suspension tube chassis LS 3 4L70E 65 Corvette Coupe 327 350hp 4spd 4:11 78 Black Silverado SWB (350/350) 5.3 & 4L60E 3:42 2000 S-Type 3.0 (wife cruiser) 2003 GMC SCSB 5.3 4L60E 3:42 |
|
|
|
|
06-24-2017, 11:15 AM
|
#17 | |
|
Registered User
Join Date: Nov 2014
Location: Oakland, CA
Posts: 114
|
Re: Kell's Two Cents - 1946 build
Quote:
|
|
|
|
|
|
06-26-2017, 01:51 AM
|
#18 |
|
Registered User
Join Date: Nov 2014
Location: Oakland, CA
Posts: 114
|
Re: Kell's Two Cents - 1946 build
alright fellas, I was back at it
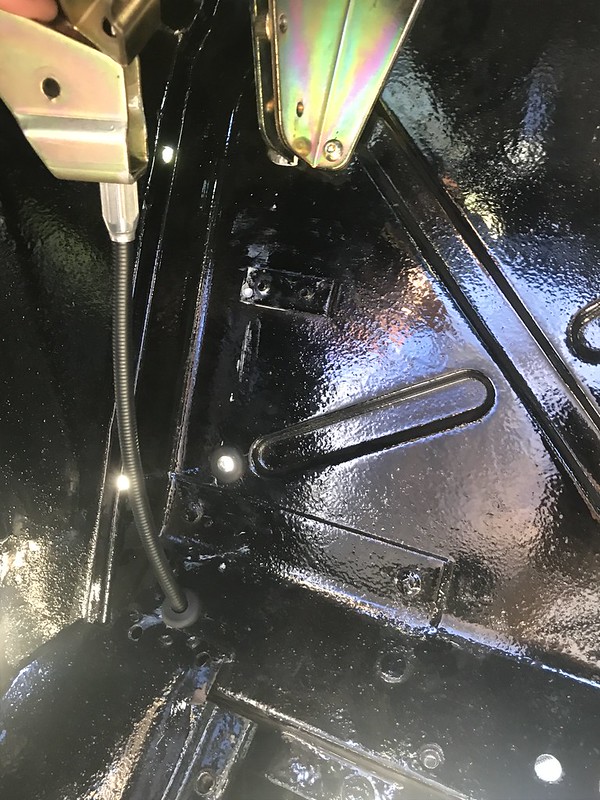
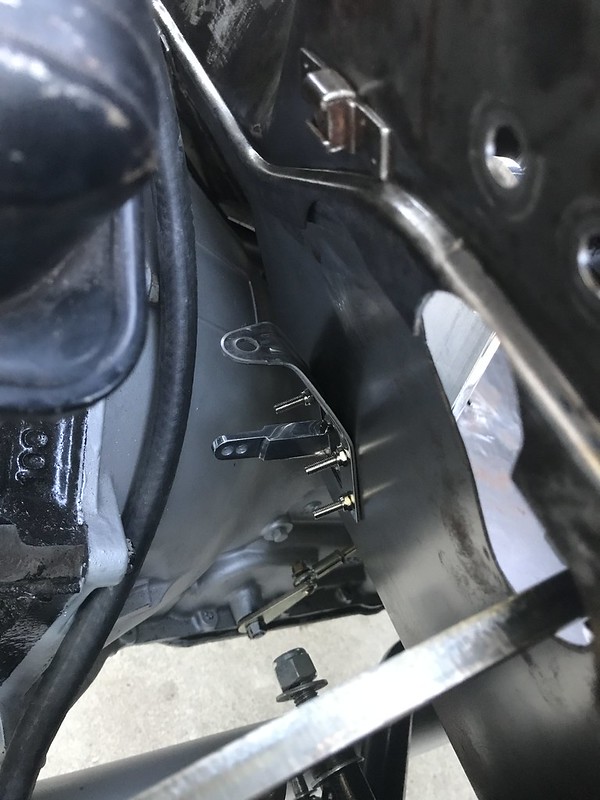
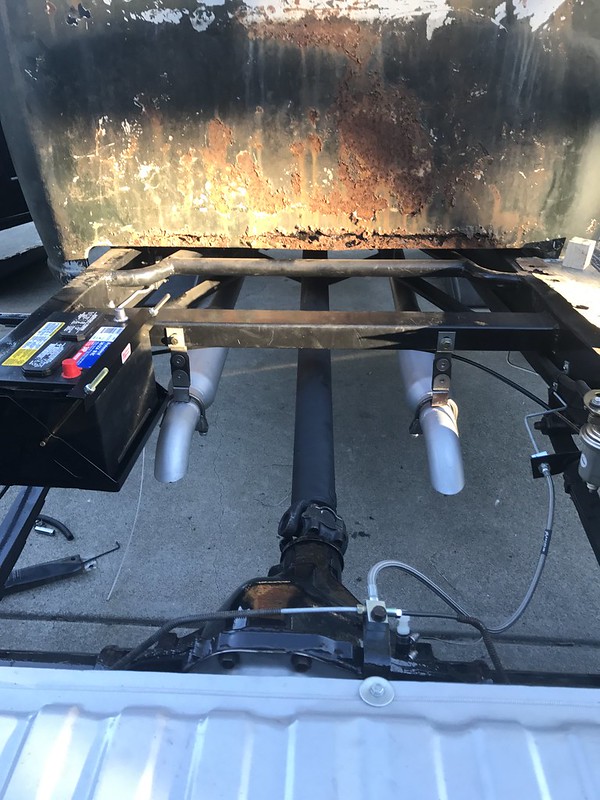
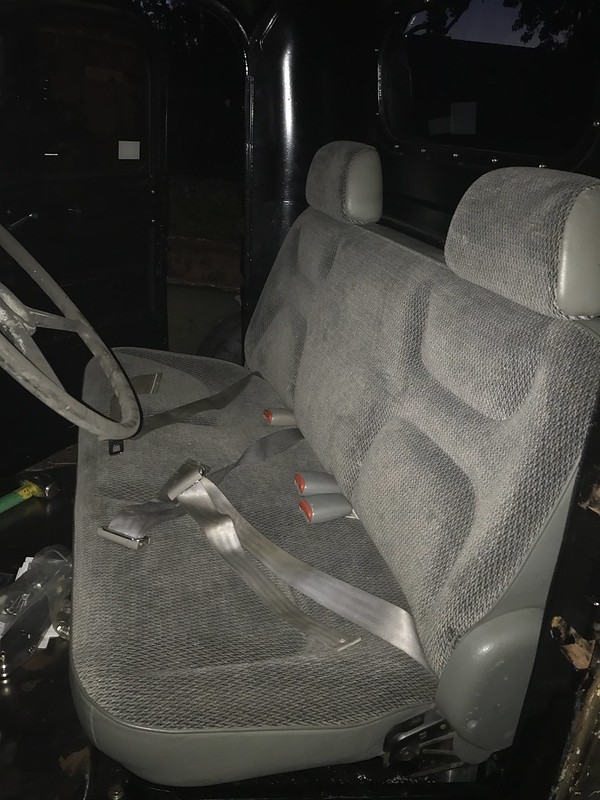
I got into running all new E-brake cables today. I thought I had a slam dunk with it until I realized that I don't seem to have the right clevis for the hand brake? It threw my off because as I was mounting it under the dash a couple weeks ago I was messing with it and thought that I had everything I needed.. Today I start at the back and work my way forward and by the time I'm in the cab about to finalize the brake lever I realized it wasn't right one. I gotta look around one more time to make sure that's the only one I have, then a call to Lokar's in order. Otherwise the cables went alright I got a few parts coated, steering column, transmission mount, and got all those back in. The transmission mount really seems a lot sturdier so I'm thinking I'm going to be ok with that. I mounted the gas pedal, mounted and ran remote reservoir for the brakes, installed some seat belts, threw in my battery and installed the driveshaft. Seems like a bunch of minor stuff on the to do list, gonna keep at it and try to get this thing going. Let me know what y'all think 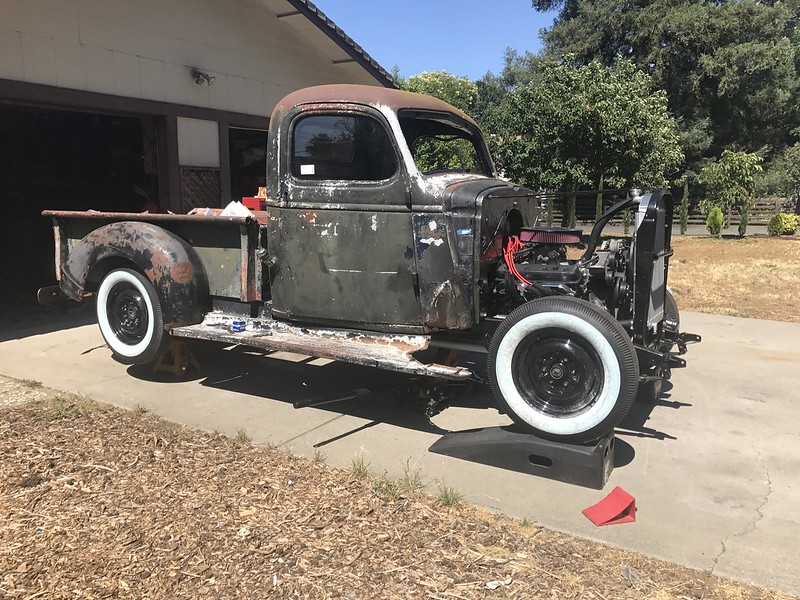 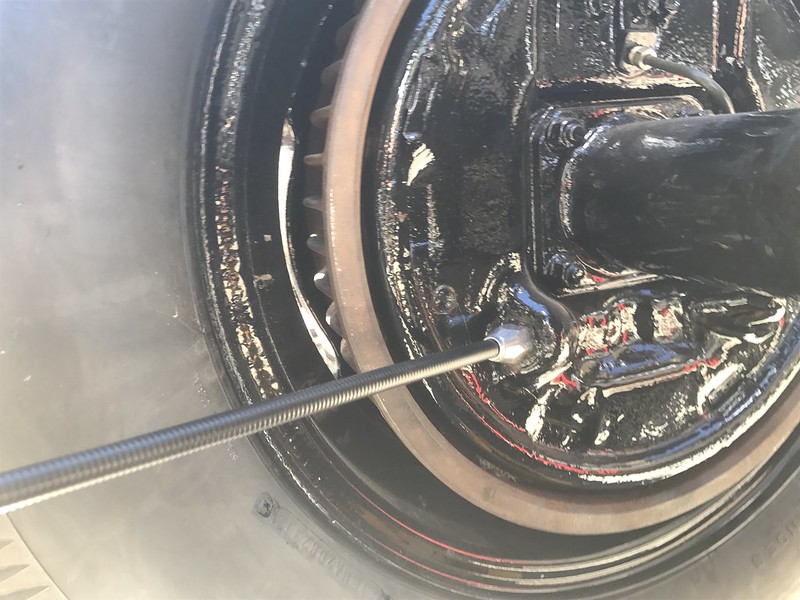 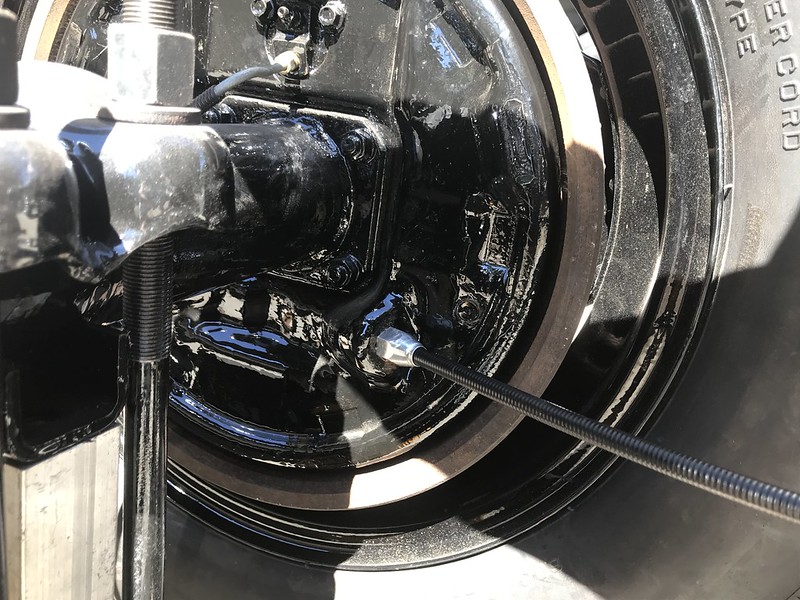 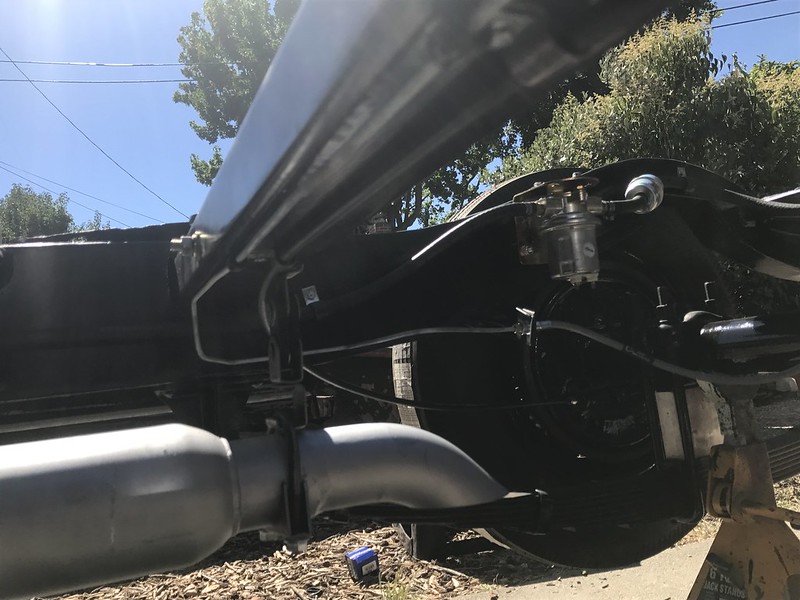 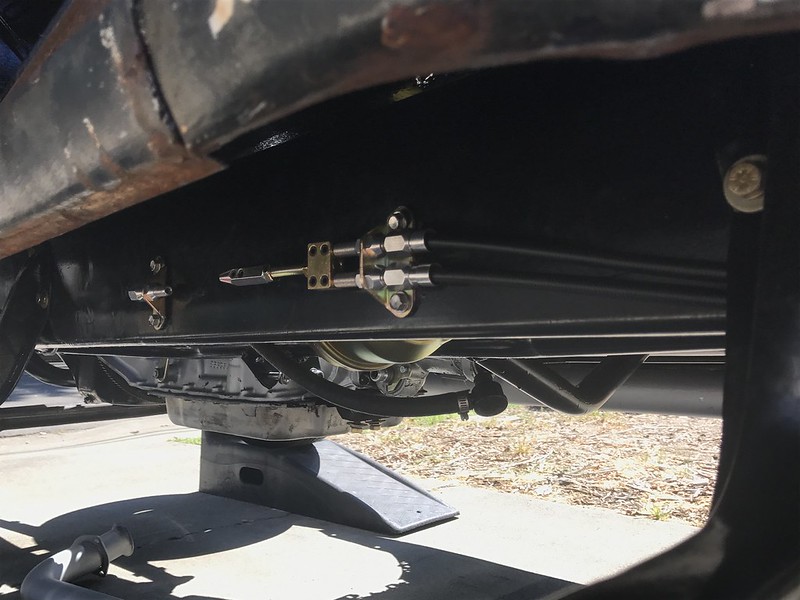 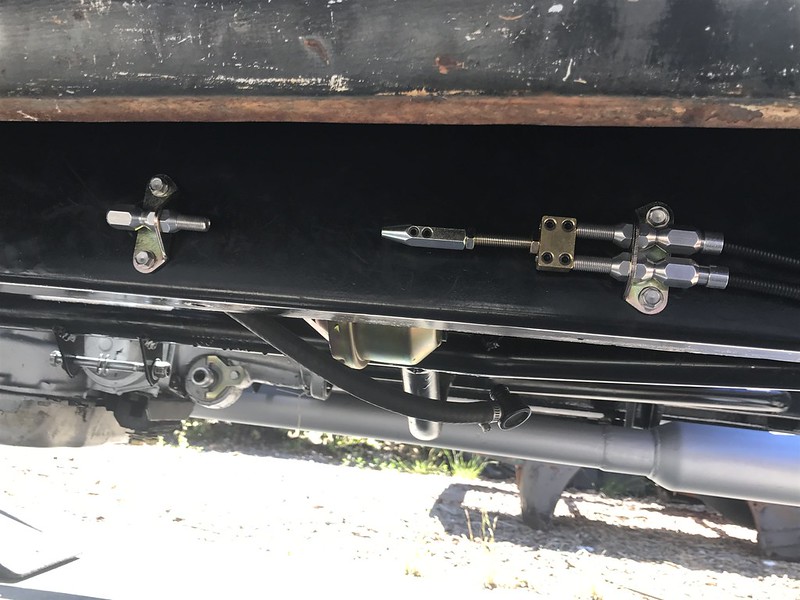 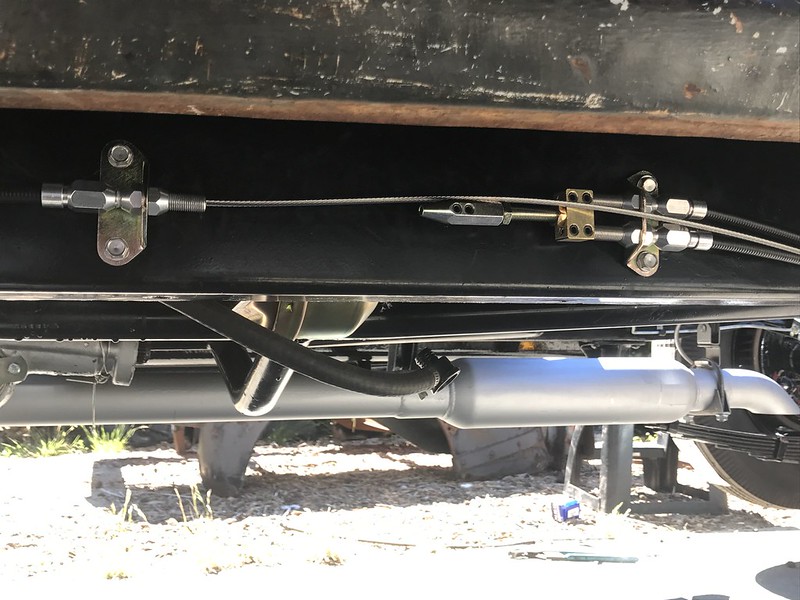
Last edited by gokellurself; 08-19-2017 at 12:32 PM. |
|
|
|
|
06-26-2017, 01:55 AM
|
#19 |
|
Registered User
Join Date: Nov 2014
Location: Oakland, CA
Posts: 114
|
Re: Kell's Two Cents - 1946 build
Last edited by gokellurself; 08-19-2017 at 12:47 PM. |
|
|
|
|
06-26-2017, 10:16 PM
|
#20 |
|
Registered User
Join Date: Nov 2014
Location: Oakland, CA
Posts: 114
|
Re: Kell's Two Cents - 1946 build
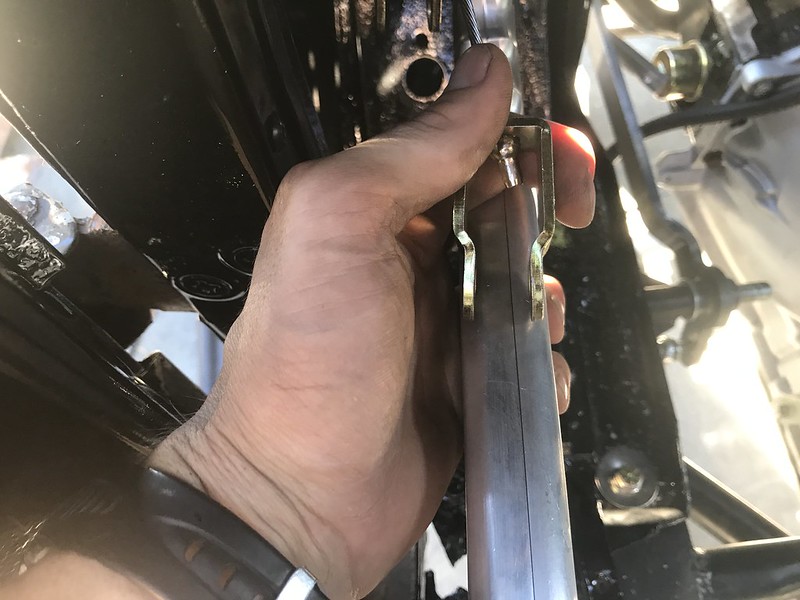
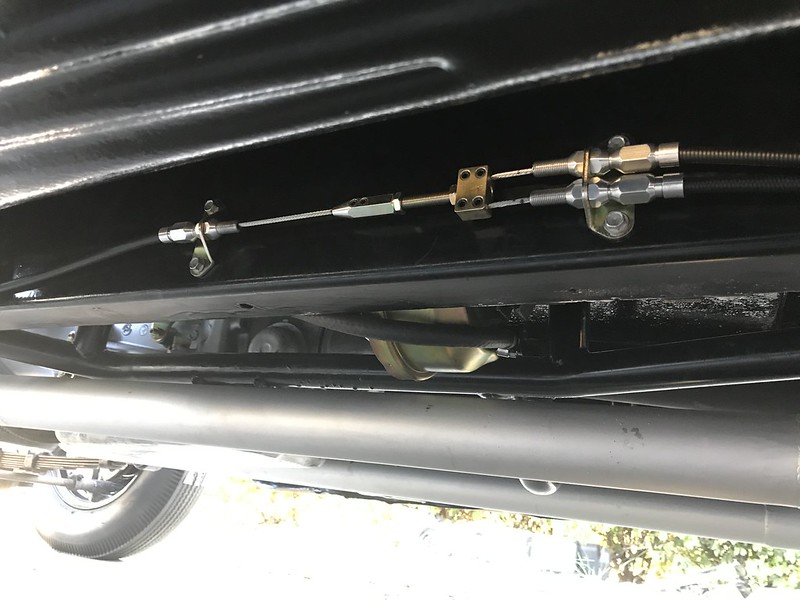
ok so I spoke with Lokar today and they were happy to send me another clevis bracket if I just sent them over some batch information off of the box. I stopped by the house to get photos of what they needed but I just wanted to look all through my stuff and confirm I didn't have it before having them send it out. And sure enough I found it at the bottom of one of my parts boxes. I knocked it out real quick so I could finally get the check mark on my to do list
Last edited by gokellurself; 08-19-2017 at 12:50 PM. |
|
|
|
|
07-12-2017, 09:53 PM
|
#21 |
|
Registered User
Join Date: Dec 2010
Location: washington NJ
Posts: 766
|
Re: Kell's Two Cents - 1946 build
Kell you have pm from the paintman!.....................
|
|
|
|
|
07-27-2017, 10:28 PM
|
#22 |
|
Registered User
Join Date: Nov 2014
Location: Oakland, CA
Posts: 114
|
Re: Kell's Two Cents - 1946 build
Hey guys, so I'll be slowly going thru and converting my thread to Flickr... there's just too much work here for me to forfeit a loss to PB so F em. I've started but it takes some time. Now let's hope Flickr doesn't change up in any short time as well
Anyways, I could really use some input today. I have all my windshield stuff finally. I've had my glass for a while and it had some real nice rubber seal around the whole edge, but now that the frame is here I find that it won't slide into the frame along with the seal to save a life. What is the rubber sealant stuff that you guys use? Is there a write up or anything? The frame is bare metal and I don't know what to do... Get a fresh coat on it? Leave it bare metal for now? Scuff it up and rust it out with muriatic acid? Honestly I was open to getting a good patina on it with the latter option but with a brand new frame I don't know if I can quite bring myself to do it.. Similarly, I'm not sure if I want a nice patina on the truck and then a freshly coated windshield frame... What do you guys think? Idk which way to go Also Paintman thanks for the wiring info. Looking at all the options I ended up going with American Autowire as well. They were a bit more expensive but it was such a thorough kit that I think by the time I gathered everything else that it came with it really it would have been about the same amount, and it's just so simple how they have it set up. Standby for the wiring walkthrough, I'm looking to spend a good long weekend on it and enjoy taking my time on it Anyways, thanks guys let me know what you think. take it easy 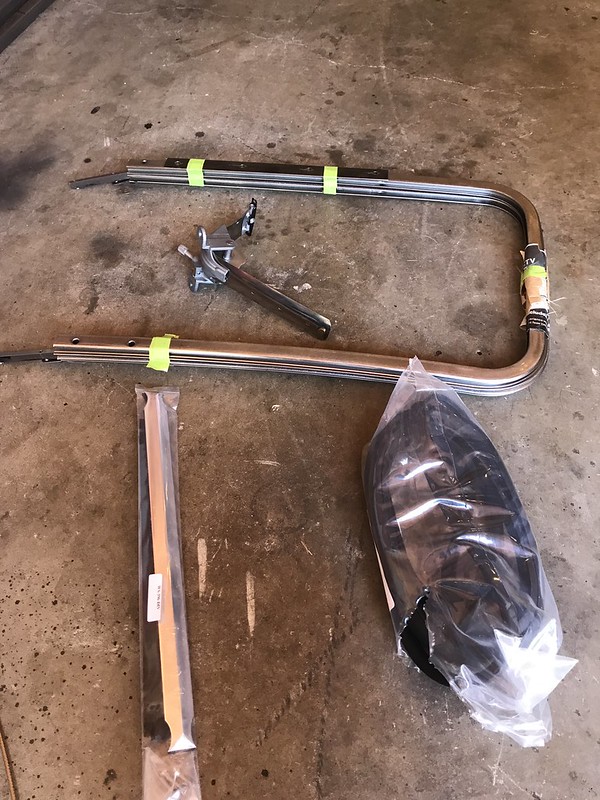
|
|
|
|
|
07-28-2017, 09:33 AM
|
#23 |
|
Registered User
Join Date: Nov 2015
Location: portage wi
Posts: 503
|
Re: Kell's Two Cents - 1946 build
You need to make the frame fit the truck first before anything else. I would suggest painting it. You can always do some fake patina on it if you really want to. I don't remember what color your truck is/was but what I would suggest is spraying some primer on the frame then whatever paint is close to what you want, then after it dries just scuff the paint until you break through to the primer. it will have protection on the frame but still look older than what it is.
|
|
|
|
|
07-28-2017, 04:10 PM
|
#24 |
|
Registered User
Join Date: Dec 2010
Location: washington NJ
Posts: 766
|
Re: Kell's Two Cents - 1946 build
Hey Kell! check out post 349 on my build thread before the pics go down. It details how I did my windshield. Originaly I took my frame and glass to a glass shop here in town to see if they would set the glass. They took one look at it and ran for the hills! They did give me some pointers though. First thing they said was don't try and use glass setting tape around the entire piece of glass. You will never get the glass to slide in. Just use 3-4 small pieces to space the glass out away from the frame.
|
|
|
|
|
07-30-2017, 02:11 AM
|
#25 | ||
|
Registered User
Join Date: Nov 2014
Location: Oakland, CA
Posts: 114
|
Re: Kell's Two Cents - 1946 build
Quote:
Quote:
Updates to come, thanks again fellas |
||
|
|
|
|
| Bookmarks |
|
|


 Hybrid Mode
