
|
|
|
 05-15-2011, 05:00 PM
|
#1 |
|
Registered User
Join Date: May 2011
Location: Anderson SC
Posts: 3,893
|
Re: '65 Chevy C10 Long Fleet Retrospective Build Thread
Guage panel restoration.
The needles were faded... 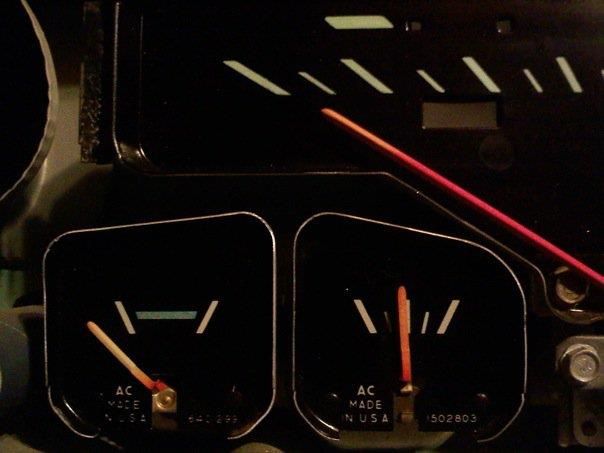 So I repainted them. I also used Zymol cleaner wax to polish the background. 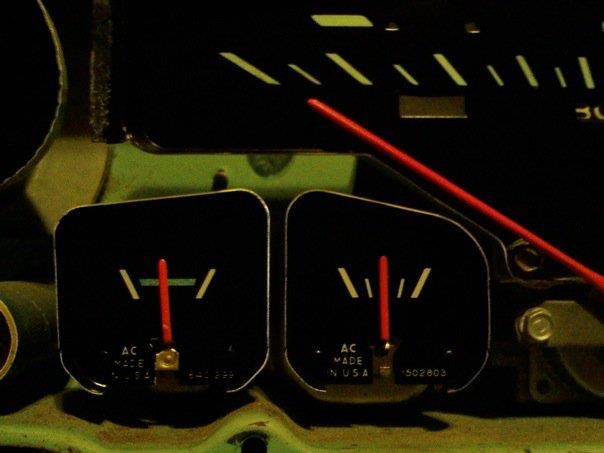 I made new warning lamp covers from sheets of translucent plastic. They were glossy so I sanded them with 2500 grit paper to knock the gloss down to match the original peices better. I had to stack abunch of them together to darken them up and they're still a little brighter than the old ones but that just makes them stand out better. The decals were printed in reverse then applied to the backside of the lens like the factory did them. 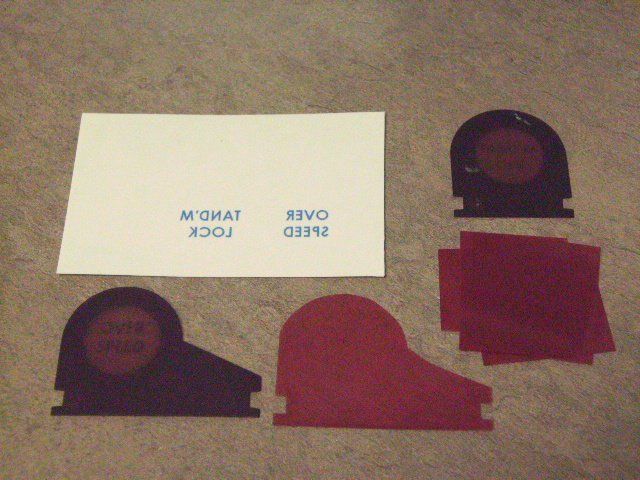  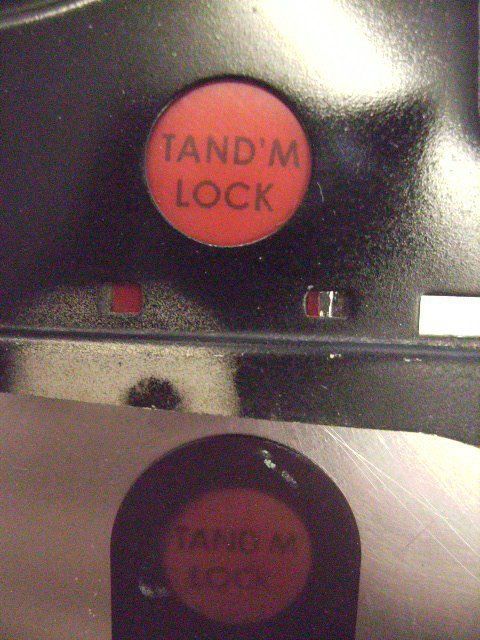 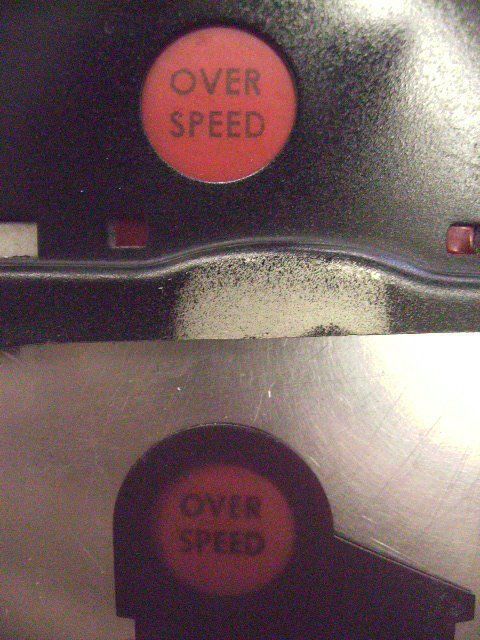 Put together with bead blasted and satin black painted frame. New outer lens. 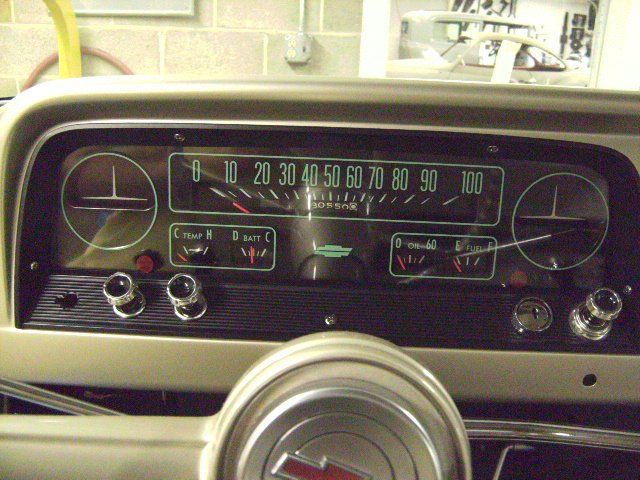 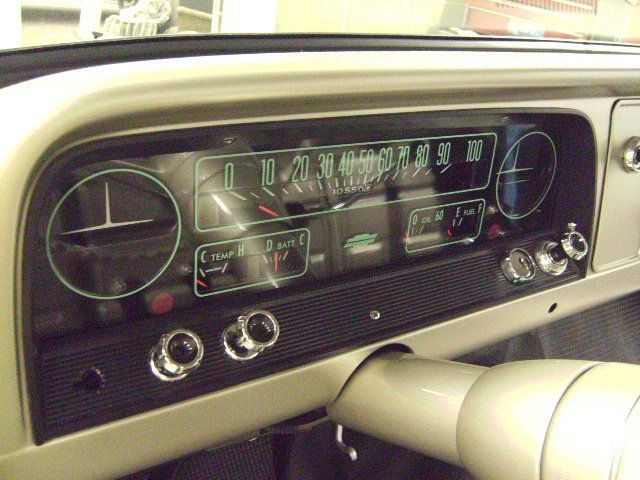
Last edited by theastronaut; 12-31-2012 at 03:56 PM. Reason: Fix dead pic links |

|

|
|
05-15-2011, 05:05 PM
|
#2 |
|
Registered User
Join Date: May 2011
Location: Anderson SC
Posts: 3,893
|
Re: '65 Chevy C10 Long Fleet Retrospective Build Thread
Heater resto.
Taken apart for blasting and painting. 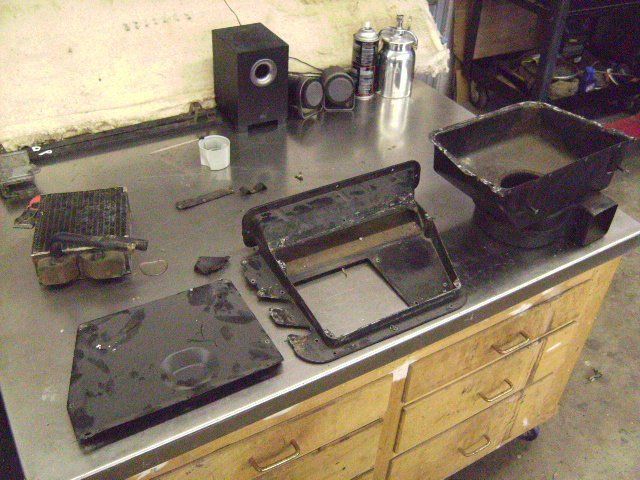 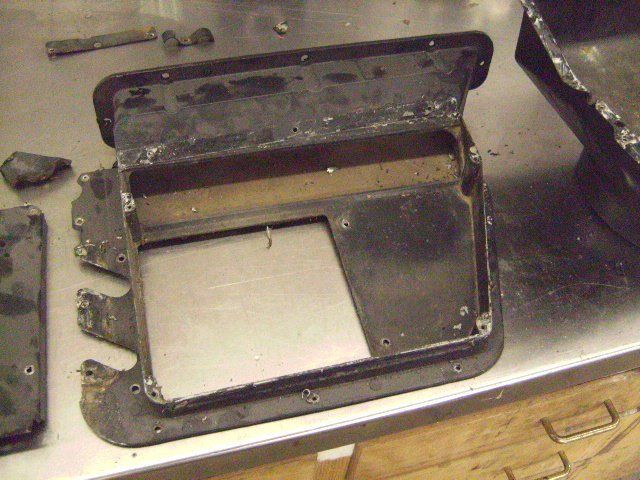 After painting and reassembly. I used white rope caulk from Ace Hardware to replicate the original sealer. The original screws were bead blasted and painted. 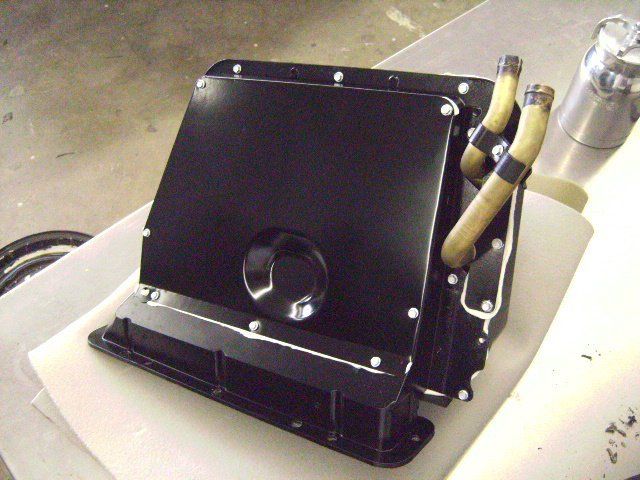 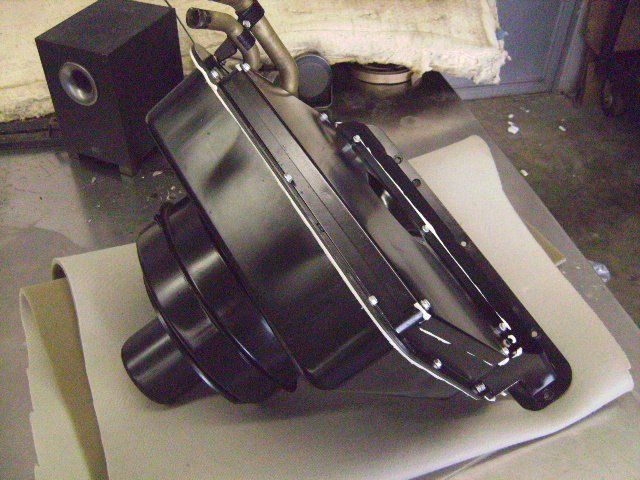 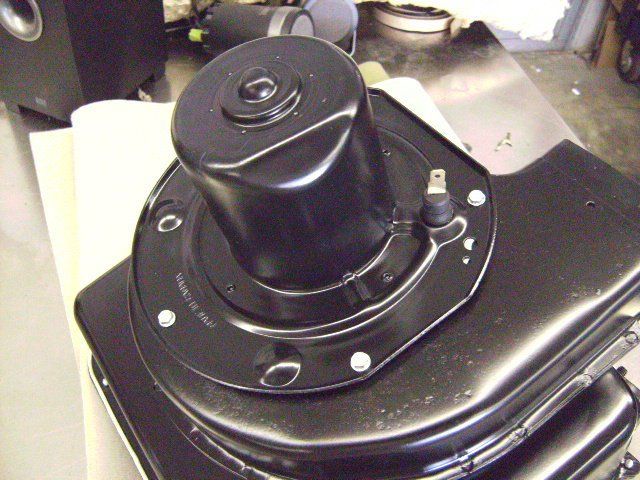
Last edited by theastronaut; 12-31-2012 at 03:59 PM. Reason: Fix dead pic links |
|
|
|
|
05-15-2011, 05:13 PM
|
#3 |
|
Registered User
Join Date: May 2011
Location: Anderson SC
Posts: 3,893
|
Re: '65 Chevy C10 Long Fleet Retrospective Build Thread
All throughout the restoration the owners didn't want to do anything under the hood cosmeticly. But once I started reassembling the truck and they saw how nice it was turning out, we were able to talk them into detailing the engine compartment. Their dad had installed a rebuilt engine shortly before he passed away so we didn't rebuild the 292, just detailed it.
Starting point: 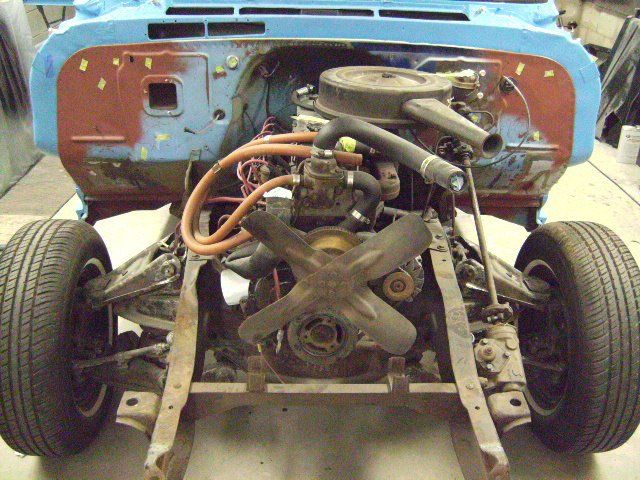 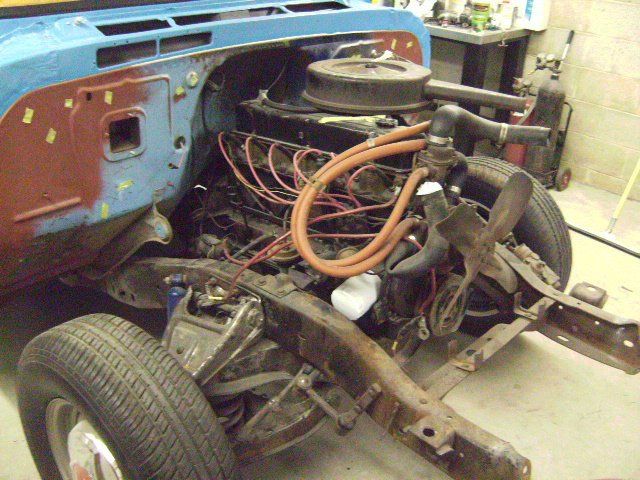 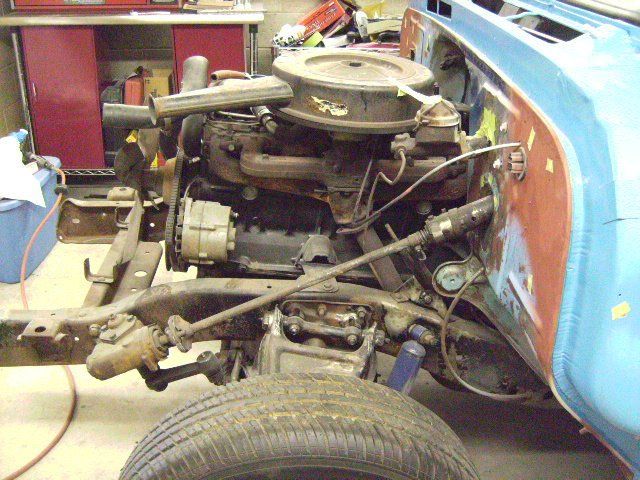 Getting it ready to pull: 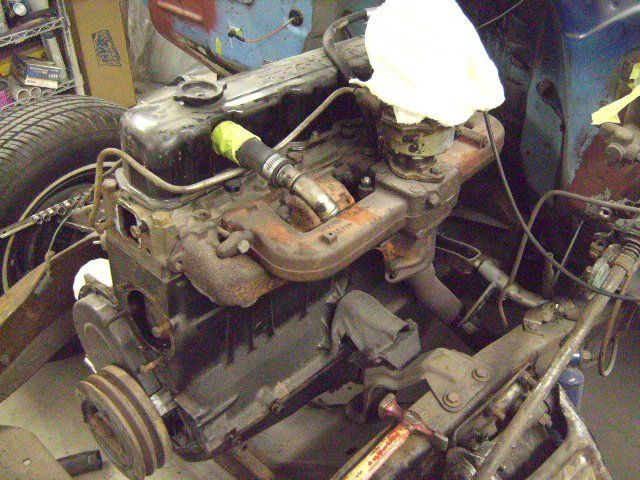 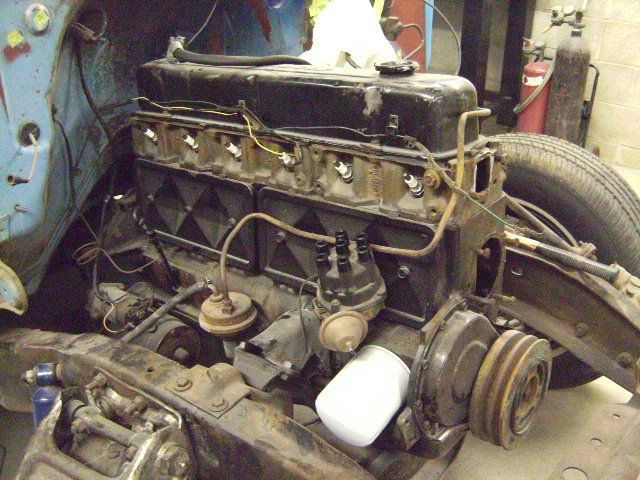 Engine out: 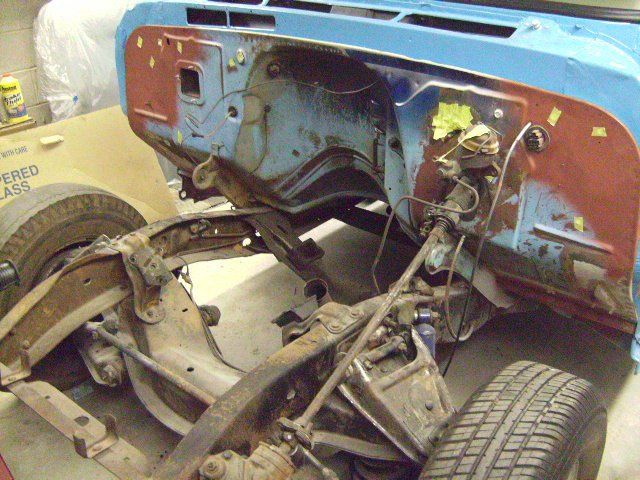 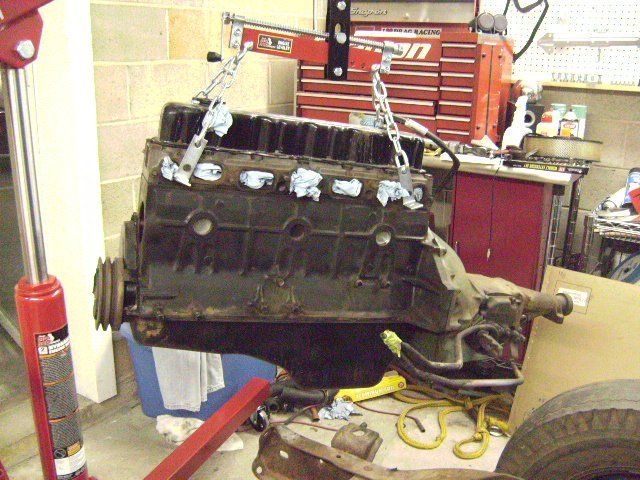 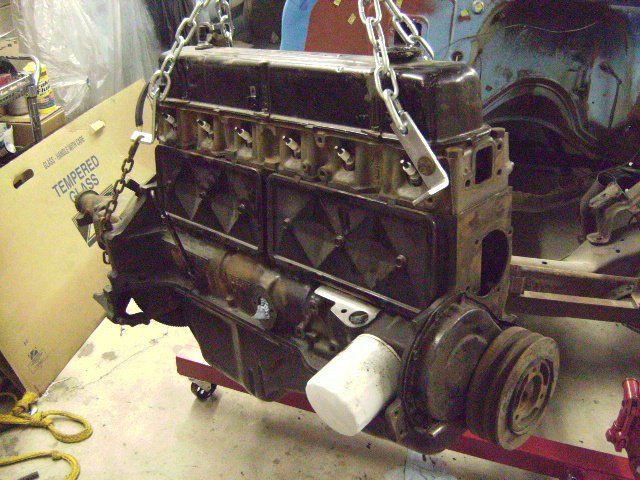 Notice the green paint and the overspray pattern on the bellhousing. I replicated this when we repainted the engine and trans. 
Last edited by theastronaut; 12-31-2012 at 04:01 PM. Reason: Fix dead pic links |
|
|
|
|
06-05-2011, 07:07 PM
|
#4 |
|
Registered User
Join Date: Mar 2011
Location: tulsa,ok.
Posts: 1,803
|
Re: '65 Chevy C10 Long Fleet Retrospective Build Thread
man, i like this truck!! you said this was your first restoration!! it don't look like it!! great job and awesome detail! if and when you do make those body tags like me know i might need one or two!! again great looking truck!!
|
|
|
|
|
06-10-2011, 05:44 PM
|
#5 |
|
Registered User
Join Date: May 2011
Location: Anderson SC
Posts: 3,893
|
Re: '65 Chevy C10 Long Fleet Retrospective Build Thread
Chad, thanks for the compliments!
My dad has done upholstery for 33+ years and already had some original '64-65 seat insert material that he stashed away 25+ years ago. Here's some shots of him working on the seat cover. He used a seat he covered about 18 years ago to make his patterns.    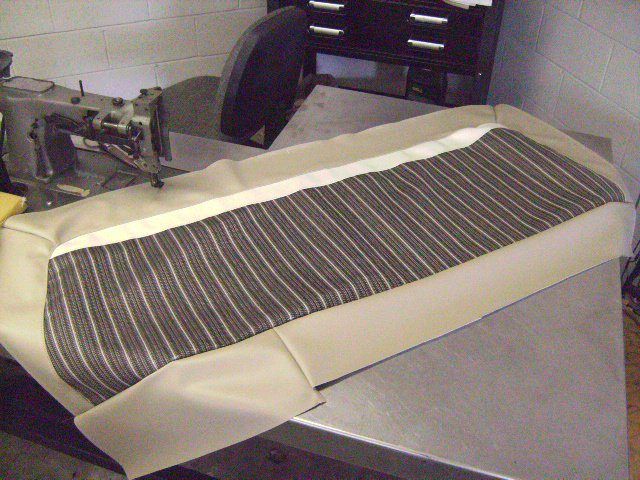 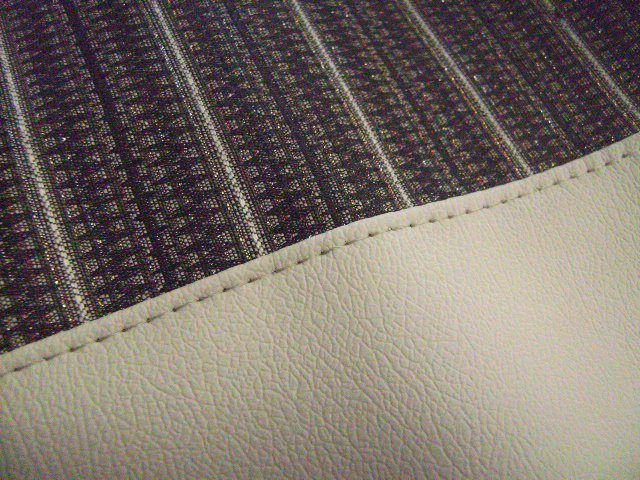 Thin carpet and burlap to keep the springs from eating through the foam. 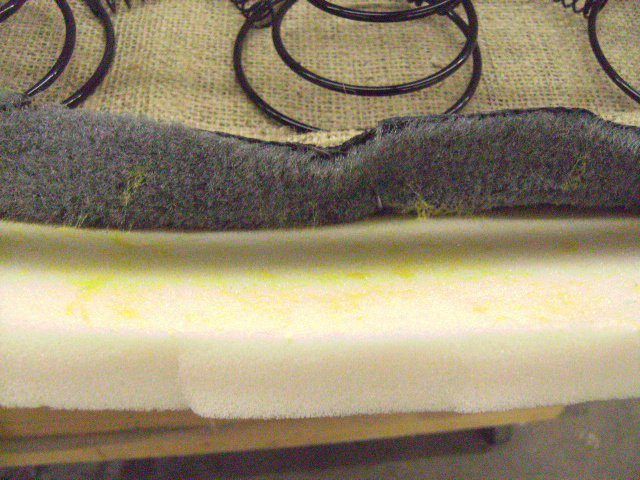 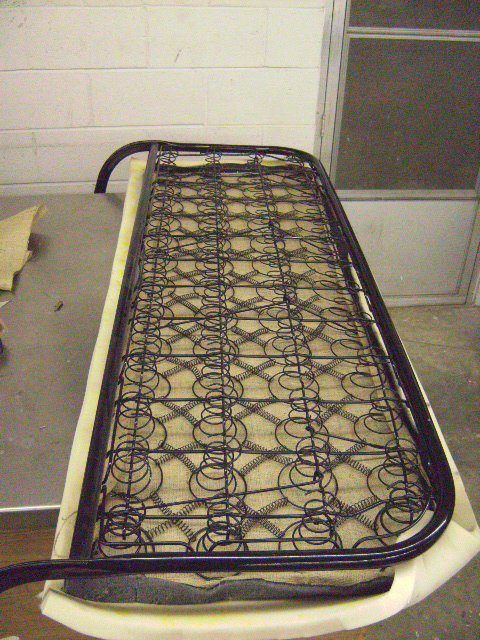 Solid rod sewn into seat edges to hog ring cover to frame. The original clips wouldn't work to hold the cover on as the new vinyl stretches to much and allowed the cover to buldge out inbetween the clips. The rod allows the whole edge of the cover to have even tension when it's attached with hog rings. 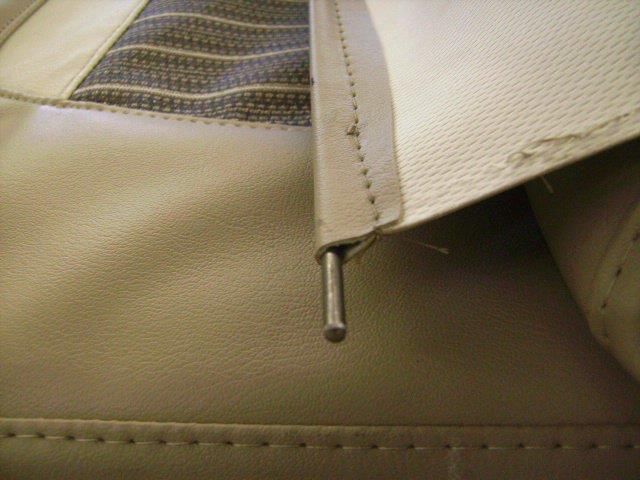 Backrest finished. We had the seat frame sandblasted and powdercoated gloss black. 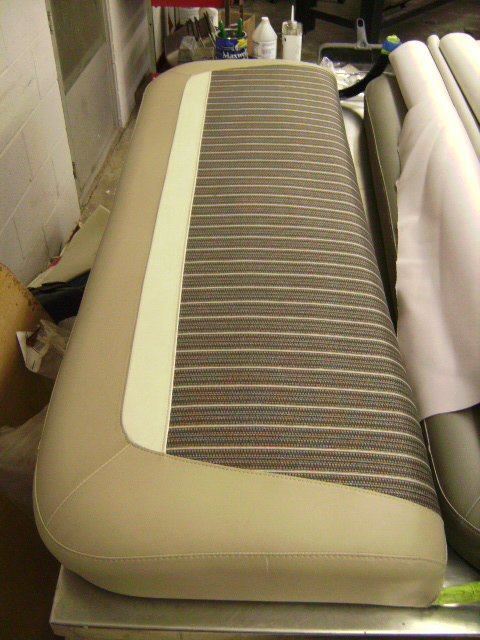 Finished and installed back in the cab. Don't think dad could have done a better job! 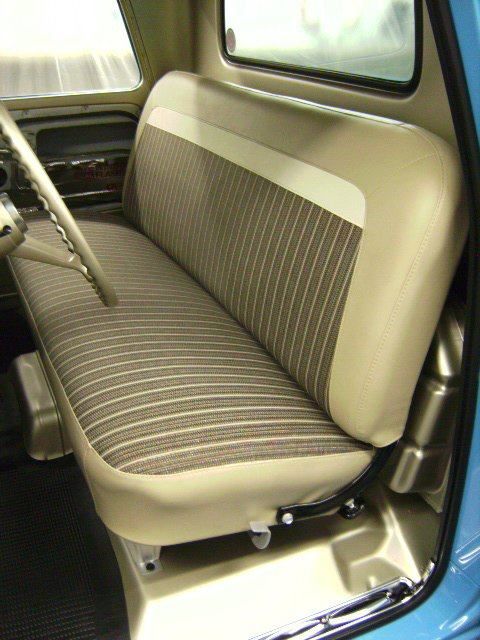
Last edited by theastronaut; 12-31-2012 at 04:47 PM. Reason: Fix dead pic links |
|
|
|
|
06-10-2011, 06:08 PM
|
#6 |
|
Registered User
Join Date: Apr 2010
Location: Billings, MT
Posts: 417
|
Re: '65 Chevy C10 Long Fleet Retrospective Build Thread
I've got to say, this truck is a work of art! I've really enjoyed looking through your build. The attention to detail is fantastic. It's nice to know that there are at least a few examples like this left.
|
|
|
|
|
06-10-2011, 06:34 PM
|
#7 | |
|
Registered User
Join Date: May 2011
Location: Anderson SC
Posts: 3,893
|
Re: '65 Chevy C10 Long Fleet Retrospective Build Thread
Quote:
Btw, I'll have the truck back at our shop soon to detail it for an upcoming show and I'll try to take some more/better overall shots of it. I've also talked to the owners to see if they'd let us have a professional photographer do a photo shoot of the truck to really capture the details and quality of work. |
|
|
|
|
|
06-11-2011, 12:32 AM
|
#8 | |
|
60-66 Nut
  Join Date: Mar 2007
Location: Coeur d'Alene, Idaho
Posts: 23,248
|
Re: '65 Chevy C10 Long Fleet Retrospective Build Thread
I'd say that you've set the bar pretty high. It is very inspiring to see your attention to detail in this build. I have not seen anyone in this area do this nice of work. I sincerely hope that your restoration business does very well for you.
Quote:
__________________
Power Steering Box Adapter Plates For Sale HERE Power Brake Booster Adapter Brackets For Sale '63-'66 HERE and '67-'72 HERE and '60-'62 HERE and "60-'62 with clutch HERE Rear Disc Brake Brackets For Sale. Impala SS calipers HERE Camaro Calipers HERE D52 Calipers HERE 6 Lug HERE Hydroboost Mounting Plates HERE Last edited by Captainfab; 06-11-2011 at 12:33 AM. |
|
|
|
|
|
06-10-2011, 06:13 PM
|
#9 |
|
Registered User
Join Date: May 2011
Location: Anderson SC
Posts: 3,893
|
Re: '65 Chevy C10 Long Fleet Retrospective Build Thread
Here's some random assembly pics, in no particular order.
The bed reunited with the cab and the wood floor installed. 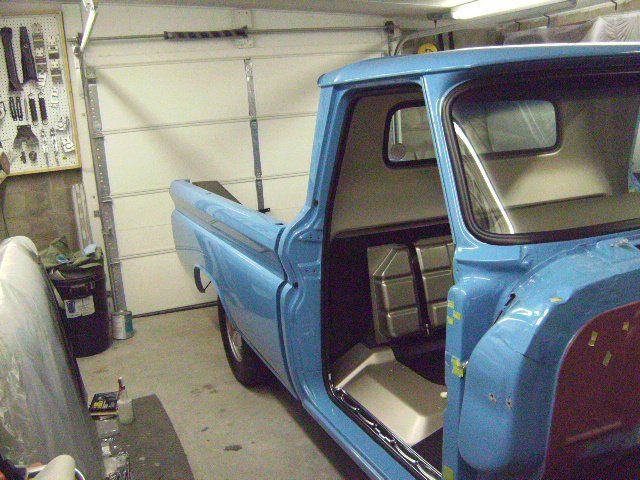 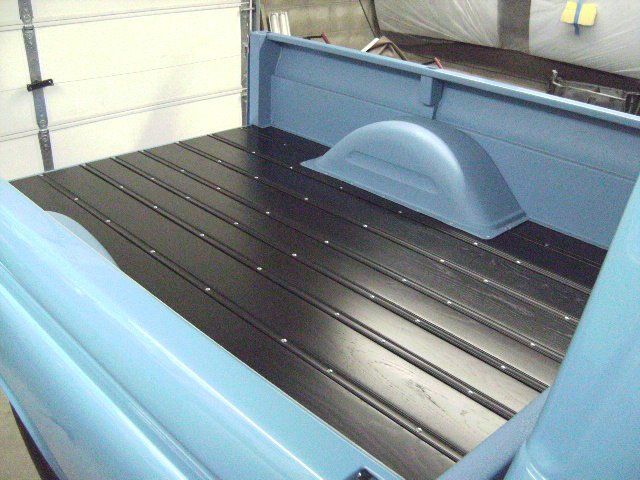 The step plates installed with all the screw slots "clocked" the same direction and the join of the weatherstripping exactly centered with the Chevy bowtie. Also treated the rubber with Duragloss' Rubber and Vinyl Dressing. You can also see just how "deep" the paint is on the top of the rocker. The door jambs were bodyworked, block sanded, wetsanded, and buffed just like the outer panels. 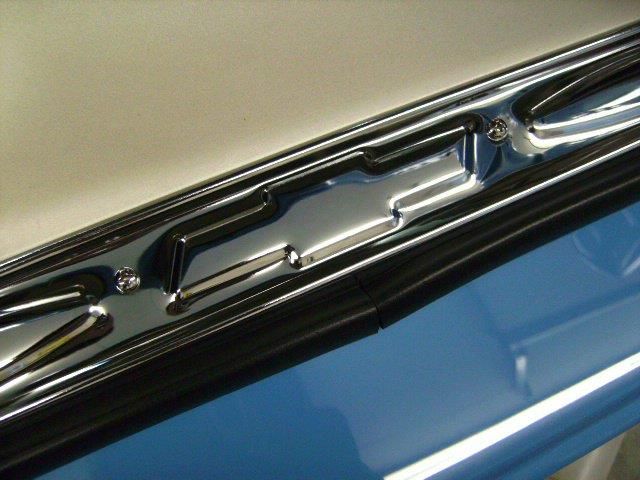 Backside of the bumpers were wetsanded and painted satin black.  The window handle knobs had a rough edge that needed to be smoothed out. 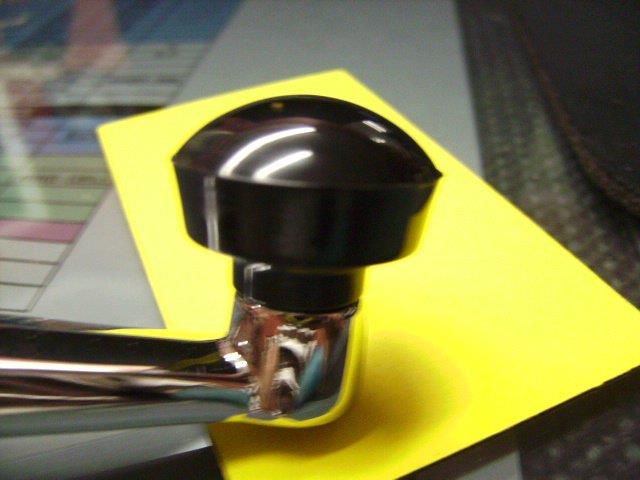 After wetsanding and buffing to smooth the knob. Better, but not glossy enough. 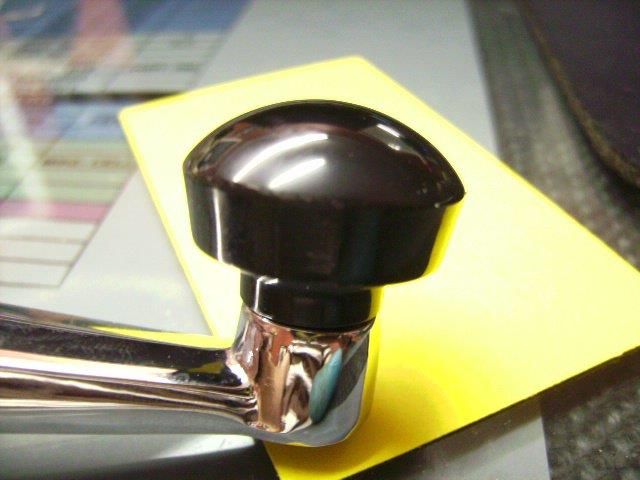 Rewetsanded and masked, ready for a coat of clear. 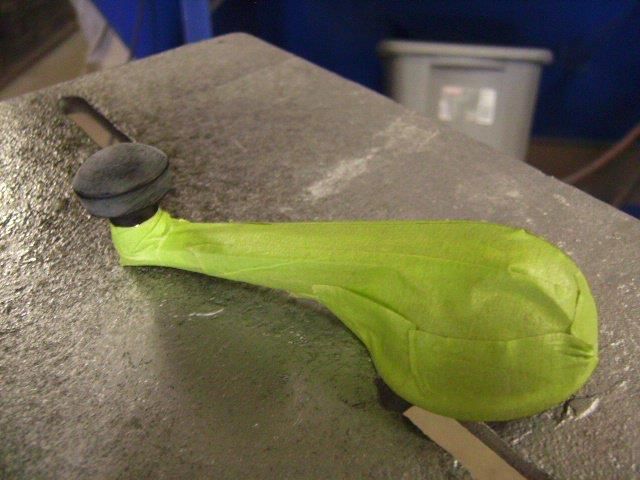 Clear coated. 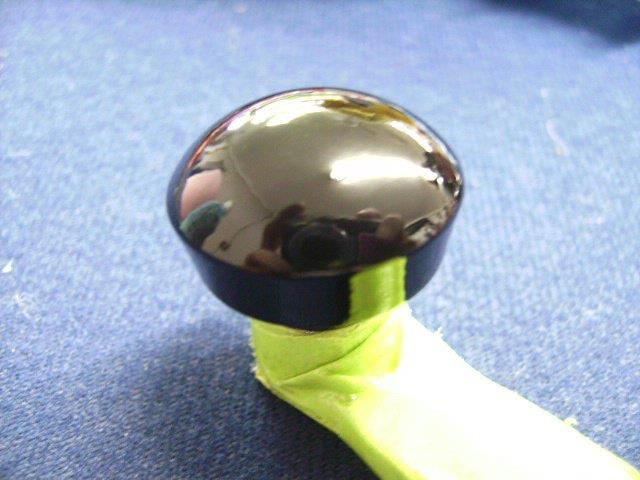 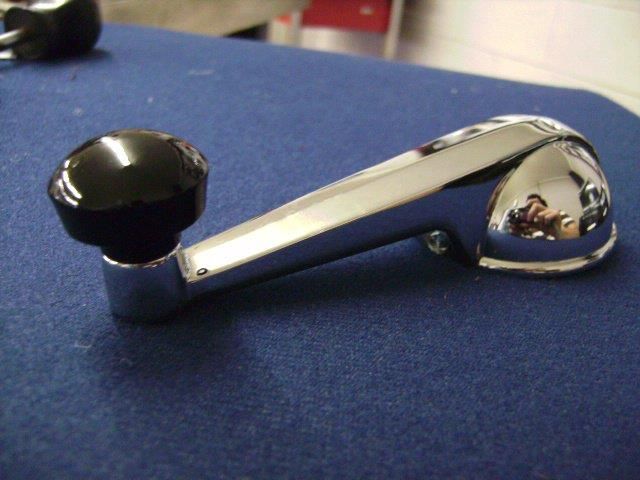 Added padding under the floor mad. I also cut padding to fit in the recessed stamping to level out the floor mat surface. 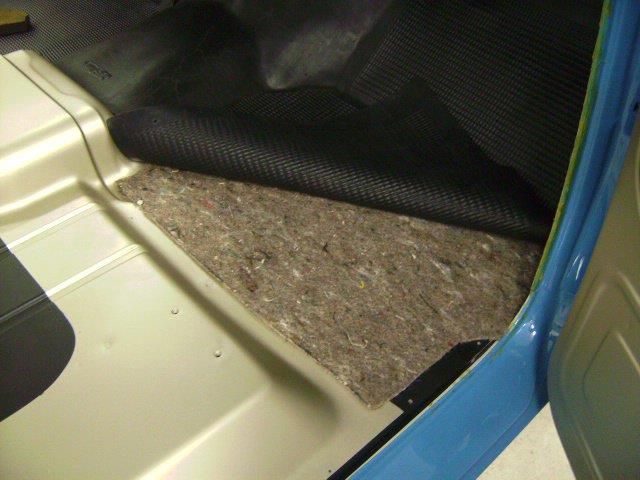 Vent windows reassembled. 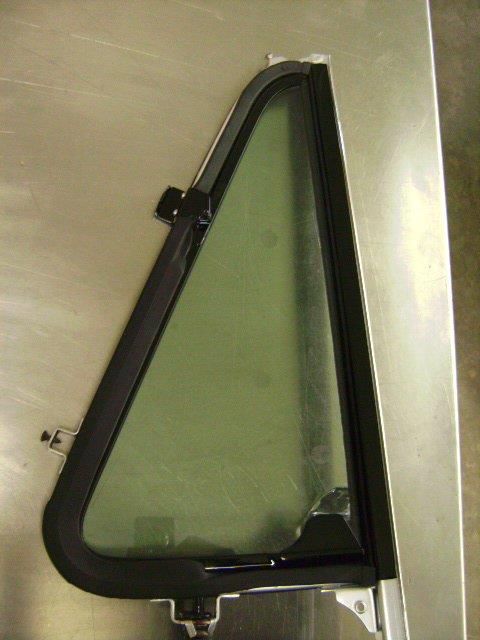 Checking the wiring.  Test fitting the emblems, had to slot out the mounting holes to make them level. 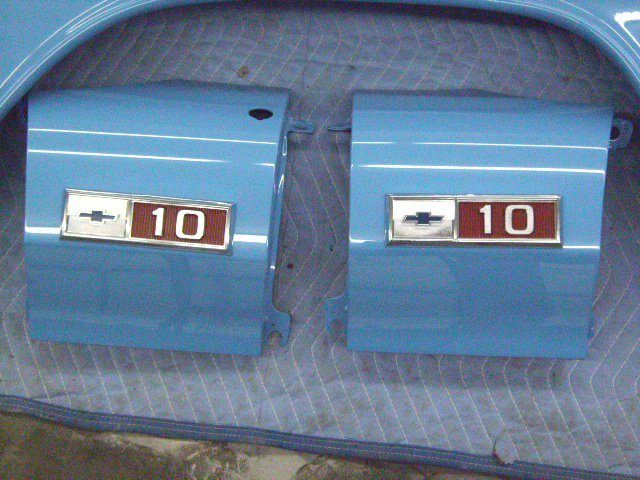 Headlight buckets blasted, painted, and test fit. 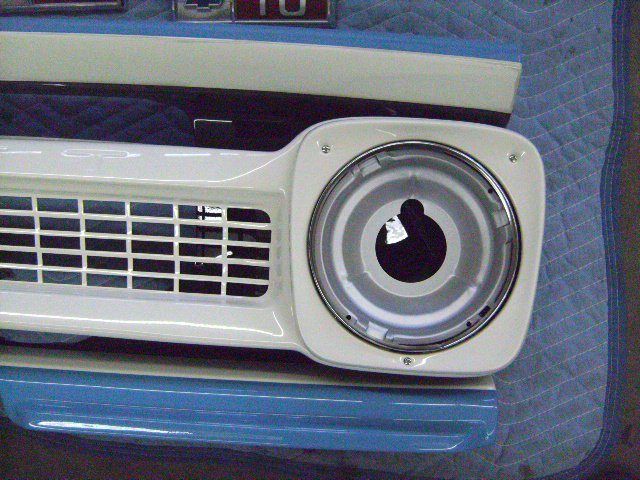 Primed and wetsanded the license plate bracket.  Painted with low gloss black paint and reassembled.  The plating on the tailgate chains had dulled out so I polished them with Wenol metal polish and clear coated them to keep them from oxidizing. 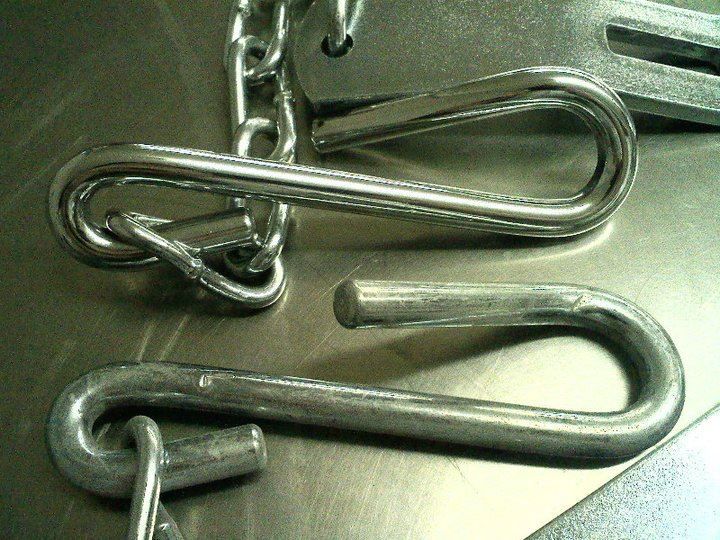 Polished the heads of the door panel screws. 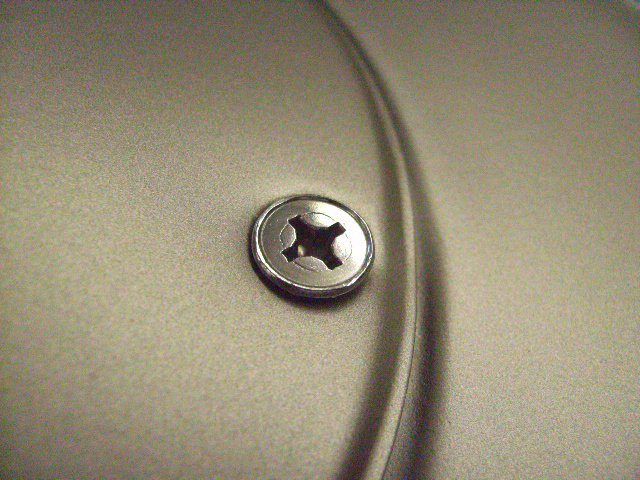 Used Duplicolor truck bed liner to undercoat the fenders.  Front clip installed. 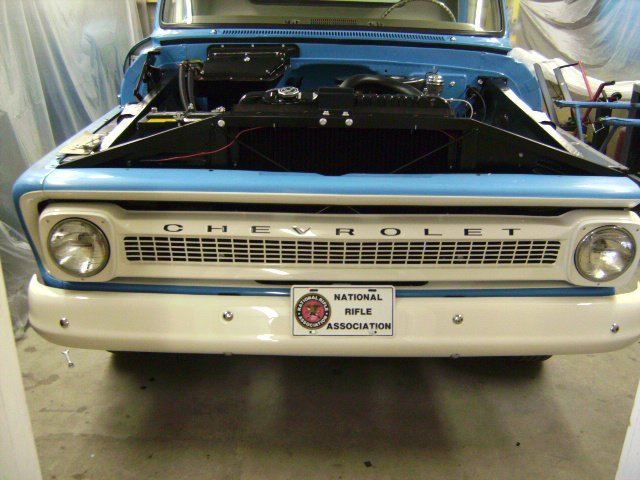 Paint edges line up pretty good. 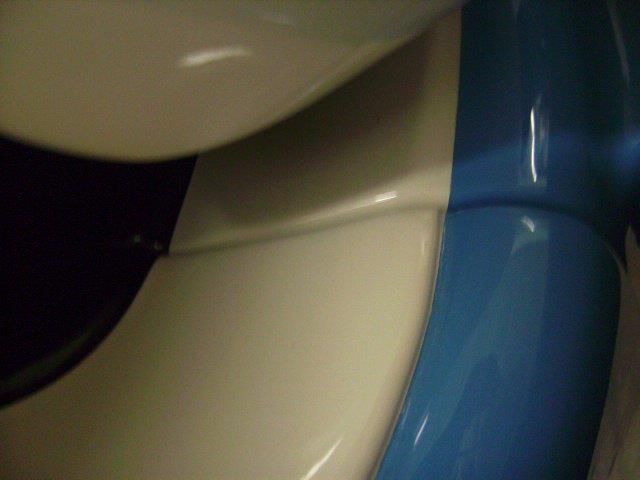
Last edited by theastronaut; 12-31-2012 at 04:57 PM. Reason: Fix dead pic links |
|
|
|
|
10-07-2011, 10:03 PM
|
#10 | |
|
Registered User
Join Date: Jul 2011
Location: Des Moines, Iowa
Posts: 3,016
|
Re: '65 Chevy C10 Long Fleet Retrospective Build Thread
Quote:
 This thread hasn't recieved nearly enough attention considering you and your father's attention to detail! Also, not sure if there is a correlation between your fender emblems not aligning straight - but, on 71' C10's, the passenger's side emblems were crooked from the factory. This is how a person can distinguish an original over an aftermarket. Must have been the stamping at the factory. Keep up the good work and future success! This thread hasn't recieved nearly enough attention considering you and your father's attention to detail! Also, not sure if there is a correlation between your fender emblems not aligning straight - but, on 71' C10's, the passenger's side emblems were crooked from the factory. This is how a person can distinguish an original over an aftermarket. Must have been the stamping at the factory. Keep up the good work and future success!
__________________
project: "my happy mess" |
|
|
|
|
|
06-11-2011, 10:07 AM
|
#11 |
|
Custom Builder
Join Date: Jun 2003
Location: Carlsbad, California
Posts: 908
|
Re: '65 Chevy C10 Long Fleet Retrospective Build Thread
Just went through your entire thread. What a great way to showcase your shops ability to perform a detailed (High Quality) restoration! Hat is off to you and your crew!
__________________
1932 Chevy Roadster Car and Pick-Up - http://67-72chevytrucks.com/vboard/s...d.php?t=465709 1966 K20 Factory 4X4 - http://67-72chevytrucks.com/vboard/s...d.php?t=455484 (Sold) 1972 K5 Blazer (Sold) - http://67-72chevytrucks.com/vboard/s...ad.php?t=87530 2007 TrailBlazer SS - http://67-72chevytrucks.com/vboard/s...34#post4706534 Last edited by LeftCoast32; 06-11-2011 at 11:01 AM. |
|
|
|
|
06-11-2011, 10:53 AM
|
#12 |
|
Registered User
Join Date: Aug 2005
Location: Manvel, Texas
Posts: 69
|
Re: '65 Chevy C10 Long Fleet Retrospective Build Thread
Stunning!!! I am in awe.
|
|
|
|
|
06-11-2011, 12:23 PM
|
#13 |
|
Registered User
Join Date: Mar 2005
Location: apple valley, ca
Posts: 2,670
|
Re: '65 Chevy C10 Long Fleet Retrospective Build Thread
I'm blown away, absolutely blown away. Your level of detail is incredible. I've done restorations in the past, and many people do not understand the time and effort that it takes to build something to that high of a standard.
I love everything about this truck. As I've said before, I love hot rods, but there's a special place in my heart for bringing something back to a better-than-factory condition. This truck is a GREAT business card for your shop. It'll bring you more work than you can handle! Keep posting pictures. This thread should be a sticky for anyone wanting to do a correct resto.
__________________
Check out my latest endeavor: https://roundsixpod.com My build threads: '55 Chevy: http://67-72chevytrucks.com/vboard/s...d.php?t=247512 '64 C-20: http://67-72chevytrucks.com/vboard/s...d.php?t=446527 Last edited by chevyrestoguy; 06-11-2011 at 12:23 PM. |
|
|
|
|
06-13-2011, 09:42 PM
|
#14 |
|
Registered User
Join Date: May 2011
Location: Anderson SC
Posts: 3,893
|
Re: '65 Chevy C10 Long Fleet Retrospective Build Thread
Again, thanks for the kind words!
Getting close to getting the rest of the pics uploaded. Here's some of the final assembly. One of my pet peeves with these trucks is the panel fitment from the factory, its terrible! I already have a few pics of the rough body work showing a little of the work I did getting the panels flush with each other and all the gaps to match but I didn't explain the whole process. I used 1/8 inch welding rods to weld onto the edges of the panels that needed the gaps closed up. I also made a "feeler guage" from nylon to check the gaps with; if the guage was loose, I welded the edge. If it was tight, I ground the edge down. The inner fender braces were sliced horizontally every 3 or so inches to reshape the fender to the shape of the door. The edges of the fender extensions were relief cut to match the shape of the door, hood, and cowl. The hood had to be narrowed 1/4 inch to make the back edge flush with the sides of the fender extensions and doors. I cut the back of the cab loose in the doorjambs and pulled the opening in or out to match the shape of the rear of the doors. The inner door bottom patch panels didn't fit the shape of the rockers so the lip was cut off and a new one made with a shrinker/stretcher to better match the curve of the rockers. The rear inner door post were relief cut and leaned in to match the shape of the rear of the cab. The fender bottoms were pie cut and reshaped to flow into the rockers better. The cab corners were cut and reshaped to match the rockers. Once all the metal work was finished and fine-tuned and the panels in their final alignment with all the latches in place and adjusted, I skim coated across the seams and long-block sanded across the panels as if they were all one panel. This got the final shape and flushness dead-on. At that point, I could take a straight edge and lay it across any seam and there would be no gap between the straight edge and the body. Here's the results of all that work. Door to cab gap. 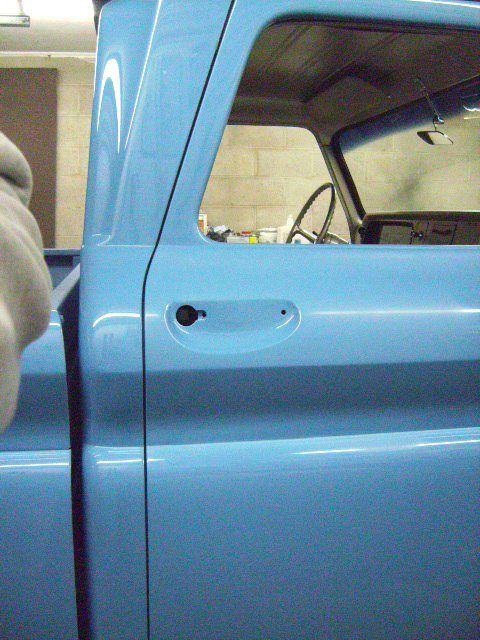 The reflection of the florescent light bulbs stay level one panel to the next. Another of my pet peeve's is reflections that don't carry over evenly to the next panel.  The inside edges of the fender extensions were bodyworked just like the rest of the truck. Never would know that it had about a dozen cuts in it! Also re-dimpled the edges to mimick the factory spot welds.  Top of the passenger side door/fender extension. 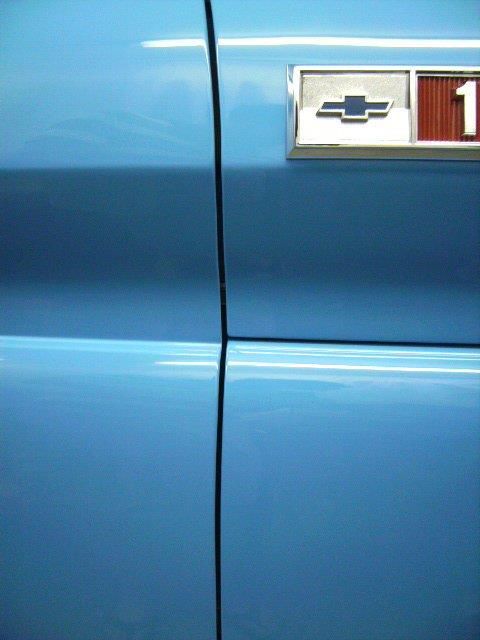 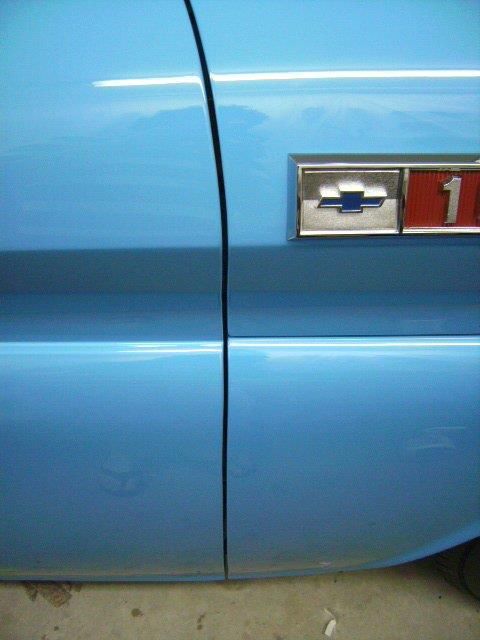 Cowl to fender extension and base of A pillar. 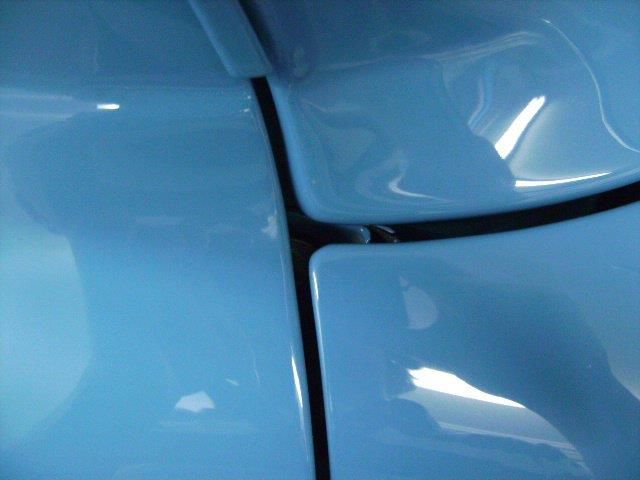 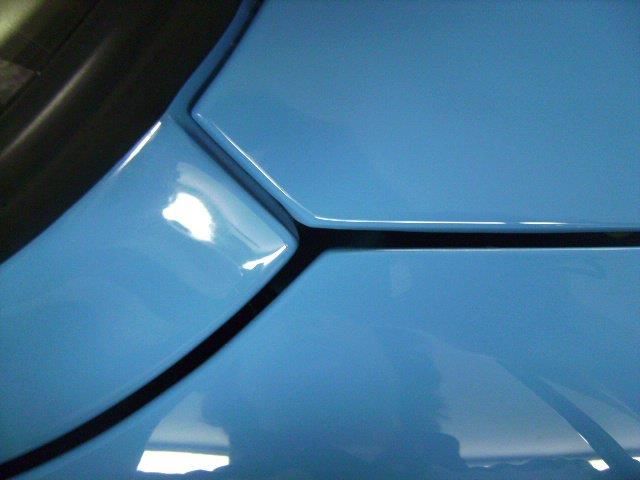 Driver's side door to fender gap. 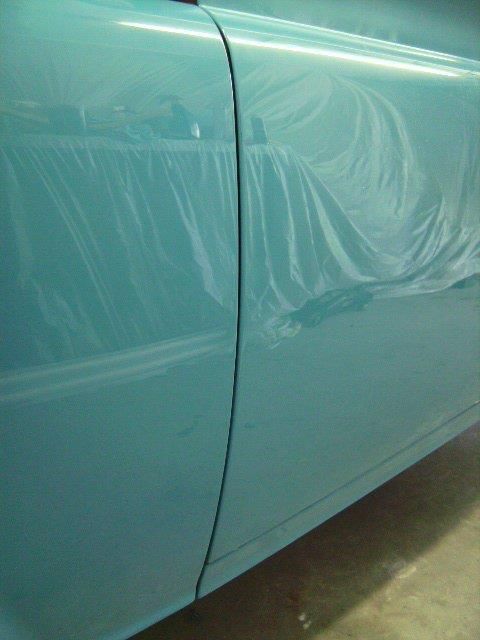 Right fender to door. 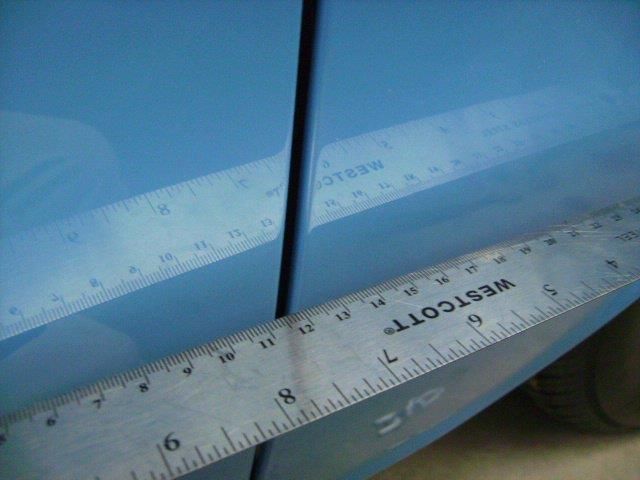 Left fender to door. 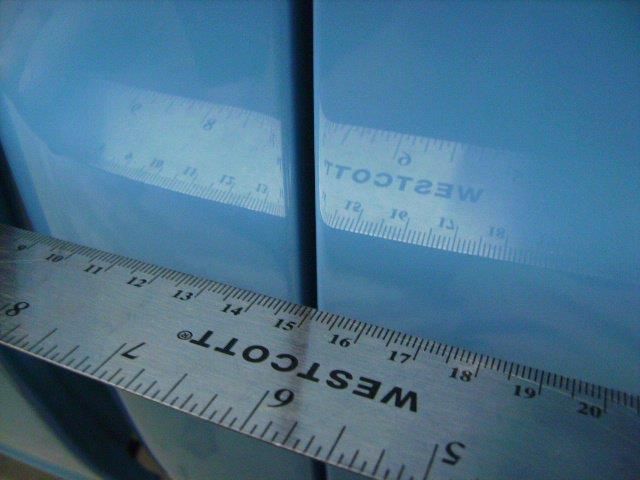 I saved this shot for last as I think this is one of the best shots I have that show off the panel flushness. The reflections stop at the edge of the door and pick up again nearly seamlessly again on the fender. The angle of the reflection doesn't change from panel to panel. 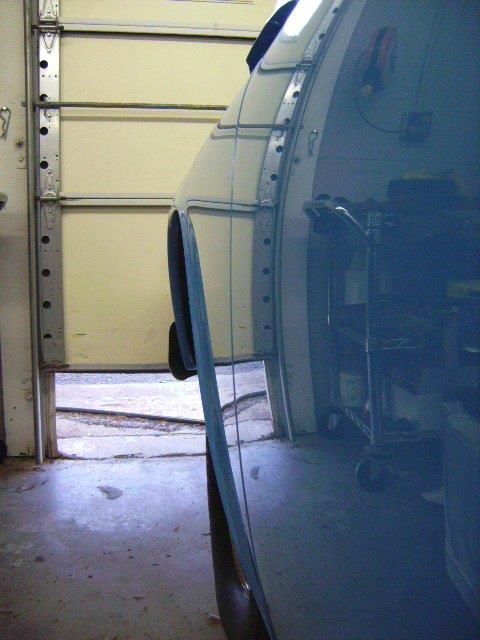
Last edited by theastronaut; 12-31-2012 at 05:05 PM. Reason: Fix dead pic links |
|
|
|
|
06-13-2011, 09:48 PM
|
#15 |
|
Registered User
Join Date: Nov 2006
Location: Music City, U.S.A.
Posts: 638
|
Wow. Yeah, these trucks are pretty bad. That's a lot of very nice work!
|
|
|
|
|
06-13-2011, 10:10 PM
|
#16 |
|
Senior Member
Join Date: Oct 2009
Location: Godley, TX
Posts: 17,968
|
Re: '65 Chevy C10 Long Fleet Retrospective Build Thread
How have i missed this thread in the past!! This is absolutely beautiful work.
Love it that you did the original white surround with black background for the grille - that seems to be missed so often or half-done (i.e. just the white surround, with body color background), which is just fine for a custom truck, looks good - but I prefer the "floating grille" look you get by doing it the factory way (that's just me though). One quick question - I noticed the way you painted the wheels with a dark center (under the hubcaps) - was that done that way from the factory? I've never seen that done before - looks good, just curious if original, and if not (or, actually, if so too) what was the purpose? BEAUTIFUL truck, holy frijoles. Last edited by jocko; 06-13-2011 at 10:11 PM. |
|
|
|
|
06-13-2011, 10:22 PM
|
#17 | |
|
Registered User
Join Date: May 2011
Location: Anderson SC
Posts: 3,893
|
Re: '65 Chevy C10 Long Fleet Retrospective Build Thread
Quote:
I can understand why alot of guys don't paint the grill shell and fenders tri-tone, its alot of work! And if you don't mock up the front clip when you mask it (or mark where to mask) the tape edges won't line up when you put it back together. The "floating grill" look is the best though! While we're on the subject, does anybody know if gloss black, or satin, or flat black is correct for the grill background? I went ahead and cleared everything but I wasn't sure... so I left it gloss. |
|
|
|
|
|
06-14-2011, 04:14 AM
|
#18 |
|
Registered User
Join Date: Jan 2009
Location: bean station tennessee
Posts: 398
|
Re: '65 Chevy C10 Long Fleet Retrospective Build Thread
semi gloss (satin) black was used behind the grill,frame,suspension components,inner front fenders.this is one nice truck i must say you have done a wonderful job of restoring it.
|
|
|
|
|
06-14-2011, 08:52 PM
|
#19 | |
|
Registered User
Join Date: May 2011
Location: Anderson SC
Posts: 3,893
|
Re: '65 Chevy C10 Long Fleet Retrospective Build Thread
Quote:
|
|
|
|
|
|
06-17-2011, 02:54 PM
|
#20 |
|
Registered User
Join Date: May 2011
Location: Anderson SC
Posts: 3,893
|
Re: '65 Chevy C10 Long Fleet Retrospective Build Thread
More final assembly details.
We cut new green tint glass for it and blasted the regulator track. New glass tape to hold the glass in place. 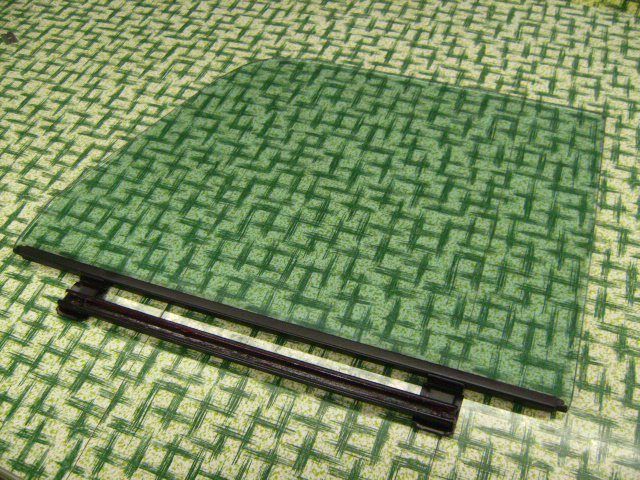 New inner and outer wipes. 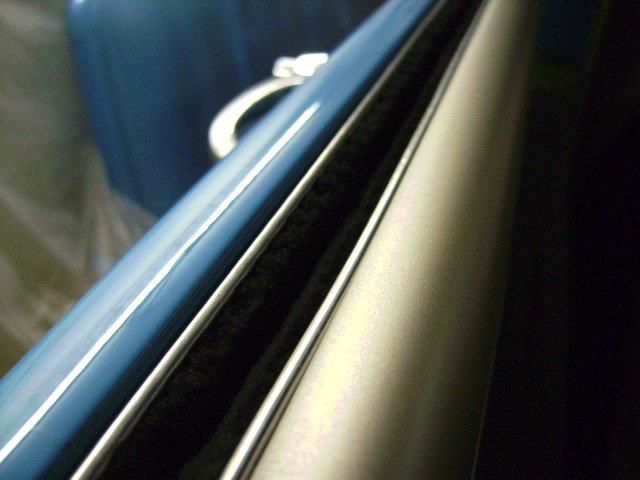 Rear edges curved and flattened to fit behind the glass run channel. 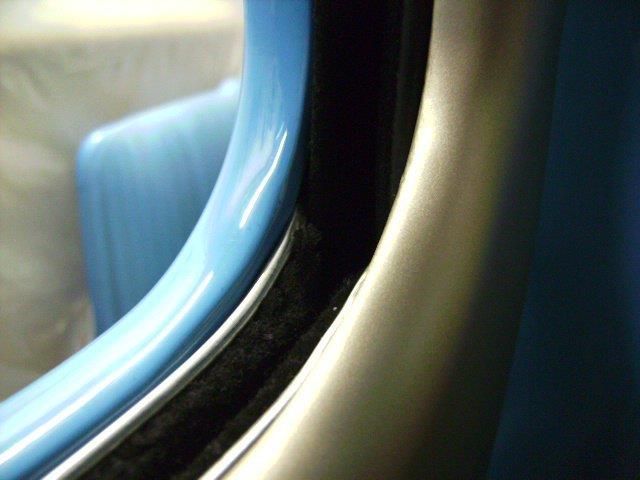 Glass installed. 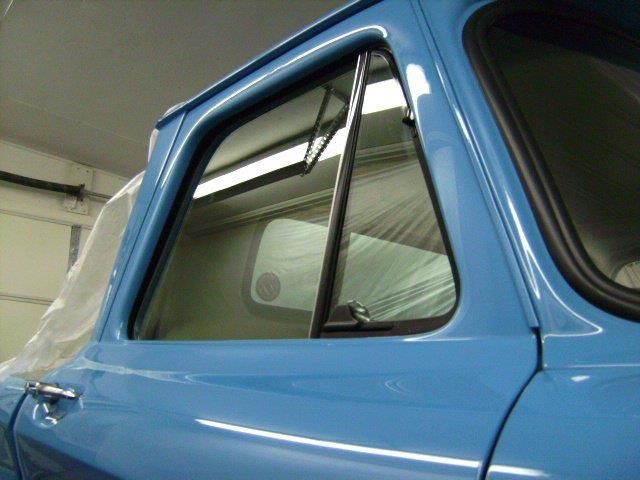 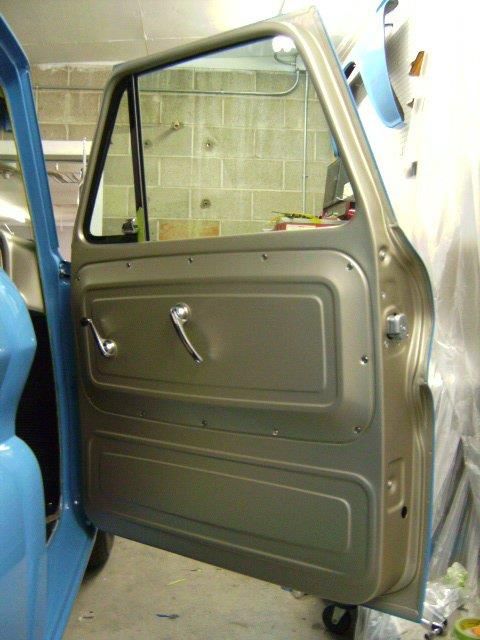 Inner door panel and handles installed. 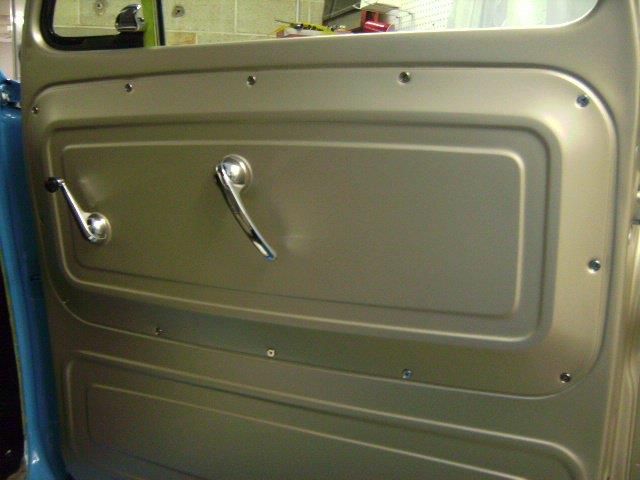 Polished screw heads. 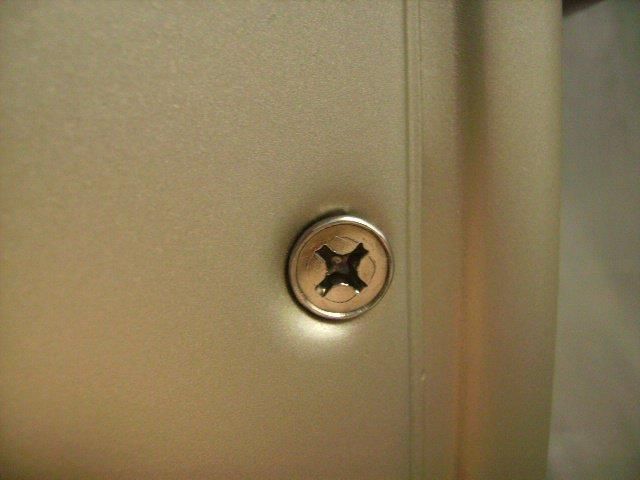 New handles. 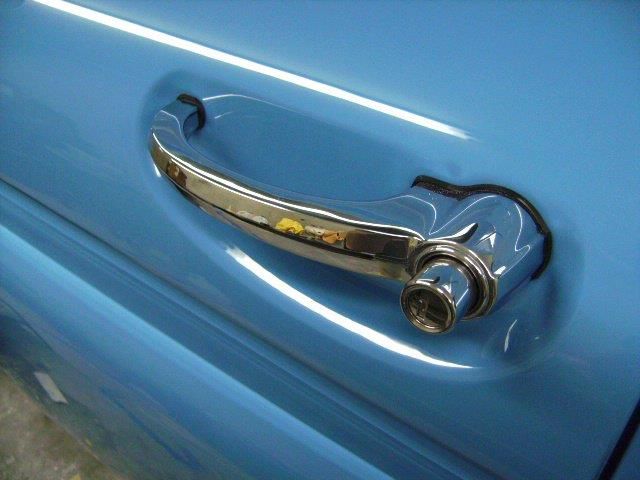 Aftermarket (ugh) mirrors didn't fit the shape of the doors at all. The base was straight instead of being curved to match the shape of the door. 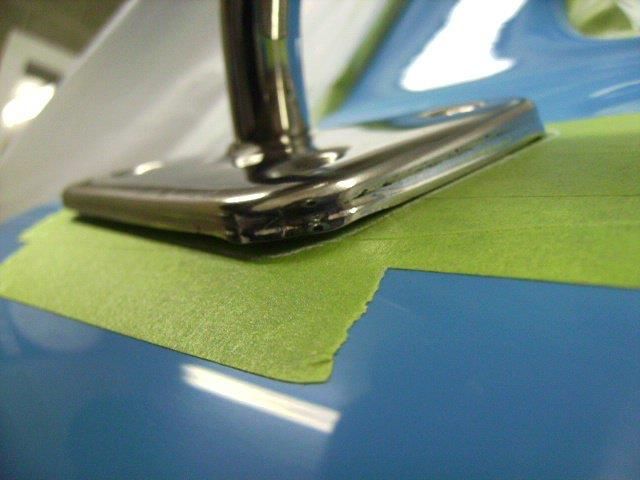 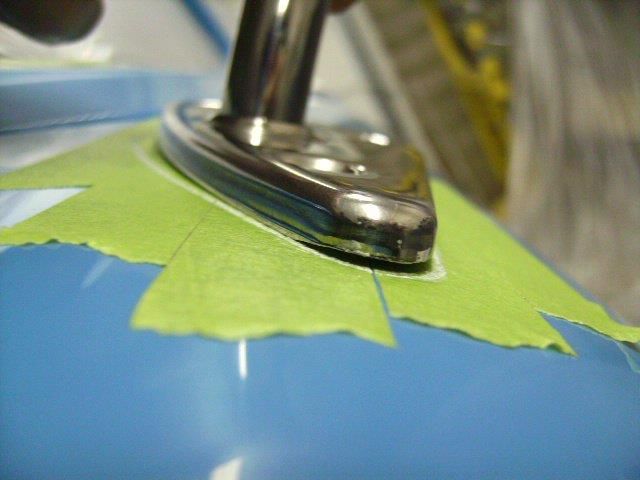 The edges also have alot of distortion that wasn't polished out.  Hairline scratches that need to be buffed out. 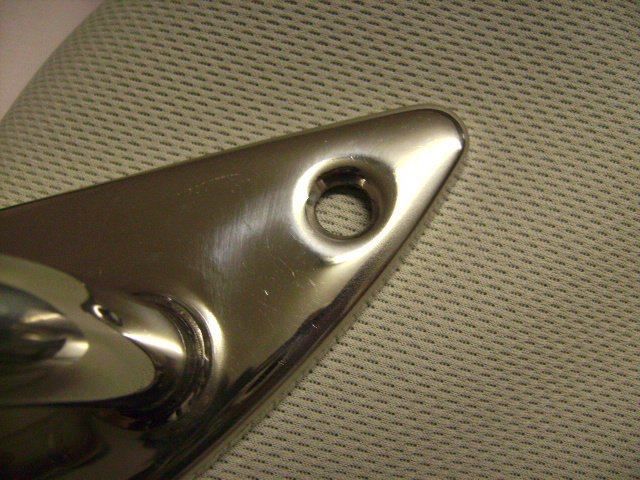  Ground the edges down to match the shape of the door skin.   Ground all the distortion out of the edges.  Sanded smooth, ready to be buffed. 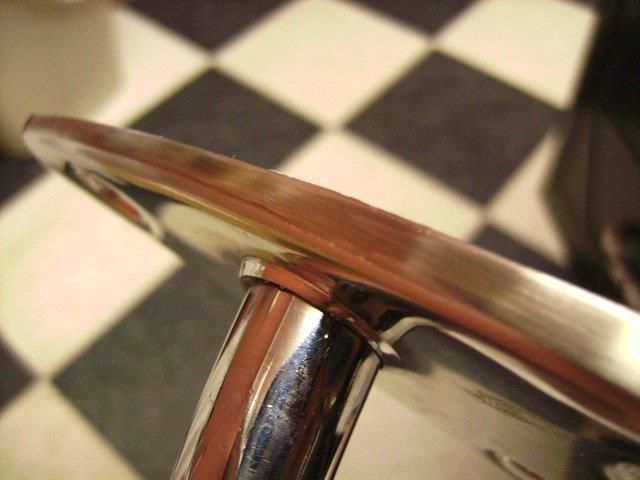 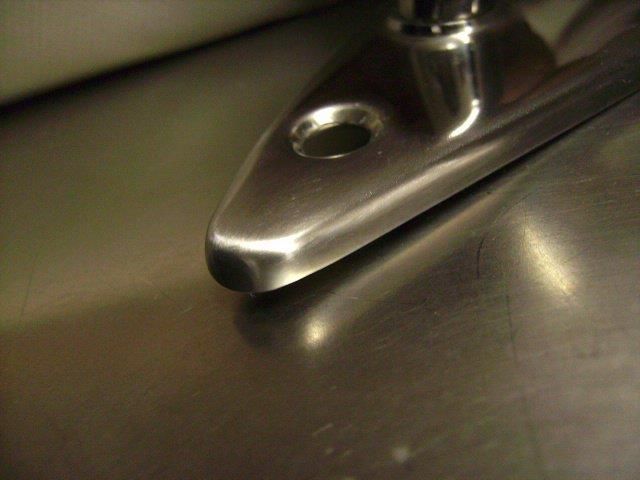 After buffing, compared to a straight out of the box mirror on the right. 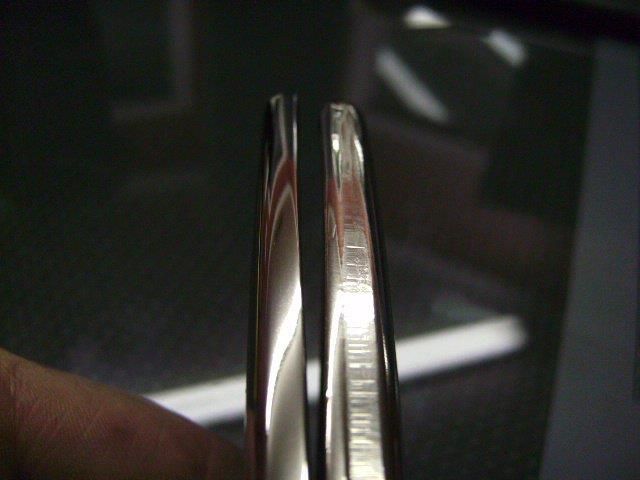 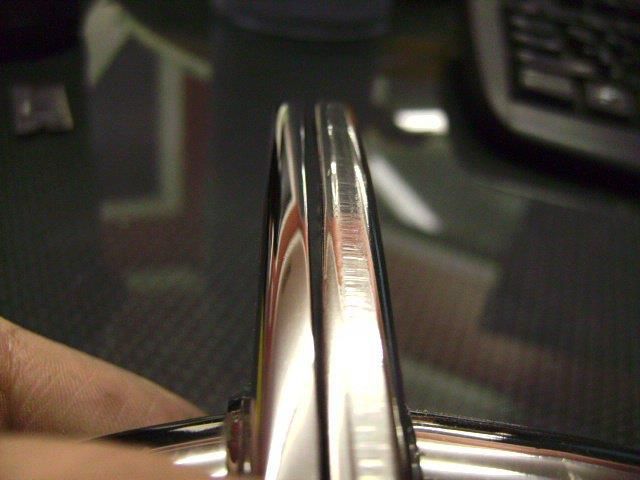 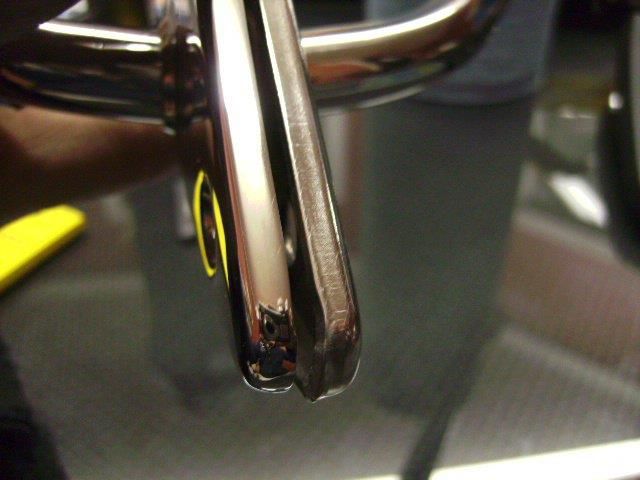 The other step plate installed. 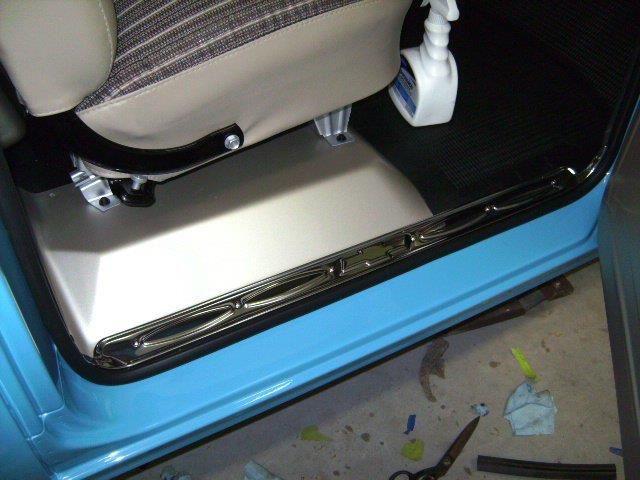 Buffed the driver's side door lock. Before and after. 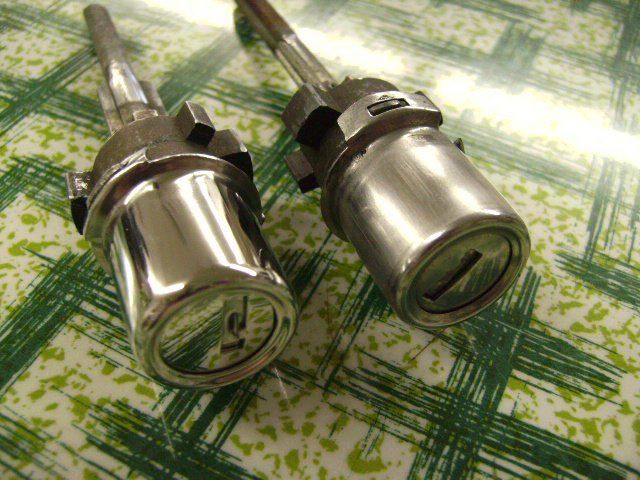 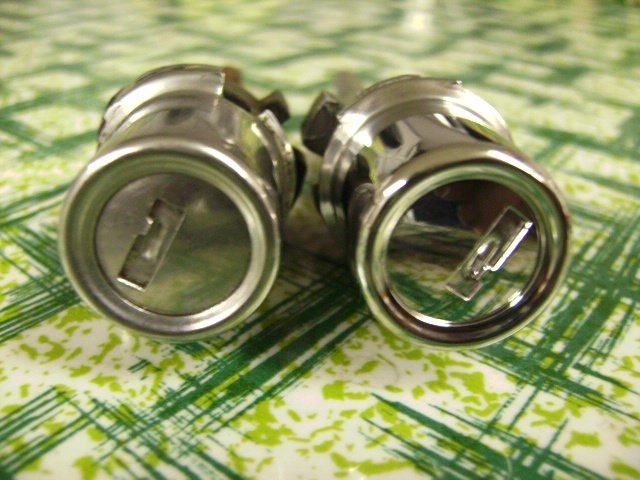 Reassembled. 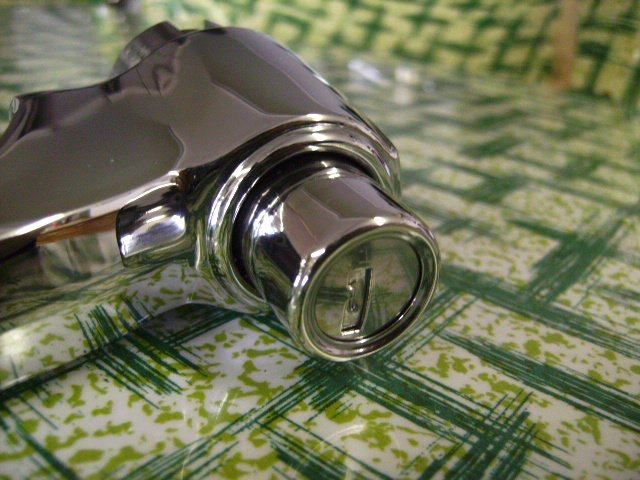 Driver's side door panel, handles, and arm rest installed. 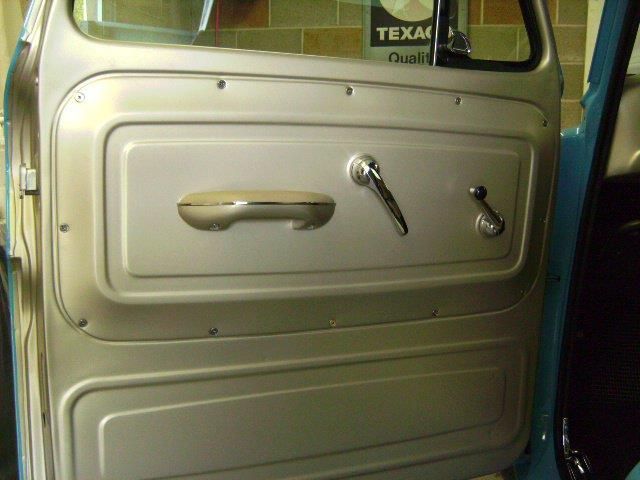 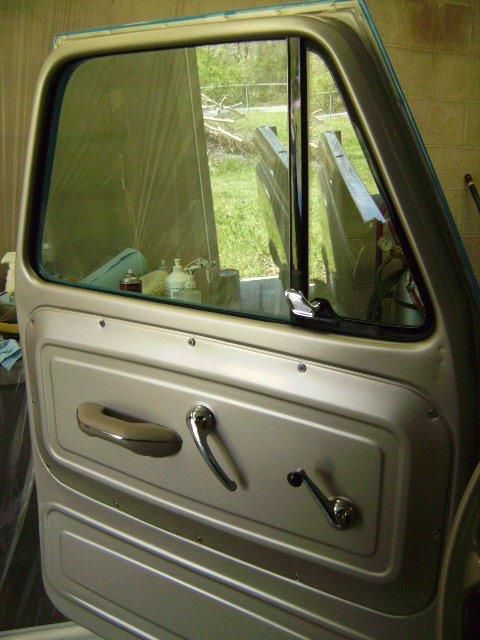 Radio intalled and wired. 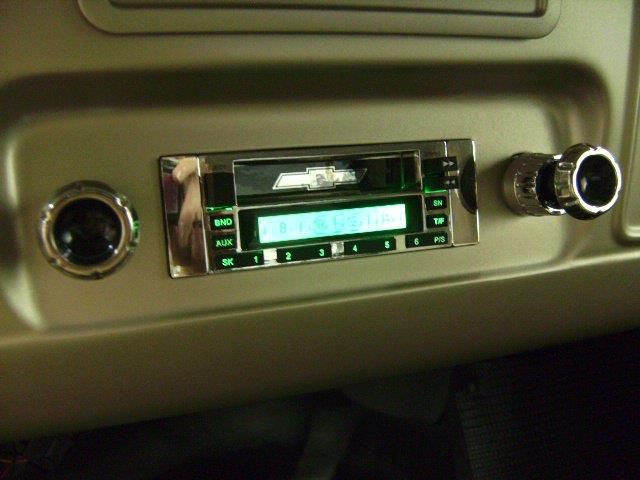 Wetsanded and painted the underside of the hood with low gloss black enamel. 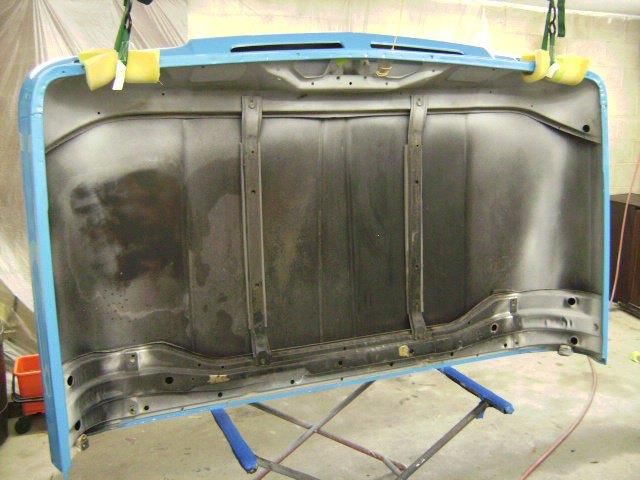 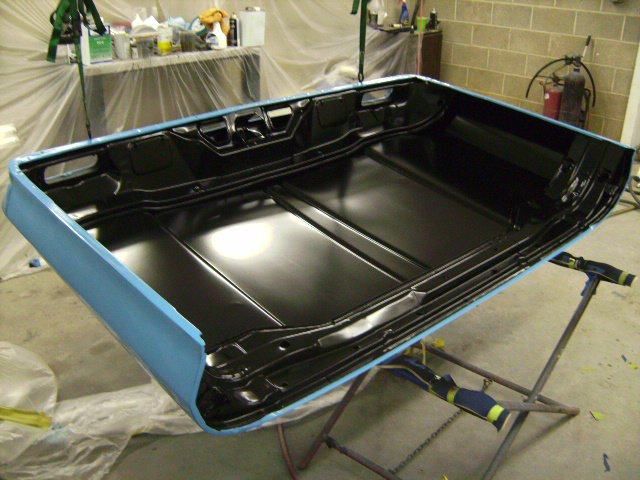 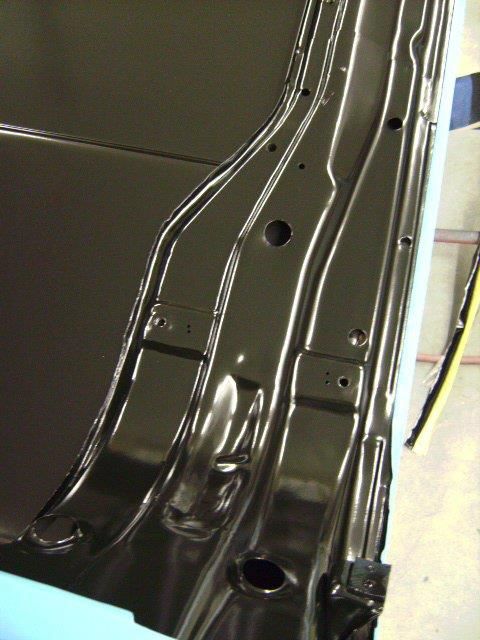 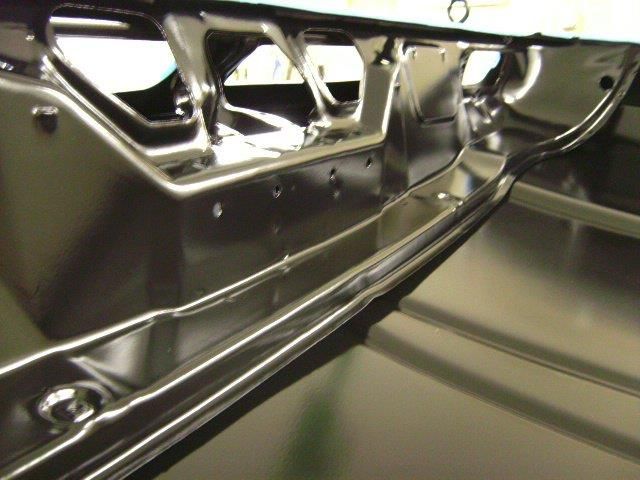 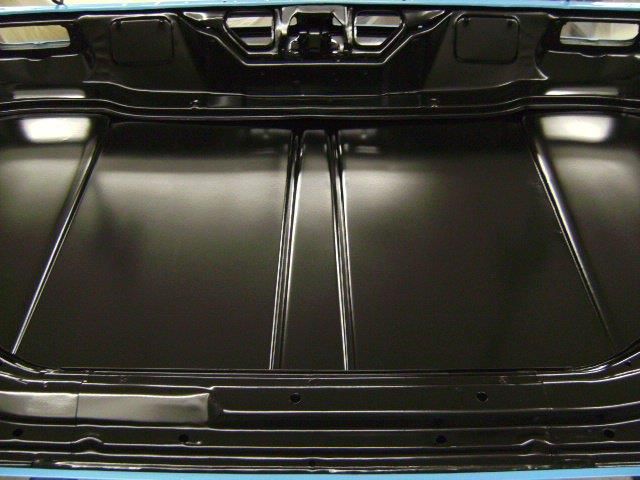 Latch and radiator seal installed.  Latch detail. 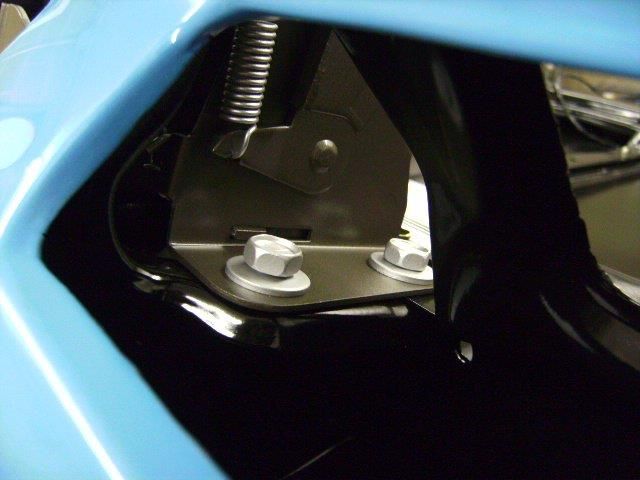 Turnsignals installed with new wiring harness. 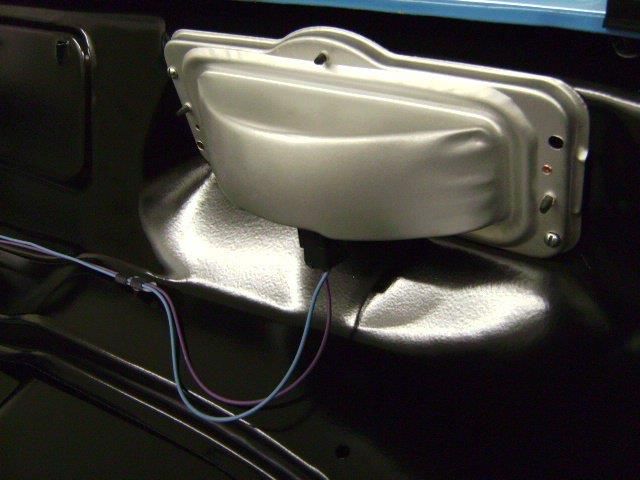 Had a pair of tailgate hinge bushings made from UHMW (Ultra High Molecular Weigh polyethylene). UHMW is self lubricating, is soft enough to keep the paint from chipping inside the hinge sockets, and hard enough to keep the tailgate in place. They fit tight enough in the hinge socket that they won't rattle either. Much better than the original metal bushings.  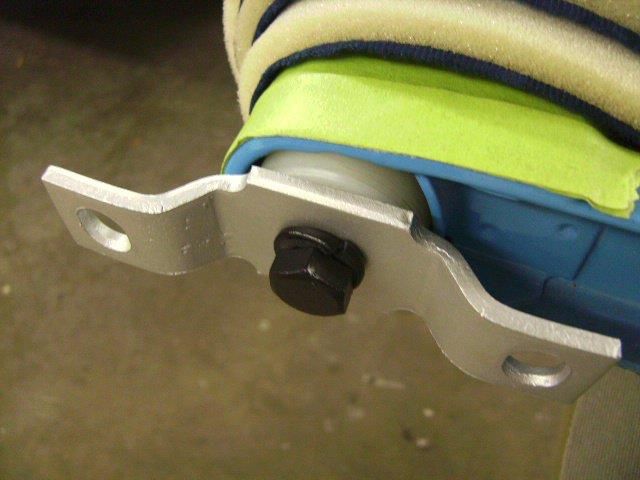 Had to enlongate the holes for the tailgate hardware. 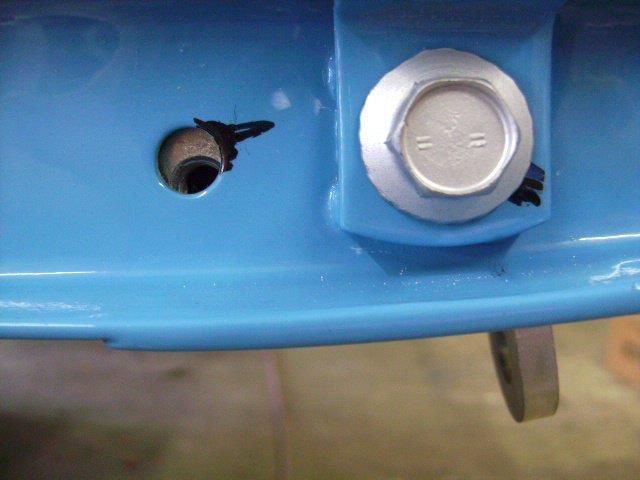 Tailgate installed. 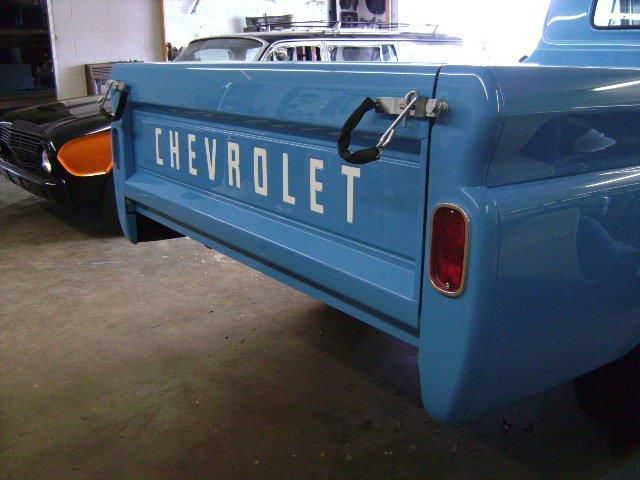 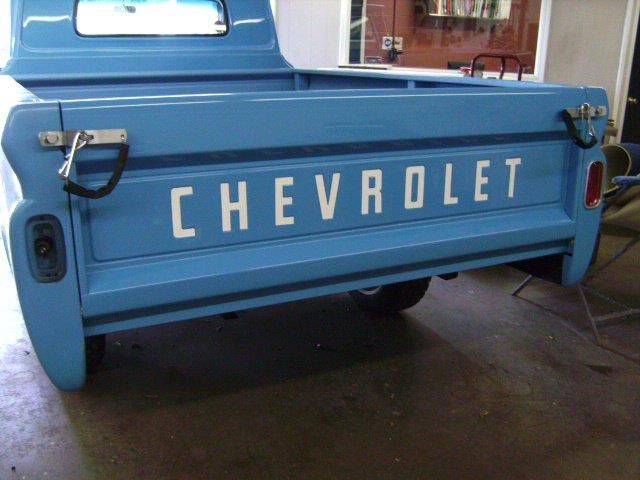  Polished and cleared tailgate chains. Applied Duragloss Rubber and Vinyl dressing to the chain covers. 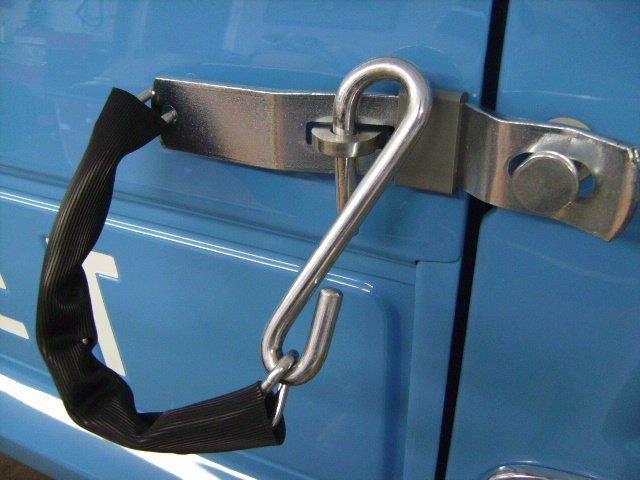 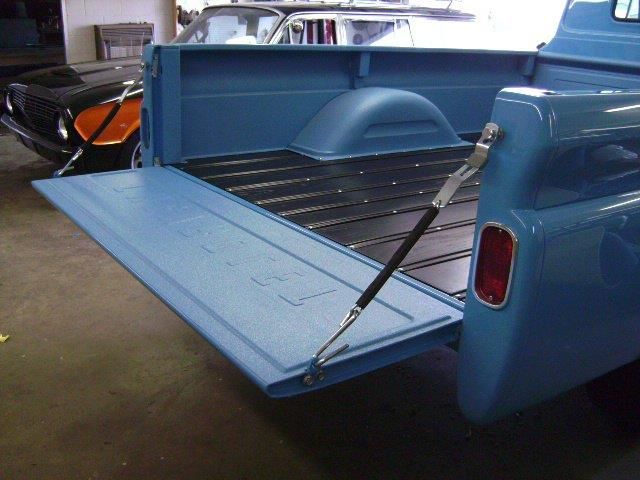 I didn't weld the bed cross sill in so I could adjust the tailgate gaps. Adjusted the bedside in at the top to even out the gap after this pic was taken. 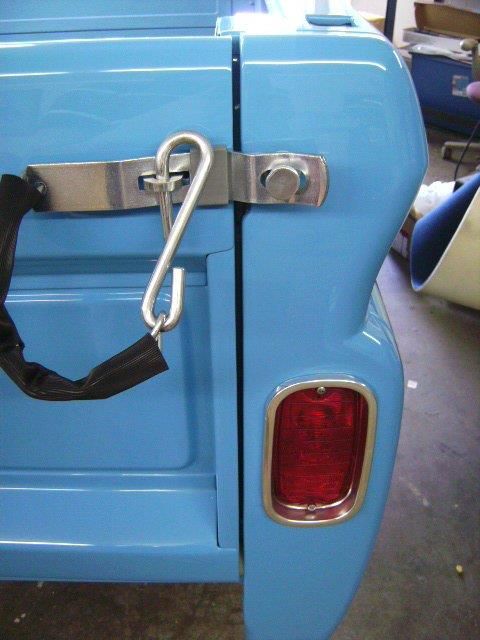 Had to repaint the bumper so I thought I'd test fit it and the splash pans before I shot the paint. 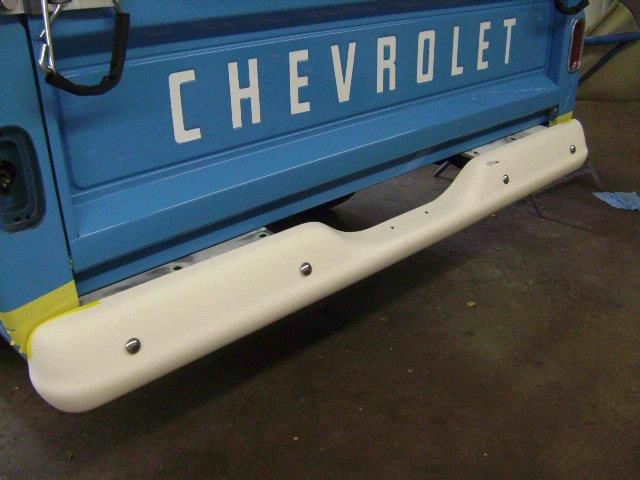 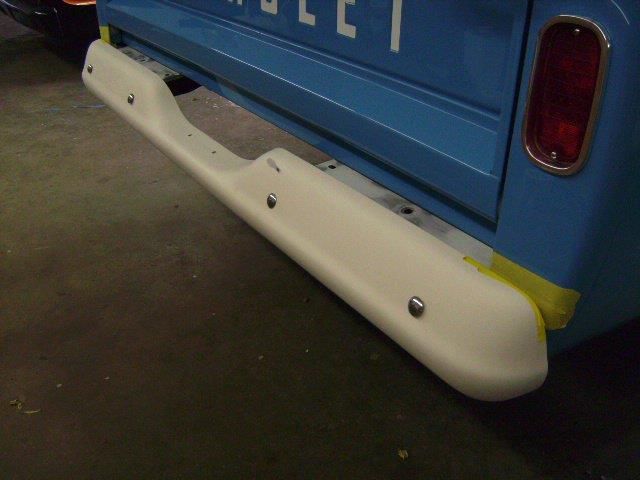 The driver's side top edge curled in towards the bed too much. Had to fix that. 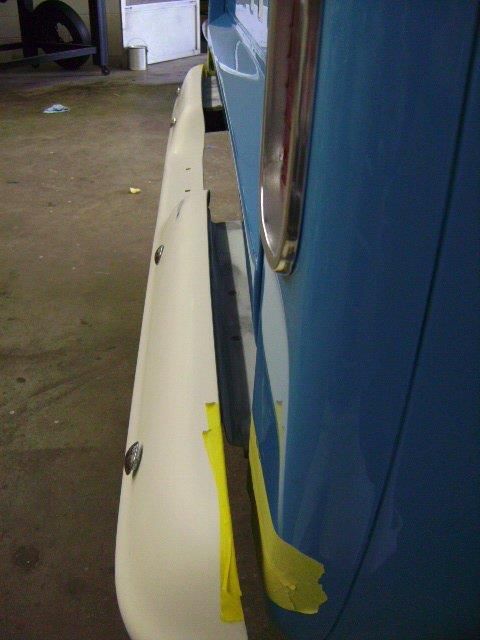 Marking the bumper brackets for the splash pan bolts. 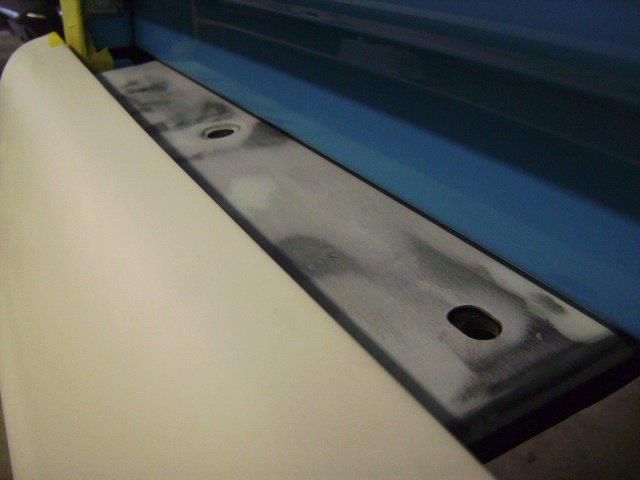 Smoothed and polished all of the bumper bolts. 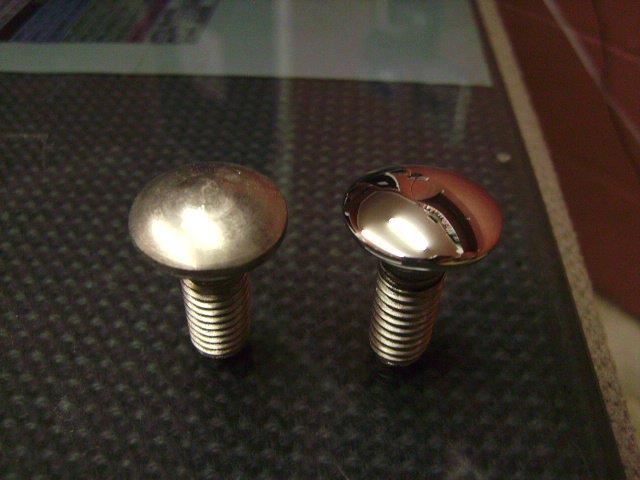 Splash pans and bumper brackets painted and installed. 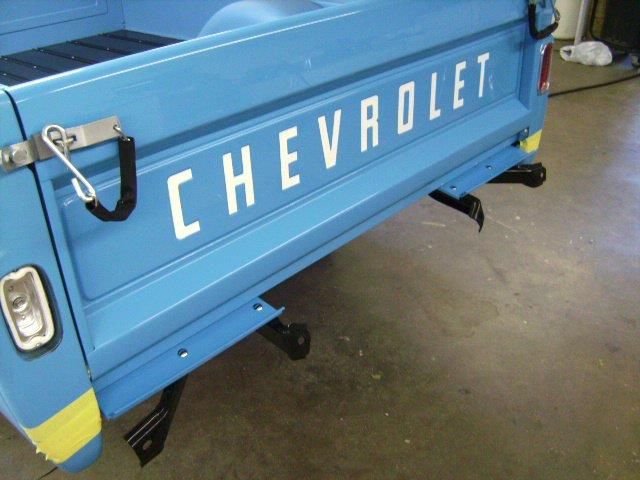 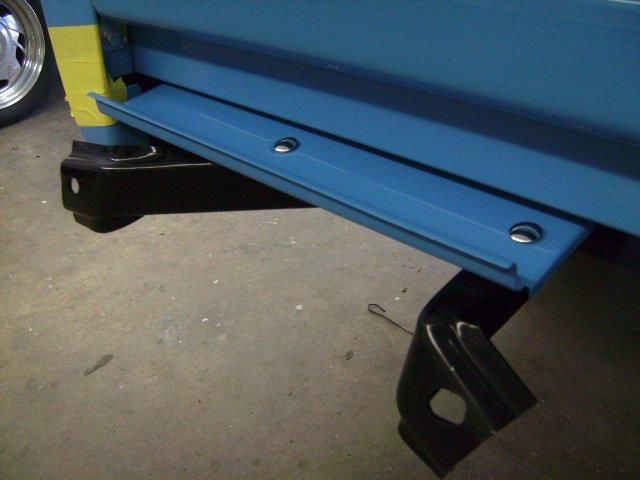 Wetsanded and buffed the bumper. 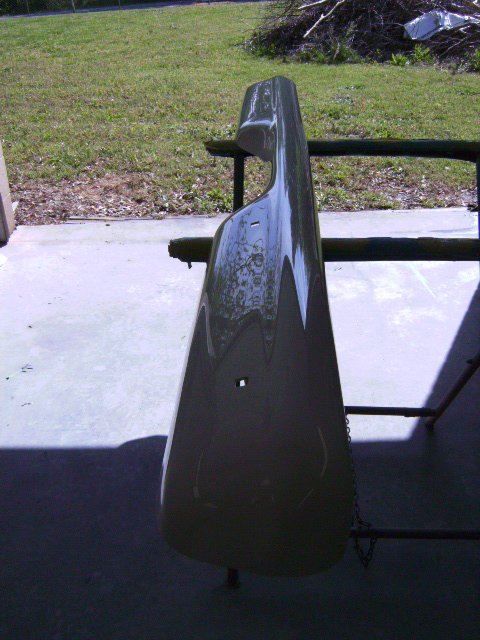  Bumper installed. 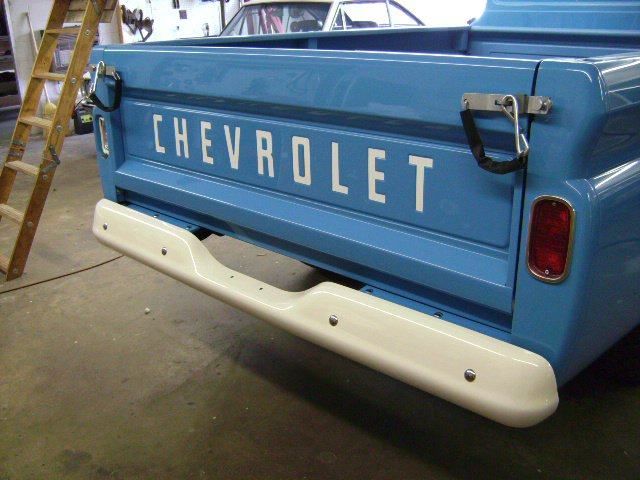 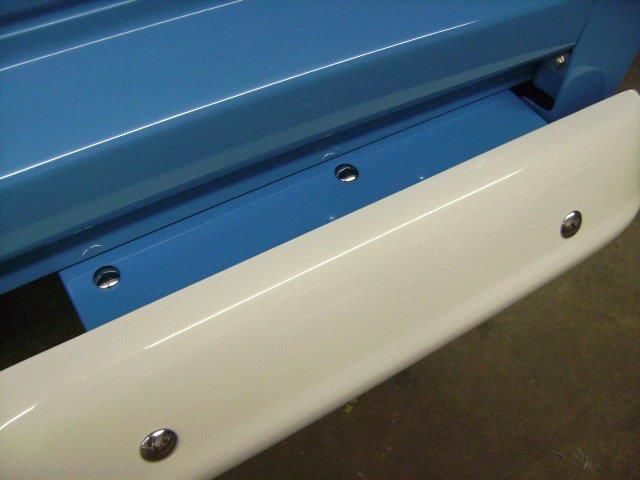
Last edited by theastronaut; 12-31-2012 at 05:23 PM. Reason: Fix dead pic links |
|
|
|
|
06-17-2011, 03:26 PM
|
#21 |
|
Registered User
Join Date: Dec 2010
Location: sooke canada
Posts: 211
|
Re: '65 Chevy C10 Long Fleet Retrospective Build Thread
oh my oh my. thats a tone of detail on there. looks great. you must have lots of patients.
__________________
chevys the way to go. 
|
|
|
|
|
06-17-2011, 03:24 PM
|
#22 |
|
Registered User
Join Date: Nov 2009
Location: Longview, Texas
Posts: 775
|
Re: '65 Chevy C10 Long Fleet Retrospective Build Thread
WOW! Your work is simply amazing!! You have on super fine truck. I would be scared to death to drive it. With my luck i would get t-boned the first time out.
Last edited by CVA59; 06-17-2011 at 03:25 PM. |
|
|
|
|
06-17-2011, 05:25 PM
|
#23 |
|
Registered User
Join Date: May 2005
Location: Beaverton, OR
Posts: 3,728
|
Re: '65 Chevy C10 Long Fleet Retrospective Build Thread
Incredible detail. Wow.
__________________
New Project: 1966 LWB C20 Plans: 1/2 ton conversion Dropmember front Dropmember rear Corvette discs Restored raised bed http://67-72chevytrucks.com/vboard/s....php?p=4295210 |
|
|
|
|
06-17-2011, 06:03 PM
|
#24 |
|
Registered User
Join Date: Sep 2010
Location: Mason City, IA
Posts: 237
|
Re: '65 Chevy C10 Long Fleet Retrospective Build Thread
excellent work! looks great
__________________
66 suburban 51 Merc 2 door coupe 38 Chevy Business Coupe (gf's) 76 Airstream Sovereign |
|
|
|
|
06-18-2011, 12:40 AM
|
#25 |
|
Registered User
Join Date: Jan 2010
Location: Yakima,WA
Posts: 34
|
Re: '65 Chevy C10 Long Fleet Retrospective Build Thread
Thats one sweet resto!
|
|
|
|
 |
| Bookmarks |
|
|


 Hybrid Mode
