
|
|
|
 05-30-2012, 08:45 AM
|
#1 |
|
Registered User
Join Date: Jan 2009
Location: Louisville,Ky
Posts: 5,811
|
Re: '55 International Metal/Body/Paint Work
I'm just happy to see someone take the time to restore a old International most don't.
|

|

|
|
05-30-2012, 12:31 PM
|
#2 |
|
Senior Member
Join Date: Jun 2005
Location: Clovis Ca.
Posts: 3,311
|
Re: '55 International Metal/Body/Paint Work
Nice work man!
__________________
Classic Trucks Link http://www.classictrucks.com/feature...uck/index.html 1958 GMC.Project Build http://67-72chevytrucks.com/vboard/s...d.php?t=162816 1966 Chevelle Build http://67-72chevytrucks.com/vboard/s...d.php?t=443576 Video http://www.youtube.com/watch?v=prrNKo8F7Zw#GU5U2spHI_4 |
|
|
|
|
05-30-2012, 01:06 PM
|
#3 | |||
|
Registered User
Join Date: May 2011
Location: Anderson SC
Posts: 3,870
|
Re: '55 International Metal/Body/Paint Work
Quote:
Quote:
Quote:
__________________
Project Goldilocks '66 C10 Short Fleet BBW Build '65 C10 Highly Detailed Stock Restoration Thread '78 Camaro Targa Roof Build '55 International Metal/Body/Paint Work '66 F100 Full Rotisserie Restoration '40 Packard 120 Convertible Coupe Restoration How To Restore and Detail an Original Gauge Cluster How To Detail Sand Body Panels, Edges, Corners, Etc |
|||
|
|
|
|
05-30-2012, 01:23 PM
|
#4 |
|
Registered User
Join Date: May 2011
Location: Anderson SC
Posts: 3,870
|
Re: '55 International Metal/Body/Paint Work
With the floor and firewall seams sealed up from the inside, I was ready to spray Lizzard Skin heat and sound insulation. I sprayed two coats of each on the floors, firewall, cowl, rear cab panel, and roof. It dampened the panels so they no longer sound like a tin can when tapped on. If you ever want to do this yourself, use paper masking instead of plastic- it doesn't stick to plastic and blows loose when you start putting on extra coats, making a huge mess.
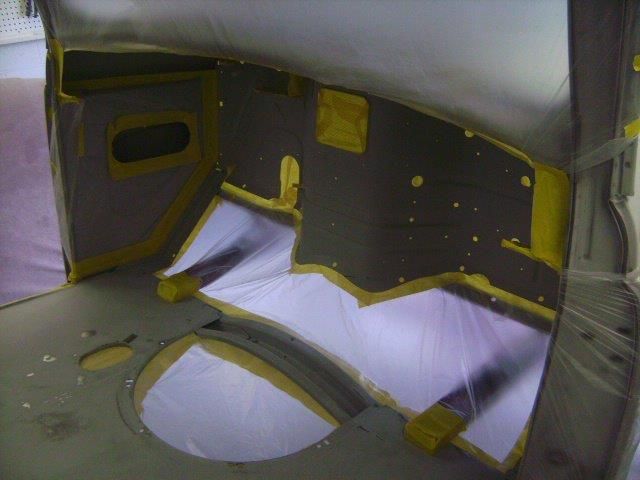 Ever seen this many holes in a firewall before?! 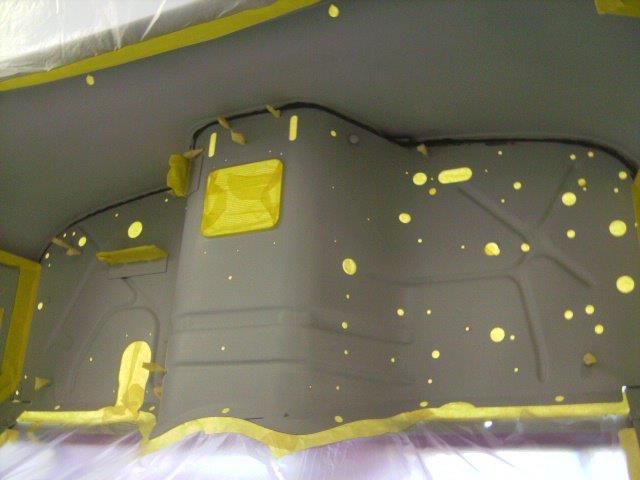 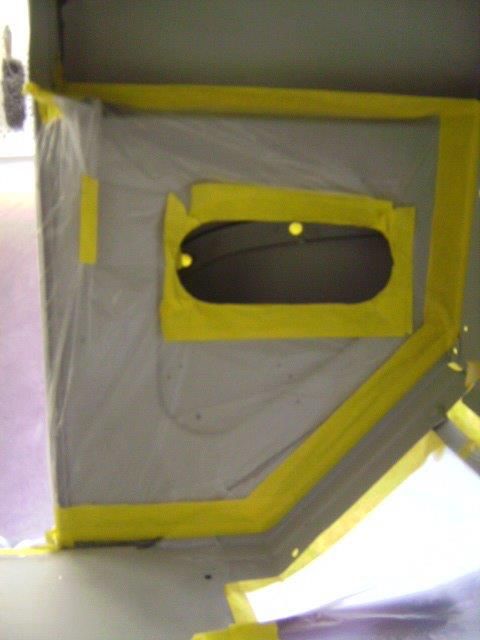 I sprayed epoxy primer over the bare metal spot here before sprayin Lizzard Skin. LS is water based so you don't want it over bare metal. 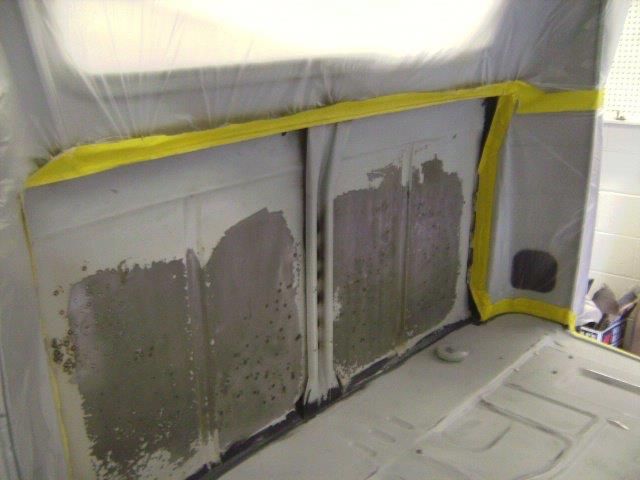 The first two coats of Sound Control. 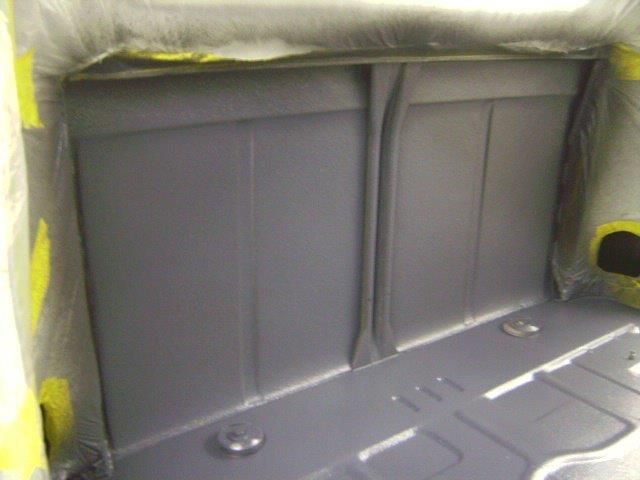 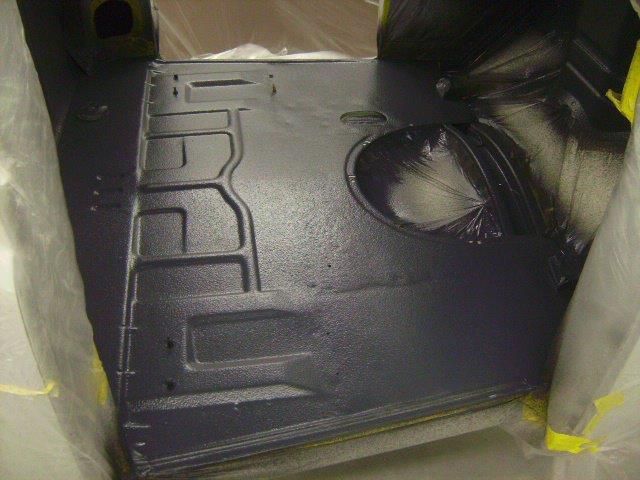 This is why I chose Lizzard Skin over Dynomat or other peel and stick sound deadeners- it's ability to be applied to areas where Dynomat sheets would have a hard time fitting, or sticking, or would have to be extensively trimmed to get even coverage. LS also is waterproof once it dries, is thick enough to seal seams, and won't ever get moisture behind it like peel and stick sheets could. 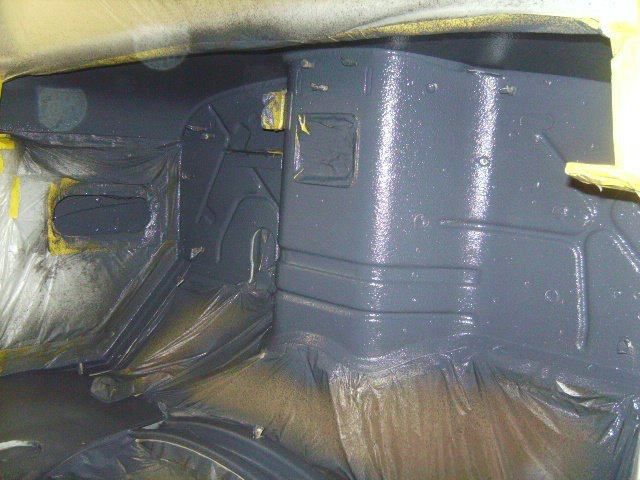  After spraying two coats of Heat Insulation and letting it dry. It dries to a dark gray/black color with a nice texture. If desired, it can be sanded flat and coated with high build primer painted to hide it, while keeping it's sound and heat insulating properties. 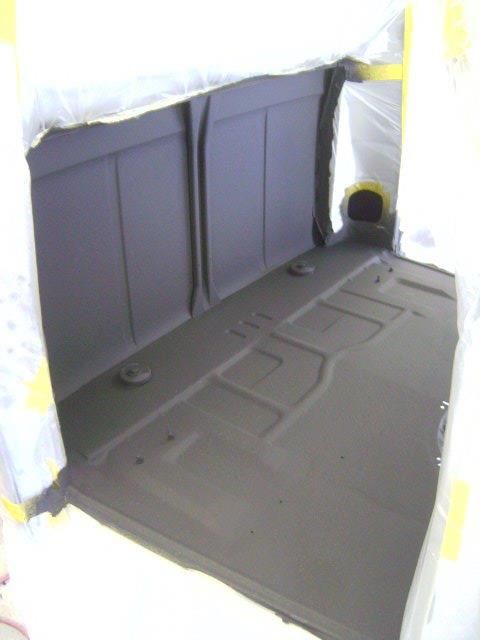 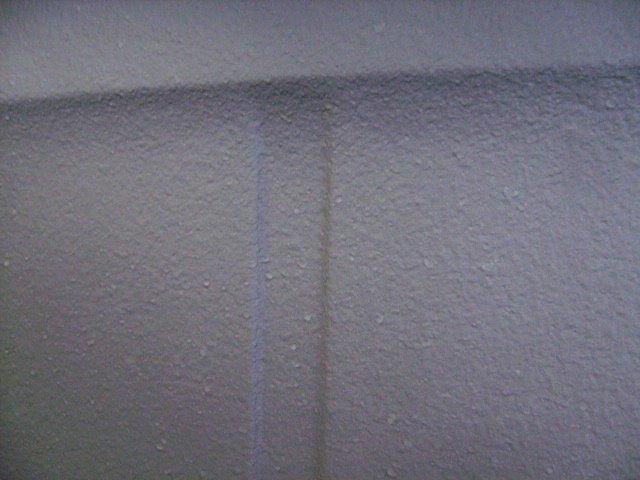 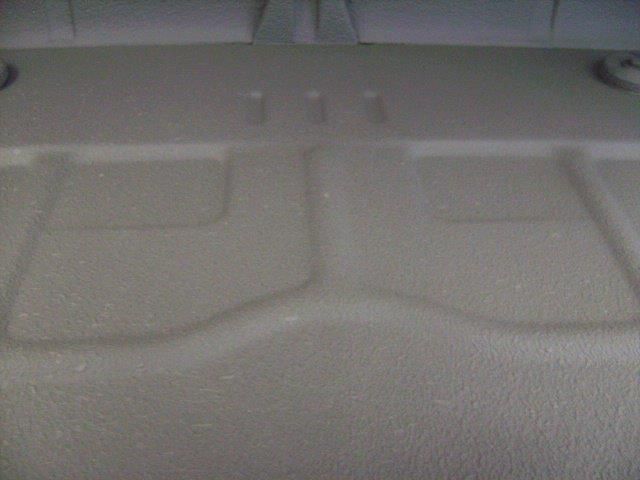 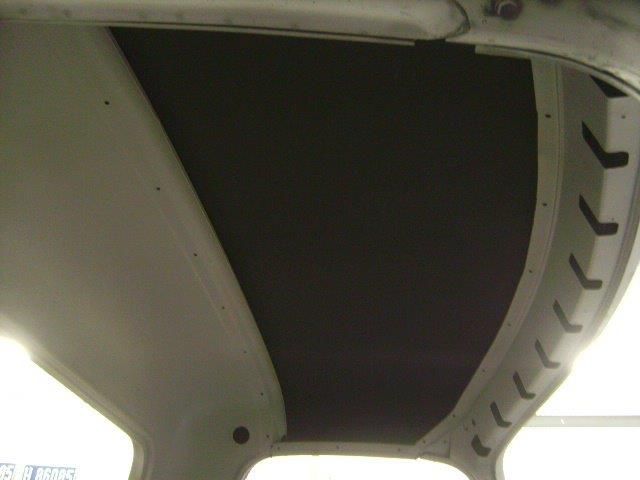
__________________
Project Goldilocks '66 C10 Short Fleet BBW Build '65 C10 Highly Detailed Stock Restoration Thread '78 Camaro Targa Roof Build '55 International Metal/Body/Paint Work '66 F100 Full Rotisserie Restoration '40 Packard 120 Convertible Coupe Restoration How To Restore and Detail an Original Gauge Cluster How To Detail Sand Body Panels, Edges, Corners, Etc |
|
|
|
|
05-30-2012, 04:48 PM
|
#5 |
|
Registered User
Join Date: Nov 2011
Location: mid ga
Posts: 552
|
Re: '55 International Metal/Body/Paint Work
great work astronaut,enjoy watching your work.
__________________
check out SANFORD build thread http://67-72chevytrucks.com/vboard/s...d.php?t=522019 |
|
|
|
|
05-30-2012, 10:26 PM
|
#6 | |
|
Registered User
Join Date: May 2011
Location: Anderson SC
Posts: 3,870
|
Re: '55 International Metal/Body/Paint Work
Quote:
Here's a sneak peek of where I'm at now. I'll work on getting the thread caught up with the progress I've made. I painted the cab and doors this weekend, and started wet sanding and buffing the paint. 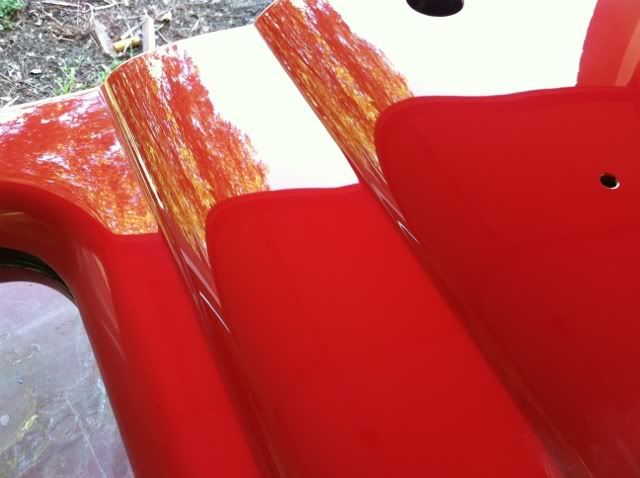 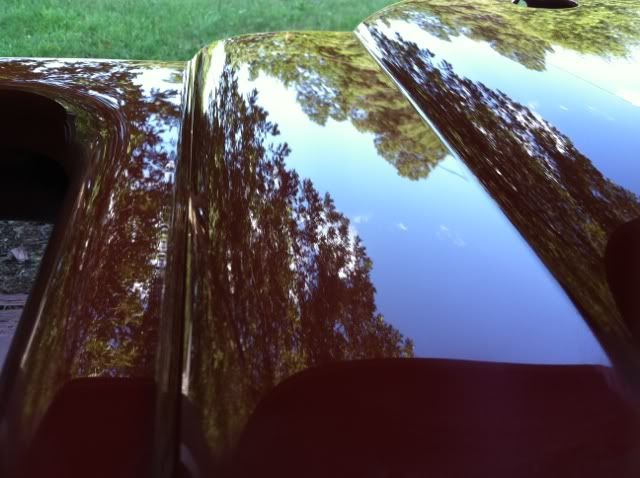 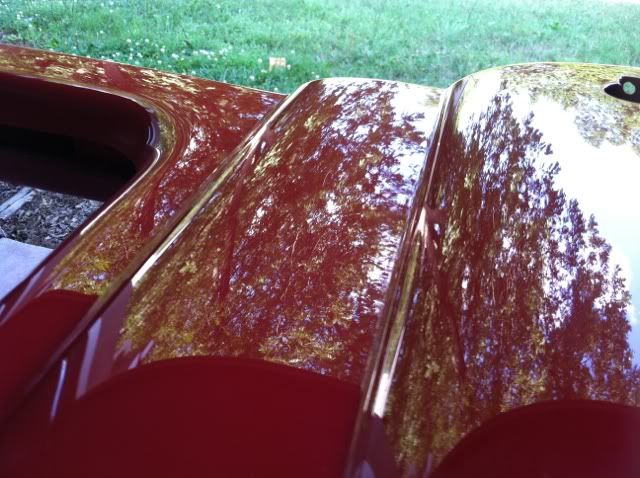 Posted via Mobile Device
__________________
Project Goldilocks '66 C10 Short Fleet BBW Build '65 C10 Highly Detailed Stock Restoration Thread '78 Camaro Targa Roof Build '55 International Metal/Body/Paint Work '66 F100 Full Rotisserie Restoration '40 Packard 120 Convertible Coupe Restoration How To Restore and Detail an Original Gauge Cluster How To Detail Sand Body Panels, Edges, Corners, Etc |
|
|
|
|
|
06-01-2012, 02:08 PM
|
#7 |
|
Registered User
Join Date: Jun 2010
Location: Vancouver Island BC
Posts: 652
|
Re: '55 International Metal/Body/Paint Work
[QUOTE=theastronaut;5407919]
Ever seen this many holes in a firewall before?! Looks like the Milky Way
__________________

|
|
|
|
|
06-01-2012, 02:14 PM
|
#8 |
|
Registered User
Join Date: Jun 2010
Location: Vancouver Island BC
Posts: 652
|
Re: '55 International Metal/Body/Paint Work
Looks like glass, beautiful work!!
Hard to believe that thin coat of Lizard Skin works as good as the thick Dynamat...is it equivalent in heat and sound deadening? Definitely looks more thorough in coverage.
__________________
|
|
|
|
|
05-31-2012, 02:33 AM
|
#9 |
|
Registered User
Join Date: Jan 2009
Location: Louisville,Ky
Posts: 5,811
|
Re: '55 International Metal/Body/Paint Work
I'm the same way i like the odd and ugly stuff most won't touch,I guess it mostly the looks of them or the lack of a aftermarket is part why too.I rather have a 55-57 buick or olds over a chevy just because its different looking.Yeah you do nice work i can't wait to see it done.
|
|
|
|
|
06-03-2012, 06:04 AM
|
#10 |
|
Registered User
Join Date: Jan 2009
Location: Louisville,Ky
Posts: 5,811
|
Re: '55 International Metal/Body/Paint Work
I like lizard skin because its spray on and water based,Dynamat is nice but sticking it down and taping all the seams takes a lot more time.
|
|
|
|
|
06-06-2012, 08:46 AM
|
#11 |
|
Registered User
Join Date: May 2011
Location: Anderson SC
Posts: 3,870
|
Re: '55 International Metal/Body/Paint Work
The hinges needed rebuilding so I had a local machine shop drill and ream them for oversize hinge pins. The pins weren't available oversize, so I had to hunt and find replacement pins from other cars/trucks that would fit, or atleast be workable. I found some for a Dodge truck that were too long, which was great since the driver side door had an extra long tapped stem on the bottom to mount the mirror.
Before pressing the pins out, I cleaned and stamped each half with LT, LB, RT, and RB so they wouldn't get mixed up. I stamped them where they slide in the door so I could keep the area masked off, and the bodywork/paint process wouldn't cover up the markings. 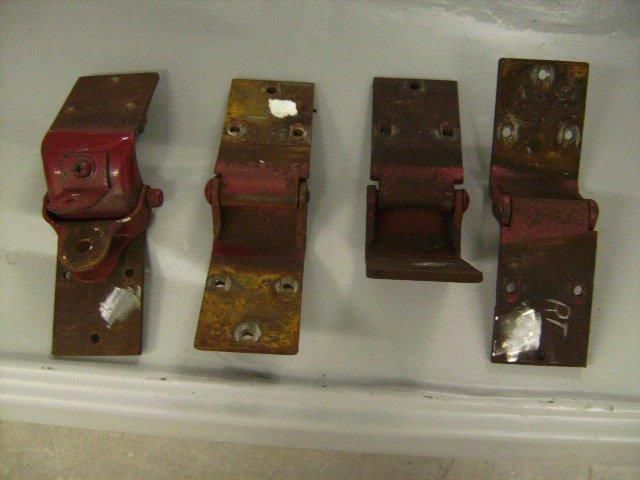 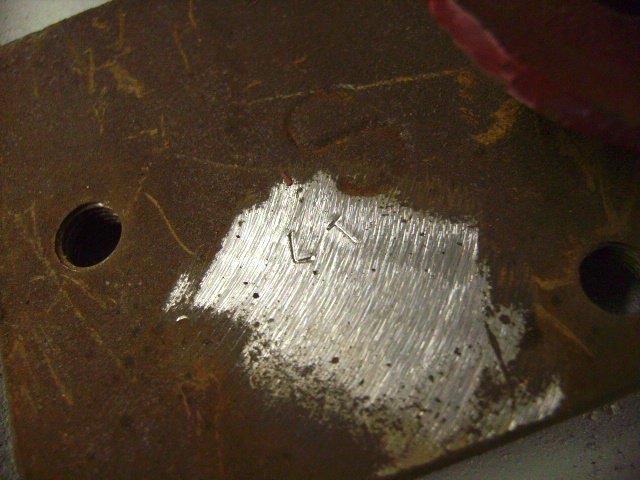 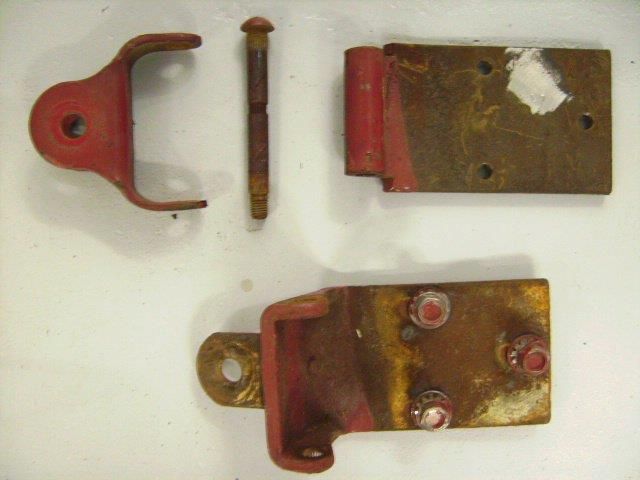 The edges were pretty rough so I smoothed them, and in the after pic you can see where I added oil-impregnated bronze thrust washers to keep the hinges from wearing as quickly. The washers were also the only way I had to adust the door up and down. 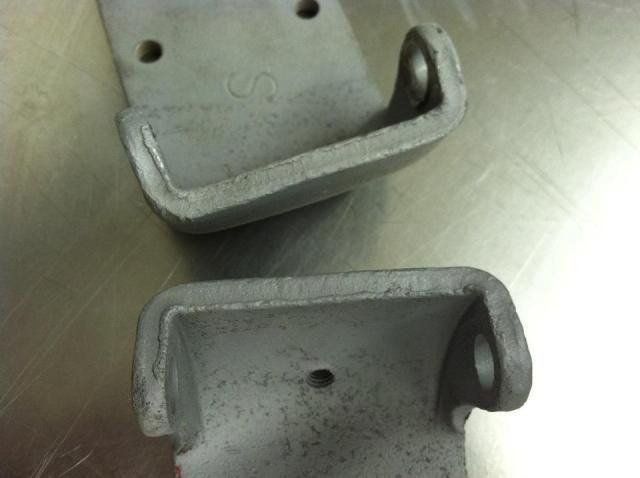 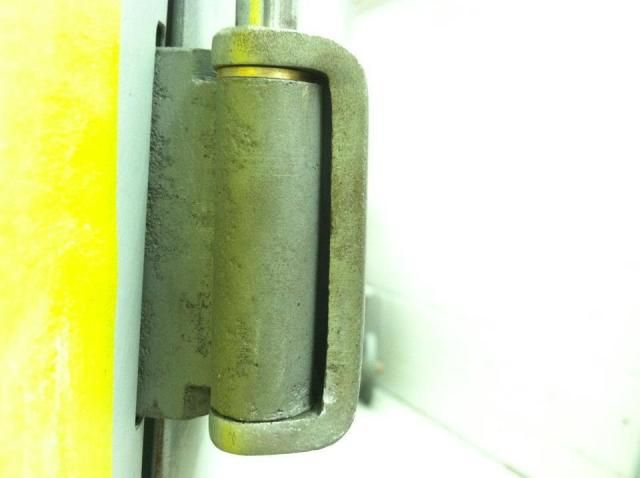
__________________
Project Goldilocks '66 C10 Short Fleet BBW Build '65 C10 Highly Detailed Stock Restoration Thread '78 Camaro Targa Roof Build '55 International Metal/Body/Paint Work '66 F100 Full Rotisserie Restoration '40 Packard 120 Convertible Coupe Restoration How To Restore and Detail an Original Gauge Cluster How To Detail Sand Body Panels, Edges, Corners, Etc |
|
|
|
|
06-06-2012, 12:47 PM
|
#12 |
|
Registered User
Join Date: Jun 2010
Location: Vancouver Island BC
Posts: 652
|
Re: '55 International Metal/Body/Paint Work
Beautiful work as usual, I like your pace and varied tasks. When I saw the red fenders I thought you were done. Nice to see the welder at work again. Do use a TIG or MIG its very nice I'm thinking TIG?
__________________
|
|
|
|
|
06-06-2012, 09:22 PM
|
#13 | |
|
Registered User
Join Date: May 2011
Location: Anderson SC
Posts: 3,870
|
Re: '55 International Metal/Body/Paint Work
Quote:
Another couple teaser shots, one as I was working on the panel alignment metalwork, and the other is after the bodywork was done and sprayed with PPG K93 tinted surfacer/sealer. 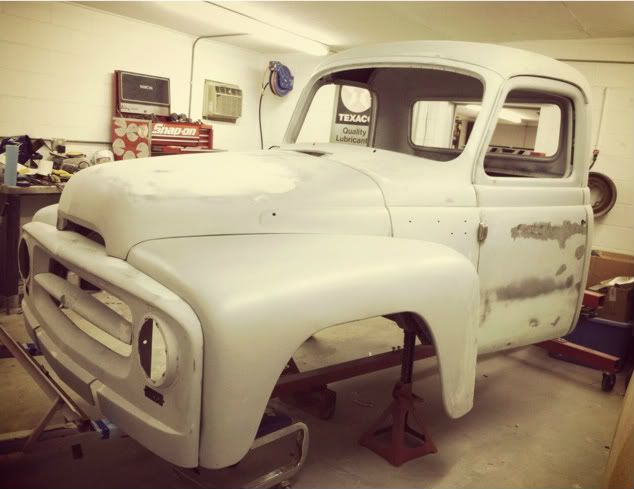 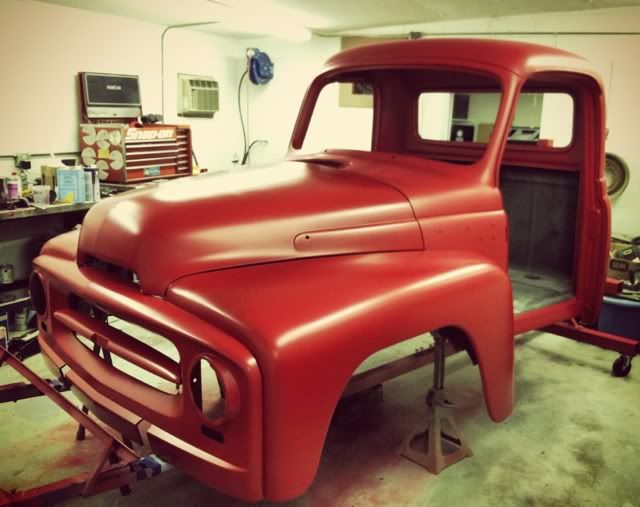
__________________
Project Goldilocks '66 C10 Short Fleet BBW Build '65 C10 Highly Detailed Stock Restoration Thread '78 Camaro Targa Roof Build '55 International Metal/Body/Paint Work '66 F100 Full Rotisserie Restoration '40 Packard 120 Convertible Coupe Restoration How To Restore and Detail an Original Gauge Cluster How To Detail Sand Body Panels, Edges, Corners, Etc |
|
|
|
|
|
06-06-2012, 09:36 PM
|
#14 |
|
Registered User
Join Date: May 2011
Location: Anderson SC
Posts: 3,870
|
Re: '55 International Metal/Body/Paint Work
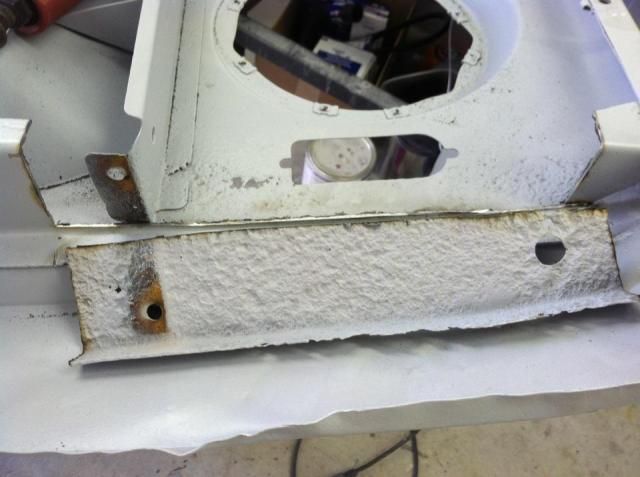
The grill panel was a nightmare, almost no part of it was straight. The center bar was pushed in and twisted right in the center emblem stamping and highly stretched, there was rust between the inner brace and outer sheetmetal, the bottom peices behind the bumper were mangled, bent, and cracked, and one of the headlight stampings was pushed in a good bit. The joys of not having replacement panels available!
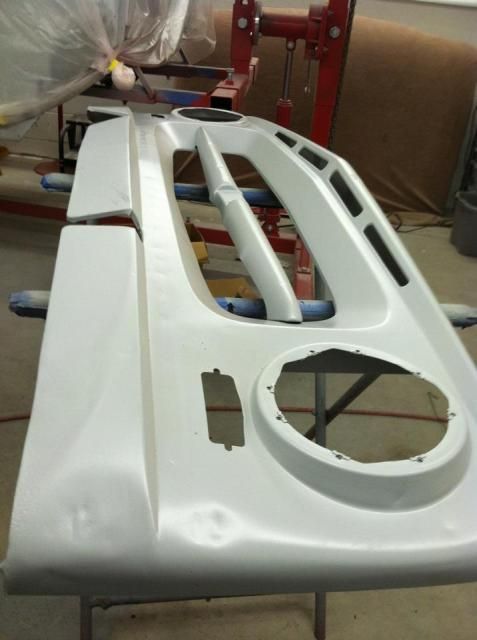 Headlight/turnsignal area warped. 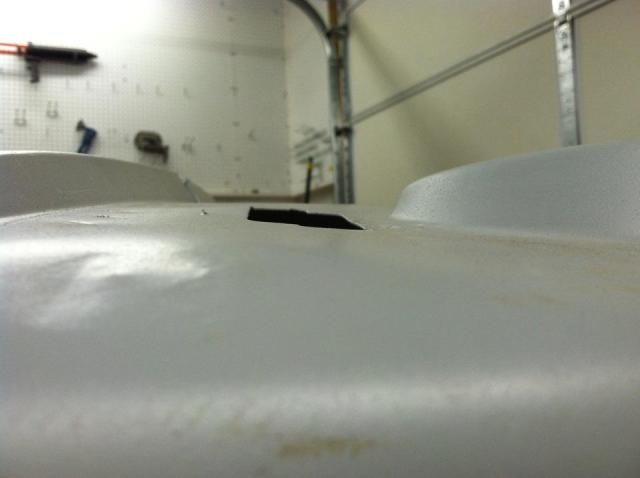 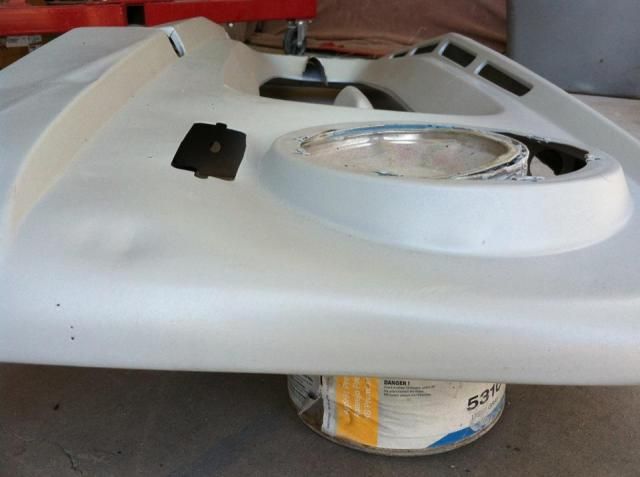 Grill bar damage.. 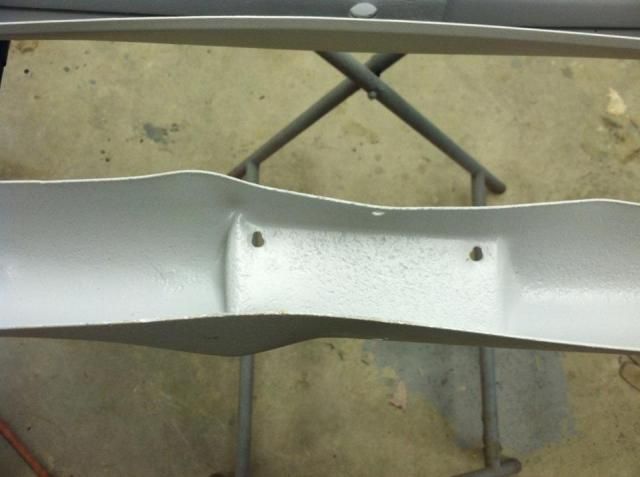 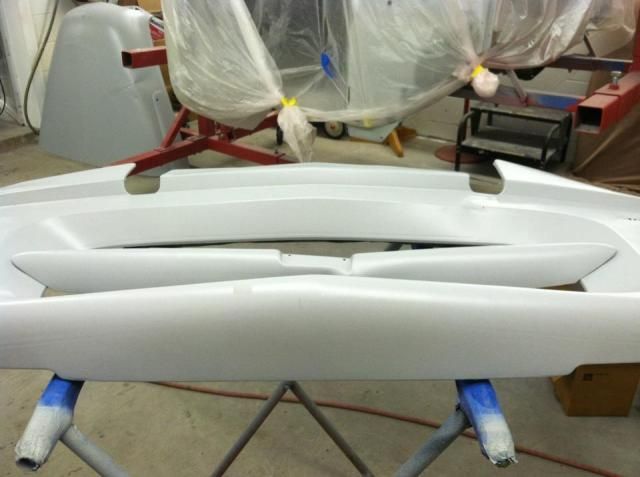 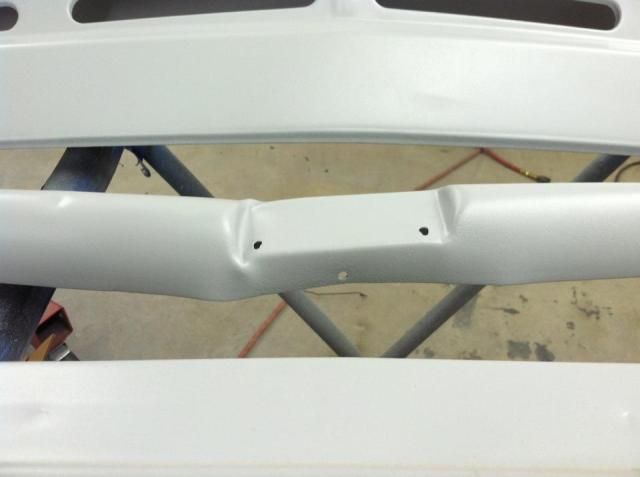 Bumper filler damage. 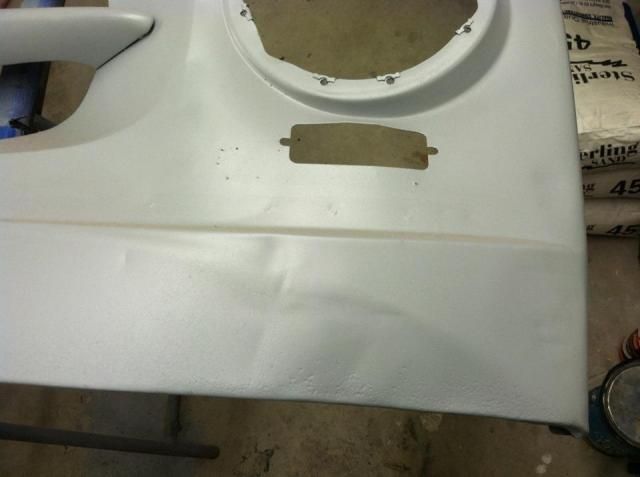 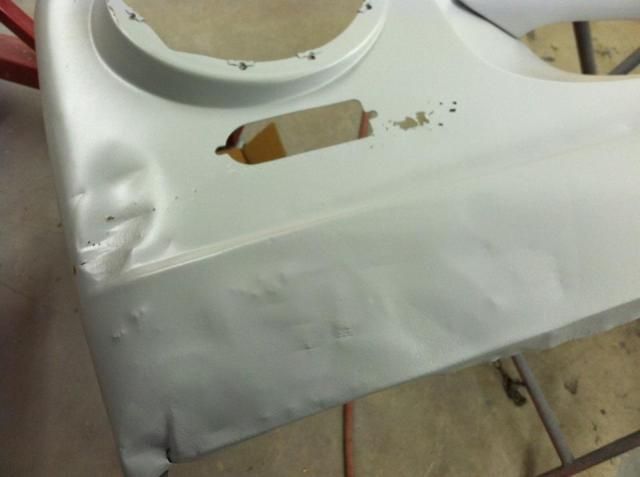 Rust. 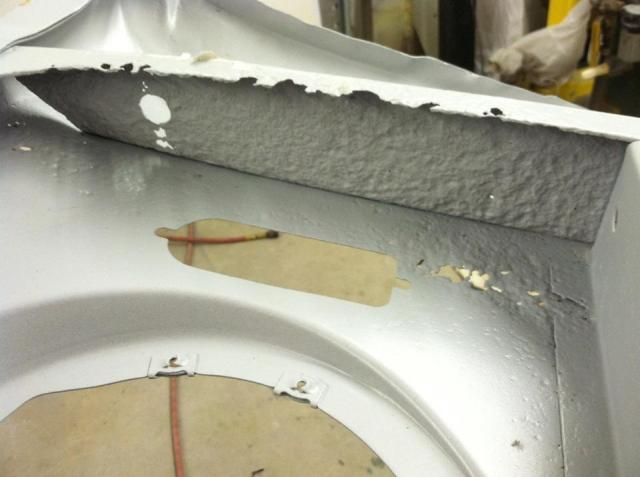 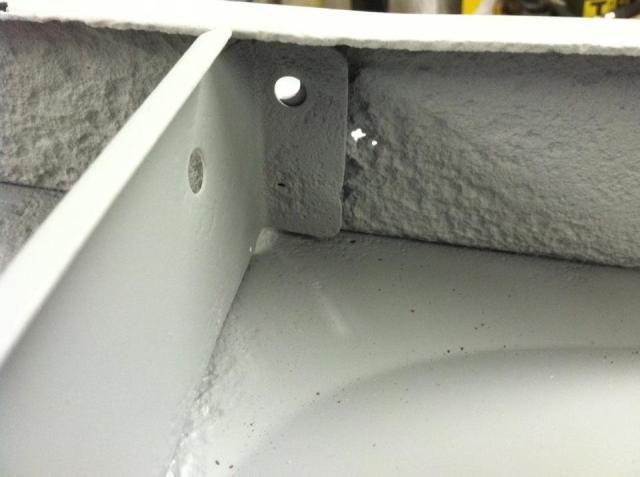 Cracks, in every corner of the bumper bracked notches. 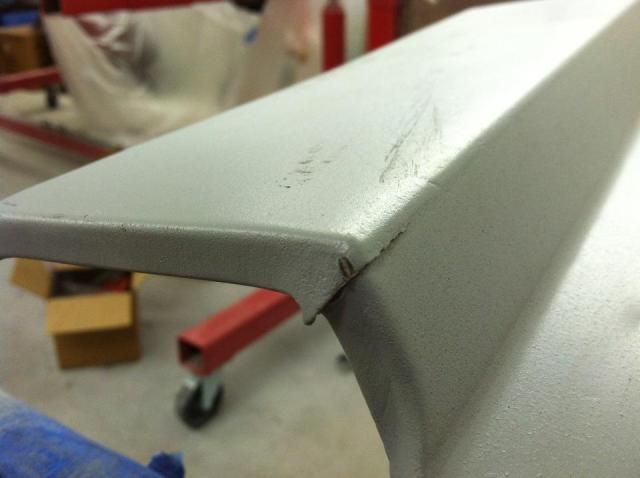
__________________
Project Goldilocks '66 C10 Short Fleet BBW Build '65 C10 Highly Detailed Stock Restoration Thread '78 Camaro Targa Roof Build '55 International Metal/Body/Paint Work '66 F100 Full Rotisserie Restoration '40 Packard 120 Convertible Coupe Restoration How To Restore and Detail an Original Gauge Cluster How To Detail Sand Body Panels, Edges, Corners, Etc |
|
|
|
|
06-06-2012, 09:50 PM
|
#15 |
|
Registered User
Join Date: May 2011
Location: Anderson SC
Posts: 3,870
|
Re: '55 International Metal/Body/Paint Work
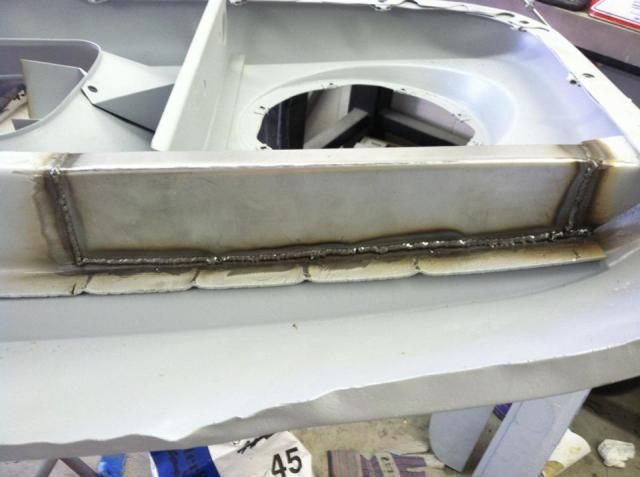
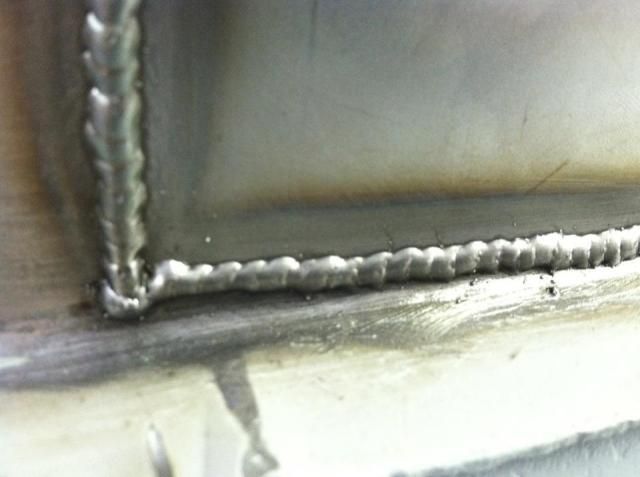
I cut the grill bar out to straighten it, there was no way all the damage was coming out if I left it in.
Once it was cut out I braced the straight side with a 1x1 steel tube and heated the crumpled area red hot with a torch and bent the bar roughly back into shape. 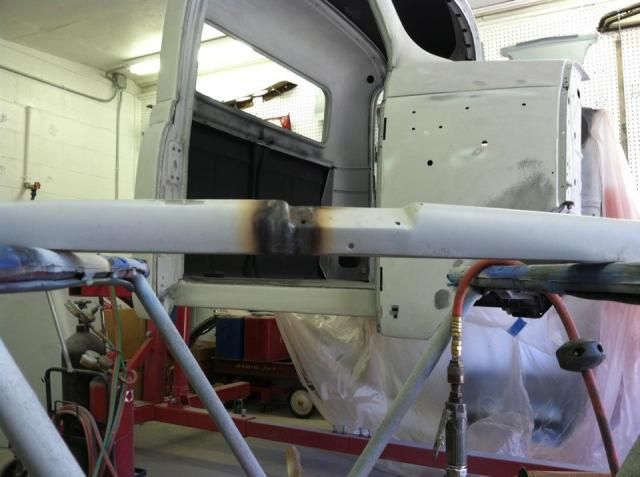 Overall shape is alot closer, still needs fine tuning. 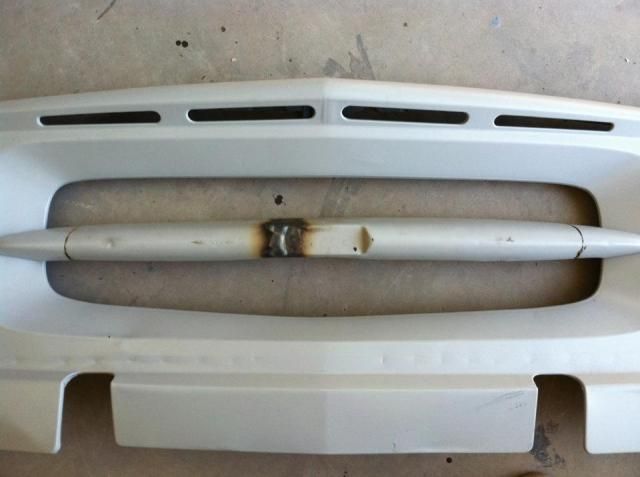 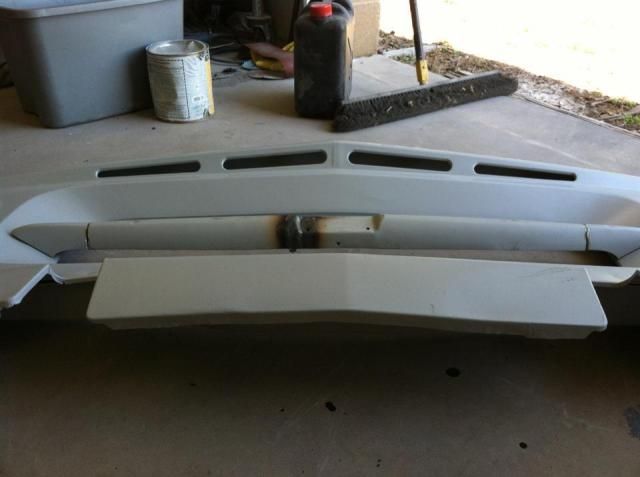 After more time heating, bending, shrinking, and stretching it was pretty close. At this point it's only tacked in place to check how it fits in the opening. The two end points where it's spotwelded to the panel needed straightening as well. 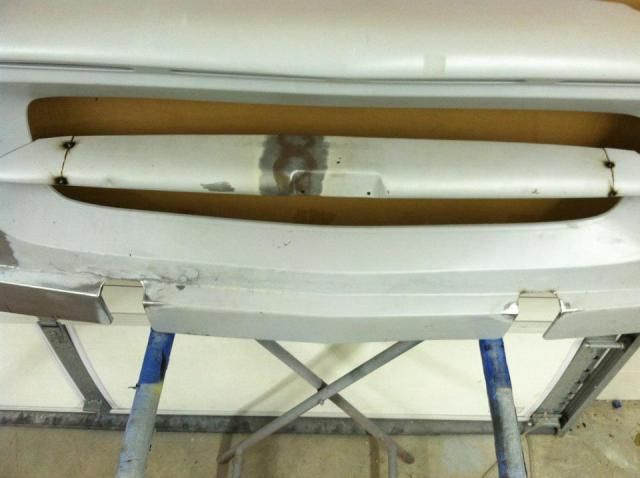 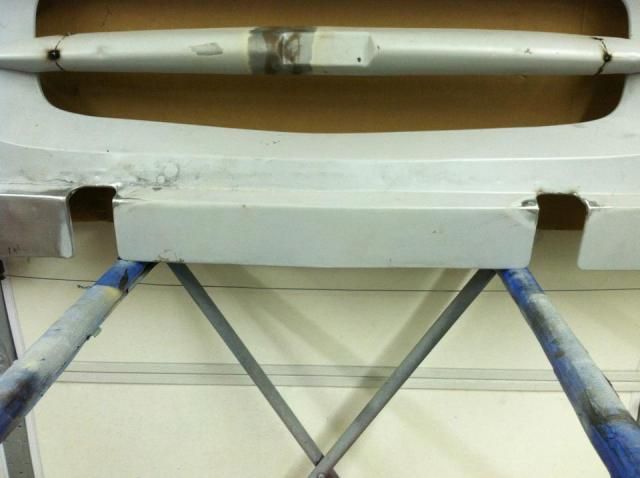 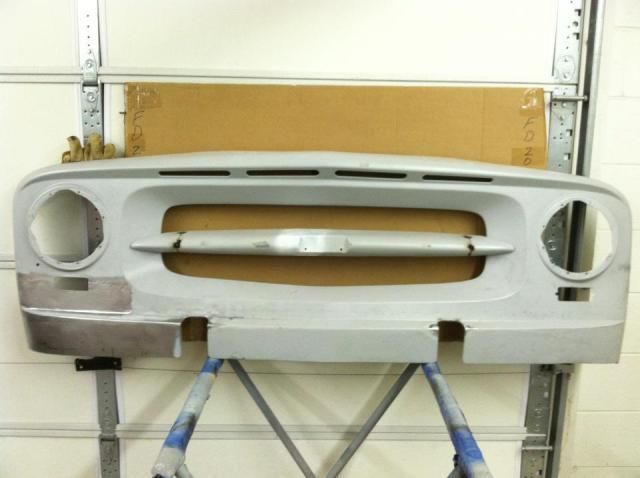 After all metalwork was done and welded back in place. That's a flexible stainless ruler on top of the grill bar in the bottom pic, I use it alot to check how even or flat a shape is. 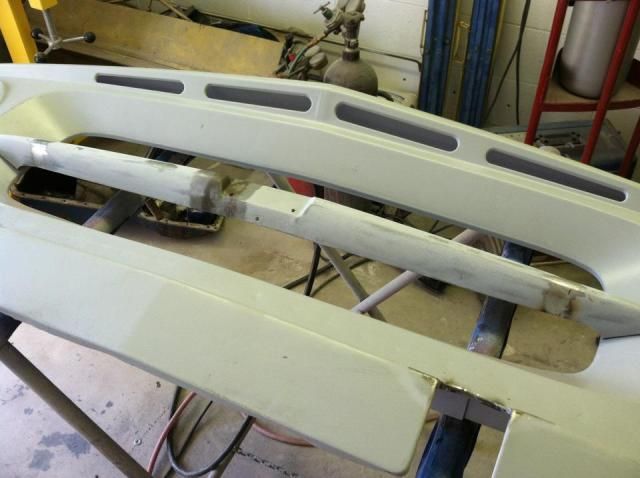 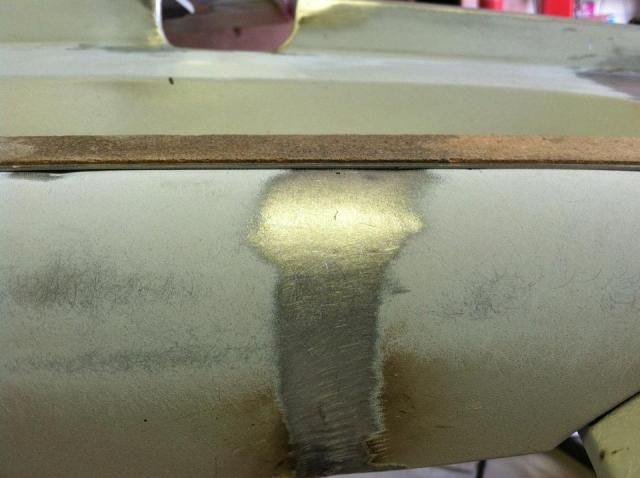
__________________
Project Goldilocks '66 C10 Short Fleet BBW Build '65 C10 Highly Detailed Stock Restoration Thread '78 Camaro Targa Roof Build '55 International Metal/Body/Paint Work '66 F100 Full Rotisserie Restoration '40 Packard 120 Convertible Coupe Restoration How To Restore and Detail an Original Gauge Cluster How To Detail Sand Body Panels, Edges, Corners, Etc |
|
|
|
|
06-06-2012, 10:08 PM
|
#16 |
|
Registered User
 Join Date: Aug 2010
Location: NH
Posts: 368
|
Re: '55 International Metal/Body/Paint Work
That is some amazing bodywork... Top notch work. Good to see an old Cornbinder being saved.
__________________
- 2010 Silverado - 1984 Chevy M1028 (K-30) - 1969 Chevy C-30 - 1933 Ford Stock Car |
|
|
|
|
06-12-2012, 06:32 AM
|
#17 |
|
Registered User
Join Date: Jan 2009
Location: Louisville,Ky
Posts: 5,811
|
Re: '55 International Metal/Body/Paint Work
I don't say this much but i would let you work on my stuff anytime.
|
|
|
|
|
06-13-2012, 07:37 PM
|
#18 |
|
Registered User
Join Date: Jul 2011
Location: El Campo, Tx
Posts: 1,246
|
Re: '55 International Metal/Body/Paint Work
Read your whole thread as well as all of your others in the past. Love them all! What i was wondering is you used Spies SS on the blue truck and it turned out amazing. What made you jump over to the Omni on this one? And you are doing BC/CC on this one correct?
__________________
72 Chevy blue LWB, 99% original Oklahoma truck, 28,000 miles 72 Chevy SWB: http://67-72chevytrucks.com/vboard/s...d.php?t=486626 (Attempt/Mistake #2) 2003 Harley Davidson Dyna Superglide with 2007 Street Bob front end 2000 Ford F350 Powerstroke 4WD CCLB, 310,000 miles running great (STOLEN St. Patricks Day 2014 AND NEVER RECOVERED) 2002 Ford F250 Powerstroke 4WD CCLB (To replace stolen one) Hook em Horns!!! |
|
|
|
|
06-13-2012, 08:26 PM
|
#19 | |||
|
Registered User
Join Date: May 2011
Location: Anderson SC
Posts: 3,870
|
Re: '55 International Metal/Body/Paint Work
Quote:
Quote:
Quote:
For the International, it's BC/CC- Omni base and PPG 2021 clear. I though it would be ok to use Omni since I'd be spraying over red tinted surfacer/sealer and would cover good. It sprays and lays out fine, just took a little more base than I thought it would to cover. I've sprayed PPG base on a Jeep and loved it, so I shoulda stuck with that. The Omni is decent with a color matched substrate, but I'll stick with all PPG from now on. I made the switch from Spies to PPG after spraying PPG base and 2021 clear with a matting agent on a Jeep and LOVED it. I don't have any pics of the Jeep, but the clear came out killer for a satin job- no cutting/buffing possible so you're stuck with whatever comes out of the gun. Thankfully the 2021 layed out like glass with no runs or trash, then dried to a very even satin finish. I'll take some pics of it this weekend and post them.
__________________
Project Goldilocks '66 C10 Short Fleet BBW Build '65 C10 Highly Detailed Stock Restoration Thread '78 Camaro Targa Roof Build '55 International Metal/Body/Paint Work '66 F100 Full Rotisserie Restoration '40 Packard 120 Convertible Coupe Restoration How To Restore and Detail an Original Gauge Cluster How To Detail Sand Body Panels, Edges, Corners, Etc |
|||
|
|
|
|
06-23-2012, 10:52 PM
|
#20 |
|
Registered User
Join Date: Jul 2011
Location: El Campo, Tx
Posts: 1,246
|
Re: '55 International Metal/Body/Paint Work
Been waiting for pics!! Don't hold out on us please. Itching to see more
 Posted via Mobile Device
__________________
72 Chevy blue LWB, 99% original Oklahoma truck, 28,000 miles 72 Chevy SWB: http://67-72chevytrucks.com/vboard/s...d.php?t=486626 (Attempt/Mistake #2) 2003 Harley Davidson Dyna Superglide with 2007 Street Bob front end 2000 Ford F350 Powerstroke 4WD CCLB, 310,000 miles running great (STOLEN St. Patricks Day 2014 AND NEVER RECOVERED) 2002 Ford F250 Powerstroke 4WD CCLB (To replace stolen one) Hook em Horns!!! |
|
|
|
|
06-24-2012, 08:44 AM
|
#21 |
|
Registered User
Join Date: Jan 2009
Location: Louisville,Ky
Posts: 5,811
|
Re: '55 International Metal/Body/Paint Work
We have a couple of shops here ones a normal garage i wouldn't let touch my lawnmower let alone my car lol.From what i have learned spend the money the first time its cheaper then doing it over again.Its just nice too see some one really do body work,I have seen enough get it close enough and just down it in filler tell its smooth.I'm not anti filler it has its place but too many use it as a fix it all when its not needed.
|
|
|
|
|
06-28-2012, 08:49 AM
|
#22 | ||
|
Registered User
Join Date: May 2011
Location: Anderson SC
Posts: 3,870
|
Re: '55 International Metal/Body/Paint Work
Quote:
 I tried yesterday morning but photobucket was down for maintenance. Will work on making a post now! I tried yesterday morning but photobucket was down for maintenance. Will work on making a post now! Quote:
__________________
Project Goldilocks '66 C10 Short Fleet BBW Build '65 C10 Highly Detailed Stock Restoration Thread '78 Camaro Targa Roof Build '55 International Metal/Body/Paint Work '66 F100 Full Rotisserie Restoration '40 Packard 120 Convertible Coupe Restoration How To Restore and Detail an Original Gauge Cluster How To Detail Sand Body Panels, Edges, Corners, Etc |
||
|
|
|
|
06-28-2012, 09:22 AM
|
#23 |
|
Registered User
Join Date: May 2011
Location: Anderson SC
Posts: 3,870
|
Re: '55 International Metal/Body/Paint Work
More work on the grill panel, cutting the rust out and welding in new metal.
   Another spot that was rotted. Anywhere there was layered panels, I used etch primer to keep the seam protected. 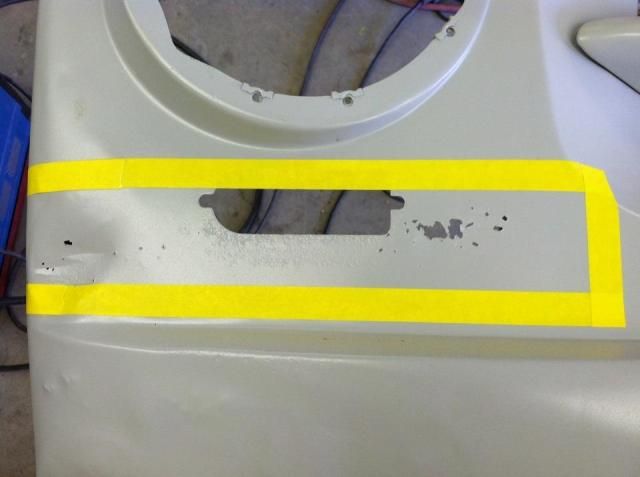 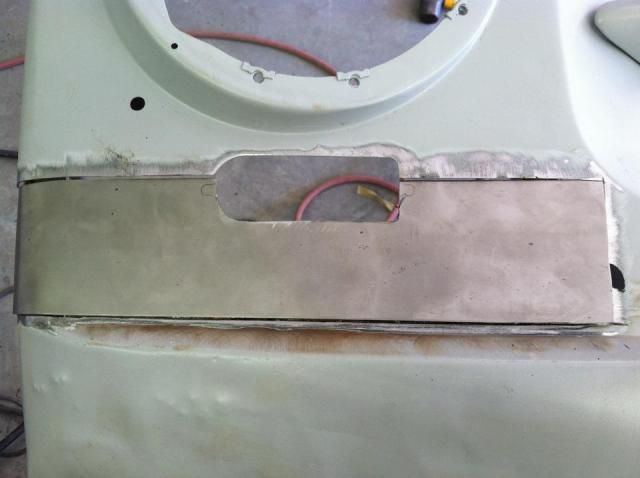 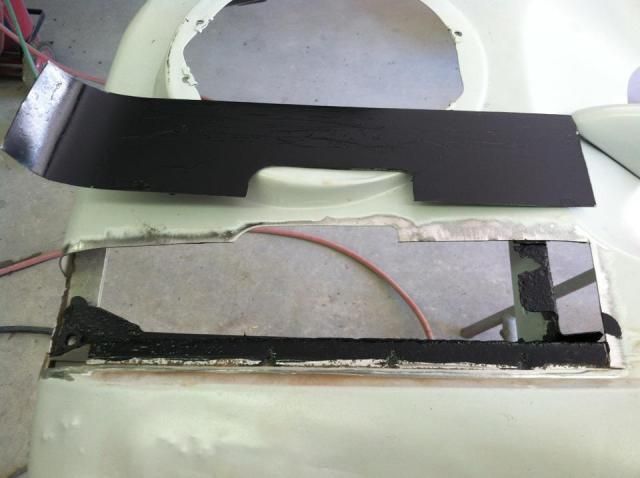 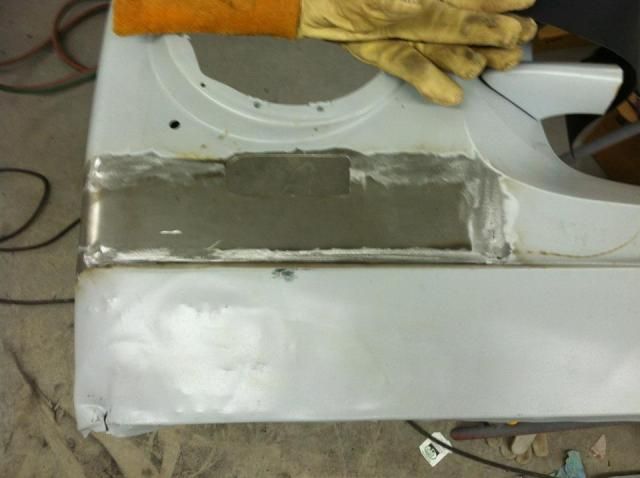 The passenger side bottom edge was easier to replace than fix. I cut it out and used the driver side as a template, and used the shrinker/stretcher to form the lower edge. 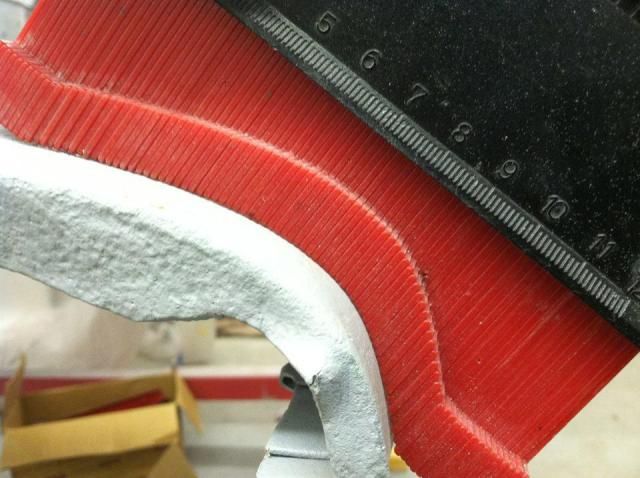 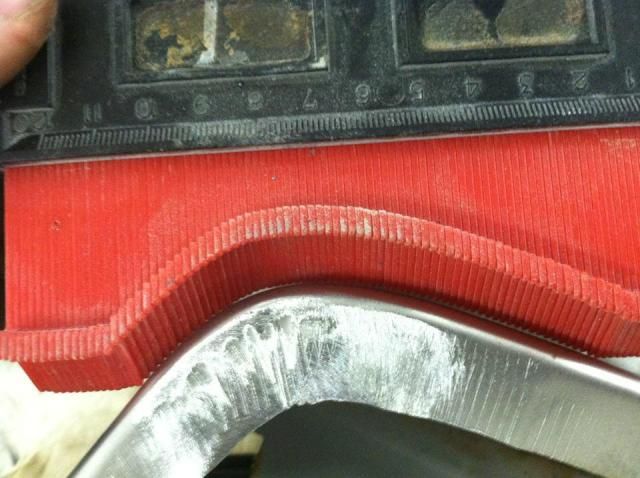 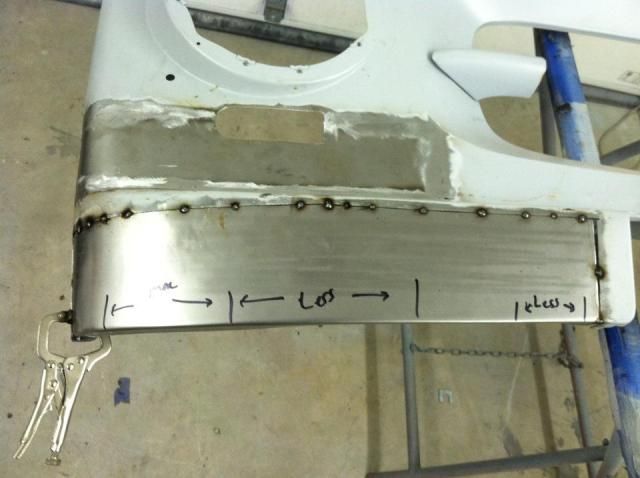 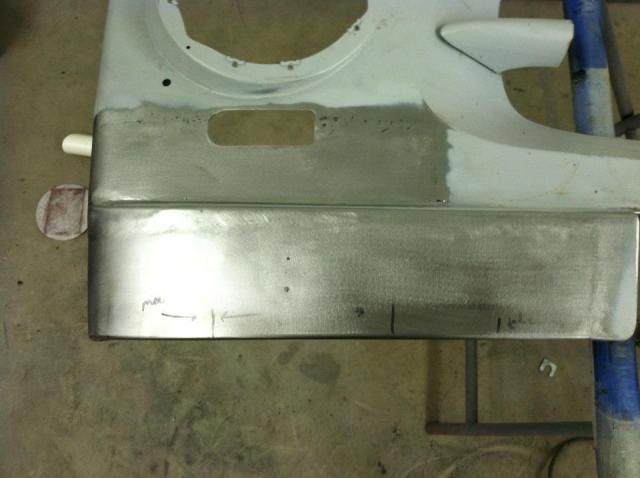
__________________
Project Goldilocks '66 C10 Short Fleet BBW Build '65 C10 Highly Detailed Stock Restoration Thread '78 Camaro Targa Roof Build '55 International Metal/Body/Paint Work '66 F100 Full Rotisserie Restoration '40 Packard 120 Convertible Coupe Restoration How To Restore and Detail an Original Gauge Cluster How To Detail Sand Body Panels, Edges, Corners, Etc |
|
|
|
|
06-28-2012, 09:31 AM
|
#24 |
|
Registered User
Join Date: May 2011
Location: Anderson SC
Posts: 3,870
|
Re: '55 International Metal/Body/Paint Work
The corners around the bumper mount openings were cracked, so I ground out them out and welded them closed.
 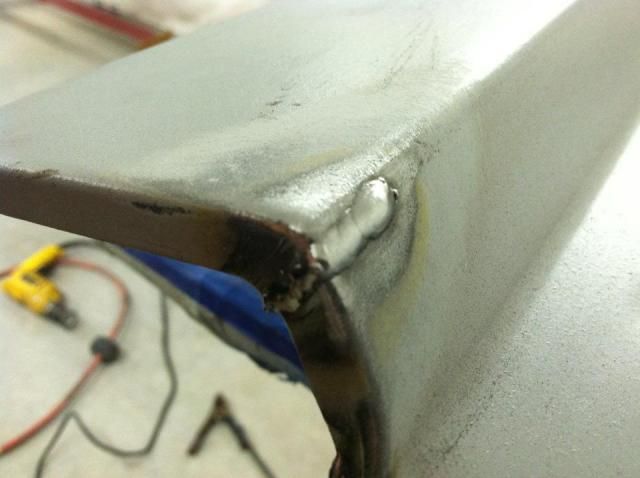 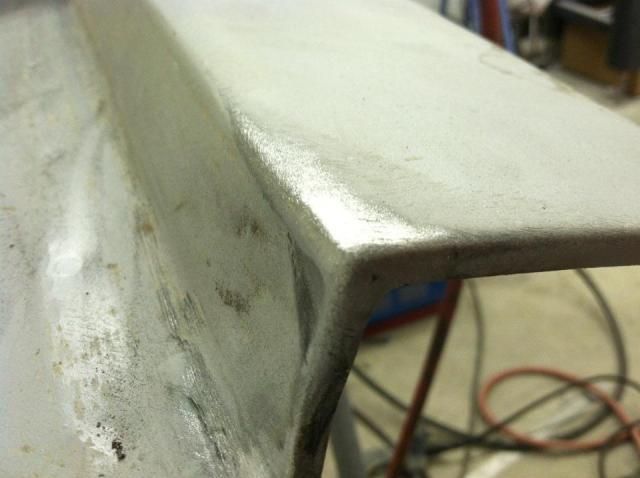 The lower grill panel sections were bent out of alignment, so I leveled the grill with an angle finder. 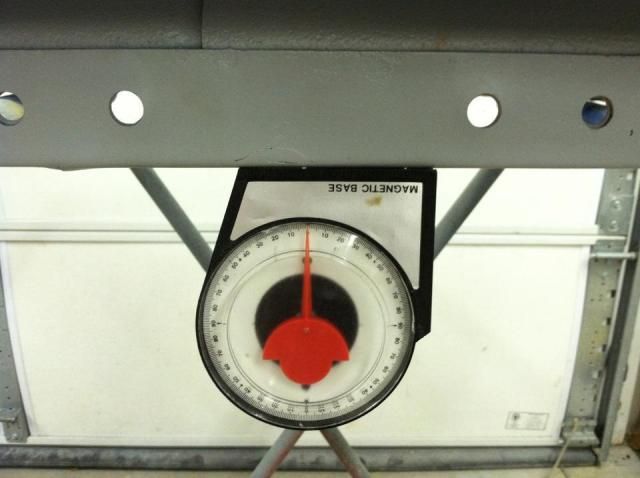  And then found the angles of the lower panels and made them match from side to side.  I also used the stainless ruler to make sure the panels were in line, or flush with each other. 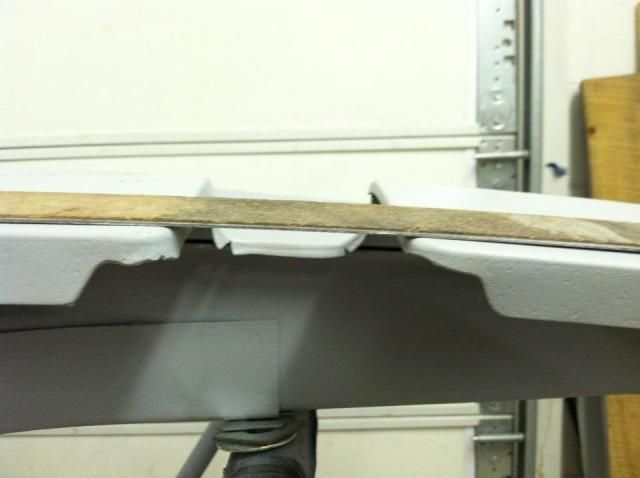 Bottom edges trued up. 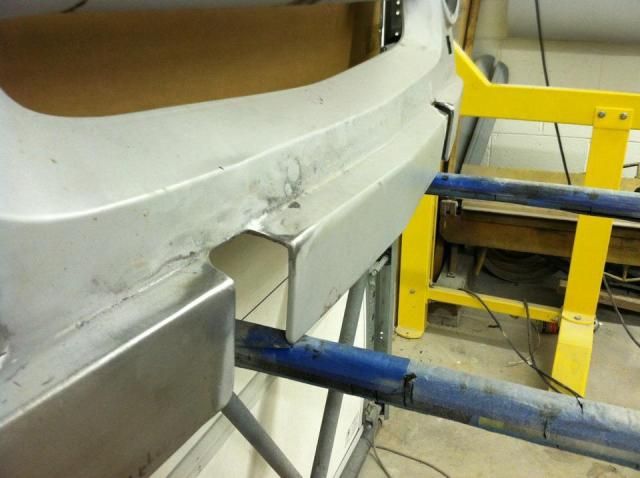
__________________
Project Goldilocks '66 C10 Short Fleet BBW Build '65 C10 Highly Detailed Stock Restoration Thread '78 Camaro Targa Roof Build '55 International Metal/Body/Paint Work '66 F100 Full Rotisserie Restoration '40 Packard 120 Convertible Coupe Restoration How To Restore and Detail an Original Gauge Cluster How To Detail Sand Body Panels, Edges, Corners, Etc |
|
|
|
|
06-28-2012, 09:38 AM
|
#25 |
|
Registered User
Join Date: May 2011
Location: Anderson SC
Posts: 3,870
|
Re: '55 International Metal/Body/Paint Work
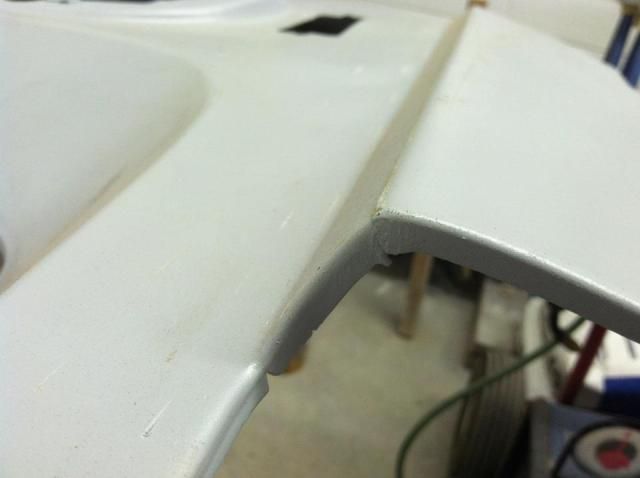
More details on straightening the lower edges.
Lumpy and sunk in bottom eges. 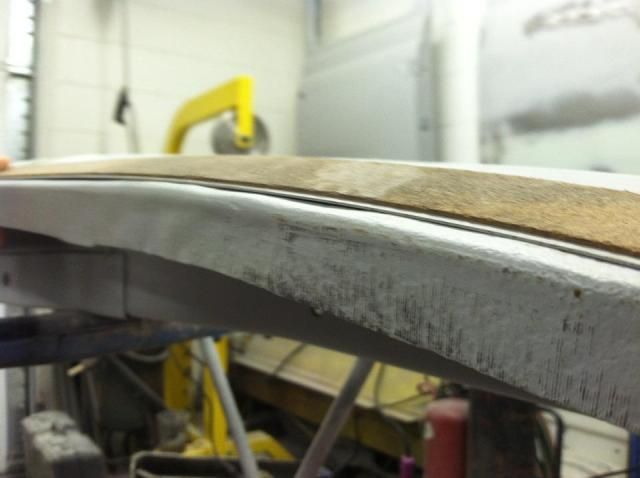 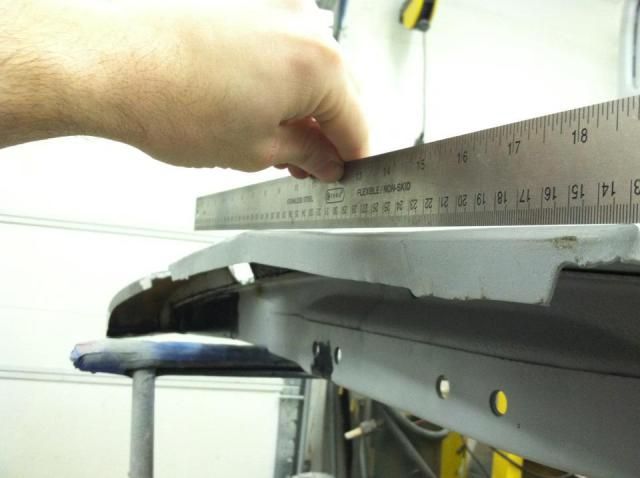 After straightening. 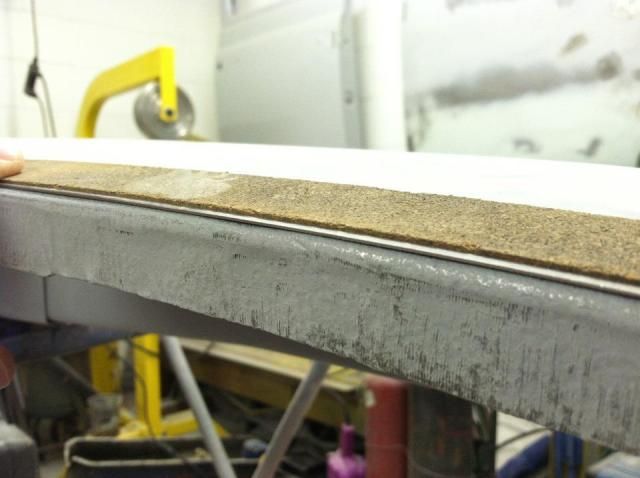 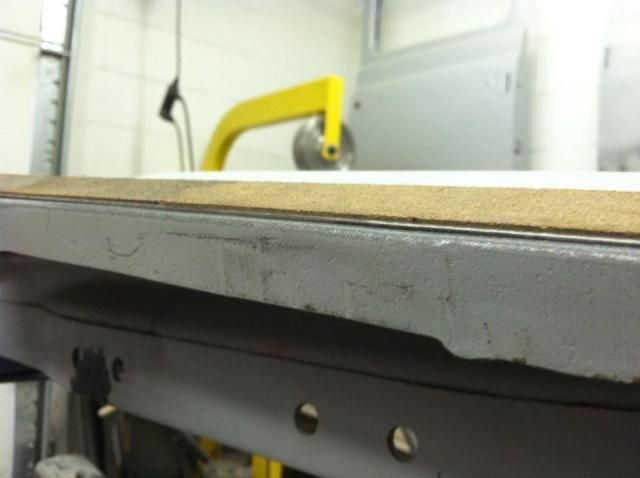 Another crack. 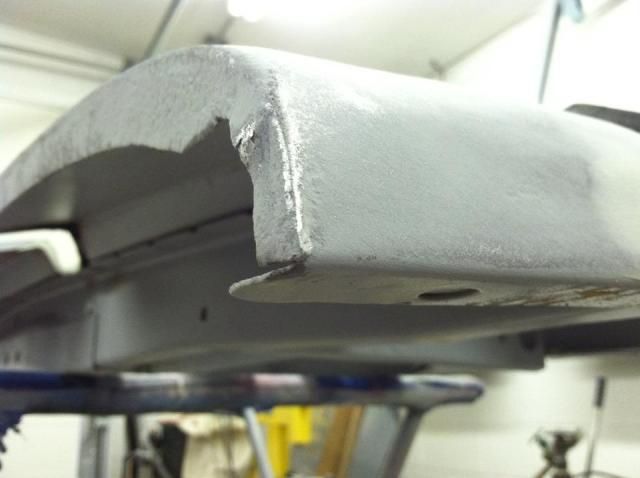 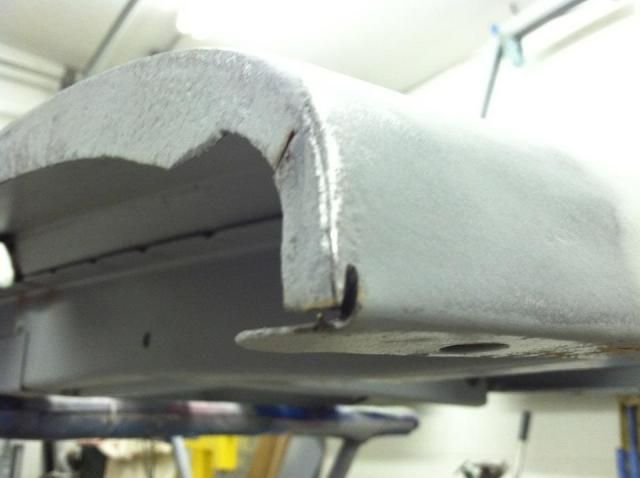 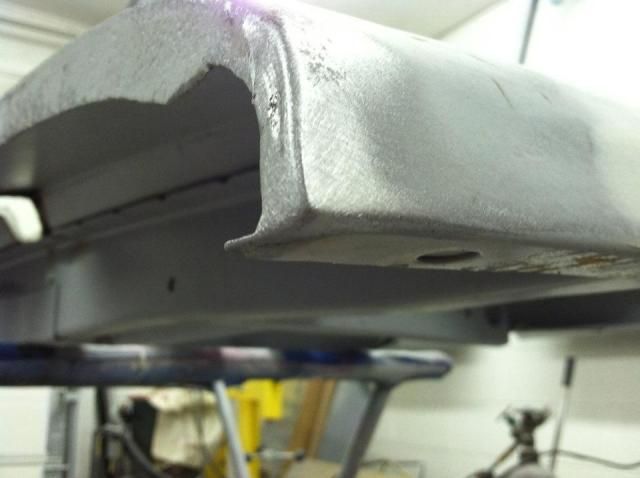 More rust. 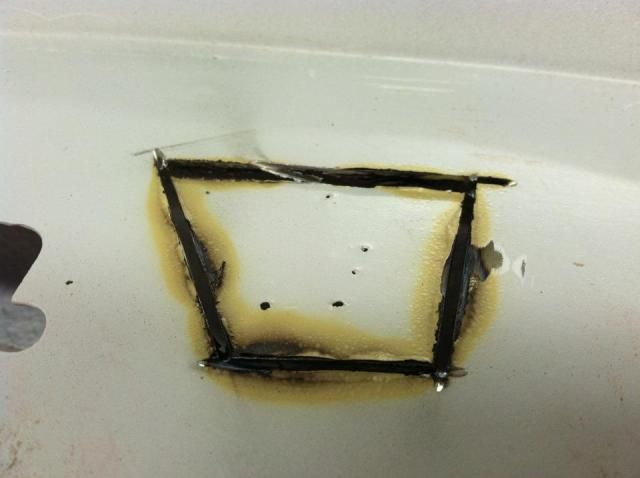   Metal work done and skim coated. 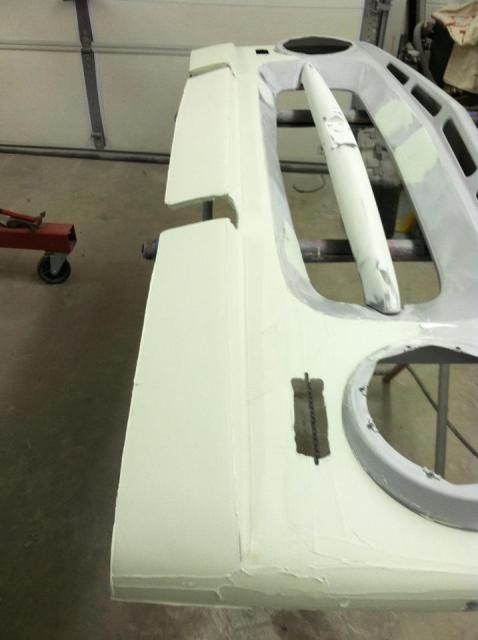
__________________
Project Goldilocks '66 C10 Short Fleet BBW Build '65 C10 Highly Detailed Stock Restoration Thread '78 Camaro Targa Roof Build '55 International Metal/Body/Paint Work '66 F100 Full Rotisserie Restoration '40 Packard 120 Convertible Coupe Restoration How To Restore and Detail an Original Gauge Cluster How To Detail Sand Body Panels, Edges, Corners, Etc |
|
|
|
 |
| Bookmarks |
|
|


 Hybrid Mode
