
 |
|
|
#26 |
|
Senior Enthusiast
Join Date: Feb 2007
Location: Spokane Valley, WA
Posts: 8,356
|
Re: Markeb01 Build Thread
|
|
|

|
|
|
#27 |
|
Senior Enthusiast
Join Date: Feb 2007
Location: Spokane Valley, WA
Posts: 8,356
|
Re: Markeb01 Build Thread
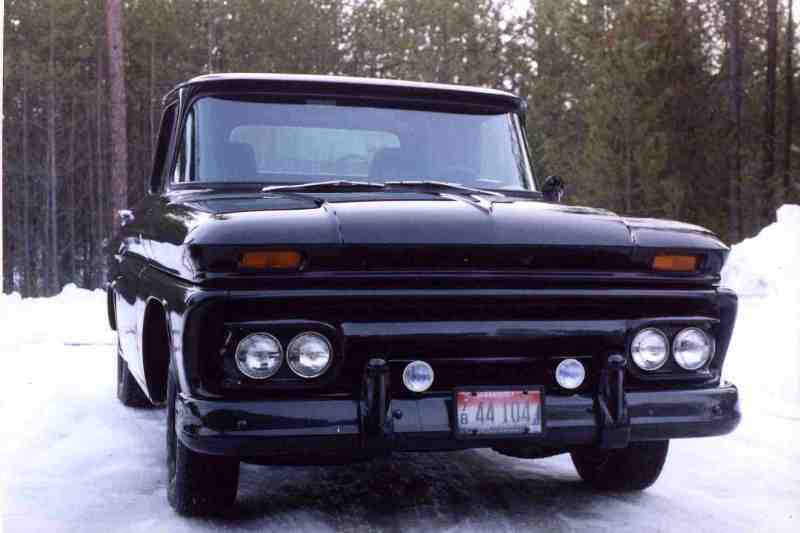
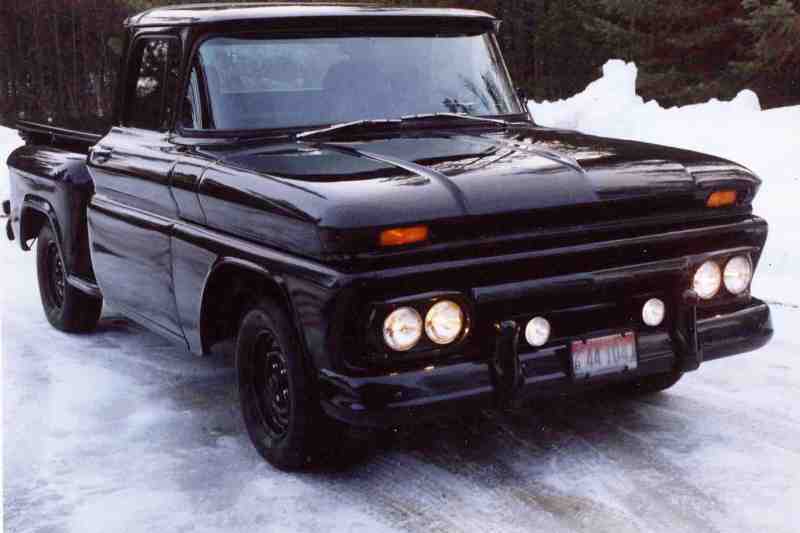
Back into winter mode, the snow tires went back on. My wife was an EMT at the time, which introduced me to Ion Crystal fog lamps. The ambulance she drove had a set, and their performance in foul weather was amazing, inspiring me to add a pair of PIAA 510 lamps. Both functionally and for appearance when illuminated these are the coolest fog lights I’ve ever owned. They turn fog into daylight, and are vivid blue from every angle except dead ahead, where they shine bright yellow:
  The next year a bonus from work paid for a pair of 15x8” Weld Wheels for the back. Later that summer we spent a fun afternoon at the Silverwood dragstrip when my wife drew standby duty, which allowed me to park the truck in the infield near the finish line, and film the action up close. 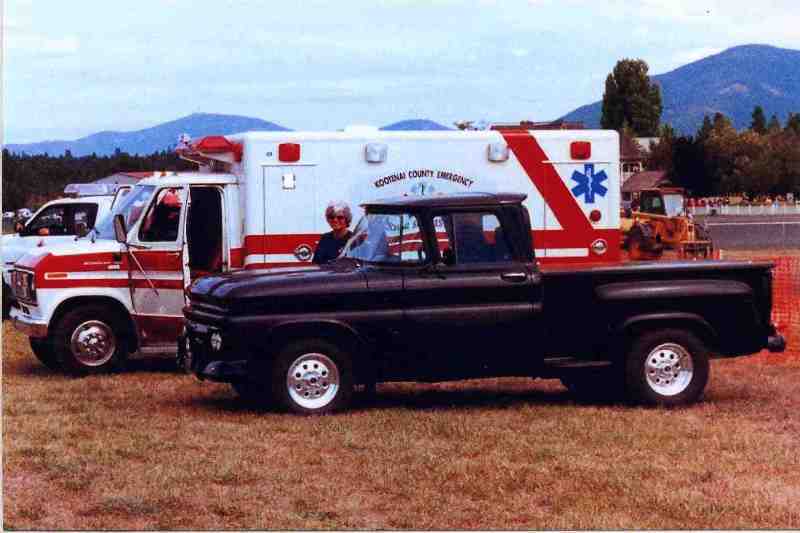 I picked up a pair of driver quality chrome radiator aprons from eBay. I found the PIAA lights so amazing I transferred them to my wife’s CRV, and replaced them with a much cheaper set of NOS Unity fog lamps, which I also liked since I previously had them on my 46 Ford: 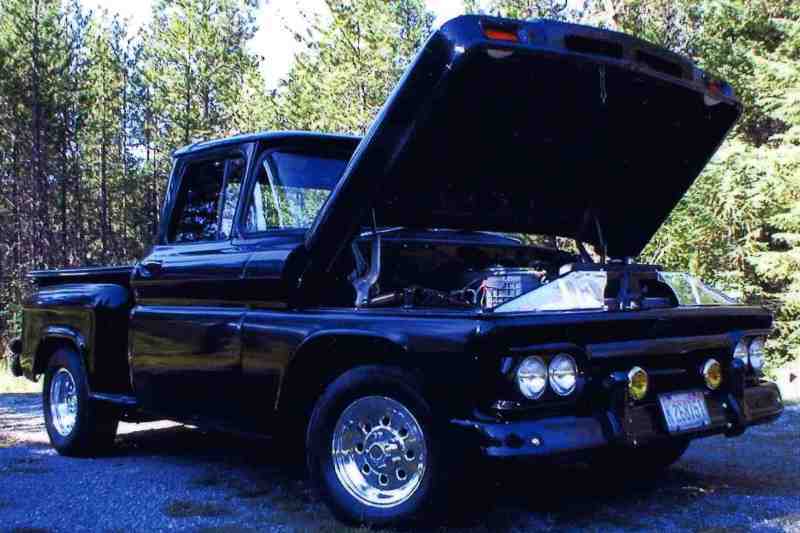 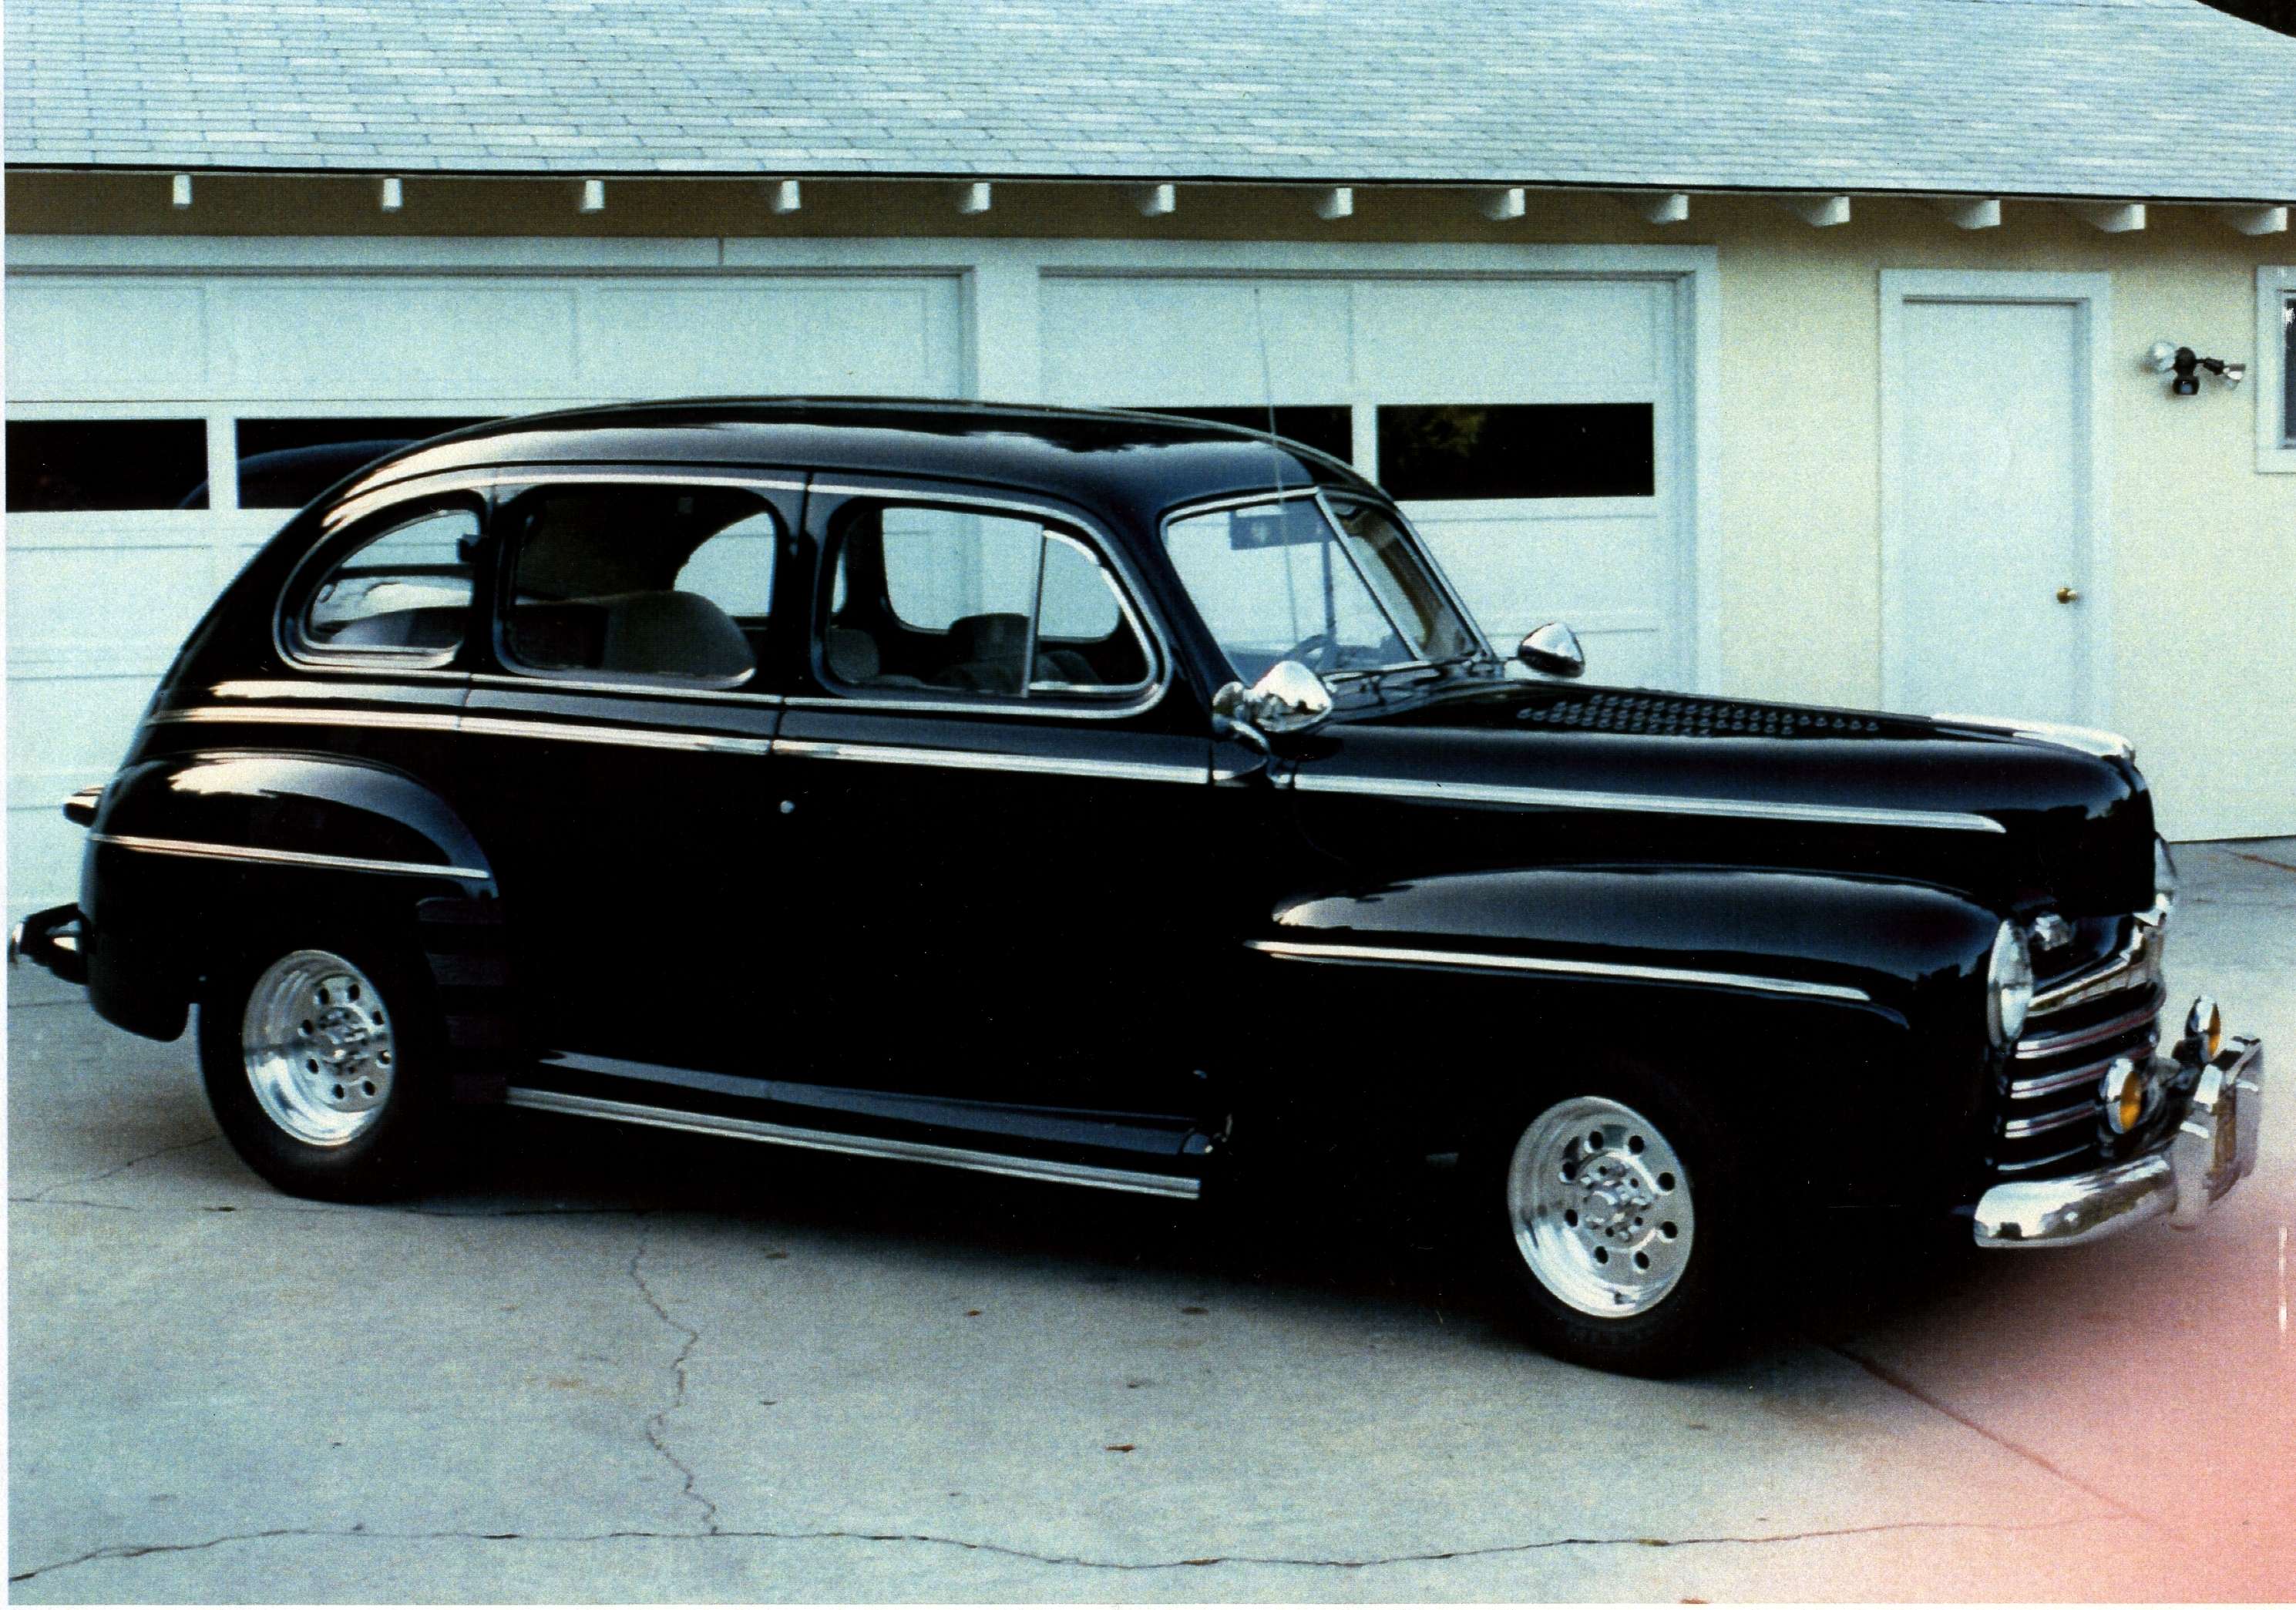 About this time we sold our property in Idaho and relocated to Washington, shutting down any truck projects for a while. Last edited by markeb01; 03-09-2012 at 12:59 PM. |
|
|

|
|
|
#28 |
|
Senior Enthusiast
Join Date: Feb 2007
Location: Spokane Valley, WA
Posts: 8,356
|
Re: Markeb01 Build Thread
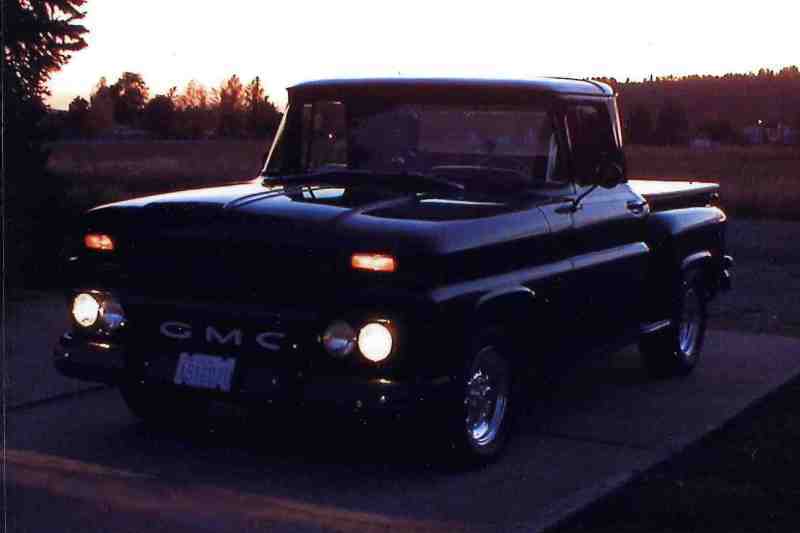
About this time I started getting tired of the all black front end. I pulled the Plymouth grille bar, painted the GMC letters white and reinstalled.
 Rust started blistering through the rockers and door bottoms. 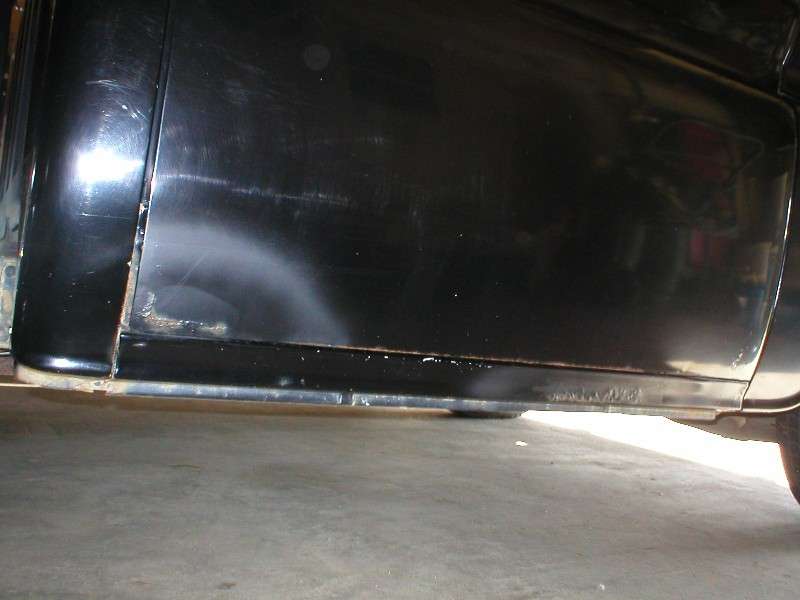 So I picked up a pair of NOS rockers off eBay, and since I don’t weld, I checked out a couple of places to perform the repairs. The first place does mostly high end Packard restorations, and really didn’t want to be bothered. They gave me a quote of over $3,000 which effectively sent me packing to look elsewhere. A local paint store highly recommended a nearby body shop, claiming they were in the same league as the Packard place, but much more reasonably priced. It was also claimed they specialized in street rods and did impeccable work. I asked around and checked with the Better Business Bureau. Finding nothing negative, I agreed to have them do the work. They installed the new rockers. From under the truck the inner rockers looked completely trashed. They welded patches on the lower door corners, slathered Bondo a quarter inch thick, and ground away the lower rear corner of both doors. 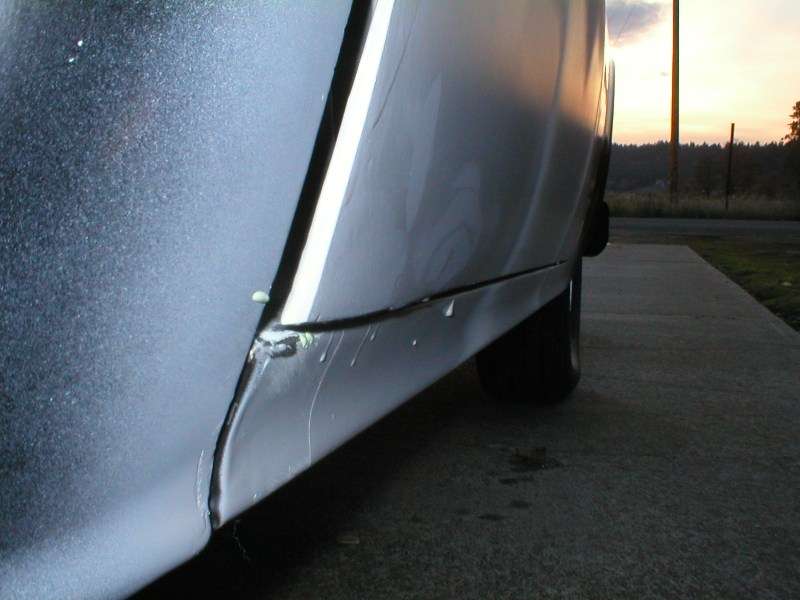 They also added dozens of dings, dents, and scratches all over the truck. Here’s a shot of a few typical injuries:  The doors were pulled, and reinstalled so badly misaligned I had difficulty getting them to latch. Primer was sprayed all over my interior, including the upholstery, gauges, and black lacquer dash. Any legal action requires giving the shop a chance to correct the problems, and since I wasn’t about to let them touch my truck again I just ate the damages. I was so depressed over the amount of money I spent to have my truck trashed, I walked away for a couple of months and seriously considered selling it. Finally enough time passed I started missing the driving experience. I dove into the repairs which took weeks to correct. About this time I was ready to make more changes so I repainted the grille and front bumper white: 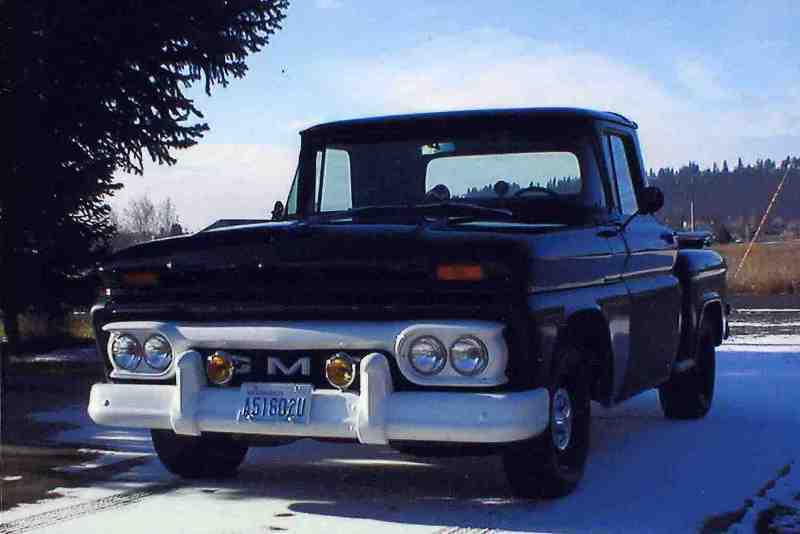 Once the winter was over, I was ready for a wheel change as well. The Weld Wheels were pulled and replaced with a pair of mid 1960’s Dragmaster 15x6 Torque Thrust replica 5 spokes. I also grabbed a pair of 1950’s Buick 15x6 rims for the rear, and changed the overall look with nothing more than a wheel change.  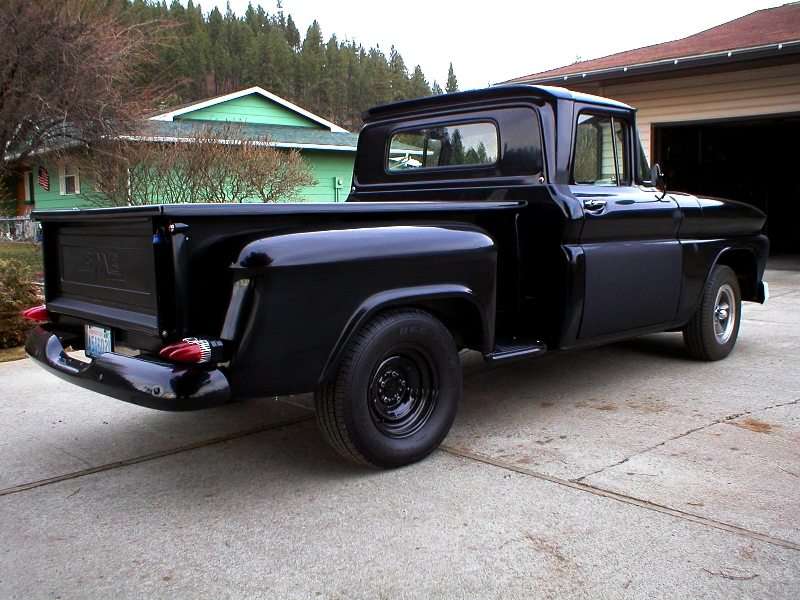 I replaced the rear wheels with 15x7 American Racing TTO’s, and a new pair of Firestone 255/70-15 tires. I briefly tried running white lettered tires, but soured on it quickly: 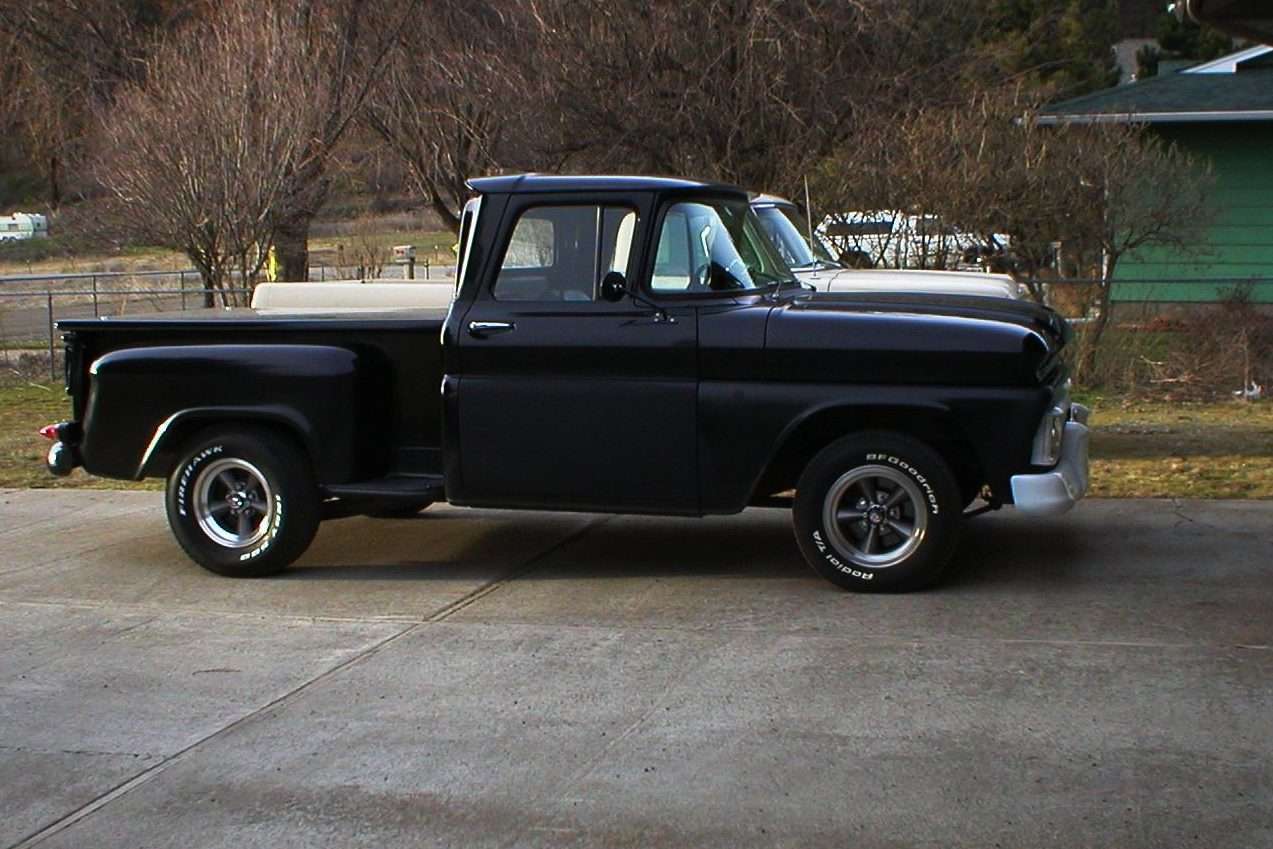
Last edited by markeb01; 10-29-2012 at 11:47 PM. |
|
|

|
|
|
#29 |
|
Registered User
 Join Date: Nov 2009
Location: Longview, Texas
Posts: 775
|
Re: Markeb01 Build Thread
I may have missed it but what is your steering wheel off of?
|
|
|

|
|
|
#30 |
|
Senior Enthusiast
Join Date: Feb 2007
Location: Spokane Valley, WA
Posts: 8,356
|
Re: Markeb01 Build Thread
If you’re referring to the wheel shown in post # 7, that’s a LeCarra Mark 4 wheel with a GMC emblem added:
http://www.lecarra.com/images/Mrk4ele.jpg It was very light and comfortable but didn’t fit the theme I was after. It went away years ago when I was finally able to locate my all time favorite – a 1960’s vintage Covico steering wheel. It’s a 14.5” dished version with a black vinyl rim. The standard Covico wheels are very distinctive, having equally spaced spokes and a shallow dish compared to Grant and Moon wheels. 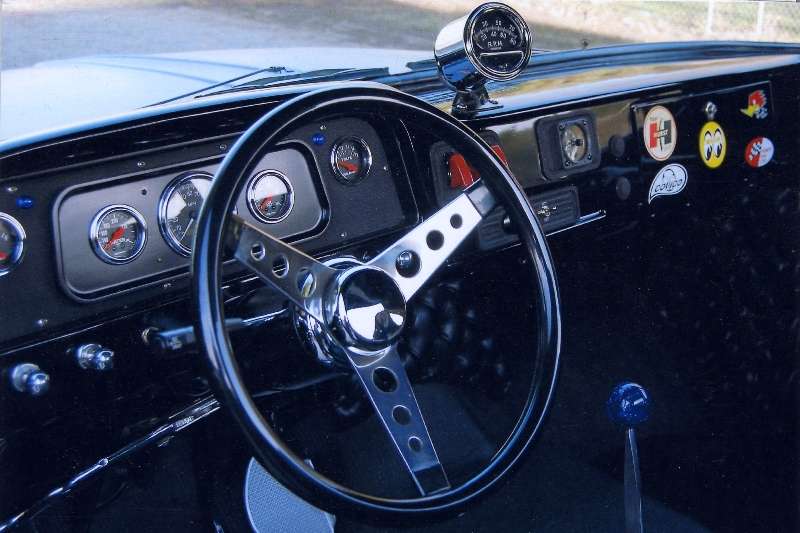 Covico wheels started out as a boat accessory, and all the early models I saw had white rims. By the early sixties it seemed every cool magazine show car, drag car, and high school car had a Covico wheel. The Monogram Big Deuce kit even came with one. As their popularity went wild, colors were expanded to include metalflakes and candy apples. Unfortunately they were inexpensively made with thin commercial quality chrome, so it is very difficult to find one in good shape today. Mine has thin plating, but is in good condition overall. In the last 30 years I’ve only seen one in better condition. Here’s a 1962 Car Craft Covico installation article on a Corvair, along with a typical ad showing the various colors and prices. I always preferred the conical shape of the Covico adapters compared to the Grant bell design, but they only fit on early steering columns which I no longer have. If I had an early column I’d have a Covico adapter.  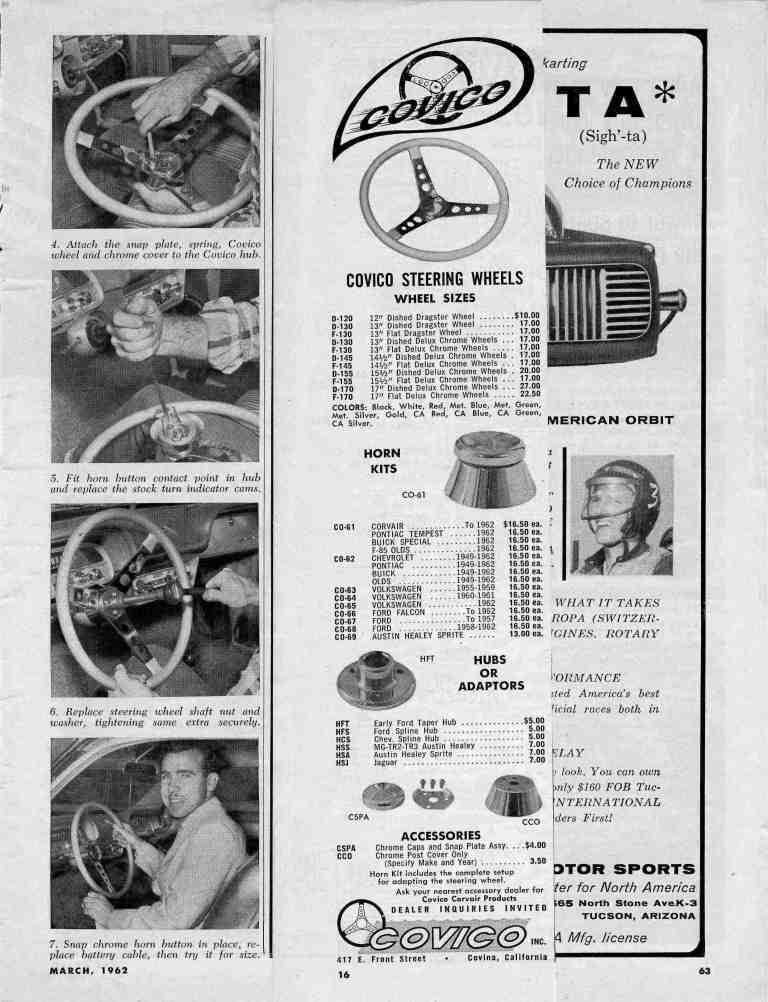
Last edited by markeb01; 06-12-2011 at 11:57 AM. |
|
|

|
|
|
#31 |
|
Registered User
Join Date: Jan 2010
Location: haysville,kansas
Posts: 524
|
Re: Markeb01 Build Thread
Love the truck and al the stories that really sucks what that shop did to your turck seems like customer service is a lost art!!
|
|
|

|
|
|
#32 |
|
Senior Enthusiast
Join Date: Feb 2007
Location: Spokane Valley, WA
Posts: 8,356
|
Re: Markeb01 Build Thread
In order to fit the International Dragmaster wheels, I had the front rotor hubs turned down a tiny amount for clearance. Since these were not disc brake wheels, caliper clearance was very tight. The wheels worked fine, but I had to direct the guys balancing the wheels to keep the weights almost directly on the centerline on the back of the rim or they would interfere with the calipers. The wheels appear to be early-mid 60’s production considering they have no safety beads, and have the large hole for the valve stem.
 Well it appears I got a few things out of sequence, so here are a few topics I missed that happened a bit earlier: I eventually picked up a chrome hood latch to go along with the chrome radiator deflector panels. The chrome is driver quality, but was cheap and looks good from five feet away.  When it came time for air conditioning, I removed all the original GM engine brackets and replaced them with Alan Grove Components. I had these powder coated gloss black before installation, and many years later they still look great and fit perfectly. I didn’t take any pictures when it first went together. To increase cooling capacity, I installed a Be Cool radiator picked up from Summit Racing. Being a cross flow design, the installation was somewhat of a pain because the lower outlet is above the passenger side frame rail. The hose has to leave the radiator, turn right, go down then back up to the water pump. I always ran an outer hose over the lower hose to prevent chafing between the frame and the lower hose. Once running, I immediately discovered the radiator had a pinhole leak near the upper hose outlet. I took it to a local radiator shop for repair, and they said it was a very poor design and wouldn’t work on it. Not sure if it was inherently a bad design or they weren’t good at fixing aluminum radiators but since the truck was my daily driver, I sent the radiator back to the factory for repair and had a new core fitted to my Impala radiator which was quickly reinstalled. The Be Cool came back repaired some time later, but was never used again. It was the most efficient radiator I’ve ever owned. When the thermostat would open, the coolant would drop five degrees immediately. But the lower hose was a pain to deal with, and since my other radiator proved adequate the Be Cool unit sits in the basement. It was installed for such a short period of time it appears I never took any pictures of it. An Old Air Hurricane air conditioner was installed and turned out to be a huge disappointment. Here’s a shot of the interior when it was first installed:  For starters the heater was for warm weather climates only, not North Idaho where winter temps frequently drop below zero. Without adequate heat the defrosters were useless in cold temperatures. There was also an internal defect in the diverter valve directing air between the defrosters and the floor. It would latch so tight in one position or the other it could not be operated with the original dash controls. I switched to a choke cable, but the valve snagged so hard it tore the T handle off the cable. I had to resort to operating the lever with a wrench from under the dash which wasn’t very convenient. The fan motor burned up twice. Old Air customer support was fantastic. They were very friendly and supportive and replaced the first motor promptly at no charge. When the second motor burned up, I wasn’t interested in a replacement, and rewired the system to utilize a fan motor from a Pontiac Fiero instead. The most annoying feature however was a loud shrieking noise emitted from the compressor at about 2500 engine rpm. I took it to every shop in town trying to discover what was wrong with it, and after spending hundreds of dollars having it purged, charged and lubricated with no improvement, I finally tore the whole system out and threw it in the garbage. In addition to never working well, I got sick of the mess under the hood. Here’s a picture of the engine compartment right before it was removed:  Years later a forum member advised the compressor may have had a bent shaft causing the noise. Amazingly none of the professional A/C outfits ever suggested that might have been the cause of the racket. A decent diagnosis might have saved the system and the investment. While the A/C was in place I discovered a need for an electric fast idle solenoid. An Edelbrock EDL-8059 was installed and tied in to the A/C controls.   Whenever the A/C was switched on, the solenoid increased the idle speed. After the A/C was gone, I realized how convenient it was to use the fast idle solenoid independent of the choke valve. So I wired up the solenoid to a dash mounted toggle switch (along with an indicator light), and control the idle speed and choke separately. On all but the coldest mornings, the choke isn’t needed. Just flipping on the fast idle electrically keeps the engine running fine until warmed up. In all the years I’d owned the truck, the dash knobs remained a mix of new and old mismatched junk. For years I tried to buy a full set of 49 Ford knobs or early Cal Custom chrome ball knobs, but never found any worth buying. Most were rusty, chipped, dented or dull. Here’s a photo of the type with vanes on them for better grip. I wanted the other type that was completely smooth.  So I went with a set of dash knobs from a 1960 Galaxie. They were black with stainless highlights and blended well with the interior. They had a nice grip shape, and finally they all matched.  All was right with the world until I went to a local Goodguys show and discovered the Clayton Machine Works ball knobs: 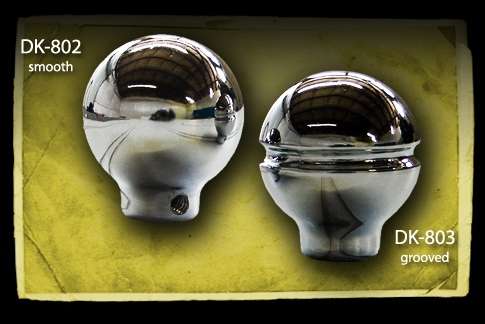 Since I had recently invested in the Galaxie knobs I wasn’t too enthusiastic about replacing them, and especially at $15.00 each. So I stewed about it. The following year I was looking them over again, when I discovered SoCal Speedshop had also released a similar knob at less cost and with a longer shank that was almost a duplicate of the original Cal Custom knobs. Here is one attached to a switch:  They became a must have, and quickly replaced the Galaxie knobs. The knobs that could be salvaged were handed over to my son who happens to own a 1960 Galaxie. Here’s what the new one’s looked like: 
Last edited by markeb01; 11-01-2011 at 11:01 AM. Reason: Replaced a dead link. |
|
|

|
|
|
#33 | |
|
Registered User
 Join Date: Nov 2009
Location: Longview, Texas
Posts: 775
|
Re: Markeb01 Build Thread
Quote:
|
|
|
|

|
|
|
#34 |
|
Senior Enthusiast
Join Date: Feb 2007
Location: Spokane Valley, WA
Posts: 8,356
|
Re: Markeb01 Build Thread
It was a very nice wheel. The internal padding is very dense and easy to grip. The leather is warm in winter and cool in summer. The only maintenance issue being the wheel itself being made out of aluminum, and requires periodic polishing.
|
|
|

|
|
|
#35 | |
|
Registered User
 Join Date: Nov 2009
Location: Longview, Texas
Posts: 775
|
Re: Markeb01 Build Thread
Quote:
Thanks again. I am probably gonna go with that same one on my truck. I also like the 60's Corvette & Chevelle wheels but they are really expensive. |
|
|
|

|
|
|
#36 |
|
"Where were you in '62?"
 Join Date: Jul 2004
Location: Cleveland County, North Cackalacky
Posts: 5,013
|
Your next set of wheels Mark!
   http://www.halibrand.com/index_frames.htm http://www.hotrodscustomstuff.com/OL...halibrand.html
__________________
PROJECT: "FULL METAL YELLOW JACKET" 1962 Chevy C-10 Stepside Shortbed Nostalgia Pro/Street Pickup Truck PROJECT: "FULL METAL YELLOW JACKET Build Thread What Are You Workin' On? - 1Bad62ChevyPickup PROJECT: "TYRANNORAMBLER REX" 1969 AMC Rambler American Nostalgia Pro/Street Youtube Channel: Father Son Projects Youtube Channel: 2TIMOTHY2FITHTEEN        "North and South Carolina Folks Click Here!" (((( ~ I have Parts For Sale & Miscellaneous Stuff ~ )))) "Well being as there's no other place around the place, I reckon this must be the place, I reckon...Nyuk Nyuk Nyuk" -Curly Howard Ph.D. |
|
|

|
|
|
#37 |
|
Senior Enthusiast
Join Date: Feb 2007
Location: Spokane Valley, WA
Posts: 8,356
|
Re: Markeb01 Build Thread
Those wheels are beautiful and would certainly go with the theme of the truck. In reality Iím hopelessly stuck on Torque Thrusts. I thought they were the most perfectly designed wheels ever created when I first saw them in the early 60ís, and that enthusiasm hasnít diminished over time.
On to the next segment in the saga - in 2005 things were going well enough to do a transmission swap back to a stick shift. The TH350 was in excellent operating condition, and had served well for 13 years. But I grew bored with the automatic and longed for the enjoyment only afforded by side shift manual 4 speed. I started the swap around a Borg Warner Super T10 from an 82 Firebird I inherited from one of my sons. The gear set in it was in beautiful condition, but it had a cracked synchro ring and a funky tail housing designed for a torque arm which mounted the shifter on the passenger side of the transmission. The shifter also looked pretty goofy, being designed for a production car to mount directly on the centerline of the transmission tunnel. The only photos I have of this trans are very poor quality, as they were originally captured on video tape, converted to DVD, and then photographed off a TV screen:  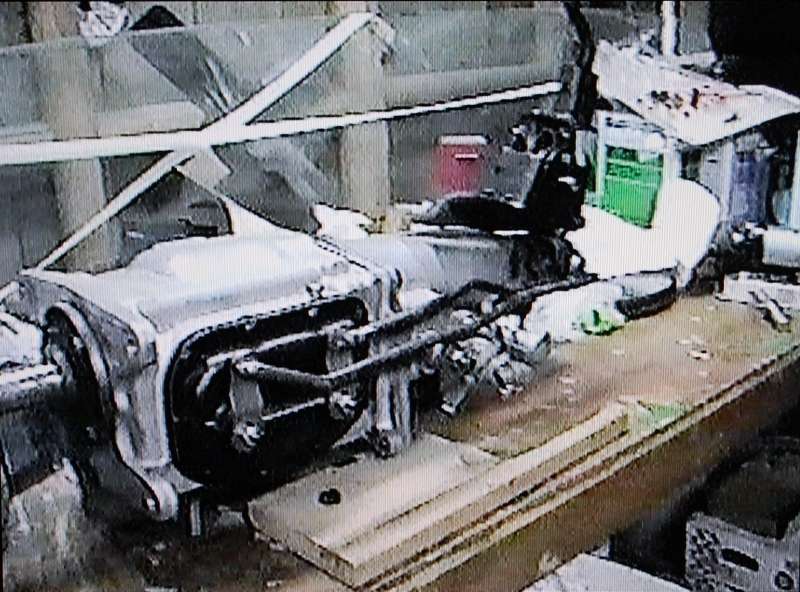 I found a complete rebuild kit online and had it installed by a local manual transmission expert. After two installations and removals for additional repairs, and needing even more repairs - I got sick of all the fruitless effort and replaced the Firebird box with a brand new Richmond Super T10 from Sallee Chevrolet in Oregon. I opted for the 2.64 low gear so it would have plenty of pull off the line with the 3.08 gear set I was running at the time. 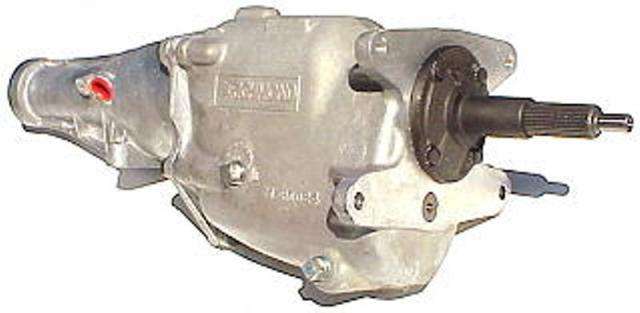  In the planning stage, I really wanted to use an original cast iron bellhousing with the tin cover on the bottom. Knowing these only come in the large flywheel 168 version, and ďassumingĒ my TH350 used the smaller 153 tooth flexplate, I tried to save some money by not replacing the existing 153 tooth starter. This turned out to be a mistake when I later discovered the TH350 actually used the larger 168 tooth flywheel and starter. Had I done a thorough check, I could have actually saved money and used the preferred 2 piece bellhousing. After ordering the 153 tooth flywheel, clutch, and bellhousing - I ended up having to replace the starter anyway! This was actually a blessing in disguise since the new starter is the preferred permanent magnet design. Much smaller and lighter (easier to install), it produces more torque and has been a fantastic upgrade. The 3858403 one piece aluminum bellhousing was sourced from Ebay, as recommended by Novak as a confirmed compatible part number. 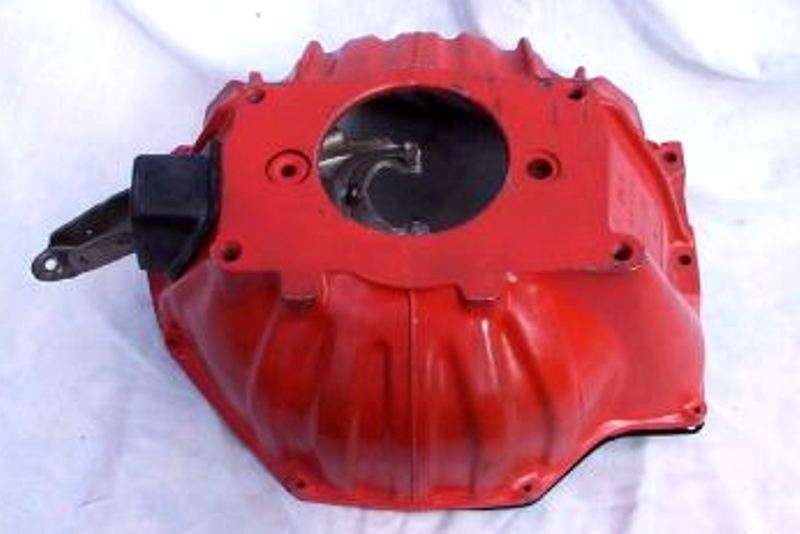 The slave cylinder kit was ordered from Novak Conversions:  They have subsequently changed the slave cylinder and bracket to a different design, but the version I have continues to work flawlessly. The folks at Novak have proven on several occasions to be very friendly, helpful and supportive. I would not hesitate to use or recommend them as a supplier. Since I already had the Master Power Brakes power booster, master cylinder, and firewall plate, I contacted them to purchase the clutch master cylinder and bracket separately. This turned out to be a major disappointment and was subsequently scrapped. It suffered from two major problems. 1. The bracket mounted the clutch master cylinder too low to provide the proper pedal ratio with the clutch pedal arm. Used as designed, the push rod bottomed out in the clutch master cylinder each time the pedal was depressed, risking the chance of fracturing the cylinder. 2. Also the bracket flexed during operation causing the clutch master cylinder to collide with the power brake booster. I fabricated several designs of links attempting to correct the pedal ratio problem. Hereís one example. Ultimately I gave up on the entire design because the master cylinder bracket was just too flimsy for the design to be viable to my standards. 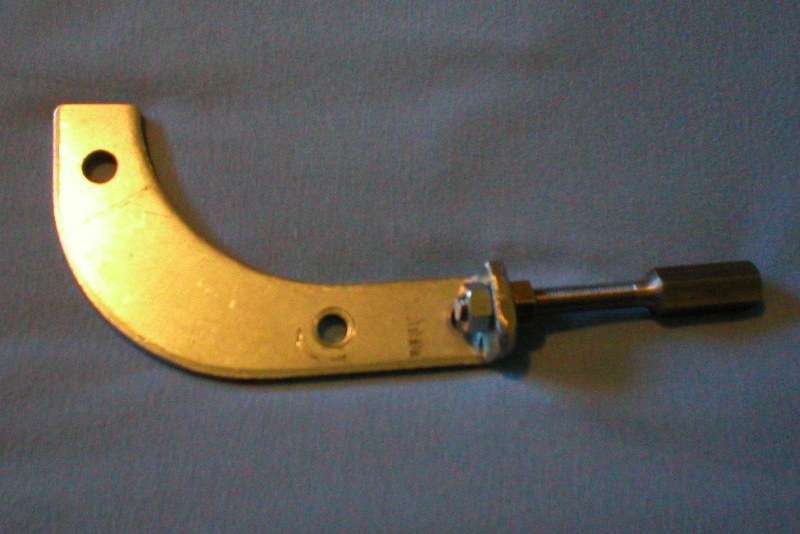 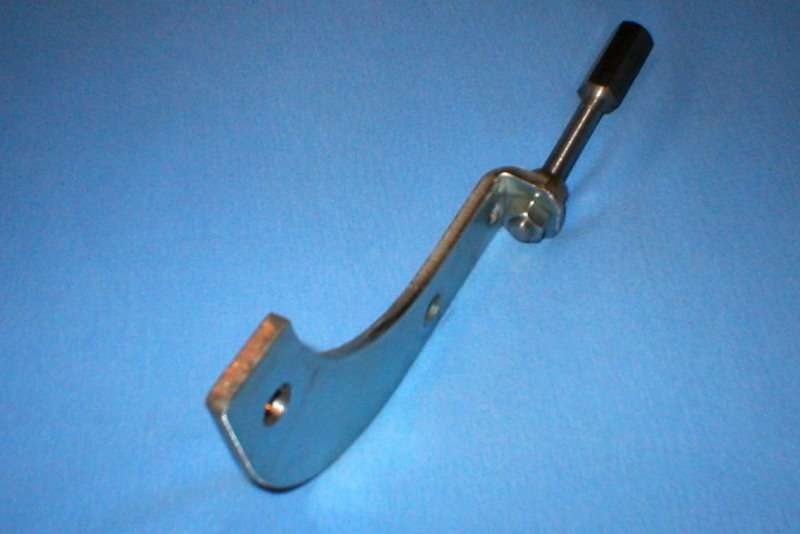 So I gave up and started searching for components to create my own design. I discovered Wilwood offered a master cylinder that would tuck right in behind the passenger side of the booster in perfect alignment with the original 1960 clutch operating lever. All that was needed was a new larger firewall plate to accommodate the new location. Since I wanted a larger custom shape, I simply sliced this up out of a chunk of 1/4" steel: 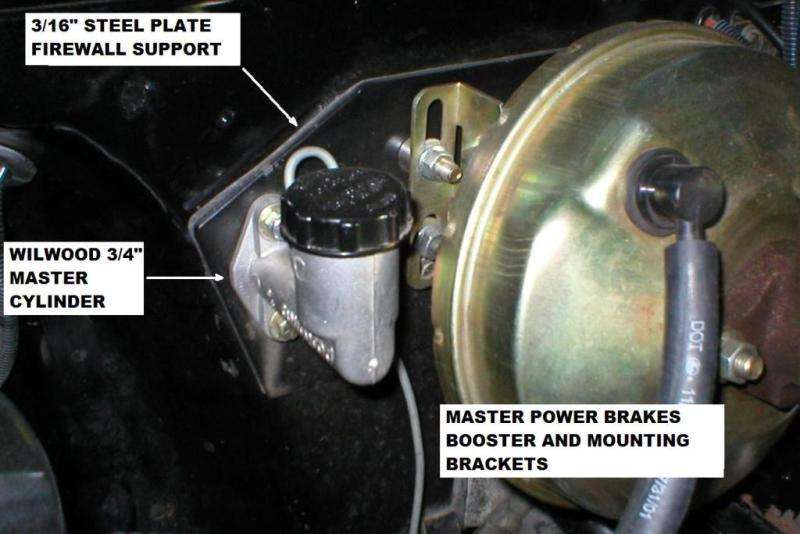
|
|
|

|
|
|
#38 |
|
Senior Enthusiast
Join Date: Feb 2007
Location: Spokane Valley, WA
Posts: 8,356
|
Re: Markeb01 Build Thread
And here is the under dash portion showing the master cylinder connected directly to the 1960 clutch arm which previously operated the OEM dual master cylinder. With this arrangement the pedal ratio is exactly as designed by the factory.
 Before installing the transmission the first time, alignment pins were fabricated by cutting the heads off 4 correct sized bolts with a Dremel tool, and ends slotted for installation and removal with a large screwdriver. They point straight to the rear, although they looked skewed in the photo due to curvature of the camera lens. These pins help prevent damage to the clutch plate when human arms get too fatiqued trying to wrestle the transmission in place: 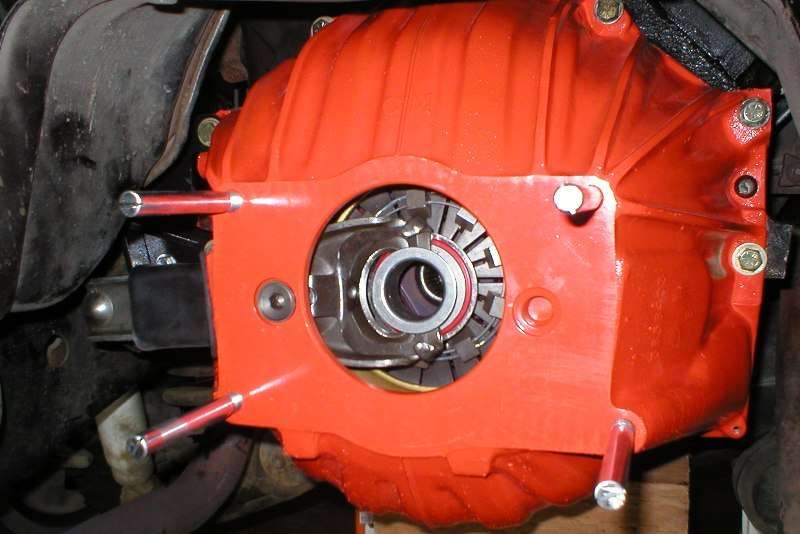 This photo also shows the clutch selected, a Centerforce I chosen for all the wonderful advertised features. I have to admit it works perfectly, but Iíd be much happier with a stock replacement pressure plate. After accelerating, when engine rpm is up and torque is removed just prior to a shift, the weights have a tendency to float and rattle annoyingly. I donít imagine anyone would care in a race car, but Iíve found it irritating ever since it was installed. Cost and work effort will keep it in place for a long time, but Iíll never buy another one. I donít mind noise in my hot rod, but I donít like rattles. No driveshaft modifications were needed swapping from the TH350 to the manual 4 speed, other than replacing the forward driveshaft yoke with a TH400 version. Both transmissions use the same tailshaft mount. Once all this was sorted out it was time to move on to the shifter and shifter stick. A new Hurst Competition Shifter was initially installed. And hereís what the first shifter mechanism looked like. The shifter fit in front of the and below the high hump pan.  The stick that came with the shifter seemed ridiculously long to me:  So it was quickly replaced with a shorter stick from Hurst. And yes, I had 3 bucket seats installed for a long time. It wasnít very attractive but sure was practical for grandkids and having my squeeze sit next to me. 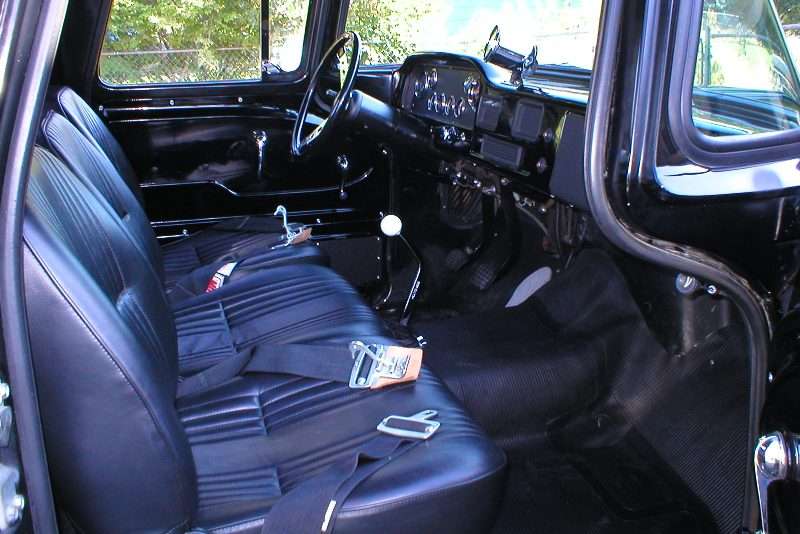 I still kept thinking I could make the shifter better, so I began studying the Hurst Super Shifter. Rather than buying a whole new shifter, the shift rods and mounting bracket for a Street Super Shifter were acquired and installed. This moved the shifter back into the floor behind the pan, with the shifter head actually protruding into the cab. I hated cutting the floor, but the difference in performance was like night and day. With the straight rods and higher mounting, it feels like a power shifter by comparison.  This of course led to more shifter stick adjustments and removal of the center seat. This is a shot of the new shifter mounting, and absence of the center seat. Itís also pretty obvious the strain the boot is under. 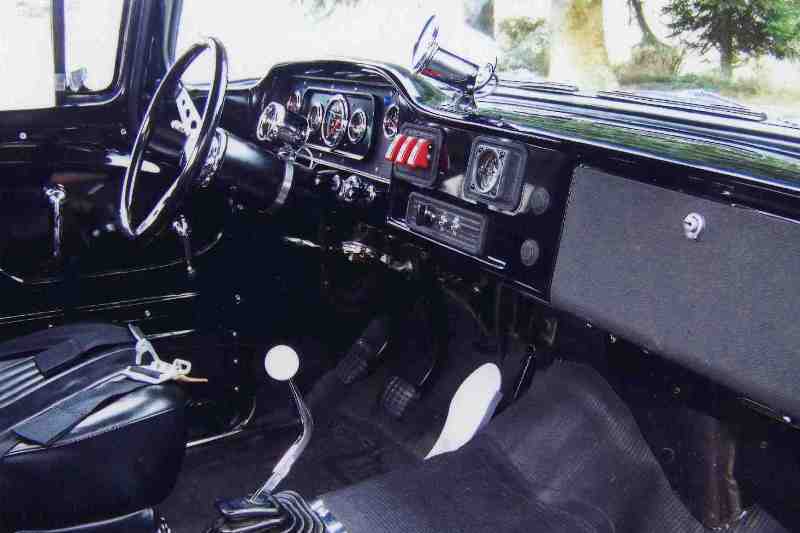
|
|
|

|
|
|
#39 |
|
Senior Enthusiast
Join Date: Feb 2007
Location: Spokane Valley, WA
Posts: 8,356
|
Re: Markeb01 Build Thread
I’ve always preferred the appearance of the conventional chrome Hurst bent handle stick with a white knob, but this configuration put so much strain on the boot it tore the first one. So, once again my machinist son was called on to fabricate a straight stick of solid aluminum round stock. This was bent about 15 degrees to the right and worked perfectly.
 Months later I had to switch to VA medical coverage and was prescribed medication that swelled and paralyzed my right hand for over a month. I simply didn’t have the strength to operate the shifter, so I had my son fabricate yet another shift handle roughly 3” longer than the previous version. This allowed me to continue driving the truck. Eventually I decided I wanted the shift knob a tad further forward! The higher mounting and straight rods made the shifter work much nicer, but it also moved the shifter head back several inches which placed the knob too close to my elbow. It finally occurred to me a simple adapter could be fabricated to move the shifter handle and also angle it forward at the same time. I worked up a template and transferred the dimensions to a chunk of scrap steel plate. The bottom of the stick moved forward 1 ľ”, while the knob moved forward about 2”, putting it in a much more comfortable position. After driving it for a day I realized the knob was a tad too far forward in 3rd gear. Since the adapter raised the stick almost an inch, and my right hand had returned to normal, I no longer needed the long stick and went back to the shorter version. I also reset the angle about Ĺ” to the rear. While I had the handle off, I also cut the upper rear corner off the adapter. Although nobody else will ever see it, I thought it looked crappy so a cosmetic improvement was in order. Now all 4 gears are within perfect reach: Here's the steel plate in mock up: 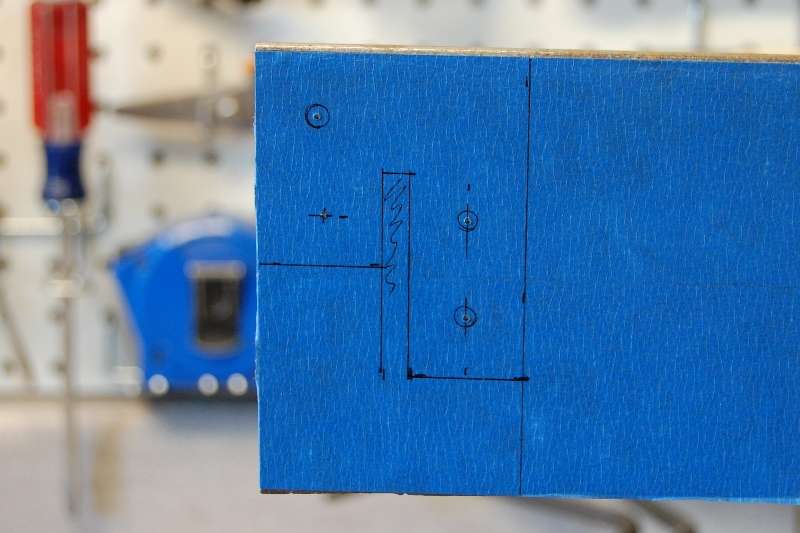 The finished adapter with a quick coat of silver paint: 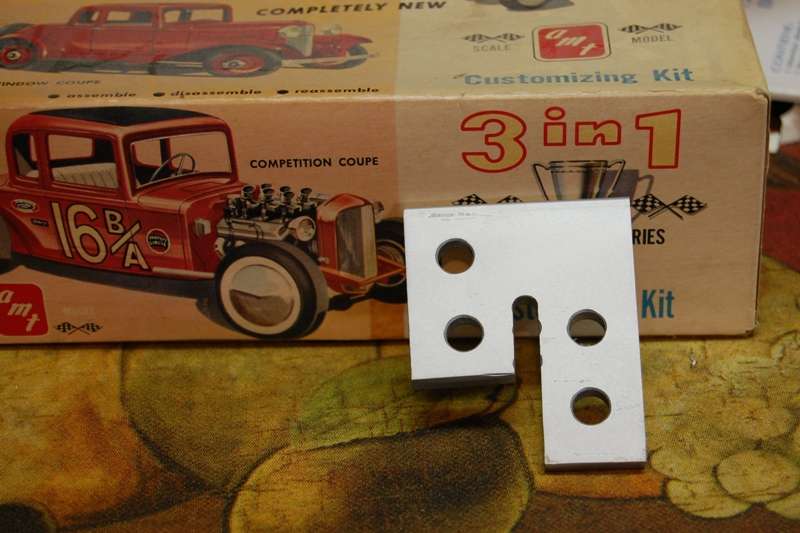 The long stick bolted to the adapter: 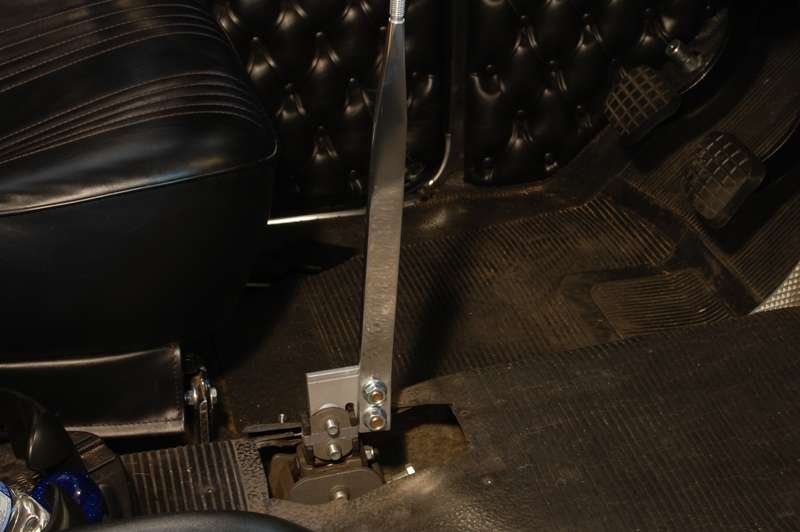 And the long stick/adapter covered with the boot: 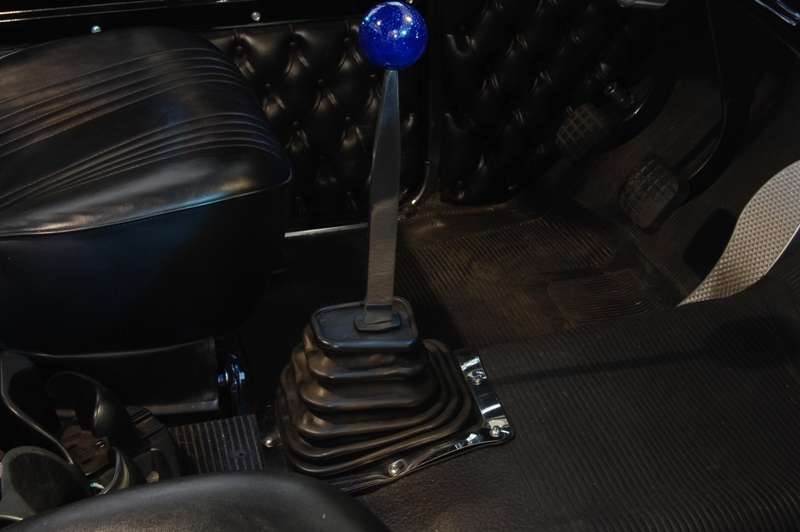 Here's the short stick on the adapter after the rear corner was removed: 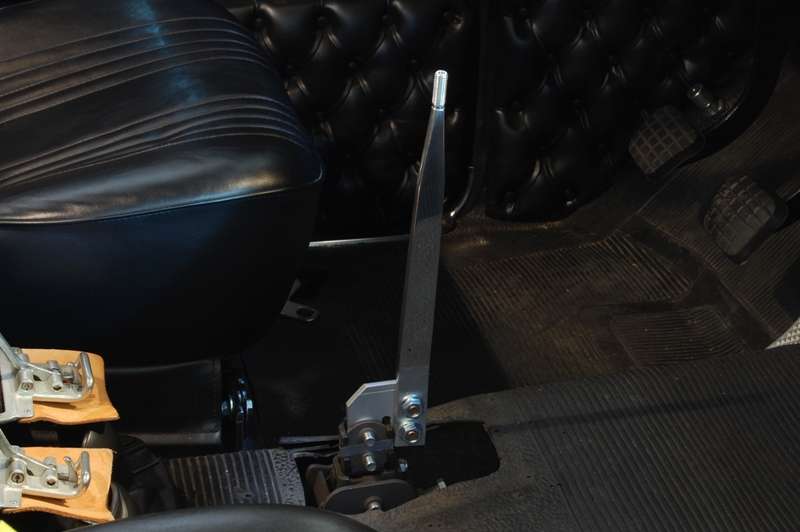 The rubber ring on top of the adapter is a valve cover smog grommet. It holds the boot up, minimizing binding on the rubber and preventing pinching wear. 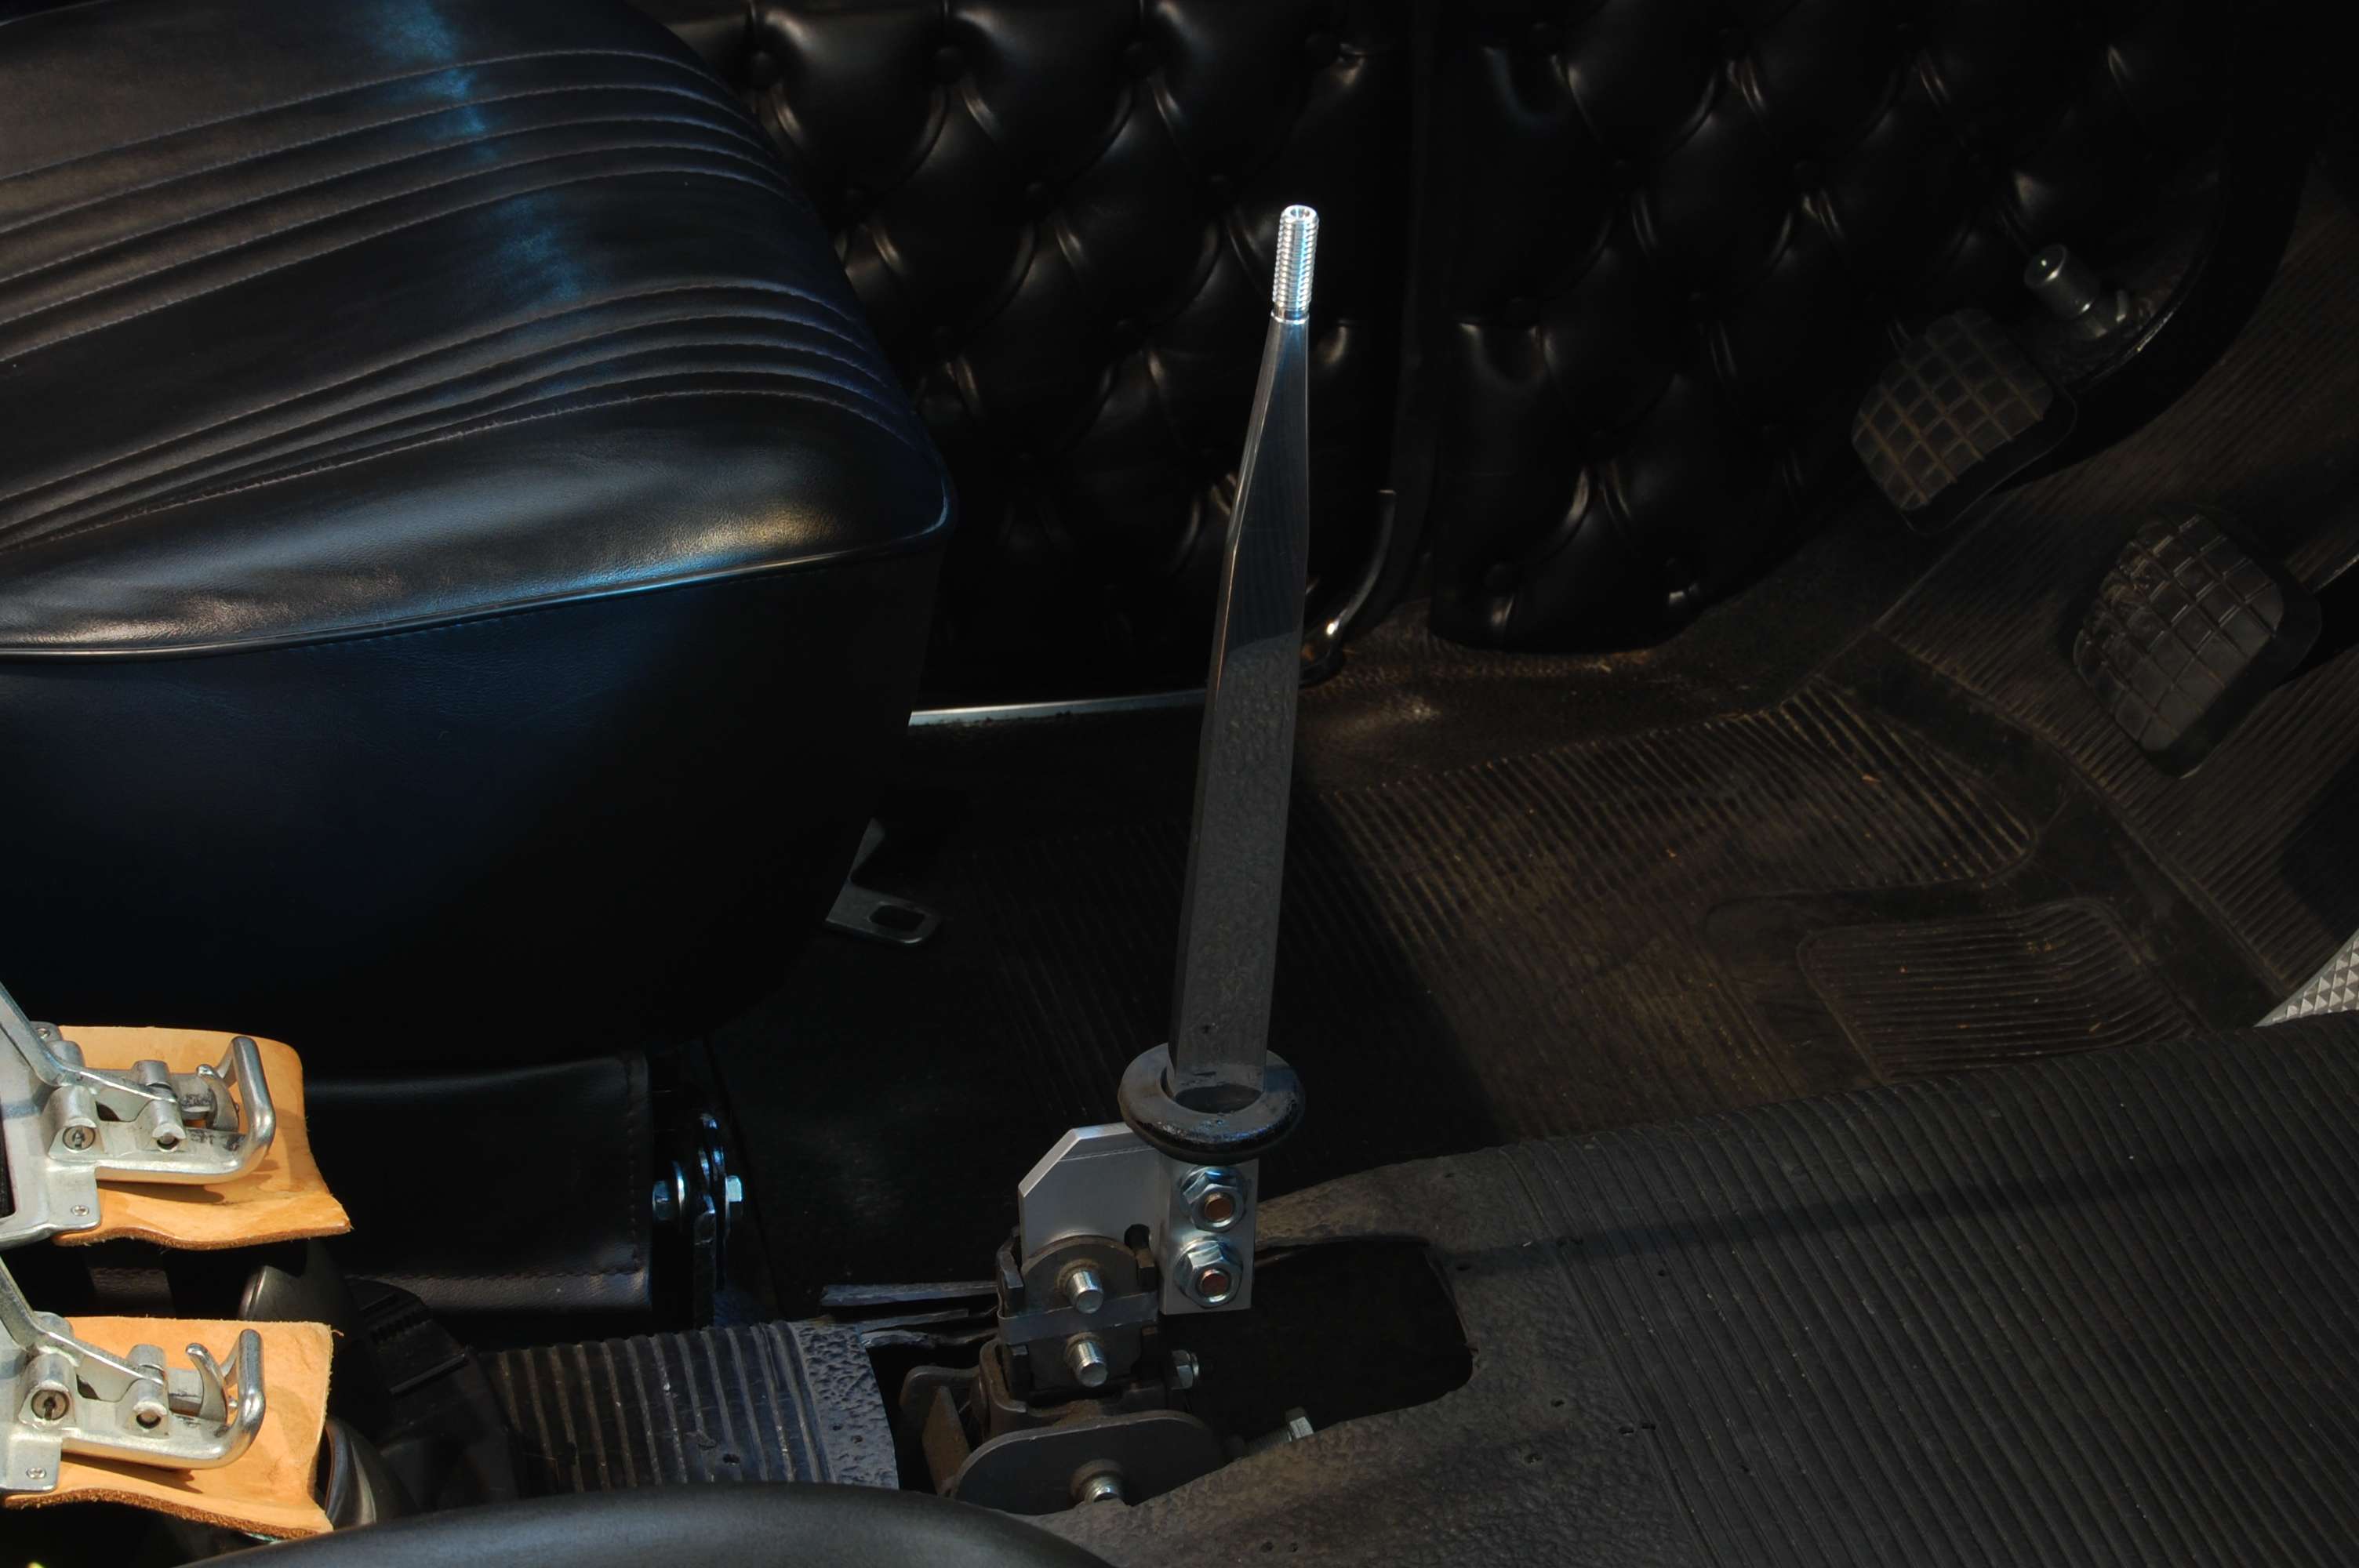 And finally the current short stick reassembled: 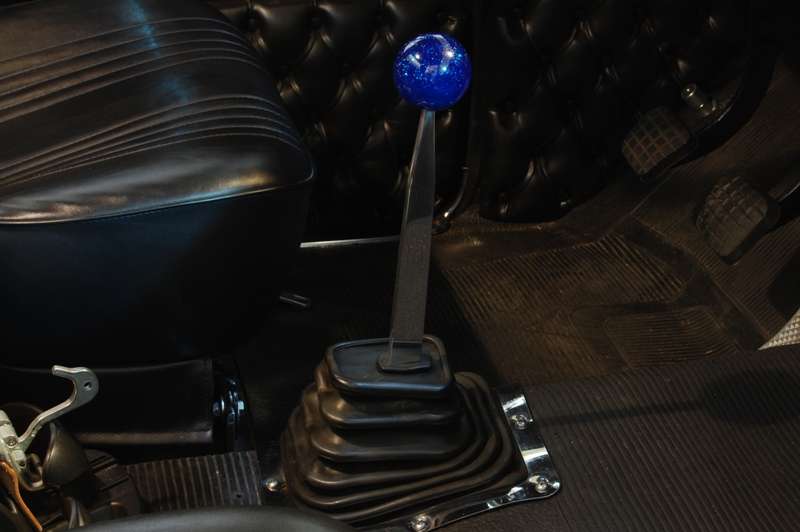 Ever since I’ve owned the truck I wanted to install a full diamond tufted interior, including the bench seat. At the time all this shifter business was going on, the only shifter that might have worked is the model designed for the 55-57 Chevy bench seat. I thought long and hard about reinstalling the original bench. It would have required going back to the earlier forward shifter mounting, and a complete new shifter since the handle is welded on the 55-57 Chevy shifter. Since I didn’t have that kind of money, and severe spinal deterioration barred the use of the bench seat, I finally let the seat go and settled on the buckets. Of course now, many years later – Hurst has finally offered a bolt on version of the C shaped shift handle! This would normally reopen a can of worms, but now that I’m retired any more ridiculous, unnecessary, and expensive changes have to be held to a minimum.  By 2006 I was tired of the 3.08 rear end gears and had 4.09 gears installed by a local expert. This made the truck “fun” to drive. It accelerates like a bullet but spins about 3,000 rpms at 60. This is fine for the type of driving it sees, since the truck rarely goes on the freeway. Last edited by markeb01; 03-09-2012 at 01:16 PM. |
|
|

|
|
|
#40 |
|
Registered User
 Join Date: May 2009
Location: Rathdrum, Idaho
Posts: 1,135
|
Re: Markeb01 Build Thread
Cool build thread Mark as usual very well detailed, I always liked your GMC nice little truck...Vernski

|
|
|

|
|
|
#41 |
|
1 thing at a time is progress.
Join Date: Jun 2007
Location: Ball Ground GA
Posts: 5,511
|
Re: Markeb01 Build Thread
Quote:
__________________
Alan
Philippians 2:14-16 |
|
|

|
|
|
#42 |
|
Senior Enthusiast
Join Date: Feb 2007
Location: Spokane Valley, WA
Posts: 8,356
|
Re: Markeb01 Build Thread
Thanks Alan. I still have years more stuff to post, but it's somewhat tedious since I'm doing everything in reverse order and trying to keep it somewhat chronological.
|
|
|

|
|
|
#43 |
|
Senior Enthusiast
Join Date: Feb 2007
Location: Spokane Valley, WA
Posts: 8,356
|
Re: Markeb01 Build Thread
Again, some of this information may be out of sequence or seen previously in a different thread, but I’m working to get everything posted in one place.
One of the joys of driving a vintage vehicle is the risk of damage. The original windshield survived 38 years with nothing more than a few chips. The replacement windshield installed during the paint job lasted only six years when it got whacked with a huge rock. Broken windshields are very common with winter driving in North Idaho. This one wasn’t getting fixed with a good polishing or chip repair. 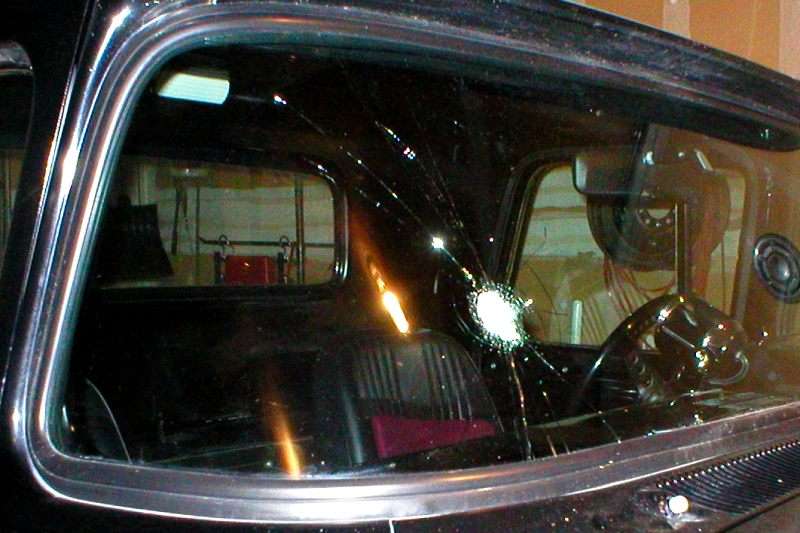 Quite a few additional changes occurred in 2007. After several modifications over the years, what was left of the exhaust system installed in 1991 was getting pretty tired. About this time I also realized the original rear torsion bar crossmember was completely unnecessary. Here’s a before picture with the crossmember in place as viewed from the rear:  And here's the same area viewed from the front after the crossmember was removed. This allowed for much cleaner routing of the new pipes. 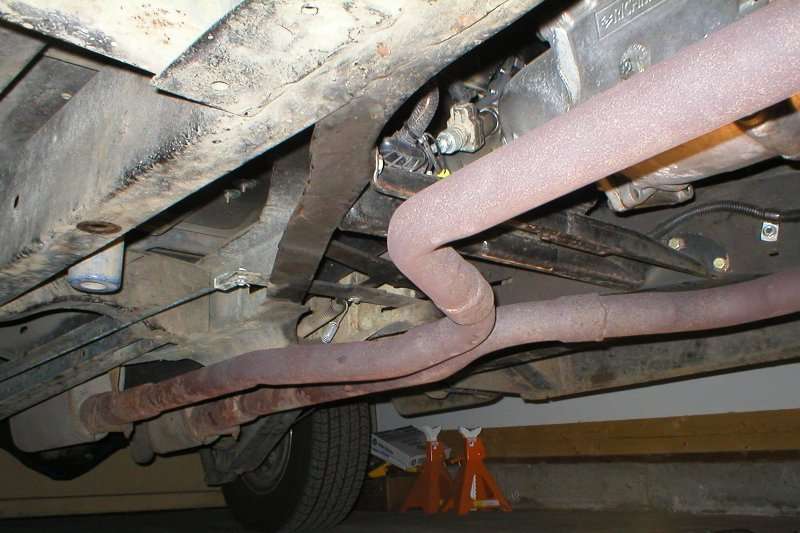 As can be seen, the old pipes looked pathetic: 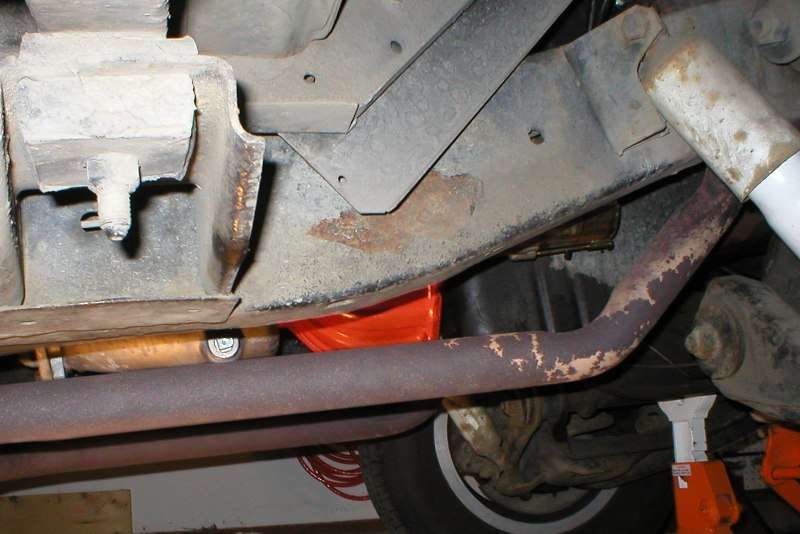  So the truck made a trip over to Discount Muffler in Spokane for a new custom exhaust. They do a great deal of high end custom work (well beyond my budget), but the workmanship on my new system was beautiful. A great deal of effort was invested making sure everything came out square, level, and parallel. It’s the nicest custom exhaust system I’ve ever owned: 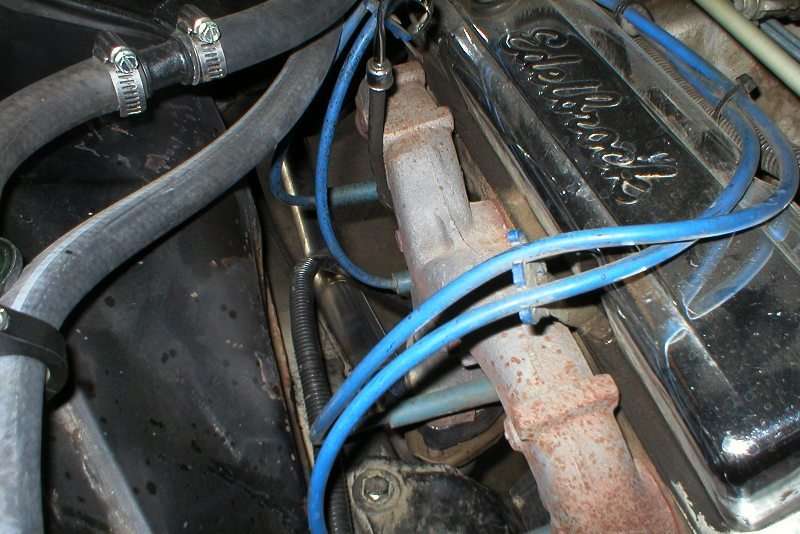 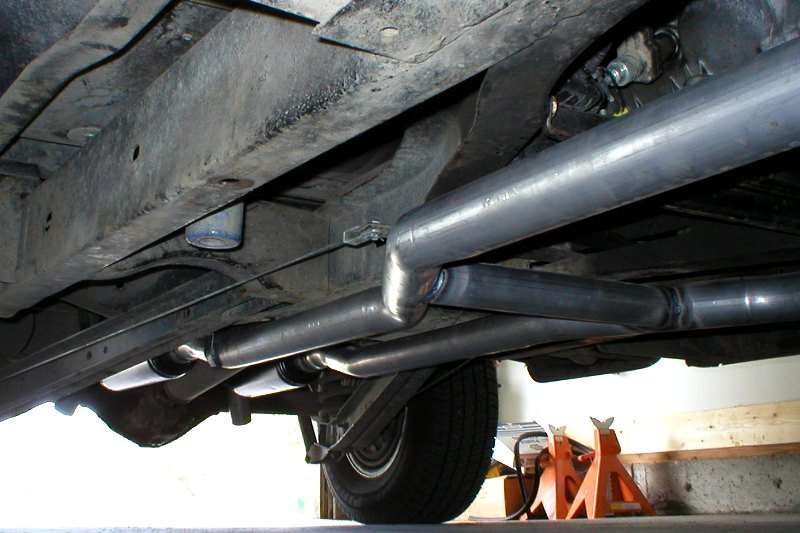 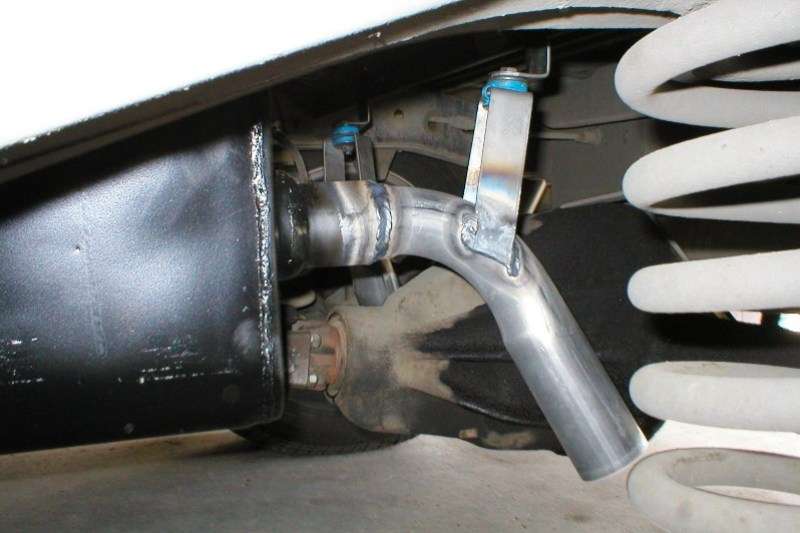 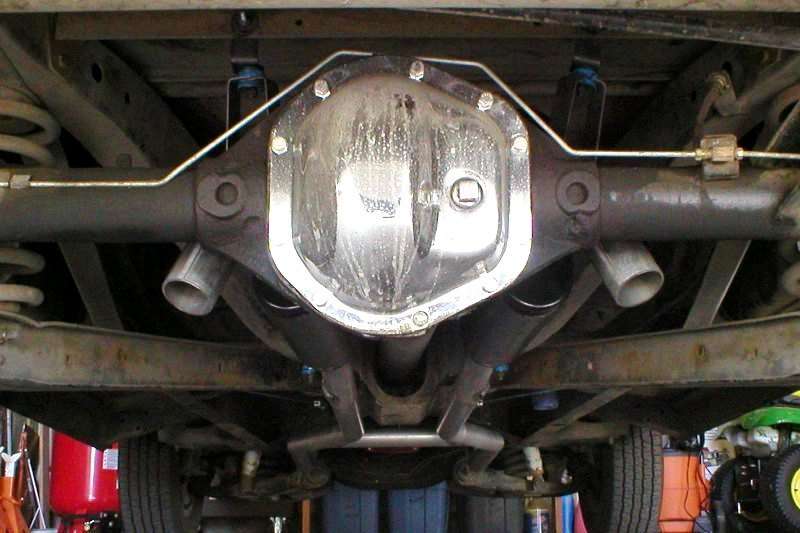
Last edited by markeb01; 01-07-2013 at 02:05 AM. |
|
|

|
|
|
#44 |
|
"Where were you in '62?"
 Join Date: Jul 2004
Location: Cleveland County, North Cackalacky
Posts: 5,013
|
I like the H-Pipe Mark!

__________________
PROJECT: "FULL METAL YELLOW JACKET" 1962 Chevy C-10 Stepside Shortbed Nostalgia Pro/Street Pickup Truck PROJECT: "FULL METAL YELLOW JACKET Build Thread What Are You Workin' On? - 1Bad62ChevyPickup PROJECT: "TYRANNORAMBLER REX" 1969 AMC Rambler American Nostalgia Pro/Street Youtube Channel: Father Son Projects Youtube Channel: 2TIMOTHY2FITHTEEN        "North and South Carolina Folks Click Here!" (((( ~ I have Parts For Sale & Miscellaneous Stuff ~ )))) "Well being as there's no other place around the place, I reckon this must be the place, I reckon...Nyuk Nyuk Nyuk" -Curly Howard Ph.D. |
|
|

|
|
|
#45 |
|
Senior Enthusiast
Join Date: Feb 2007
Location: Spokane Valley, WA
Posts: 8,356
|
Re: Markeb01 Build Thread
I debated for a long time whether to include one or not. Every piece of advice I found indicated they improve low end torque and quiet the system, but I wasn't sure I wanted it quieter. At first I was marginally disappointed with the sound level, until my wife drove the truck and I heard it from the outside. To me, with the H pipe it sounds exactly like a 60's era Corvette, and is much more impressive than when it was louder. It only took a few days to appreciate the addition.
|
|
|

|
|
|
#46 |
|
"Where were you in '62?"
 Join Date: Jul 2004
Location: Cleveland County, North Cackalacky
Posts: 5,013
|
You can definitely tell the difference in sound when you add a H-Pipe or X-Pipe.
I can vouch for that being around Hot Rods, Muscle Cars and owning Mustang GT's and having friends with late model mustangs, camaros, Firebirds. Yep..... X-pipe and H-pipes synchronize the balance of the exhaust pulses from each bank of cylinders based on firing order which increases velocity and scavenging from each cylinder. Most people agree that X-pipes are better at improving performance than H-pipes, especially at the top end. However, H-pipes tend to have a deeper sound than x-pipe equipped vehicles and generally build power down low. That's why I like H-Pipes better due to the deeper sound & low end torque. An X-pipe's greatest advantage is due to the bends are smoother at the convergence, the flow and scavenging are both better, and hence the X-pipe is worth more power. All H-Pipes and X-Pipes are not all made the same as you can see on Jegs and Summit website. And the sound is different with different headers, mufflers and the way it's cammed. Most H-Pipes to me sound better with a chambered muffler. I can't remember if I ever heard an X-Pipe with a canister style muffler. I want to add an H-Pipe on my truck later. Right now the exhaust system is temporary. Although I have been getting way too many compliments on Dad's Homemade Drive Shaft Mufflers.  There made out of what? Dang....  Old School Cool
__________________
PROJECT: "FULL METAL YELLOW JACKET" 1962 Chevy C-10 Stepside Shortbed Nostalgia Pro/Street Pickup Truck PROJECT: "FULL METAL YELLOW JACKET Build Thread What Are You Workin' On? - 1Bad62ChevyPickup PROJECT: "TYRANNORAMBLER REX" 1969 AMC Rambler American Nostalgia Pro/Street Youtube Channel: Father Son Projects Youtube Channel: 2TIMOTHY2FITHTEEN        "North and South Carolina Folks Click Here!" (((( ~ I have Parts For Sale & Miscellaneous Stuff ~ )))) "Well being as there's no other place around the place, I reckon this must be the place, I reckon...Nyuk Nyuk Nyuk" -Curly Howard Ph.D. |
|
|

|
|
|
#47 |
|
Senior Enthusiast
Join Date: Feb 2007
Location: Spokane Valley, WA
Posts: 8,356
|
Re: Markeb01 Build Thread
About this time I got the bug to improve the instrument panel. To recap dash changes up to this point, I’d changed the instrument panel twice since eliminating the original gauge cluster.
Here’s the original: 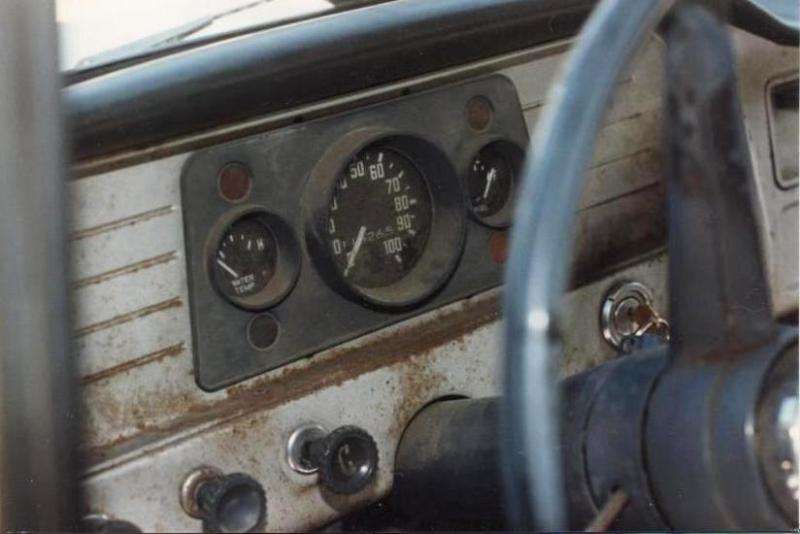 And here’s the first replacement panel. 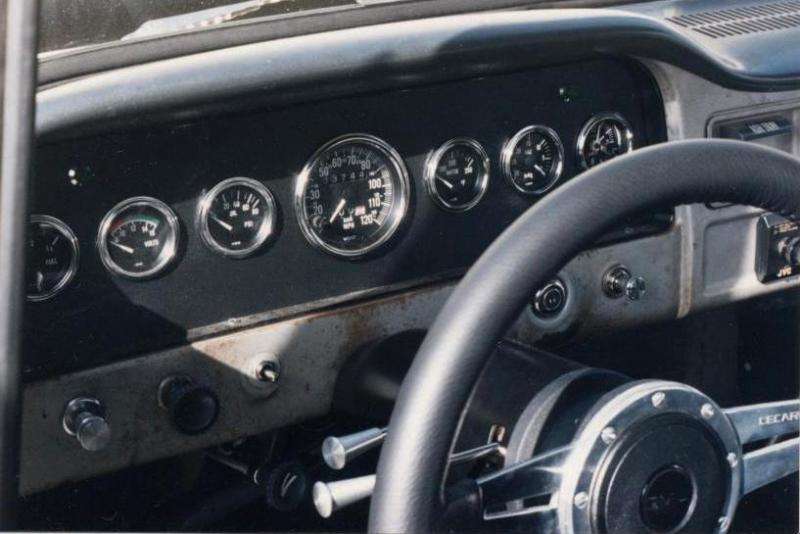 Being an old school guy I wanted to install a full set of Stewart Warner gauges, with a Sun Tach on the dashboard. None of my local suppliers carried S&W any longer due to terrible customer service to the dealers, and genuine Sun tachs were essentially unavailable until Ebay came along many years later. So I ended up buying a package deal of VDO gauges. Most of them worked okay, but I quickly became disappointed with the design because the rims were very undersized and I soured on the look. In fact the rims are so tiny the gauge will fall through the dash hole if cut even slightly oversize. The panel layout being a plain linear design I quickly found it boring to look at: Since the panel was easy to create, I whipped up another version which spaced the gauges out so I had a clear view of all the gauge faces through the steering wheel arc. It was very functional, but it didn’t take long to find it ugly as well:  Eventually I found an NOS Sun tach long cup on Ebay and was inspired to mount the tach on top of the dash. Unable to afford a real Sun tach, I settled on a Moon tach. At the time they were being produced for Moon by Autometer. 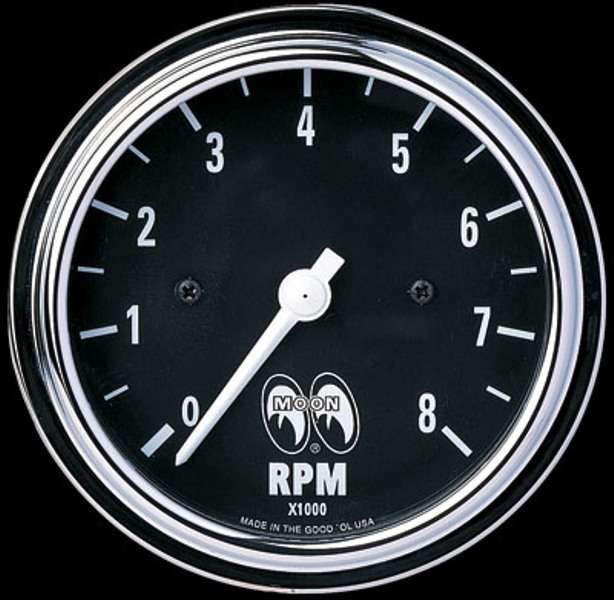 (This turned out to be a perfect match for the Autometer gauges I would install later). Current full sweep Moon tachs are manufactured by Classic Instruments, and don’t look nearly as impressive in my opinion. A bit of simple adapting was required to fit the Autometer head into the Sun cup. In order to give the instrument panel a more vintage look, I also sourced an NOS Sun vacuum gauge. Being 50+ years old it read about 3 pounds low and was eventually replaced with different gauges and adapters. 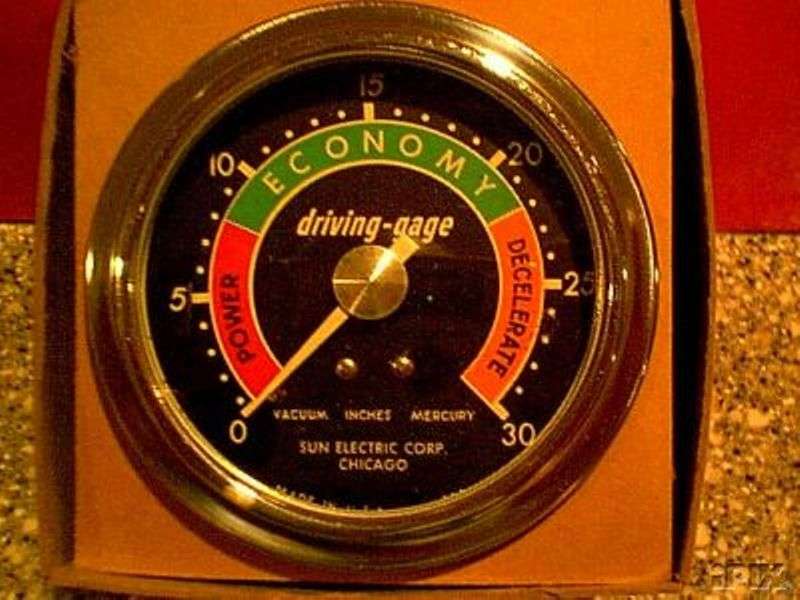 I moved the speedometer to the left end of the cluster and mounted the vacuum gauge on the right end, with the tach up top. Unfortunately, the mechanical speedometer cable could not be connected on the left end due to interference with the firewall. This required the expense of an electric speedo to resolve the problem. 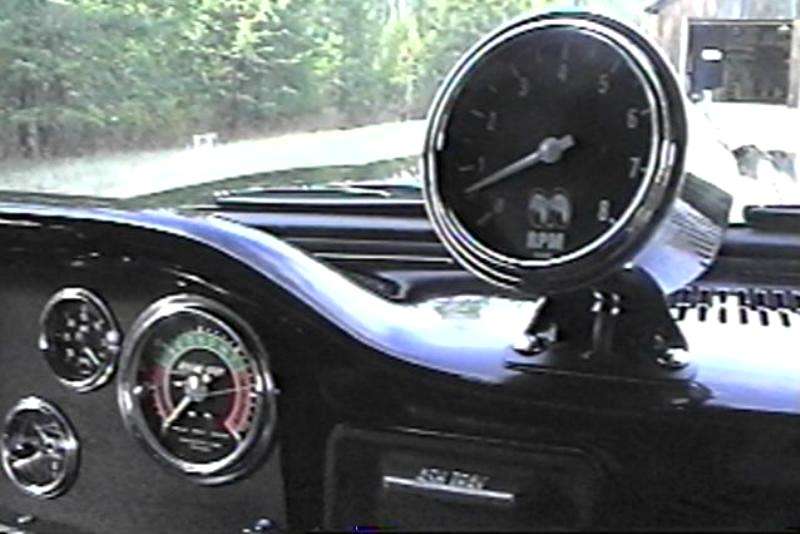 Some time later I again grew tired of the dash layout, so another panel was created which eliminated the second 3 3/8” hole. Here’s a shot of panel #4: 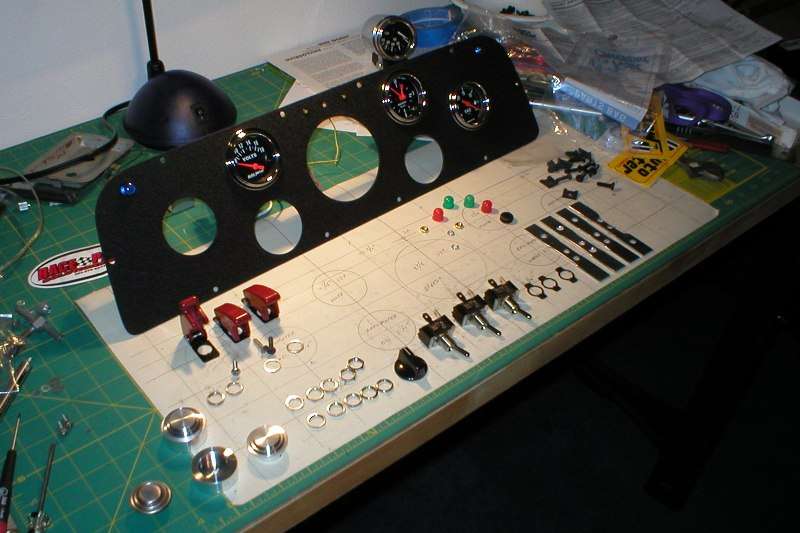 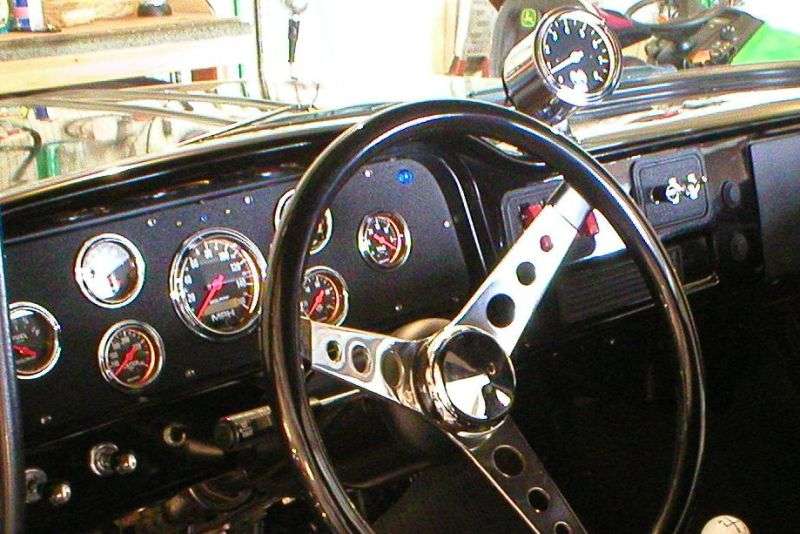 Here’s a comparison between panels 3 & 4. With the new panel came a complete set of Autometer gauges: 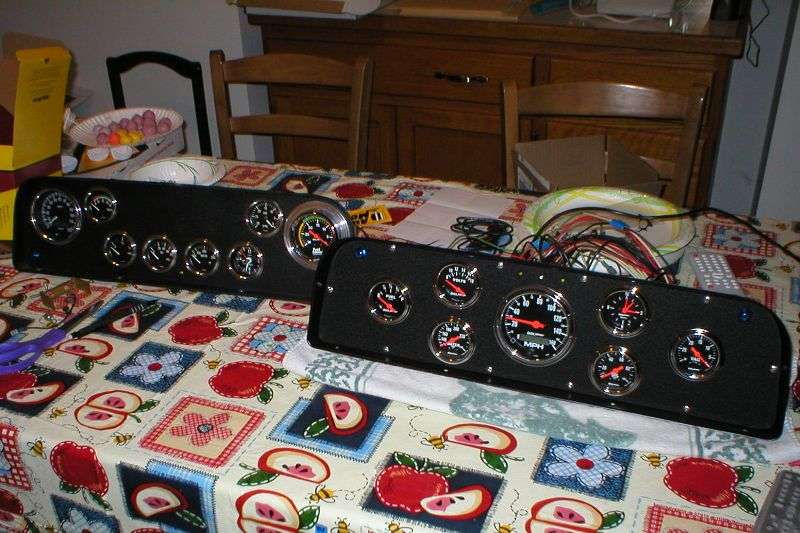 Shortly after installation the brand new Autometer clock failed. Warranty expense and delays made repair impractical, and since I used the clock daily I wanted something that would consistently tell time. I decided it was time for an aircraft clock. So the new panel was modified to accommodate the new clock, which keeps “perfect” time. Other than periods when the battery is disconnected, this clock maintains exact time continuously. 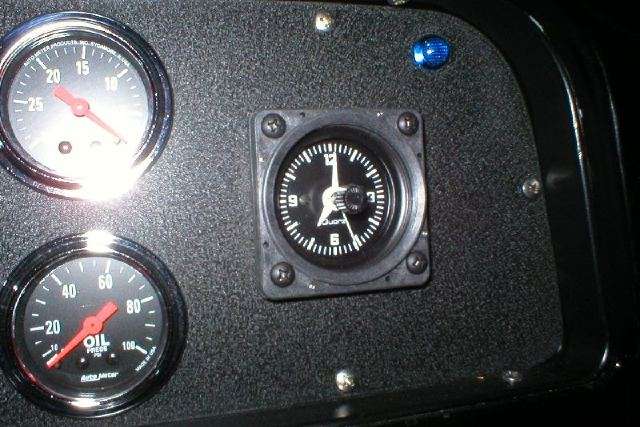
Last edited by markeb01; 01-07-2013 at 02:11 AM. |
|
|

|
|
|
#48 |
|
Senior Enthusiast
Join Date: Feb 2007
Location: Spokane Valley, WA
Posts: 8,356
|
Re: Markeb01 Build Thread
I also had my son machine up new switch panels for the dash, replacing the ashtray, heater and radio block off plates. Although the radio plate looks factory, it’s actually solid milled aluminum. The plates can be seen in the third picture above.
The new had barely worn off panel #4 before I started thinking about redesign #5. I discovered panel #4 looked very similar to the standard Ford dashboard of the same period, and it just didn’t look very striking. This time I wanted something that actually looked like it had some thought put into it, and would also be reminiscent of the original cluster. So a two piece design was dreamed up and fabricated by my machinist son. 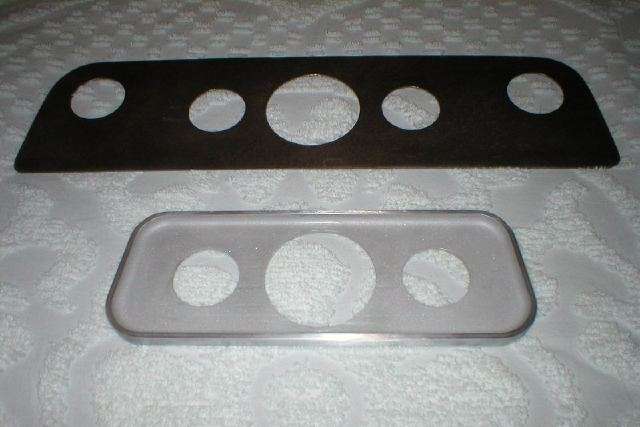 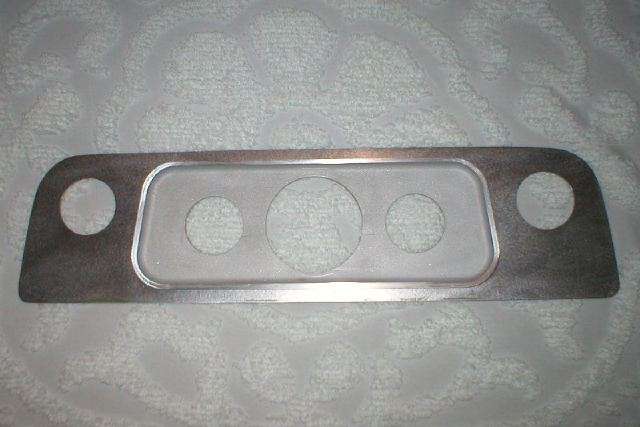 I wanted to minimize the amount of wrinkle finish, so the center panel was painted satin black and fit over the wrinkle back panel. Another feature of both panels 4 & 5 is they attach by perimeter screws to the factory rim. This allows removal of the cluster panel without scratching the paint on the dash. Being an old guy with a bad back, I can’t work up under the dash. With the current configuration, I can pull the steering wheel and have the instrument panel pulled and laying on a towel within 15 minutes. This allows all gauge wiring issues to be handled from the comfort of the driver’s seat. Here’s a shot of the assembled dash. In addition to the gauges on the instrument panel, I also moved the vacuum gauge to the steering column, and the clock to the old heater panel. Fog lamp and heater switches which had previously been on the heater panel were moved to the radio plate, after more modifications by my son: 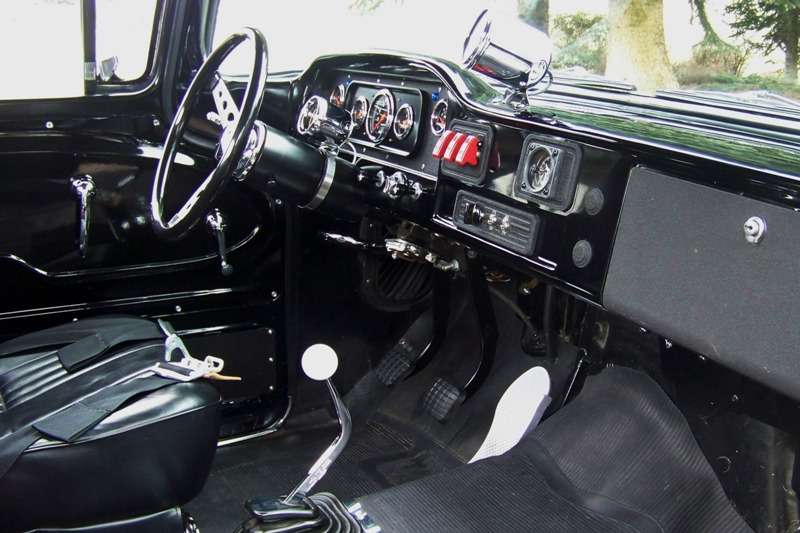 At first I thought having the gauge on the steering column would be an interesting feature, but the chrome cup glared so bad in the windshield I had to put a cut off sock over the cup to see where I was going. 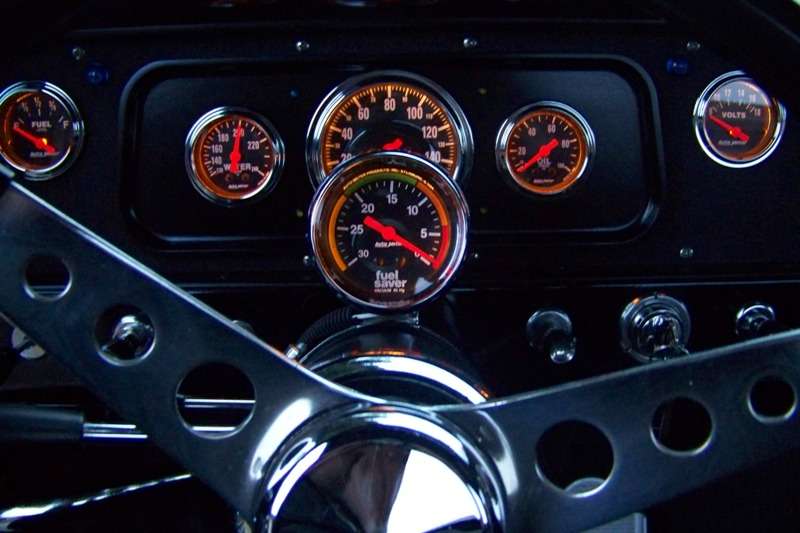 I tried mounting the vacuum gauge under the dash lip, which looked ridiculous: 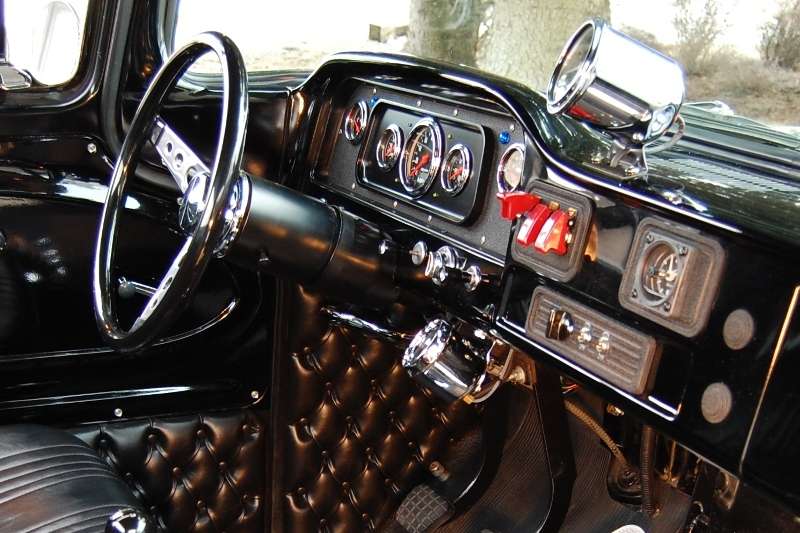 This gave me an excuse to create one of the few missing accessories that were so popular in my youth – an under dash gauge panel. Not being able to find a suitable accessory panel, I once again called on my son. He whipped one up out of aluminum, and a 2 1/16” vacuum gauge was mounted down below: 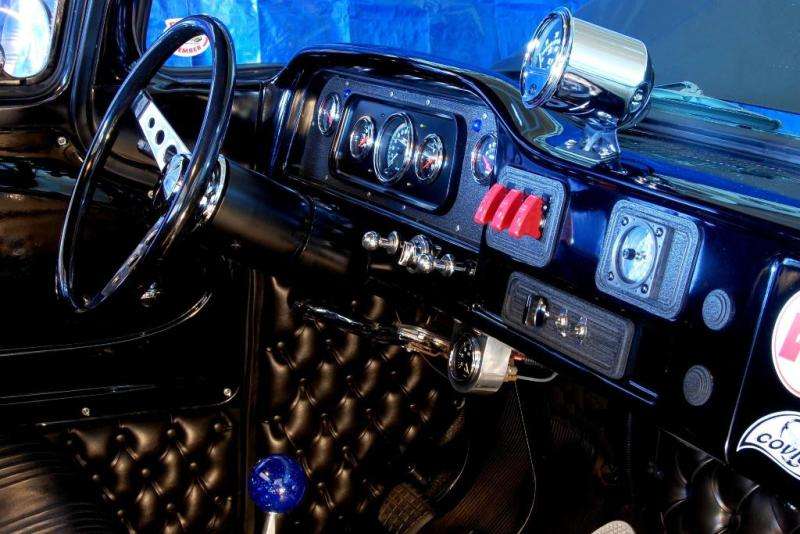 Lingering on this topic a bit into the future, this configuration lasted for several years until I got the bug for a triple gauge panel with external lights. These were very popular in 1962 and were gone almost as soon as they appeared (panels with external lights). After years of searching, I finally came up with a suitable example at a price I could afford. Upon arrival it was discovered to not be in the tip top shape I had hoped for. Starting with 100 grit on an air file, final polish came 3 Ĺ hours later. Unfortunately my son recently borrowed his buffer back so all the finish work had to be done by hand. Rather than fabricating a new cluster panel to eliminate the empty gauge holes, I decided to cover the holes with two chrome bullets I had hanging around. I actually like the way they look, appearing more as design features than an afterthought to cover up missing gauges. 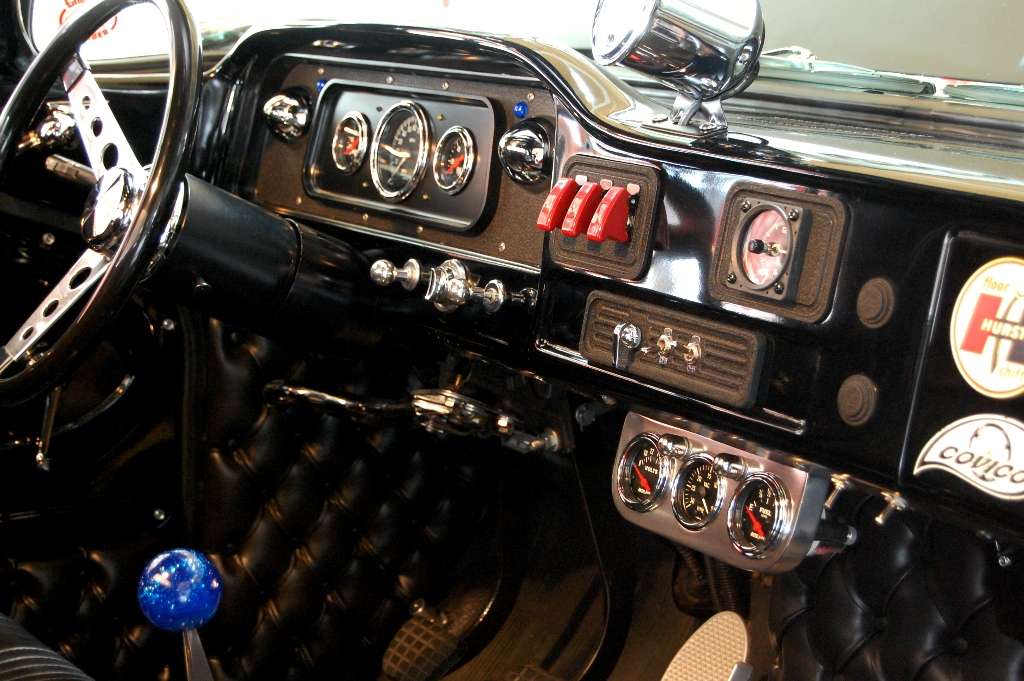 Here’s the before shot with the VDO gauge in the center  And here’s the after shot with the Autometer matched set, clearly illustrating how much more important the Autometer rim looks: 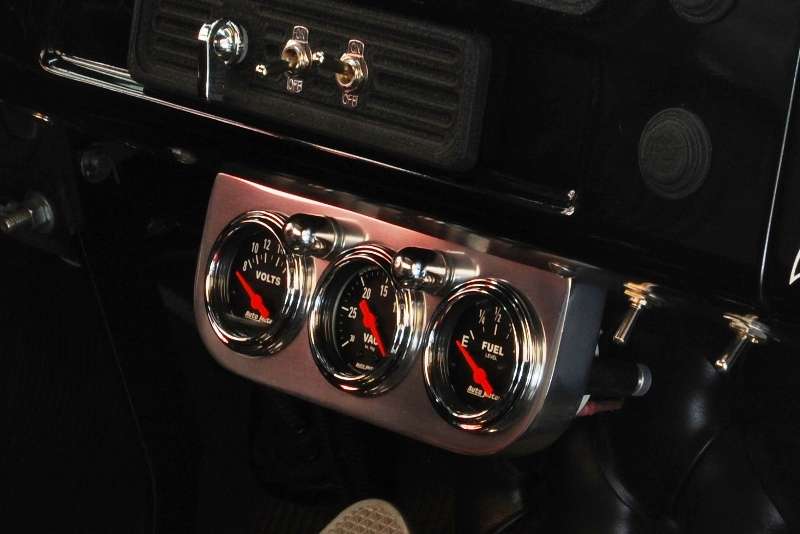 Having every interior accessory I ever dreamed of owning in my youth, no additional dash changes are scheduled or anticipated. Swapping from VDO to Autometer gauges also meant the gas gauge sending unit had to go. Since my bed is already ugly (and covered), I simply cut another hole over the sending unit to allow removal and replacement of the sender. The cover plate was reattached with epoxy. It was certainly easier than dropping the tank. 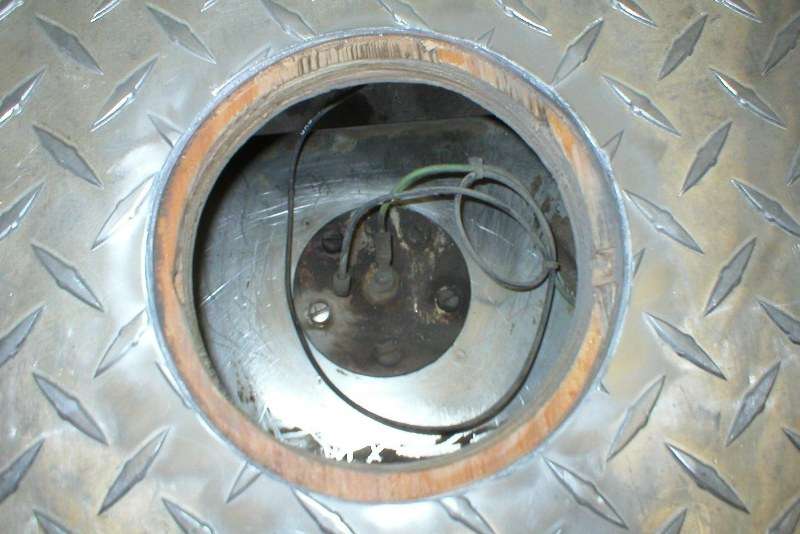
Last edited by markeb01; 01-07-2013 at 02:15 AM. |
|
|

|
|
|
#49 |
|
Senior Enthusiast
Join Date: Feb 2007
Location: Spokane Valley, WA
Posts: 8,356
|
Re: Markeb01 Build Thread
When the truck was at the body shop mentioned above in post # 28, they were suppose to weld up door jamb cracks on both sides of the truck. They did perform some very poor welding in the area, which cracked out within weeks. Having no interest in further outside help, I repaired the damage by my old tried and true method Ė JB Weld.
After grinding away the poorly attempted repair, the bare metal was cleaned up inside and out. A pair of inexpensive hardware store angle brackets were formed to exactly match the contour of the body. Duct tape was placed over the outside, and the reinforcement plates were installed from the inside with a generous quantity of JB Weld. 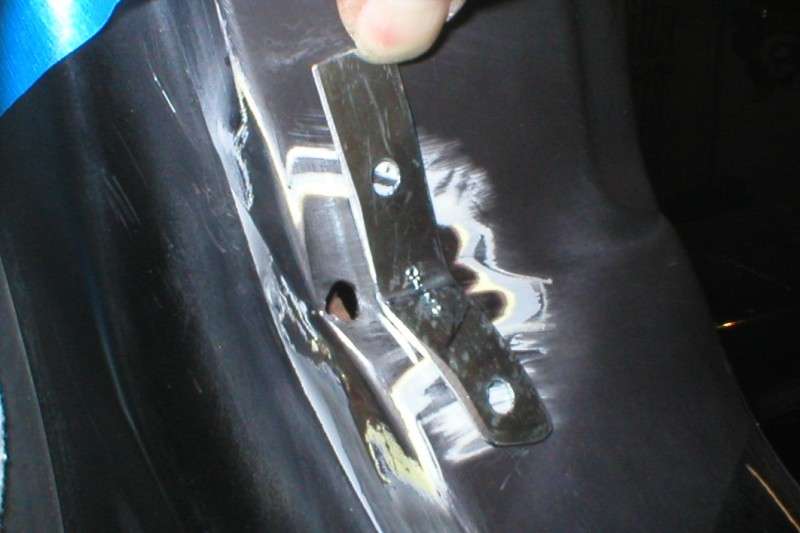 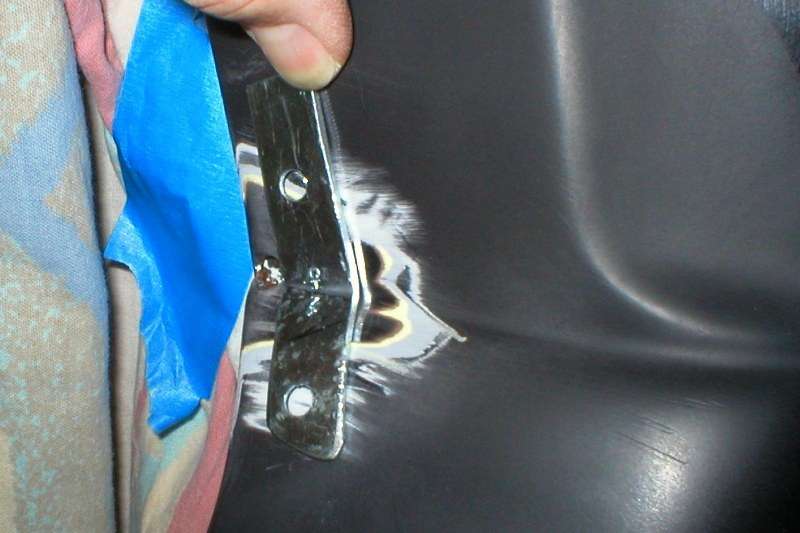 After curing, a coat of primer and some block sanding left an invisible repair. Four years later and the repair remains undetectable. 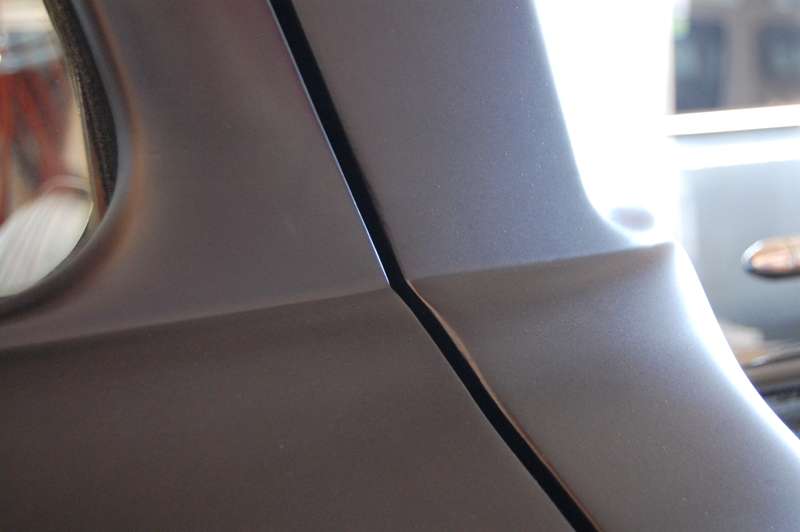
|
|
|

|
|
|
#50 |
|
Senior Enthusiast
Join Date: Feb 2007
Location: Spokane Valley, WA
Posts: 8,356
|
Re: Markeb01 Build Thread
In 2008 the local gas station where we normally filled up converted to smog nozzles on their pumps, which complicated filling the bed floor tank fill.
When converting from side fill to floor fill I simply cut a hole through the aluminum diamond plate in the bed floor. The hole in the plywood underneath was cut about an inch smaller, so the aluminum bed plate would rest in the resulting ledge. The aircraft cap on the tank itself was about 3” below the floor level. With an unrestricted nozzle, it was easy to watch the amount of fuel entering the tank. With the smog nozzle it was difficult to get a full tank, since pressing down on the accordion hose placed the nozzle deep in the tank. So once again my son came to the rescue and fabricated a 3” tall neck which bolted onto the tank. Next a flange was fabricated which screwed to the wooden bed floor and retained the original cut down piece of diamond plate. I don’t have any before pictures, but here’s what the finished job looked like:  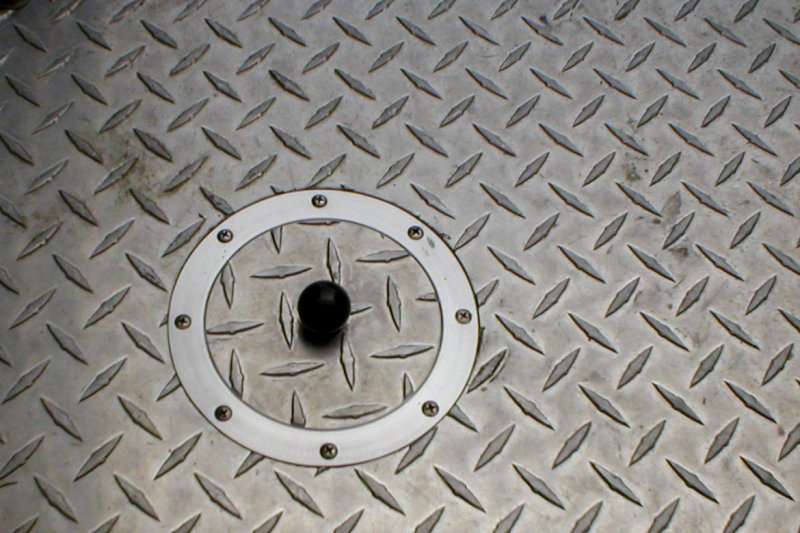 At the time I was working as many as 20 hours a day both in the office and from home, which really put a crimp in hobby progress. Much of the available time was spent cleaning up the engine compartment. After 100,000+hard commuter miles it no longer resembled a street rod. Everything was cluttered and filthy. Here’s what it looked like earlier when the truck still ran an automatic transmission: 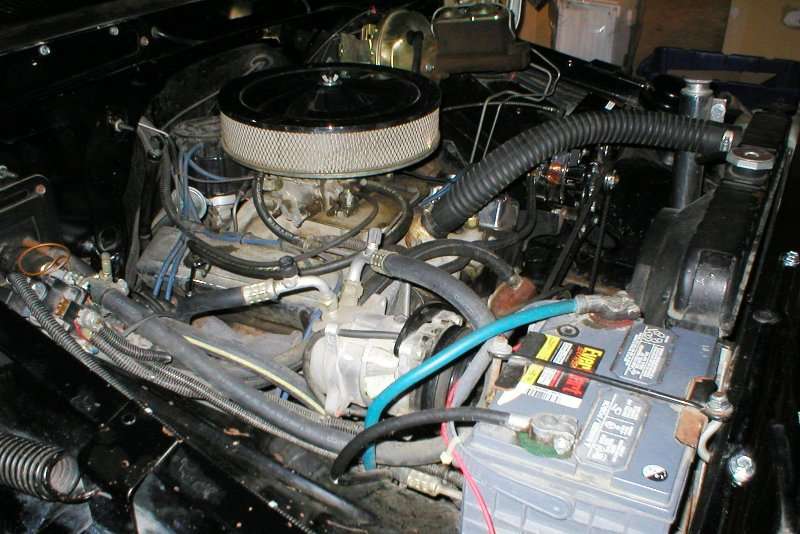 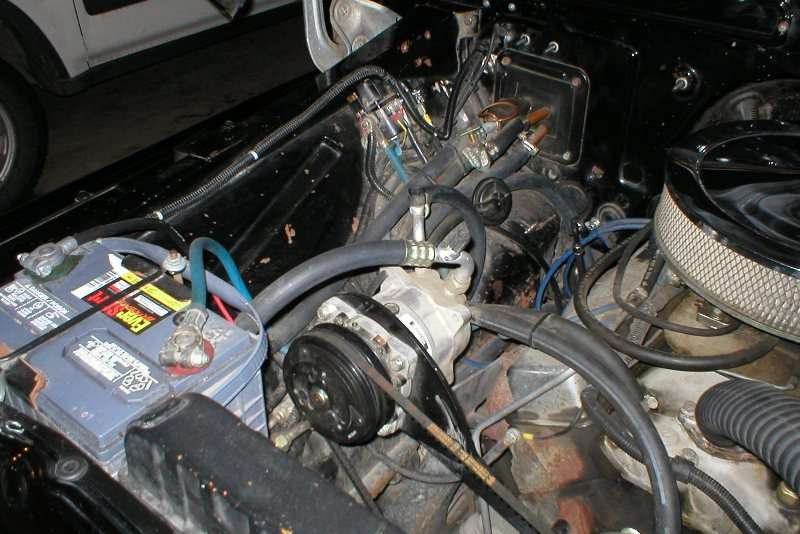 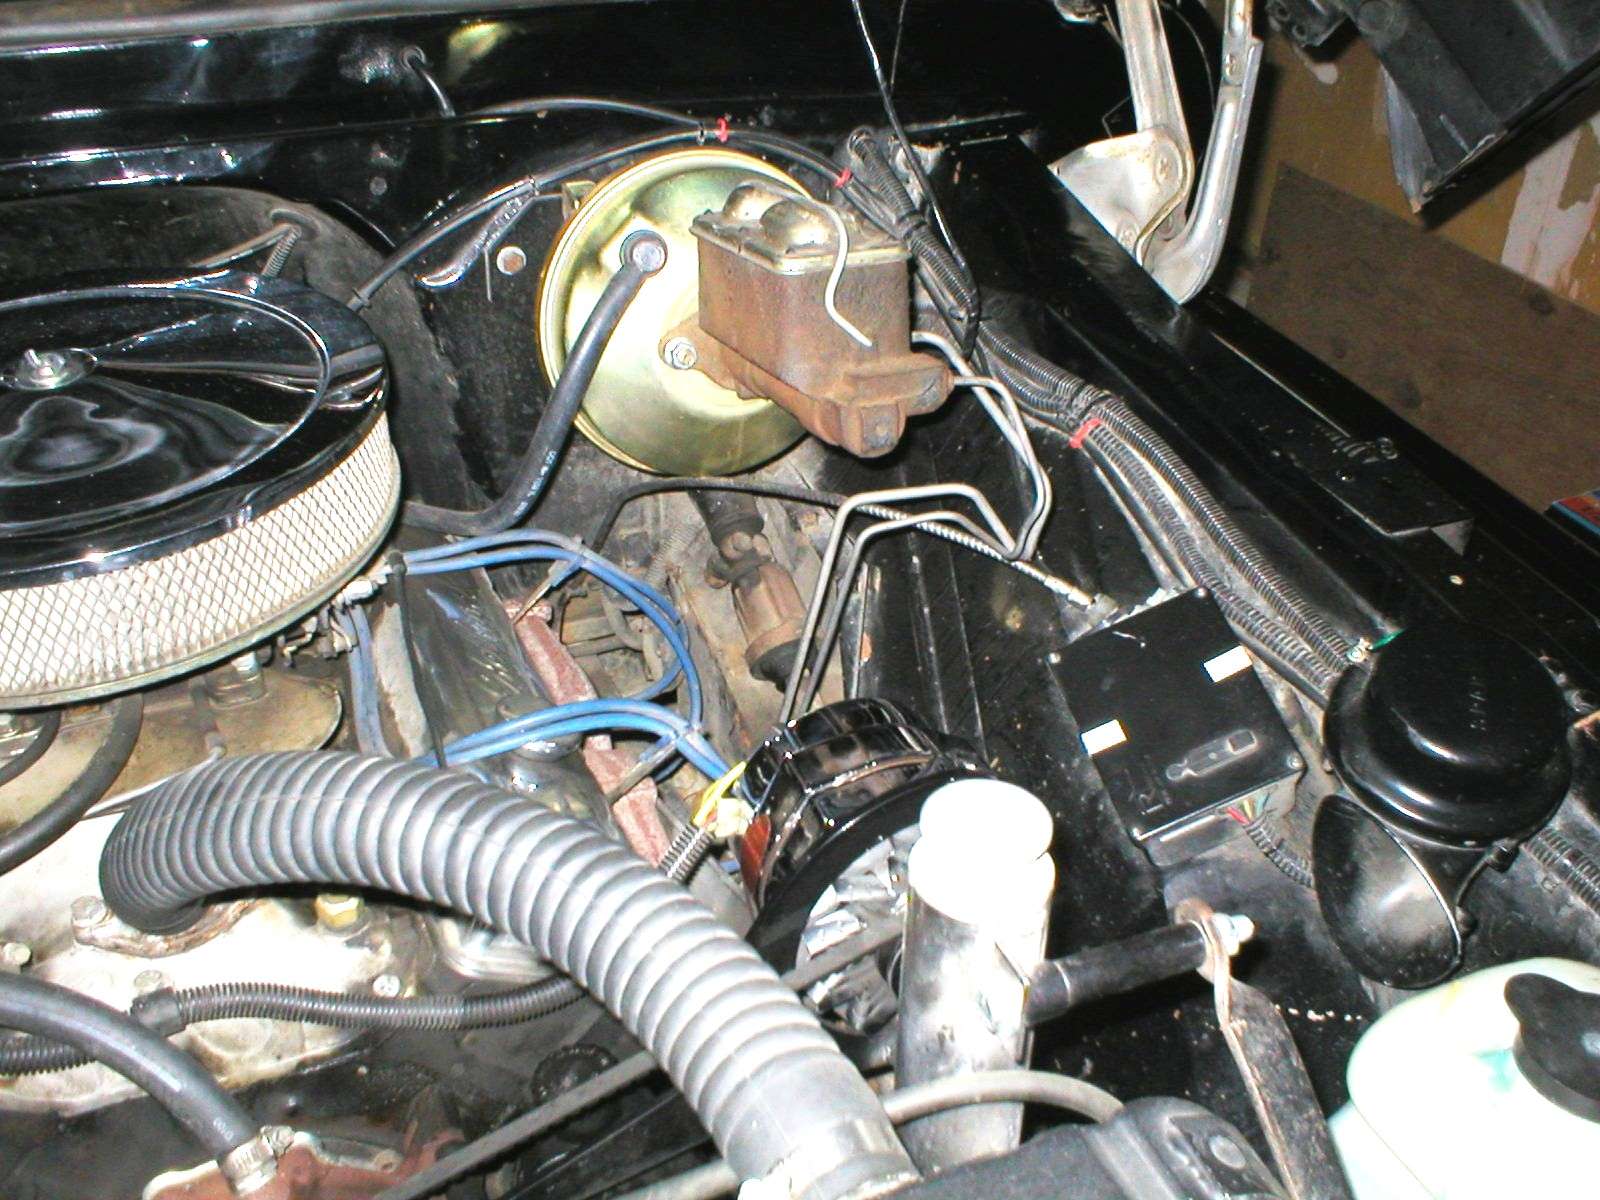  As mentioned previously the air conditioning system was removed and trashed. The cruise control box was relocated inside of the firewall next to the heater. The 1956 Dodge horns were relocated from the driver side fender panel to behind the front bumper. Wiring that ran down the top of the passenger side fender panel was rerouted, and wires the came through various holes in the firewall were consolidated to the upper left fender panel. Here another shot part way through the clean up: 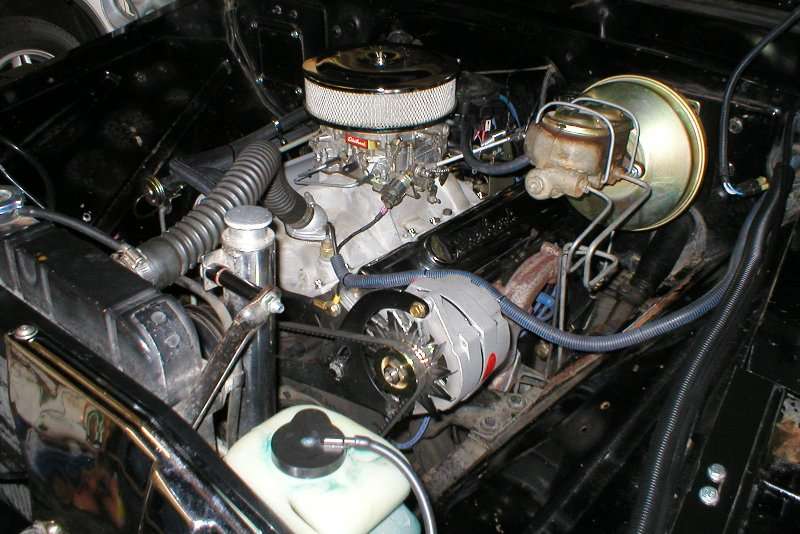 It took another year to completely realize, but I also started thinking about cosmetically converting the engine to look like a 283/327. Here’s a link to a thread that details the project, and includes photos of the finished result: http://67-72chevytrucks.com/vboard/s...d.php?t=366853 Over time (and living with perpetual back pain) I got tired of dealing with the shank style mag wheel nuts on the vintage 1960's front wheels. It just took too much effort to line everything up for mounting, so I bought a pair of 15x5 American Racing TTO’s for the front. These have tapered seats making it a breeze to toss them on and bolt up. 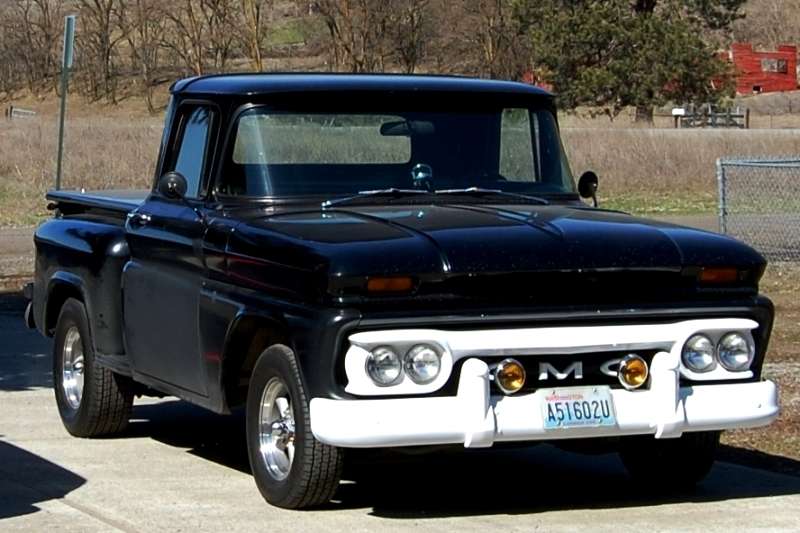 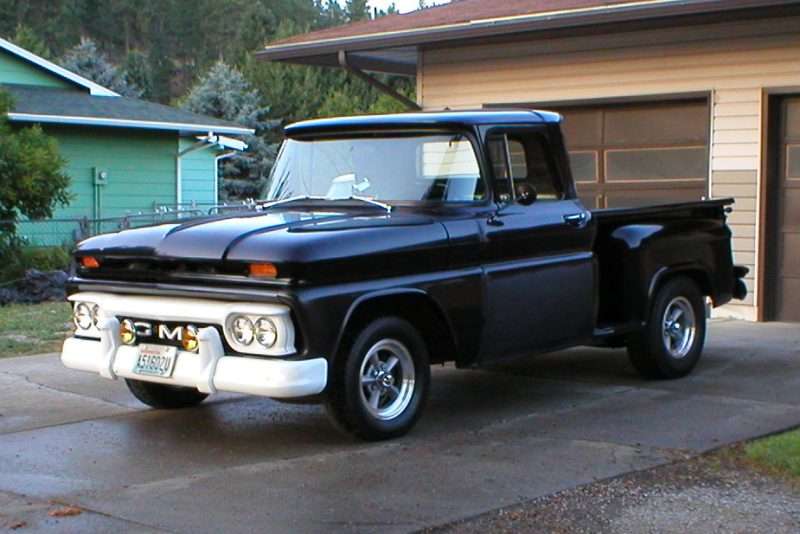
Last edited by markeb01; 05-12-2012 at 08:36 PM. |
|
|

|
 |
| Bookmarks |
|
|