
|
 02-20-2011, 02:35 AM
|
#26 |
|
Registered User
Join Date: Nov 2010
Location: Fayetteville NC
Posts: 752
|
Re: K1's build thread
And completely unrelated to the truck...if anyone is wondering about my user name hopefully this will explain it. I've got photobucket open and I figure i may as well pimp myself a bit.
K1 = designation for a 1 person kayak Rodeo boater = freestyle whitewater kayaking....something like this.... 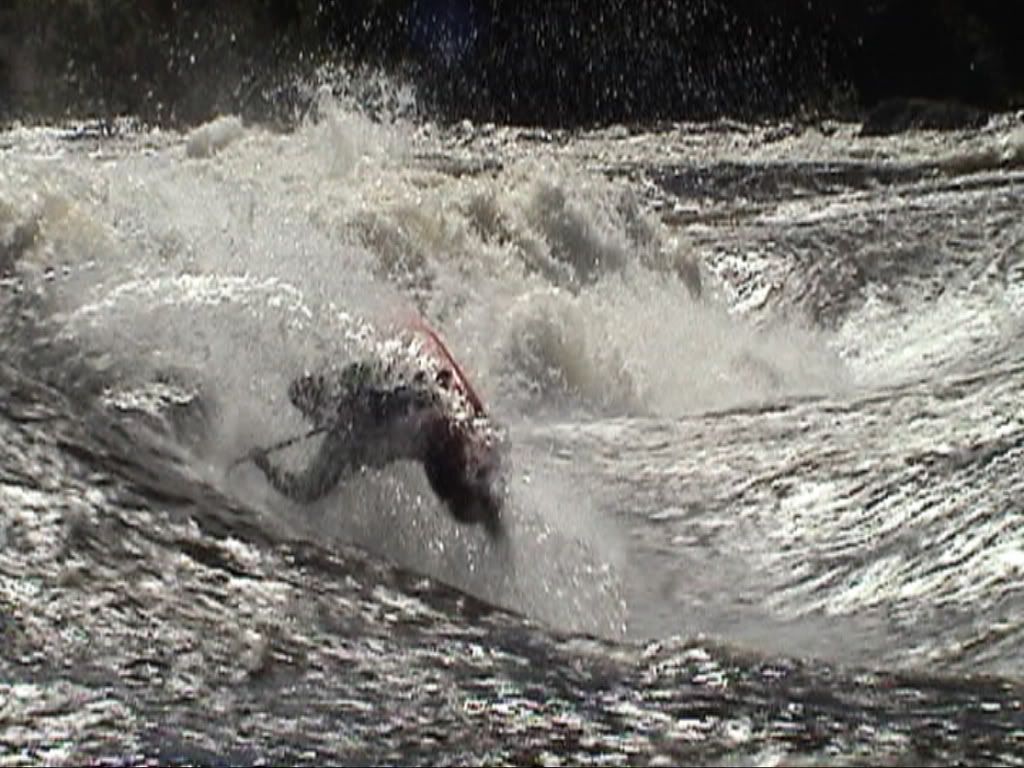 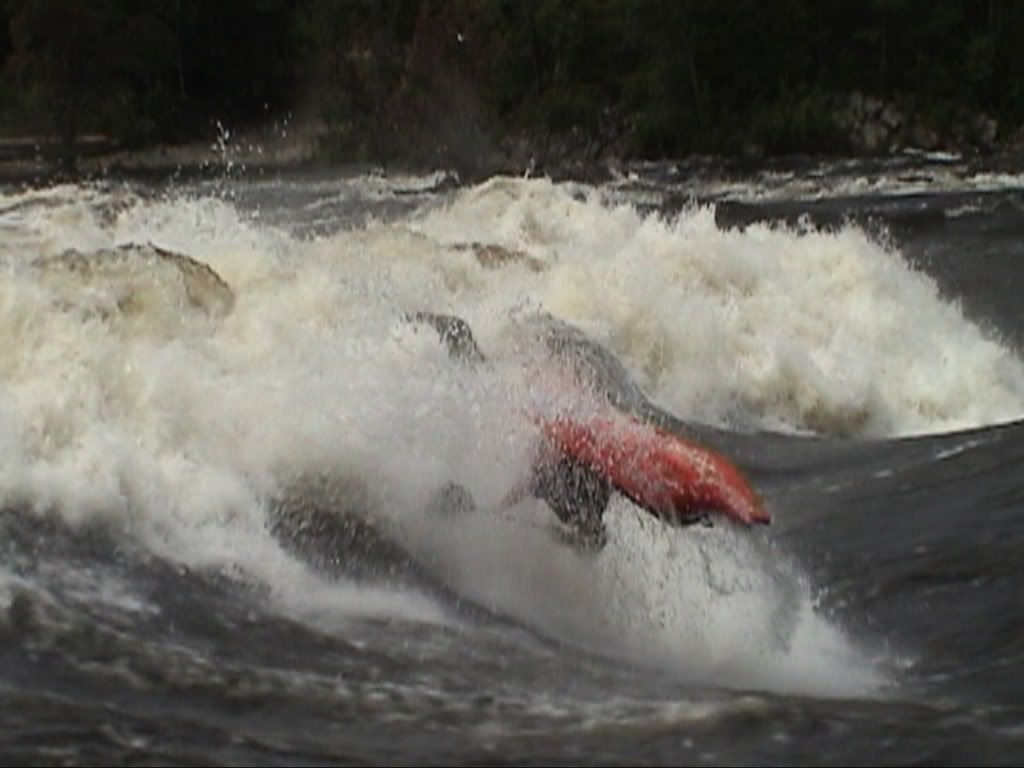  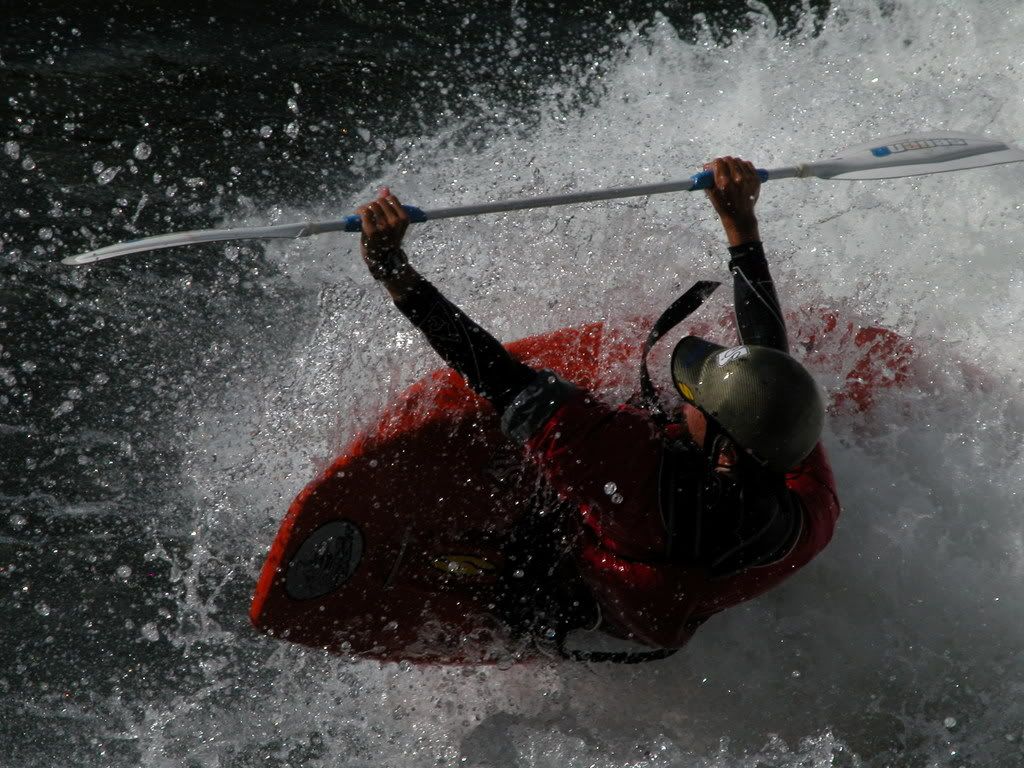 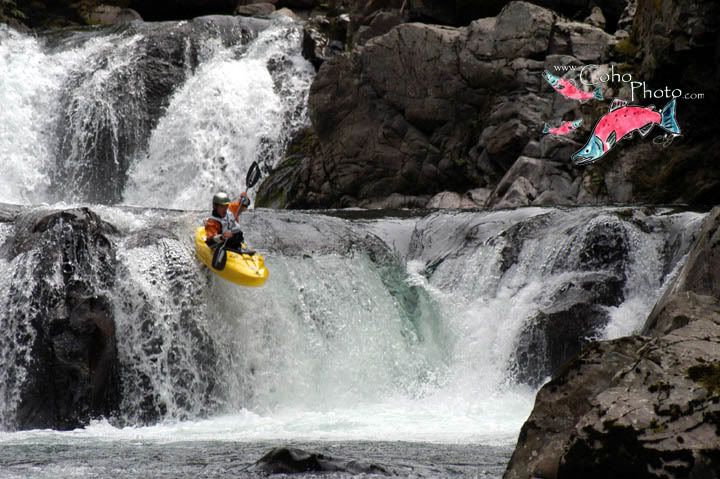 In order... The first two are from 2003 on the Ottawa River in Ontario Canada. The next 2 are from 2005 on the White Nile River in Uganda. The last one is from the 2002 Oregon Cup down river race IIRC. That was my short stint as a professional athlete. Graduate high school in 2005 and went to college. Did my 4 years there and graduated in 2009. A month and a half later I was at Ft Benning GA for Infantry OSUT, and almost 2 years later I'm at Ft Bragg. Last edited by k1rodeoboater; 02-20-2011 at 02:38 AM. |

|

|
|
02-20-2011, 09:12 PM
|
#27 |
|
Registered User
Join Date: Feb 2011
Location: Post Falls, ID
Posts: 113
|
Re: K1's build thread
Let me know how the gas tank comes out. I really want to get mine out of the cab.
Posted via Mobile Device
__________________
-Chapa 65 SWB step-side / 383 stroker / TH350 / 4:10 gears / static drop 4 1/2" front 5" rear. |
|
|
|
|
02-21-2011, 12:13 AM
|
#28 |
|
Registered User
Join Date: Dec 2009
Location: vancouver b.c....is the biggest place most people would know but I am actually out in the valley 45 mins away
Posts: 2,050
|
Re: K1's build thread
I am with you on the trucks.....but that white water.....dude your on your own...lol
__________________
1966 Pro street build http://67-72chevytrucks.com/vboard/s...?t=448089[ 1958 LS 2 build http://67-72chevytrucks.com/vboard/s...d.php?t=527123 1966 SBFS low and go http://67-72chevytrucks.com/vboard/s....php?p=5799909 1966 SBFS street HULK http://67-72chevytrucks.com/vboard/s...=1#post5886625 Poject Low and go gets a 6.2 ltr LSA supercharged with 6 speed automatic Aluinum Radiator Dealer pm for details |
|
|
|
|
02-21-2011, 12:31 AM
|
#29 | |
|
Registered User
Join Date: Nov 2010
Location: Fayetteville NC
Posts: 752
|
Re: K1's build thread
Quote:
As for my truck. I readjusted the tank straps one more time. The realization that 100lbs of gas will be hanging from them made me have second thoughts about my first go at it. Here are some before and after pictures... Before  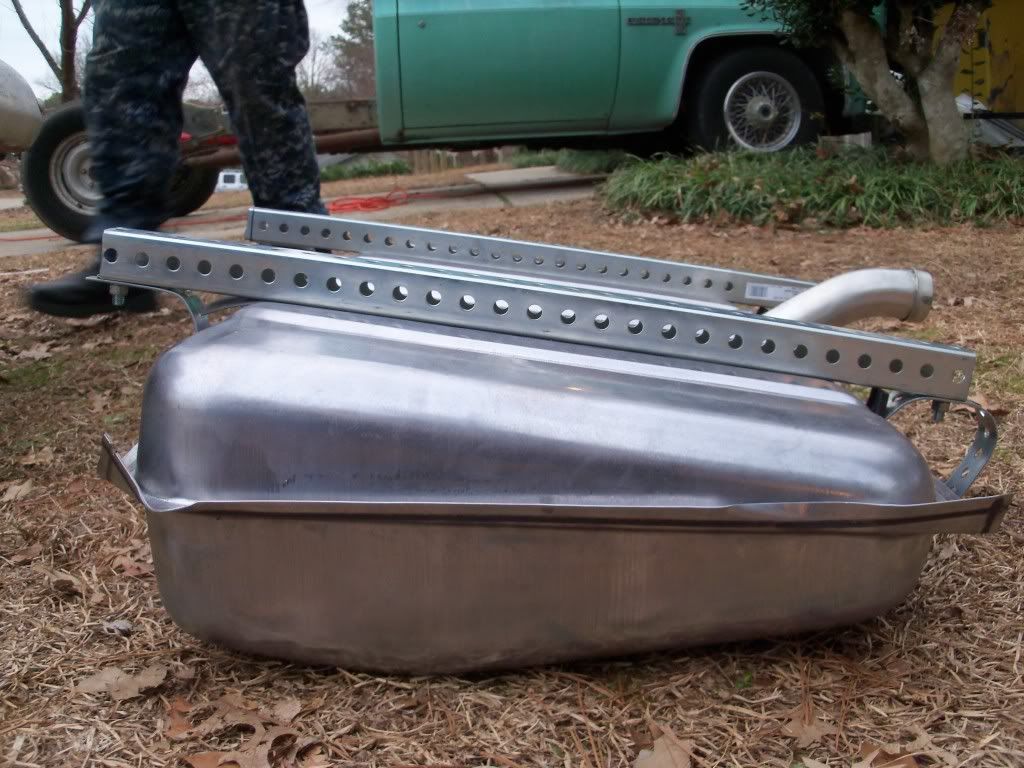 <Note the location of the bolts on the bracket securing the tank straps. I wasn't confident that it would stay in place when the tank was full> After 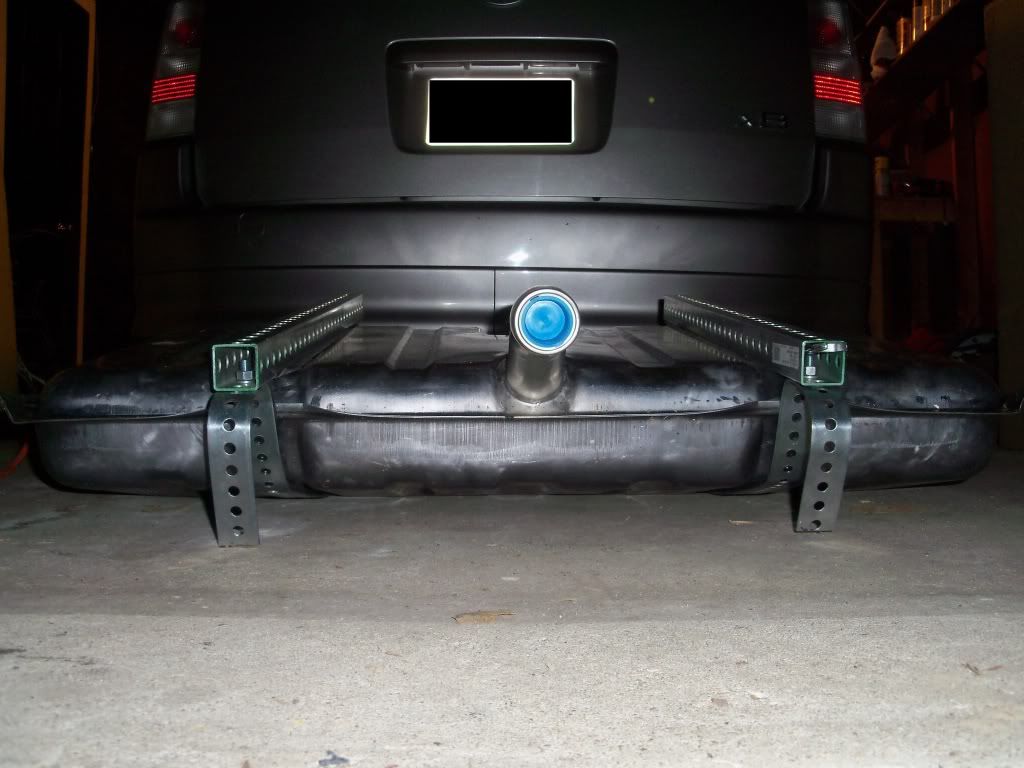 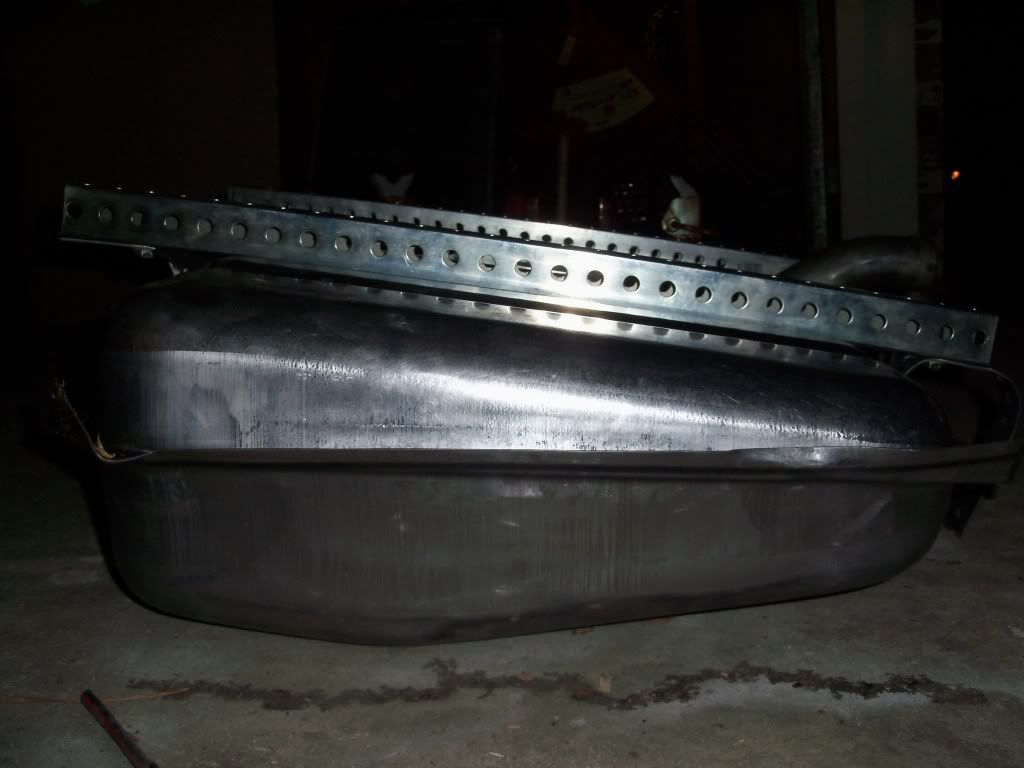 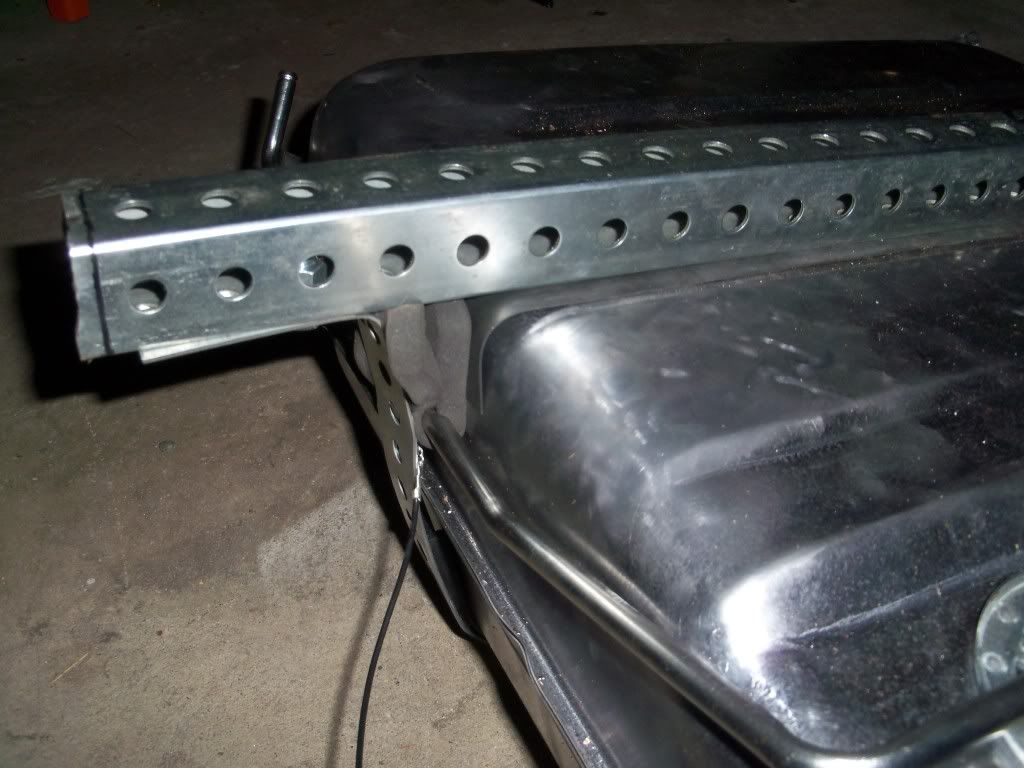 <Again take note and compare the difference in location of the bolts. 1 back in front (front being the filler neck side), 3 back in the rear. Last pic is of something I forgot to do originally, need that foam around the fuel line to protect it from the tank strap> The difference between the two is HUGE. Before I could move the brackets and straps slightly, but now with the adjustment made I literally cannot move it at all despite my buddy and I pulling on it in opposite directions. We tried to mount up the tank and a slight problem came up....I have no way to get the bolt back to where I need it to attach it to the front cross sill on the frame in the front because it's about halfway down the bracket. I'm going to try to tape the bolt onto a rod and try to bolt it on tomorrow but I'm honestly not all that optimistic about it being able to be done. The rear bolts aren't an issue at all since they're pretty much right at the end of the bracket. I have a backup plan just in case, I'll post it up if I end up having to do it. If you have a welder you could just weld a nut right onto the bracket and call it a day...but I don't have a welder. Oh yeah and if anyone is wondering about the bent down parts of the tank straps on the front of the tank...it's because I'm using them as handles to move the tank around easier by myself. You don't have to have them if you don't want them, but I plan on leaving them there once the install is finished. Tomorrow the tank will be mounted up come hell or high water. Depending on what time I get done cleaning and taking stuff over to storage I may even try to run the fuel line and get the wiring ready to go. Last edited by k1rodeoboater; 02-21-2011 at 01:07 AM. |
|
|
|
|
|
02-21-2011, 01:04 AM
|
#30 | |
|
Registered User
Join Date: Nov 2010
Location: Fayetteville NC
Posts: 752
|
Re: K1's build thread
Quote:

|
|
|
|
|
|
02-22-2011, 12:40 AM
|
#31 |
|
Registered User
Join Date: Nov 2010
Location: Fayetteville NC
Posts: 752
|
Re: K1's build thread
to tired...to lazy....click here...
http://67-72chevytrucks.com/vboard/s...d.php?t=448386 Tank install is DONE! 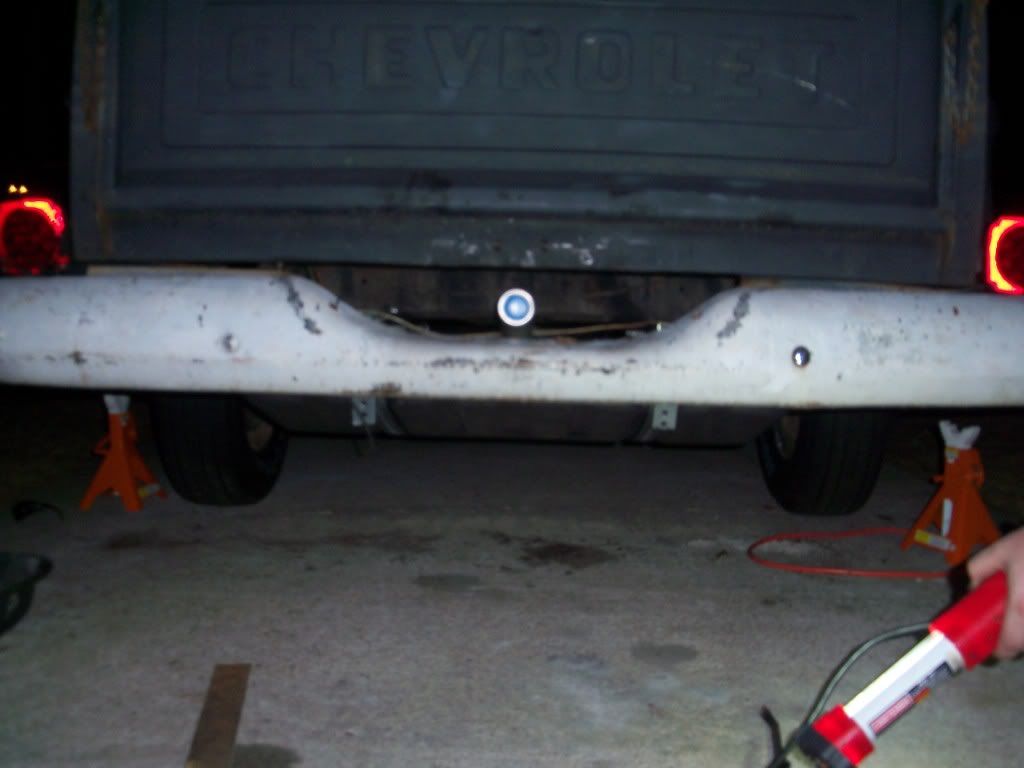 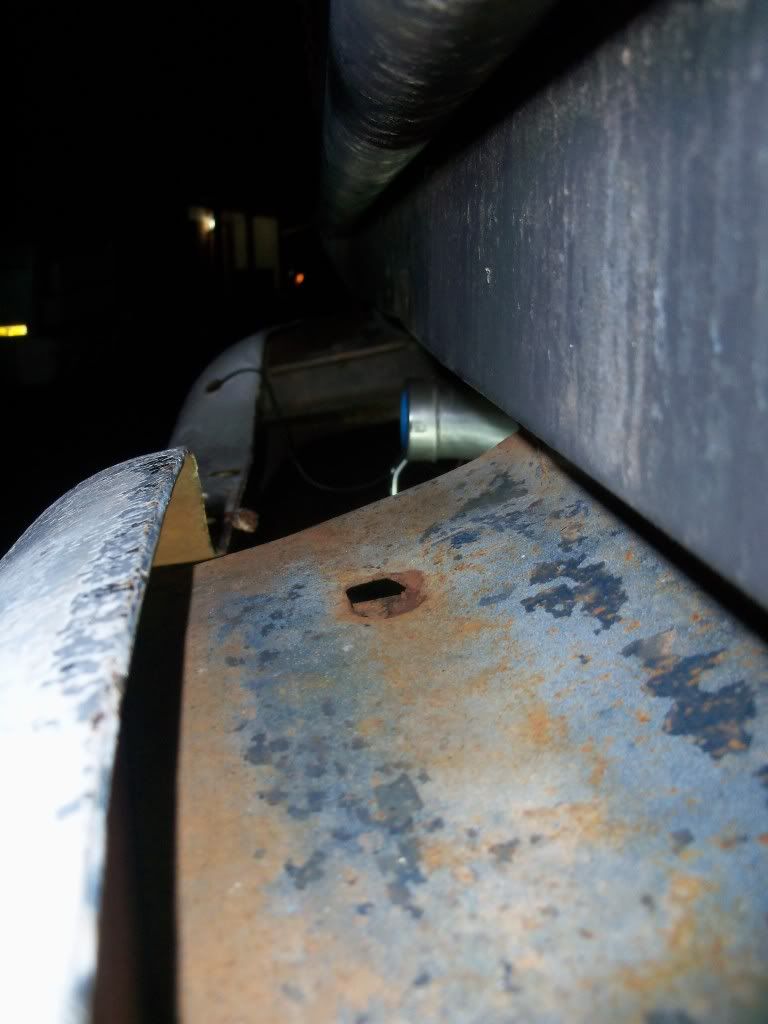 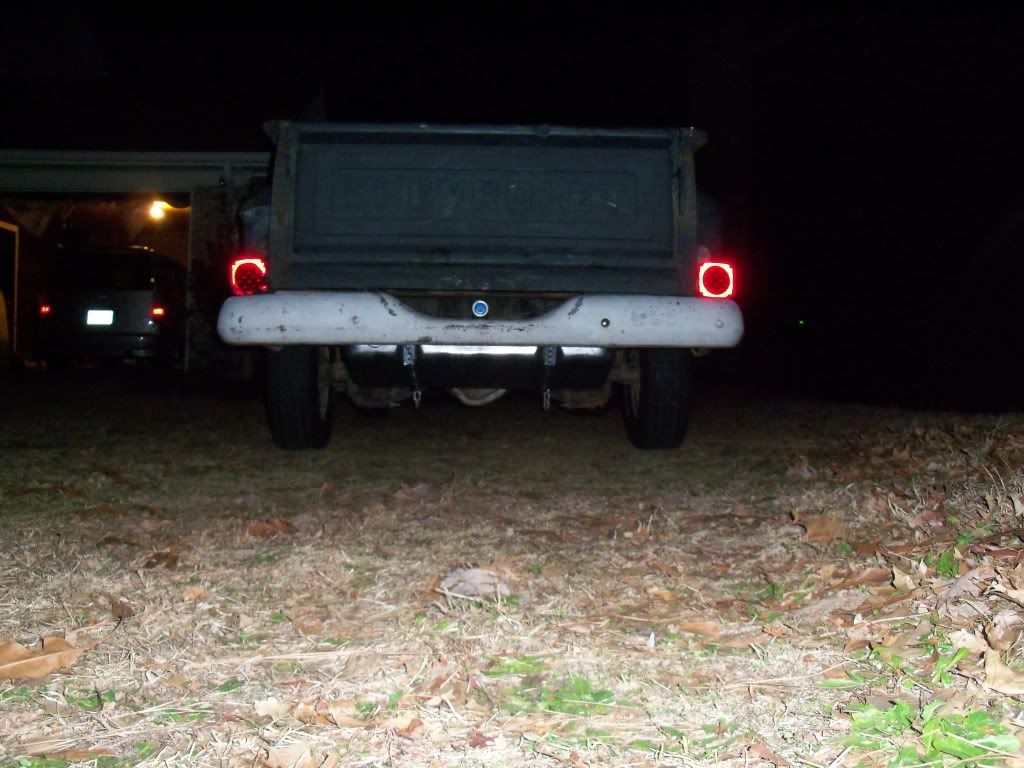
|
|
|
|
|
02-24-2011, 05:15 PM
|
#32 |
|
Registered User
Join Date: Dec 2010
Location: sanford nc
Posts: 499
|
Re: K1's build thread
hey , never mind, lol I found your build thread, truck looks like its in good shape.
__________________
  69 chevelle malibu, 64 C-10 shortbed 69 chevelle malibu, 64 C-10 shortbed
|
|
|
|
|
02-27-2011, 03:52 AM
|
#33 |
|
Registered User
Join Date: Nov 2010
Location: Fayetteville NC
Posts: 752
|
Re: K1's build thread
Here's a quick little update
Ran the rubber and hard fuel lines today. Got to get another length of rubber hose to connect from the hard line to the fuel pump. When I eventually take the bed off of the truck I'll have to redo the hard line from the tank. It's a PITA to try to run from underneath the truck. I got it bent in more or less the right places but I'm not happy with it. It'll work but it's not pretty. I ended up getting a can of rustolem rust converter the other day. My inner door panels were pretty rusty, especially the drivers side. I don't know how good this stuff is, but it's worth a shot. I stripped the pieces with aircraft stripper, scraped the junk off, sanded, degreased with brake cleaner, sprayed purple power rust converter on them, degreased again with simple green, and lastly sprayed with the rustoleum converter. The pitting damage on the drivers side is bad...really bad. Filler primer will probably help some of the pitting but the rest will need a skim of bondo to be smooth again. In all honesty, with the amount of flex that these door panels have I'm skeptical that bondo will work. Ended up sanding some of the surface rust off of the hood...then sanded more....and then said screw it and sanded the whole thing (with the exception of the front lip because it needs bodywork). I hit as much of the hood with some filler primer (spraycan, no compressor so it's the best I got). Some of the surface rust really was just that, but in a few places it was starting to pit. I know it's not the best or ideal, but it's better than what I've got that's not protecting the metal at all. My plan for tomorrow is to take off the cowls, sand, and spray them with primer to even things out a bit. I sprayed the hood with it on the truck so there's overspray on the cowls, wiper cover piece, and fenders (I don't care about them, they're getting replaced anyways) While I'm at it I will probably sand and primer the roof (it's exactly like the hood was) and maybe part of the cab. There's some crappy bondo work that needs to be fixed first though. Sometime during the week I'll start painting parts of the truck in addition to the replacement inner & outer fenders. I'm nervous about the roll on paint job but excited at the same time. I know the pluses and minuses to it, and given my constraints with equipment and budget it makes the most sense. I know it won't be anywhere near show quality, but if it protects the metal that's really all I care about. I'll strip the whole truck down and shoot it with real paint at a later date when I have more time and the space to do a frame off. I also had a bit of an "I'm in way over my head" moment today. Just seeing how much work is left on the truck had me wondering if it's possible to actually do this. Just the basic rundown Body fix hood dents and rust pinholes fix door dents, mirror holes and lower door skin rust cab rust repair (floors, rear supports, rockers, corners, kicks (and reattach floor where it's separated) fix rear fender (cut and splice) paint Mechanical Brake conversion Hook up tank Replace carrier bearing Replace shocks (springs too maybe) Flush/clean out engine (changed the PCV grommet and saw a bunch of sludge in the valve cover...not sure if this will necessitate engine tear down or not) What has me worried is the engine right now. The sludge I saw is really disconcerting. I can get the stuff from the auto store to "remove" sludge but I question how useful that stuff really is. The auto hobby shop on post has a "engine flush" that they charge $50 for and it basically pumps a solvent/detergent through your engine to clean it out. I'm not sure if that will do more damage than good or if it's just a load of crap. I also really need to get cracking on learning how to weld ASAP. I think that's part of the "I'm in over my head" feeling I'm getting. The sooner I can start the rust repair the better. I'm going to try to get a tank of Argon this week and a sheet of 18ga steel to start practicing running welds on. Once I get a feel for running beads then I'll try sticking stuff together. Once I feel confident with that I think I'm going to try to fix the pinholes in the front hood lip first before they get any worse. Unfortunately none of them are accessible from the rear so I'll just have to do the best I can with a wire wheel and fill the hole with a weld, grind flush, prime & paint. Next on the hit list will likely be the cab repair, I figure if I have ugly welds on the floorboards it won't matter since no one will see them. I also hope that by the time I finish the floor repair I'll have gotten a bit better so that my visible welds won't be quite so atrocious. I'll save the visible stuff for last (cab corner rear fender, door skin repair/replacement) in hopes that I've improved a bit from when I first started. I know this will not be the first time I have this feeling...and ultimately in the end you just gotta do it. Once you do the confidence boost you get will help propel you through the next hurdle. |
|
|
|
|
02-27-2011, 10:47 AM
|
#34 |
|
Registered User
 Join Date: Nov 2009
Location: Longview, Texas
Posts: 775
|
Re: K1's build thread
I apologize if i missed it somewhere but, can you tell me what year model Camaro you got the tank from? That looks like something i might be interested in for my 64.
Thanks |
|
|
|
|
02-27-2011, 11:12 AM
|
#35 |
|
Registered User
Join Date: Apr 2010
Location: Billings, MT
Posts: 417
|
Re: K1's build thread
It can be so easy to get overwhelmed. It happens to me pretty regularly. I like to find something small that I can complete easily, and after it's done I feel better. Just try to let the little victories carry you through. It looks like you have the right mindset, and I've really enjoyed reading your thread. Great job with the gas tank, and keep up the good work!
|
|
|
|
|
02-27-2011, 12:01 PM
|
#36 | |
|
Registered User
Join Date: Nov 2010
Location: Fayetteville NC
Posts: 752
|
Re: K1's build thread
Quote:
|
|
|
|
|
|
02-27-2011, 12:07 PM
|
#37 | |
|
Registered User
Join Date: Nov 2010
Location: Fayetteville NC
Posts: 752
|
Re: K1's build thread
Quote:
I'm thinking I may nickname this project "WTF have I gotten myself into" |
|
|
|
|
|
02-27-2011, 08:00 PM
|
#38 |
|
Registered User
Join Date: Nov 2010
Location: Fayetteville NC
Posts: 752
|
Re: K1's build thread
Sunday update...
My friend Justin and I went and worked on my truck from about 1300 till 1730 Before then we did a bunch of running around, namely I had to go to harbor freight to get some throw away supplies and a few things that were on sale. Love or hate that place sometimes they've got some good stuff. I took a look at their welding cart, and I'm probably going to get one eventually. I'm going to try to get a bottle of Argon sometime this week too so I can start practicing welding. Anyways here's what we did
Not a whole lot really but it took us a little while to do all the sanding and spraying. He also hit the door panels with another coat of the rust converter. Tomorrow I'll go back over and hit them with some filler primer. Anyways here's the pics. 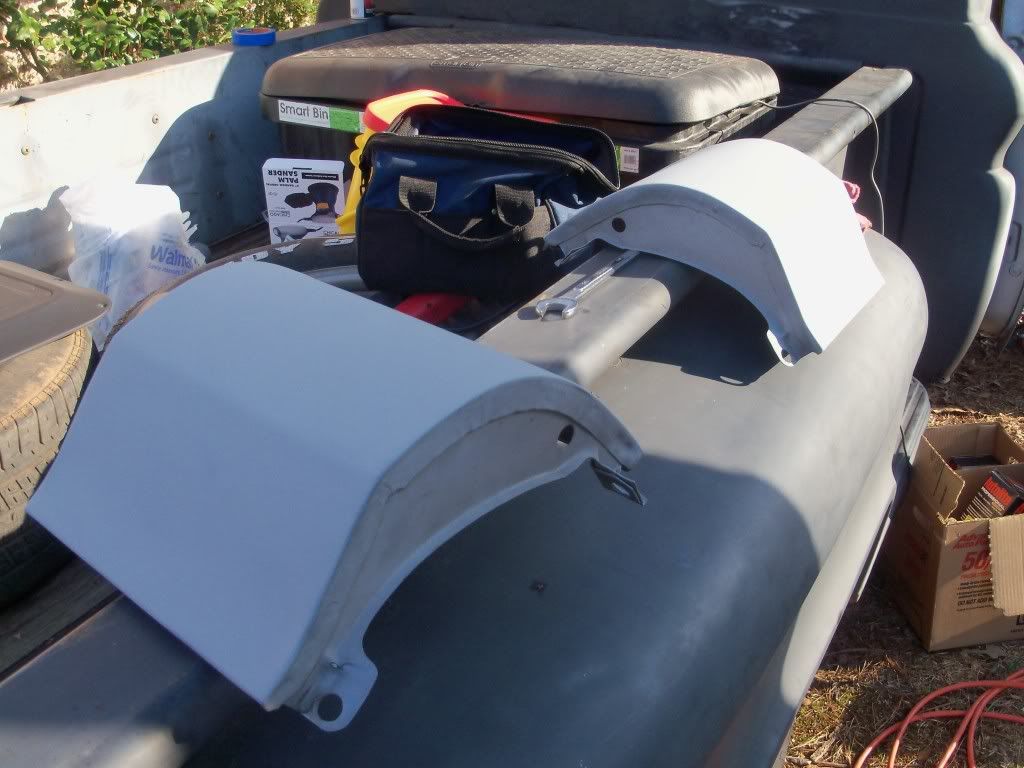  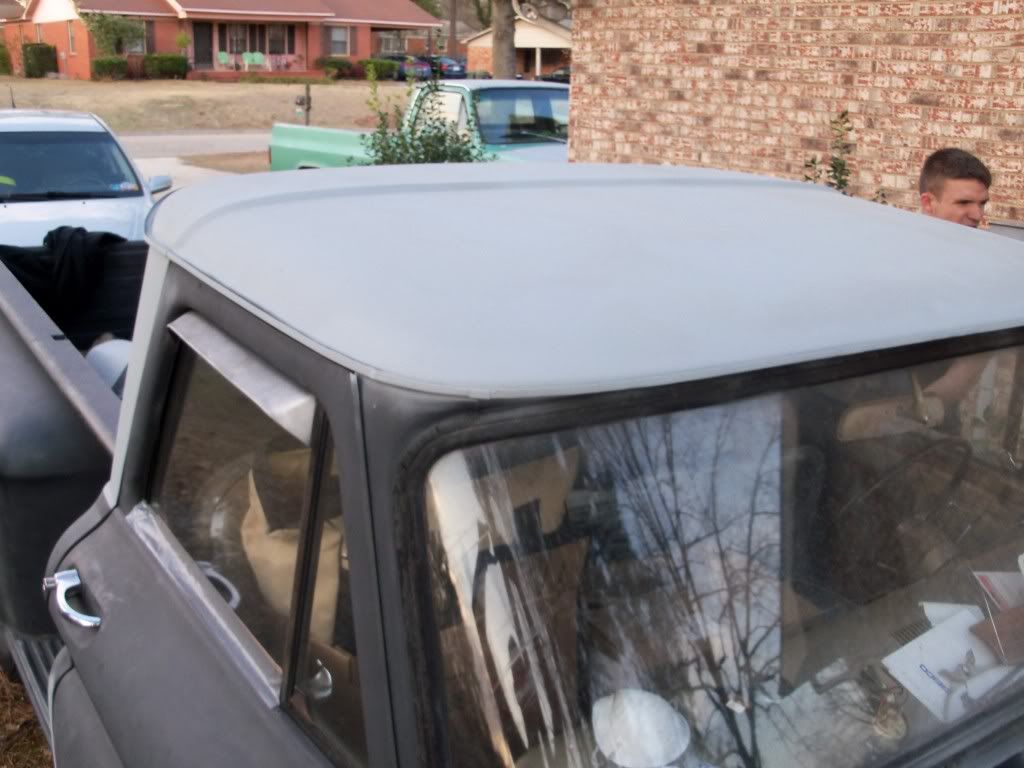 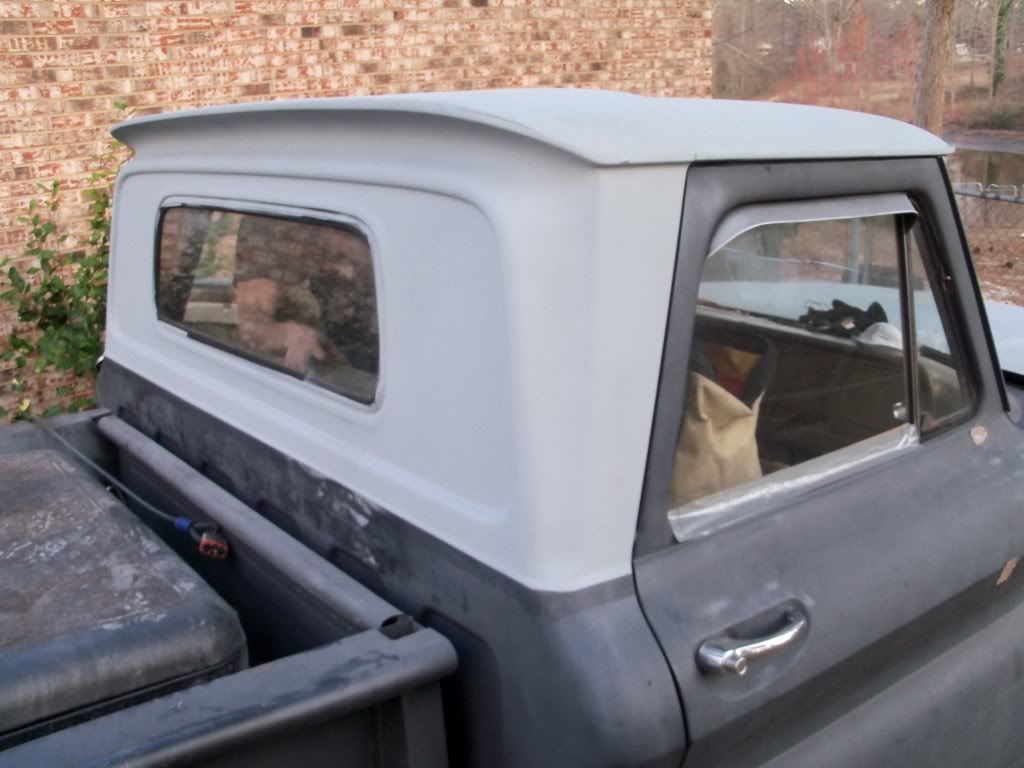 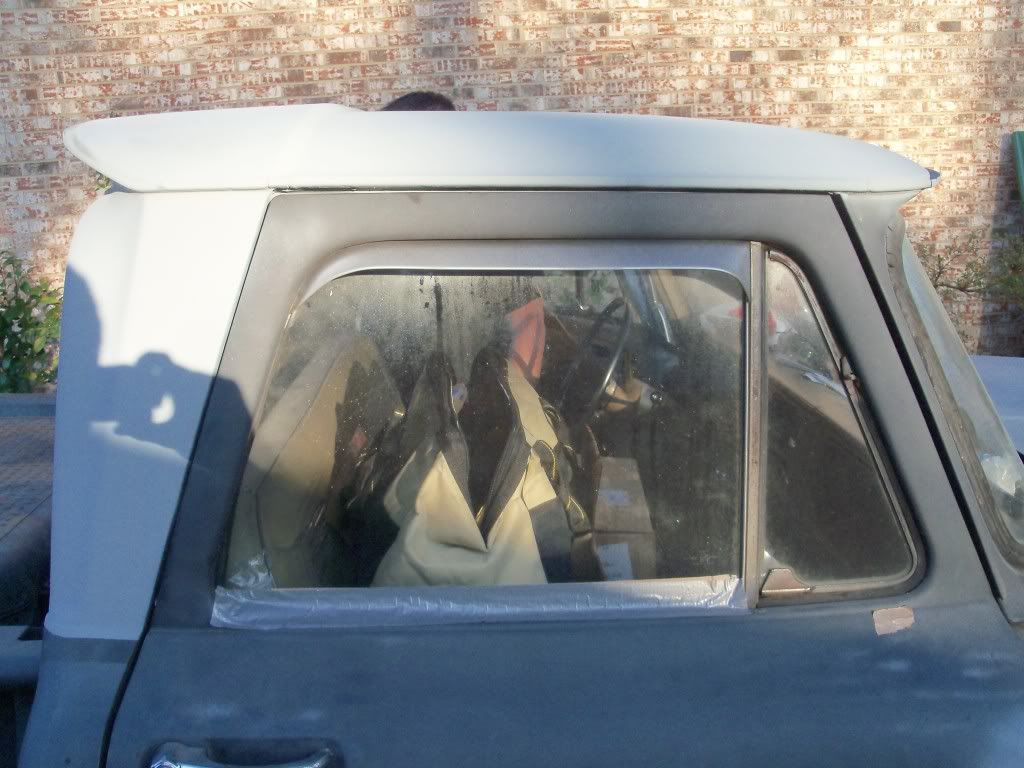 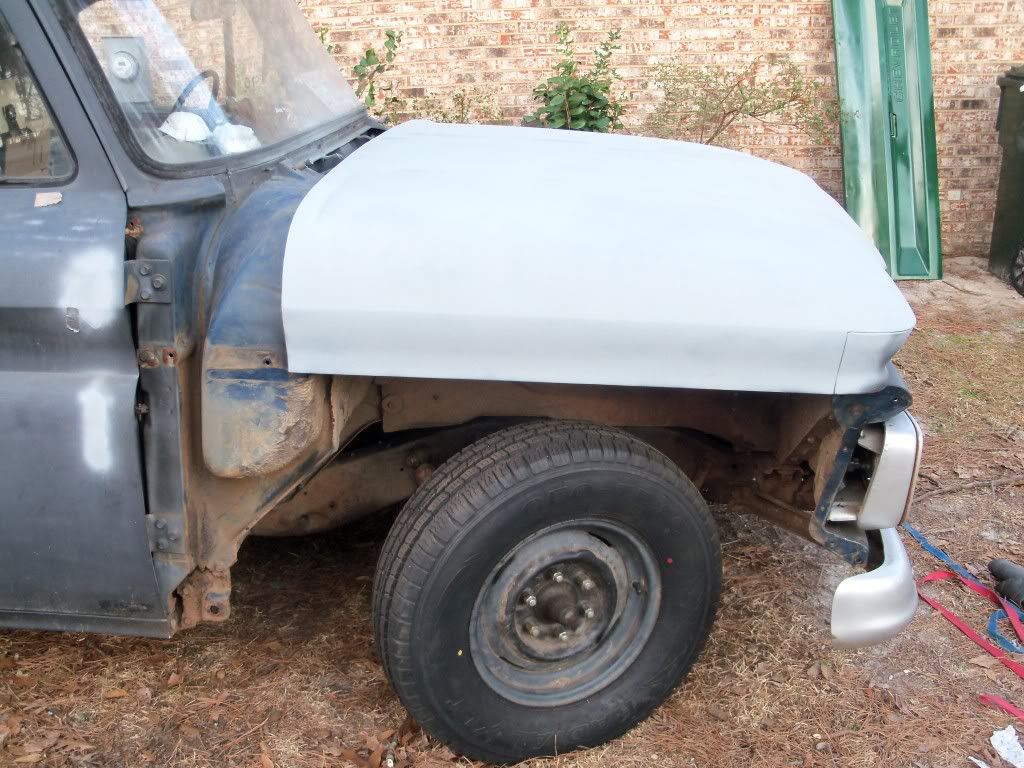 Now here's a better look at the rust damage on the passenger side...I'm gonna have to do a little metal fabrication work I think.... outside... 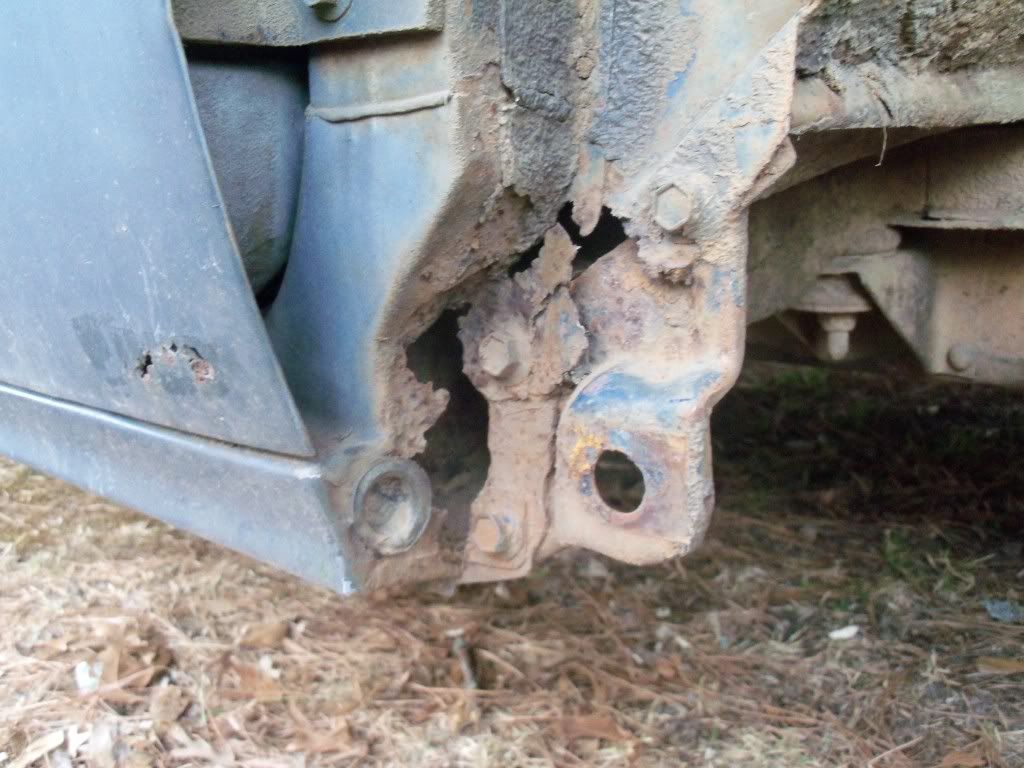 inside... 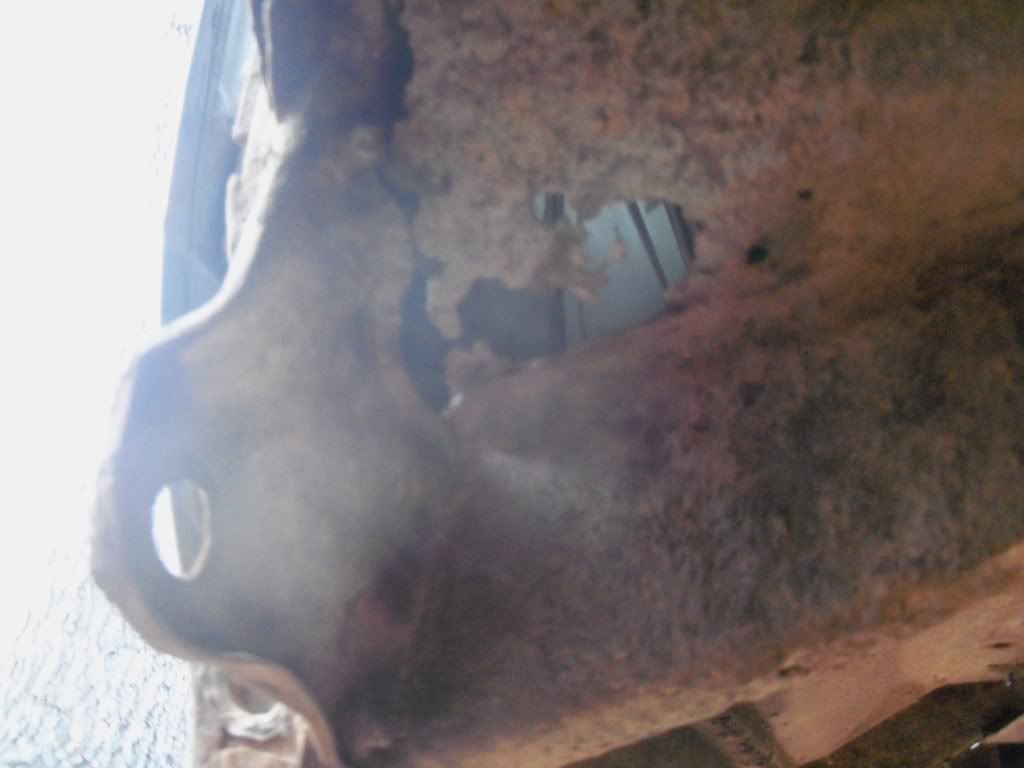 bottom... 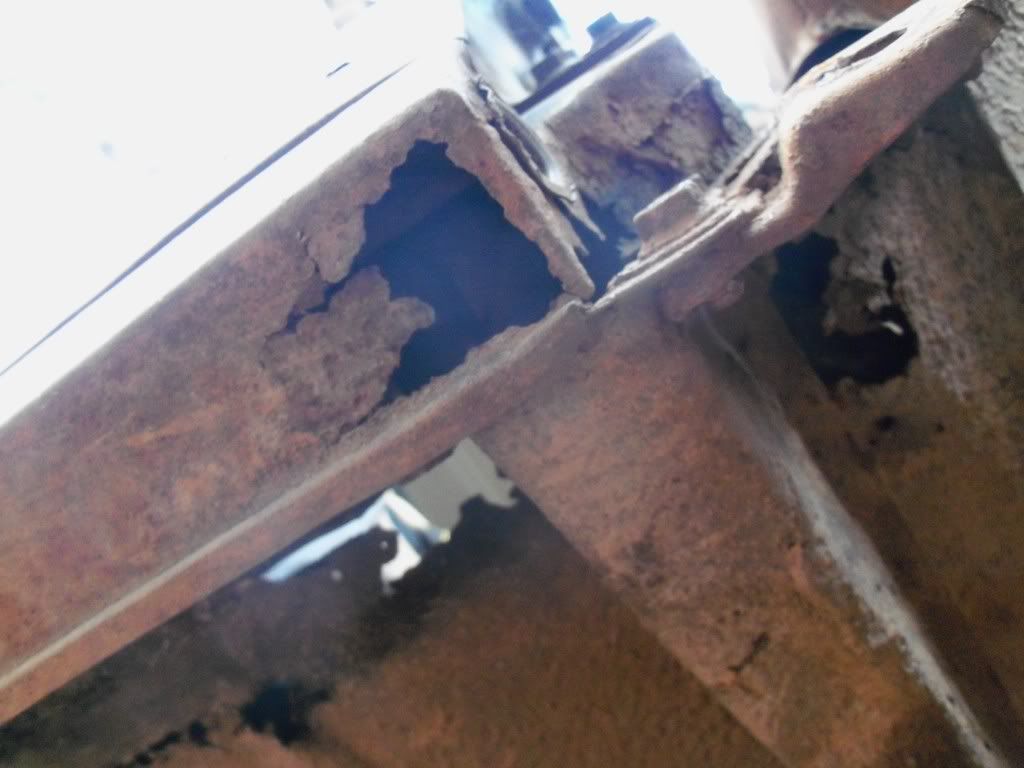 looks like I will need the following just for the front...
|
|
|
|
|
02-27-2011, 08:23 PM
|
#39 |
|
Registered User
Join Date: Dec 2010
Location: sanford nc
Posts: 499
|
Re: K1's build thread
hey, Your primed peices look good to me. I wanted to let you know before you get the argon. Argon is for aluminum. You need to get the unimix, its a blend of argon and co2. Be prepared when you go to get this stuff, its not cheap. I got my small bottle from cruco here in sanford and if you dont have a bottle to refill you have to pay the rental fee for the bottle. So my bottle was 180.00$$ and thats the small bottle about 2 1/2 ft tall and about 5 inches around. I have the hobart handler 140 mig welder from northern tool. Its a pretty good welder (IMO). Good luck and let me know if you find the unimix cheaper around here.
__________________
69 chevelle malibu, 64 C-10 shortbed
|
|
|
|
|
02-27-2011, 10:31 PM
|
#40 | |
|
Registered User
Join Date: Nov 2009
Location: Longview, Texas
Posts: 775
|
Re: K1's build thread
Quote:
|
|
|
|
|
|
02-28-2011, 12:32 AM
|
#41 | |
|
Registered User
Join Date: Nov 2010
Location: Fayetteville NC
Posts: 752
|
Re: K1's build thread
Quote:
I have a feeling I may wind up getting a 20cu ft tank to keep around as a spare/reserve tank. That way I could use my main tank down to empty and switch over to the reserve to be able to keep working in case the welding supply place isn't still open. I know they're not super cost effective but the convenience is a plus because I know once I get in a groove I'll not want to stop. That said I do think a 90cu ft tank (which I was told was about 3hrs of arc time) will last me quite a long while since my understanding of sheet metal repair is that you're dot welding it and not running beads |
|
|
|
|
|
02-28-2011, 01:43 AM
|
#42 | |
|
VA72C10
 Join Date: Mar 2008
Location: Midlothian, VA
Posts: 25,269
|
Re: K1's build thread
I'd check craigslist or your local trading post for a cheap tank....a lot of deals out there right now with people out of work needing money....
...a friend picked up an extra 20gal just filled for I think $25. He uses that when his other runs out like you said. Quote:
__________________
Looking for a 67-72 swb or blazer project in or around VA. 
|
|
|
|
|
|
02-28-2011, 04:30 PM
|
#43 |
|
Registered User
Join Date: Dec 2010
Location: sanford nc
Posts: 499
|
Re: K1's build thread
hey guys, I got you beat on that deal. My father-in-law called me while at a yard sale last summer and said would you be interested in this bottle of gas. I said maybe, whats in it, he read the lable and said unimix, Then when he said she wants 5 dollars for it I said OH YEAH, so i got a half full bottle, The big bottle too, for the big 5 dollars, now thats a deal, lol
__________________
69 chevelle malibu, 64 C-10 shortbed
|
|
|
|
|
02-28-2011, 05:32 PM
|
#44 |
|
Registered User
Join Date: Nov 2010
Location: Fayetteville NC
Posts: 752
|
Re: K1's build thread
...damn that is a heck of a deal!!!
I called the gas place again...they keep telling me different prices every time I call back. What kinda BS is that??? They also told me initially that they refill your tank, but now they're telling me they tank swap. Seems like they don't know there posterior from their ginglymus. If I want to get a small tank for a spare I'm probably gonna pick up a 20cu ft cylinder from Harbor Freight with a 20% off coupon, it's a lot cheaper than what either gas place sells them for. I'd imagine that a 20cu ft tank for sheetmetal work would probably last a pretty long time. I'm estimating that the estimated hour of arc time will probably I also discovered my trucks engine very well may be original. The casting number on the block is 3877178 which is a 230 or 250 from 62-72 from any one of these Chevrolet / Buick / Oldsmobile / Pontiac / GMC....so pretty much it's probably original. I'm ordering my rims today too....just got to figure out which lug nuts I need. Last edited by k1rodeoboater; 02-28-2011 at 05:36 PM. |
|
|
|
|
03-01-2011, 06:41 PM
|
#45 |
|
Registered User
Join Date: Nov 2010
Location: Fayetteville NC
Posts: 752
|
Re: K1's build thread
Sprayed the inner door panels with primer, the inside of the one cowl with primer (it was a bit rusty in there), and touched up some of the thin spots on the roof.
Aside from that I picked up some .024 Hobart welding wire, some more .024 tips, some nozel gel, and the paint I'm going to use for my truck. I'm not gonna say what color though...you all will have to wait and see.... |
|
|
|
|
03-03-2011, 01:28 AM
|
#46 |
|
Registered User
Join Date: Nov 2010
Location: Fayetteville NC
Posts: 752
|
Re: K1's build thread
I ordered my rims, lugs, and caps today, the total came to $258.40. I'm just waiting to get those and the parts from CPP I think. I'll do an inventory this weekend to see what all I'm missing if anything. As soon as the rims arrive I need to get my tires swapped over.
I also picked up the two outer fenders, inner fenders, a drivers inner door panel (that's the one on my truck that is really badly pitted), and tail light brackets tonight. I should have the tail lights themselves, turn signal switch, lock assemblies, and fender/inner fender gaskets at the end of next week. That will give me plenty of stuff to do on the truck for a while. Tomorrow the panels will get dropped off at my storage unit sometime during the day. I'll hold off till prepping and spraying primer till Friday though, I've got an appointment that evening so I won't have a whole lot of free time. I'll probably run down to TSC and pick up some rattle cans of the colors I need, and a small sheet of 18ga or 16ga steel to practice welding on. I'll swing by Lowes on my way out to get some sandpaper. I also want to try to pick up a tank of Argon from the welding supply place across town. And lastly after my appointment a trip to Harbor Freight is in order to pick up some consumable items as well as a pair of sawhorses and a welding cart. Friday I'll probably enlist the help of my friend Justin again to get the fenders prepped and primered. I'll try to do a little bit of body filler skimming on the cab roof and door panels so that Saturday we can start painting. That should probably carry us pretty well into night. If not we'll remove the one remaining front fender and rear fenders off of the bed and perhaps start prepping the bedsides and fenders. I have a sneaking suspicion I'm going to need to cut the bolts off so it'll take longer if that's the case. We'll probably work as long as we can manage for. Saturday will hopefully be paint day. I'm planning on getting up around 0700 and heading over to my storage unit so I can roll a coat of paint onto the parts by 0800. I'll try to get the other coat down later that day or in the evening. After I finish rolling them I'll head back over to my truck and will get the fenders off of the bedsides, if I haven't already, and start fixing/prepping the bedsides. Around lunch time I figure Justin will be awake so I'll go get him and we'll go back to prepping the bedsides and the upper cab half. I'd like to spray a few coats of white gloss paint on the upper half of the cab if possible. I figure it's already primered and ready to go, why not. Sunday will be more wetsanding and painting over at my storage unit in the morning and evening, and continuing with prepping the bedsides, fenders, and steps. I may try to patch the drivers side rear fender while Justin does some more prep work. If I can get that welded up I'd be super stoked and consider the day complete at that point, I'm not kidding either since it'll really really improve the look of the truck not having a mashed up rear fender. All of my plans are pretty flexible. I just like to have a goal to shoot for, for each day so it keeps me on track and focused for the weekend. Hopefully I'll have some good progress/teardown shots for you guys. From then on out my plan will be to roll 1 to 2 coats of paint on my storage unit parts a day during the weekdays. If what I've read about the roll on job is correct I should have them fully painted and done by next weekend. Everything I've read has said anywhere from 5 to 10 coats of paint for complete coverage. I'll be taking coat by coat pictures as well as before and after wet sanding pictures for you guys and for my records.
__________________
1966 C10 Long step build on a budget http://67-72chevytrucks.com/vboard/s...d.php?t=445201 no garage, no shop, limited storage space and tools....no problem. |
|
|
|
|
03-04-2011, 11:16 AM
|
#47 |
|
Registered User
Join Date: Nov 2010
Location: Fayetteville NC
Posts: 752
|
Re: K1's build thread
Rims will be here tomorrow much to my surprise....Summit sure does ship fast. I'm going to change up my plans a bit and try to get my tires swapped onto them on Sunday over at the base auto shop. I'm hoping my parts from CPP will be here next week as well. I'm going to do a quick inventory while I'm over at my storage unit this afternoon.
I didn't get the tank of Argon yesterday. I'm going to put off getting it for a little while longer so my funds can play catchup. I don't really want to dip into my savings, I'd rather keep this all on my bi-monthly paychecks. I'll pick the tank up after I go on leave.
__________________
1966 C10 Long step build on a budget http://67-72chevytrucks.com/vboard/s...d.php?t=445201 no garage, no shop, limited storage space and tools....no problem. |
|
|
|
|
03-06-2011, 02:28 AM
|
#48 |
|
Registered User
Join Date: Nov 2010
Location: Fayetteville NC
Posts: 752
|
Re: K1's build thread
Yesterday...
Went over to my buddy's house after work and Justin and I removed drivers side rear fender, what a PITA. Ended up having to cut off all be 4 of the screws because the heads either egged out or we couldn't get enough purchase on them with the screwdriver. Surprisingly I managed to cut them off only nicking the bedside once. Unfortunately just removing the fender took us a little over 2 hours and close to 8PM. That's my cutoff for using power tools. Not because of city ordinances, or that anyone has complained about the noise, I just figure out of courtesy at 8PM you should be winding down or doing stuff that doesn't make a whole lot of noise. We cleaned up our work area, grabbed what we needed for the next project, and headed to my storage unit. There we prepped and primered the inner and outer fenders, probably taking another hour or so to do it all. I just sprayed the "show" sides with primer. I will more than likely roll/spray bed liner on the insides of them. After carefully putting them away into my little storage unit we packed it up and called it a night. Not a very productive evening but we got the parts primered which was really what I primarily wanted to get done. Today..... Woke up early on a weekend for once. Justin and I went over to the storage unit to retrieve the parts we primered last night. Much to my surprise they came out pretty dang good for rattle can primer. I've gotten better with the spray cans from why I did the hood and cab. Here's a pic of just the outers "fresh" from my storage unit 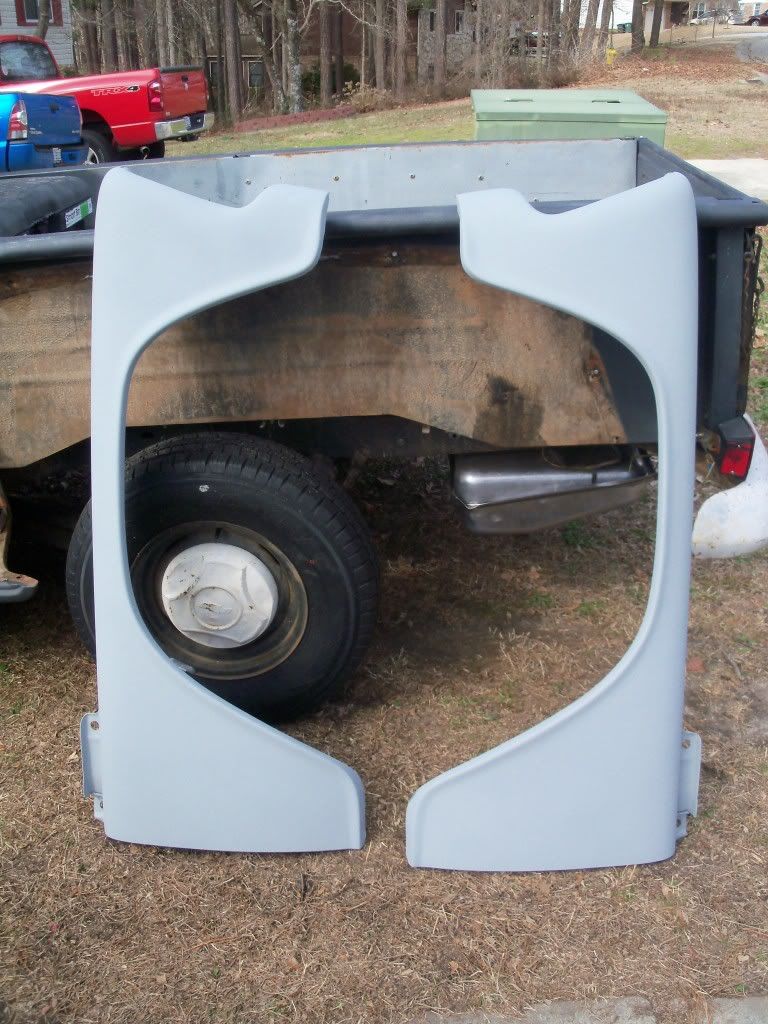 I couldn't get everything loaded into my car, so while I made another trip to the storage unit a few minutes away Justin started assembling a pair of 1000lb each sawhorses I got from Harbor Freight for $25. They're definitely not the best sawhorses in the world, nor would I trust them with anywhere near that weight, but all I need is a piece of 1/4" steel to bolt to it and I've got my self a decent mobile workbench/welding table. Much like anything you get at HF the directions sucked and the picture on the box was actually a better reference point for assembly. As Justin finished up with the sawhorses I stirred up the paint and got it mixed with the mineral spirits. Once he was done we setup everything and scuffed the primered fenders with green Scothbrite pads and wiped them down with damp tack cloths. I tried not to think to much about what I was about to do and started rolling. Here's what the first coat looked like 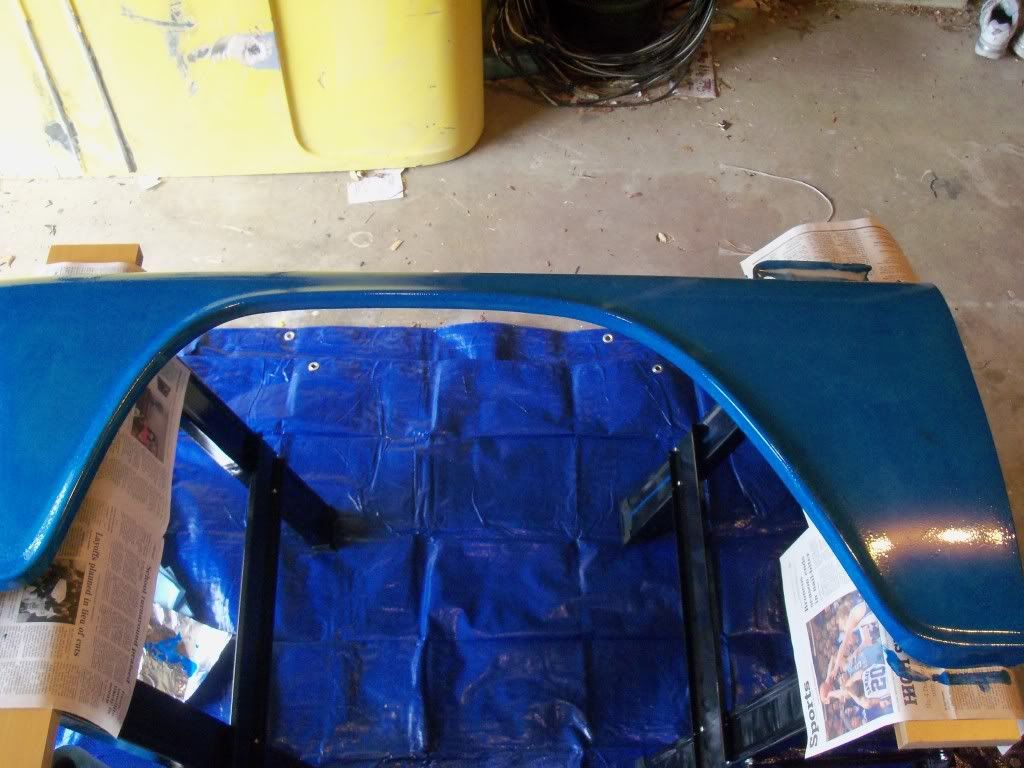 Looks ok....until you get a closer shot... 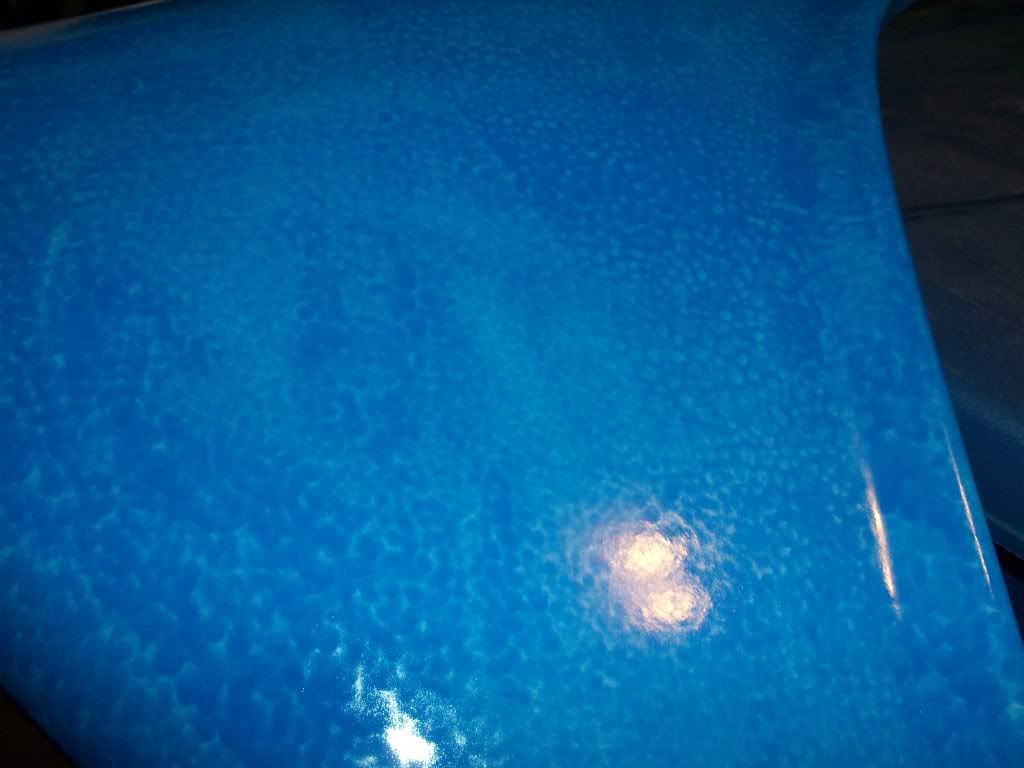 Though after it dried a little bit more this is what it REALLY looked like....not gonna lie..I gagged when I saw it 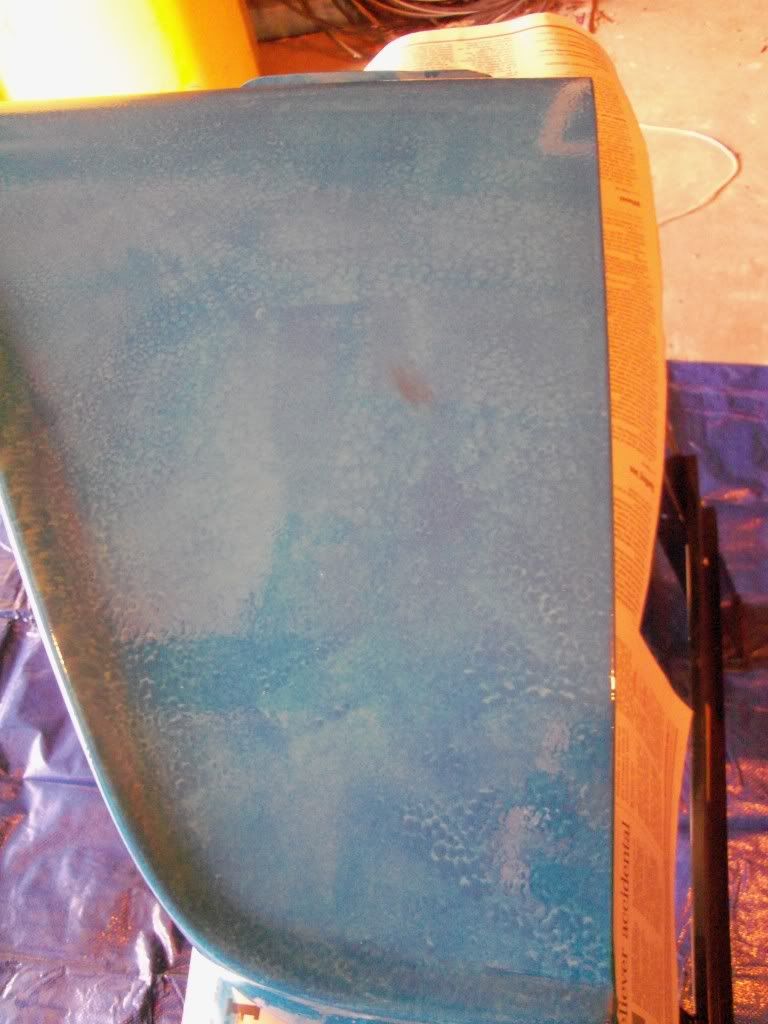 Looks like crap don't it. I wasn't happy at all with the color, it was a turquoise or light/baby blue color that I really didn't care for. At this point I shrugged my shoulders and said, "to late now" and rolled the rest of the panels (except the inners, wasn't sure I wanted to do them). Lots and lots and lots of bubbles in the paint and it in general laid down like crap. As I contemplated how much of an idiot I am for wanting to be cheap and do a roll on paint job "for the experience" we got back to work. First thing we did was remove the drivers step, mostly because I knew that if we didn't I'd forget it wasn't attach and try to stand on it to grab something out of the bed. Justin got that off while I took a 80grit flap disc to where the fender mounted to clean off all the gunk/paint/rust. Much to my surprise the rust damage wasn't that bad, some pitting but nothing to bad. Next off came the drivers side front fender....and that also proved to be a PITA. The passenger side fender wasn't all that easy but the drivers side had more petrified dirt caked up in there and some damage on the front top edge made reaching the front bolt nigh impossible. I tried for about an hour succeding only in skinning up my knuckles and rounding the bolt a bit. Getting frustrated and pissed off I reverted to my caveman like instincts and got a BFH and chisel out. I ended up splitting the front of the fender apart just so I could get my ratchet in there to take the bolt off. In all honesty it was probably the best way to get access to it. The dent in the fender made it impossible to fit the ratchet in from the inside, the panel wasn't salvageable, and if I kept doing what I was doing I would have for sure rounded the bolt head completely. The next victim was the passenger rear fender and step. Interestingly this side of the truck didn't have the screws denting the bedside near as much as the drivers side. Possibly because there were washers on the other side of the bedside keeping it from bowing out. We were able to get all but 3 of the screws out, so this fender came off a lot easier. After lunch I decided to examine the drivers rear fender again and compare it with the donor piece I want to patch onto it....lets just say if it works that'd be sweet. If not I'm only out $15....and my gut says I'll be out $15 at this point. I determined where the worst damage on my original fender was and I cut it off just before that point. I had marked another area on the fender where I thought would be a good place to splice them together, and the area I cut it at left me with about a foot of material to work with till I hit that point. Normally I'd wait on cutting it till I'm ready to weld, but I need to get some of my crap out of my buddy's garage. I've been storing far to many random parts and things at his place as it is. I'm trying to condense stuff down in size as well as compile things to go to the scrapper. Of course me being a bit scatter brained and going all over the place it didn't dawn on me till much later that I hadn't cleaned up the passenger bedside where the fender sat....so I took the flap disc to it and found this... 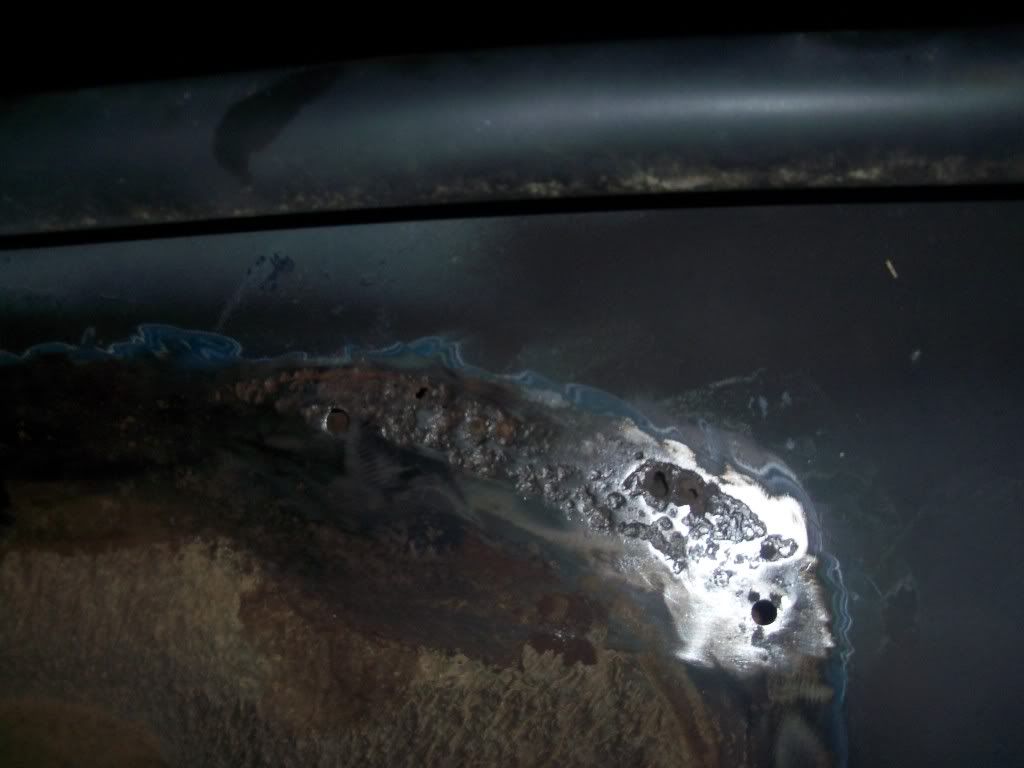 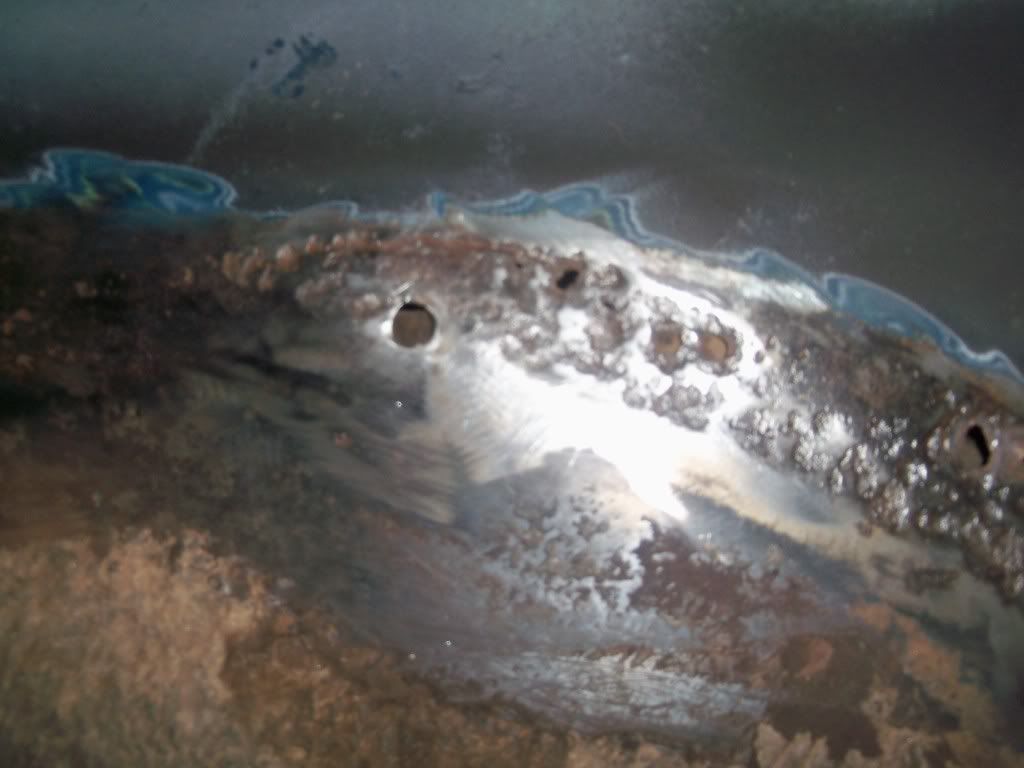 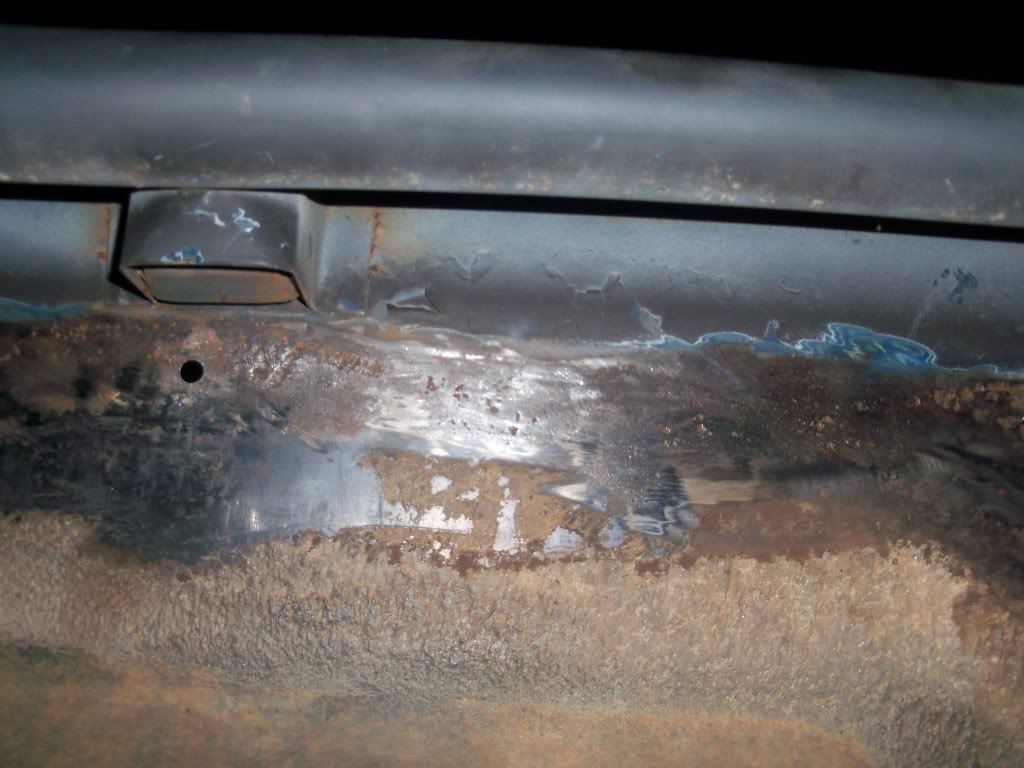 looks like I'm going to be cutting and patching my bedside too...that rust has eaten or severely weakened the metal enough to the point that I was able to push a scratch awl or screwdriver through it in places. Those are the 3 really bad spots. There is surface rust in other places but I got almost all of it off with that flap disc and a wire wheel. Just after sundown Justin and I pulled the rear bumper off. I actually ended up shearing off the nuts on the carriage bolts trying to get the brackets off. Oh well, I have replacements anyways. Where the carriage bolts went the bumper had been sucked in, so I remedied that with a few blows from a 3lb sledgehammer. Once freed from the mounting brackets I started stripping the paint off with the grinder and flap disc. I got about 3/4 of the way and had to stop due to being in to much pain so Justin took over to finish the job. Here's a pic...because everyone loves pictures  You can't see it in that picture but he's wearing eye pro and a mask. Even wearing the mask I know I sucked in some of the paint dust...hope it doesn't affect my kids if I ever have any someday. Fedex came and delivered my order from Summit Racing around 5PM. I didn't bother with opening the boxes till the end of the day. I ordered a set of rims (and it dawned on me this is actually my first set of rims...ever), a set of 24 chrome lug nuts with valve stems and 4 wheel locks, and lastly a set of 3" chrome center caps. here's a quick teaser....ignore the thrush and other box, they're empty. 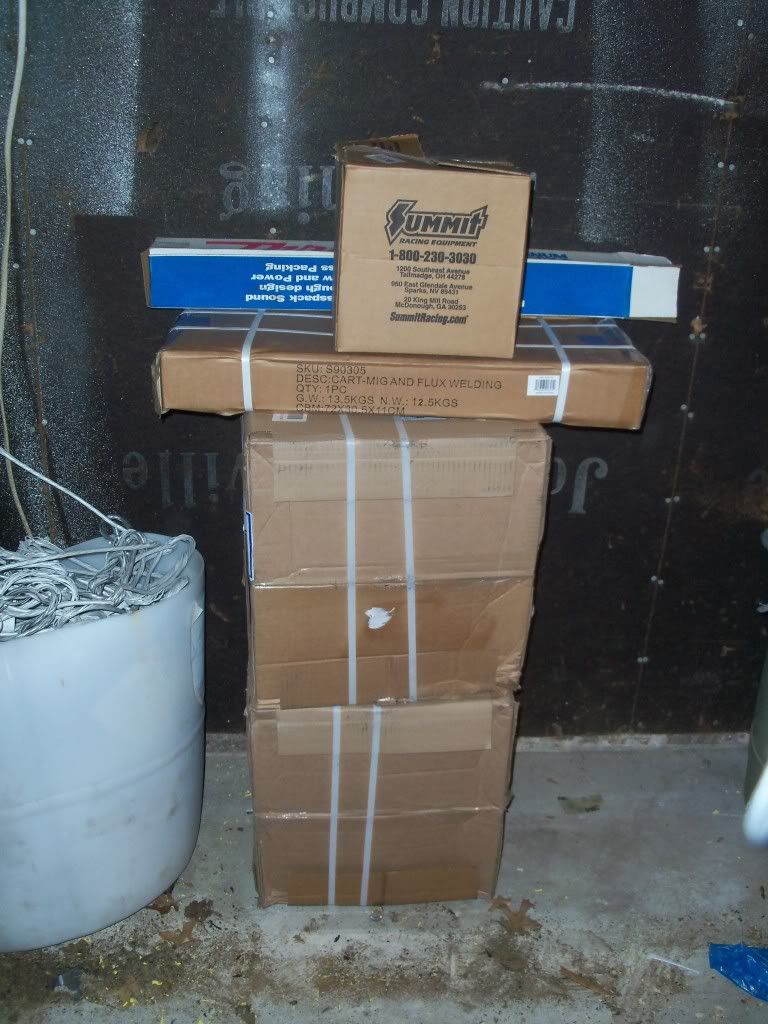 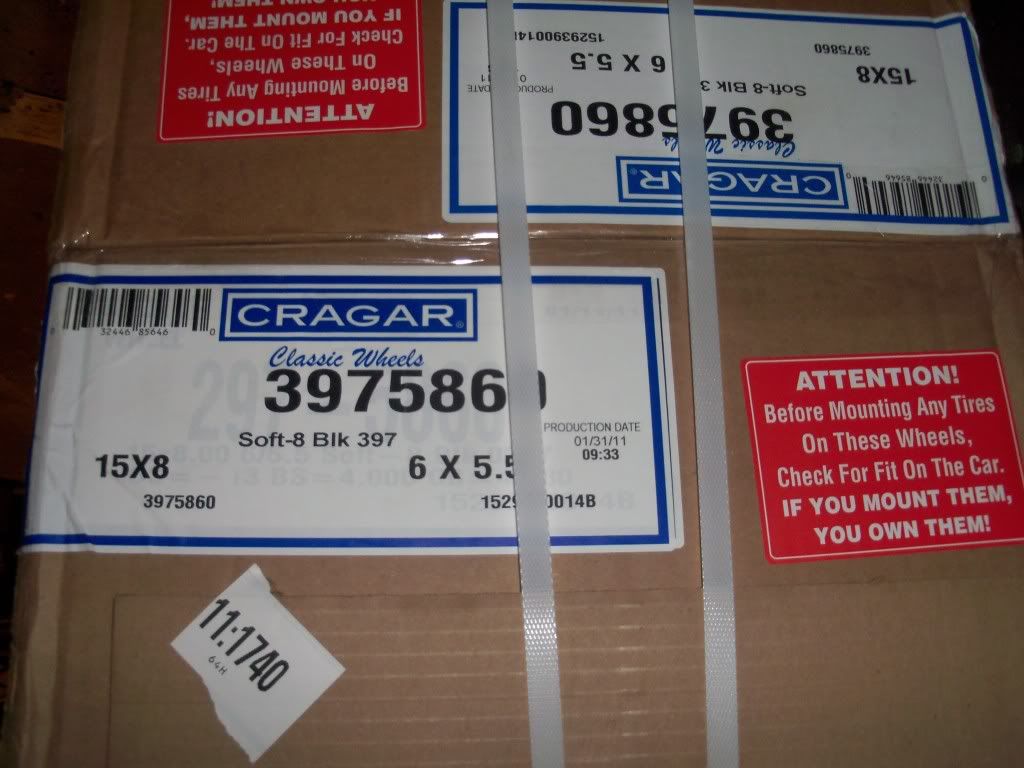 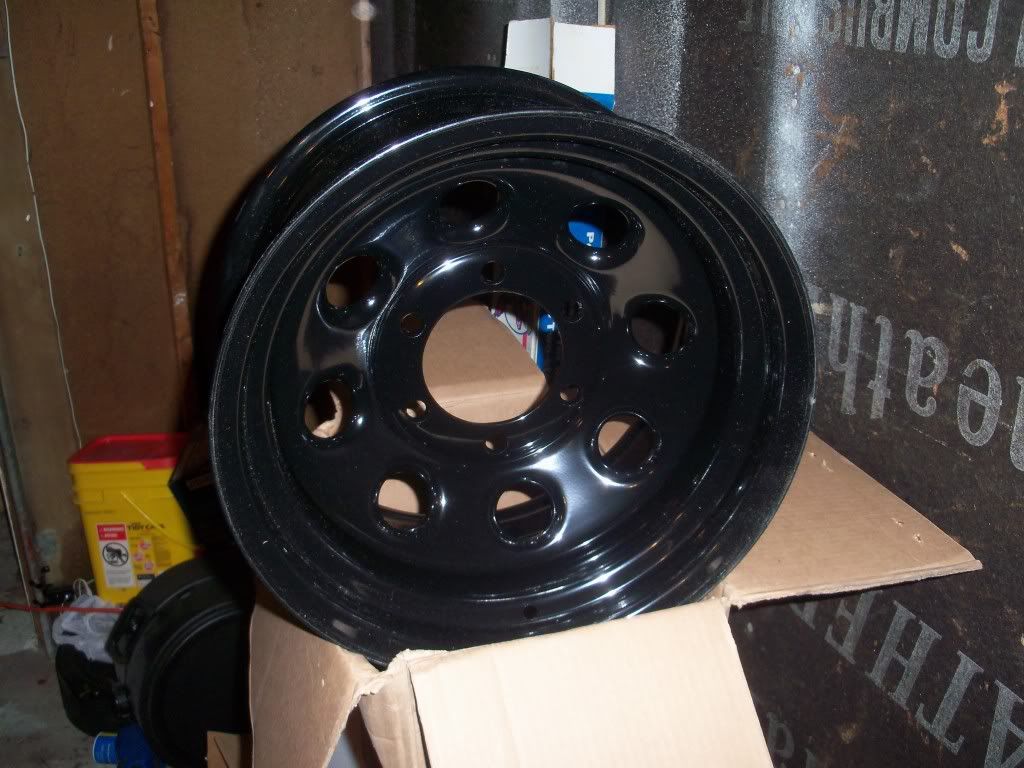 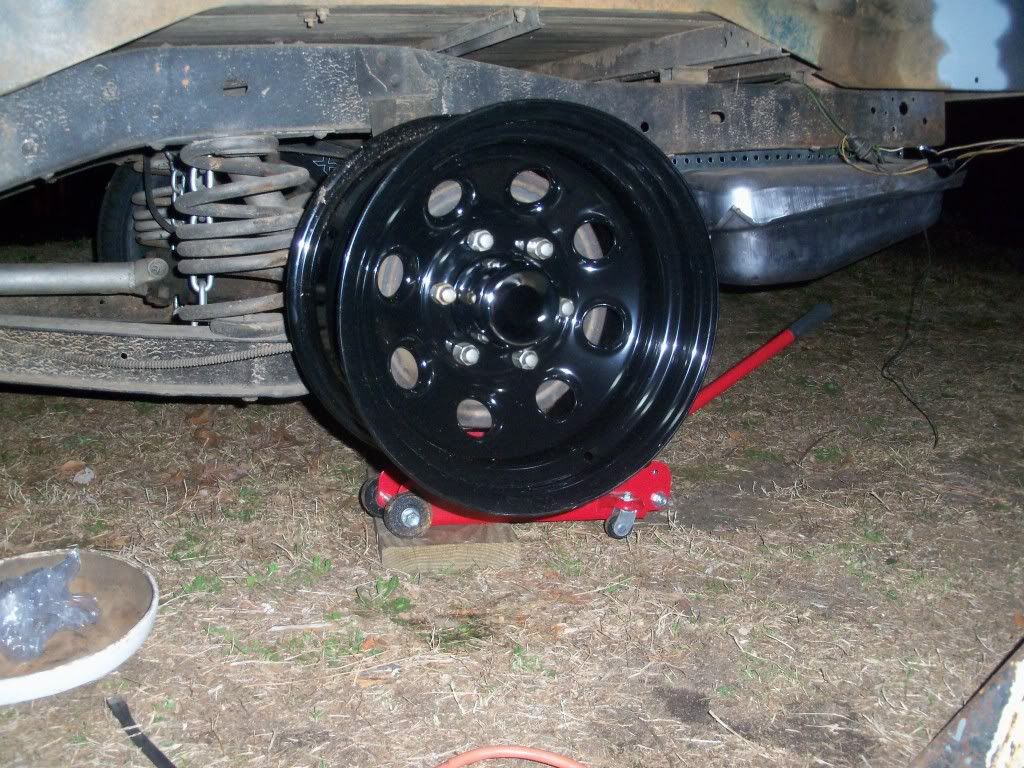 They ought to look nice on the truck when it's all said and done. I'm hoping to get them mounted and balanced tomorrow. I want to get that done sometime soon so the brake swap can happen as soon as the rest of my parts comein. I'll be leaving the front fenders off till the swap happens, I figure the extra room to work will be helpful. Yeah it makes my truck look like a hoopty but I'm not driving it around so what do I care. Just before we called it a night I rolled on another coat of paint....here's the results, I'll let you judge... 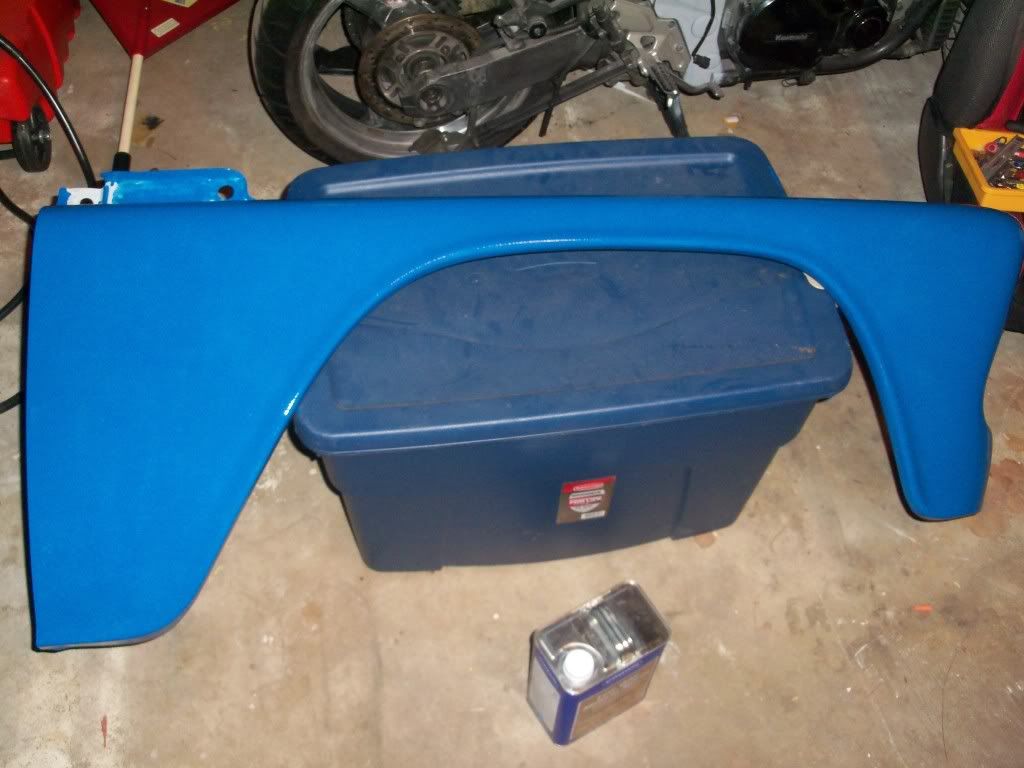 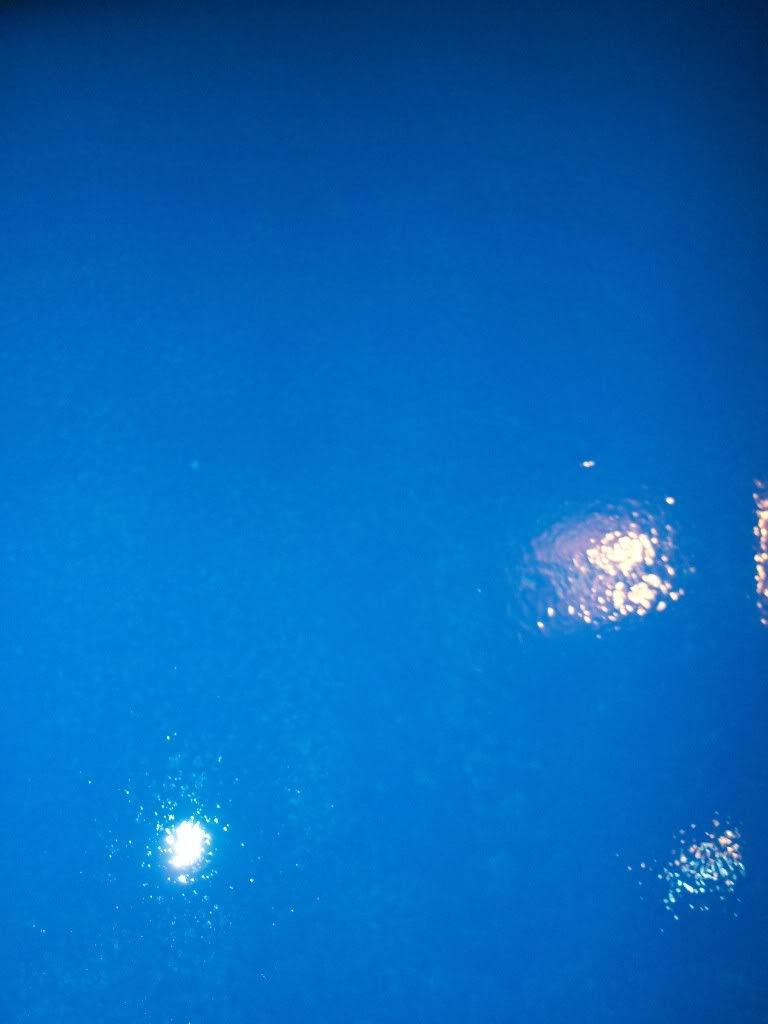 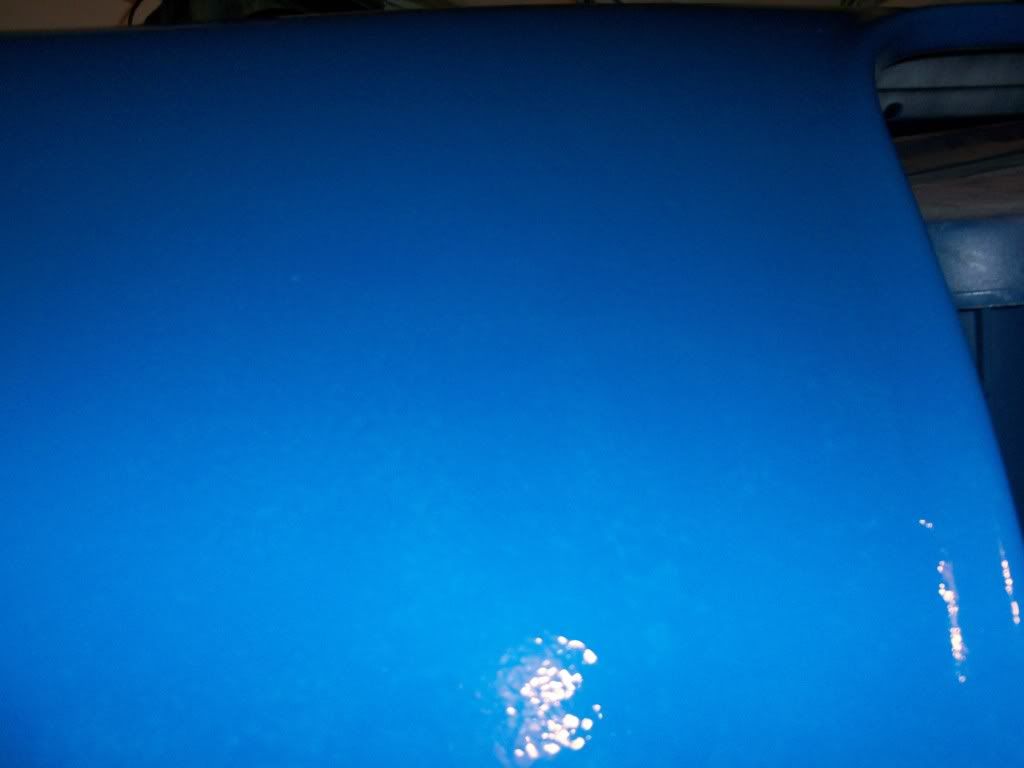 Interestingly the paint seemed to lay down a LOT nicer. There were far fewer bubbles and runs in the paint. I don't think I changed my technique any, I may have unconsciously but I don't think I did anything different. The color got a LOT darker. Obviously in the 1st coat you can see the primer underneath it and that makes it seem lighter and somewhat a different color. Hopefully with each successive layer the blue will get deeper/brighter to look more like it should. I don't know if thinning it with the mineral spirits has changed the color of the paint or not...but I guess I'll find out. Oh yeah and once I finish the paint on these pieces I'll post a picture of the can...but not till I'm done. So this is basically how my truck is sitting right now... 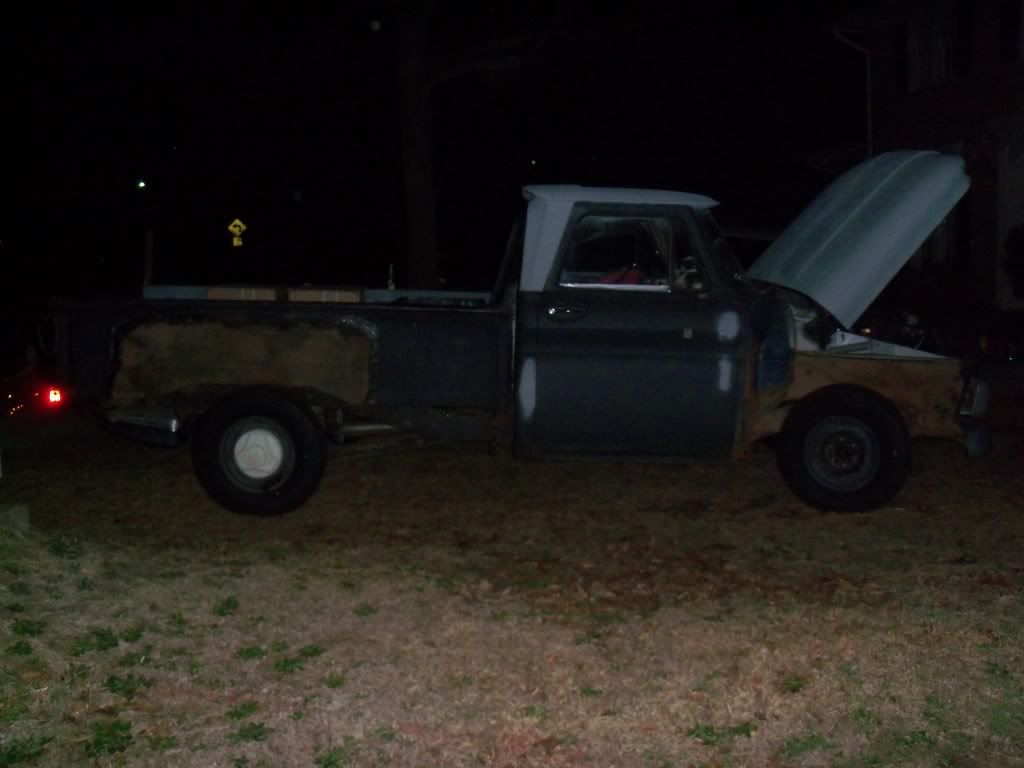 .....sexy ain't it
__________________
1966 C10 Long step build on a budget http://67-72chevytrucks.com/vboard/s...d.php?t=445201 no garage, no shop, limited storage space and tools....no problem. |
|
|
|
|
03-06-2011, 11:01 PM
|
#49 |
|
Registered User
Join Date: Nov 2010
Location: Fayetteville NC
Posts: 752
|
Re: K1's build thread
Updates!!!
It rained today so the only thing I was able to do was wets and paint the parts again. I'm up to 4 coats on them. Here's what they look like 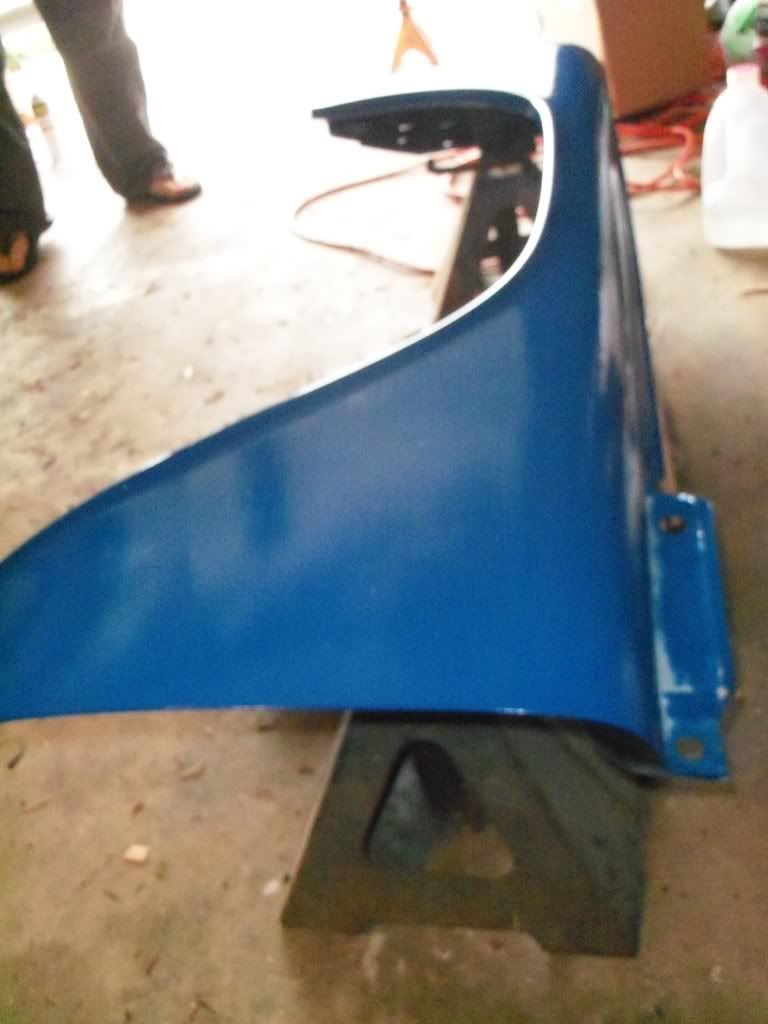 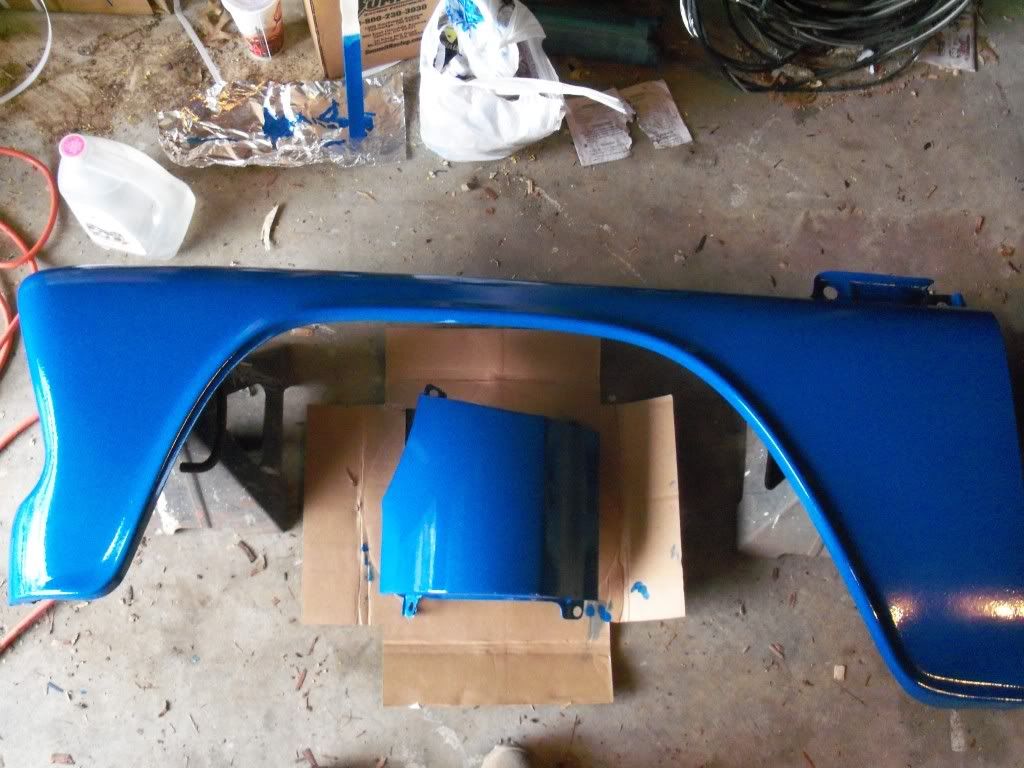 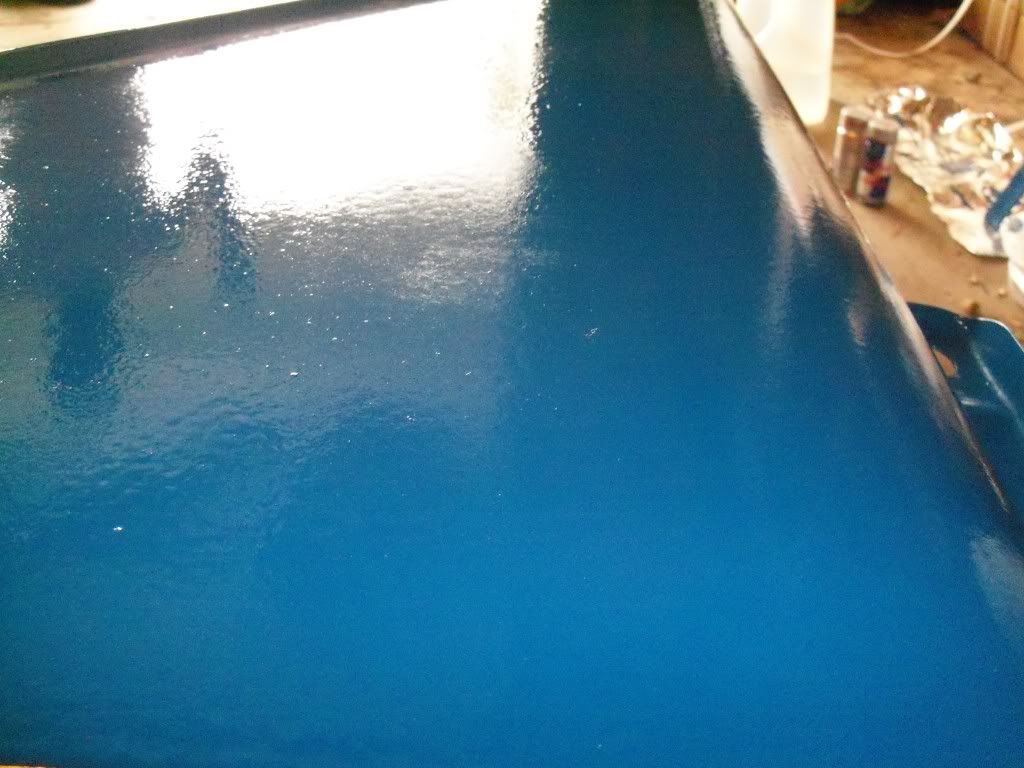 I'm not to happy with the color, I was hoping that it would be a darker blue but oh well. It'll look better than the chalky flat black that's on my truck currently. I also sprayed my bumper with 4 coats of white gloss rattle can rustoleum. It's not perfect but it looks a hell of a lot better than it did before. I didn't bother to scuff the primer before painting, in retrospect I probably should have. No pics of it, forgot to snap some. But here's a daylight photo of my truck. We threw the tarp over the bed last night before we left because of the forecast. And some daylight pictures....  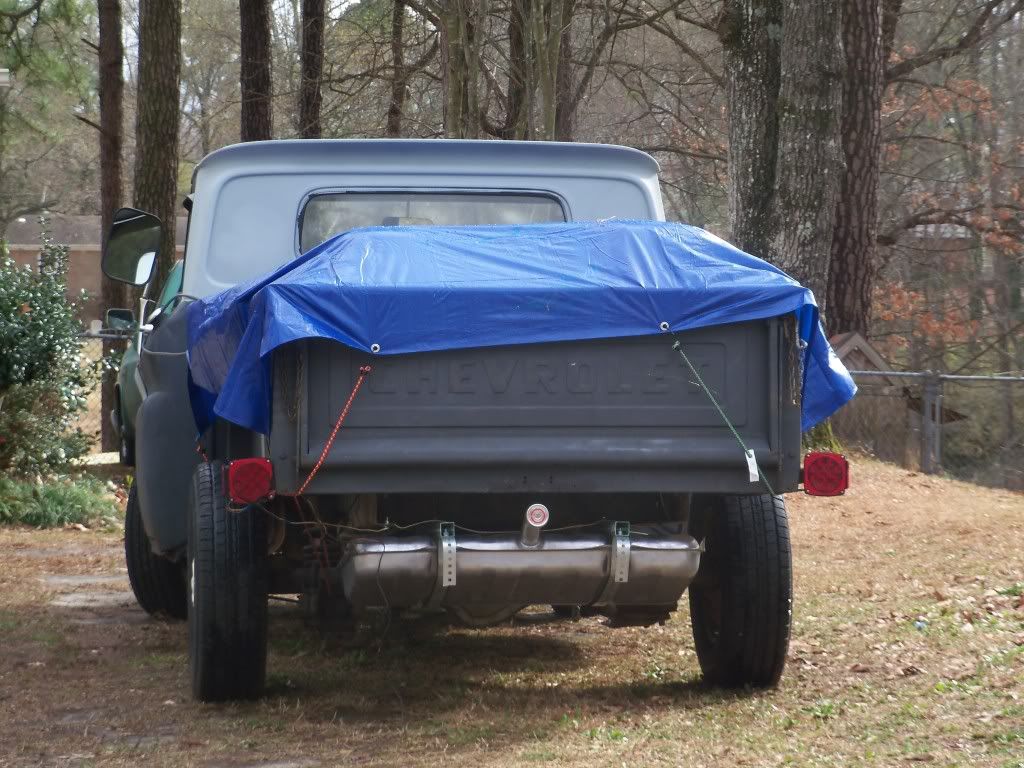
__________________
1966 C10 Long step build on a budget http://67-72chevytrucks.com/vboard/s...d.php?t=445201 no garage, no shop, limited storage space and tools....no problem. |
|
|
|
|
03-09-2011, 09:11 PM
|
#50 |
|
Registered User
Join Date: Nov 2010
Location: Fayetteville NC
Posts: 752
|
Re: K1's build thread
I did some more painting today. I skipped eating lunch to go work on my truck for a little bit. I managed to get the cab masked off, primer scuffed, and painted before I had to be back. When I finally got off for the day I went back to peel off the paper and tape, as well as roll on another coat of paint onto the parts. I'm up to 6 coats now, and I'll only be doing 2 more before putting them away to harden for a while. I also painted my inner door panels as well. They're probably going to get covered in some sort of material rather than remain painted. I've yet to really decide what t do with the interior, and. Anyways onto the pics...
      <eta> that's only 1 coat of white paint on the cab. I wanted to get something down on it before it rains tonight. The hood is gonna get done this weekend.
__________________
1966 C10 Long step build on a budget http://67-72chevytrucks.com/vboard/s...d.php?t=445201 no garage, no shop, limited storage space and tools....no problem. Last edited by k1rodeoboater; 03-09-2011 at 09:15 PM. |
|
|
|
 |
| Bookmarks |
|
|


 Linear Mode

