
 |
|
|
#26 |
|
Registered User
Join Date: Mar 2012
Location: Hooper Ut
Posts: 466
|
Re: My own build thread
Thanks Dino, hope it comes out half as nice as some of yours.
|
|
|

|
|
|
#27 |
|
Registered User
Join Date: Mar 2012
Location: Hooper Ut
Posts: 466
|
Re: My own build thread
So.... After speaking with Dino "thanks btw" he suggested that I not "Z" the front and instead he suggested that I pancake my cross member. That is what I'm doing, I welded my frame back together and put some gussets to make it stronger.
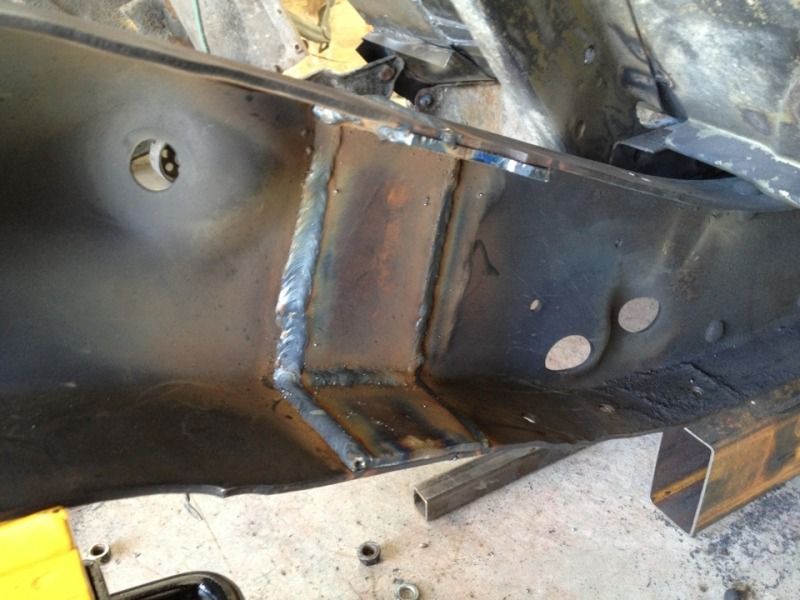 I sectioned out about an inch from the cross member. 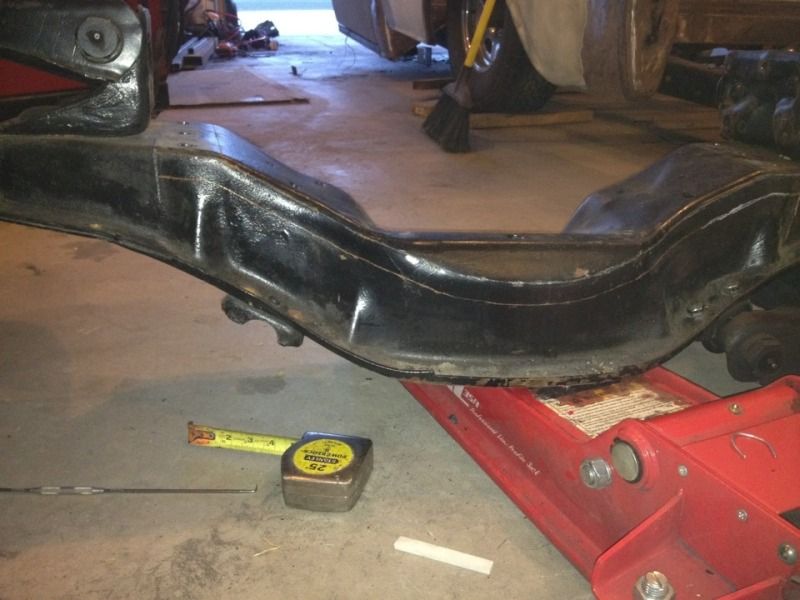 This is the front welded together, I made slits so that I could bend some of the portions of the lower section that we sticking out further than the rest. It made it much easier to weld back together 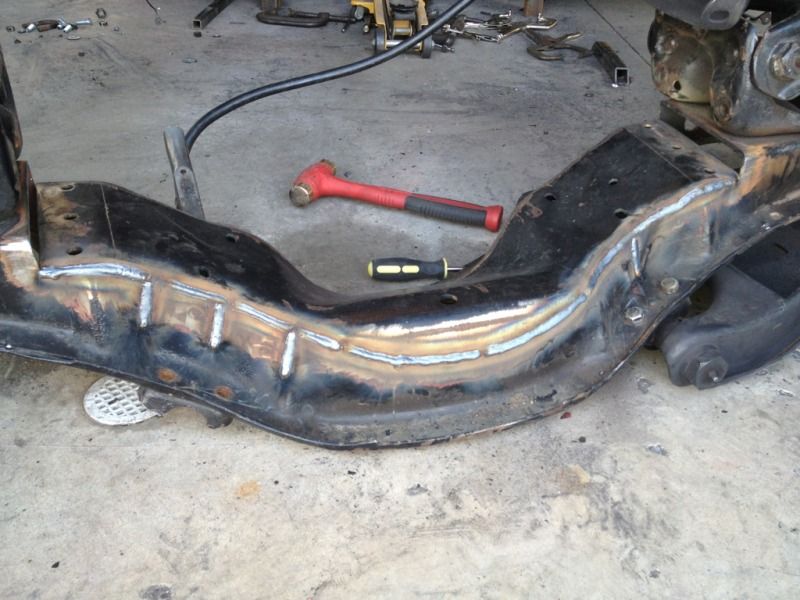 Here is the back 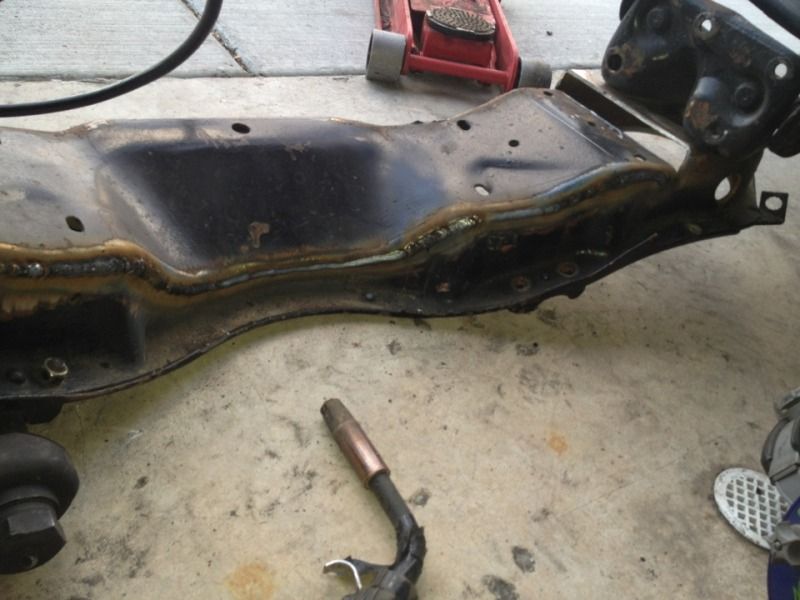 That is as far as I got last night, I still need to finish it. Hopefully I can finish it tonight or tomorrow. |
|
|

|
|
|
#28 |
|
Registered User
Join Date: Mar 2012
Location: Hooper Ut
Posts: 466
|
Re: My own build thread
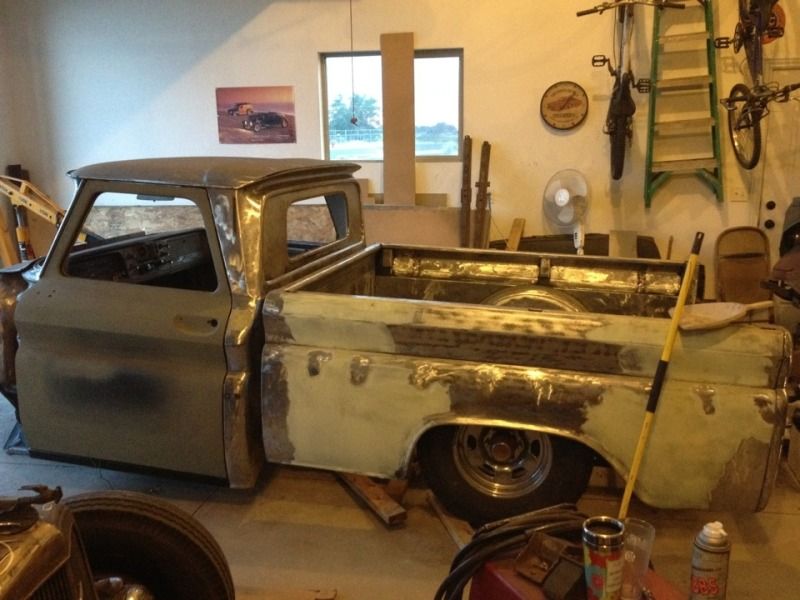
I put the bed back on "sort of" so that my wife could have her spot back, I thought she was going to stab me unless I got the bed out of her spot... haha I still need to move the wheel wells up. I can't wait to see how it will look all laid out.
|
|
|

|
|
|
#29 |
|
1 thing at a time is progress.
Join Date: Jun 2007
Location: Ball Ground GA
Posts: 5,511
|
Re: My own build thread
Welcome aboard. very nice work!!
__________________
Alan
Philippians 2:14-16 |
|
|

|
|
|
#30 |
|
Registered User
Join Date: Mar 2012
Location: Hooper Ut
Posts: 466
|
Re: My own build thread
I got my wheels and tires yesterday, unfortunately one of the wheels had some chrome chipped off of it
 . They are returning it and getting me a new one, not that my truck is even close to needing them yet but I wanted to see what they looked like. I still need to get my rear axle drilled for 5 lug, hopefully I can get that done this coming week. . They are returning it and getting me a new one, not that my truck is even close to needing them yet but I wanted to see what they looked like. I still need to get my rear axle drilled for 5 lug, hopefully I can get that done this coming week. Here's a picture of the wheels 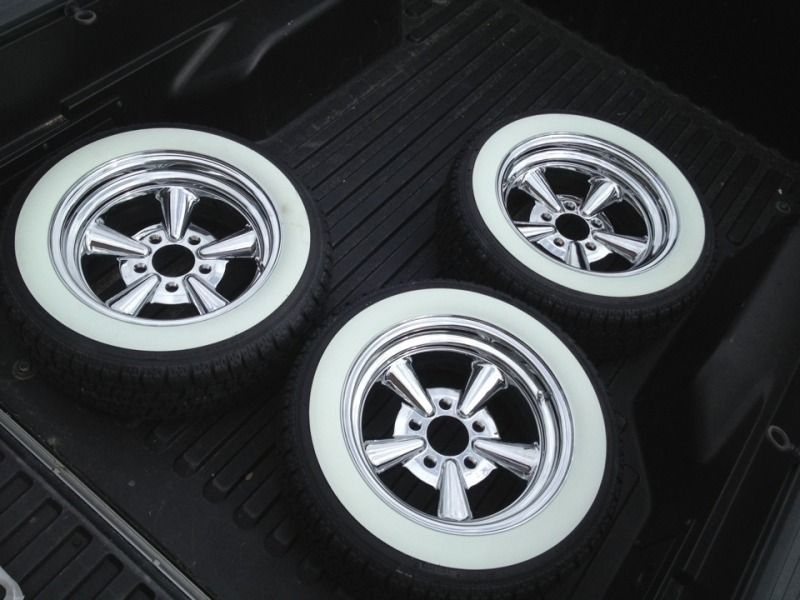
|
|
|

|
|
|
#31 |
|
Registered User
Join Date: Dec 2011
Location: Blytheville/Bentonville, AR
Posts: 393
|
Re: My own build thread
Great progress but the bodylines on the bed look a little off....
Posted via Mobile Device |
|
|

|
|
|
#32 | |
|
Registered User
Join Date: Sep 2011
Location: Tacoma, WA
Posts: 2,425
|
Re: My own build thread
Quote:
I may be doing that as well to accomodate my rear mounted, center fill fuel cell, and some other ideas I have for that half of the rig. From my renderings of the side view a 4" raise to the bed rails still looks good, and to some extent looks more in keeping with the top of the hood-across the bottom of the side windows body line.
__________________
Michael McMurphy My 66 Stepside My 64 Tow Truck My 66 Tempest Table Of Contents Added to Page1 |
|
|
|

|
|
|
#33 |
|
Registered User
Join Date: Mar 2012
Location: Hooper Ut
Posts: 466
|
Re: My own build thread
The bed is just sitting on the tires, that isn't where it is staying. I have to raise the bed floor up but I have a lot to do before I do that.
Posted via Mobile Device |
|
|

|
|
|
#34 |
|
Registered User
Join Date: Mar 2012
Location: Hooper Ut
Posts: 466
|
Re: My own build thread
OK, I haven't updated things in awhile. I got a little discouraged because I Z'd the front then welded it back together to find out I still had to Z the front.... So I ended up cutting the gussets back off and redoing the Z but this time I pushed the frame forward an inch to center the wheels so it I guess it all worked out.
Here is where I re-cut the Z and angled it so I could move everything forward an inch 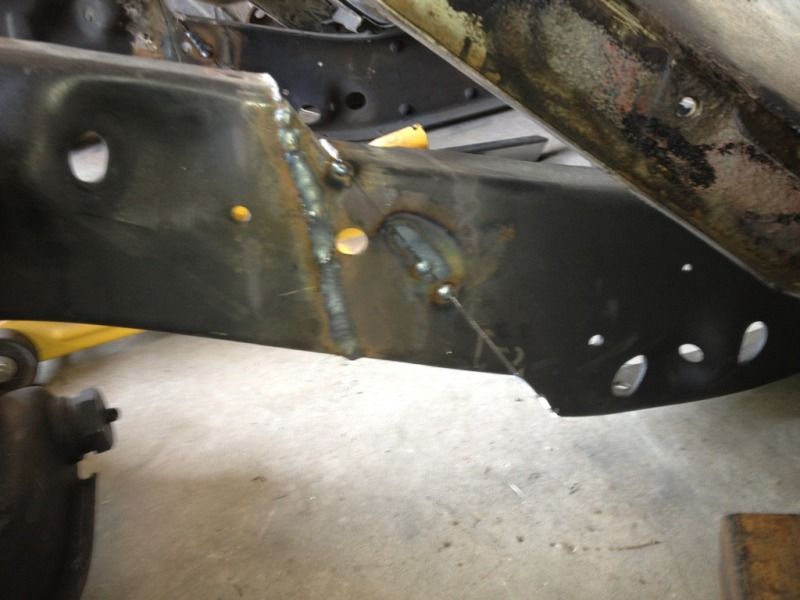 This is after I plated the outside of the Z 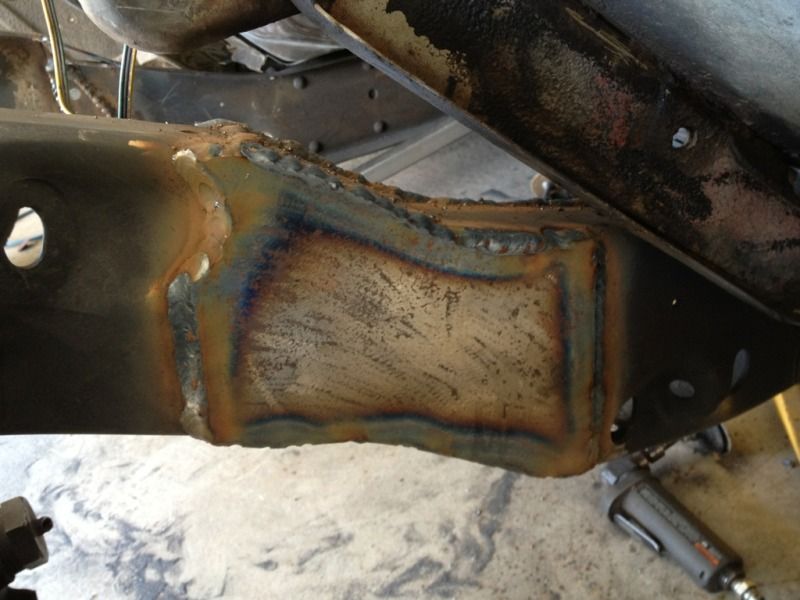 Since I had to redo the Z I decided to box the inside to give it some extra strength, it's probably over kill but I would rather be safe than sorry. 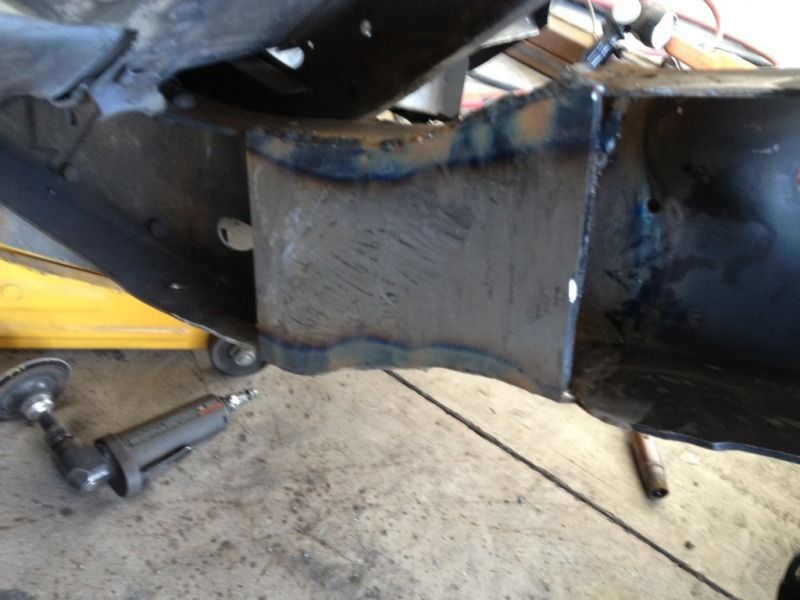 This is the front frame horns, I sitll need to finish this up. I'm going to put a plate on the inside so I can still mount the steering box correctly. I also had to take an inch out in the front because I pushed the Z forward an inch. 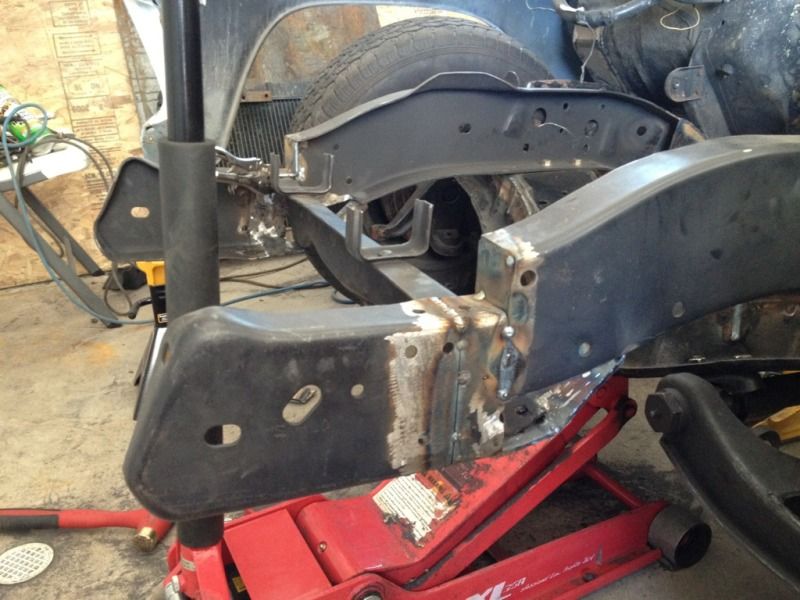 I'm trying to keep the stock radiator so I'm trying to keep the stock radiator crossmember. I may have to modify this some more but I won't know until I mock it back up again 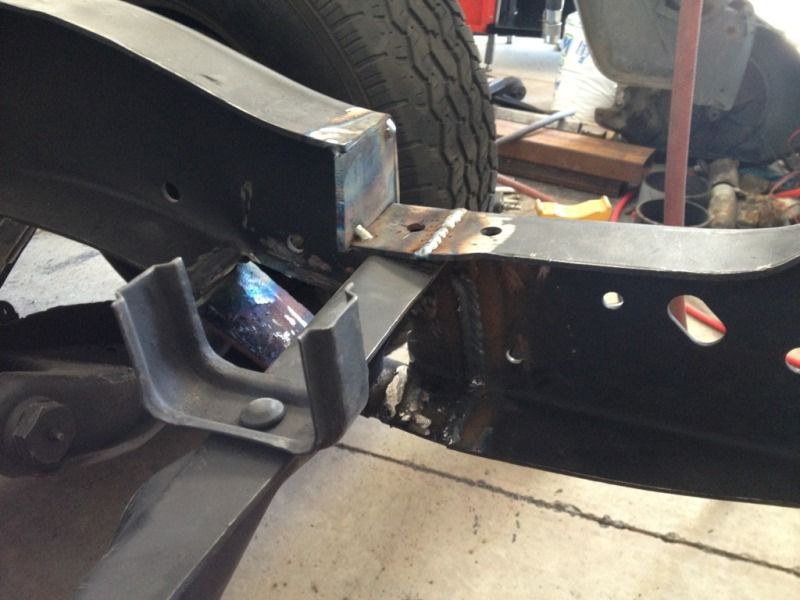 Another shot of the front 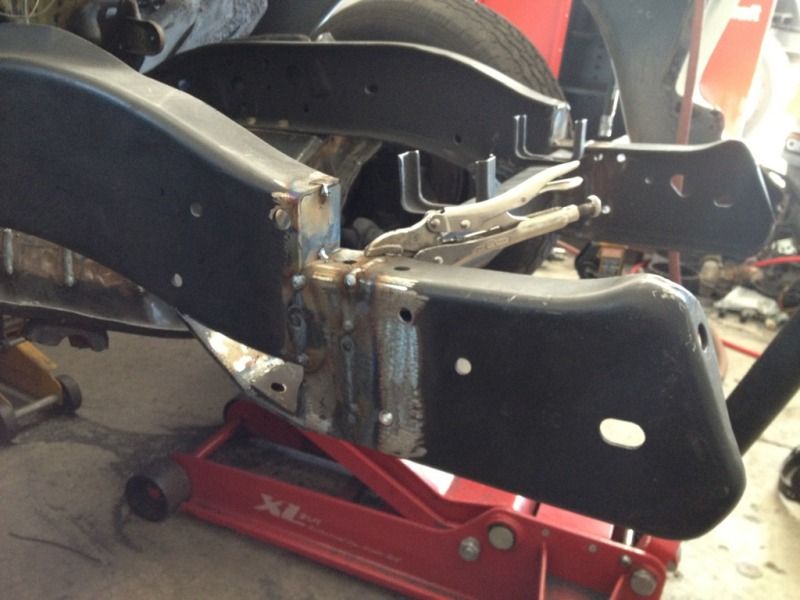 Here's the first mock up of the front since I dropped it. I can't wait to finish this and chrome everything! 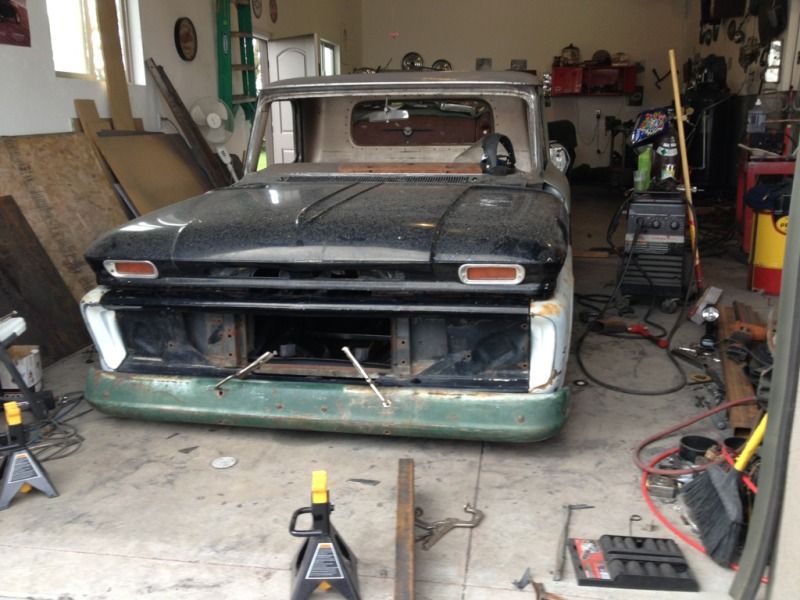 Side view 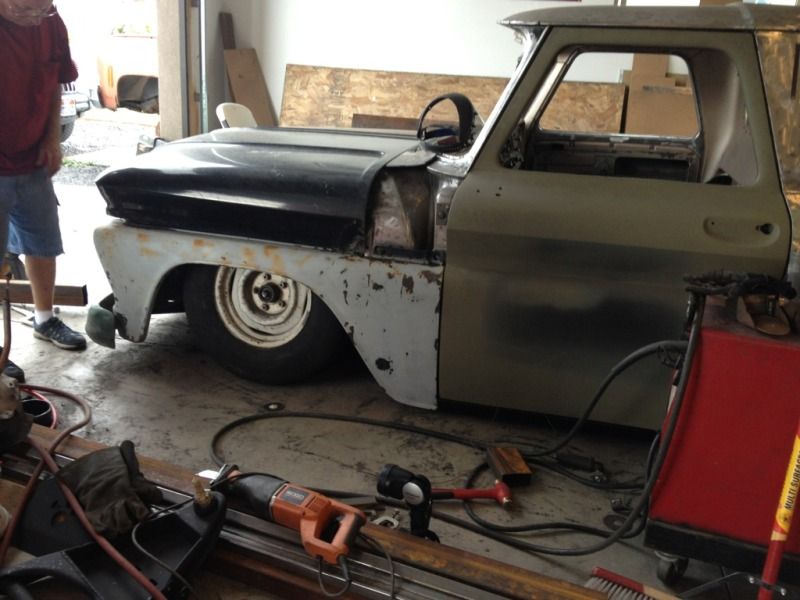 I still have a ton of work to do but it's getting there slowly. I'm going to try like hell to paint this thing before then end of October because it will probably get too cold after that. I better get moving because I still have a long way to go. |
|
|

|
|
|
#35 |
|
Registered User
Join Date: Aug 2012
Location: Tooele, Utah
Posts: 327
|
Re: My own build thread
Glad to see you are back on it Zip! I think mine will be on the road in the next couple of weeks and may have to drive up your way......
__________________
1936 Chevrolet 1/2t 1964 Chevrolet C10 1964 Chevrolet C10 (sons) 1965 Chevrolet K10 Suburban 1969 Chevrolet C10 1937 Plymouth P4 |
|
|

|
|
|
#36 |
|
Registered User
Join Date: Mar 2012
Location: San Diego CA
Posts: 223
|
Re: My own build thread
Awsome build man. You have done some nice work.
Posted via Mobile Device |
|
|

|
|
|
#37 |
|
Registered User
Join Date: Mar 2012
Location: Hooper Ut
Posts: 466
|
Re: My own build thread
Thanks guys! Not tooting my own horn but I have done a lot of work and I'm far from being finished but it will get there one day "hopefully soon". I honestly didn't think it was going to be this much work, lol. Ive probably made this about as big of build as I possibly could have though but at least I'm sticking with it. Hopefully I can get it driving before the snow comes.
Eric any time you want to come up just give me a call. Posted via Mobile Device |
|
|

|
|
|
#38 |
|
Chevy Only Tx
Join Date: May 2009
Location: Pecos,Tx
Posts: 1,061
|
Re: My own build thread
Looking good! Keep it up
Posted via Mobile Device
__________________
Chevy Only Tx......... |
|
|

|
|
|
#39 |
|
Registered User
Join Date: Mar 2012
Location: Hooper Ut
Posts: 466
|
Re: My own build thread
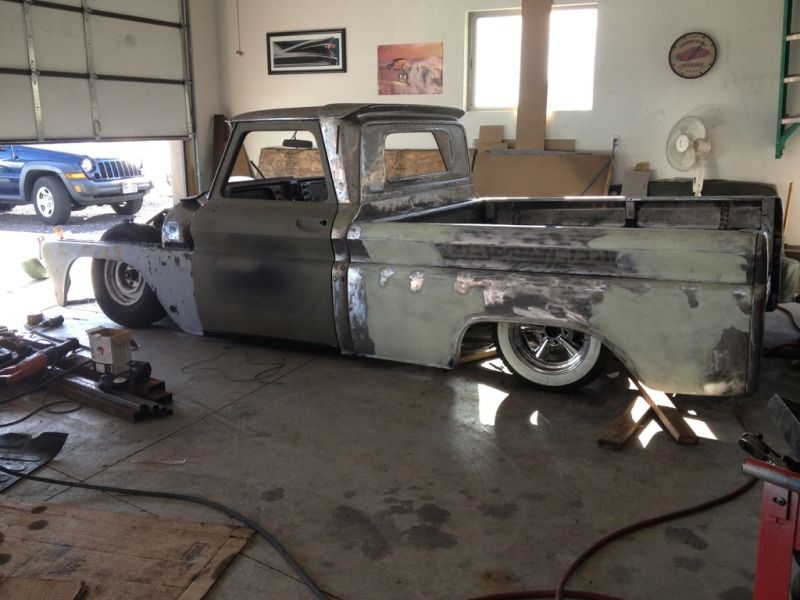
My old man came over and helped me figure out where we are going to have to trim the bed for the wheels. I took a picture to show how my new wheels look. Good news is the front is almost finished. I dropped the cross member back down so that I can wire wheel the whole thing tonight and get it painted.
 This is a picture from the other day but it shows the tail lights. Can't wait to get this thing in some paint! 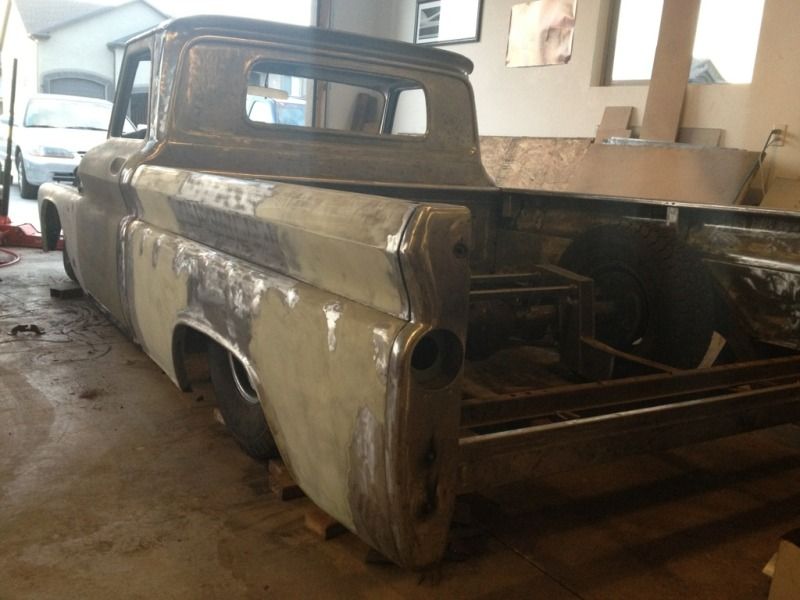
|
|
|

|
|
|
#40 |
|
Registered User
Join Date: Feb 2011
Location: muskogee, ok
Posts: 1,091
|
Re: My own build thread
sweet build so far man!!! u been doing great work! btw great taste on wheels!! i just bought the same ones.. lol
__________________
 bagged 66 longbed build http://67-72chevytrucks.com/vboard/s...d.php?t=449548 my favorite colors.. black, rust, and shiny!!!! instagram: @coulter918 |
|
|

|
|
|
#41 |
|
Registered User
Join Date: Mar 2012
Location: Hooper Ut
Posts: 466
|
Re: My own build thread
Thank you! I love these wheels they are some of my favorite. It was either these or smoothies but I like these a little better. I can't wait to drive this thing. I have my old man helping me out with it so hopefully I can get it in paint by the end of October but it's gonna be a lot of work to get it done by then. Hopefully we make it!
Posted via Mobile Device |
|
|

|
|
|
#42 |
|
Registered User
Join Date: Mar 2012
Location: San Diego CA
Posts: 223
|
Re: My own build thread
Looks awesome. Always liked those wheels too. Do you have anymore pictures on how you did the crossmember? I have an extra i want to try and section.
Posted via Mobile Device |
|
|

|
|
|
#43 |
|
Registered User
Join Date: Mar 2012
Location: Hooper Ut
Posts: 466
|
Re: My own build thread
Sorry man those are the only pictures I took. I meant to take more but I got to workin and forgot. It isn't that hard, I was told make sure you don't take out more than 1 3/8th or you will run into problems. I would also try and make the section you take out without any curves. The way I did mine there were spots that had pretty big gaps because of the curves not lining up. It ended up working out ok but it could have been done a little cleaner. I actually dropped the crossmember back down last night so I can prime and paint it tonight. Hopefully I can get my wire wheel in all the hard to get places. The biggest thing to make sure is that you give yourself enough room so you can bolt it back into place. Its kind of hard to get a cutoff wheel close enough to make the cut because of the upper control gets in the way. If you have a good 90 degree die grinder you should be ok.
Posted via Mobile Device |
|
|

|
|
|
#44 |
|
Registered User
Join Date: Mar 2012
Location: San Diego CA
Posts: 223
|
Re: My own build thread
Cool thanks man
Posted via Mobile Device |
|
|

|
|
|
#45 |
|
Registered User
Join Date: Mar 2012
Location: Hooper Ut
Posts: 466
|
Re: My own build thread
|
|
|

|
|
|
#46 |
|
Registered User
Join Date: Mar 2012
Location: Hooper Ut
Posts: 466
|
Re: My own build thread
Well... I didn't make as much progress as I wanted to but I still got some things finished. I spent more time going back and forth to the parts house than anything else... O well, that's building cars/trucks I guess.
Anyway, I wire wheeled the whole crossmember, flattened the upper control arms and painted everything. I also replaced all the wheel bearings and seals, greased up all the grease points, put new rotors, calipers, and brake pads on. I also mounted the front bags and started on the rear brakes last night but I had a hard time finding the rear bearing seals and had to order them. They should be in tomorrow and I also dropped off the rear axles last Thursday to get drilled for 5 lug. Hopefully this week I can get the rear bags mounted and finish up the rear end and the rear brakes. If I can get all the finished I will be pretty happy because then I can load it up and take it over to my old mans house to start the body work and hopefully get it painted before it gets too cold outside. I also have to drop some parts off tonight to get blasted "hopefully it doesn't cost me a million bucks"... 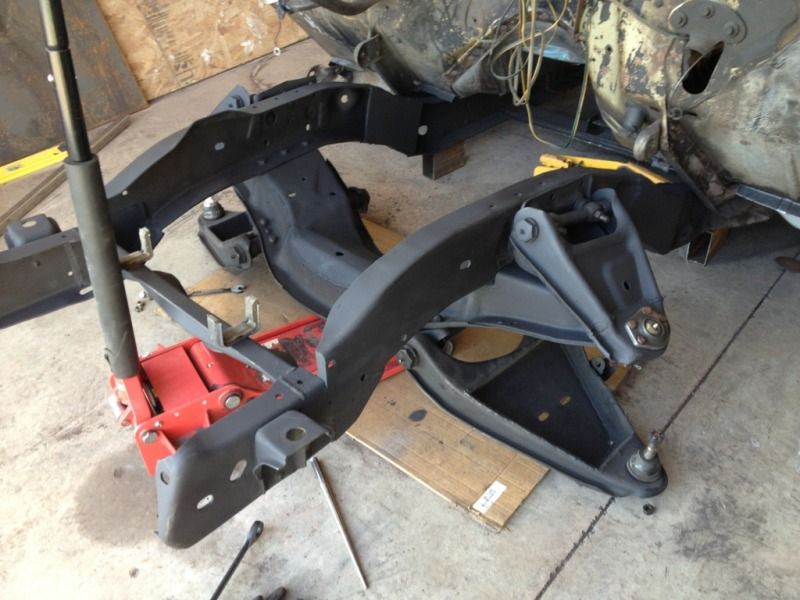 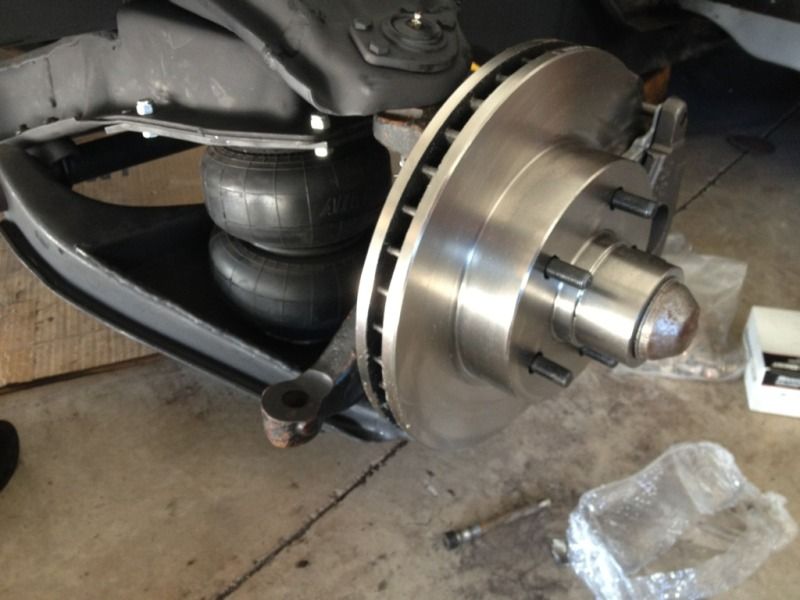
|
|
|

|
|
|
#47 |
|
Registered User
Join Date: Aug 2012
Location: Tooele, Utah
Posts: 327
|
Re: My own build thread
Getting anything done??
__________________
1936 Chevrolet 1/2t 1964 Chevrolet C10 1964 Chevrolet C10 (sons) 1965 Chevrolet K10 Suburban 1969 Chevrolet C10 1937 Plymouth P4 |
|
|

|
|
|
#48 |
|
Registered User
Join Date: Mar 2012
Location: Hooper Ut
Posts: 466
|
Re: My own build thread
Yes sir! I've been chipping away. I sent off the hood, bed, inner fenders, core support, and some misc other parts to sand blaster last week. I got them back friday and put everything that was blasted in primer yesterday. Holy crap is the inside of the hood a pain in the ass! lol, that thing is HUGE! I also brought the truck and most of the parts over to my Dads shop because my garage is attached to my house and I don't want to have my house smell like paint.
I finished mounting the rear bags "that was a huge pain in the ass btw"... I didn't take any pictures of what I primed but I did take pictures of the truck after we got it on the trailer and also of the air tank mounted as well as the compressor and valve box installed. I also installed my new Moser rear axles because my original axles were too worn to be drilled and the machine shop wanted 200 bucks to drill them... pretty stupid when brand new 5 lug axles were 305 shipped to my house... If anyone needs axles I highly recommend Moser engineering. They were awesome, they messed up and sent me 6 lug axles by accident and I called them and the over nighted me the 5 lug axles at no cost and to top it off I got to actually speak to someone that worked there "not someone in India". Anyway, I rebuilt the whole rear end, put new seals, bearings, axles, all new brakes, drums, pads etc. Everything is starting to come together. Tonight I'm going to work on patching the inner fenders and notching the fender and inner fender so the wheels dont rub. Then I'm going to strip the firewall and prime and paint it. Then I have to figure out the steering "not looking forward to that". Anyway here are the pictures Rear bag mounts 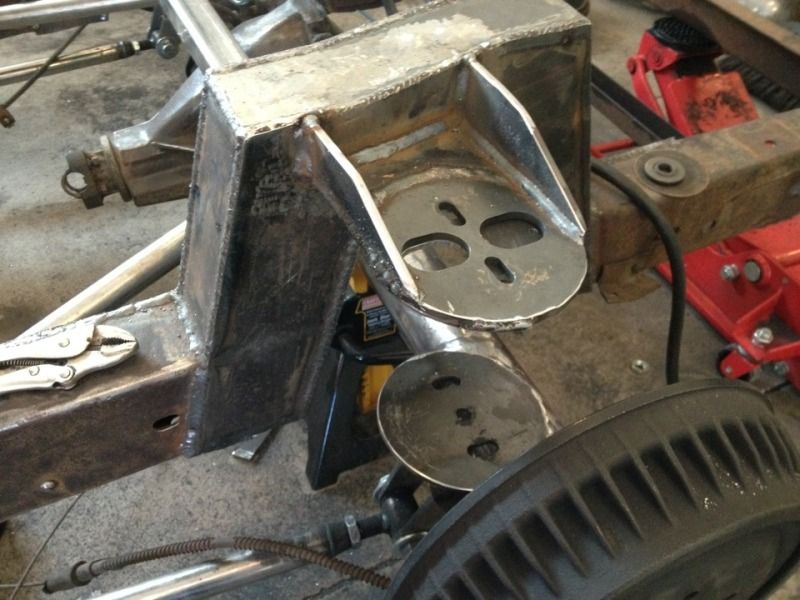 Bags installed 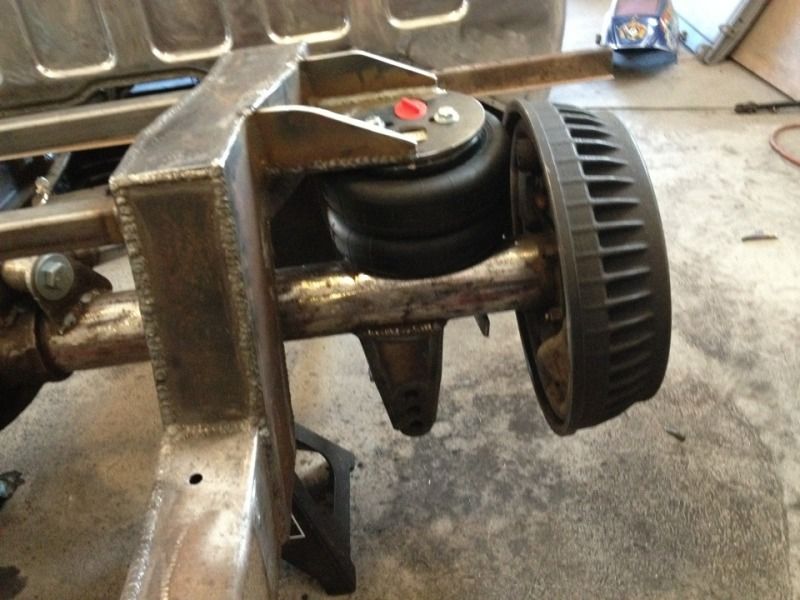 Here's the tank and valve box installed 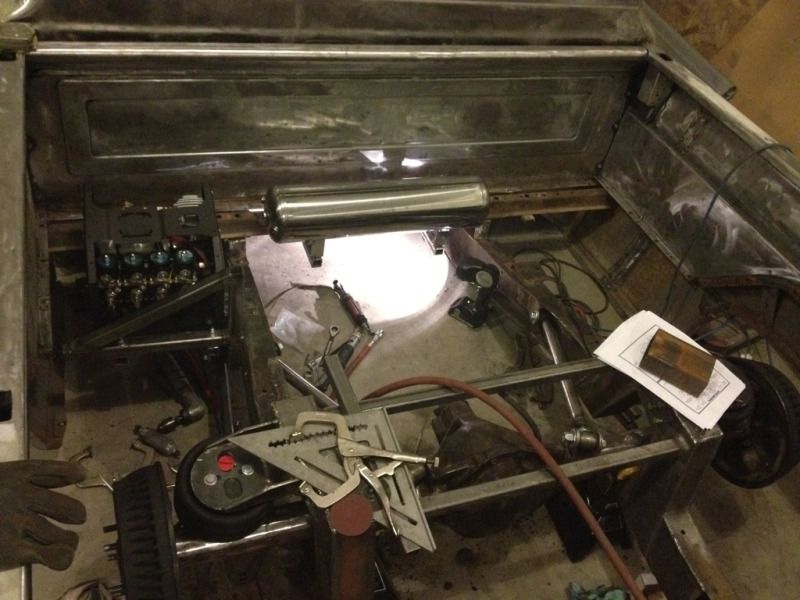 My new axles! 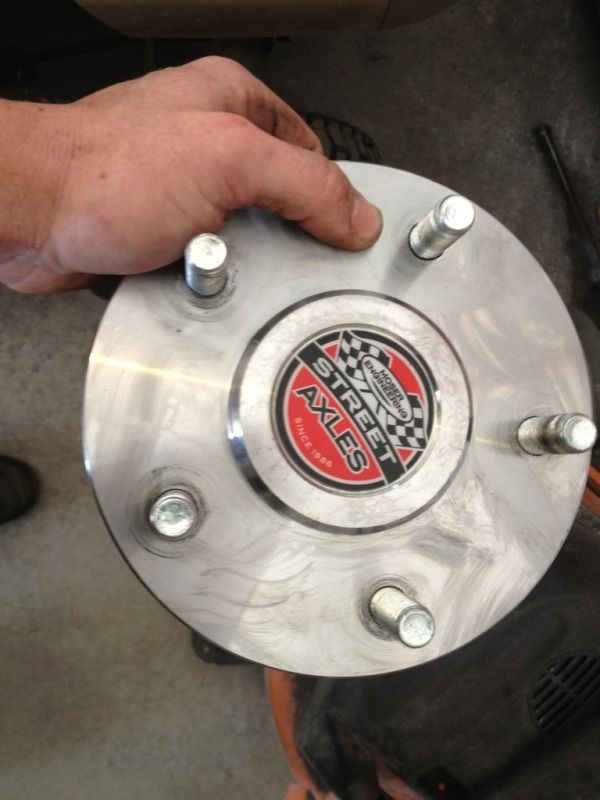 Here she is on the trailer! 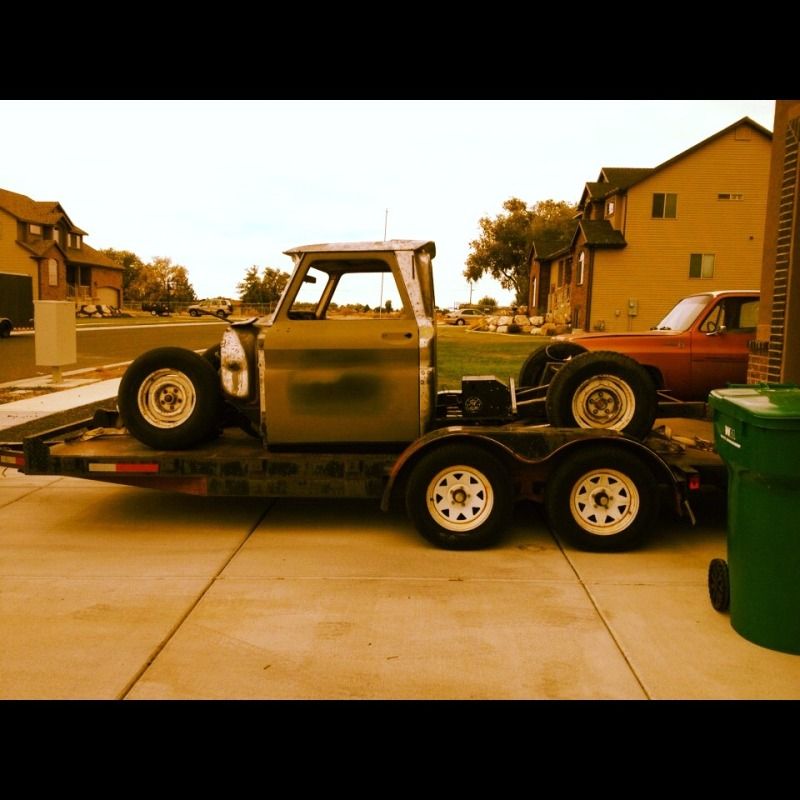
|
|
|

|
|
|
#49 |
|
Registered User
Join Date: Mar 2012
Location: Hooper Ut
Posts: 466
|
Re: My own build thread
Oh, I also ordered my gas tank last week and it should be here tomorrow so we can install it this week. I'm going to try and get the inside of the cab in paint this week but that's going to be a tall order because there is a lot to get done before that.
|
|
|

|
|
|
#50 |
|
Registered User
Join Date: Aug 2012
Location: Tooele, Utah
Posts: 327
|
Re: My own build thread
Right on man! I'm glad you are still moving along. When do you plan on spraying? Winter is knocking on the door...
__________________
1936 Chevrolet 1/2t 1964 Chevrolet C10 1964 Chevrolet C10 (sons) 1965 Chevrolet K10 Suburban 1969 Chevrolet C10 1937 Plymouth P4 |
|
|

|
 |
| Bookmarks |
|
|