
|
 11-29-2012, 11:44 PM
|
#26 | |
|
Registered User
Join Date: Nov 2012
Location: Atl, GA
Posts: 103
|
Re: Projekt Housewyfe
Quote:
im not a fan of staggered wheels.....while im not bagging the truck, i do want to go as low as statically possible, and keep the same dimension wheels on all 4 corners. if this means stretching a tire slightly to clear the fenders, i can live with that. id also like for the wheels to come out even with the fenders, or just slightly passed. this gives a vehicle a very aggressive look, without looking like a crx on daytons...... side note: my 1986 corolla had 13x10 aero racing wheels wrapped in 186-60's....stuffed under a wide body. reguardless of the critics on "stretched tires" i ran several drift competitions on this setup, sometimes having 70-80mph entry speeds, under inertia, and never popped a bead. same goes with chasing an art morrison framed, ls7 powered 67 camaro around road atlanta, they did just fine. that car, can be seen here (before the rear wide fenders made it across the pacific) |
|

|

|
|
11-30-2012, 03:19 AM
|
#27 |
|
Registered User
Join Date: Nov 2012
Location: Atl, GA
Posts: 103
|
Re: Projekt Housewyfe
*185/60's.
|
|
|
|
|
11-30-2012, 07:39 PM
|
#28 |
|
Registered User
Join Date: Nov 2012
Location: Atl, GA
Posts: 103
|
Re: Projekt Housewyfe
got to work on the rig for about an hour today, after i got off work, and finaggled with the wifeys volvo's hesitation issue for about 20 minutes.
managed to countersink the drip rail moulding screw holes, remove the side emblem, and apply the next layer of fiberglass over the previous application. at the same time, managed to countersink and wipe the emblem area, and moulding wholes. i can never get pics of the wipe process, because im always wiping at dusk...... 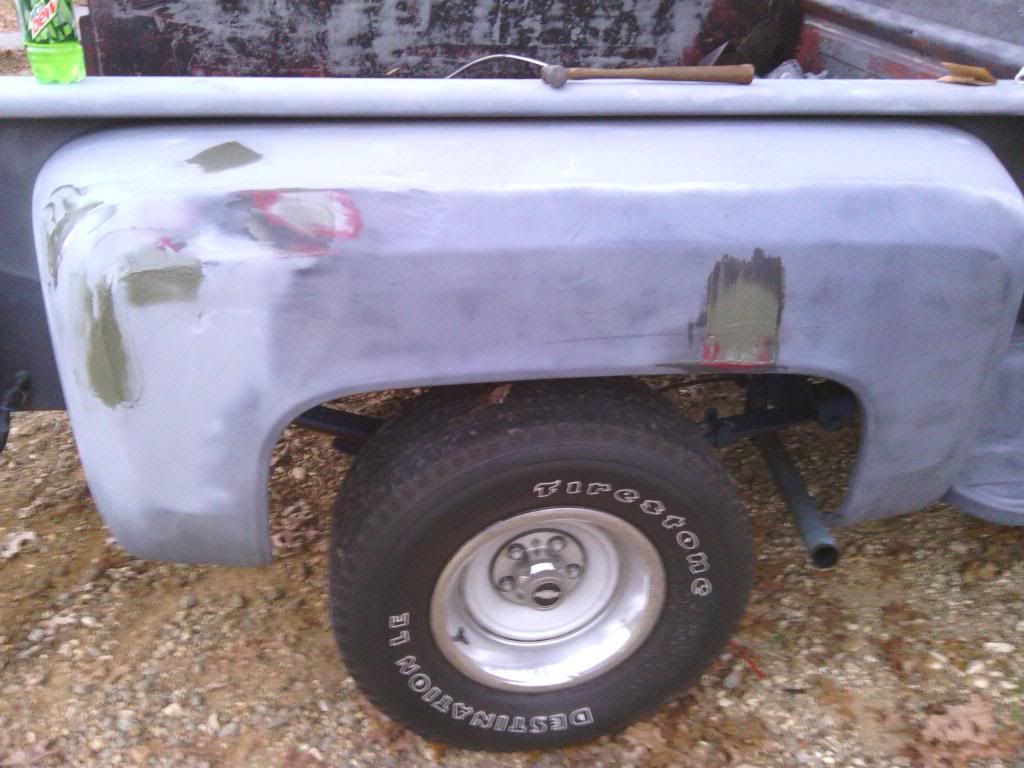 i know the wipe looks like ****, and body lines distorted, but trust me, i got this....lol 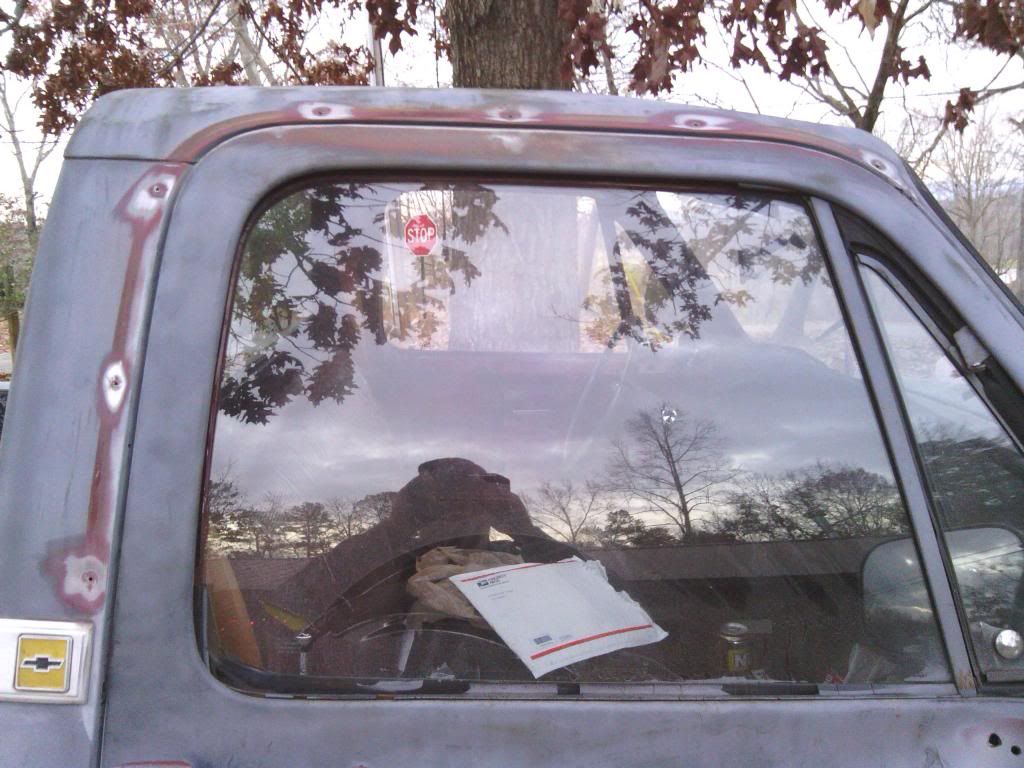 should i shave the cab trim, and pinch line? |
|
|
|
|
11-30-2012, 07:41 PM
|
#29 |
|
Registered User
Join Date: Nov 2012
Location: Atl, GA
Posts: 103
|
Re: Projekt Housewyfe
also got the flip kit in the mail today, still waiting on the spindles.
|
|
|
|
|
11-30-2012, 08:32 PM
|
#30 |
|
Registered User
Join Date: Nov 2011
Location: Nashville TN
Posts: 3,595
|
Re: Projekt Housewyfe
Heck yeah man!! Good work
__________________
PLEASE HELP WITH PROJECT UNDERHAULIN http://67-72chevytrucks.com/vboard/showthread.php?t=306320 Gemini - 1978 GMC C15 High Sierra - 305 c/e - Given to Mother Electra - 1967 Mustang Coupe - 302/w 3 speed Build Chyna - 1968 Chevy C20 Long Stepper
|
|
|
|
|
11-30-2012, 09:54 PM
|
#31 |
|
Registered User
Join Date: Nov 2012
Location: Atl, GA
Posts: 103
|
Re: Projekt Housewyfe
thanks!!
|
|
|
|
|
12-01-2012, 06:59 PM
|
#32 |
|
Registered User
Join Date: Mar 2012
Location: Lincoln, IL
Posts: 880
|
Re: Projekt Housewyfe
shoob, i agree with Jeff,
 the shaved look on this if you like it, run with it. my idea is the opposite keep it original looking, but il probably shave mine anyways. if you shave the tail gate to match every thing else(which looks very good) they have the after market ones that perch out on the tail gate but dont have an identation for original chevrolet plate markings like they have on original stepsides. ill show you couple of examples, but if you like the chevrolet indent, i was thinking if i shave my tail gate about welding the chevrolet Letterings plate up on the shaved stepside tailgate the shaved look on this if you like it, run with it. my idea is the opposite keep it original looking, but il probably shave mine anyways. if you shave the tail gate to match every thing else(which looks very good) they have the after market ones that perch out on the tail gate but dont have an identation for original chevrolet plate markings like they have on original stepsides. ill show you couple of examples, but if you like the chevrolet indent, i was thinking if i shave my tail gate about welding the chevrolet Letterings plate up on the shaved stepside tailgatehere is the tailgate im speaking of
__________________
Her name is Quicksilver 1978 Chevrolet silverado, shortbox stepside currently being swapped IN is a LM7 5300 vortec, 4l80E, factory 4.11s, slammed, a dream ride and coined QUICKSILVER gotta pay $$ if you wanna play
|
|
|
|
|
12-01-2012, 11:05 PM
|
#33 |
|
Registered User
Join Date: Nov 2012
Location: Atl, GA
Posts: 103
|
Re: Projekt Housewyfe
i actually like my beat up tailgate, lol. the only thing im working on the bed are the fendeers. the rails, and tailgate will remain unworked.........it is a truck, and will be used, lol. i like the chains, and everything, and honestly will probably just make a 10x4" piece of diamond plate press braked 90 degrees, and mount it behind the chains to protect the paint.
Im in the dead middle of the flip in the rear right this second as im typing, took a break, i needed to get some reference info, and decided id browse for a second..... fronts already dropped, it appears i need new lower control arms....my lower ball joints are kinda sliding up and down in their seats, and will not seperate from the spindle......i spent 2 hours on one side, and said screw it, and seperated the spindle from the upper control arm...15 minutes per side after that was figured out. ill try and get pics when i run to the store here in a few (beer run for victory!!!) |
|
|
|
|
12-01-2012, 11:50 PM
|
#34 | |
|
Registered User
Join Date: Mar 2012
Location: Lincoln, IL
Posts: 880
|
Re: Projekt Housewyfe
Quote:
__________________
Her name is Quicksilver 1978 Chevrolet silverado, shortbox stepside currently being swapped IN is a LM7 5300 vortec, 4l80E, factory 4.11s, slammed, a dream ride and coined QUICKSILVER gotta pay $$ if you wanna play
|
|
|
|
|
|
12-02-2012, 03:41 AM
|
#35 |
|
Registered User
Join Date: Nov 2012
Location: Atl, GA
Posts: 103
|
Re: Projekt Housewyfe
no beer for me......
just finished in the last 30 minutes...... you wanna know what sucks in life? 30 year old 1/2 ton u-bolts, and no air tools or lift. i think my arms are as big around as my legs now...... ended up coming out to a 5/7 drop. i have about 3" of suspension travel up front (w/o bumpstops) and i still have 4" in the rear before getting close to notching (bump and bracket removed). 2.5 coils cut off, flip kit and removed helper leaf. un-settled. id like to go 3" more front, and 4-5" more rear. as it sits now, again unsettled, still sitting in the driveway were it was lowered off the jack. my front cross member/subframe is sitting about 4.5"-5" off the ground. next purchase will be shackles, and hangers, and a bolt in notch, for the rear. for the front.....2" spindles, and........? whats this i keep reading about not being able to run spindles and A/M drop control arms? why? and can it honestly be solved? seeming as i need to replace my control arms anyway, i guess ill spring for some aftermarket ones......but i guess im hanging on the question of why cant this combo be ran.....together. pics manana.....'night. Last edited by shoob; 12-02-2012 at 03:55 AM. |
|
|
|
|
12-02-2012, 11:55 AM
|
#36 | |
|
Registered User
Join Date: Sep 2010
Location: Marble Falls, TX
Posts: 1,575
|
Re: Projekt Housewyfe
Quote:
__________________
Michael Re-starting the neglected '77...http://67-72chevytrucks.com/vboard/s...=425464&page=9 |
|
|
|
|
|
12-02-2012, 12:18 PM
|
#37 |
|
Registered User
Join Date: Nov 2012
Location: Atl, GA
Posts: 103
|
Re: Projekt Housewyfe
i stripped out one of my craftsman 1/2" drive ratchets, and i think i broke the pin in my 1/2" drive 30" snap-on breaker, because i was having to use a 5 ft. jack handle on the jast rounds, and thats with tranny fluid on the u-bolts, trying to keep them lubed up. my shoulders feel like i pitched a 9 inning game that went into over time.
out to get pics. |
|
|
|
|
12-02-2012, 03:09 PM
|
#38 |
|
Registered User
Join Date: Sep 2012
Location: Midway, NC
Posts: 3,275
|
Re: Projekt Housewyfe
I'm digging this build.
__________________
http://67-72chevytrucks.com/vboard/s...d.php?t=581873 The low buck build threads. Check'em out! http://67-72chevytrucks.com/vboard/s...d.php?t=666022 My build thread Crossmembers CC |
|
|
|
|
12-02-2012, 06:34 PM
|
#39 |
|
Registered User
Join Date: Nov 2012
Location: Atl, GA
Posts: 103
|
Re: Projekt Housewyfe
thanks.
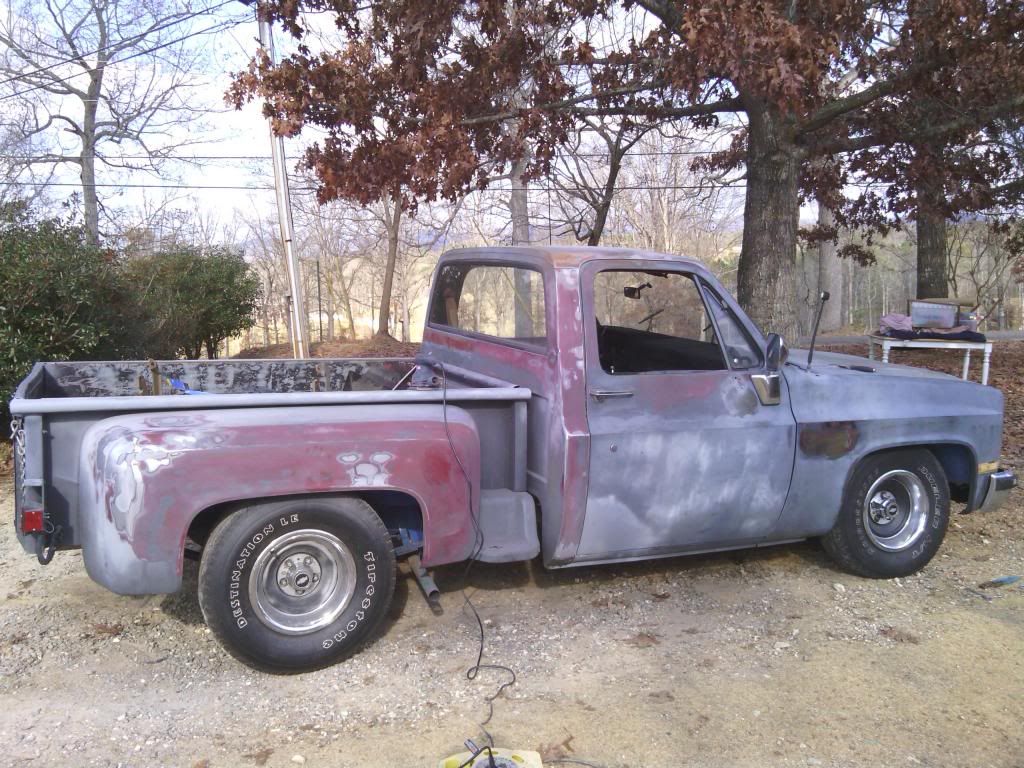
okay, pics as promised. 2.5 coils cut in the front, flip kit in the rear, and helper leaf pulled (didnt make a difference, it just helps when loaded) front tires are 30x9.5 rear 30x10.5 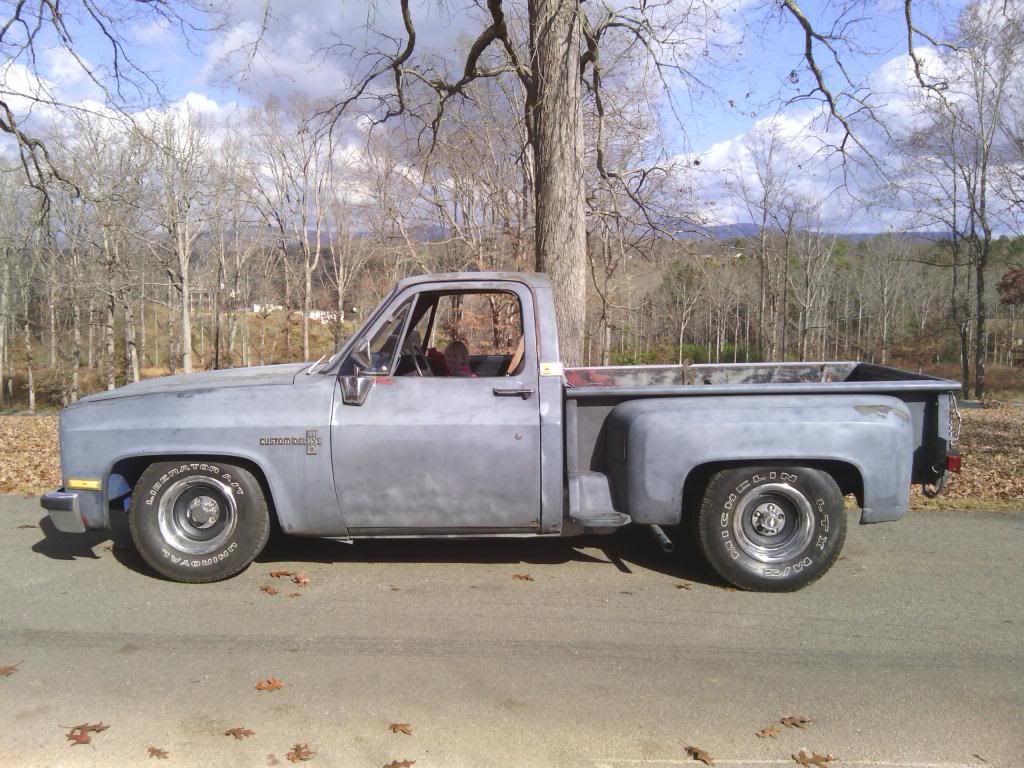 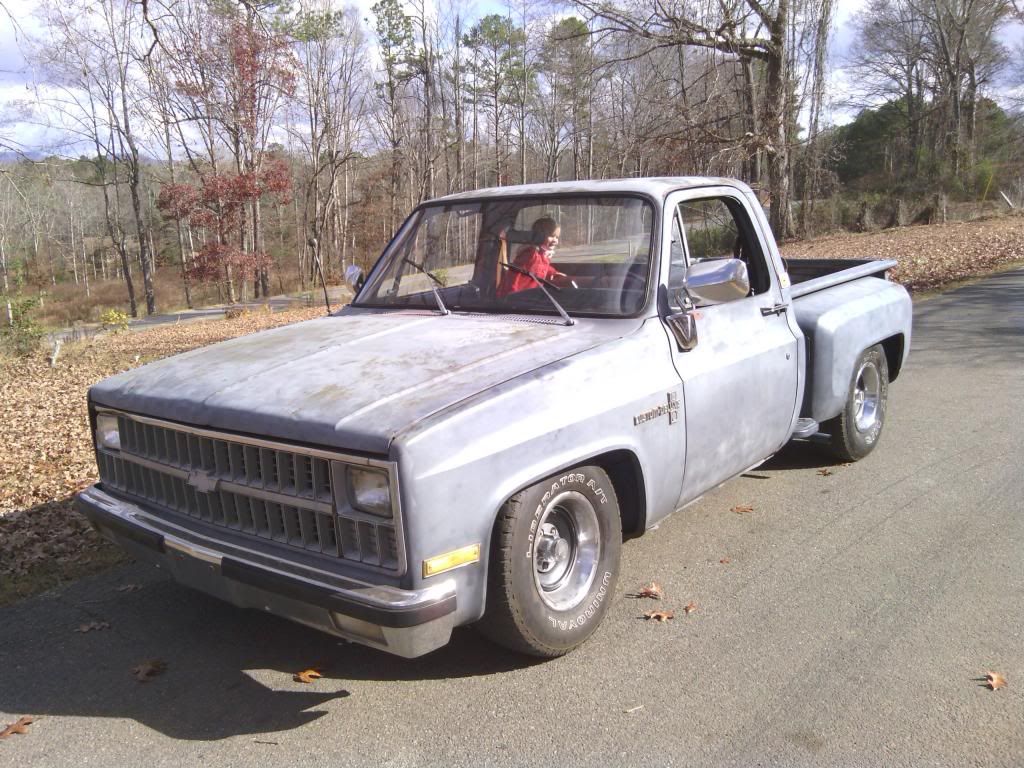 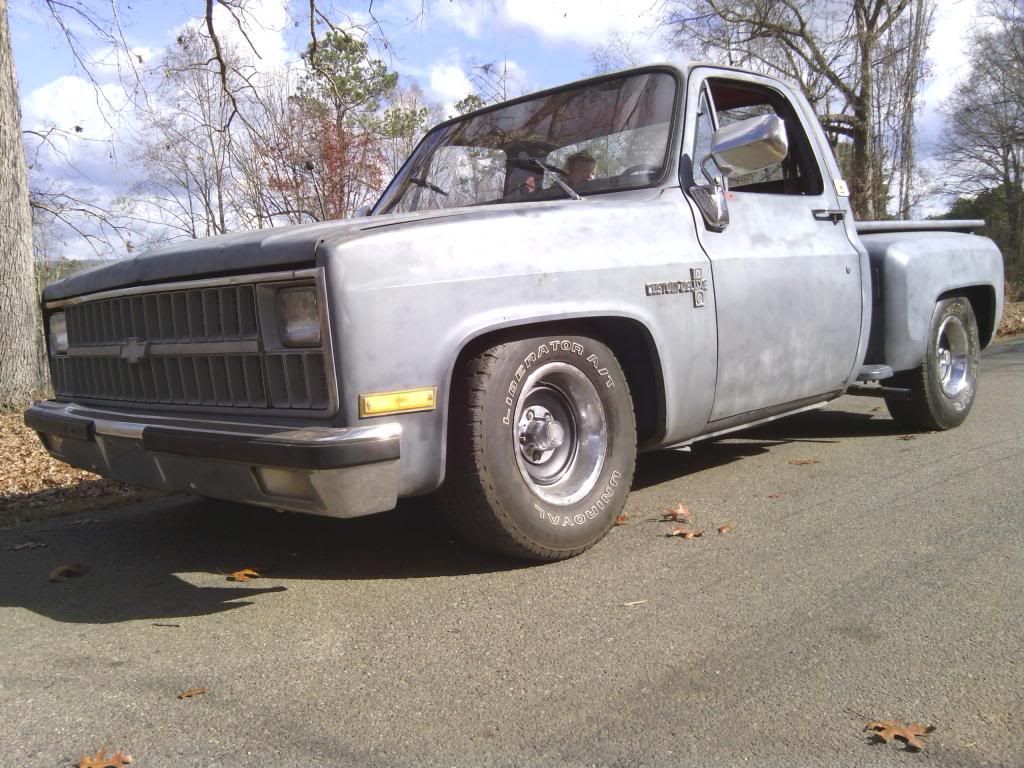 needz more low....... |
|
|
|
|
12-02-2012, 06:39 PM
|
#40 |
|
Registered User
Join Date: Nov 2012
Location: Atl, GA
Posts: 103
|
Re: Projekt Housewyfe
got a good bit more body work done today....
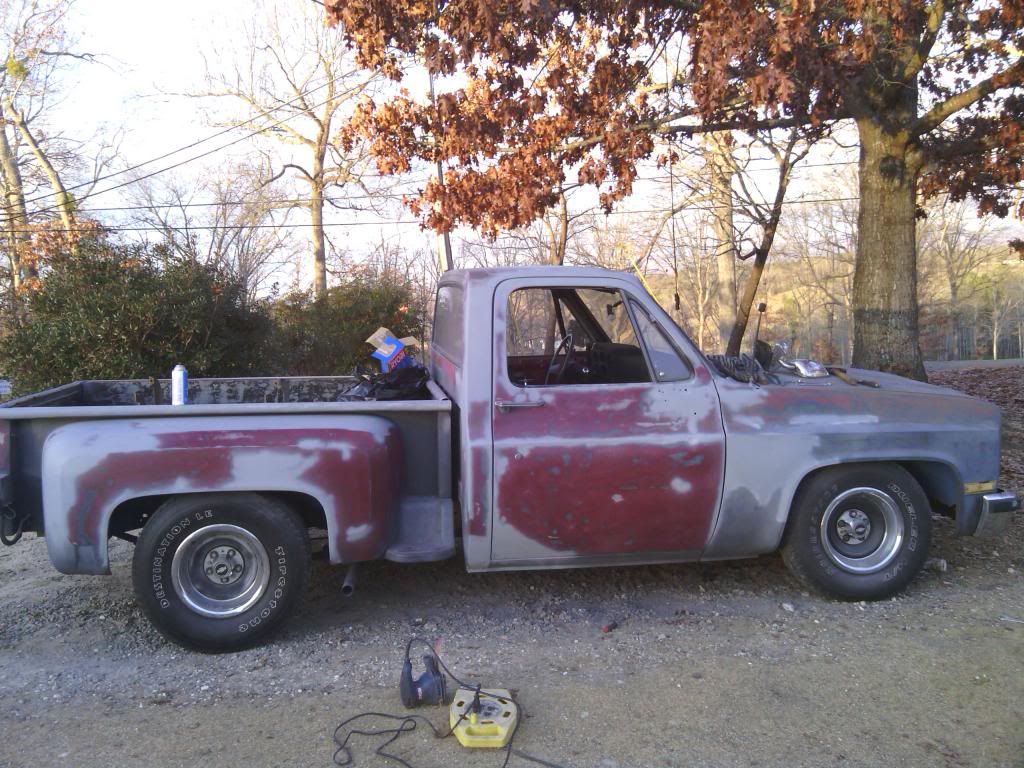
Remember that $#:tty wipe job on the bed? finally got around to sanding and shaping the 2nd layer of glass filler. still have to add the final layer of bondo and glaze putty to fill in the small pin holes and imperfections.   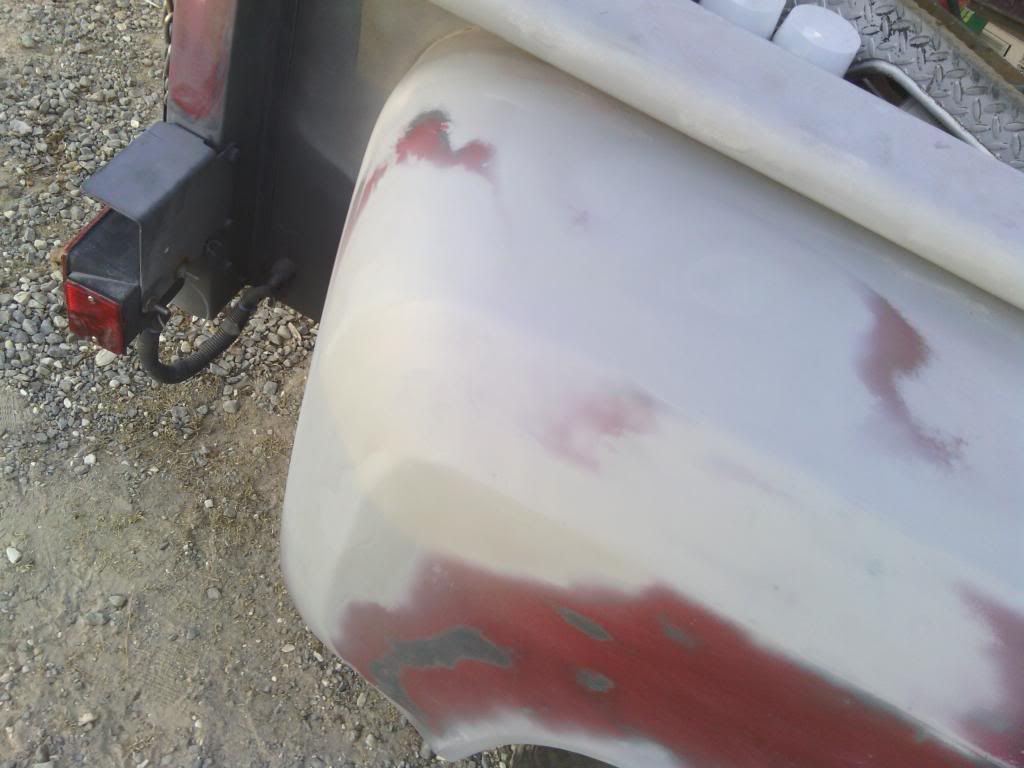 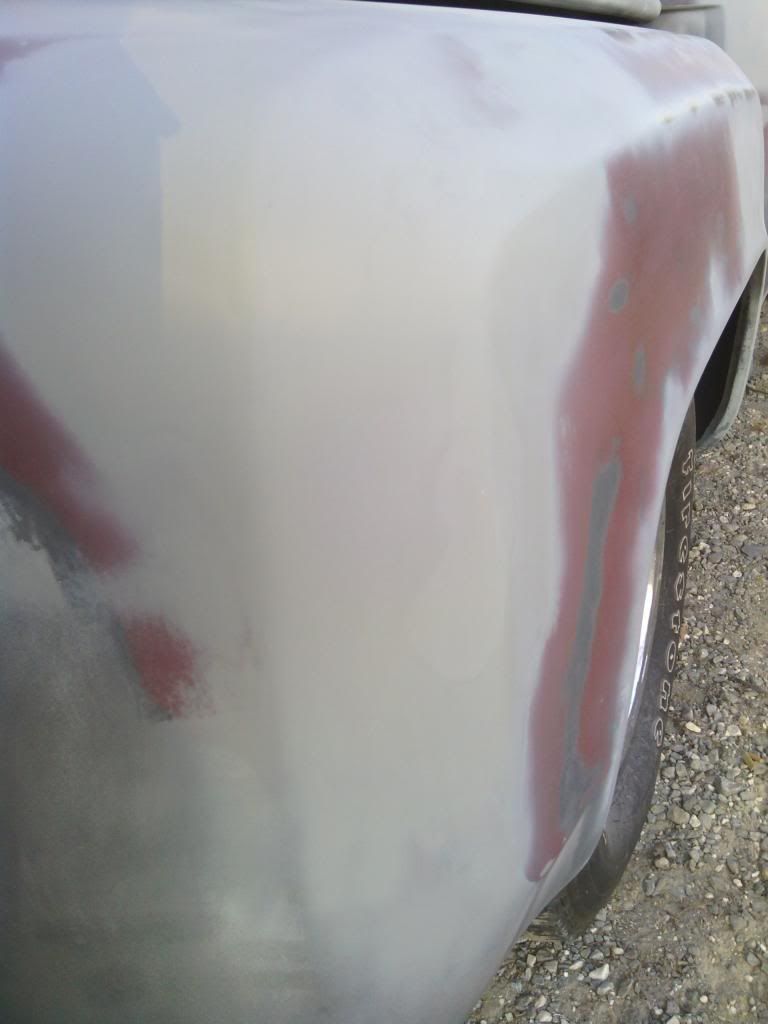
|
|
|
|
|
12-02-2012, 06:46 PM
|
#41 |
|
Registered User
Join Date: Nov 2012
Location: Atl, GA
Posts: 103
|
Re: Projekt Housewyfe
as for the huge hole in the rear lower cab quarter, i managed to ges some glass and resin backing in the whole itself, so id have something for the glass hair filler to stick too....
and rough sanded it. tons more work to do here.  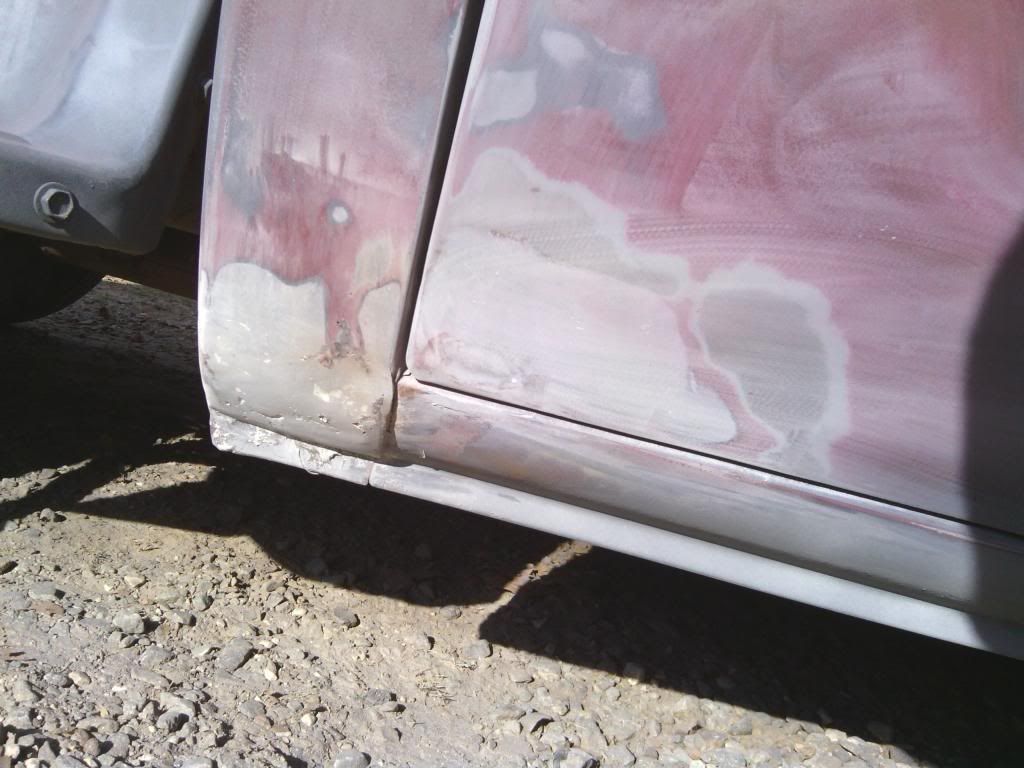 
|
|
|
|
|
12-02-2012, 06:52 PM
|
#42 |
|
Registered User
Join Date: Nov 2012
Location: Atl, GA
Posts: 103
|
Re: Projekt Housewyfe
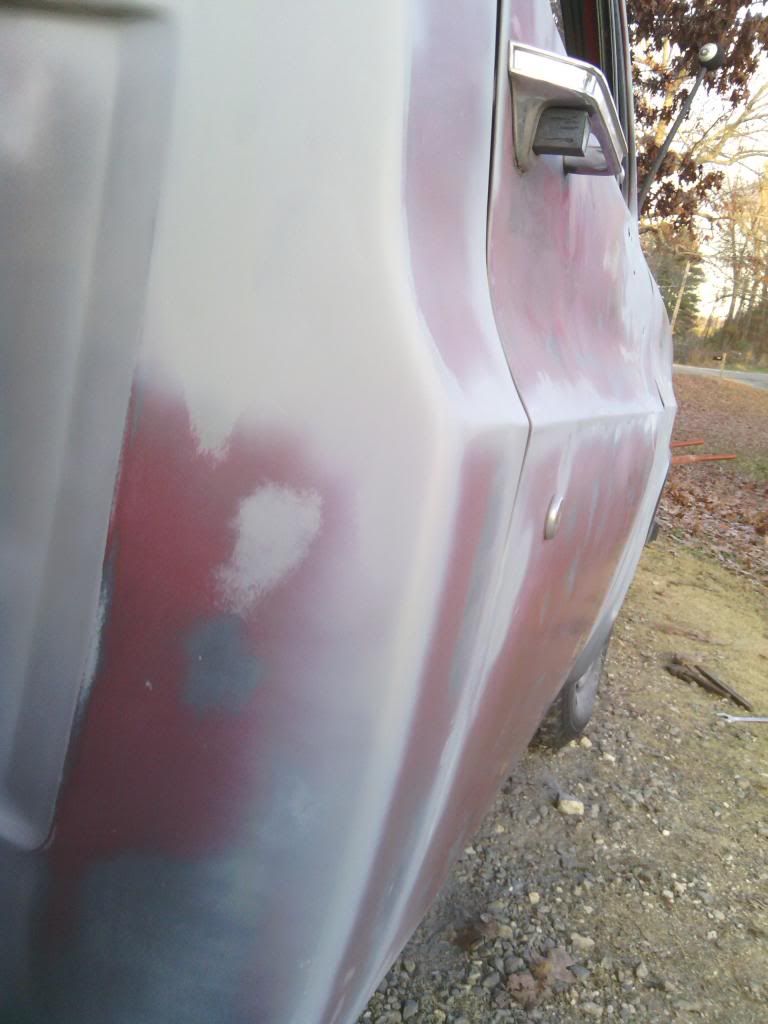
i also got around to sanding almost the entire passenger side with 100 grit, just to see what im working with, and where all the low spots are that will need working. removed the rear cab band too.
  apparently a few of the PO's couldnt decide which mirrors they liked.....thanks guys. you can also see in this picture, i have a hell of a ding right in the body line on the door, ive managed to sink it in a good bit to be able and reshape it with filler. 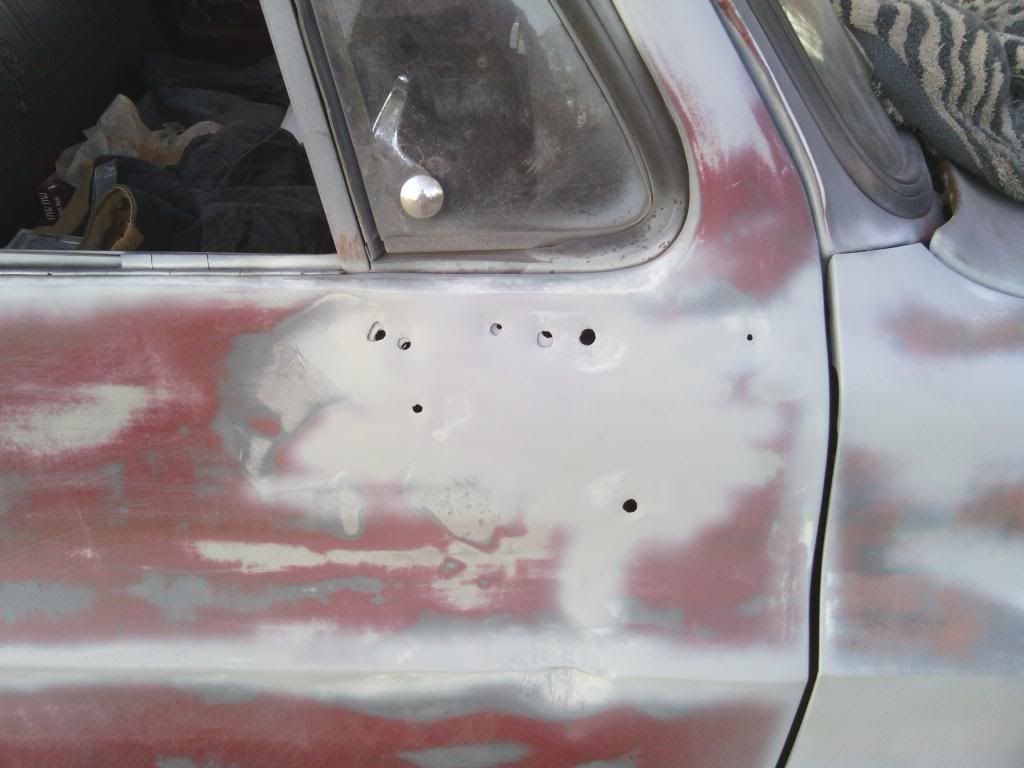
Last edited by shoob; 12-02-2012 at 07:13 PM. |
|
|
|
|
12-02-2012, 07:04 PM
|
#43 |
|
Registered User
Join Date: Nov 2012
Location: Atl, GA
Posts: 103
|
Re: Projekt Housewyfe
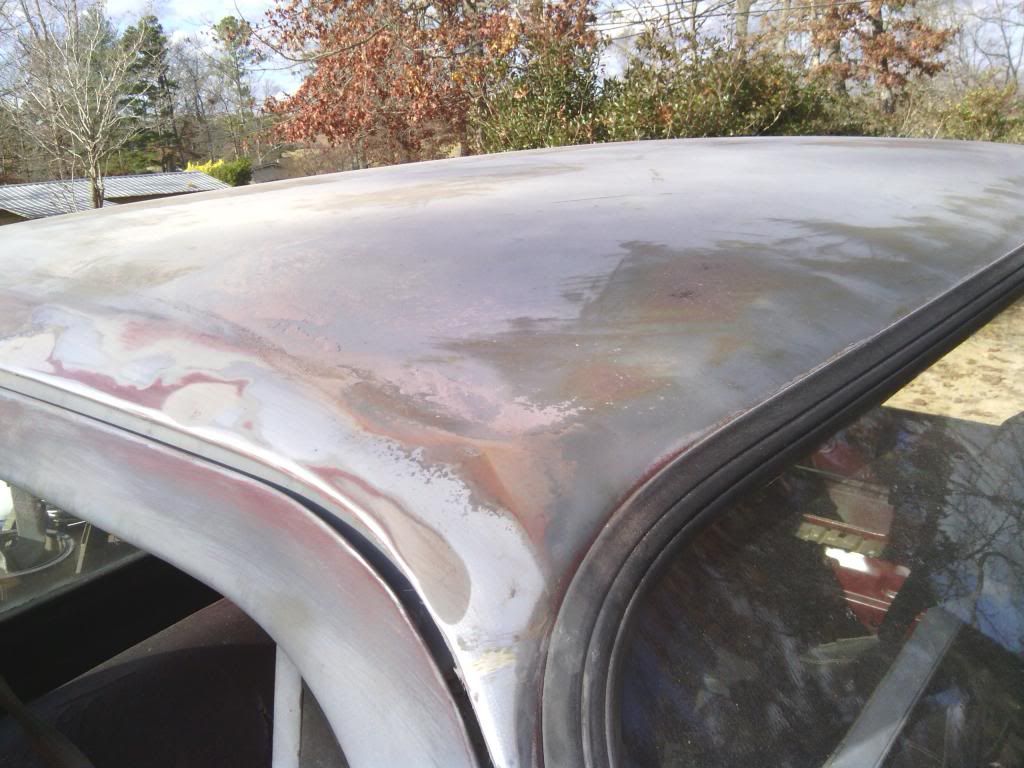
got the drip rail pretty much shaved, again, just glass filler, no bondo wipe or glaze yet. then, i never noticed this dent in the roof untill i lowered the truck......wtf. cant get to it from inside, so it looks like ill be visiting the shop to use there weld on dent puller thingy. cant really see itin this pic, but its about 8" in diameter, and at least an inch deep in the deepest part.
|
|
|
|
|
12-02-2012, 07:08 PM
|
#44 |
|
Registered User
Join Date: Nov 2012
Location: Atl, GA
Posts: 103
|
Re: Projekt Housewyfe
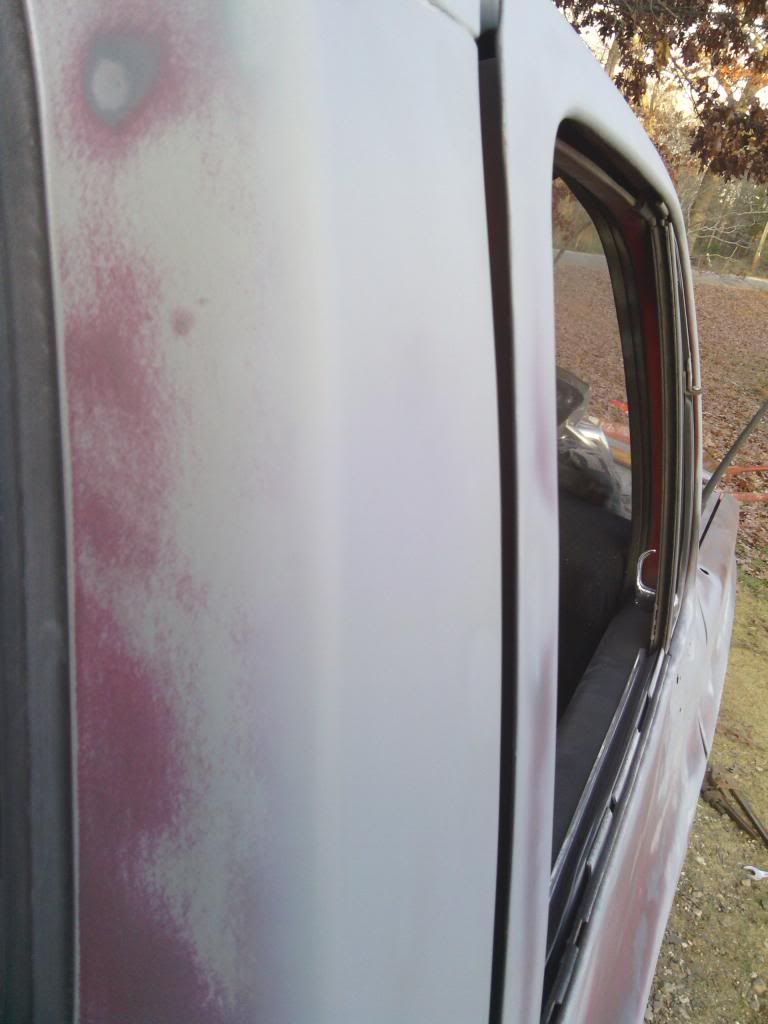
another issue ive ran into is the passenger door. while it closes flush at the bottom, it protrudes at the top, ive tried bending the top window rail by hand to get it to meet the body, but from being sore from last nights u-bolt-a-thon, and it being a real chevy truck.....no dice. any suggestions?
|
|
|
|
|
12-02-2012, 07:10 PM
|
#45 |
|
Registered User
Join Date: Nov 2012
Location: Atl, GA
Posts: 103
|
Re: Projekt Housewyfe
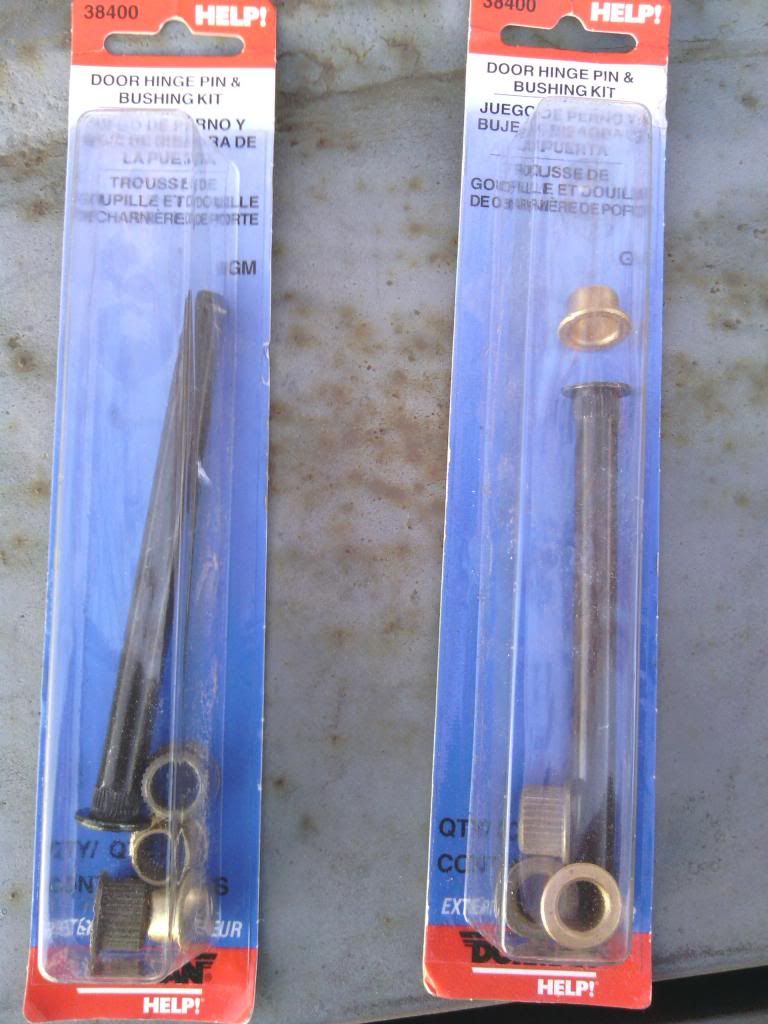
as for the body lines between the cab/door/fender, these should take care of that.....something every gm truck owner should be familiar with.
|
|
|
|
|
12-02-2012, 07:16 PM
|
#46 |
|
Registered User
Join Date: Nov 2012
Location: Atl, GA
Posts: 103
|
Re: Projekt Housewyfe
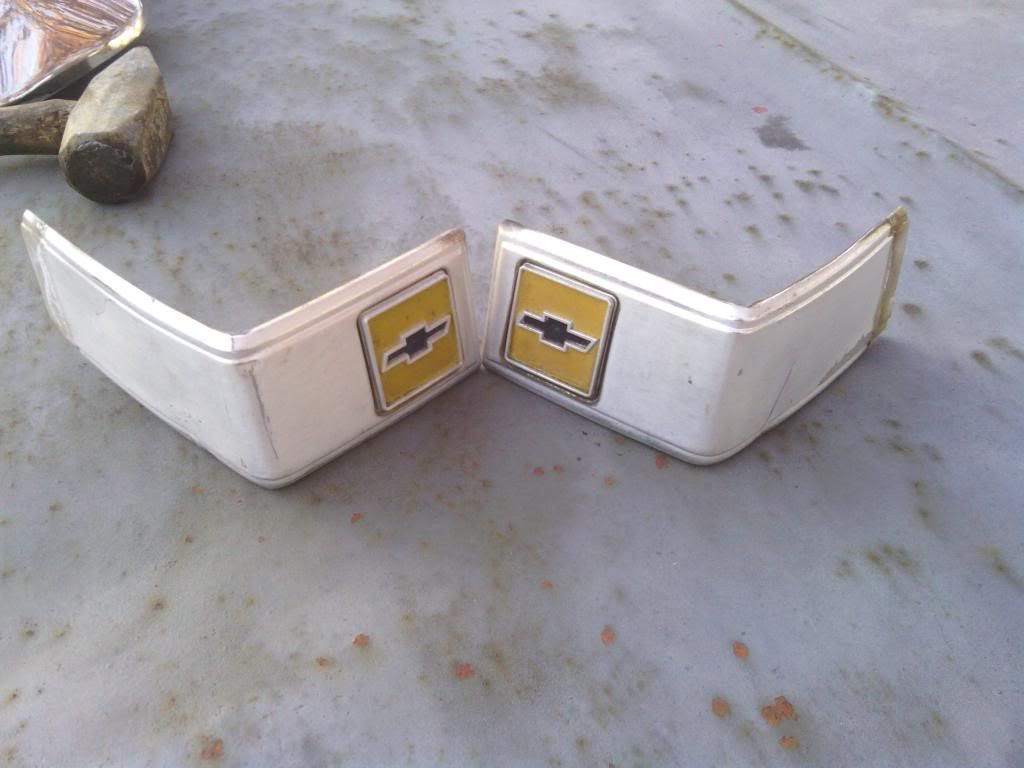
i removed the cab corner trim, and kinda have an idea. i think ill use my dremel and cut the square chevy logo's out, and bevel them, paint the yellow red, and either remount them on the fender, or their original spots on the cab, or on either side of the cowl hood im eyeballing.
|
|
|
|
|
12-02-2012, 07:48 PM
|
#47 |
|
Registered User
Join Date: Nov 2011
Location: Nashville TN
Posts: 3,595
|
Re: Projekt Housewyfe
FYI....Those door pins are bigger then oem so your gonna have to do some adjusting
 Good work today though..Its looking good
__________________
PLEASE HELP WITH PROJECT UNDERHAULIN http://67-72chevytrucks.com/vboard/showthread.php?t=306320 Gemini - 1978 GMC C15 High Sierra - 305 c/e - Given to Mother Electra - 1967 Mustang Coupe - 302/w 3 speed Build Chyna - 1968 Chevy C20 Long Stepper
|
|
|
|
|
12-02-2012, 08:46 PM
|
#48 |
|
Registered User
Join Date: Oct 2010
Location: Geneva, FL
Posts: 78
|
Re: Projekt Housewyfe
I have 15x10 2¾ backspace 8 lug american racing rims with 295 50r 15 with a 2 inch drop all the way around. If i go 5 inches lower ill be rubbing my fender. Looks like you got a really good deal for 900 bucks though!
Posted via Mobile Device
__________________
77' 3/4 Shortbed Stepside Silverado |
|
|
|
|
12-02-2012, 08:52 PM
|
#49 |
|
Registered User
Join Date: Oct 2010
Location: Geneva, FL
Posts: 78
|
Re: Projekt Housewyfe
And i just got done shaving my drip rails and back trim today. I do like the idea of removing the chevy logo and mounting it somewhere back on to the truck. I might just have to try it!
Posted via Mobile Device
__________________
77' 3/4 Shortbed Stepside Silverado |
|
|
|
|
12-02-2012, 09:29 PM
|
#50 |
|
Registered User
Join Date: Nov 2012
Location: Atl, GA
Posts: 103
|
Re: Projekt Housewyfe
thanks guys, it is a work in progress. as far as the door pins, what exactly do you mean? i used these on my s-10 blazer, and had no issues......are these different? will i need to bore the oem whole out or.......?
|
|
|
|
 |
| Bookmarks |
|
|


 Linear Mode

