
|
 01-06-2012, 02:36 PM
|
#26 | |
|
Registered User
Join Date: Sep 2011
Location: cedar lake indiana
Posts: 53
|
Re: my 57 ..project
Quote:
1'5" front to back 9 inches deep http://www.summitracing.com/parts/SUM-290100/ looks like this one from summit is the same |
|

|

|
|
01-11-2012, 12:16 AM
|
#27 |
|
Registered User
Join Date: Sep 2011
Location: cedar lake indiana
Posts: 53
|
Re: my 57 ..project
todays progress...have some finish grinding left and have to weld a brace because i eliminated the inner cab corner...other than that the floor will need to be filled (going to do that later when the cab is lifted off the frame)..
could be better..i expected worse..so i am happy |
|
|
|
|
01-11-2012, 01:13 AM
|
#28 |
|
Registered User
Join Date: Aug 2007
Location: Corona, California
Posts: 7,998
|
Re: my 57 ..project
Coming along nicely.
Kim |
|
|
|
|
01-11-2012, 01:28 AM
|
#29 | |
|
Registered User
Join Date: Sep 2011
Location: cedar lake indiana
Posts: 53
|
Re: my 57 ..project
Quote:
|
|
|
|
|
|
01-11-2012, 03:58 AM
|
#30 | |
|
Registered User
Join Date: Nov 2011
Location: Langley, BC
Posts: 702
|
Re: my 57 ..project
Quote:
|
|
|
|
|
|
01-11-2012, 08:47 AM
|
#31 |
|
A320 Pilot/USAF Retired
Join Date: Mar 2009
Location: Charleston, SC
Posts: 2,629
|
Re: my 57 ..project
Nice start on a great looking project!
__________________
JJ My 1957 build: http://67-72chevytrucks.com/vboard/s...d.php?t=334552 http://www.trifive.com/forums/showthread.php?t=22037 Instagram - Chuckdriver57 |
|
|
|
|
01-11-2012, 10:39 AM
|
#32 | |
|
Registered User
Join Date: Sep 2011
Location: cedar lake indiana
Posts: 53
|
Re: my 57 ..project
Quote:
|
|
|
|
|
|
01-11-2012, 04:41 PM
|
#33 |
|
Registered User
Join Date: Jun 2006
Location: Idaho
Posts: 8,800
|
Re: my 57 ..project
Not being terribly confident about my welding skills when I did my corners I did not need the full height of the patch panel. After I cut it to fit, I cut about a 1" piece of the section directly above my fit line. I then screwed it behind the original metal and screwed the patch panel to the exposed edge. the screws allowed me to get the panel flush, the little piece provided backing. Once I had the patch seam welded, I spot welded the screw holes. before painting and undercoat I used seam sealer on the inside so water could not get in between the two pieces. Purists and pro's are probably cringing but it keeps stuff aligned and over time I think it will keep the joint from flexing and cracking.
__________________
1959 Chevy Short Fleetside w/ 74 4WD drive train (current project) OrrieG Build Thread 1964 Chevelle Malibu w/ 355-350TH (daily driver) Helpful AD and TF Manual Site Old Car Manual Project |
|
|
|
|
01-11-2012, 08:53 PM
|
#34 | |
|
Registered User
Join Date: Sep 2011
Location: cedar lake indiana
Posts: 53
|
Re: my 57 ..project
Quote:
|
|
|
|
|
|
01-19-2012, 04:16 AM
|
#35 |
|
Registered User
Join Date: Sep 2011
Location: cedar lake indiana
Posts: 53
|
Re: my 57 ..project
so the door handles were shaved on my truck...
was wondering..besides cutting out the welds to get the holes for the locks and handles back..and getting new handles and locks..anything i should be aware of when putting handles and locks back on this thing,,,dont want any surprises and if it'll be to much of a task i might just by the door poppers... getting ready to pull the doors off and rebuild the windows and fix some rust issues so i figure this might be the time to tackle it either way |
|
|
|
|
02-09-2012, 02:15 PM
|
#36 |
|
Registered User
Join Date: Sep 2011
Location: cedar lake indiana
Posts: 53
|
Re: my 57 ..project
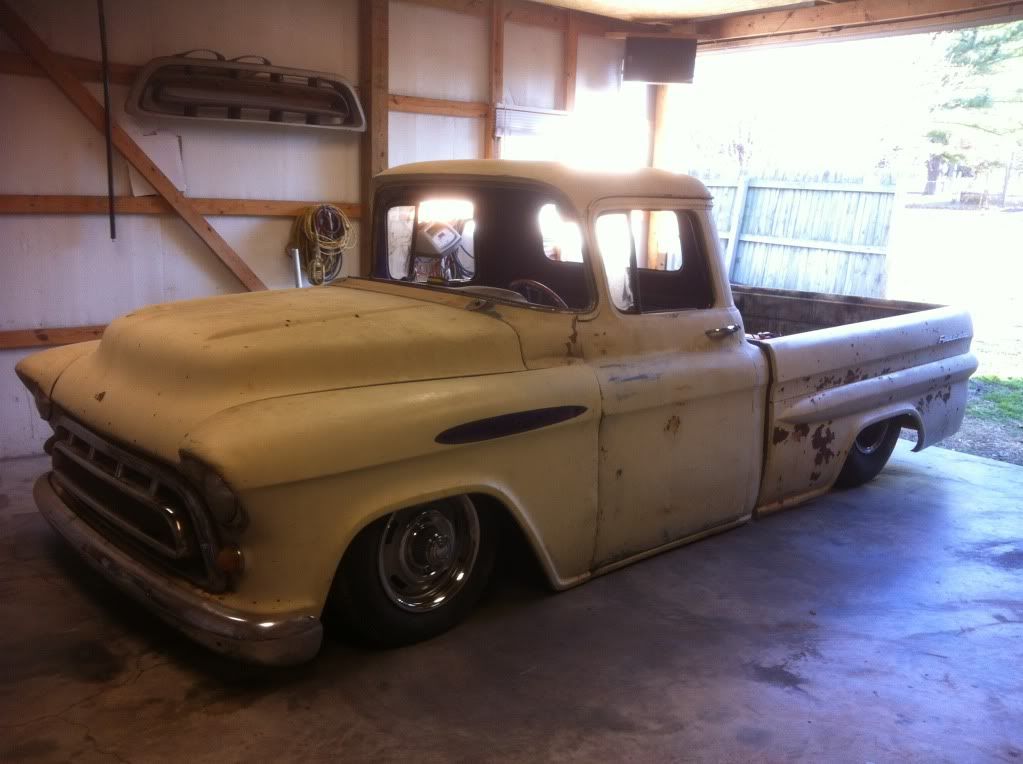
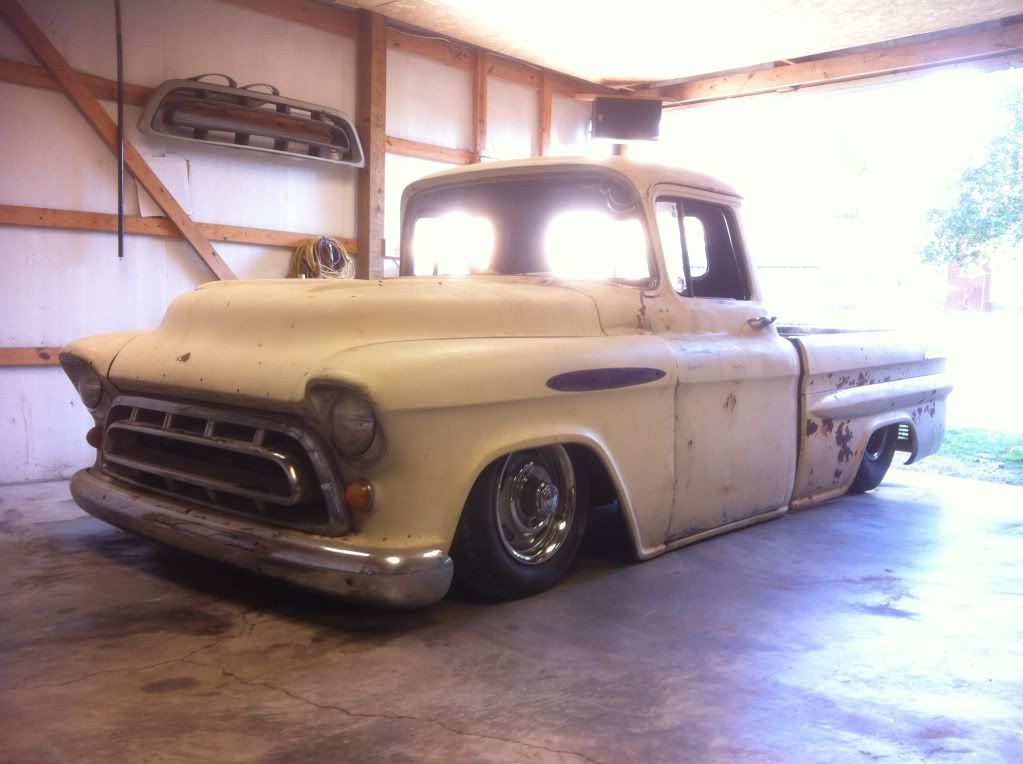
well it should be getting pretty interesting around here soon... ordered a bunch of stuff from brothers...and have all of my 4link parts and air suspension parts ordered......
anyone run air ride or have theirs dropped alot..if so what size wheels and tires are you running?..not looking for anything fancy... just stock looking steelies.... pictures would be helpful also |
|
|
|
|
02-09-2012, 03:18 PM
|
#37 |
|
Registered User
 Join Date: Dec 2011
Location: NE Oklahoma
Posts: 64
|
Re: my 57 ..project
Are you running pro street in the rear? my fronts are 80/15/s and rear are 31/16.5/15. you can see my build thread in my signature, looking Great BTW!
|
|
|
|
|
02-09-2012, 03:45 PM
|
#38 | |
|
Registered User
Join Date: Sep 2011
Location: cedar lake indiana
Posts: 53
|
Re: my 57 ..project
Quote:
you truck looks great though...actually have a set of chevy 15x6 rally wheels...only problem is my truck is 5x5...dont know about using adapters...might look into it though..like the way yours look |
|
|
|
|
|
02-09-2012, 05:28 PM
|
#39 |
|
Registered User
Join Date: Dec 2011
Location: NE Oklahoma
Posts: 64
|
Re: my 57 ..project
My truck was a 5x5 pattern, I purchased a new set of rotors and took them to a local machine shop and had them redrilled to fit the car pattern... I wouldn't use spacers, with the 6" wheels your going to be pushing hitting the fenders as it is... The wheels I am running are 5" and they tuck under nicely with about a finger gap to spare
|
|
|
|
|
02-09-2012, 07:33 PM
|
#40 |
|
Registered User
Join Date: Jan 2012
Location: Motown
Posts: 7,680
|
Re: my 57 ..project
i use the same method as orrieg does for welding patch panels in, 1'' backer plate and self-drill screws to hold everything together.
half the time the backer plate will come out, with a little effort. i also steal his pictures 
__________________
cool, an ogre smiley Ogre's 58 Truk buildhow to put your truck year and build thread into your signature shop air compressor timer |
|
|
|
|
02-10-2012, 02:48 AM
|
#41 | |
|
Registered User
Join Date: Sep 2011
Location: cedar lake indiana
Posts: 53
|
Re: my 57 ..project
Quote:
|
|
|
|
|
|
02-10-2012, 10:05 AM
|
#42 | |
|
Registered User
Join Date: Sep 2005
Location: Glendale Arizona
Posts: 1,188
|
Re: my 57 ..project
Camaro and nova are the same bolt pattern 5 on 4.75 , i think they work on the caddy spindles. Why dont you just have the rotors redrilled for chevy might be cheaper.
Quote:
|
|
|
|
|
|
04-02-2012, 11:46 PM
|
#43 |
|
Registered User
Join Date: Sep 2011
Location: cedar lake indiana
Posts: 53
|
Re: my 57 ..project
a little progress..cant wait to change shifts at work..it'll give me more time in the garage
|
|
|
|
|
04-02-2012, 11:58 PM
|
#44 |
|
Registered User
Join Date: Sep 2011
Location: cedar lake indiana
Posts: 53
|
Re: my 57 ..project
probably spent way to much time on this fender...if i would have worked the overtime i spent doing this one i could have bought a new one..but being my first project i want to do it all so it is what it is..
|
|
|
|
|
04-03-2012, 12:05 AM
|
#45 |
|
Registered User
Join Date: Aug 2007
Location: Corona, California
Posts: 7,998
|
Re: my 57 ..project
Looking good.
Kim |
|
|
|
|
04-03-2012, 12:53 AM
|
#46 | |
|
Registered User
Join Date: Sep 2011
Location: cedar lake indiana
Posts: 53
|
Re: my 57 ..project
Quote:
|
|
|
|
|
|
04-03-2012, 02:28 PM
|
#47 | |
|
Registered User
Join Date: Jan 2012
Location: Motown
Posts: 7,680
|
Re: my 57 ..project
Quote:
i could have bought a new truck if i had paid myself $2/hr there's a lot more satisfaction in driving what you built
__________________
cool, an ogre smiley Ogre's 58 Truk buildhow to put your truck year and build thread into your signature shop air compressor timer |
|
|
|
|
|
04-03-2012, 03:00 PM
|
#48 | |
|
Registered User
Join Date: Sep 2011
Location: cedar lake indiana
Posts: 53
|
Re: my 57 ..project
Quote:
|
|
|
|
|
|
04-03-2012, 06:25 PM
|
#49 |
|
Registered User
Join Date: Jan 2012
Location: Motown
Posts: 7,680
|
Re: my 57 ..project
that's a first... added door handles
__________________
cool, an ogre smiley Ogre's 58 Truk buildhow to put your truck year and build thread into your signature shop air compressor timer |
|
|
|
|
04-03-2012, 08:53 PM
|
#50 | |
|
Registered User
Join Date: Sep 2011
Location: cedar lake indiana
Posts: 53
|
Re: my 57 ..project
Quote:
|
|
|
|
|
 |
| Bookmarks |
|
|


 Linear Mode

