
 |
Register or Log In To remove these advertisements. |
|
|
|
|||||||
 |
|
|
Thread Tools | Display Modes |
|
|
#26 |
|
Senior Member
Join Date: Apr 2004
Location: sw colorado
Posts: 2,720
|
Re: Making an engine stand, the overkill way
back at it today!
it fits! really well. about 2 thou clearance and the bushings were concentric! 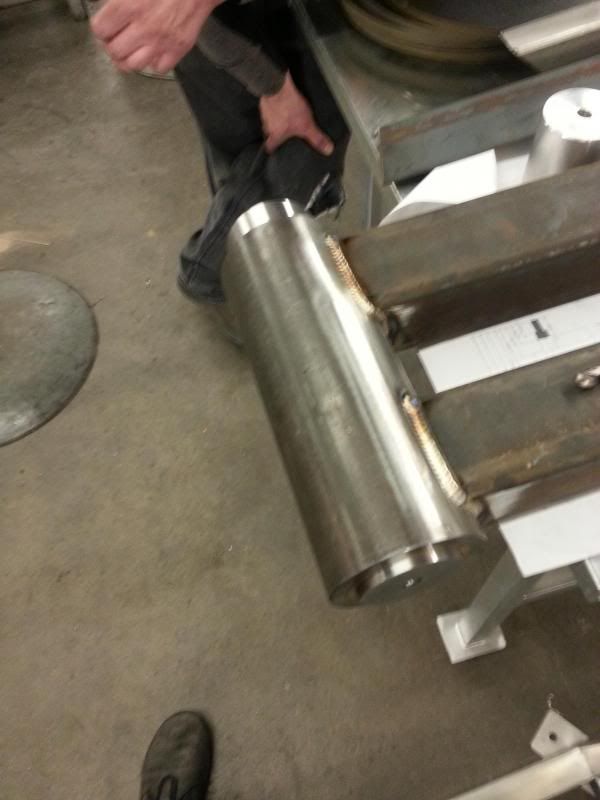 the big end. the mounting plate will be here one day 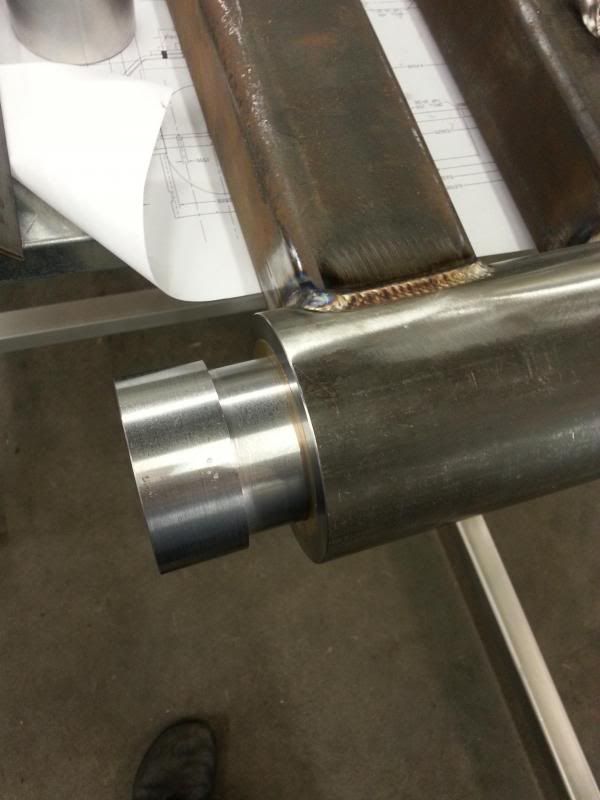 its not really a DIY project without a little blood letting... i didnt break the edge of the larger end and when it slid home, my thumb was in the way. Doh 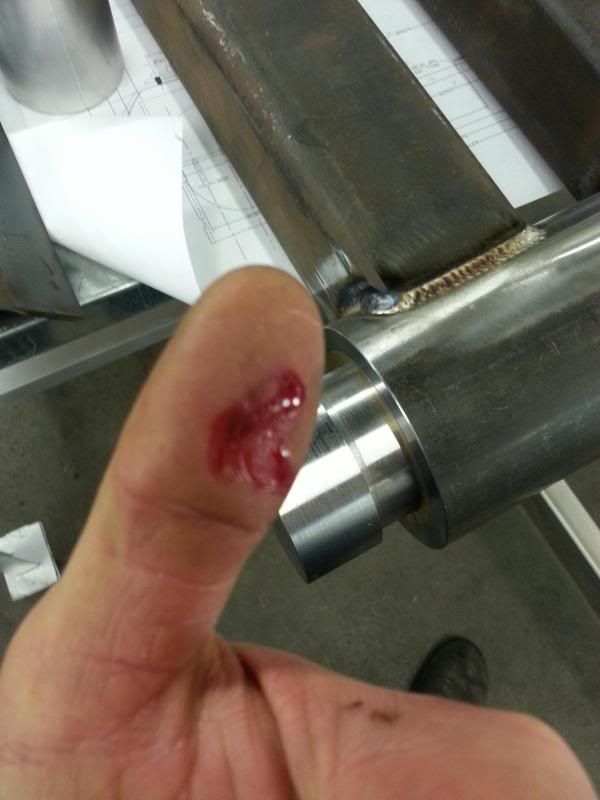 then i dug this bad boy out of the pile. its the inside of a flange we jetted. 1.5" plate and about 12" diameter now. i will be making it all pretty as well as cutting a bore for a press fit on the shaft. i know the the chuck is over jawed. itll be ok for no more than it is. 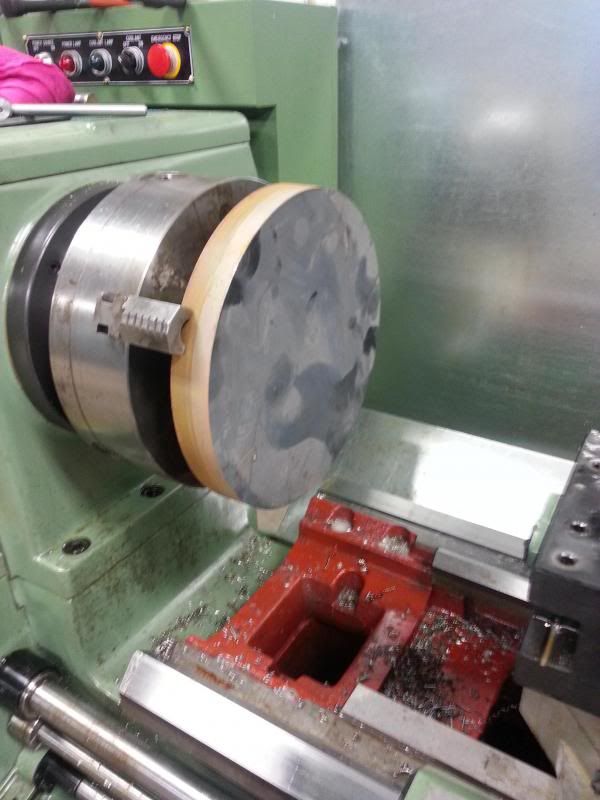
|
|
|

|
|
|
#27 |
|
I had a V-8
Join Date: May 2003
Location: Phoenix AZ
Posts: 1,116
|
Re: Making an engine stand, the overkill way
Nice thumb. That is so something that I would do.
I was at a shop today that had a 24V on a typical parts house stand mounted (sort of) to a plate mounted to the lower block on the oil cooler side. Had a plate mounted to the block and that mounted to the plate that the "adjustable arms" would typically mount to. There were four bolts at various angles through the two plates and three of them had nuts on them. The fourth was there but its support was in spirit only. It obviously worked, but it seemed just a little bit sketchy. Otherwise it looked like they did some nice work.
__________________
1972 K20 Suburban, 5.9L Cummins, Banks Power Pack, NV4500HD, NP205, H.A.D., D60/14FF ARB Link To Build: HERE. |
|
|

|
|
|
#28 |
|
60-66 Nut
  Join Date: Mar 2007
Location: Coeur d'Alene, Idaho
Posts: 23,252
|
Re: Making an engine stand, the overkill way
What's up with that 12" disc, the edge looks like wood

__________________
Power Steering Box Adapter Plates For Sale HERE Power Brake Booster Adapter Brackets For Sale '63-'66 HERE and '67-'72 HERE and '60-'62 HERE and "60-'62 with clutch HERE Rear Disc Brake Brackets For Sale. Impala SS calipers HERE Camaro Calipers HERE D52 Calipers HERE 6 Lug HERE Hydroboost Mounting Plates HERE |
|
|

|
|
|
#29 | |
|
Senior Member
Join Date: Apr 2004
Location: sw colorado
Posts: 2,720
|
Re: Making an engine stand, the overkill way
Quote:
thats the waterjet. it has this funny glaze of rust that forms after its cut. it does kinda look like wood in the picture.. 
|
|
|
|

|
|
|
#30 |
|
Senior Member
Join Date: Apr 2004
Location: sw colorado
Posts: 2,720
|
Re: Making an engine stand, the overkill way
|
|
|

|
|
|
#31 |
|
60-66 Nut
  Join Date: Mar 2007
Location: Coeur d'Alene, Idaho
Posts: 23,252
|
Re: Making an engine stand, the overkill way
That stands to reason. Being a drop, I imagine no one would have cared if it rusted a little.
__________________
Power Steering Box Adapter Plates For Sale HERE Power Brake Booster Adapter Brackets For Sale '63-'66 HERE and '67-'72 HERE and '60-'62 HERE and "60-'62 with clutch HERE Rear Disc Brake Brackets For Sale. Impala SS calipers HERE Camaro Calipers HERE D52 Calipers HERE 6 Lug HERE Hydroboost Mounting Plates HERE |
|
|

|
|
|
#32 |
|
Senior Member
Join Date: Apr 2004
Location: sw colorado
Posts: 2,720
|
Re: Making an engine stand, the overkill way
almost any mild steel part flash rusts as soon as you pull it from the table. if you get them off quick and wipe them down they stay pretty fresh, but what rust forms wipes off with a scotch brite pad.
i faced both sides and got the bore and OD all shiny. i wish i had waited to finish the bore till after i had the OD and faces cut. now there are jaw marks on the bore. i didnt make it a real tight press fit, so it should be OK, just more annoyance that i forgot to do it than anything. next step will be cutting the hole pattern. i cant decide if i should tap the holes or through bolt. and i am a little up in the air on what size to use. 6 grade 8 1/2" bolts will hold a lot, but i have room and thickness to go with 3/4... probably just do the 1/2. not really any sense in going so big. 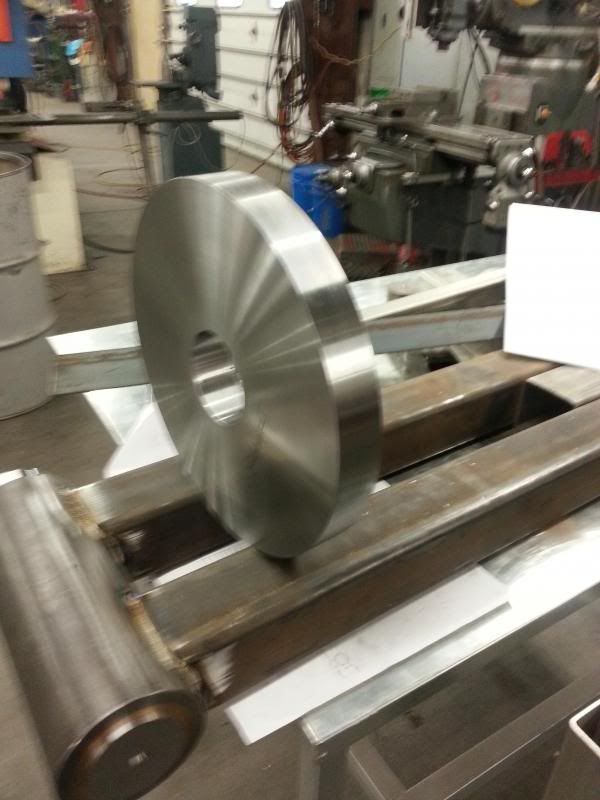 have to go do the taxes tomorrow immediately after work, but i think i will stop in saturday and look into counter boring the shaft and pressing the plate on the hub, or start cutting the rest of the framework. Last edited by ryanroo; 02-20-2014 at 11:33 PM. |
|
|

|
|
|
#33 |
|
Senior Member
Join Date: Apr 2004
Location: sw colorado
Posts: 2,720
|
Re: Making an engine stand, the overkill way
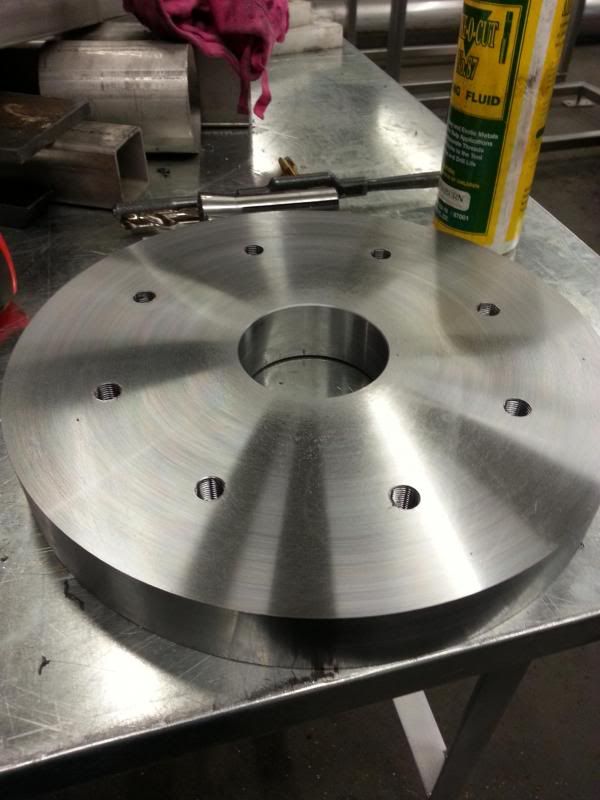
So, after i held the 5/8-18 tap in my hand for 5 minutes looking for a suitable 37/64" split point, i bailed out and went with the original plan of 1/2-20 tapped holes. i was planning a 6 on 7" pattern. since i went with the smaller bolt and ended up with a bigger diameter plate than i planned i decided to push that out to an 8 on 8" 8 half inch bolts will hold more than this stand could hope to, so i think it will be A OK.
|
|
|

|
|
|
#34 |
|
Senior Member
Join Date: Apr 2004
Location: sw colorado
Posts: 2,720
|
Re: Making an engine stand, the overkill way
I dropped by the shop yesterday for a bit.
i counter bored the end of the shaft for clearance on the drive output. 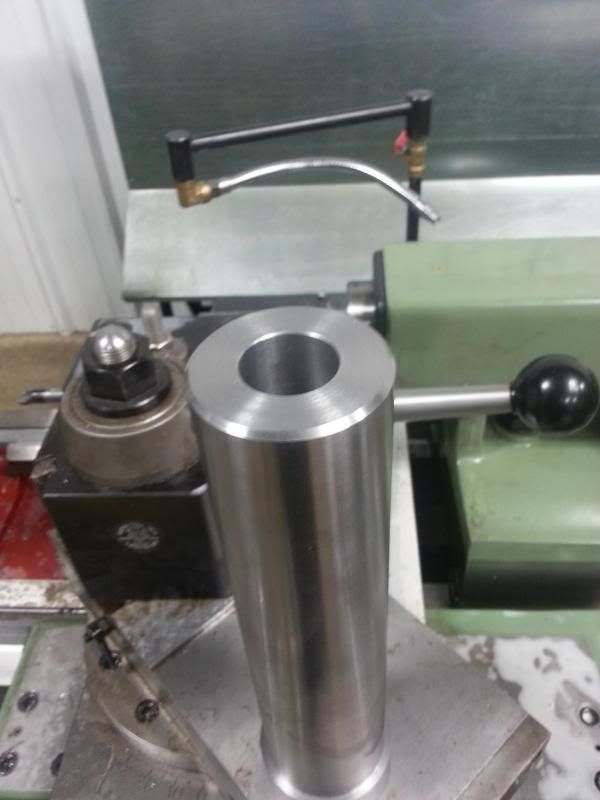 i also cut the lower frame. i have my welders all scattered due to work projects, so i didn't begin tacking it up. 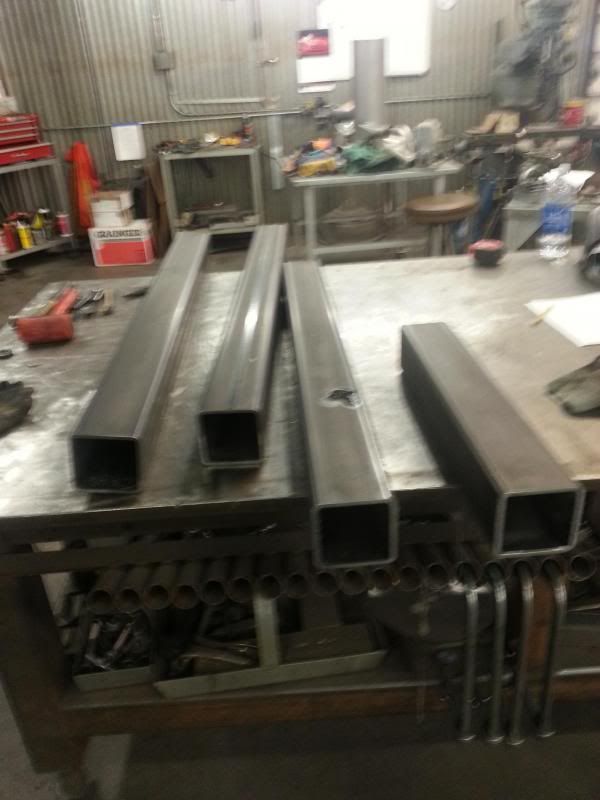 then i pressed the shaft into the flange. i dithered on how i wanted to do this, ended up leaving a lip on the rear, headstock side for welding and then the front also has a pocket for weld. the front side will be machined a little more to get it perfectly true to the shaft. cant have any runout on this high performance engine(stand). haha 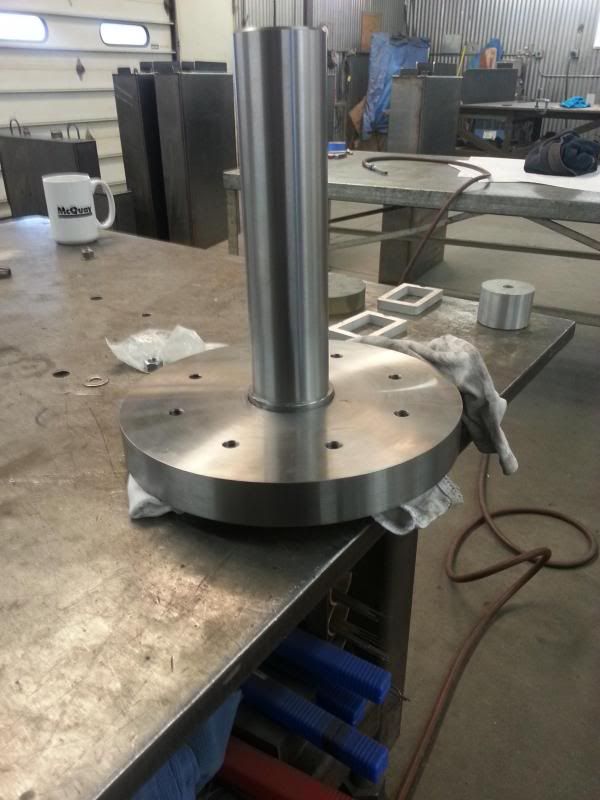 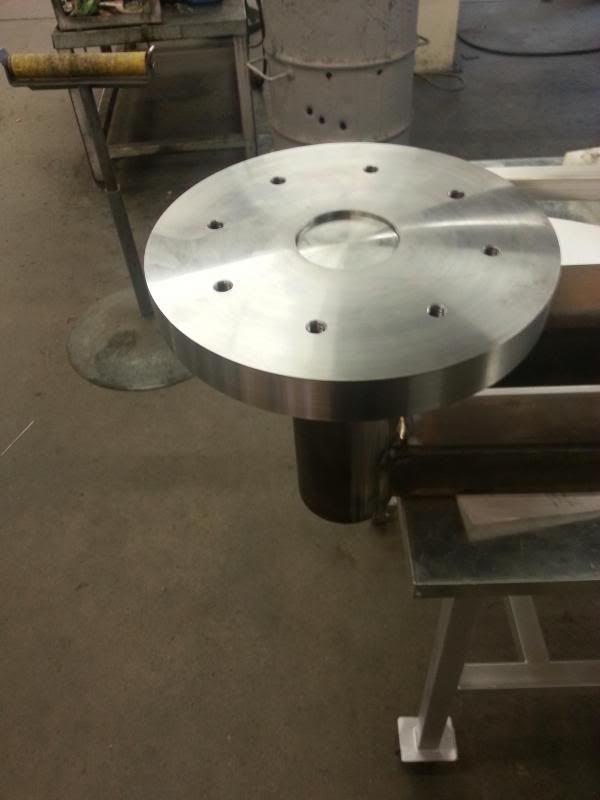
|
|
|

|
|
|
#35 |
|
Registered User
Join Date: Oct 2007
Location: Spanaway
Posts: 8,451
|
Re: Making an engine stand, the overkill way
Runnout? what??
 This has got to be the nicest and most over planned and stout buildup on an engine stand ever, Great work! This has got to be the nicest and most over planned and stout buildup on an engine stand ever, Great work!
__________________
Mike. Swamp Rat build thread : http://67-72chevytrucks.com/vboard/s...d.php?t=595019 72 3/4T 4X4 4" BDS Lift 33" BFG's |
|
|

|
|
|
#36 |
|
Senior Member
Join Date: Apr 2004
Location: sw colorado
Posts: 2,720
|
Re: Making an engine stand, the overkill way
|
|
|

|
|
|
#37 |
|
Junk Yartist
Join Date: Jul 2009
Location: Greeley, CO
Posts: 2,203
|
Re: Making an engine stand, the overkill way
I'm guessing 1100# when its all done...
__________________
-Jeremy YOU ONLY FAIL IF YOU STOP TRYING 70 Crew Cab Build Link 70 GMC Suburban 4X4 build thread 95 Yukon Daily Driver Rebuilding an NP205 |
|
|

|
|
|
#38 |
|
Senior Member
Join Date: Apr 2004
Location: sw colorado
Posts: 2,720
|
Re: Making an engine stand, the overkill way
well i hope the capacity is more than that! and if it weighs 1100 finished, ive been shopping for the wrong casters! i wouldnt doubt it weighs all of 350 when it gets finished. i was thinking that i need to weigh it before i take it home though. i am curious what frankenstand will weigh.
|
|
|

|
|
|
#39 |
|
Senior Member
Join Date: Apr 2004
Location: sw colorado
Posts: 2,720
|
Re: Making an engine stand, the overkill way
|
|
|

|
|
|
#40 |
|
Registered User
 Join Date: Jan 2003
Location: Safford,AZ
Posts: 3,625
|
Re: Making an engine stand, the overkill way
sure is nice and beefy!!
__________________
1969  307, t350 307, t3501950 Chevy Wagon 1978 Big 10 1967 C10, 250,3-OTT |
|
|

|
|
|
#41 |
|
Senior Member
Join Date: Apr 2004
Location: sw colorado
Posts: 2,720
|
Re: Making an engine stand, the overkill way
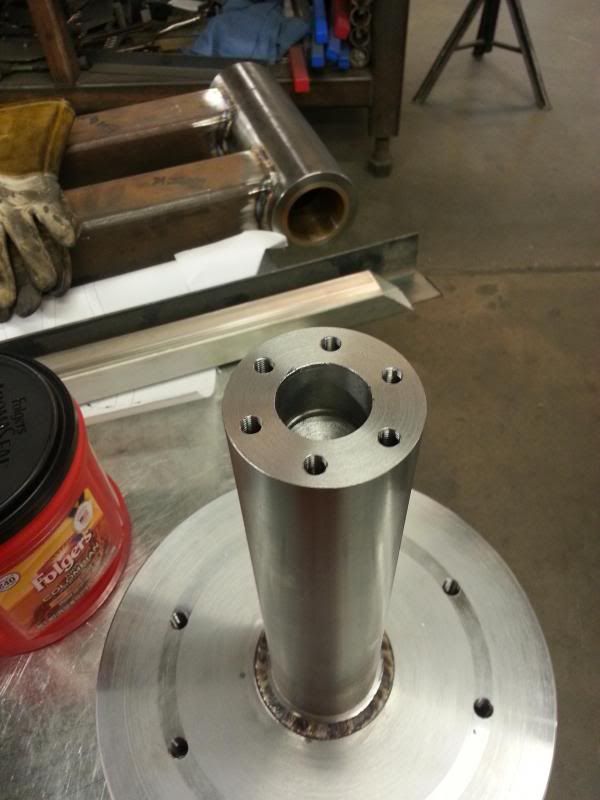
I drilled and tapped the bolt pattern in the end of the shaft. i decided to go with 6 instead of 4. these are 5/16-24
 broke out the spray gun and built a frame 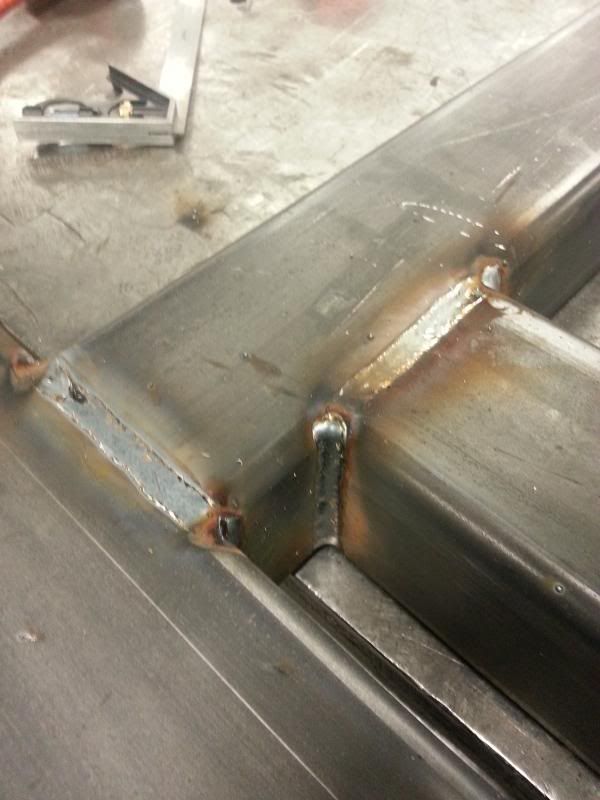 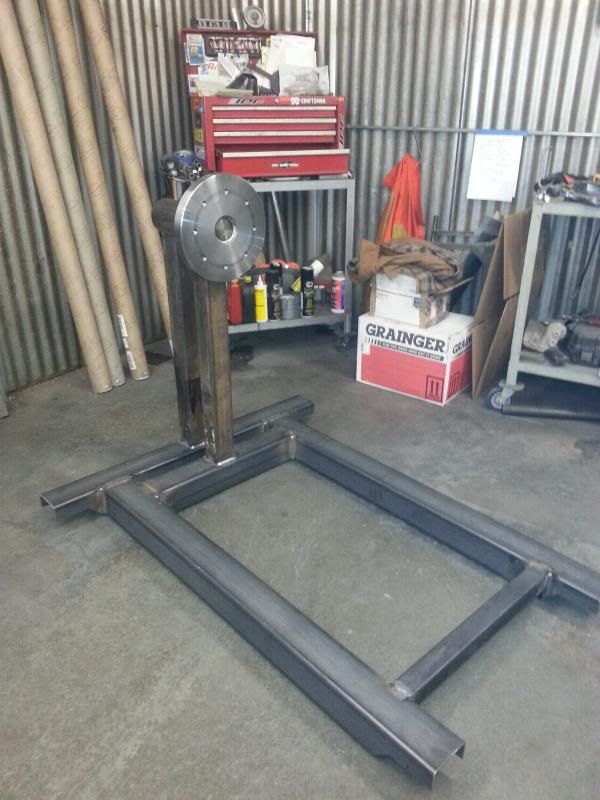 this is a close up of the rear retainer. i was going to machine it, but 15 minutes in the aquatic center saved my 2 hours or more of machining. good enough for me 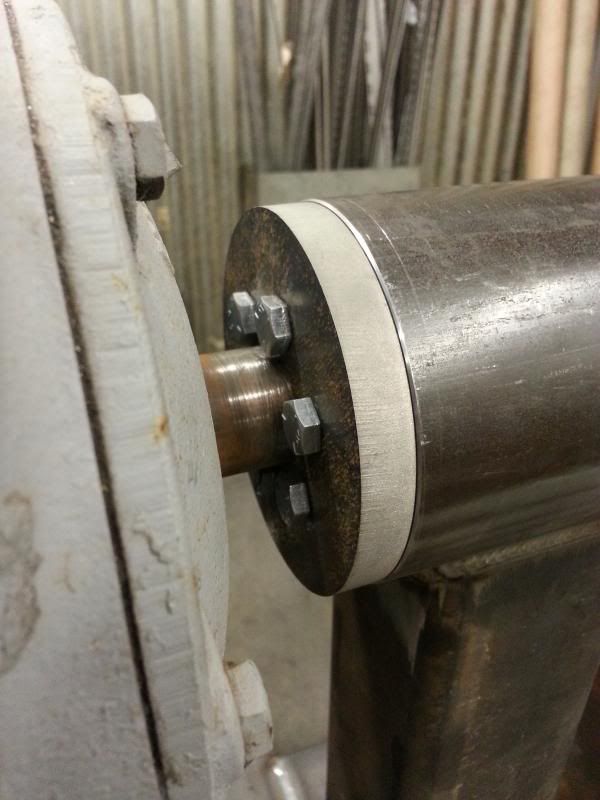 built a mount for the gear box 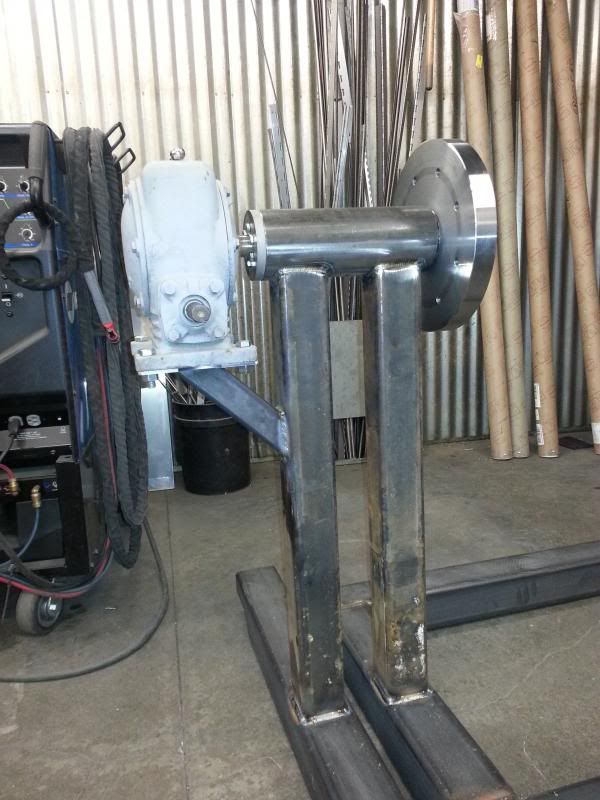 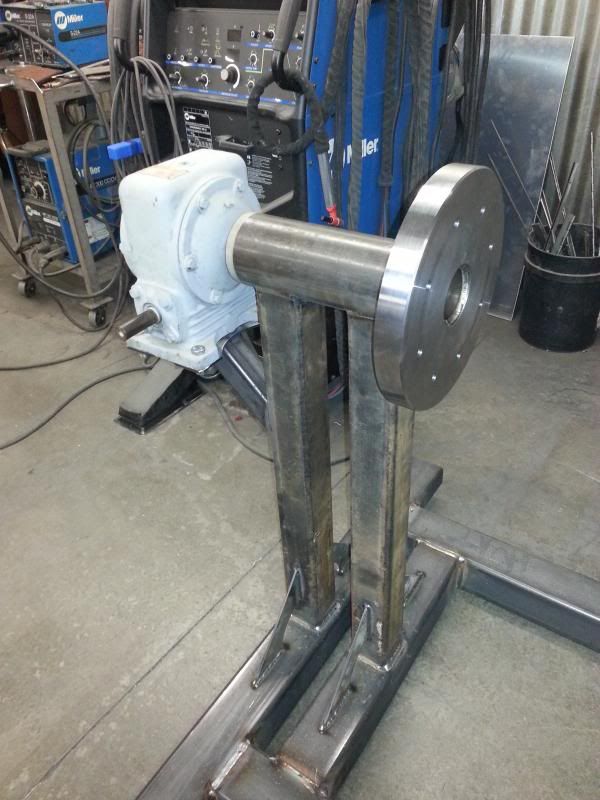 and i gusseted the upright. i dont think its going anywhere, but they are library parts on the machine so it was quick and easy 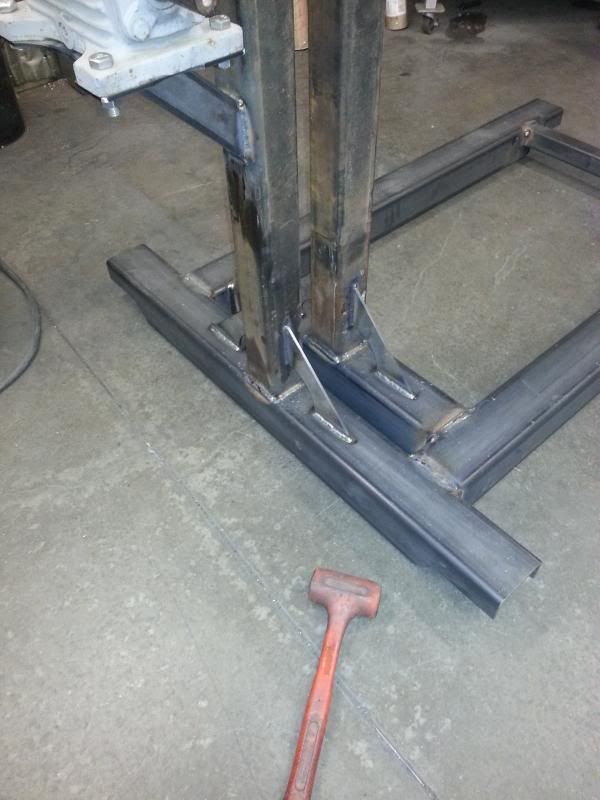
|
|
|

|
|
|
#42 |
|
Registered User
 Join Date: Jan 2003
Location: Safford,AZ
Posts: 3,625
|
Re: Making an engine stand, the overkill way
Wait-hold up here.
 You build this super beefy engine stand and use scrap steel strip for the gussets ??  How about a 2x2 over that gusset to make it look more correct? I'm just busting your **ts, it your design and its looking good.
__________________
1969  307, t350 307, t3501950 Chevy Wagon 1978 Big 10 1967 C10, 250,3-OTT |
|
|

|
|
|
#43 |
|
Registered User
Join Date: Aug 2013
Location: Marion AR
Posts: 33
|
Re: Making an engine stand, the overkill way
I just checked on the last 5.9 we shipped out. All dressed out ready to run with shipping stand weighed 900LBS. I don't know which wheels you have but all of ours are steel. If the wheels don't have brakes you might have to come up with something to keep it from scooting around when your tourquing things down. We cut up 2 C clamps and welded it to the inside frame. Just run it down and it sits flat. I'm sure you can come up with something nicer though. Looking good and we start the day with your post.
|
|
|

|
|
|
#44 |
|
Junk Yartist
Join Date: Jul 2009
Location: Greeley, CO
Posts: 2,203
|
Re: Making an engine stand, the overkill way
Just more proof that off the shelf is no substitute for good old hand made in the USA. UNBELIEVABLE craftsmanship and use of materials.
__________________
-Jeremy YOU ONLY FAIL IF YOU STOP TRYING 70 Crew Cab Build Link 70 GMC Suburban 4X4 build thread 95 Yukon Daily Driver Rebuilding an NP205 |
|
|

|
|
|
#45 |
|
Registered User
Join Date: Oct 2007
Location: Spanaway
Posts: 8,451
|
Re: Making an engine stand, the overkill way
Got to admit, square tube gussets would look cool on the stand.
That said i'm still sitting here drooling at the workmanship. Did you think to add any grease zirks? When you weld are you making the beads with a straight linear movement? or making little circles? I want to learn to weld like you!
__________________
Mike. Swamp Rat build thread : http://67-72chevytrucks.com/vboard/s...d.php?t=595019 72 3/4T 4X4 4" BDS Lift 33" BFG's |
|
|

|
|
|
#46 | ||||
|
Senior Member
Join Date: Apr 2004
Location: sw colorado
Posts: 2,720
|
Re: Making an engine stand, the overkill way
Quote:
there is really no need for the gussets as it is. the side load on the column is almost nothing. the worst it will see is if i add force while torquing something. and trust me, the design and welding are far stronger than any force i can manage to exert even on a breaker bar. given the gear box and the fact that there wont be any shcok load associated with turning the engine on the stand the gussets are mostly a just because thing. i had thought about the square tube, but i feel it would be to obtrusive. the only thing i would consider is a flat strap on the top to make it a T. that might add some class. I should add that they are actually CNC plasma cut and have a little flair to them! its just hard to see in the picture. and that the whole stand is mostly made of drops and scrap... i'm a scrounger! Quote:
thanks for the weight number. i feel pretty confident this thing will handle that. so far ive been asked if it is for a 3406 and a 3408 by two separate people. Haha. Quote:
Quote:
the zerk will be added to the headstock when i pull it all apart for paint. i didn't want to drill it right now with the shaft in there, and i totally forgot before i assembled it. i have a Sharpie note on the headstock so i dont whiff it again! The welding motion is linear. any side to side is only to accomodate my shakiness or to make sure to get proper fusion on both edges. at spray arc voltages there isn't much point in making any patterns in the weld unless you are doing a weaved double pass. you can get a 10mm weld with no cold lap or undercut with the right settings and wire, and the weld nugget is very deep in comparison to short arc. |
||||
|
|

|
|
|
#47 | |
|
Registered User
Join Date: Oct 2007
Location: Spanaway
Posts: 8,451
|
Re: Making an engine stand, the overkill way
Quote:
Keep up the good work!
__________________
Mike. Swamp Rat build thread : http://67-72chevytrucks.com/vboard/s...d.php?t=595019 72 3/4T 4X4 4" BDS Lift 33" BFG's |
|
|
|

|
|
|
#48 |
|
Registered User
Join Date: Mar 2012
Location: Lacombe, Alberta
Posts: 288
|
Re: Making an engine stand, the overkill way
Subscribed simply because of the awesome build quality.
|
|
|

|
|
|
#49 |
|
Senior Member
Join Date: Apr 2004
Location: sw colorado
Posts: 2,720
|
Re: Making an engine stand, the overkill way
thanks
i laid this out and managed to get it right. 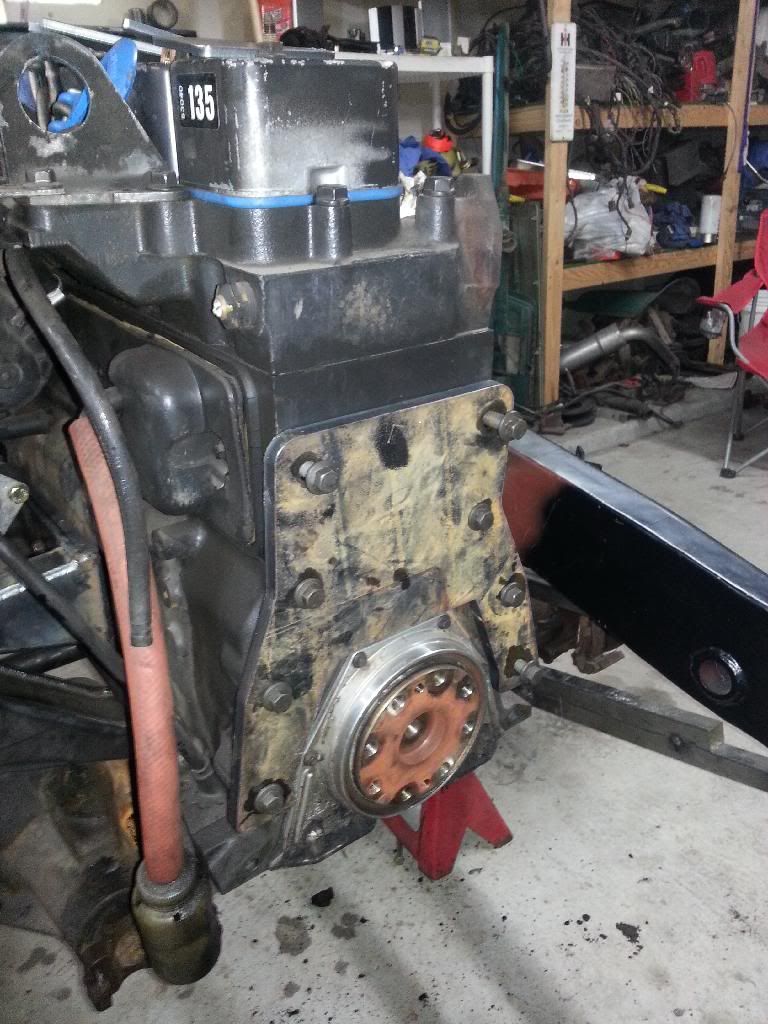 so i made up the adapter plate. i decided to paint it cummins blue. i figure as i built more adapters i would be able to tell them apart easier if they were all colored differently and what the heck, i may as well give them a color that matched the manufacturer somehow. i dont like beige, so that was out 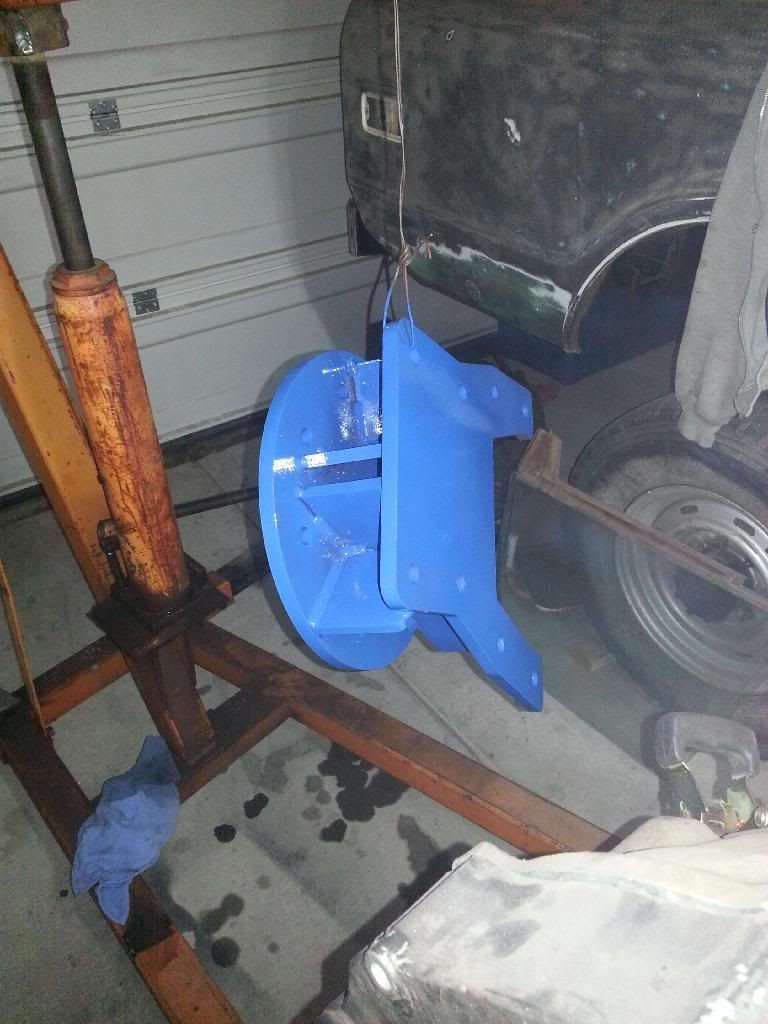
|
|
|

|
|
|
#50 |
|
60-66 Nut
  Join Date: Mar 2007
Location: Coeur d'Alene, Idaho
Posts: 23,252
|
Re: Making an engine stand, the overkill way
Lookin good
 Are you spraying .035 or .045?
__________________
Power Steering Box Adapter Plates For Sale HERE Power Brake Booster Adapter Brackets For Sale '63-'66 HERE and '67-'72 HERE and '60-'62 HERE and "60-'62 with clutch HERE Rear Disc Brake Brackets For Sale. Impala SS calipers HERE Camaro Calipers HERE D52 Calipers HERE 6 Lug HERE Hydroboost Mounting Plates HERE |
|
|

|
 |
| Bookmarks |
|
|