
 |
|
|
#26 |
|
Registered User
Join Date: Jul 2013
Location: minneapolis, mn
Posts: 28
|
Re: Simple TBI build
Chris,
I just finished installing the same GM L05 from Summit in my 87. I also used the Edelbrock 3704 and stock TBI. I am curious to see how you deal with a few of the snags that I ran into using the aftermarket manifold. Can't wait to see your updates! Have fun! Tony |
|
|

|
|
|
#27 |
|
Registered User
Join Date: Aug 2005
Location: Louisiana
Posts: 711
|
Re: Simple TBI build
I am running the Summit (Flowtech) 1-1/2 long tube headers on my '85 C10, no issues except I had to dimple the #3 tube just a tad for spark plug boot clearance. I am running Dart s/s 165 heads with straight plugs.
|
|
|

|
|
|
#28 | |
|
Registered User
Join Date: Dec 2011
Location: Boise, Idaho
Posts: 582
|
Re: Simple TBI build
Quote:
All of my brackets did not align with the edlebrock holes. No horrible, +/- 1/4 inch. Easy enough to fix, just thought they would have it dialed in a little better. |
|
|
|

|
|
|
#29 | |
|
Registered User
Join Date: Jul 2013
Location: minneapolis, mn
Posts: 28
|
Re: Simple TBI build
Quote:
Are you planning to keep all of the emissions equipment? T |
|
|
|

|
|
|
#30 |
|
Registered User
Join Date: Dec 2011
Location: Boise, Idaho
Posts: 582
|
Re: Simple TBI build
I have to keep all of the emissions stuff.
If i had not ground on the intake,, i would be sending it back. |
|
|

|
|
|
#31 |
|
Registered User
Join Date: Oct 2009
Location: Buhl, Idaho
Posts: 1,438
|
Re: Simple TBI build
I hope your crate motor doesn't leak like mine does. I will be following along, the flat tappet cam will be fine just use a zinc additive on break in ect..
__________________
86 c30 crew cab dually 454/400 4/6 drop SOLD 1-8-11 1981 chevy K10 short Bed Scottsdale SOLD 10-26-2020 67 GMC Stepside Straight six/3 on the tree "The Peach" 2020 Silverado Double Cab LT Z71 5.3 8 speed Daily Driver K10 build http://67-72chevytrucks.com/vboard/s...d.php?t=671934 The Peach build http://67-72chevytrucks.com/vboard/s...d.php?t=733903 
|
|
|

|
|
|
#32 | |
|
Registered User
Join Date: Dec 2011
Location: Boise, Idaho
Posts: 582
|
Re: Simple TBI build
Quote:
Leaks? I removed all of the sheet metal so if it leaks it will be on me.. Unless it is the rear main or timing cover. |
|
|
|

|
|
|
#33 |
|
Registered User
Join Date: Dec 2011
Location: Boise, Idaho
Posts: 582
|
Header comparison
I thought i would share some pics of the two headers i bought. The hedmans win hands down. It sure would be nice if the manufactures would have real install pictures to compare.
summit (SUM-G9006) http://www.summitracing.com/parts/sum-g9006 hedman 69230 http://www.summitracing.com/parts/hed-69230 I wanted to run the smaller tubed summit but they hang so low i can not imagine not being a driveshaft issue. Take a look; Headman vs summit 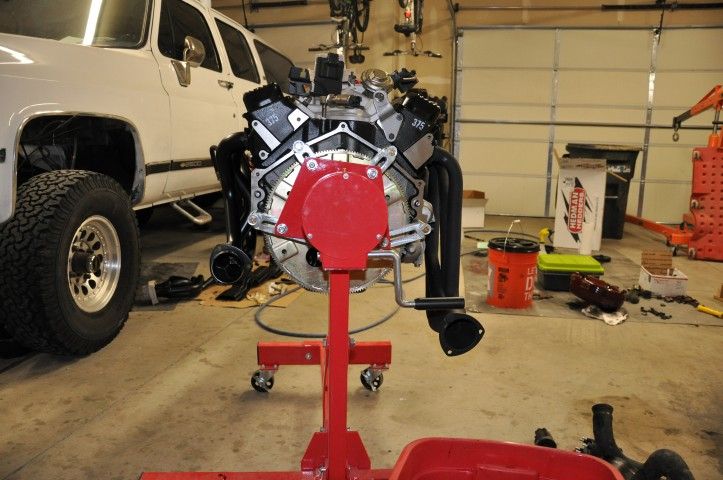 69230 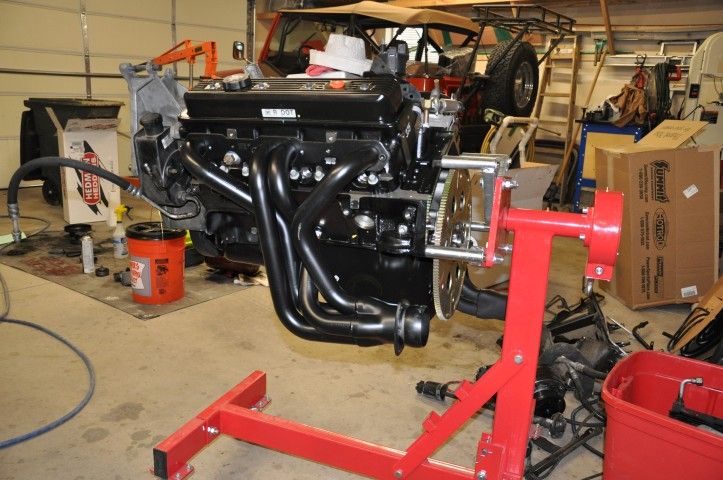 summit G9006 (every tube is really close to the starter) 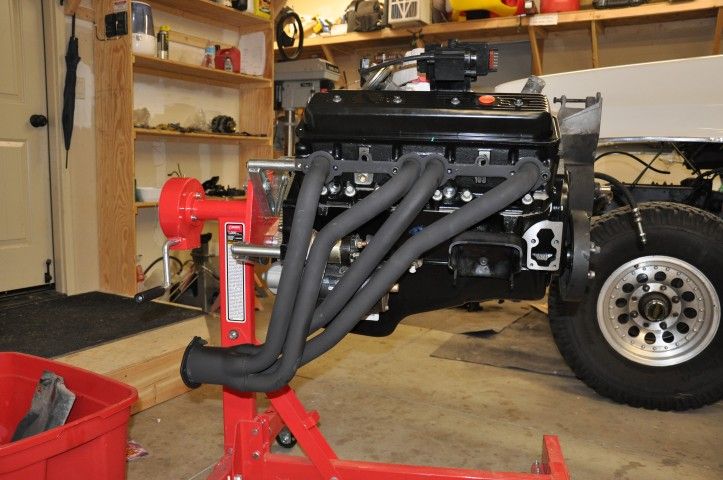 Hedmans installed 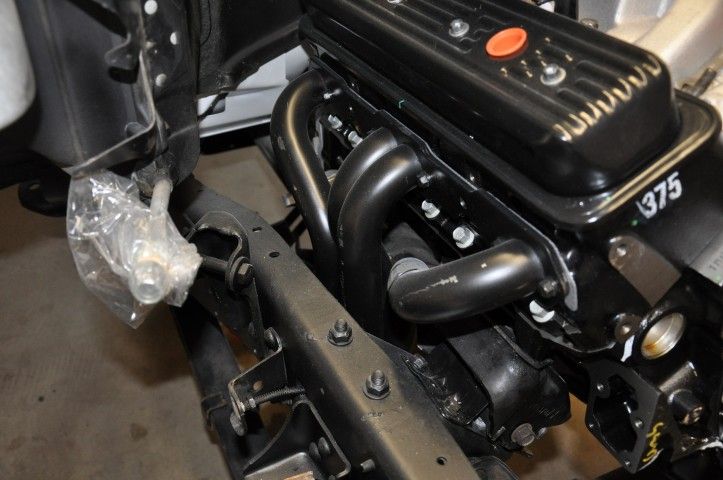 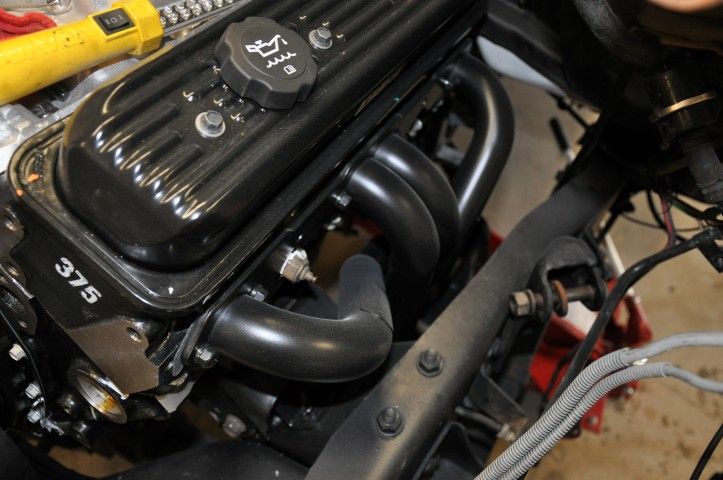 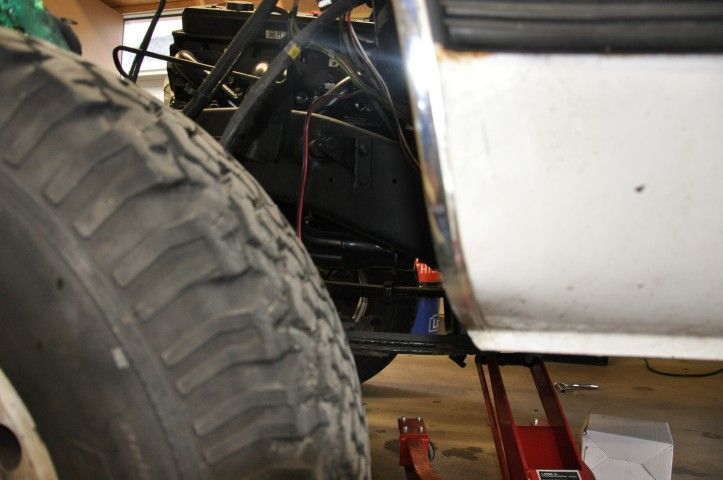 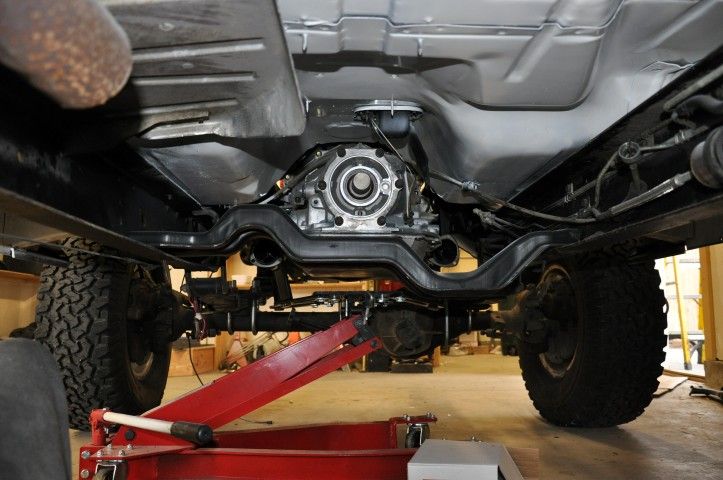 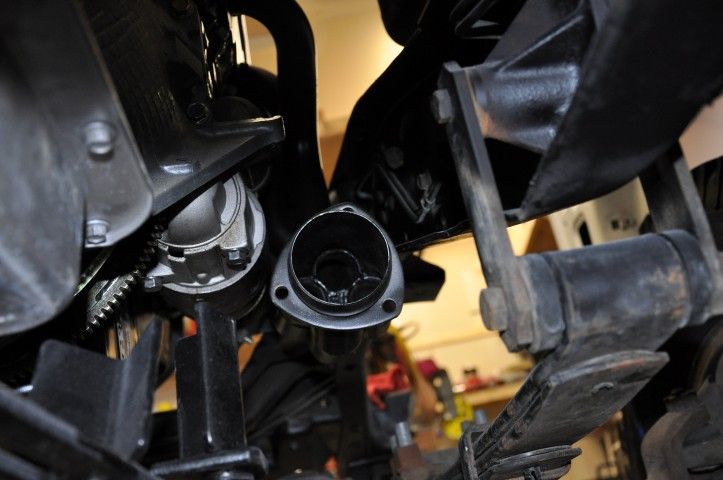 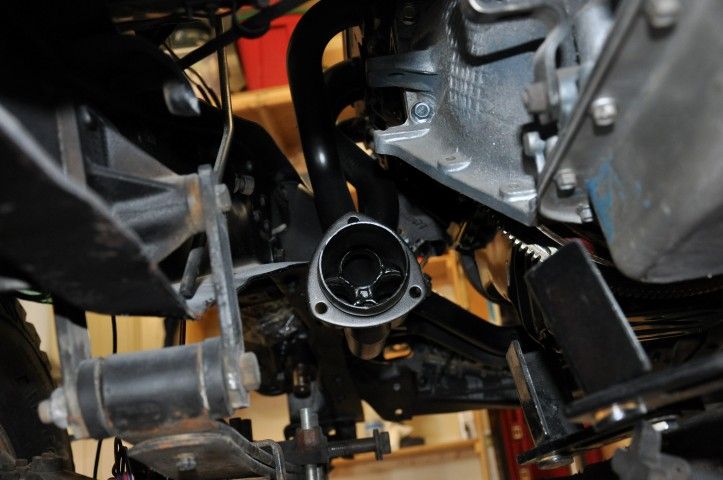 The driver dropped in from the top without one issue. The passenger almost went in without removing the starter but instead if forcing it, I just dropped the starter and it also dropped in effortlessly from the top. I did have to clean up the #7 cylinder bolt holes so the threads would start, (just a few burs). Anyhooo, the hedmans collectors are higher than the frame, you cannot even see them. I did not have to dent or modify anything other than the power steering bracket which i am not even sure i need. I think i am going to run shorty spark plug and 90 degree boots. |
|
|

|
|
|
#34 |
|
Registered User
Join Date: Sep 2013
Location: Vacaville CA
Posts: 490
|
Re: Simple TBI build
Oh, you small block guys, and all the room you have...
|
|
|

|
|
|
#35 |
|
Registered User
Join Date: Jun 2012
Location: Minnesota
Posts: 509
|
Re: Simple TBI build
Nice writeup. Sounds like you did your homework before buying parts and came up with a good formula for a pretty solid combo. The factory intake is pathetic, while the Edelbrock might be a little rough around the edges, the performance is noticeable and will complement your cam very well. Very interested to see this finished and hear how you like it. I'd expect you'll be quite pleased with the power and reliability.
|
|
|

|
|
|
#36 |
|
Registered User
Join Date: Apr 2015
Location: Youngstown,OH
Posts: 4
|
Re: Simple TBI build
|
|
|

|
|
|
#37 |
|
I know the pieces fit
Join Date: Nov 2007
Location: MONTGOMERY, AL
Posts: 5,523
|
Re: Simple TBI build
That's one of the cams Harris Performance recommends. Are you using one of his TBI recipes?
|
|
|

|
|
|
#38 |
|
Registered User
Join Date: Dec 2011
Location: Boise, Idaho
Posts: 582
|
Re: Simple TBI build
|
|
|

|
|
|
#39 |
|
Registered User
Join Date: Aug 2005
Location: Louisiana
Posts: 711
|
Re: Simple TBI build
Curious to know how those Headmans would fit on a 2WD.
|
|
|

|
|
|
#40 | |
|
Registered User
Join Date: Dec 2011
Location: Boise, Idaho
Posts: 582
|
Re: Simple TBI build
Quote:
I like Lunati and choose them because, A- They answer their phone, and B- They answer their phone C- We spoke in great length about custom grinds for another project and the man new his stuff. He took the time to listen and he offered to grind a custom for this application but i figured it was not necessary. It was just nice that they really want to work with the customer. |
|
|
|

|
|
|
#41 |
|
Registered User
Join Date: Dec 2011
Location: Boise, Idaho
Posts: 582
|
Re: Simple TBI build
Jake,, If you need some pictures or measurements, let me know. The front end is still off and it is easy enough to get it for you.
It does not show any 2wd applications at summit but unless you have a cross member in the way i can not see why it would not work? |
|
|

|
|
|
#42 |
|
Registered User
Join Date: Aug 2005
Location: Louisiana
Posts: 711
|
Re: Simple TBI build
They seem to exit high enough for a 2WD. I also like the way the tubes exit out of the ports and not overlap one of the other tubes, makes plug wire routing and plug access easier.
That is the way my Summit 1 1/2 headers are but thinking of going to 1 5/8 when I do my 383. |
|
|

|
|
|
#43 |
|
Registered User
Join Date: Dec 2011
Location: Boise, Idaho
Posts: 582
|
Re: Simple TBI build
|
|
|

|
|
|
#44 | |
|
Registered User
Join Date: Dec 2011
Location: Boise, Idaho
Posts: 582
|
Re: Simple TBI build
Quote:
I absolutely hate this intake, It is the biggest POS i have touched in a long time. I keep modifying and today i went to install the fuel lines and the TBI ~1inch rear of the OEM position. My vacuum barb now won't fit, throttle cable short now, and the fuel lines are almost touching the firewall instead being able to mount to the rear of the block. I already modified the brackets, power brake line, drilled and tapped for my AC etc. I want to send it back to summit but they say i can not because it is mounted. I feel i am ready to dispute the charge and toss it in the trash can. What did you do |
|
|
|

|
|
|
#45 | |
|
Registered User
Join Date: Dec 2011
Location: Boise, Idaho
Posts: 582
|
Re: Simple TBI build
Quote:
throttle cable too long. |
|
|
|

|
|
|
#46 |
|
Registered User
Join Date: Dec 2011
Location: Boise, Idaho
Posts: 582
|
Re: Simple TBI build
Update,
Still waiting on some parts to get this thing back running but,,, In the mean time i have run into an snag that i did not even think of. The dust cover for the converter is turning out to be impossible to source. The 400 cover will not fit and the 7.4 cover does not fit well at the engine oil pan. The correct cover (GM#15671930) is discontinued and i can not find any small block 4l80 combos in my local pic&pull. The 4l60s/small blocks are everywhere. Something to consider if you are swapping in an OD transmission; Finding the right cover. 4l60 has a 3.00 first gear and a .7 OD 4l80 has a 2.50 first gear and a .75 OD. The 4l60 is lighter with less rotating mass and a few inches shorter If i wasn't towing 8500# i would have considered the 4l60. If you are towing 3-4K the 60 might be good choice. Big block on the left,, small block on the right. 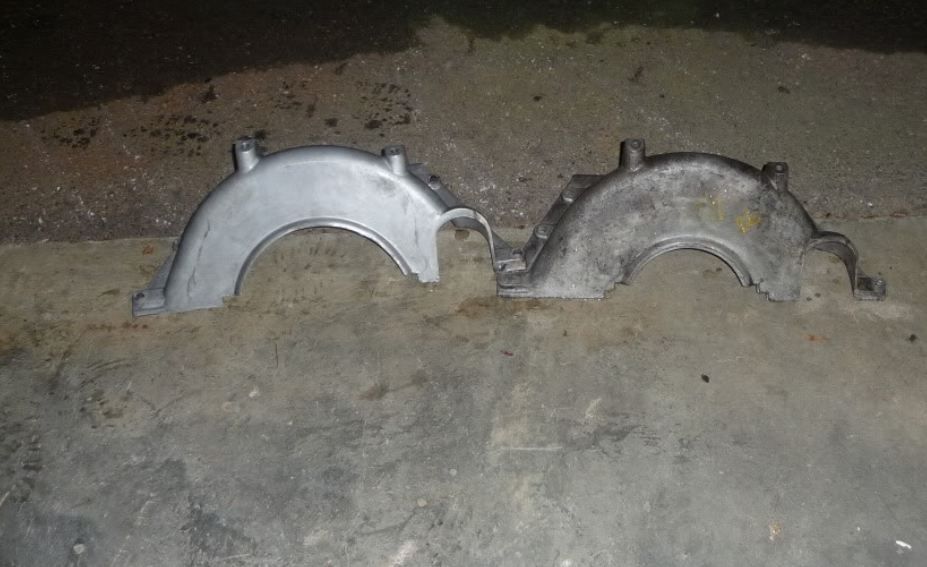
|
|
|

|
|
|
#47 |
|
Registered User
Join Date: Nov 2014
Location: Alameda, CA
Posts: 877
|
Re: Simple TBI build
Yeah, for light duty the 4L60E certainly has some advantages. Whether you want close or wide ratio depends on the application, wide tends to help mileage and, if you have a good torque curve, can help acceleration (depending on rear end).
For towing much the 4L80E is the way to go. Same if you're going turbo.
__________________
1973 C20, 350/350 |
|
|

|
|
|
#48 | |
|
Registered User
Join Date: Jul 2013
Location: minneapolis, mn
Posts: 28
|
Re: Simple TBI build
Quote:
The biggest problem I ran into was the vac line that is supposed to come up between the fuel lines just behind the TBI. I ended up purchasing a brass Edelman fitting (similar to www.summitracing.com/parts/edd-831260 ) and machining it a bit to get sufficient clearance. I didn't have any problems with the fuel lines or throttle cable...not sure why our applications would be different. My pickup is a 2wd, but it doesn't seem like that would matter. For what it's worth, I removed the AIR pump crossover line behind the block, I wonder if that gained me a bit of room for the lines to still attach to the block. I will look closer tonight to see if I can provide any pics that might help. Good luck Chris. T |
|
|
|

|
|
|
#49 | |
|
Registered User
Join Date: Dec 2011
Location: Boise, Idaho
Posts: 582
|
Re: Simple TBI build
Quote:
I got the fuel lines mounted to the back of the block ok,, a little tweaking here and there. I will need the 90 in your link for the vacuum. All in all i will get it done, For an OEM replacement, It just consumed a lot of my limited garage time. |
|
|
|

|
|
|
#50 |
|
Registered User
Join Date: Dec 2011
Location: Boise, Idaho
Posts: 582
|
4l80 transfer case rod.
I have a question for anyone following along,
What have others done with the transfer case support rod length. The 4l80 is a few inches longer than the 400. I was looking for a OEM 1991 v2500 because it came with the 4l80. Do others just cut and add some DOM tubing to make it longer? Chris |
|
|

|
 |
| Bookmarks |
|
|