
|
Register or Log In To remove these advertisements. |
|
|
|
|||||||
 |
|
|
Thread Tools | Display Modes |
 07-09-2016, 04:16 PM
|
#26 | |
|
Registered User
Join Date: Feb 2009
Location: Winnipeg, Manitoba
Posts: 68
|
Re: Run Away's '69 C10 LWB Project Log
Quote:
I also phoned and email'd Bill's Truck Shop in Ontario, they had the floor in stock but didn't reply to my email for a total, even though they were expecting it (sent the email about an hour after talking on the phone). Maybe it never got delivered, who knows. I wanted a few things (like the Precision weather strip) that GMC Paul's offered, and price-wise they were very good too so I just bought it all from them. Decent communication so far, my only gripes are they charged me $450 USD for shipping..hoping they will refund some of that when the actual shipping costs are figured out. It's truck freight but all the sheetmetal is going on one shipment so I would think it would be cheaper than that. They also email'd me and said their last 69-90 firewall had damage, I opted to put the order on hold until a good one comes in. That should be the 20th. |
|

|

|
|
07-09-2016, 05:24 PM
|
#27 |
|
Registered User
Join Date: Feb 2009
Location: Winnipeg, Manitoba
Posts: 68
|
Re: Run Away's '69 C10 LWB Project Log
Drilled out the back wall of the cab
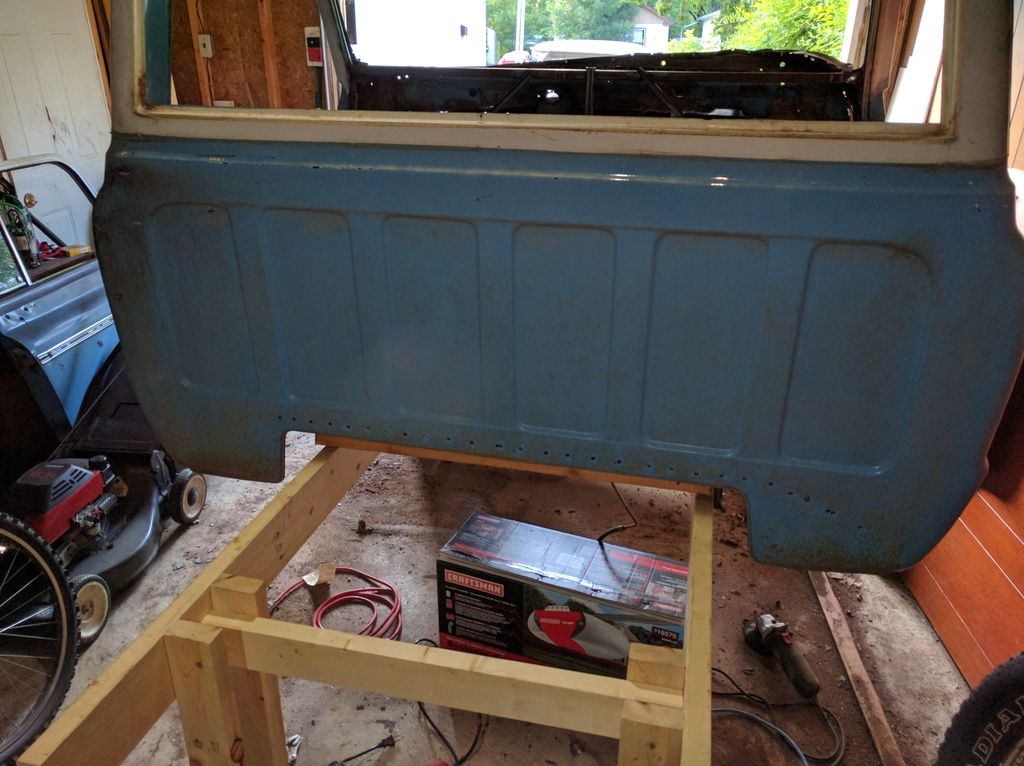 Removed the rear bolts, some fiddling with the car corners and it's free 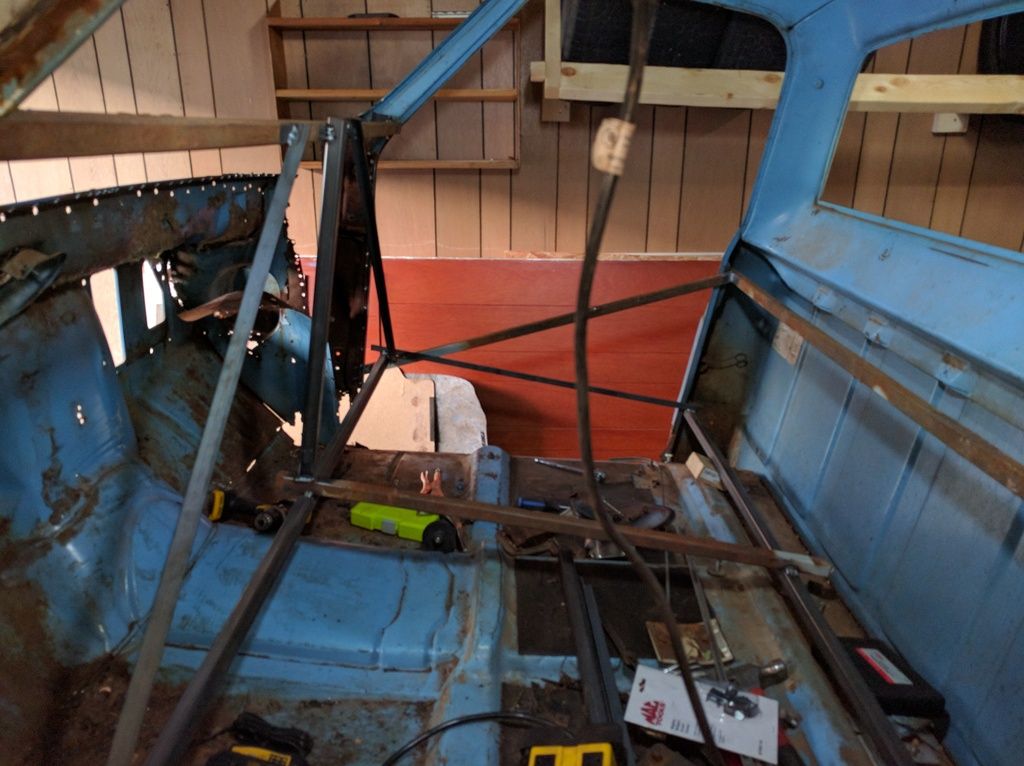 My dad came over this afternoon and helped me lift it off, then back on  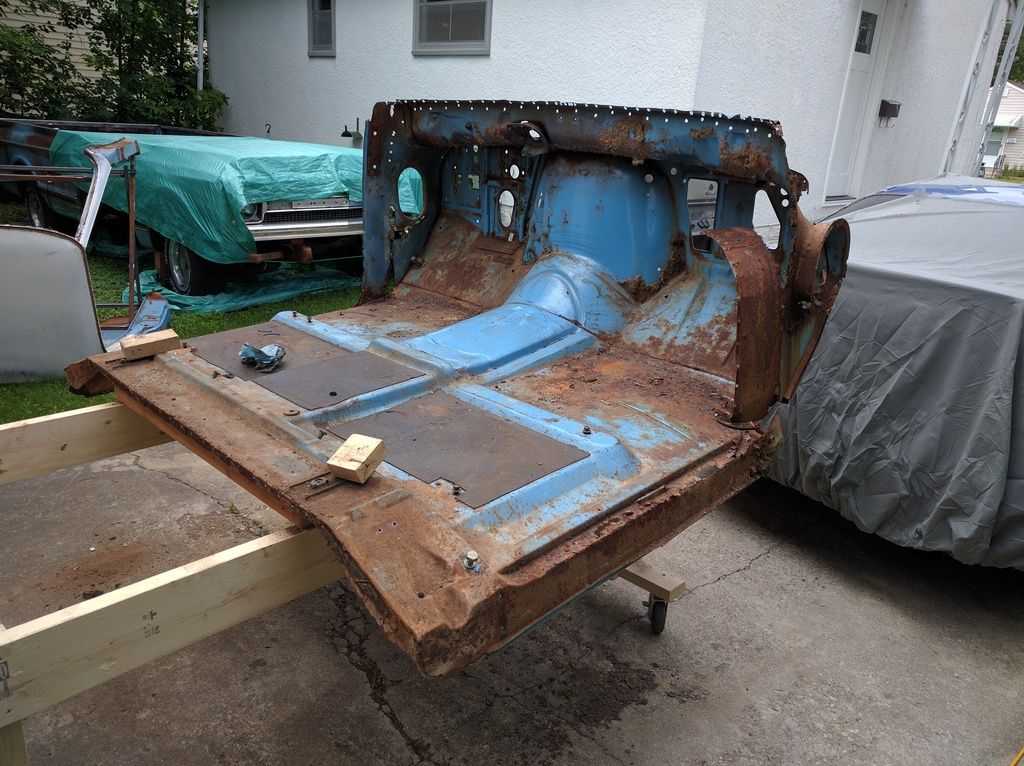 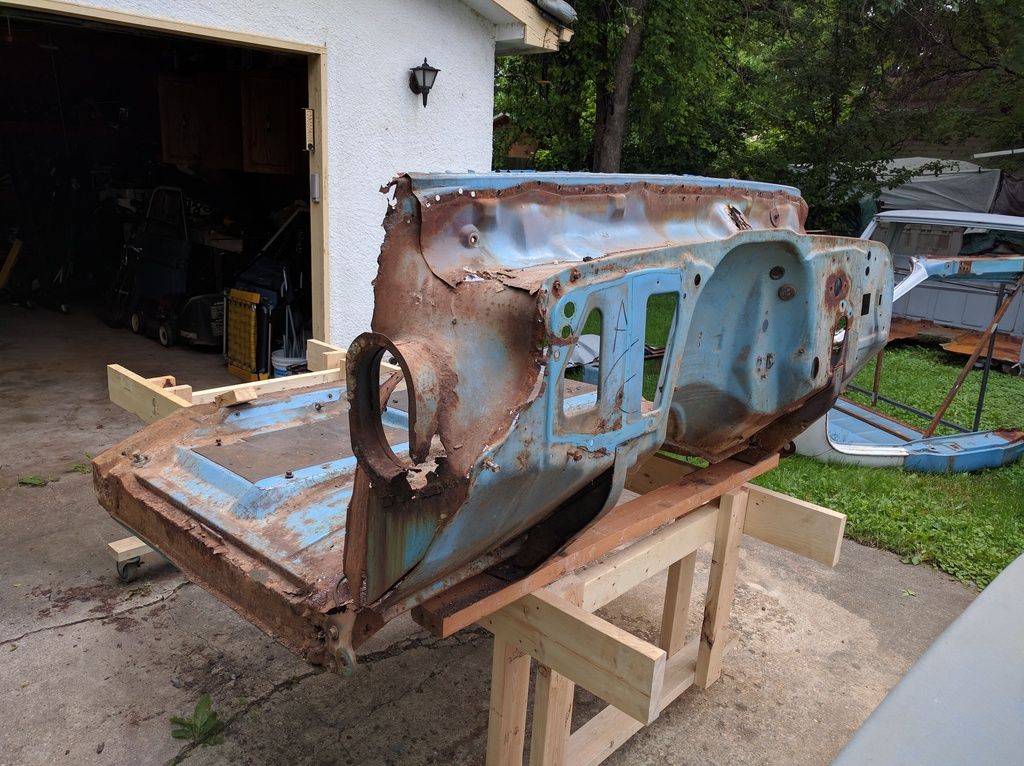 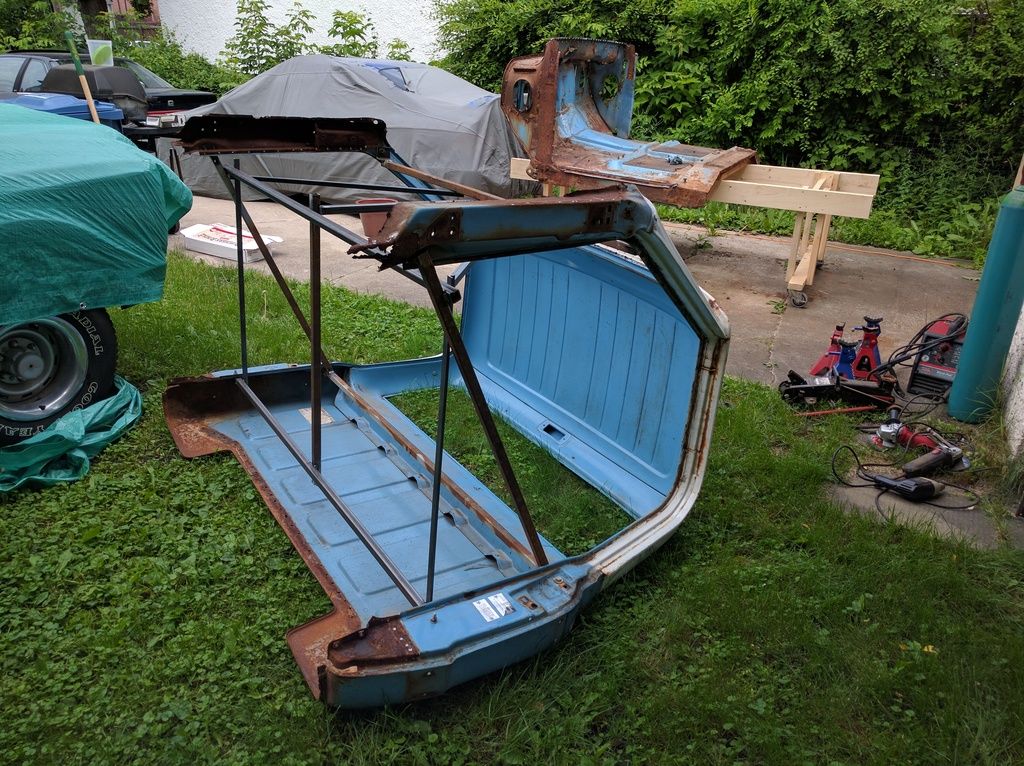 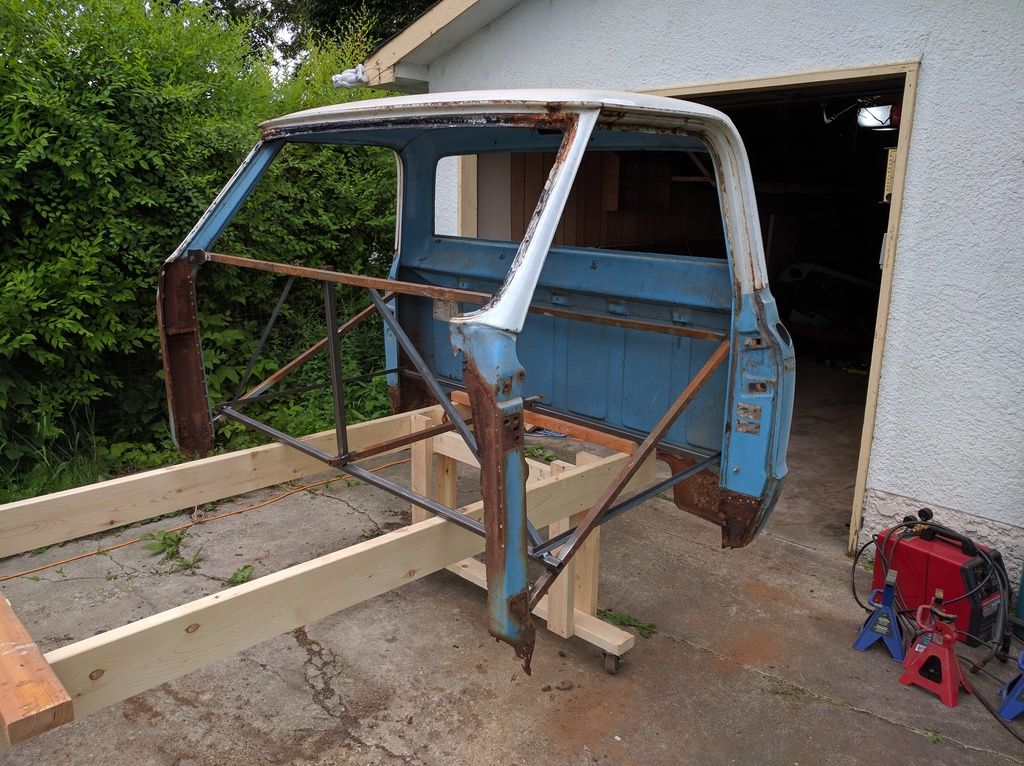
|
|
|
|
|
07-09-2016, 05:28 PM
|
#28 |
|
Registered User
Join Date: Feb 2009
Location: Winnipeg, Manitoba
Posts: 68
|
Re: Run Away's '69 C10 LWB Project Log
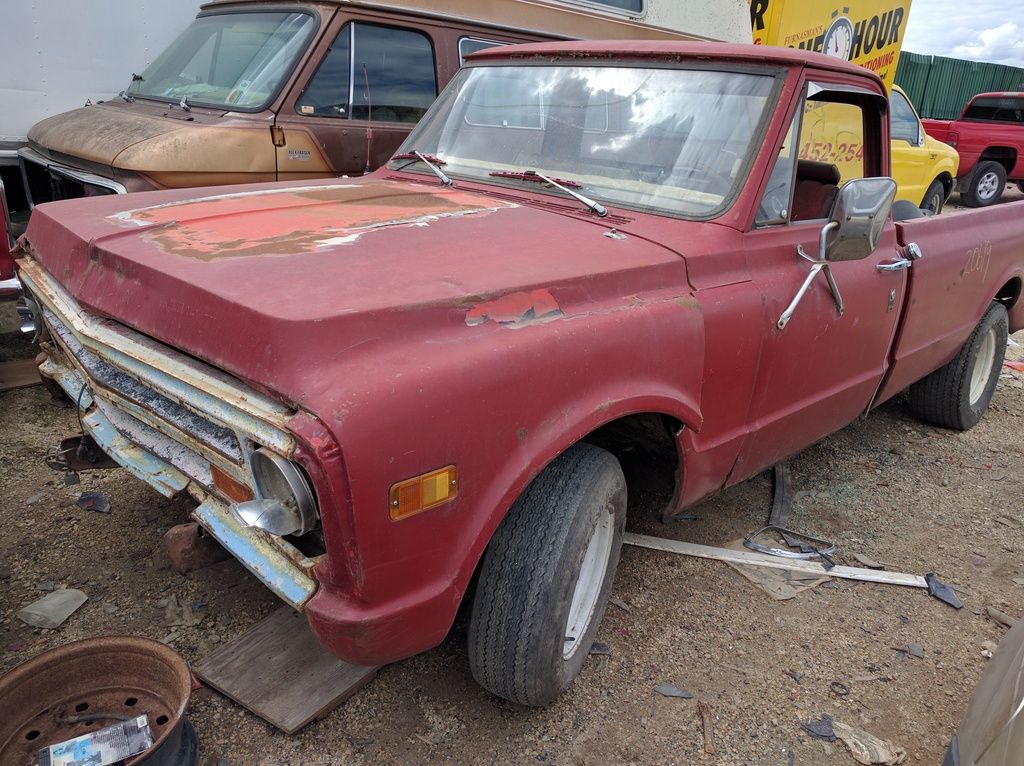
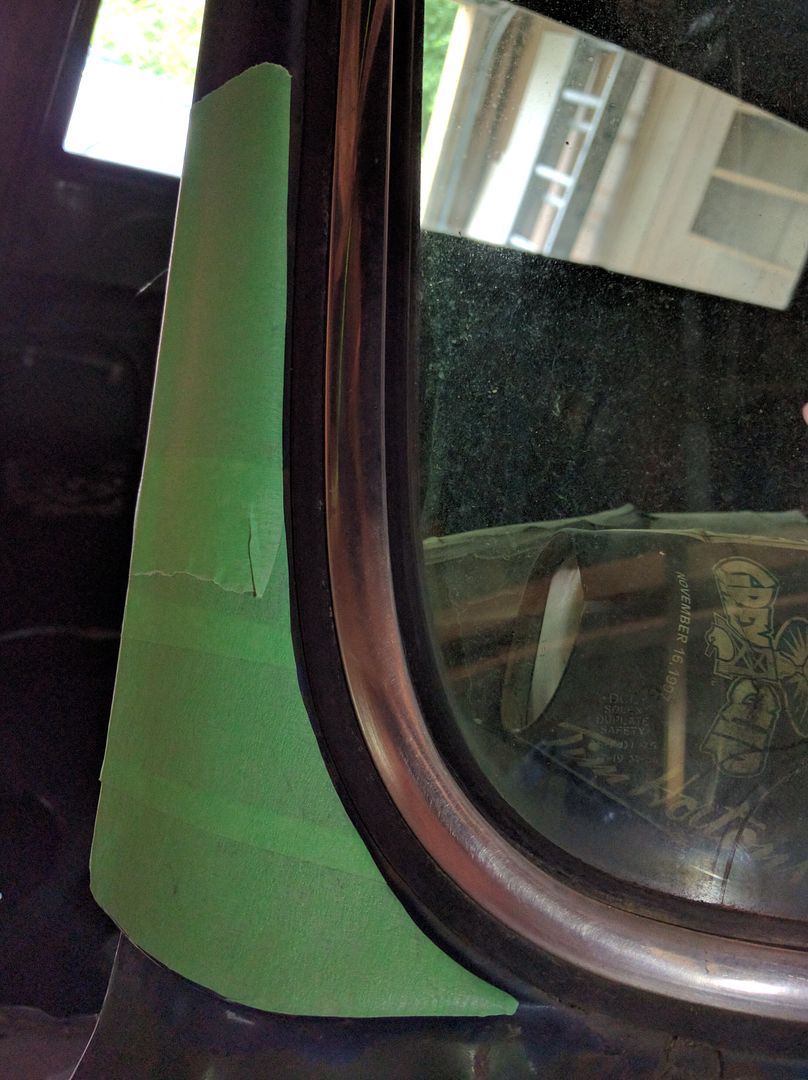
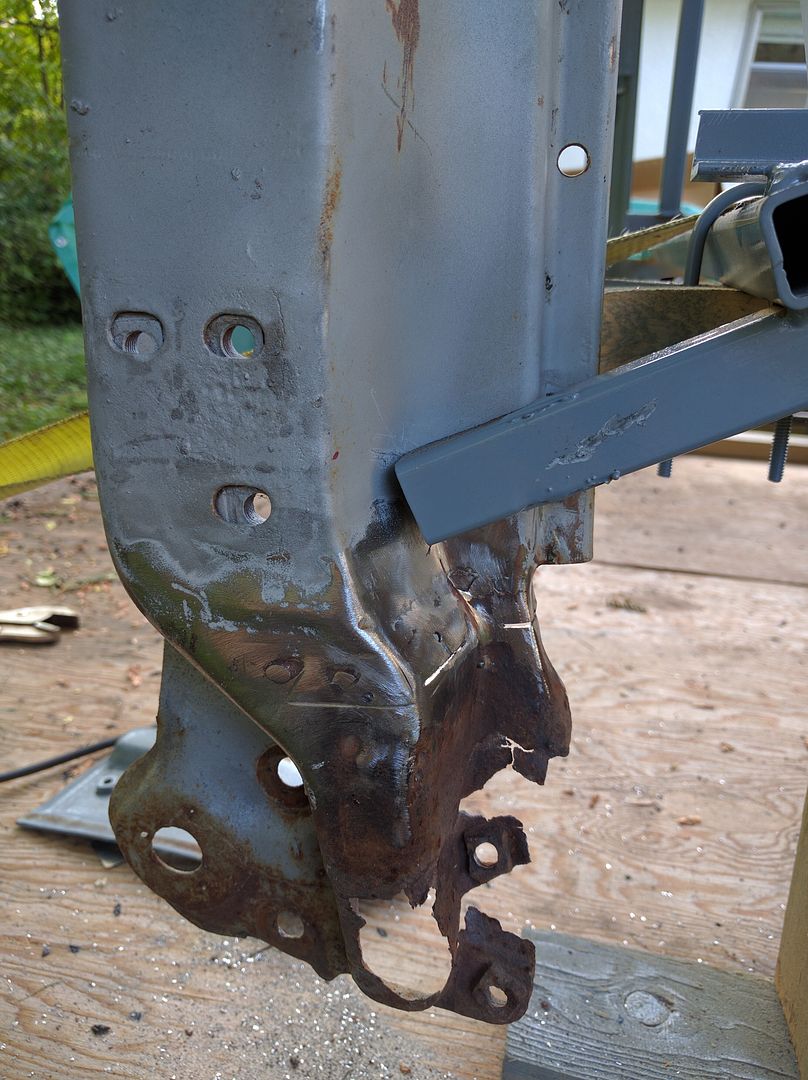
I was concerned with this area before separating the cab
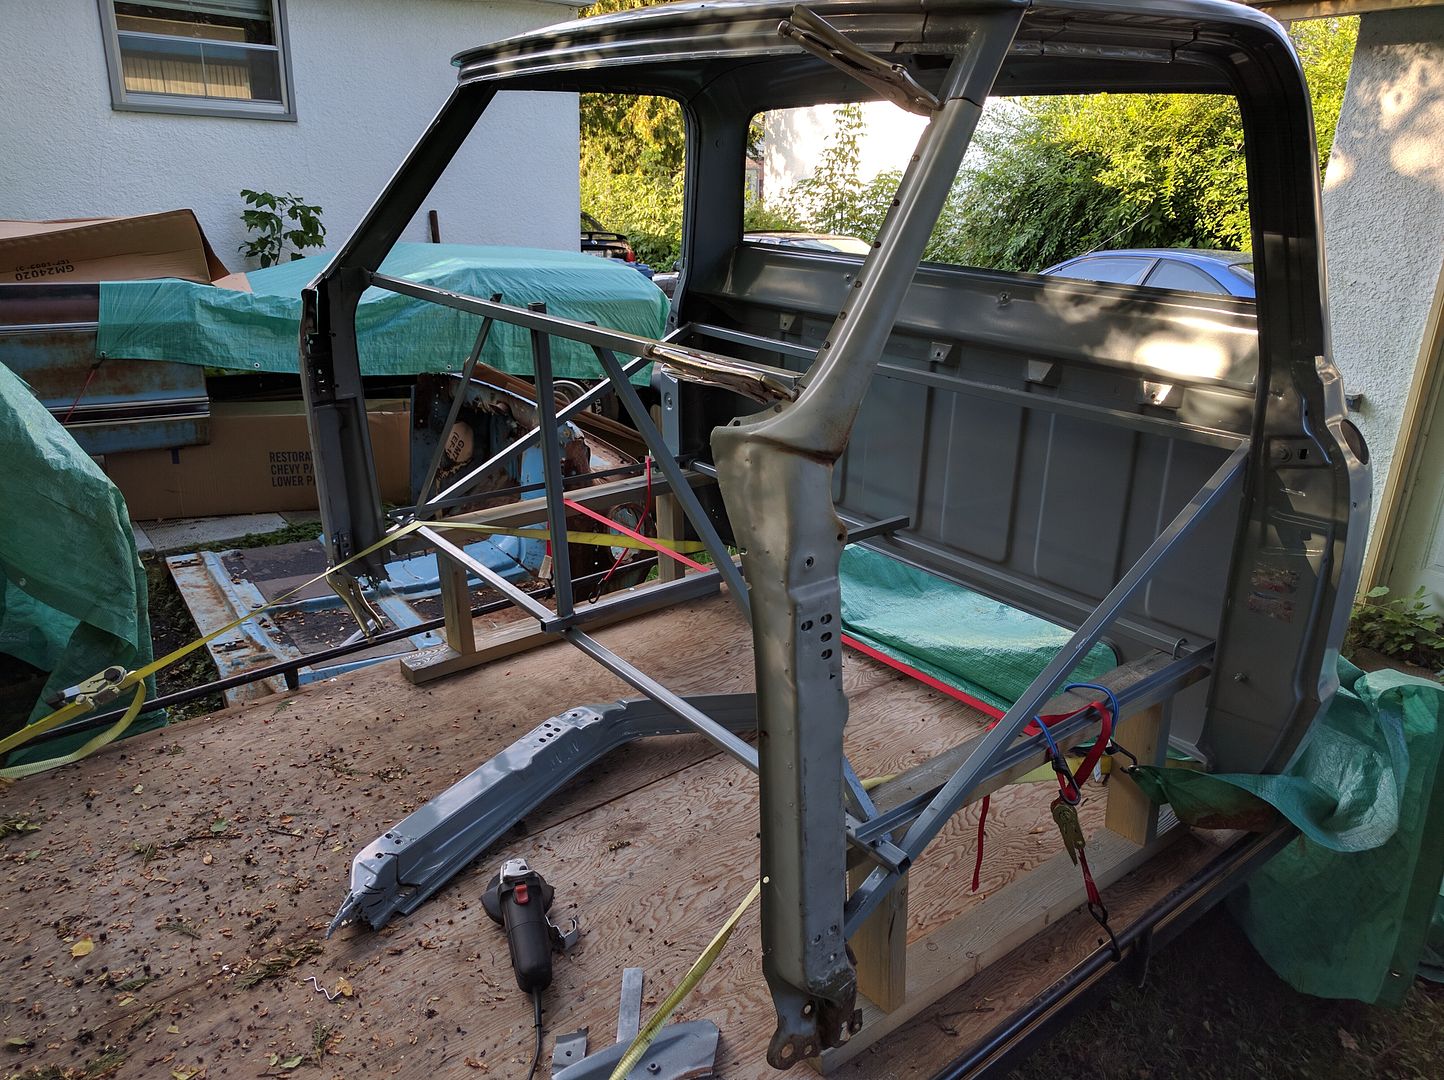
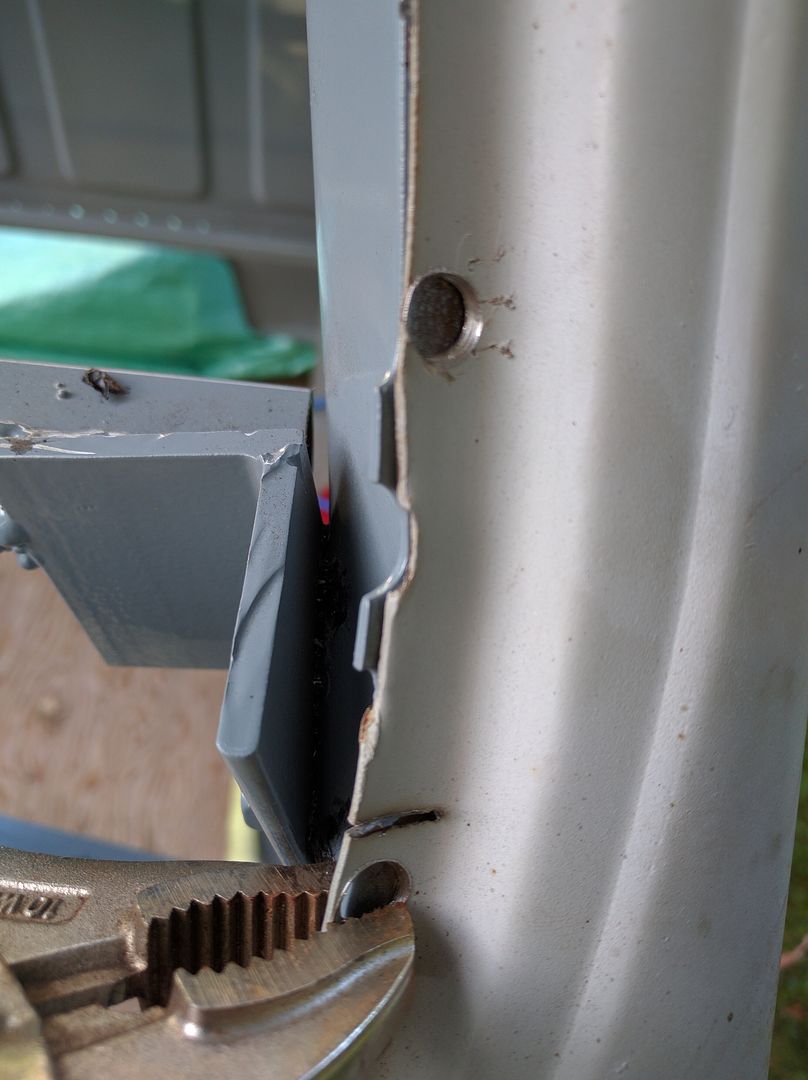
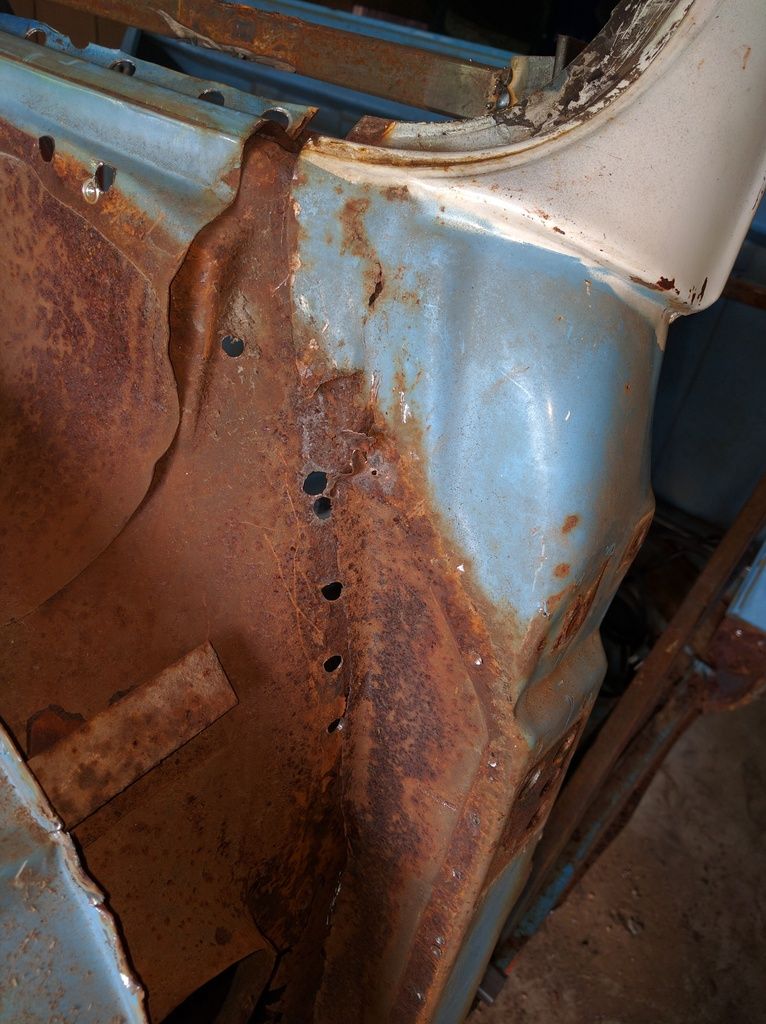 My plan was to cut the A pillar in half and use the front half from the parts cab 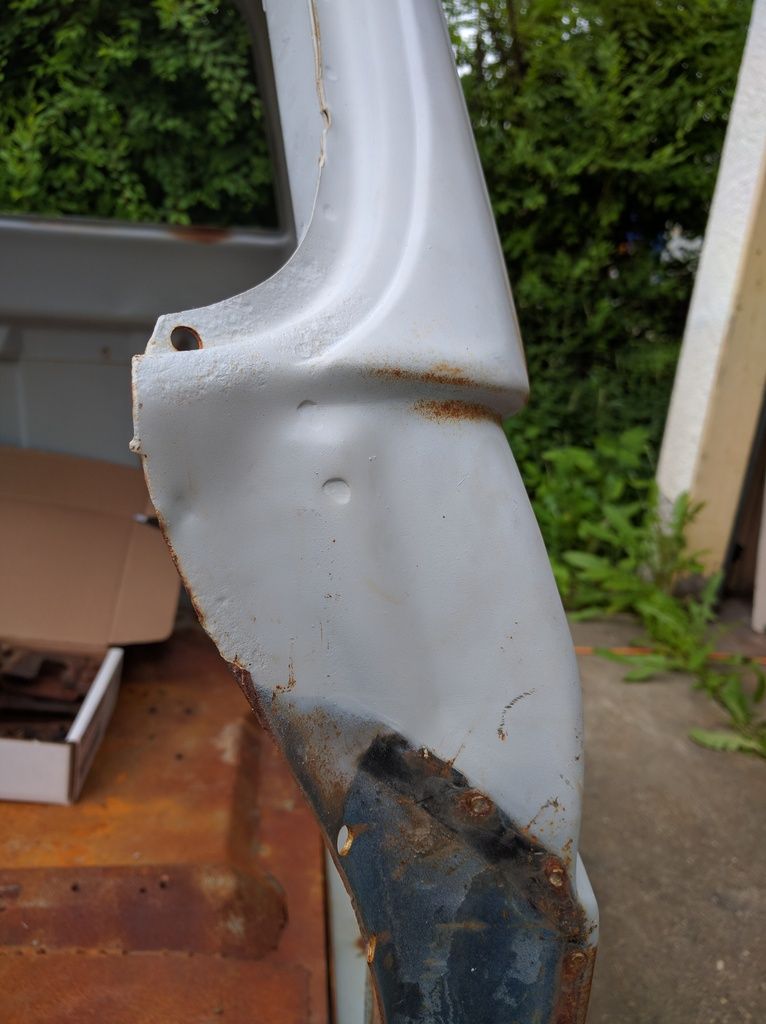 But it's worse than I thought inside. The inner reinforcement has rusted away from the A pillar on both sides. 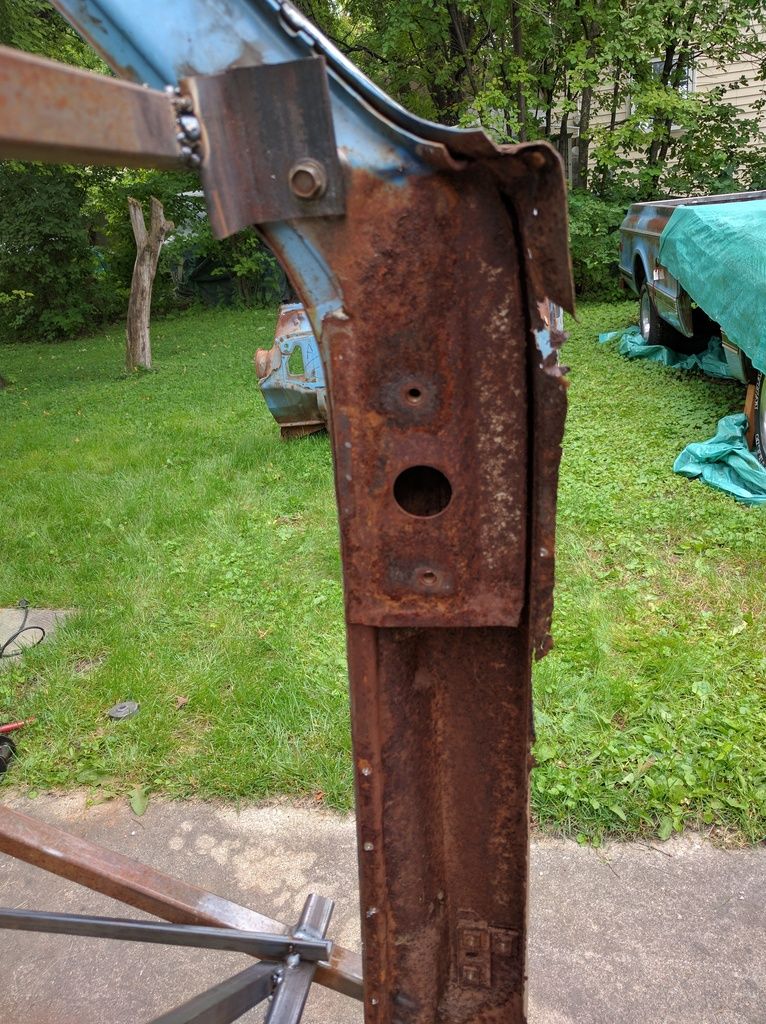 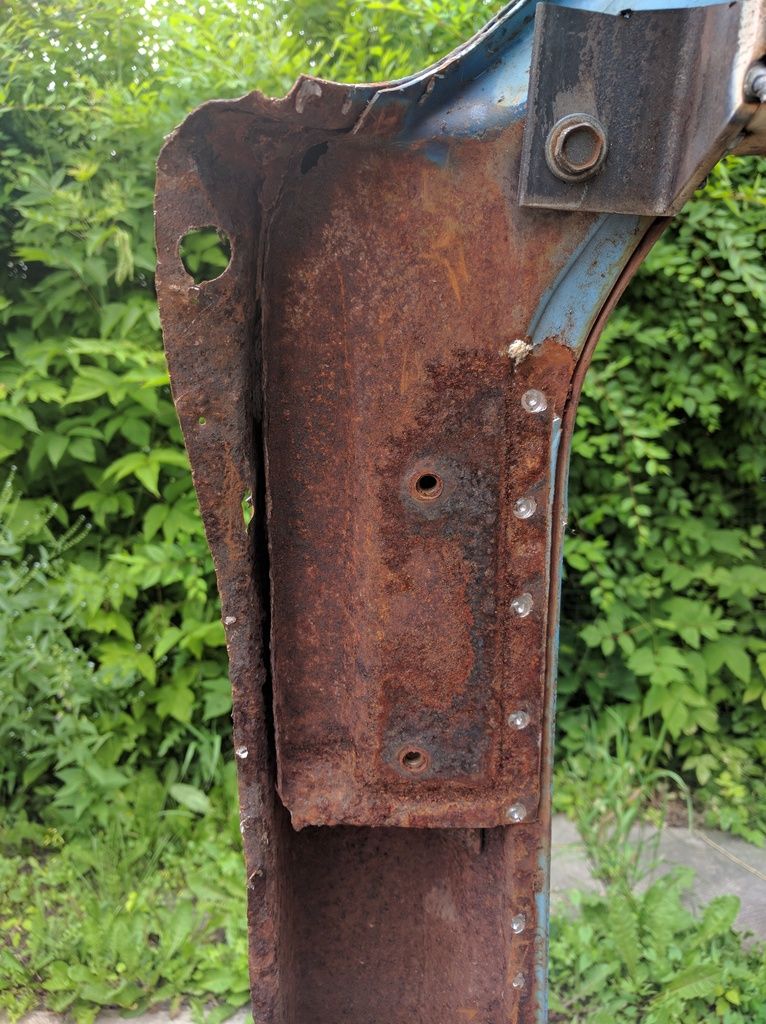 I didn't take a good shot from further back on the parts cab, but this is how it's supposed to look. This is the inside of the driver's A pillar at the base of the windshield. 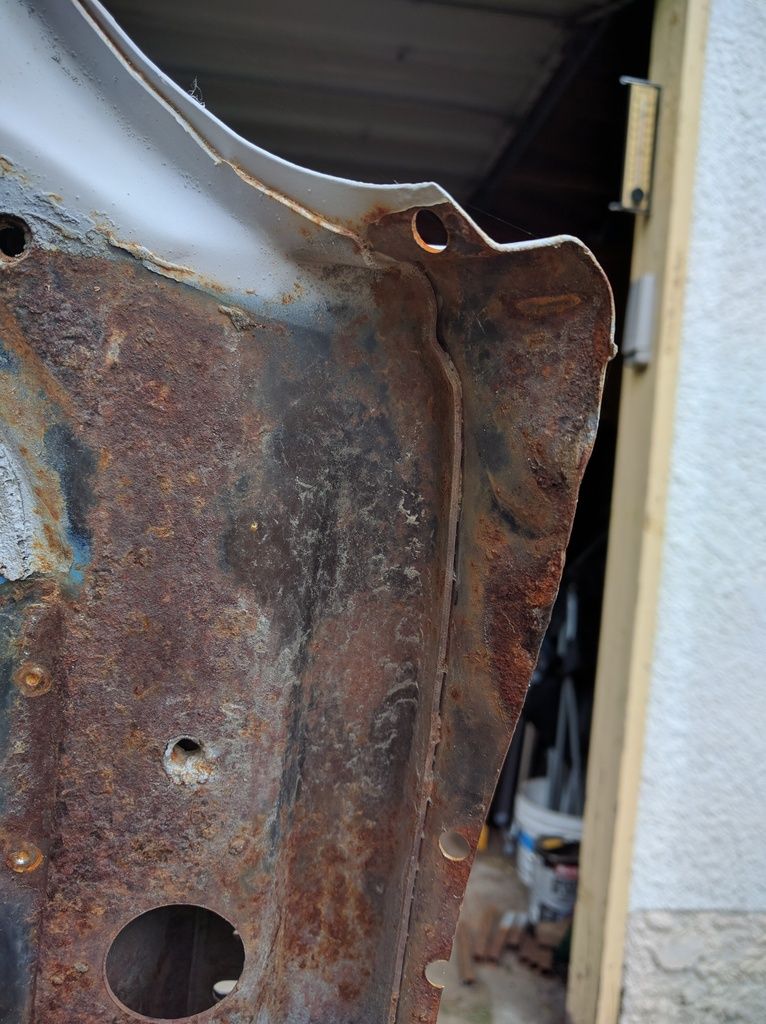 Cleaned up the garage and pushed it back in to mull over my options. 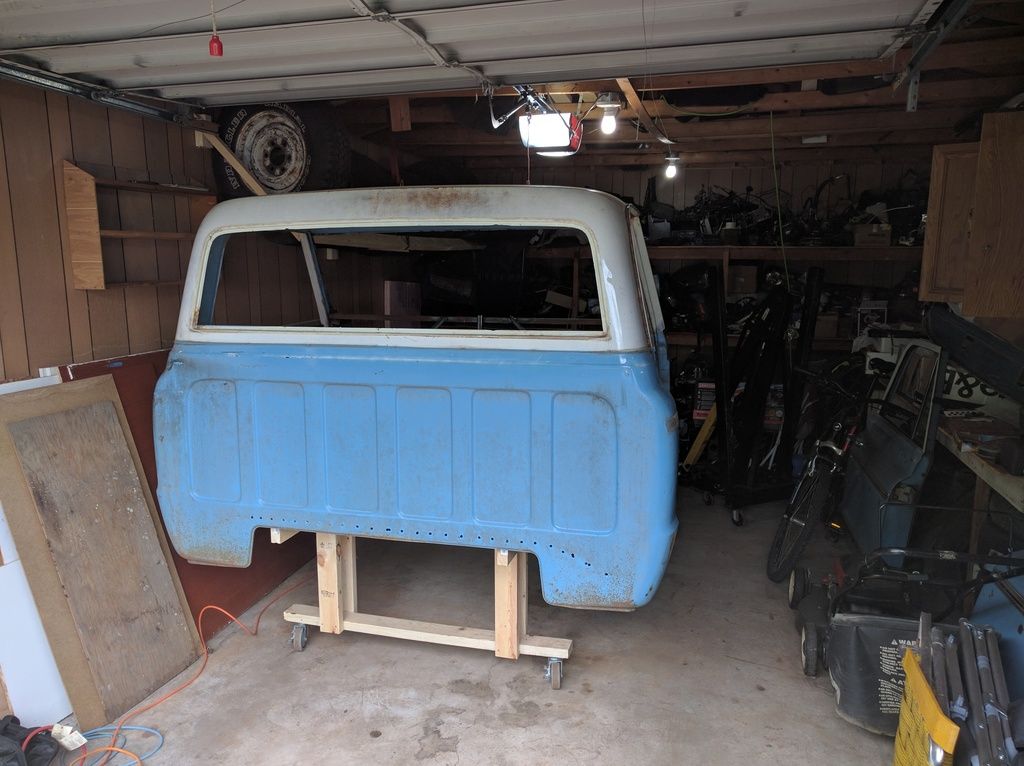 I'd need to have it blasted to know for sure, but I suspect the metal in the A pillar is too thin to be saved. My biggest issue is keeping it all square. If I cut the A pillars off I don't have a good way of properly placing their replacements. Really wishing now I had left the parts cab alone and simply cut the A pillars halfway down the windshield , then grafted the front end onto my cab. Which brings me to my next though. Currently, I'm thinking the best plan of action is to: -blast/wire wheel/treat all the bits of the parts cab I removed removing all rust that wasn't reached when it was blasted all assembled -re-install the panels back onto the parts cab. I should be able to line up everything pretty easily just by matching the spot welds drill holes. -cut back the floor of the parts cab where it meets the firewall to allow room for... -tack new firewall onto parts cab along the cowl and A pillars -cut the A pillars of the parts cab about halfway down the windshield, and cut the base of the A pillars away from the floor and rockers -after lots of measuring, tack the assembled front half of the cab on to the remains of my "good" cab -test fit windshield, hang and test fit doors to confirm measurements -weld A pillars together in solid with some sort of internal fish plating or sleeve -fit new floor pan to the cab at the back, slice and dice as needed to join firewall to floor. Opinions? Hoping someone has a better plan (other than buy another cab...) I am so over my head it's not even funny. 
|
|
|
|
|
07-12-2016, 08:22 PM
|
#29 |
|
Registered User
Join Date: Oct 2007
Location: Spanaway
Posts: 8,451
|
Re: Run Away's '69 C10 LWB Project Log
You can keep your eye on the parts board for someone dissecting a cab and find the proper A pillar patch panels you need? I know i'm not much help.
__________________
Mike. Swamp Rat build thread : http://67-72chevytrucks.com/vboard/s...d.php?t=595019 72 3/4T 4X4 4" BDS Lift 33" BFG's |
|
|
|
|
07-13-2016, 12:44 PM
|
#30 |
|
Registered User
Join Date: May 2015
Location: Calgary
Posts: 17
|
Re: Run Away's '69 C10 LWB Project Log
|
|
|
|
|
07-13-2016, 01:14 PM
|
#31 |
|
Registered User
Join Date: Jun 2015
Location: shreveport, la.
Posts: 160
|
Re: Run Away's '69 C10 LWB Project Log
Hey buddy, good work on the tear down. Welcome to a truck from the south. I thought I had a lot to repair/replace. wish I had known in advance I had a few original pcs you could have used. Anyway, good luck and keep up the good.....Casey
|
|
|
|
|
07-13-2016, 10:07 PM
|
#32 |
|
Registered User
Join Date: Dec 2011
Location: winnipeg
Posts: 1,107
|
Re: Run Away's '69 C10 LWB Project Log
Wow that's a lot of cab repair,in fact that's the most I've ever seen, good to see a fellow winnipeg person on here,there's a couple on here now finally.
|
|
|
|
|
07-17-2016, 12:19 PM
|
#33 |
|
Registered User
Join Date: Feb 2009
Location: Winnipeg, Manitoba
Posts: 68
|
Re: Run Away's '69 C10 LWB Project Log
Thanks for the words, all!
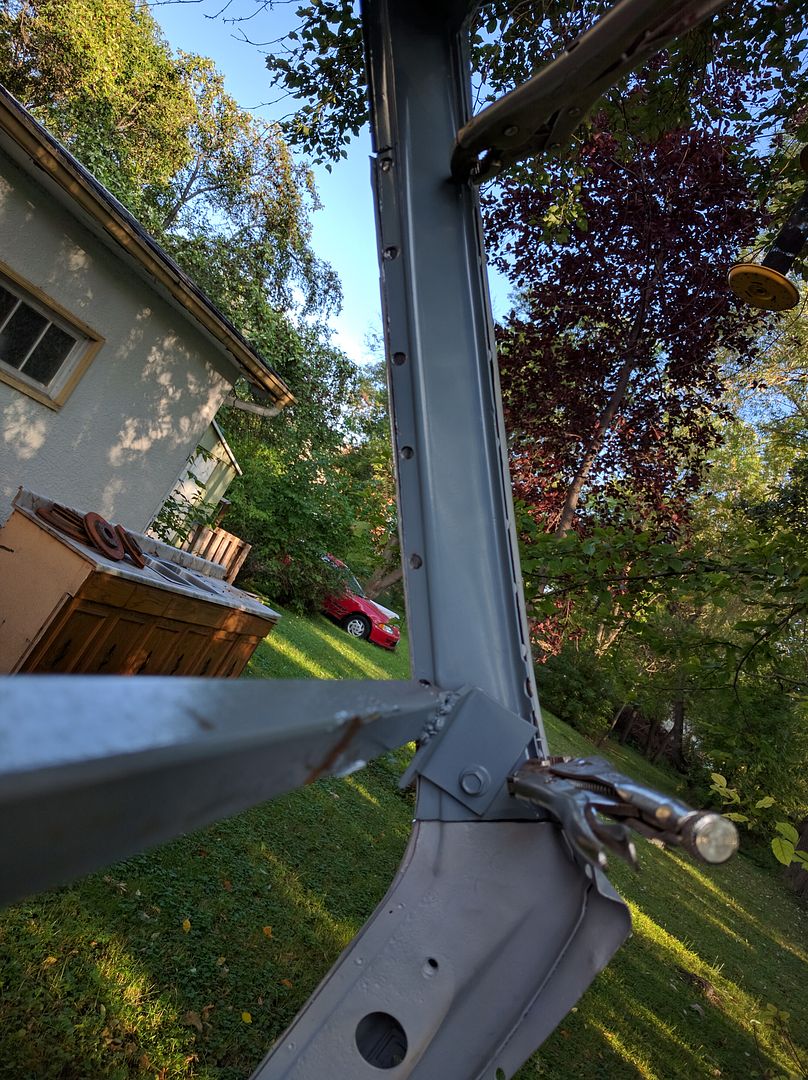
I think I'm going to continue with fixing this cab. It's a matter of $$ vs time vs space for me. Using the A pillars from my parts cab will cost me zero dollars, zero space, but a bunch more time measuring and fitting. Before I was going to do all the cab repairs on the dolly, with replacing the A pillars I think a couple of rounds with the cab on the chassis hanging doors and the front clip will be the best way to go to ensure proper fitment. Here are the two possibilities locally if I were to start on another cab: http://www.kijiji.ca/v-classic-cars/...ationFlag=true http://www.kijiji.ca/v-classic-cars/...ationFlag=true I'd need to pay someone to haul them home for both, and I don't have the space at home unless I want to work on grass. Here's some better shots of the A pillars on the parts cab. 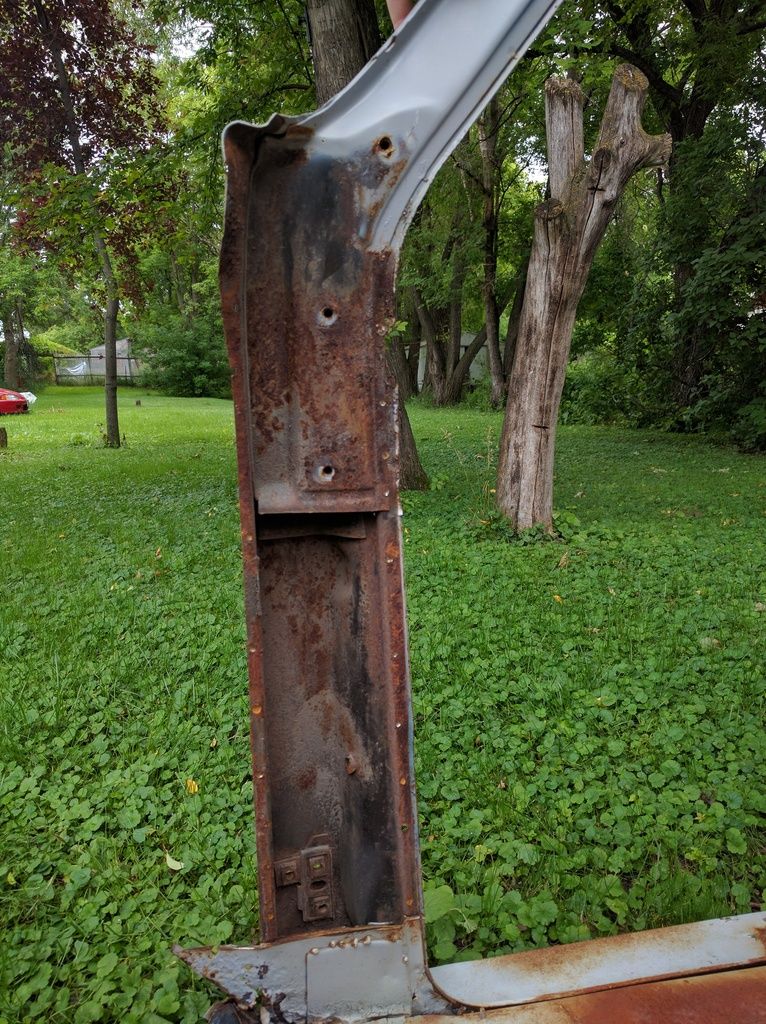 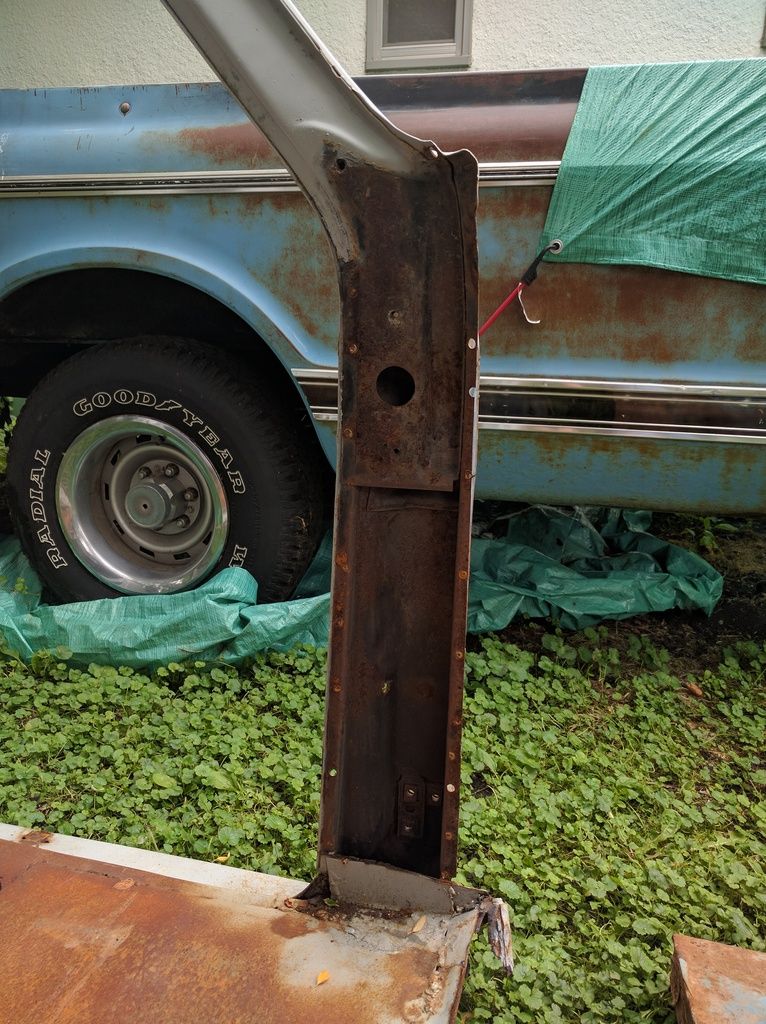 I haven't done any more work on the truck really, been looking for a little utility trailer to buy so I can cart the cab(s) around to get blasted. Also rolled the chassis around, got the tarps out from under it and cut the grass. My girlfriends father donated a bunch of 2x2 patio stones and I bought a few more, going to lay down some landscaping cloth and hopefully make a little parking pad for the chassis/bed/front end so it's not over grass. 
|
|
|
|
|
07-17-2016, 08:02 PM
|
#34 |
|
Registered User
Join Date: Jun 2015
Location: Melbourne, Australia
Posts: 231
|
Re: Run Away's '69 C10 LWB Project Log
A very thorough tear down. I don't think the rust has got any place left to hide.
Look forward to seeing you piece this one back together. Great job so far and good luck with the rest.
__________________
John 69 c20, 396, th400, dana60, ps, ac |
|
|
|
|
07-18-2016, 07:08 PM
|
#35 |
|
Registered User
Join Date: Sep 2014
Location: San Diego, CA
Posts: 57
|
Re: Run Away's '69 C10 LWB Project Log
Let me tell you im following this, you Sir are definitely fearless! Cant wait to see this done!
__________________
John San Diego, CA 1969 C-10 A person who never made a mistake, never tried anything new. Albert Einstein |
|
|
|
|
07-23-2016, 01:41 PM
|
#36 | ||
|
Registered User
Join Date: Feb 2009
Location: Winnipeg, Manitoba
Posts: 68
|
Re: Run Away's '69 C10 LWB Project Log
Quote:
  Quote:
Not too much progress. Made a pad to park the truck on so it's off the grass, just paving stones over landscaping fabric.  Also bought a small trailer to cart cabs and engines and stuff around. 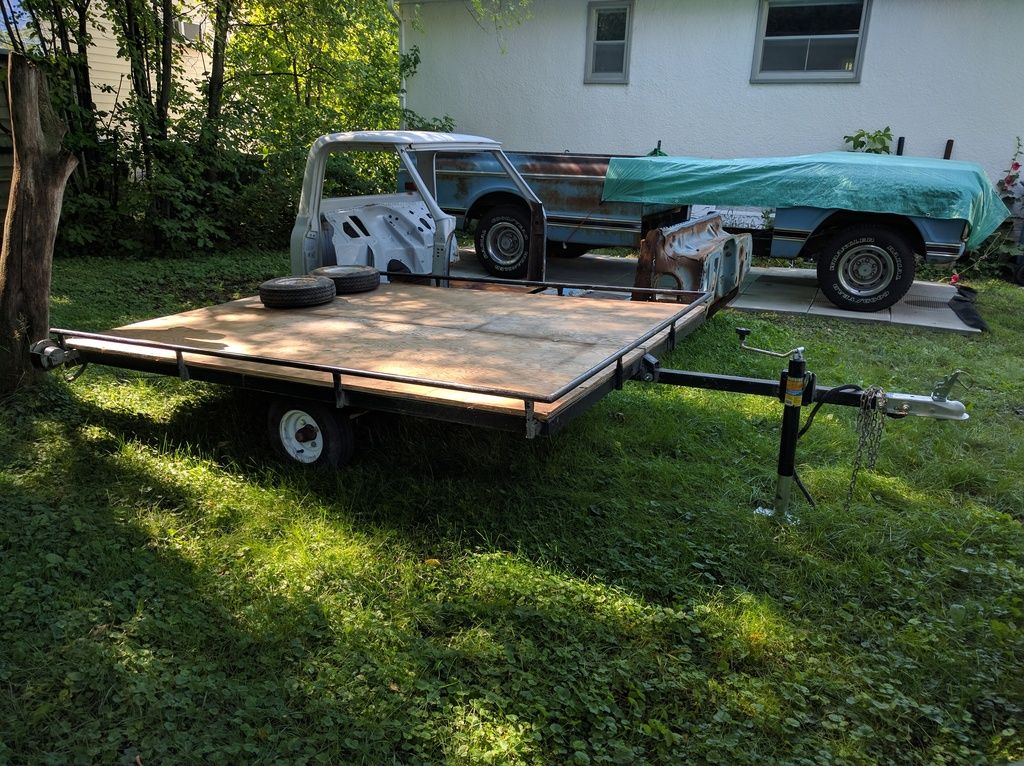 I've also bought a little sandblaster that supposedly only uses 2 cfm at 50psi so I should be able to run it off a tiny little compressor my dad has. Just for spot clean up. And my sheetmetal from GMC Paul's has shipped, I may be picking it up next weekend. |
||
|
|
|
|
08-06-2016, 02:03 PM
|
#37 |
|
Registered User
Join Date: Feb 2009
Location: Winnipeg, Manitoba
Posts: 68
|
Re: Run Away's '69 C10 LWB Project Log
Not too much going on. Life is busy and it seems like every time I've got a spare couple hours it rains.
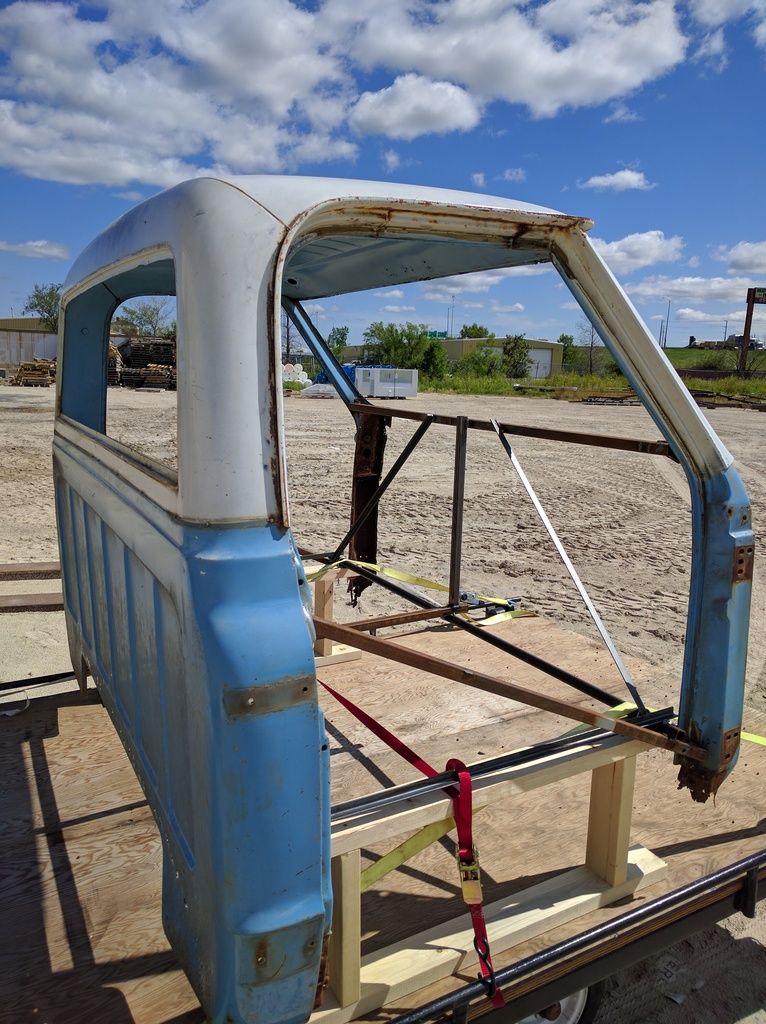
Purchased a new cab 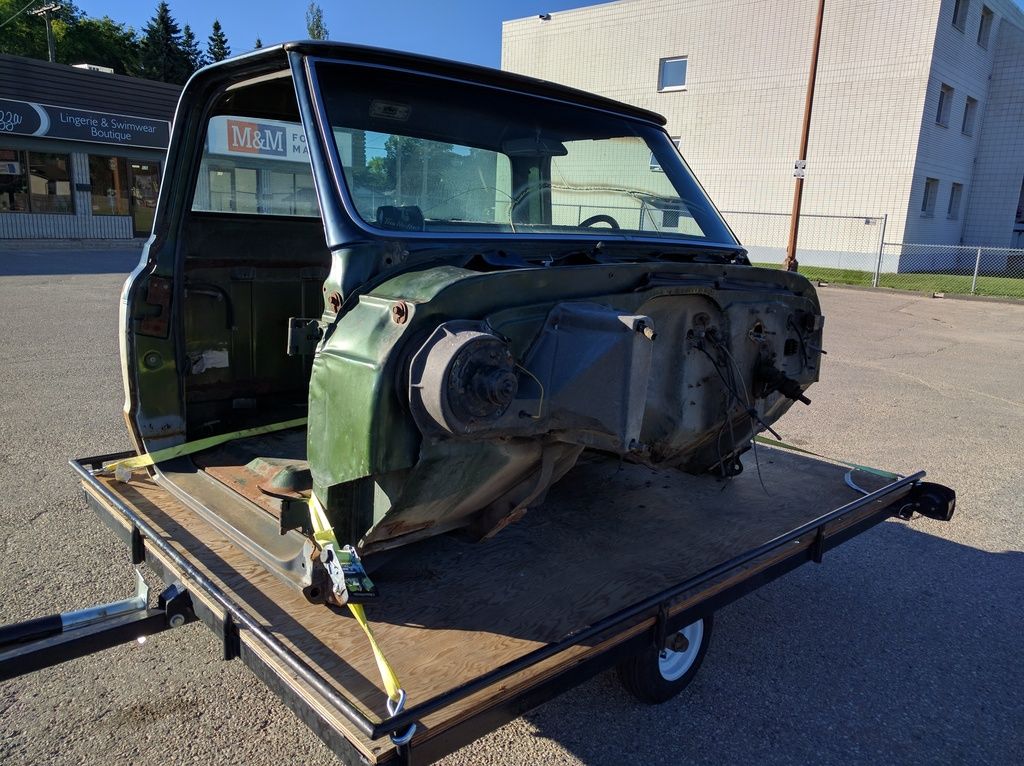 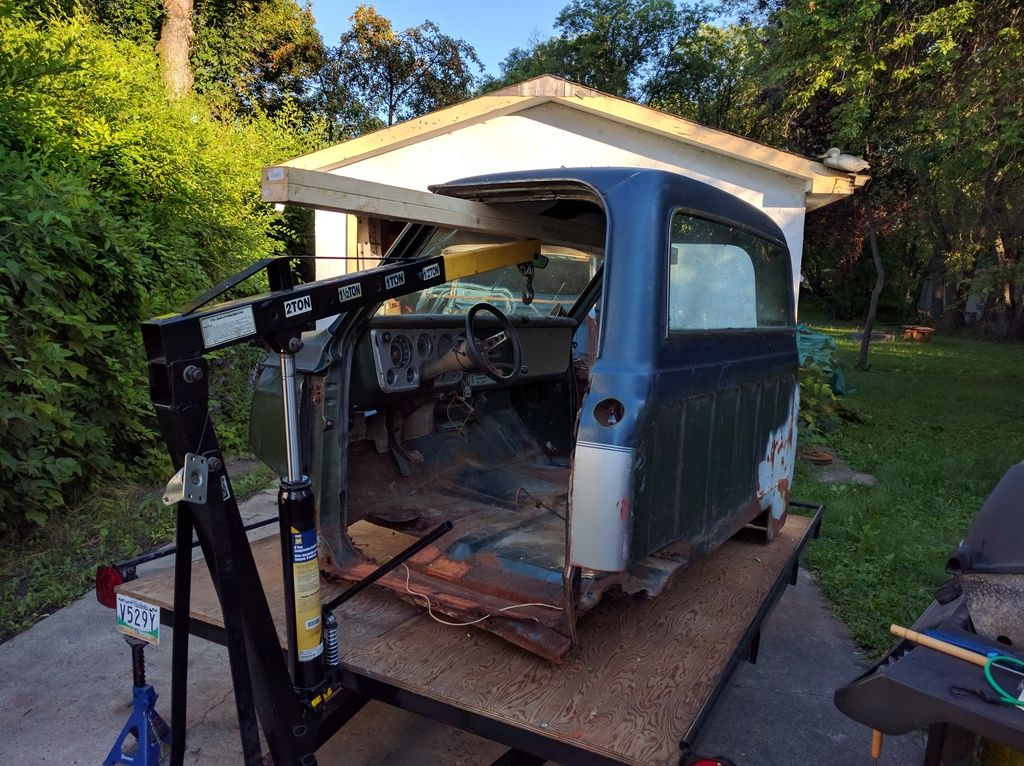 Shuffled it onto the dolly. Juuuust barely enough room for two. 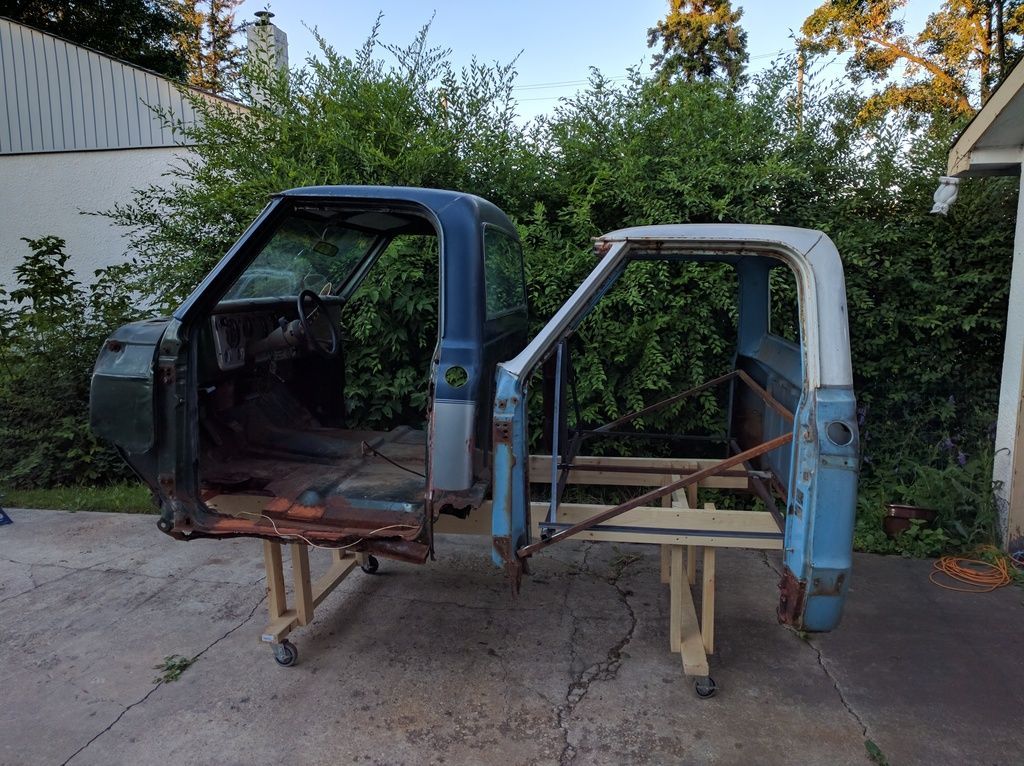 The cab needs floor work, cab corners, rockers, and floor extensions but it otherwise in very nice shape. Someone has already worked on the passenger side. 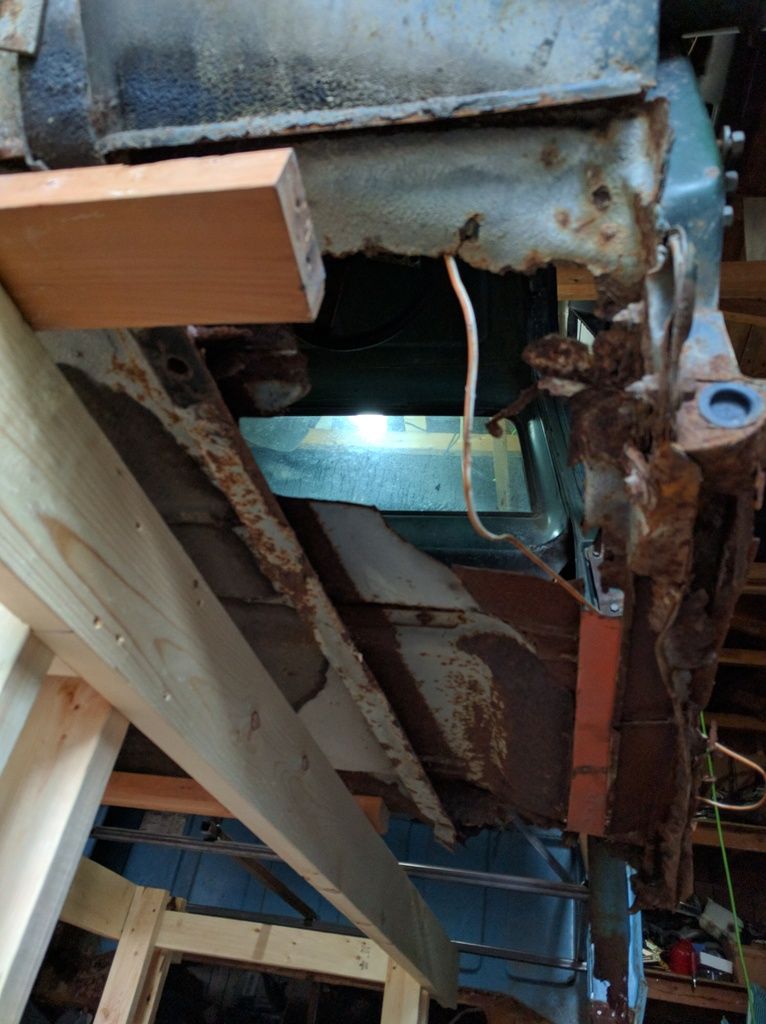 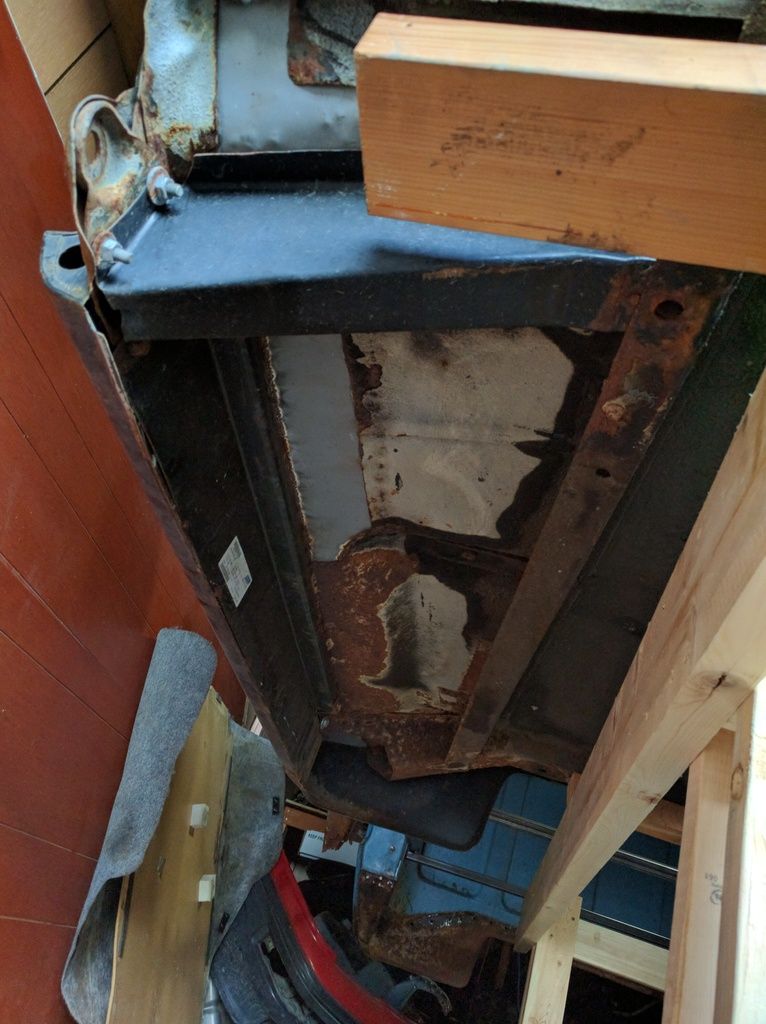 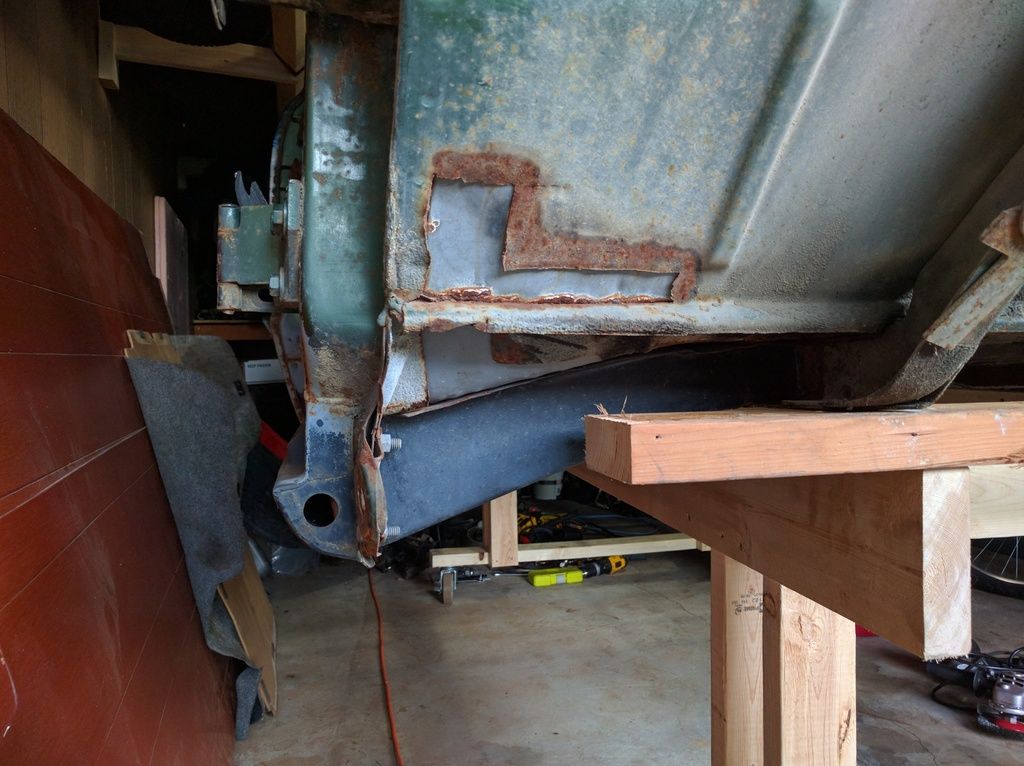 Pretty impressive option list 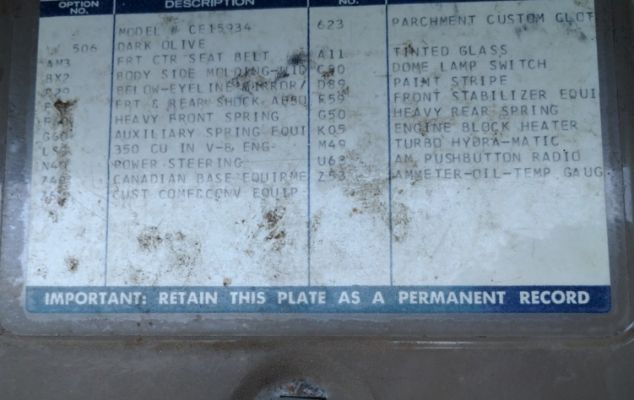 There's some title issues with this cab however so I'm not going to work much on it until I know definitively what's going on with that. Drove down to the border to pick up my parts. My timing was terrible with border crossing on a long weekend, took about 5 hours round trip. Part of that was repacking the shipment as it was originally packaged like this 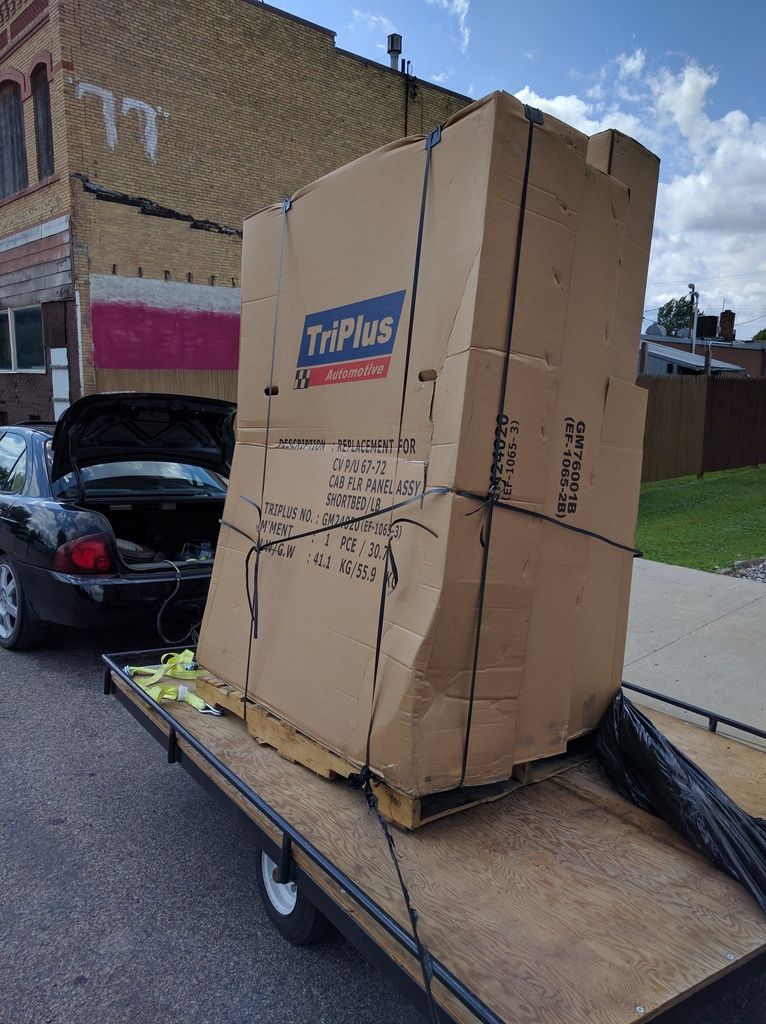 Fits a lot better like this 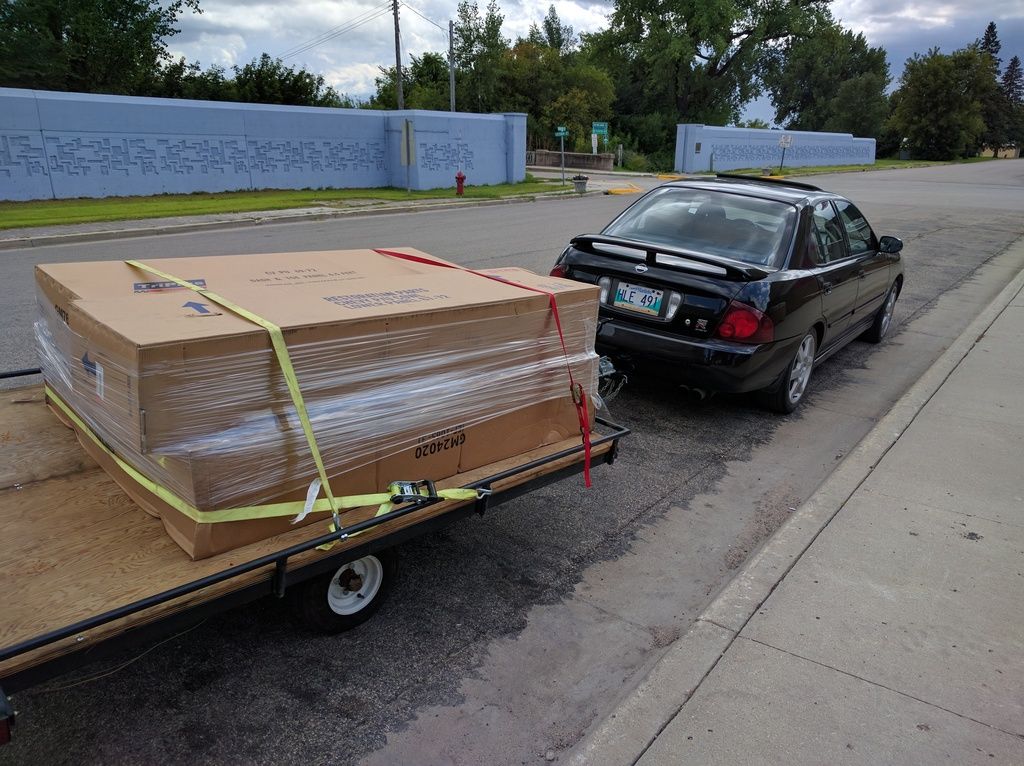 All the goodies layed out. Not pictured is the full floor as it was too heavy to wrestle around by myself. 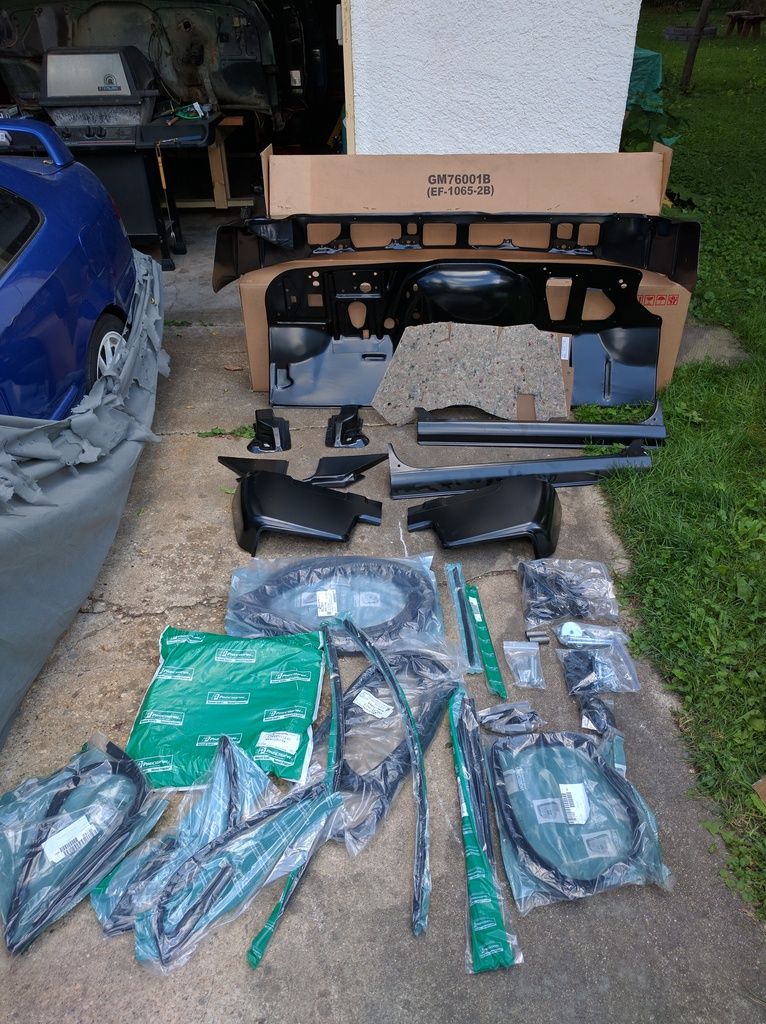
|
|
|
|
|
08-06-2016, 02:05 PM
|
#38 |
|
Registered User
Join Date: Feb 2009
Location: Winnipeg, Manitoba
Posts: 68
|
Re: Run Away's '69 C10 LWB Project Log
Bought a cheap sandblaster for $40 and tried it out with my dad's tiny little 2.6 cfm compressor. Cleaned up the inner A pillars on the parts cab
     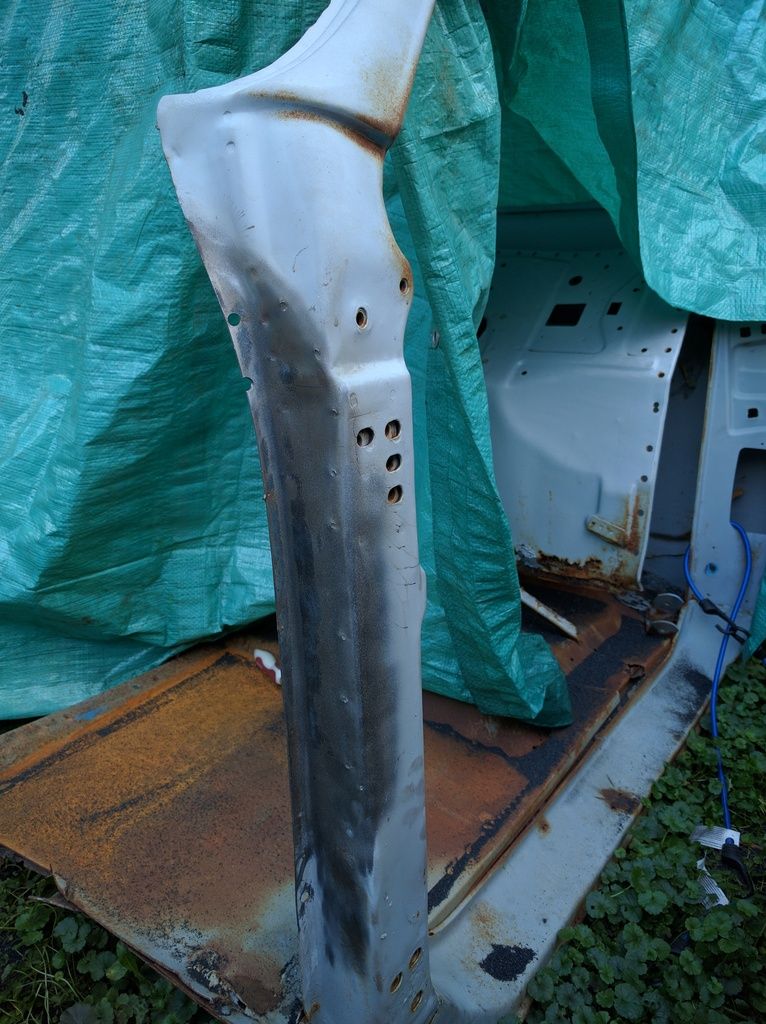 Coated everything with this 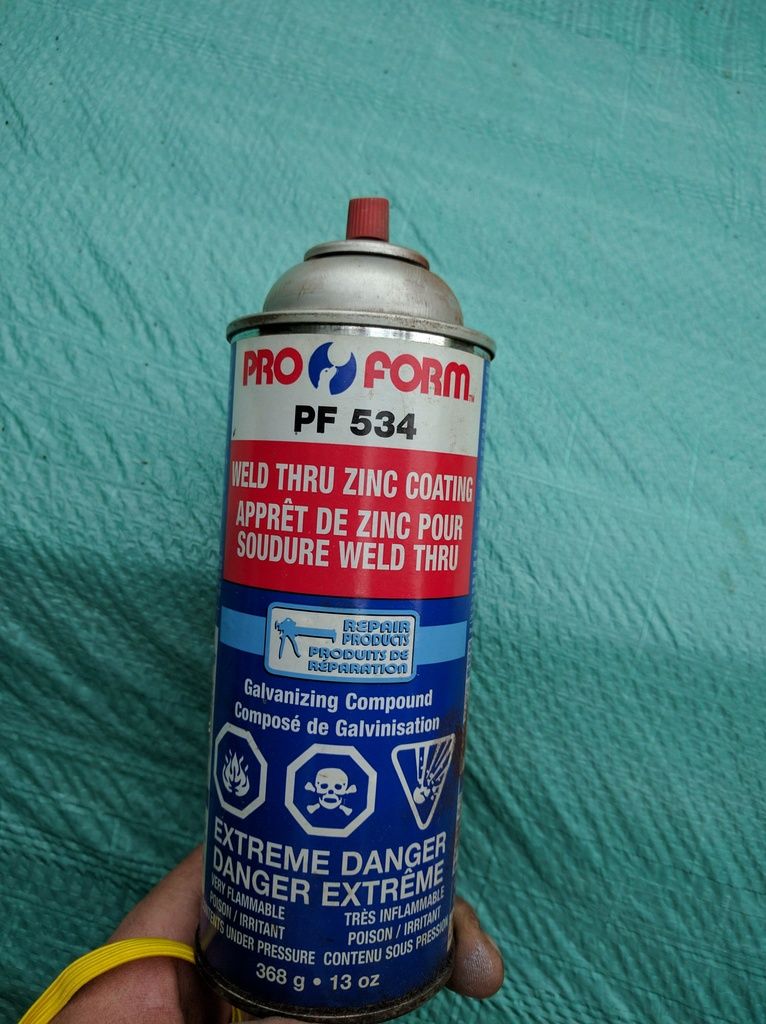 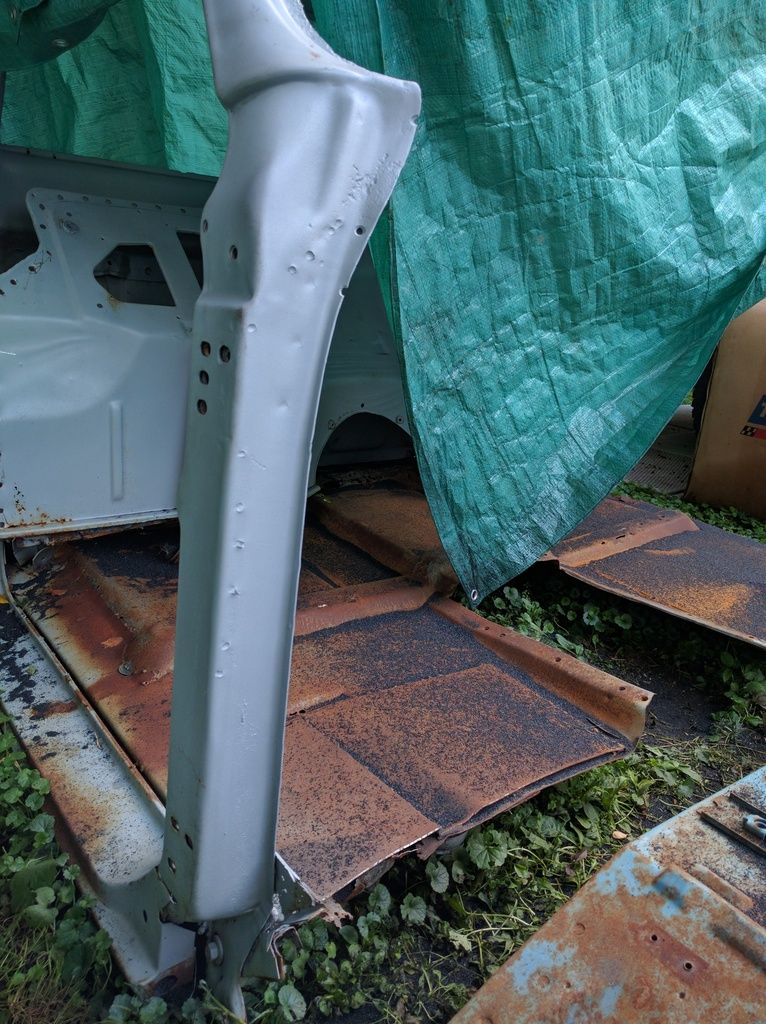 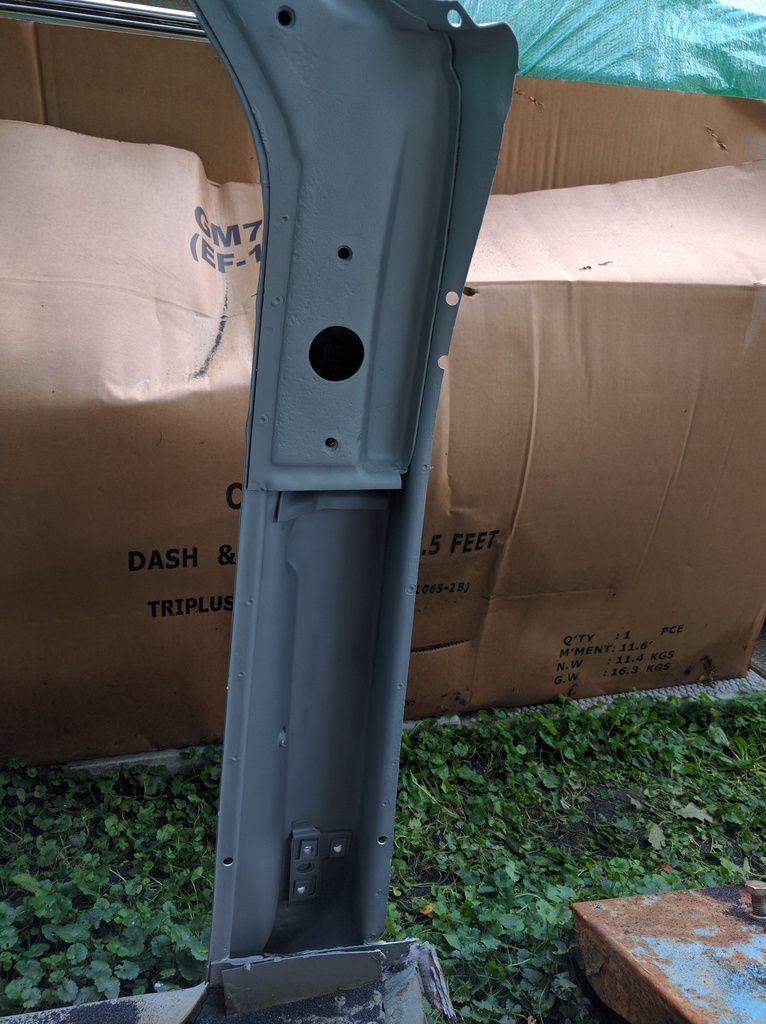 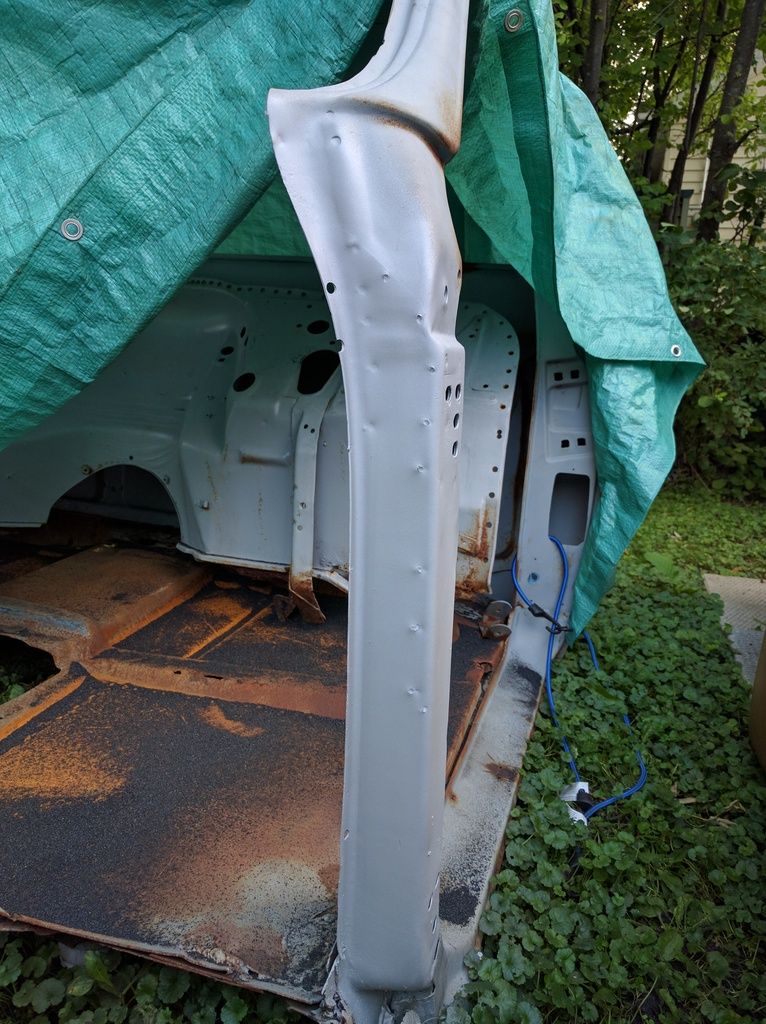 have to fix up this crack before I use the pillar 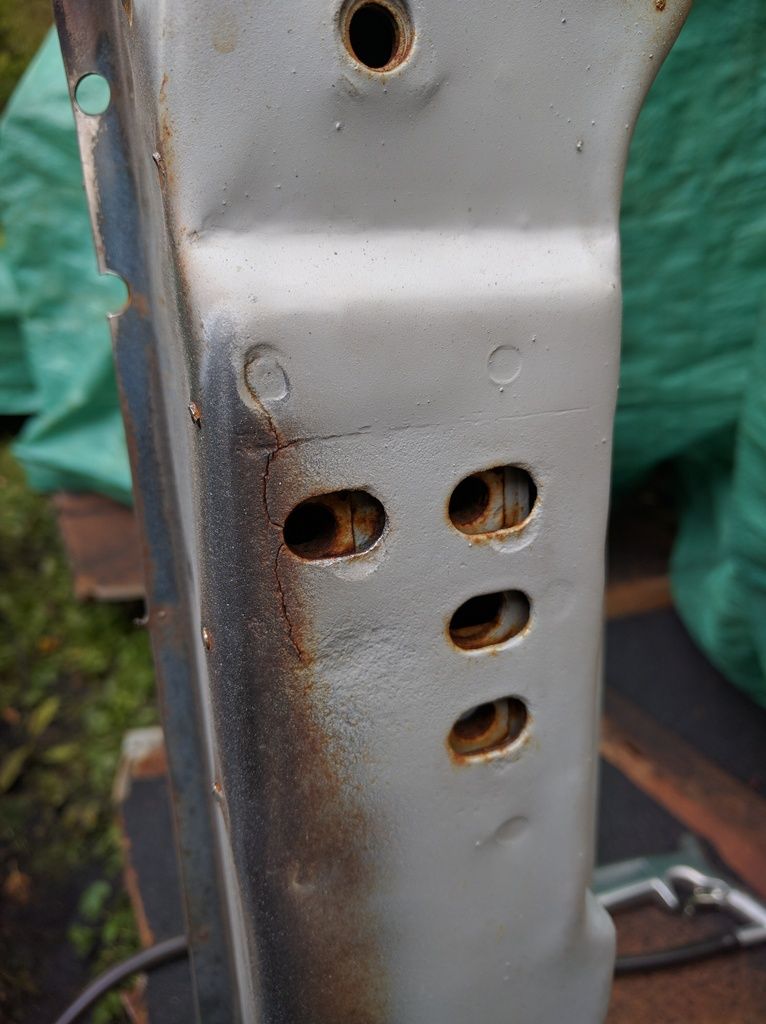 So I think my next step is to get my original cab blasted to see how bad the roof is. If the roof is done, then I think I'm throwing in the towel with it. |
|
|
|
|
08-07-2016, 11:22 AM
|
#39 |
|
Registered User
 Join Date: Jun 2012
Location: springfield mo
Posts: 3,076
|
Re: Run Away's '69 C10 LWB Project Log
i havent commented before but have seen this since the beginning. Youre making good work on it. Keep going and there wont be any rust left
__________________
United States Marine Corps 2000-2011 Iraq and Afghanistan veteran Just living life now and enjoying it and my wife, daughter and son 
|
|
|
|
|
08-20-2016, 10:19 PM
|
#40 |
|
Registered User
Join Date: Feb 2009
Location: Winnipeg, Manitoba
Posts: 68
|
Re: Run Away's '69 C10 LWB Project Log
Brought my cab to be sandblasted
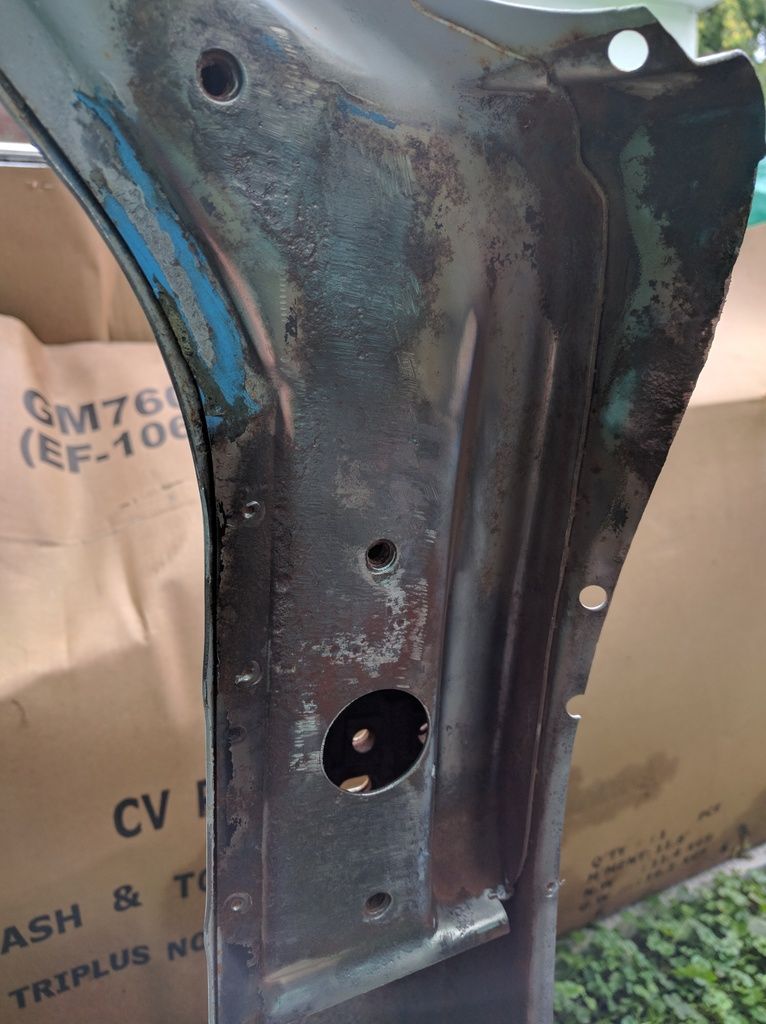
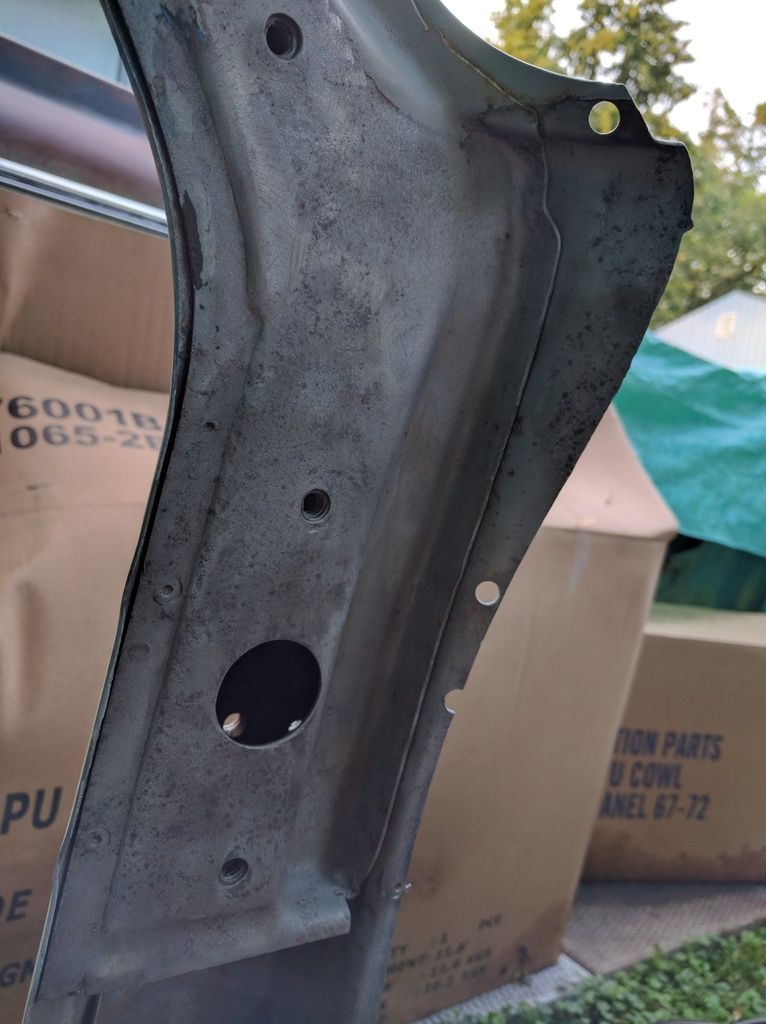
 Turned out great! Roof is mint, I was very relieved 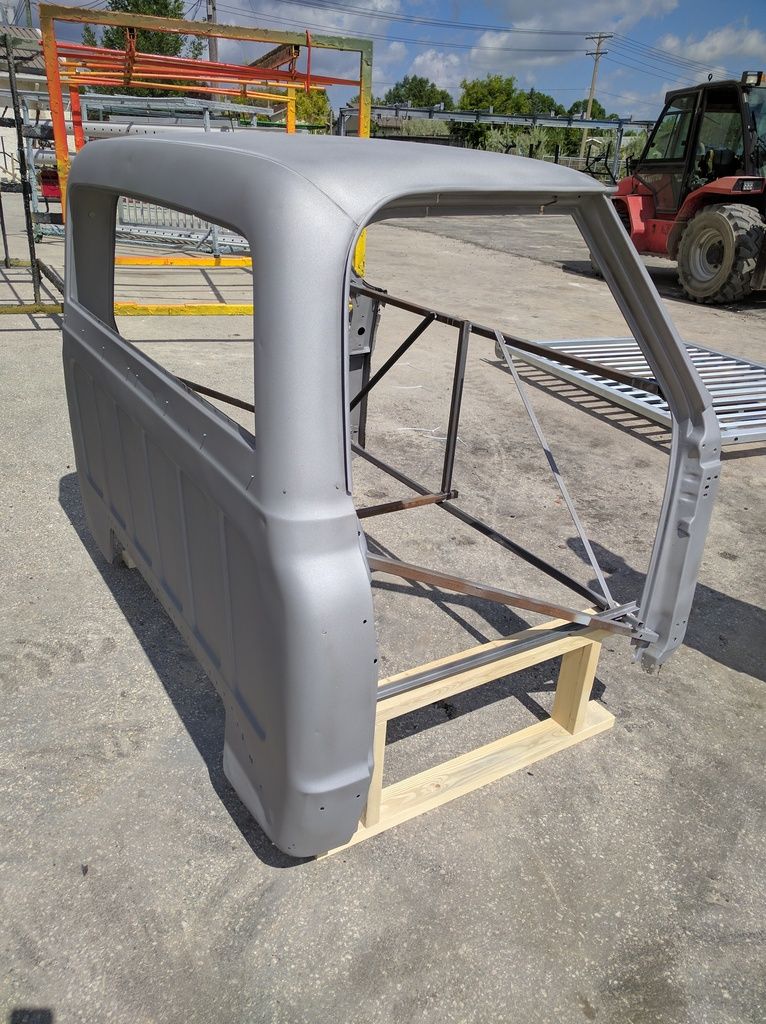  Original cab corners only have a few pinholes  And powder coated with zinc primer. I also got 6 other pieces done (cowl and side wings), and they cut me a great deal. Just under $300 for everything. 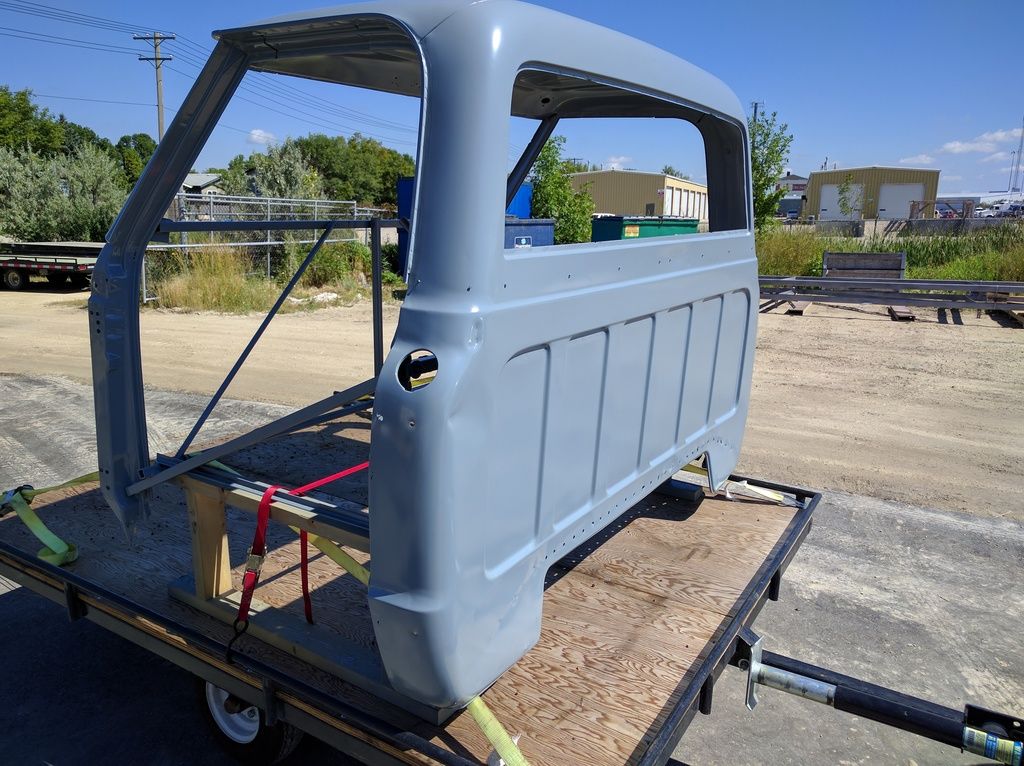 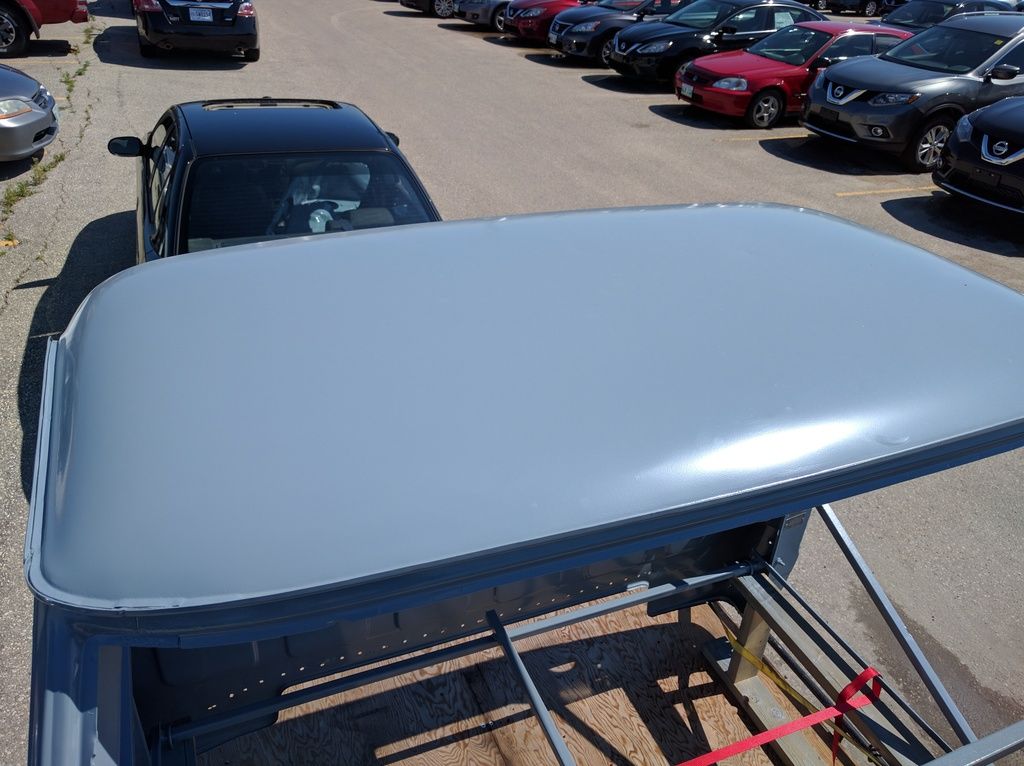 Some holes near the vin plates and by the door 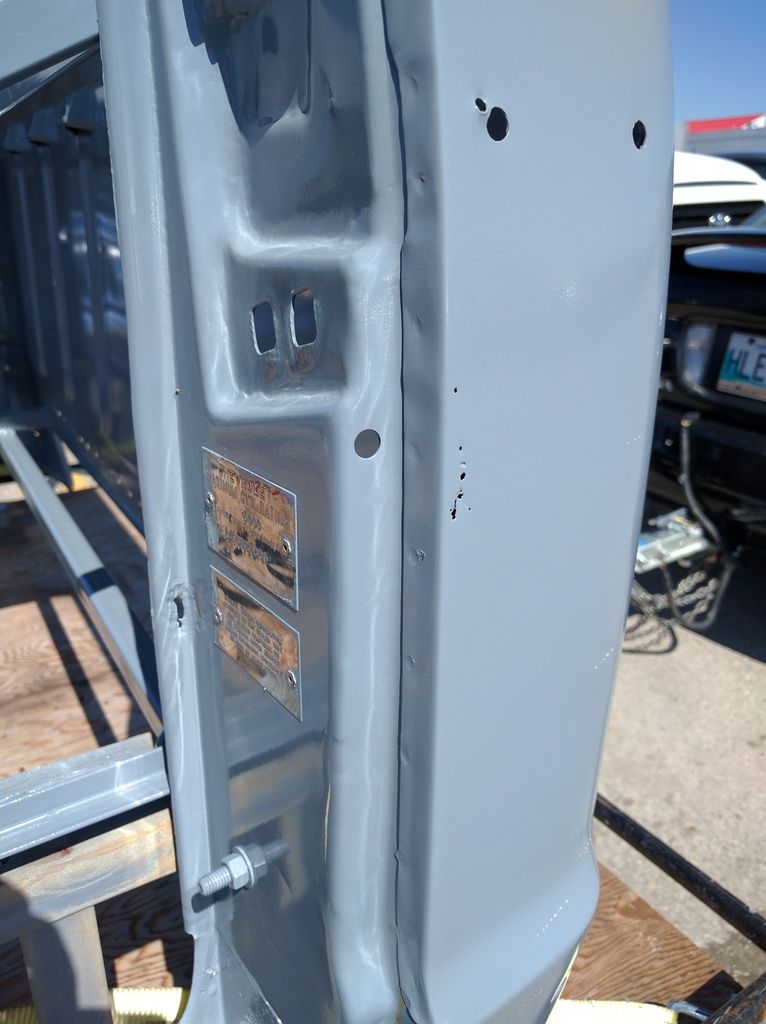 Drip rail on drivers side 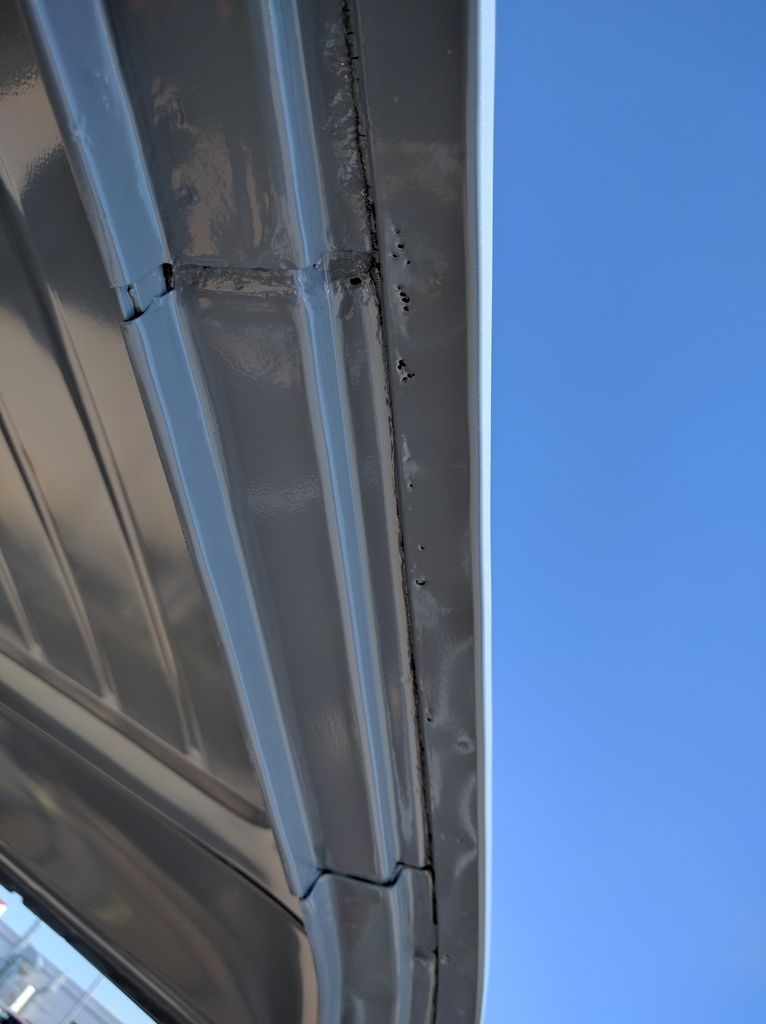 Inside the cab 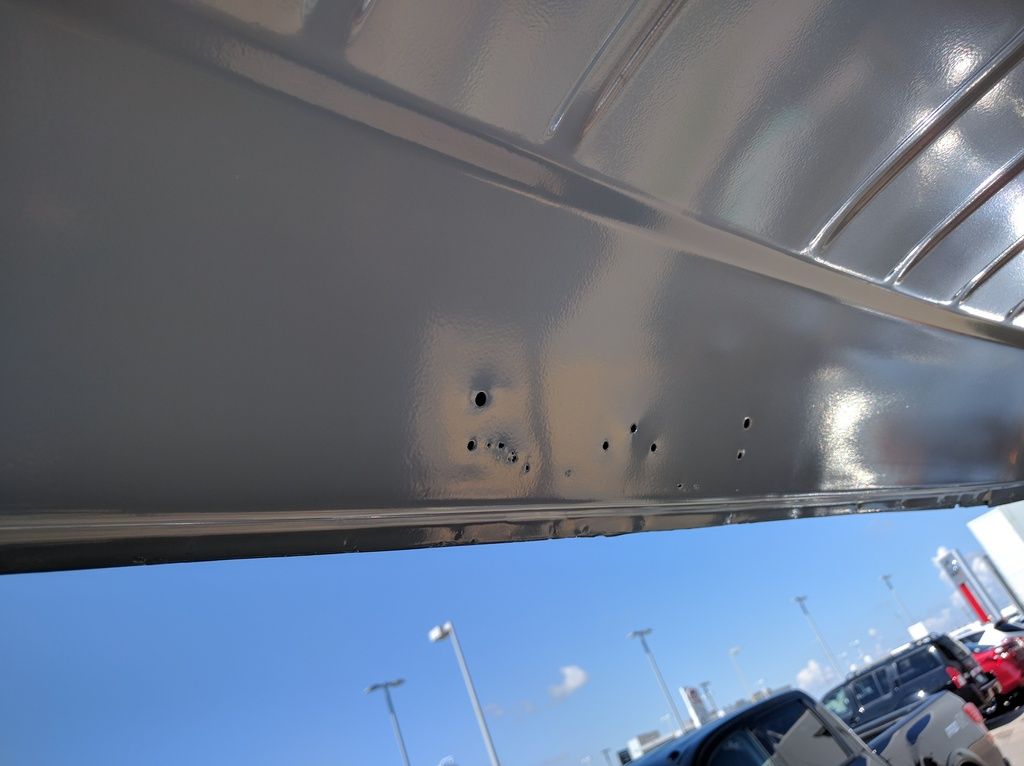 And a small hole on the passenger side door jamb near the A pillar 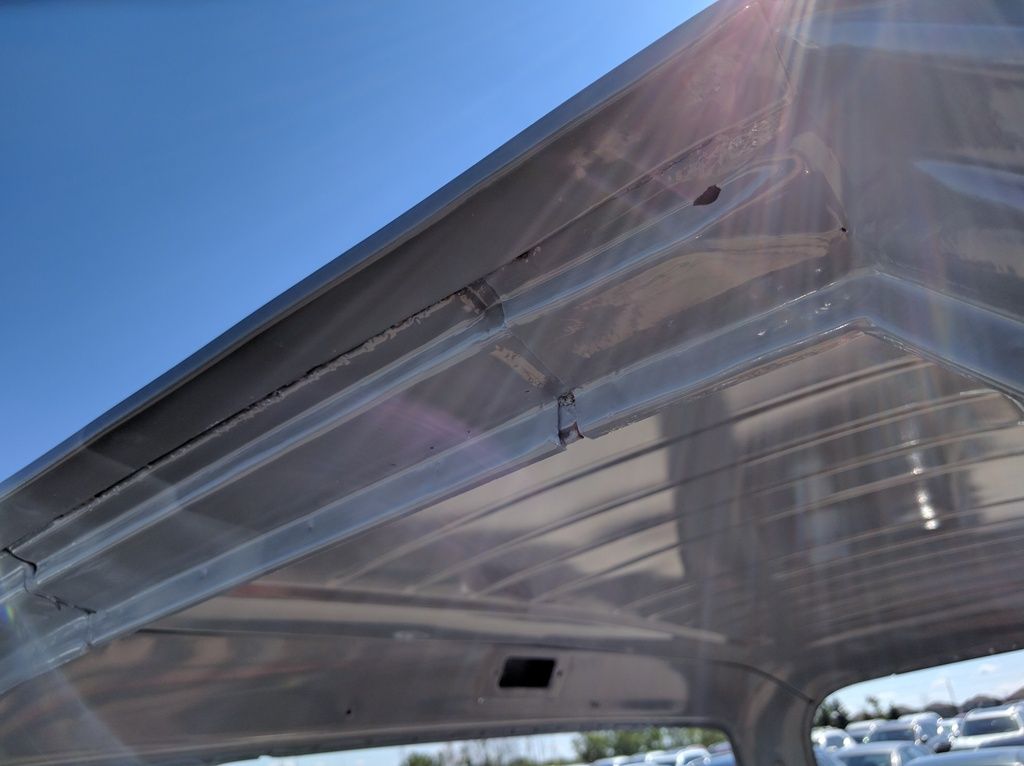 Inside the cab corners 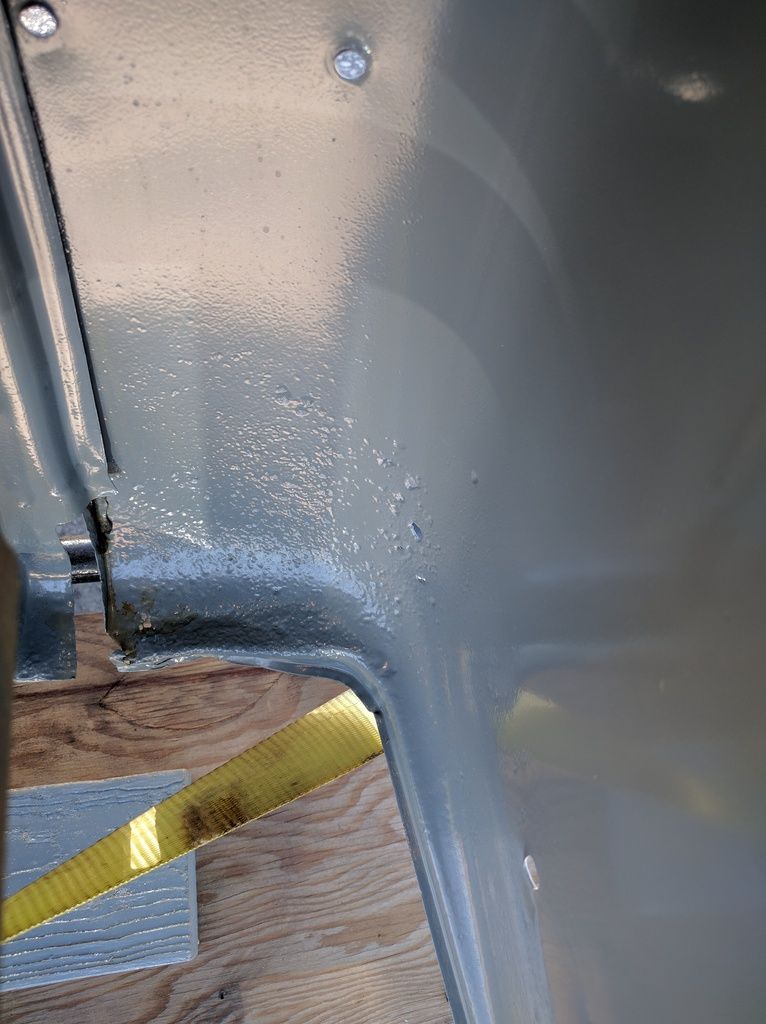 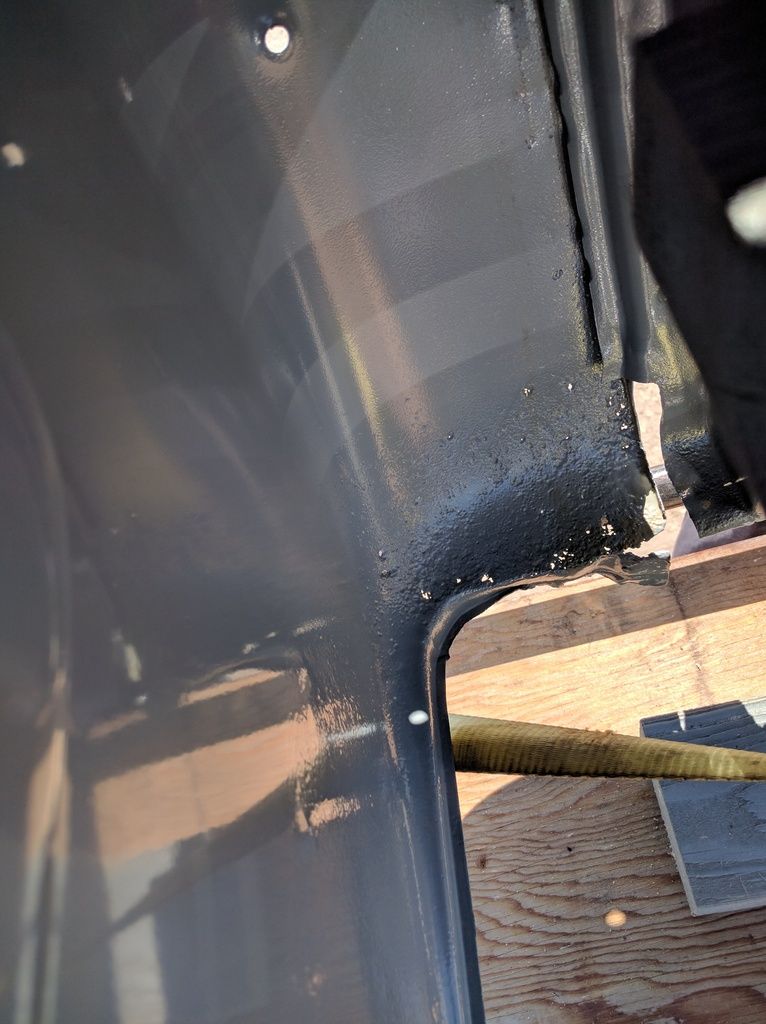
|
|
|
|
|
08-20-2016, 10:22 PM
|
#41 |
|
Registered User
Join Date: Feb 2009
Location: Winnipeg, Manitoba
Posts: 68
|
Re: Run Away's '69 C10 LWB Project Log
Went to the junkyard and found this truck hanging out front. Not sure what year but it's got 5 lugs, leaf springs, and a homemade one piece flip front end with a 69-72 hood but a 67-68 grille. Weird. Hopefully I can grab a few parts off it one day.
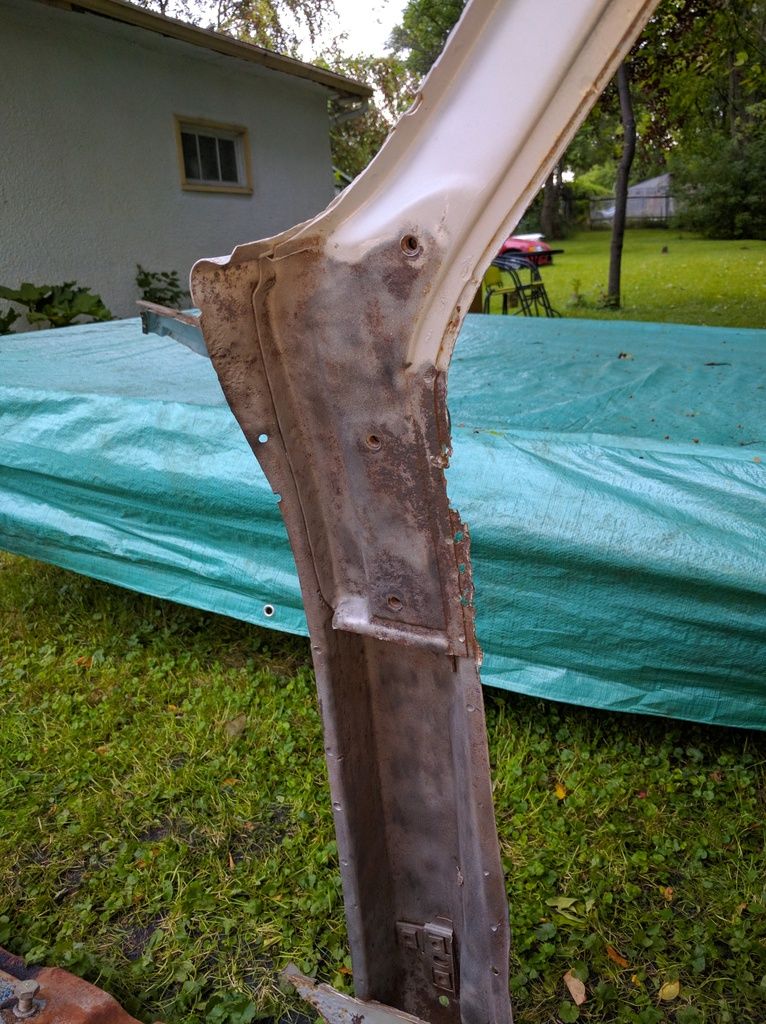
 Today I started work on the passenger side A pillar 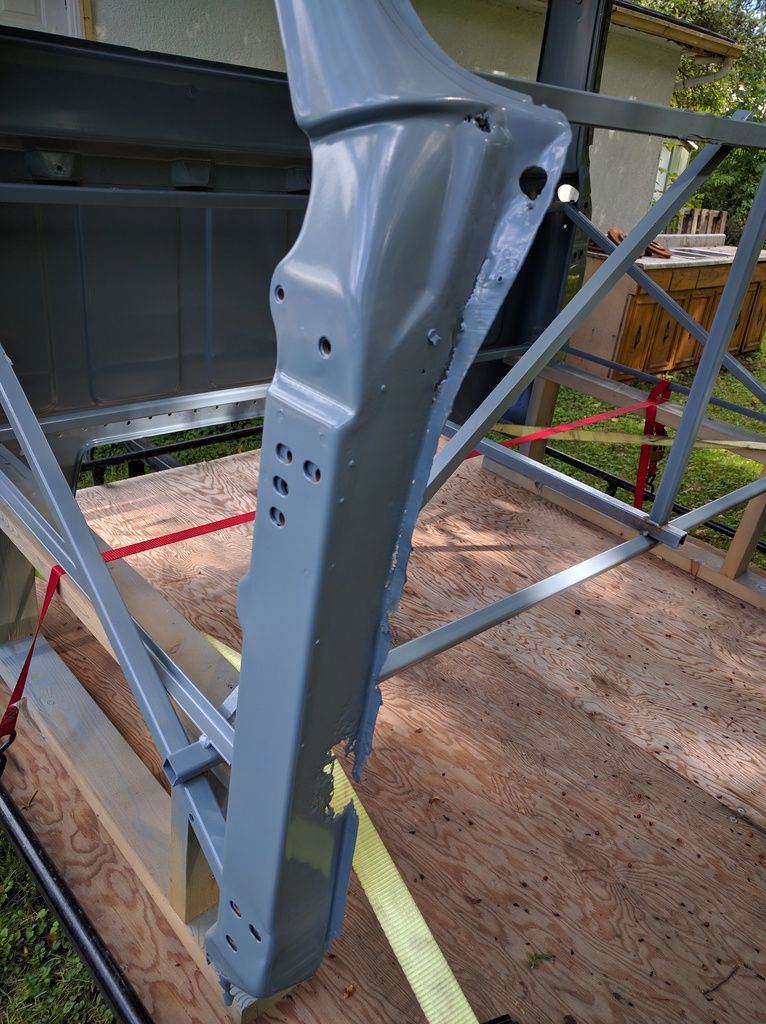 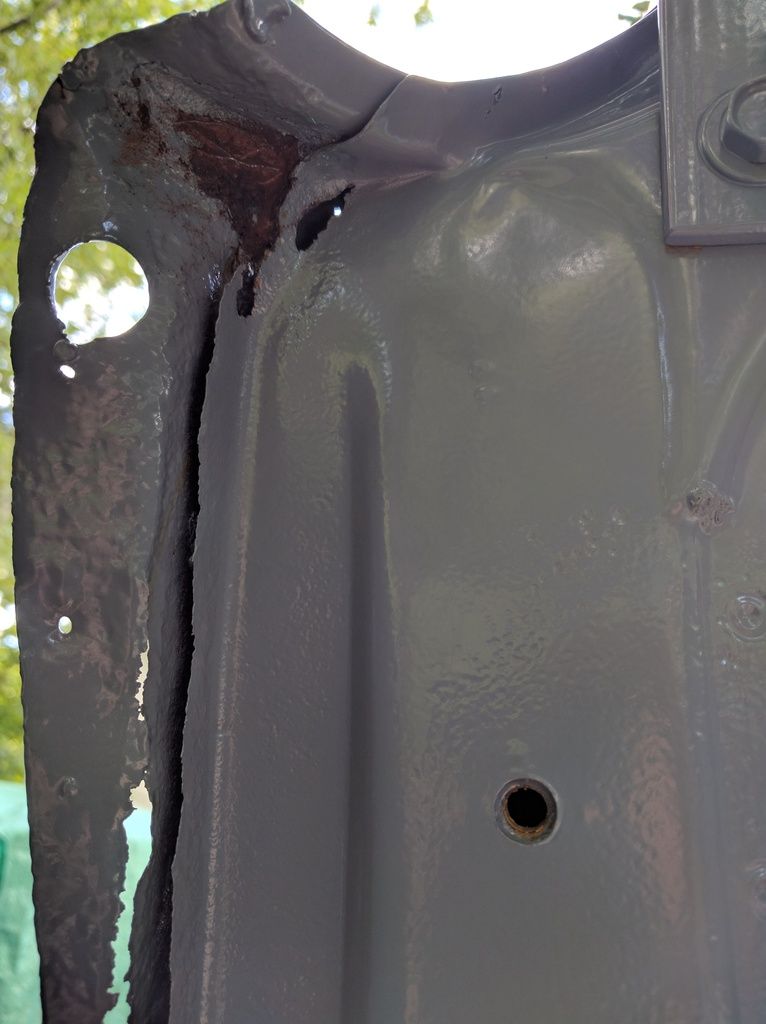 Cut the front half off the parts cab. I later regretted cutting here, but this is my first try at fixing rust...  Same thing on my cab 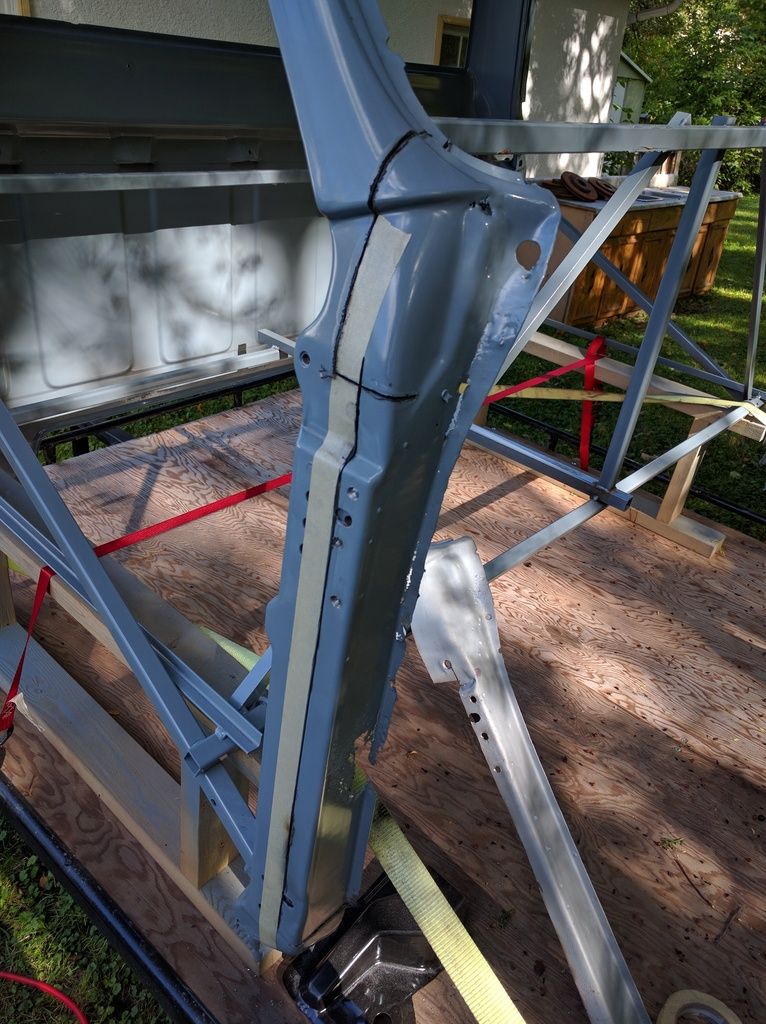 Together 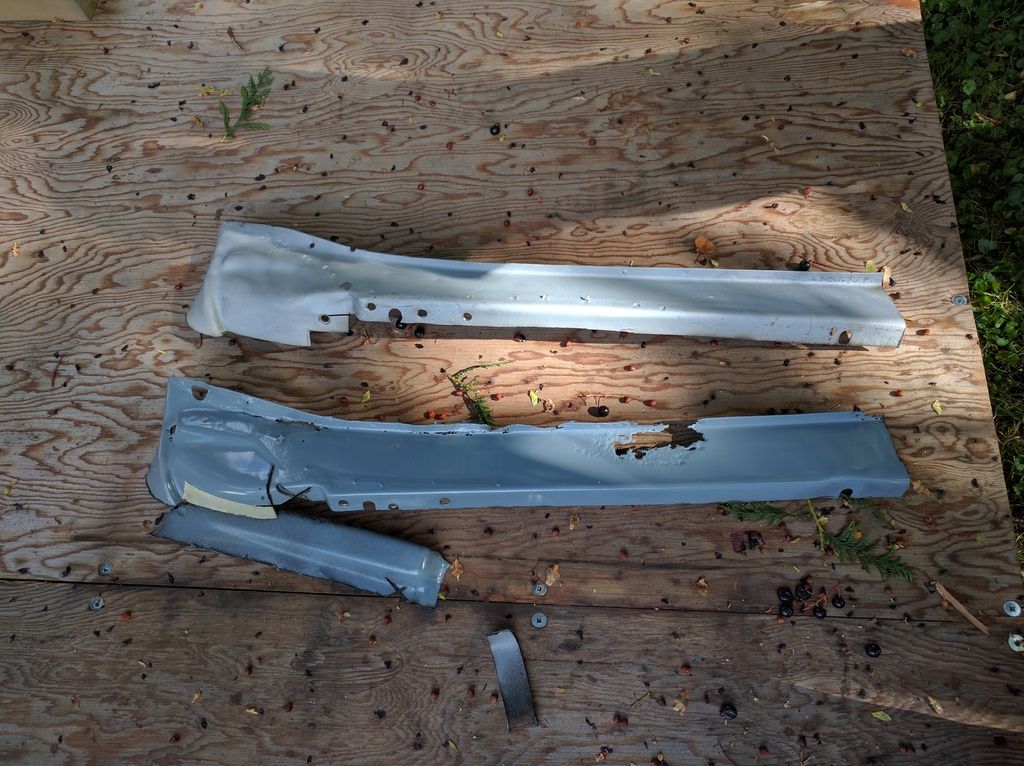 Started with this 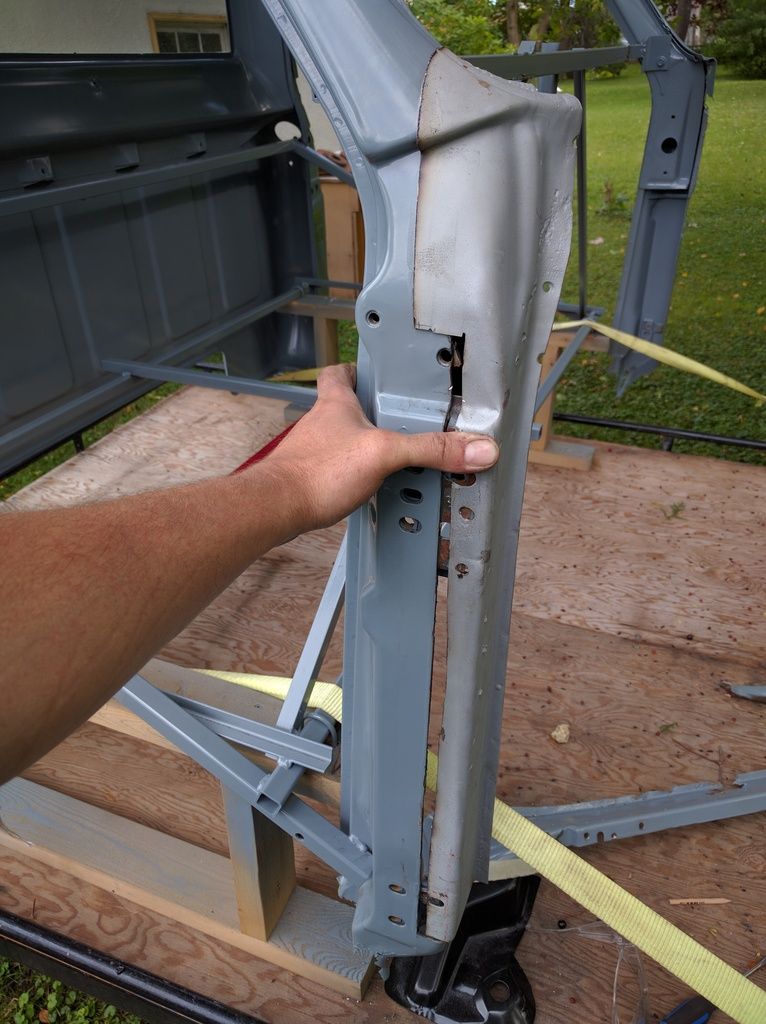 Ended up here 
|
|
|
|
|
08-20-2016, 10:23 PM
|
#42 |
|
Registered User
Join Date: Feb 2009
Location: Winnipeg, Manitoba
Posts: 68
|
Re: Run Away's '69 C10 LWB Project Log
Really regretting cutting across the 4 curved body lines. Proving almost impossible to line up. Not sure if it's my trimming or if the two panels don't have the exact same lines (from different stampings or whatever).
I can get the bottom three to line up like this 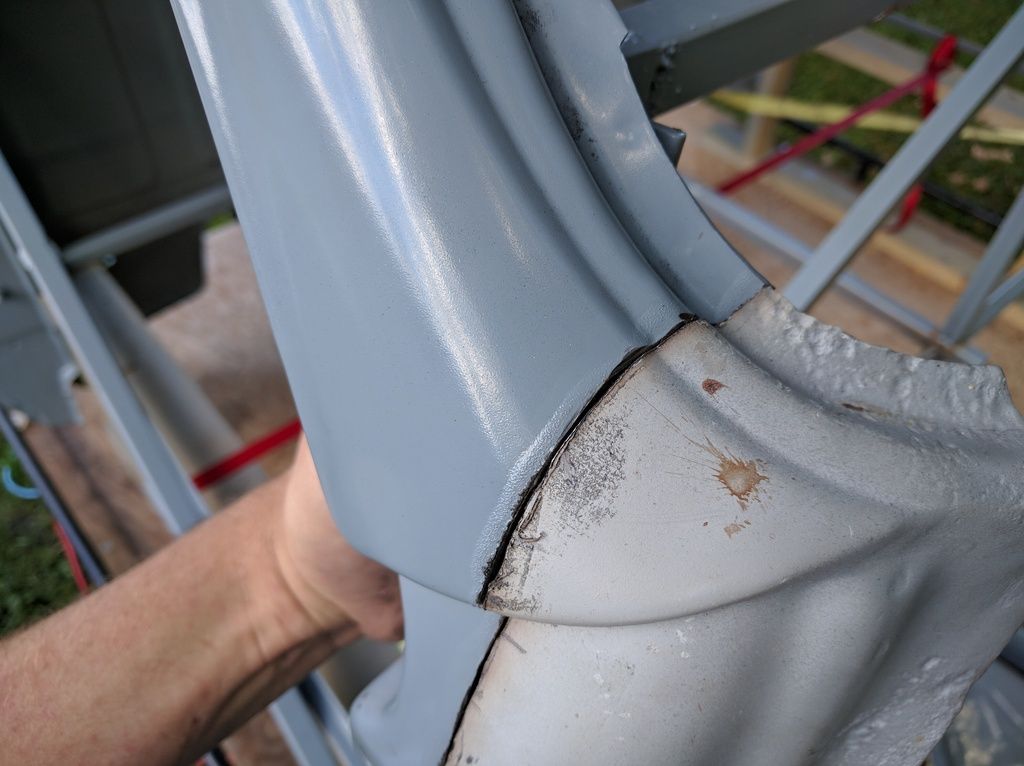 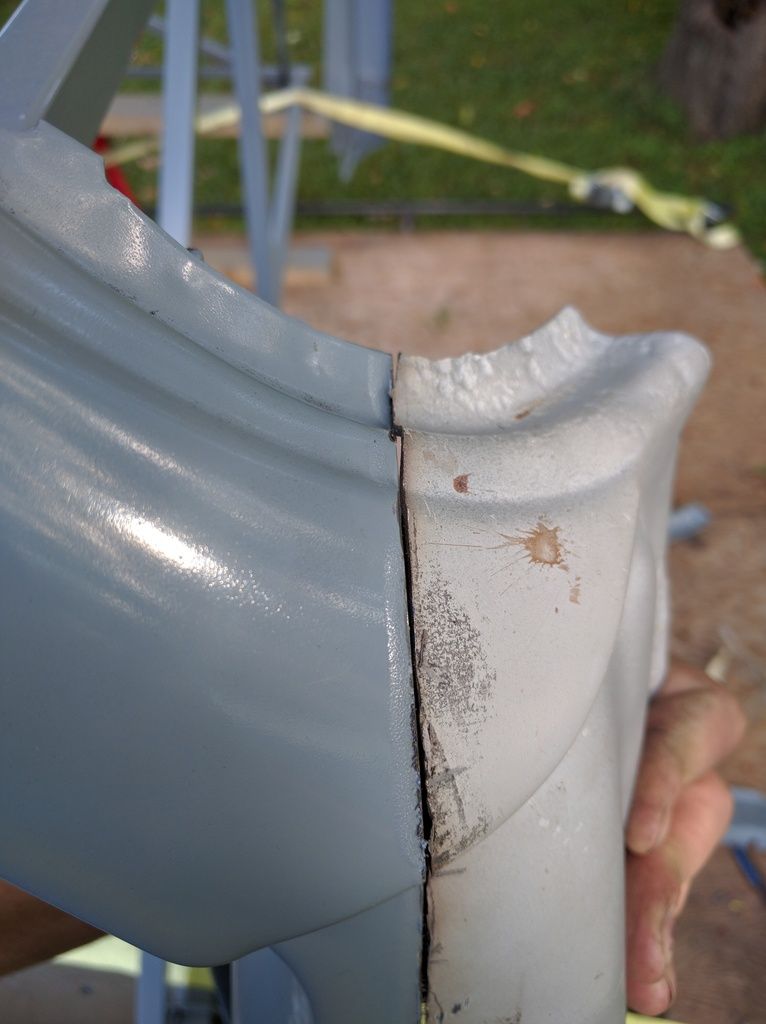  But the top line/lip won't line up if I align the others. If I line up the top, it sucks the panel in and here's what I get 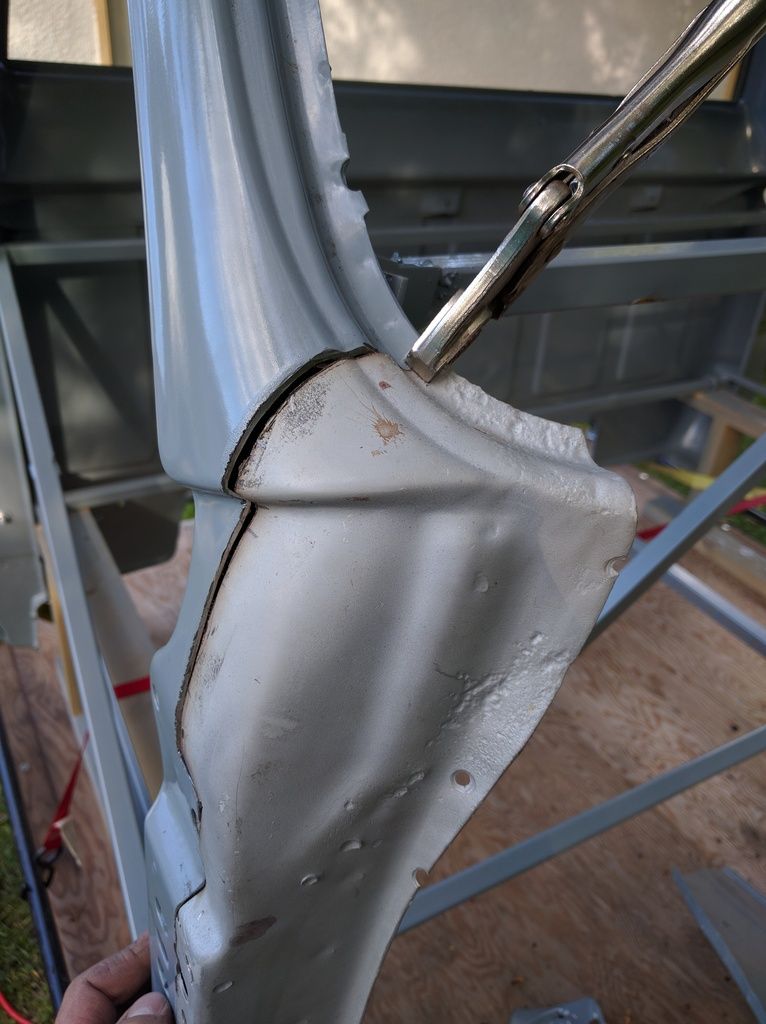 Not sure what I should do next. Might cut off the top lip and use the original chunk up there. Just realized I didn't take a picture of the backside, but that's got a section of panel welded in too that has to line up. |
|
|
|
|
08-21-2016, 02:13 AM
|
#43 |
|
Registered User
Join Date: Oct 2007
Location: Spanaway
Posts: 8,451
|
Re: Run Away's '69 C10 LWB Project Log
Per that last picture is it possible that ya just need to trim the window opening flange a little more so it would allow the lighter piece to curl inward a little more?
__________________
Mike. Swamp Rat build thread : http://67-72chevytrucks.com/vboard/s...d.php?t=595019 72 3/4T 4X4 4" BDS Lift 33" BFG's |
|
|
|
|
08-21-2016, 12:45 PM
|
#44 |
|
Registered User
Join Date: Feb 2009
Location: Winnipeg, Manitoba
Posts: 68
|
Re: Run Away's '69 C10 LWB Project Log
Possibly...I'm at the point where I don't want to trim too much more as I'm afraid of going too far. Wish I had someone locally who could take a look and give me their opinion of what's going on, whether it's the panels that are not quite the same or my cut isn't located properly.
|
|
|
|
|
08-21-2016, 01:57 PM
|
#45 |
|
Registered User
Join Date: Oct 2007
Location: Spanaway
Posts: 8,451
|
Re: Run Away's '69 C10 LWB Project Log
You almost need an uncut cab and pull a curvature pattern off of it.
maybe just go ahead and tack it in place on the outer surface and keep fitting the other parts until you see what you got? i would think that window flange should be able to be "adjusted" a bit before final welding.
__________________
Mike. Swamp Rat build thread : http://67-72chevytrucks.com/vboard/s...d.php?t=595019 72 3/4T 4X4 4" BDS Lift 33" BFG's Last edited by swamp rat; 08-28-2016 at 04:01 PM. |
|
|
|
|
08-28-2016, 11:43 AM
|
#46 |
|
Registered User
Join Date: Feb 2009
Location: Winnipeg, Manitoba
Posts: 68
|
Re: Run Away's '69 C10 LWB Project Log
That's a good suggestion swap rat, I did just that! Windsheild is still in the other cab so I couldn't do much other than confirm I'm pretty close.
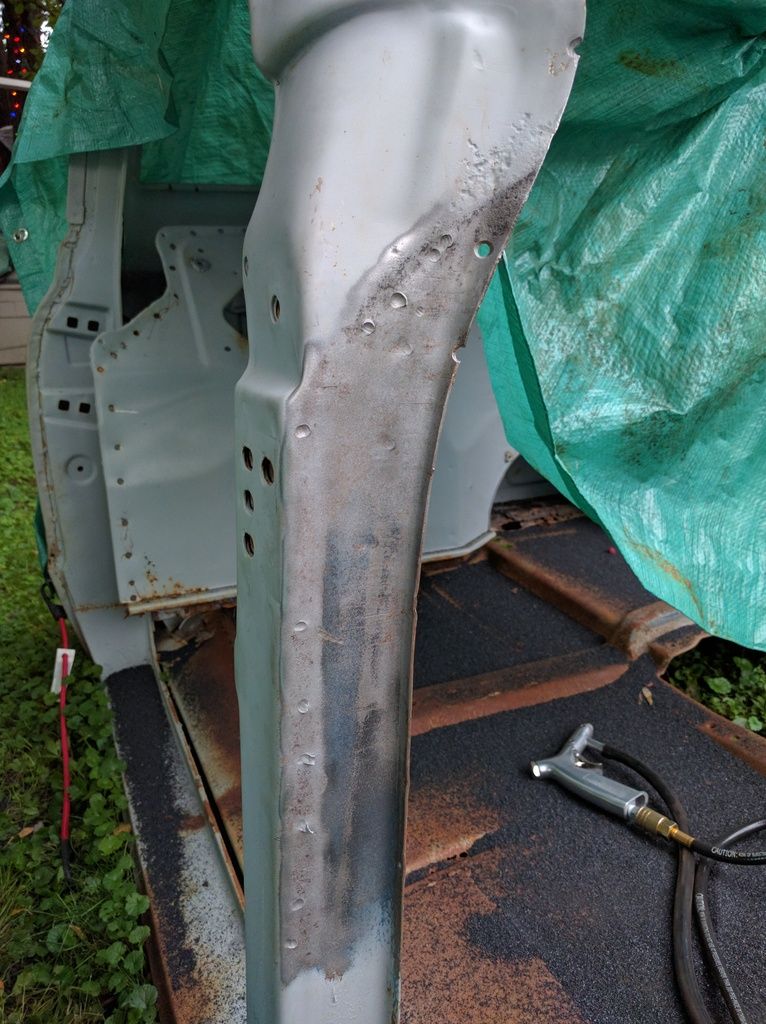
 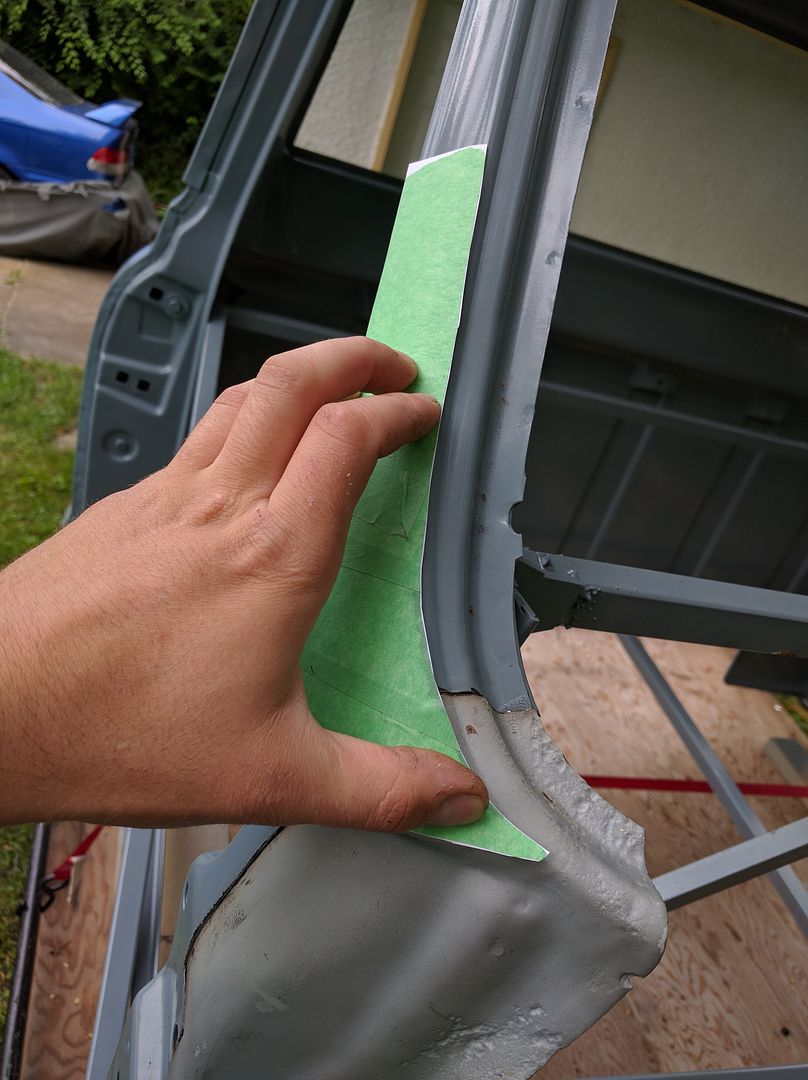 I decided having the inner section welded together was preventing me from pushing things to where I wanted. 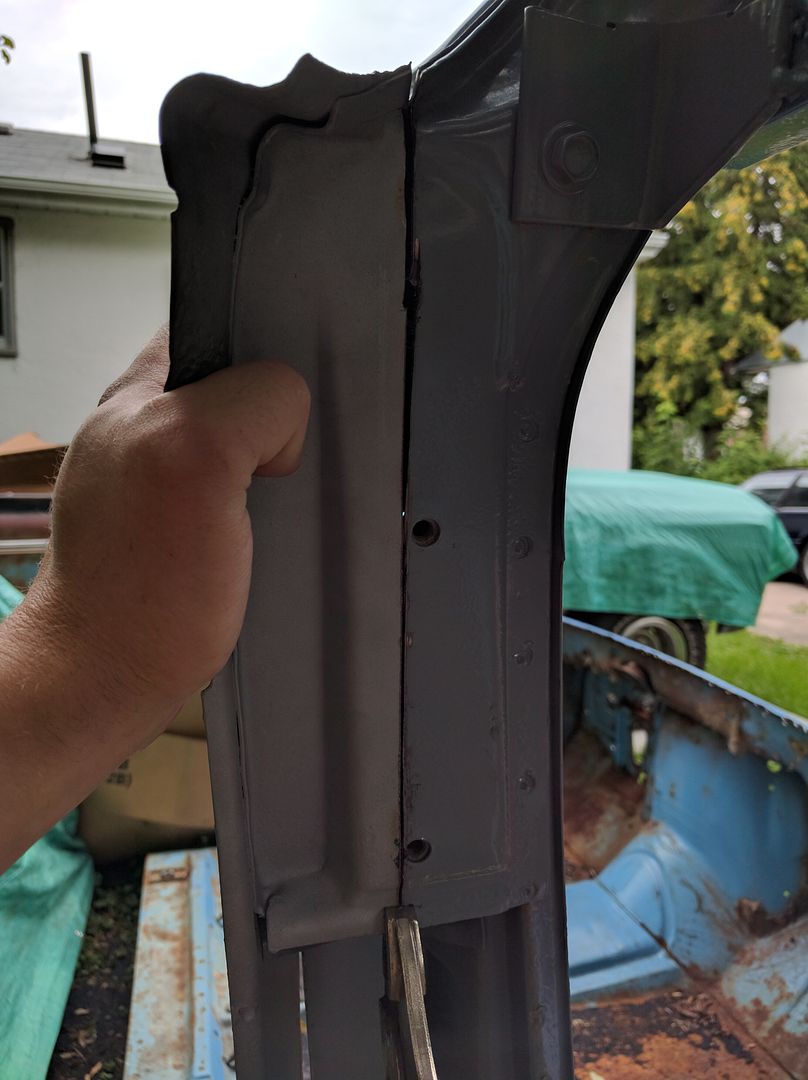 You can see how the original and the replacement are different at the top. 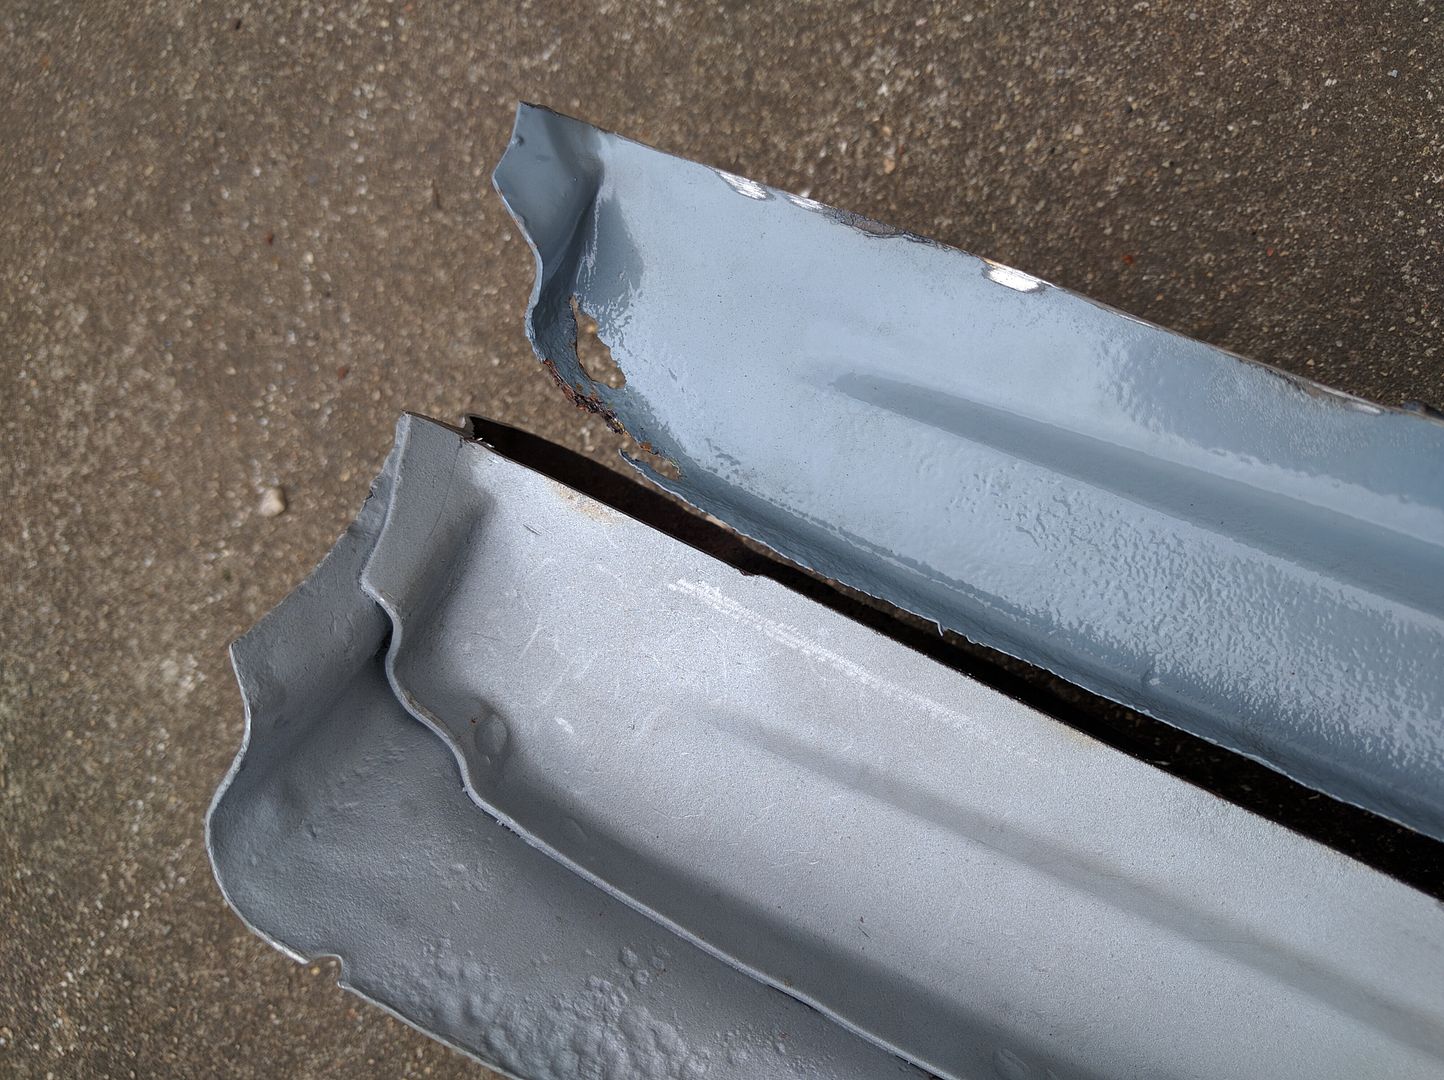 So I drilled it out 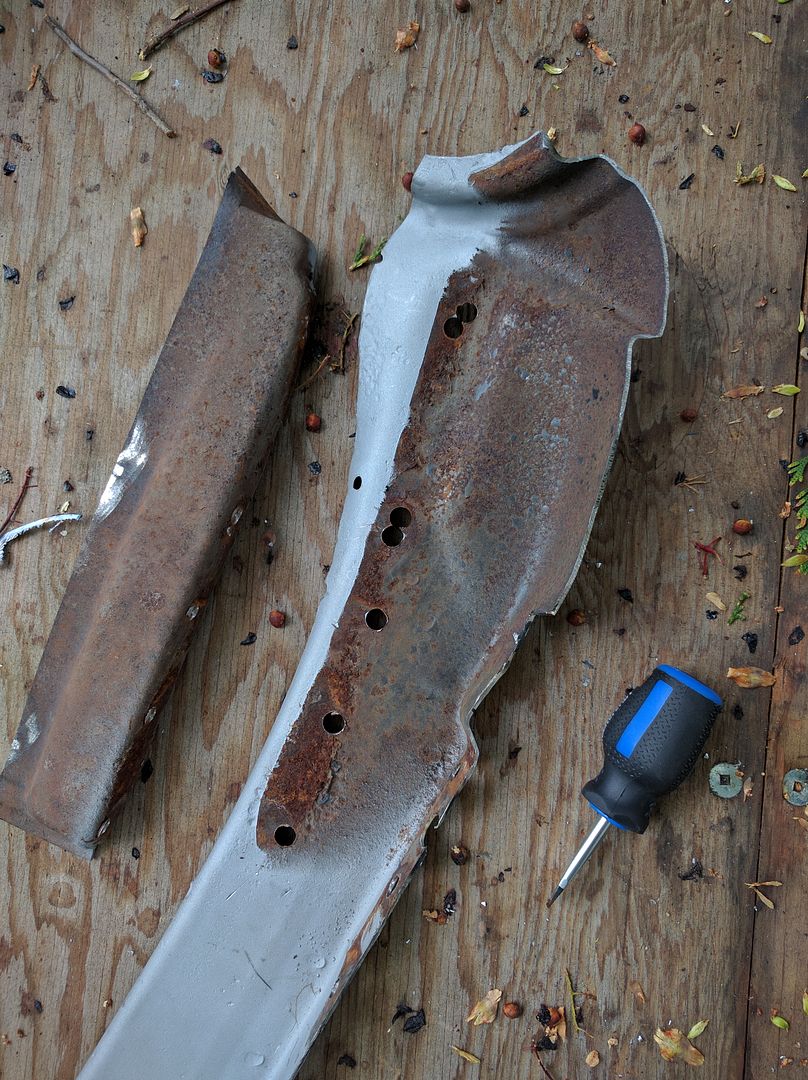 And that was the ticket, it all fits much better now 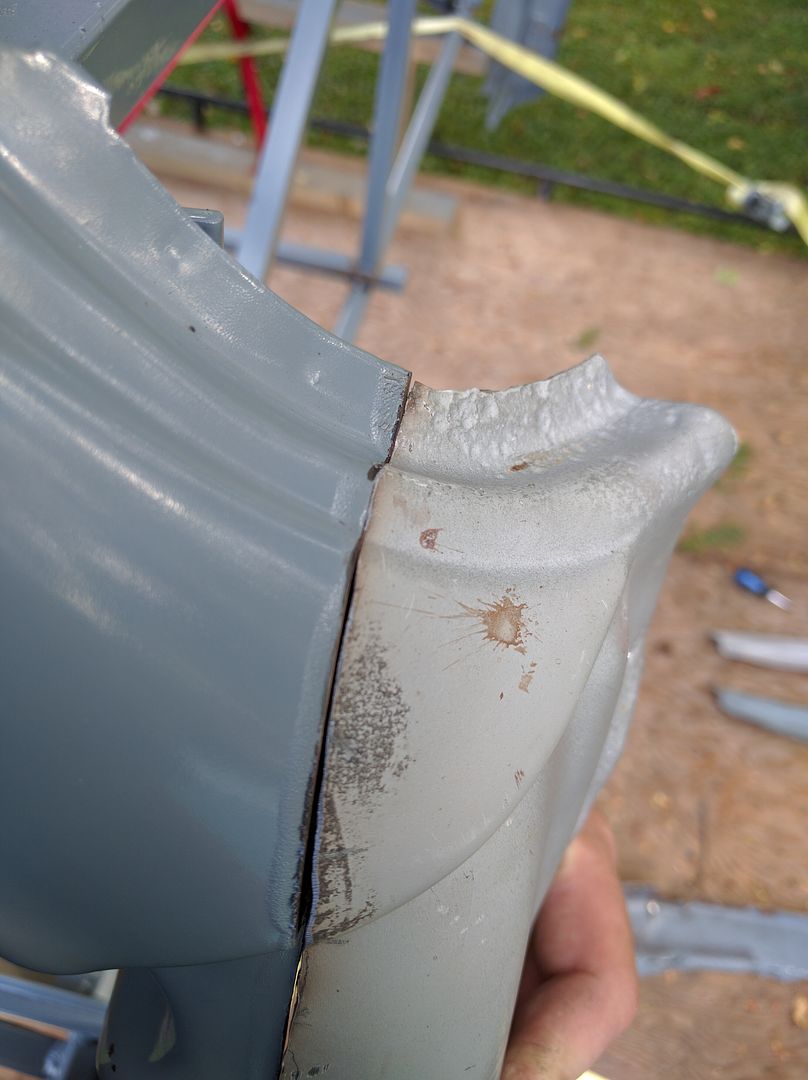 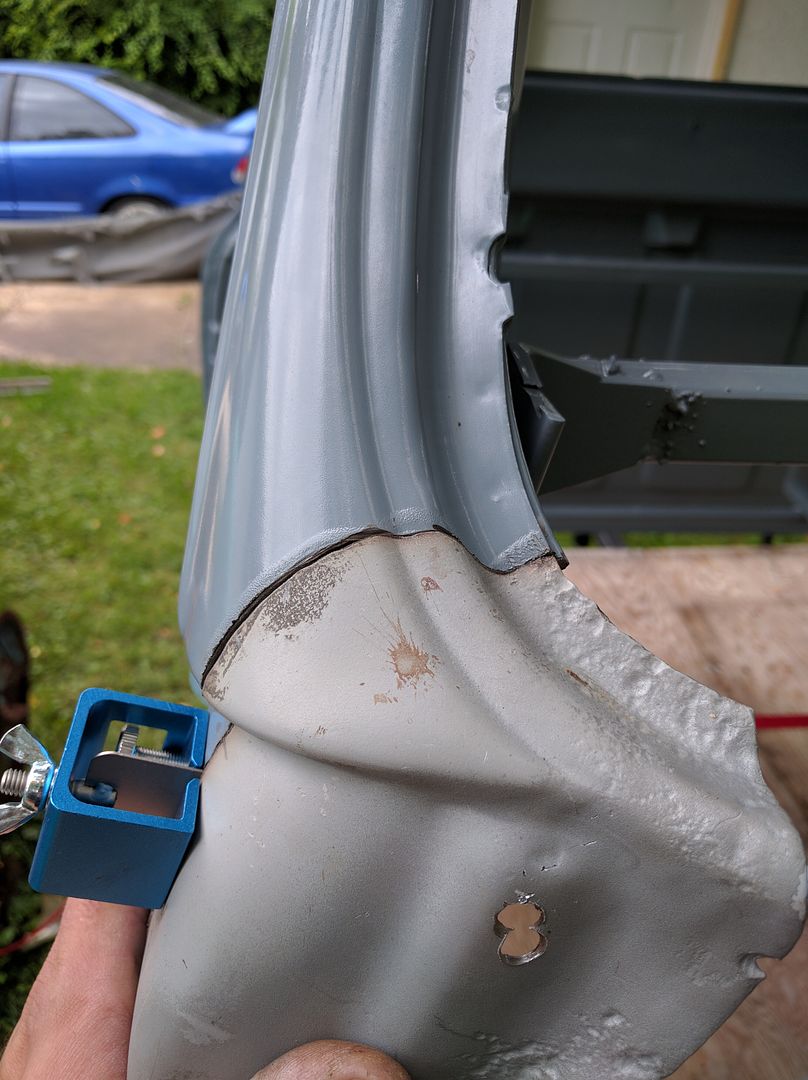 Moving on to the drivers side, I made a cut near the top of the windsheild 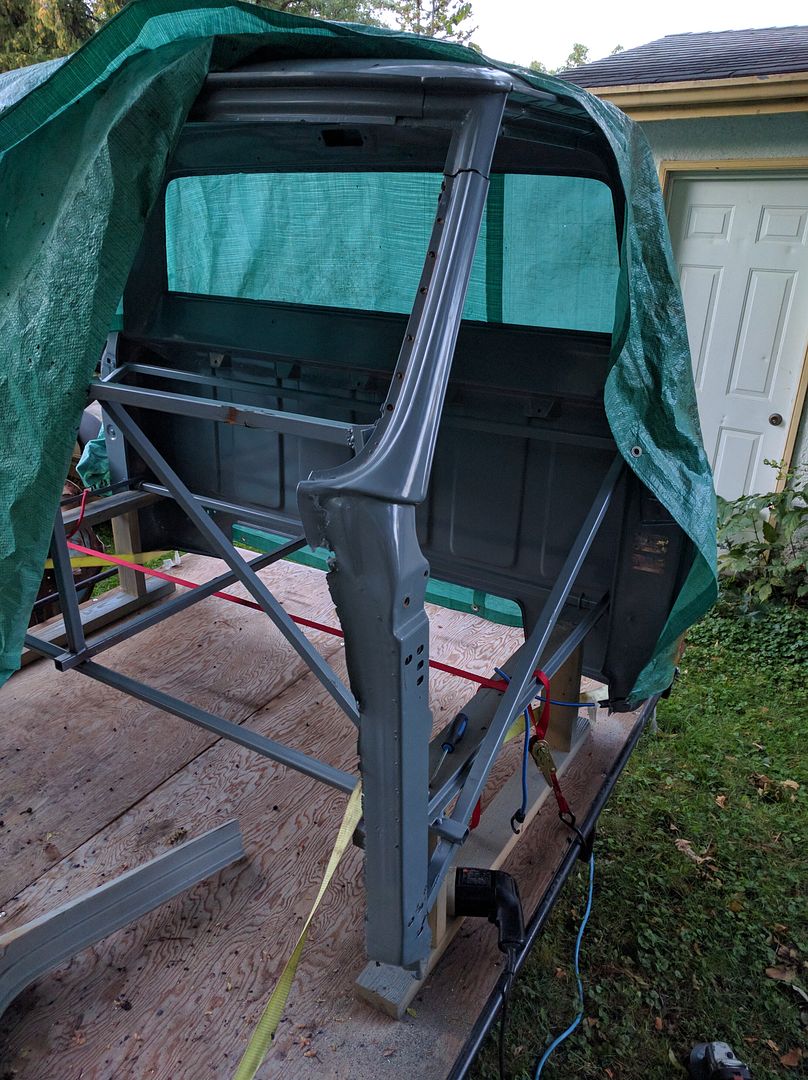 And chopped it off 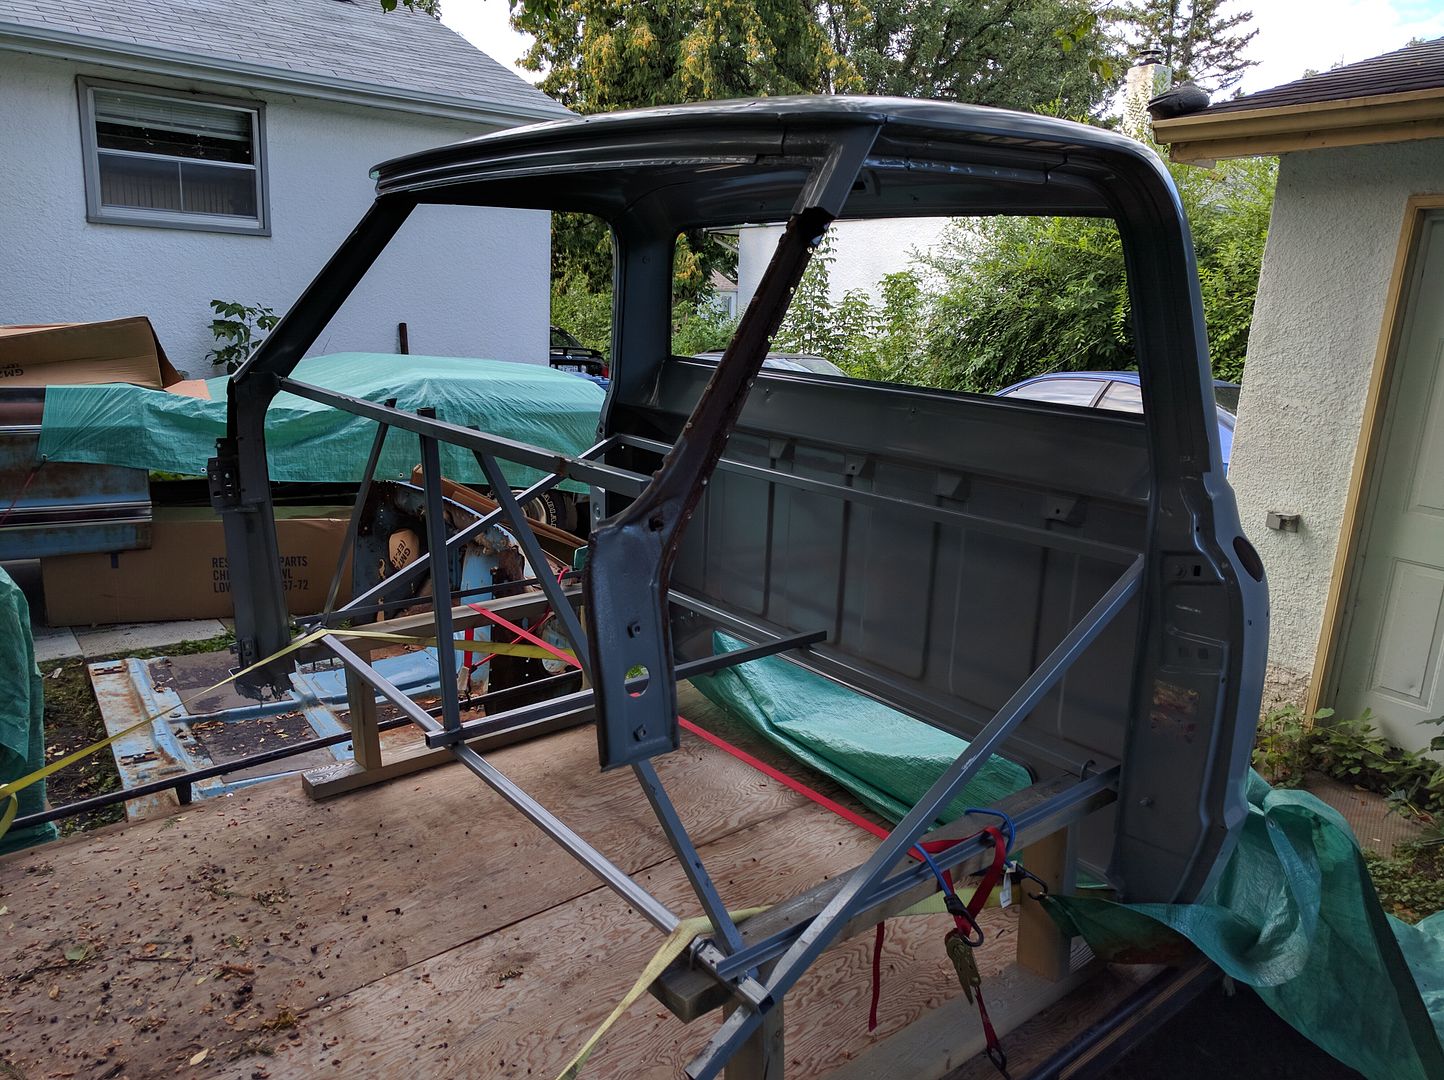
|
|
|
|
|
08-28-2016, 11:44 AM
|
#47 |
|
Registered User
Join Date: Feb 2009
Location: Winnipeg, Manitoba
Posts: 68
|
Re: Run Away's '69 C10 LWB Project Log
Did the same to the parts cab and after some trimming here's the result
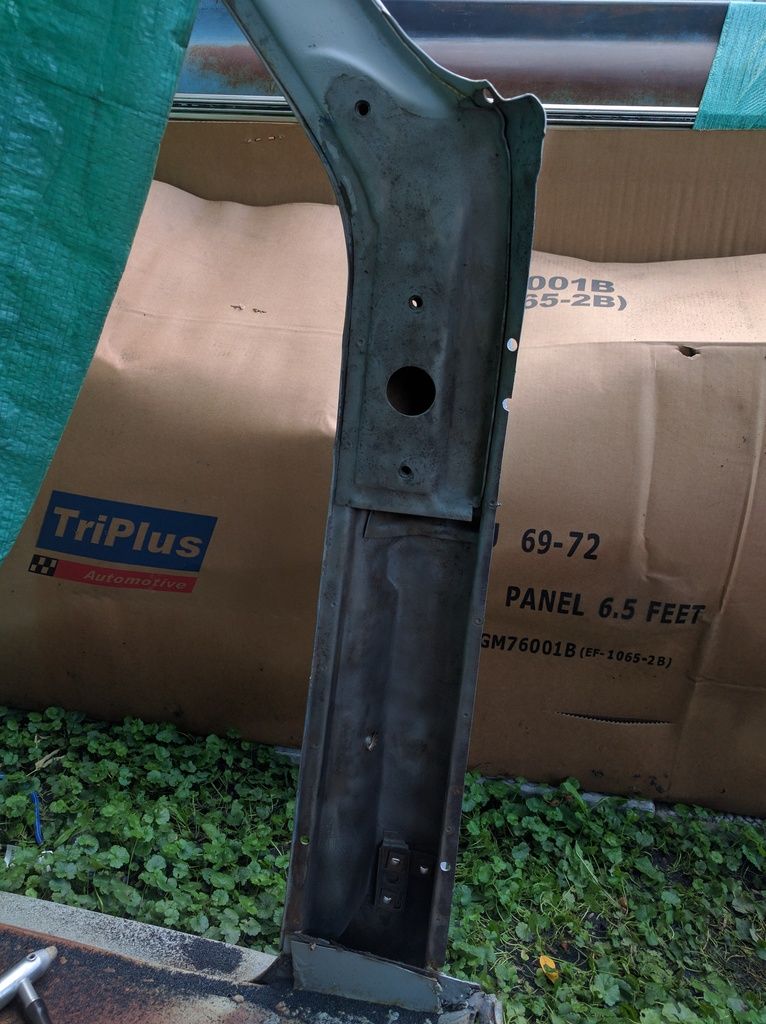
    Much easier so far than what I did for the passenger side. i went with doing the full pillar because of the damage found here 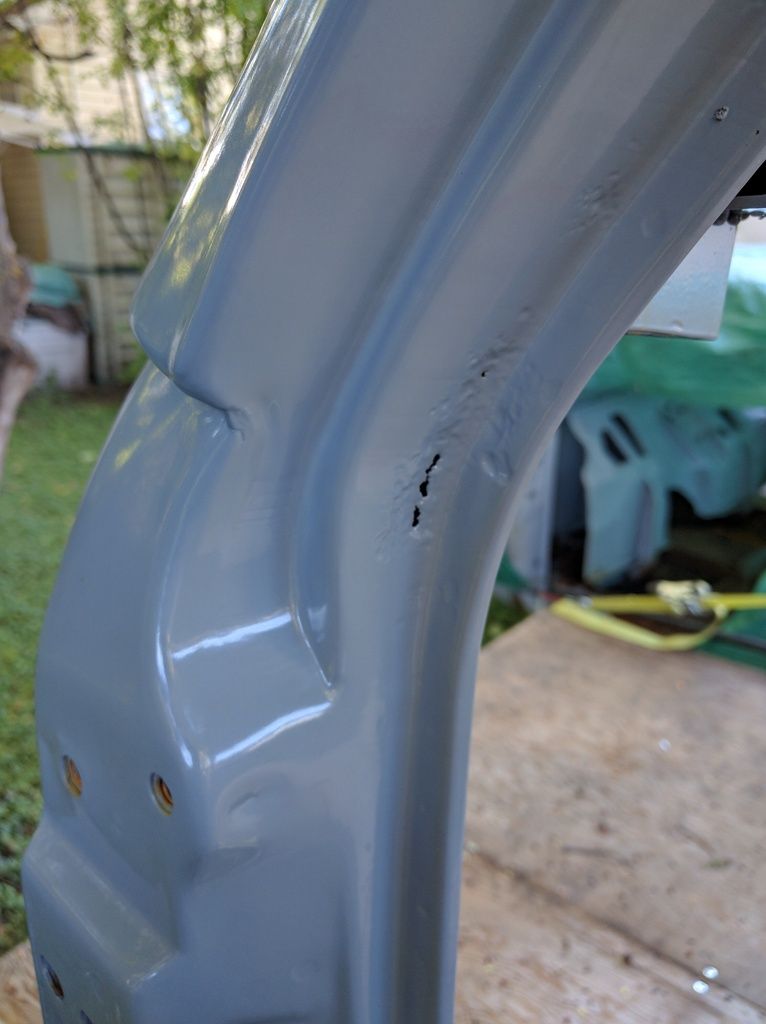 I haven't started welding it in yet as I've been sandblasting the inner sections of all the panels and it's slow going. My blaster doesn't have much power and there are difficult angles to reach. |
|
|
|
|
08-28-2016, 04:04 PM
|
#48 |
|
Registered User
Join Date: Oct 2007
Location: Spanaway
Posts: 8,451
|
Re: Run Away's '69 C10 LWB Project Log
Nice work!
__________________
Mike. Swamp Rat build thread : http://67-72chevytrucks.com/vboard/s...d.php?t=595019 72 3/4T 4X4 4" BDS Lift 33" BFG's |
|
|
|
|
09-04-2016, 11:07 AM
|
#49 |
|
Registered User
Join Date: Feb 2009
Location: Winnipeg, Manitoba
Posts: 68
|
Re: Run Away's '69 C10 LWB Project Log
So the panels I took apart had surface rust inside. I've gone this far, might as well take care of it while I can.
Before: 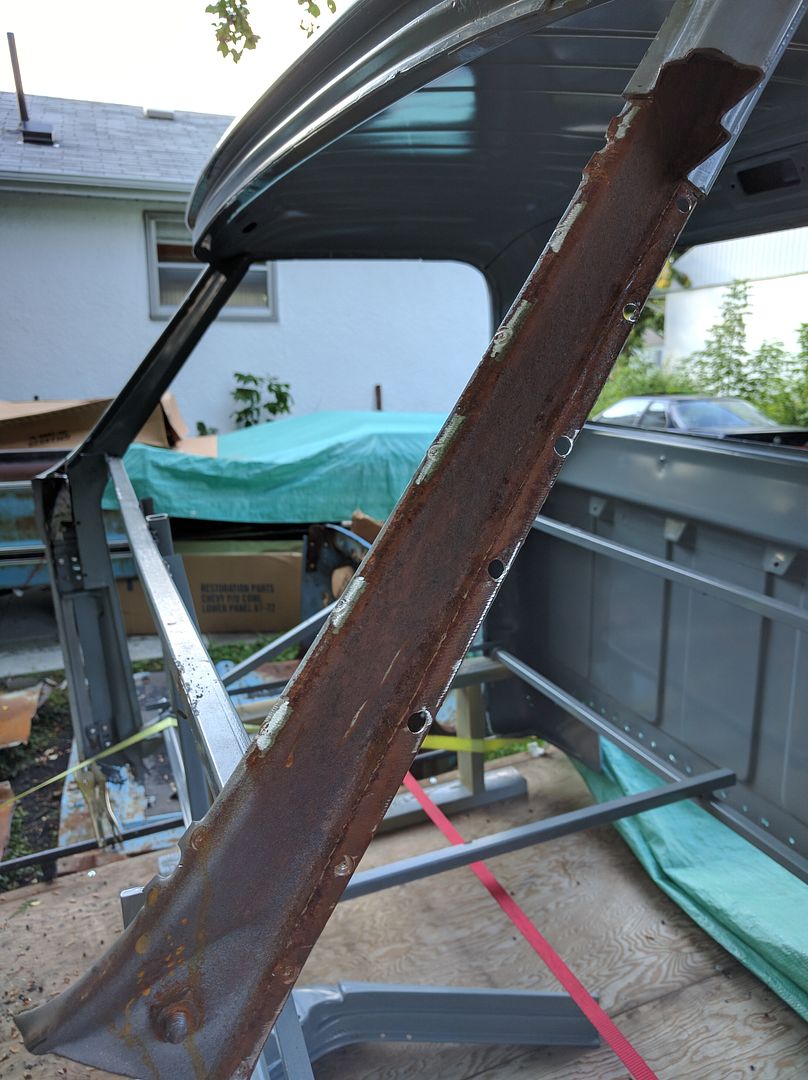 After lots of sandblasting with my dad's tiny compressor bought to run an air nailer. 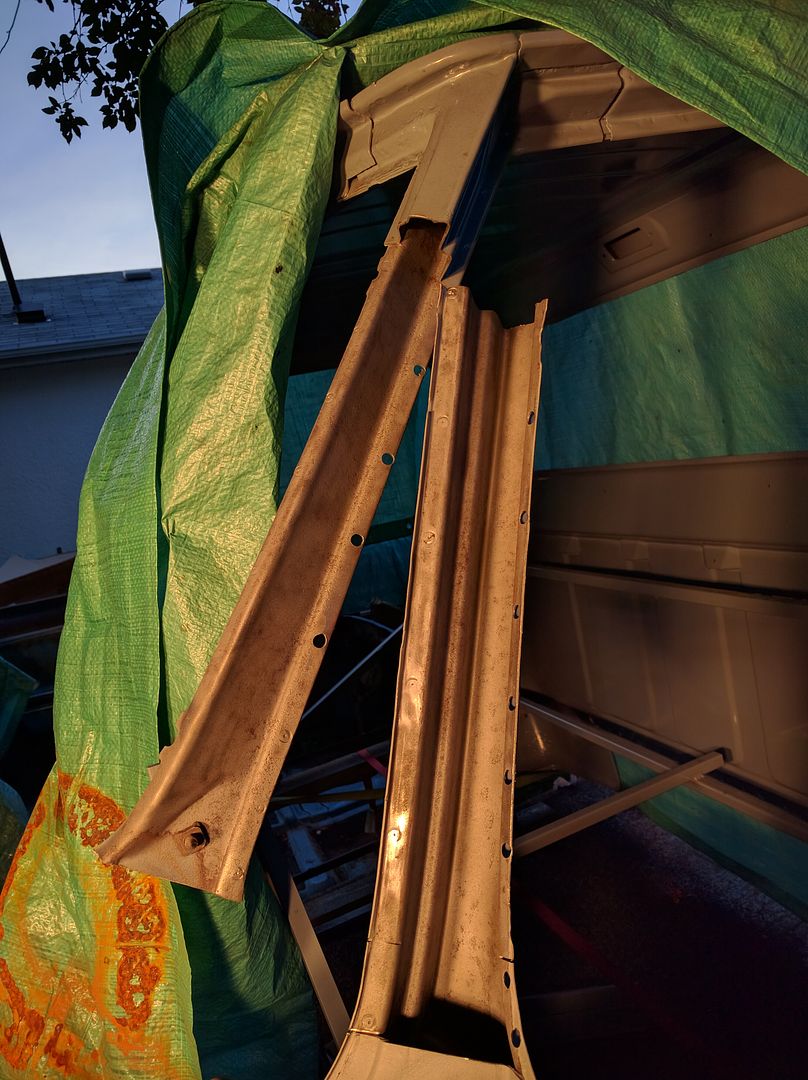 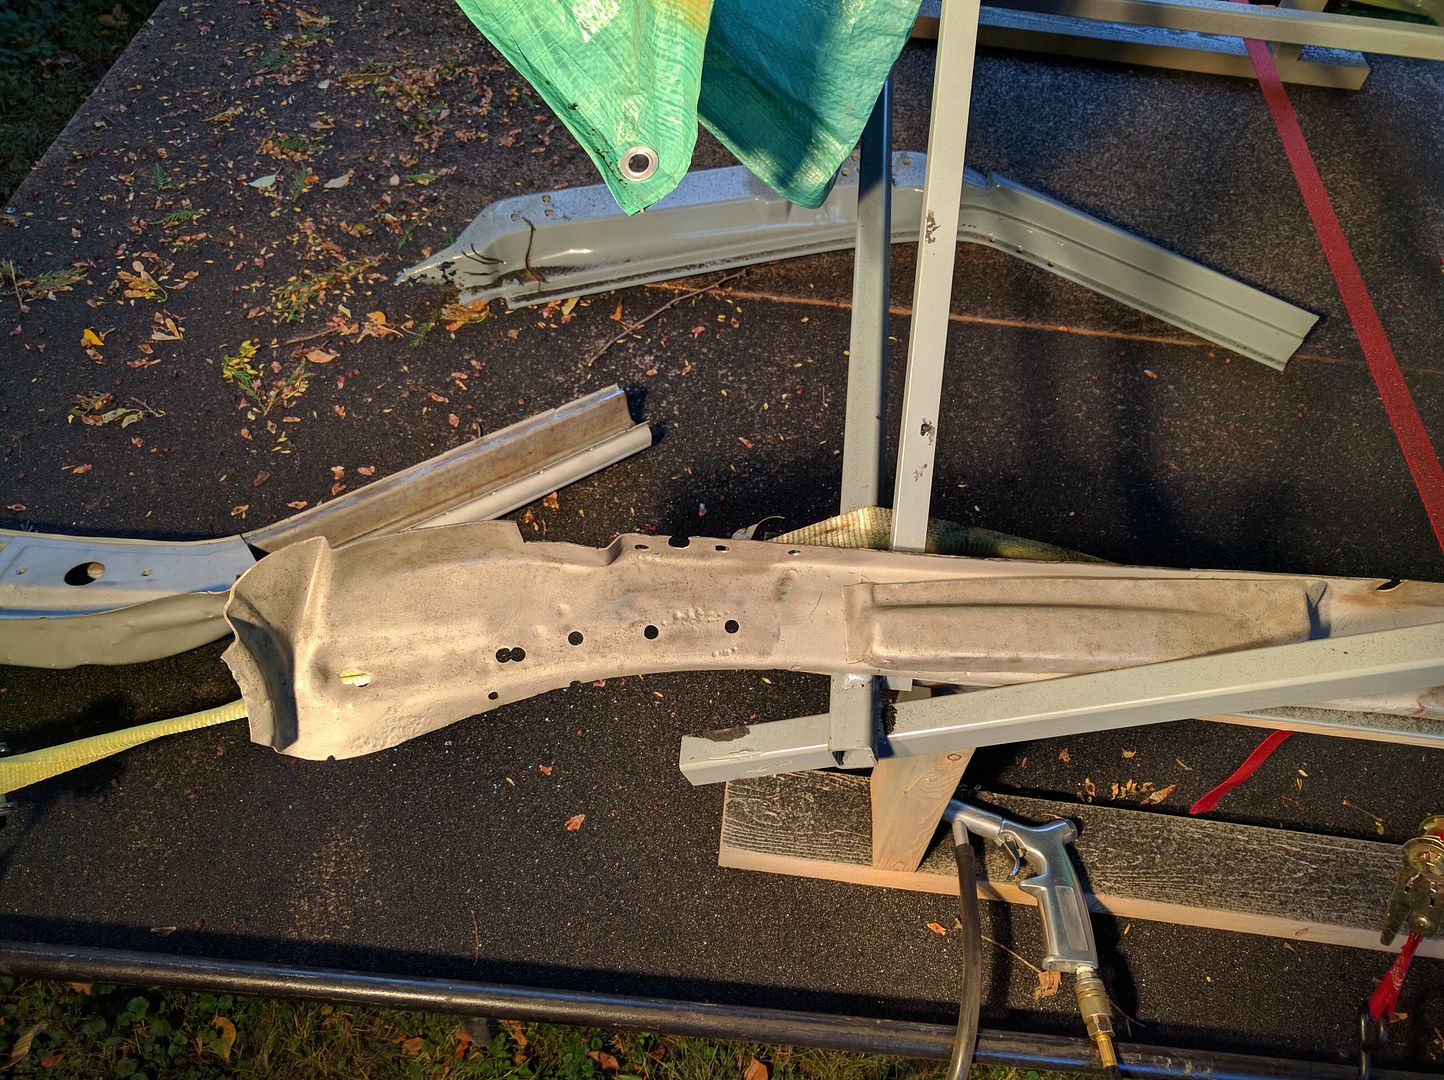 It's not powerfull enough to get the deepest pitting and around the corners where I can't get a good angle, but it'll have to do. Coated everything in zinc weld though primer 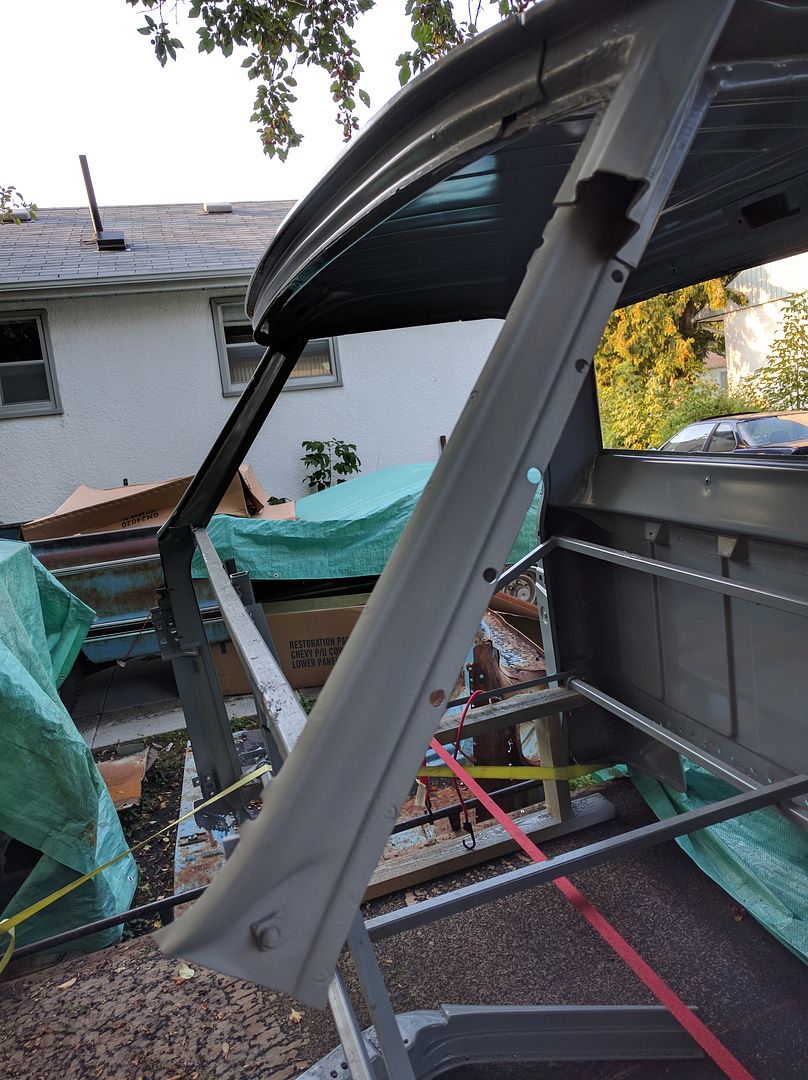 Made the first tack last night 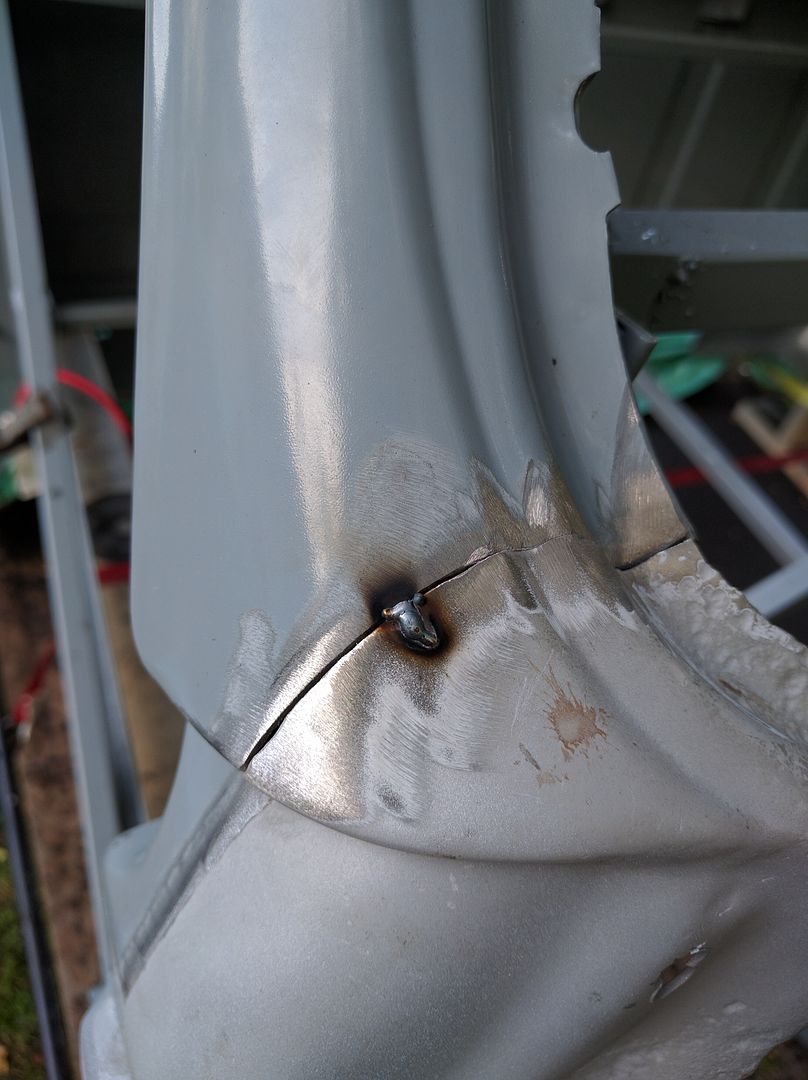 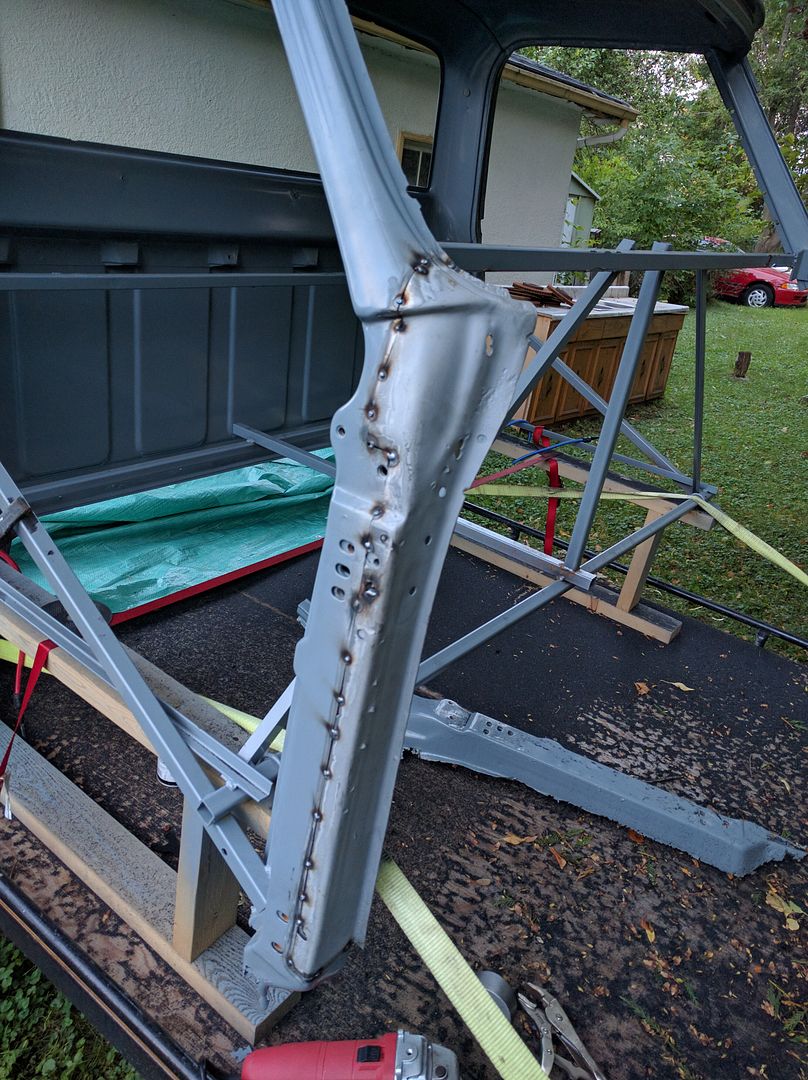 I started from the top and worked my way down. The replacement panel really didn't want to sit flat down here and was pretty twisted. 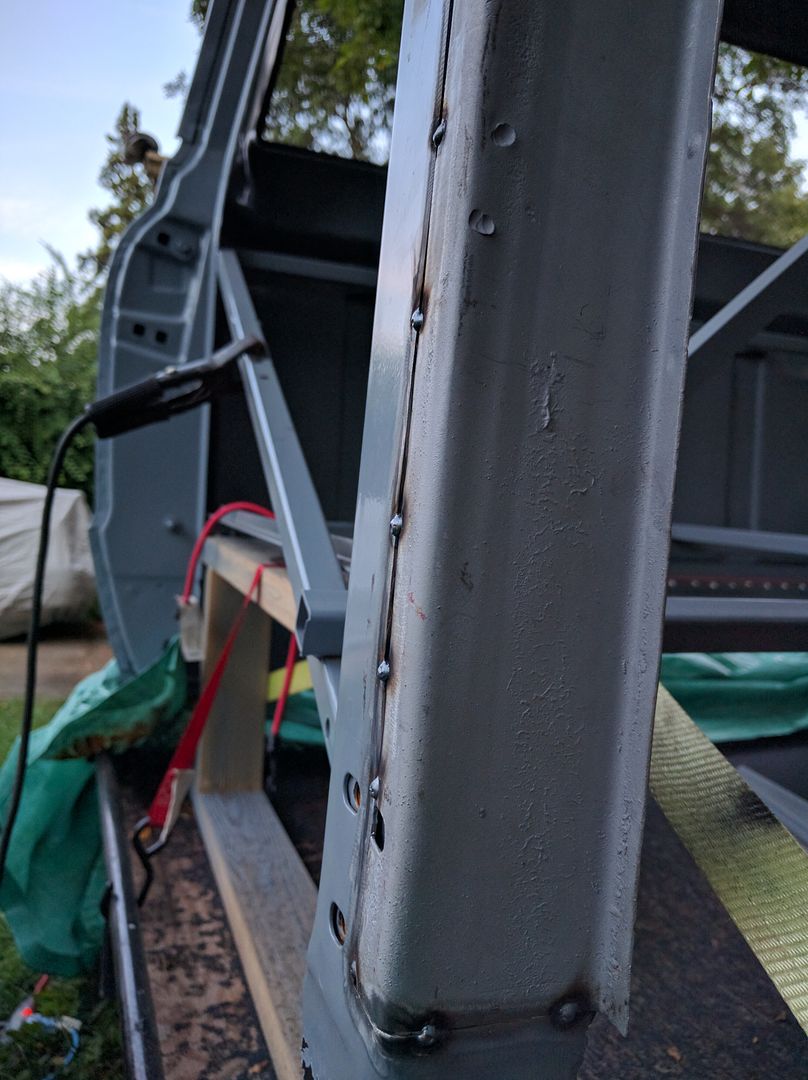 I'm having trouble getting nice welds. Here's my initial settings that I used all of yesterday 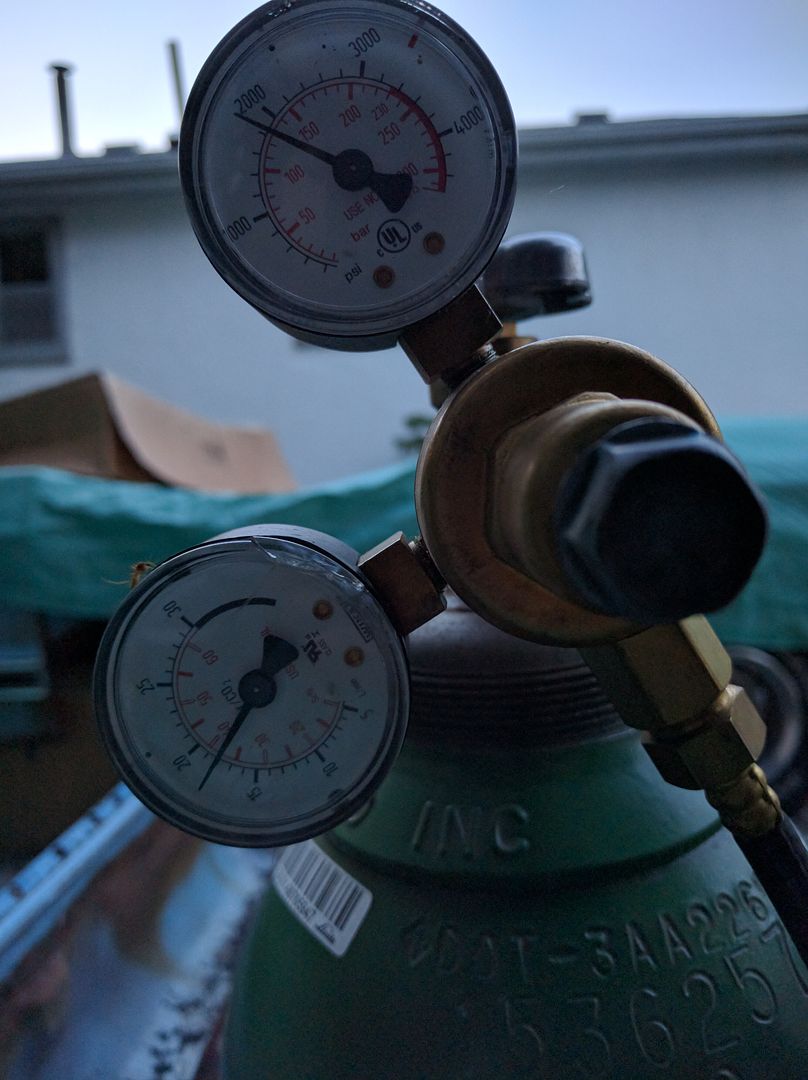 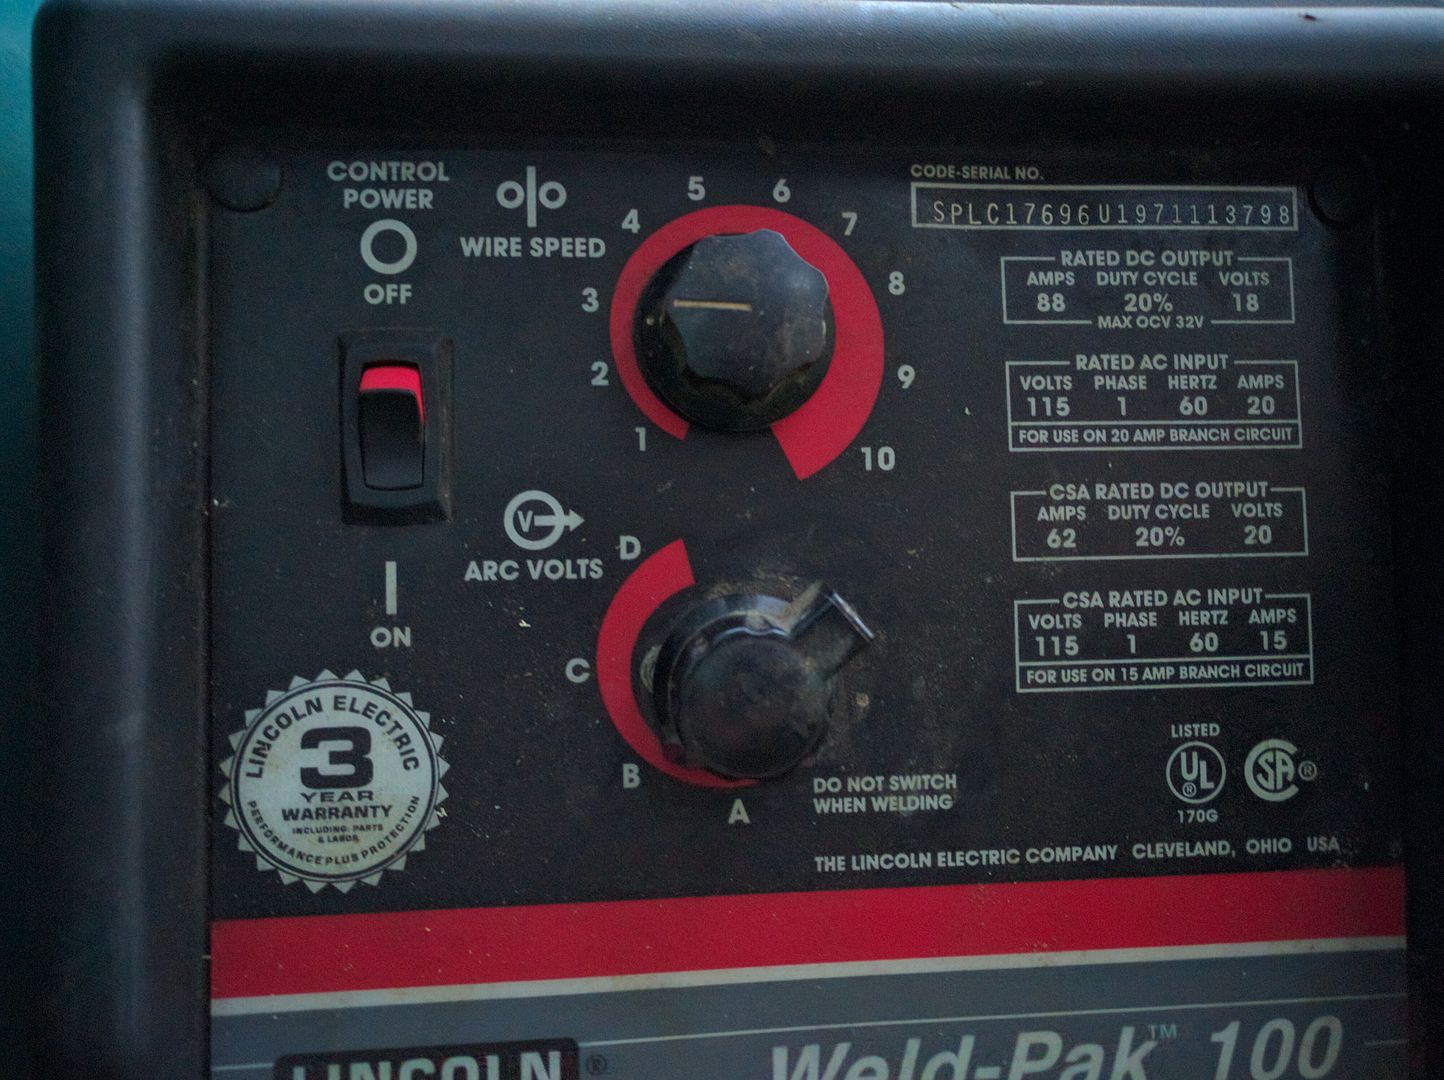
|
|
|
|
|
09-04-2016, 11:08 AM
|
#50 |
|
Registered User
Join Date: Feb 2009
Location: Winnipeg, Manitoba
Posts: 68
|
Re: Run Away's '69 C10 LWB Project Log
I messed around with the settings today and tried going hotter (setting "C") with just a touch more wire speed but ended up going back. I can't get nice flat welds, it seems to mostly sit on top. Sometimes the wire doesn't even tranfer and makes a little ball at the end of the wire.
I don't remember what setting I had for these, but you can sort of see. 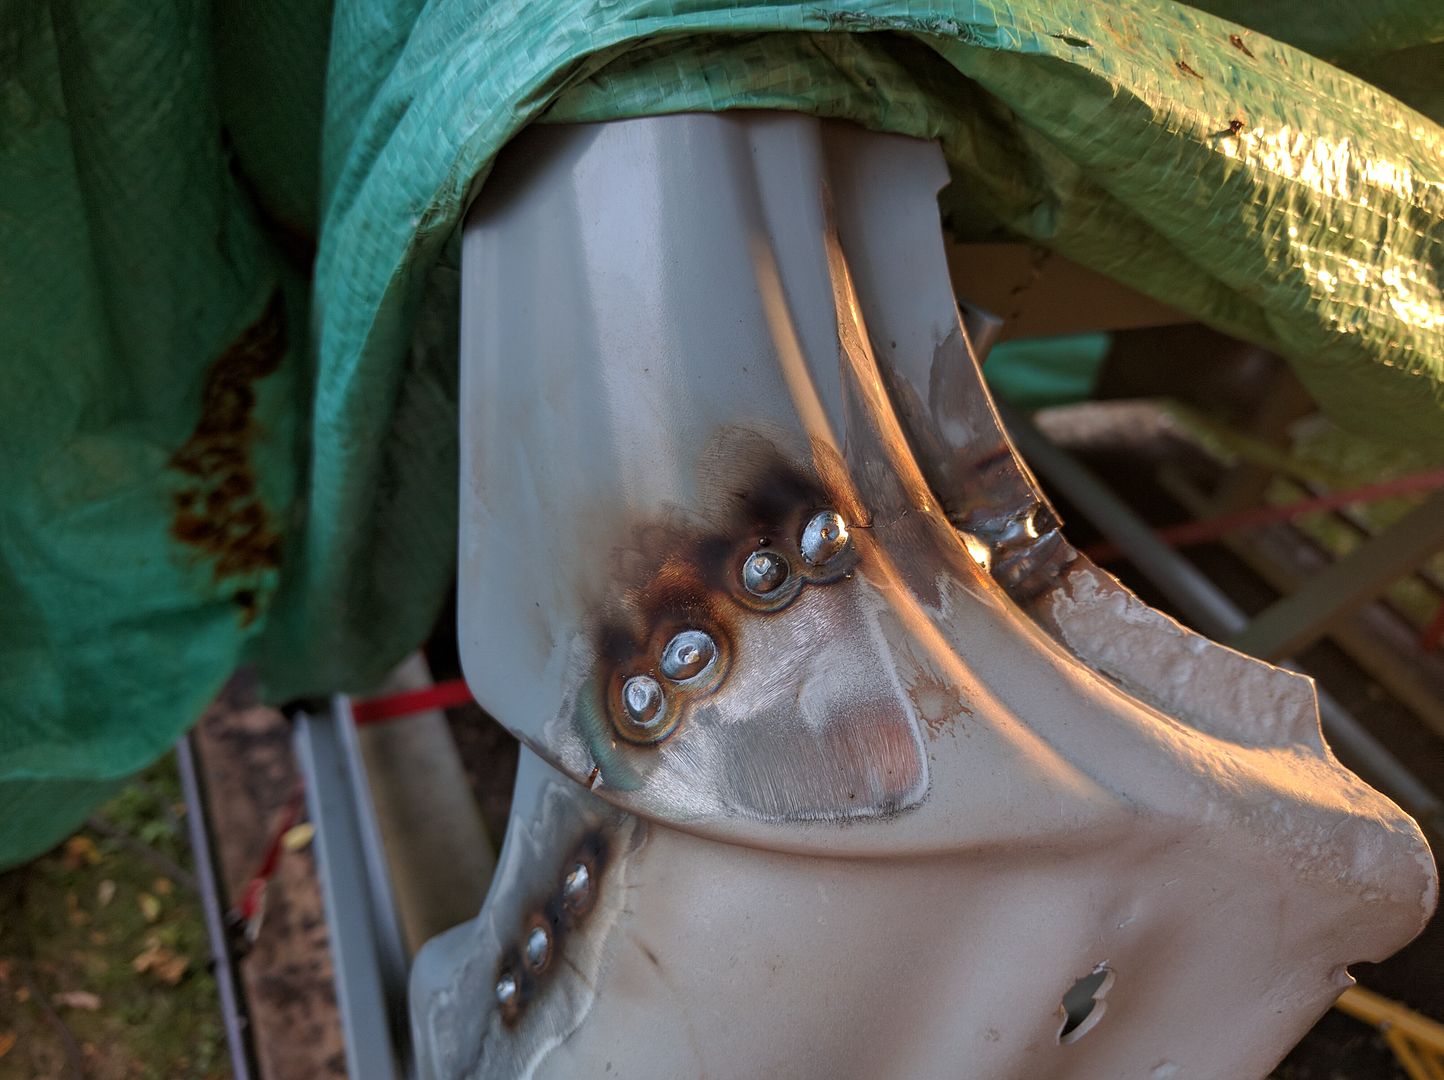 Part of the reason is my gaps are all uneven. I tried doing a little welding on the back side too and that doesn't work so well as I can't get the flap wheel in there to clean the old paint and powercoat. It's really tempting to run short beads, I did a couple and they ended up decent. 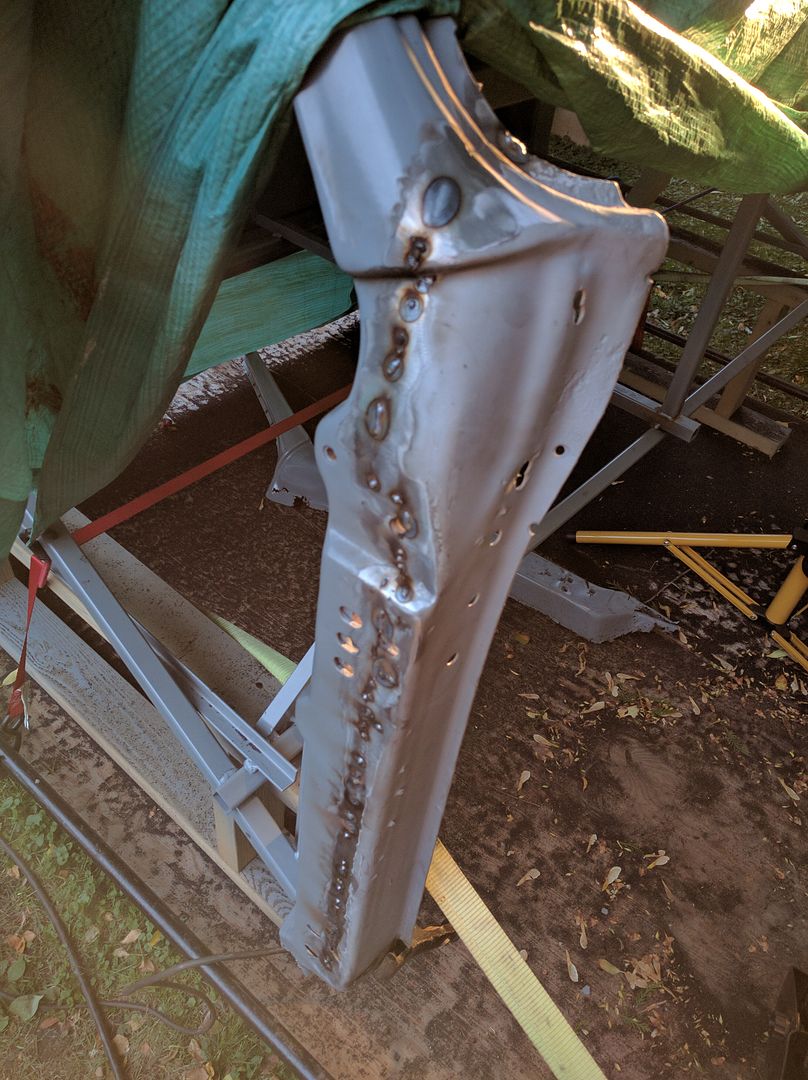 Where I stopped tonight. 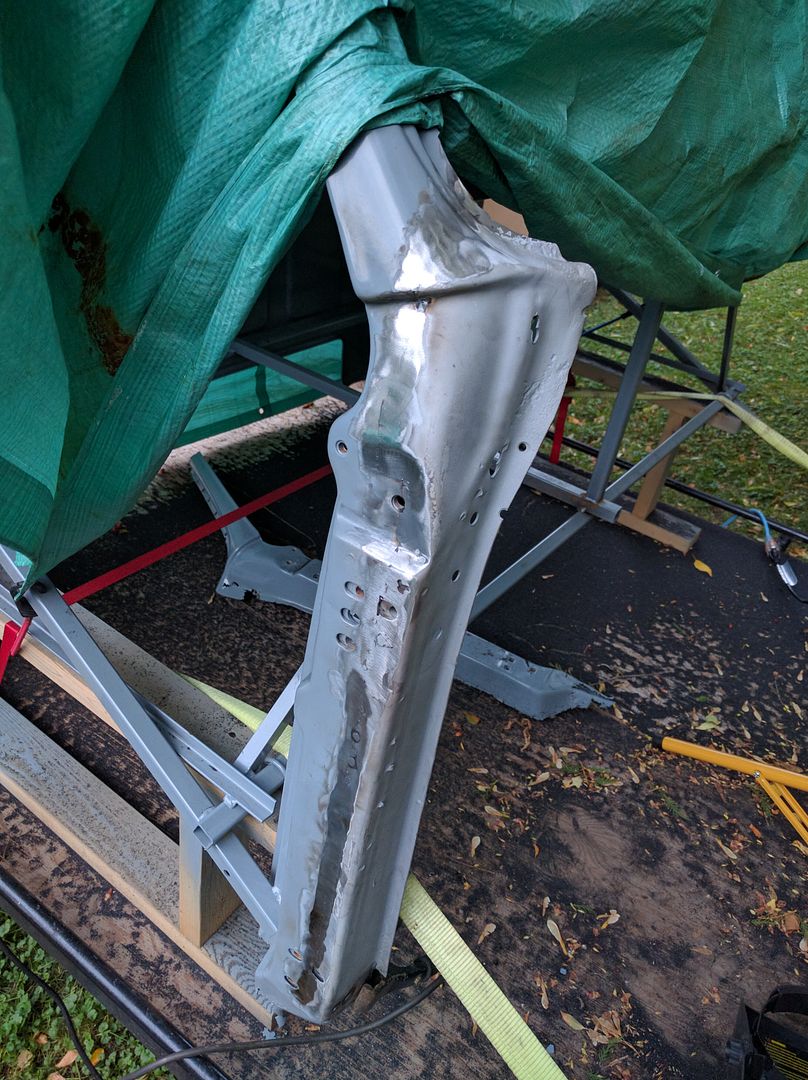 Not happy with the lower part. It's flat here 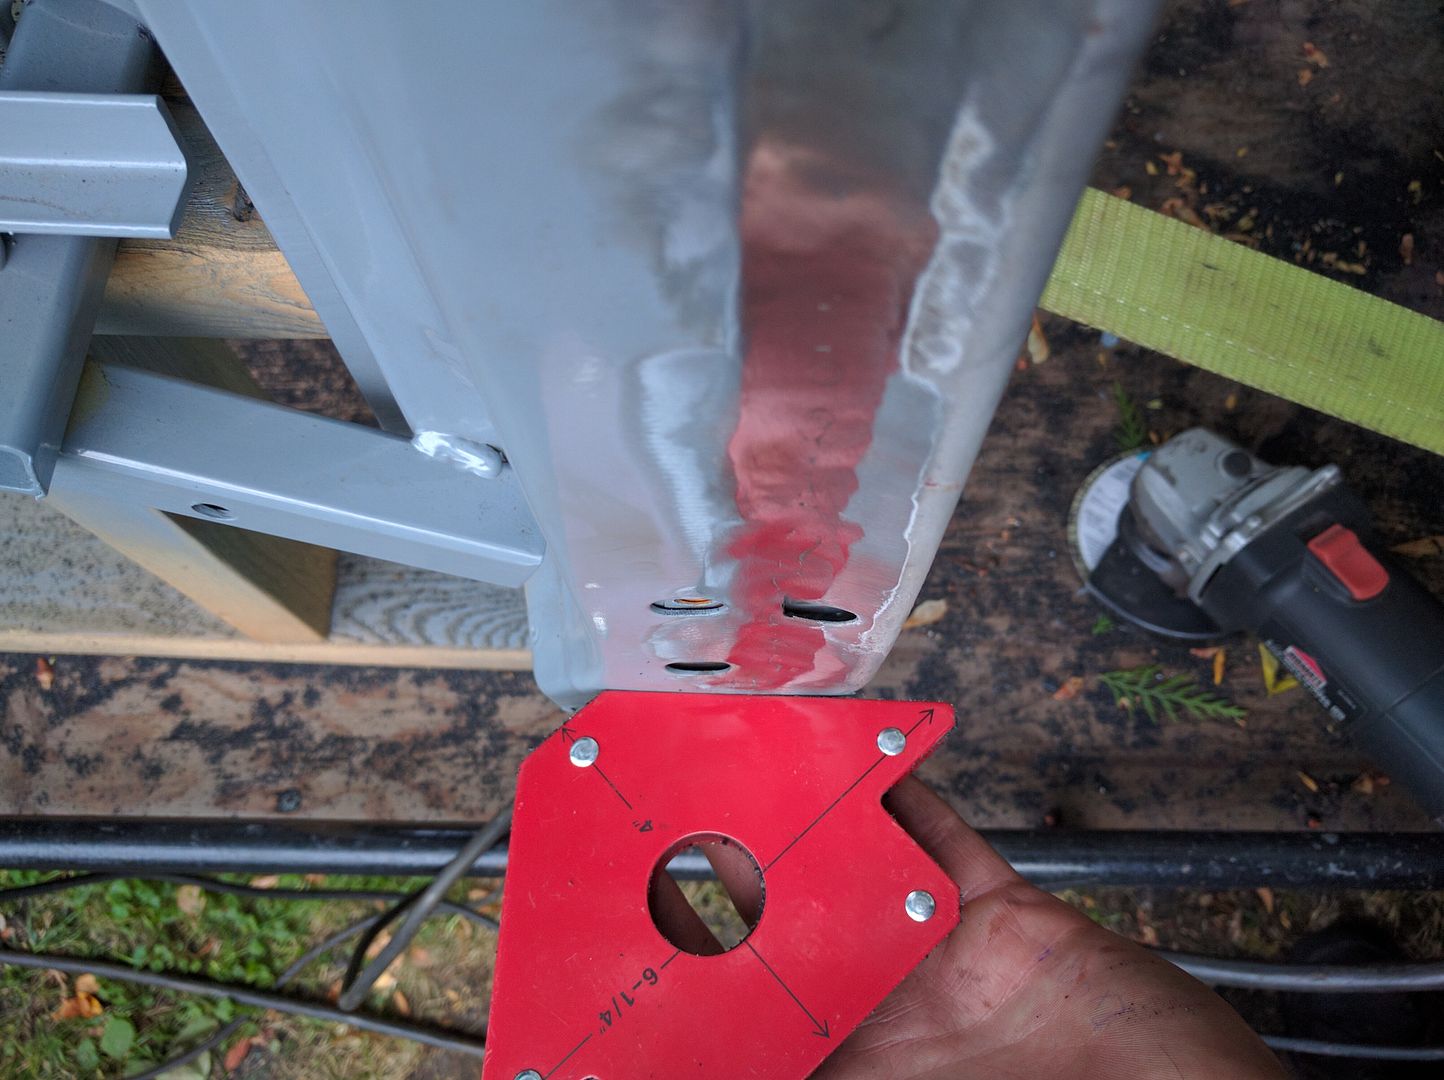 Bowed inwards the worst at the lower door hinge area  And flat again near the top  It was bowed in at the bottom a bit when I first tacked it in and got worse as I added heat. Hoping when I cut the bottom of the A-pillar off to put in the patch panel I can hammer and bend it back straight a little since it'll be a little weaker without the lower bit. Good thing this is the passenger side and I won't see it every time I get into the truck. |
|
|
|
|
| Bookmarks |
|
|


 Linear Mode

