 |
|
|
#26 |
|
Registered User
Join Date: Sep 2016
Location: Redington Beach
Posts: 1,317
|
Re: 57 Panel "FAKMLC" build
|
|
|

|
|
|
#27 |
|
Registered User
Join Date: Sep 2016
Location: Redington Beach
Posts: 1,317
|
Re: 57 Panel "FAKMLC" build
|
|
|

|
|
|
#28 |
|
Registered User
Join Date: Sep 2016
Location: Redington Beach
Posts: 1,317
|
Re: 57 Panel "FAKMLC" build
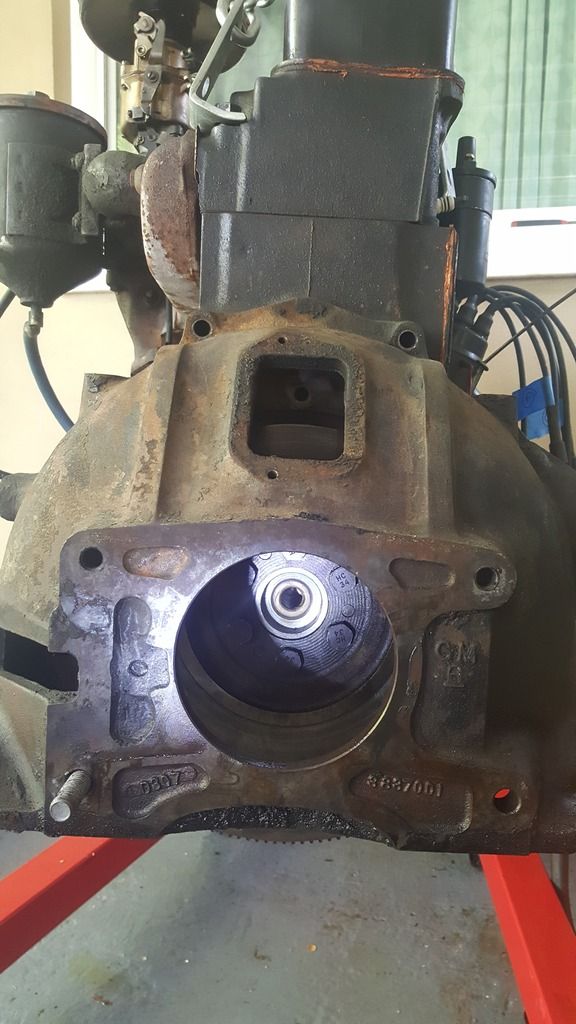
looking at a couple videos seems like I can just leave the clutch and bellhousing attached to engine. Remove Trans and seperate and then pull each.
Wasnt sure if clutch would remain engaged to input shaft etc. Then pull clutch off engine once pulled out. Off to thanksgiving deal ...... do this tomorrow. |
|
|

|
|
|
#29 |
|
Registered User
Join Date: Sep 2011
Location: Nevada City, CA
Posts: 908
|
Re: 57 Panel "FAKMLC" build
You "can" pull the trans off the bellhousing though I don't know why you would. I've always taken it out in one piece.
one thing I like to do is pull a bellhousing bolt, identify the thread size / pitch, and buy two more bolts the same length. Cut the hex heads off and grind the end until it's not sharp enough to do any harm. Then, pull the bottom two bolts from the bellhousing and wind your stubs in by hand. Now when you pull all the rest of the attaching hardware your trans isn't going to fall and if you forgot to remove anything or just didn't see it, you get to find out before you are managing the weight of the trans.
__________________
"Over my head" 1957 Chevy 3200, big rear window & 6 lug. Front disc, power steering, Vortec 4.8 / 4L60E swap, hydro boost brakes & patina. |
|
|

|
|
|
#30 |
|
Registered User
Join Date: Sep 2016
Location: Redington Beach
Posts: 1,317
|
Re: 57 Panel "FAKMLC" build
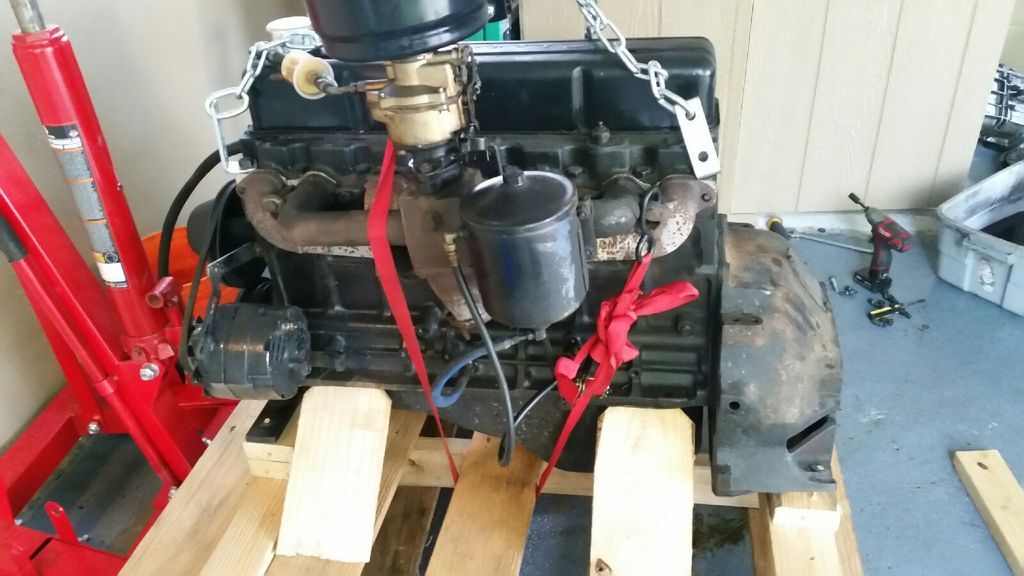
Engine and transmission out and engine on pallet ready to ship.
2 main things. 1) bellhousing has bolts on inside that can only be removed after flex plate and clutch are removed. 2) it's pretty easy to move engine on hoist. If it feels like it's hung up it probably is. I thought I had disengaged everything and wasted an hour ..... 2 times. First was throttle cable to carb as I was looking down and rear not up. Second was fuel line to fuel pump.  
|
|
|

|
|
|
#31 |
|
Registered User
Join Date: Sep 2016
Location: Redington Beach
Posts: 1,317
|
Re: 57 Panel "FAKMLC" build
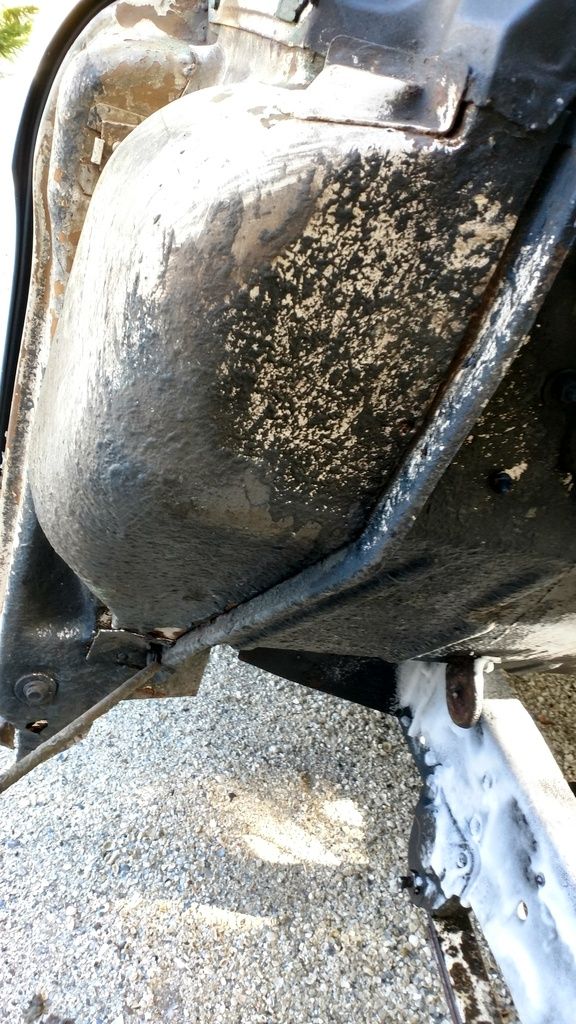
Ok so engine and transmission are sold. Went to pull truck into carport today to work on front axle removal and thought I should clean up a little. Well 6 cans of oven cleaner and scrubbing what I can get to still needs more - so I might have to go off and buy a pressure washer.
 This black stuff is like tar. Figure its either road tar built up over the years or some sort of protecting rubbercoating - but obviously think the 1st. I cant remove with oven cleaner or scraping - so looks like I could only wire wheel it off. Some questions. 1) this is not a show truck - just want to clean it up and paint it and preserve it. Im thinking to basically use a high pressure wash and some simple green and scrubbing. The tar will remain on. So after that prime everything, paint black and then a final coat of rubberized coating on firewall ifs it heat resistant. Thoughts ? 2) Which primer and paint. I was just going to use rustoleum auto. |
|
|

|
|
|
#32 |
|
Registered User
Join Date: Sep 2016
Location: Redington Beach
Posts: 1,317
|
Re: 57 Panel "FAKMLC" build
Bought one of these.
https://www.amazon.com/gp/product/B0...?ie=UTF8&psc=1 Also going with this paint unless someone says not to. https://www.amazon.com/Rust-Oleum-77...um+rust+primer https://www.lowes.com/pd/Rust-Oleum-...-fl-oz/4459357 |
|
|

|
|
|
#33 |
|
Registered User
Join Date: Sep 2016
Location: Redington Beach
Posts: 1,317
|
Re: 57 Panel "FAKMLC" build
|
|
|

|
|
|
#34 |
|
Senior Member
 Join Date: Jul 2012
Location: Oblong, Illinois
Posts: 7,028
|
Re: 57 Panel "FAKMLC" build
Fakky, can you easily see the tar once the truck is put back together? If it was mine and I could see it from the engine compartment it would probably bug me. I don't think leaving it on will hurt at all.
Lizard Skin was applied on the floors (inside and outside) of my Burb and it looks decent. Here is a look.... |
|
|

|
|
|
#35 |
|
Registered User
Join Date: Sep 2016
Location: Redington Beach
Posts: 1,317
|
Re: 57 Panel "FAKMLC" build
Thanks Doug.
That looks good. We're you happy with lizardskin..... Would you do it again given the price. Yes the tar you can't see when the panels are back on .... More just about painting over it ..... Best ways etc .. |
|
|

|
|
|
#36 | |
|
Senior Member
 Join Date: Jul 2012
Location: Oblong, Illinois
Posts: 7,028
|
Re: 57 Panel "FAKMLC" build
Quote:
Painting or coating over the tar...hmm...I will defer to others for ideas. I would have to remove it I think. |
|
|
|

|
|
|
#37 |
|
A320 Pilot/USAF Retired
Join Date: Mar 2009
Location: Charleston, SC
Posts: 2,629
|
Re: 57 Panel "FAKMLC" build
Cool build!

__________________
JJ My 1957 build: http://67-72chevytrucks.com/vboard/s...d.php?t=334552 http://www.trifive.com/forums/showthread.php?t=22037 Instagram - Chuckdriver57 |
|
|

|
|
|
#38 |
|
Registered User
Join Date: Sep 2016
Location: Redington Beach
Posts: 1,317
|
Re: 57 Panel "FAKMLC" build
|
|
|

|
|
|
#39 |
|
Registered User
Join Date: Sep 2016
Location: Redington Beach
Posts: 1,317
|
Re: 57 Panel "FAKMLC" build
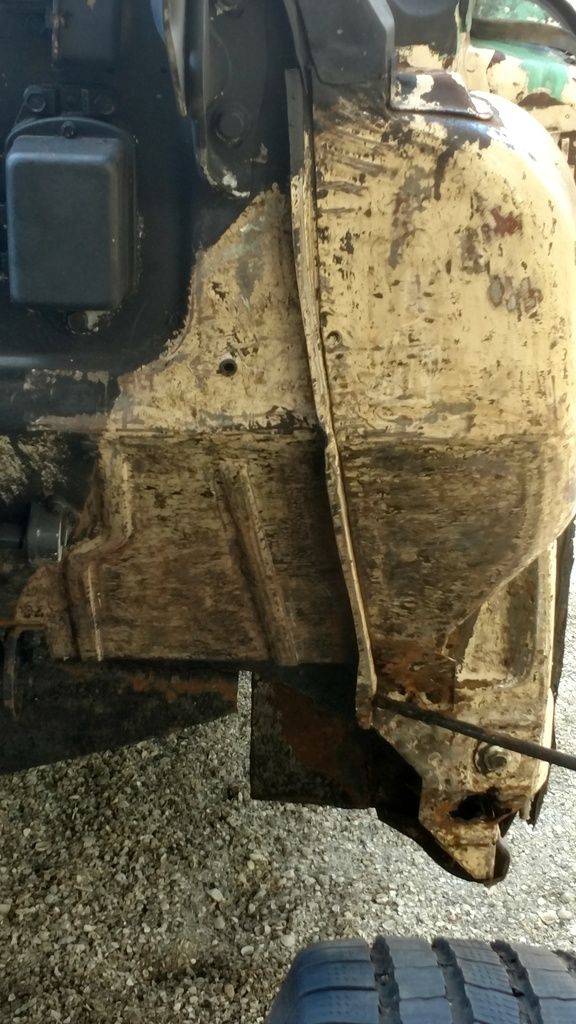
 Closer PIC. So my question on getting ready for priming. Im just using rustoleum grey primer for auto and then back over with black. What do I need to do to the paint in the middle etc and on frame. Its had about 4 chemical baths (oven cleaner, degreaser, soap etc) and pressure washed. I dont think I have to bring down to raw steel .... but obviously some of the older paint flakes, some is yellow/cream (original enamel) and some the firewall black is still on. Not going to be a show truck .... but want dont want paint to not hold in a couple years. So .......... anyone got a link of their build or suggestions on good paint prep for basic priming (obviously not show paint as most of time not even seen). |
|
|

|
|
|
#40 |
|
Senior Member
 Join Date: Jul 2012
Location: Oblong, Illinois
Posts: 7,028
|
Re: 57 Panel "FAKMLC" build
Great job on removing the tar! How long did that take?
Hopefully others with paint experience will chime in on your question. |
|
|

|
|
|
#41 |
|
Registered User
Join Date: Sep 2016
Location: Redington Beach
Posts: 1,317
|
Re: 57 Panel "FAKMLC" build
Probably about an hour each side .... Multi tool scraper was really a god send. Nothing else but a wire wheel would take it off ... Pretty hard
Reading online I think I'm going to lightly sand all paint with my same multitool ... Then apply some corroseal for rust sealing...... Then paint with primer then paint with black 
|
|
|

|
|
|
#42 |
|
Registered User
 Join Date: Apr 2010
Location: Warrensburg, MO
Posts: 2,690
|
Re: 57 Panel "FAKMLC" build
Yet I would wet sand everything I wanted to paint with 220. That be course enough to take off any loose paint and fine enough to paint over.
__________________
www.olesargecustoms.com email: chris@olesargecustoms.com '48 build: http://67-72chevytrucks.com/vboard/s...d.php?t=541904 '33 build: http://67-72chevytrucks.com/vboard/s...=1#post6232888 '49 build: http://67-72chevytrucks.com/vboard/s...=1#post6364475 |
|
|

|
|
|
#43 |
|
Registered User
Join Date: Sep 2016
Location: Redington Beach
Posts: 1,317
|
Re: 57 Panel "FAKMLC" build
Update. Been away working remote and visiting family and seeing my twin niece/nephew play ball in senior year.
So back ..... And front axle out. Pretty easy but you do need breaker bar/good impact/large wrenches at least 1.5" I think for pitman arm ....Oh and puller. Last edited by FAKKY; 01-22-2017 at 05:56 PM. |
|
|

|
|
|
#44 |
|
Registered User
Join Date: Sep 2016
Location: Redington Beach
Posts: 1,317
|
Re: 57 Panel "FAKMLC" build
|
|
|

|
|
|
#45 |
|
Registered User
Join Date: Sep 2016
Location: Redington Beach
Posts: 1,317
|
Re: 57 Panel "FAKMLC" build
|
|
|

|
|
|
#46 |
|
Registered User
Join Date: Sep 2016
Location: Redington Beach
Posts: 1,317
|
Re: 57 Panel "FAKMLC" build
|
|
|

|
|
|
#47 |
|
Registered User
Join Date: Sep 2011
Location: Nevada City, CA
Posts: 908
|
Re: 57 Panel "FAKMLC" build
Oh fun - now time to pull rivets!
I tried torch, hammer & punch, drilling, etc. What I found worked best is to use an angle grinder or, where necessary, a die grinder & burr to either make an "X" in the head of each rivet, grind it flush, or cut the head off it with a cutting wheel. From there, air hammer + punch bit. More air pressure = better. You'd be surprised how much more kick it has at 150 psi vs 90 psi. If you don't have an air hammer, it's worth buying one just for this. I'll be super excited to see the Industrial Chassis kit install! Thanks for sharing progress!
__________________
"Over my head" 1957 Chevy 3200, big rear window & 6 lug. Front disc, power steering, Vortec 4.8 / 4L60E swap, hydro boost brakes & patina. |
|
|

|
|
|
#48 | |
|
Registered User
Join Date: Sep 2016
Location: Redington Beach
Posts: 1,317
|
Re: 57 Panel "FAKMLC" build
Quote:
Yes was originally planning on just drilling heads off then whacking with a chisel end of a crowbar ..... might go ahead and just buy a air impact hammer as well ..... Really want to try and keep the pull-handle parking brake ...... but will have to see ..... Yeah the IC kit excited to get in and then move on to other stuff ...... shouldn't be too big a deal ... but taken me much longer to get this far so we will see .... |
|
|
|

|
|
|
#49 |
|
Registered User
Join Date: Sep 2011
Location: Nevada City, CA
Posts: 908
|
Re: 57 Panel "FAKMLC" build
Your experience might be different but I found drilling to be a lot slower and hammering a lot harder than I'd wanted. It does work, but for $85 and a tool you're going to find a lot of uses for, I went air hammer.
The parking brake, I haven't gotten there yet, but I think a custom cable setup (or maybe a repurposed OEM cable from something or other) could make the handle function without the original bell crank & rod setup. I hope so, anyway, because my exhaust manifolds and steering shaft got in the way and the handle brake is just cool.
__________________
"Over my head" 1957 Chevy 3200, big rear window & 6 lug. Front disc, power steering, Vortec 4.8 / 4L60E swap, hydro boost brakes & patina. |
|
|

|
|
|
#50 |
|
Registered User
Join Date: Sep 2016
Location: Redington Beach
Posts: 1,317
|
Re: 57 Panel "FAKMLC" build
Ill probably go and pick up one of these tonight.
http://www.harborfreight.com/air-imp...kit-92037.html Don't have a big AC compressor ....... but should be ok for a a few good hits every 60 seconds LOL. Yossarian do you like the power of the 4.8 .... still weighing up 4.8/5.3/6.0 based on what I find at time at a good price. Another thing I need to work out is if I HAVE to remove the front engine frame cross member. Industrial Chassis provides you with a spreader/support bar ..... but not sure if it actually needs removal. Kinda like here (but its a ford) http://www.ford-trucks.com/forums/at...1&d=1256675751 and here http://67-72chevytrucks.com/vboard/s...d.php?t=268013 buts its a 1950 AD. |
|
|

|
 |
| Bookmarks |
|
|