
 |
|
|
#26 |
|
Registered User
 Join Date: Jun 2012
Location: springfield mo
Posts: 3,075
|
Re: C10 Goldilocks
Nice truck! Gonna be a cool build here
__________________
United States Marine Corps 2000-2011 Iraq and Afghanistan veteran Just living life now and enjoying it and my wife, daughter and son 
|
|
|

|
|
|
#27 |
|
Registered User
Join Date: Oct 2012
Location: mountain home, AR
Posts: 794
|
Re: C10 Goldilocks
The link below for the bed, cab lift is exactly what I built just using good lumber and it works exactly the same. But mine is strictly for a 67-72 cab only. Not as useful as the tool in the link. I can get you a picture of it if you want to build one.
__________________
Project Double Tap http://67-72chevytrucks.com/vboard/s...d.php?t=555901 69 Olive Verde http://67-72chevytrucks.com/vboard/s...d.php?t=734720 |
|
|

|
|
|
#28 |
|
Registered User
Join Date: Nov 2013
Location: Rhode Island
Posts: 98
|
Re: C10 Goldilocks
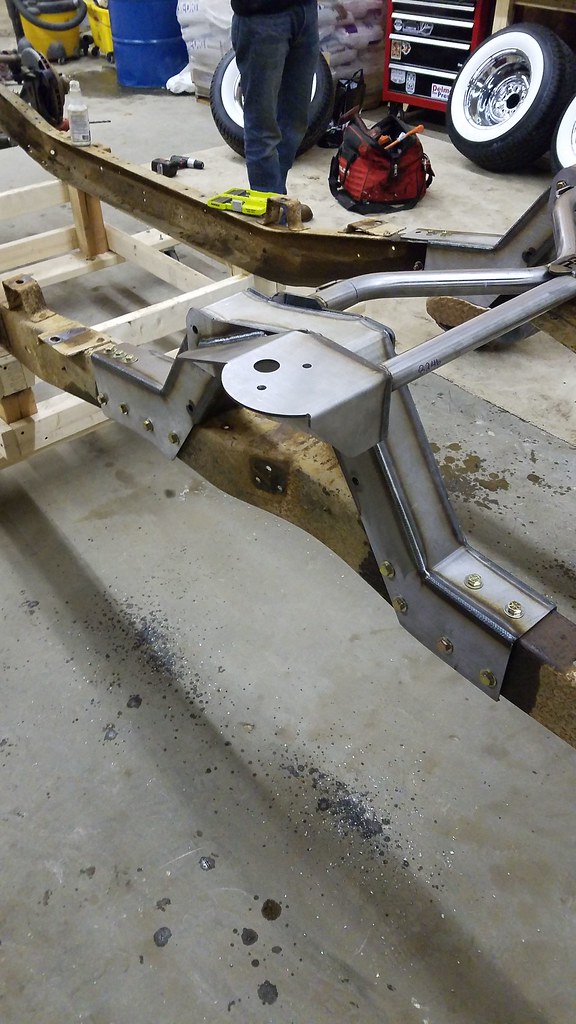
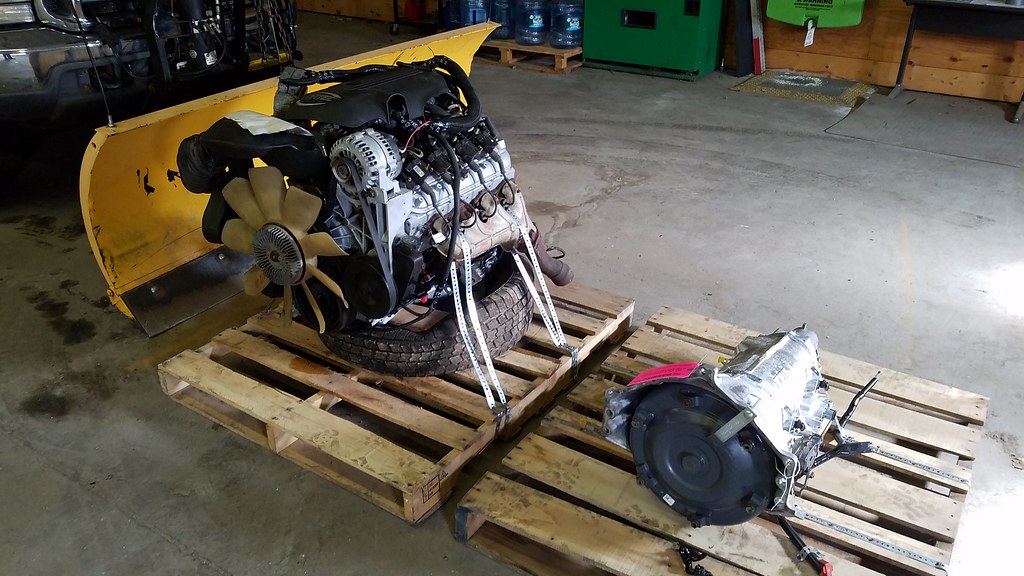
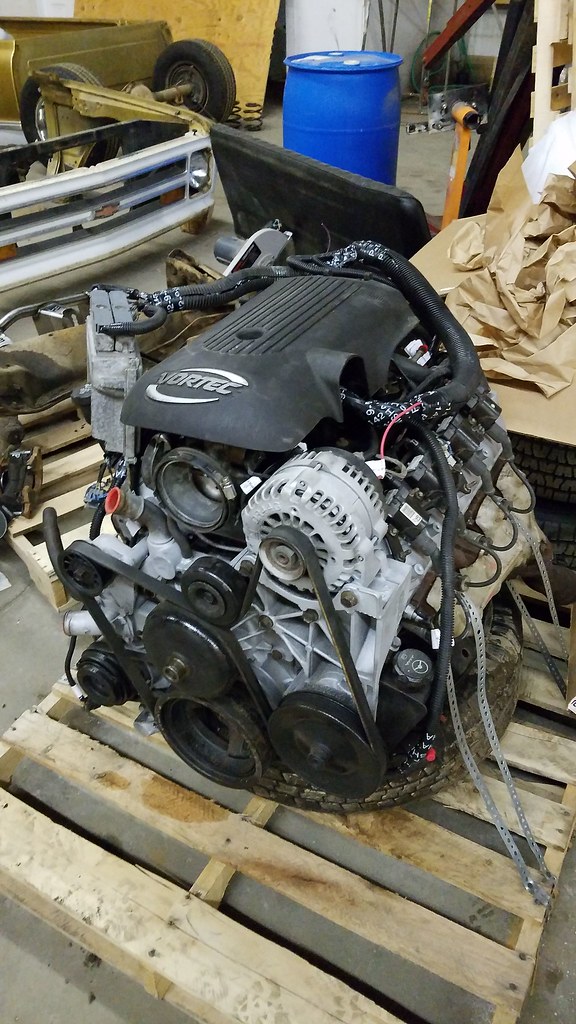
Went to the shop last night to finish up drilling out the rear end. I know not all of these bolts need to be in right now but I want as much strength as I can get bracing the frame for cutting out the excess. That will be a job for this upcoming Sunday. Also had a nice delivery on Tuesday from the great guys at LSX4u.com. LQ4 with 100k on it, a re-manufactured 4L80e with a 2 year 24k warranty and a chopped down harness. Can't say enough positive things about my experience with these guys. I live only a few states away from their location in Maine and they told me dont even worry about driving up, they can ship it to me for cheaper, with lift gate too! Took about 2 weeks from hanging up the phone to arriving on my shop floor. They even went as far as to touching up the motor with some paint, all in all it looks fantastic.
   More this weekend. Hoping to get the trailing arms set in place, rear end the frame cut out and hopefully make it a roller! Spring is coming up soon so I gotta get moving if I wanna cruise this summer. |
|
|

|
|
|
#29 |
|
Registered User
Join Date: Jun 2016
Location: Visalia California
Posts: 891
|
Re: C10 Goldilocks
Looking nice keep up the good work.
|
|
|

|
|
|
#30 |
|
Registered User
 Join Date: Dec 2012
Location: Rochester, IL
Posts: 537
|
Re: C10 Goldilocks
 The wheels look killer!! We are going with wide whites on my boys 67, I love them!
__________________
__________________ Mike 70 Med Olive build http://67-72chevytrucks.com/vboard/s...d.php?t=714804 Instagram- protouring66 |
|
|

|
|
|
#31 |
|
Registered User
Join Date: Nov 2013
Location: Rhode Island
Posts: 98
|
Re: C10 Goldilocks
Finally an update! I haven't been sleeping on the truck just nothing really update worthy. After I drilled out the holes the next step was cutting out the excess of the rear. We decided to use a sawsall for the top cuts and then a death wheel for the side cuts to get it as close as we could. Once the frame was cut out, the notch caps fit so tight that I spent more of this day with the grinder than any other tool. Same story with the front and the rack notches. Cut them smaller than marked and then just grinded the hell out of it until they fit flush. Say what you want about harbor freight but their $20 angle grinder did me just fine. I've also used their engine hoist and stand.
My buddy Ian choppin up the sides 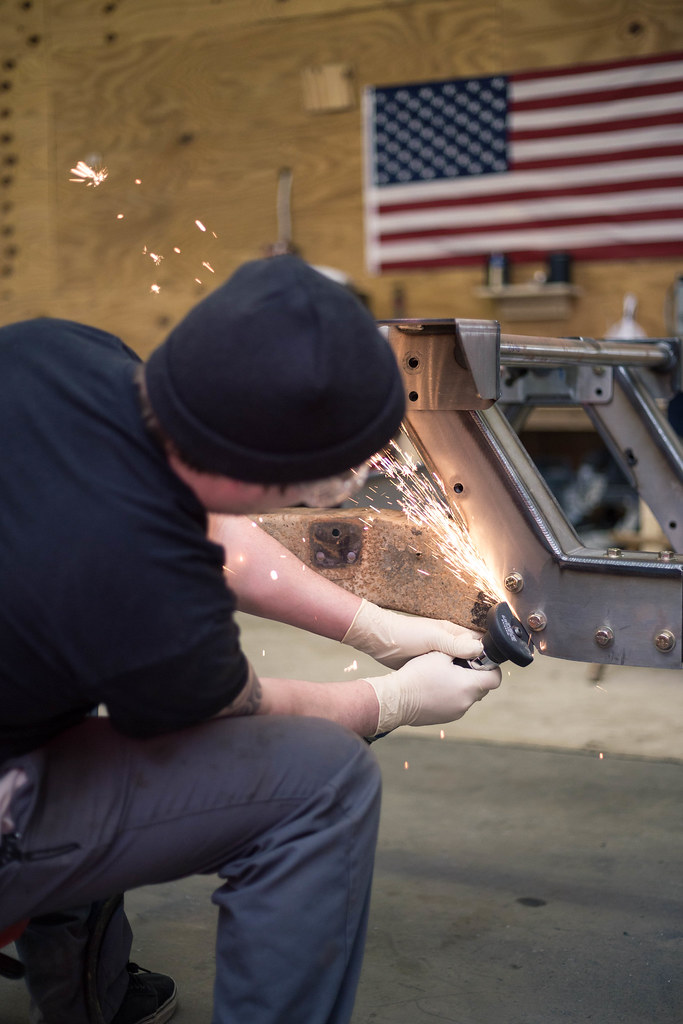 Here I am with the grinder going at it. 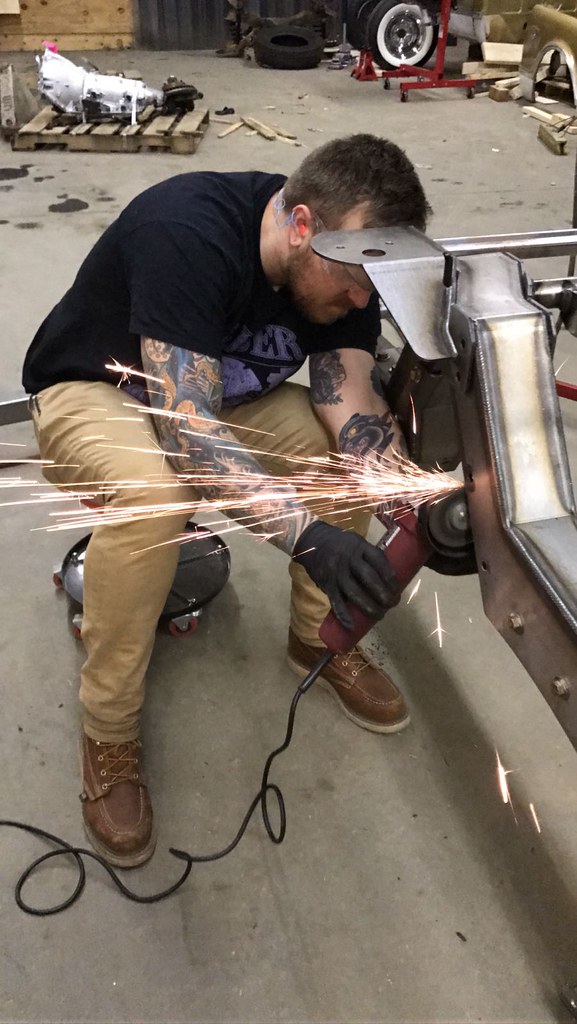 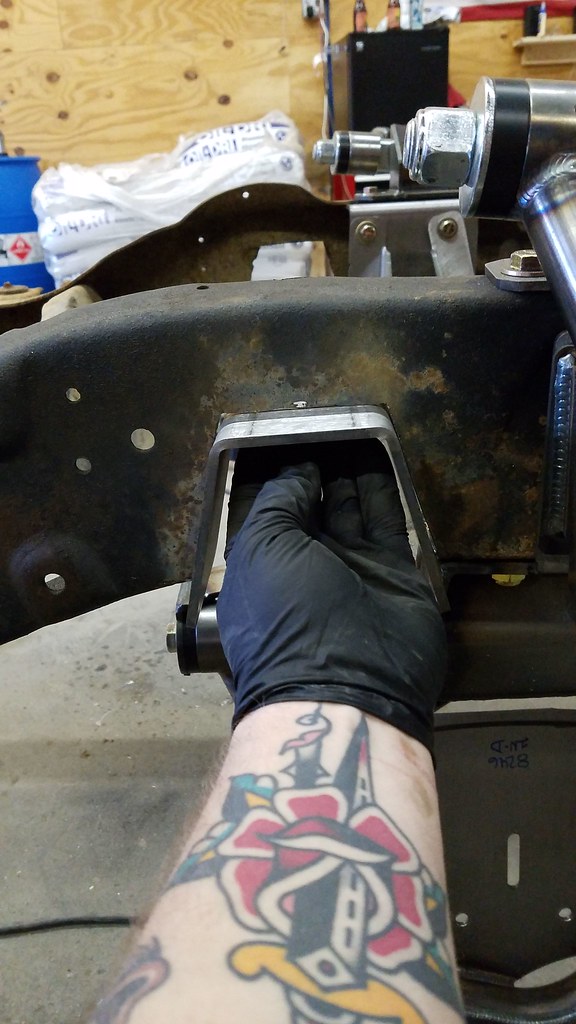 The trailing arm crossmember plates needed some massaging as well. I ended up cutting about an eight of an inch off the end bottom of the C bracket because they were just simply too wide to allow the brace to bolt in, then the bottom holes were slotted about another half inch longer to allow the factory frame holes to still be used. I didn't want to lobe the frame holes to weaken anything, so this is the direction I decided to go with. In the end either would have worked but I felt more comfortable cutting a bracket than the frame. Started with putting the brackets to the drill press, getting the end of the cut, and then taking the death wheel to connect it to the existing slots. 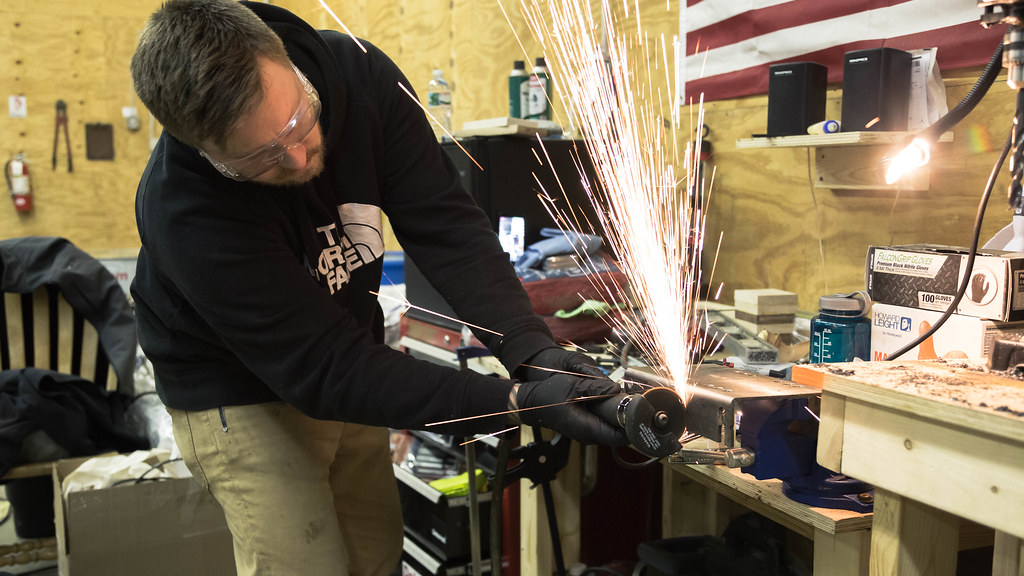 Once all that was cut and fitted the rear end went together faster than anything else. I can't say enough about Porterbuilt, it's unbelievably easy how most of this stuff goes together. You can tell the crew really spends their time ensuring the quality and fit of their stuff is right where it needs to be. So I bolted up the rear end to the trailing arms, put on the notch caps, slid the trailing arm cross member in place, slid the rear end under and allowed the trailing arms to dictate which holes I used in the bracket, and viola, I have a roller. Not a whole lot of photos documenting the process as I was just cranking it out. 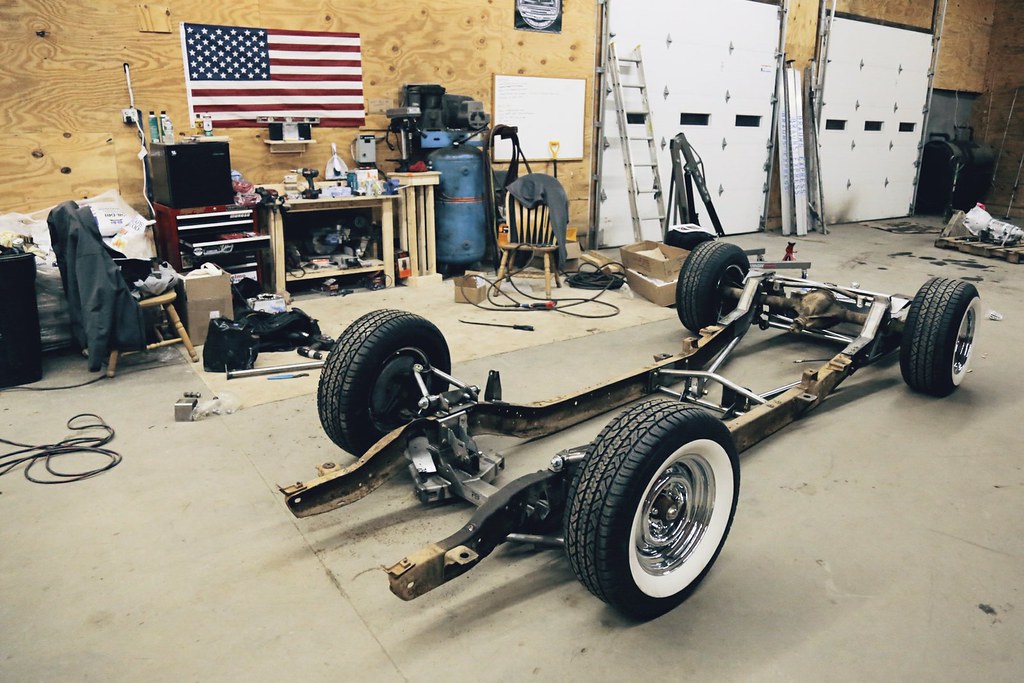 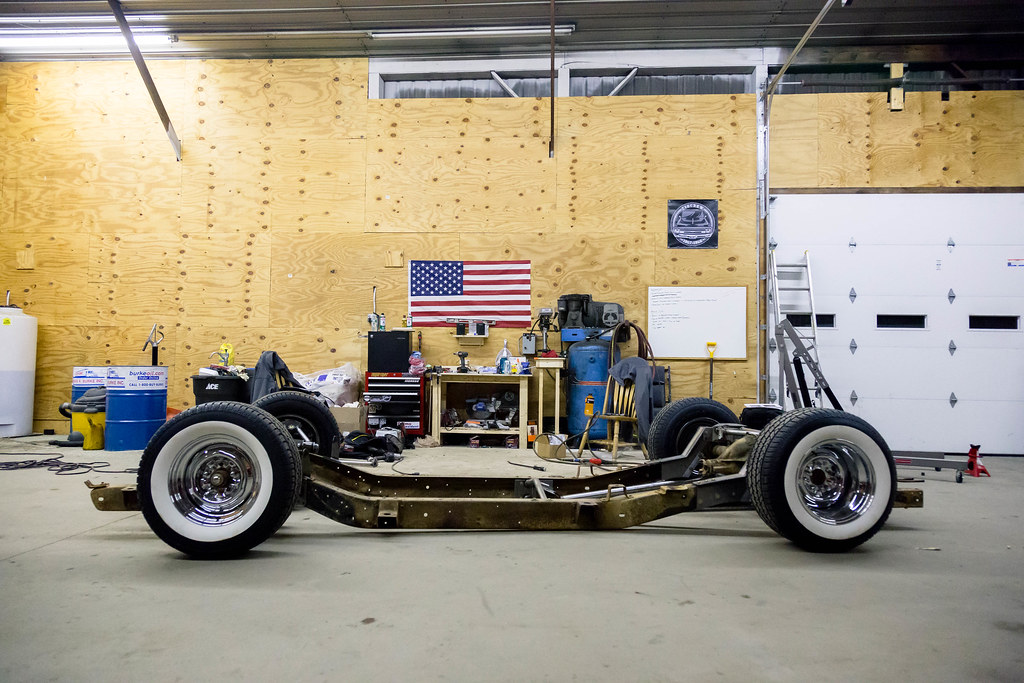 A couple of my buddies trying to get a good angle on it  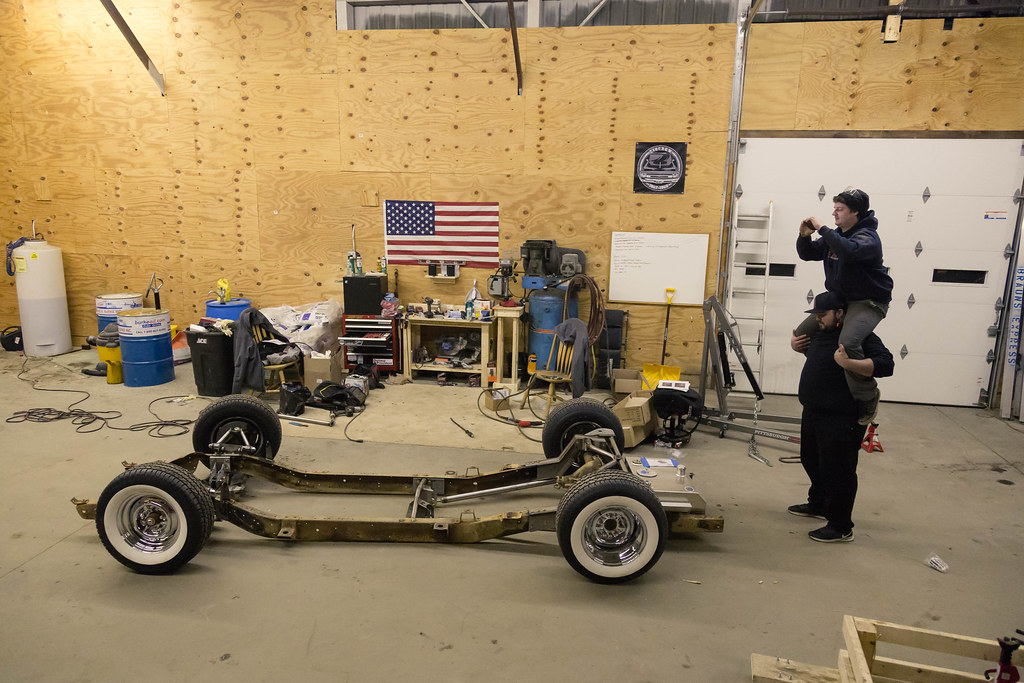 Next up was setting the motor on the stand. I stripped off the stock exhaust manifolds, spark plug wires (those big boots just aren't going to fit with a set of tight to the block headers), mounting brackets, swapped the oil pan, windage tray, pick up tube and now it's pretty ready to get set in the chassis for the first time. I need to mate up the transmission so I can get the transmission crossmember placed. The picture here the stock pan and mounts are on it but you get the idea. 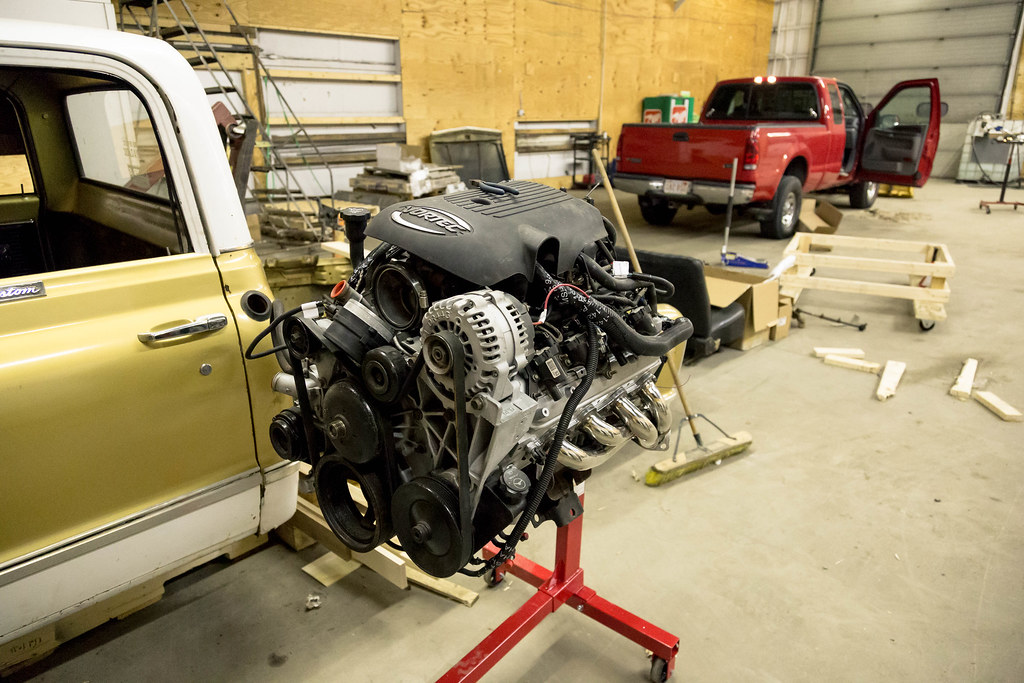 Boy these truck motors are unsightly lol. I don't plan on doing much "cosmetics" to it right away, my main focus is get it in and get it running. Once it's running I'll do a cam, springs and rods. I plan on using the brian tooley stage 4 kit. Chime in if you have any experience. Still on the bucket list is weld the rear end bag brackets in place, weld in the rack caps, get the steering rack in, get the front shock mounts in place (shocks are in the mail), and then it should be pretty ready to be taken back apart for powder coat. Short video of me grinding up the truck, playing around with my camera one night. https://www.youtube.com/watch?v=xBFa8wAj8jU Next weekend I'm not sure how much I'll be able to get done but we shall see. |
|
|

|
|
|
#32 |
|
Registered User
 Join Date: Dec 2012
Location: Rochester, IL
Posts: 537
|
Re: C10 Goldilocks
Man, just getting it to a roller stage is enough to get anyone motivated
 Just something to think about here. I'm not sure if your going with BTR's stage 4 truck cam or the stage 4 LS3 cam but definitely measure piston to valve clearance. The stage 4 truck cam should have plenty of ptv but the stage 4 LS3 cam gets pretty tight. This is going to be a cool build!!
__________________
__________________ Mike 70 Med Olive build http://67-72chevytrucks.com/vboard/s...d.php?t=714804 Instagram- protouring66 |
|
|

|
|
|
#33 | |
|
Registered User
Join Date: Feb 2017
Location: Puyallup
Posts: 77
|
Quote:
This is sick. Subd Posted via Mobile Device |
|
|
|

|
|
|
#34 |
|
Registered User
Join Date: Nov 2013
Location: Rhode Island
Posts: 98
|
Re: C10 Goldilocks
Thanks guys! Good tip Mike, I appreciate it.
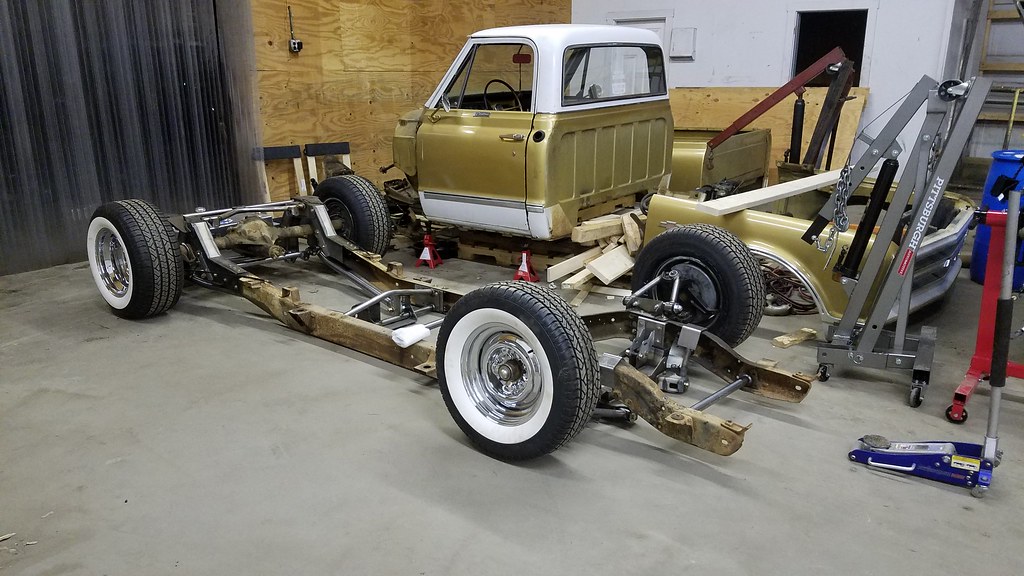 Got to work Wednesday night, got the shock mounts drilled and mounted, shocks on and bags in. 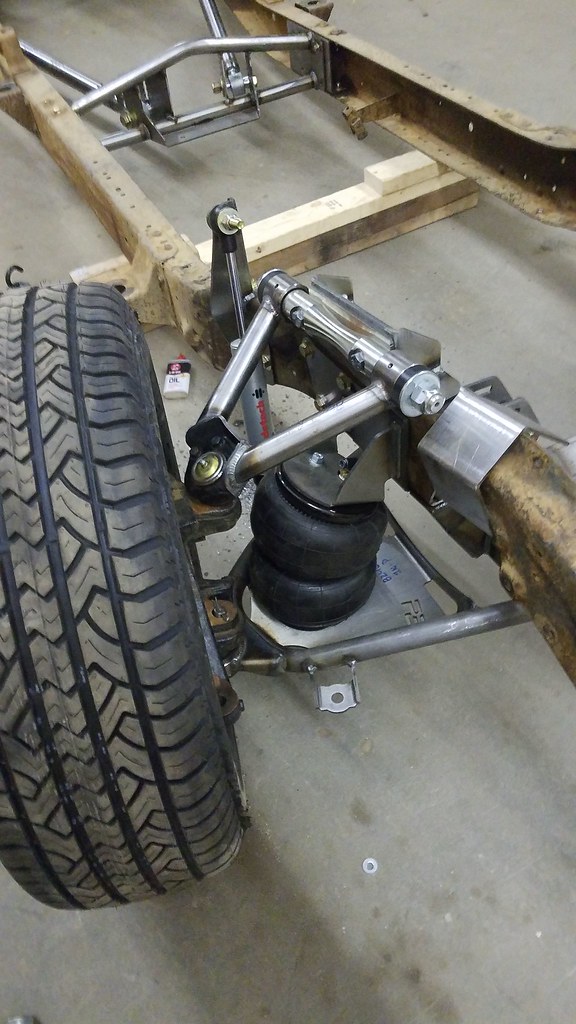 https://www.youtube.com/watch?v=FAUr3kw3gp8 Had to throw some fittings on it and see the frame air up and down for the first time. Link above. It's moments like this that keep you going. Still need to do the rear but only had a few spare hours. I ordered the cab hoist that someone recommended a bit earlier in here, should be here sometime next week. Stoked to throw the cab on soon and see it together for a brief moment! |
|
|

|
|
|
#35 |
|
Registered User
Join Date: Jun 2014
Location: Mocksville, NC
Posts: 1,765
|
Re: C10 Goldilocks
This is such a cool build and is going to have a unique old school flare that you don't see very often anymore with those wide whites. Oh, and your Surabru was pretty cool too. I am into imports as well and I used to have a '63 Beetle.
__________________
Builds: Green Gus the 68 C10 | Bluey the 72 1500 | Lowly the 70 C10 - Instagram: @dr.hewitt - C10 Concept/Development Photos: Master Thread |
|
|

|
|
|
#36 | |
|
Registered User
Join Date: Nov 2013
Location: Rhode Island
Posts: 98
|
Re: C10 Goldilocks
Quote:
My girlfriend is begging me to build her a beetle next, very jealous you had a 63. The subaru was a ton of fun, I had a great time with that car but inevitably practicality won and I traded it in for the Silverado which after owning I couldn't do without. here's another of the wrx for good measure. 
|
|
|
|

|
|
|
#37 |
|
Registered User
 Join Date: Dec 2012
Location: Rochester, IL
Posts: 537
|
Re: C10 Goldilocks
  So cool!!
__________________
__________________ Mike 70 Med Olive build http://67-72chevytrucks.com/vboard/s...d.php?t=714804 Instagram- protouring66 |
|
|

|
|
|
#38 |
|
Registered User
Join Date: Nov 2013
Location: Rhode Island
Posts: 98
|
Re: C10 Goldilocks
Boy I'm pretty bad at updating this.
Last week was a super productive week on the truck, wish they could all be like that. We got a good snow storm on Tuesday so I went into the shop and got some small stuff done. Figured out the gas tank placement, adjusted the trailing arm length, drilled some more holes (story of my life) and tied up a few loose ends. I used a good tip that Mike (MMcMasters) gave me and used some universal end link bushings to raise the tank but I took it one step further and had a friend machine some outer sleeves for them. No pictures of it unfortunately but I'll remember to take some when I go to the shop next. 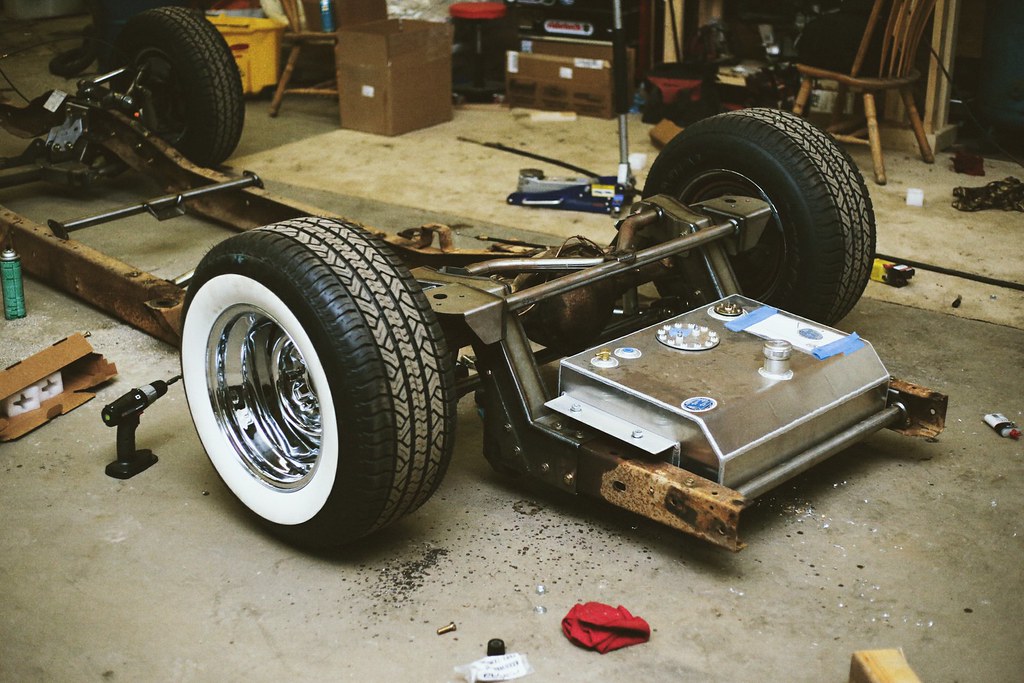 Friday night I had a good friend come over whos a far better welder than me and weld up the rack notches, made a front brace for the cab mounts, and then I had time tack in the step notches in the back so I can have the frame powder coated as a square unit rather than in total pieces. 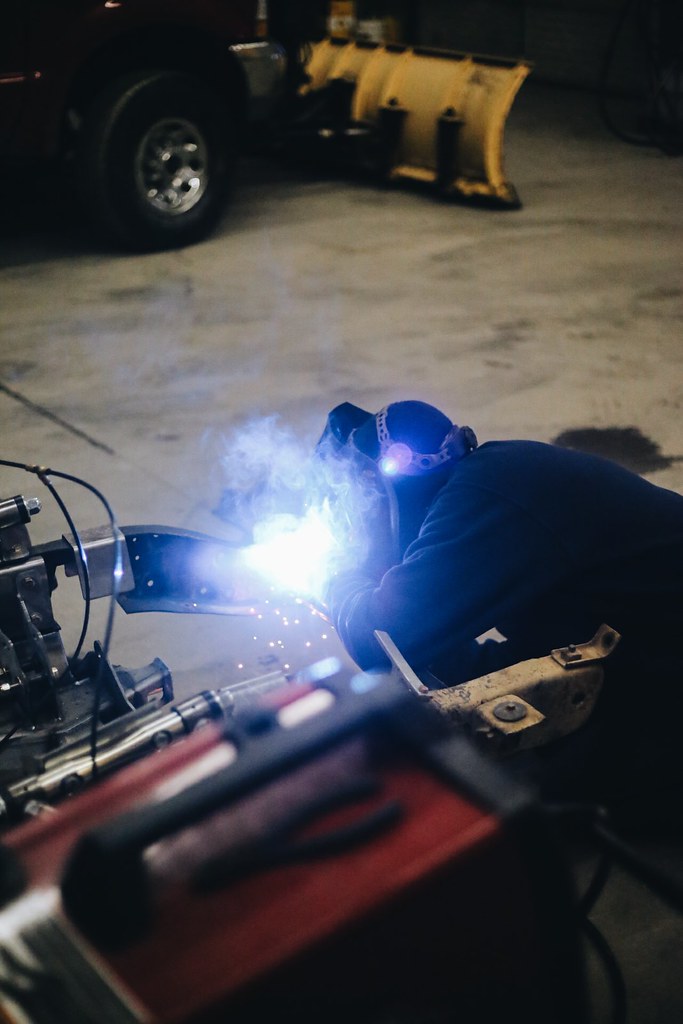 Then yesterday I got the steering rack in place, had to cut just about 3 inches of either side to get it in place. The length it came it was pushing the tiresatleast 5 degrees toed out. Drilled out the knuckles to allow the 5/8ths bolts, got the sway bar in place, matted the trans to the motor, slapped it in and there it was. 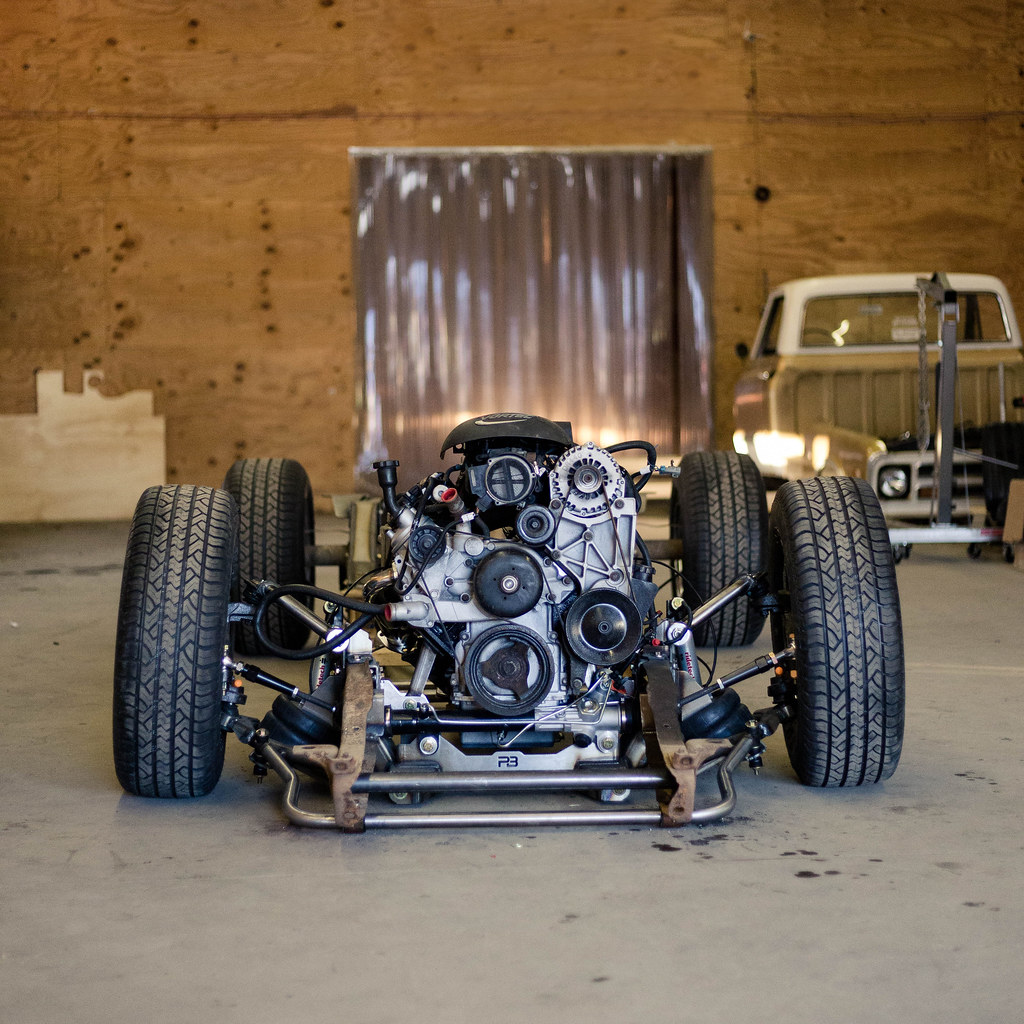 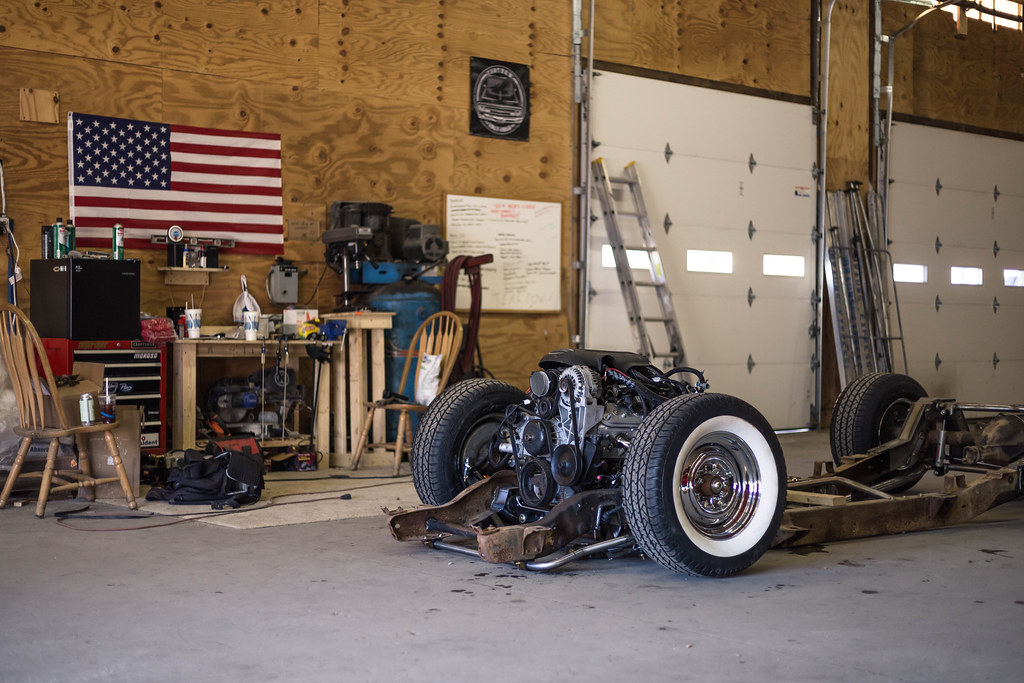 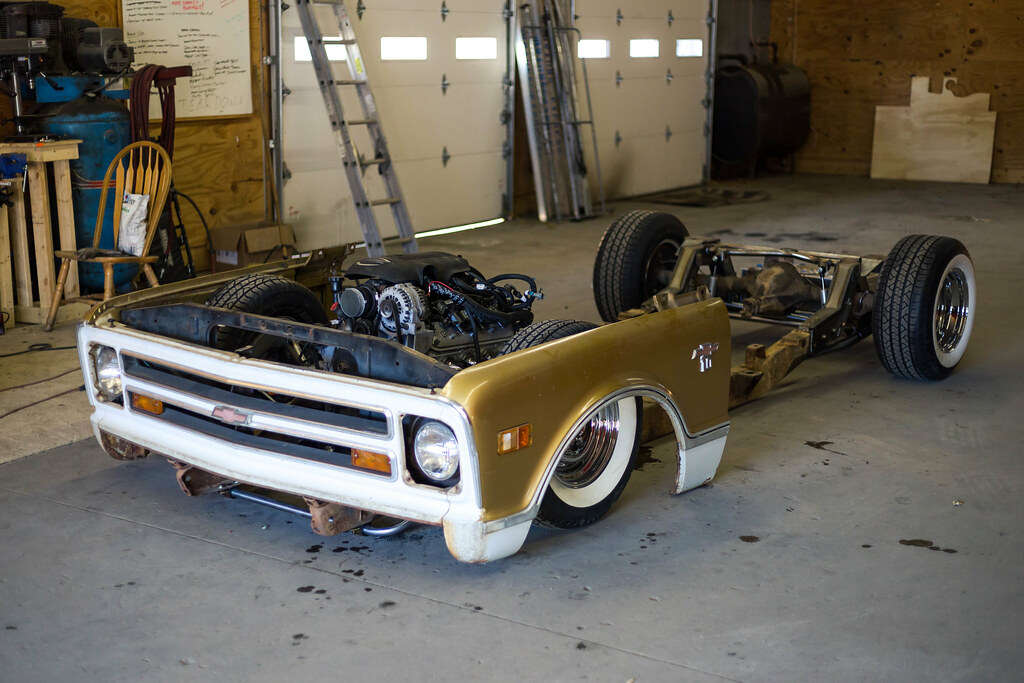 I absolutely love how the porterbuilt sway bar fits PERFECTLY under the front of the frame and is placed underneath the front brace so you won't see if when you look in the engine bay. Those guys have it down right! I have a few issues to figure out, like my headers. The passenger side clearance I don't think is going to work. The collector hits the bellhousing so I might have to get some new ones. The transmission brace I have from porterbuilt is far too short to reach both inners of the frame so I need to figure out if they sent me the wrong one or what the hell else is going on. This is butted up all the way against the other side/ 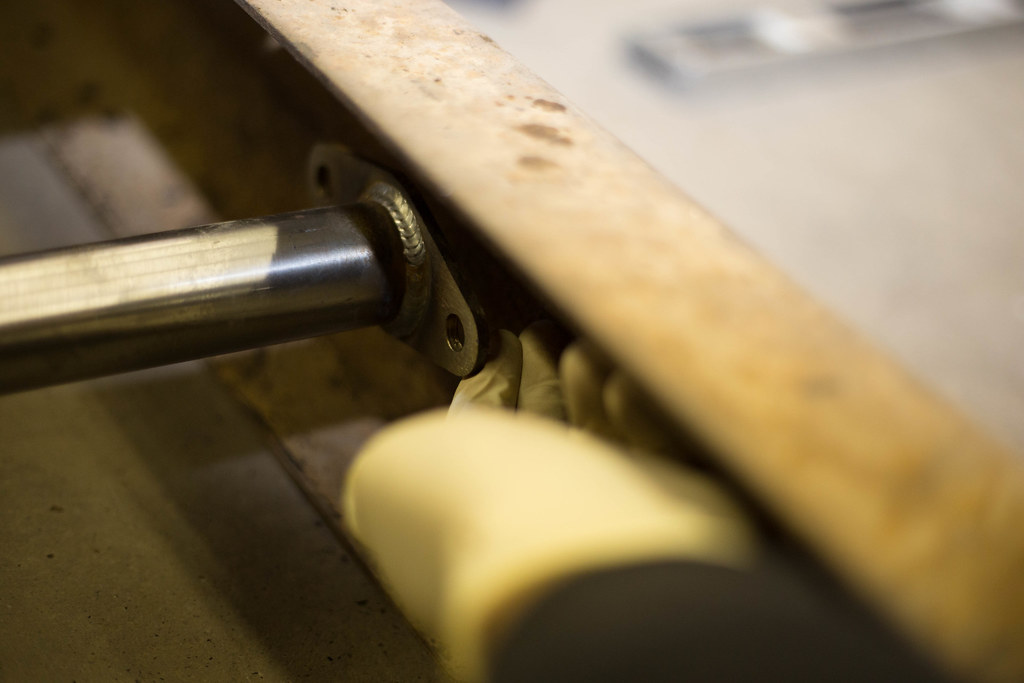 I think after get that situated and get the brace in place it's time for powedercoat. What did you guys typically pay to get your frames done? What was the turn around as well? I'll go out some day this week and take some more photos of stuff to update you guys, cause if you're anything like me you're in here for the pictures lol. Still trying to figure out where I'm gonna put my air ride. Since I raised the tank I don't have room for it above there. I don't LOVE the idea of it being under the bed becasue I don't wanna have to do a tilt floor nor do I wanna get underneath the truck just to change a fuse on the compressor, drain a trap or something else. I might just put it behind the bench and deal with the compressors for the 30 seconds they're on. I'm using to 444c viairs in a 5 gallon which is out of my subaru so I know it doesn't take too long to fill. If only accuair already have their endo CVT tank out! Last edited by Phill0406; 03-20-2017 at 02:19 PM. |
|
|

|
|
|
#39 |
|
Registered User
 Join Date: Dec 2012
Location: Rochester, IL
Posts: 537
|
Re: C10 Goldilocks
I can't get enough pictures of your ride, I love the 50th Anniversary gold/white!!
Something isn't right as far as the transmission cross member goes. Could it be that when you located your trailing arm cross member, that the rails were spread apart and the trailing arm cross member is now holding the rails apart? Just throwing possibilities out. Good luck man!
__________________
__________________ Mike 70 Med Olive build http://67-72chevytrucks.com/vboard/s...d.php?t=714804 Instagram- protouring66 |
|
|

|
|
|
#40 | |
|
Registered User
Join Date: Nov 2013
Location: Rhode Island
Posts: 98
|
Re: C10 Goldilocks
Quote:
Boy I hope that isn't it haha. I would've figured the rear notch brace and cross memeber wouldn't have allowed the frame to bellow out in the middle like that but anything is possible I suppose. It's funny you say you love the 50th because it certainly wan't my first choice. Honestly I spontaneously bought this truck just in the heat of the moment. If I could've had any color it would've been patinaed factory mint green. 
|
|
|
|

|
|
|
#41 |
|
Senior Member
 Join Date: Jun 2009
Location: Belews Creek , NC
Posts: 4,220
|
Re: C10 Goldilocks
Man !! This thing is looking saweet !!!

__________________
Larry It is easily overlooked that what is now called vintage was once brand new. "Project 68" paypal.me/ldgrant |
|
|

|
|
|
#42 |
|
Registered User
Join Date: Nov 2013
Location: Rhode Island
Posts: 98
|
Re: C10 Goldilocks
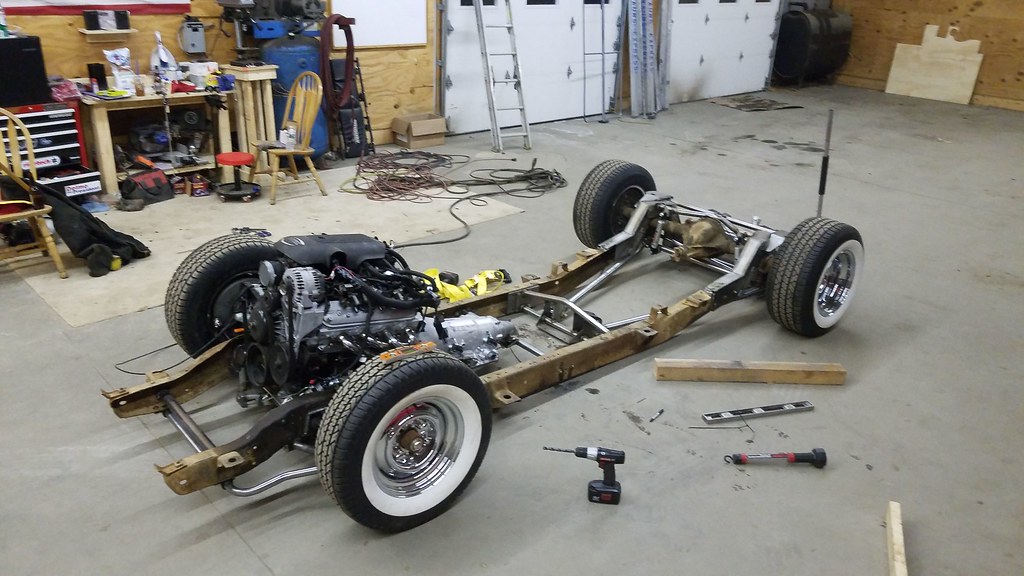
Figured out the trans brace, with the shims provided by porterbuild and a few clicks of a ratched the frame was perfect. Set the trans angle 5 down using an engine hoist and chains over the tail shaft, drilled it and had a complete frame.
 Lasted only about 2 days though as I already stripped everything down to powder. I decided I'm going to be using POR15 and some chassis black paint on the frame itself and then powder on all the loose pieces. My thinking being 1 to cut down cost, 2 im going to have to grind off some to weld on exhaust hangers, 3 it allows me to do more myself, and 4 easy to repair. 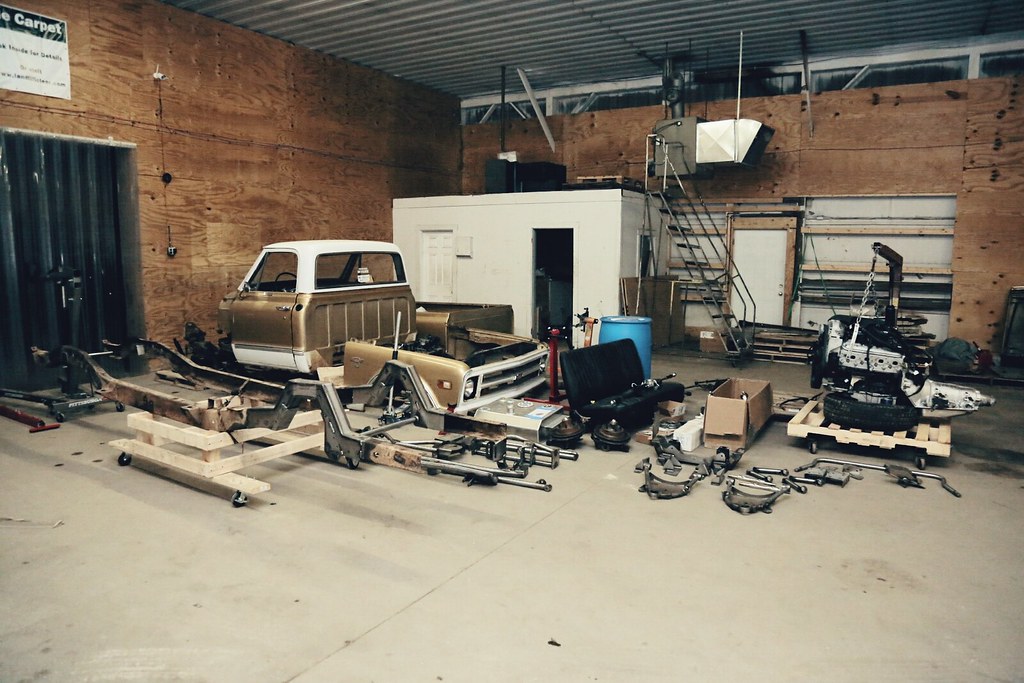 Really sucks to see it like this but I know it's still progress. Took about an hour and a half with a few friends to strip it all down, tag and bag all the bolts and have it all inventoried. The porter pieces are going to powder tomorrow or Wednesday and I was told to be returned April 7th. That being said, went out and got a wire cup wheel and went to town on my frame. I have a little 40lb sandblaster from harbor freight I'm gonna use for the hard to reach places but this 3" wheel is knocking it out pretty fast. Few hours into it last night when I had to call it quits and work on the first lady's Jeep. Plus I need a friend to come by and help me flip it over to get the bottom sides. 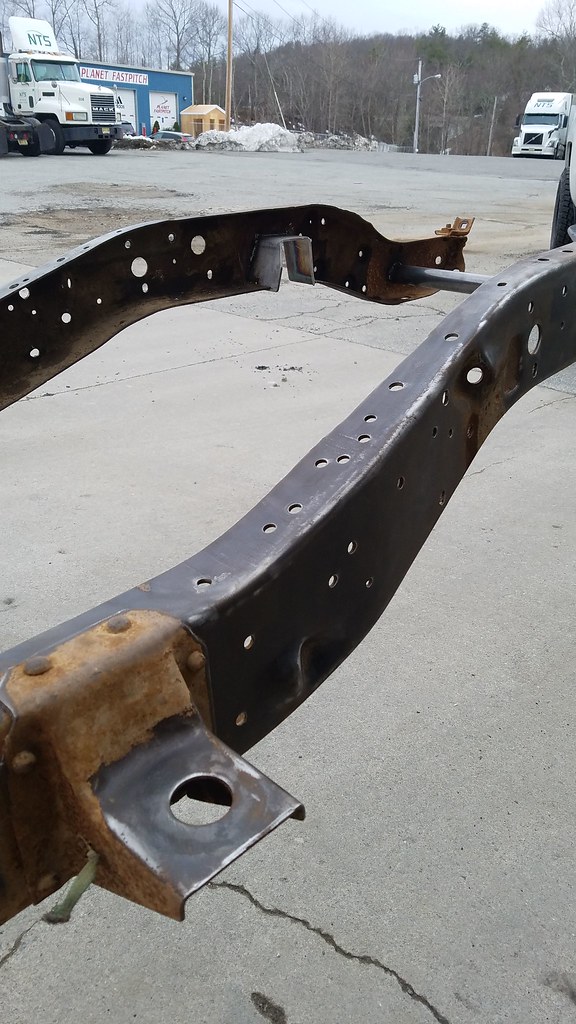 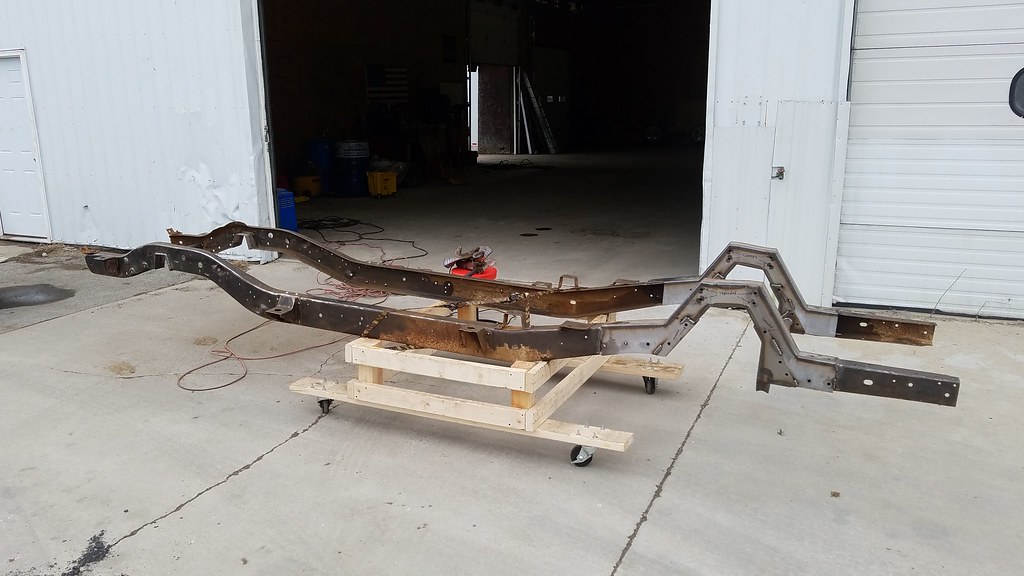 My plan is to get this thing painted this weekend and if I have time, put a posi in the rear end and get that cleaned up too. I swear this truck is consuming my entire life lately. |
|
|

|
|
|
#43 |
|
Registered User
Join Date: Jul 2012
Location: Rosenberg, Texas
Posts: 3,506
|
Re: C10 Goldilocks
They tend to do that at times... Looks great though! You'll be putting it all back together soon.
__________________
-Duane C/10 Club Texas member 1971 Chevy C10 "Brutus" SWB Fleetside 2016 6.0L (L96) 6L90E (driver/project) 1965 Pontiac GTO "Royal Goat" 400/TH400 w/AC (my baby) |
|
|

|
|
|
#44 |
|
Registered User
Join Date: Jun 2014
Location: Mocksville, NC
Posts: 1,765
|
Re: C10 Goldilocks
I love catching up on updates with your truck.
__________________
Builds: Green Gus the 68 C10 | Bluey the 72 1500 | Lowly the 70 C10 - Instagram: @dr.hewitt - C10 Concept/Development Photos: Master Thread |
|
|

|
|
|
#45 |
|
Registered User
Join Date: Jul 2009
Location: San Jose Ca
Posts: 2,871
|
Re: C10 Goldilocks
Nice progress! Try a stripper disc. It works a lot faster than the wire brush. It wont get in the tight areas but you can hit those with the cup brush after.
I wouldn't use the POR15 though. I tried it. Prepped exactly like the instructions said. Some of it was hard as a rock. Some pealed in sheets. I ended up stripping it and painting it with 2k epoxy. Never have had an issue with epoxy. What camera are you using. Those are great pics. I have been wanting to up my photography game.
__________________
David Used parts build: http://67-72chevytrucks.com/vboard/s...d.php?t=638991 My brother's Nova: http://www.67-72chevytrucks.com/vboa...d.php?t=727985 Rear suspension rework: http://www.67-72chevytrucks.com/vboa...d.php?t=750557 Instagram: myfabguy |
|
|

|
|
|
#46 | |
|
Registered User
Join Date: Nov 2013
Location: Rhode Island
Posts: 98
|
Re: C10 Goldilocks
Thanks fellas. Getting there.
Quote:
I have a canon 6d that I use for the decent looking ones. I used to do a lot of photography but have kinda been sidetracked by the truck lately. I have a whole line of lenses though... sigma 35mm 1.4, canon 50 mm 1.8, rokinon 14mm 2.8, canon 24-105mm f4 and a canon 40mm 2.8. I tend to shoot mostly with the 50 though which ironically is probably the cheapest of the bunch. |
|
|
|

|
|
|
#47 |
|
Registered User
 Join Date: Dec 2012
Location: Rochester, IL
Posts: 537
|
Re: C10 Goldilocks
[/QUOTE] I swear this truck is consuming my entire life lately.[/QUOTE]
I know the feeling brother. Your kicking ass though!
__________________
__________________ Mike 70 Med Olive build http://67-72chevytrucks.com/vboard/s...d.php?t=714804 Instagram- protouring66 |
|
|

|
|
|
#48 | ||
|
Registered User
Join Date: Nov 2013
Location: Rhode Island
Posts: 98
|
Re: C10 Goldilocks
Quote:

|
||
|
|

|
|
|
#49 | |
|
Registered User
Join Date: Jul 2009
Location: San Jose Ca
Posts: 2,871
|
Re: C10 Goldilocks
Quote:
Do you have a compressor? I shoot all my primer with a harbor freight purple gun ($10 bucks on sale). Just clean it really well first and play with the adjustments before you shoot something. There are a lot of good videos on youtube that show you how to set it up. Here is my frame that I sprayed.  My brother used a brush and did the bottom side of his Nova. Not as smooth obviously but looks good (the hvlp gun doesn't work to well upside down).  You can get 2k paints in a can. They are a bit more expensive though. http://www.eastwood.com/eastwood-s-2...ack-gloss.html
__________________
David Used parts build: http://67-72chevytrucks.com/vboard/s...d.php?t=638991 My brother's Nova: http://www.67-72chevytrucks.com/vboa...d.php?t=727985 Rear suspension rework: http://www.67-72chevytrucks.com/vboa...d.php?t=750557 Instagram: myfabguy |
|
|
|

|
|
|
#50 | |
|
Registered User
Join Date: Nov 2013
Location: Rhode Island
Posts: 98
|
Re: C10 Goldilocks
Quote:
Best way to learn to use a camera is to just shoot constantly. It's a constant learning process. I do have a compressor, maybe I'll swing by Harbor Freight (seems like I live there and Home Depot) and grab a gun. Always down to learn a new skill! |
|
|
|

|
 |
| Bookmarks |
|
|