
 |
|
|
#501 |
|
Registered User
Join Date: Aug 2007
Location: Corona, California
Posts: 7,998
|
Re: 1957 Chevy truck re-rebuild
Nice and shiny.
Kim |
|
|

|
|
|
#502 |
|
Registered User
Join Date: Aug 2012
Location: Salem Mo
Posts: 652
|
Re: 1957 Chevy truck re-rebuild
Well I was hoping to skip the cut and buff on the dash, ha, who am I foolin', I'm gonna cut and buff, it's the ultimate finish. Was it easy? no, patience, patience. I really had to be careful around all the edges, then the same with the buffing.
I'm getting excited to get all the chrome knobs and radio installed but for now I can enjoy the dash as is. I view of the top of the dash. 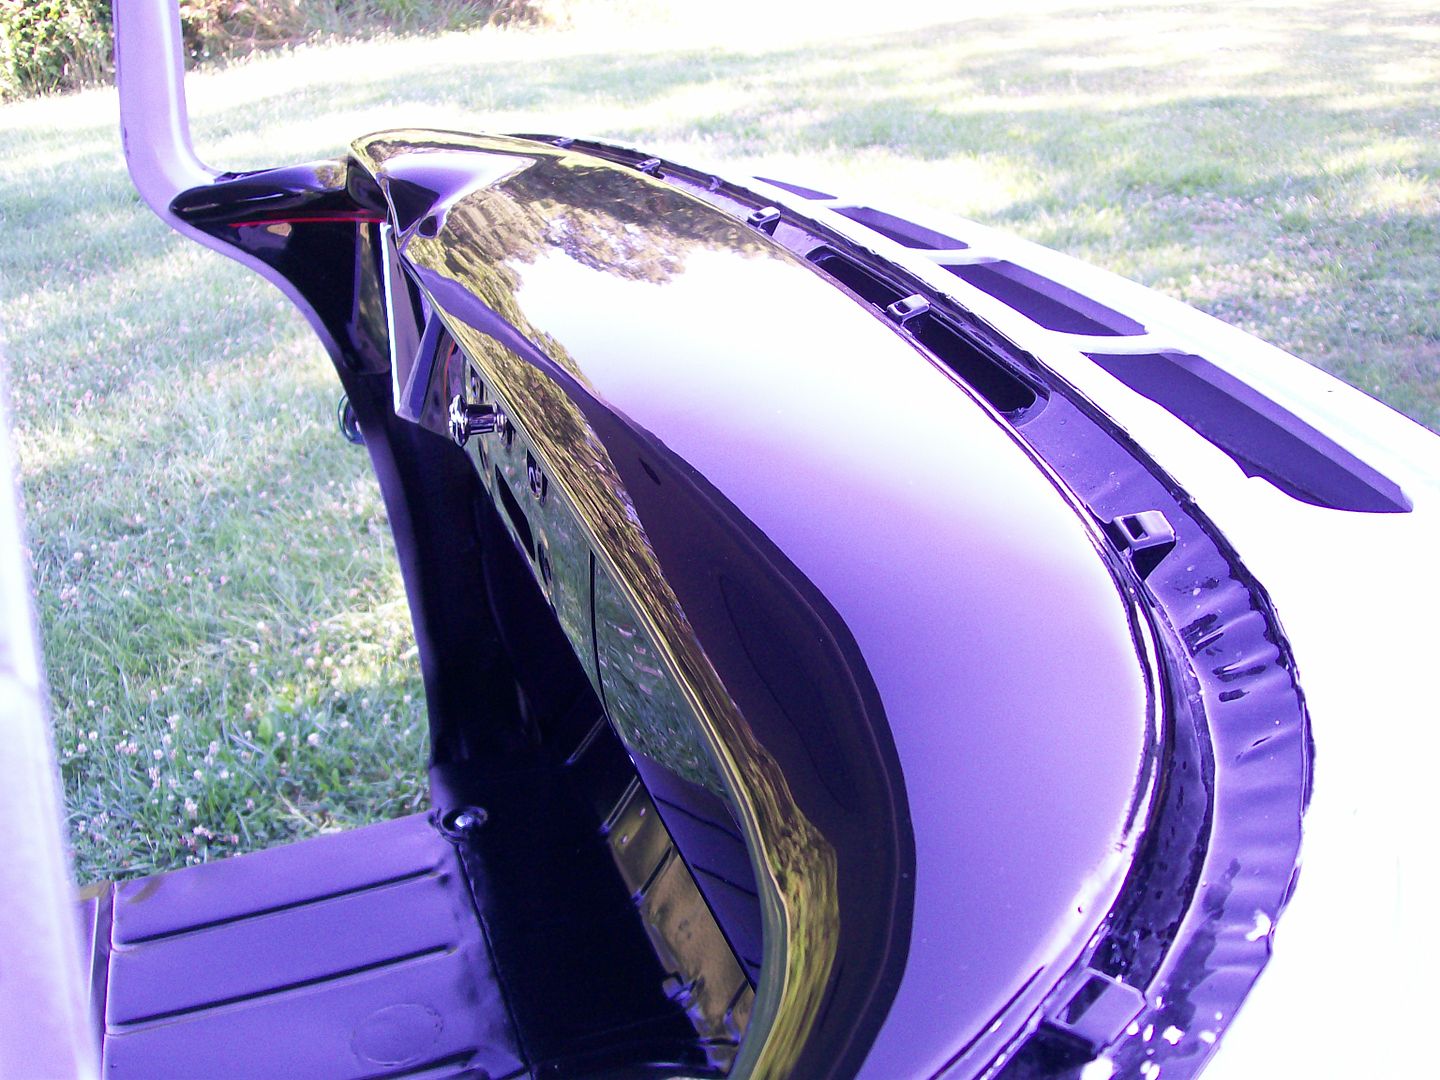 I've gone back and looked at the pictures from a year ago with the maroon, what a difference. 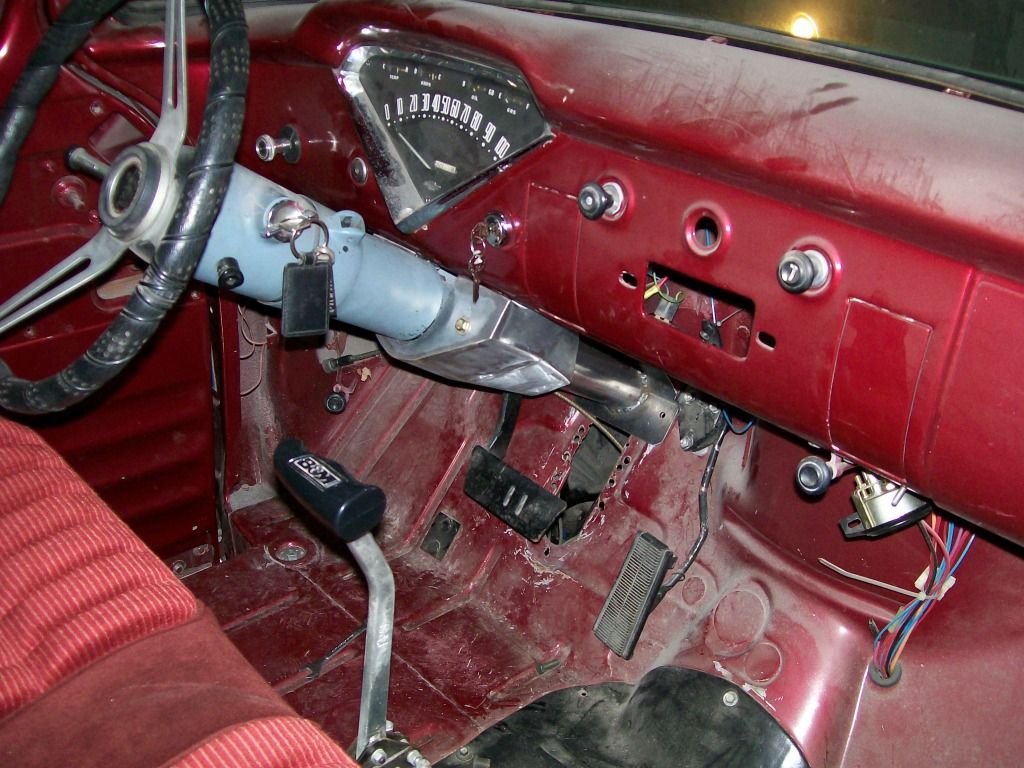 Another showing the welding of the radio face plate, covering the ash tray, heater plate and putting in a spot for another switch on the far side. 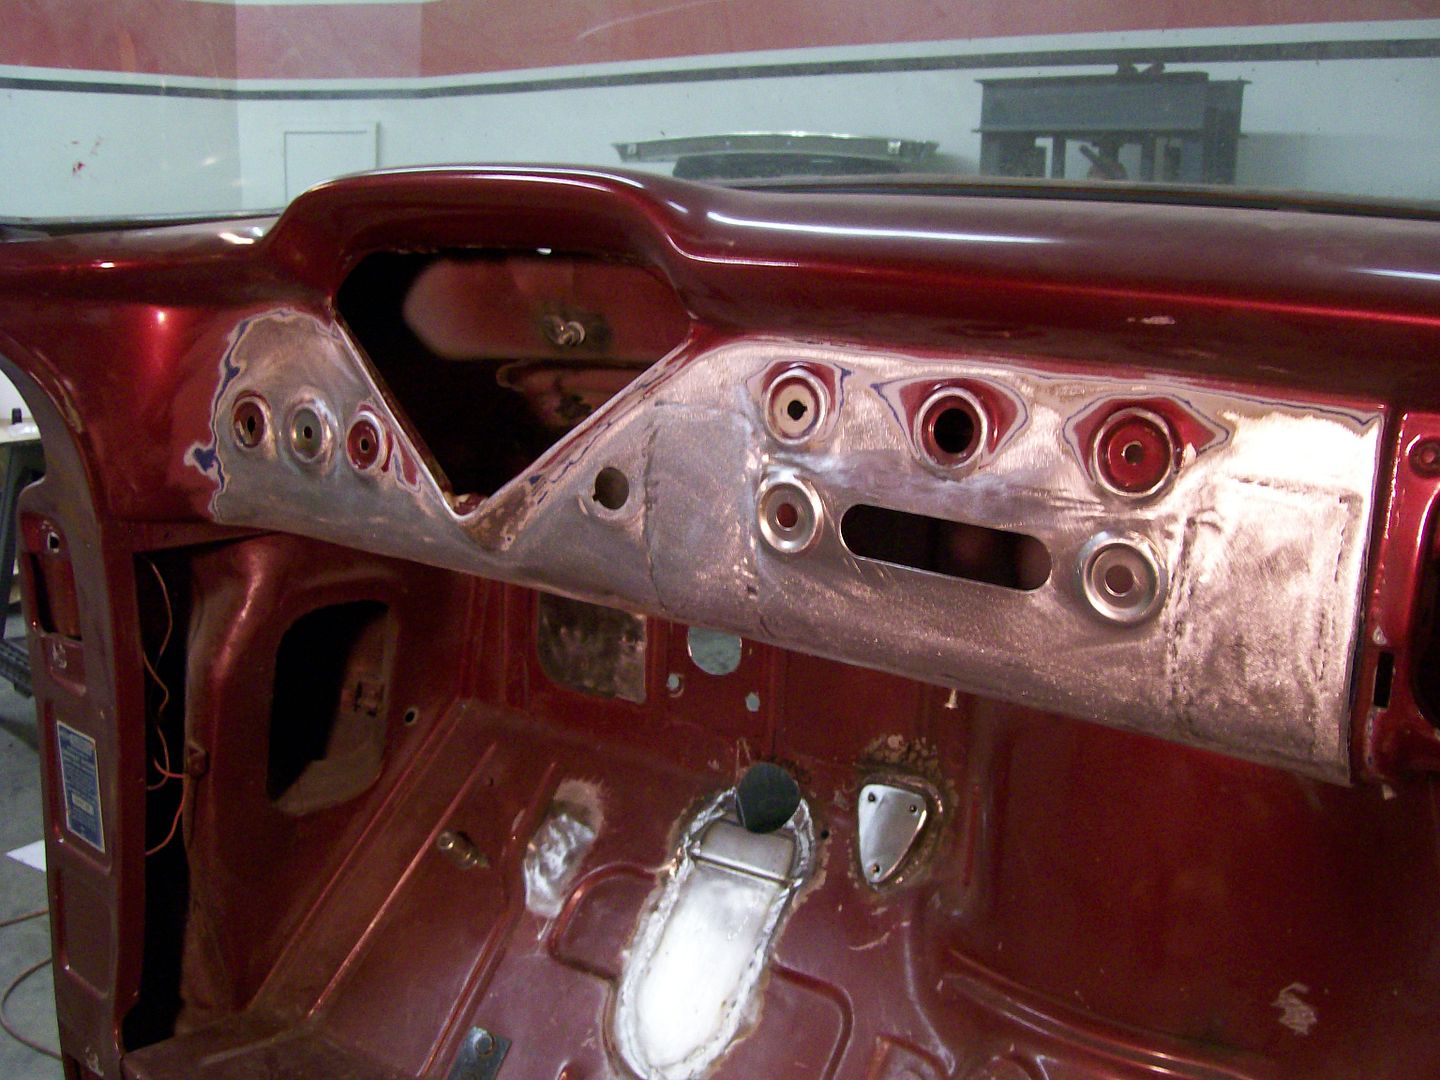 With the black color I'm getting a serious attitude in the cab, I'm also looking forward to getting all the vinyl, chrome and stainless steel. I did install the lighter to get an idea of the reflection that the chrome knobs will create. 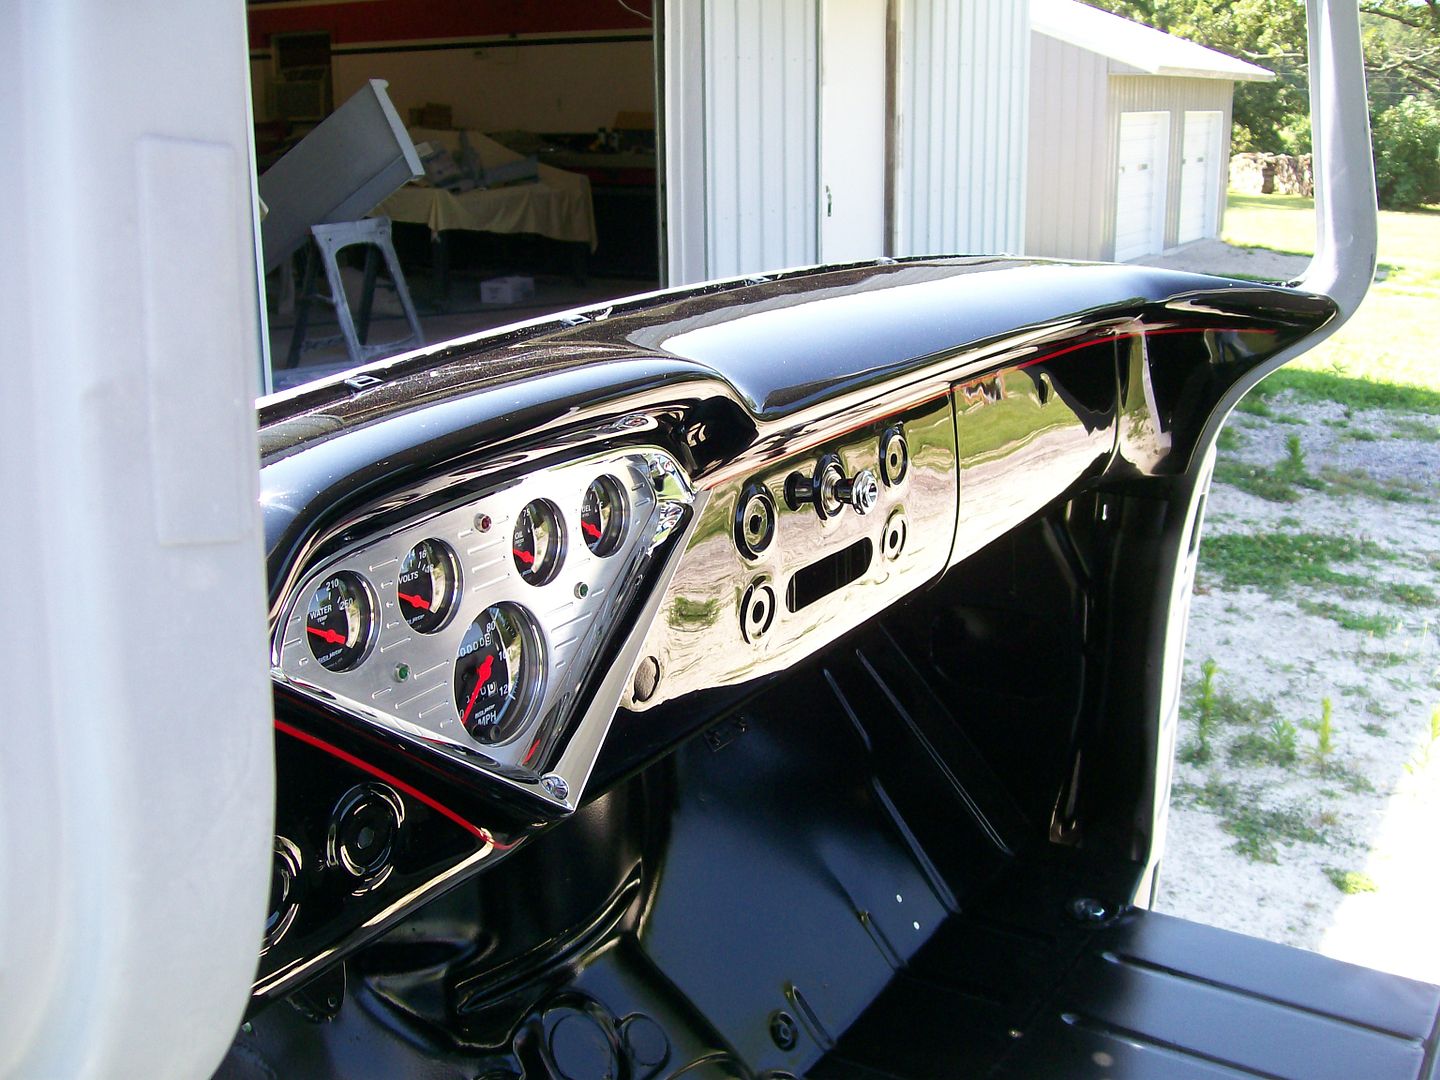 Before and after pics can sure be a boost in motivation.
__________________
My 57 Chevy truck build.http://67-72chevytrucks.com/vboard/s...d.php?t=541132 Last edited by Stepside Jim; 07-09-2014 at 12:18 PM. |
|
|

|
|
|
#503 |
|
Registered User
Join Date: Jan 2012
Location: Motown
Posts: 7,680
|
Re: 1957 Chevy truck re-rebuild
for all of us L
  KING good KING good
__________________
cool, an ogre smiley  Ogre's 58 Truk build Ogre's 58 Truk buildhow to put your truck year and build thread into your signature shop air compressor timer |
|
|

|
|
|
#504 |
|
Registered User
Join Date: Aug 2012
Location: Salem Mo
Posts: 652
|
Re: 1957 Chevy truck re-rebuild
ahhh, a double smiley face, thans _Ogre.
Looking at the last picture the glove box looks like it has a terrible sag/runs coming down from the red stripe. I am having a heck of a time trying to get pictures that will show the finish without pulling in a reflection that gives a false impression, such as the phantom sag/runs. This is another angle of the glove box yet, it itself is trying to pull in the reflection of the drivers side gray door jam and once again, distorting the image, but no sags/runs. 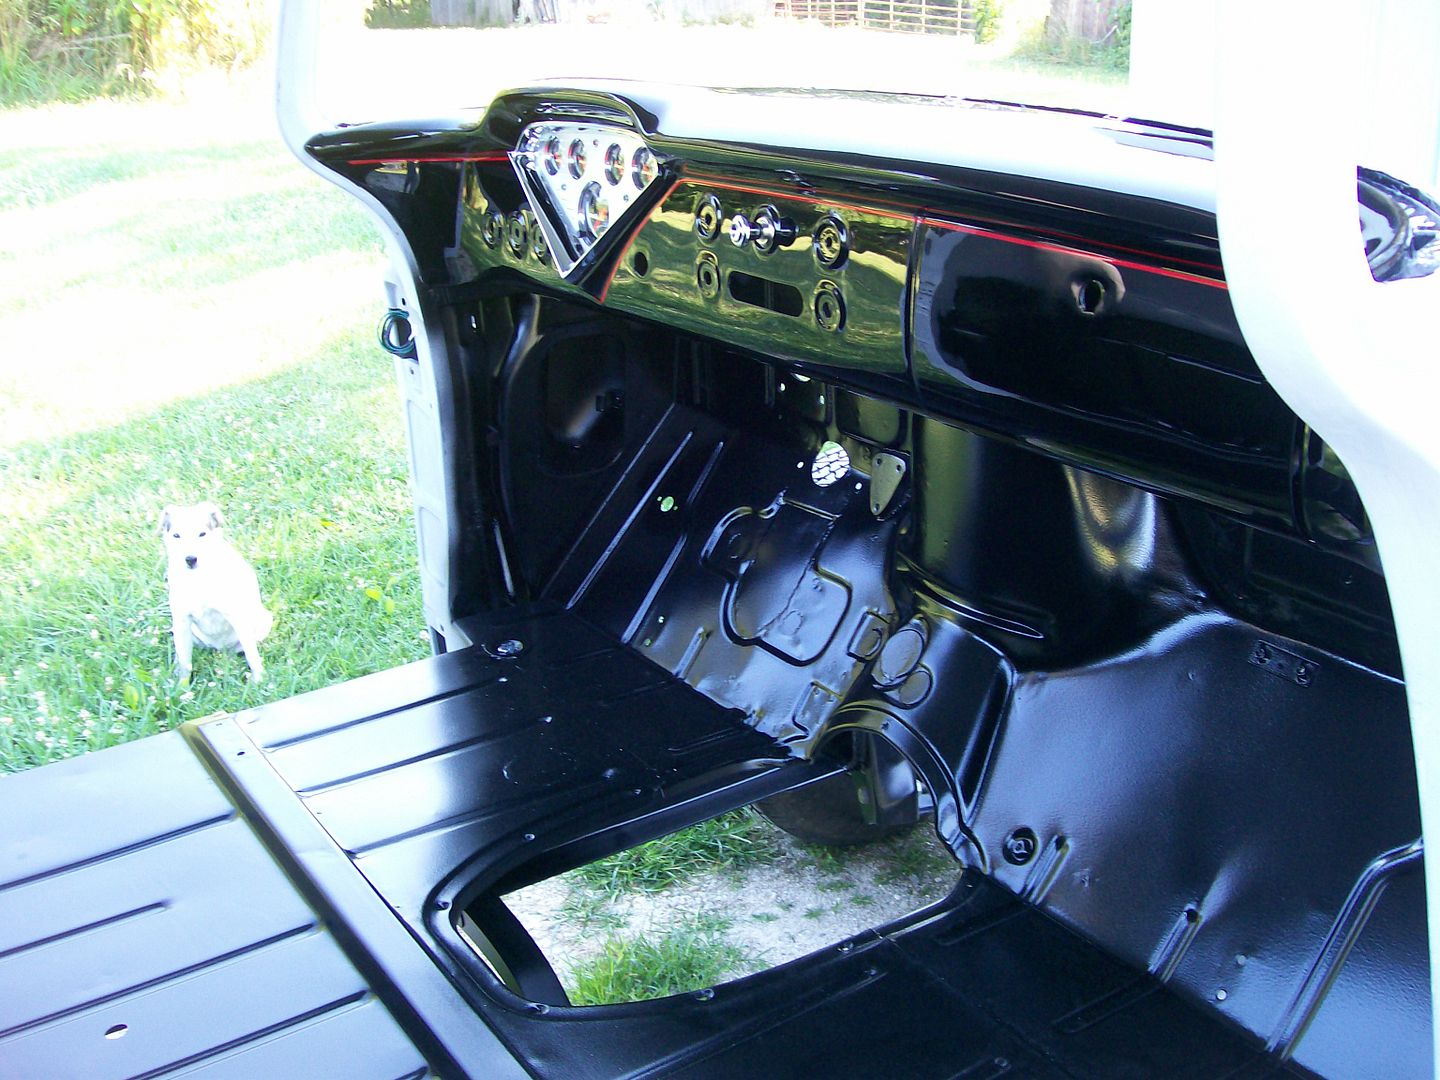 Ok, I feel better... 
__________________
My 57 Chevy truck build.http://67-72chevytrucks.com/vboard/s...d.php?t=541132 |
|
|

|
|
|
#505 |
|
Registered User
Join Date: Aug 2007
Location: Corona, California
Posts: 7,998
|
Re: 1957 Chevy truck re-rebuild
Looks great.
Kim |
|
|

|
|
|
#506 |
|
Registered User
Join Date: Aug 2012
Location: Salem Mo
Posts: 652
|
Re: 1957 Chevy truck re-rebuild
Last year I cleaned and primed the hood. Once the primer dried I went to block sanding.
The first thing I noticed was the metal in the center off the hood flexing, some call it oil canning. I've read others having the same issue. With the hood being about the last main part to be blocked I have to deal with it. I don't know if there is a fix available but I have to do something. I started with a drawing for size and dimension. 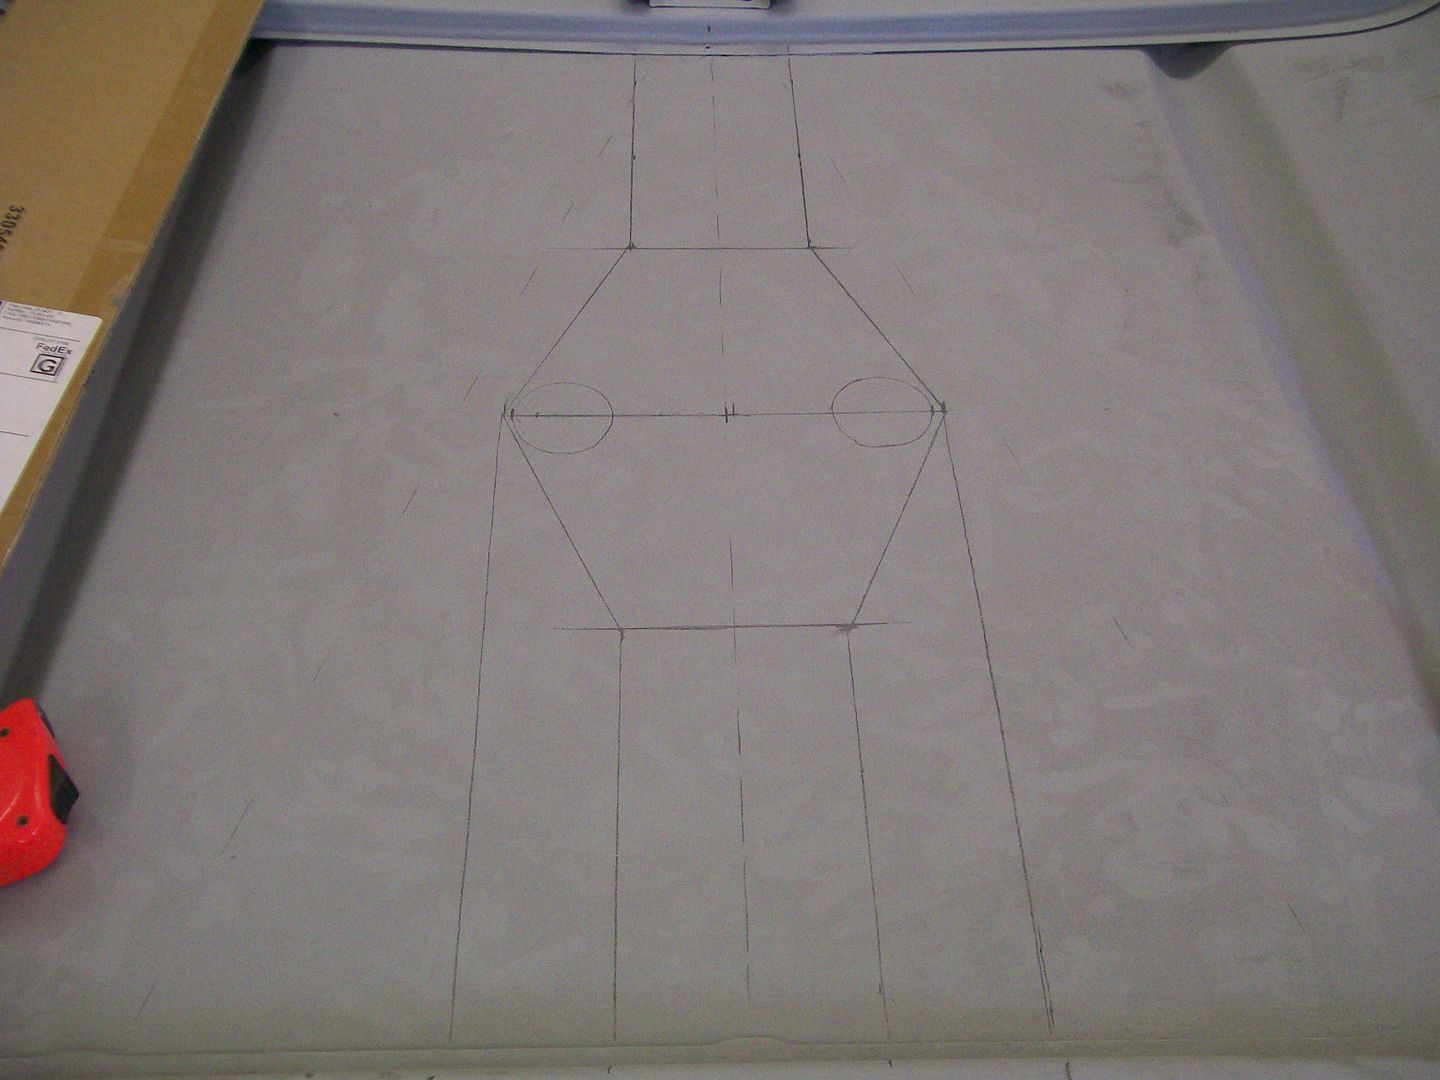 I don't follow every line I draw but it gives me a good idea of where I want to go with the final design. 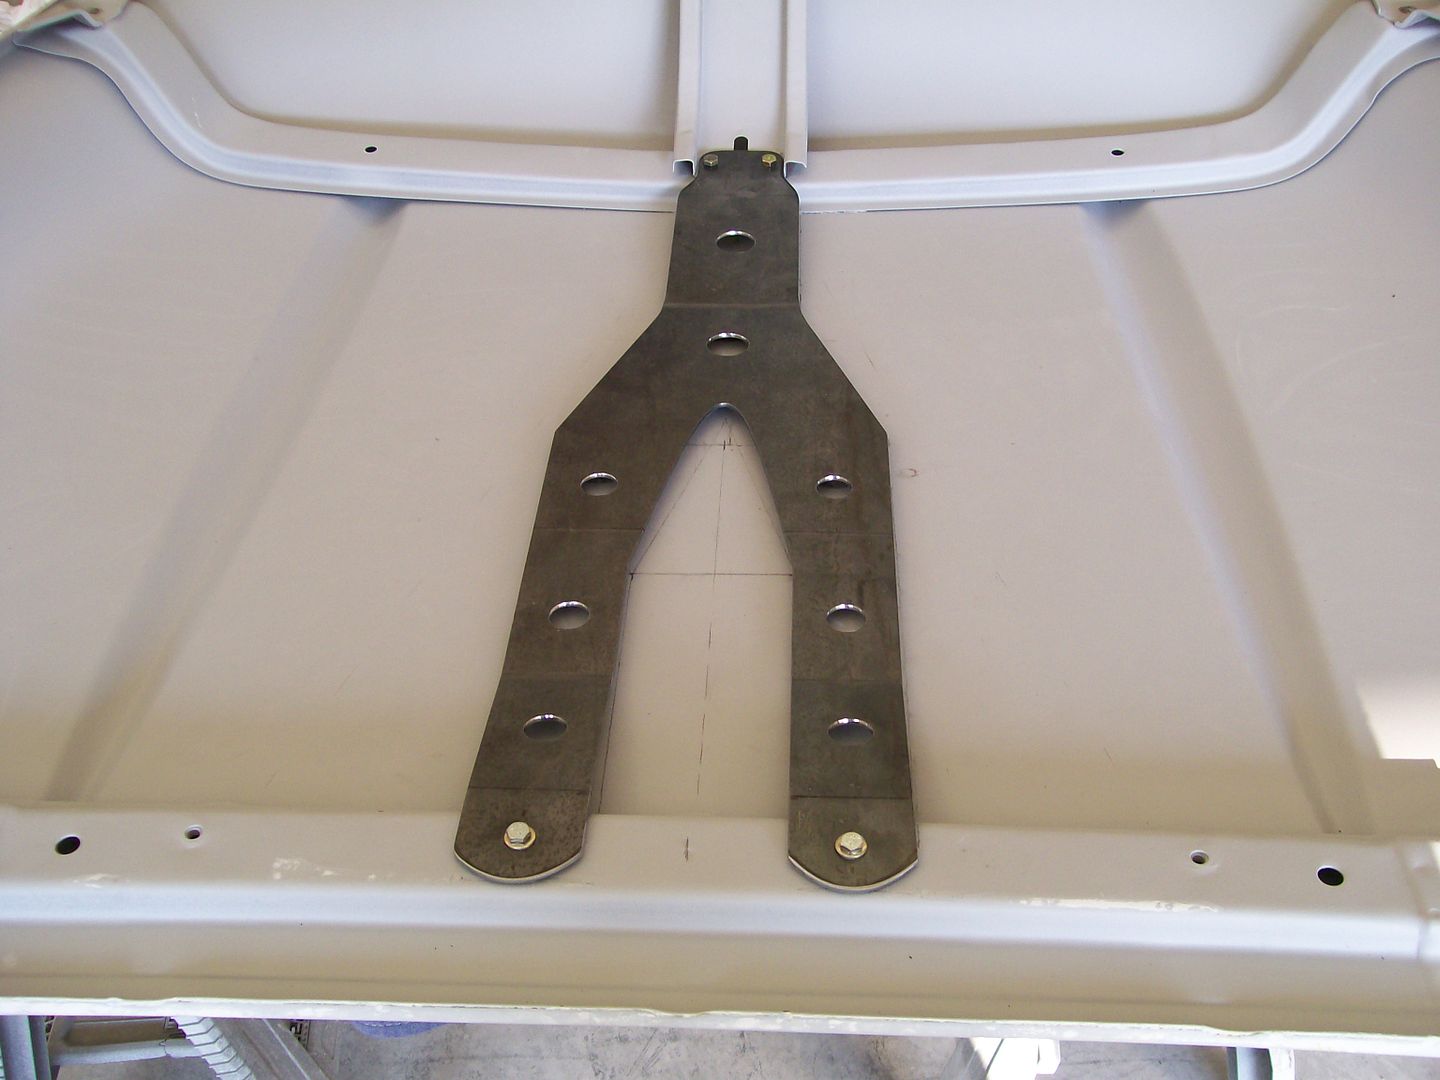 The front mounting holes were all ready there, in the back I had to drill two holes and insert these expanding nuts. 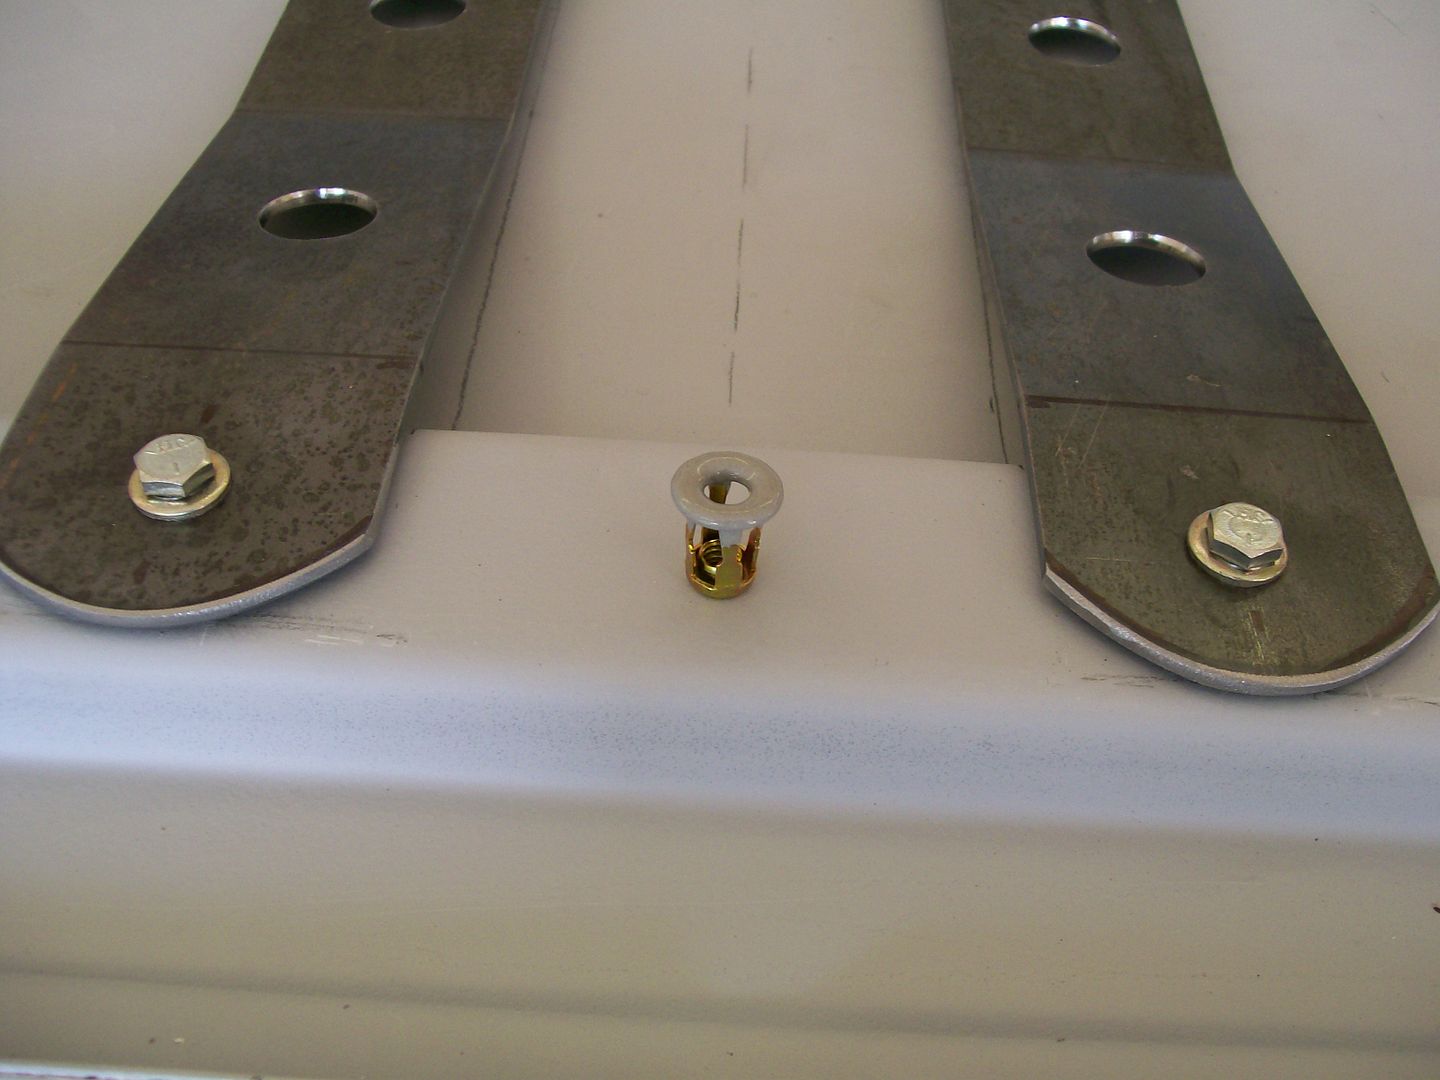 My goal was to have the brace hover about a 1/4" above the hood after I bend and shaped the brace. 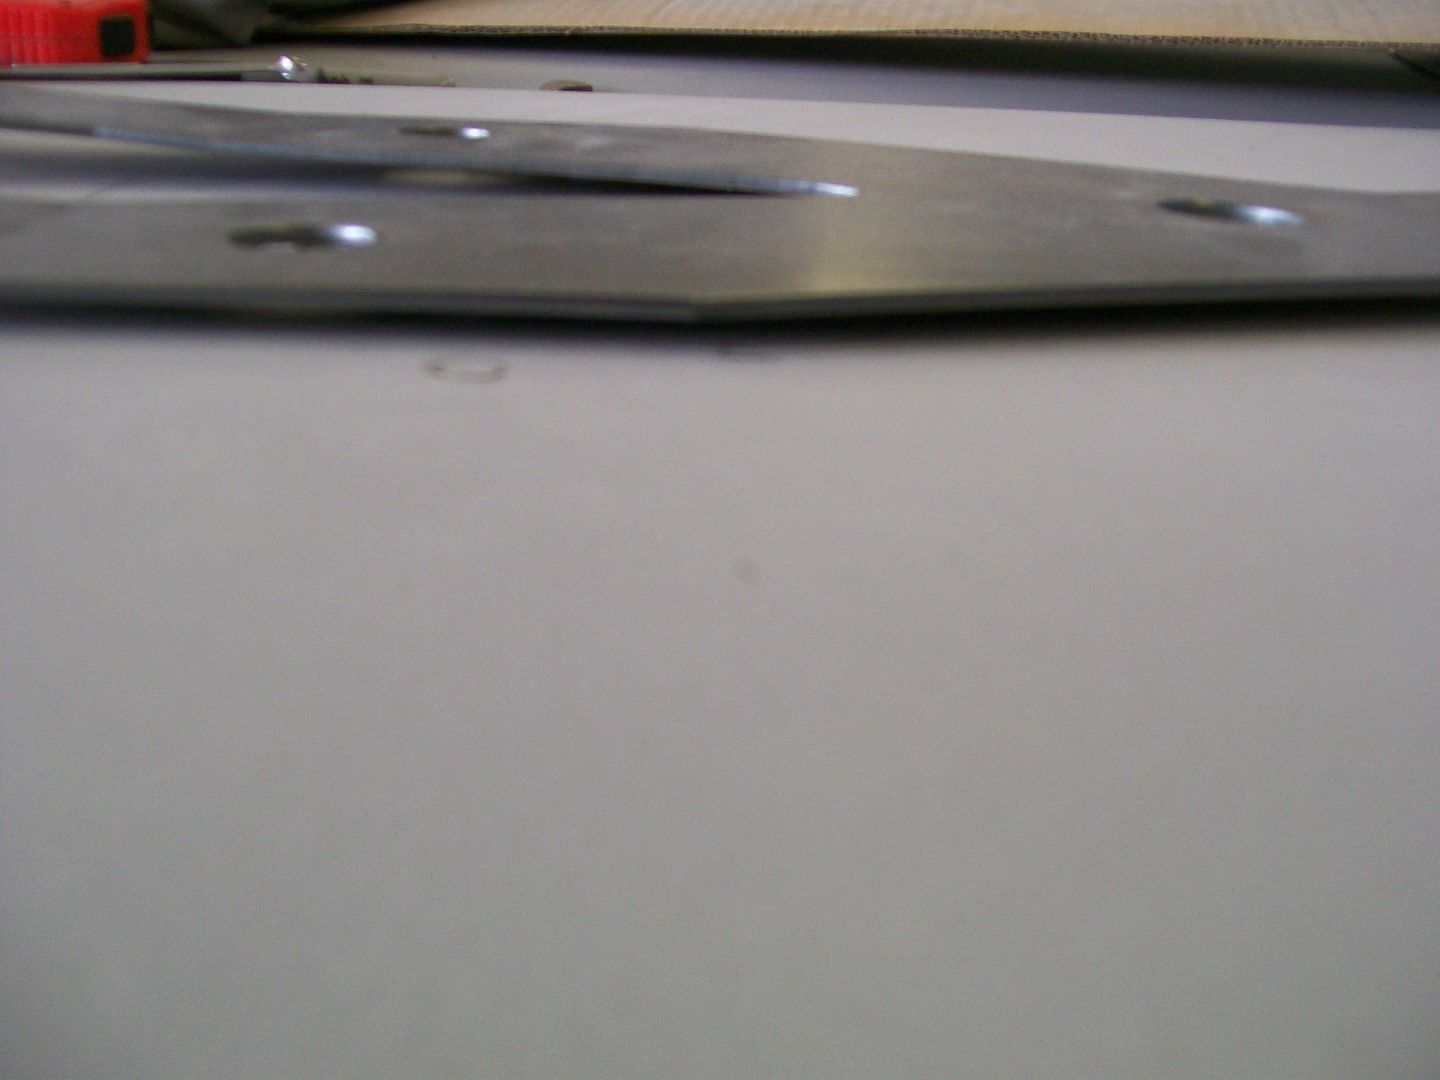 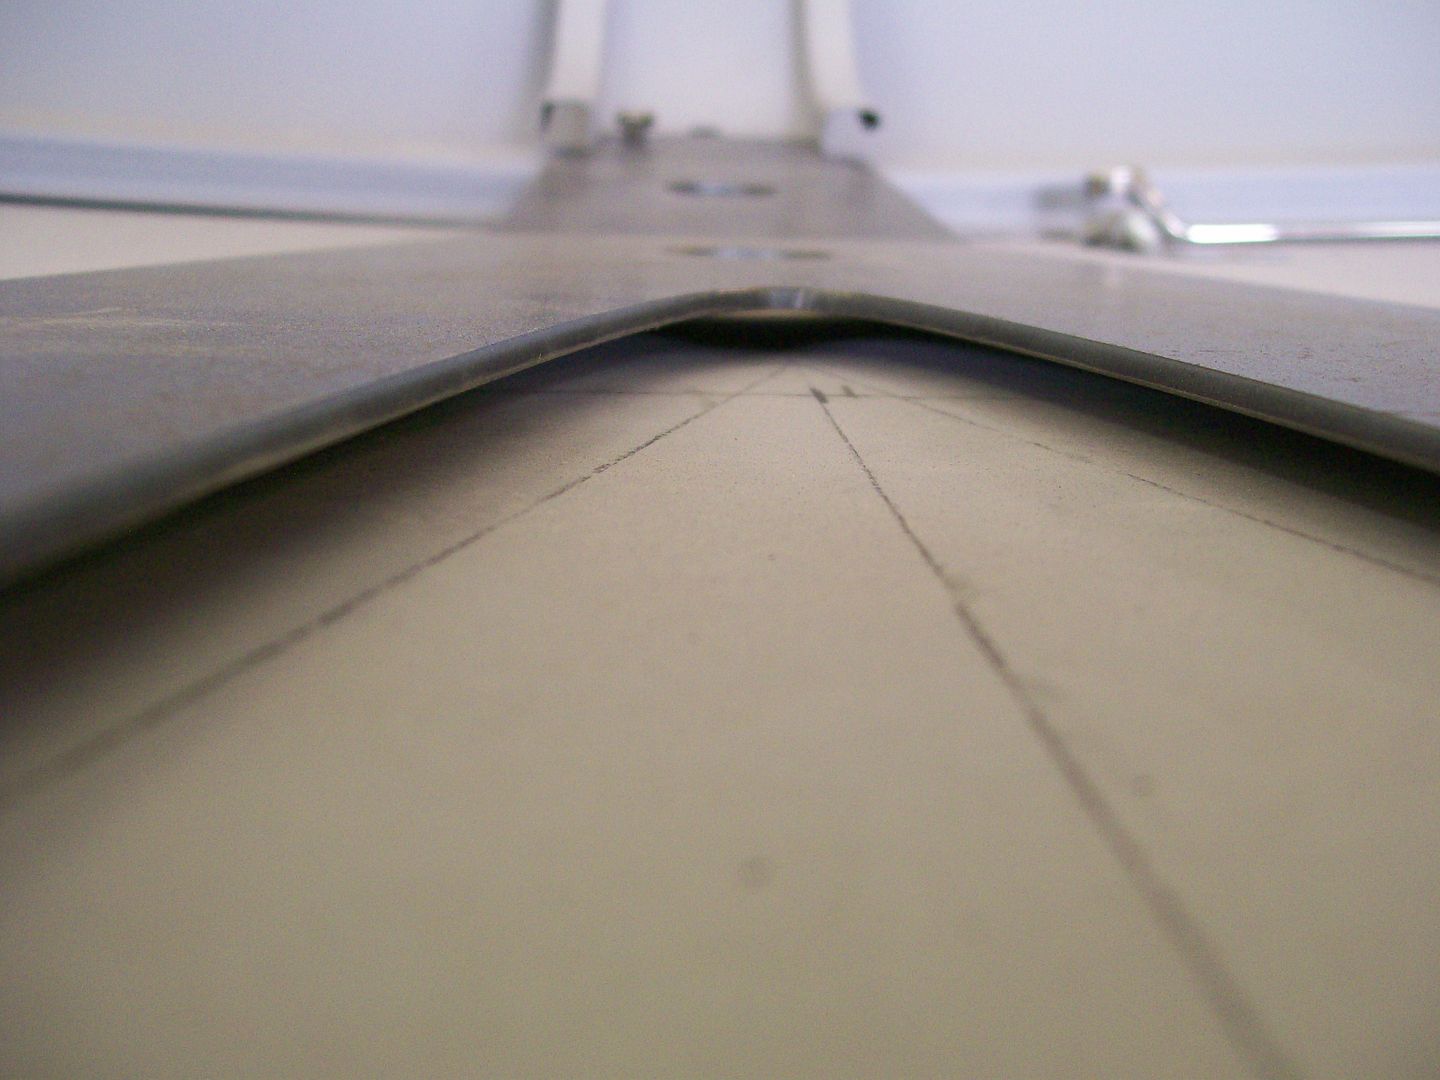 I cut some rubber spacers and slid them between the brace and the hood. 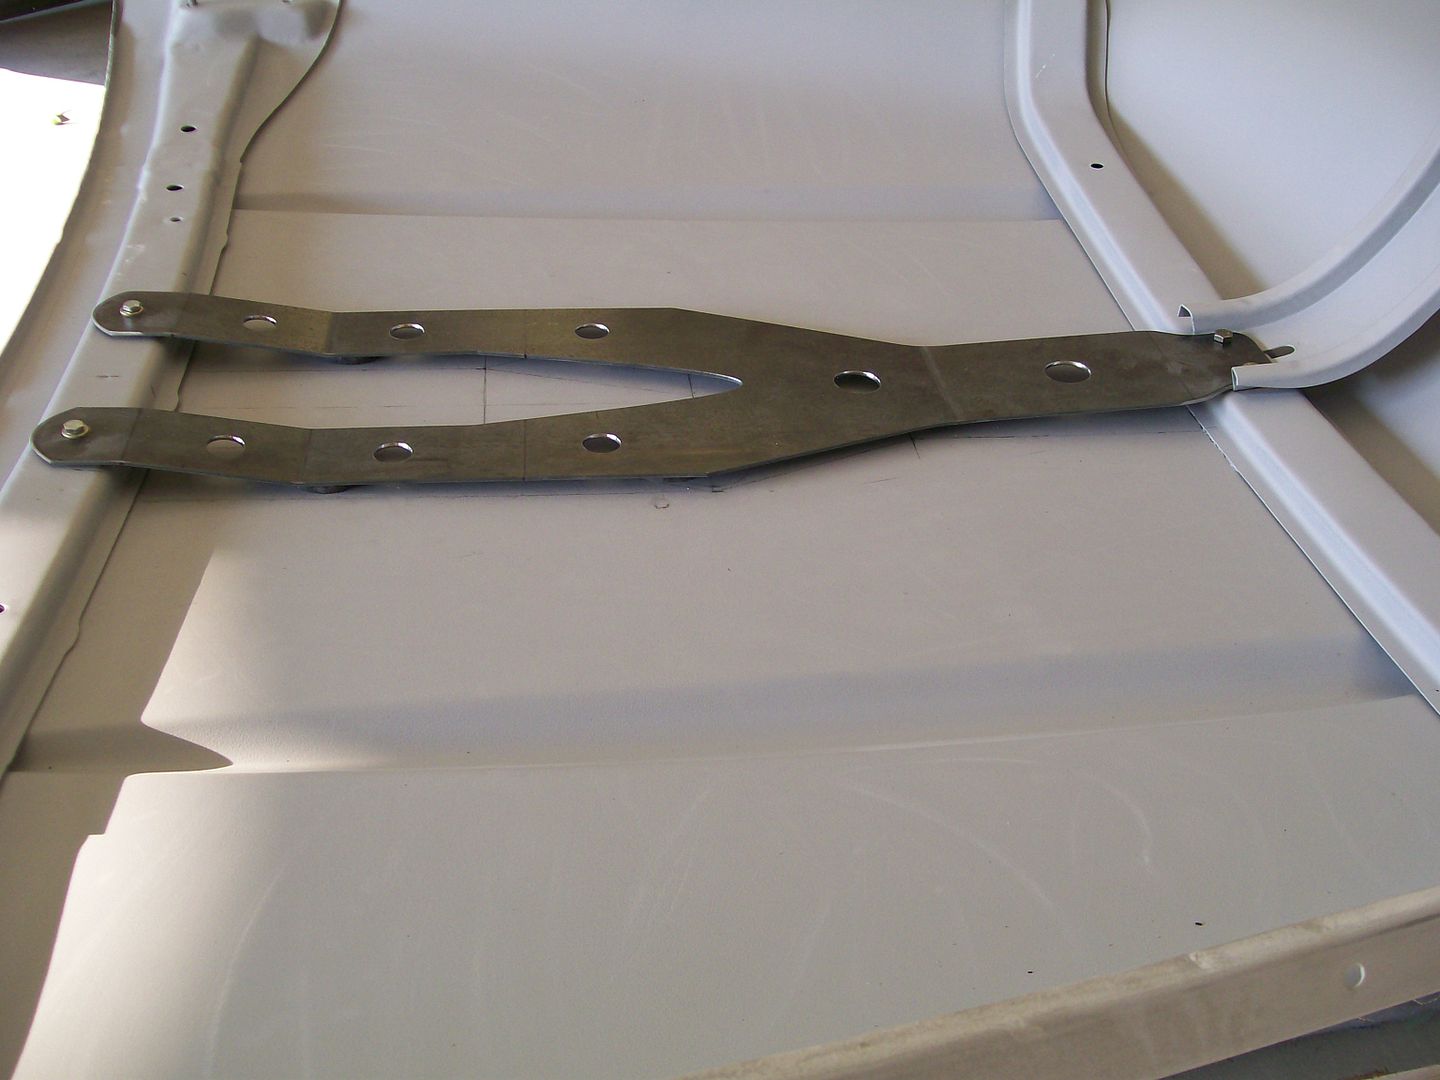 Later I'll paint the brace and glue the rubber spacers in place but for now I'm able to get back to block sanding the hood without it trying to change shape as I'm working on it.
__________________
My 57 Chevy truck build.http://67-72chevytrucks.com/vboard/s...d.php?t=541132 |
|
|

|
|
|
#507 |
|
Registered User
Join Date: Jul 2008
Location: Buckeye, Arizona
Posts: 694
|
Re: 1957 Chevy truck re-rebuild
an excellent way to solve the problem. There was a post about a similar situation in the body and paint section which turned to using a shrinking disc to alleviate the stretched area.
__________________
"Fear makes the wolf look bigger" http://67-72chevytrucks.com/vboard/s...d.php?t=305629 |
|
|

|
|
|
#508 |
|
Registered User
Join Date: Aug 2007
Location: Corona, California
Posts: 7,998
|
Re: 1957 Chevy truck re-rebuild
Pretty slick fix.
Kim |
|
|

|
|
|
#509 |
|
A320 Pilot/USAF Retired
Join Date: Mar 2009
Location: Charleston, SC
Posts: 2,629
|
Re: 1957 Chevy truck re-rebuild
Very nice!
__________________
JJ My 1957 build: http://67-72chevytrucks.com/vboard/s...d.php?t=334552 http://www.trifive.com/forums/showthread.php?t=22037 Instagram - Chuckdriver57 |
|
|

|
|
|
#510 |
|
Senior Member
 Join Date: Jul 2009
Location: Tomball, Texas
Posts: 1,592
|
Re: 1957 Chevy truck re-rebuild
Nice fix on the hood. Those expanding nuts look like they came in handy. Do you recall where you got them? Are they pretty good about not spinning in the hole as you tighten the bolt?
__________________
Rick 78 GMC K15 SWB, 350/NV4500/NP205/4.10s Project Hazel 71 GMC C25 350/TH400 - Project Angie 59 Chevy SWB Stepside (next in line? Not sure now  ) )2001 GMC Sierra K2500 |
|
|

|
|
|
#511 | |
|
Registered User
Join Date: Aug 2012
Location: Salem Mo
Posts: 652
|
Re: 1957 Chevy truck re-rebuild
Quote:
The part number is NAPA, 665-1059, small bag of 4 on the rack of small body clips and such. A couple of posts back I sand blasted and painted the door hinges, now to assemble with new bushings and pins from Classic parts. Surprisingly the original bushings were plastic, I never would have guessed they would have used plastic. Hmmm. One worn bushing. 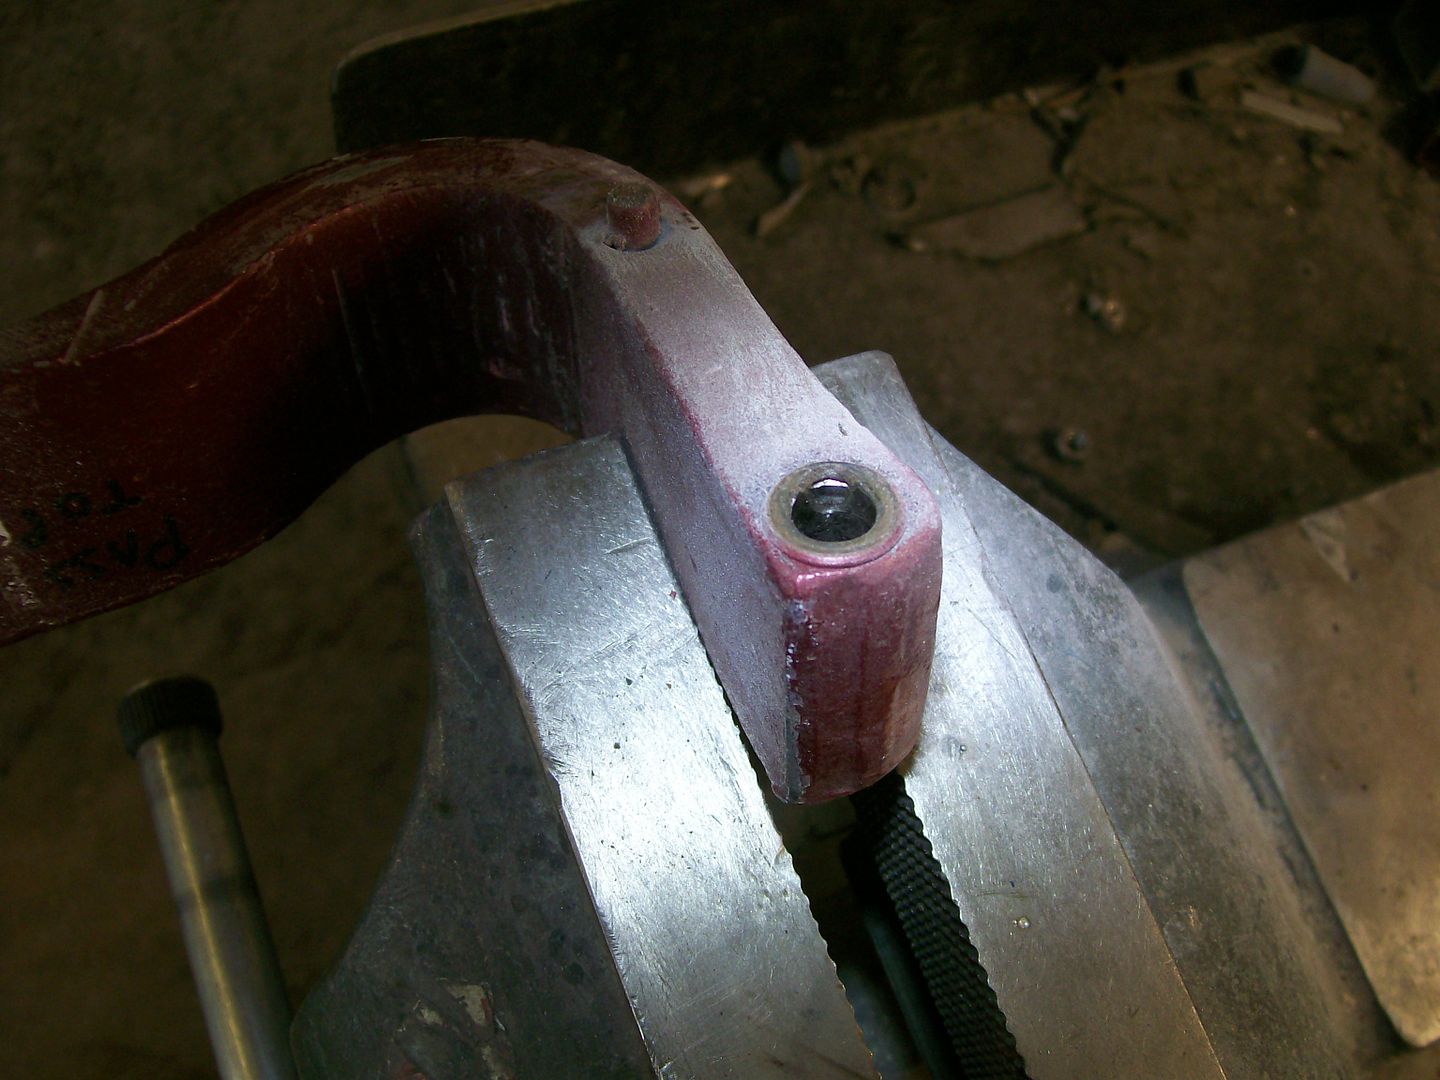 New parts, old parts. 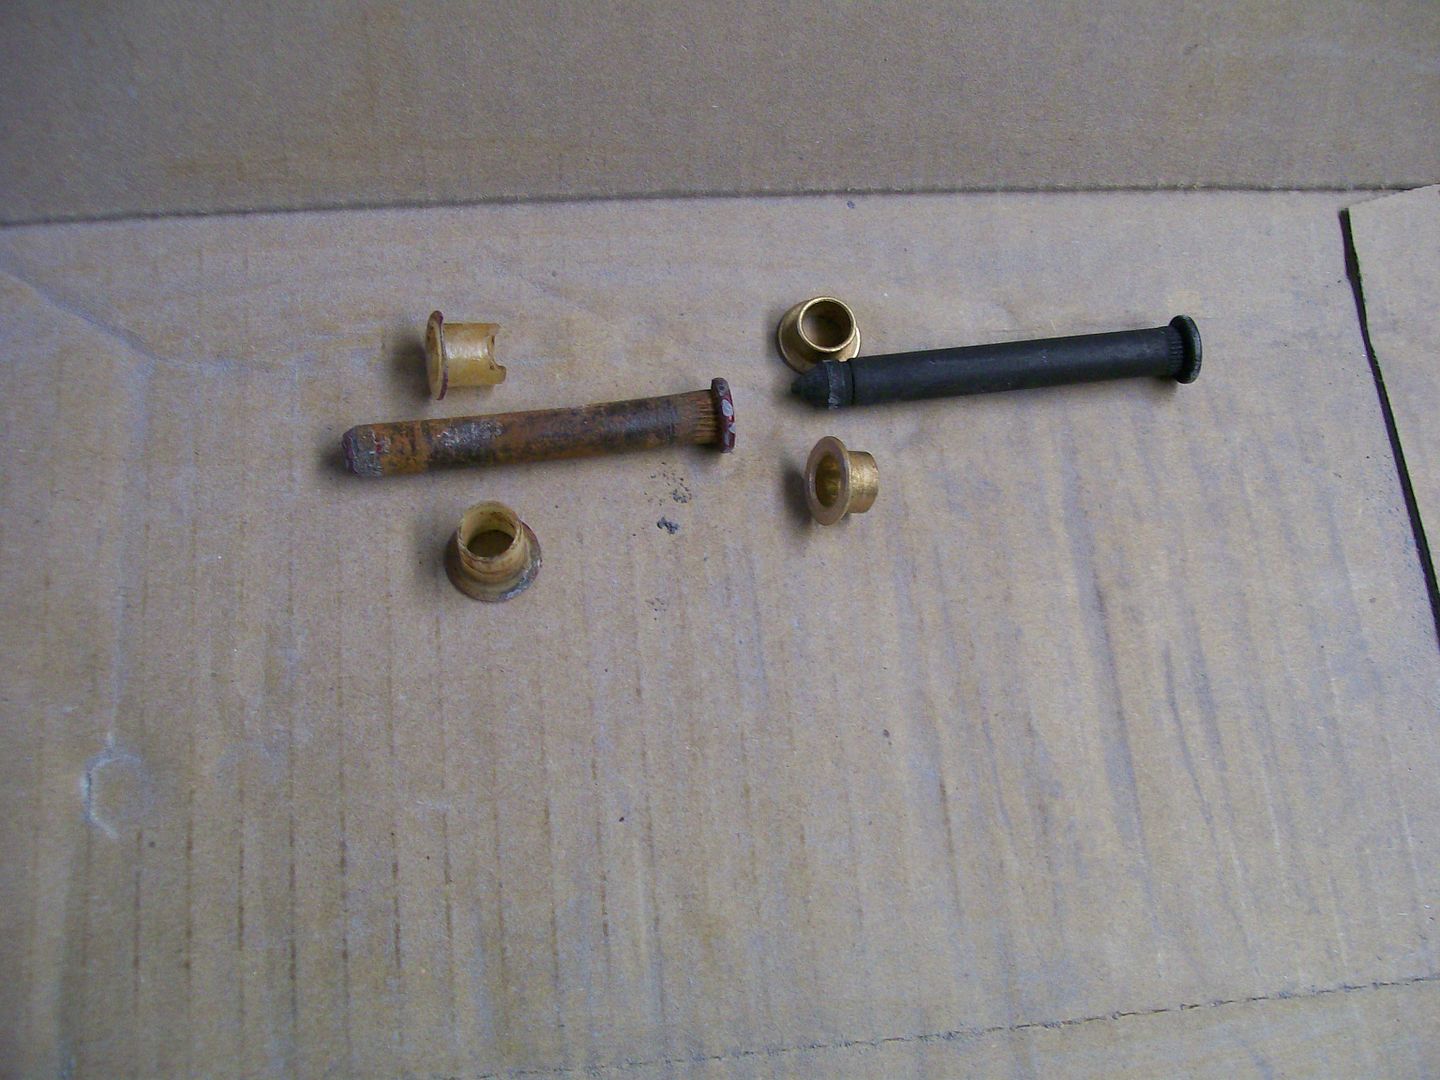 I used the vise and a socket to assemble.  All done. I did all 4 with no problems. The pin probably fits other vehicles and uses the E clip slot, the pin slightly pressed into place, not needing a clip to hold it in. 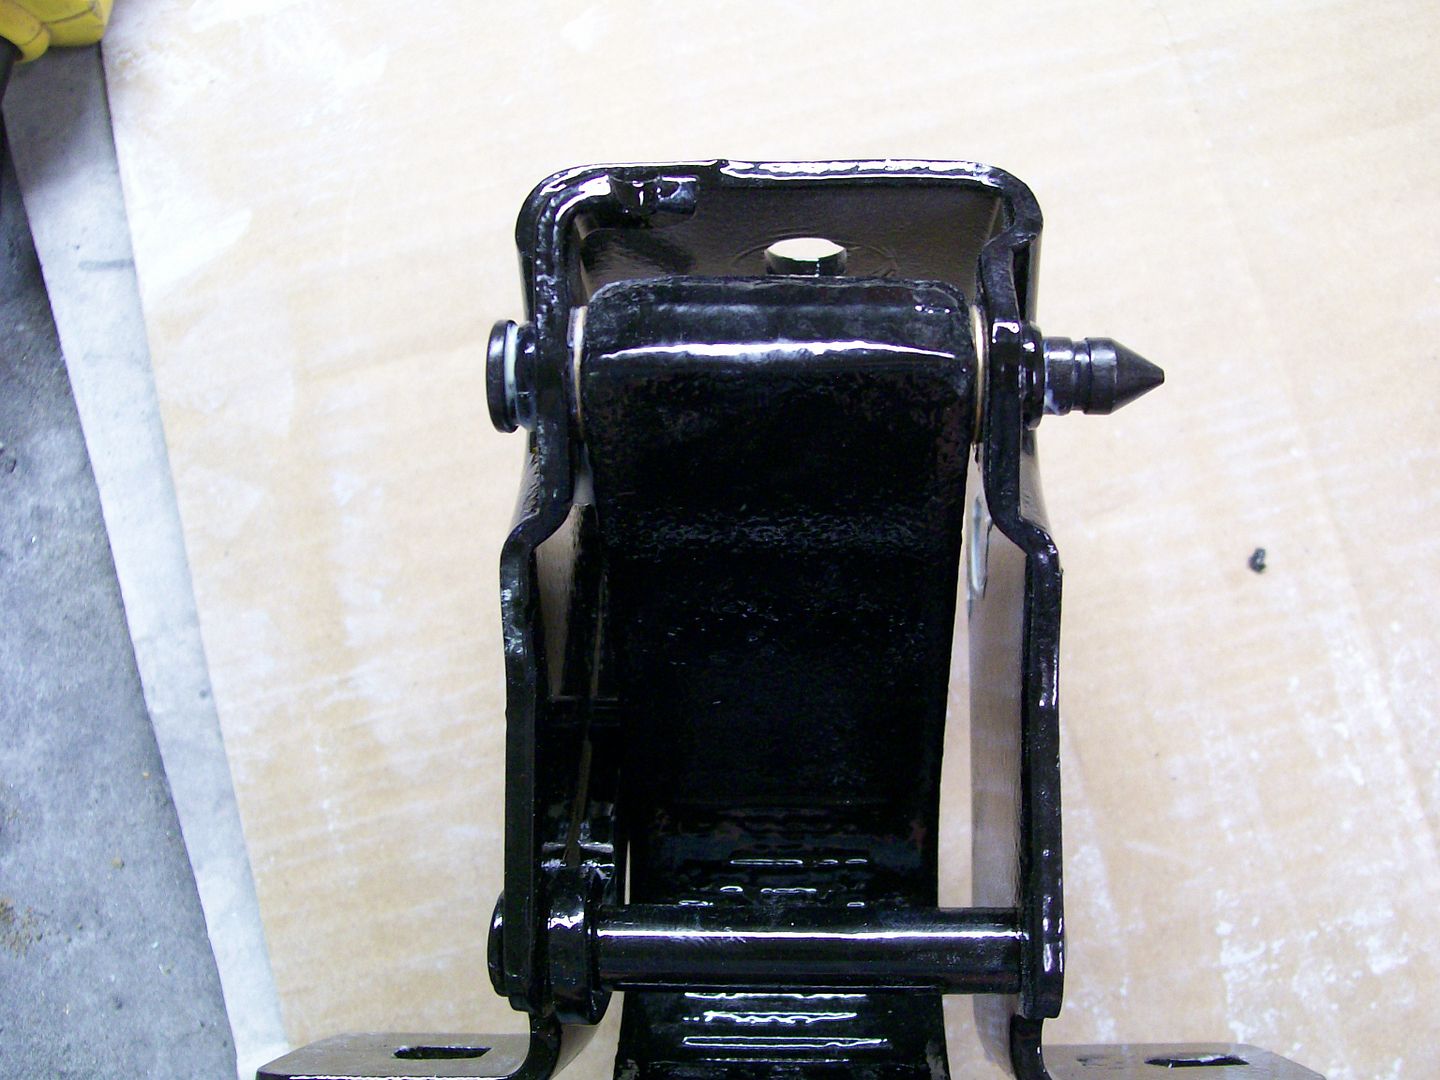
__________________
My 57 Chevy truck build.http://67-72chevytrucks.com/vboard/s...d.php?t=541132 |
|
|
|

|
|
|
#512 |
|
Registered User
Join Date: Aug 2007
Location: Corona, California
Posts: 7,998
|
Re: 1957 Chevy truck re-rebuild
Hinges look real nice.
Kim |
|
|

|
|
|
#513 |
|
Registered User
Join Date: Dec 2011
Location: Mobile, Alabama
Posts: 996
|
Re: 1957 Chevy truck re-rebuild
Nice design on the hood brace. May have to steal the design. Just tried to reuse my hood cross brace. It hits the 5.3 which I expected. Yours would easily clear.
__________________
My Build - http://67-72chevytrucks.com/vboard/s...d.php?t=515876 |
|
|

|
|
|
#514 | |
|
Registered User
Join Date: Aug 2012
Location: Salem Mo
Posts: 652
|
Re: 1957 Chevy truck re-rebuild
Quote:
Working some over time at work and just trying to get through all the odds and ends, progress is slow but moving forward. I choose to keep the original tank location, yet I didn't want to trust the original tank so I ordered a new one. Then just to be on the safe side I treated the inside with tank sealant as an insurance for non leakage. Then scuffing the outside and priming then satin black. 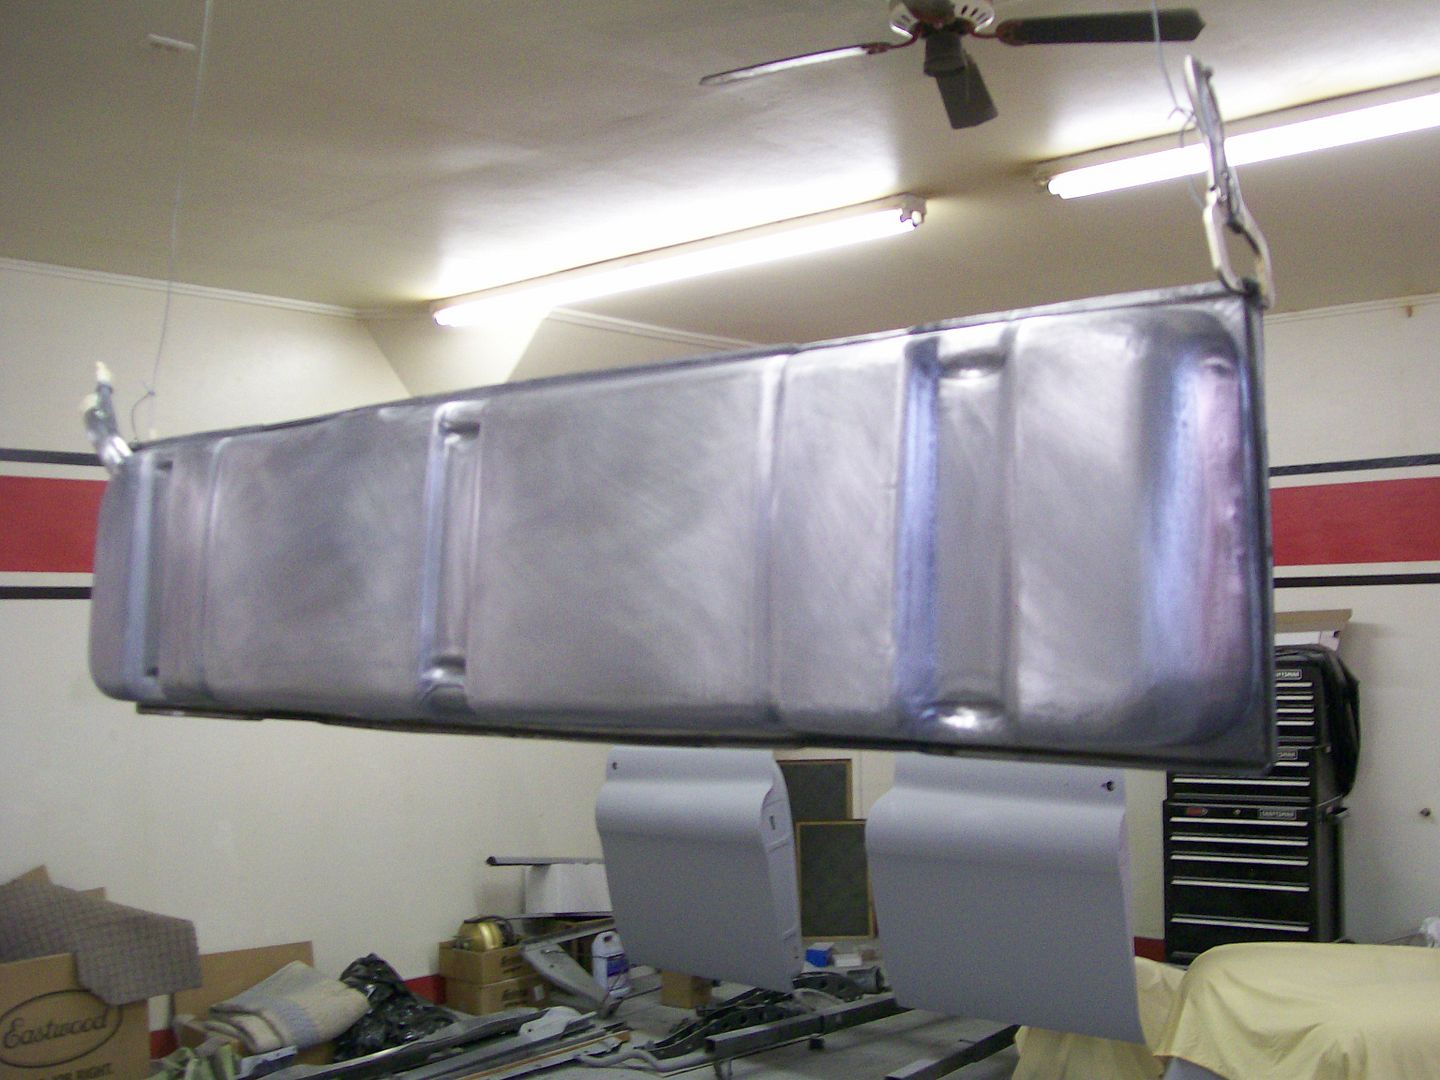 I forgot to take a picture of it painted in the shop, but here it is sitting in place in the truck. 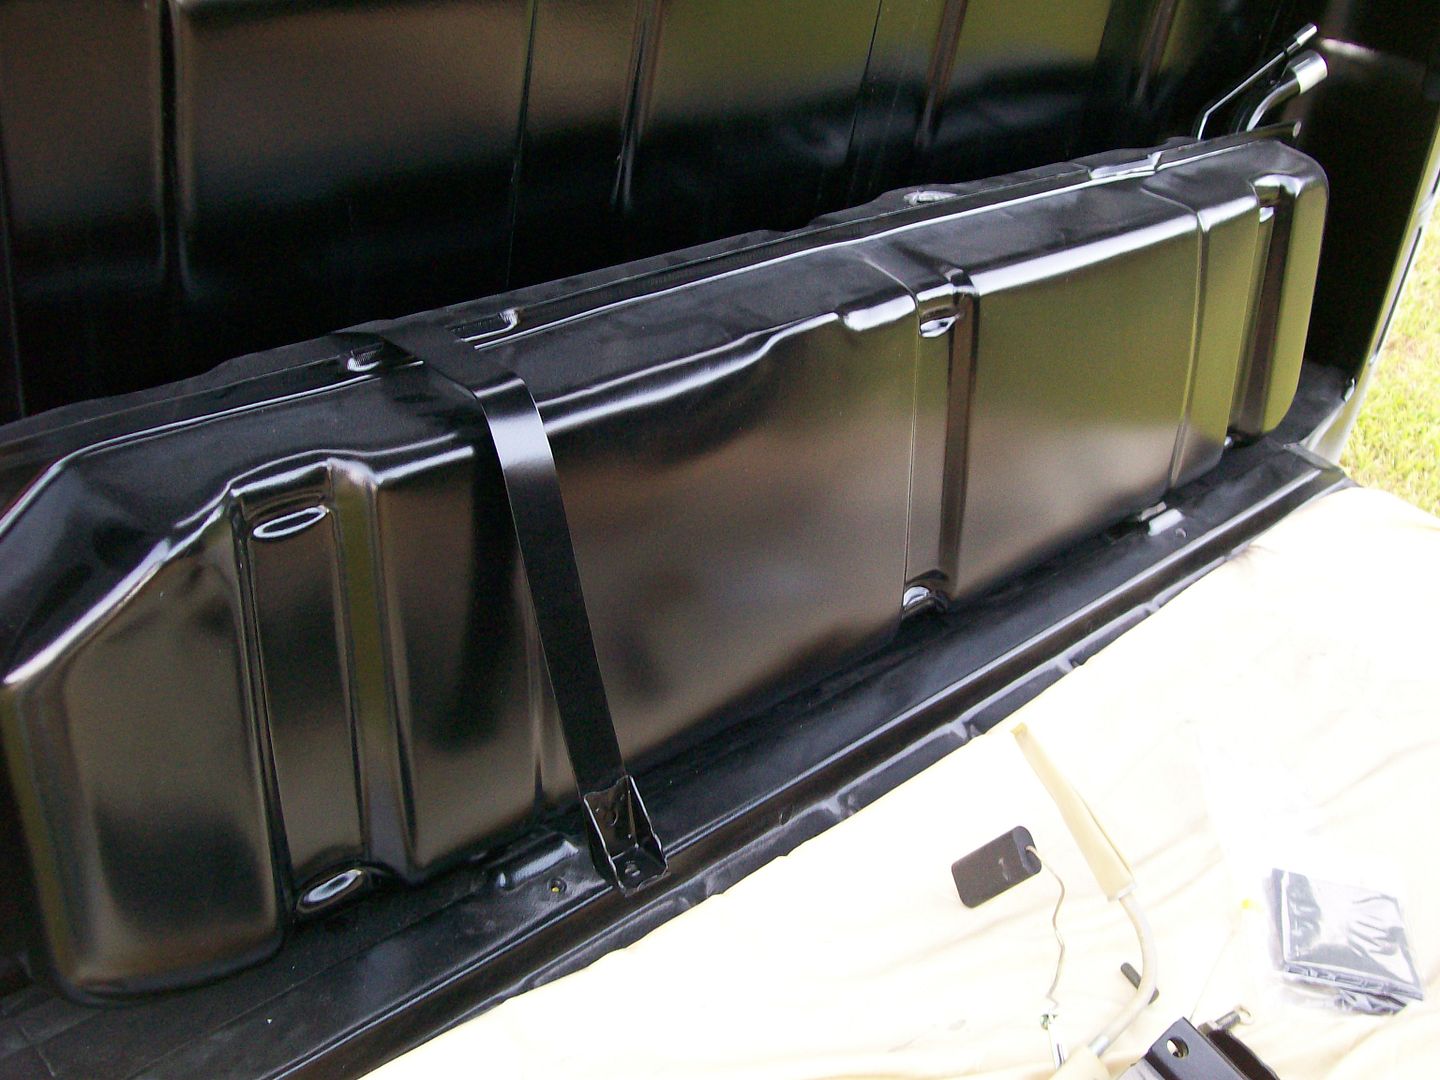 I'm looking forward to getting the drive train back in place but the transmission needs the longer tail shaft to match the longer adapter for the Gear Vendors over drive that I had to get to accommodate the "X" pipe exhaust system. Yes, there's a song here.... One thing, one thing, leads to another. One Turbo 350 ready for a new tail shaft. 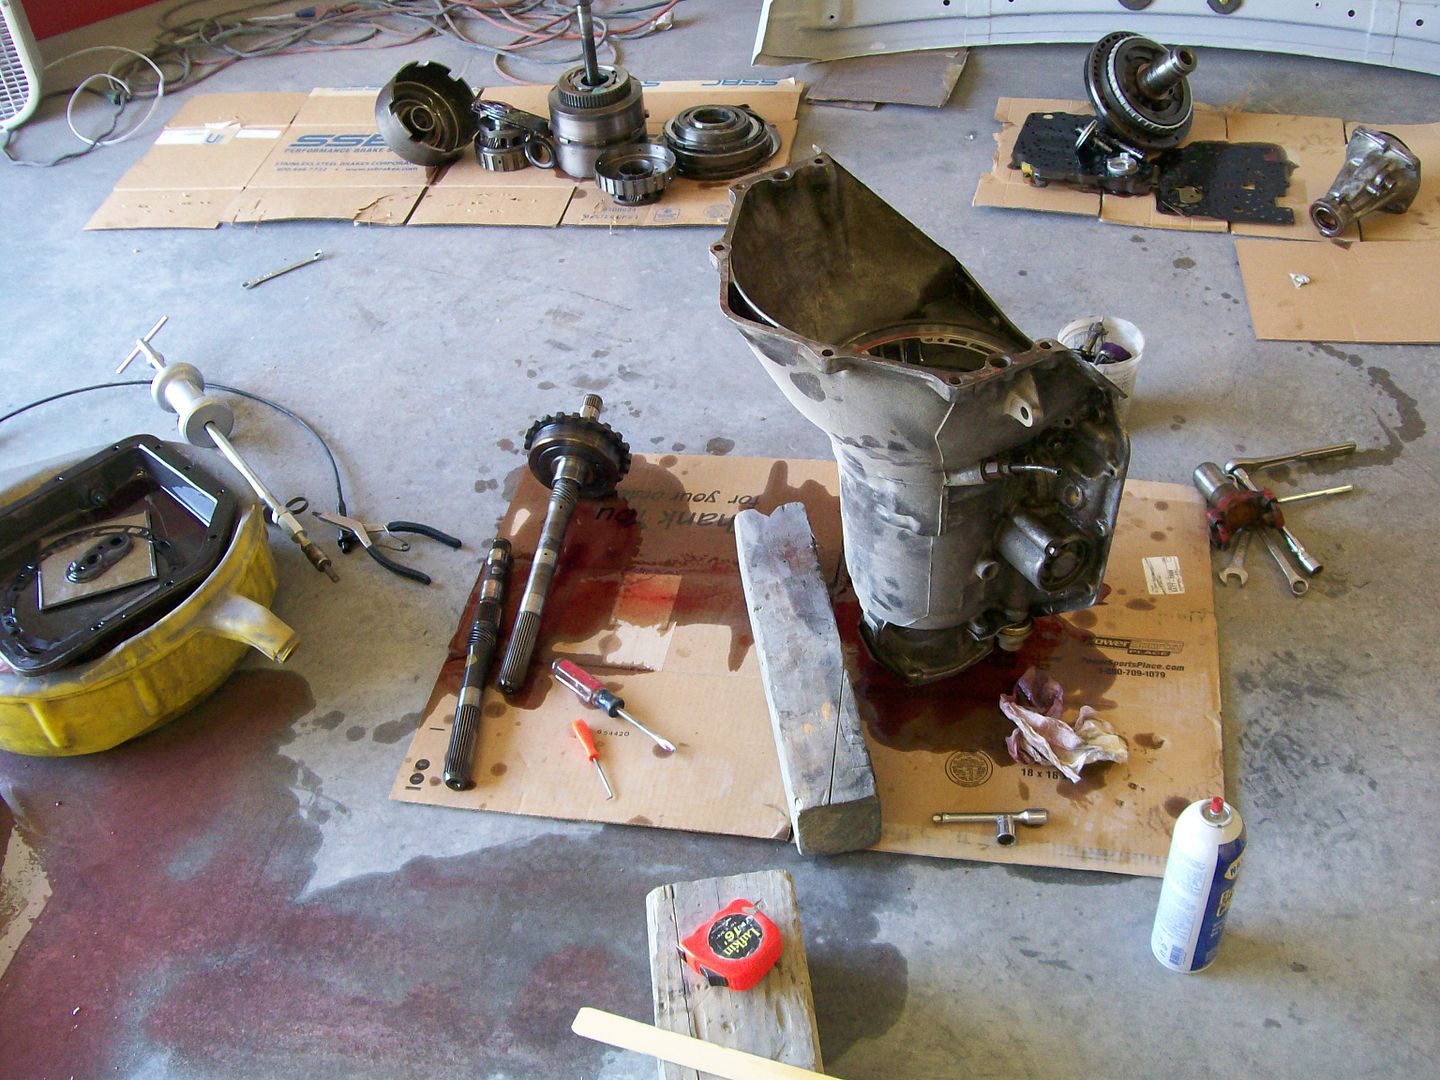 One Turbo 350 with a tail shaft sticking out the rear about 3'' extra, just what I needed. The tail shaft housing will be removed as the adapter will be replacing it later.  Putt, putt, surely but slowly I really want to see this thing rolling down the road before winter.
__________________
My 57 Chevy truck build.http://67-72chevytrucks.com/vboard/s...d.php?t=541132 |
|
|
|

|
|
|
#515 |
|
Registered User
Join Date: Aug 2007
Location: Corona, California
Posts: 7,998
|
Re: 1957 Chevy truck re-rebuild
Coming along nicely.
Kim |
|
|

|
|
|
#516 |
|
Registered User
Join Date: Aug 2012
Location: Salem Mo
Posts: 652
|
Re: 1957 Chevy truck re-rebuild
As with many others this project is one large project consisting of a whole bunch of small ones. Tonight I'm focusing on an area that I've many others ponder what to do with the exposed wires and steering column mounting clamp when using a GM column.
I had an idea of what I wanted but couldn't picture in my head a good design so I built, then modified. My original idea, something that went covered the area. 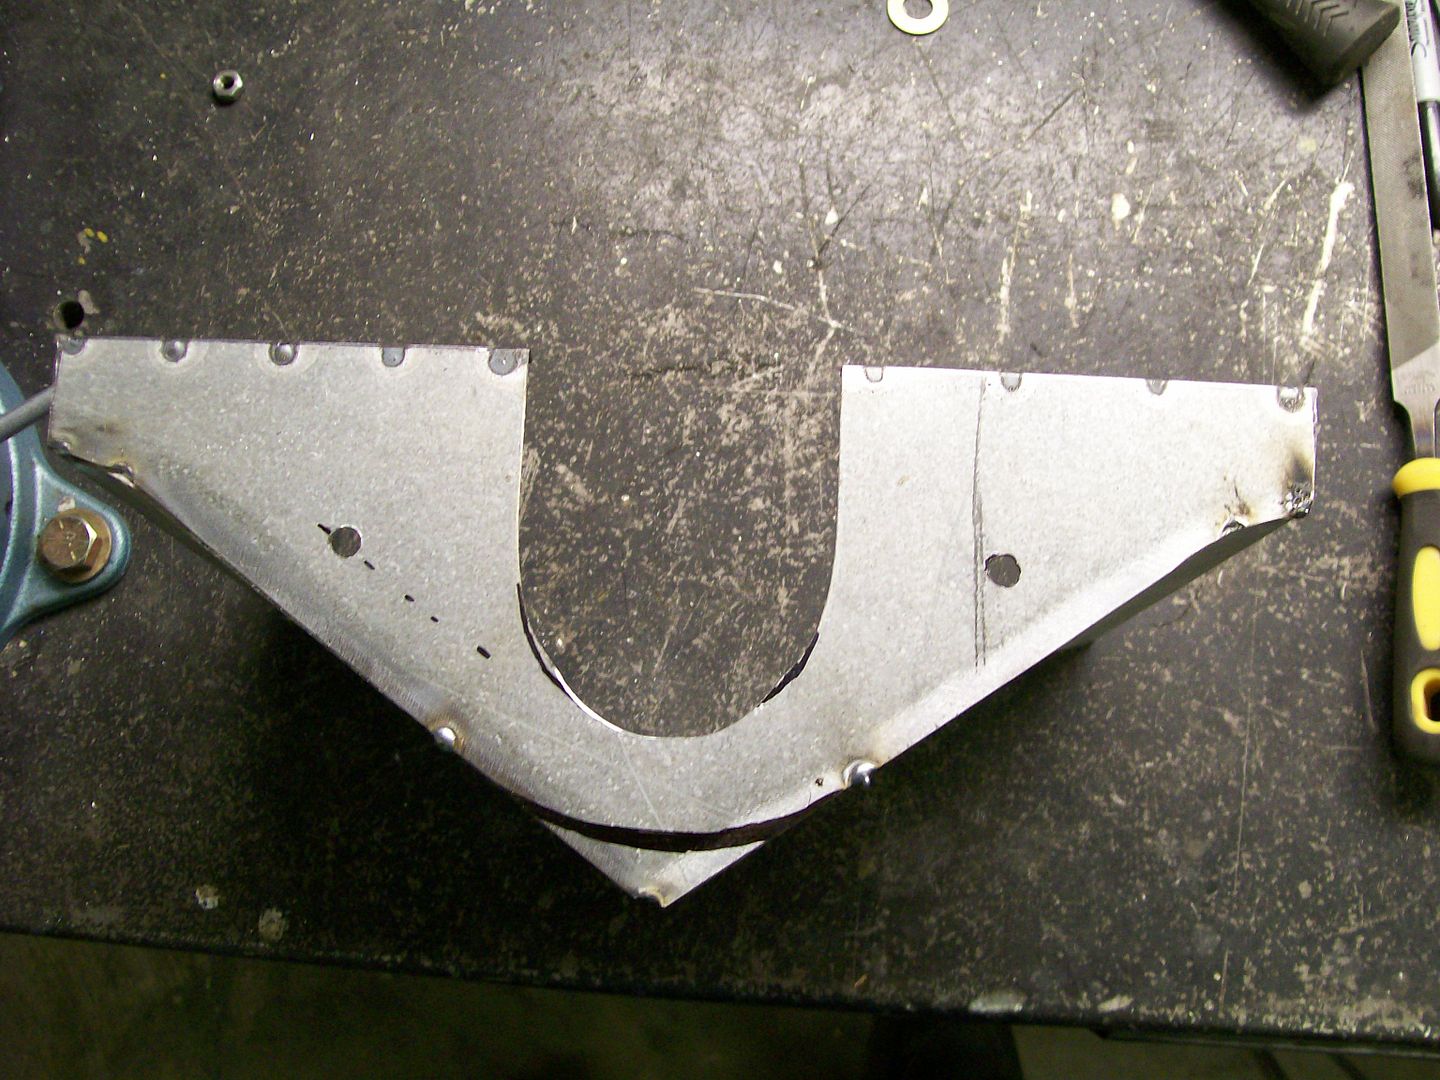 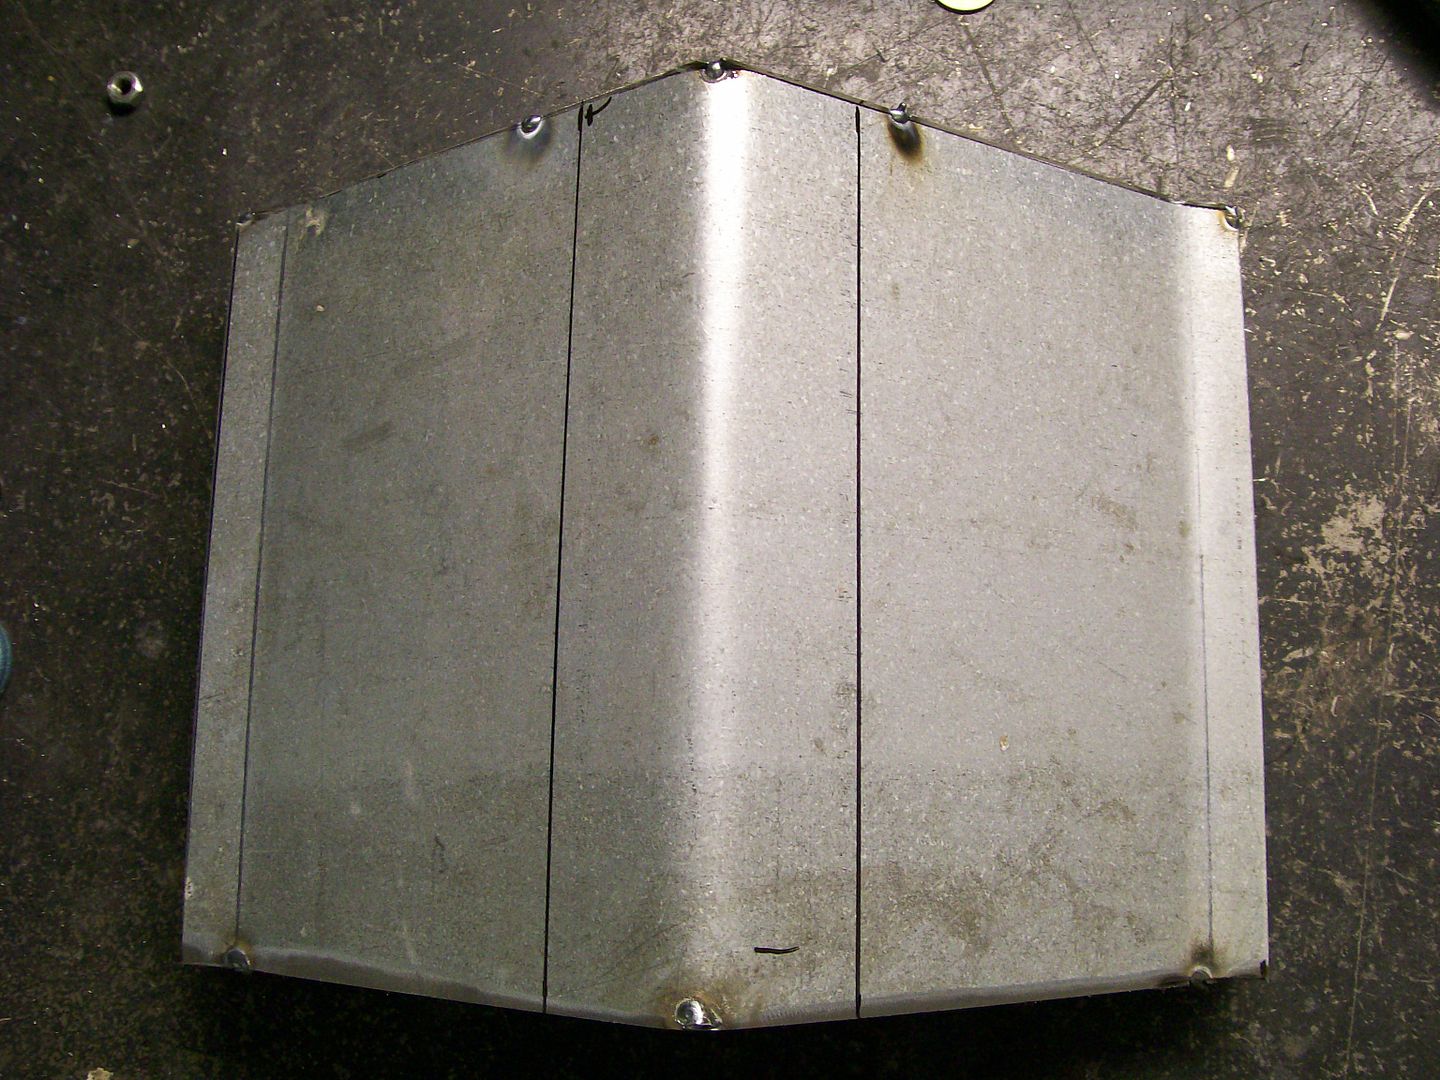 From the pics above I smoothed the edges and rounded the bottom. I made a upper plate that will go above the column to cover the top half up to the dash of the truck. 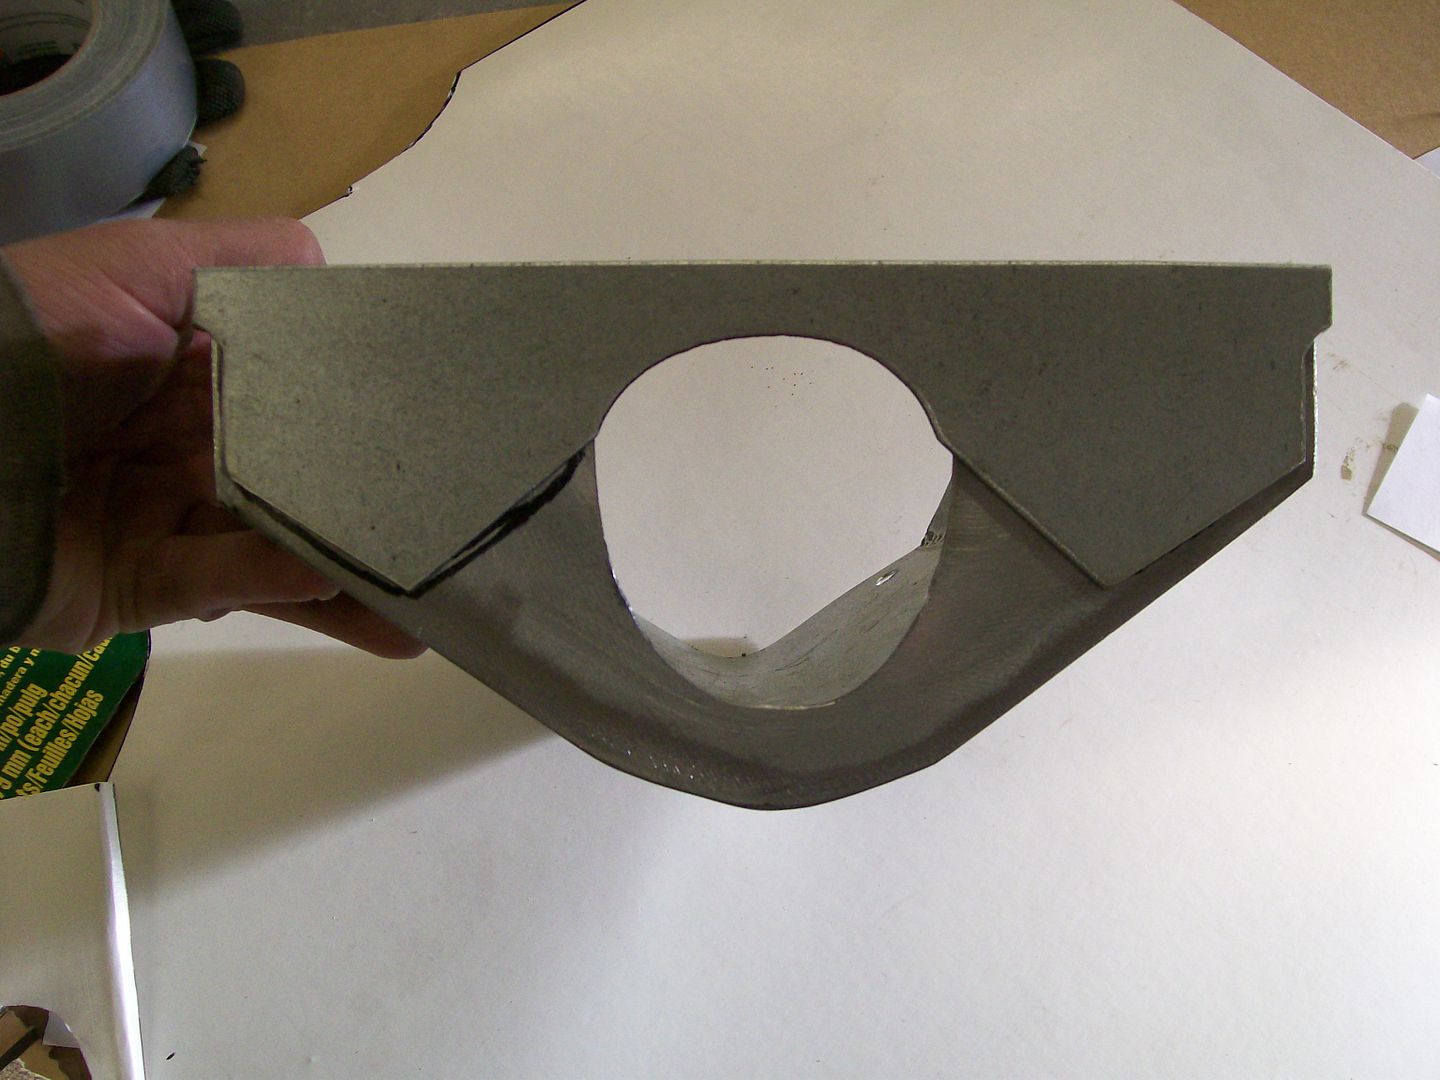 Finally satisfied with the design I sand blasted then used a thin layer of glazing putty to smooth the surface, after the putty came epoxy primer and high build primer. Then a final block sanding and ready for paint. 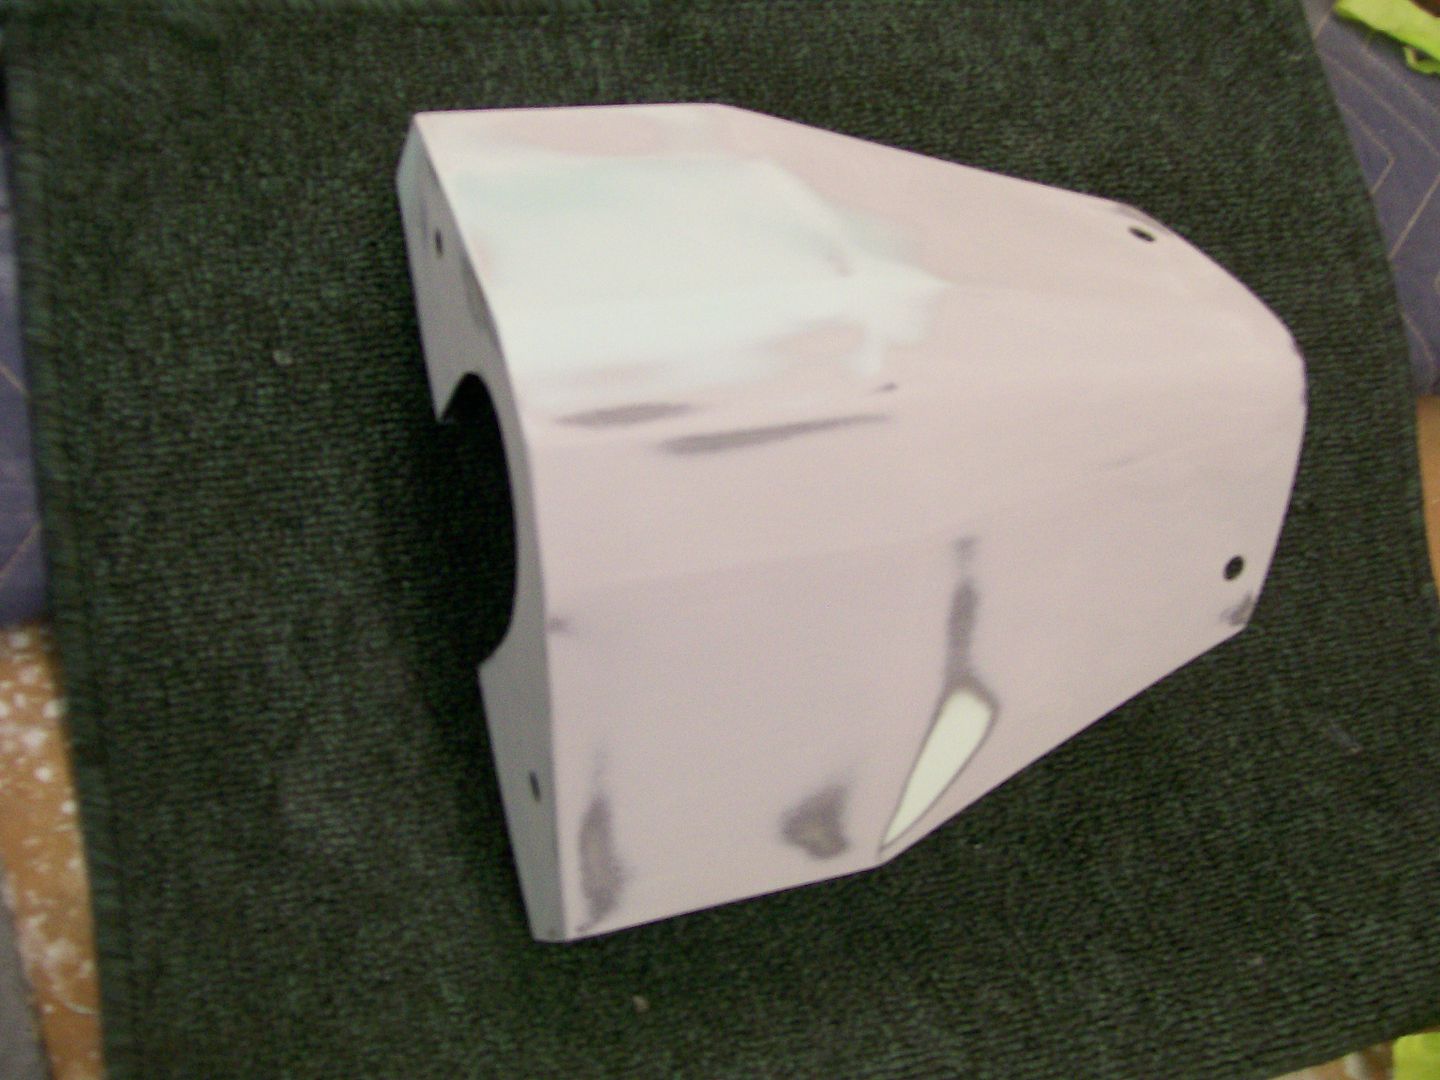 Same process for painting, clearing and cut and buffing.  I'm still piecing the dash parts together to confirm everything is still gonna fit after painting. Without a cover under the column, exposed wires and holding clamp.  Cover now in place, no clamp, no wires. 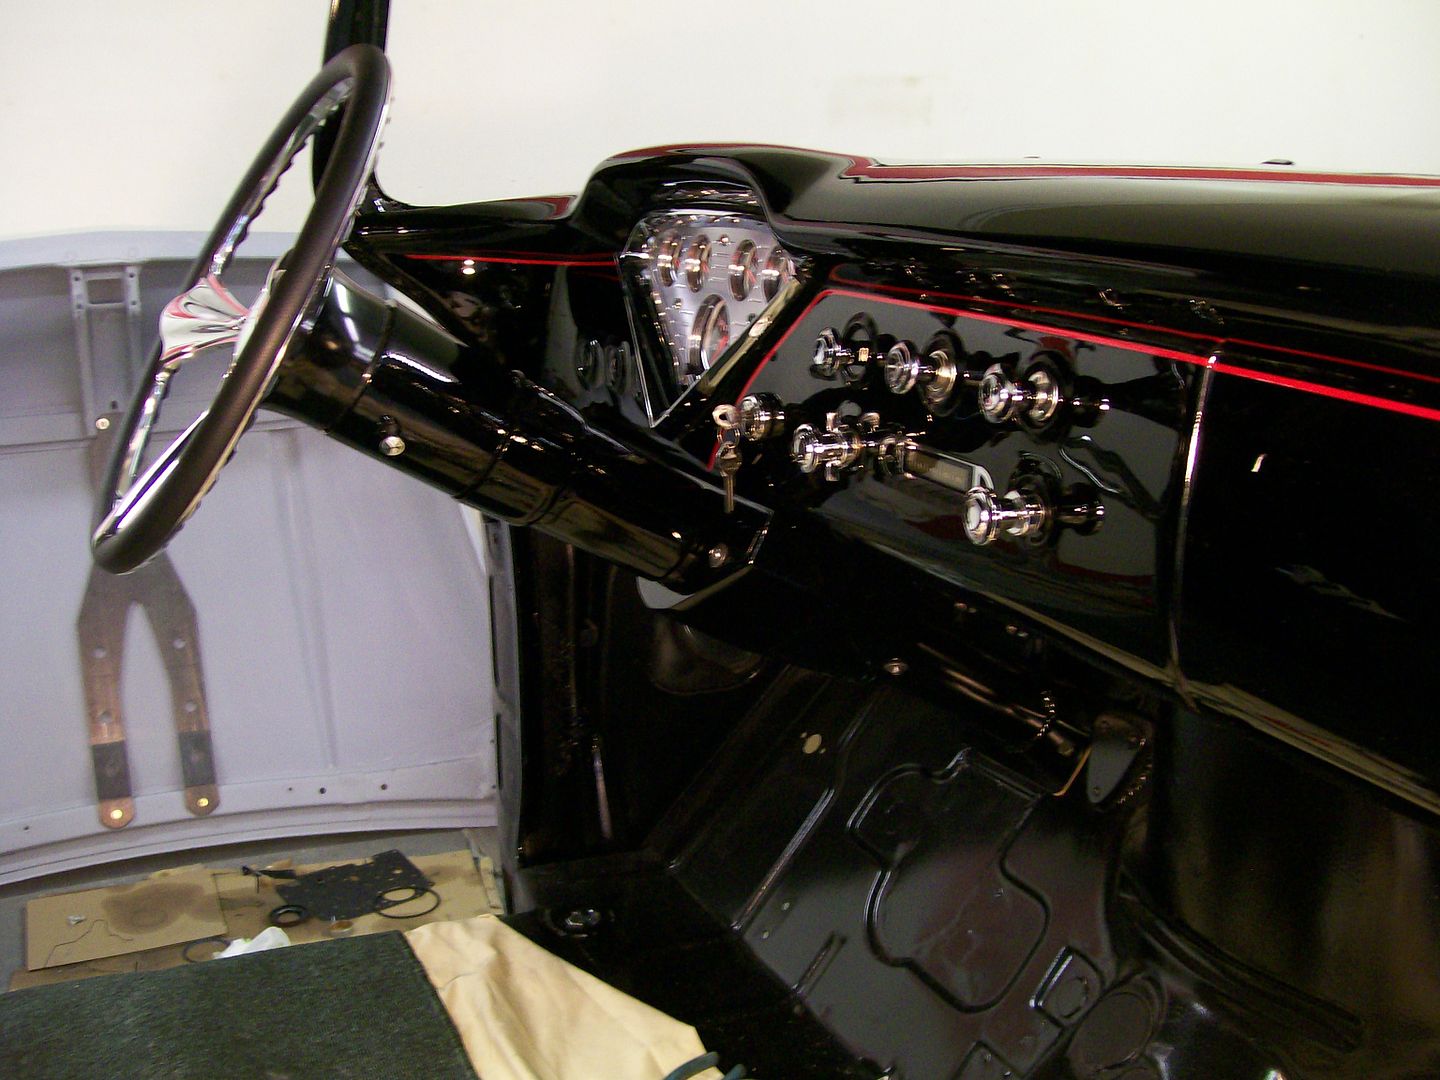 A look from the other side.  I've found these flat stainless washers that have a thin layer of rubber on one side, I really like them, I can tight up against the painted surfaces and not damage the paint. This is where the build thread and all the pictures come together, it's gonna be fun taking pictures from the last couple of years and combine them for a before and after story.
__________________
My 57 Chevy truck build.http://67-72chevytrucks.com/vboard/s...d.php?t=541132 Last edited by Stepside Jim; 08-17-2014 at 08:56 PM. |
|
|

|
|
|
#517 |
|
Registered User
Join Date: Apr 2011
Location: .
Posts: 3,104
|
Re: 1957 Chevy truck re-rebuild
Really like that column cover. That is Slick
|
|
|

|
|
|
#518 |
|
Registered User
Join Date: Oct 2013
Location: Oklahoma City Okla
Posts: 196
|
Re: 1957 Chevy truck re-rebuild
Thanks for posting. I like the attention to detail and how you solved a problem. Like the work.
Dwight |
|
|

|
|
|
#519 |
|
Registered User
Join Date: Jul 2008
Location: Buckeye, Arizona
Posts: 694
|
Re: 1957 Chevy truck re-rebuild
That looks sweet, where is it attached at?
__________________
"Fear makes the wolf look bigger" http://67-72chevytrucks.com/vboard/s...d.php?t=305629 |
|
|

|
|
|
#520 |
|
Registered User
Join Date: Aug 2007
Location: Corona, California
Posts: 7,998
|
Re: 1957 Chevy truck re-rebuild
That's real nice.
I may have to copy it when I get there on mine. Kim |
|
|

|
|
|
#521 |
|
Registered User
Join Date: Aug 2013
Location: Adelaide, South Australia
Posts: 241
|
Re: 1957 Chevy truck re-rebuild
Good job on the steering column cover. Nice touch
__________________
Nev Need a bigger garage so I can keep more cool cars alive My build, a long way to go.  http://67-72chevytrucks.com/vboard/s...d.php?t=595909 |
|
|

|
|
|
#522 |
|
Registered User
Join Date: Aug 2012
Location: Salem Mo
Posts: 652
|
Re: 1957 Chevy truck re-rebuild
First, thanks everybody, like I mentioned, it seems these exposed wires and clamp is an eye sore for everyone, I knew somehow I was going to get them taken care of, I just had to keep trimming and reshaping my original piece.
As for mounting it I simply welded a web/gusset on the main column clamp, then drilled 2 holes and used rubber well nuts that have a regular metal nut with in them. Once tightened they hold well, when loose, they allow a little wiggle room. 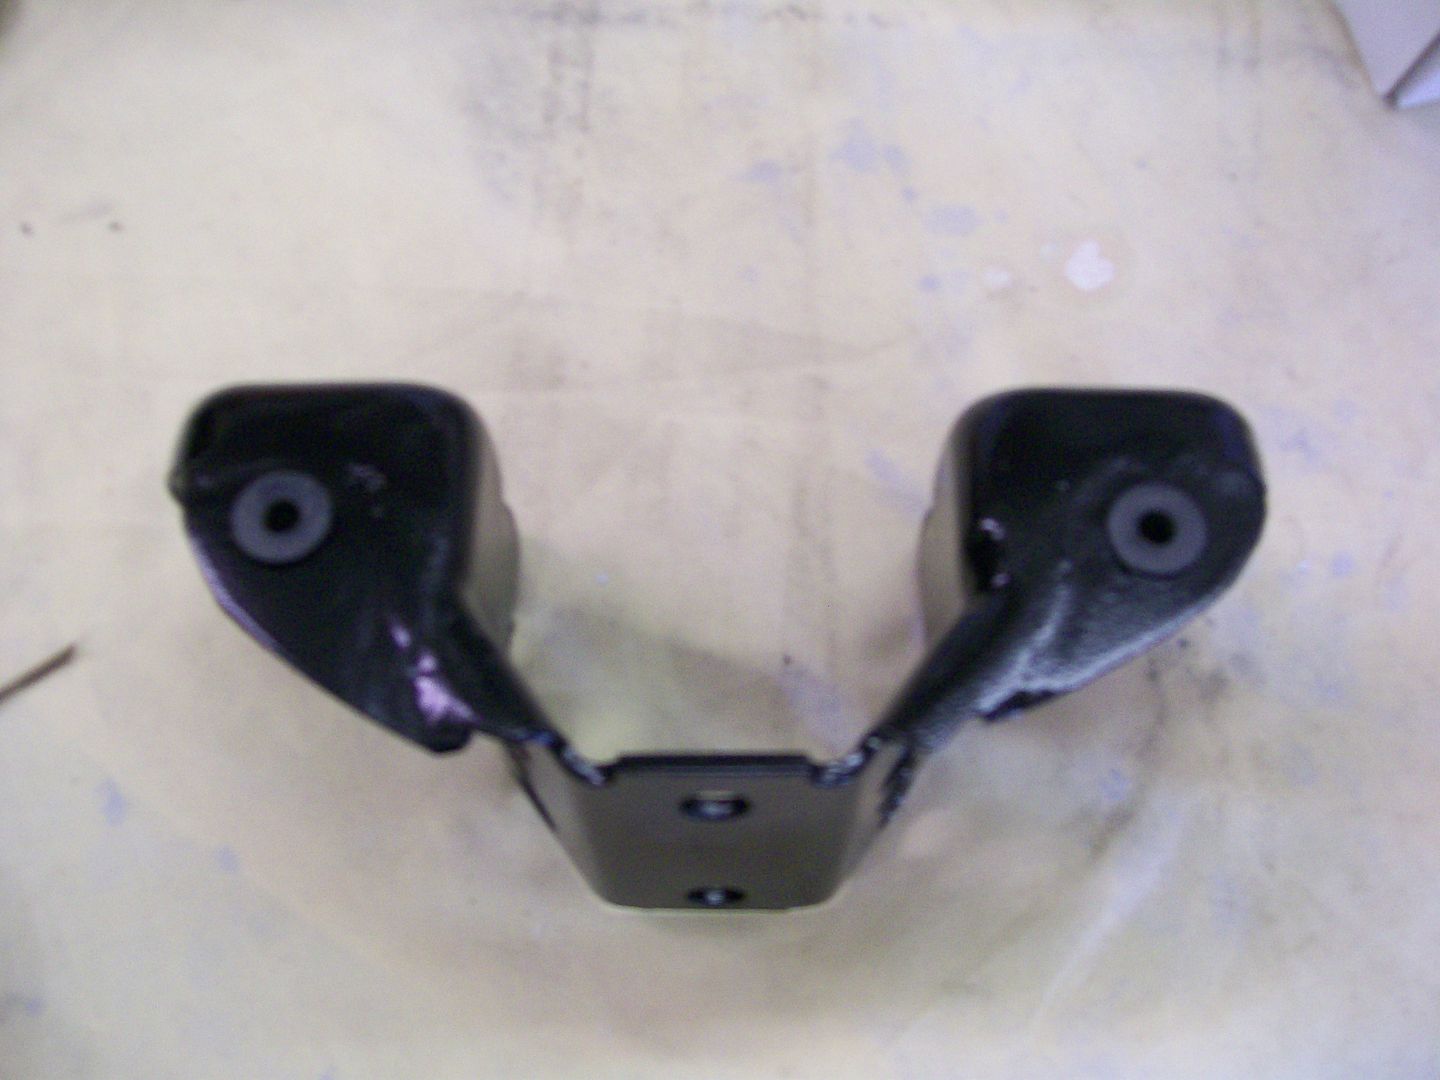 Ok, for the attaching nut on the lower side you have to realize the main clamp in the picture above has slotted mounting holes, what I found was, each time I removed and re-tightened the main clamp, the distance changed from the clamp mounting holes to the lower mounting holes, grrrrrrr, then I had to force the bolts in place. And no, loosening the main clamp and attaching the cover first was not an option, once the cover is in place, I can't get to the main clamp bolts to tighten them after the cover is on.. Notice the lower mounting holes, I made drop brackets holding the nuts. Now if the distance changes, I can simply bend the bracket slightly to move the nut where I need to so the holes in the cover match the lower mounting nuts.  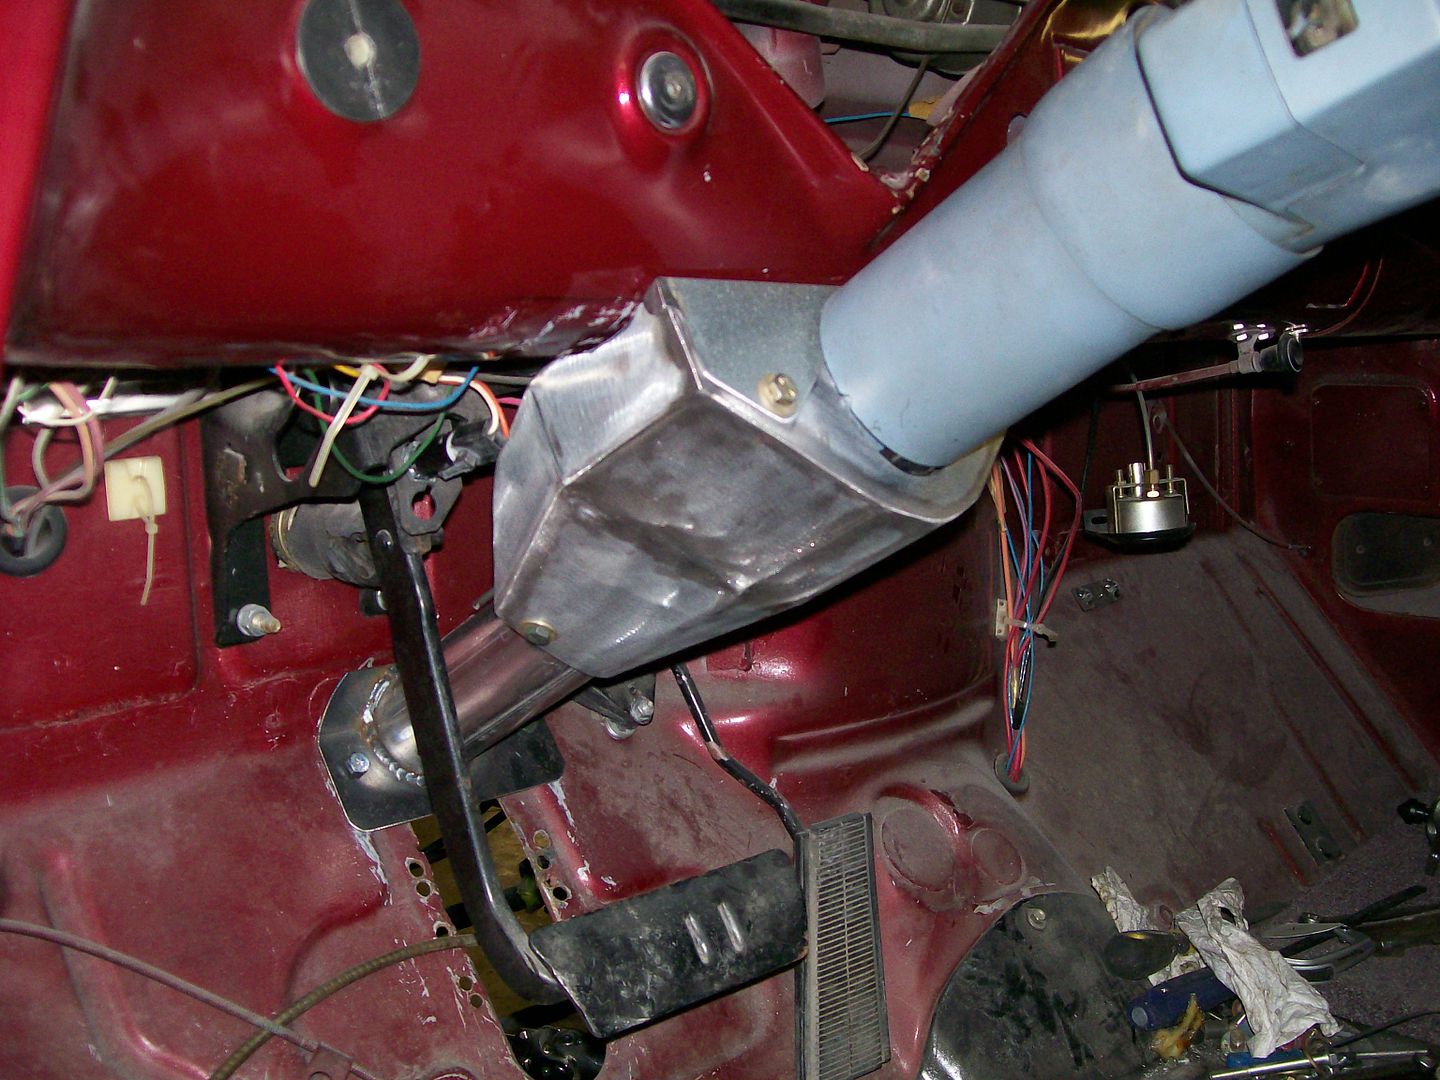 Yes, I know, sometimes I tend to complicate things, on the other hand, I'd rather foresee an issue during mock-up, than fight something after painting.
__________________
My 57 Chevy truck build.http://67-72chevytrucks.com/vboard/s...d.php?t=541132 |
|
|

|
|
|
#523 |
|
Senior Member
  Join Date: Nov 2008
Location: Glendora, CA
Posts: 6,339
|
Re: 1957 Chevy truck re-rebuild
I'm surprised no one has yet offered (as far as I know) a cover like this commercially given all the trucks like ours with aftermarket modern steering columns.
PS: What's the third switch hole on the left side of the column for?
__________________
'55 Big Window Shortbed, Drive-It-&-Work-On-It slid down the "slippery slope" to a Frame-Off Rodstoration! LQ4/4l85e/C4 IFS/Mustang 8.8 rearend w/3.73's Dan's '55 Big Window "Build" - Well, Kinda! |
|
|

|
|
|
#524 | |
|
Registered User
Join Date: Aug 2012
Location: Salem Mo
Posts: 652
|
Re: 1957 Chevy truck re-rebuild
Quote:
The far left hole is for the headlight switch, the far right hole is for a manual choke cable and the new center hole is for a master switch for switches I will have in the front of the center counsel between the seats. There will be the individual switches for the exhaust cut outs, line lock and nitrous. By having a master switch for these items I don't have to worry about anybody messing around without my permission.
__________________
My 57 Chevy truck build.http://67-72chevytrucks.com/vboard/s...d.php?t=541132 |
|
|
|

|
|
|
#525 |
|
Registered User
Join Date: Aug 2012
Location: Salem Mo
Posts: 652
|
Re: 1957 Chevy truck re-rebuild
Since the steering column is the focus right now I figure I'd put together a batch of pictures showing the column going from an ignition switch and automatic transmission lever column to a dash switch/floor shifter column.
It seems to be from a 1978 or newer mid-sized GM. I'm guessing the interior was blue.  The hacksaw and rotary brr is gonna place a part here. Here goes the column shifter mount. 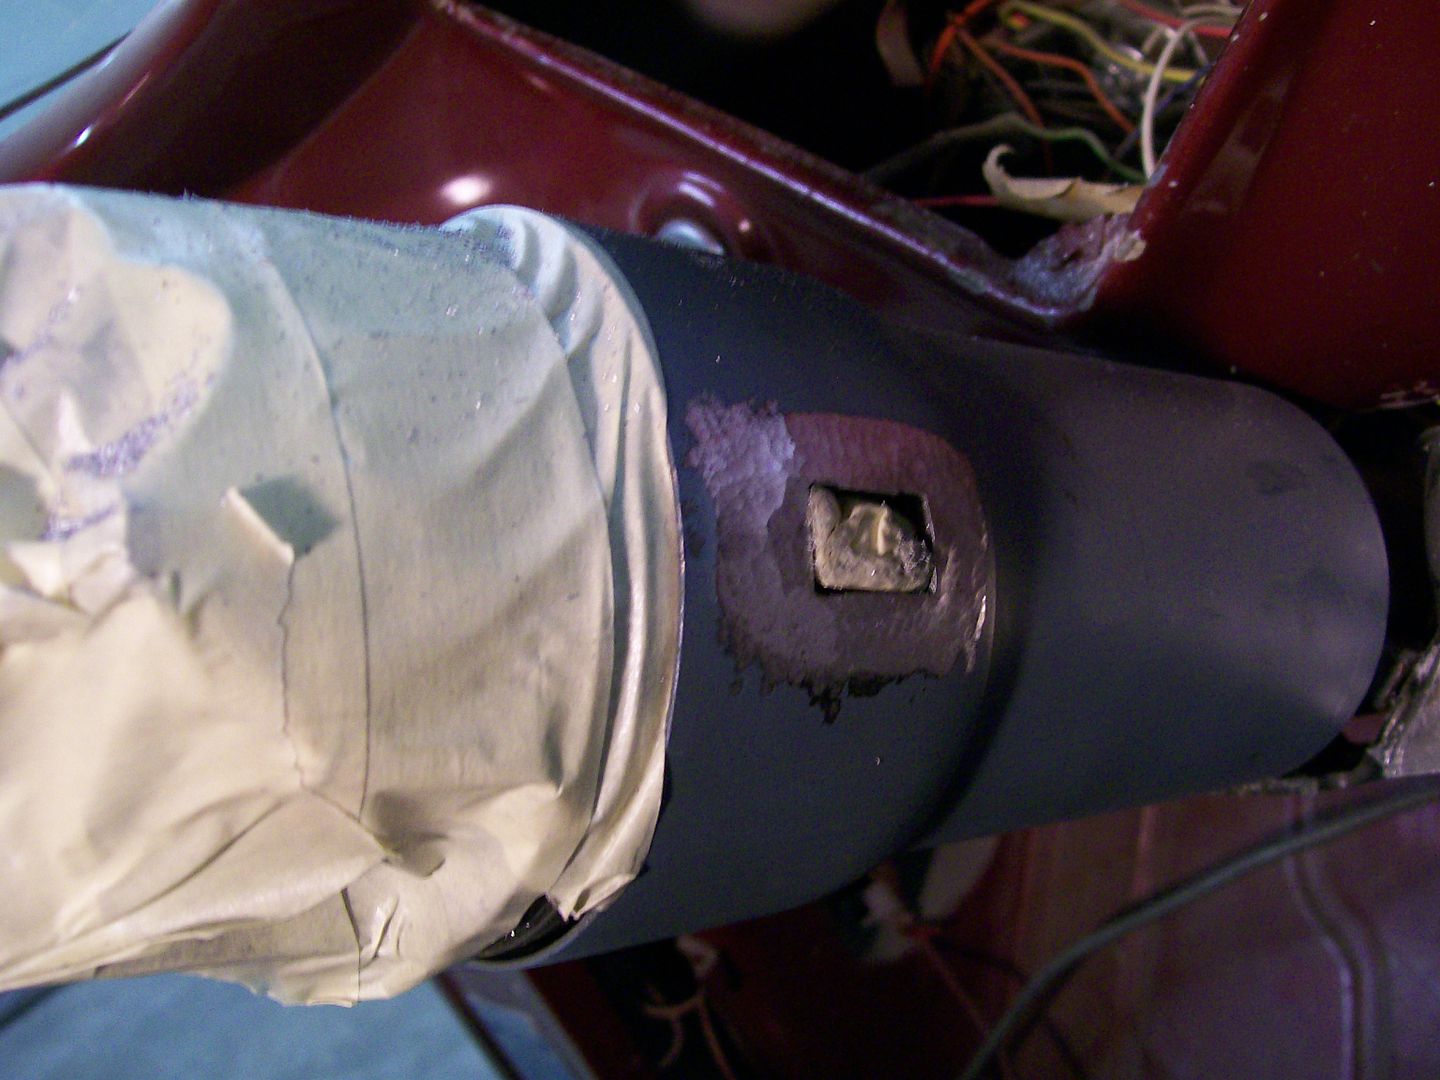 Next up is the ignition switch mount. Once I disassembled the upper part of the column I was able to hold this in the vise and cut off the mount for the switch. 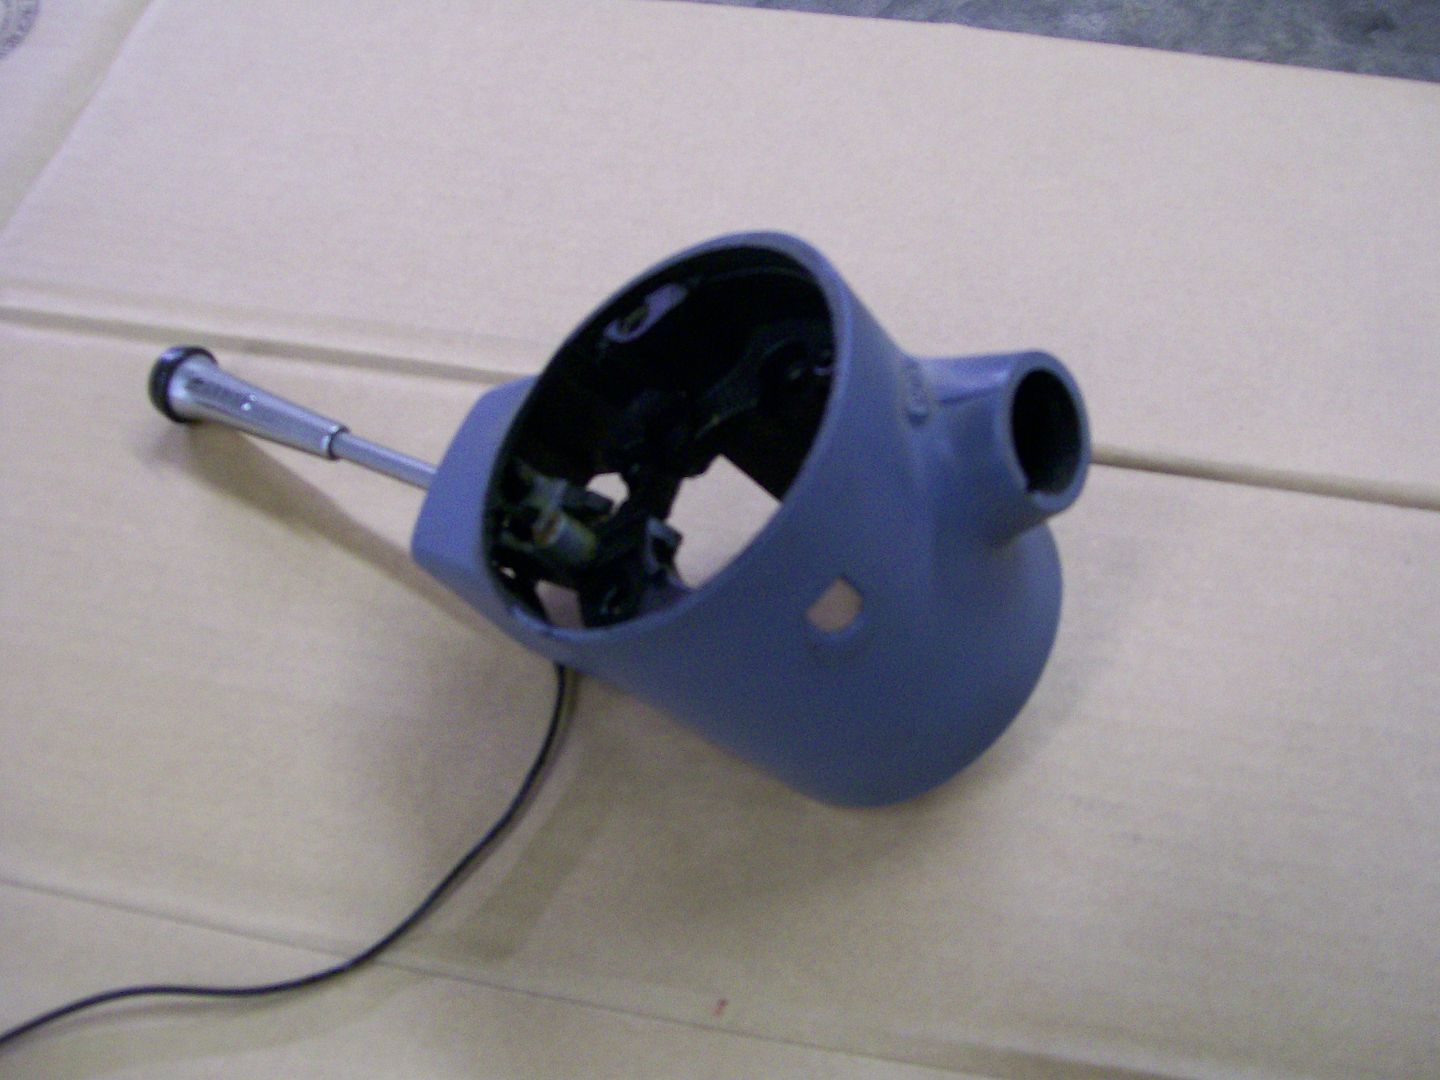 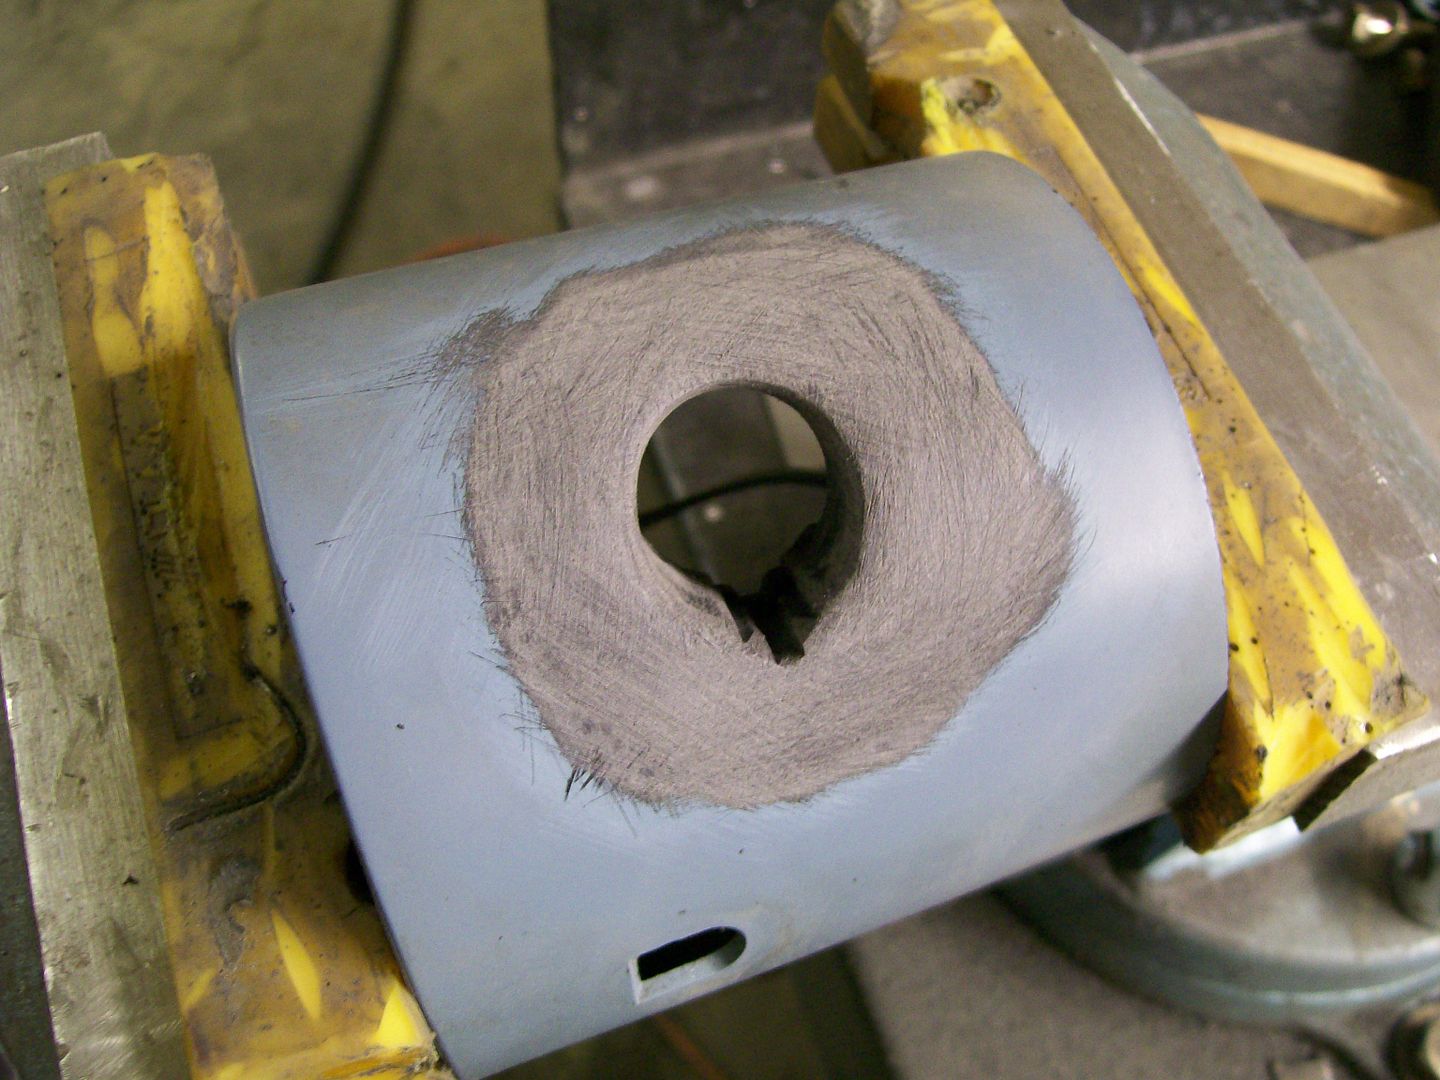 Sorry for the bad pics here.... but I used the rotary brr to cut a recess in both the switch opening and the shifter opening. 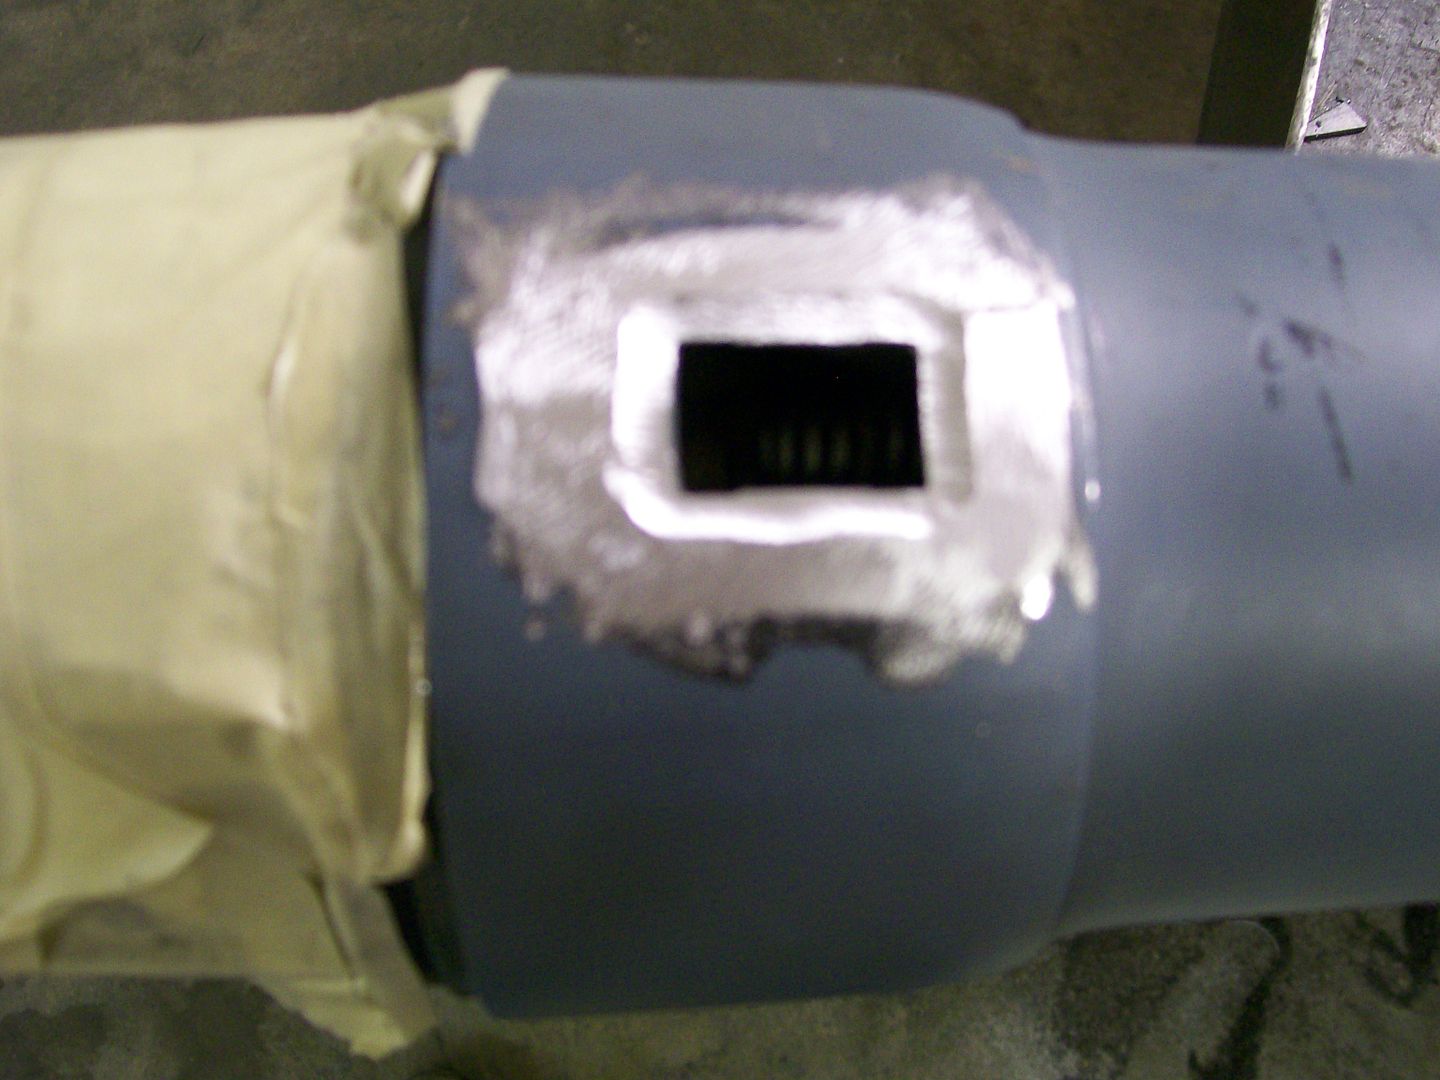 Then for both areas I cut a thin piece of aluminum that fit the recessed areas. 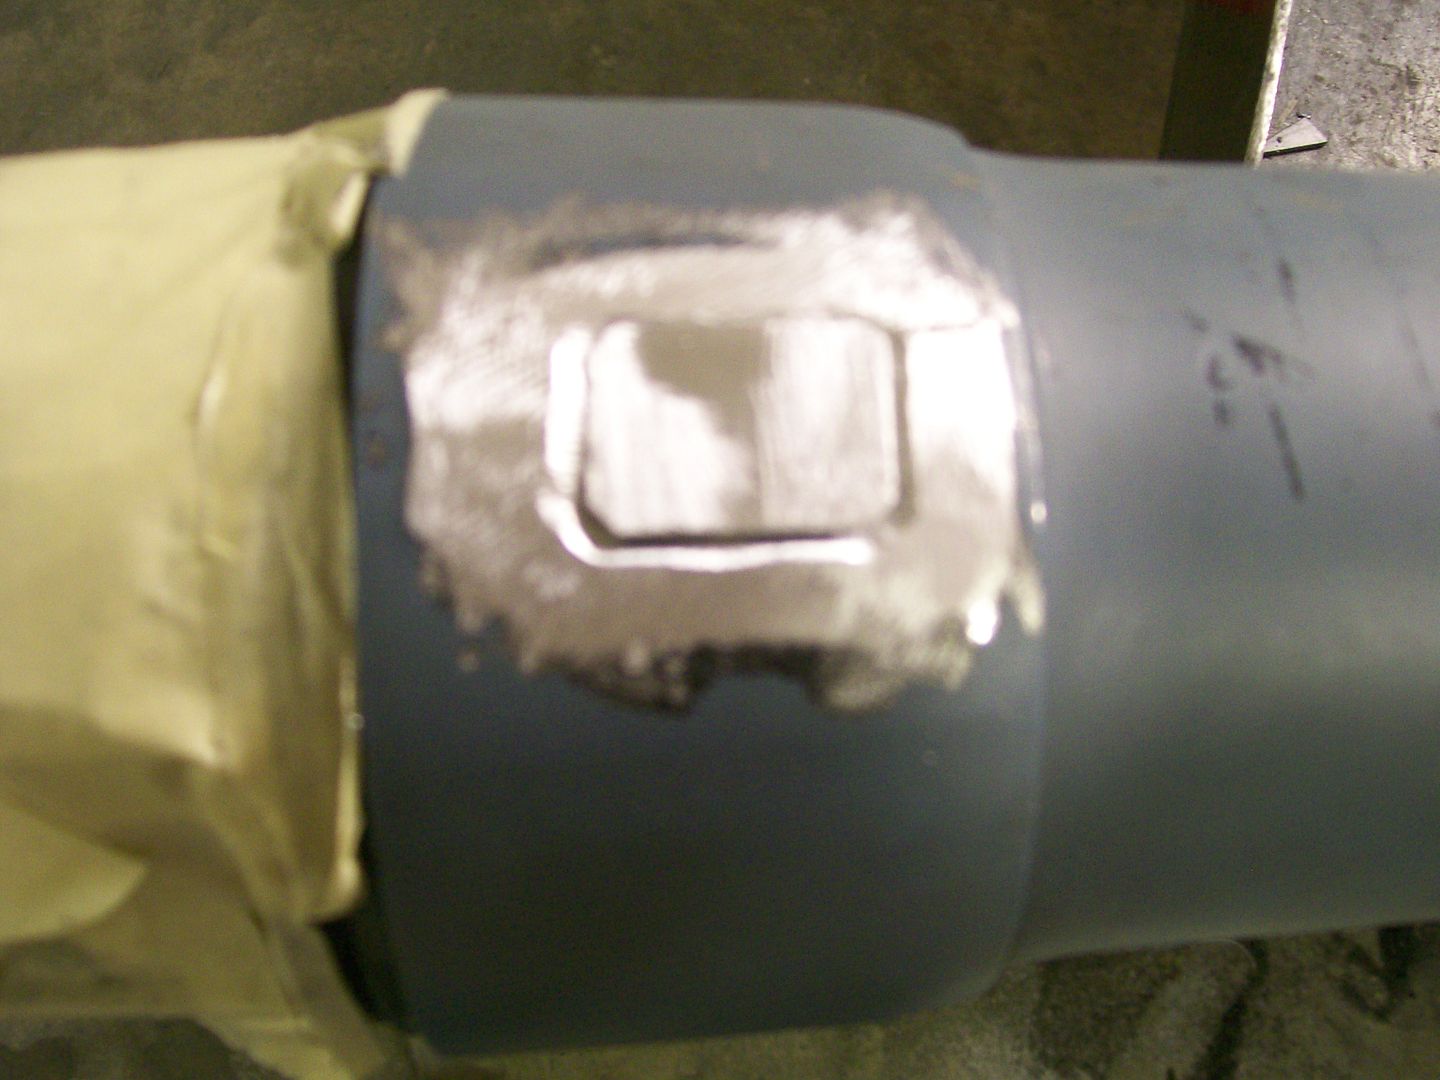 Then using JB weld I glued the aluminum plates in place, then once the plates were dried I scuffed the whole area and used more JB weld to fill and smooth the areas. 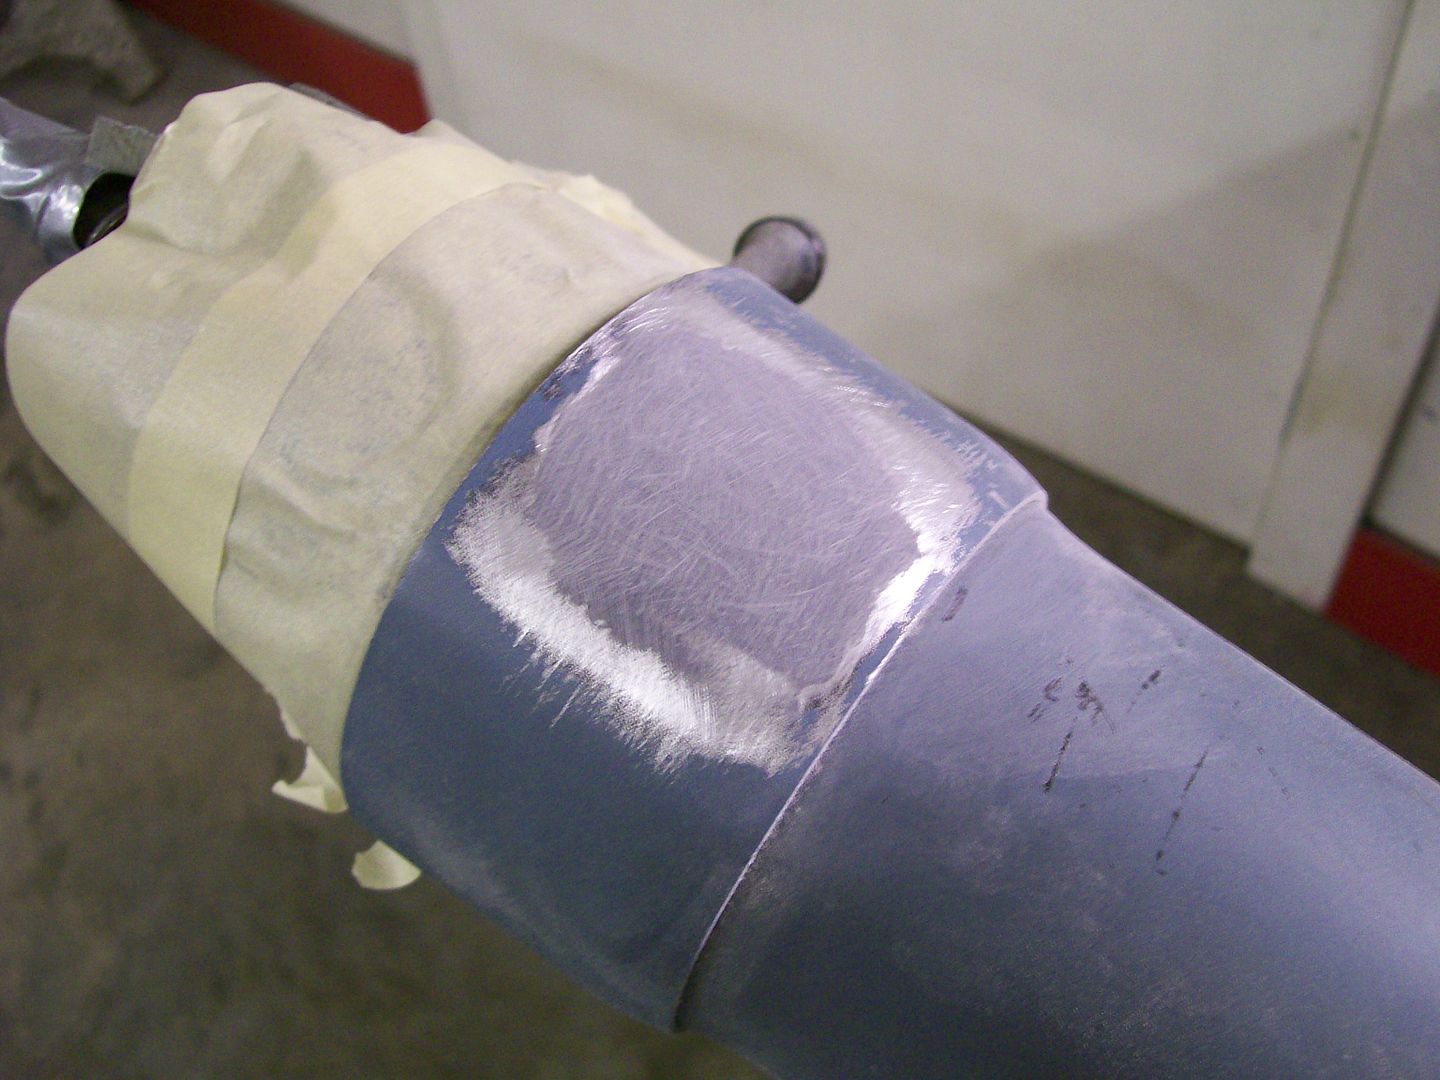 Once the ares were filled an leveled, then the appropriate primers were used before paint. This column had a column dimmer switch but I didn't want it due to the fact that it was seen on the lower part of the column. My lower cover could have covered it but it would have a bulge that I felt would look bulky. Since the turn signal switch moved up and down and side to side it had a large opening were the lever came out, I had to cover part of the opening. I glued in a piece of black plastic in a lower piece. 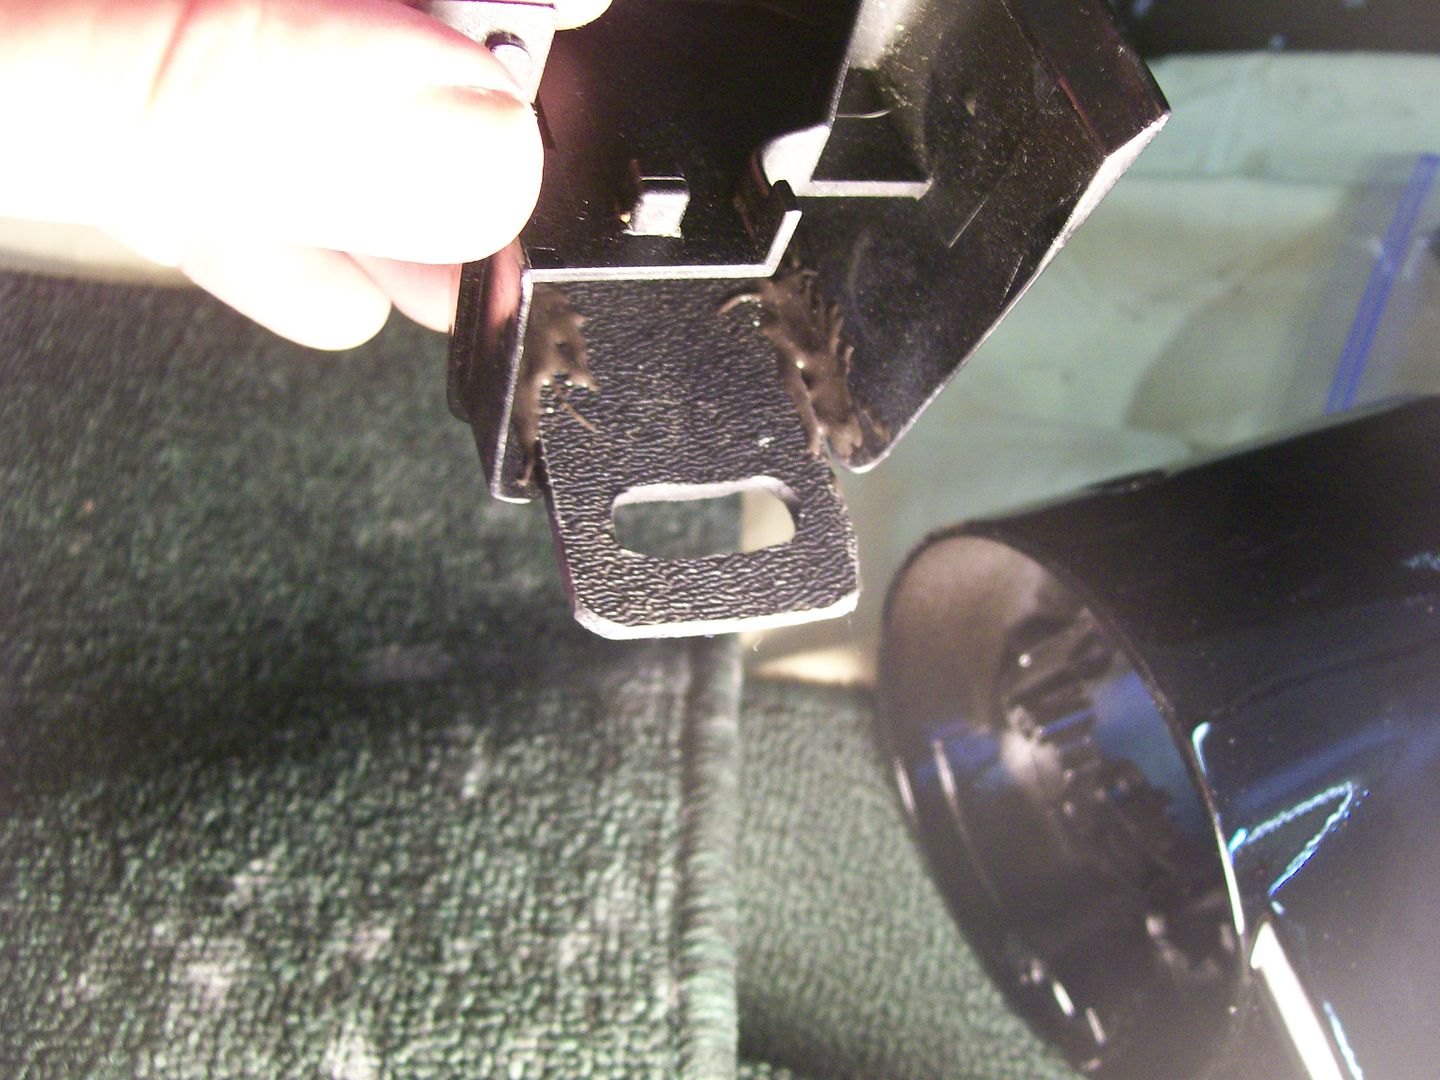 Now when the column pieces are slid together, the plastic extends upward to cover much of the opening except for where the lever needs to move up and down.  I bought Billet Specialties tilt and turn signal handle kit, problem was, it was for the earlier column, not the 1978 and later, I was able to use the outer handles from the kit but had to cut an thread 1/4" stainless rod to get the right length and angle for this column. There we are, a smooth column adapted for the truck. 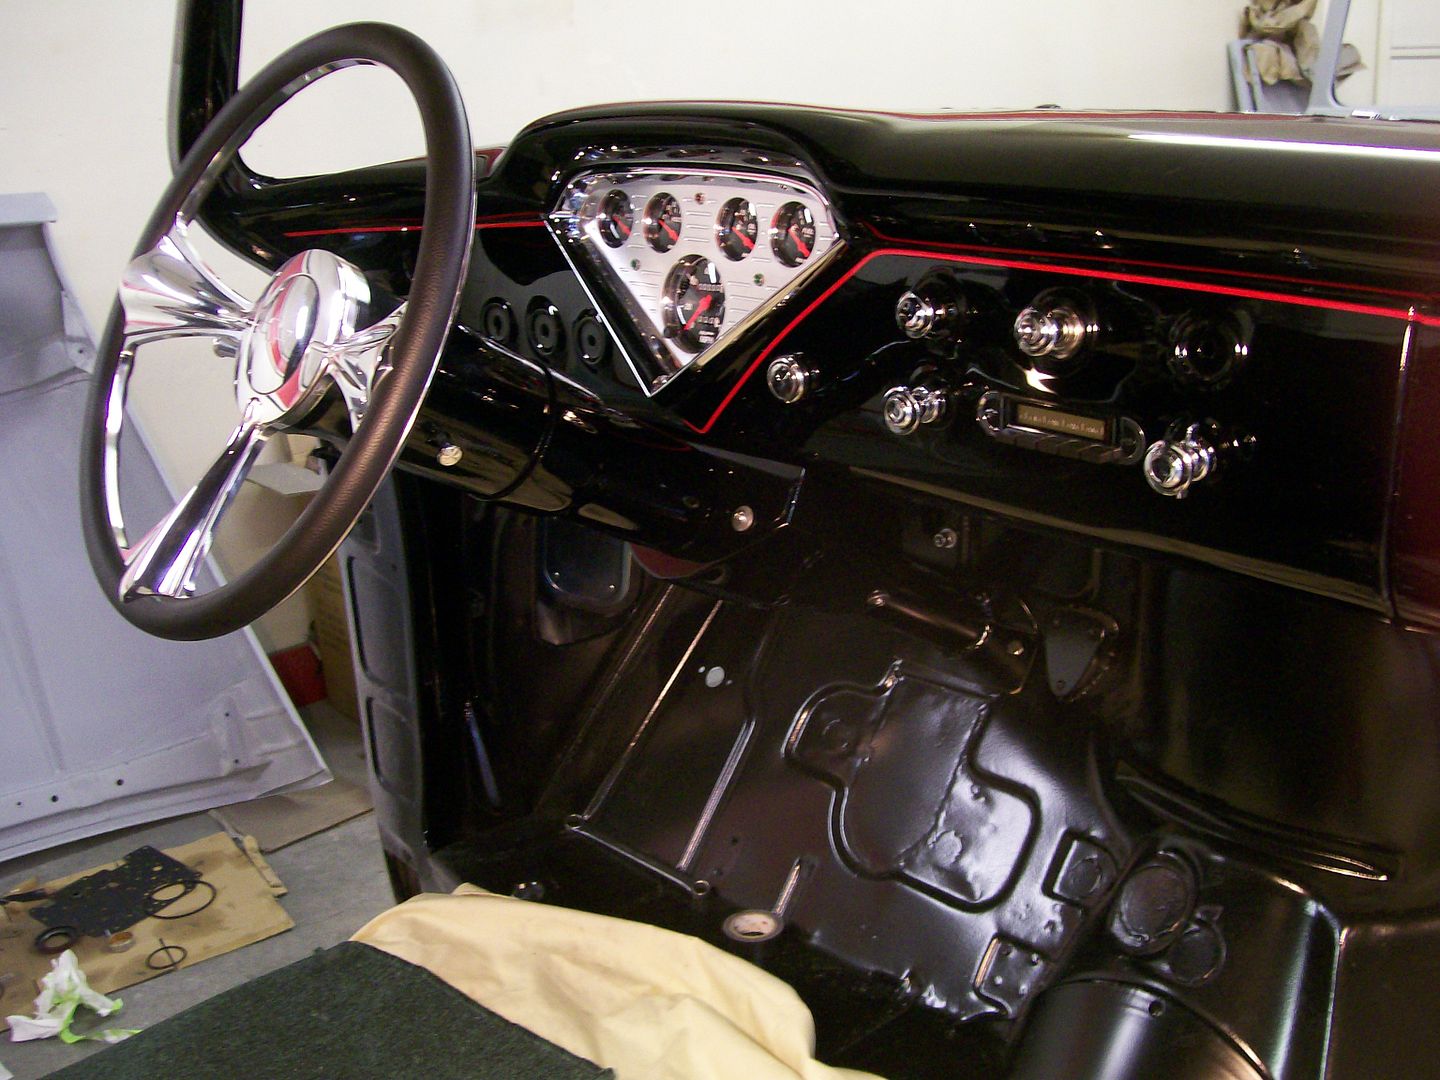 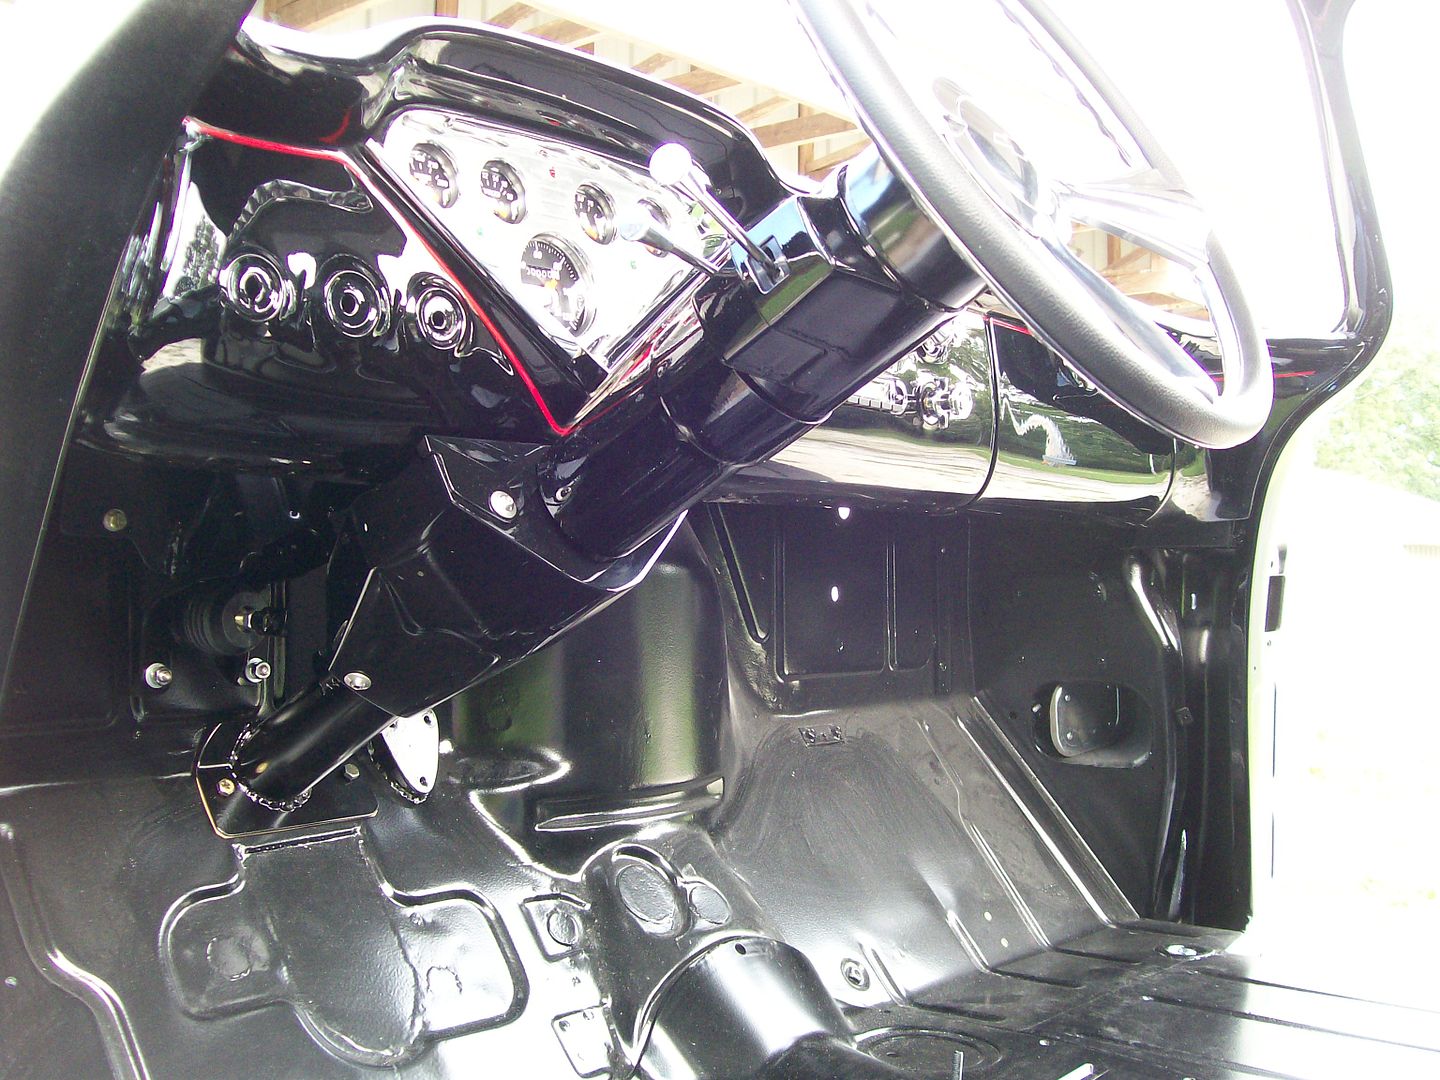 In the end, if this column didn't come with the truck, I would have saved a ton of time getting an aftermarket column. For anybody with a truck and having the switch and shiifter like I did and would like to adapt it, perhaps this write up will help.
__________________
My 57 Chevy truck build.http://67-72chevytrucks.com/vboard/s...d.php?t=541132 Last edited by Stepside Jim; 08-24-2014 at 10:51 PM. |
|
|

|
 |
| Bookmarks |
|
|