
|
|
|
 02-26-2009, 01:12 AM
|
#1 | ||
|
1 thing at a time is progress.
Join Date: Jun 2007
Location: Ball Ground GA
Posts: 5,511
|
Re: My 1965 build thread
Quote:
As far as the headlight mount panel pix, I'd like to have one with it assembled to the radiator support for referrence. Especially the lower center attachment. I know it is simple, but I thought someone might have a pic handy. Don't go to any trouble getting one. I can probably go to LMC and get a decent pic. I tried from work today but I was blocked. Scratch the LMC idea I just chcked it out and they didn't have a good IPB Quote:
 I think I got that one. I think I got that one.A little got done tonight. I was able to repair the area I messed up. BTW it was all done above the floor support so the repair is not noticeable from underneath.  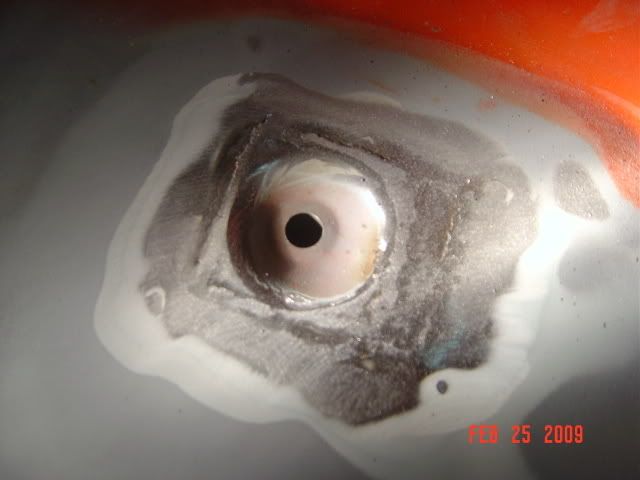 Also transfered the washer over. Still have to do the otherside. 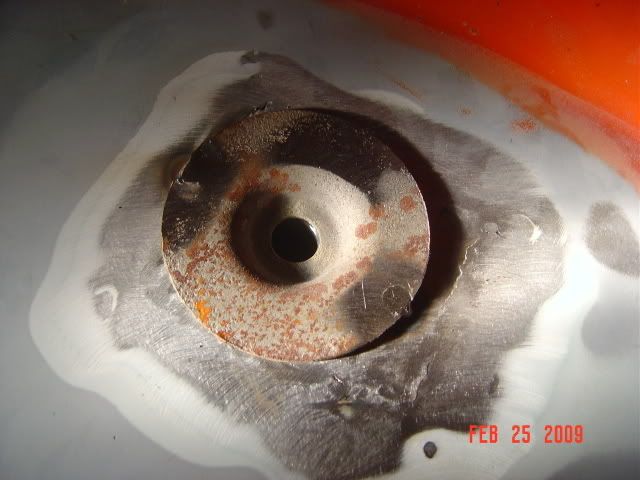 The battery box was test fitted. Need to do a little manipulaton there as well. Two holes don't line up. 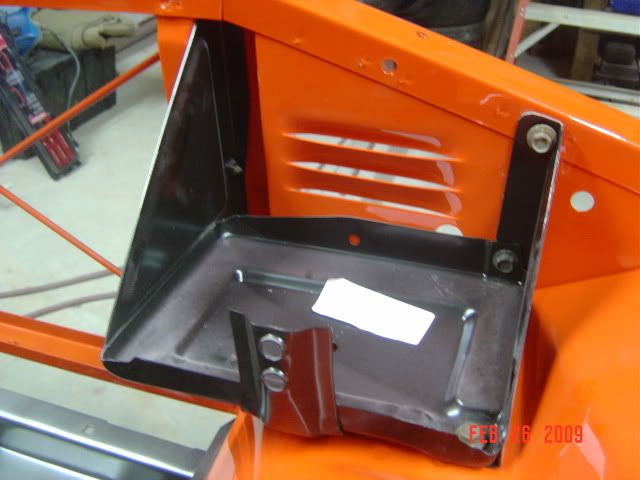
__________________
Alan
Philippians 2:14-16 |
||

|

|
|
02-26-2009, 09:05 AM
|
#2 |
|
Registered User
Join Date: Feb 2009
Location: Dirt Coast
Posts: 88
|
Re: My 1965 build thread
I think I got that one.Note to self : Never post when it's past your bedtime
__________________
 1st project 66 SWB Dave |
|
|
|
|
02-26-2009, 08:02 AM
|
#3 |
|
1961 crewcab
Join Date: Dec 2007
Location: missoula, mt
Posts: 6,164
|
Re: My 1965 build thread
that taillight idea is what I was thinking that you were thinking....
So here is the idea: make the inside bed panel as wide as the stake post. maybe all the way to the wheel tub, for asthetics. then run your fuel filler right up to the back of the taillight, set the light up so that it pulls out from the rear of the truck so that you can acces the fuel filler. I just built one like this for my dads 55 chev car. there is also a guy on here building a blazer that did one similar to this idea... |
|
|
|
|
02-26-2009, 09:35 AM
|
#4 | ||
|
1 thing at a time is progress.
Join Date: Jun 2007
Location: Ball Ground GA
Posts: 5,511
|
Re: My 1965 build thread
Quote:
Quote:
BTW note to self get more rest when sick. It came back with a vengance this morning. 
__________________
Alan
Philippians 2:14-16 |
||
|
|
|
|
02-26-2009, 10:03 AM
|
#5 |
|
Registered User
Join Date: Dec 2007
Location: Palmer, Alaska
Posts: 13,821
|
Re: My 1965 build thread
yeah man, get some rest!!
we need you in tip-top shape!!
__________________
 CHEVY ONLY CHEVY ONLY
|
|
|
|
|
02-26-2009, 12:16 PM
|
#6 |
|
1 thing at a time is progress.
Join Date: Jun 2007
Location: Ball Ground GA
Posts: 5,511
|
Re: My 1965 build thread
Thought I would try to get something small done before I get some rest. I'm trying to change the signal switch on the column. I really haven't had with the columns lately. I'm trying to get the piece below the switch out. Anyone been there and done that? The switches are different in only one way that I can see. The one that needs to be changed has the shift indicator light. I can live without it (I think). I tried to find some numbers on the old switch so I can get a new one, but I need to figure out how to get that piece out so I can get the wire connector down thru the column. I got the old one out because someone cut the plug off.
Exploded parts view 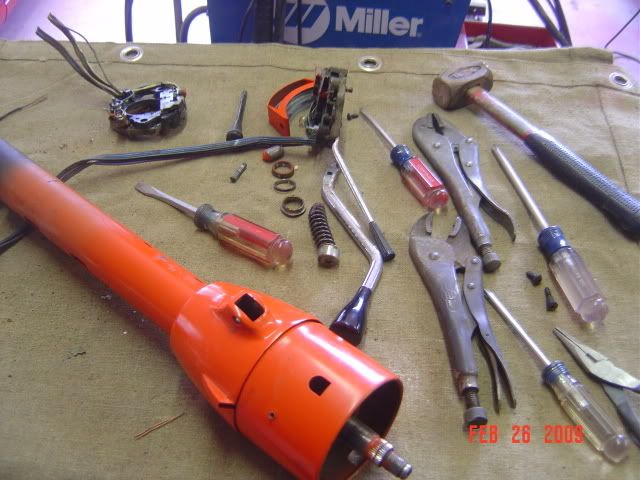 The only difference I see is circled. It's the light socket for the indicator.  This is the piece I need out 
__________________
Alan
Philippians 2:14-16 |
|
|
|
|
02-27-2009, 01:41 AM
|
#7 | |
|
Registered User
Join Date: Dec 2007
Location: Palmer, Alaska
Posts: 13,821
|
Re: My 1965 build thread
Quote:
what plug is it? you should be able to pop the terminals out of the plug, just be sure to write what wire went where, maybe take some pics too
__________________
CHEVY ONLY
|
|
|
|
|
|
02-26-2009, 03:18 PM
|
#8 |
|
1961 crewcab
Join Date: Dec 2007
Location: missoula, mt
Posts: 6,164
|
Re: My 1965 build thread
K here are a couple of shots...
your rad support should have three nuts welded to the inside of the chanel . they bolt in from underneth the truck.(pic 1) I traced out the box idea I was talking about (pic 2) I brought the short stuff blazer thread btt, post # 35 has the gas door idea... |
|
|
|
|
02-27-2009, 04:39 AM
|
#9 | |
|
Registered User
Join Date: Oct 2008
Location: Phoenix, AZ
Posts: 67
|
Re: My 1965 build thread
Quote:
My fuel filler is in a the same location. I have a tank out of a 55-57 chevy car, and the filler is out of a 56 I believe. We cut and welded it, so it came up in between the outer bed skirt and the inner bed skirt. I have a 6" x 6" square cut out there now, however on the other bed sides I have I will weld in a square fuel fill door. Will post pictures for anyone, just say I. Last edited by FreeRideYZ250; 02-27-2009 at 04:41 AM. |
|
|
|
|
|
02-27-2009, 09:29 AM
|
#10 |
|
Registered User
Join Date: Dec 2007
Location: Palmer, Alaska
Posts: 13,821
|
Re: My 1965 build thread
I

__________________
CHEVY ONLY
|
|
|
|
|
02-27-2009, 10:11 AM
|
#11 |
|
Registered User
Join Date: Oct 2008
Location: Phoenix, AZ
Posts: 67
|
Re: My 1965 build thread
I'll get some this afternoon.

|
|
|
|
|
02-27-2009, 10:21 AM
|
#12 | ||||
|
1 thing at a time is progress.
Join Date: Jun 2007
Location: Ball Ground GA
Posts: 5,511
|
Re: My 1965 build thread
Quote:
Quote:
since I've been beat down. I can't believe I didn't think of that. I've done that 100's of times at work. I need to get a replacement switch. The one I was going to use is cracked where the turn signal lever screws into. Thanks for the enlightenment.Quote:
Quote:

__________________
Alan
Philippians 2:14-16 |
||||
|
|
|
|
02-27-2009, 03:52 PM
|
#13 |
|
Hey Y'all!!
Join Date: Dec 2007
Location: Bay Minette, Alabama
Posts: 1,755
|
Re: My 1965 build thread
I
__________________
Just hopin' I live long enough to finish something!!! |
|
|
|
|
03-03-2009, 01:05 AM
|
#14 | |
|
Registered User
Join Date: Oct 2008
Location: Phoenix, AZ
Posts: 67
|
Re: My 1965 build thread
Quote:
I apologize guys. I got consumed with a garage cleaning project over the weekend. If I wasn't moving junk in or out of the garage, I was sleeping. Will shoot some photos asap. 
|
|
|
|
|
|
03-03-2009, 02:35 AM
|
#15 |
|
Registered User
Join Date: Oct 2008
Location: Southern, MO
Posts: 233
|
Re: My 1965 build thread
Hey allan, when you do your final fit on the front clip what fender bolts are you going to use? I am a long ways away from fitting, but have been pondering what to use, paint or ss or chrome. One thing I thought might work (never tried) use a thin neoprene washer on the fender bolts to keep from dammaging the paint when tightened.
|
|
|
|
|
03-03-2009, 07:33 AM
|
#16 |
|
Registered User
Join Date: Feb 2008
Location: texas gulf coast
Posts: 211
|
Re: My 1965 build thread
Well Alan,you could add one more video to that for a grand total of 5 'cause I would buy one!Very nice work man
|
|
|
|
|
02-27-2009, 06:19 PM
|
#17 |
|
1961 crewcab
Join Date: Dec 2007
Location: missoula, mt
Posts: 6,164
|
Re: My 1965 build thread
I will get a pic of the setup..
my dads bodyman had already built a housing to house the fuel filler behind the taillight, all I did was buy a steel rod, and a steel tube from ace, the rod fit perfect inside the tube, I cut the tube to 9 inches, and the rod is 15 inches, then I welded a lugnut to the end (for a stopper). It all fits quite snug, the rod and tube are metal on metal, but I suppose that you could surround the exposed part (when the door is closed) with a bigger tube, and the put a grease zerk on it , and fill it up with grease, I will do that with my dads if there is an issue of surface rust binding up the slide... but we have almost no humidity up here, so that won't be too much of a problem.... I will have to get you some pics of the mechanism.. right now it is installed on his car at his house, so it might be over the week end. |
|
|
|
|
02-27-2009, 07:27 PM
|
#18 | |
|
1 thing at a time is progress.
Join Date: Jun 2007
Location: Ball Ground GA
Posts: 5,511
|
Re: My 1965 build thread
Quote:
We are really slow at work. It's getting pretty scary. It's slowest it's been in 5 years. Got a little done today while at work. Repaired a few areas on the headlight mount panel. For the most part it was in really good shape. 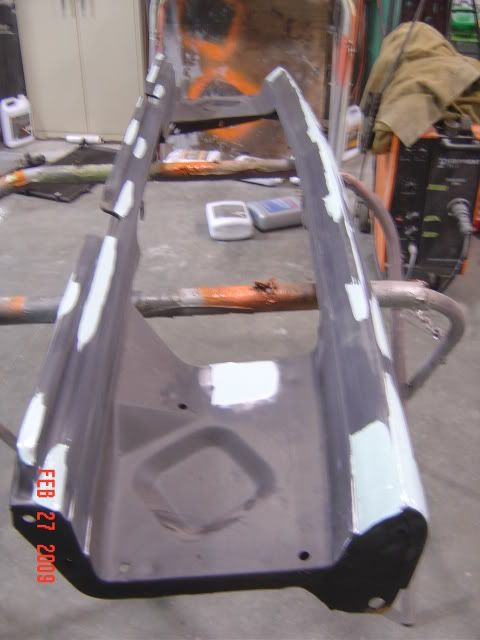 And primed 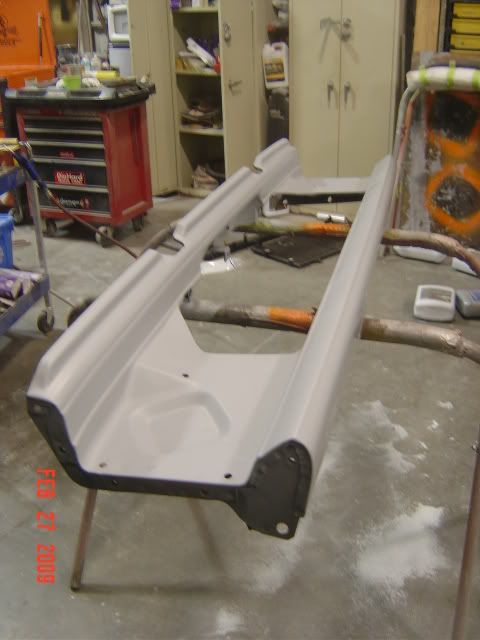
__________________
Alan
Philippians 2:14-16 |
|
|
|
|
|
02-27-2009, 09:11 PM
|
#19 | ||
|
Registered User
Join Date: Dec 2007
Location: Palmer, Alaska
Posts: 13,821
|
Re: My 1965 build thread
Quote:
 thought I was missing something  Quote:
nice work
__________________
CHEVY ONLY
|
||
|
|
|
|
02-27-2009, 09:36 PM
|
#20 | ||
|
1 thing at a time is progress.
Join Date: Jun 2007
Location: Ball Ground GA
Posts: 5,511
|
Re: My 1965 build thread
Quote:
Quote:
I priced a 1979 G1500 Van turn signal swith assy from Auto zone $79.95. They actually had a picture of it in the computer and looked to be the same. I expected about $20. So I had to pass. I called Chevy and my cost was $85. Going to reconsider my options.
__________________
Alan
Philippians 2:14-16 Last edited by Alan's Classic; 02-27-2009 at 10:01 PM. |
||
|
|
|
|
02-28-2009, 12:34 PM
|
#21 |
|
Daring to be Different
Join Date: Aug 2008
Location: Hesperia, Ca
Posts: 4,499
|
Re: My 1965 build thread
What's the hammer for ?? I don't think you should use it to get the T-Signal switch out.

__________________
Dennis Check out my 65/73 Cheap Build Thread. http://www.67-72chevytrucks.com/vboa...d.php?t=327644 KUSTOM RIDES FACE BOOK PAGE: https://www.facebook.com/groups/291198124258863/ 1965 C-10 Short Bed 350/700r4 2012 Silverado 1500 Crew Cab 2016 Honda Accord w/ 18" rims 2007 Honda Goldwing Trike w/ NAVI 2001 Yamaha Roadstar Indian look alike "Life's journey is not to arrive at the grave safely in a well preserved body, but rather to skid in sideways, totally worn out, shouting "...WOW!...what an amazing ride!" Live Life Passionately!!! [/COLOR]  I AM WE TODD IT, I AM SOFA KING WE TODD IT Last edited by Strodder; 02-28-2009 at 12:35 PM. |
|
|
|
|
02-28-2009, 12:36 PM
|
#22 | |
|
1 thing at a time is progress.
Join Date: Jun 2007
Location: Ball Ground GA
Posts: 5,511
|
Re: My 1965 build thread
Quote:
__________________
Alan
Philippians 2:14-16 |
|
|
|
|
|
02-28-2009, 12:38 PM
|
#23 |
|
Its Deja Vu time again
Join Date: Aug 2008
Location: Marysville, North of Seattle WA
Posts: 815
|
Re: My 1965 build thread
In my garage I have a 10lb sledge I call the calibrator. Actually it might weigh a little more, but when I hit things with it they normally move.
|
|
|
|
|
02-28-2009, 12:40 PM
|
#24 |
|
Its Deja Vu time again
Join Date: Aug 2008
Location: Marysville, North of Seattle WA
Posts: 815
|
Re: My 1965 build thread
Alan just saw your first instructional video. We need more.
Actually I need more.
|
|
|
|
|
02-28-2009, 12:43 PM
|
#25 | |
|
Daring to be Different
Join Date: Aug 2008
Location: Hesperia, Ca
Posts: 4,499
|
Re: My 1965 build thread
Quote:
Just kidding Allan. Your doing a great job.
__________________
Dennis Check out my 65/73 Cheap Build Thread. http://www.67-72chevytrucks.com/vboa...d.php?t=327644 KUSTOM RIDES FACE BOOK PAGE: https://www.facebook.com/groups/291198124258863/ 1965 C-10 Short Bed 350/700r4 2012 Silverado 1500 Crew Cab 2016 Honda Accord w/ 18" rims 2007 Honda Goldwing Trike w/ NAVI 2001 Yamaha Roadstar Indian look alike "Life's journey is not to arrive at the grave safely in a well preserved body, but rather to skid in sideways, totally worn out, shouting "...WOW!...what an amazing ride!" Live Life Passionately!!! [/COLOR] I AM WE TODD IT, I AM SOFA KING WE TODD IT |
|
|
|
|
 |
| Bookmarks |
| Tags |
| 1959, 1960, 1964, 1965, 1966, c10, hugger, impala, orange |
|
|


 Hybrid Mode
