 |
|
|
#526 |
|
Senior Member
Join Date: Aug 2002
Location: Valley Center KS
Posts: 3,525
|
Re: Ackattack's Pro touring restoration thread
been plugging away on stuff very slowly.
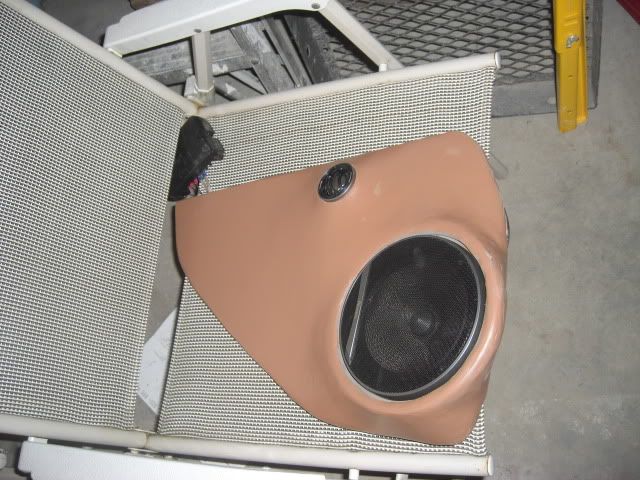
The kick panel speaker enclosures are just about done. I need to go back with a little resin, cause I sanded through one of the layers, and then fill in a few "holes" in the bondo. For now they're gonna be painted until I figure out what I'm doing with the seats. I still don't have my radio, so no to on tunes for now any way. I've also been working on the Old Air A/C setup. I got the controls mounted last night, the under the dash unit is mounted up, I have a couple of lines run through the radiator core support to the condensor. I'll do some wiring tonight, and will hopefully have heat by this weekend. |
|
|

|
|
|
#527 |
|
Registered User
Join Date: Apr 2009
Location: Saskatchewan, Canada
Posts: 236
|
Re: Ackattack's Pro touring restoration thread
What the problem with the seats?
Hope they work, I picked up a set for my own 71 looks good!!
__________________
Rolled the dice and lost!!  Check Out my 71 build http://67-72chevytrucks.com/vboard/s...d.php?t=375158 |
|
|

|
|
|
#528 |
|
Senior Member
Join Date: Aug 2002
Location: Valley Center KS
Posts: 3,525
|
Re: Ackattack's Pro touring restoration thread
Oh, nothings wrong with them, they're just grey and the interior is going to be brown, so they'll get recovered eventually.
|
|
|

|
|
|
#529 |
|
I've got grease on my mind.
Join Date: Sep 2007
Location: Oly, Wa
Posts: 481
|
Re: Ackattack's Pro touring restoration thread
Great to see the truck "Live" for the first time and meet the Fam. Looks great, sounds great, love the color. I don't think I would have done anything differently. You have reason to be proud!
I like that you chose to tackle the modern running rear update. Any word on the mileage after the 200 mile trip? |
|
|

|
|
|
#530 |
|
BlahBlahBlah
Join Date: Feb 2002
Location: Wa.
Posts: 20,000
|
Re: Ackattack's Pro touring restoration thread
|
|
|

|
|
|
#531 |
|
Senior Member
Join Date: Aug 2002
Location: Valley Center KS
Posts: 3,525
|
Re: Ackattack's Pro touring restoration thread
I ordered some stereo equipment awhile ago. Some component Pioneer speakers and retrosound classic radio (not the model one....figured I didn't need the usb input)
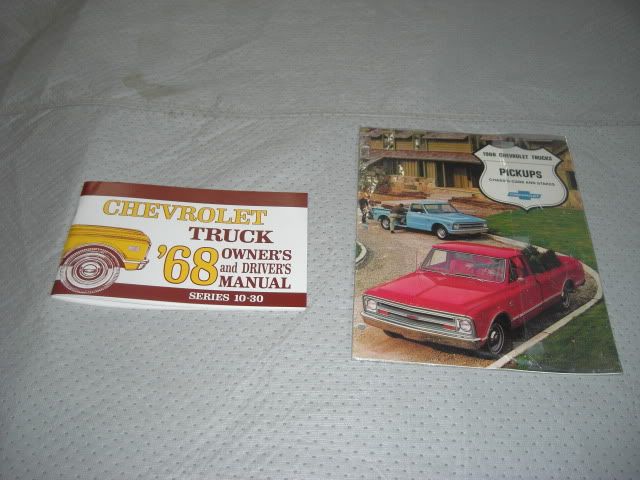
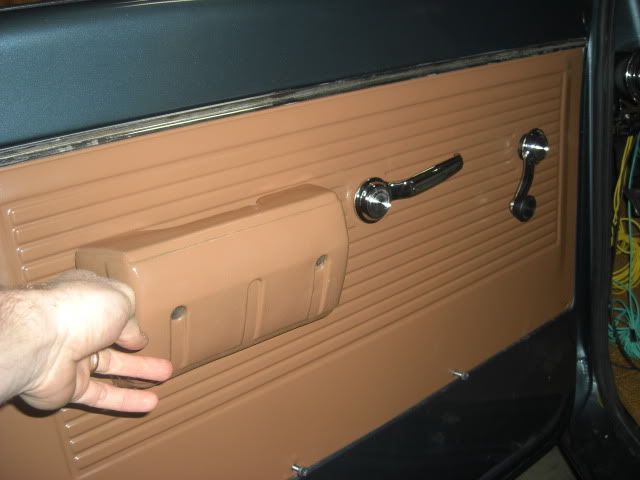
I got the speakers shortly and started making the kick panel speaker pods using fiberglass and MDF. For the drivers side, I wanted to be able to use the brake pedal (72 cab...remember) as well as the dimmer switch. What to do???? Well with my fiberglass cowl, it really doesn't let it much air through the kickpanel vents, and since I'll have A/C there isn't much need for them anyways, so I made the kickpanel speakers so the magnet of the speaker extends into that area. Here's what I ended up with:  I also went to the Monroe Swap meet last weekend (met several board members and had a good time  ) )While there I picked up a few items Set of arm rests. A set of defroster ducts (must have lost mine) an owners manual and sales brochure  And then a sub and amp The sub is a 10" shallow mount, Pioneer TS-SW251 I tried to find a set of 69 metal door panels. These are what I have in my 69 3/4 ton "No buck" and they look nice. I like the horizontal stripes rather than the vertical ones. I didn't have any luck finding them. What to do?? Steal them off of "No buck". The problem with that is they had a couple of dings in them. And they were a little old/crusty. So I removed them, power washed them with my sand blasting attachment, hammered and dollied out the few dings (first time hammer and dollying actually accomplished what I wanted to  ), scuffed them up with a scotch bright pad, sprayed a coat of primer, then paint. I painted the back black and the front the brown I've been using on the interior pieces. ), scuffed them up with a scotch bright pad, sprayed a coat of primer, then paint. I painted the back black and the front the brown I've been using on the interior pieces.  I have to get some screws for permanent mounting. I'm also going to put some sound deadener on the back of the door panel....just cause I can 
__________________
Project Bruiser: 68 Pro-Touring C-10 5.3L / 4L60E Project Ironhide: 97 GMC Crew Cab 4x4 Cummins SOLD: '69 GMC 1/2T SWB TBI'd: Project No Buck Assembly Manual Index Sign up Thread!!! Factory Service Manual Index Last edited by Ackattack; 05-17-2010 at 10:15 PM. |
|
|

|
|
|
#532 | |
|
Senior Member
Join Date: Aug 2002
Location: Valley Center KS
Posts: 3,525
|
Re: Ackattack's Pro touring restoration thread
Quote:
Good to meet you too. Haven't checked mileage yet.....might go fill up tonight. |
|
|
|

|
|
|
#533 |
|
Registered Chevy Owner
Join Date: Aug 2008
Location: Snohomish, wa
Posts: 1,557
|
Re: Ackattack's Pro touring restoration thread
After seeing your truck at the meet it's hard to believe that this is what you started with. Your truck looks great.
It was great meeting you and your family. Hope to see you again next time.
__________________
Love is fleeting, but Chevy trucks are forever!!!!  1970 Chevy CST C10 long box 350/400  2008 Chevy Silverado short box 4x4 Had; 1951 Chevy short box 307/T5 1988 Chevy shot box 4x4 350/350 1971 Chevy C10 long box 4x4 350/350 1971 Chevy C20 long box 350/350 1971 Chevy C10 long box 350/350 |
|
|

|
|
|
#534 | |
|
Senior Member
Join Date: Aug 2002
Location: Valley Center KS
Posts: 3,525
|
Re: Ackattack's Pro touring restoration thread
Quote:
Thanks More progress: I got the glass set in the track thing (can't remember what it's called). It was a pain, but got it done. The stereo is also finished being installed for now. The drivers side kick panel is very tight up in there, but it fits. On the passenger side the kick panel fits, however I don't think it will fit once I run my AC/heat lines through the firewall, so I'll probably have to re-do that one, oh well. I got the drivers side door panel installed. For the bottom bolts I used some stainless steel button head cap screws that look nice. I can't do the pass. side right now. of the 4 holes that secure the door panel, 2 of them have bolts broken off into them, and a third one is missing the threaded insert. No big deal, just not a straight forward installation. I've had a bad rattle coming from the dash area, so I dropped the steering column and popped out the gauges to investigate. Nothing obvious. I think its one of the numerous wires under there tapping on the gauge cluster itself, so I think once I do some tie wrapping, it will be taken care of. While I had the steering column dropped down I got to looking and thinking. Right now it is very "cozy" wit the steering column and steering wheel (Grant wheel with like 4" dish) and Ethans car seat right next to me. It's like I can barely move. My steering column has two "notches" in it that could align with the "nub" and it was aligned with the forward most, pushing the steering wheel back. Well I'm going to push it forward. However, this isn't as easy as it sounds. The neutral safety switch is about 3/4" from the fire wall and the hole column needs to move about 2" (maybe 3" forward to get to the next notch. So I'm going to have to cut another notch in the steering column outer tube so that I can move the neutral safety switch up the column. It will be a big pain to remove it, but really, it will make driving much more pleasurable. While I have the steering column out, I will also rebuild the turn signal cancel mechanism since it only works when turning one direction. I also ordered some new door weatherstripping from GMCPaul's today. I got the push on kind that will hopefully seal better than what I have on there now (the glue on type from LMC with a poor glue job). I also ordered a compressor block from a company called Docs Blocks to be able to use my LS1 A/C compressor with the standard size A/C lines. Also ordered some new lower air bag cups so I can raise my minimum ride height so my tires aren't scrubbing the inner fenders at full dump. Probably only need 1/2" taller or so. |
|
|
|

|
|
|
#535 |
|
Account Suspended
Join Date: Sep 2006
Location: Kingston, TN
Posts: 178
|
Re: Ackattack's Pro touring restoration thread
what type of wheels are you running and where could I possibly find a set at?
Thanks |
|
|

|
|
|
#536 | |
|
Senior Member
Join Date: Aug 2002
Location: Valley Center KS
Posts: 3,525
|
Re: Ackattack's Pro touring restoration thread
Quote:
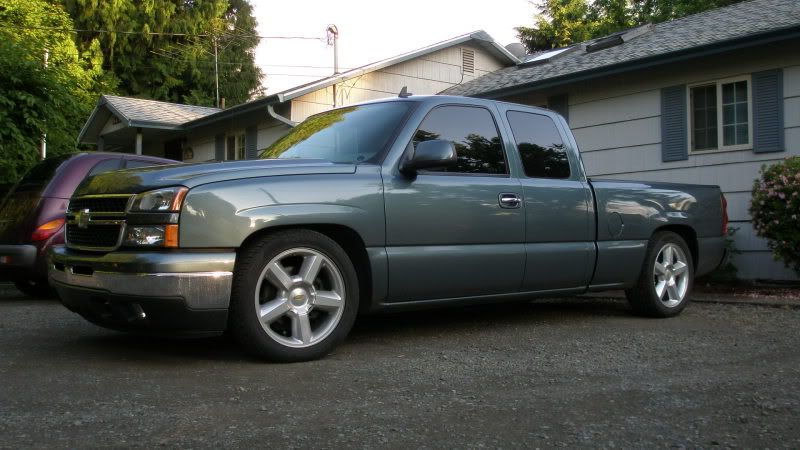
They're Raceline speedsters (20x10 and 20x8.5) http://www.racelinewheels.com I just looked at their website, and they're having a special on some nice looking 18" wheels for $290/each. I paid around $600/each |
|
|
|

|
|
|
#537 |
|
I've got grease on my mind.
Join Date: Sep 2007
Location: Oly, Wa
Posts: 481
|
Re: Ackattack's Pro touring restoration thread
Are those the s10 seals or something else? Does it have the molded edge at the upper A-pillar?
|
|
|

|
|
|
#538 |
|
Senior Member
Join Date: Aug 2002
Location: Valley Center KS
Posts: 3,525
|
Re: Ackattack's Pro touring restoration thread
Rumor has it they're for a mid-80s dodge full size or a dakota....not sure
|
|
|

|
|
|
#539 |
|
Registered User
Join Date: Jun 2007
Location: The West
Posts: 767
|
Re: Ackattack's Pro touring restoration thread
Great build. The truck looks great!
Thanks for posting and you have shared some great info.... I have gone through most of the 22 pages. Any updates? |
|
|

|
|
|
#540 |
|
Senior Member
Join Date: Aug 2002
Location: Valley Center KS
Posts: 3,525
|
Re: Ackattack's Pro touring restoration thread
It's been slow going lately. I've been tinkering with the A/C lines, but I need an elbow for one line at least, then get them crimped on.
I've been working on my 69 pickup lately. I swapped on a good condition cab last week. |
|
|

|
|
|
#541 |
|
Senior Member
Join Date: Aug 2002
Location: Valley Center KS
Posts: 3,525
|
Re: Ackattack's Pro touring restoration thread
filled up the truck today, and I was a little disappointed with the 16.7 mpg I got.
I need to spend a little time with the tuning and get my wideband hooked up and I will do a litle better. |
|
|

|
|
|
#542 |
|
Registered User
Join Date: Nov 2006
Location: Boring, Oregon
Posts: 162
|
Re: Ackattack's Pro touring restoration thread
GORGEOUS truck and awesome build thread!!! But...curious what conversion headlights you used. Any close up's of them and any info would be very helpful. I read all but about 5-paint work. lol. Those would look just MEAN at dusk w/ just the running lights on.
Thanks!! I hope someday I'll be able to see it in person! My buddy's '07 and his dad's '06 HD are the same color! I'm gonna show him this thread tomorrow. 
__________________
'71 SNB, 406sbc, TH350 w/ Transpak & Starshifter, 12bolt w/ 3.73s, 2" Early Classic front coils, 2.5" Flowmaster Super 40's
|
|
|

|
|
|
#543 | |
|
Still plays with trucks
Join Date: Jul 2009
Location: Spokane, WA
Posts: 3,556
|
Re: Ackattack's Pro touring restoration thread
Quote:
With the lighter truck you should be in the 20 - 22 mpg freeway range once tuned properly. Glock35ipsc is getting 22 out of his 5.3 swap square body.
__________________
miSSed opportunity - ground up creation of an AWD 1994 454 SS that never was http://67-72chevytrucks.com/vboard/s...d.php?t=795577 69 C10 shortbed stepside 400 small block - built like what a super sport truck could have been 69 K20 lwb TBI 350 4L60E NP208 14-bolt Dana-44 w/disc 68 Camaro SS / RS 500hp 439 inch roller cam big block 4L80E 79 Malibu TPI 350 4L60 w/ Z28 steering & sway bars |
|
|
|

|
|
|
#544 | |
|
Senior Member
Join Date: Aug 2002
Location: Valley Center KS
Posts: 3,525
|
Re: Ackattack's Pro touring restoration thread
Quote:
Mine was mainly 60 mph freeway driving. My 5800 pound crew cab 4wd would get 21ish on the freeway (it had 32" tires and 3.42 gears). I know my 4.10 gears will hurt a little, but I expected 20. We'll see. |
|
|
|

|
|
|
#545 |
|
I've got grease on my mind.
Join Date: Sep 2007
Location: Oly, Wa
Posts: 481
|
Re: Ackattack's Pro touring restoration thread
Did you get the new door rubbers on yet? How did they fit?
|
|
|

|
|
|
#546 |
|
Active Member
 Join Date: Oct 2006
Location: Mesa, AZ
Posts: 682
|
Re: Ackattack's Pro touring restoration thread
How is the sound with the speakers up under the dash like that? I was thinking of doing the same thing.
|
|
|

|
|
|
#547 | |
|
Senior Member
Join Date: Aug 2002
Location: Valley Center KS
Posts: 3,525
|
Re: Ackattack's Pro touring restoration thread
Yeah I got them on, and they fit pretty good. The doors close better than they did with the glue on type and way less wind noise. I'm still getting a little wind noise from around the windows, but that is an issue with the one piece windows, not the door weatherstripping.
Quote:
Not that great right now. I think the main issue is I don't have my sub installed yet, so the 6" just aren't cutting it. I may also need to re-wire the tweeters (2 settings on crossover) and play with the settings on the stereo to figure out what I like. It make noise though! |
|
|
|

|
|
|
#548 |
|
Senior Member
Join Date: Aug 2002
Location: Valley Center KS
Posts: 3,525
|
Re: Ackattack's Pro touring restoration thread
Well after over a month of waiting, I finally got my bag cups from Suicided doors this week. I popped them in tonight with no problems.
I also got my dash pad and some heater hose bulkhead fittings this week. Hopefully I'll get those in this week. I am waiting on an A/C belt idler pulley. I ordered the tensioner pulley by mistake and had to send it back. Almost done. There is a show on 4th of July that I'll be going to, but the truck won't be done. However, there is the goodguys show towards the end of July , and I hope to be "done" with it by then. We'll see! |
|
|

|
|
|
#549 |
|
67cheby
 Join Date: Sep 2008
Location: siloam springs ar 72761
Posts: 17,890
|
Re: Ackattack's Pro touring restoration thread
IF WE CANT SEE IT..... IT DIDNT HAPPEN !!! so is it lower with the bag cups??
|
|
|

|
|
|
#550 | |
|
Senior Member
Join Date: Aug 2002
Location: Valley Center KS
Posts: 3,525
|
Re: Ackattack's Pro touring restoration thread
Quote:
No, it will actually be 1/2" higher with the bags dumped. Ride height will be the same though. |
|
|
|

|
 |
| Bookmarks |
|
|