
|
|
|
 12-12-2011, 11:54 PM
|
#1 |
|
Grandpa in the rustmobile...
Join Date: Nov 2008
Location: Spokane WA/Viola TN
Posts: 11,422
|
Re: Project 67 DRGNWGN - 67 Burban!!
hey kev-did u ever get your drop block etc resolved i memeber u were lookin for 1.5" u bolts or somethign
__________________
John Goose-1968 C10 355,9.32-1CR, Vortec Heads ,262 voodoo, 3.73:1 3OTT (HS ride/beater/farm truck) http://67-72chevytrucks.com/vboard/s...d.php?t=317684 Grams 53-1953 Chevrolet Belair http://67-72chevytrucks.com/vboard/s...=1#post4327784 1969 Chevy C10 Shortbed 4.5/6?" Frame off resto http://67-72chevytrucks.com/vboard/s...d.php?t=548136 1999 Toyota Tacoma 4x4 |

|

|
|
12-13-2011, 06:58 AM
|
#2 | ||
|
low n' slo
 Join Date: Mar 2009
Location: rosenberg, texas
Posts: 5,145
|
Re: Project 67 DRGNWGN - 67 Burban!!
Quote:
Quote:
__________________
67 1/2 ton Suburban - Project DRGNWGN. Build thread  -_--_--_ _________ _--_-_ -/____|__|__\__ ,.,,,.,.,,.,|_O _______ O_] |
||
|
|
|
|
01-14-2012, 01:06 AM
|
#3 |
|
Sofa King Crazy!!
Join Date: Oct 2008
Location: Houston, TX
Posts: 3,090
|
Re: Project 67 DRGNWGN - 67 Burban!!
We need some pics....even if it's just old stuff!! Keep at it bro!
__________________
You found the Tater.  My Blazer Build (New) - http://67-72chevytrucks.com/vboard/s...d.php?t=654650 My 67 Build - http://67-72chevytrucks.com/vboard/s...d.php?t=335650 67 Chevy LWB big window a/c AKA TOTALLED BY A JACKASS.  1972 2wd Blazer "Porterbuilt and Sloshed" 
|
|
|
|
|
01-14-2012, 01:05 PM
|
#4 |
|
low n' slo
Join Date: Mar 2009
Location: rosenberg, texas
Posts: 5,145
|
Re: Project 67 DRGNWGN - 67 Burban!!
lol..man i been slackin lately!
havent done crap since i got the rims on it...i need to get back on it! im not sure if i should clean up the sub frame for paint or just get back to my original plan and start the body work...i never had plans to paint anything on the frame, so it would be another setback!
__________________
67 1/2 ton Suburban - Project DRGNWGN. Build thread -_--_--_ _________ _--_-_ -/____|__|__\__ ,.,,,.,.,,.,|_O _______ O_] |
|
|
|
|
01-16-2012, 10:44 PM
|
#5 |
|
low n' slo
Join Date: Mar 2009
Location: rosenberg, texas
Posts: 5,145
|
Re: Project 67 DRGNWGN - 67 Burban!!
i would like to try to rework my orginal hinges to make them work. but i just dont see how i could..i still need to trim the inners a little bit more, and its already super close to the lower bolt hole, unless i cut it off...has anyone tried that?
im sanding down my interior now since i cant figure out whether to do my own body work or let someone else do it. since i lost my heater, and am not using the heater control panel (for now), is everyone welding them up or leaving the dummy control panel in there to fill the gap? i just about have the dash sanded up and will prob move to the back and start sanding later this week..
__________________
67 1/2 ton Suburban - Project DRGNWGN. Build thread -_--_--_ _________ _--_-_ -/____|__|__\__ ,.,,,.,.,,.,|_O _______ O_] |
|
|
|
|
01-27-2012, 07:57 PM
|
#6 |
|
low n' slo
Join Date: Mar 2009
Location: rosenberg, texas
Posts: 5,145
|
Re: Project 67 DRGNWGN - 67 Burban!!
dash in primer and wetsanded...
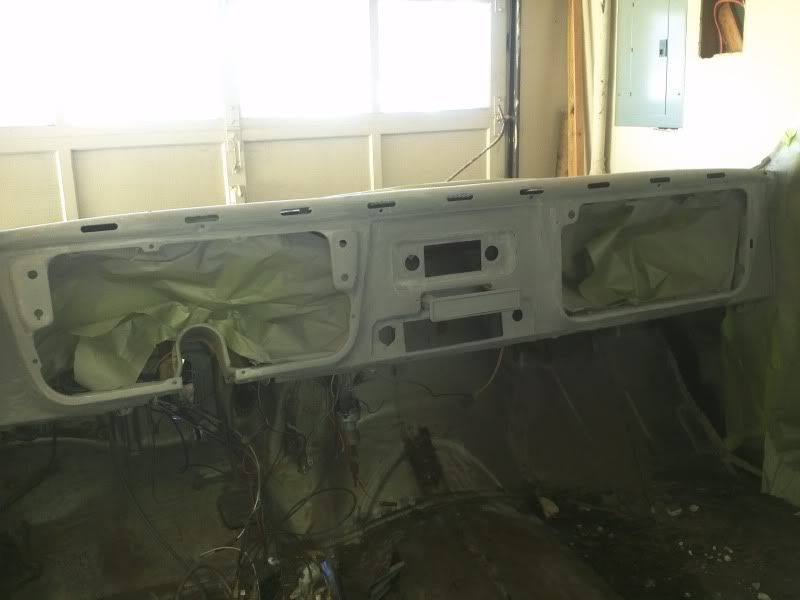 paint im shooting...massey ferguson red from tsc (single stage) 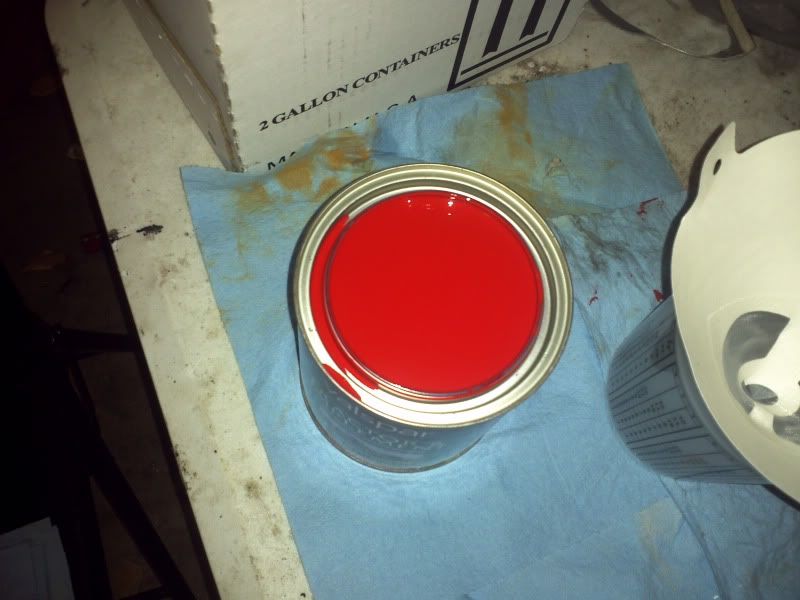 and heres how it turned out... after the first coat... 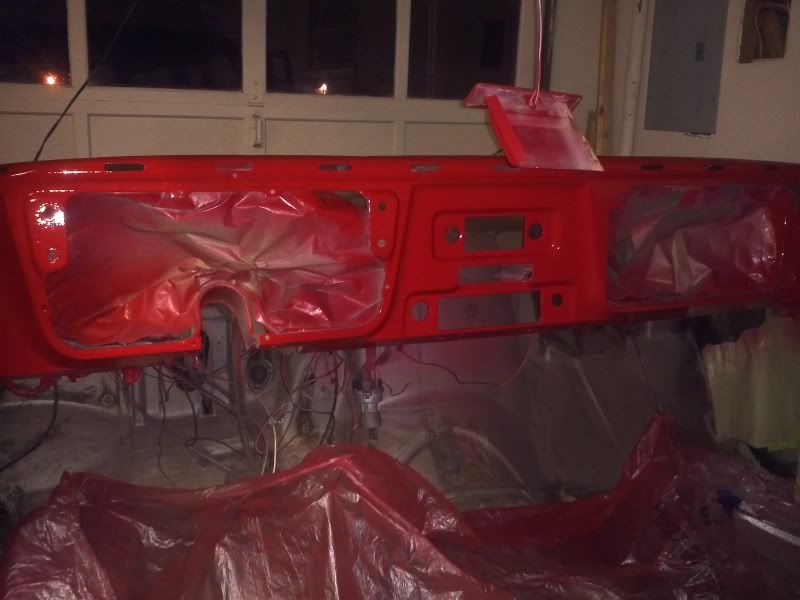 24 hours dry time.. 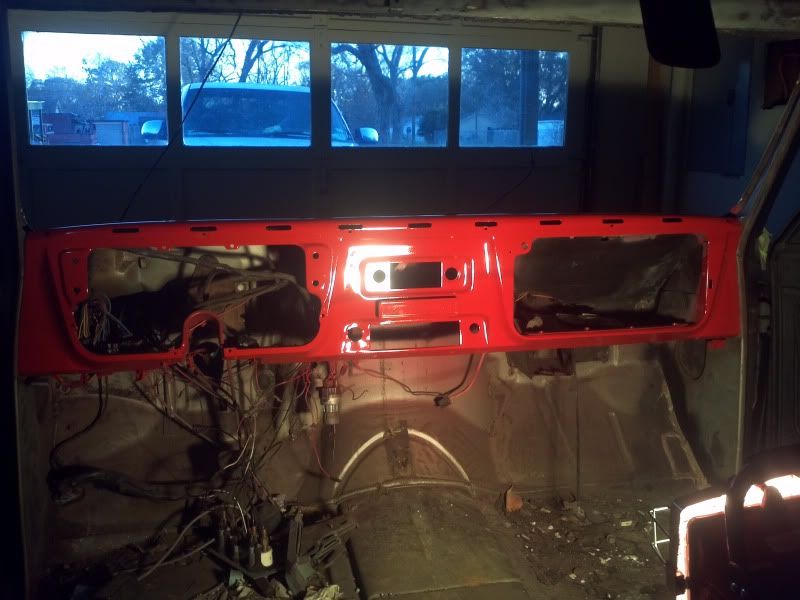 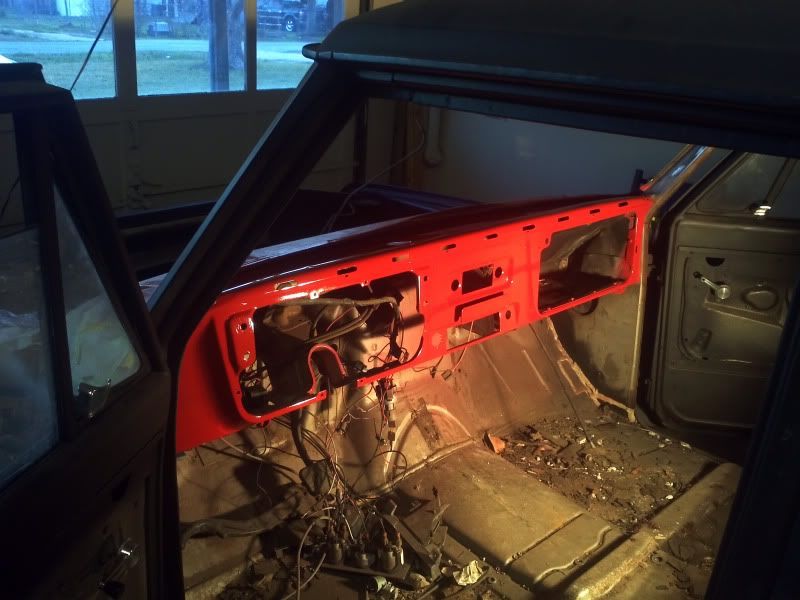 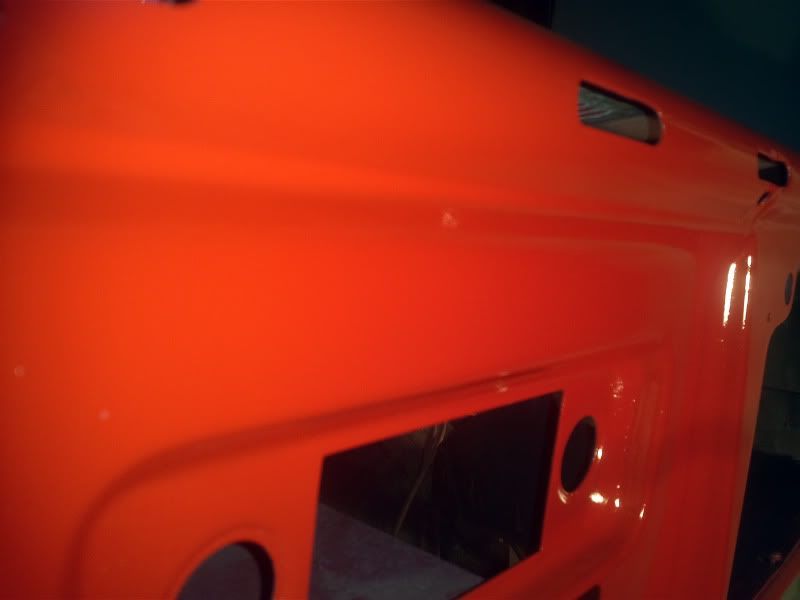 i really like how it turned out. i mixed it with mineral spirits this time to thin it out instead of regular paint thinner. i think it made a big difference in how it flowed out from the gun, and it also didnt water down the color like the black did. workin on laying some primer on the rest of the interior..hopefully this weekend! what you guys think?
__________________
67 1/2 ton Suburban - Project DRGNWGN. Build thread -_--_--_ _________ _--_-_ -/____|__|__\__ ,.,,,.,.,,.,|_O _______ O_] |
|
|
|
|
01-27-2012, 11:36 PM
|
#7 |
|
Hotrodchevy
Join Date: Sep 2010
Location: Hot Springs NC
Posts: 275
|
Re: Project 67 DRGNWGN - 67 Burban!!
looks good i like that color
__________________
2017 1500 CREW CAB GMC 1997 C1500 Chevy 1971 CHEVY CHEVELLE SS 402BB : 1971 CHEVY C10 Stepside Project 71 cluncker http://67-72chevytrucks.com/vboard/s...ferrerid=89816 My Build Second Chance Suburban (SCS)http://67-72chevytrucks.com/vboard/s...d.php?t=424650 |
|
|
|
|
01-28-2012, 01:13 AM
|
#8 |
|
Registered User
Join Date: Mar 2010
Location: Sin City, Nevada
Posts: 152
|
Re: Project 67 DRGNWGN - 67 Burban!!
The red looks good man!
__________________
Eric '68 C20 Suburban, Bagged with Suicide 3rd Door, and Loaded with a 396 - Under Construction http://67-72chevytrucks.com/vboard/s...d.php?t=403690 |
|
|
|
|
01-28-2012, 08:32 AM
|
#9 |
|
Registered User
Join Date: Aug 2008
Location: halifax nova scotia
Posts: 375
|
Re: Project 67 DRGNWGN - 67 Burban!!
looks good man.big fan of the color combo haha.
__________________
check out my build (the start of a shaved,channeled,bagged 67 gmc with a 01 gmc frame and drivetrain) http://67-72chevytrucks.com/vboard/s...d.php?t=434253 |
|
|
|
|
02-01-2012, 12:04 AM
|
#10 | |||
|
low n' slo
Join Date: Mar 2009
Location: rosenberg, texas
Posts: 5,145
|
Re: Project 67 DRGNWGN - 67 Burban!!
Quote:
Quote:
Quote:
How did u do your doors ? I don't want to have a black outside then when u crack the door u see red jambs.... Posted via Mobile Device
__________________
67 1/2 ton Suburban - Project DRGNWGN. Build thread -_--_--_ _________ _--_-_ -/____|__|__\__ ,.,,,.,.,,.,|_O _______ O_] |
|||
|
|
|
|
02-04-2012, 11:53 PM
|
#11 |
|
VA72C10
 Join Date: Mar 2008
Location: Midlothian, VA
Posts: 25,269
|
Re: Project 67 DRGNWGN - 67 Burban!!
Looking good man! You've really come a long way on this!
__________________
Looking for a 67-72 swb or blazer project in or around VA.
|
|
|
|
|
02-05-2012, 11:29 AM
|
#12 | ||
|
low n' slo
Join Date: Mar 2009
Location: rosenberg, texas
Posts: 5,145
|
Re: Project 67 DRGNWGN - 67 Burban!!
Quote:
Quote:
tried to get some pics of the inteior but it was really tough, the lighting in my garage isnt the best and i really dont want to roll it out just yet. i think the paint turned out pretty good, i just have to fix a small overspray that got into the corner of my dash. probably too small to see once everything is together, but i know its there. maybe i can wetsand 1500..? 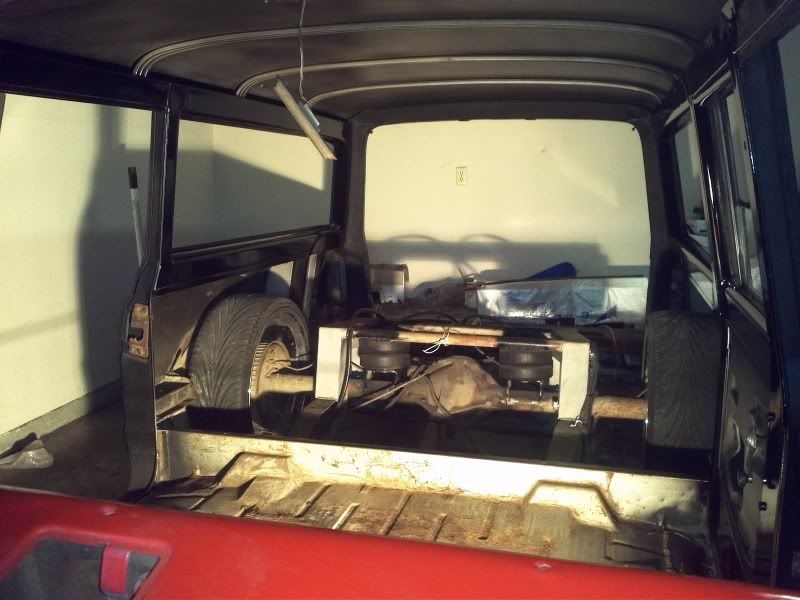 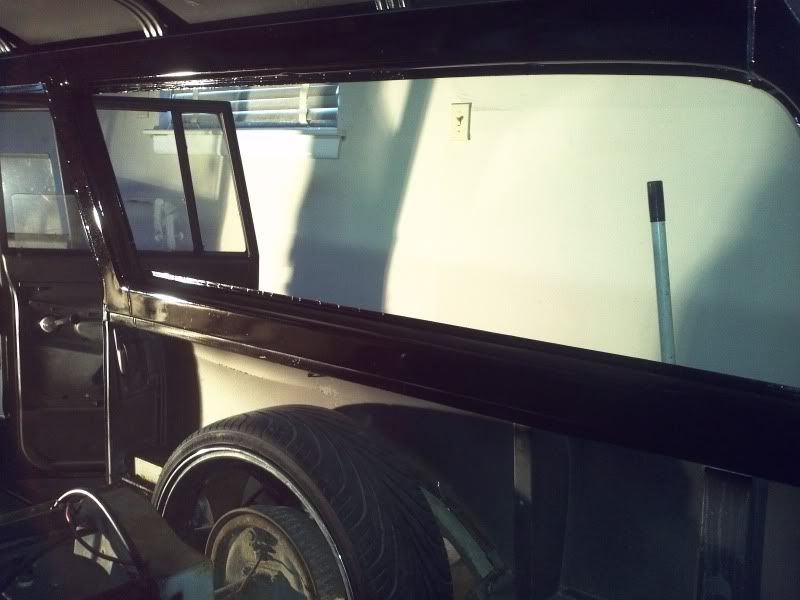 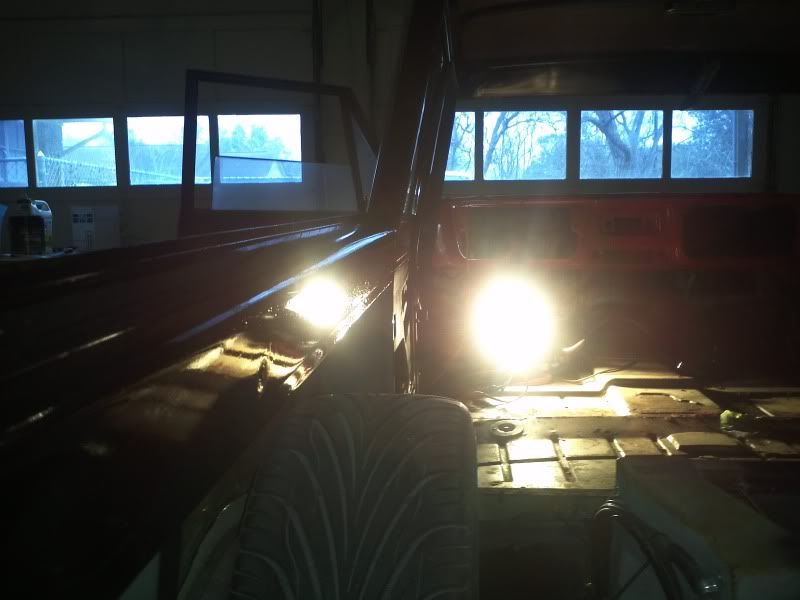 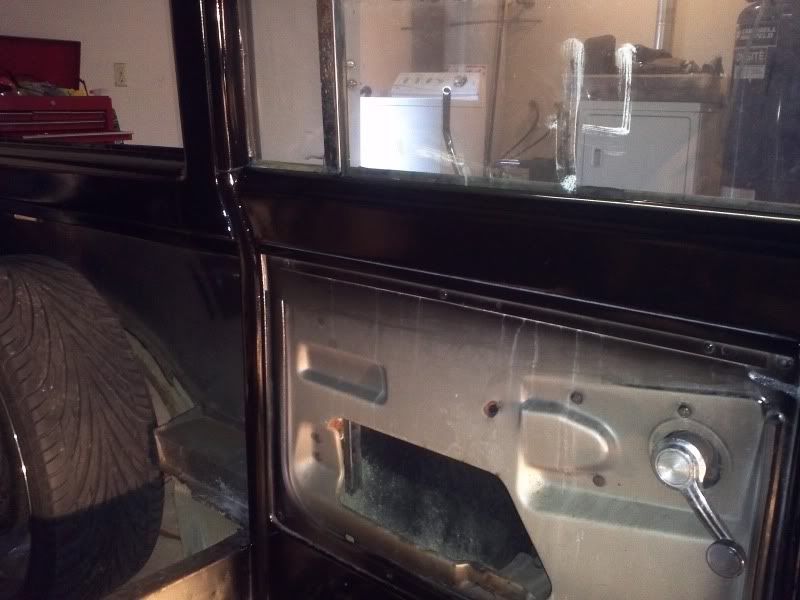
__________________
67 1/2 ton Suburban - Project DRGNWGN. Build thread -_--_--_ _________ _--_-_ -/____|__|__\__ ,.,,,.,.,,.,|_O _______ O_] |
||
|
|
|
|
02-05-2012, 11:31 AM
|
#13 |
|
low n' slo
Join Date: Mar 2009
Location: rosenberg, texas
Posts: 5,145
|
Re: Project 67 DRGNWGN - 67 Burban!!
  ill get some pics up of the overspray part later.... i still need tubs, and to make some kick panel covers with speakers, and also panels in the back that cover the sides, which is why i didnt spray there. thats a whole job by itself...what you guys think?
__________________
67 1/2 ton Suburban - Project DRGNWGN. Build thread -_--_--_ _________ _--_-_ -/____|__|__\__ ,.,,,.,.,,.,|_O _______ O_] |
|
|
|
|
02-05-2012, 11:39 AM
|
#14 |
|
low n' slo
Join Date: Mar 2009
Location: rosenberg, texas
Posts: 5,145
|
Re: Project 67 DRGNWGN - 67 Burban!!
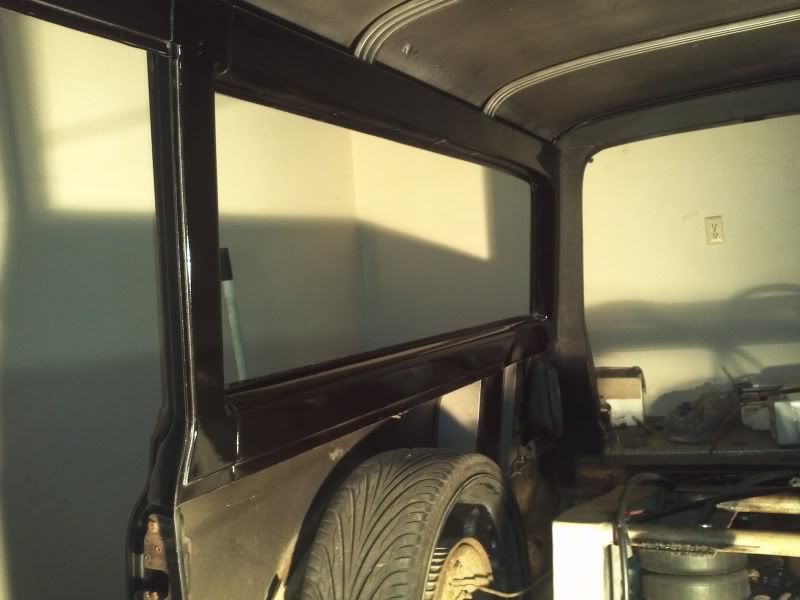
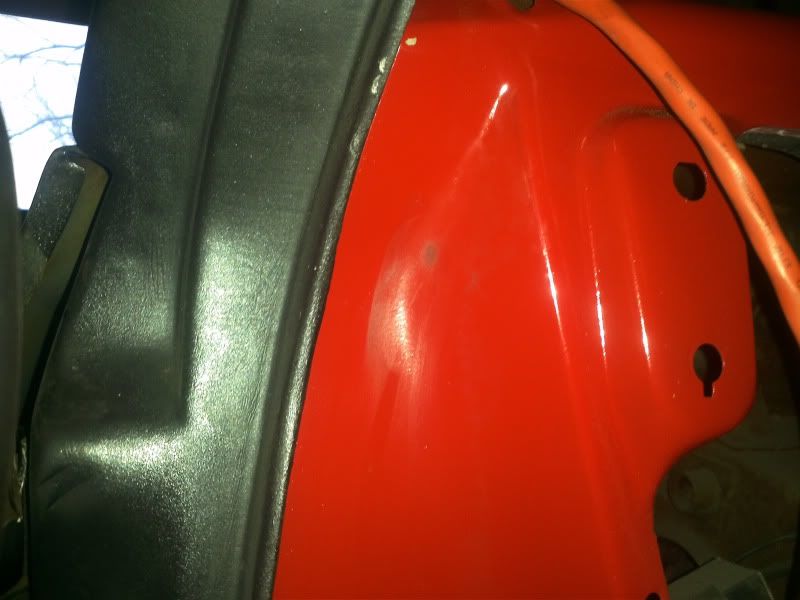
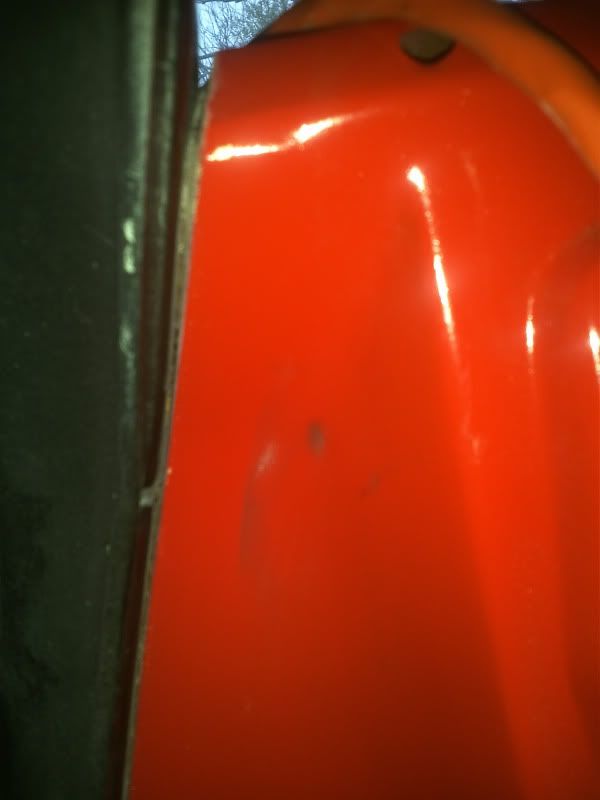
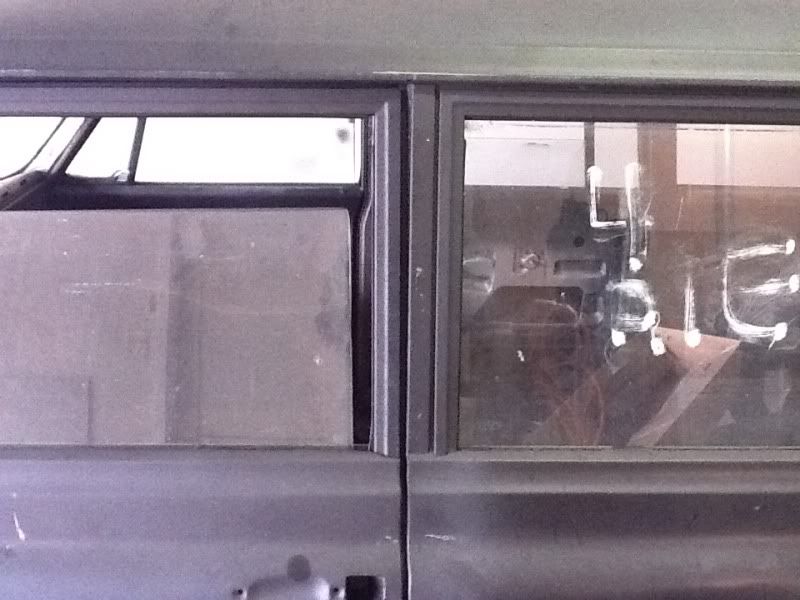
here is the overspray, there is another spot on the top corner of the glass but i will just wetsand it. with the window and rubber in, it wont be noticeable at all.
__________________
67 1/2 ton Suburban - Project DRGNWGN. Build thread -_--_--_ _________ _--_-_ -/____|__|__\__ ,.,,,.,.,,.,|_O _______ O_] |
|
|
|
|
02-05-2012, 12:06 PM
|
#15 |
|
Registered User
Join Date: Jun 2008
Location: pensacola fl
Posts: 3,072
|
Re: Project 67 DRGNWGN - 67 Burban!!
Wet Sand it a bit. It's like I tell the guys that work for me when it comes to wet sanding.... Start light. Lol. I'd do 2500 gritt.
Truck is looking killer man. Posted via Mobile Device
__________________
68 BB burb build thread Scott's super slam front/rear http://67-72chevytrucks.com/vboard/s...d.php?t=378084 |
|
|
|
|
02-05-2012, 02:32 PM
|
#16 |
|
low n' slo
Join Date: Mar 2009
Location: rosenberg, texas
Posts: 5,145
|
Re: Project 67 DRGNWGN - 67 Burban!!
sounds good...my body shop friend should have some of that...ill probably pick it up today. hope it doesnt dull the red underneath!
ill probably start getting everything lined up and get the gaps straight, then pull everything off for body work!
__________________
67 1/2 ton Suburban - Project DRGNWGN. Build thread -_--_--_ _________ _--_-_ -/____|__|__\__ ,.,,,.,.,,.,|_O _______ O_] |
|
|
|
|
02-05-2012, 05:53 PM
|
#17 | |
|
Sofa King Crazy!!
Join Date: Oct 2008
Location: Houston, TX
Posts: 3,090
|
Re: Project 67 DRGNWGN - 67 Burban!!
Quote:
__________________
You found the Tater. My Blazer Build (New) - http://67-72chevytrucks.com/vboard/s...d.php?t=654650 My 67 Build - http://67-72chevytrucks.com/vboard/s...d.php?t=335650 67 Chevy LWB big window a/c AKA TOTALLED BY A JACKASS. 1972 2wd Blazer "Porterbuilt and Sloshed"
|
|
|
|
|
|
02-11-2012, 07:45 PM
|
#18 |
|
low n' slo
Join Date: Mar 2009
Location: rosenberg, texas
Posts: 5,145
|
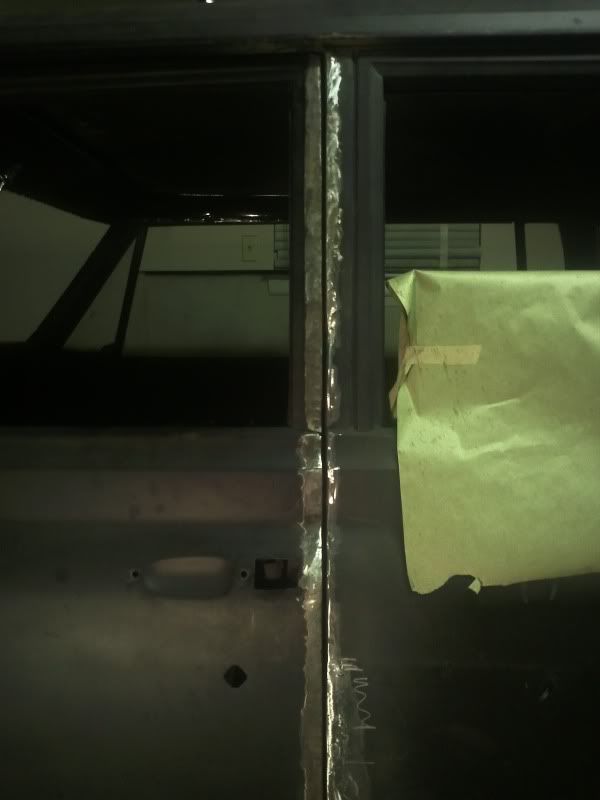
Re: Project 67 DRGNWGN - 67 Burban!!
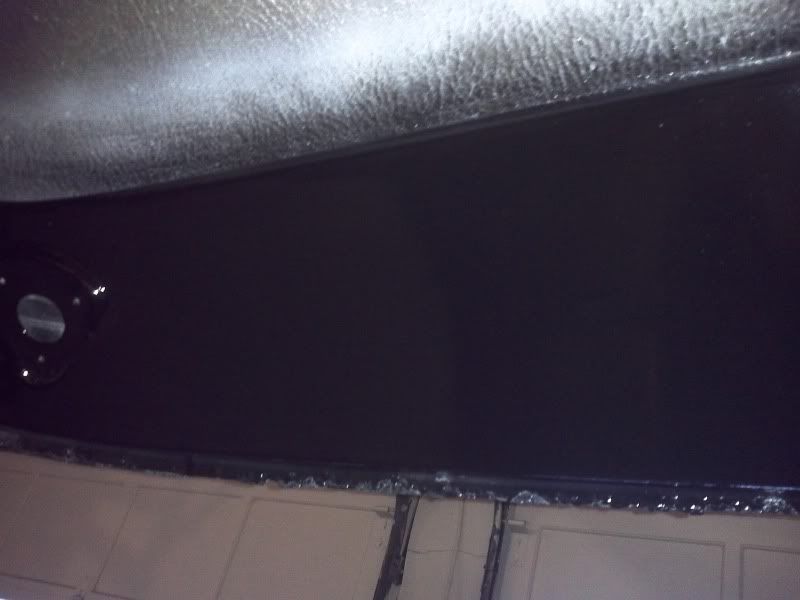
heres what i been working on last night and a few hours this morning...
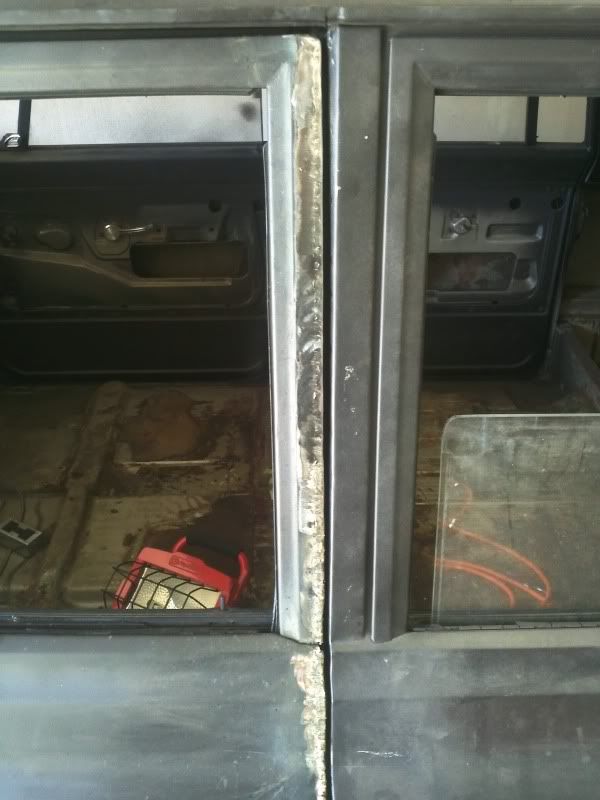  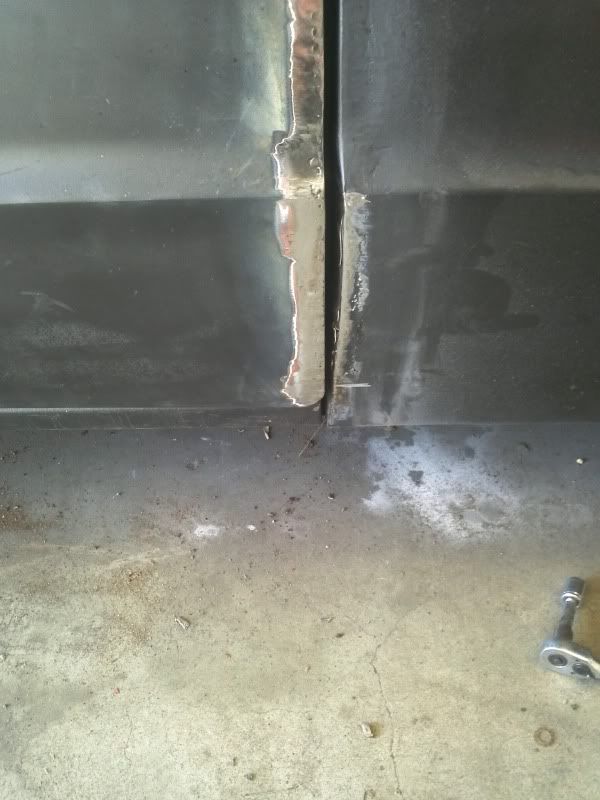 still have to weld some rods to the bottom and top of the body, it has a weird twist in it. you can see it here... 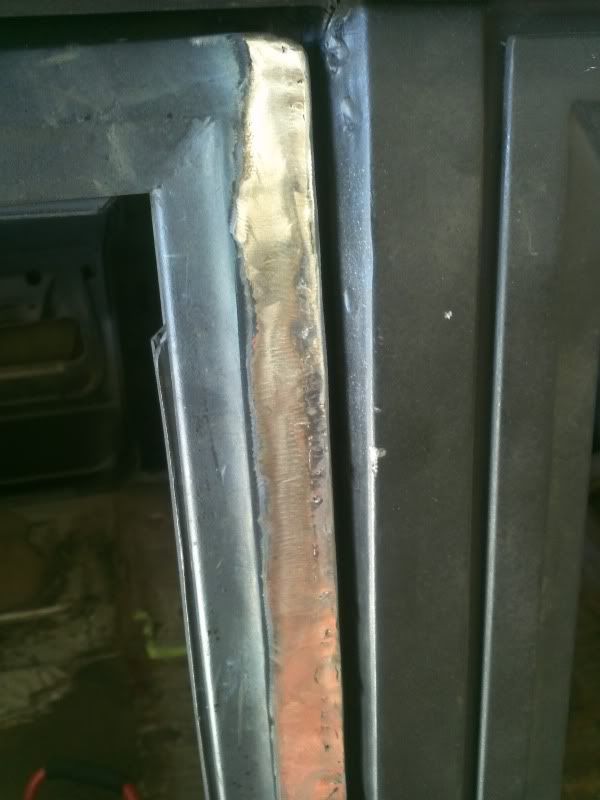
__________________
67 1/2 ton Suburban - Project DRGNWGN. Build thread -_--_--_ _________ _--_-_ -/____|__|__\__ ,.,,,.,.,,.,|_O _______ O_] |
|
|
|
|
02-11-2012, 07:46 PM
|
#19 |
|
low n' slo
Join Date: Mar 2009
Location: rosenberg, texas
Posts: 5,145
|
Re: Project 67 DRGNWGN - 67 Burban!!
didnt really take any before pics but i had these saved..
  probably get back on it tomorrow and finish it up, its actually turning out nice!
__________________
67 1/2 ton Suburban - Project DRGNWGN. Build thread -_--_--_ _________ _--_-_ -/____|__|__\__ ,.,,,.,.,,.,|_O _______ O_] |
|
|
|
|
02-11-2012, 08:10 PM
|
#20 |
|
VA72C10
Join Date: Mar 2008
Location: Midlothian, VA
Posts: 25,269
|
Re: Project 67 DRGNWGN - 67 Burban!!
Nice progress! Getting the gaps right makes a big difference down the road when it's all painted!
__________________
Looking for a 67-72 swb or blazer project in or around VA.
|
|
|
|
|
02-12-2012, 03:59 AM
|
#21 |
|
Registered User
Join Date: Jul 2010
Location: Norman, Oklahoma
Posts: 557
|
Re: Project 67 DRGNWGN - 67 Burban!!
How are you what are you using to fill those gaps?
Posted via Mobile Device
__________________
Max Max's bagged 81 81 rcsb bagged, 22s, build in progress 09 ext cab, 24" U2's, DD sub/amp |
|
|
|
|
02-12-2012, 11:42 AM
|
#22 | ||
|
low n' slo
Join Date: Mar 2009
Location: rosenberg, texas
Posts: 5,145
|
Re: Project 67 DRGNWGN - 67 Burban!!
Quote:
the other gaps are fine...maybe i will have to fix the door to rocker gaps, but thats a lot easier! Quote:
http://www.67-72chevytrucks.com/vboa...d.php?t=497761
__________________
67 1/2 ton Suburban - Project DRGNWGN. Build thread -_--_--_ _________ _--_-_ -/____|__|__\__ ,.,,,.,.,,.,|_O _______ O_] |
||
|
|
|
|
02-17-2012, 08:01 PM
|
#23 |
|
low n' slo
Join Date: Mar 2009
Location: rosenberg, texas
Posts: 5,145
|
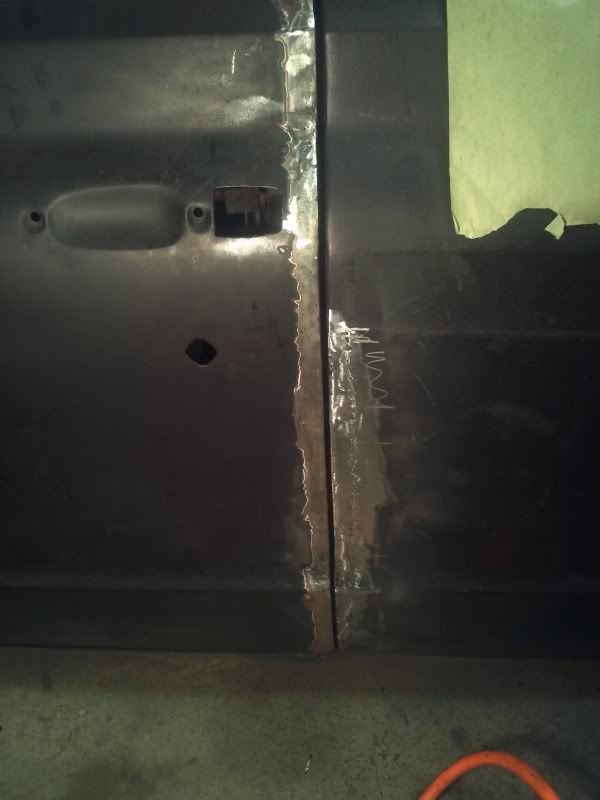
Re: Project 67 DRGNWGN - 67 Burban!!
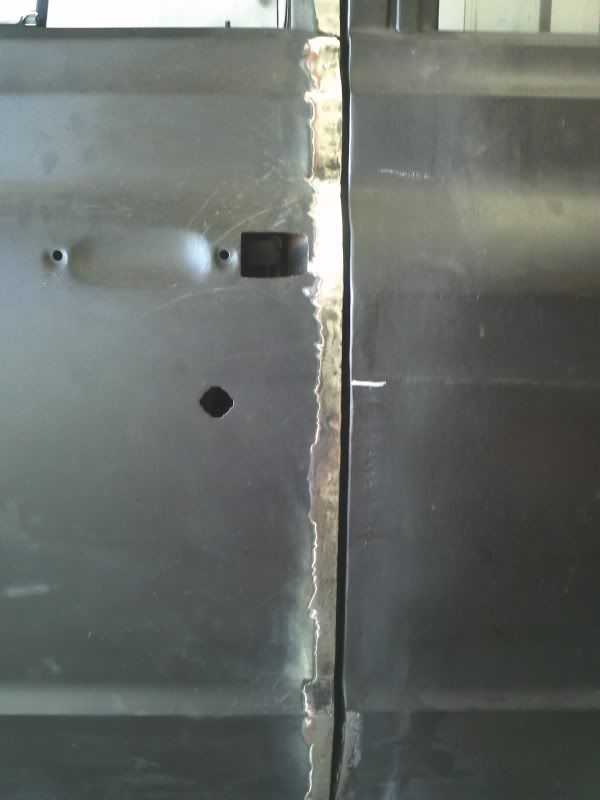
almost finished up the gap...just need a little more grinding to even up the gap..
__________________
67 1/2 ton Suburban - Project DRGNWGN. Build thread -_--_--_ _________ _--_-_ -/____|__|__\__ ,.,,,.,.,,.,|_O _______ O_] |
|
|
|
|
02-17-2012, 08:05 PM
|
#24 |
|
low n' slo
Join Date: Mar 2009
Location: rosenberg, texas
Posts: 5,145
|
Re: Project 67 DRGNWGN - 67 Burban!!
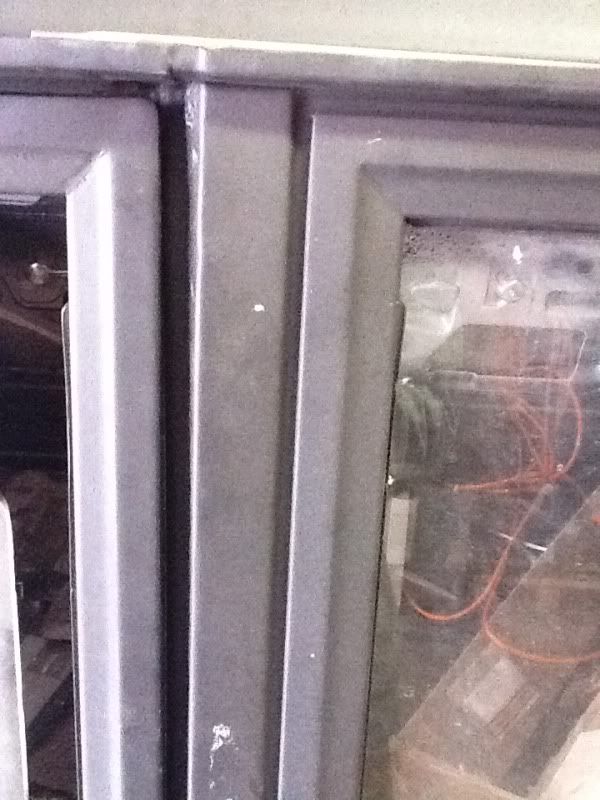
looks a lot better than that ugly twist that was in there...
i also got a little bored last night of fixing the gap, so i went to put my new ubolt in and also the panhard bar spacer from cpp...and i noticed something strange.. DRIVER SIDE 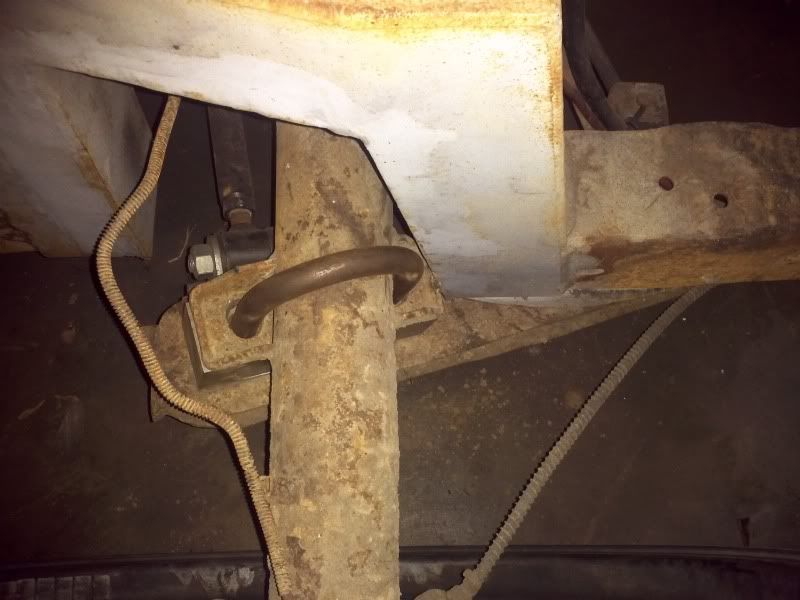 PASSENGER SIDE 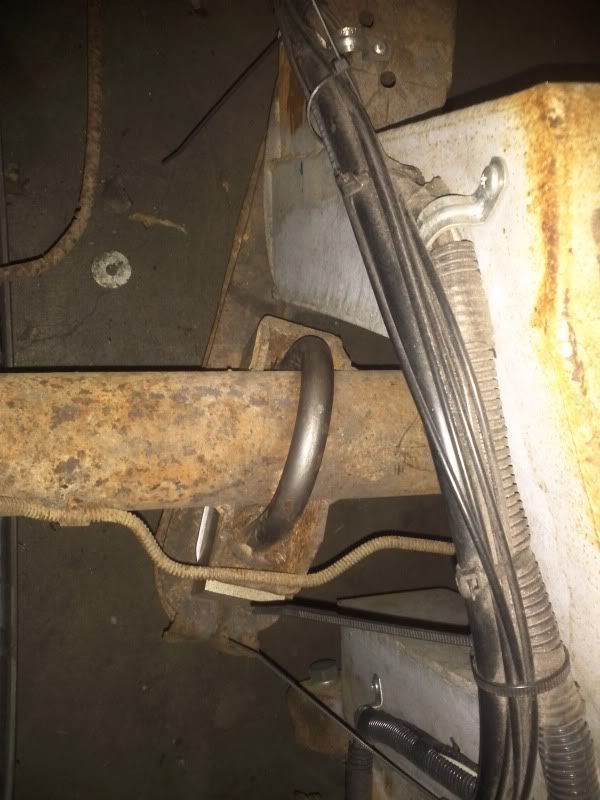 i believe my notch was not welded in centered up...i took these pics of some mounting holes next to the notch and you can see the space between the holes and notch are different on both sides... 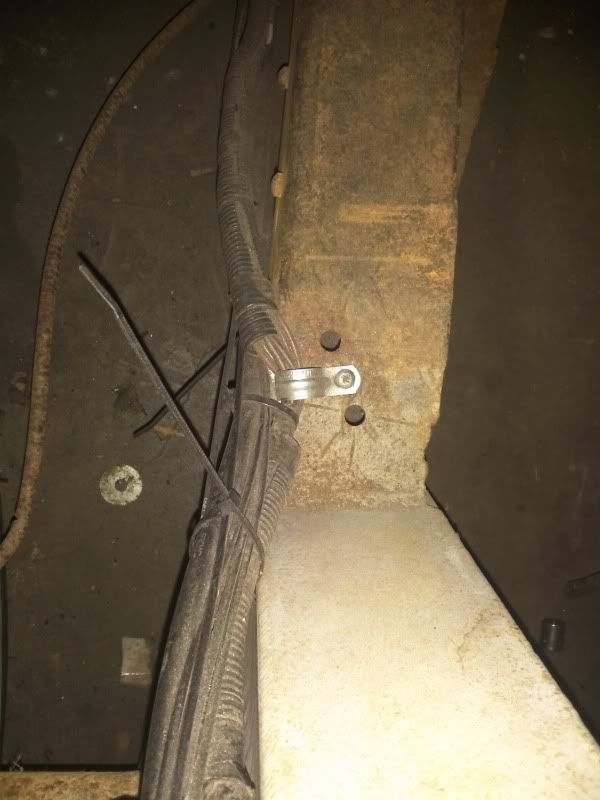  is this going to pose a problem? i really dont want to pay someone to cut this notch out and move it....it seems like it only touches when its completely aired out...
__________________
67 1/2 ton Suburban - Project DRGNWGN. Build thread -_--_--_ _________ _--_-_ -/____|__|__\__ ,.,,,.,.,,.,|_O _______ O_] |
|
|
|
|
02-20-2012, 12:20 AM
|
#25 | |
|
Registered User
Join Date: Jan 2008
Location: HOUSTON TX
Posts: 1,161
|
Re: Project 67 DRGNWGN - 67 Burban!!
Quote:
|
|
|
|
|
 |
| Bookmarks |
|
|


 Hybrid Mode
