
|
|
|
 10-02-2017, 09:17 PM
|
#1 |
|
Registered User
Join Date: Sep 2012
Location: Leander, TX
Posts: 969
|
Re: 64 C10 Stepside "Jaybird"
Started early this morning at 730 sharp. Put in about 8 hours today. Suppose to rain the next two days so wanted to make the most of today.
So here is where I left off with the fender. I spent about an hour getting it fit just right and rechecking all my measurements to make sure it was in the right place. 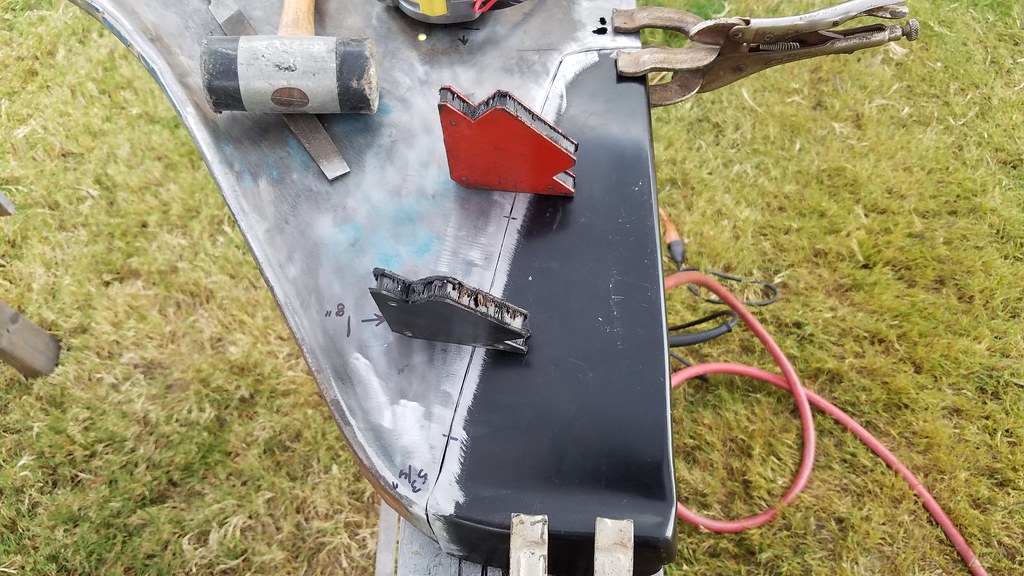 20171002_085520 by bjohnson388, on Flickr 20171002_085520 by bjohnson388, on Flickr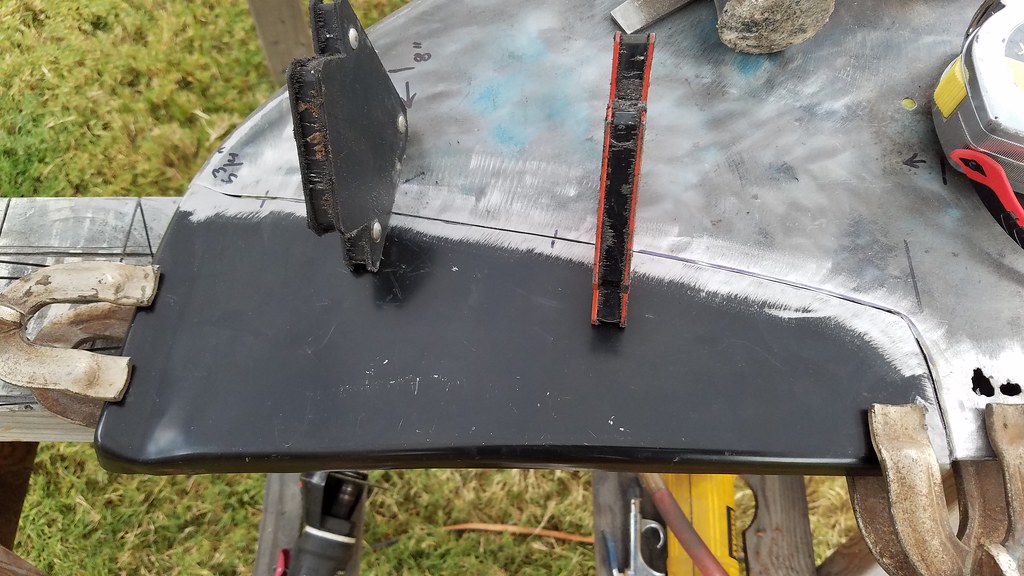 20171002_085514 by bjohnson388, on Flickr 20171002_085514 by bjohnson388, on FlickrSome tack welds to hold it in place. I went very slow let it cool completely and planished each weld with hammer and dolly. 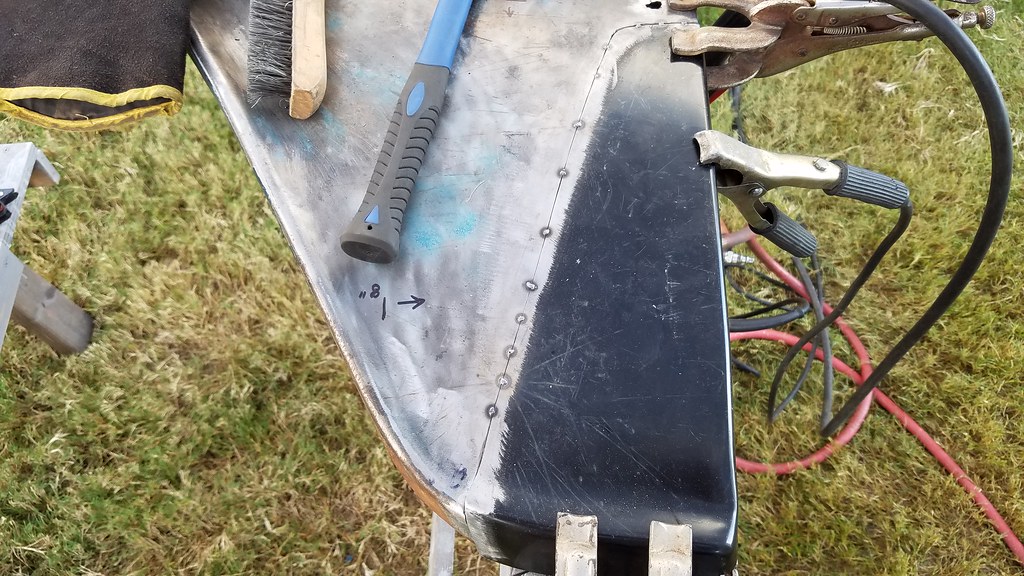 20171002_091919 by bjohnson388, on Flickr 20171002_091919 by bjohnson388, on FlickrThis part would have to be shaped after it was welded in securely. These aftermarket parts never fit properly. They all require massaging. 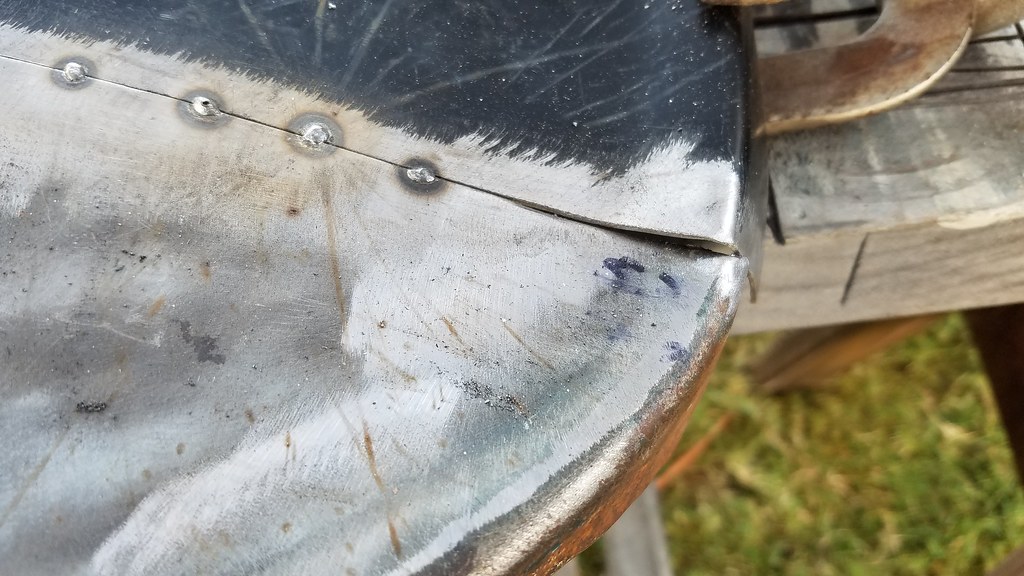 20171002_091929 by bjohnson388, on Flickr 20171002_091929 by bjohnson388, on FlickrAfter the patch was secure flipped it over to replace this mess. Took 2 measurements to the mounting hole to get it back in the same place. 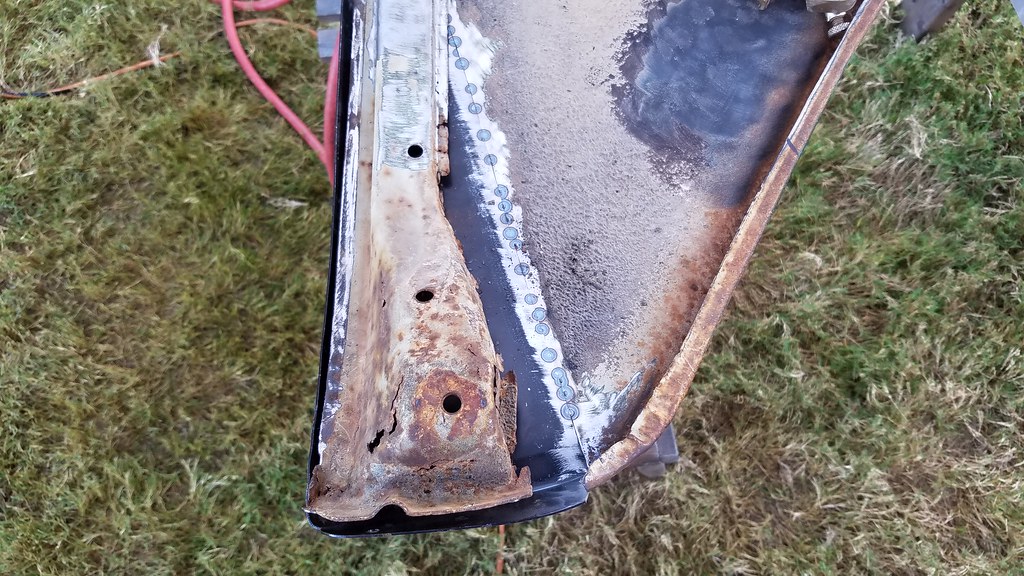 20171002_093939 by bjohnson388, on Flickr 20171002_093939 by bjohnson388, on Flickr 20171002_093943 by bjohnson388, on Flickr 20171002_093943 by bjohnson388, on FlickrCut the old piece above damage and test fitting the replacement. 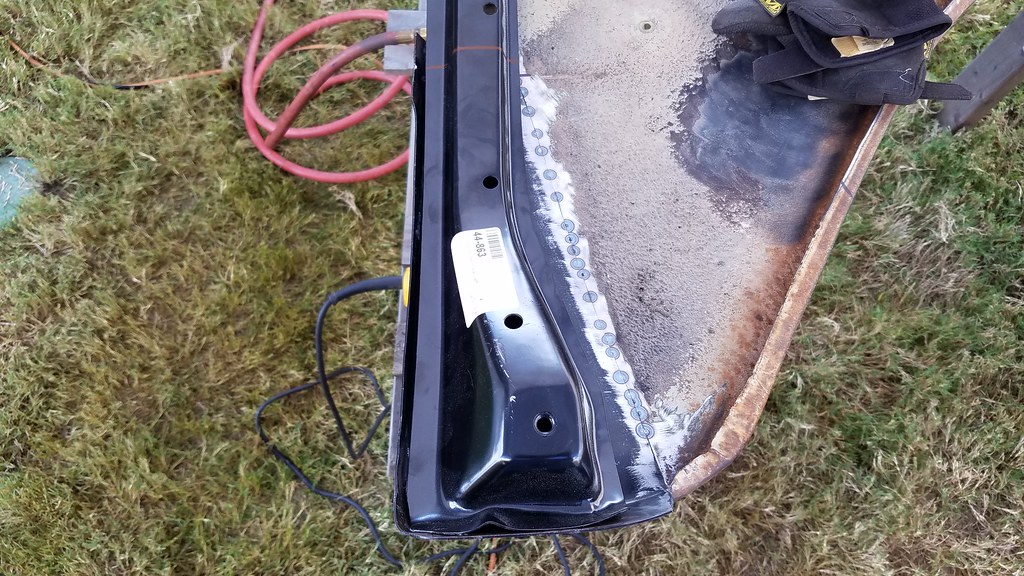 20171002_094728 by bjohnson388, on Flickr 20171002_094728 by bjohnson388, on FlickrCut line.  20171002_094730 by bjohnson388, on Flickr 20171002_094730 by bjohnson388, on FlickrCut to size and clamped in place. 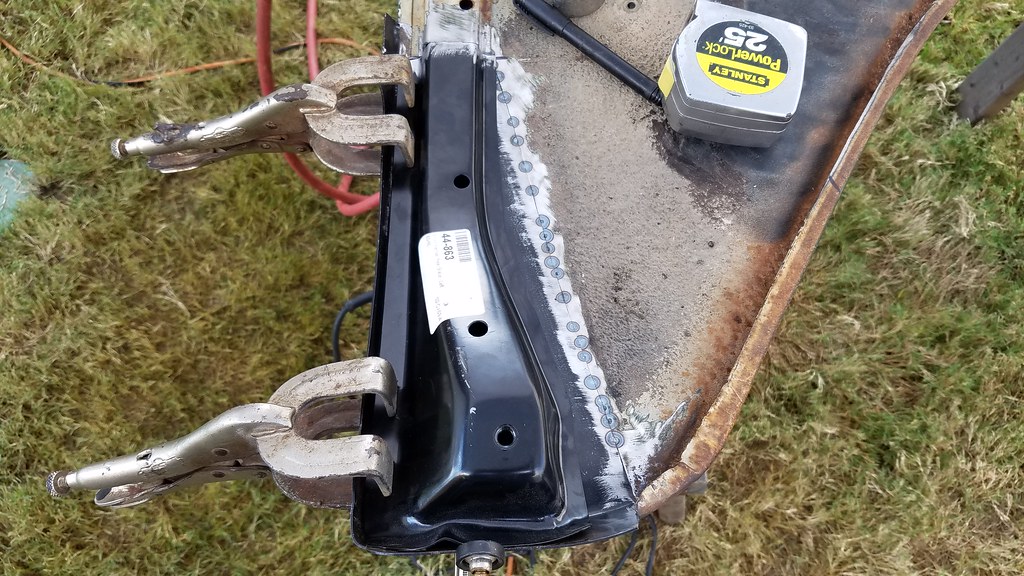 20171002_100724 by bjohnson388, on Flickr 20171002_100724 by bjohnson388, on FlickrDecent fit. 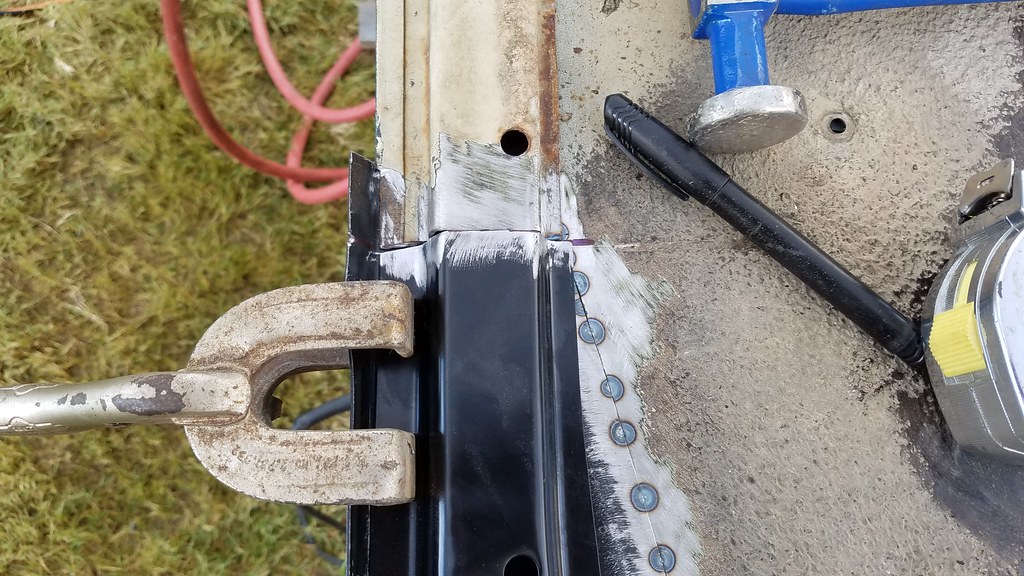 20171002_100727 by bjohnson388, on Flickr 20171002_100727 by bjohnson388, on FlickrOne of my measurements to verify it is in the right vertical position. Also more of the ugly original paint of my truck. 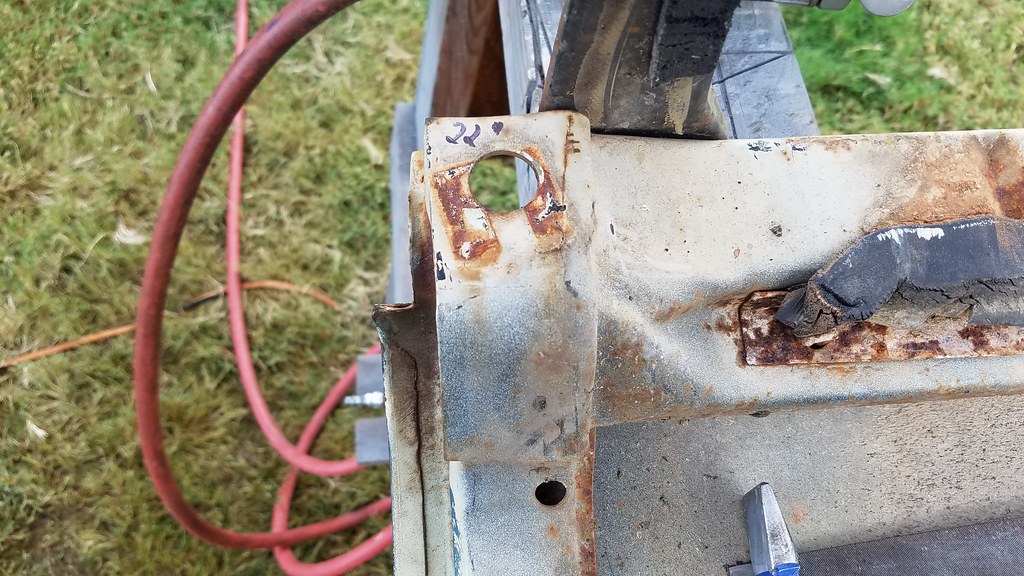 20171002_100736 by bjohnson388, on Flickr 20171002_100736 by bjohnson388, on FlickrHad to put this clamp on the outside to put some curve in since the brace was cut right in the middle it was sagging.  20171002_100742 by bjohnson388, on Flickr 20171002_100742 by bjohnson388, on FlickrAfter I tacked the brace I put it on the truck to verify it was right. It came out perfect. This fender hasn't been on this truck for almost 4 years.  20171002_104922 by bjohnson388, on Flickr 20171002_104922 by bjohnson388, on FlickrThis bottom mounting hole is about 3/4" big so there is plenty of play to move the fender around. 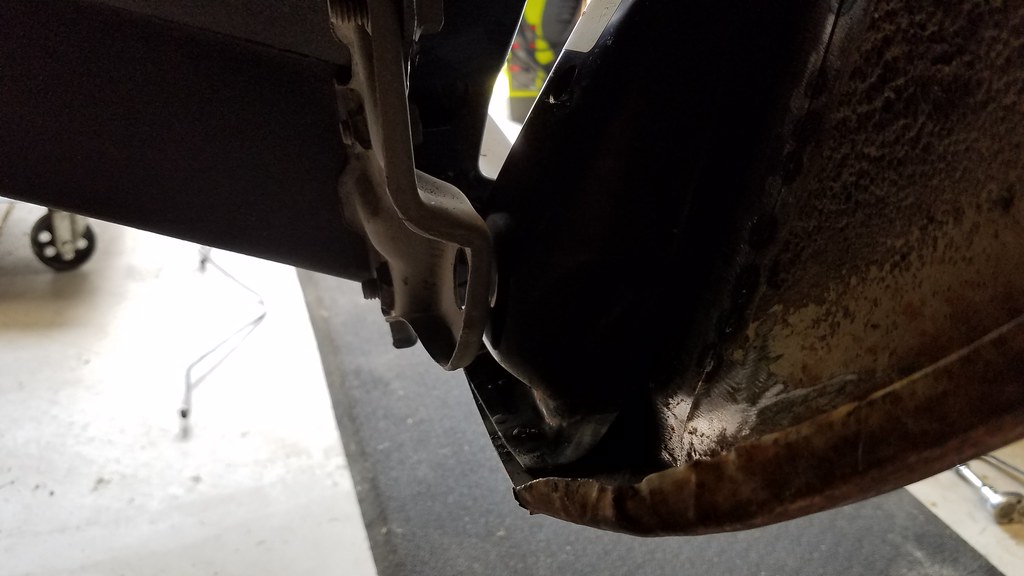 20171002_104935 by bjohnson388, on Flickr 20171002_104935 by bjohnson388, on Flickr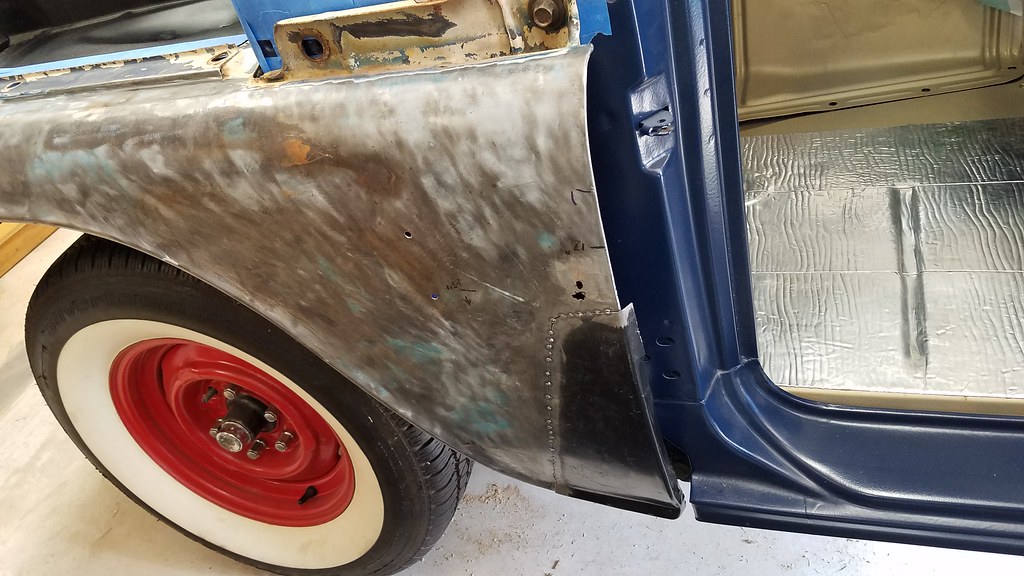 20171002_104944 by bjohnson388, on Flickr 20171002_104944 by bjohnson388, on FlickrWith it verified it was in the right place plug welded the brace in.  20171002_113145 by bjohnson388, on Flickr 20171002_113145 by bjohnson388, on FlickrWith some primer and undercoating no one will never notice anything happened here.  20171002_114654 by bjohnson388, on Flickr 20171002_114654 by bjohnson388, on Flickr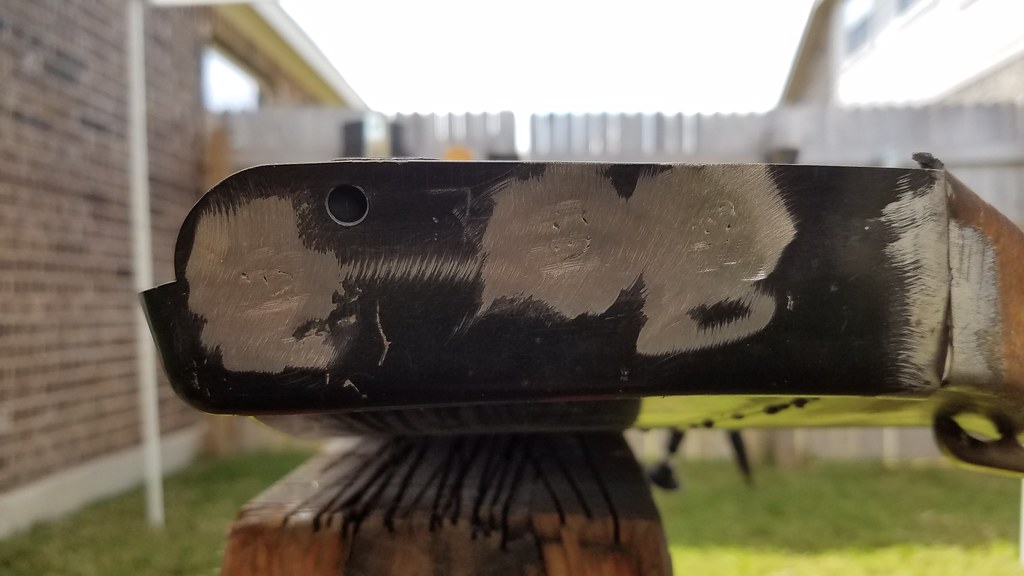 20171002_114658 by bjohnson388, on Flickr 20171002_114658 by bjohnson388, on FlickrDealt with this part next. Massaged it into place. 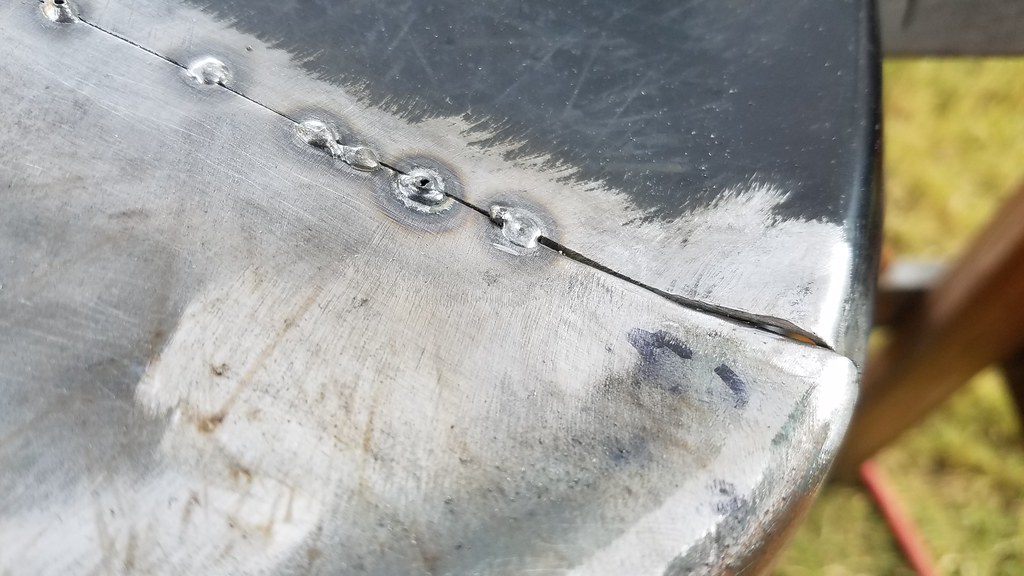 20171002_115024 by bjohnson388, on Flickr 20171002_115024 by bjohnson388, on FlickrStitching it up very slowly. VERY SLOW.  20171002_121239 by bjohnson388, on Flickr 20171002_121239 by bjohnson388, on FlickrIn fact to keep busy during cooling I drug out the front bed panel to see if I could get the bow out of it. I didn't take any pics but I took a 2x4 and a BFH and beat the hell out of it til I got it pretty damn straight. I also knocked out about 8 really bad dents that were from stuff sliding forward in the bed. So while waiting for the fender to cool I decided to start stripping it. 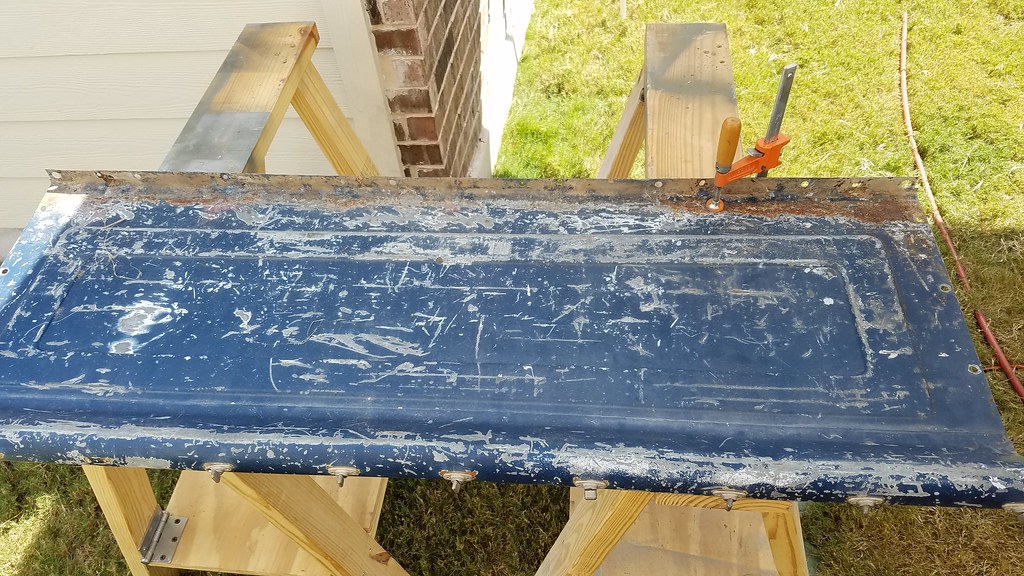 20171002_142759 by bjohnson388, on Flickr 20171002_142759 by bjohnson388, on Flickr2 work stations in the shade with the Big fan blowing. Was a beautiful 84* today. I worked til 5p. 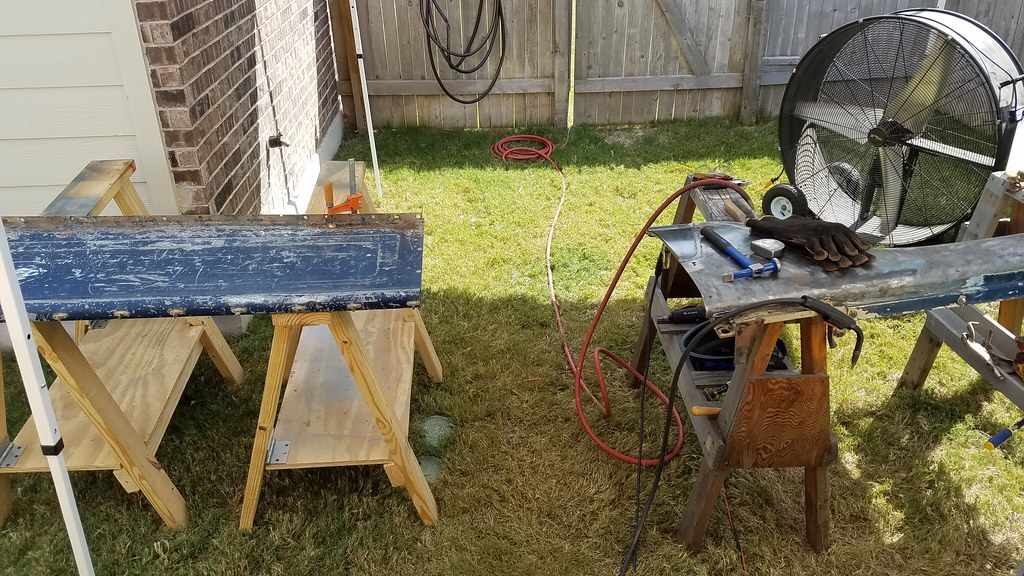 20171002_142808 by bjohnson388, on Flickr 20171002_142808 by bjohnson388, on FlickrBefore 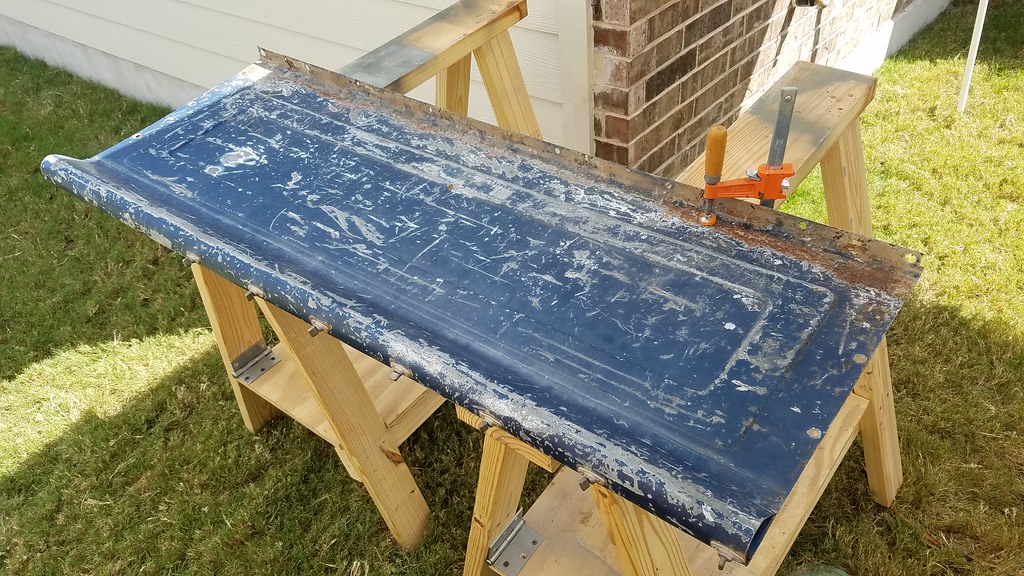 20171002_142803 by bjohnson388, on Flickr 20171002_142803 by bjohnson388, on FlickrDrilled out the rivets and took these buggers off. My FIL had a vinyl tonneau cover on it. 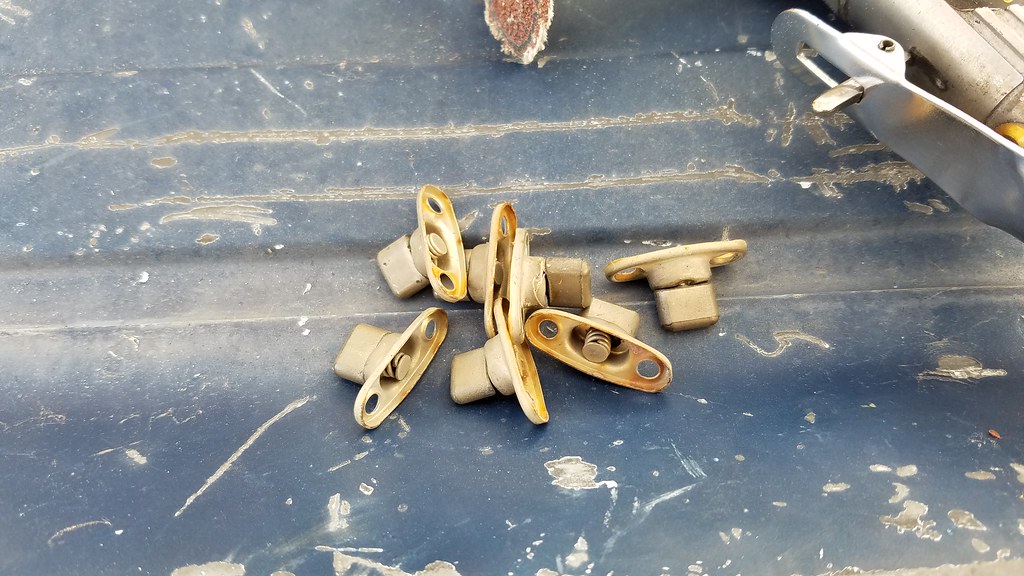 20171002_143614 by bjohnson388, on Flickr 20171002_143614 by bjohnson388, on FlickrAching neck, back, arms and 3 hours later. 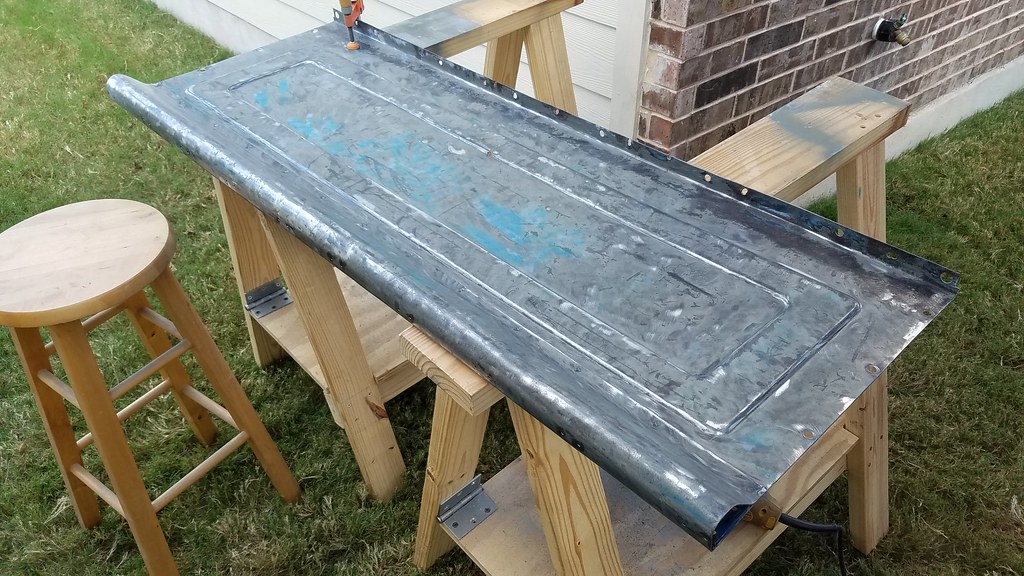 20171002_164953 by bjohnson388, on Flickr 20171002_164953 by bjohnson388, on Flickr 20171002_165012 by bjohnson388, on Flickr 20171002_165012 by bjohnson388, on FlickrThe fender is almost stitched up. The the next thing is putting a patch right above this new piece. The bottom patch wasn't quite long enough.  20171002_165017 by bjohnson388, on Flickr 20171002_165017 by bjohnson388, on FlickrQuick pass with the dual action sander and some 80 grit. These bed pieces are galvanized from the factory. I tried my best to leave as much of it as possible. 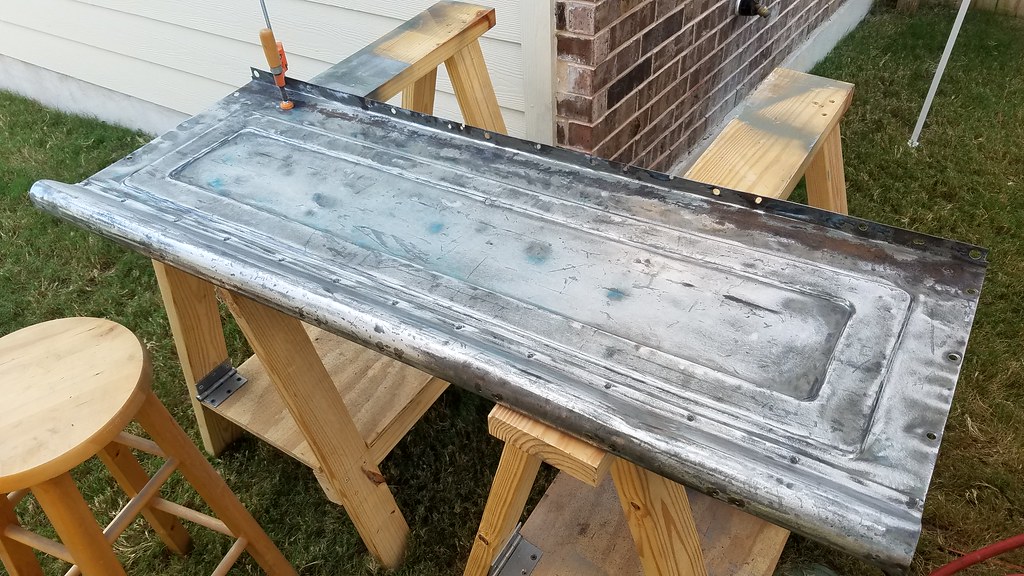 20171002_165537 by bjohnson388, on Flickr 20171002_165537 by bjohnson388, on FlickrI have a little bit of rust at the bottom of the panel I will have to treat and one small pin hole I can weld up with a nail head.  20171002_165541 by bjohnson388, on Flickr 20171002_165541 by bjohnson388, on FlickrThat's it for today. Bret
__________________
64' Build Thread http://67-72chevytrucks.com/vboard/s...d.php?t=586955 |

|

|
|
10-03-2017, 06:34 AM
|
#2 |
|
Registered User
Join Date: Nov 2014
Location: Omaha
Posts: 558
|
Re: 64 C10 Stepside "Jaybird"

|
|
|
|
|
10-03-2017, 02:45 PM
|
#3 |
|
Registered User
Join Date: Dec 2012
Location: Rochester, KENT
Posts: 10,511
|
Re: 64 C10 Stepside "Jaybird"
This is really making me smile Mate.
Great progress again today. Well done.
__________________
MY BUILD LINK: http://67-72chevytrucks.com/vboard/s...585901]Redneck Express - 1966 C10 Short Fleetside MY USA ROADTRIPS http://forum.retro-rides.org/thread/...2018-humdinger IF YOU CAN'T FIX IT WITH A HAMMER, YOU'VE GOT AN ELECTRICAL PROBLEM MATE. |
|
|
|
|
10-04-2017, 08:42 AM
|
#4 | ||
|
Registered User
Join Date: Sep 2012
Location: Leander, TX
Posts: 969
|
Re: 64 C10 Stepside "Jaybird"
Quote:
 Quote:
Bret
__________________
64' Build Thread http://67-72chevytrucks.com/vboard/s...d.php?t=586955 |
||
|
|
|
|
10-04-2017, 09:11 AM
|
#5 |
|
Registered User
Join Date: Sep 2012
Location: Leander, TX
Posts: 969
|
Re: 64 C10 Stepside "Jaybird"
Yesterday's work.
I only had the morning to get stuff done as the weatherman predicted and rain. And for once he was right! Made a patch for this small spot. 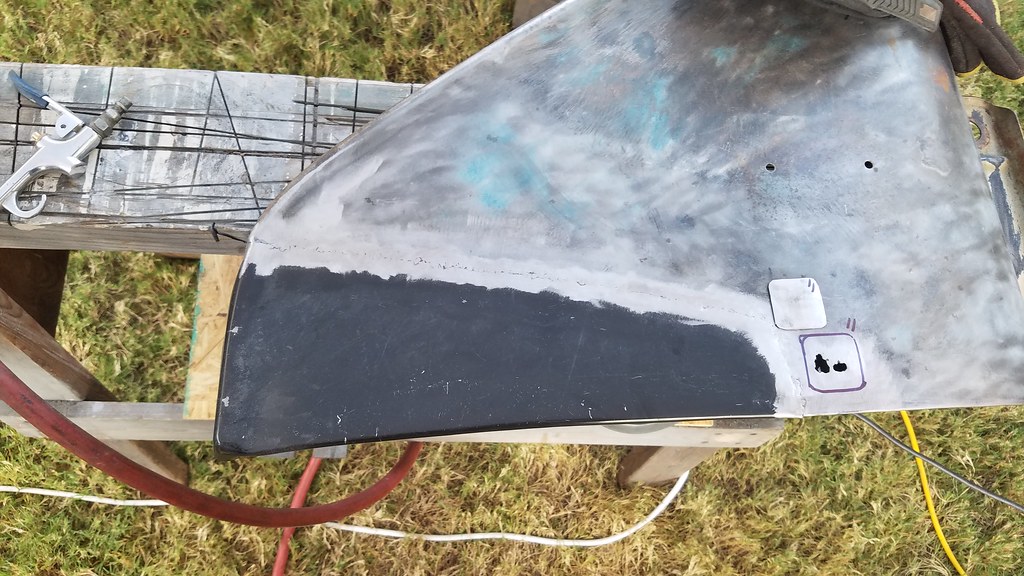 20171003_082614 by bjohnson388, on Flickr 20171003_082614 by bjohnson388, on FlickrOne thing I have learned is cutting the hole to match the patch is much easier than cutting the patch to try and match the hole. 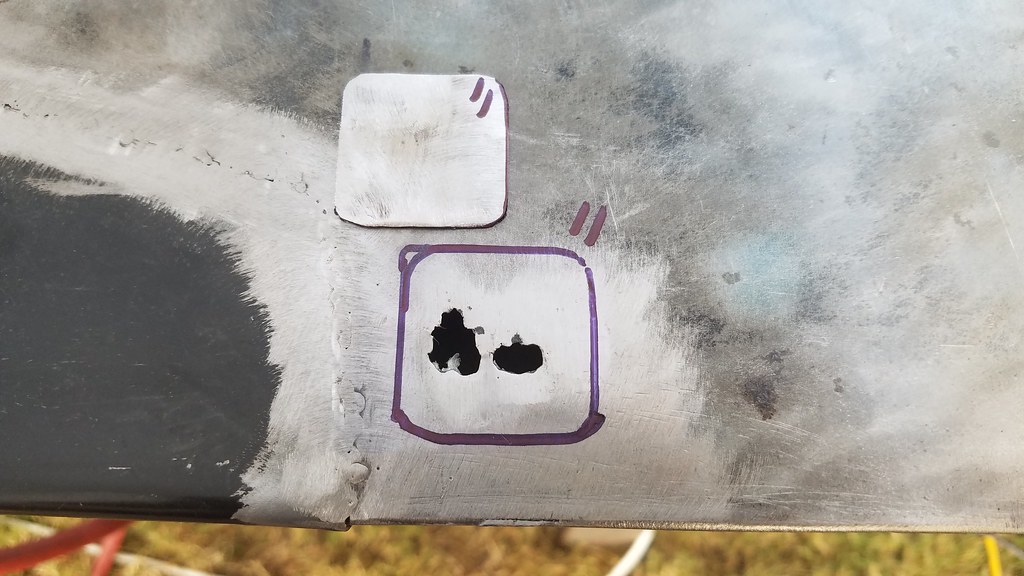 20171003_082610 by bjohnson388, on Flickr 20171003_082610 by bjohnson388, on FlickrI have been make all of my patches from this piece of a cab back. When I got my gas tank mounts John just cut the whole piece from the cab versus cutting all the spot welds. I don't blame him and the plus side I have some original sheet metal to patch with. 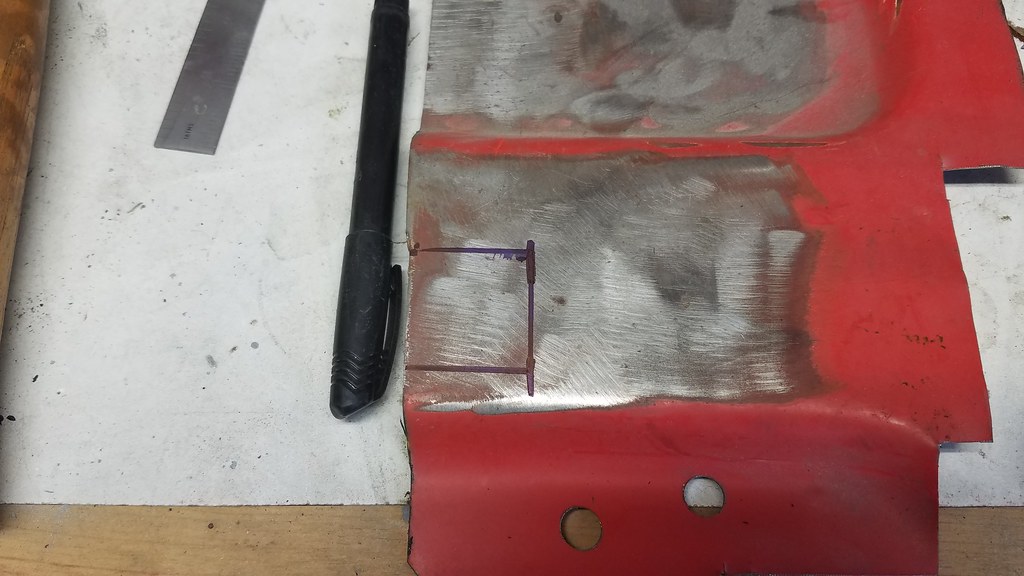 20171003_082216 by bjohnson388, on Flickr 20171003_082216 by bjohnson388, on Flickr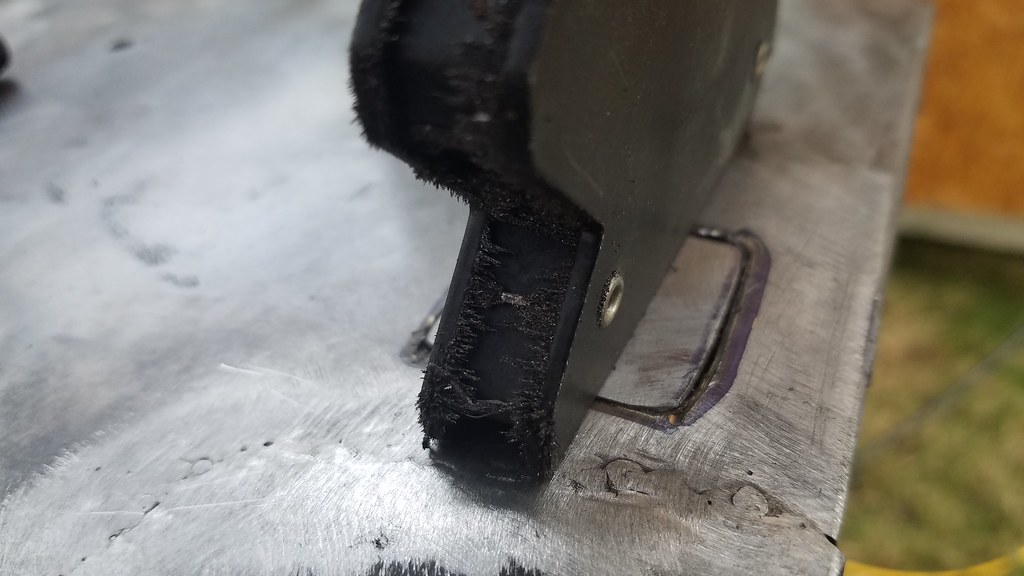 20171003_085125 by bjohnson388, on Flickr 20171003_085125 by bjohnson388, on Flickr 20171003_085130 by bjohnson388, on Flickr 20171003_085130 by bjohnson388, on FlickrWhile welding in the patch I flipped the front bed panel over. This is the only place on the whole truck that still has decent paint. It even still has a sheen to it. So I plan to just sand this side down really well and feather in all the bad places and just prime over it.  20171003_090156 by bjohnson388, on Flickr 20171003_090156 by bjohnson388, on FlickrI almost wanted to polish it out to see what the paint job my FIL did looked like.  20171003_090202 by bjohnson388, on Flickr 20171003_090202 by bjohnson388, on FlickrYou can see all the dents from over the years I knocked down. Not perfect but much better than before.  20171003_092921 by bjohnson388, on Flickr 20171003_092921 by bjohnson388, on Flickr 20171003_092926 by bjohnson388, on Flickr 20171003_092926 by bjohnson388, on FlickrDrilled out the one small rust hole it had. 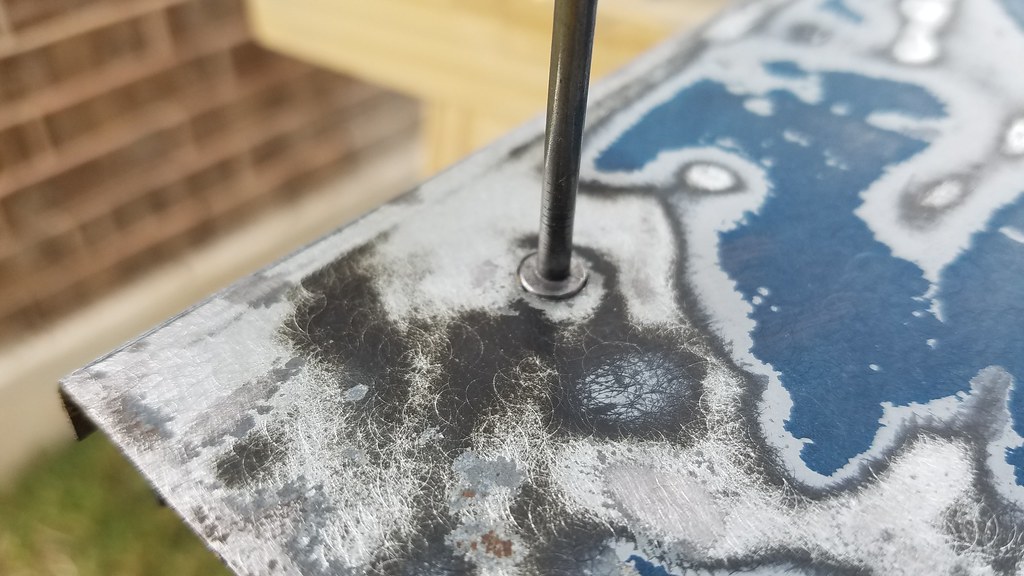 20171003_093509 by bjohnson388, on Flickr 20171003_093509 by bjohnson388, on Flickr 20171003_094517 by bjohnson388, on Flickr 20171003_094517 by bjohnson388, on FlickrWelding up the 20 holes across the top. 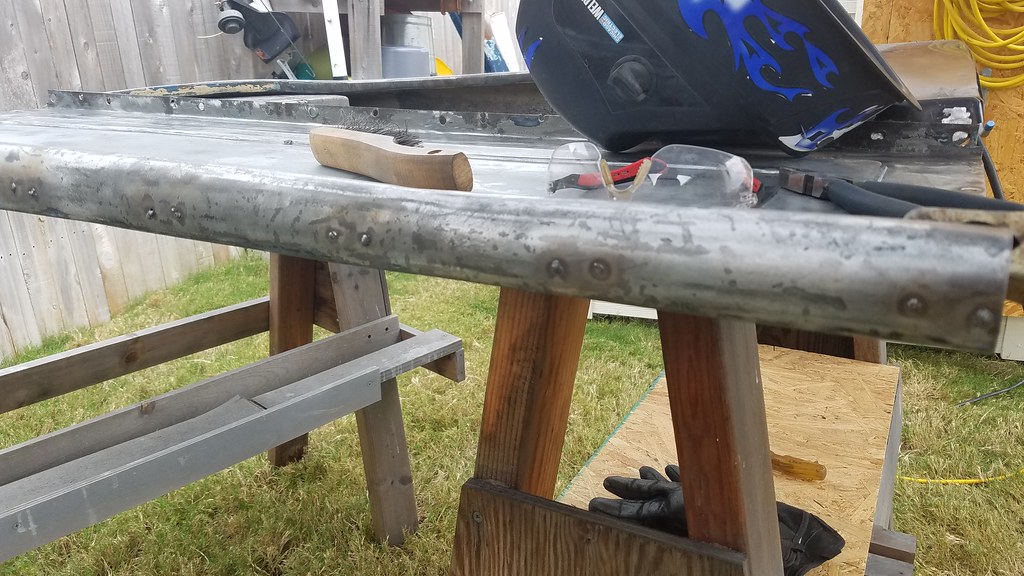 20171003_101315 by bjohnson388, on Flickr 20171003_101315 by bjohnson388, on FlickrThese were super easy. Even for me.  20171003_094528 by bjohnson388, on Flickr 20171003_094528 by bjohnson388, on FlickrHad one big 3/8" size hole right in the raised part in the middle. I made a flanged patch and welded from both sides. 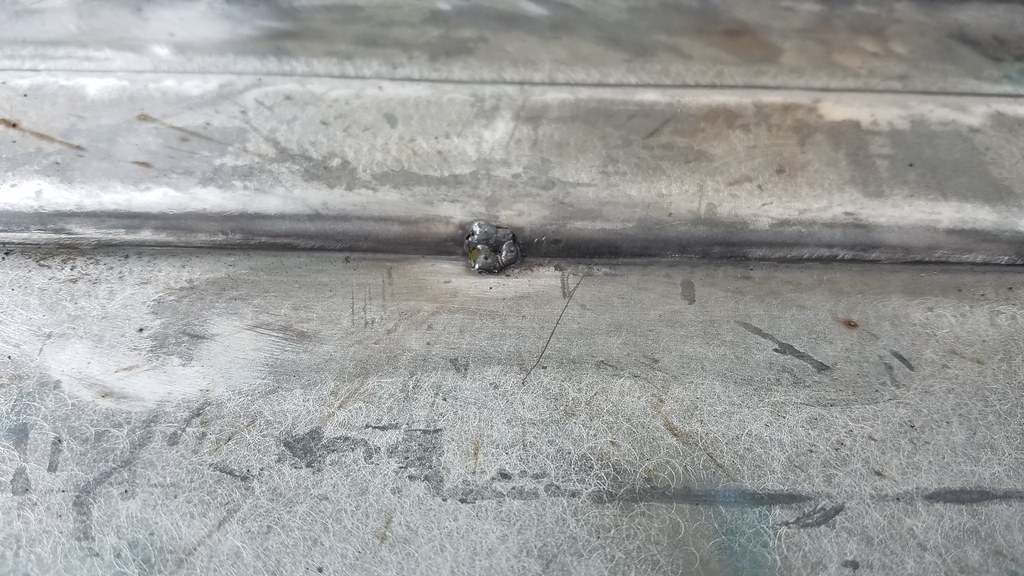 20171003_101321 by bjohnson388, on Flickr 20171003_101321 by bjohnson388, on FlickrThis pic popped up on my instagram feed and the shot of the bed really helps motivate me. Hopefully I will have mine looking like that soon. Not sure about the Elco bumper?  Screenshot_20171003-135200 by bjohnson388, on Flickr Screenshot_20171003-135200 by bjohnson388, on FlickrStarted stripping the driver side bed panel. I made a run to HF and bought one of their Polycarbide abrasive wheels, a new cup brush and a 3" Roloc Disc sander. The Polycarbide wheel works really well for stripping fast and is much faster than the cup brush. Downside is it wears out really quick. 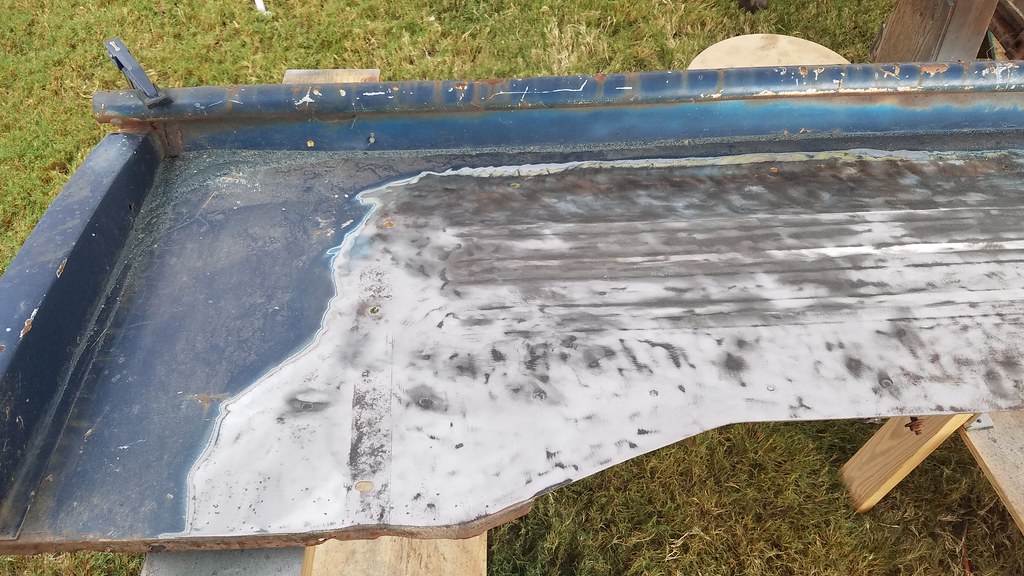 20171003_175334 by bjohnson388, on Flickr 20171003_175334 by bjohnson388, on FlickrNot sure how I am going to get up at the top near the rail. My grinder is too big to fit up in there. Either going to have to sandblast or use paint stripper.  20171003_175328 by bjohnson388, on Flickr 20171003_175328 by bjohnson388, on FlickrTons of paint on this bedside. Especially around the outside edges of the fenders. Looks like there is about 6 layers of paint and primer. 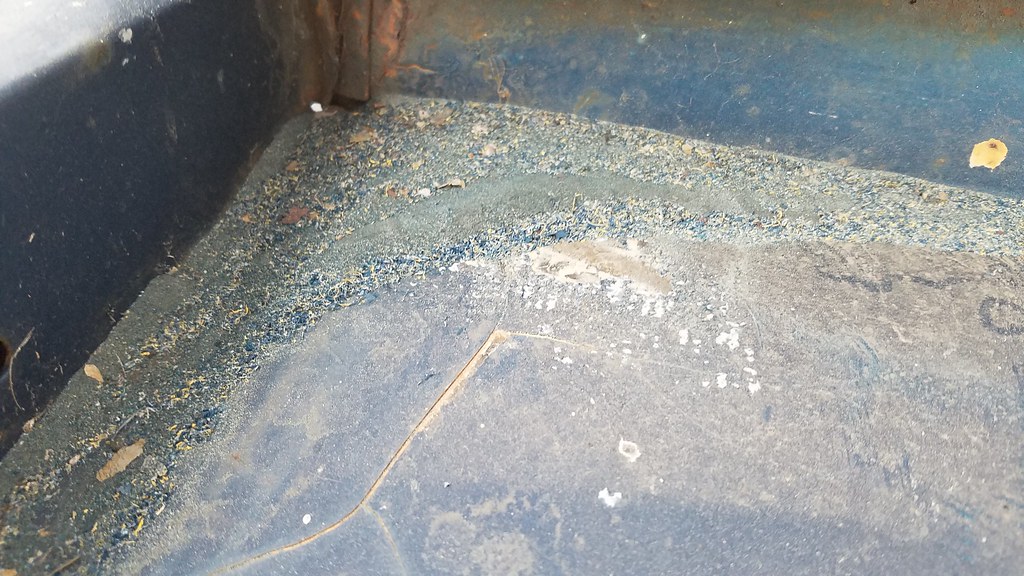 20171003_175337 by bjohnson388, on Flickr 20171003_175337 by bjohnson388, on FlickrSo this front corner needs attention. Some one pulled or tied something too it and pulled it loose from the stake, broke the weld and the metal on then side of the bed and the tab where it was spot welded to the bedside. What were they thinking?  20171003_175343 by bjohnson388, on Flickr 20171003_175343 by bjohnson388, on FlickrBroken tab.  20171003_175351 by bjohnson388, on Flickr 20171003_175351 by bjohnson388, on FlickrLooks like it might have happened before my father in law got it as the top of the bed has body filler on it. 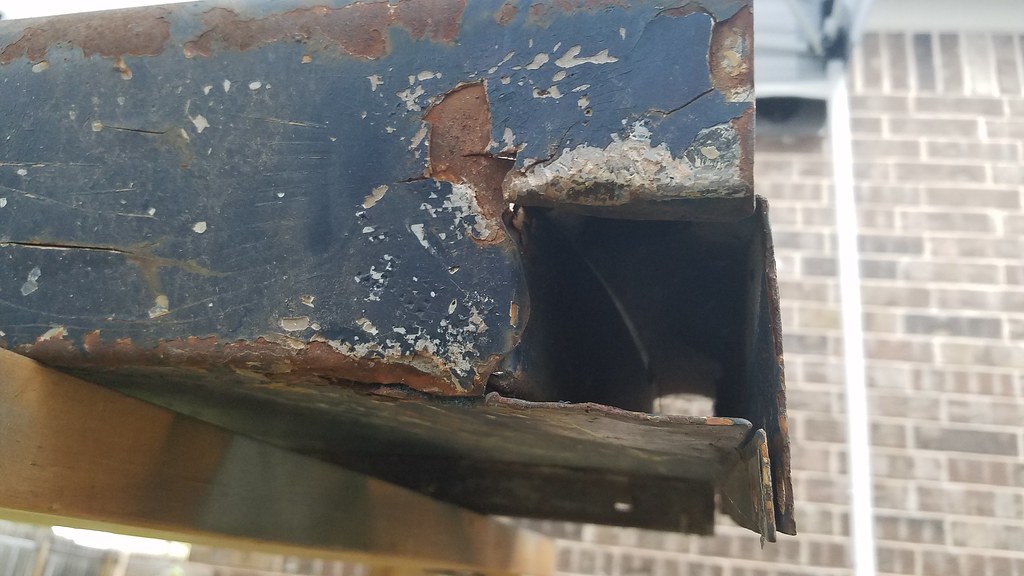 20171003_175404 by bjohnson388, on Flickr 20171003_175404 by bjohnson388, on Flickrthanks for looking in, Bret
__________________
64' Build Thread http://67-72chevytrucks.com/vboard/s...d.php?t=586955 Last edited by bj383ss; 10-04-2017 at 09:40 AM. |
|
|
|
|
10-04-2017, 08:52 AM
|
#6 |
|
Registered User
Join Date: Sep 2013
Location: Kent England
Posts: 1,025
|
Re: 64 C10 Stepside "Jaybird"
Looking good Bret . I have started getting my doors lined up to the fenders , luckily the pattern fender to door gap seems quite good .
__________________
FINALLY PUTTING IT BACK TOGETHER AT LONG LAST MY BUILD THREAD: http://67-72chevytrucks.com/vboard/s...d.php?t=611614 |
|
|
|
|
10-04-2017, 07:15 PM
|
#7 |
|
Registered User
Join Date: Sep 2009
Location: Monroe,Iowa
Posts: 4,370
|
Re: 64 C10 Stepside "Jaybird"
WOW! Just read your whole Thread, I'm impressed with the work you have done and thankful for the pictures on how you did it. I'm starting a Full tear down of my 64 this Fall and going to have to do a lot of the same things you did. Thanks Again ,Ray
|
|
|
|
|
10-04-2017, 08:44 PM
|
#8 | ||
|
Registered User
Join Date: Sep 2012
Location: Leander, TX
Posts: 969
|
Re: 64 C10 Stepside "Jaybird"
Quote:
Quote:
Bret
__________________
64' Build Thread http://67-72chevytrucks.com/vboard/s...d.php?t=586955 |
||
|
|
|
|
10-04-2017, 09:09 PM
|
#9 |
|
Registered User
Join Date: Sep 2012
Location: Leander, TX
Posts: 969
|
Re: 64 C10 Stepside "Jaybird"
I spent all day working on the driver fender.
First off was bending over the patch. 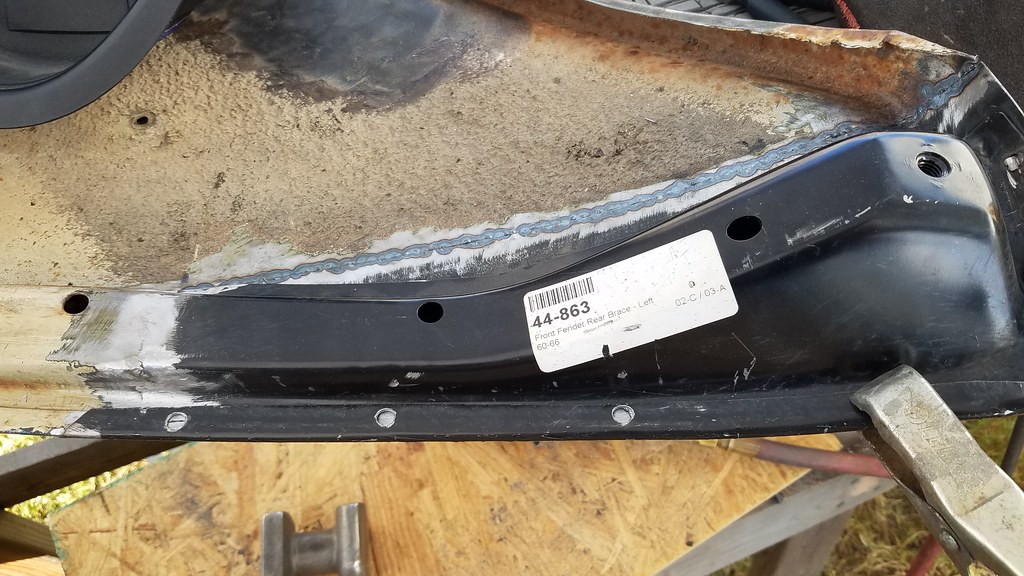 20171004_102558 by bjohnson388, on Flickr 20171004_102558 by bjohnson388, on FlickrNext I knocked this dent back in place and then welded up the holes. 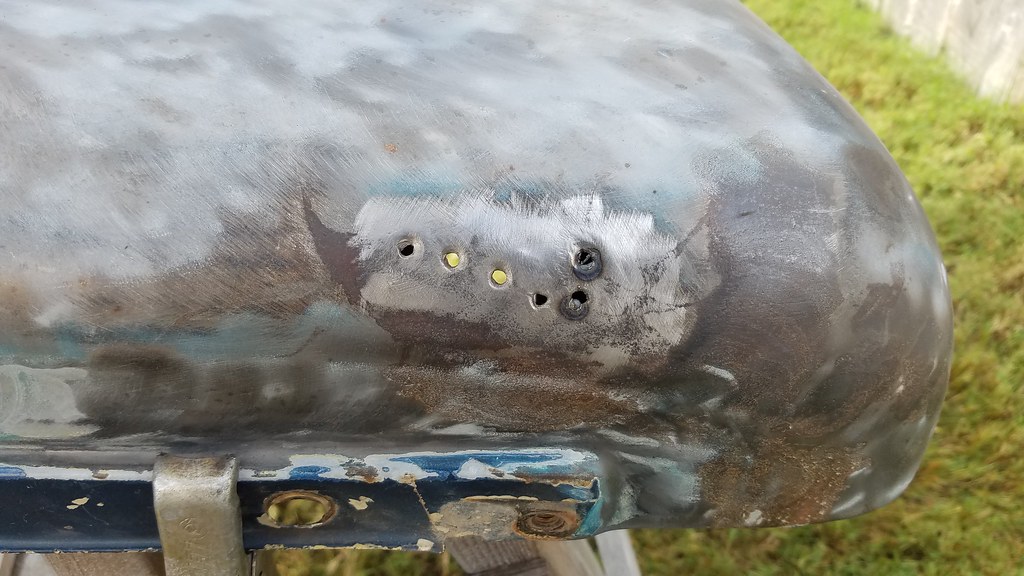 20171004_112317 by bjohnson388, on Flickr 20171004_112317 by bjohnson388, on Flickr 20171004_122024 by bjohnson388, on Flickr 20171004_122024 by bjohnson388, on Flickr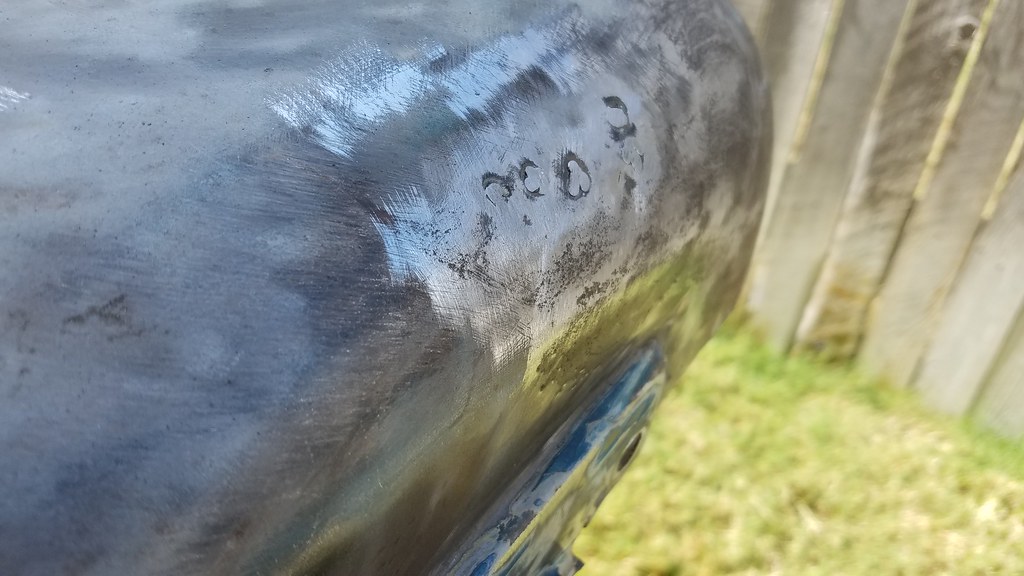 20171004_122028 by bjohnson388, on Flickr 20171004_122028 by bjohnson388, on FlickrLast thing to weld up was a patch for this rotted place on the eyebrow.  20171004_122042 by bjohnson388, on Flickr 20171004_122042 by bjohnson388, on FlickrHung it on the sawhorse to make it easier to work on.  20171004_123306 by bjohnson388, on Flickr 20171004_123306 by bjohnson388, on FlickrI didn't take a pic but this corner was packed all the way back to the top of my cut with dirt and rust. It took about 10 minutes to dig and blow it all out.  20171004_124340 by bjohnson388, on Flickr 20171004_124340 by bjohnson388, on Flickr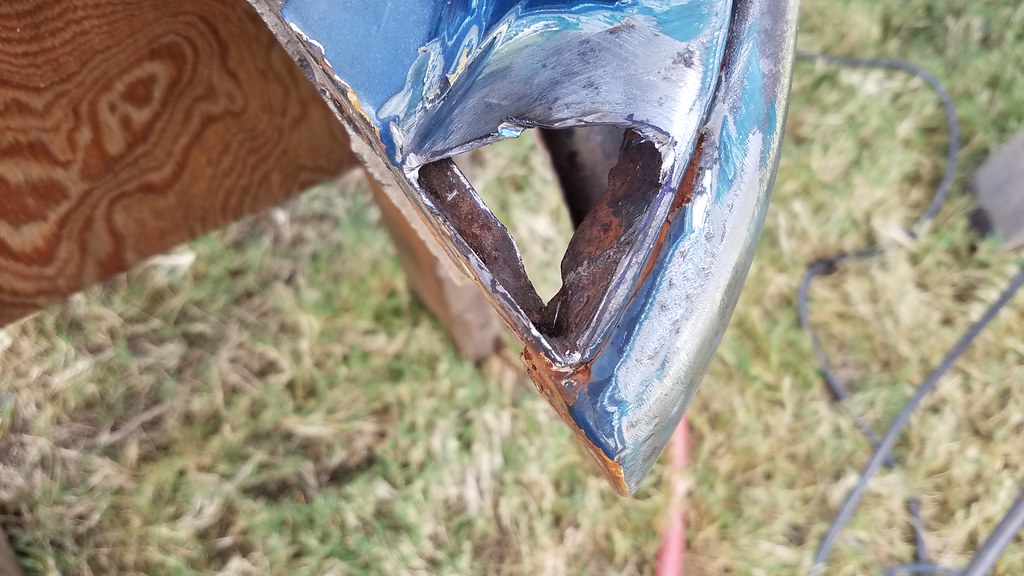 20171004_124345 by bjohnson388, on Flickr 20171004_124345 by bjohnson388, on Flickr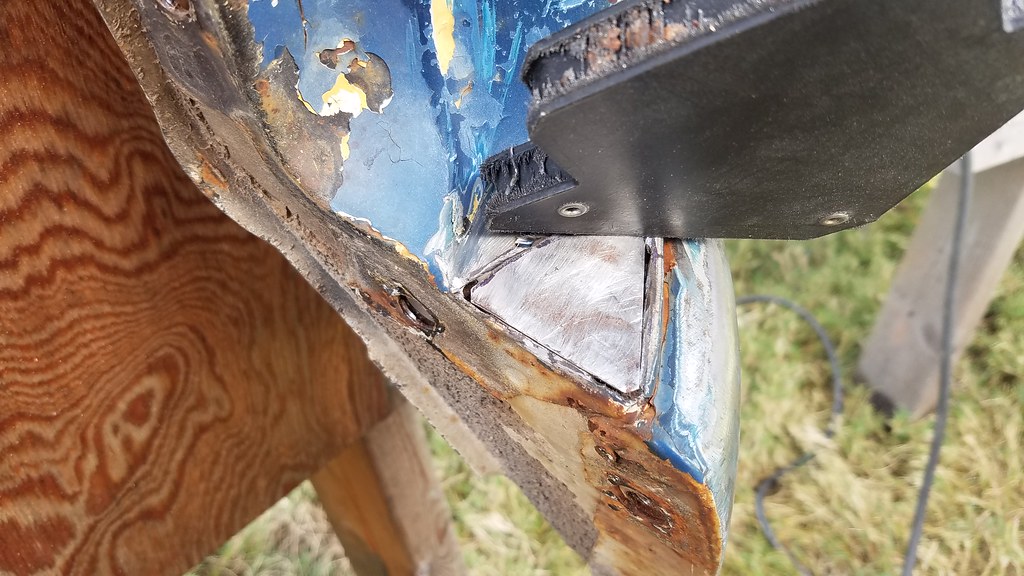 20171004_124332 by bjohnson388, on Flickr 20171004_124332 by bjohnson388, on FlickrNot perfect but pretty close and will be fine with some mud. 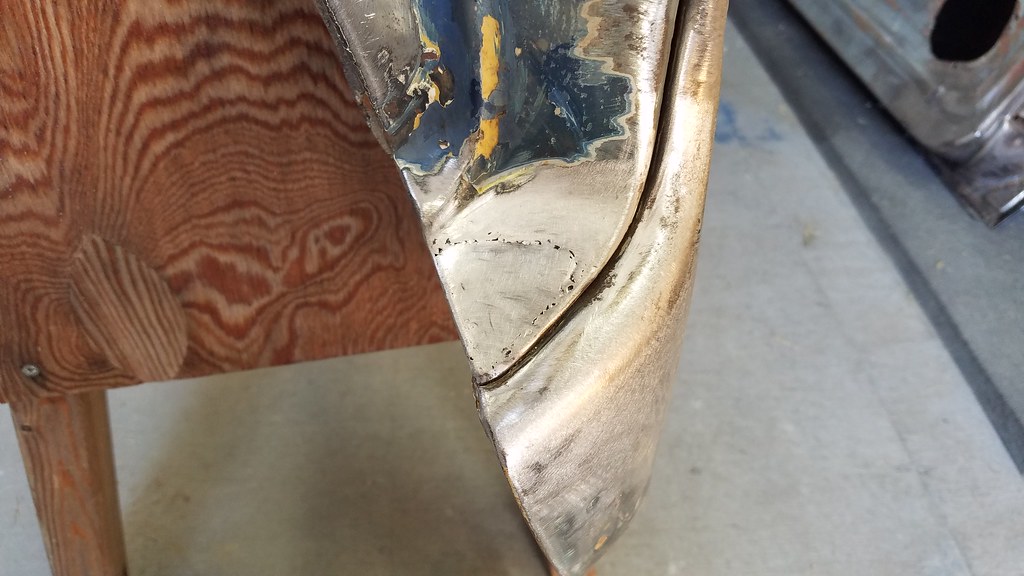 20171004_153748 by bjohnson388, on Flickr 20171004_153748 by bjohnson388, on Flickr 20171004_153800 by bjohnson388, on Flickr 20171004_153800 by bjohnson388, on FlickrAnd here is the fender all stripped, cleaned, welded, and ground ready for some Metal 2 Metal aluminum filler before primer. 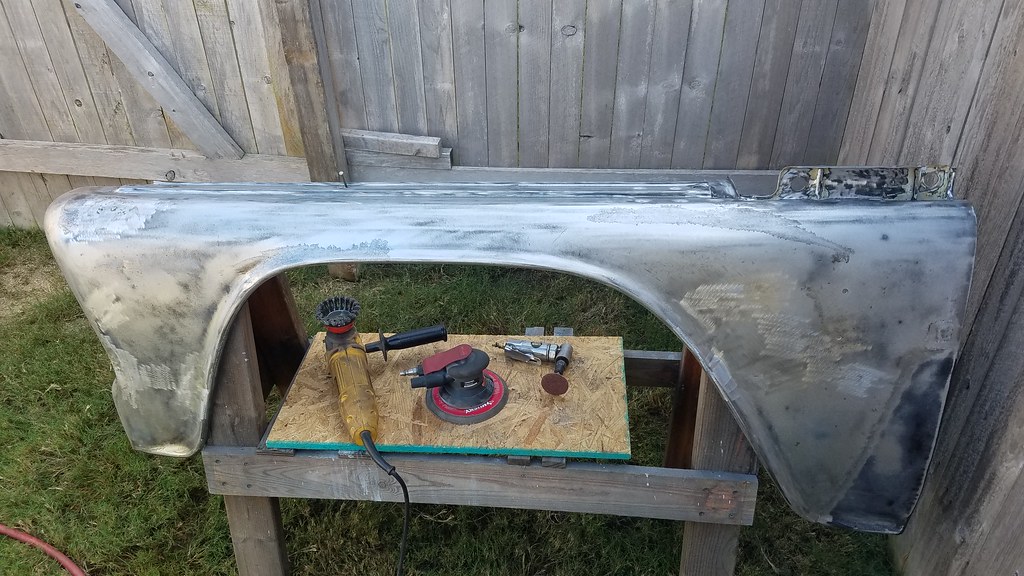 20171004_160429 by bjohnson388, on Flickr 20171004_160429 by bjohnson388, on Flickr 20171004_160433 by bjohnson388, on Flickr 20171004_160433 by bjohnson388, on Flickr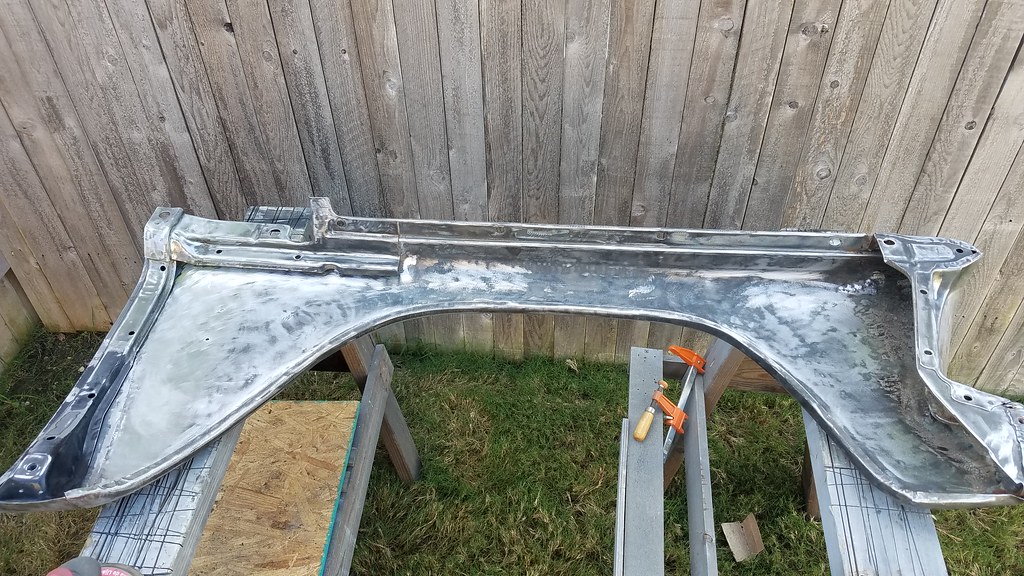 20171004_162834 by bjohnson388, on Flickr 20171004_162834 by bjohnson388, on FlickrThis eyebrow part of the fender is one of my favorite parts about these trucks.  20171004_162842 by bjohnson388, on Flickr 20171004_162842 by bjohnson388, on FlickrFirst coat of mud.  20171004_165908 by bjohnson388, on Flickr 20171004_165908 by bjohnson388, on Flickr 20171004_165917 by bjohnson388, on Flickr 20171004_165917 by bjohnson388, on Flickr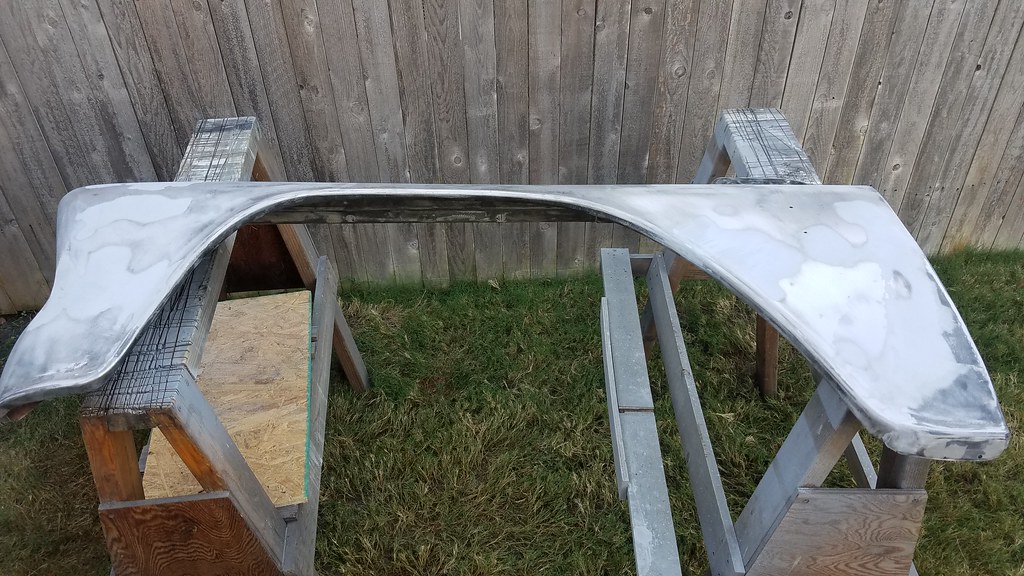 20171004_175126 by bjohnson388, on Flickr 20171004_175126 by bjohnson388, on FlickrBest before shot I could find of it. 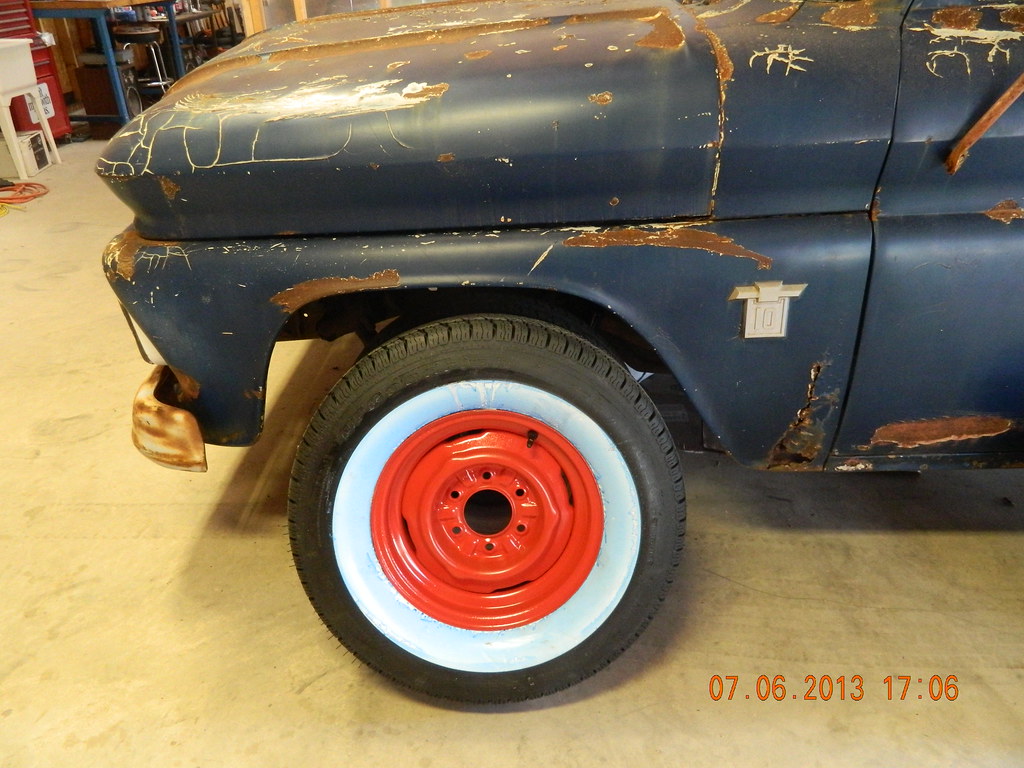 DSCN6789 by bjohnson388, on Flickr DSCN6789 by bjohnson388, on FlickrTomorrow will get i primed and then some primer surfacer and blocking after that. Bret
__________________
64' Build Thread http://67-72chevytrucks.com/vboard/s...d.php?t=586955 |
|
|
|
|
10-05-2017, 12:36 AM
|
#10 |
|
Post Whore
 Join Date: Mar 2013
Location: Southern Oregon
Posts: 10,384
|
Re: 64 C10 Stepside "Jaybird"
You do some fast work man!
Looks good! 
__________________
1966 Chevy C10 "Project Two Tone" http://67-72chevytrucks.com/vboard/s...d.php?t=596643 1964 GMC "Crustine" semi-build:http://67-72chevytrucks.com/vboard/s...d.php?t=665056 My youtube channel. Username "Military Chevy": https://www.youtube.com/channel/UC_h...fzpcUXyK_5-uiw |
|
|
|
|
10-05-2017, 06:15 PM
|
#11 | |
|
Registered User
Join Date: Sep 2012
Location: Leander, TX
Posts: 969
|
Re: 64 C10 Stepside "Jaybird"
Quote:
Well my progress today is not as impressive as I never made it back outside after lunch. After 6.5 days of going strong my body gave out today. I did get the driver fender in primer and the front bed panel. 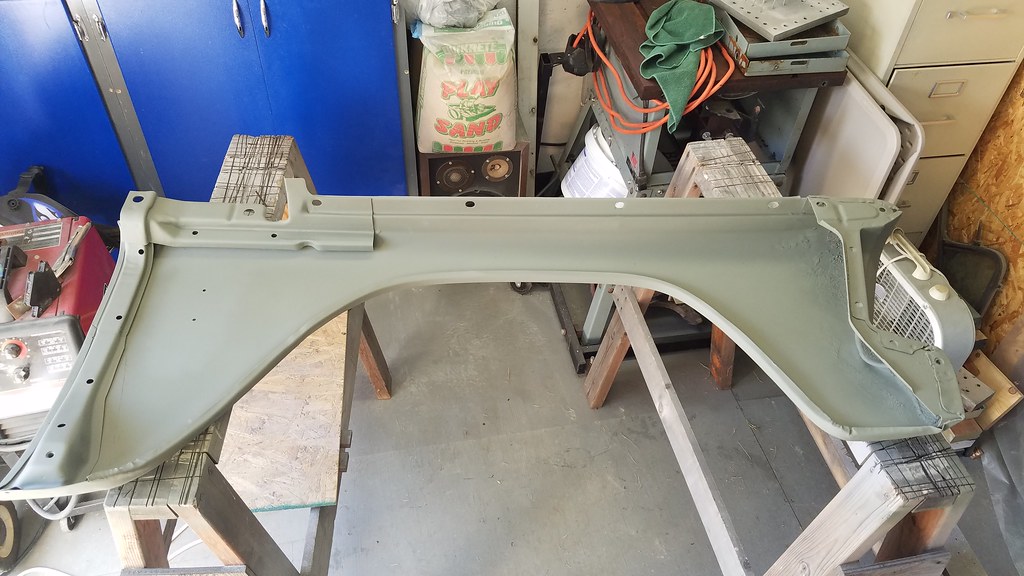 20171005_144642 by bjohnson388, on Flickr 20171005_144642 by bjohnson388, on FlickrIt still need a little bit of glazing putty. 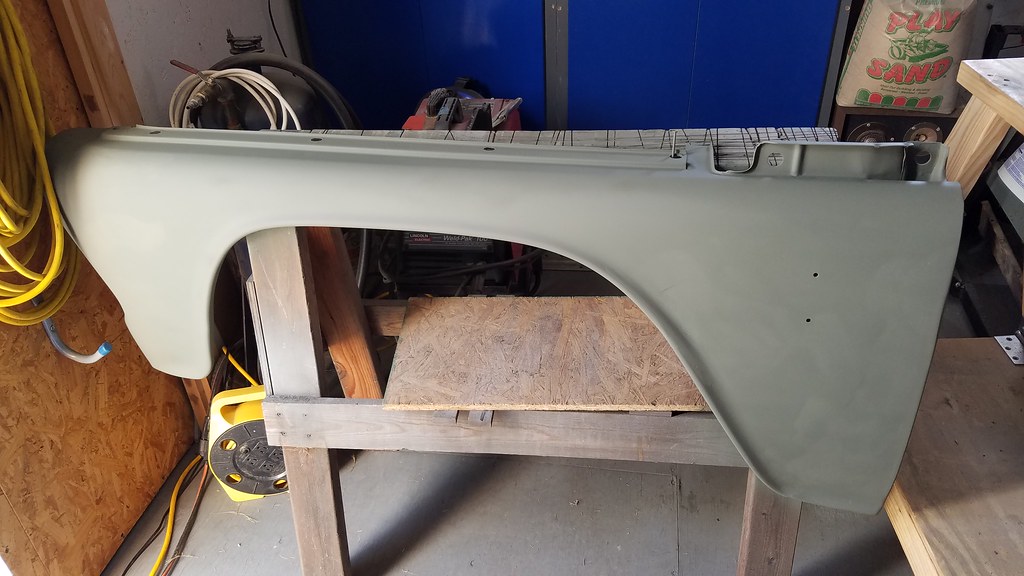 20171005_164921 by bjohnson388, on Flickr 20171005_164921 by bjohnson388, on FlickrBed panel looks pretty good considering how rough it was. 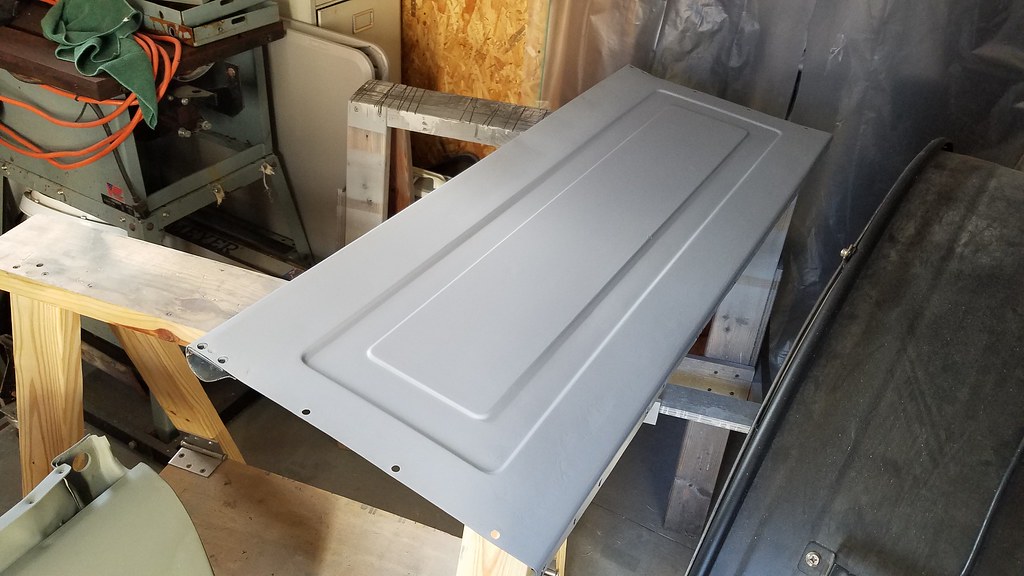 20171005_164927 by bjohnson388, on Flickr 20171005_164927 by bjohnson388, on FlickrThat's it for today. Will hit it hard in the morning and then a lunch date with the wife. So tomorrow might be another half day. Bret
__________________
64' Build Thread http://67-72chevytrucks.com/vboard/s...d.php?t=586955 |
|
|
|
|
|
10-04-2017, 08:57 PM
|
#12 |
|
Registered User
Join Date: Sep 2009
Location: Monroe,Iowa
Posts: 4,370
|
Re: 64 C10 Stepside "Jaybird"
Bret, I don't have a thread yet. I'm still working on my shop. I have a 24x48 shop and I need to make room for our Harley's ,my wife's car and my Caddy plus get the 64 in it. But I have a plan, the Harleys may spend the winter in the MC trailer and the Caddy will sit outside with my S10 unless it's snowing. The PO thought he was a Sculpter and worked wonders with Bondo! Luckily I'm retired and I can spend as much time as I want in the shop. Ray
|
|
|
|
|
10-06-2017, 09:36 PM
|
#13 |
|
Registered User
Join Date: Sep 2009
Location: Monroe,Iowa
Posts: 4,370
|
Re: 64 C10 Stepside "Jaybird"
Those look like 1950 Pontiac Taillights.
|
|
|
|
|
10-07-2017, 04:04 AM
|
#14 |
|
Registered User
Join Date: Dec 2012
Location: Rochester, KENT
Posts: 10,511
|
Re: 64 C10 Stepside "Jaybird"
You are rocking man !!
Some serious forward progress here.
__________________
MY BUILD LINK: http://67-72chevytrucks.com/vboard/s...585901]Redneck Express - 1966 C10 Short Fleetside MY USA ROADTRIPS http://forum.retro-rides.org/thread/...2018-humdinger IF YOU CAN'T FIX IT WITH A HAMMER, YOU'VE GOT AN ELECTRICAL PROBLEM MATE. |
|
|
|
|
10-07-2017, 08:10 AM
|
#15 | ||
|
Registered User
Join Date: Sep 2012
Location: Leander, TX
Posts: 969
|
Re: 64 C10 Stepside "Jaybird"
Quote:
Quote:
Bret
__________________
64' Build Thread http://67-72chevytrucks.com/vboard/s...d.php?t=586955 |
||
|
|
|
|
10-07-2017, 08:57 AM
|
#16 |
|
Registered User
Join Date: Sep 2013
Location: Kent England
Posts: 1,025
|
Re: 64 C10 Stepside "Jaybird"
Looking good Bret . I plan to get some done on my next holiday ( vacation ) at Christmas time as we shut down for two weeks .
__________________
FINALLY PUTTING IT BACK TOGETHER AT LONG LAST MY BUILD THREAD: http://67-72chevytrucks.com/vboard/s...d.php?t=611614 |
|
|
|
|
10-07-2017, 09:14 AM
|
#17 |
|
Registered User
Join Date: Jan 2012
Location: Killeen, Tx
Posts: 1,352
|
Re: 64 C10 Stepside "Jaybird"
When do you think you will be done? We have a show coming up at the end of the month I would love for you to attend.
__________________
John Z 1962 Chevy C10 Stepside 62 Barnfind My build tread: http://67-72chevytrucks.com/vboard/s...d.php?t=507513 |
|
|
|
|
10-07-2017, 07:45 PM
|
#18 | ||
|
Registered User
Join Date: Sep 2012
Location: Leander, TX
Posts: 969
|
Re: 64 C10 Stepside "Jaybird"
Quote:
Quote:
Bret
__________________
64' Build Thread http://67-72chevytrucks.com/vboard/s...d.php?t=586955 |
||
|
|
|
|
10-07-2017, 07:53 PM
|
#19 |
|
Registered User
Join Date: Sep 2012
Location: Leander, TX
Posts: 969
|
Re: 64 C10 Stepside "Jaybird"
Worked half day today and my body just gave out again. So I went inside and helped the wife with some chores and hung out with my boys.
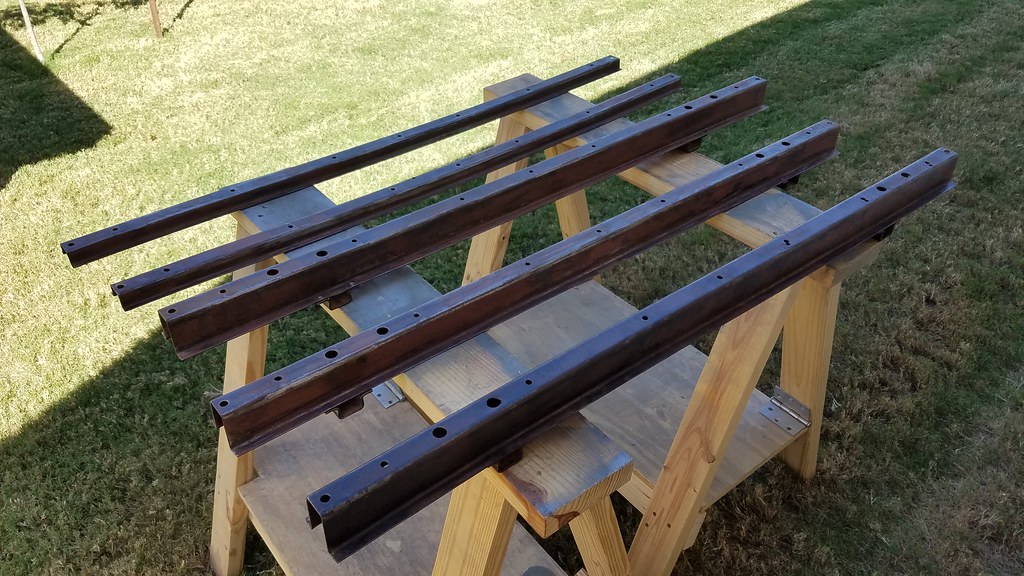
Got this ready for some metal 2 metal.  20171007_105642 by bjohnson388, on Flickr 20171007_105642 by bjohnson388, on FlickrMy buddy John talked me into doing bodywork on all the bed panels so here is the start. 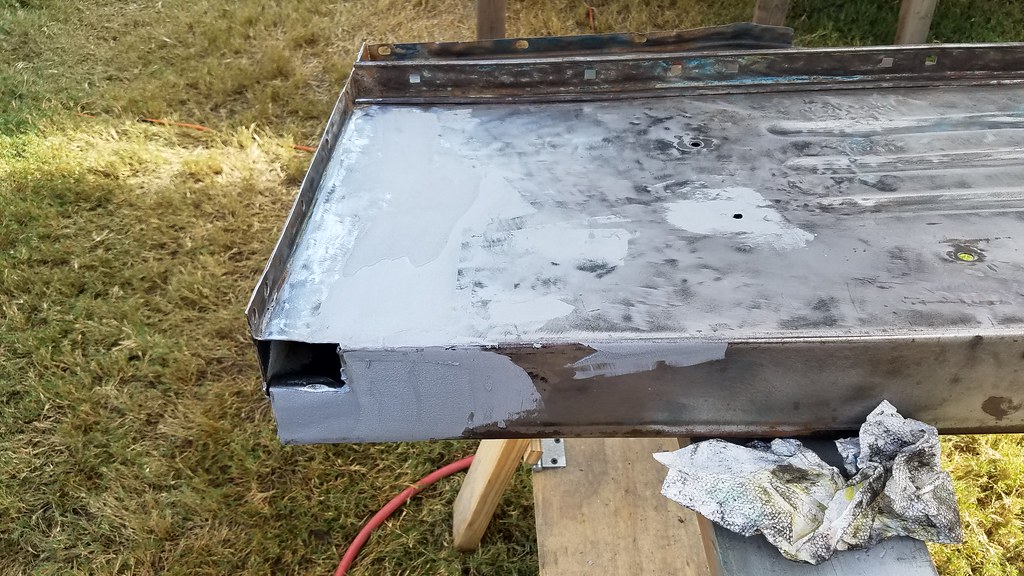 20171007_110633 by bjohnson388, on Flickr 20171007_110633 by bjohnson388, on Flickr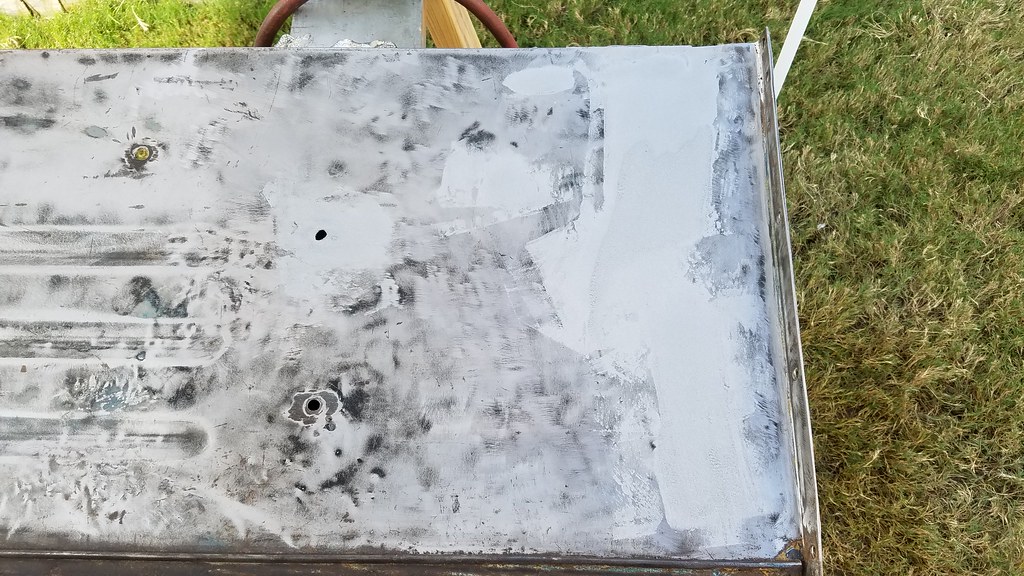 20171007_110628 by bjohnson388, on Flickr 20171007_110628 by bjohnson388, on FlickrWhen I block sanded the driver fender I had 2 high spots near my patch weld so I knocked them down gently but accidentally messed up some of my metal 2 metal so sanded it down and reapplied some more. UGH. 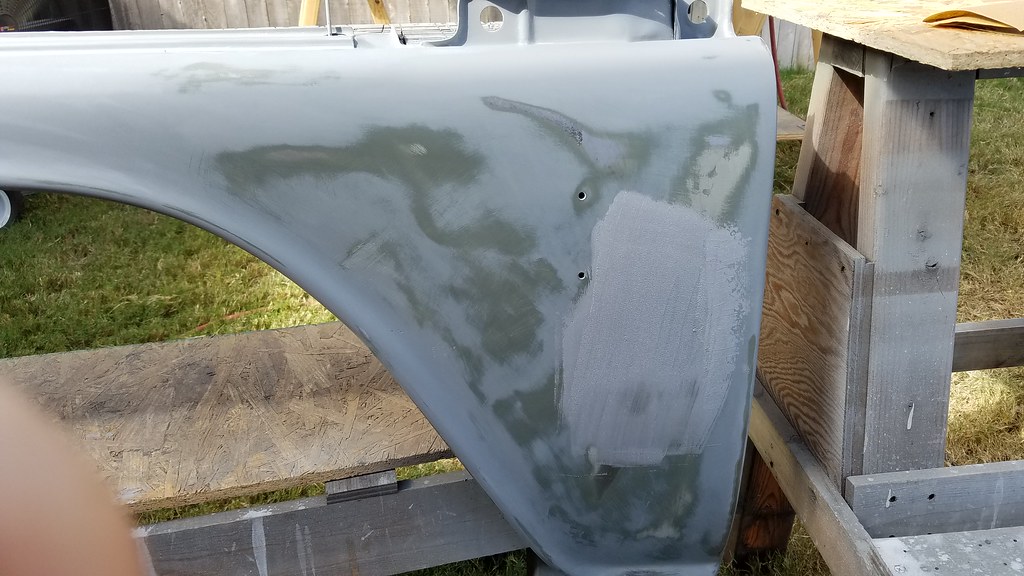 20171007_110620 by bjohnson388, on Flickr 20171007_110620 by bjohnson388, on FlickrNext up was working on my cross sills. I was originally going to sandblast them to bare metal but after looking at them and cleaning them up they aren't that bad. My FIL shot these with red oxide primer when he repainted the truck. What little rust I did have I shot with Rust encaspulator. Will let that dry for 24 hours and then prime and shoot them satin Black. 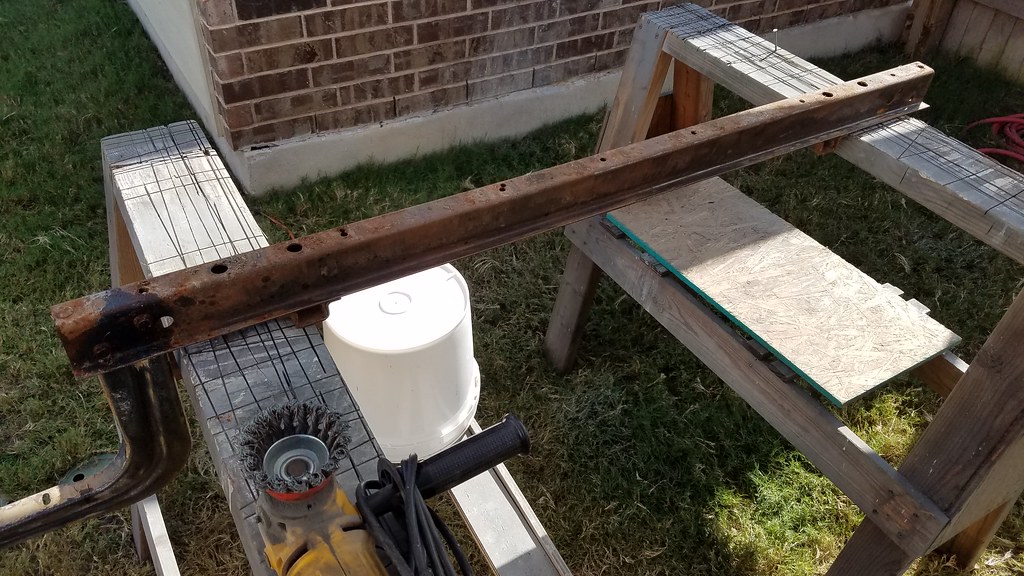 20171007_111201 by bjohnson388, on Flickr 20171007_111201 by bjohnson388, on Flickr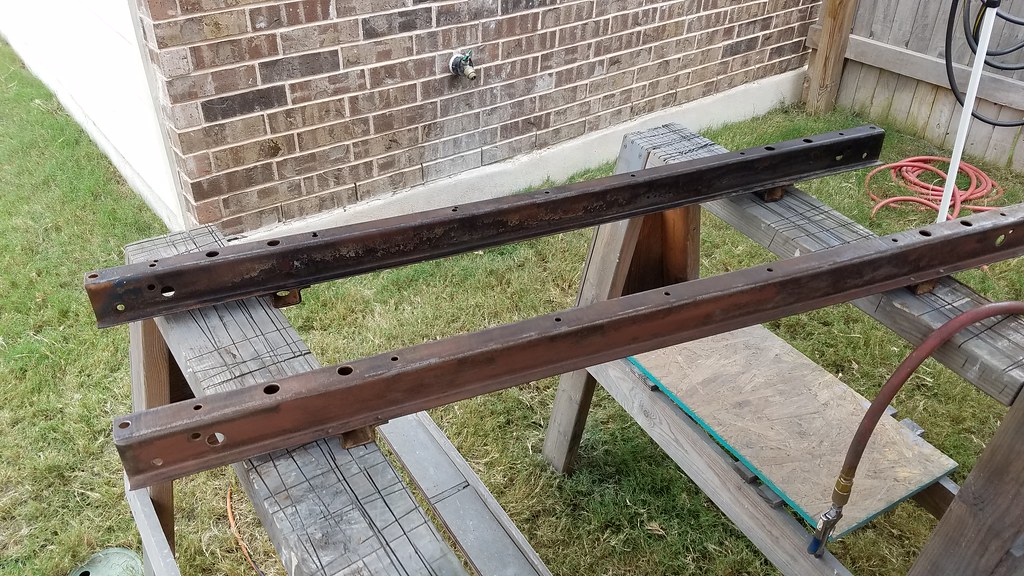 20171007_134409 by bjohnson388, on Flickr 20171007_134409 by bjohnson388, on Flickr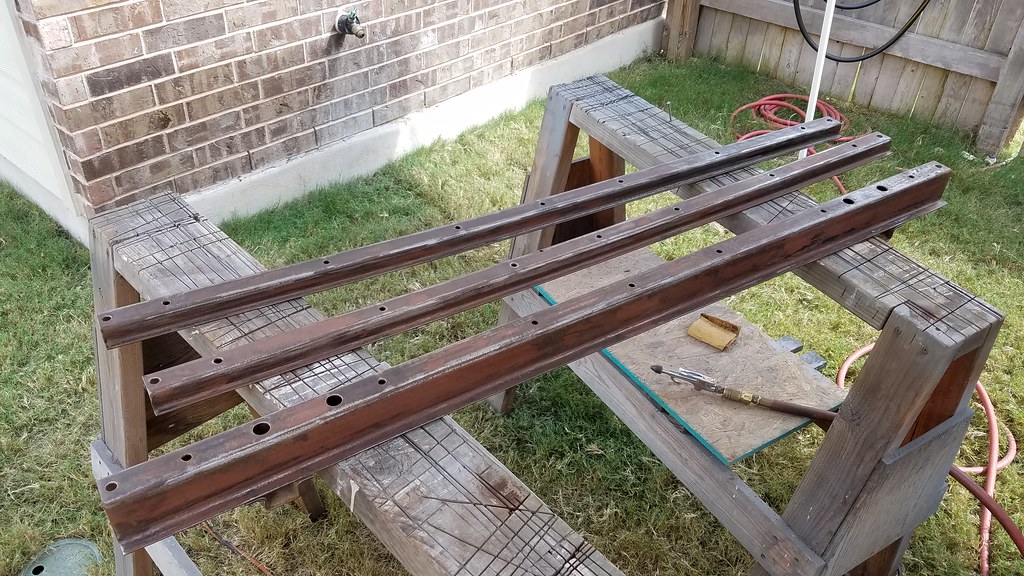 20171007_143711 by bjohnson388, on Flickr 20171007_143711 by bjohnson388, on FlickrBret
__________________
64' Build Thread http://67-72chevytrucks.com/vboard/s...d.php?t=586955 |
|
|
|
|
10-09-2017, 07:00 PM
|
#20 |
|
Registered User
Join Date: Sep 2012
Location: Leander, TX
Posts: 969
|
Re: 64 C10 Stepside "Jaybird"
This all I got done yesterday.
 20171008_141240 by bjohnson388, on Flickr 20171008_141240 by bjohnson388, on Flickr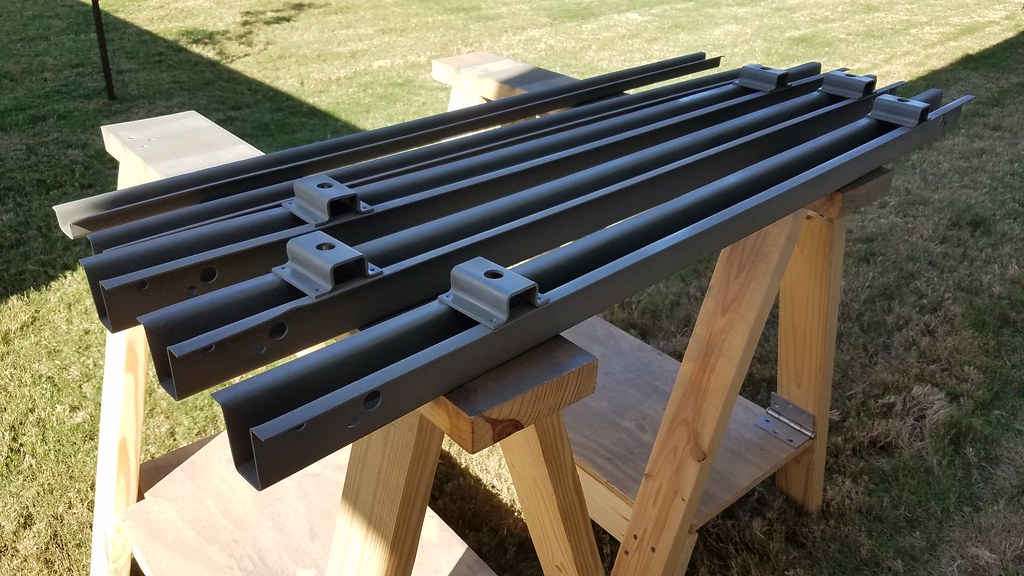 20171008_154007 by bjohnson388, on Flickr 20171008_154007 by bjohnson388, on FlickrBut I did a little better today. Last day of vacation. Back to the rat race tomorrow.  20171009_090440 by bjohnson388, on Flickr 20171009_090440 by bjohnson388, on Flickr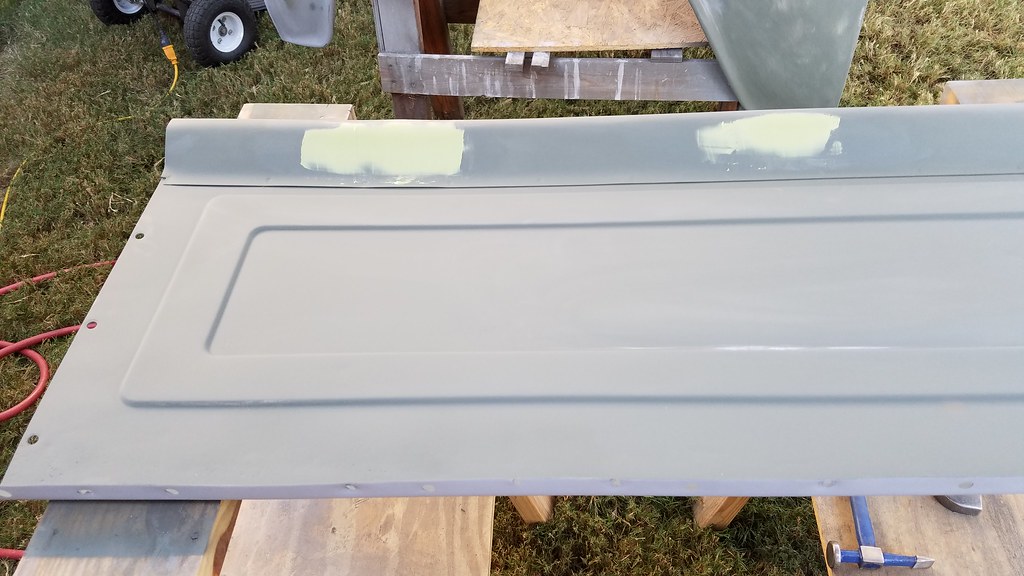 20171009_090446 by bjohnson388, on Flickr 20171009_090446 by bjohnson388, on Flickr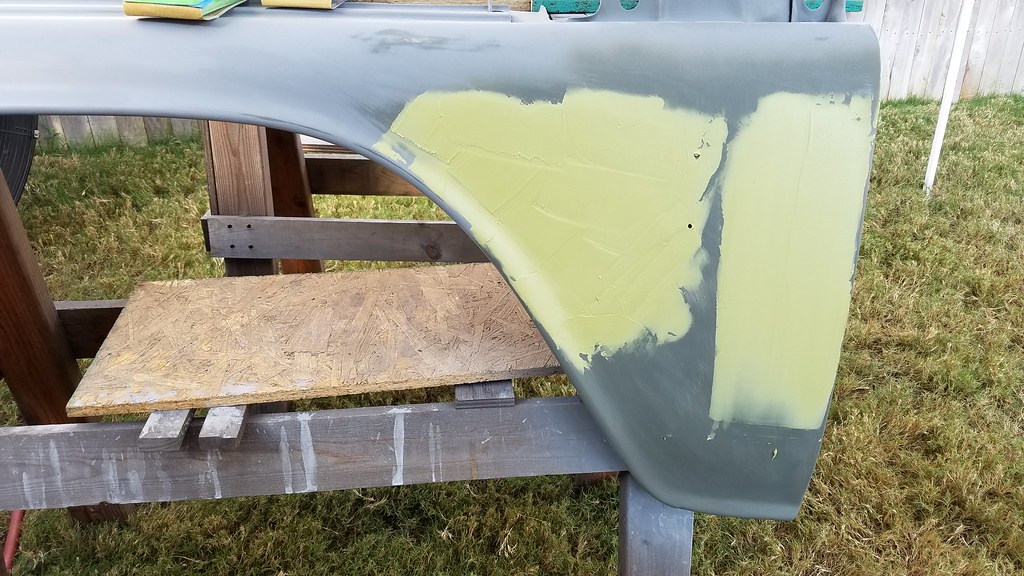 20171009_093445 by bjohnson388, on Flickr 20171009_093445 by bjohnson388, on FlickrAll sanded down. Need to block them and put glazing putty in a few places and then one more coat of High build and block again and see where I am at. 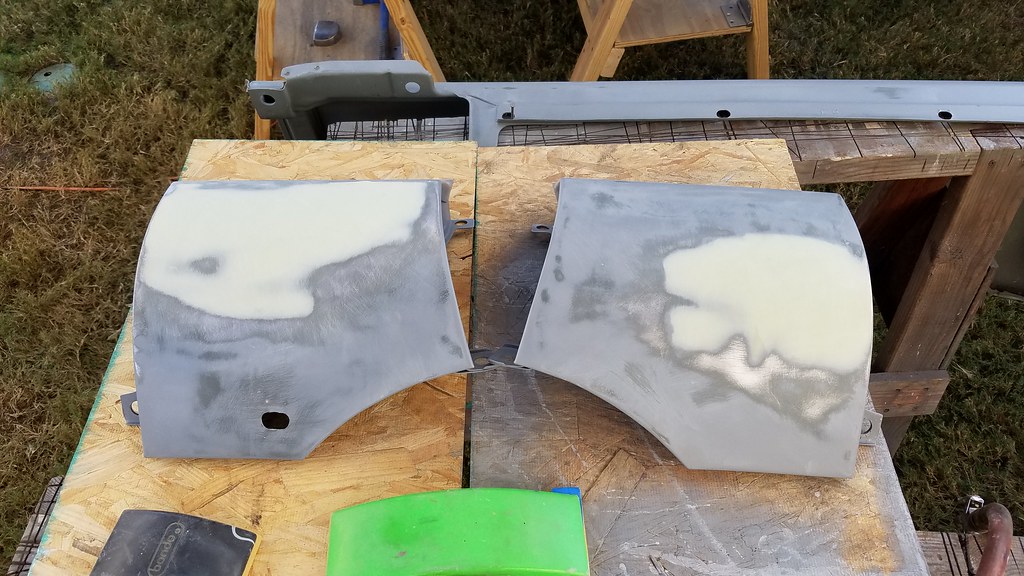 20171009_092923 by bjohnson388, on Flickr 20171009_092923 by bjohnson388, on Flickr 20171009_093440 by bjohnson388, on Flickr 20171009_093440 by bjohnson388, on FlickrForgot to take a pic of the fender before high build. 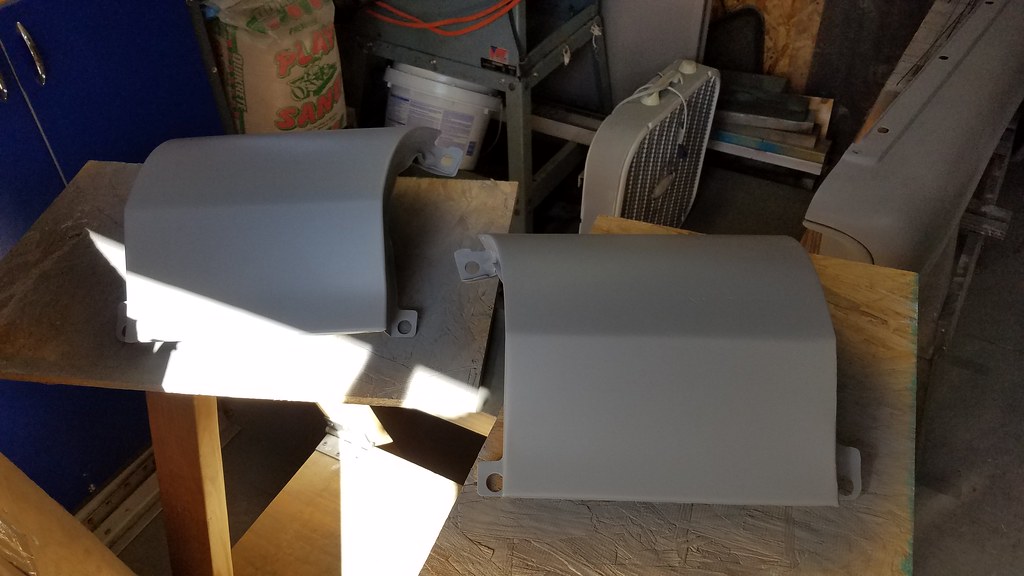 20171009_104310 by bjohnson388, on Flickr 20171009_104310 by bjohnson388, on Flickr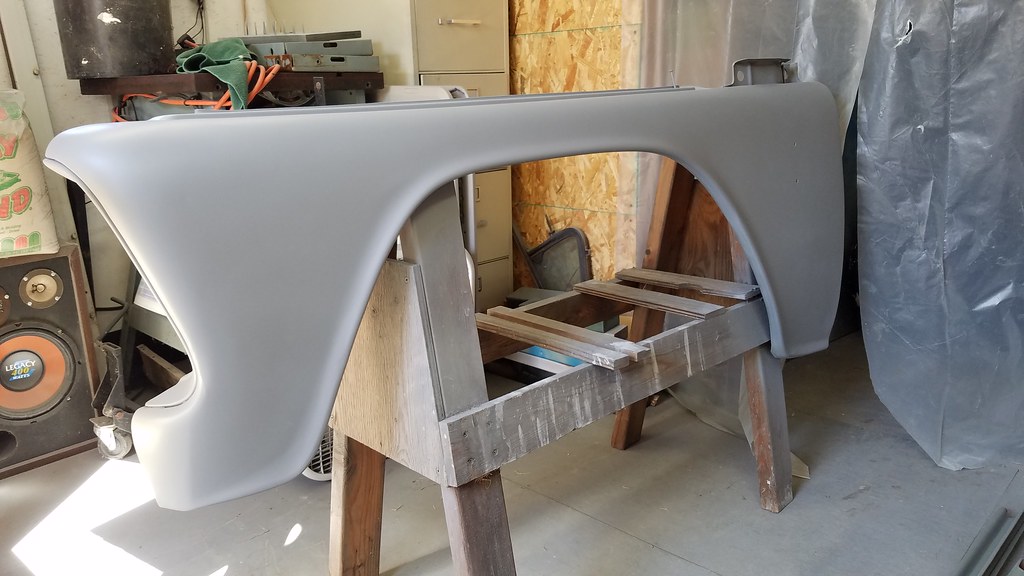 20171009_104319 by bjohnson388, on Flickr 20171009_104319 by bjohnson388, on Flickr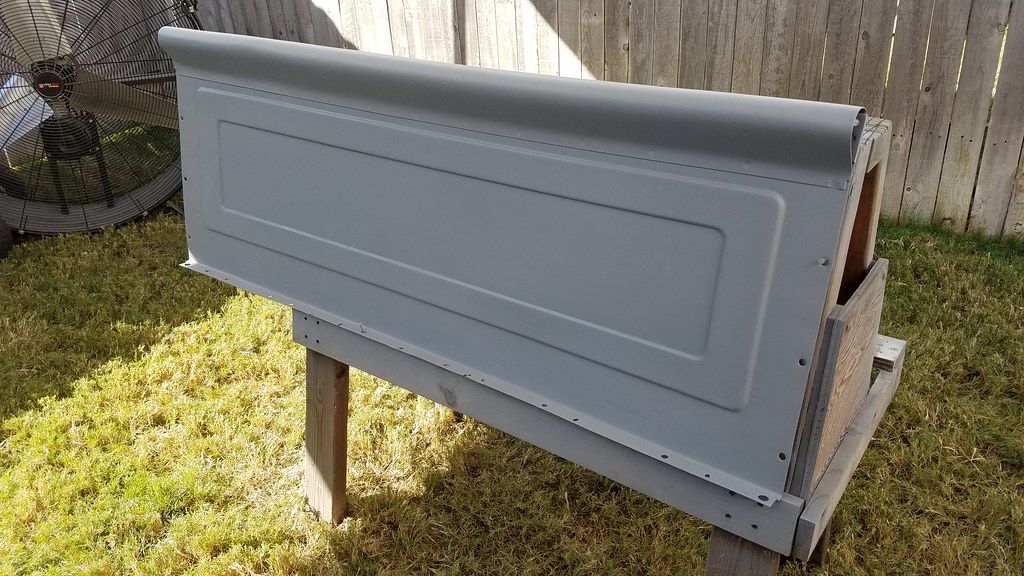 20171009_104329 by bjohnson388, on Flickr 20171009_104329 by bjohnson388, on FlickrStarting to look more like a truck. 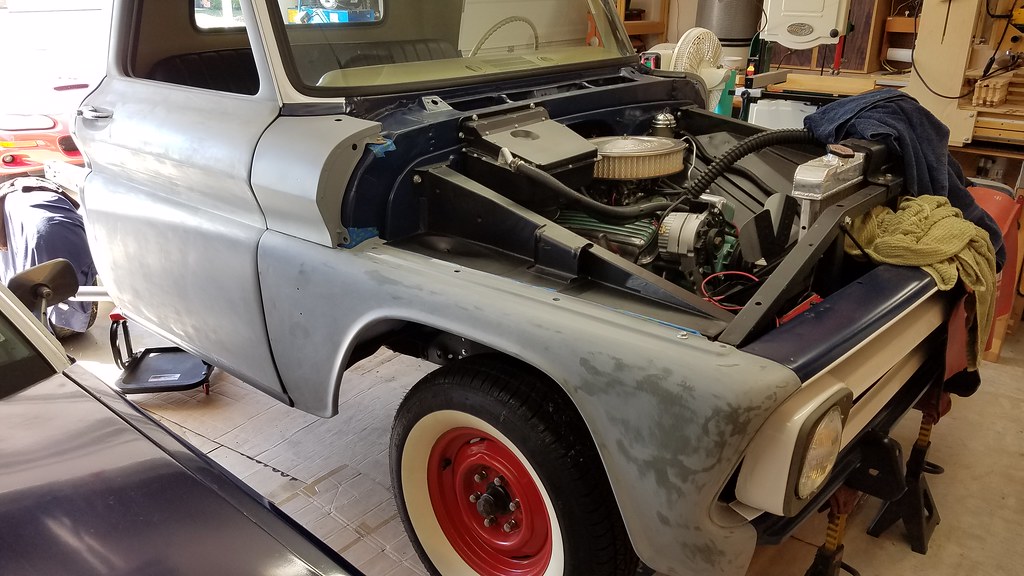 20171009_110617 by bjohnson388, on Flickr 20171009_110617 by bjohnson388, on FlickrReally proud of this Driver fender. It is by no means perfect but much better than the mess it was. Can't wait to get the driver door done.  20171009_110631 by bjohnson388, on Flickr 20171009_110631 by bjohnson388, on Flickr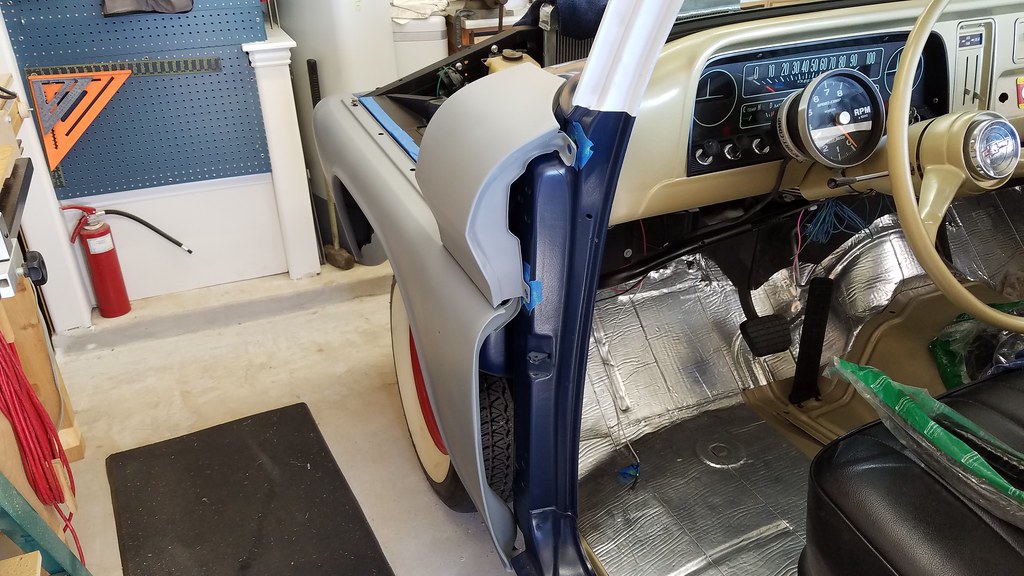 20171009_110641 by bjohnson388, on Flickr 20171009_110641 by bjohnson388, on FlickrGot 2 coats of Satin Black on the bed sills. 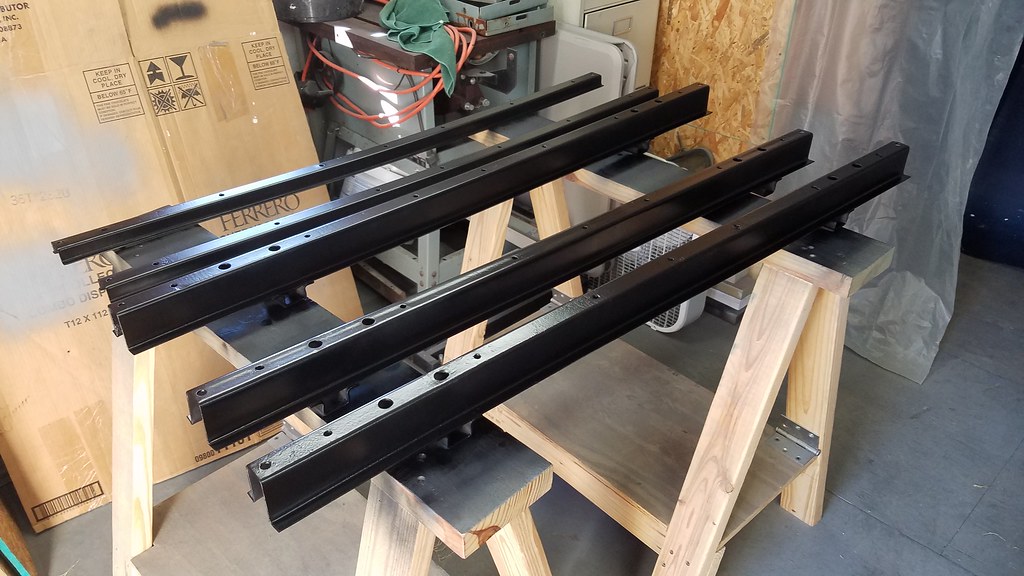 20171009_152534 by bjohnson388, on Flickr 20171009_152534 by bjohnson388, on FlickrThis tailgate is a mess. It is bowed, which I think I can get most of it out its only on the top. It has several deep dents on the bottom that I will have to drill a hole and use the slide hammer to pull out and then weld back up. 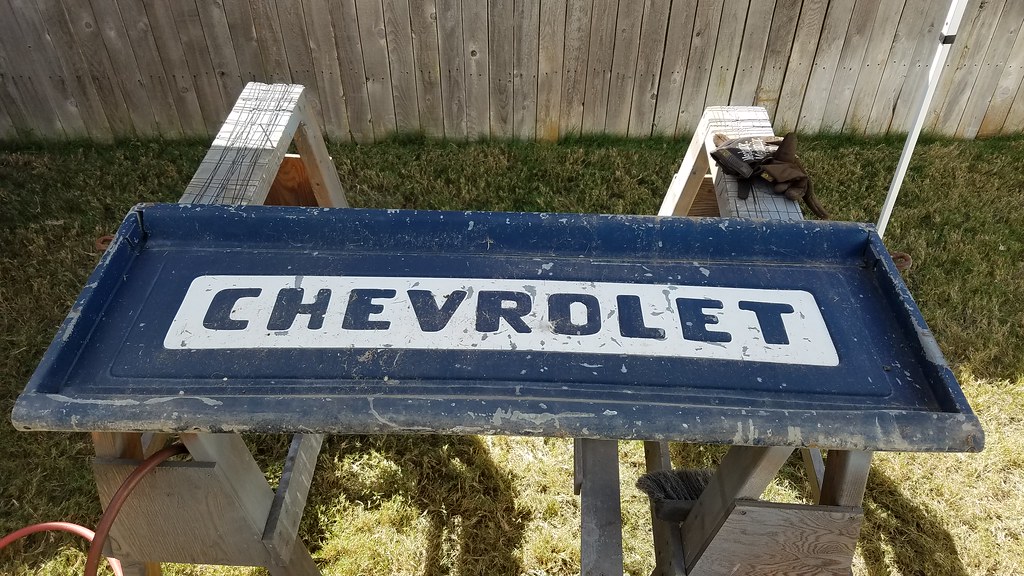 20171009_143228 by bjohnson388, on Flickr 20171009_143228 by bjohnson388, on Flickr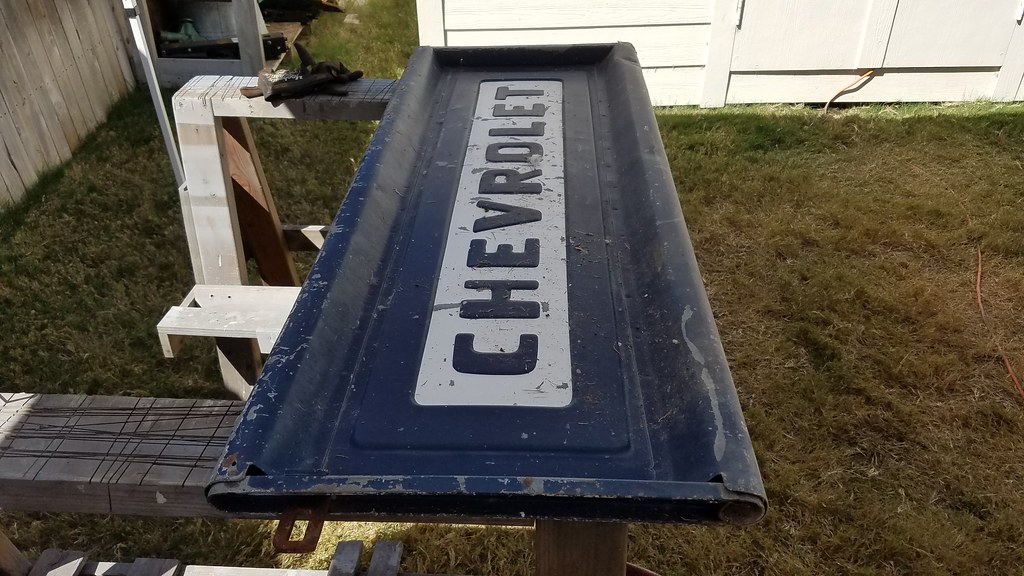 20171009_143233 by bjohnson388, on Flickr 20171009_143233 by bjohnson388, on FlickrThe bow in the top. 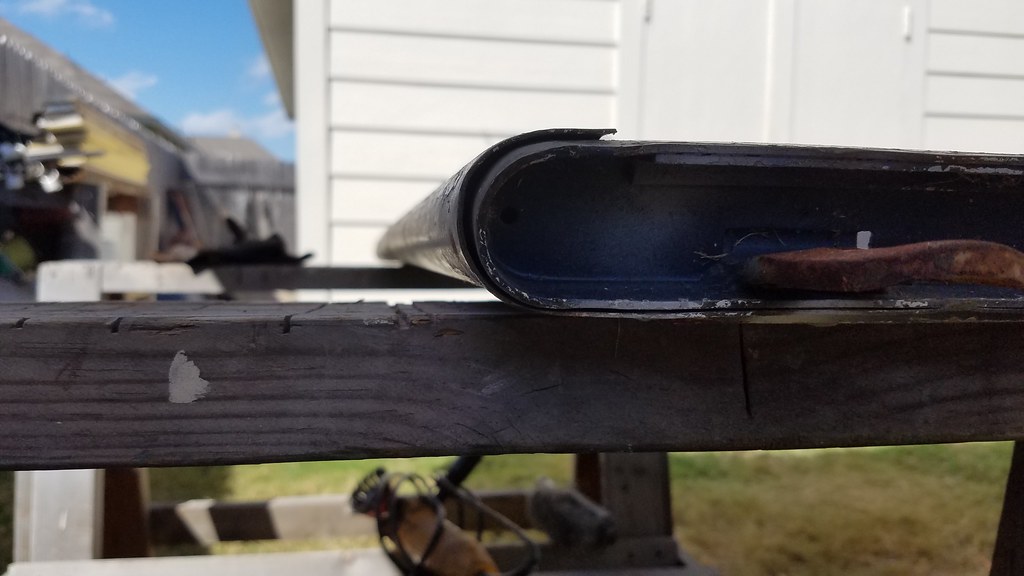 20171009_143238 by bjohnson388, on Flickr 20171009_143238 by bjohnson388, on FlickrSomeone used it as a workbench too much. SMH. 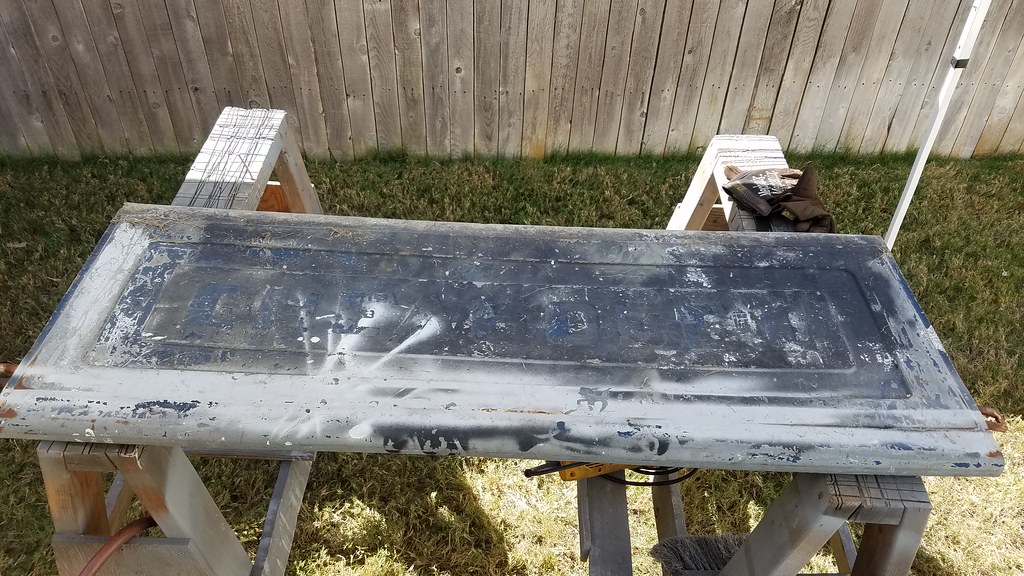 20171009_143257 by bjohnson388, on Flickr 20171009_143257 by bjohnson388, on FlickrPulled out the other bedside and started stripping didn't finish but got a good start.  20171009_143608 by bjohnson388, on Flickr 20171009_143608 by bjohnson388, on FlickrIt is in alot better shape than the other side. 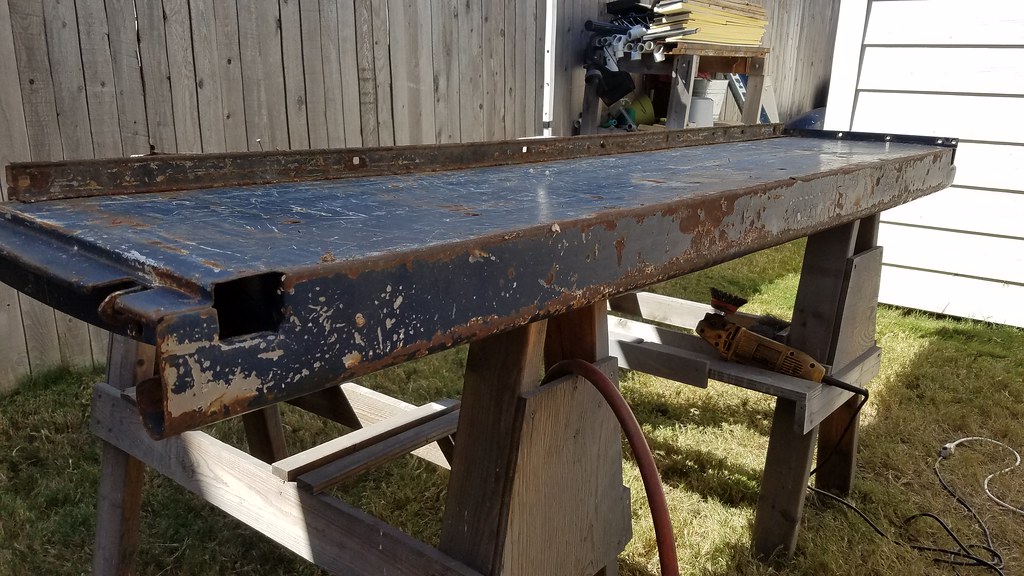 20171009_143613 by bjohnson388, on Flickr 20171009_143613 by bjohnson388, on Flickr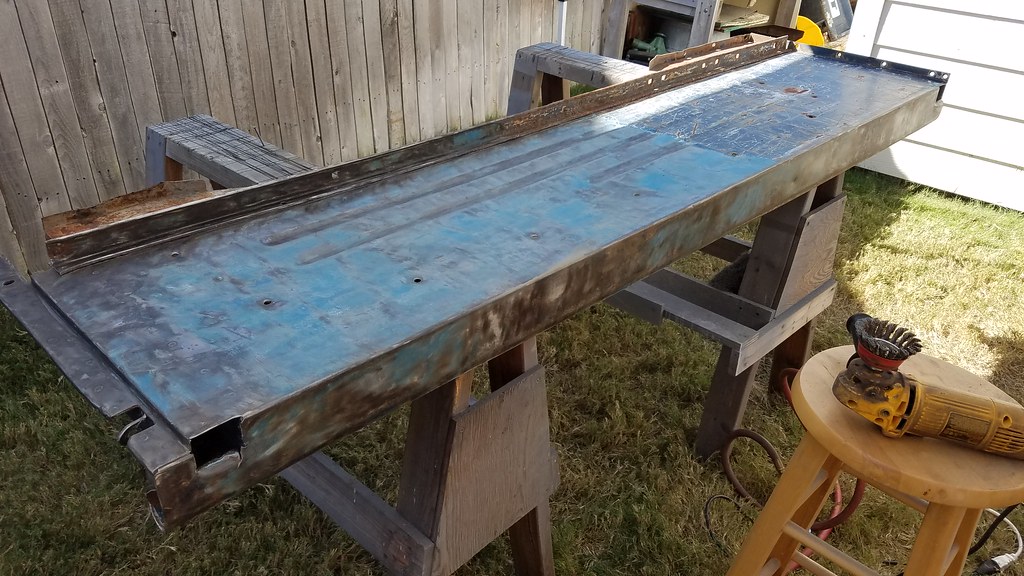 20171009_152745 by bjohnson388, on Flickr 20171009_152745 by bjohnson388, on FlickrBoth stake pockets need some attention.  20171009_152748 by bjohnson388, on Flickr 20171009_152748 by bjohnson388, on Flickr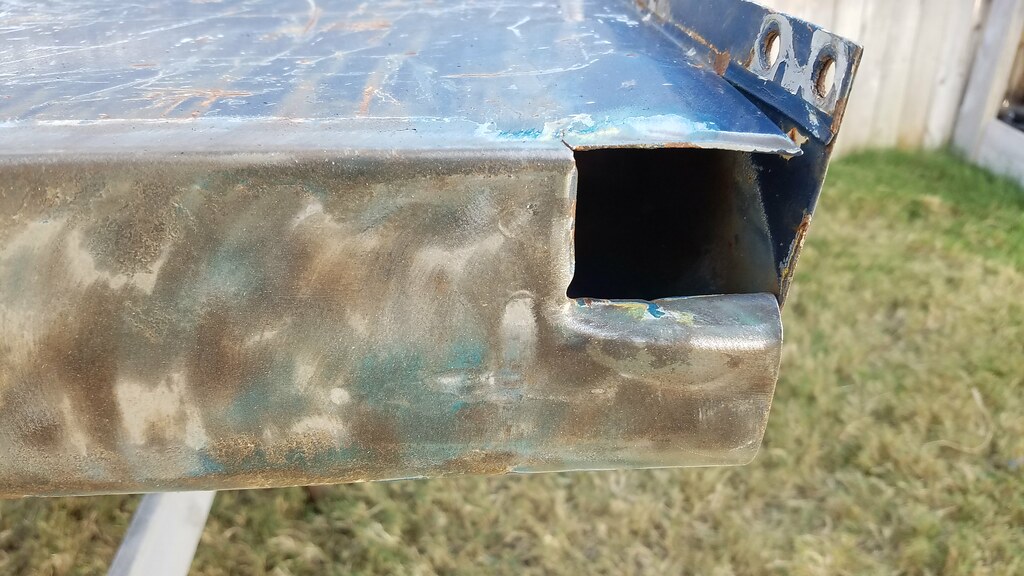 20171009_152753 by bjohnson388, on Flickr 20171009_152753 by bjohnson388, on Flickr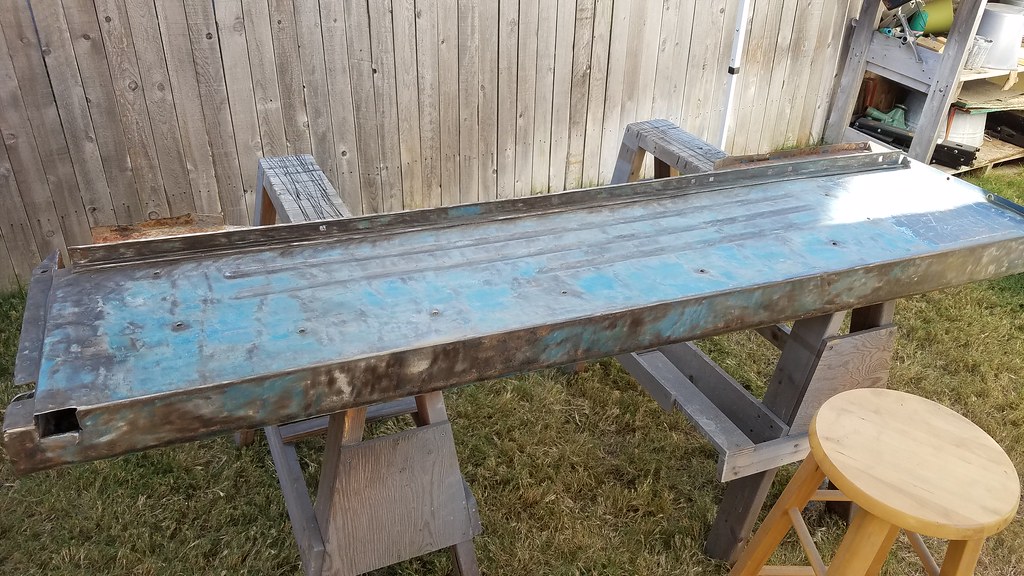 20171009_154823 by bjohnson388, on Flickr 20171009_154823 by bjohnson388, on FlickrAnd that concludes my vacation progress. Thanks for stopping in, Bret
__________________
64' Build Thread http://67-72chevytrucks.com/vboard/s...d.php?t=586955 |
|
|
|
|
10-09-2017, 08:04 PM
|
#21 |
|
Registered User
Join Date: Sep 2009
Location: Monroe,Iowa
Posts: 4,370
|
Re: 64 C10 Stepside "Jaybird"
Slow and Steady Keep up the Good Work.
|
|
|
|
|
10-10-2017, 12:41 PM
|
#22 |
|
Registered User
Join Date: Dec 2012
Location: Rochester, KENT
Posts: 10,511
|
Re: 64 C10 Stepside "Jaybird"
Absolutely nailed it mate.
Well done. Were the boys not about to help?
__________________
MY BUILD LINK: http://67-72chevytrucks.com/vboard/s...585901]Redneck Express - 1966 C10 Short Fleetside MY USA ROADTRIPS http://forum.retro-rides.org/thread/...2018-humdinger IF YOU CAN'T FIX IT WITH A HAMMER, YOU'VE GOT AN ELECTRICAL PROBLEM MATE. |
|
|
|
|
10-11-2017, 08:52 PM
|
#23 |
|
Registered User
Join Date: Jan 2012
Location: Killeen, Tx
Posts: 1,352
|
Re: 64 C10 Stepside "Jaybird"
Looking good! I'm glad you decided to do the body work.
__________________
John Z 1962 Chevy C10 Stepside 62 Barnfind My build tread: http://67-72chevytrucks.com/vboard/s...d.php?t=507513 |
|
|
|
|
10-12-2017, 12:33 AM
|
#24 |
|
Post Whore
Join Date: Mar 2013
Location: Southern Oregon
Posts: 10,384
|
Re: 64 C10 Stepside "Jaybird"
Nice job!
__________________
1966 Chevy C10 "Project Two Tone" http://67-72chevytrucks.com/vboard/s...d.php?t=596643 1964 GMC "Crustine" semi-build:http://67-72chevytrucks.com/vboard/s...d.php?t=665056 My youtube channel. Username "Military Chevy": https://www.youtube.com/channel/UC_h...fzpcUXyK_5-uiw |
|
|
|
|
10-15-2017, 09:06 PM
|
#25 |
|
Registered User
Join Date: Aug 2013
Location: Wildomar Ca
Posts: 274
|
Re: 64 C10 Stepside "Jaybird"
All your hard work is paying off looks great. Fender came out real nice.
|
|
|
|
 |
| Bookmarks |
|
|


 Hybrid Mode
