
|
|
|
 01-06-2016, 12:24 AM
|
#1 |
|
Registered User
Join Date: Jan 2013
Location: Leonardtown, MD
Posts: 1,637
|
Re: 55 Wagon Progress
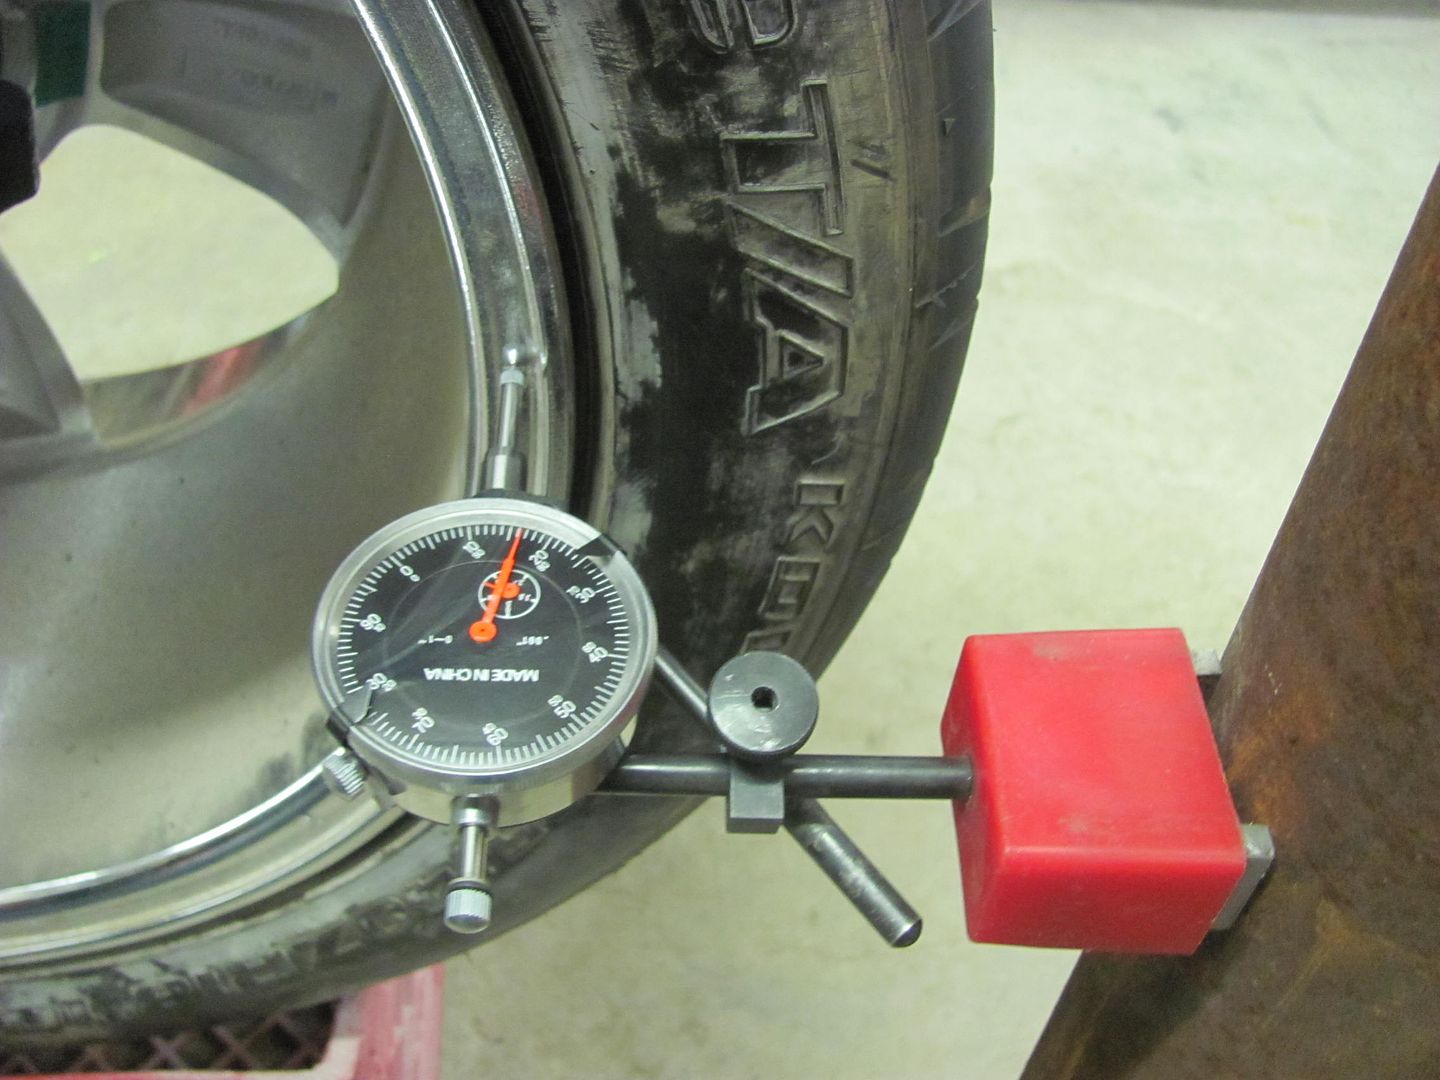
Well tonight we worked on getting the parts out of the booth so we can get the next load of parts ready for epoxy, and in between spent some more time on straightening the rear. In measuring at the bead of the 18" wheels, we had a +/- .020 on the passenger side and a +/- .035 on the drivers side.
 ....and more heat applied for some shrink.. 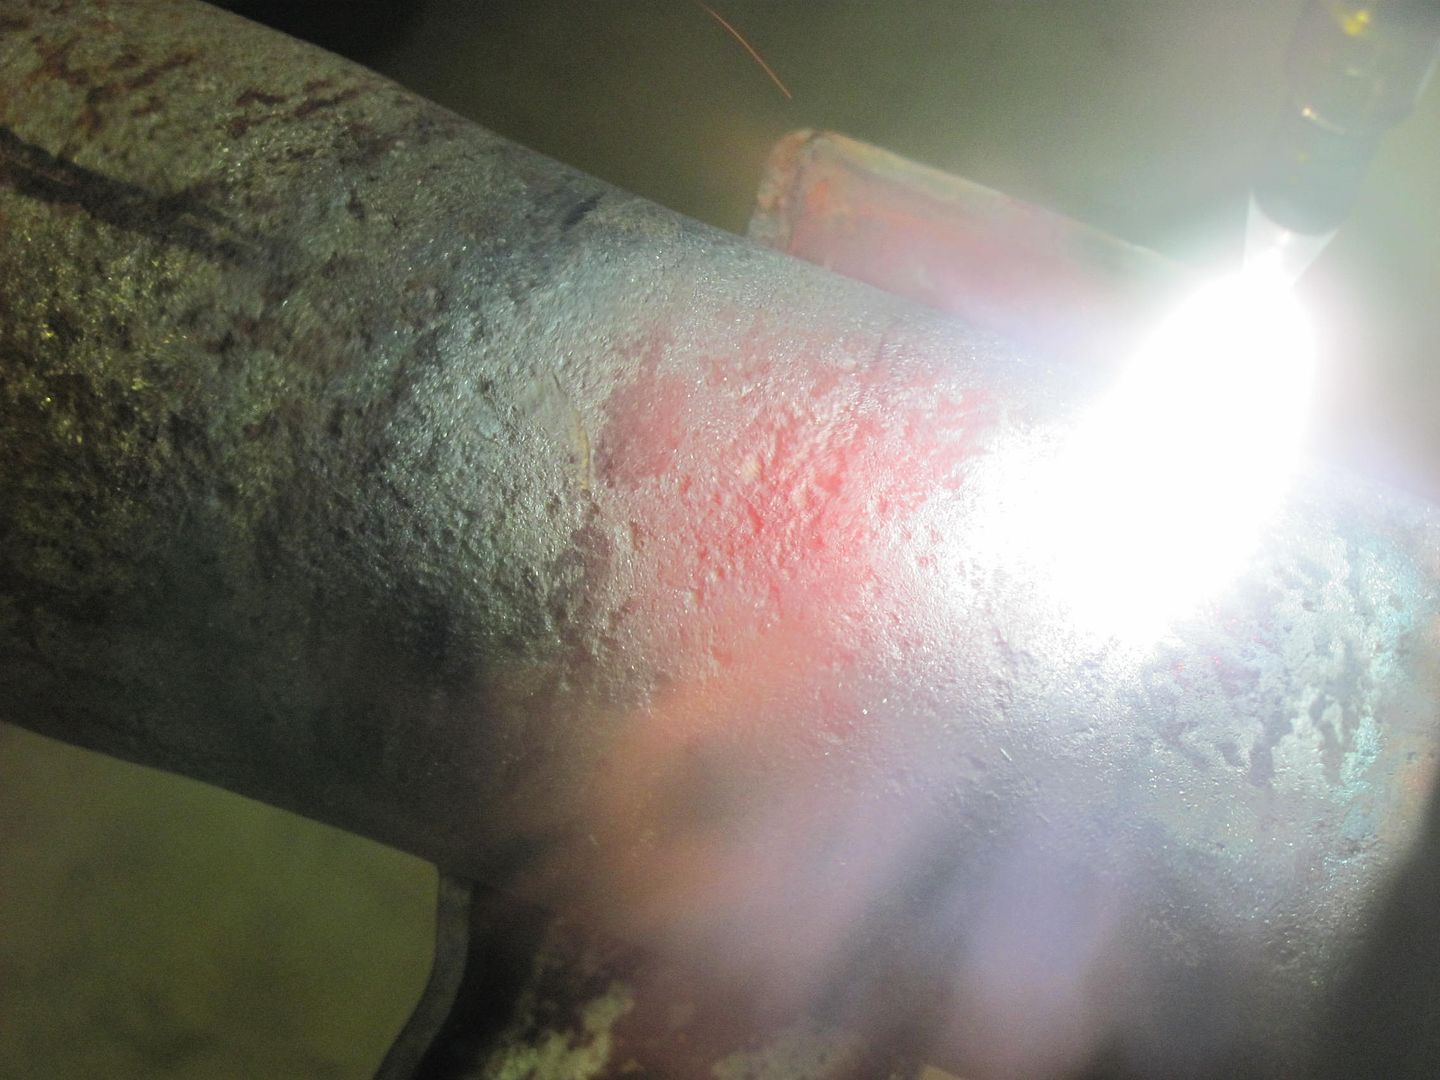 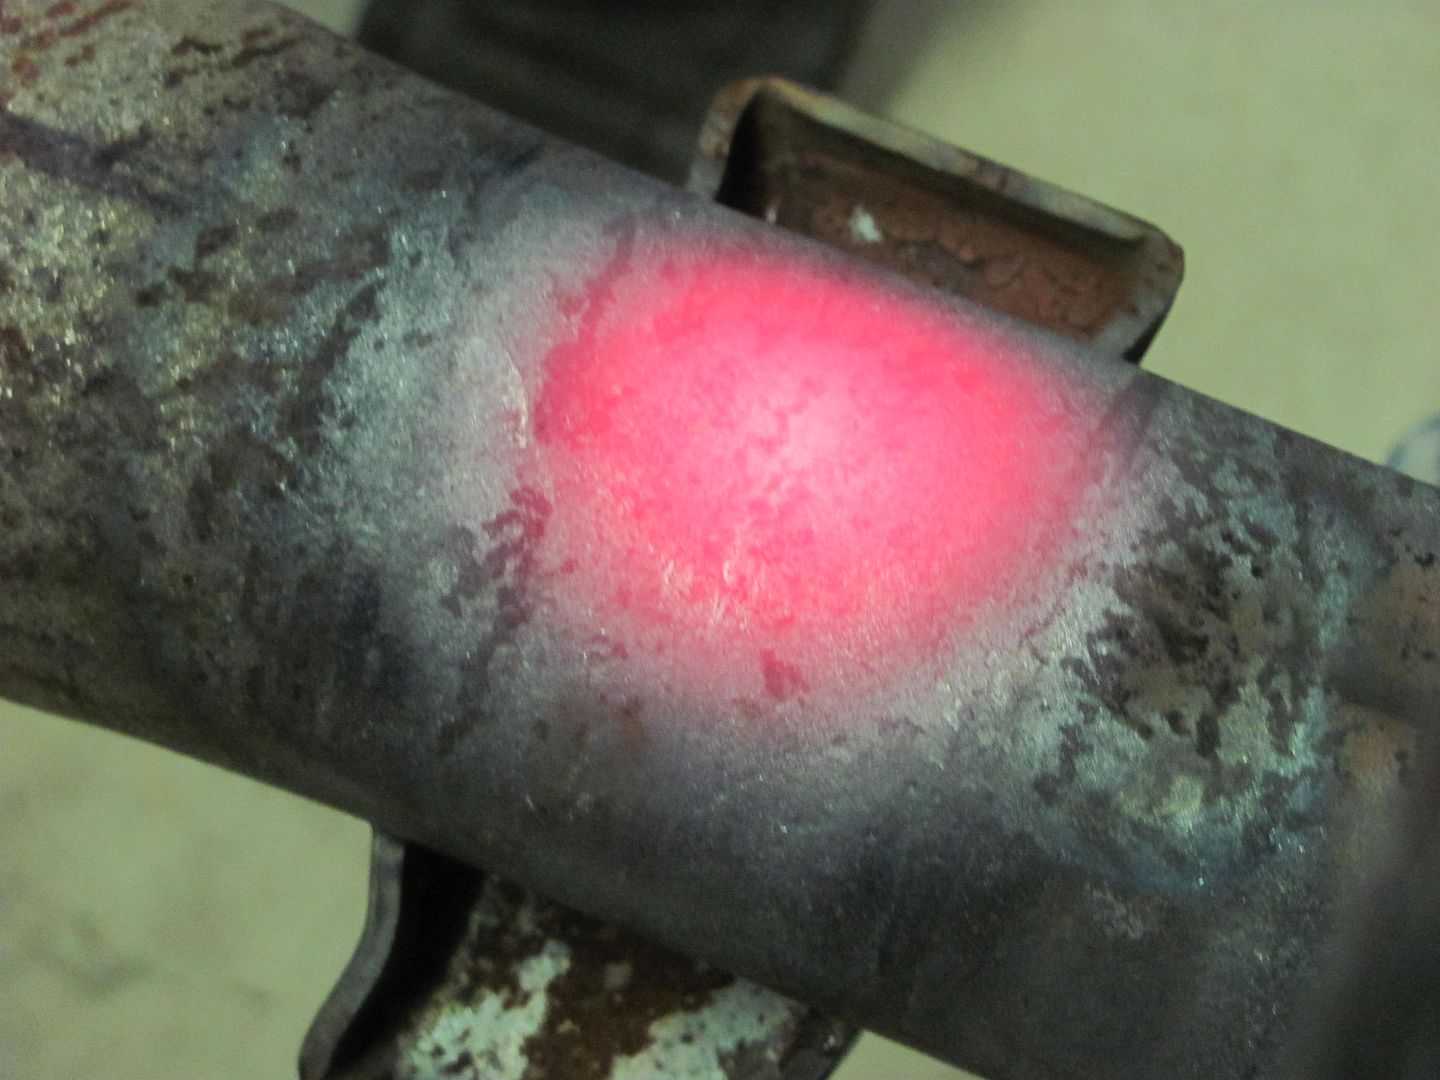 We'll let that cool and get some of the front end parts bolted up.. 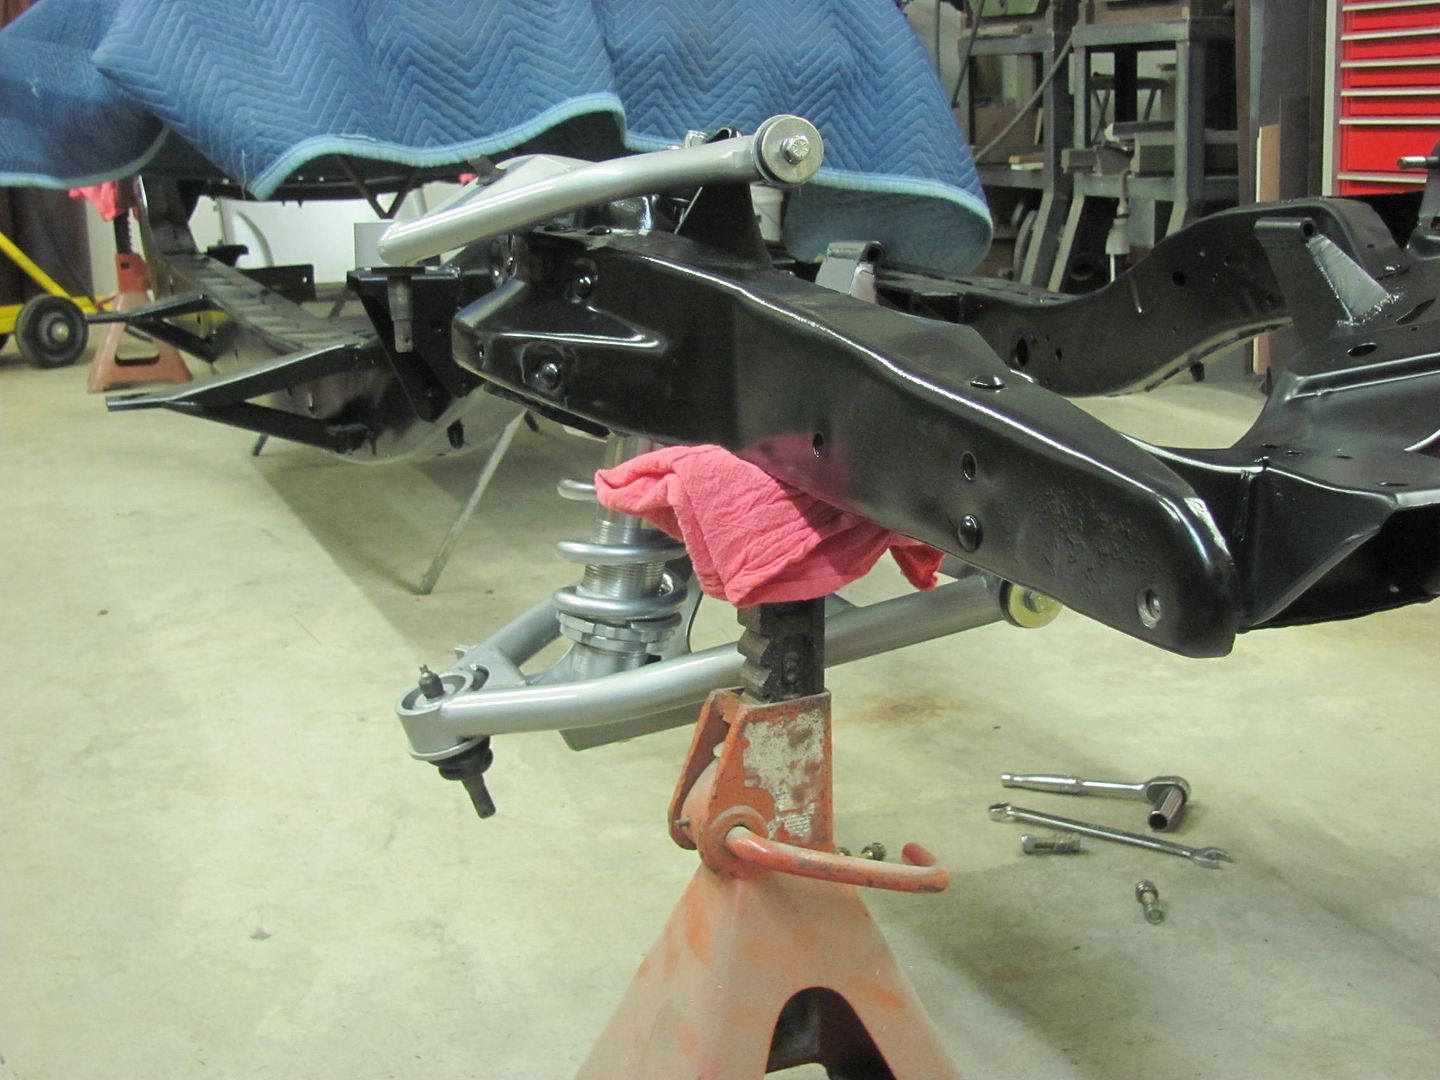 
__________________
Robert |

|

|
|
01-10-2016, 01:49 AM
|
#2 |
|
Registered User
Join Date: Jan 2013
Location: Leonardtown, MD
Posts: 1,637
|
Re: 55 Wagon Progress
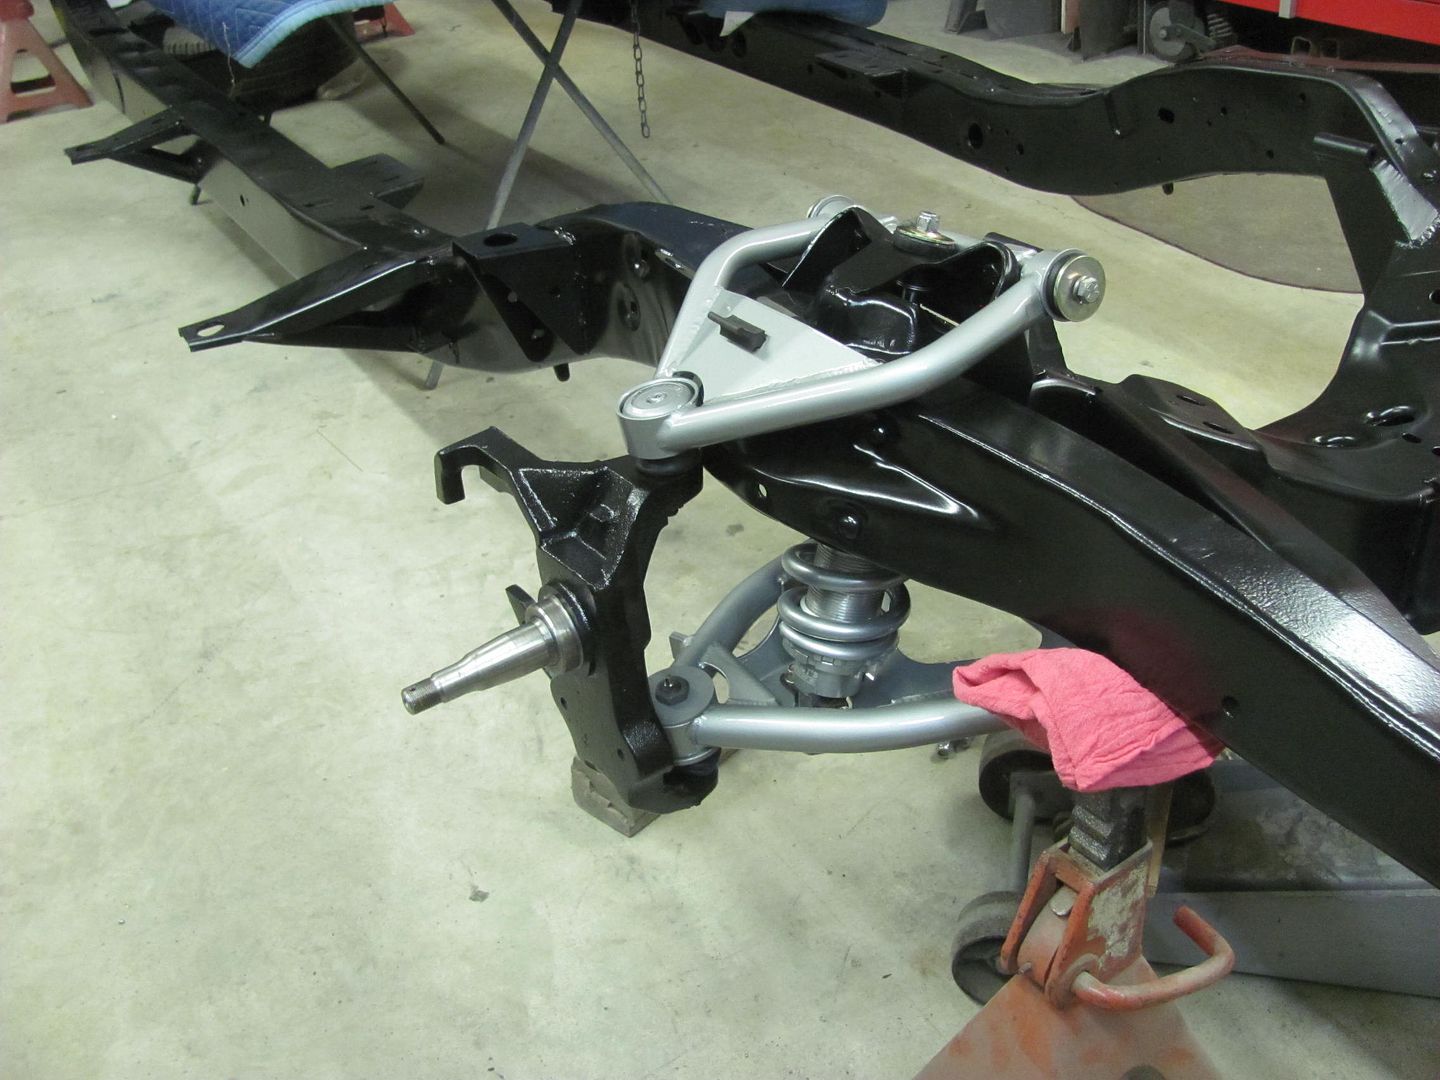
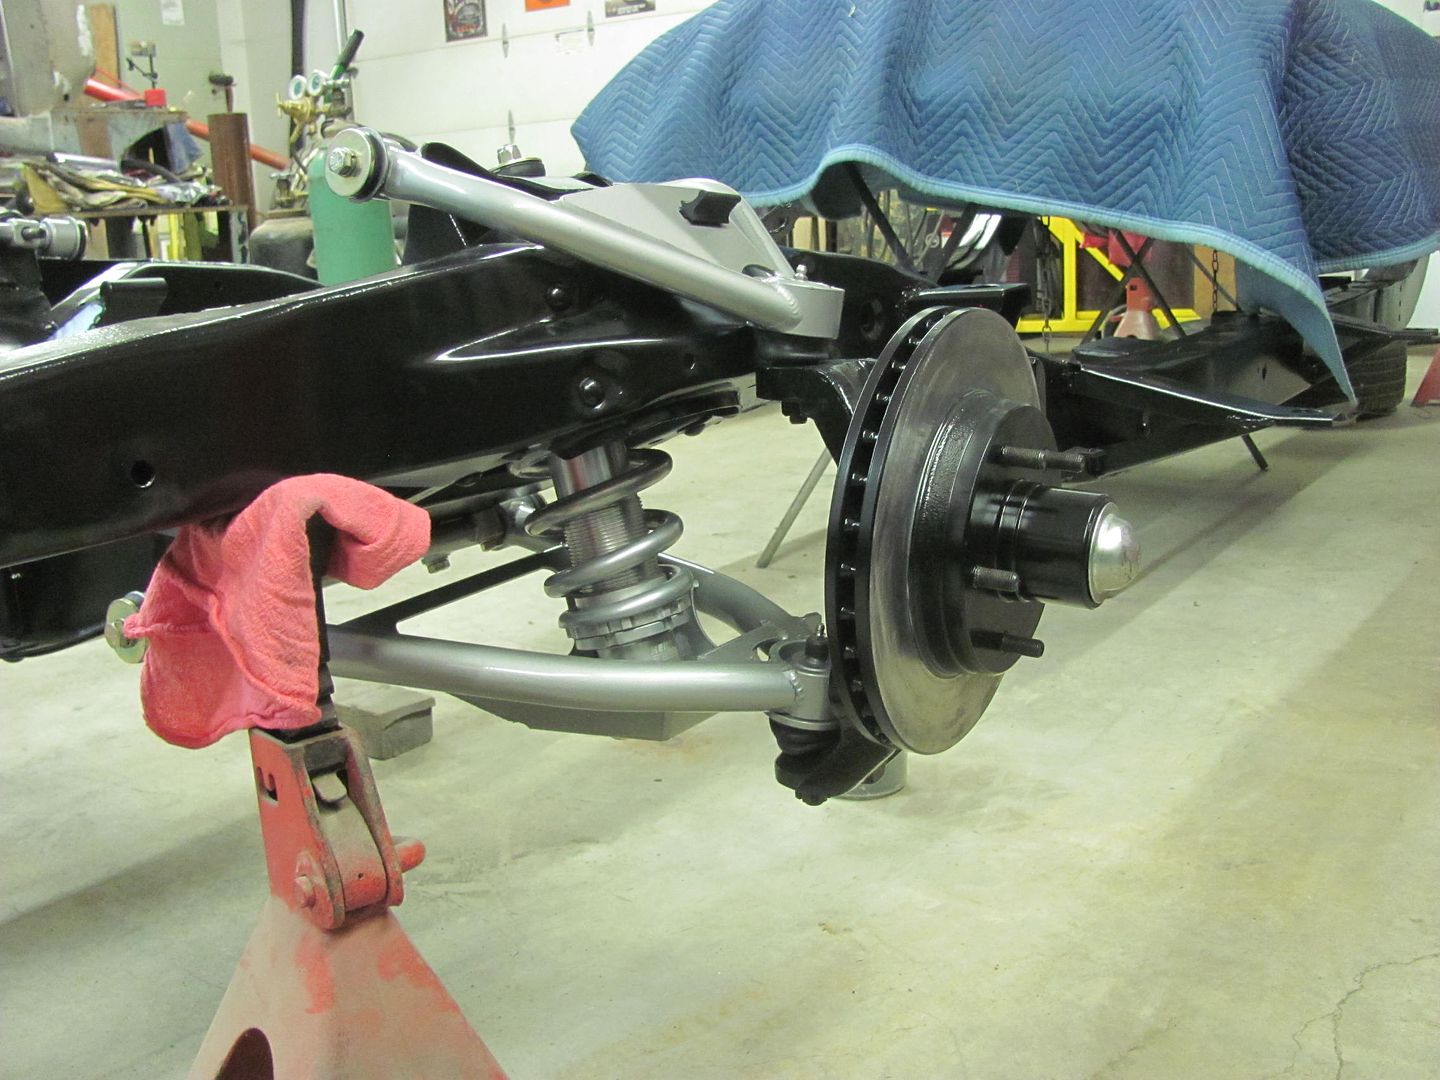
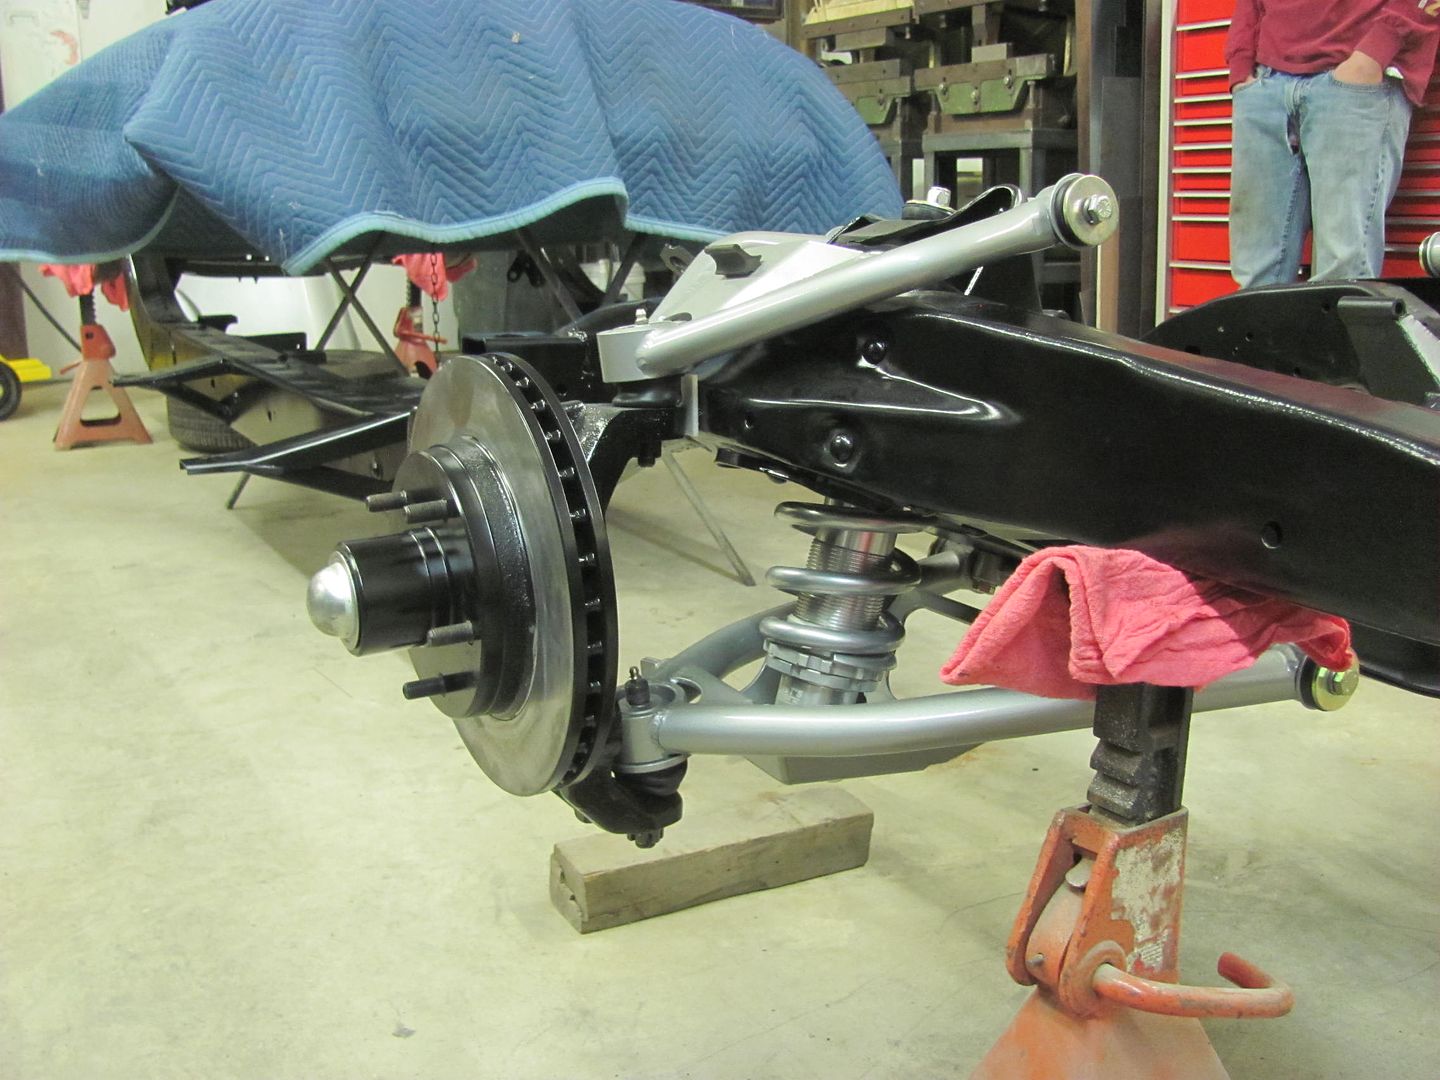
Getting the front end put together...
   ....and more blocking and hanging parts in prep for the next round of epoxy... 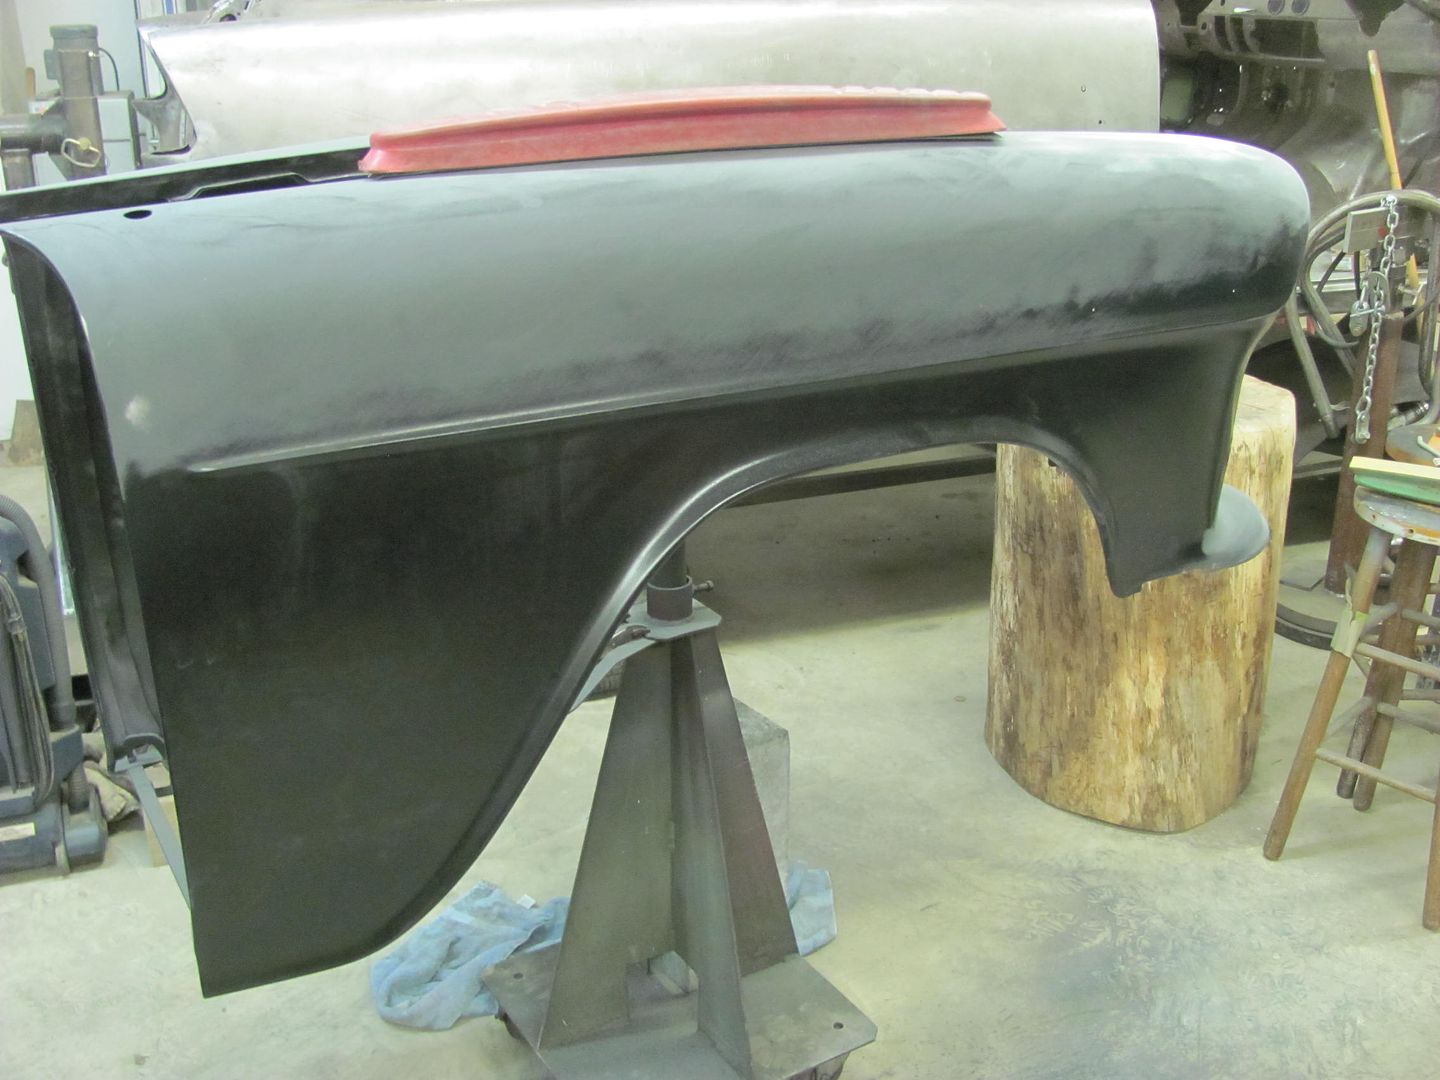 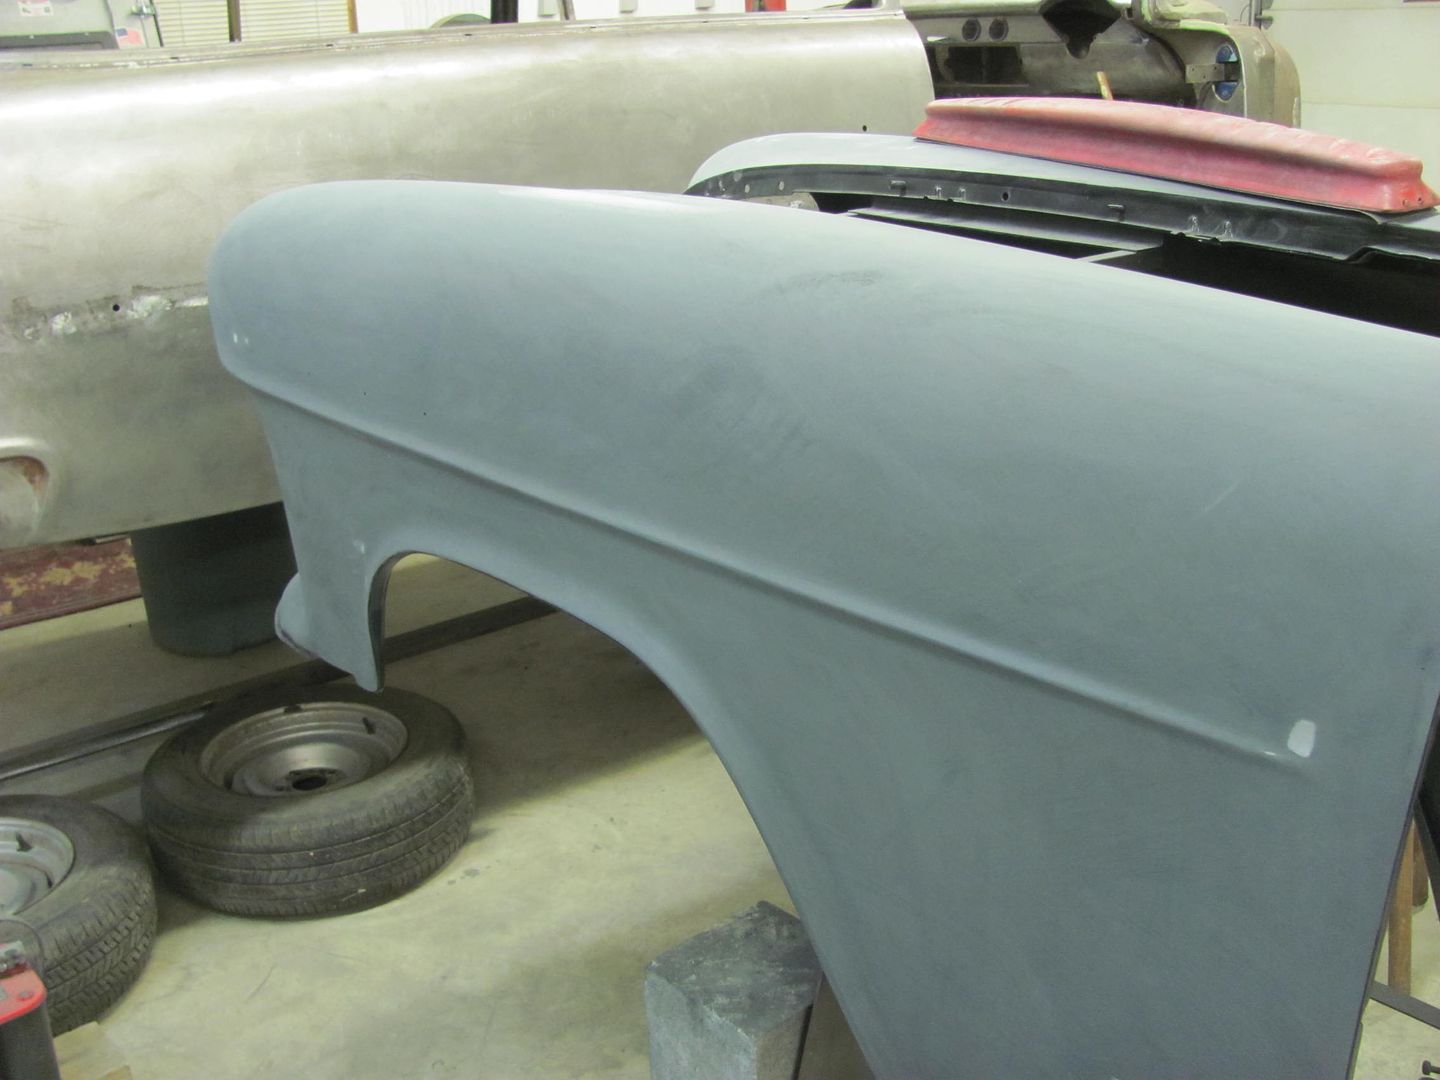 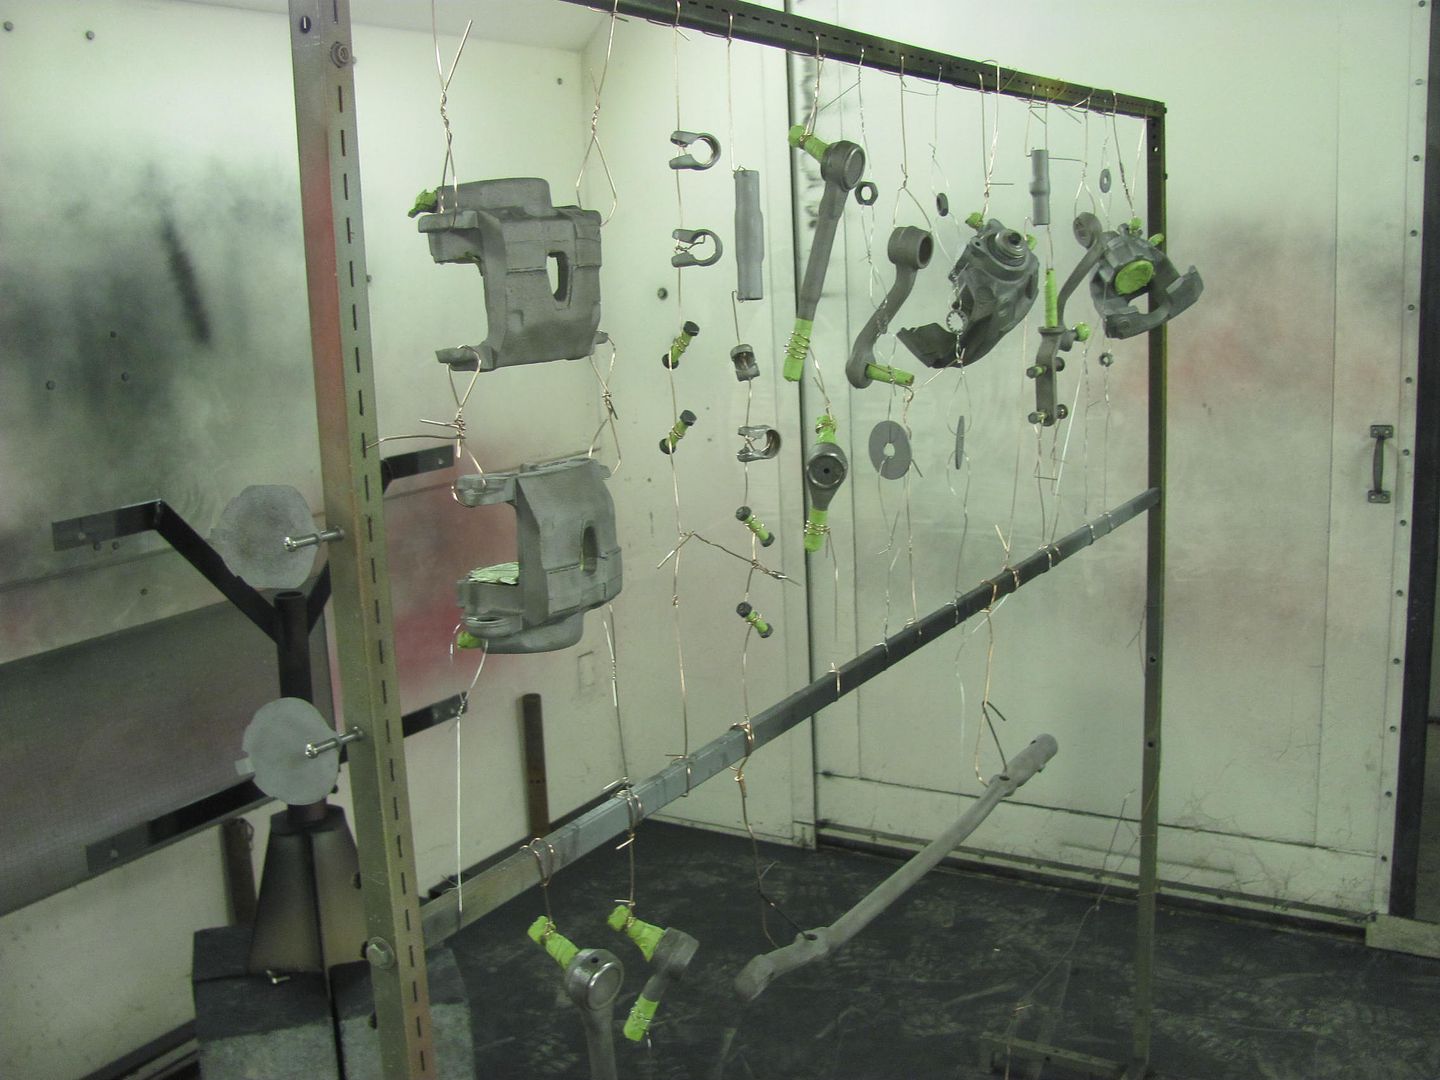 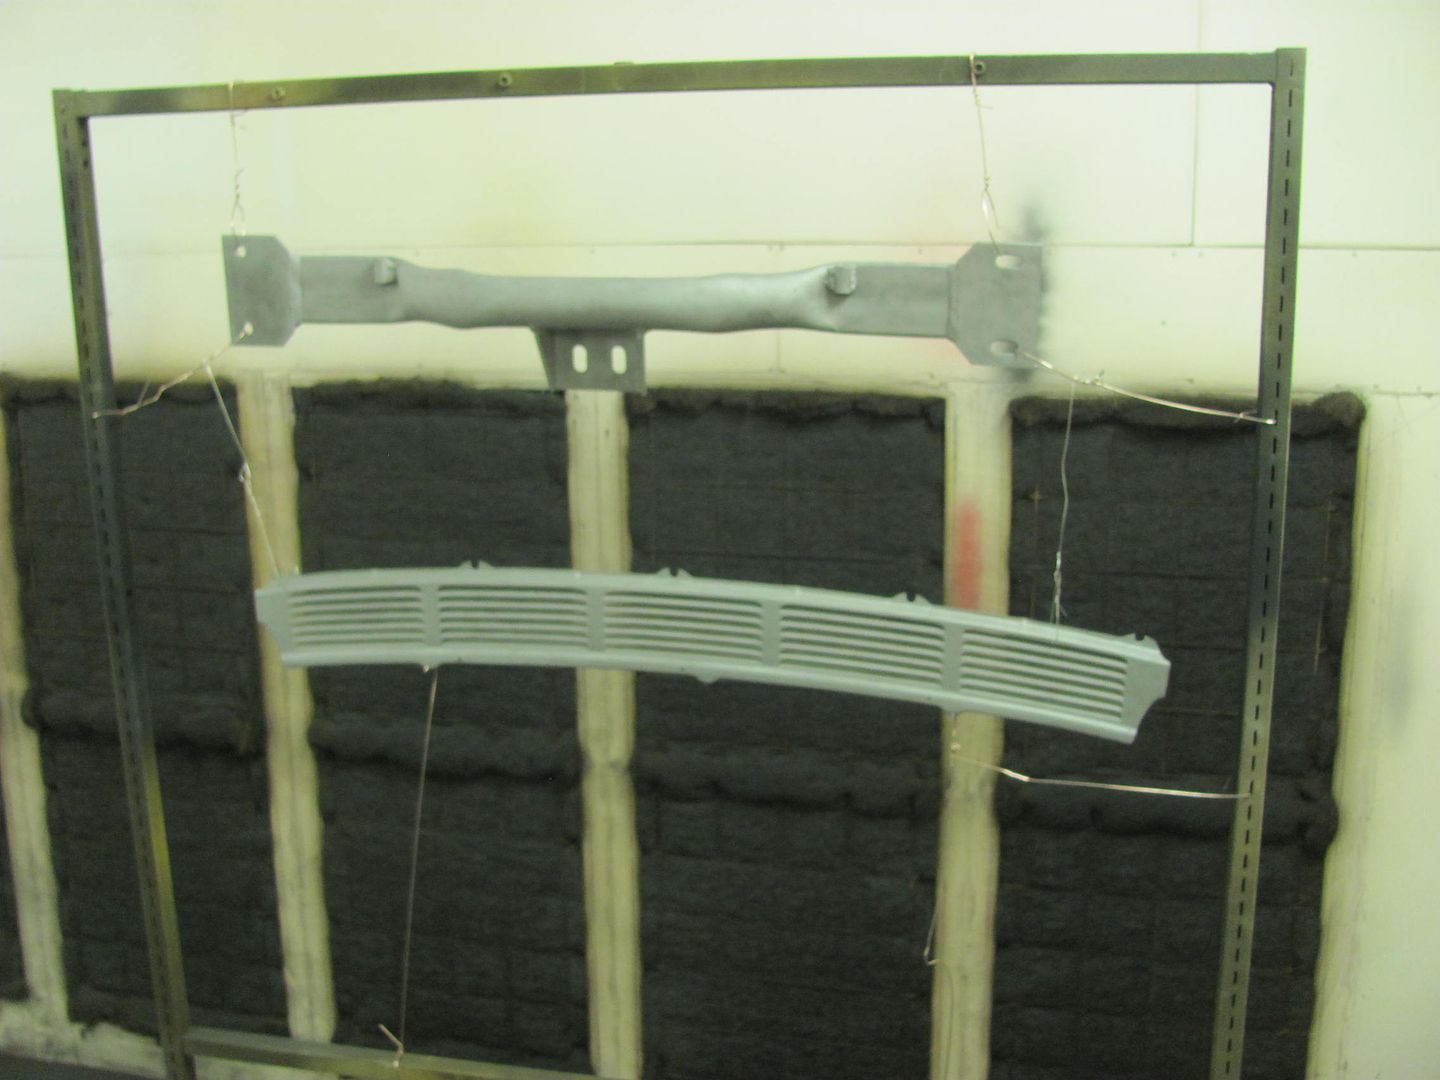 The doors are getting real close to needing wet sanding.. 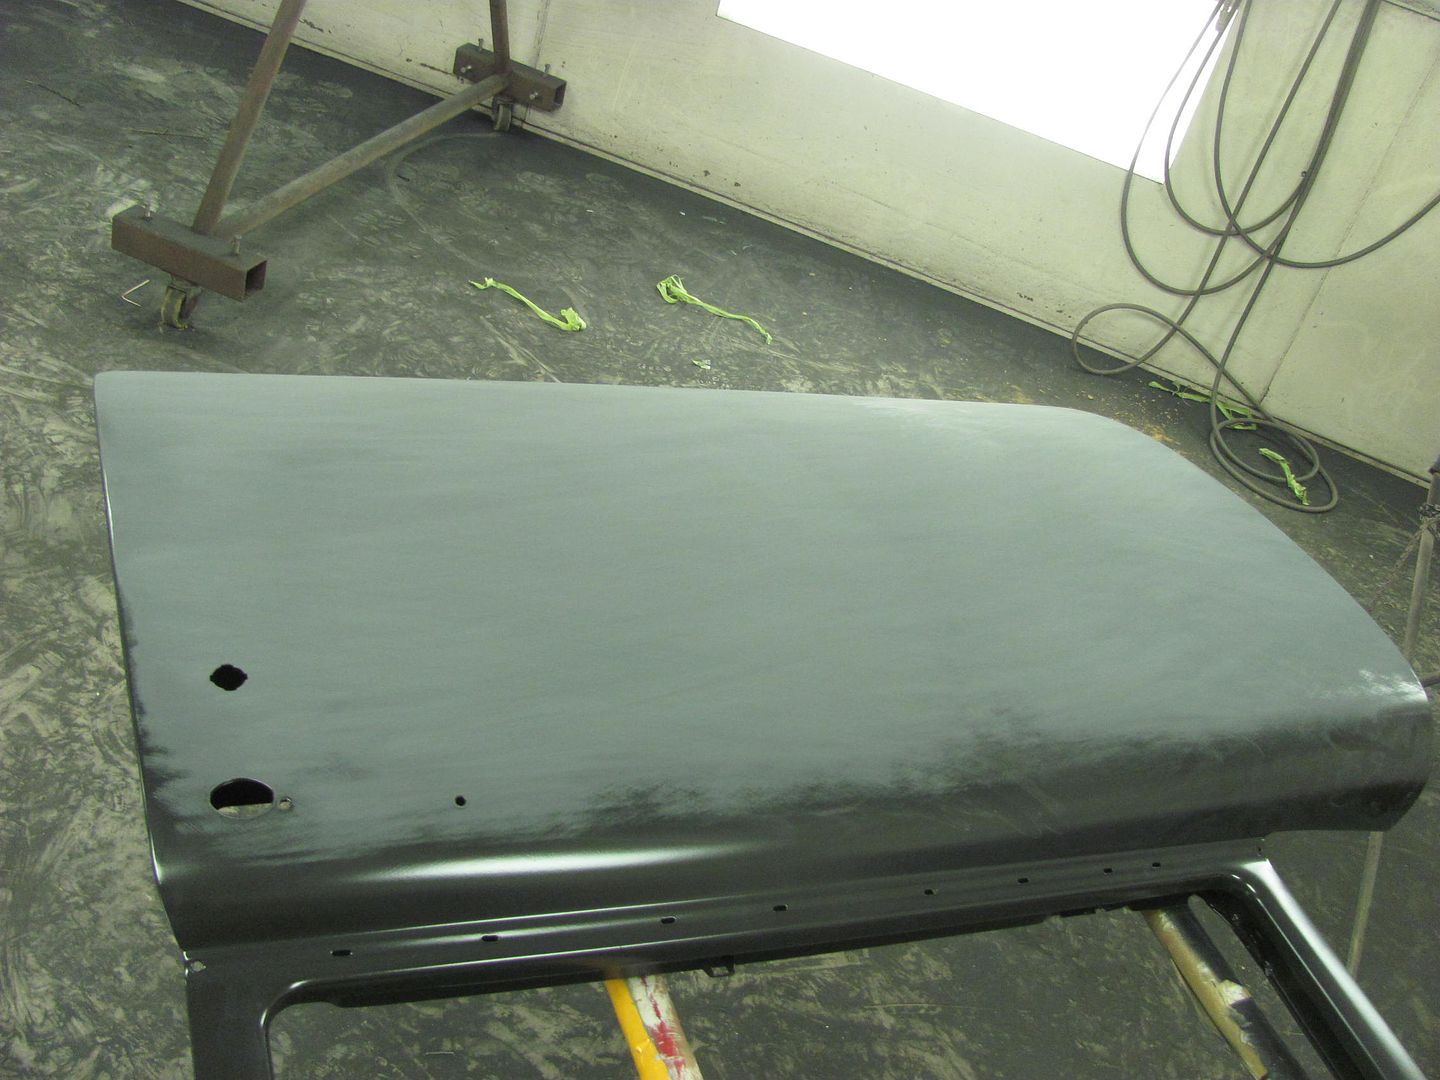
__________________
Robert |
|
|
|
|
01-10-2016, 09:33 AM
|
#3 |
|
Active Member
 Join Date: Aug 2012
Location: East Hartford, CT
Posts: 159
|
Re: 55 Wagon Progress
This project is simply fantastic! Always wanted a 55 wagon. Thank you very much for sharing this great build and your metal working skills!
|
|
|
|
|
01-10-2016, 10:13 AM
|
#4 |
|
Senior Member
Join Date: Mar 2011
Location: West Plains, Missouri
Posts: 7,555
|
Re: 55 Wagon Progress
Looks great...Jim
__________________
my build thread: http://67-72chevytrucks.com/vboard/s...d.php?t=459839 Jimbo's long bed step build:http://67-72chevytrucks.com/vboard/s...t=464626<br /> |
|
|
|
|
01-10-2016, 12:16 PM
|
#5 |
|
Registered User
Join Date: Jan 2013
Location: Leonardtown, MD
Posts: 1,637
|
Re: 55 Wagon Progress
Thanks for the comments guys!
Here's a video taken yesterday using the 36" AFS sander. Note how the sander is grasped and the fact that this promotes letting the sandpaper do the work without "leaning" on it. Applying downward force through your palm to get the job done more quickly runs the risk of deflecting the sander downward at that point, causing low spots... Block Sanding Video
__________________
Robert |
|
|
|
|
01-10-2016, 02:06 PM
|
#6 |
|
I have no time for this
Join Date: Dec 2002
Location: Fort St John B.C. CANADA
Posts: 434
|
Re: 55 Wagon Progress
I am curious why you aren't using a good 2k primer over the SPI epoxy then sanding the 2k and finishing withe epoxy then wet sand to finish. Is it to keep mil thickness to a minimum? With the amount of time you put into metal work it wouldn't take much 2k to finish your panels. I'm not bashing in any way I'm just wondering. I was in the trade for a lot of years and am a huge fan of your skills and patience.
__________________
1986 Chevy short box ( PROJECT ) 1994 Chevy Blazer lifted 6" 2009 Gmc 2500 HD 1999 Hugger orange Camaro SS 2007 BMW X5 Sport |
|
|
|
|
01-10-2016, 02:00 PM
|
#7 |
|
Senior Member
Join Date: Jul 2012
Location: Oblong, Illinois
Posts: 7,024
|
Re: 55 Wagon Progress
Great video Robert. The tutorial on checking and correcting rear axle tube deflection is good too. In checking the run out at the wheel, is there possibility some of the run out is the wheel? One set I bought once had 0.040" run out mounted on the wheel balancer.
|
|
|
|
|
01-10-2016, 04:11 PM
|
#8 |
|
Registered User
Join Date: Jan 2013
Location: Leonardtown, MD
Posts: 1,637
|
Re: 55 Wagon Progress
With housing stationary and wheels rotated, we did see a bit of fluctuation of about +/- .005 to .010 in the wheels, but it was rather sporadic and not relative to the welded pads. When the tires where stationary and the housing was rotated around, before our heating efforts the runout started at about +/- .050, and was directly related to the welded pad location. At the point the housing was being rotated, the dial indicator remained in the same spot on the wheel, so although the wheel isn't perfect, the reading should have reflected housing issues only.
Our last major restoration was on a 65 Fairlane, where we did use some Slick Sand. A few years later, I now notice some slight shrinkage in areas and given SS isuch more porous and less stable IMO than epoxy, I am trying epoxy only to see if it provides better results...
__________________
Robert |
|
|
|
|
01-10-2016, 09:56 PM
|
#9 |
|
I have no time for this
Join Date: Dec 2002
Location: Fort St John B.C. CANADA
Posts: 434
|
Re: 55 Wagon Progress
I hear ya on the shrinkage of slick sand I used it a couple times and it shrank a little bit.
__________________
1986 Chevy short box ( PROJECT ) 1994 Chevy Blazer lifted 6" 2009 Gmc 2500 HD 1999 Hugger orange Camaro SS 2007 BMW X5 Sport |
|
|
|
|
01-12-2016, 11:12 PM
|
#10 |
|
Registered User
Join Date: Jan 2013
Location: Leonardtown, MD
Posts: 1,637
|
Re: 55 Wagon Progress
Well Kyle was mostly on his own tonight as I had some repairs to do on the wife's vehicle..
New U-bolts came in yesterday, they have a pretty good selection on their web site if anyone needs some....  Threads taped off and all the parts media blasted... 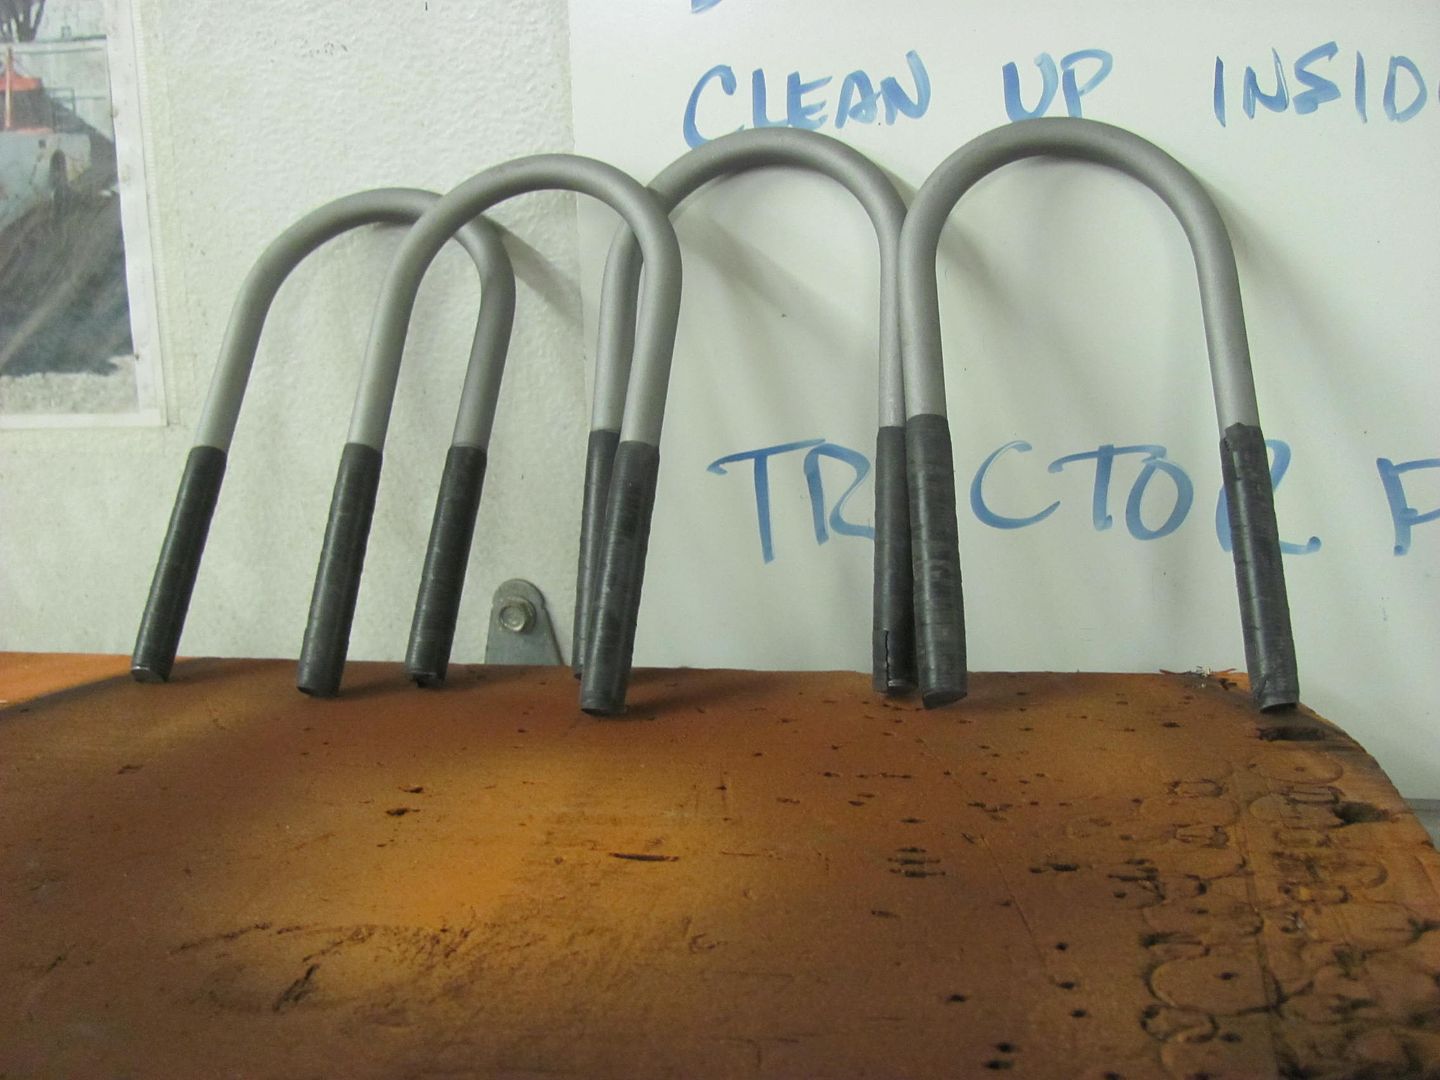 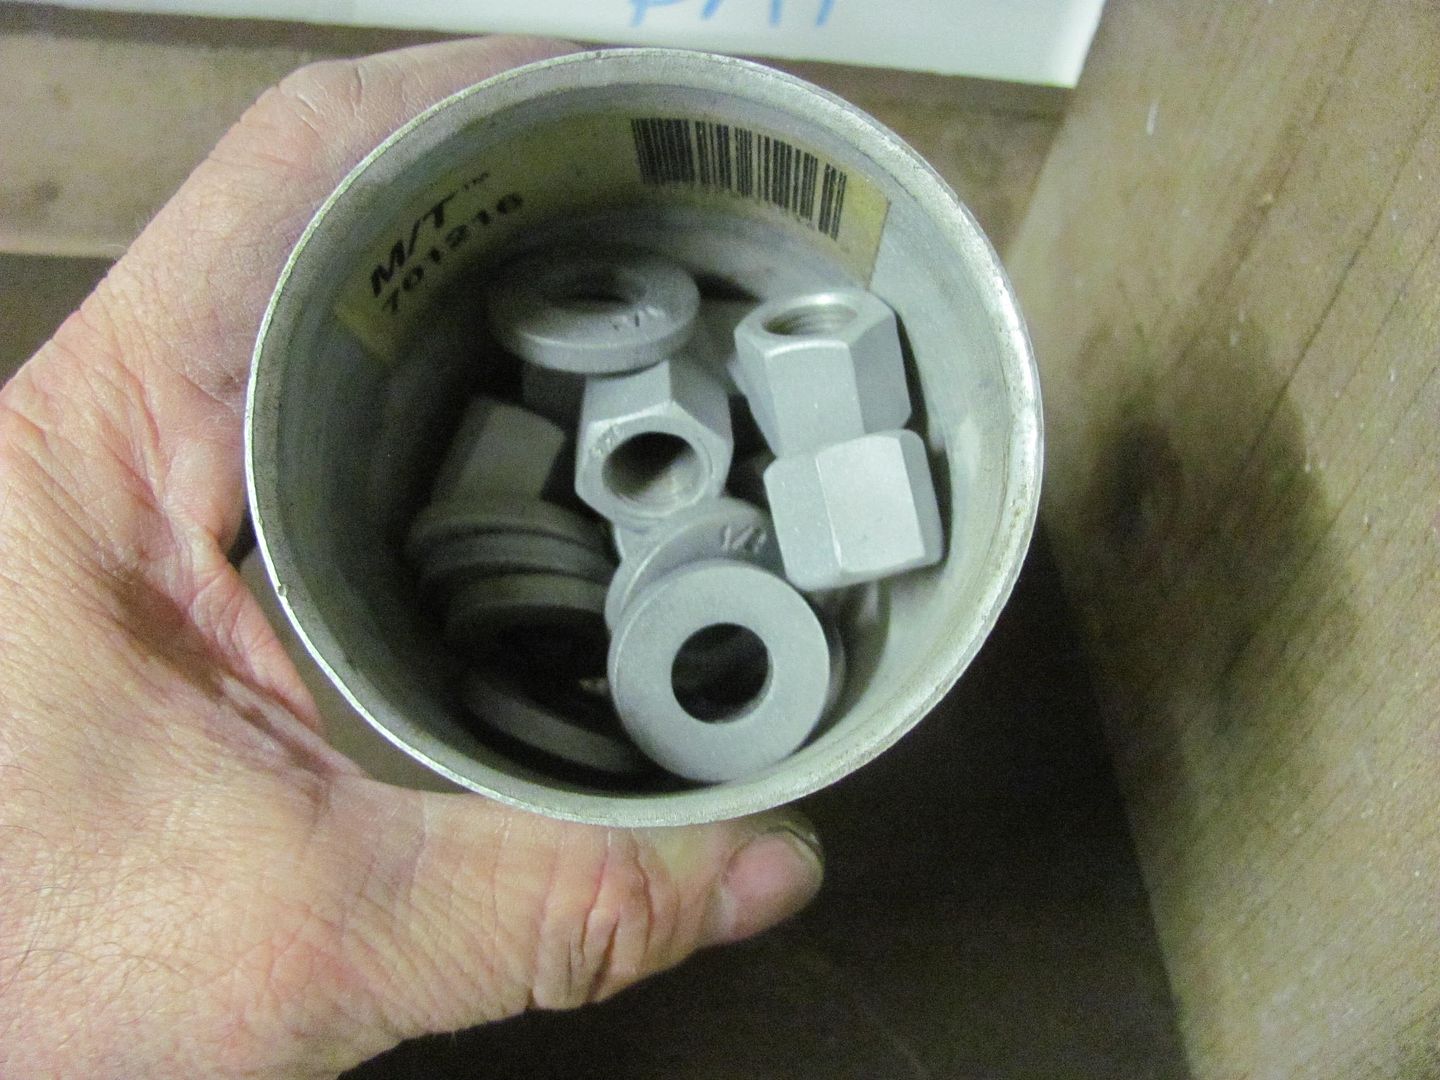 Then Kyle got the rear torn down for media blasting as well. Blast cabinet just the right size.. 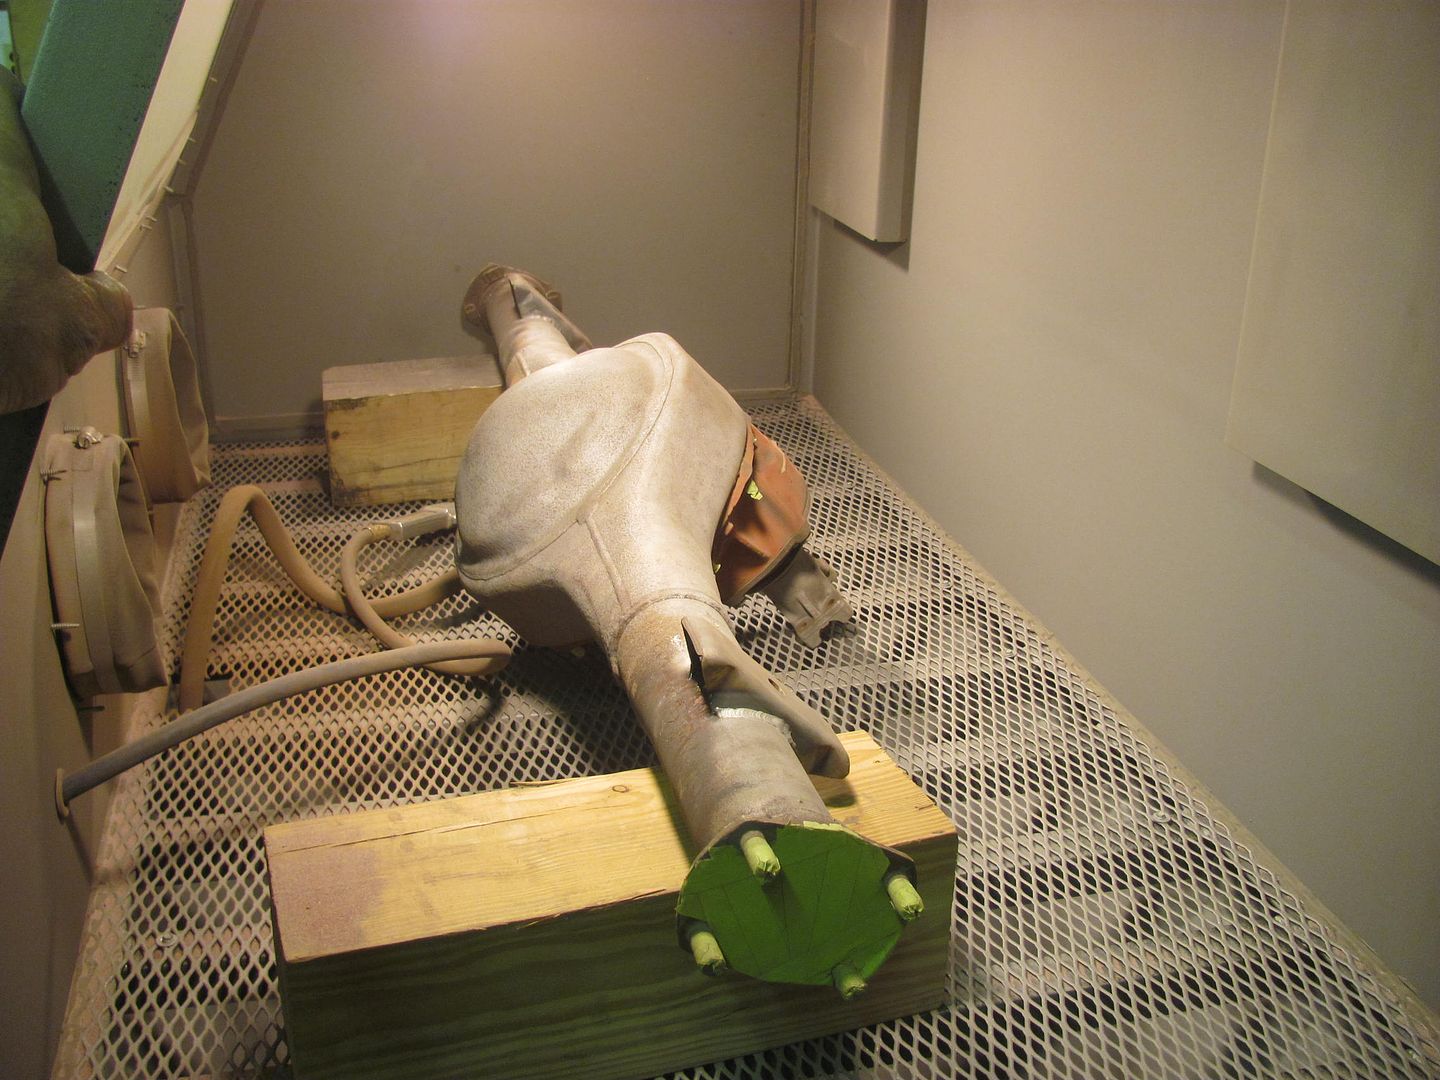 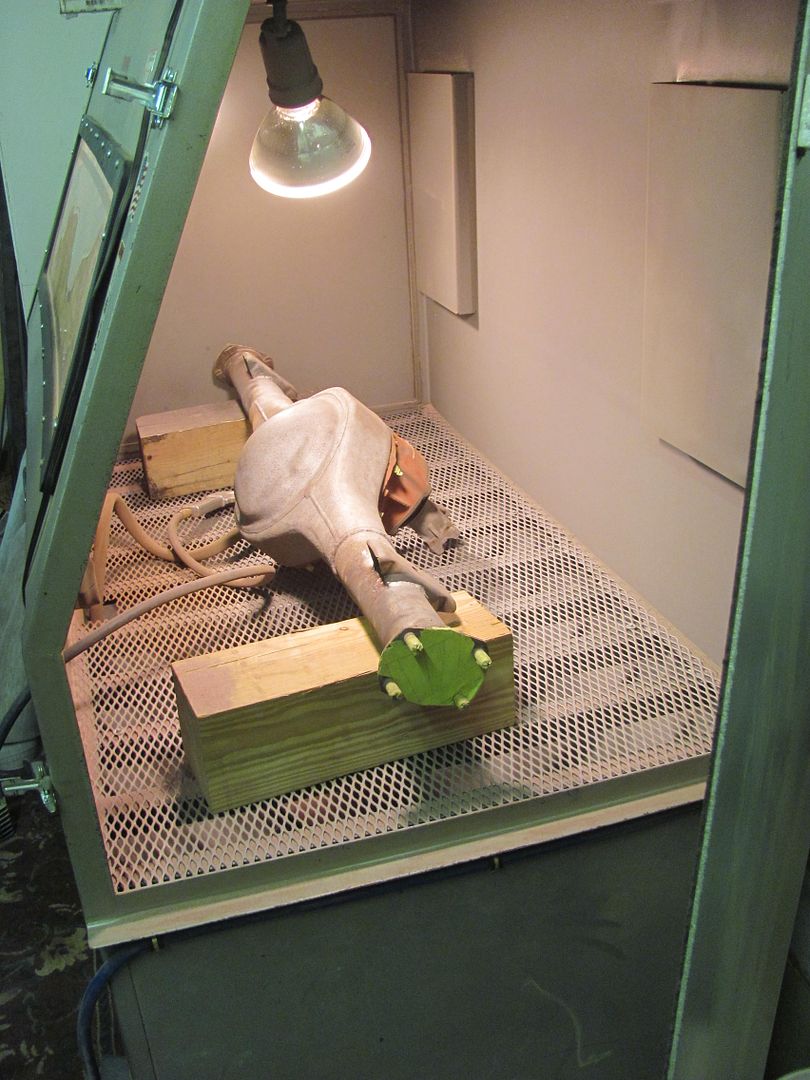
__________________
Robert |
|
|
|
|
01-13-2016, 07:38 PM
|
#11 |
|
Registered User
Join Date: Jan 2013
Location: Leonardtown, MD
Posts: 1,637
|
Re: 55 Wagon Progress
Some Hoosier Profile parts showed up for the new wheeling machine.. Joe Andrews does some real nice work..

__________________
Robert |
|
|
|
|
01-13-2016, 07:53 PM
|
#12 |
|
Senior Member
Join Date: Mar 2011
Location: West Plains, Missouri
Posts: 7,555
|
Re: 55 Wagon Progress
Whoa, those look super...Jim
__________________
my build thread: http://67-72chevytrucks.com/vboard/s...d.php?t=459839 Jimbo's long bed step build:http://67-72chevytrucks.com/vboard/s...t=464626<br /> |
|
|
|
|
01-13-2016, 08:13 PM
|
#13 |
|
Registered User
Join Date: Jan 2012
Location: Eastern Ontario, Canada
Posts: 1,041
|
Re: 55 Wagon Progress
Awesome Robert! I have a C4 IRS that is all aluminum but the input and output yokes are steel and rusty. Any recommendations on prepping the steel yokes for paint without complete disassembly of the rear end?
__________________
1952 Canadian Chevy 1300 C4 IFS & D44 IRS 5.3 HO L33 My Build: http://67-72chevytrucks.com/vboard/s...d.php?t=632938 
|
|
|
|
|
01-13-2016, 08:24 PM
|
#14 |
|
Registered User
Join Date: Jan 2013
Location: Leonardtown, MD
Posts: 1,637
|
Re: 55 Wagon Progress
Got a picture?
__________________
Robert |
|
|
|
|
01-13-2016, 08:55 PM
|
#15 |
|
Registered User
Join Date: Jan 2012
Location: Eastern Ontario, Canada
Posts: 1,041
|
Re: 55 Wagon Progress
 I plan on cleaning up the casting flash and painting the aluminum parts. Just not sure on the rusty steel yokes.
__________________
1952 Canadian Chevy 1300 C4 IFS & D44 IRS 5.3 HO L33 My Build: http://67-72chevytrucks.com/vboard/s...d.php?t=632938
|
|
|
|
|
01-13-2016, 09:07 PM
|
#16 |
|
Registered User
Join Date: Jan 2013
Location: Leonardtown, MD
Posts: 1,637
|
Re: 55 Wagon Progress
Look for some "pre-caulking filler rope" or other such product to seal between the shafts and the housing. Then media blast, the pull out the rope afterward and use air nozzle to clean up anything that may have sneaked past. Leave out for the Epoxy painting stage, a bit more paint inside shouldn't hurt..
Oh.. and I'd separate the half shafts to clean up the yokes and paint all the nooks and crannies.
__________________
Robert Last edited by MP&C; 01-13-2016 at 09:17 PM. |
|
|
|
|
01-16-2016, 10:03 PM
|
#17 |
|
Registered User
Join Date: Jan 2013
Location: Leonardtown, MD
Posts: 1,637
|
Re: 55 Wagon Progress
Getting things ready for the next round of SPI epoxy, here hanging the 9" rear on the multi-purpose rotisserie a-frame..
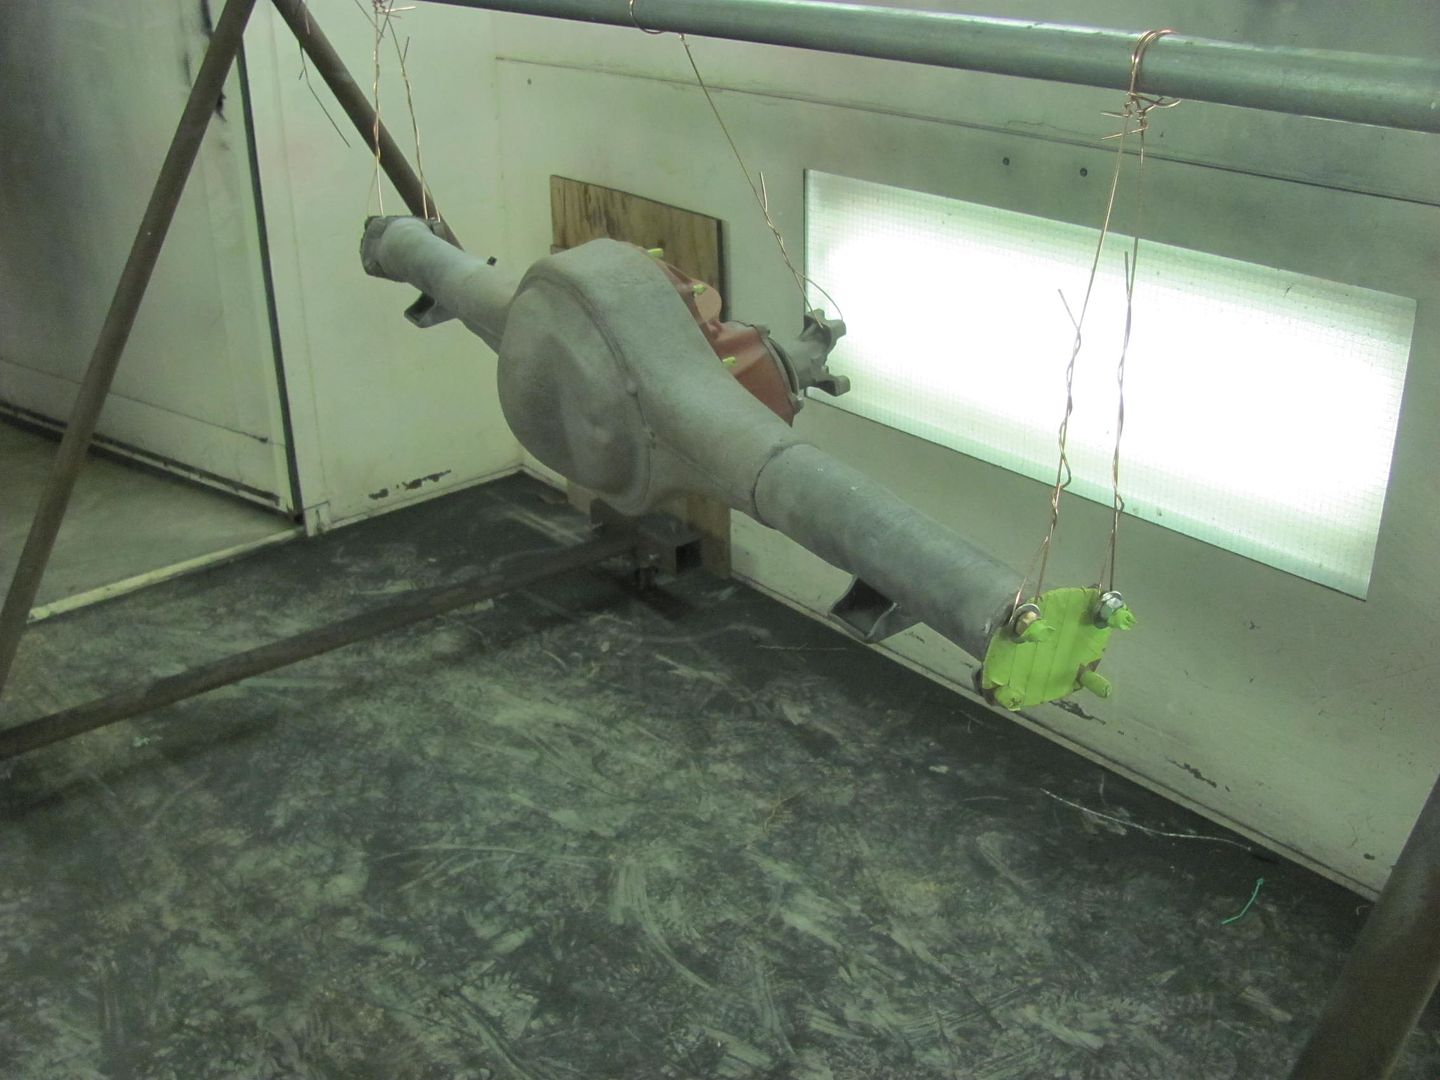 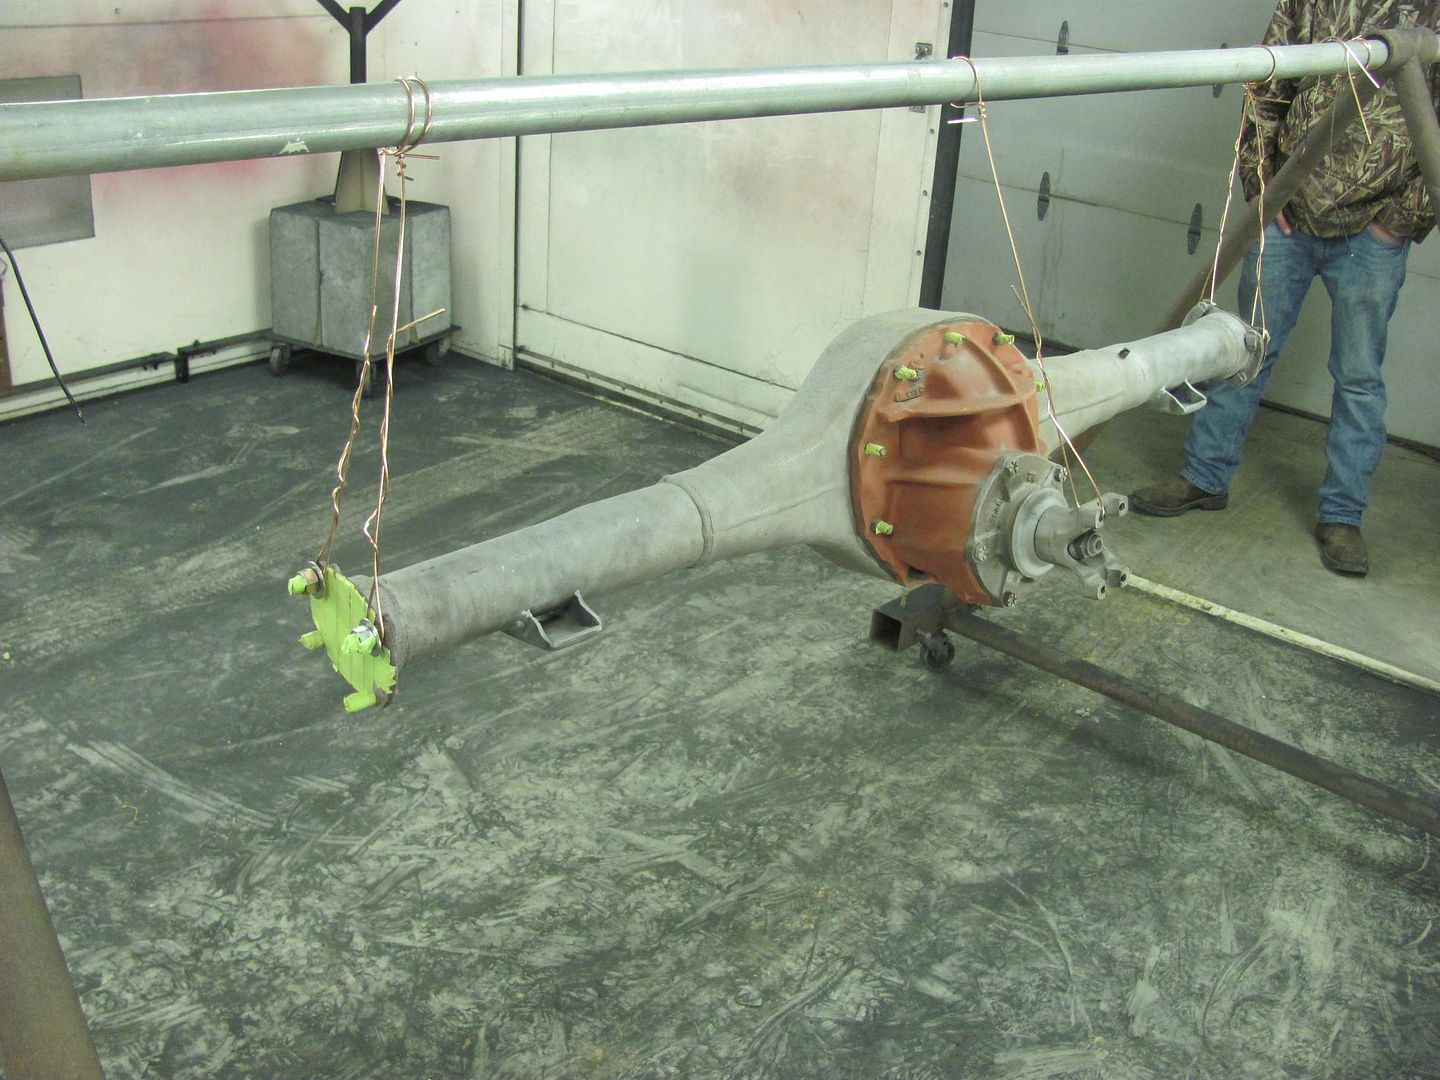 We had this bare spot after the last time we blocked, and had bumped it a bit with the flat body hammer. 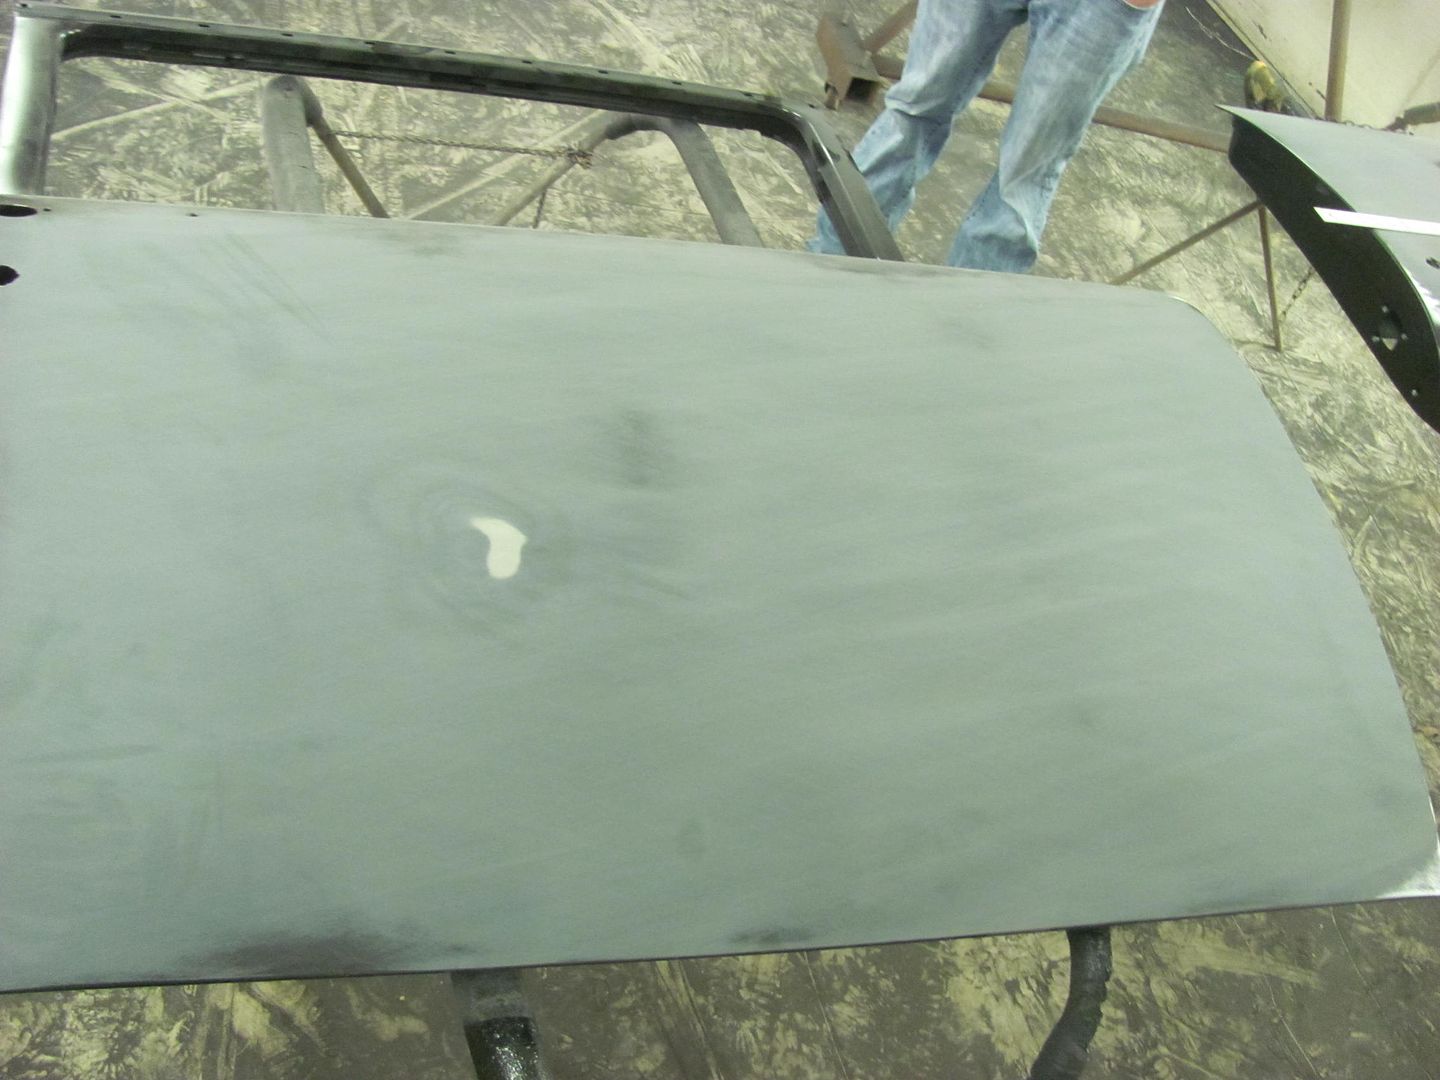 Doesn't look like it did much to rectify the issue, let's look further....  Looks like the rear end of the inside bracket is pushing a bit on the skin, no wonder the hammer didn't do much. Time to find the tool for the job, a pair of crimping pliers for stove pipe/ductwork..... 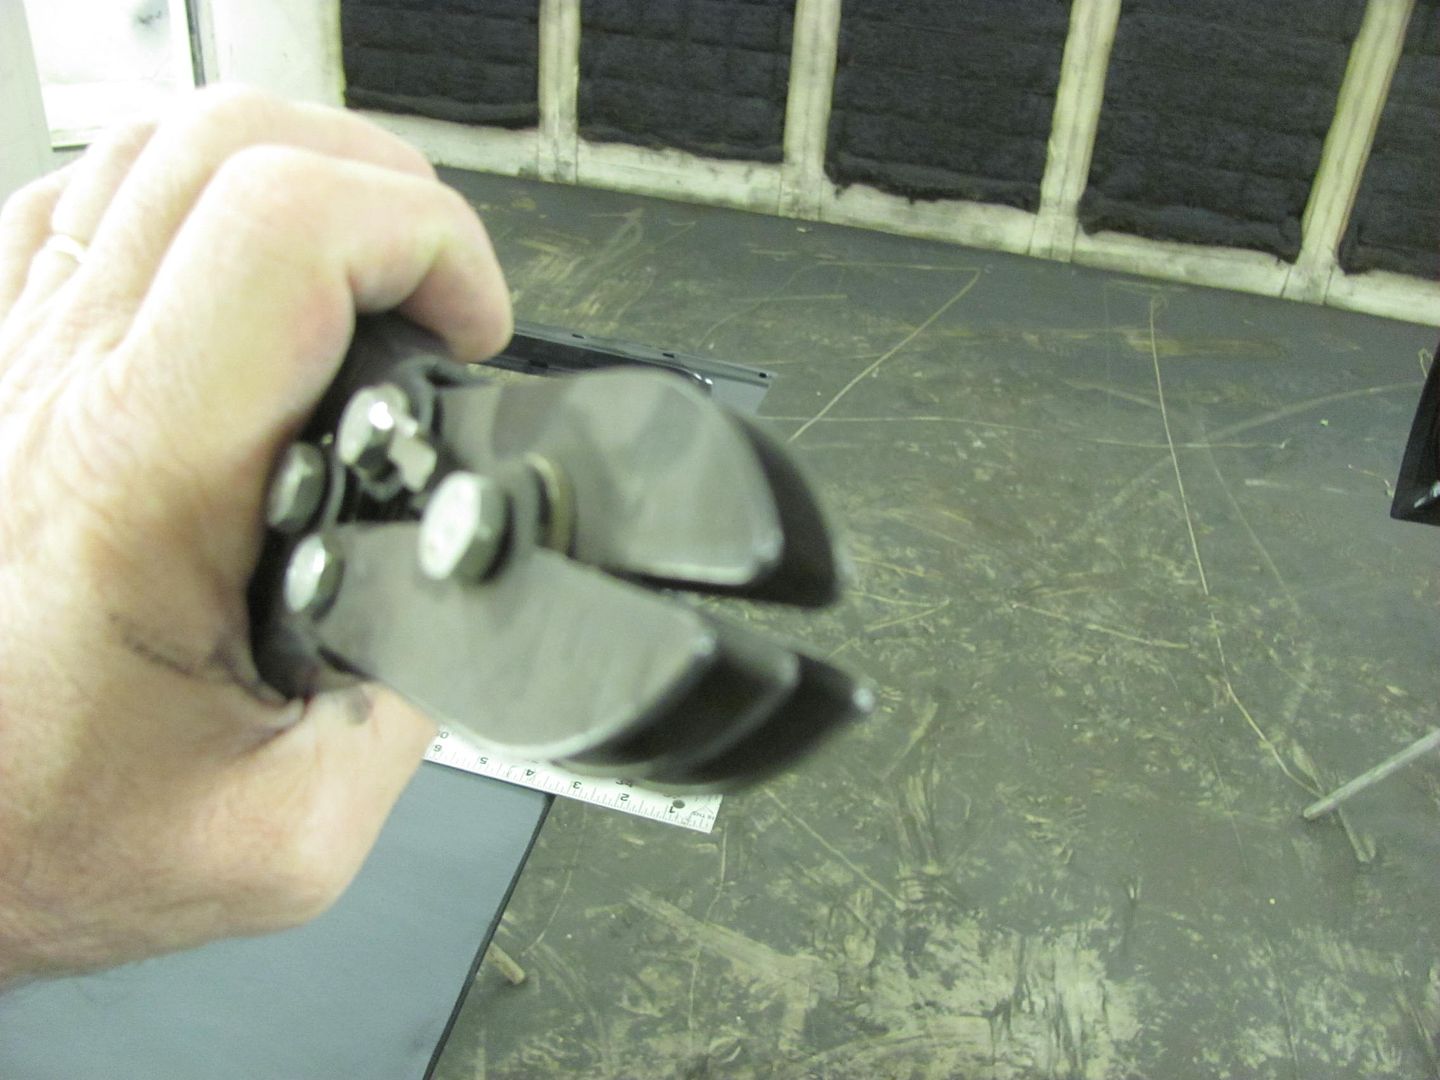 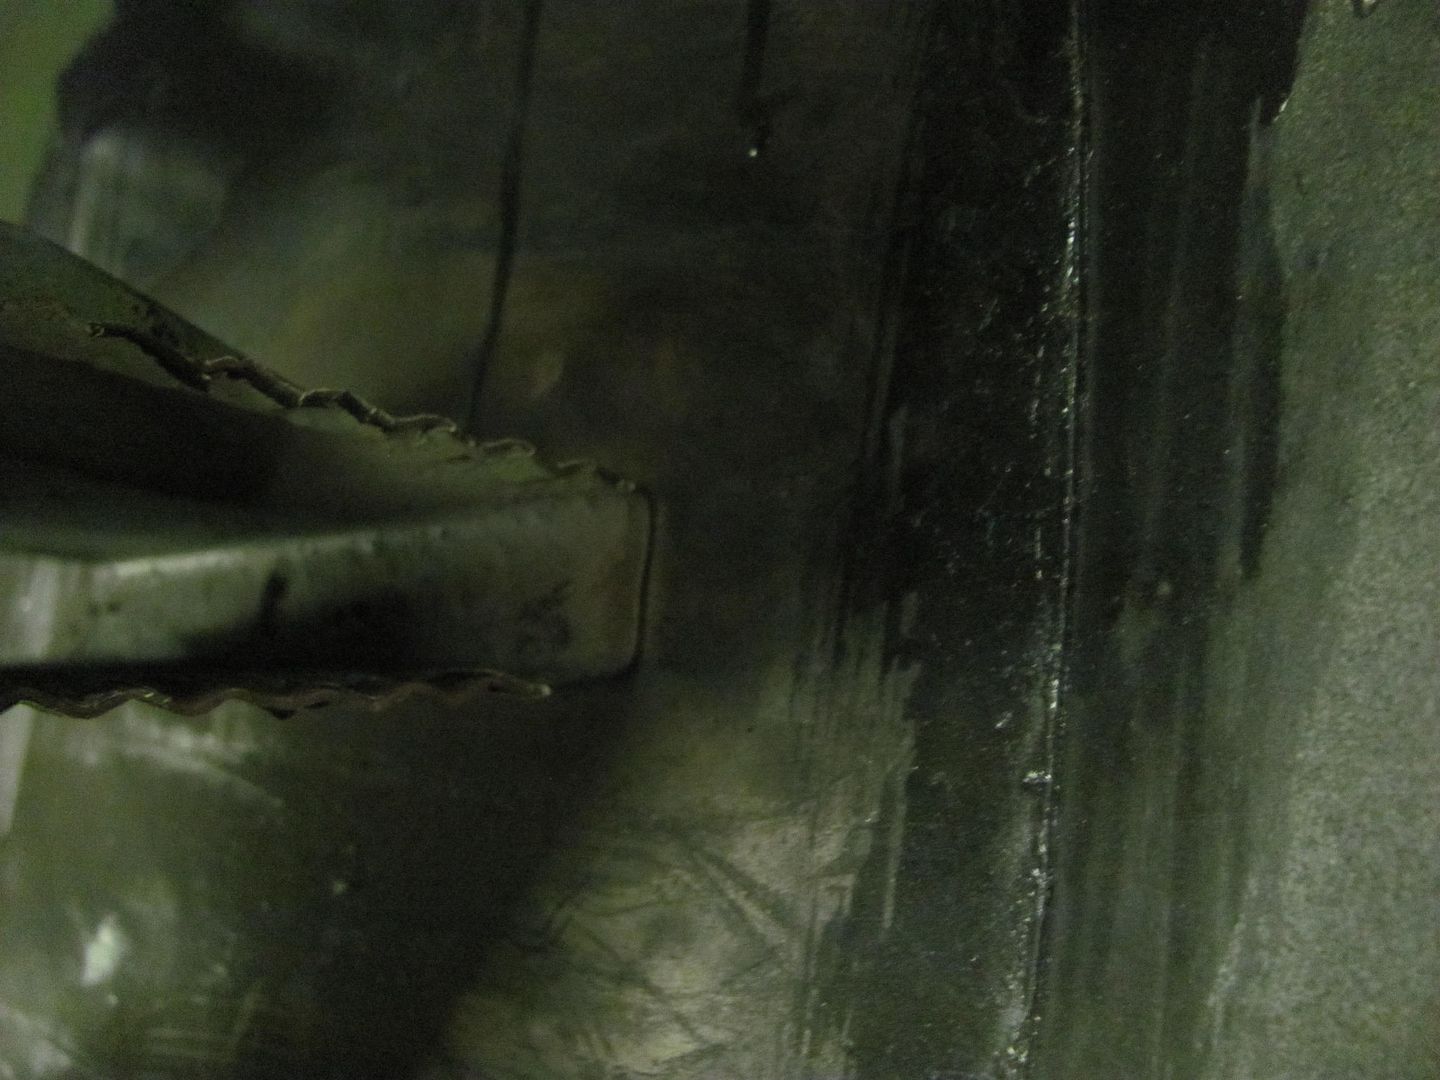 That should give us some breathing room, and bumped it again with the hammer. Put the SPI in the paint shaker, should have tapped the lid a bit tighter.. 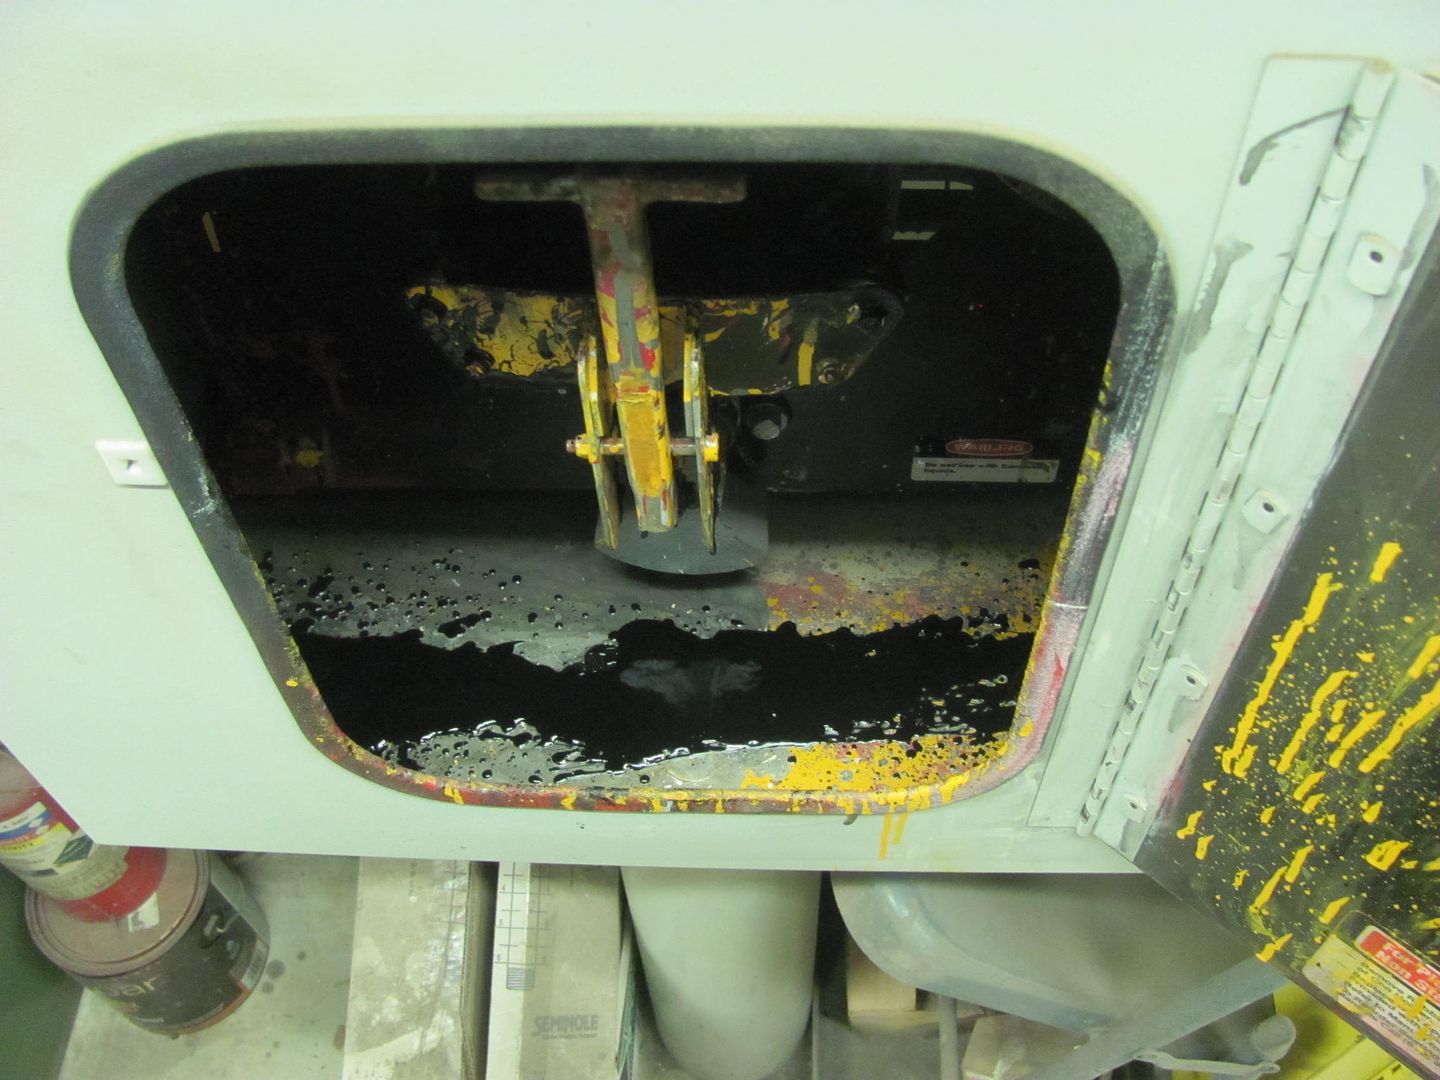 More parts ready for spraying.... 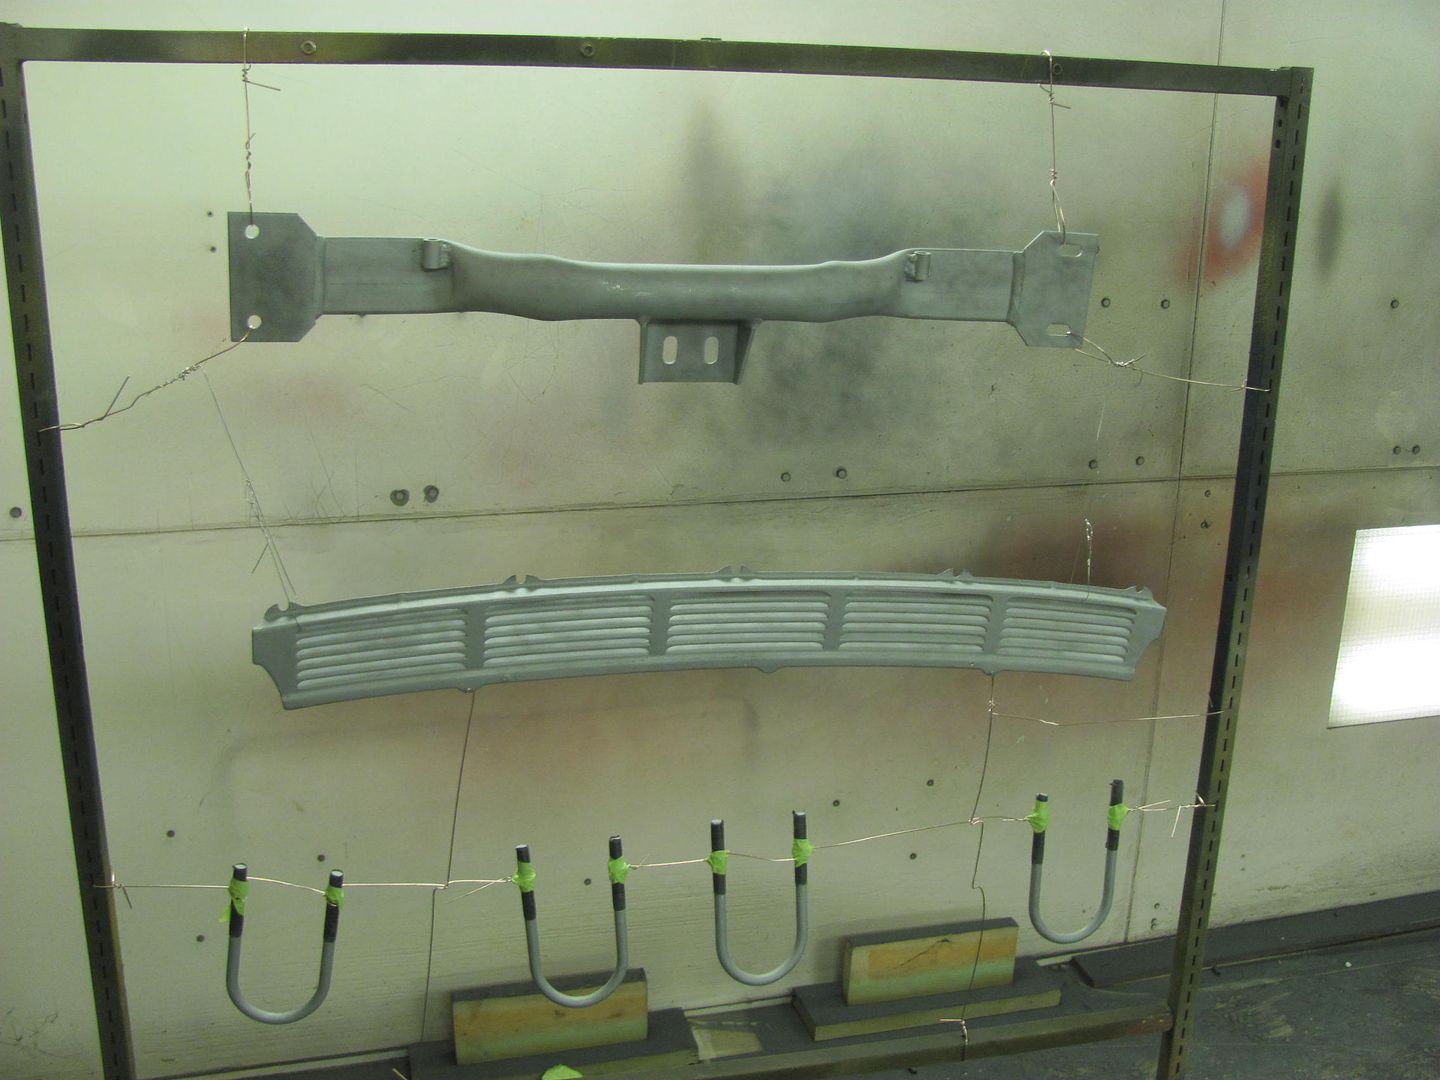 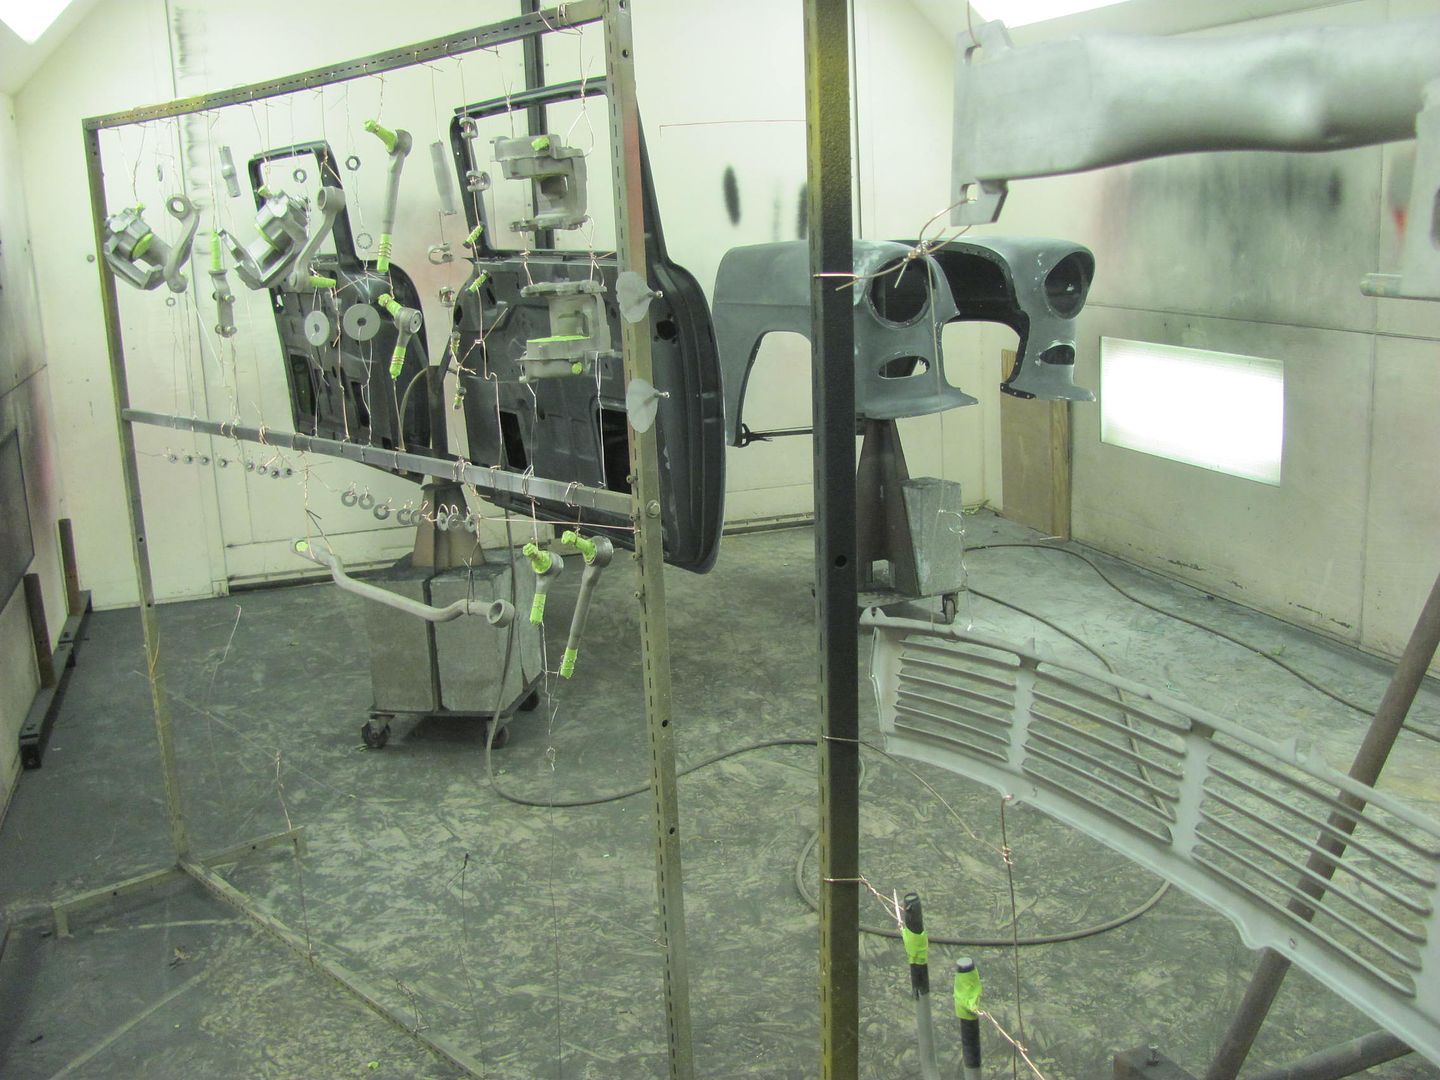 After 3 coats of epoxy.... 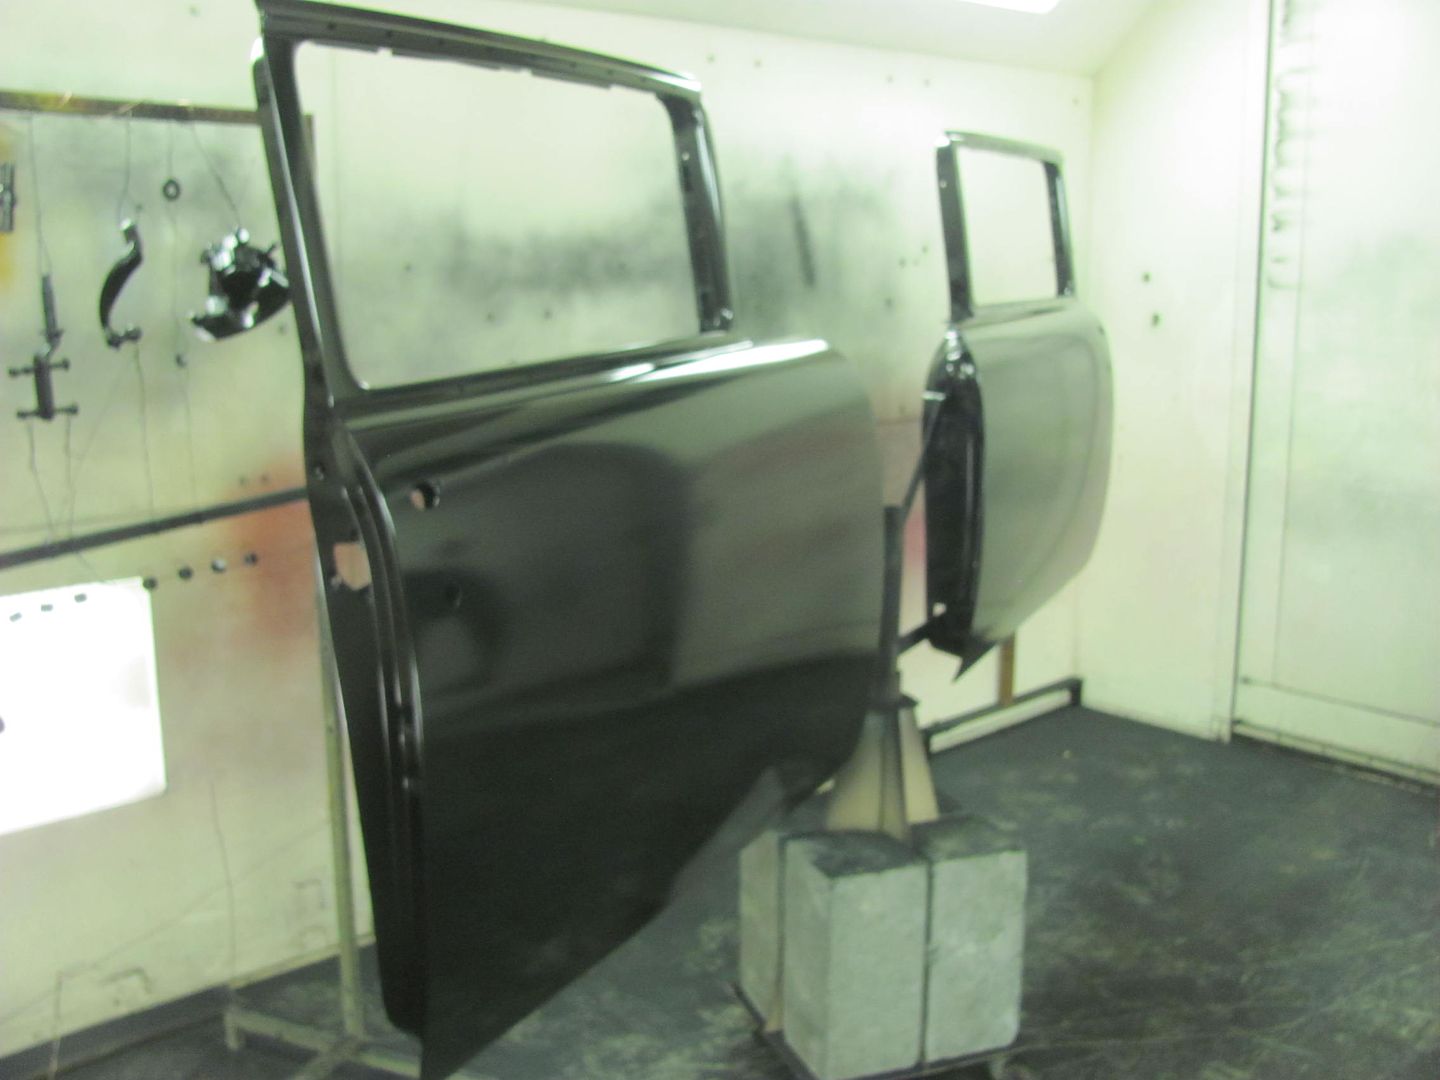 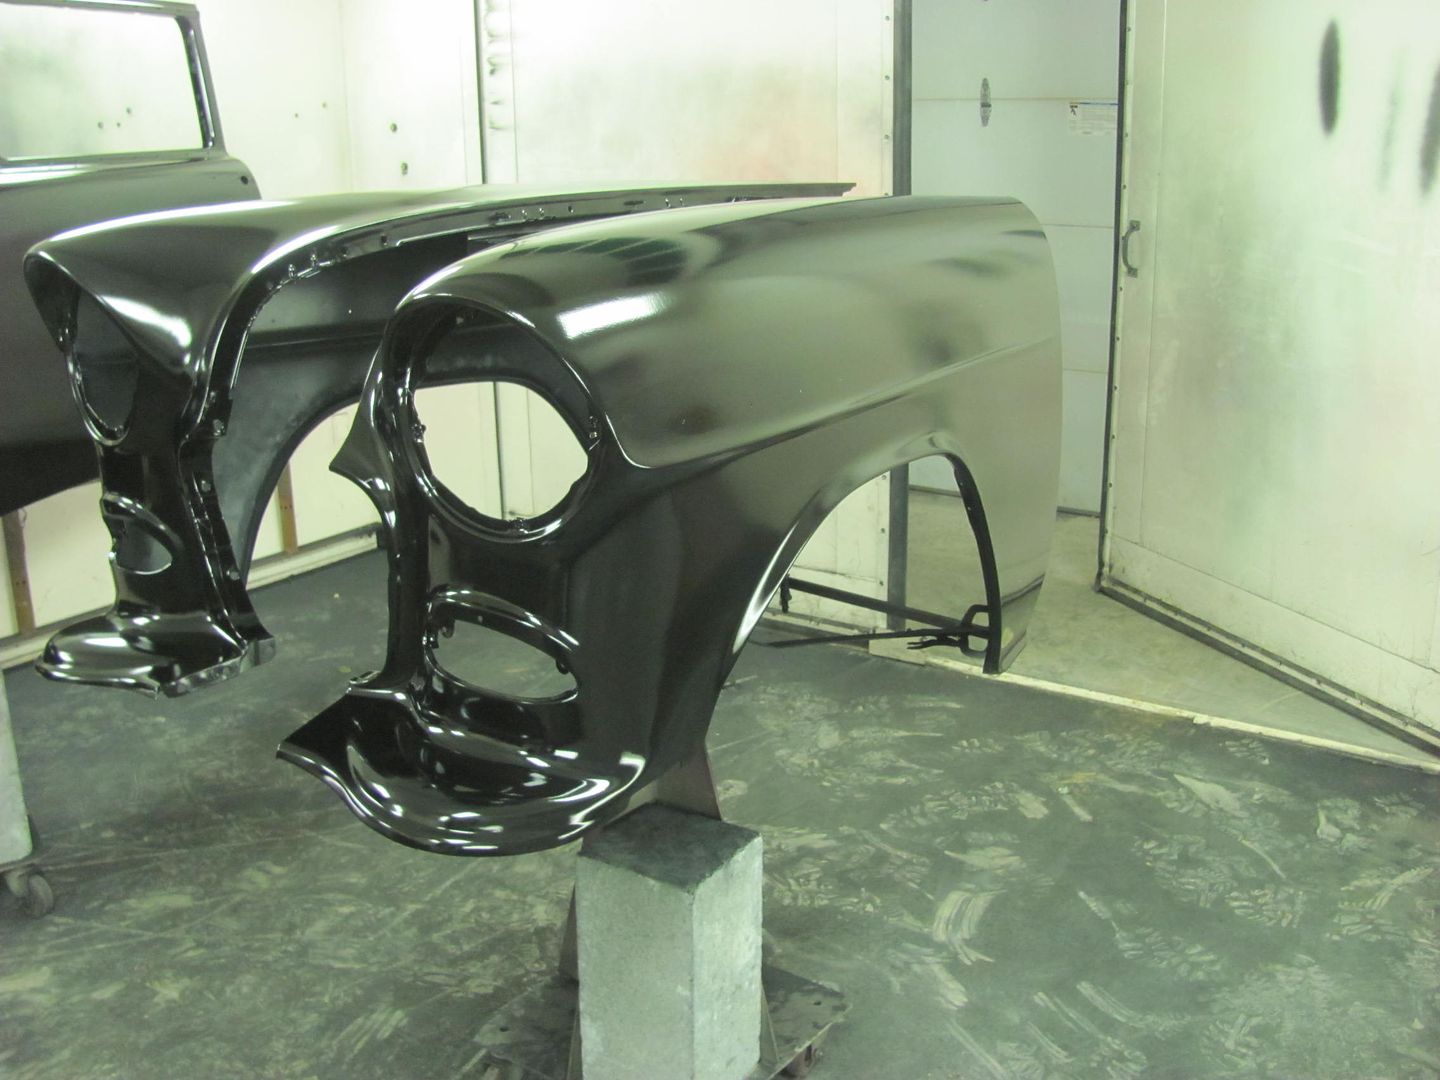 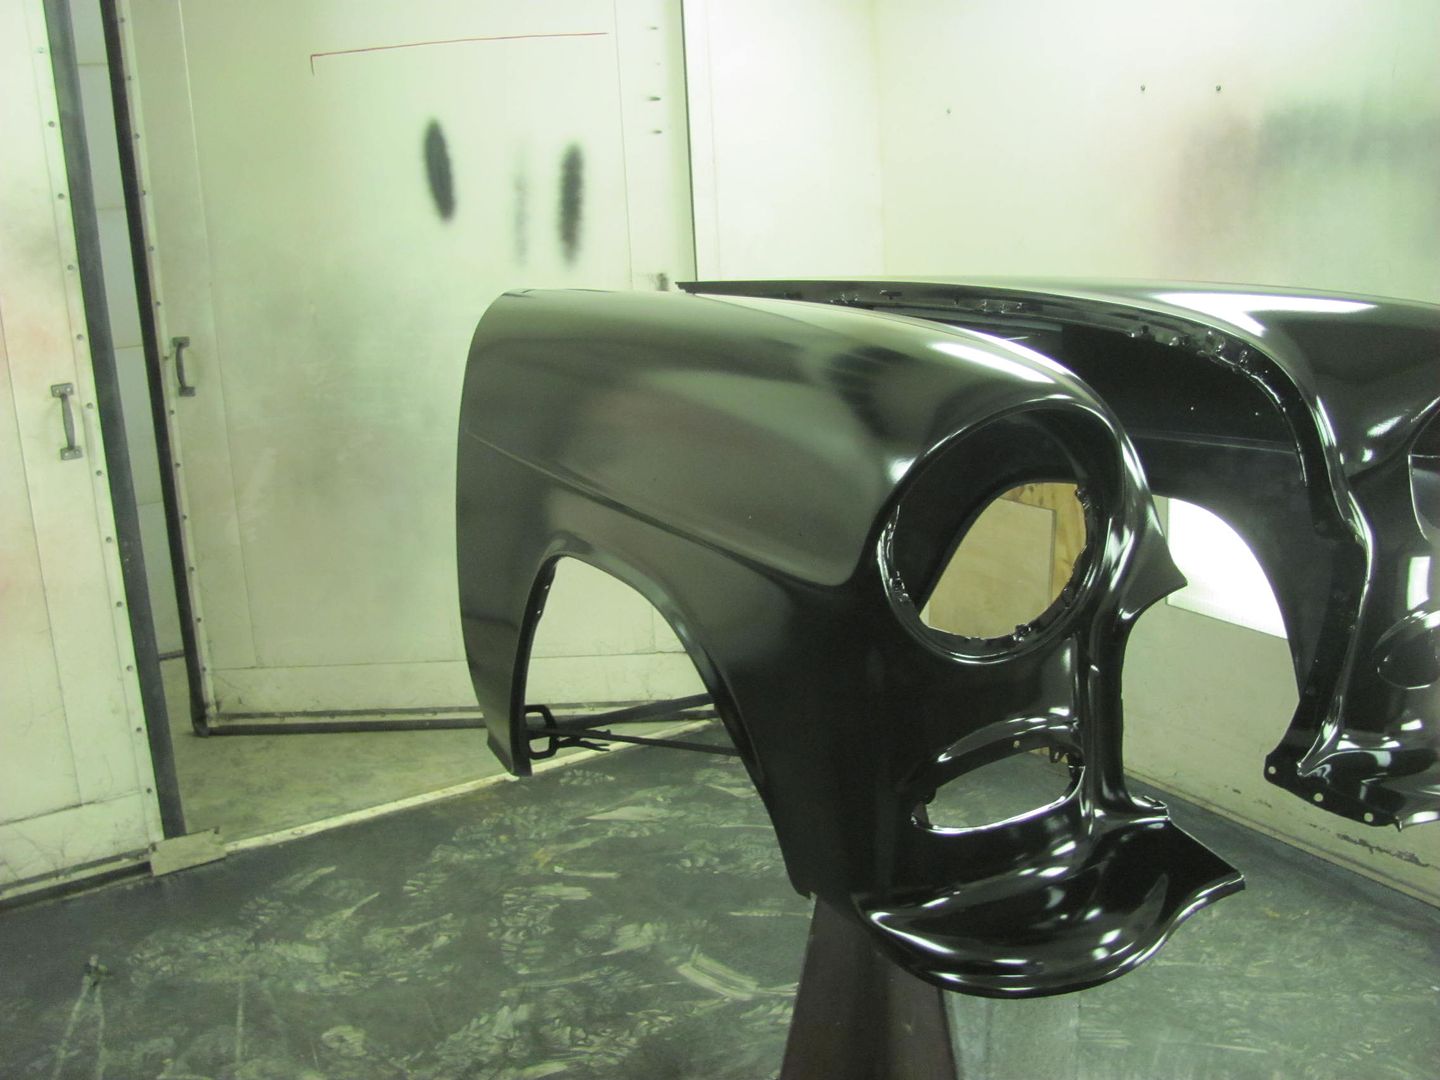 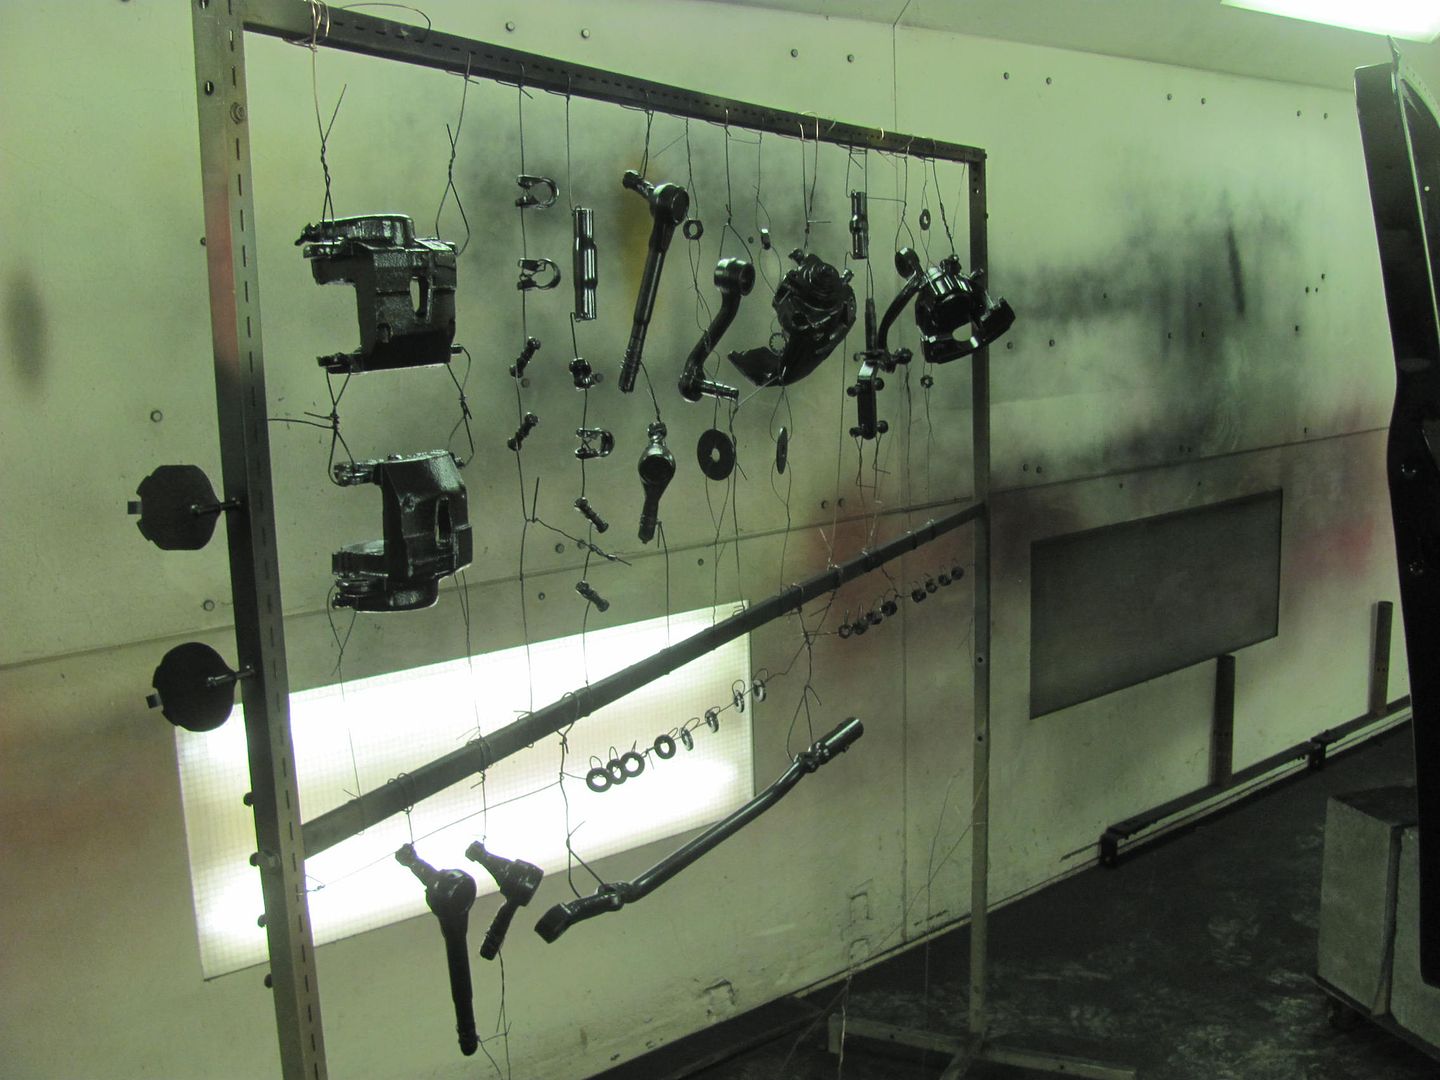 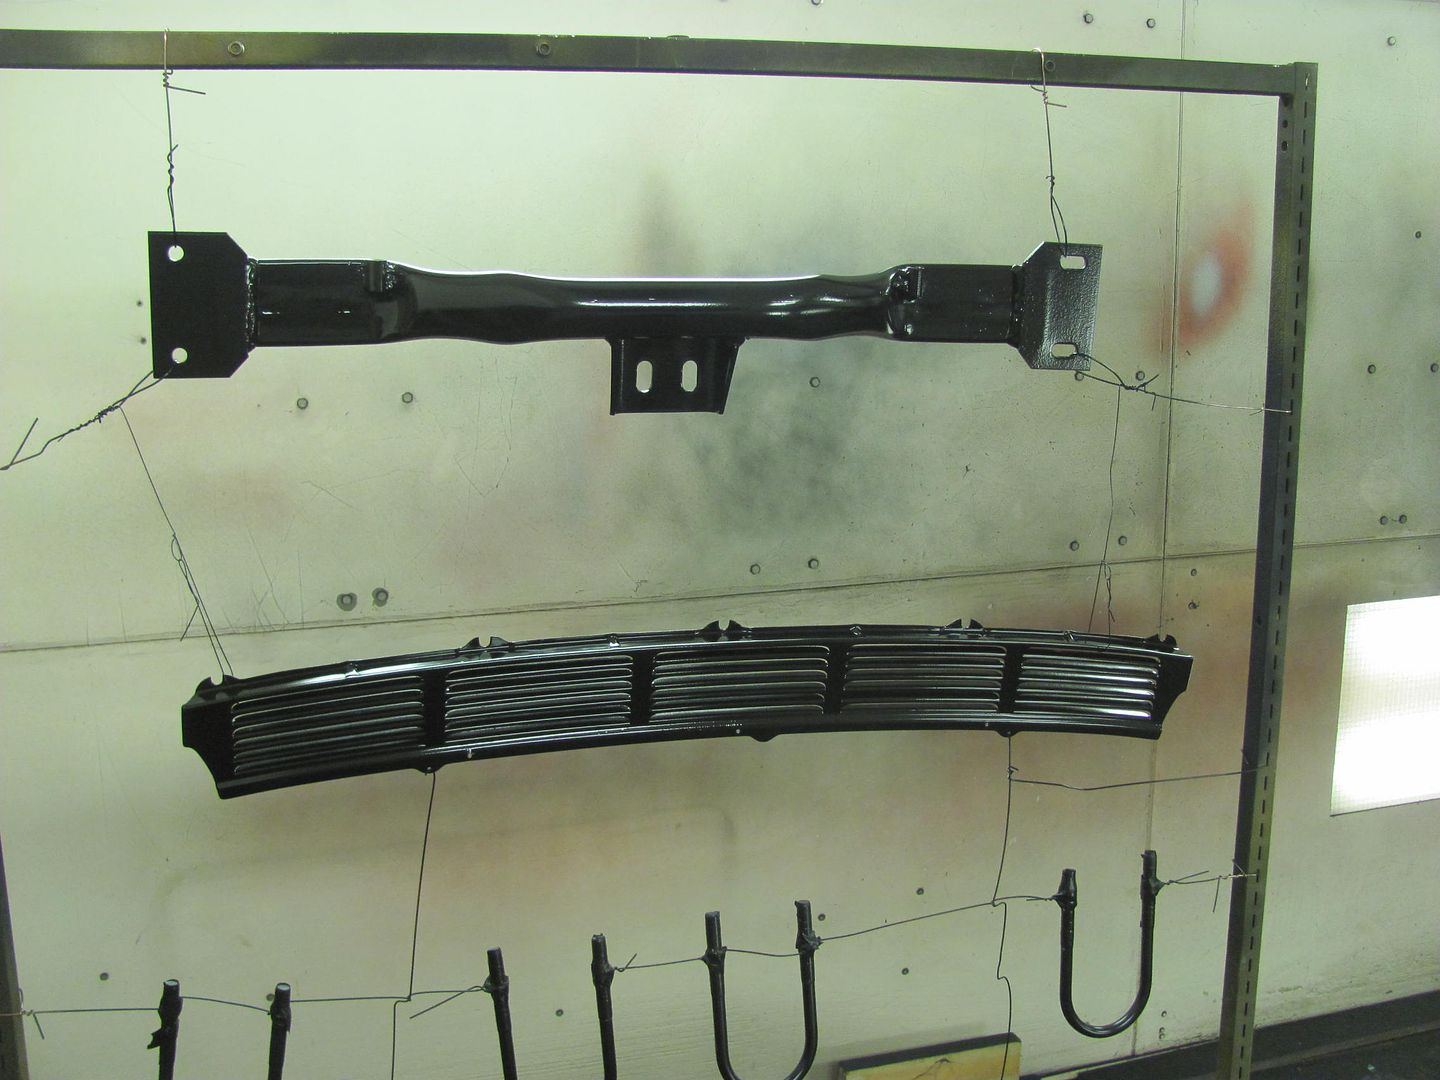 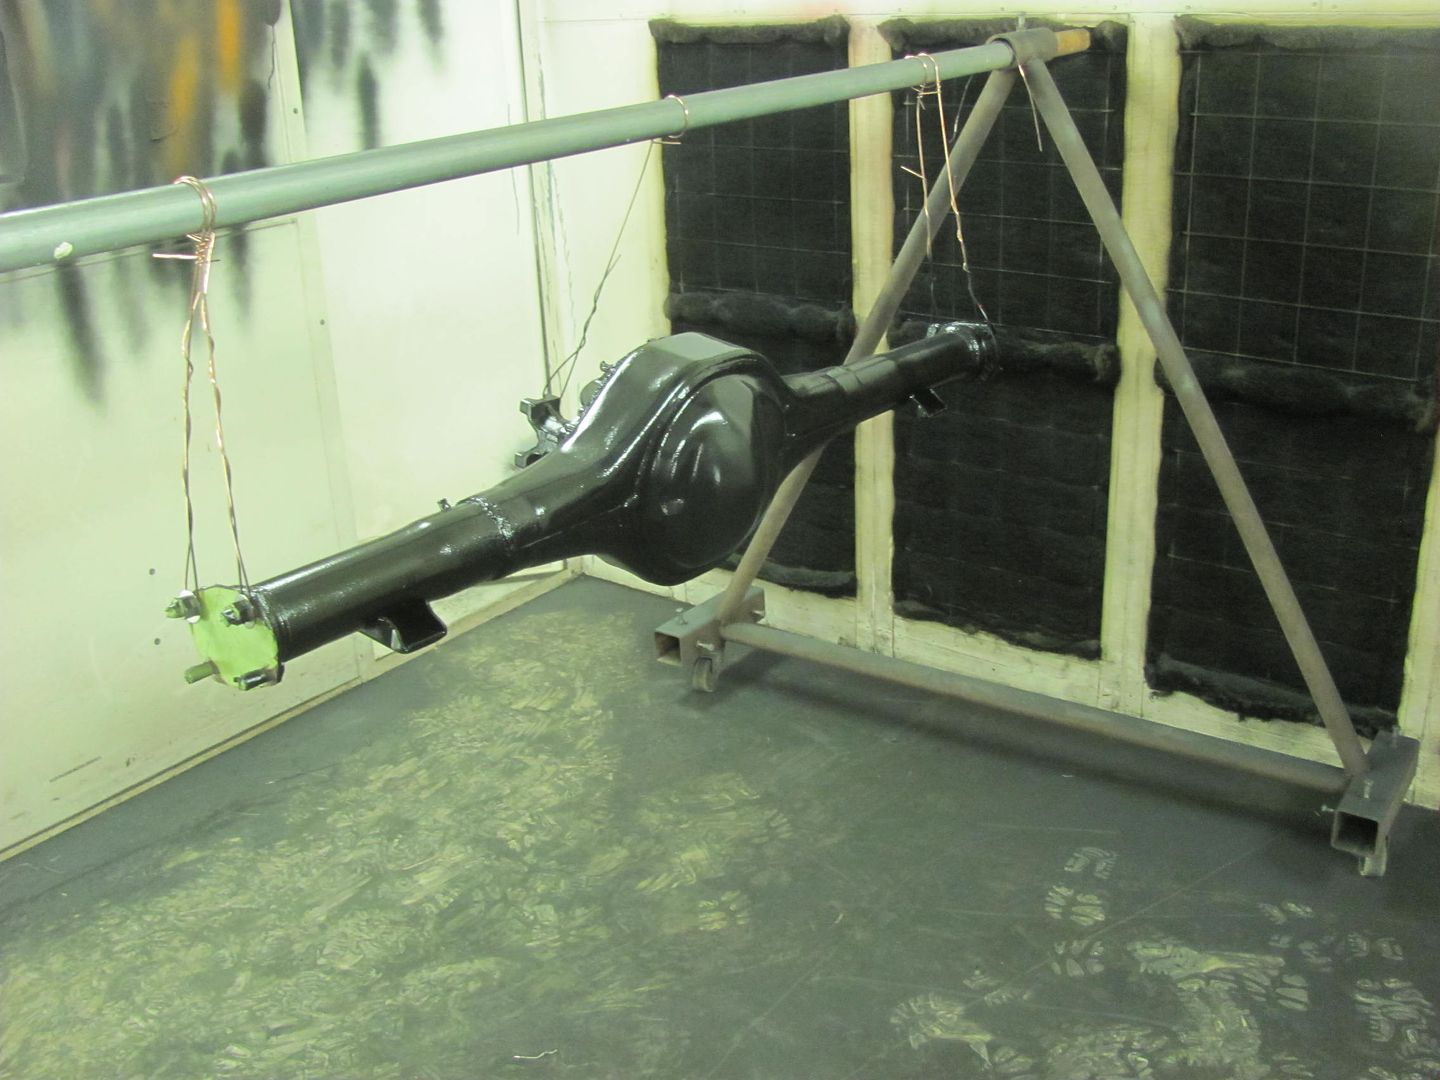 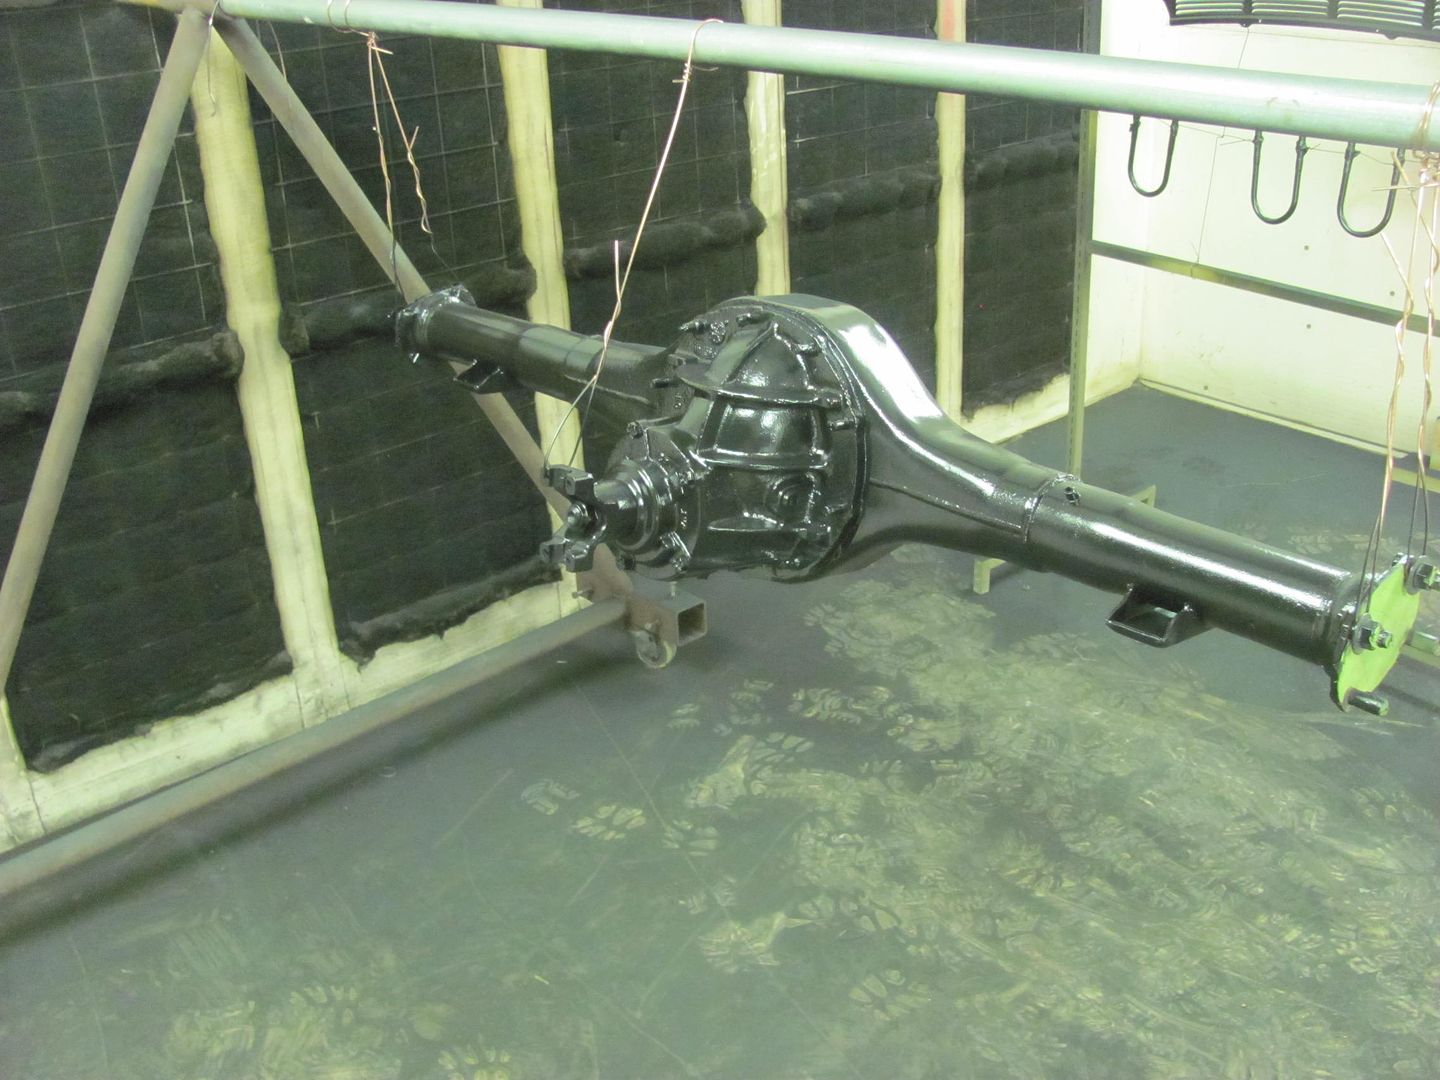 Here's some of the "restraint" methods for painting the small parts.... 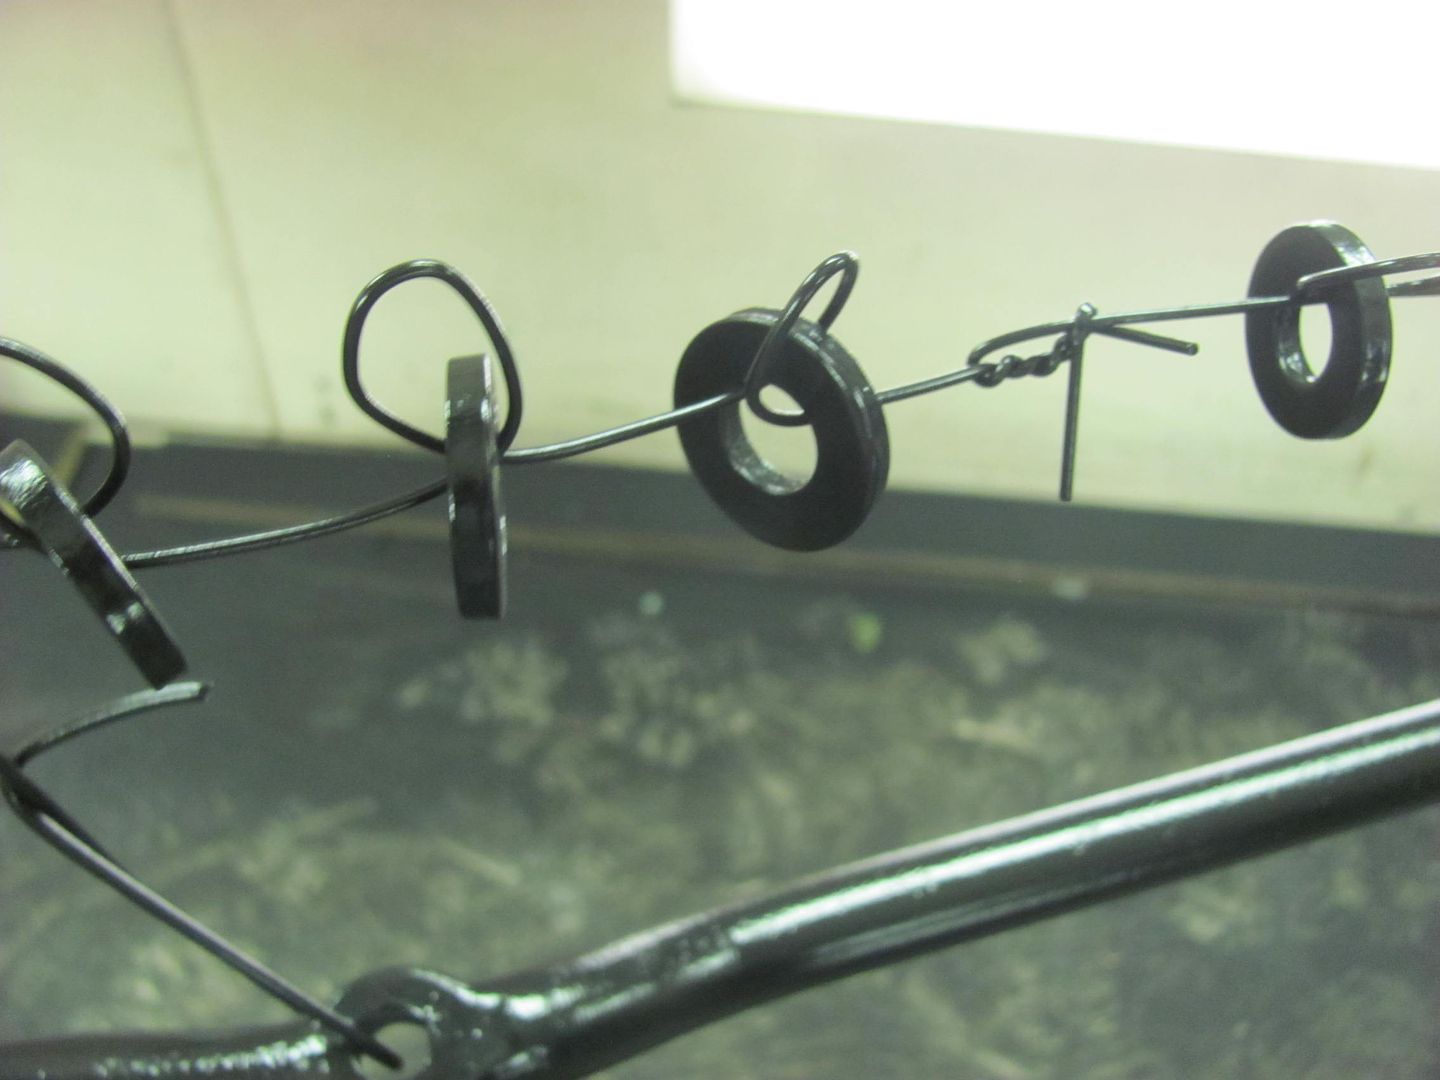  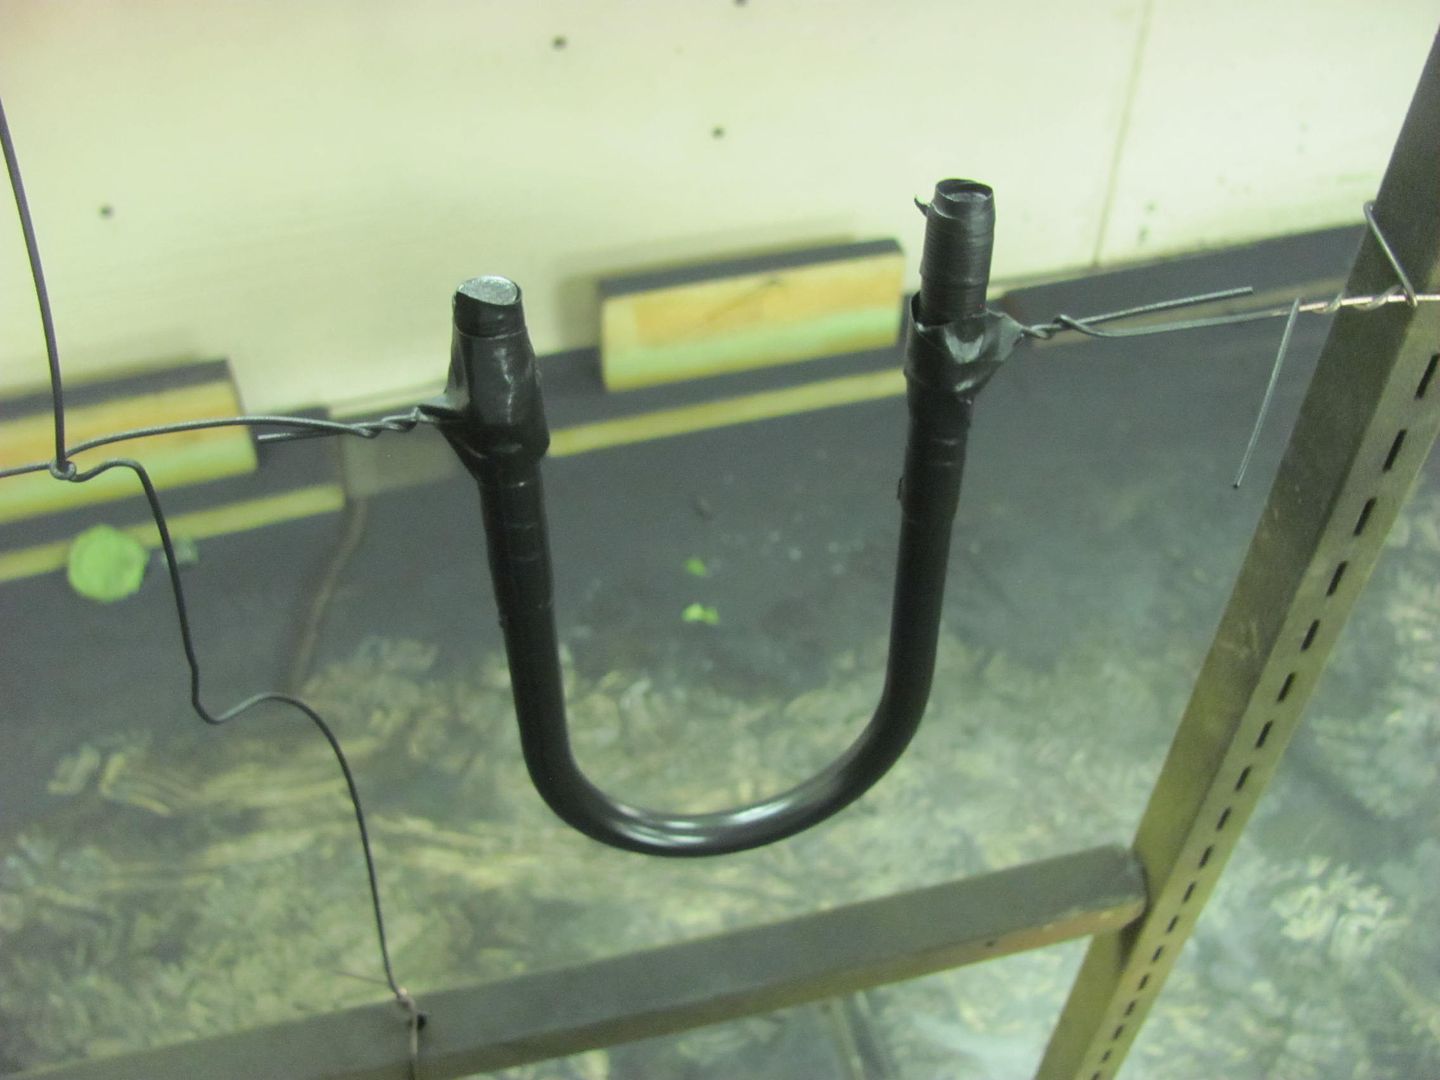 I think the fenders should be good for wet sanding after this go round: https://www.youtube.com/watch?v=wHrxzkEc618 .
__________________
Robert |
|
|
|
|
01-21-2016, 11:31 PM
|
#18 |
|
Registered User
Join Date: Jan 2013
Location: Leonardtown, MD
Posts: 1,637
|
Re: 55 Wagon Progress
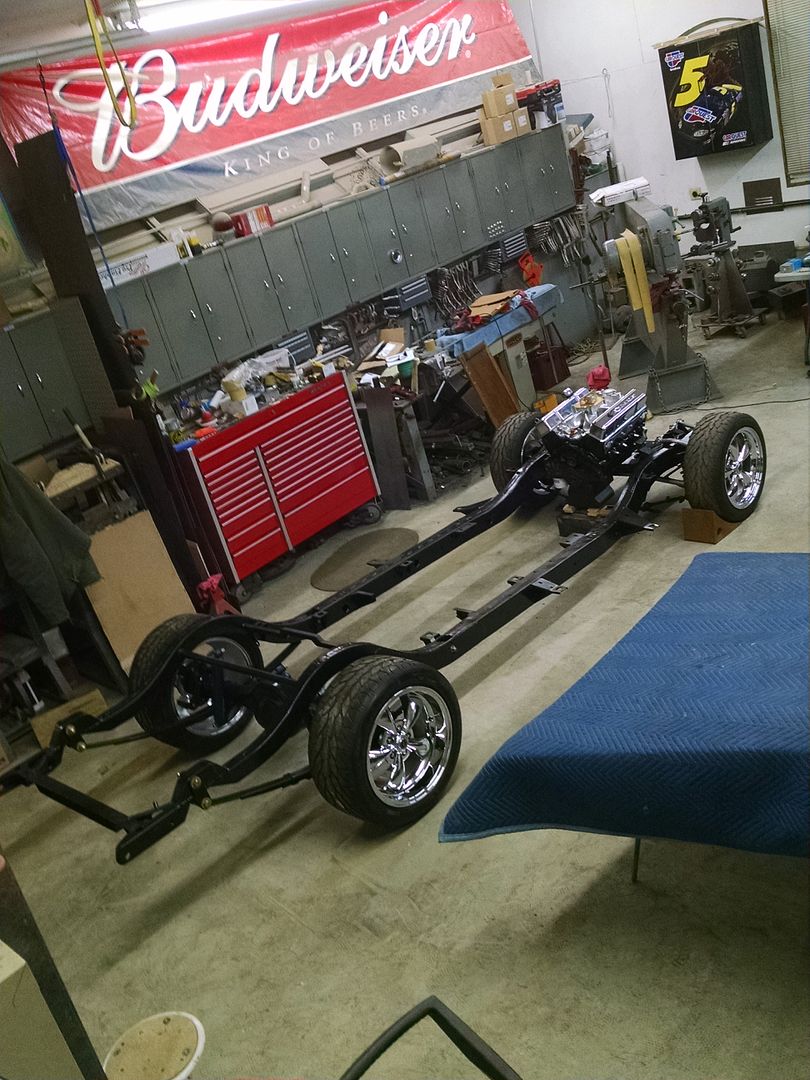
Well we didn't get many pictures tonight, but we've got the frame back on 4 wheels!
__________________
Robert |
|
|
|
|
01-22-2016, 12:19 AM
|
#19 |
|
Senior Member
Join Date: Mar 2011
Location: West Plains, Missouri
Posts: 7,555
|
Re: 55 Wagon Progress
Looking very nice...Jim
__________________
my build thread: http://67-72chevytrucks.com/vboard/s...d.php?t=459839 Jimbo's long bed step build:http://67-72chevytrucks.com/vboard/s...t=464626<br /> |
|
|
|
|
01-26-2016, 11:57 PM
|
#20 |
|
Registered User
Join Date: Jan 2013
Location: Leonardtown, MD
Posts: 1,637
|
Re: 55 Wagon Progress
Thanks Jim!
Well after the weekend off for the Snowmaggedon, back at more parts prep for the next round of primer.. Kyle did some media blasting on the steering box and other parts while I blocked out the inside of the hood and the hood brace.. 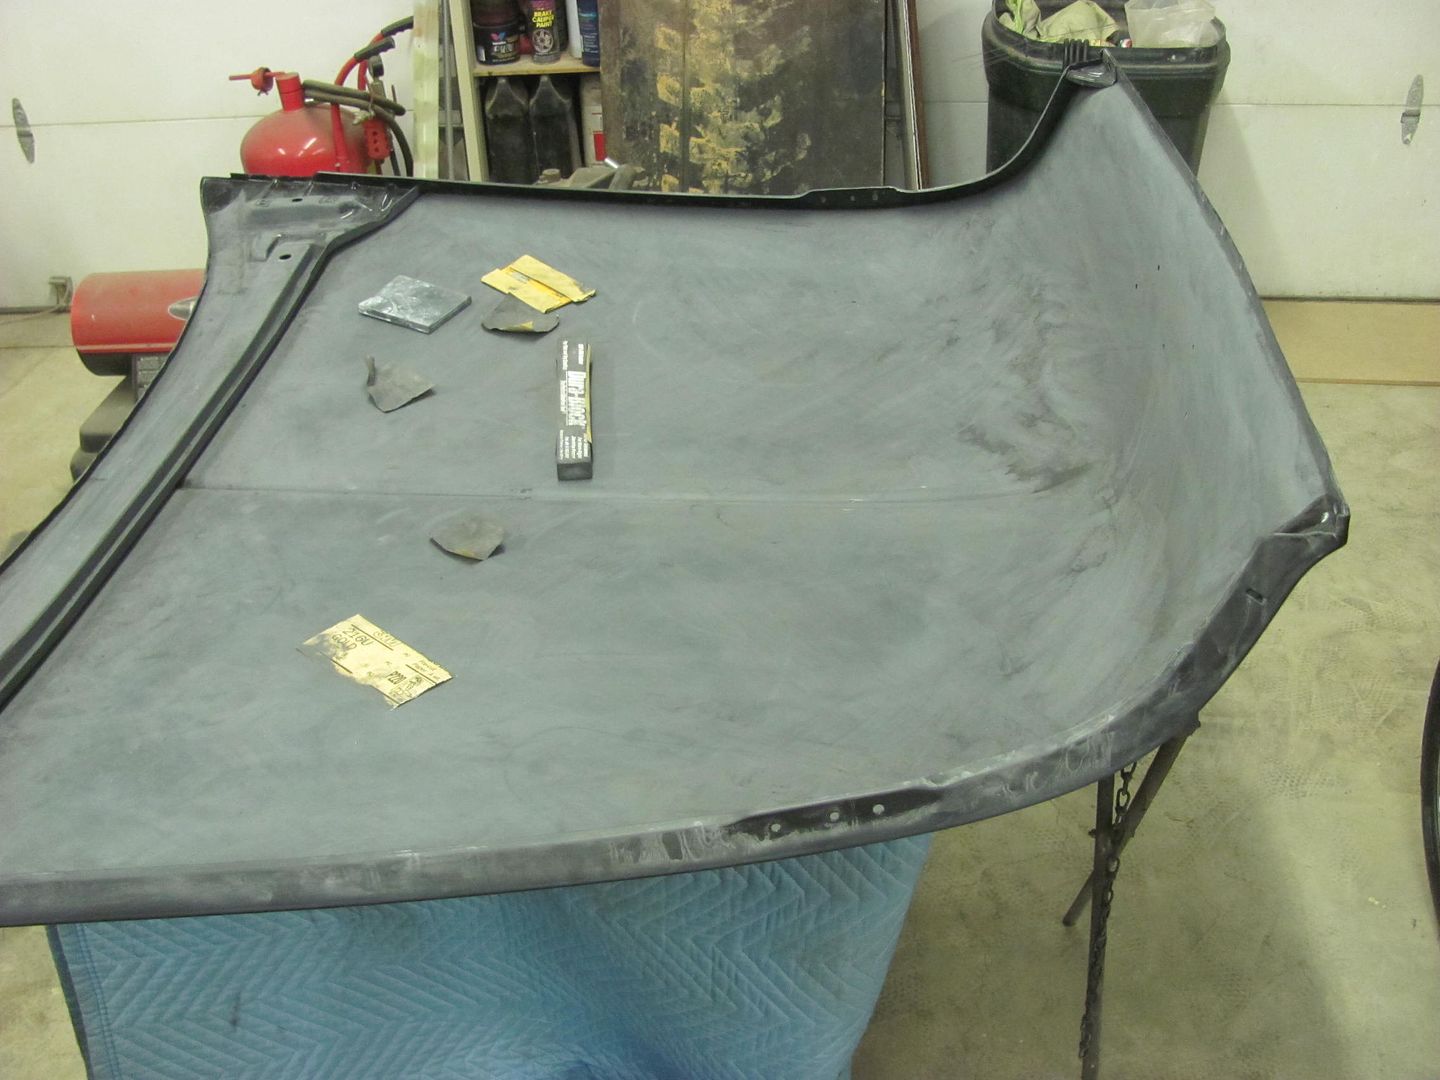 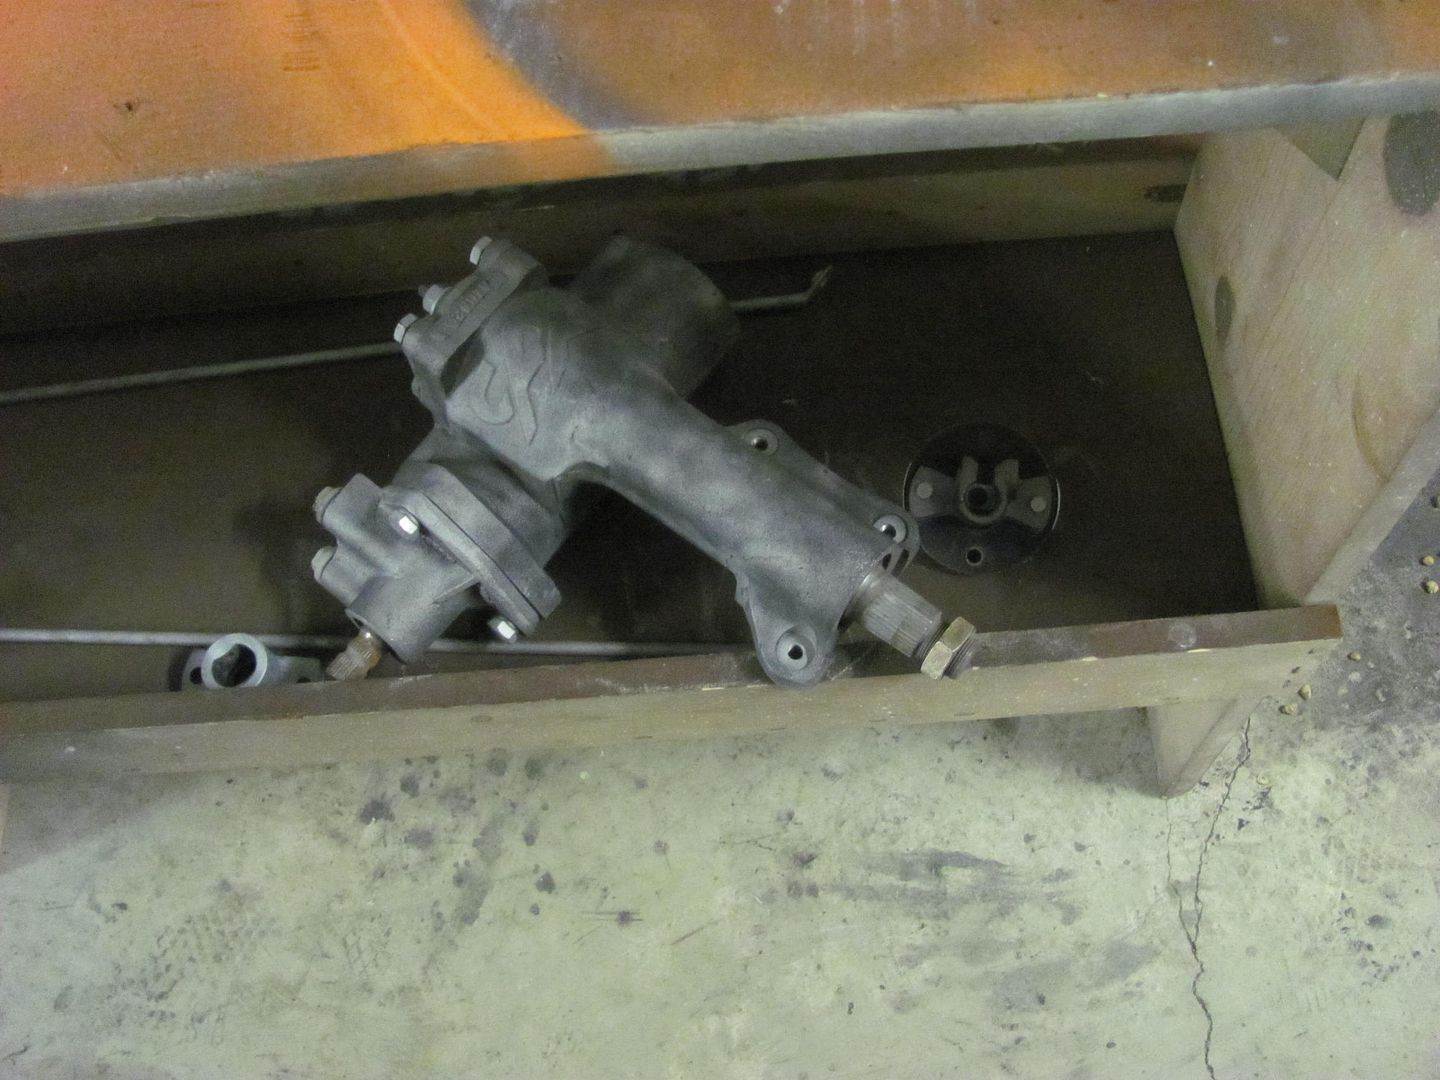 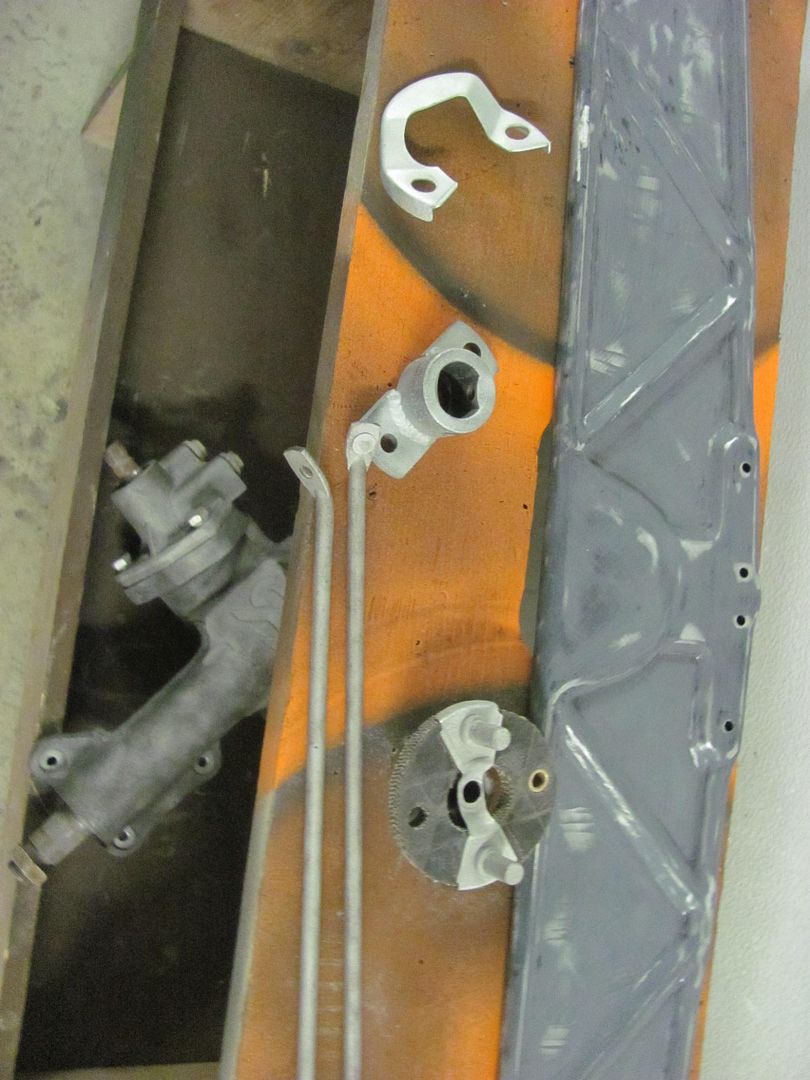 Then Kyle worked on degreasing and scuffing the trans... 
__________________
Robert |
|
|
|
|
01-27-2016, 10:29 AM
|
#21 |
|
Registered User
Join Date: Jan 2012
Location: Eastern Ontario, Canada
Posts: 1,041
|
Re: 55 Wagon Progress
Nice! Not worried about media getting in the steering box while blasting? I have the same sanding blocks, how do you like them?
__________________
1952 Canadian Chevy 1300 C4 IFS & D44 IRS 5.3 HO L33 My Build: http://67-72chevytrucks.com/vboard/s...d.php?t=632938
|
|
|
|
|
01-27-2016, 10:41 AM
|
#22 |
|
Registered User
Join Date: Jan 2013
Location: Leonardtown, MD
Posts: 1,637
|
Re: 55 Wagon Progress
It looked to be pretty tight around the shafts, and we had plastic plugs in the PS orifices. So Kyle just stayed away from the input/output shafts and got the bulk of it..
I have Durablocks, AFS, and countless home-made for special application. Each has there calling 
__________________
Robert |
|
|
|
|
01-28-2016, 11:53 PM
|
#23 |
|
Registered User
Join Date: Jan 2013
Location: Leonardtown, MD
Posts: 1,637
|
Re: 55 Wagon Progress
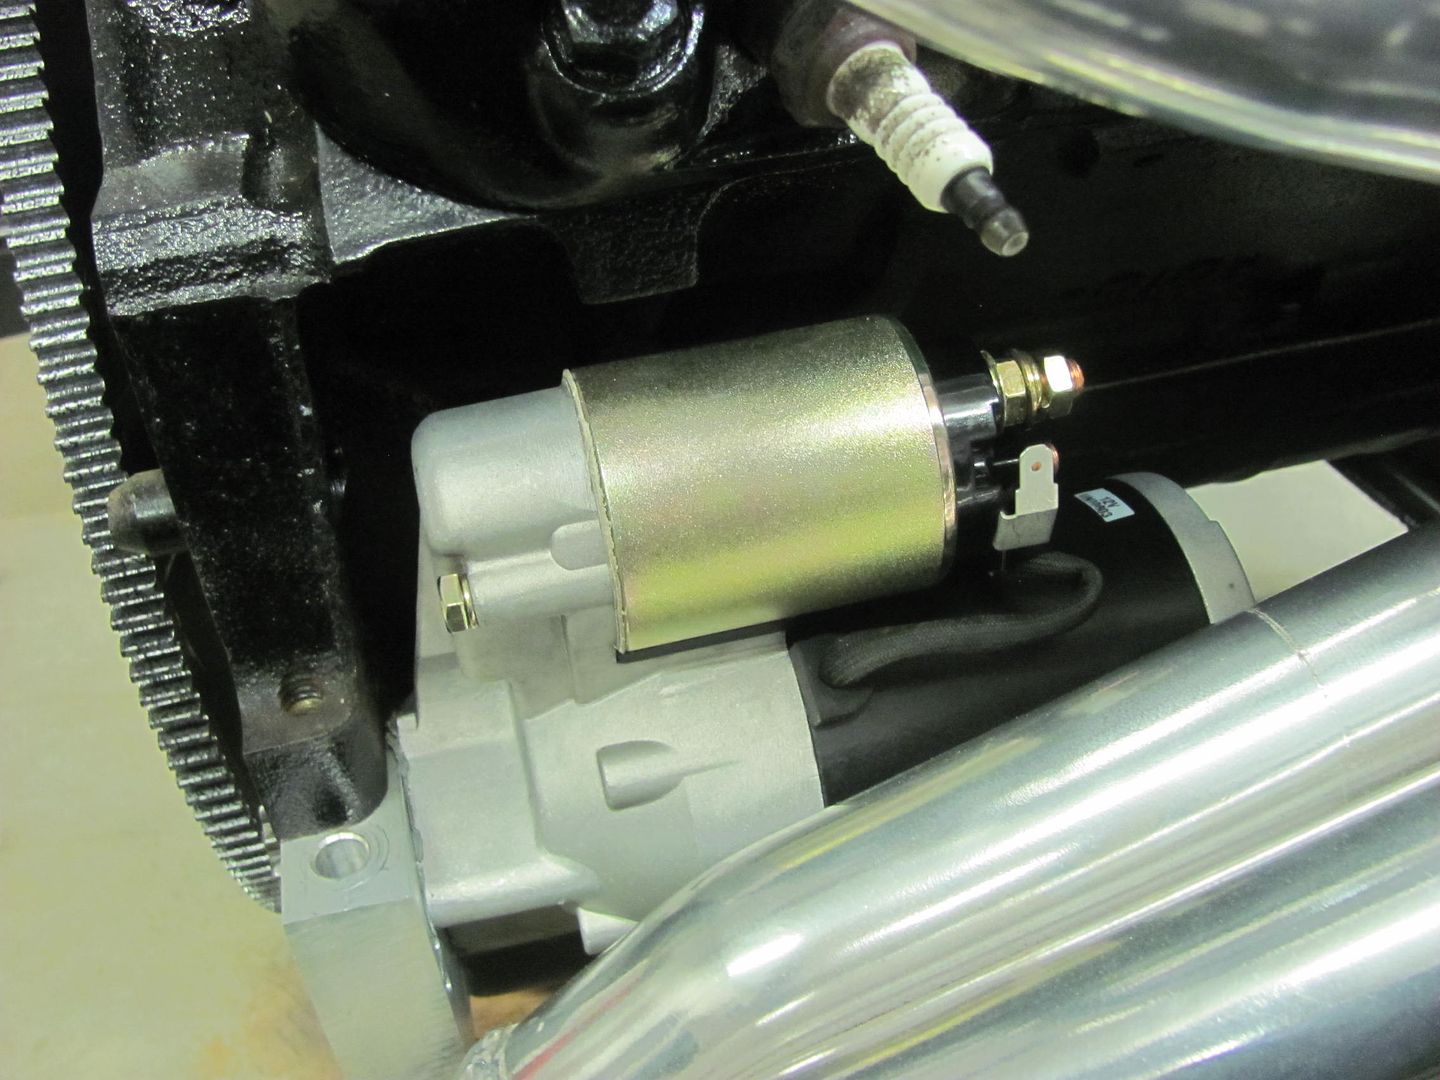
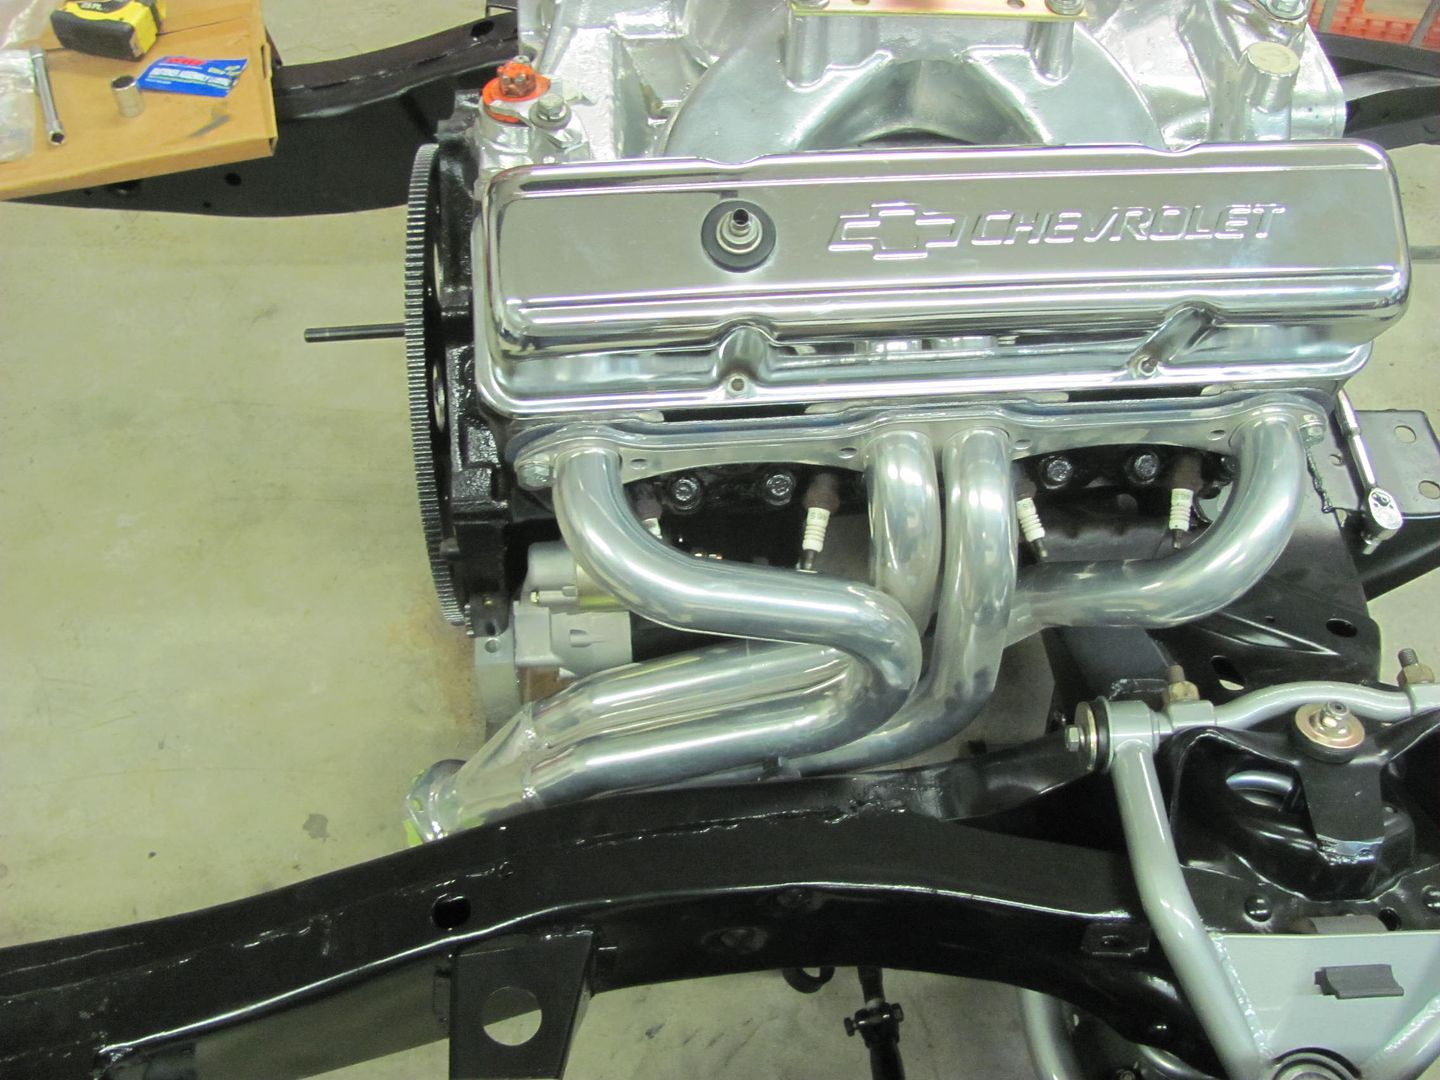
I started some engine assembly this evening, getting the flex plate bolted on and torqued down, starter installed and checked for clearance, and checked clearances for the header..
   Kyle blocked out the doors, it looks like our "adjustment" with the stovepipe crimper pliers did the trick to remove the high spot... 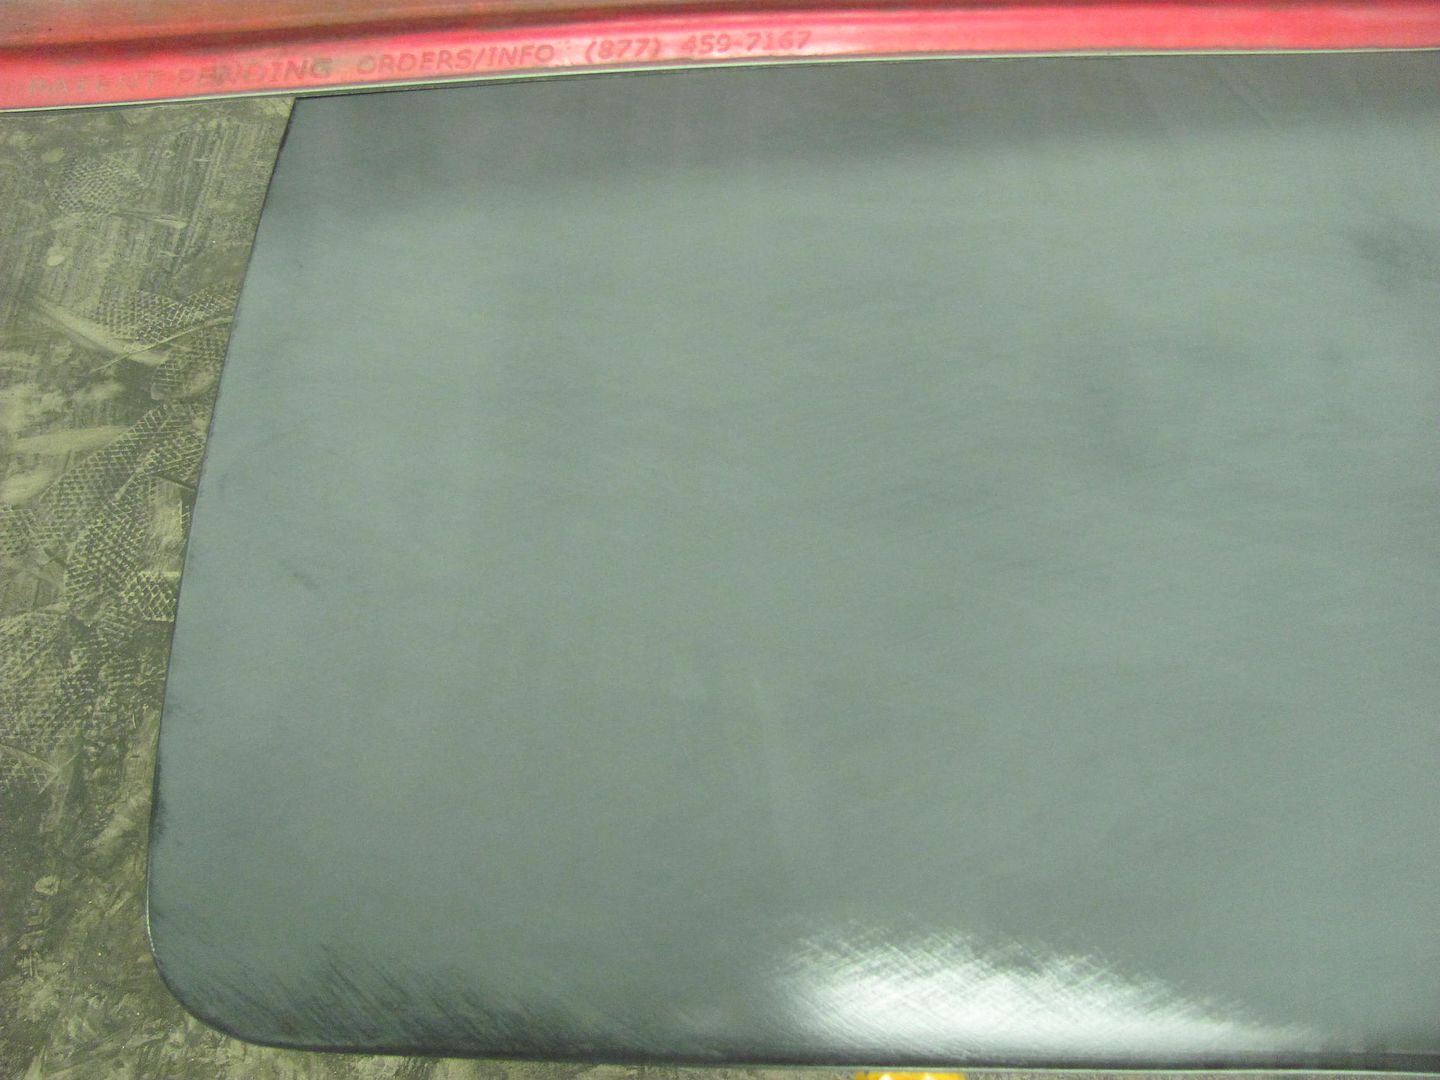 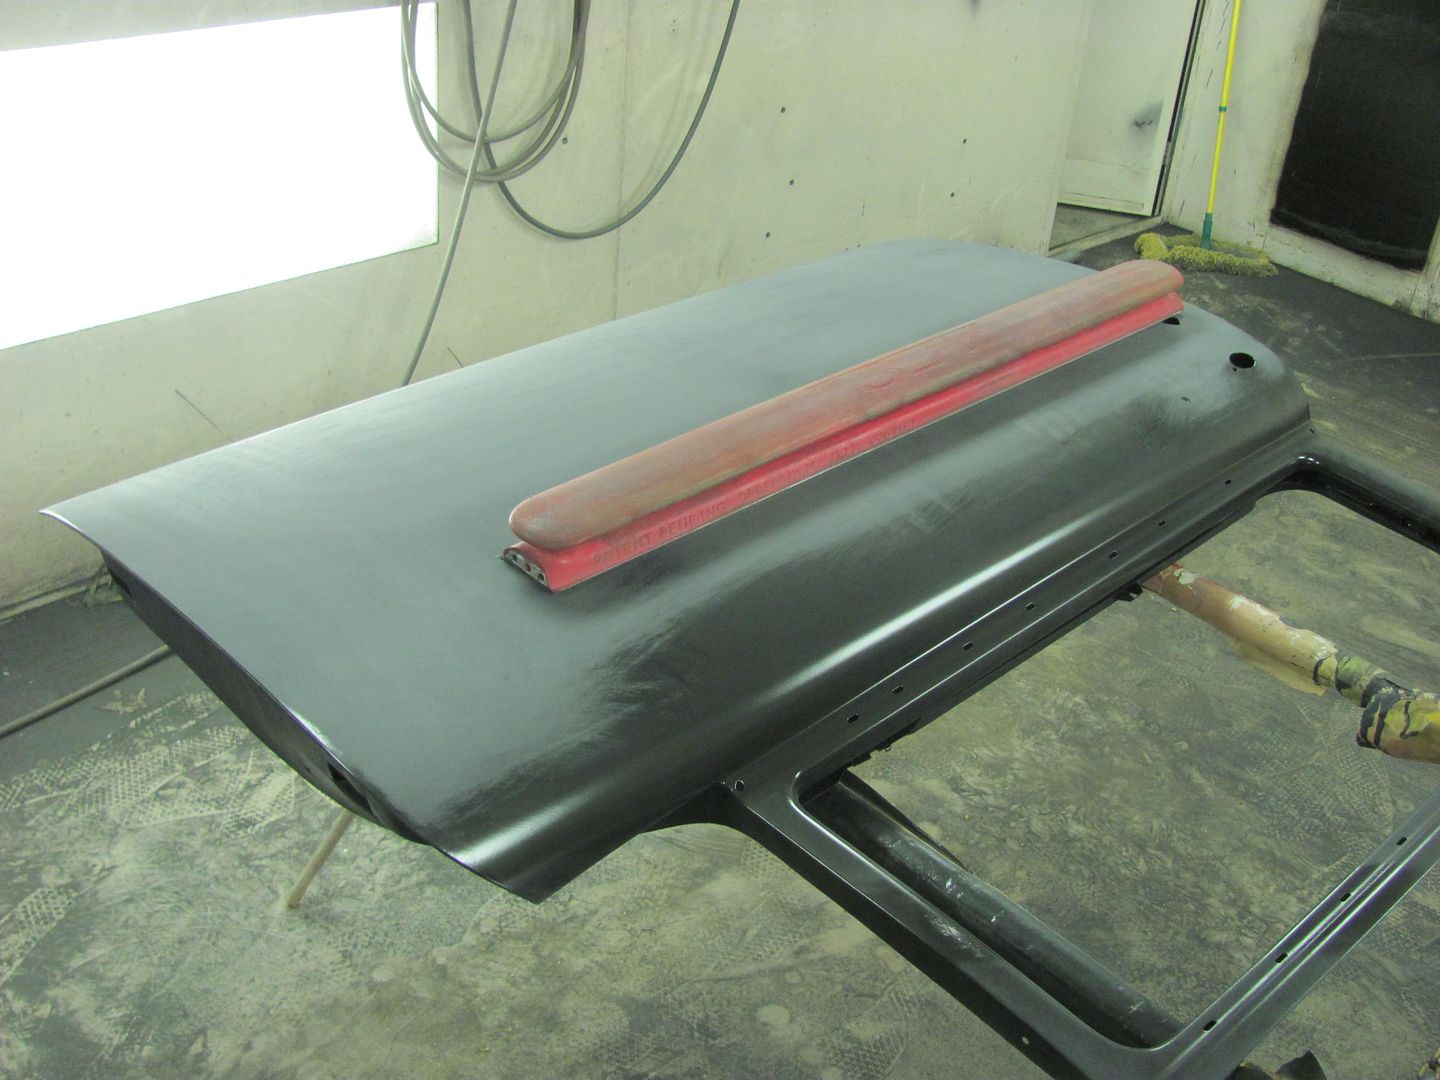
__________________
Robert |
|
|
|
|
01-29-2016, 01:27 AM
|
#24 |
|
Registered User
Join Date: Apr 2011
Location: .
Posts: 3,104
|
Re: 55 Wagon Progress
With the trans being aluminum and high temp, what primer and paint will you use?
Looks great. Can't wait to see it all back together. |
|
|
|
|
01-29-2016, 08:56 AM
|
#25 |
|
Registered User
Join Date: Jan 2013
Location: Leonardtown, MD
Posts: 1,637
|
Re: 55 Wagon Progress
We're going to use the SPI epoxy to give it a nice semi-gloss black.
__________________
Robert |
|
|
|
 |
| Bookmarks |
|
|


 Hybrid Mode
