
 |
|
|
#626 |
|
Registered User
Join Date: Apr 2011
Location: .
Posts: 3,104
|
Re: Project Goldilocks, '66 C10 SWB BBW Build
Might fit better with a bell crank set up. Are you planning on running stock gauges?
|
|
|

|
|
|
#627 |
|
Registered User
Join Date: May 2011
Location: Anderson SC
Posts: 3,898
|
Re: Project Goldilocks, '66 C10 SWB BBW Build
Stock gauges and column.
__________________
Project Goldilocks '66 C10 Short Fleet BBW Build '65 C10 Highly Detailed Stock Restoration Thread '78 Camaro Targa Roof Build '55 International Metal/Body/Paint Work '66 F100 Full Rotisserie Restoration '40 Packard 120 Convertible Coupe Restoration How To Restore and Detail an Original Gauge Cluster How To Detail Sand Body Panels, Edges, Corners, Etc |
|
|

|
|
|
#628 | |
|
Still Learning
Join Date: Jul 2009
Location: Central Oklahoma
Posts: 10,108
|
Re: Project Goldilocks, '66 C10 SWB BBW Build
Quote:

|
|
|
|

|
|
|
#629 |
|
Registered User
Join Date: Mar 2012
Location: Hooper Ut
Posts: 466
|
Re: Project Goldilocks, '66 C10 SWB BBW Build
Killer build! I used to Live in Sumter SC. I used to work with Mr Scrapes, he did most of the bags and hydro setups around there. Not sure if he's still around, I haven't been back there for almost 10 years...
Great job! I dig your motor! Here I thought I was being cool with a tripower haha! |
|
|

|
|
|
#630 |
|
Registered User
Join Date: May 2011
Location: Anderson SC
Posts: 3,898
|
Re: Project Goldilocks, '66 C10 SWB BBW Build
Rotors came in today. I weighed everything except the pads and caliper brackets (don't have those yet) to compare to the old disc conversion stuff. Wasn't expecting the bigger brakes to be lighter, but they'll shave about five pounds off each side. Not much overall, but it's all unsprung weight so it makes a bigger difference.
12" Disc Conversion Parts:
65 Pounds, 3.7 oz each side. New parts:
60 pounds, 5.8 oz 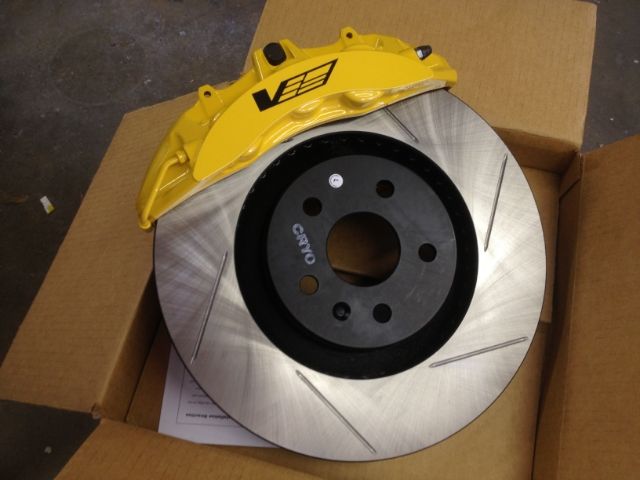
__________________
Project Goldilocks '66 C10 Short Fleet BBW Build '65 C10 Highly Detailed Stock Restoration Thread '78 Camaro Targa Roof Build '55 International Metal/Body/Paint Work '66 F100 Full Rotisserie Restoration '40 Packard 120 Convertible Coupe Restoration How To Restore and Detail an Original Gauge Cluster How To Detail Sand Body Panels, Edges, Corners, Etc |
|
|

|
|
|
#631 |
|
Registered User
Join Date: May 2011
Location: Anderson SC
Posts: 3,898
|
Re: Project Goldilocks, '66 C10 SWB BBW Build
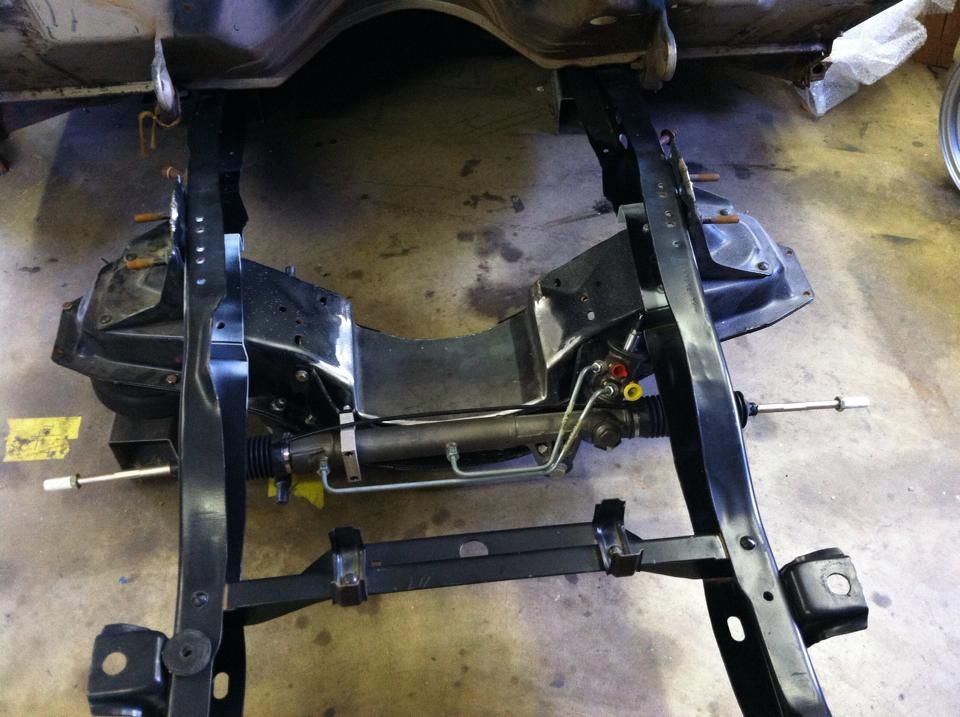
Got to work on 'Locks a little yesterday. Got the rack and pinion bolted in and set the frame rails on 4x4" tubing. I want that to be the normal ride height, maybe slightly more if it scrapes too much. The lowest point on my '64 VW is 2.75 and it rarely bottoms out so I think 4" will be plenty.
 Mocked up the lower bag mount height with another 4x4" block, which leave the bag at 4.75". Is that compressed too much? The max compressed height is 2.8" aired out, but I can't find info on the minimum bag height at ride height. 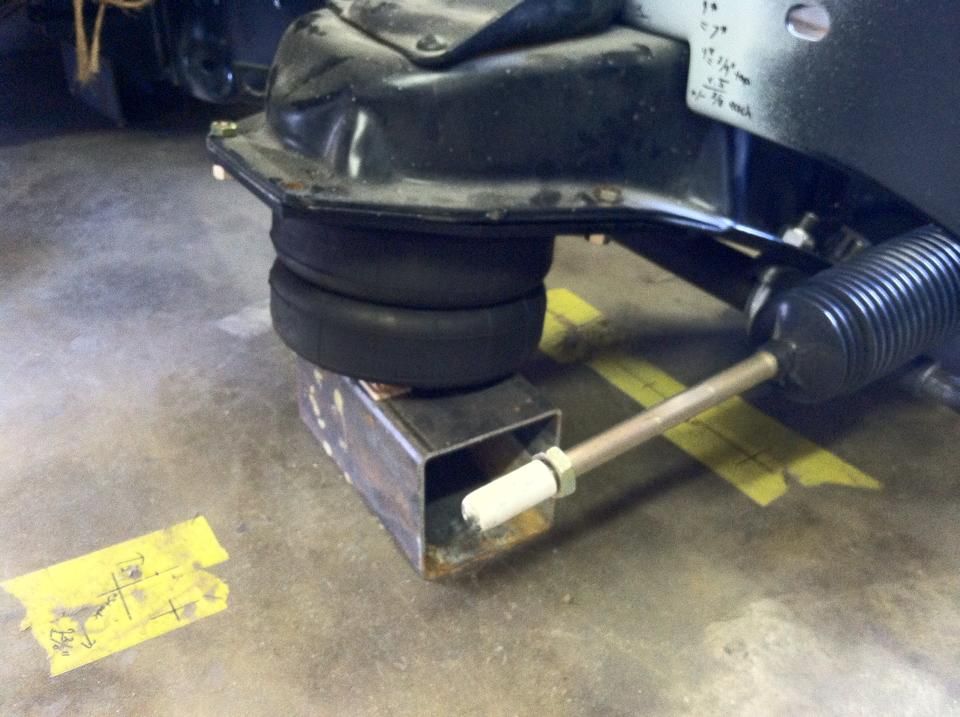 Also built a stand to work on the caliper brackets. It looks like one of the bolt holes in the spindle will line up already, and I'll only have to make a bracket for the bottom holes. 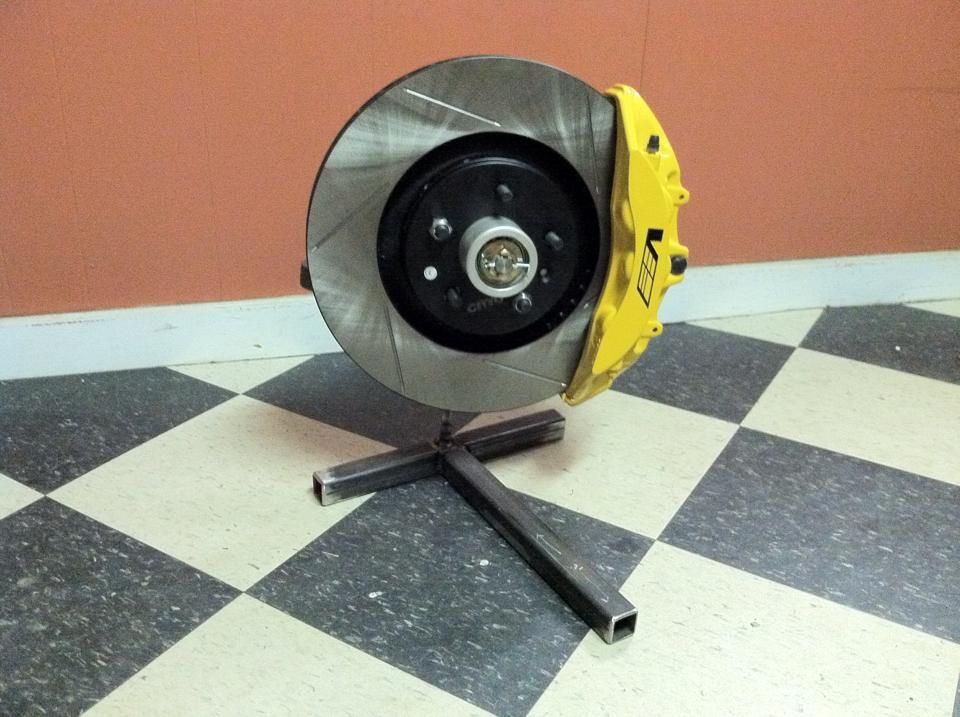 I had to plug a leak in my sister's TBSS tire so while it was off I checked to see how well 20's with a decent size sidewall would fit... way too tall. I don't want rubber band sidewalls so it looks like I'll be doing 18's. 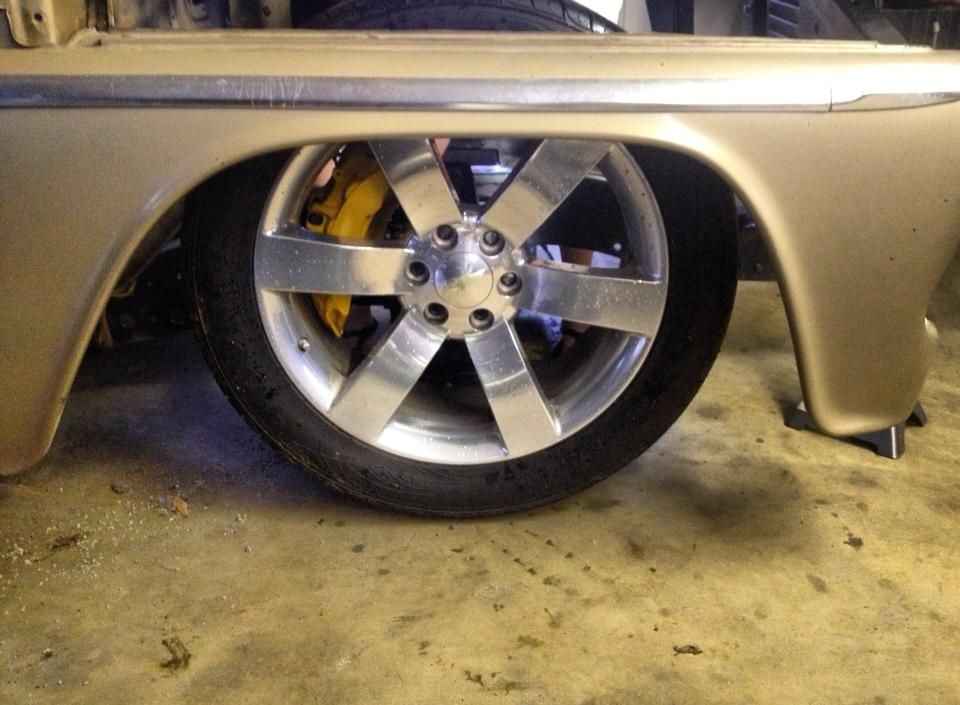 And speaking of wheels, I ran across this picture of CCW classics in the perfect color- brushed translucent bronze. They're three pieced forged so they're light and they're relatively inexpensive compared to most other three piece forged wheels. Can be built in just about any size/offset and they can make sure that they'll clear the calipers without using spacers. 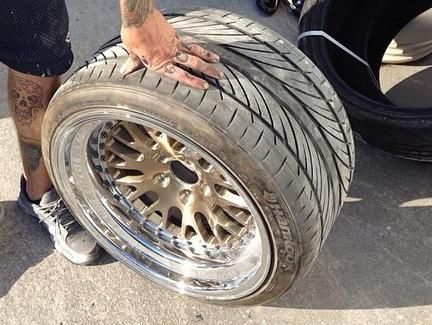
__________________
Project Goldilocks '66 C10 Short Fleet BBW Build '65 C10 Highly Detailed Stock Restoration Thread '78 Camaro Targa Roof Build '55 International Metal/Body/Paint Work '66 F100 Full Rotisserie Restoration '40 Packard 120 Convertible Coupe Restoration How To Restore and Detail an Original Gauge Cluster How To Detail Sand Body Panels, Edges, Corners, Etc |
|
|

|
|
|
#632 | ||
|
Registered User
Join Date: Apr 2011
Location: .
Posts: 3,104
|
Re: Project Goldilocks, '66 C10 SWB BBW Build
Quote:
How much air pressure will you be needing to maintain the 4.75" height? Will it be too soft, too hard? If you take a corner aggressively will you suffer from body roll? Depending on the driving situation, weight in the truck, freeway, in town, track, winding scenic road out in the country, that usually plays a big part in desired bag pressure. May have to adjust bag height to accomplish desired comfort in ride quality. I have this info bookmarked from 67c10rustbucket: Info I refer back to now and again. Quote:
I've read a few articles. Info you probably already know. http://www.ridetech.com/info/pressur...eight-control/ http://www.dakotadigital.com/index.c...rod/prd131.htm http://toplinehb.com/auto-repair/hig...ension-setups/ Not sure if any of this will help. Sure do have a truck load of cool stuff going on. Keep it up cause your build info is really helpful on my build. |
||
|
|

|
|
|
#633 | |
|
Registered User
Join Date: May 2011
Location: Anderson SC
Posts: 3,898
|
Re: Project Goldilocks, '66 C10 SWB BBW Build
Quote:
__________________
Project Goldilocks '66 C10 Short Fleet BBW Build '65 C10 Highly Detailed Stock Restoration Thread '78 Camaro Targa Roof Build '55 International Metal/Body/Paint Work '66 F100 Full Rotisserie Restoration '40 Packard 120 Convertible Coupe Restoration How To Restore and Detail an Original Gauge Cluster How To Detail Sand Body Panels, Edges, Corners, Etc |
|
|
|

|
|
|
#634 |
|
Rollin' Old Skool
Join Date: Jun 2007
Location: Hattiesburg, MS
Posts: 5,371
|
Re: Project Goldilocks, '66 C10 SWB BBW Build
I'm no good for helping with the technical info, but I just wanted to say it's good to see you getting back on it.

__________________
_____________________________________________ Phillip My Build threads: 1966 Chevy C-10 "Black Betty" shortbed, fleetside, BBW, 327 V8/ Powerglide (under construction) http://67-72chevytrucks.com/vboard/s...ighlight=betty 1997 Chevy Tahoe, 2dr/2wd, mild custom (Daily driver) http://67-72chevytrucks.com/vboard/s...d.php?t=601142 Pics: '66 C-10 https://flic.kr/s/aHsjHWD4h9 '97 Tahoe https://flic.kr/s/aHsjGZ7wKP '93 C-1500 https://flic.kr/s/aHskxdpdnQ '88 S-10 Blazer https://flic.kr/s/aHsjYGx4Md Previous Rides: 1993 Chevy S-10 ext. cab, 4.3L, 4/5 drop (Sold) 1993 Chevy C-1500 short/step Retro-Rod (Sold) 1988 S-10 Blazer 2dr/2wd mild custom (Sold) |
|
|

|
|
|
#635 |
|
I'm just glad to be here!
Join Date: Jan 2008
Location: Longview, TX
Posts: 4,788
|
Re: Project Goldilocks, '66 C10 SWB BBW Build
Everything I have read about ride height and air bags, is the bag should be set at a height that is in the middle of the stoke fo the bag.
If the bag has a 2.5" compressed height and the max extended height is 12", then the bag at ride height should be close to 8.375". For a lot of the 2600# bags on the market that I have looked at, the ride height is between 6.5"-7.5".
__________________
Karl  1965 Chevy Stepside(Grandpa's Old Blue) and (July 2015 Shop Build!)(2020, the Saga Continues) http://67-72chevytrucks.com/vboard/s...d.php?t=372424 The LST Challenge: http://67-72chevytrucks.com/vboard/s...=1#post7812257 Korbin's 1st Square: "Sunburn" http://67-72chevytrucks.com/vboard/s...d.php?t=418618 1985 GMC Sierra: "White Trash", Korbin's 2nd now... http://67-72chevytrucks.com/vboard/s...d.php?t=632305 Henry - 1984 Chevrolet, Owen's 1st Square |
|
|

|
|
|
#636 | ||
|
Registered User
Join Date: May 2011
Location: Anderson SC
Posts: 3,898
|
Re: Project Goldilocks, '66 C10 SWB BBW Build
Quote:
Quote:
The mounts I made today will put it right around 6.75".
__________________
Project Goldilocks '66 C10 Short Fleet BBW Build '65 C10 Highly Detailed Stock Restoration Thread '78 Camaro Targa Roof Build '55 International Metal/Body/Paint Work '66 F100 Full Rotisserie Restoration '40 Packard 120 Convertible Coupe Restoration How To Restore and Detail an Original Gauge Cluster How To Detail Sand Body Panels, Edges, Corners, Etc |
||
|
|

|
|
|
#637 |
|
Registered User
Join Date: May 2011
Location: Anderson SC
Posts: 3,898
|
Re: Project Goldilocks, '66 C10 SWB BBW Build
Chopped the crossmember today to raise the bag mount area. I need to get some plate and 10" pipe to box the area in. At this point I've realized I would have been better off to buy a No Limit WideRide crossmember...
2" cut out. 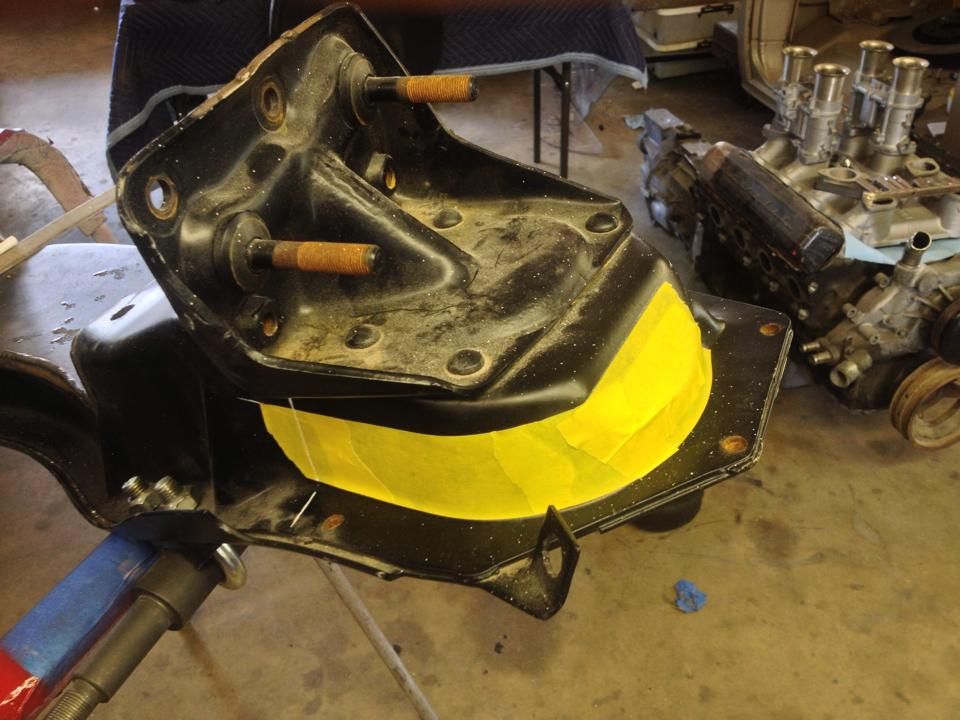 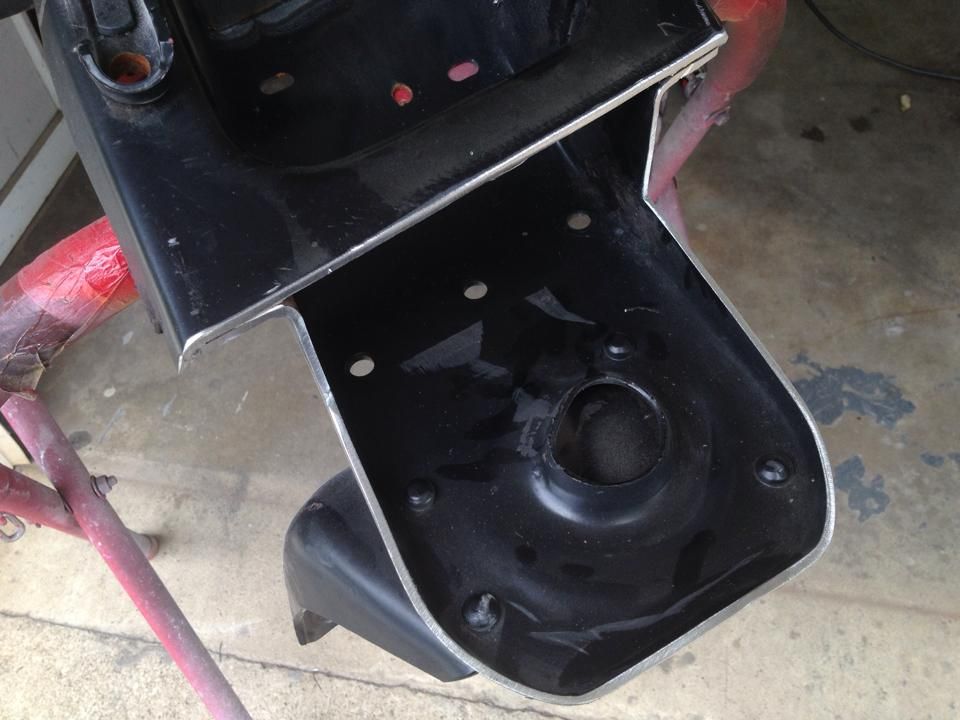 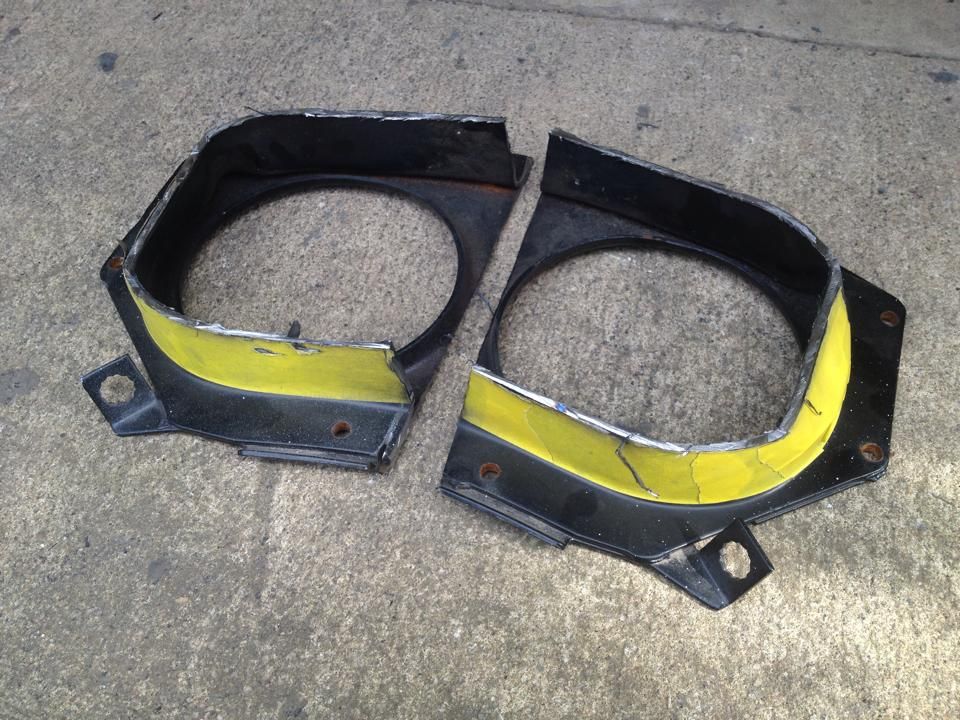 7" tall now. That'll shrink a little once I plate the mounting pad but it's a major improvement! 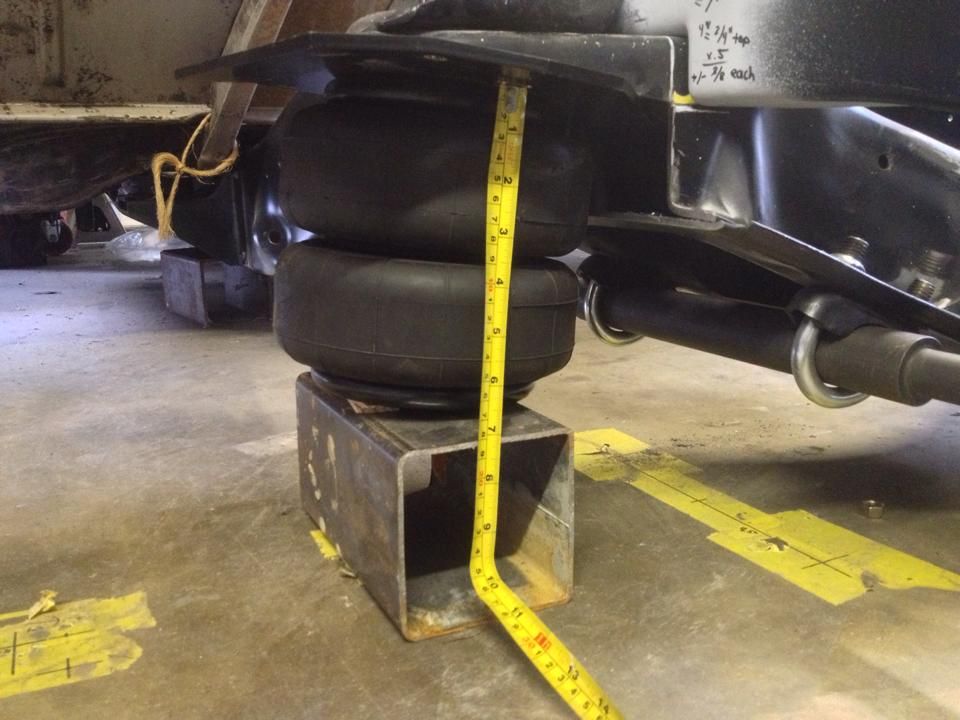
__________________
Project Goldilocks '66 C10 Short Fleet BBW Build '65 C10 Highly Detailed Stock Restoration Thread '78 Camaro Targa Roof Build '55 International Metal/Body/Paint Work '66 F100 Full Rotisserie Restoration '40 Packard 120 Convertible Coupe Restoration How To Restore and Detail an Original Gauge Cluster How To Detail Sand Body Panels, Edges, Corners, Etc |
|
|

|
|
|
#638 |
|
Still Learning
Join Date: Jul 2009
Location: Central Oklahoma
Posts: 10,108
|
Re: Project Goldilocks, '66 C10 SWB BBW Build
Very nice work as always.
|
|
|

|
|
|
#639 |
|
Registered User
Join Date: May 2011
Location: Anderson SC
Posts: 3,898
|
Re: Project Goldilocks, '66 C10 SWB BBW Build
__________________
Project Goldilocks '66 C10 Short Fleet BBW Build '65 C10 Highly Detailed Stock Restoration Thread '78 Camaro Targa Roof Build '55 International Metal/Body/Paint Work '66 F100 Full Rotisserie Restoration '40 Packard 120 Convertible Coupe Restoration How To Restore and Detail an Original Gauge Cluster How To Detail Sand Body Panels, Edges, Corners, Etc |
|
|

|
|
|
#640 |
|
Registered User
Join Date: May 2011
Location: Anderson SC
Posts: 3,898
|
Re: Project Goldilocks, '66 C10 SWB BBW Build
__________________
Project Goldilocks '66 C10 Short Fleet BBW Build '65 C10 Highly Detailed Stock Restoration Thread '78 Camaro Targa Roof Build '55 International Metal/Body/Paint Work '66 F100 Full Rotisserie Restoration '40 Packard 120 Convertible Coupe Restoration How To Restore and Detail an Original Gauge Cluster How To Detail Sand Body Panels, Edges, Corners, Etc |
|
|

|
|
|
#641 |
|
Registered User
Join Date: Mar 2011
Location: tulsa,ok.
Posts: 1,803
|
Re: Project Goldilocks, '66 C10 SWB BBW Build
lens looks great, always top notch detail
__________________
my project: http://67-72chevytrucks.com/vboard/s...d.php?t=456163 |
|
|

|
|
|
#642 |
|
Registered User
Join Date: May 2011
Location: Anderson SC
Posts: 3,898
|
Re: Project Goldilocks, '66 C10 SWB BBW Build
No real updates other than I've been buying parts. Bought a set of Porterbuilt 1" forward and 1" narrowed A-arms this week. Haven't had time to build my own and these will do everything I was wanting to do except for having a little extra drop at the bag mount for bag spacers. Maybe raising the upper mount will create enough room that I can still shim the bag if needed.
Been picking up NOS parts when I can find them at reasonable prices- not into dealing with aftermarket junk if I don't have to! So far found a pair of '66 Fawn armrests, interior mirror mount, and an anodized grill. Another find was a pair of NOS offset stud mirror heads. They're not GM but are identical. I also bought a pair of NOS chrome bumper guards that had a fair amount of shelf wear but I couldn't bring myself to use them for what I have in mind... So instead I bought a pair of used guards to cut up. Wanting to shorten them a few inches to take some of their bulk away, always thought that they just looked to tall to fit the proportions of our trucks. 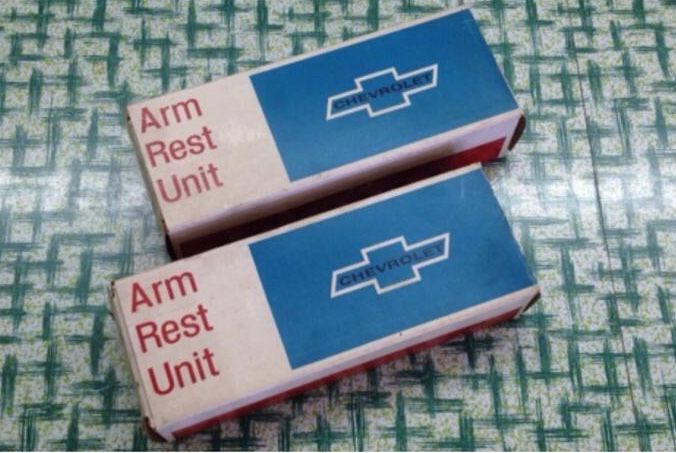 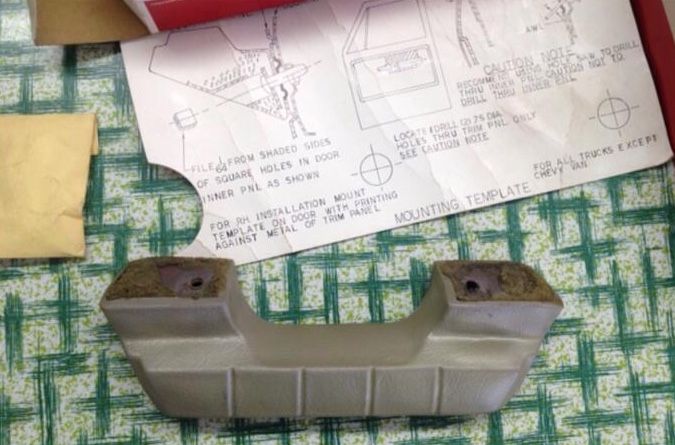 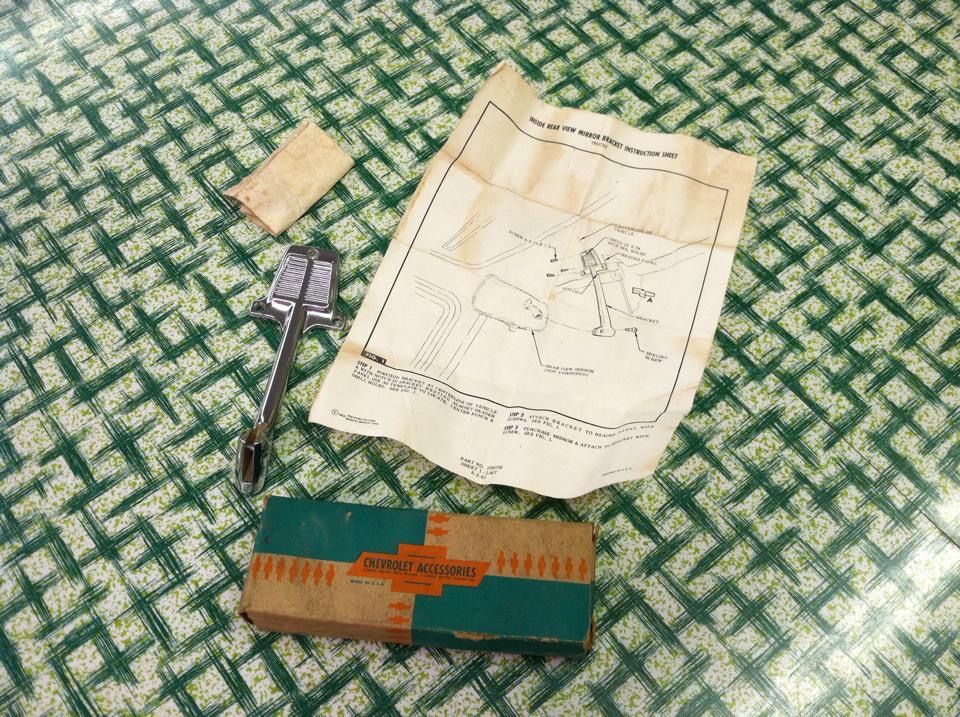 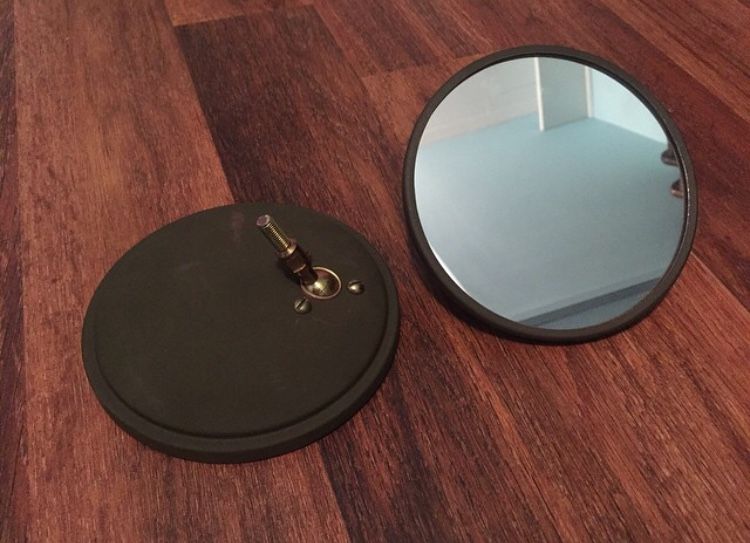 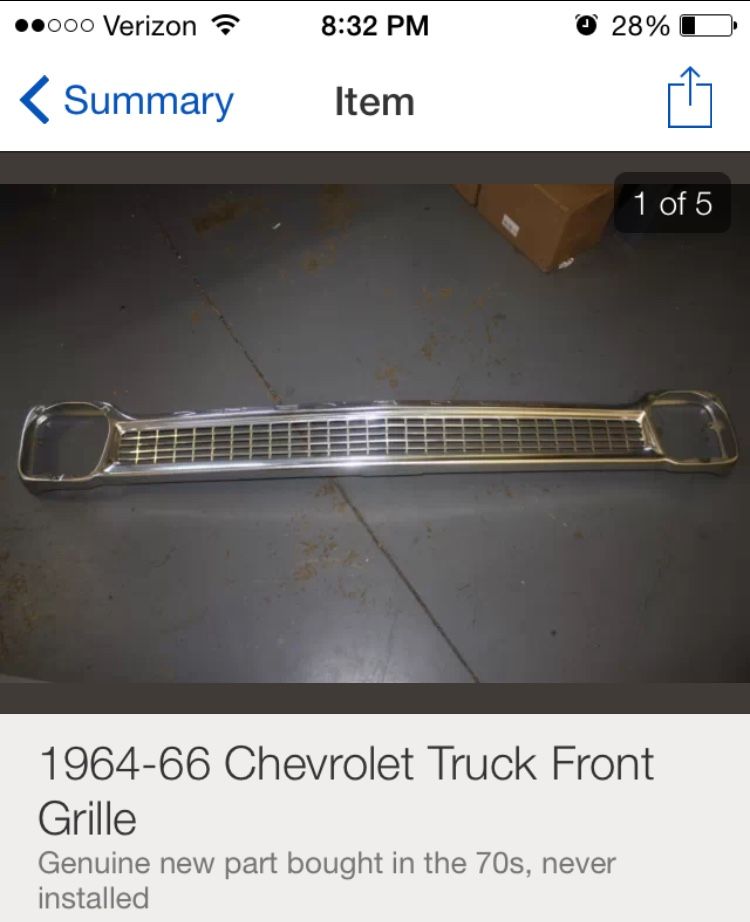 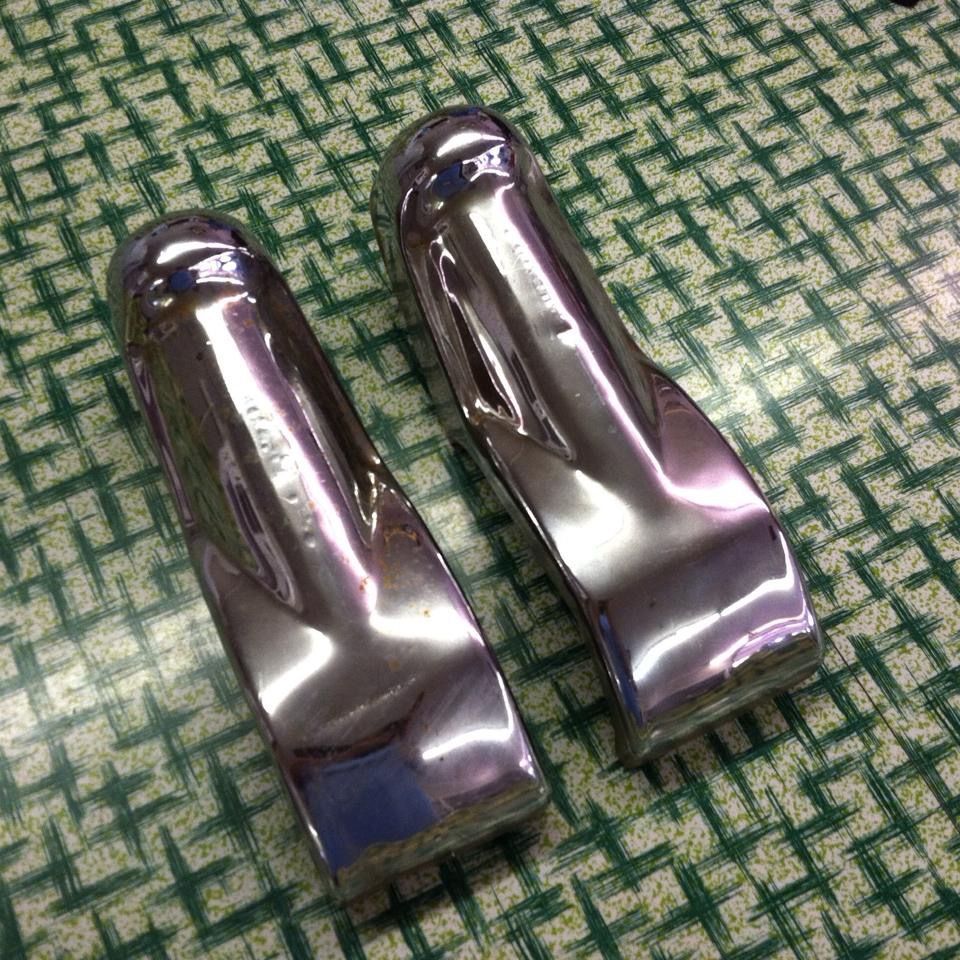
__________________
Project Goldilocks '66 C10 Short Fleet BBW Build '65 C10 Highly Detailed Stock Restoration Thread '78 Camaro Targa Roof Build '55 International Metal/Body/Paint Work '66 F100 Full Rotisserie Restoration '40 Packard 120 Convertible Coupe Restoration How To Restore and Detail an Original Gauge Cluster How To Detail Sand Body Panels, Edges, Corners, Etc |
|
|

|
|
|
#643 |
|
Registered User
Join Date: Apr 2011
Location: .
Posts: 3,104
|
Re: Project Goldilocks, '66 C10 SWB BBW Build
Great Score on all the parts!!!!
|
|
|

|
|
|
#644 |
|
Registered User
 Join Date: May 2007
Location: Deale Md
Posts: 4,663
|
Re: Project Goldilocks, '66 C10 SWB BBW Build
That's some great finds.
__________________
James 63 GMC V6 4speed carryall 65 chevy swb bbw V8 auto 68 K20 327/4 speed, buddy buckets 2002 GMC CC Dually Duramax 64 GMC lwb 3/4 V6 4speed SOLD 66 GMC swb bbw buddy buckets SOLD IG duallyjams The only thing that stays the same is constant change! |
|
|

|
|
|
#645 |
|
Senior Member
 Join Date: Mar 2011
Location: Tucson, Arizona
Posts: 2,082
|
Re: Project Goldilocks, '66 C10 SWB BBW Build
It's good to see you back at it. That's a nice group of parts you've accumulated. I don't even want you to tell me what you paid for that grill. If it was a real good deal I'll feel terrible that you got it and I didn't and if you paid a lot, then I'll be discouraged about ever finding one I can afford. It is a killer find, though. Let's get back to some of that quality work you put out.

__________________
Sanity'66 http://67-72chevytrucks.com/vboard/s...d.php?t=515110 Long bed, Fleetside, Small back window I've Done So Much, With So Little, For So Long, That Now I Can Do Anything With Nothing. 
|
|
|

|
|
|
#646 |
|
Registered User
Join Date: May 2011
Location: Anderson SC
Posts: 3,898
|
Re: Project Goldilocks, '66 C10 SWB BBW Build
Thanks dudes. Been wanting to get back on it, just been busy with everything else lately. The VW broke a valve spring so it's out for repairs and upgrades (can't leave anything alone!). Hoping for another 30-40 hp with a cam and heads swap. It should be back together in a few weeks. Was going to autocross it at Goodguys Charlotte this weekend if this hadn't happened.
The PB arms should be here Monday. I'll get templates to plate the upper bag mounts and have a fab shop bend the filler plates next week. Should have the front rolling again soon. Pdxhaull, the grill was a good deal- I happened to be on Ebay at just the right time. Matching bezels will be impossible to find though.
__________________
Project Goldilocks '66 C10 Short Fleet BBW Build '65 C10 Highly Detailed Stock Restoration Thread '78 Camaro Targa Roof Build '55 International Metal/Body/Paint Work '66 F100 Full Rotisserie Restoration '40 Packard 120 Convertible Coupe Restoration How To Restore and Detail an Original Gauge Cluster How To Detail Sand Body Panels, Edges, Corners, Etc Last edited by theastronaut; 11-18-2014 at 06:45 PM. |
|
|

|
|
|
#647 |
|
Registered User
Join Date: May 2011
Location: Anderson SC
Posts: 3,898
|
Re: Project Goldilocks, '66 C10 SWB BBW Build
__________________
Project Goldilocks '66 C10 Short Fleet BBW Build '65 C10 Highly Detailed Stock Restoration Thread '78 Camaro Targa Roof Build '55 International Metal/Body/Paint Work '66 F100 Full Rotisserie Restoration '40 Packard 120 Convertible Coupe Restoration How To Restore and Detail an Original Gauge Cluster How To Detail Sand Body Panels, Edges, Corners, Etc |
|
|

|
|
|
#648 |
|
Registered User
 Join Date: May 2007
Location: Deale Md
Posts: 4,663
|
Re: Project Goldilocks, '66 C10 SWB BBW Build
did you weigh the old verses the new
I always thought with the bumper guards being tall was for adding a grill bar between them, look forward to seeing you shorten them up.
__________________
James 63 GMC V6 4speed carryall 65 chevy swb bbw V8 auto 68 K20 327/4 speed, buddy buckets 2002 GMC CC Dually Duramax 64 GMC lwb 3/4 V6 4speed SOLD 66 GMC swb bbw buddy buckets SOLD IG duallyjams The only thing that stays the same is constant change! |
|
|

|
|
|
#649 |
|
Registered User
Join Date: May 2011
Location: Anderson SC
Posts: 3,898
|
Re: Project Goldilocks, '66 C10 SWB BBW Build
Haven't weighed them yet. Got to come back apart for new ball joints and paint so I'll do it then.
__________________
Project Goldilocks '66 C10 Short Fleet BBW Build '65 C10 Highly Detailed Stock Restoration Thread '78 Camaro Targa Roof Build '55 International Metal/Body/Paint Work '66 F100 Full Rotisserie Restoration '40 Packard 120 Convertible Coupe Restoration How To Restore and Detail an Original Gauge Cluster How To Detail Sand Body Panels, Edges, Corners, Etc |
|
|

|
|
|
#650 |
|
Registered User
Join Date: May 2011
Location: Anderson SC
Posts: 3,898
|
Re: Project Goldilocks, '66 C10 SWB BBW Build
Taller upper ball joints from QA1 came today. I'll get those bolted in and the correct lower ball joints pressed in next week. I talked with a local machine shop about designing and machining a set of caliper brackets; he's interested so I'll drop off the parts with him this week. Final mock up should be soon! Then on to the rear suspension.
Still haven't decided on an axle. It'll need to be fully floating to prevent pad knock back since the calipers are fixed. I'd like to build a Trailblazer EXT axle since the center section is aluminum. With chromoly axle tube pressed in they're roughly 50 pounds lighter than a 9" or 12 bolt. 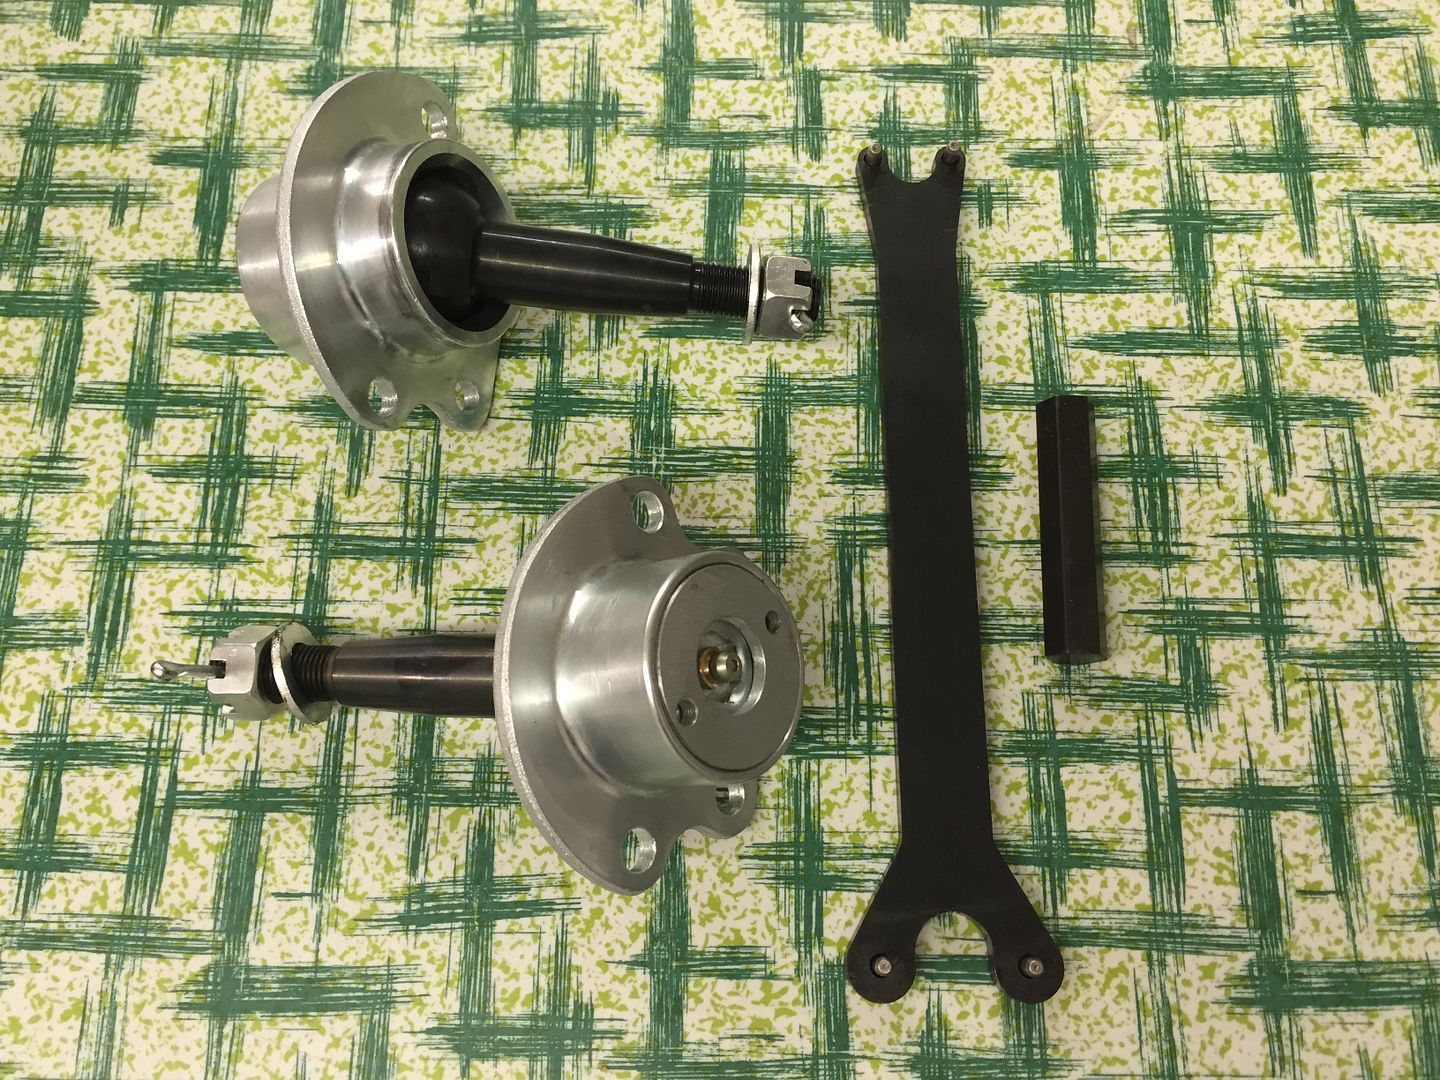
__________________
Project Goldilocks '66 C10 Short Fleet BBW Build '65 C10 Highly Detailed Stock Restoration Thread '78 Camaro Targa Roof Build '55 International Metal/Body/Paint Work '66 F100 Full Rotisserie Restoration '40 Packard 120 Convertible Coupe Restoration How To Restore and Detail an Original Gauge Cluster How To Detail Sand Body Panels, Edges, Corners, Etc |
|
|

|
 |
| Bookmarks |
|
|